
New How to Make an Adorable Video for Your Babys First Year for 2024
How to Make a Video for Your Baby’s First Year
How to Make an Adorable Video for Your Baby’s First Year

Ollie Mattison
Mar 27, 2024• Proven solutions
Your baby grows up very fast and being able to see him grow is maybe one of the most interesting and exciting moments in your life. Documenting the first year is amazing and it will surely offer you an extraordinary value so try to do that the best way you can. Imagine how touched your child would be when he/she, at the age of 18, watch something like this:
How to make the baby’s first year video
Filming tips
Shooting a good baby’s first year video can take a little bit of preparation and it will surely offer you an extraordinary experience in the long run. It will also help offer you an incredible value to begin with which is always impressive.
Stabilize the camera - The first thing you need to do is to stabilize the camera. Using a tripod can be the best option here so take your time and results will be great for sure. Of course, placing the camera on your counter will also help, so try to keep that in mind as it can indeed be a very good option to begin with.
Lighting - You will also have to play with the proper lighting setup. A good light will help you get much better results and even though it can take some time to get the best experience, it really is a truly amazing option that you do not want to miss.
Focus - Of course, focus on the baby. Yes, focus but don’t zoom in and out all the time. Find a good pattern that will help keep the baby steady and do all in your power to get the best results. Granted, it will take some time to get good results but don’t rush it otherwise the experience will not be as good as you would expect.
Audio - Moreover, audio should be your focus here as well. Take the time and do something good here, a good audio will always pay off very well so get a good audio setup if you want to obtain a stellar experience.
Props - Also, we recommend you to use props. These can really make a good video and they will even add in some much needed fun to your setup. Try to find the best possible props and add them in your video. Some good prop examples would be a stuffed animal, a toy, maybe even the family pet. All of these are great and well worth your time.
Editing tips
Once you finished capturing the movie, you will have to go to editing. This is where you have to use a good video editing tool that will help provide a good baby’s first year video in the end. With that in mind, Wondershare Filmora can be the tool of choice as it offers you all the features you need in order to create a good baby video.
=“” style=”width: 100%; height: 278.438px;”;
 Download Mac Version ](https://tools.techidaily.com/wondershare/filmora/download/ )
Adjust saturation - You should try to use the app in order to adjust the saturation as this can lead to some very bad results if you’re not careful. Find the proper saturation levels and opt for them right away.
Trim, cut, or split - If needed, split, cut or even trim the video. There will be times when you will need the reversing effect as well. All of these effects are accessible via the Wondershare Filmora video app.
Advanced editing - Plus, you will also need to apply a green screen effect as this will help you place your baby in a variety of funny locations, be it a funny MV or a Hollywood movie. The app can also help you clone the baby with PIP effects and you can also use it to add filters, overlays or text.
Wondershare Filmora will offer you an extraordinary set of tools and it will bring in front a very good value right from the start. The interface of the app is user friendly and you will have no problem using it as you see fit. Also, you can create the baby’s first year video on both Mac and Windows as the app supports both platforms. It also delivers immediate support for camcorders and smartphones so you can use any device you want for video capture. With its help you can share videos to DVD or YouTube too if you so desire. Don’t hesitate and access this great tool as fast as possible to get a good outcome!
Ollie Mattison
Ollie Mattison is a writer and a lover of all things video.
Follow @Ollie Mattison
Ollie Mattison
Mar 27, 2024• Proven solutions
Your baby grows up very fast and being able to see him grow is maybe one of the most interesting and exciting moments in your life. Documenting the first year is amazing and it will surely offer you an extraordinary value so try to do that the best way you can. Imagine how touched your child would be when he/she, at the age of 18, watch something like this:
How to make the baby’s first year video
Filming tips
Shooting a good baby’s first year video can take a little bit of preparation and it will surely offer you an extraordinary experience in the long run. It will also help offer you an incredible value to begin with which is always impressive.
Stabilize the camera - The first thing you need to do is to stabilize the camera. Using a tripod can be the best option here so take your time and results will be great for sure. Of course, placing the camera on your counter will also help, so try to keep that in mind as it can indeed be a very good option to begin with.
Lighting - You will also have to play with the proper lighting setup. A good light will help you get much better results and even though it can take some time to get the best experience, it really is a truly amazing option that you do not want to miss.
Focus - Of course, focus on the baby. Yes, focus but don’t zoom in and out all the time. Find a good pattern that will help keep the baby steady and do all in your power to get the best results. Granted, it will take some time to get good results but don’t rush it otherwise the experience will not be as good as you would expect.
Audio - Moreover, audio should be your focus here as well. Take the time and do something good here, a good audio will always pay off very well so get a good audio setup if you want to obtain a stellar experience.
Props - Also, we recommend you to use props. These can really make a good video and they will even add in some much needed fun to your setup. Try to find the best possible props and add them in your video. Some good prop examples would be a stuffed animal, a toy, maybe even the family pet. All of these are great and well worth your time.
Editing tips
Once you finished capturing the movie, you will have to go to editing. This is where you have to use a good video editing tool that will help provide a good baby’s first year video in the end. With that in mind, Wondershare Filmora can be the tool of choice as it offers you all the features you need in order to create a good baby video.
=“” style=”width: 100%; height: 278.438px;”;
Download Mac Version ](https://tools.techidaily.com/wondershare/filmora/download/ )
Adjust saturation - You should try to use the app in order to adjust the saturation as this can lead to some very bad results if you’re not careful. Find the proper saturation levels and opt for them right away.
Trim, cut, or split - If needed, split, cut or even trim the video. There will be times when you will need the reversing effect as well. All of these effects are accessible via the Wondershare Filmora video app.
Advanced editing - Plus, you will also need to apply a green screen effect as this will help you place your baby in a variety of funny locations, be it a funny MV or a Hollywood movie. The app can also help you clone the baby with PIP effects and you can also use it to add filters, overlays or text.
Wondershare Filmora will offer you an extraordinary set of tools and it will bring in front a very good value right from the start. The interface of the app is user friendly and you will have no problem using it as you see fit. Also, you can create the baby’s first year video on both Mac and Windows as the app supports both platforms. It also delivers immediate support for camcorders and smartphones so you can use any device you want for video capture. With its help you can share videos to DVD or YouTube too if you so desire. Don’t hesitate and access this great tool as fast as possible to get a good outcome!
Ollie Mattison
Ollie Mattison is a writer and a lover of all things video.
Follow @Ollie Mattison
How to Make Memoji Talk-Make Memoji Video On Your Own
How to Make Memoji Talk-Make Memoji Video On Your Own

Shanoon Cox
Mar 27, 2024• Proven solutions
Memojis are the 3D virtual caricatures customized to look exactly like you. Much like an animoji, memoji can mimic your facial as well as body movements. Using a memoji to convey your messages is an exciting and fun concept that is novel and unique to your personality. But, how to make memoji talk?
Well, that’s the fun part. We will walk you through the steps on how to make memoji talk in 5 simple steps. And if you’re worried about how to make memoji talk on an Android phone, don’t fret. We have the perfect solution for that too.
Read ahead to start learning how to make memoji talk.
- Part 1: How to Make Memoji Talk on iPhone
- Part 2: How to Make Memoji Talk on Android
- Bonus tip-Add Memoji to Your Video with Wondershare Filmora
Part 1: How to Make Memoji Talk on iPhone
Now you can make a talking memoji that mimics your expressions as well as your movements. Cool, right? And if you don’t know how to make memoji talk, you will be a master at it by the end of this article.
Here’s a guide on how to make memoji talk in 5 easy steps:
1.Open imessages. Go to New Message or open an existing conversation. If you don’t see the app tray above the keyboard, click on the App storeicon to reveal the hidden apps.
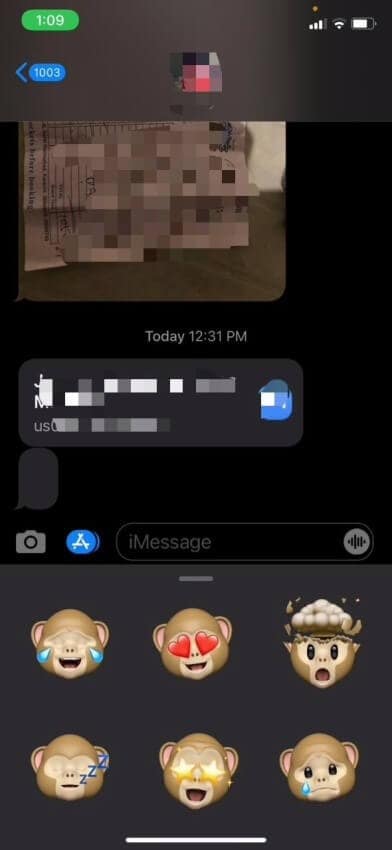
2.Now, in the app tray, click on the three-headed icon to see your memoji. If you record right there, it will just be a basic memoji head limited to a 30-second video. But, since we want more than that, click on the camera icon.
![]()
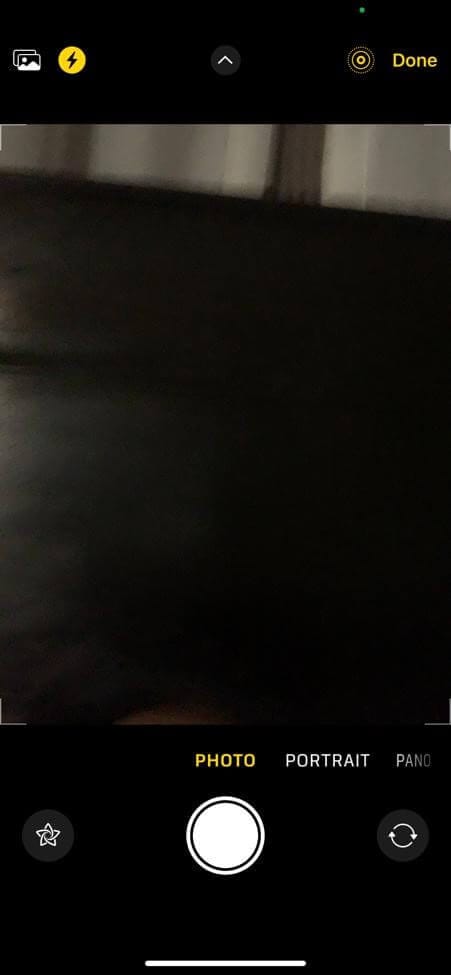
3.Now, switch to selfie mode and click on the Staricon for Effects in the bottom left corner for more options
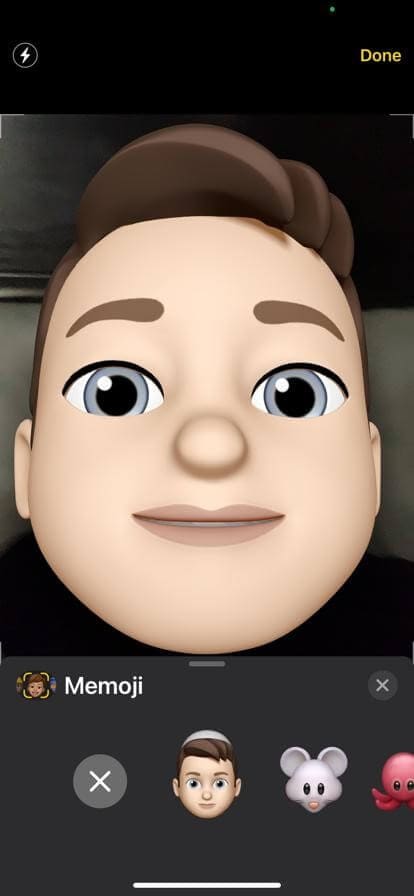
4.Click on the Animoji icon and choose the custom memoji you like to record with. Tap to start recording. Click Doneonce you finish recording.
5.The recorded talking memoji will be automatically sent to the opened chat and will also be saved to your gallery for easy sharing to other contacts or other platforms.

Part 2: How to Make Memoji Talk on Android
Well, we know how to make memoji talk on an iPhone, but what about Android users?
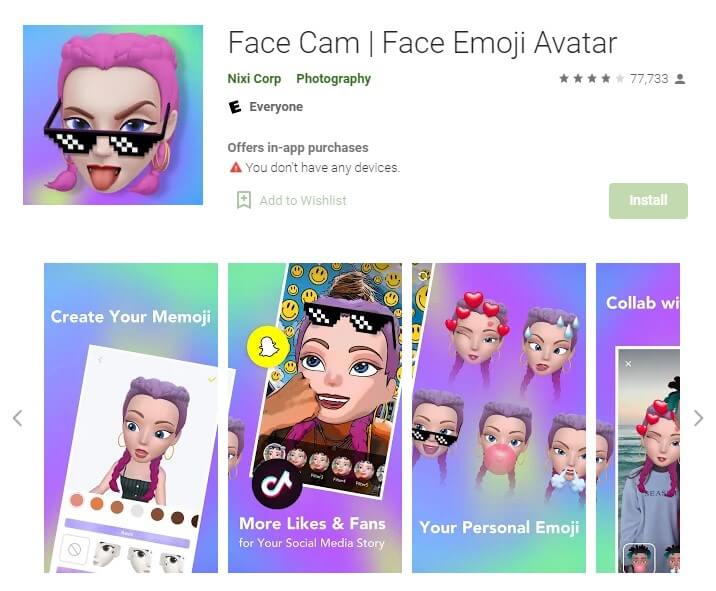
Since Android has no in-built option to make or record a talking memoji, you will need some outside help. Face Cam is an amazing app and solution to your worries. Even if you have no idea how to make memoji video, Face Cam’s user-friendly interface lets you easily understand how to make memoji talk. Plus, you can also personalize your memoji in a fun way
Let’s see how to make memoji talk on Android phones-
1.Install and launch Face Cam on your smartphone.
2.Now, make a custom memoji that looks like you. Select the hairstyle, face shape, eye color, accessories, etc. Tap the Tickicon to proceed.
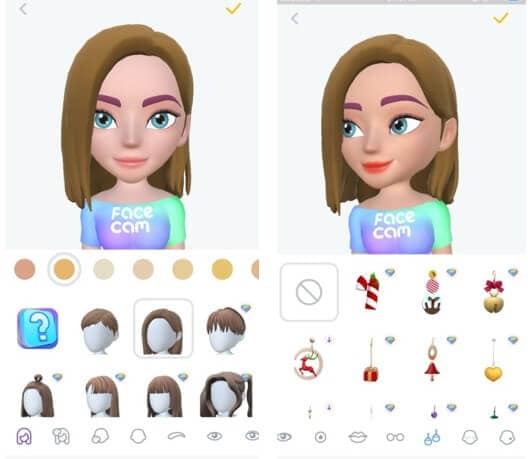
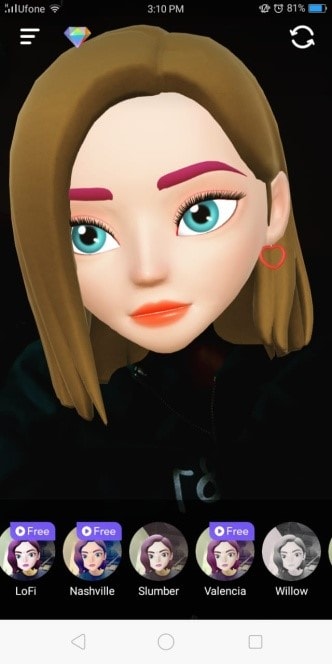
3.Click on the filter tab to reveal filters. Choose the filter you would like to apply.
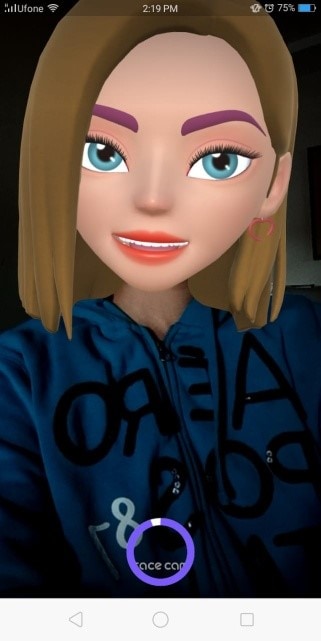
4.Tap and hold the record button to make your video.
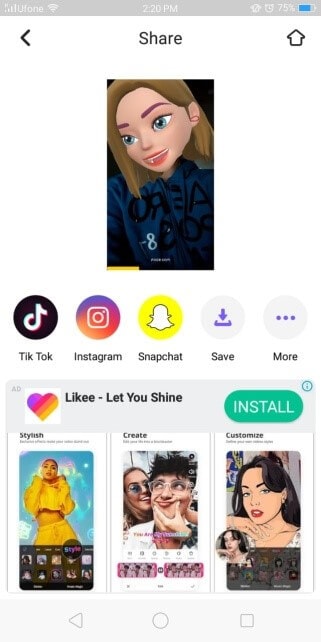
5.Finally, you can tap on the Savebutton to save the video to your gallery. You can also tap on the social media icons to share instantly.
Bonus tip-Add Memoji to Your Video with Wondershare Filmora
Wanna add emoji to your video? Now here is a bonus tip for you!
Filmora is a highly professional video editor with an incredibly intuitive and easy-to-use interface. It is packed with high-end editing tools such as keyframe animations, split-screen effect, cloning, etc. There is a range of aesthetic filters and cool special effects to give your videos a cinematic touch. One key feature is motion tracking. Once you learn how to make memoji talk, you can use your memoji sticker in any video. You will be able to paste your sticker onto your face that will follow it through the clip with easy and swift motion tracking.

Follow these steps:
1.Install and launch Wondershare Filmora. Import the video and memoji sticker to Filmora.
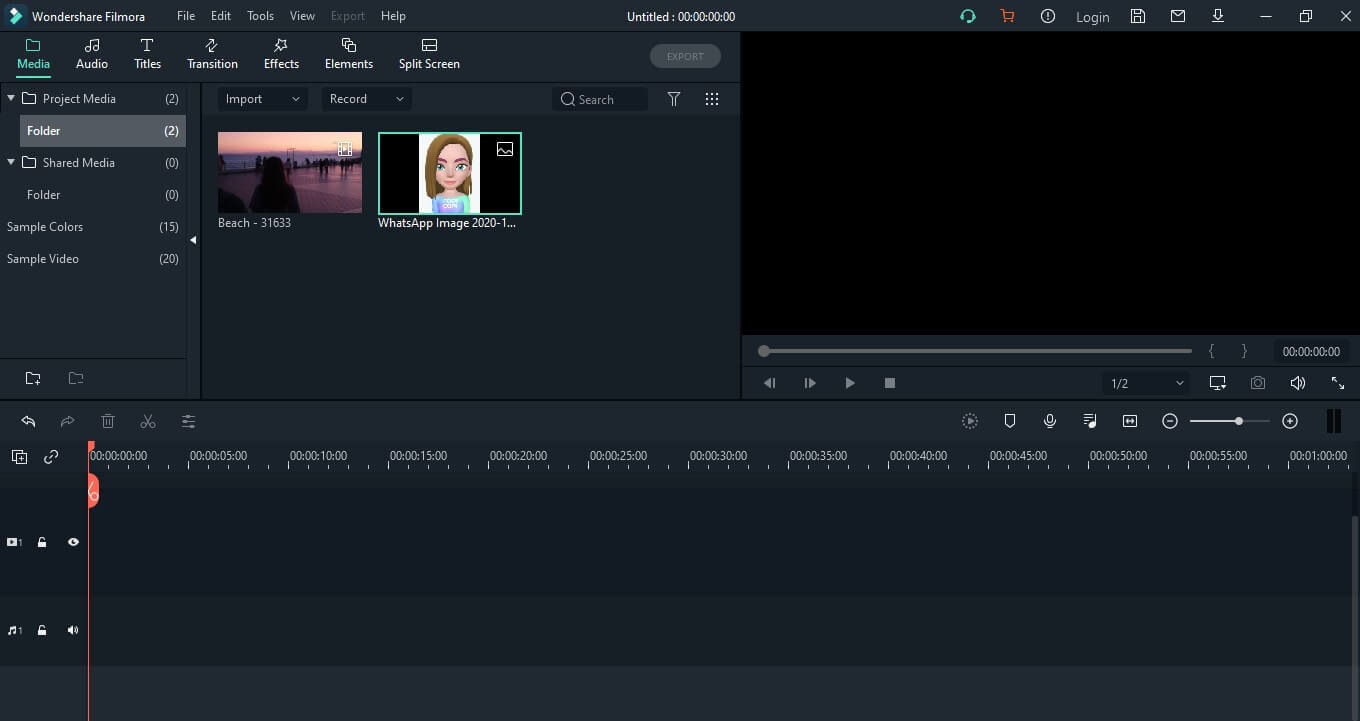
2.Drag the video to video track one and the sticker to the video track 2. And you can click on the sticker and adjust its size and position.
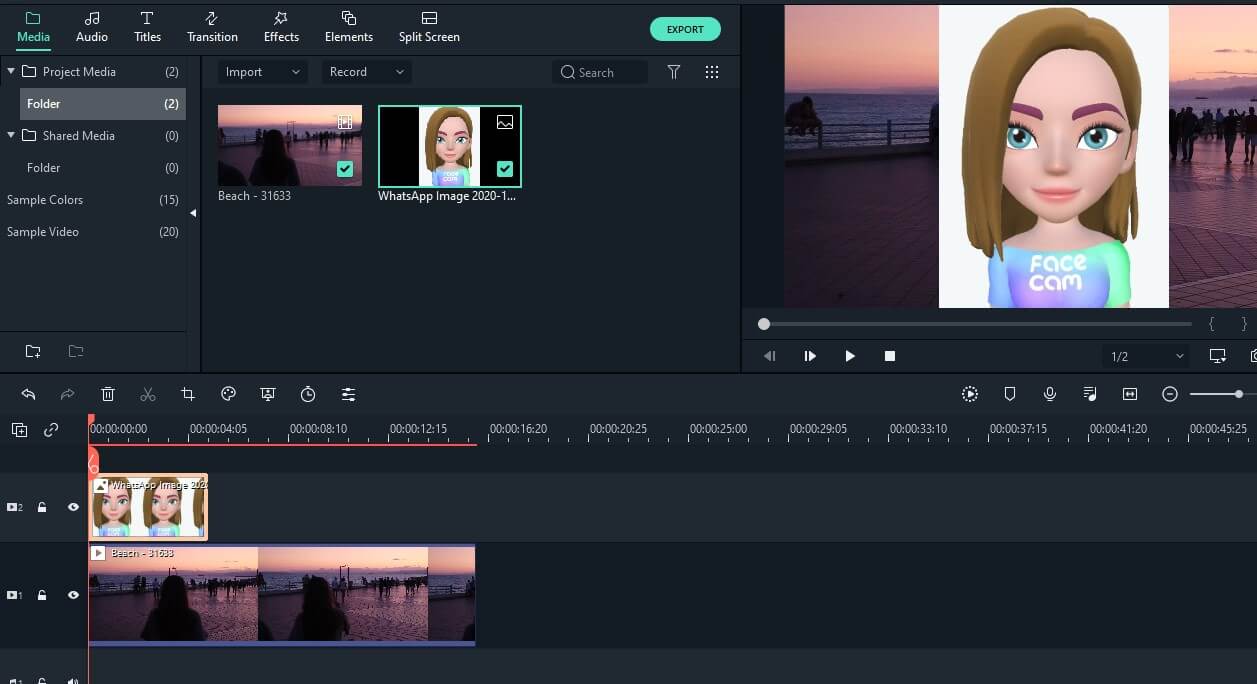
3.Double click on the video in the timeline to open settings. In the Videotab, select motion tracking, choose the area or person you want to track, and click Start Tracking.
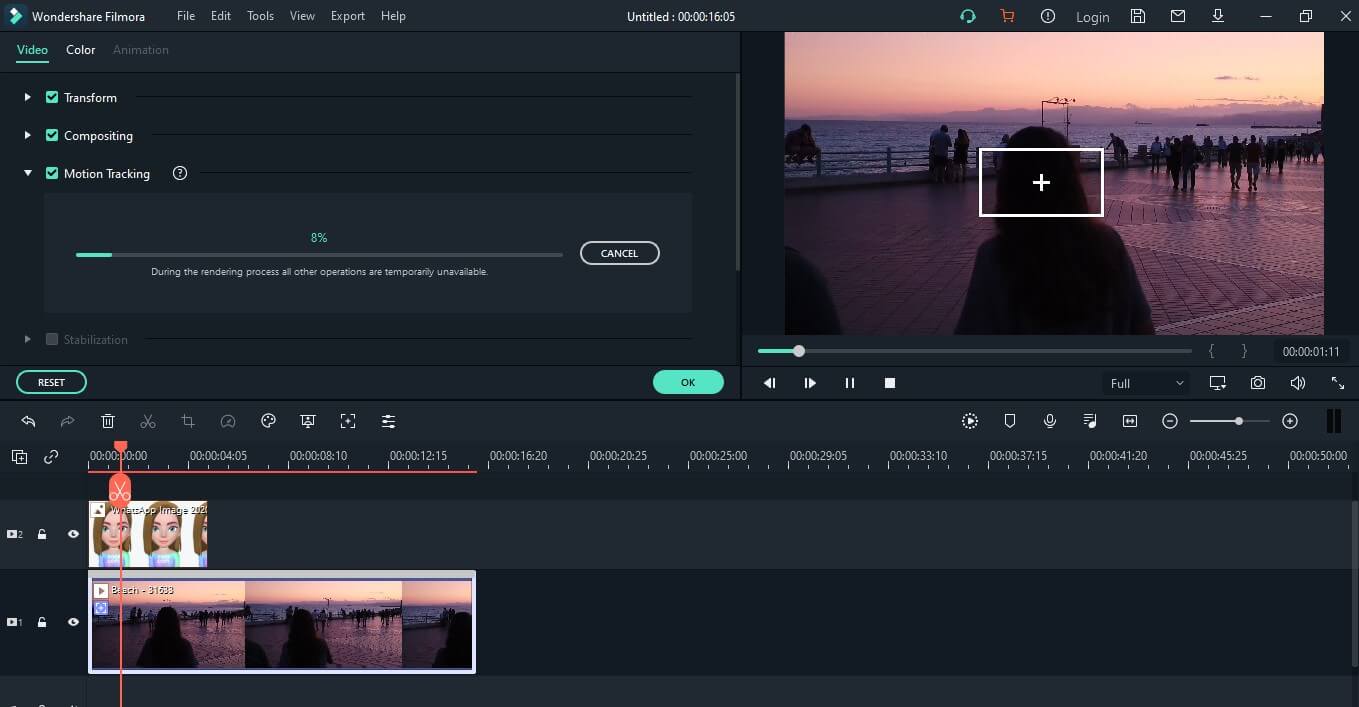
4.Now, choose the element. Open the drop-down menu and select the sticker memoji. Click Okto complete.

5.Finally, click Export. Choose the destination, format, and resolution and press Export.

Conclusion
Texting and virtual communication has now been redefined with the advent of emojis and memojis. So, you need to step up your game by learning how to make memoji talk and enter the exciting world of endless possibilities.
If you were unaware of how to make memoji talk, you must be a master at it by now. The 5 simple steps on how to make memoji video are easy to grasp and fun to try. So, don’t waste any time and start making talking memojis to share laughter. Take help from our ultimate guide on how to make memoji talk and express yourself hilariously and uniquely
Shanoon Cox
Shanoon Cox is a writer and a lover of all things video.
Follow @Shanoon Cox
Shanoon Cox
Mar 27, 2024• Proven solutions
Memojis are the 3D virtual caricatures customized to look exactly like you. Much like an animoji, memoji can mimic your facial as well as body movements. Using a memoji to convey your messages is an exciting and fun concept that is novel and unique to your personality. But, how to make memoji talk?
Well, that’s the fun part. We will walk you through the steps on how to make memoji talk in 5 simple steps. And if you’re worried about how to make memoji talk on an Android phone, don’t fret. We have the perfect solution for that too.
Read ahead to start learning how to make memoji talk.
- Part 1: How to Make Memoji Talk on iPhone
- Part 2: How to Make Memoji Talk on Android
- Bonus tip-Add Memoji to Your Video with Wondershare Filmora
Part 1: How to Make Memoji Talk on iPhone
Now you can make a talking memoji that mimics your expressions as well as your movements. Cool, right? And if you don’t know how to make memoji talk, you will be a master at it by the end of this article.
Here’s a guide on how to make memoji talk in 5 easy steps:
1.Open imessages. Go to New Message or open an existing conversation. If you don’t see the app tray above the keyboard, click on the App storeicon to reveal the hidden apps.
2.Now, in the app tray, click on the three-headed icon to see your memoji. If you record right there, it will just be a basic memoji head limited to a 30-second video. But, since we want more than that, click on the camera icon.
![]()
3.Now, switch to selfie mode and click on the Staricon for Effects in the bottom left corner for more options
4.Click on the Animoji icon and choose the custom memoji you like to record with. Tap to start recording. Click Doneonce you finish recording.
5.The recorded talking memoji will be automatically sent to the opened chat and will also be saved to your gallery for easy sharing to other contacts or other platforms.
Part 2: How to Make Memoji Talk on Android
Well, we know how to make memoji talk on an iPhone, but what about Android users?
Since Android has no in-built option to make or record a talking memoji, you will need some outside help. Face Cam is an amazing app and solution to your worries. Even if you have no idea how to make memoji video, Face Cam’s user-friendly interface lets you easily understand how to make memoji talk. Plus, you can also personalize your memoji in a fun way
Let’s see how to make memoji talk on Android phones-
1.Install and launch Face Cam on your smartphone.
2.Now, make a custom memoji that looks like you. Select the hairstyle, face shape, eye color, accessories, etc. Tap the Tickicon to proceed.
3.Click on the filter tab to reveal filters. Choose the filter you would like to apply.
4.Tap and hold the record button to make your video.
5.Finally, you can tap on the Savebutton to save the video to your gallery. You can also tap on the social media icons to share instantly.
Bonus tip-Add Memoji to Your Video with Wondershare Filmora
Wanna add emoji to your video? Now here is a bonus tip for you!
Filmora is a highly professional video editor with an incredibly intuitive and easy-to-use interface. It is packed with high-end editing tools such as keyframe animations, split-screen effect, cloning, etc. There is a range of aesthetic filters and cool special effects to give your videos a cinematic touch. One key feature is motion tracking. Once you learn how to make memoji talk, you can use your memoji sticker in any video. You will be able to paste your sticker onto your face that will follow it through the clip with easy and swift motion tracking.
Follow these steps:
1.Install and launch Wondershare Filmora. Import the video and memoji sticker to Filmora.
2.Drag the video to video track one and the sticker to the video track 2. And you can click on the sticker and adjust its size and position.
3.Double click on the video in the timeline to open settings. In the Videotab, select motion tracking, choose the area or person you want to track, and click Start Tracking.
4.Now, choose the element. Open the drop-down menu and select the sticker memoji. Click Okto complete.
5.Finally, click Export. Choose the destination, format, and resolution and press Export.
Conclusion
Texting and virtual communication has now been redefined with the advent of emojis and memojis. So, you need to step up your game by learning how to make memoji talk and enter the exciting world of endless possibilities.
If you were unaware of how to make memoji talk, you must be a master at it by now. The 5 simple steps on how to make memoji video are easy to grasp and fun to try. So, don’t waste any time and start making talking memojis to share laughter. Take help from our ultimate guide on how to make memoji talk and express yourself hilariously and uniquely
Shanoon Cox
Shanoon Cox is a writer and a lover of all things video.
Follow @Shanoon Cox
How to Add Bitmoji to Keyboard?
Emojis have made it so much better for people to express themselves. Let’s say someone compliments you on a chat app; you can use a smiley emoji to tell that you are happy. At the same time, an angry emoji lets you express that you are angry.
Apart from the generic emojis that you can find in your chat applications, Bitmoji enables you to customize your character and share it with people you chat with. Bitmoji is fun, but do you know how to add it to a keyboard? If you don’t, don’t worry, this post will help you understand how to do that.
In this article
02 How to Add and Use Bitmoji to iPhone Keyboard?
03 How to Get the Bitmoji Keyboard on Android?
04 How to Install and Use Bitmoji on Windows and Mac?
Part 1: What is Bitmoji?
If you are new to Bitmoji, you may wonder what it is? Bitmoji is essentially your own personal emoji. You can create a cartoon version of yourself and share it with people to make the conversation fun. So, what one does is create an avatar of themselves and give it all kinds of expressions.
Then, you can create comics using your Bitmoji, use it to express yourself while having a chat, and even use it as a reaction. Anyone who is done using the same old emojis has started using Bitmoji because it’s a lot more fun.
Now, let’s learn how to create your very own Bitmoji.
Step 1: First, go to the App Store or Play store and download the Bitmoji application.
Step 2: Once downloaded, launch the app and start making an avatar or your Bitmoji.
Step 3: Pick a skin color, hair color, chin, nose, hairstyle, jawline, and more.

Once your Bitmoji is created, you are all set to use the Bitmoji as stickers. Moreover, the app lets you dress your Bitmoji as you want as well. Let it have different expressions and postures because that’s how it’s going to be fun! After your Bitmoji is added, the next thing to do is enable Bitmoji on the keyboard of the device you are using.
Part 2: How to Add and Use Bitmoji to iPhone Keyboard?
Since you have learned how to create a Bimoji, it’s time to learn the steps to use it on your iPhone keyboard. Unfortunately, just by downloading the app, it won’t reflect on the keyboard directly. Instead, you will have to follow a few steps to add Bitmoji to the keyboard. Here’s what you need to do.
Step 1: Launch your iPhone and click on the Settings option.
Step 2: Now, go to the General option and click on the Keyboard option.

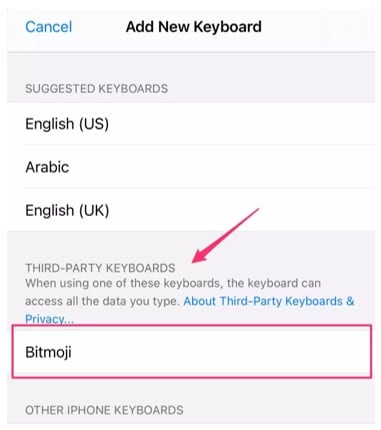
Step 3: When the Keyboard page opens, click on the option that says Keyboards and then click on Add New Keyboard.
Step 4: You will see the Third Party Keyboards option. There, you need to click on Bitmoji.
Step 5: Now, toggle the option that says Allow Full Access. Once you do that, you will see a small pop-up. Click on the Allow option.
And that’s it. Bitmoji will be added to the iPhone keyboard. Open any messaging app and click on the globe and hold it for a few seconds. When you see Bitmoji, click on that, and you will be able to use Bitmoji stickers.
Part 3: How to Get the Bitmoji Keyboard on Android?
Bitmoji is available for Android users as well. Before you begin to use it, go through the first part again and download the app. Then create your Bitmoji, as explained earlier. You can send Bitmojis directly from the app itself, but if you plan to use Bitmoji regularly, getting the Bitmoji keyboard makes sense. So, once you are done, follow the following steps to get the Bitmoji keyboard on Android.
Step 1: Launch the Bitmoji app. Click on the Keyboard option that you see at the bottom of the Bitmoji app screen.
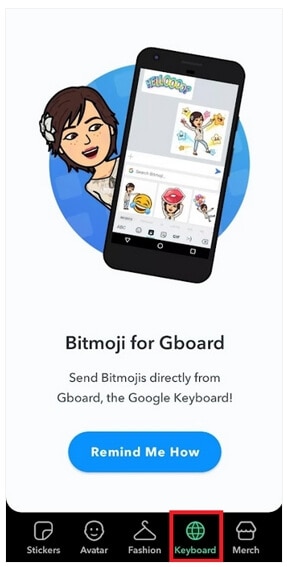
Step 2: Install Bitmoji keyboard and give permission to your phone to use Bitmoji keyboard. Bitmoji will notify you when the Bitmoji keyboard gets activated.
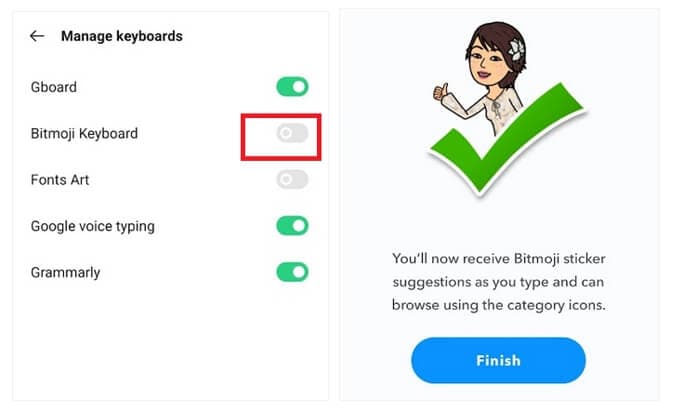
You are all done. Now, use the Bitmoji keyboard to chat with your family members and friends and make everything fun and exciting.
Part 4: How to Install and Use Bitmoji on Windows and Mac?
If you want to use Bitmoji on Windows and Mac, you will have to use the Google Chrome browser. If you already have the Google Chrome browser, carry on with the steps explained below; otherwise, get the browser before starting.
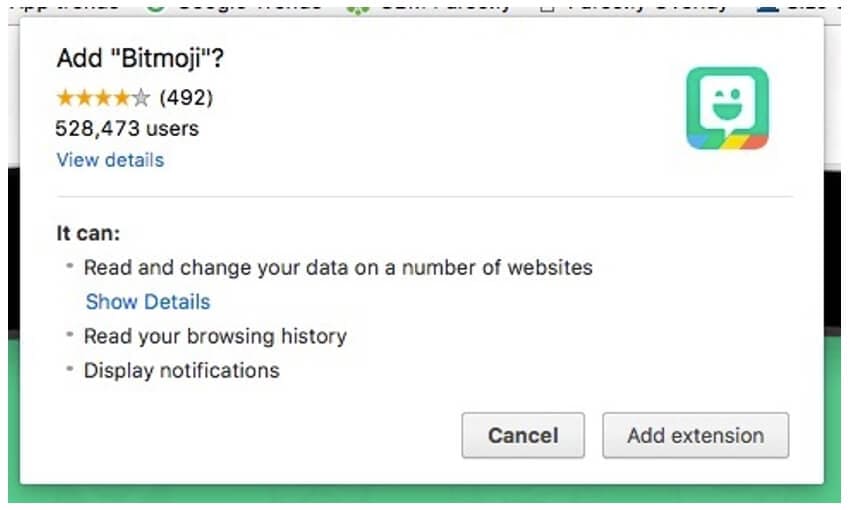
Step 1: Go to Chrome Extension and install Bitmoji for Chrome Extension.
Step 2: You will have to sign in to Bitmoji. If you want to add Bitmoji to Gmail, click on add Bitmoji to Gmail.
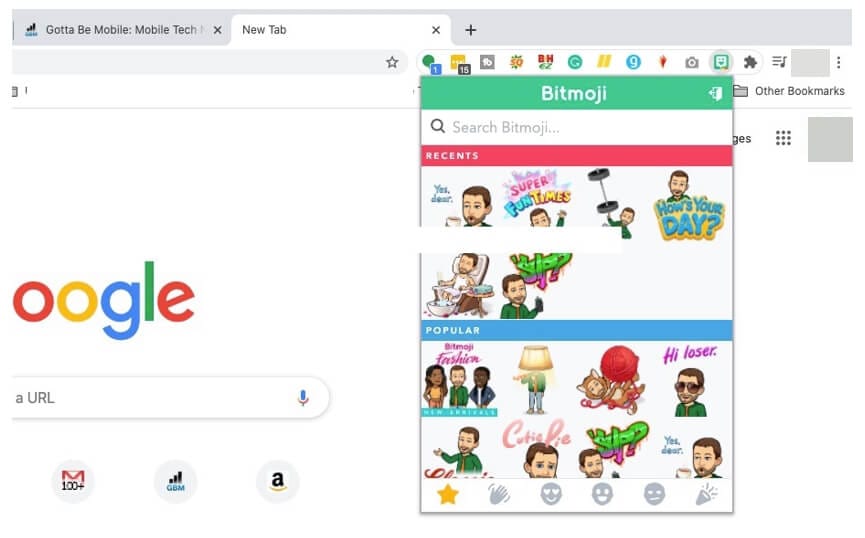
After you are done following the three easy steps, you will see Bitmoji is installed. To start using it, move the cursor to the upper corner of the browser and click on the Bitmoji icon. Next, you will see the Bitmojis. Choose any Bitmoji, copy it, and paste it on Gmail or instant messaging applications.
Part 5: Where can You Use Bitmoji?
Bitmojis can be used on different platforms. All you need to do is enable Bitmoji keyboard on your iPhone or Android phone or Windows and Mac computers and use it on various social media platforms. For example, use Snapchat to send Bitmojis for different types of occasions.
If you are an iPhone user, you can share fun Bitmojis through iMessage. On a computer, you can use these Bitmojis on Facebook or other instant messaging platforms. You can drag and drop the Bitmoji sticker or copy it to share it with your friends.
If you are a working professional and want to lighten the mood of your Slack workspace, use Bitmojis to make your coworkers feel relaxed. Plus, this can be a great way to make someone feel pumped up. Like that, there are many other platforms to use Bitmojis!
Related: Best Free Apps to Get Emojis on iPhone and Android
Conclusion
So, there you go. We have finally reached the end of this guide. We hope you have found this post interesting and will face no hassle using the Bitmoji keyboard on different devices. Get the Bitmoji app if you haven’t downloaded it yet and make your conversations fun and enjoyable!
02 How to Add and Use Bitmoji to iPhone Keyboard?
03 How to Get the Bitmoji Keyboard on Android?
04 How to Install and Use Bitmoji on Windows and Mac?
Part 1: What is Bitmoji?
If you are new to Bitmoji, you may wonder what it is? Bitmoji is essentially your own personal emoji. You can create a cartoon version of yourself and share it with people to make the conversation fun. So, what one does is create an avatar of themselves and give it all kinds of expressions.
Then, you can create comics using your Bitmoji, use it to express yourself while having a chat, and even use it as a reaction. Anyone who is done using the same old emojis has started using Bitmoji because it’s a lot more fun.
Now, let’s learn how to create your very own Bitmoji.
Step 1: First, go to the App Store or Play store and download the Bitmoji application.
Step 2: Once downloaded, launch the app and start making an avatar or your Bitmoji.
Step 3: Pick a skin color, hair color, chin, nose, hairstyle, jawline, and more.
Once your Bitmoji is created, you are all set to use the Bitmoji as stickers. Moreover, the app lets you dress your Bitmoji as you want as well. Let it have different expressions and postures because that’s how it’s going to be fun! After your Bitmoji is added, the next thing to do is enable Bitmoji on the keyboard of the device you are using.
Part 2: How to Add and Use Bitmoji to iPhone Keyboard?
Since you have learned how to create a Bimoji, it’s time to learn the steps to use it on your iPhone keyboard. Unfortunately, just by downloading the app, it won’t reflect on the keyboard directly. Instead, you will have to follow a few steps to add Bitmoji to the keyboard. Here’s what you need to do.
Step 1: Launch your iPhone and click on the Settings option.
Step 2: Now, go to the General option and click on the Keyboard option.
Step 3: When the Keyboard page opens, click on the option that says Keyboards and then click on Add New Keyboard.
Step 4: You will see the Third Party Keyboards option. There, you need to click on Bitmoji.
Step 5: Now, toggle the option that says Allow Full Access. Once you do that, you will see a small pop-up. Click on the Allow option.
And that’s it. Bitmoji will be added to the iPhone keyboard. Open any messaging app and click on the globe and hold it for a few seconds. When you see Bitmoji, click on that, and you will be able to use Bitmoji stickers.
Part 3: How to Get the Bitmoji Keyboard on Android?
Bitmoji is available for Android users as well. Before you begin to use it, go through the first part again and download the app. Then create your Bitmoji, as explained earlier. You can send Bitmojis directly from the app itself, but if you plan to use Bitmoji regularly, getting the Bitmoji keyboard makes sense. So, once you are done, follow the following steps to get the Bitmoji keyboard on Android.
Step 1: Launch the Bitmoji app. Click on the Keyboard option that you see at the bottom of the Bitmoji app screen.
Step 2: Install Bitmoji keyboard and give permission to your phone to use Bitmoji keyboard. Bitmoji will notify you when the Bitmoji keyboard gets activated.
You are all done. Now, use the Bitmoji keyboard to chat with your family members and friends and make everything fun and exciting.
Part 4: How to Install and Use Bitmoji on Windows and Mac?
If you want to use Bitmoji on Windows and Mac, you will have to use the Google Chrome browser. If you already have the Google Chrome browser, carry on with the steps explained below; otherwise, get the browser before starting.
Step 1: Go to Chrome Extension and install Bitmoji for Chrome Extension.
Step 2: You will have to sign in to Bitmoji. If you want to add Bitmoji to Gmail, click on add Bitmoji to Gmail.
After you are done following the three easy steps, you will see Bitmoji is installed. To start using it, move the cursor to the upper corner of the browser and click on the Bitmoji icon. Next, you will see the Bitmojis. Choose any Bitmoji, copy it, and paste it on Gmail or instant messaging applications.
Part 5: Where can You Use Bitmoji?
Bitmojis can be used on different platforms. All you need to do is enable Bitmoji keyboard on your iPhone or Android phone or Windows and Mac computers and use it on various social media platforms. For example, use Snapchat to send Bitmojis for different types of occasions.
If you are an iPhone user, you can share fun Bitmojis through iMessage. On a computer, you can use these Bitmojis on Facebook or other instant messaging platforms. You can drag and drop the Bitmoji sticker or copy it to share it with your friends.
If you are a working professional and want to lighten the mood of your Slack workspace, use Bitmojis to make your coworkers feel relaxed. Plus, this can be a great way to make someone feel pumped up. Like that, there are many other platforms to use Bitmojis!
Related: Best Free Apps to Get Emojis on iPhone and Android
Conclusion
So, there you go. We have finally reached the end of this guide. We hope you have found this post interesting and will face no hassle using the Bitmoji keyboard on different devices. Get the Bitmoji app if you haven’t downloaded it yet and make your conversations fun and enjoyable!
Best Emoji Removers to Remove Emojis From Pictures [Online/PC/Mobile]
Thanks to technology, editing photos have become easy. You can crop and rotate a photo, add filters, and even add emojis. While removing emojis is easy while you are editing an image and have not saved your work, but what if you have and want to get rid of the emojis you added to the picture? How to go about that?
So, if you want to remove an emoji from a picture and the picture is already saved, don’t worry; this post will help you learn about the top ways to remove it. Keep reading!
Related: How to Remove Unwanted Objects from Photo
In this article
01 Best Emoji Removers Online to Remove Emojis from Pictures
02 Best Emoji Removers on Windows/Mac Computer
03 Best Emoji Remover Apps on iPhone and Android
Part 1: Best Emoji Removers Online to Remove Emojis from Pictures
1. Inpaint
So, the first online emoji remover that you can try is Inpaint. This is a simple to use tool and will remove unwanted objects, such as emojis, from a picture by intelligently filling it with textures that match the surrounding image data.
The image formats Inpaint accepts are JPG, WebP, and PNG. Just remember to use only the recommended image formats, and you can start using them right away. You don’t need to log in or sign up to start using it.
Features
- An online tool that removes unwanted objects quickly.
- You don’t need to sign up or log in.
- It accepts JPG, PNG, and WebP formats.
- 4.2MP is the maximum image resolution.
Website: https://theinpaint.com/
2. Pixlr
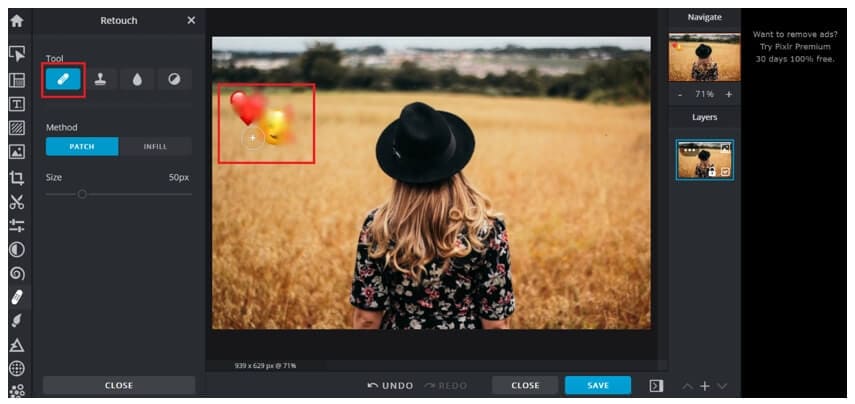
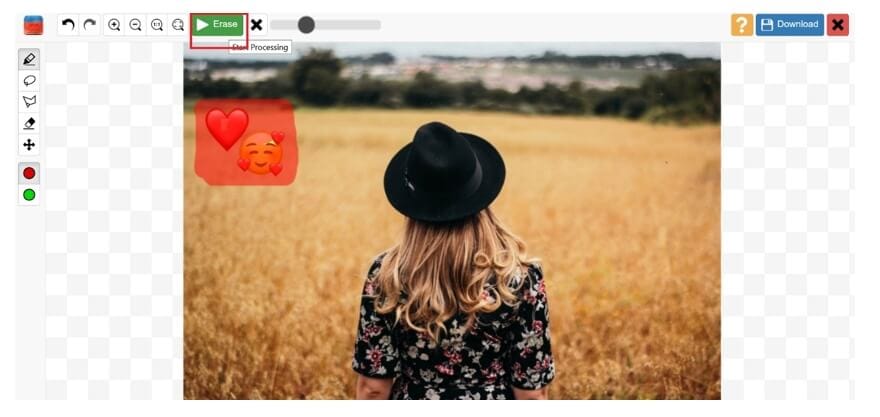
The next popular online tool is Pixlr. Pixlr is a popular photo editing tool that allows you to fix your pictures as well. You can use the tool online either using your computer web browser or mobile.
Whatever works for you. It doesn’t only let you remove emojis but erase background as well. But since you want to remove emojis, you will have to add the image and click on the retouch button from the toolbar. Then, you need to click on the image multiple times so that its surroundings overlap the emojis.
Features
- Pixlr can be used on both mobile and web browsers.
- Multiple photo editing tools are available.
- Removes emojis by blending them with the surroundings.
- Using Pixlr is easy and convenient.
Website: https://pixlr.com/
3. Fotor

Fotor is a professional photo editing tool, which lets you clone an emoji with a part of the image. The online tool asks you to sign up using your Google account to save your work. So, if you want to know how to remove emoji from a photo, you can use the clone feature.
Once you upload an image with emojis, move your cursor to the tool section in the left menu bar. Scroll down, and you will see the Clone option. Touch one part of the image that you want to use instead of the emoji. The first dot will be the area you want to clone and place the second dot on the emoji. And all done.
Website: https://www.fotor.com/
Features
- You can clone the emoji to remove it.
- A professional tool with lots of editing features.
- One needs to sign up or log in before using Fotor.
- The tool retains the original picture quality.
Related: Best Online Photo Editors
Part 2: Best Emoji Removers on Windows/Mac Computer
1. Adobe Photoshop
Adobe Photoshop is arguably one of the best photo editing tools that only allows you to enhance a photo but fix issues, such as removing emojis, unwanted objects, and so on. Adobe Photoshop is a professional tool and might not be the best for those new to it, but if you have used Adobe Photoshop earlier, you can use the Lasso Tool or the Marqueel Tool, which you will find on the left toolbar to remove emojis and unwanted items. Once done, save the image, and yes, the original picture quality will be retained.
Key Features
- A professional photo editing tool.
- It has multiple photo editing features and lets you remove emojis.
- You can draw on the emoji with a pen or pencil.
- It autosaves your work.
2. Wondershare Fotophire
Wondershare Fotophire is a fantastic photo editing tool that works magically on all kinds of images. Whether your photo is loaded with multiple emojis, you can remove them easily using Fotophire. If you are thinking about how to remove emojis from pictures using Fotophire, it’s pretty easy.
You need to clone any part of the image, and the tool will automatically use its algorithm to fill the emoji with its surroundings so that the filled area looks natural and blends well with the rest of the photo. Fotophire is a good option for both beginners and pros.
Key Features
- It removes all kinds of unwanted objects from an image, including emojis.
- Using Fotophire is easy and convenient.
- A good tool for both pros and beginners.
- Background doesn’t get impacted, and the original image quality remains intact.
3. GIMP
GIMP is a free and open-source photo editor, which allows you to remove emojis from a photo. It is available for Windows, macOS, GNU/Linux, and other operating systems. GIMP has been designed for everyone who would want their picture to look better.
If you wish to manipulate a high-quality image, you don’t have to worry about that because it accepts bigger-size photos as well. GIMP lets you clone an area and use that part on the emoji. You can also adjust the opacity of the cloned item depending on your requirements.
Key Features
- It lets you clone the surrounding area to hide an emoji.
- Accepts all the top image formats.
- It doesn’t pixelate the image after editing it.
- A free tool to use with lots of photo editing features.
4. Jihosoft Photo Eraser
Jihosoft Photo Eraser is a good photo editor tool that removes emojis or unwanted objects from an image by analyzing the surroundings. Once done, it will fill the selected emojis with the intelligently-generated textures. If you no longer want the emojis to be there is an image, Jihosoft Photo Eraser will be an ideal tool to use. The tool’s primary purpose is to remove unwanted items from an image, which is why it is an excellent software to go for.
Key Features
- It removes unwanted objects, such as emojis, from a photo.
- It allows the cloning of things to replace emojis.
- Using Jihosoft Photo Eraser is easy.
- The photo quality remains intact.
Part 3: Best Emoji Remover Apps on iPhone and Android
1. Snapseed
Snapseed is a photo editing app that is available for both iPhone and Android users. It has a masking feature, which lets you mask any object in a photo, including an emoji. Snapseed is a good tool to get rid of unwanted items from any image.
It has around 29 photo editing tools, which will help a user to enhance the photo quality. Using it is very easy because all the tools are readily available on the main screen. You just need to select the right tool and get started with the work.
Key Features
- It helps in removing emojis and unwanted objects from a photo.
- It works on both RAW and JPG files.
- It has multiple photo editing tools.
- Using Snapseed is easy.
2. AirBrush
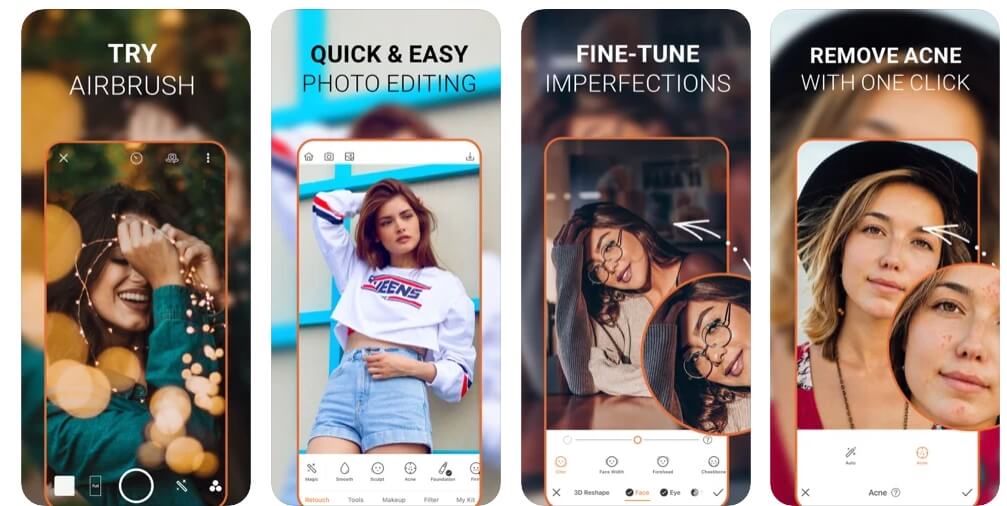
AirBrush is a leading photo editing tool for iPhone users and has a high rating of 4.9. The tool makes editing an image effortlessly. If you don’t want the emojis to ruin your photo, use AirBrush to deal with it quickly. Moreover, it lets you edit your photos further, for example, remove blemishes, make the image look smooth and glowing, add filters to give it a magical touch, and so much more! The tool has quite a lot of features that you will like.
Key Features
- It removes emojis and unwanted objects from an image.
- Using AirBrush is easy.
- It removes emojis quickly.
- It has many photo editing tools.
3. TouchRetouch
If you are looking for a professional photo editing tool that will let you do much more than just remove emojis, you should try TouchRetouch. You can use it to remove unwanted items, such as emojis, lines, blemishes, imperfections, and more.
It has a rating of 4.8, which is great looking at the kind of photo editing features TouchRetouch offers. No matter what objects you want to get rid of in your photo, TouchRetouch can let you do that easily.
Key Features
- It removes all kinds of unwanted objects quickly.
- It provides you with a single-flick line removal function.
- TouchRetouch is easy to use.
- It offers easy to understand tutorials.
FAQ About Removing Emojis from Pictures
How Do I Remove an Emoji from a Hidden Face?
It depends on the kind of tool you have picked. Typically, the tool will let you select the emoji and mask it with its surroundings to blend in well. So, let’s say you are on a dating site and you can’t see how the person looks like because they have hidden their face with an emoji.
In such a case, even if you use an emoji remover tool, it won’t show the actual face, instead replace it with the surrounding. Emoji removal tools are for personal use only.
Conclusion
So, now you know about the easy ways to remove emojis from pictures. Try any of the tools and remove unwanted objects and emojis from any photo you want. The tools that we have listed here are trusted by many and are easy to use.
02 Best Emoji Removers on Windows/Mac Computer
03 Best Emoji Remover Apps on iPhone and Android
Part 1: Best Emoji Removers Online to Remove Emojis from Pictures
1. Inpaint
So, the first online emoji remover that you can try is Inpaint. This is a simple to use tool and will remove unwanted objects, such as emojis, from a picture by intelligently filling it with textures that match the surrounding image data.
The image formats Inpaint accepts are JPG, WebP, and PNG. Just remember to use only the recommended image formats, and you can start using them right away. You don’t need to log in or sign up to start using it.
Features
- An online tool that removes unwanted objects quickly.
- You don’t need to sign up or log in.
- It accepts JPG, PNG, and WebP formats.
- 4.2MP is the maximum image resolution.
Website: https://theinpaint.com/
2. Pixlr
The next popular online tool is Pixlr. Pixlr is a popular photo editing tool that allows you to fix your pictures as well. You can use the tool online either using your computer web browser or mobile.
Whatever works for you. It doesn’t only let you remove emojis but erase background as well. But since you want to remove emojis, you will have to add the image and click on the retouch button from the toolbar. Then, you need to click on the image multiple times so that its surroundings overlap the emojis.
Features
- Pixlr can be used on both mobile and web browsers.
- Multiple photo editing tools are available.
- Removes emojis by blending them with the surroundings.
- Using Pixlr is easy and convenient.
Website: https://pixlr.com/
3. Fotor
Fotor is a professional photo editing tool, which lets you clone an emoji with a part of the image. The online tool asks you to sign up using your Google account to save your work. So, if you want to know how to remove emoji from a photo, you can use the clone feature.
Once you upload an image with emojis, move your cursor to the tool section in the left menu bar. Scroll down, and you will see the Clone option. Touch one part of the image that you want to use instead of the emoji. The first dot will be the area you want to clone and place the second dot on the emoji. And all done.
Website: https://www.fotor.com/
Features
- You can clone the emoji to remove it.
- A professional tool with lots of editing features.
- One needs to sign up or log in before using Fotor.
- The tool retains the original picture quality.
Related: Best Online Photo Editors
Part 2: Best Emoji Removers on Windows/Mac Computer
1. Adobe Photoshop
Adobe Photoshop is arguably one of the best photo editing tools that only allows you to enhance a photo but fix issues, such as removing emojis, unwanted objects, and so on. Adobe Photoshop is a professional tool and might not be the best for those new to it, but if you have used Adobe Photoshop earlier, you can use the Lasso Tool or the Marqueel Tool, which you will find on the left toolbar to remove emojis and unwanted items. Once done, save the image, and yes, the original picture quality will be retained.
Key Features
- A professional photo editing tool.
- It has multiple photo editing features and lets you remove emojis.
- You can draw on the emoji with a pen or pencil.
- It autosaves your work.
2. Wondershare Fotophire
Wondershare Fotophire is a fantastic photo editing tool that works magically on all kinds of images. Whether your photo is loaded with multiple emojis, you can remove them easily using Fotophire. If you are thinking about how to remove emojis from pictures using Fotophire, it’s pretty easy.
You need to clone any part of the image, and the tool will automatically use its algorithm to fill the emoji with its surroundings so that the filled area looks natural and blends well with the rest of the photo. Fotophire is a good option for both beginners and pros.
Key Features
- It removes all kinds of unwanted objects from an image, including emojis.
- Using Fotophire is easy and convenient.
- A good tool for both pros and beginners.
- Background doesn’t get impacted, and the original image quality remains intact.
3. GIMP
GIMP is a free and open-source photo editor, which allows you to remove emojis from a photo. It is available for Windows, macOS, GNU/Linux, and other operating systems. GIMP has been designed for everyone who would want their picture to look better.
If you wish to manipulate a high-quality image, you don’t have to worry about that because it accepts bigger-size photos as well. GIMP lets you clone an area and use that part on the emoji. You can also adjust the opacity of the cloned item depending on your requirements.
Key Features
- It lets you clone the surrounding area to hide an emoji.
- Accepts all the top image formats.
- It doesn’t pixelate the image after editing it.
- A free tool to use with lots of photo editing features.
4. Jihosoft Photo Eraser
Jihosoft Photo Eraser is a good photo editor tool that removes emojis or unwanted objects from an image by analyzing the surroundings. Once done, it will fill the selected emojis with the intelligently-generated textures. If you no longer want the emojis to be there is an image, Jihosoft Photo Eraser will be an ideal tool to use. The tool’s primary purpose is to remove unwanted items from an image, which is why it is an excellent software to go for.
Key Features
- It removes unwanted objects, such as emojis, from a photo.
- It allows the cloning of things to replace emojis.
- Using Jihosoft Photo Eraser is easy.
- The photo quality remains intact.
Part 3: Best Emoji Remover Apps on iPhone and Android
1. Snapseed
Snapseed is a photo editing app that is available for both iPhone and Android users. It has a masking feature, which lets you mask any object in a photo, including an emoji. Snapseed is a good tool to get rid of unwanted items from any image.
It has around 29 photo editing tools, which will help a user to enhance the photo quality. Using it is very easy because all the tools are readily available on the main screen. You just need to select the right tool and get started with the work.
Key Features
- It helps in removing emojis and unwanted objects from a photo.
- It works on both RAW and JPG files.
- It has multiple photo editing tools.
- Using Snapseed is easy.
2. AirBrush
AirBrush is a leading photo editing tool for iPhone users and has a high rating of 4.9. The tool makes editing an image effortlessly. If you don’t want the emojis to ruin your photo, use AirBrush to deal with it quickly. Moreover, it lets you edit your photos further, for example, remove blemishes, make the image look smooth and glowing, add filters to give it a magical touch, and so much more! The tool has quite a lot of features that you will like.
Key Features
- It removes emojis and unwanted objects from an image.
- Using AirBrush is easy.
- It removes emojis quickly.
- It has many photo editing tools.
3. TouchRetouch
If you are looking for a professional photo editing tool that will let you do much more than just remove emojis, you should try TouchRetouch. You can use it to remove unwanted items, such as emojis, lines, blemishes, imperfections, and more.
It has a rating of 4.8, which is great looking at the kind of photo editing features TouchRetouch offers. No matter what objects you want to get rid of in your photo, TouchRetouch can let you do that easily.
Key Features
- It removes all kinds of unwanted objects quickly.
- It provides you with a single-flick line removal function.
- TouchRetouch is easy to use.
- It offers easy to understand tutorials.
FAQ About Removing Emojis from Pictures
How Do I Remove an Emoji from a Hidden Face?
It depends on the kind of tool you have picked. Typically, the tool will let you select the emoji and mask it with its surroundings to blend in well. So, let’s say you are on a dating site and you can’t see how the person looks like because they have hidden their face with an emoji.
In such a case, even if you use an emoji remover tool, it won’t show the actual face, instead replace it with the surrounding. Emoji removal tools are for personal use only.
Conclusion
So, now you know about the easy ways to remove emojis from pictures. Try any of the tools and remove unwanted objects and emojis from any photo you want. The tools that we have listed here are trusted by many and are easy to use.
Top 12 Best Meme Makers Online for FREE
Top 12 Best Meme Makers Online for FREE
Ollie Mattison
Mar 27, 2024• Proven solutions
Memes have become a central part of many online conversations. They pop up a lot on social media, especially platforms such as Twitter, Tumblr and Facebook . People even converse with each other using meme keyboards.
With memes taking over popular culture, you may want to make a meme for yourself. By using a meme maker, you can do just that! Here is a look at the top 10+ best meme maker online options that you can use for free.
10+ Best Meme Makers Online
1. Filmora Free Meme Generator
Filmora meme maker is a totally free meme generator without a watermark. Also, you don’t need to sign up or log in first to use it. It supports importing images, GIFs, and videos in one place. Just drag and drop to import, so easy to use. More importantly, if you want to select a white or black background to input the caption, Filmora meme maker can help you quickly. Changing text size, color and position is also available. After editing is done, just one click to export your work within a few seconds. You can also freely upload to social media platforms, like FB and IG.
- Place text anywhere (inside and outside of image)
- Support exporting to popular image and video formats, including jpg, png, gif, mp4
- It is totally free to use, no subscription or cost
[
3. Wondershare PixStudio
Wondershare PixStudio owns massive templates that can help you create your memes easily. You can feel free to upload your image and start to design it with text, colors and filters to the images.
Features:
- Free and easy to use.
- Ability to create memes with your images.
- Option to add filters to images for your memes.
- Option to change font and text color.
4. Quickmeme
Quickmeme is the best meme maker option for anyone who wants a simple experience, without too many frills. You can check out featured memes, which show you the most popular ones right now.
All you need to do to create a meme is go on “upload a funny” to start from scratch. If you want to select a famous picture and add your own text, you can do so using the “caption a meme” option.
Features:
- Create a meme with your own images or famous images.
- Login with Facebook to set up your account and save the memes you create.
5. MemeGenerator
One of the most popular tools for creating memes, MemeGenerator is the meme maker online that you can use when you want to add some funny captions to images. You can check out all the popular images that are being used to create memes by other people.
If you want to create a meme with one of those images, simply click on them or you can choose “create” to start making a meme with your own image or character.
Features:
- Create memes with custom images or characters.
- Add your own text to famous meme images.
- Send and share memes through the site.

6. Imgur
Imgur is mostly known as an image hosting platform. People will host images on Imgur so they can share them with friends or on social media. But there is also a meme creation tool that you can use on the site.
All you need to do is select one of the default images on the site, or use your own, and you can add the text that you want. Selecting the text to put at the top and bottom of the image is very easy with Imgur.
Features:
- Takes under a minute to create a meme with your own image or pre-selected ones.
- Imgur also offers an image hosting service.
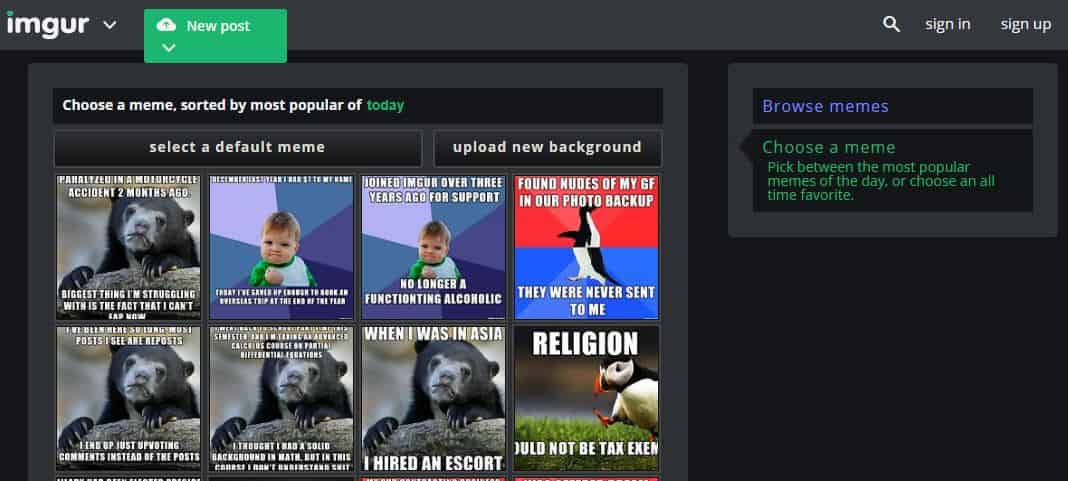
7. Make a Meme
When you go on Make a Meme, you will immediately see images of all the most famous memes from around the world. You can click on those images, where you get an interface asking for the top text, bottom text, and your custom title. Then you click on “make a meme” and your image is ready.
You can even upload your own image and then add text to it in a similar way. You have the option to preview your memes before you create them as well.
Features:
- Create memes from custom images or popular ones.
- Add top and bottom text easily.
- Create custom meme titles.
- Preview memes before making them.
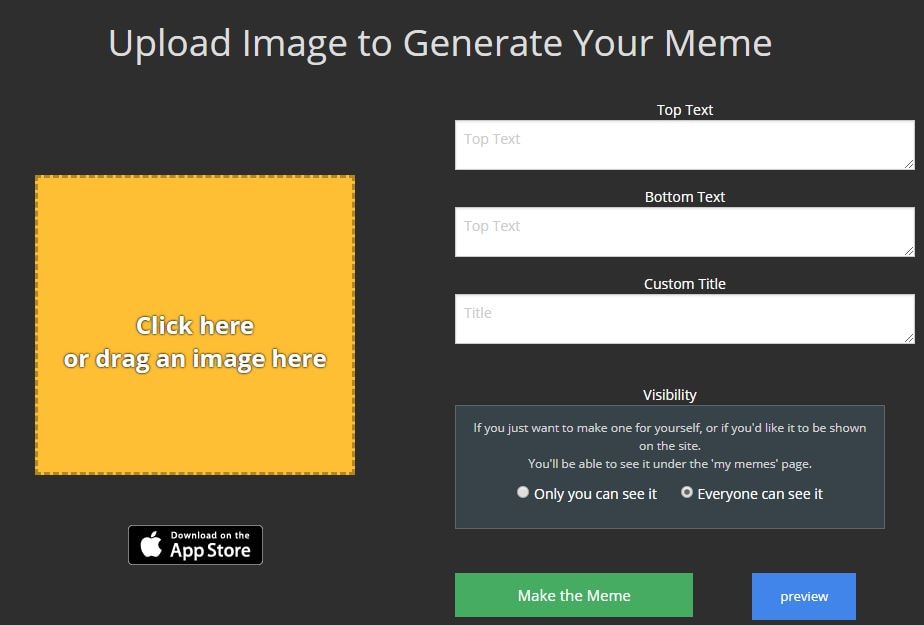
8. Livememe
Livememe is a meme generator that is very straightforward to use. When you visit the homepage, you will see a few selected images that are very popular. Click on the “create a meme” button and you will get a drop down menu that is thumbnails of all the popular memes.
You may select any of those images to create your own meme, or upload your own image and add the relevant text. You can save the image on your computer and even share it through the site.
Features:
- Includes nearly every popular meme as preselected images.
- Ability to create custom image memes.
- Easily share created memes.
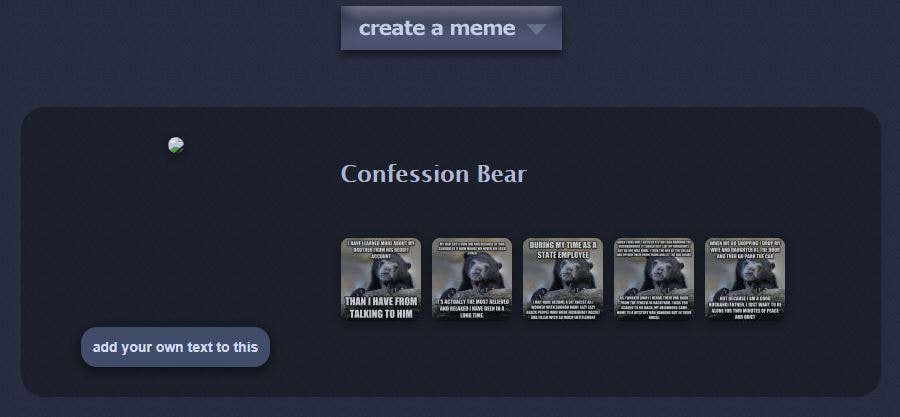
9. Canva
Unlike other sites, Canva goes a step further and gives you professionally created templates that you can use for your memes. There are over a million stock photos available to you. It is a much larger selection than other sites.
But you can also upload your own image, add relevant text and then create the meme.
Features:
- Large collection of stock images.
- Ability to create memes with your own images.
- Option to add filters to images for your memes.
- Option to change font and text color.
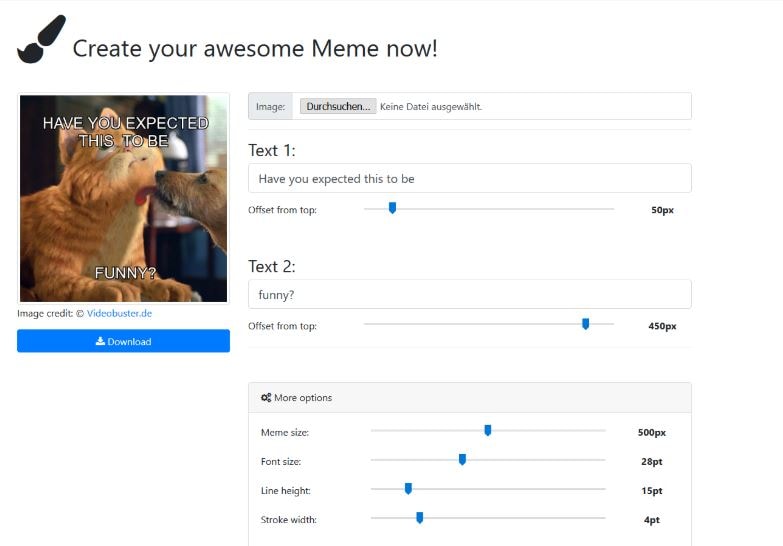
10. iLoveIMG
iLoveIMG is one of the easiest sites to use if you want to create a meme. The homepage will let you upload an image or select a meme template to get started.
Text boxes are already present, but you can edit them with your own text and see exactly how they would look. If you want to add more lines of text, you can do that as well.
It is even possible to add an image on top of one image to take your meme game to a whole new level!
Features:
- Easy meme creation with uploaded or custom images.
- Ability to add more than two lines of text.
- Option to add an image on top of the existing image.
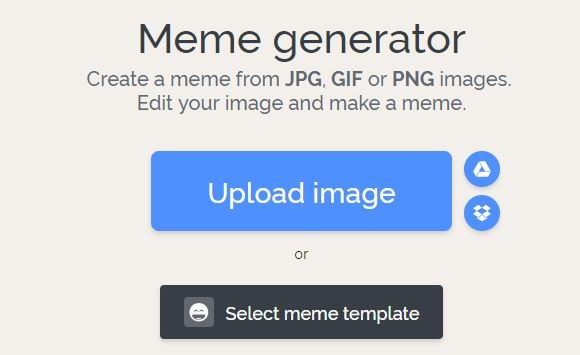
11. Meme Creator
With Meme Creator, you can recreate existing memes with the text of your choice, or upload images to make custom memes.
The site is very easy to use, which does not require you to create an account, and is completely free. It is possible to adjust the text size and color when you are using this meme generator, which is not always an option on these free tools.
Within a minute, you will have the custom meme that you can share with friends!
Features:
- Use preexisting and custom images for memes.
- Adjust the color and font size of both top and bottom text.
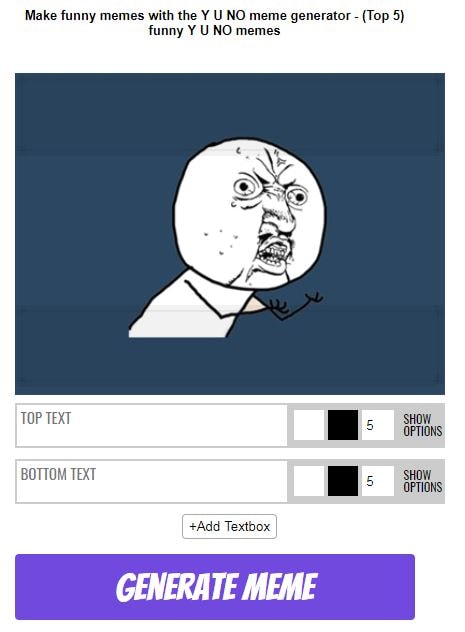
12. DIYLOL
Want to create a meme from images that already have become popular memes? Now you can do so with DIYLOL. All you need to do is pick the preexisting image that you like best, add your top and bottom text, and you are ready to go.
You can even adjust the font color and size for the top and bottom text. Then you can download the image to share with friends and family.
Features:
- Easy tool to create memes from preexisting images.
- Ability to adjust font size and color.
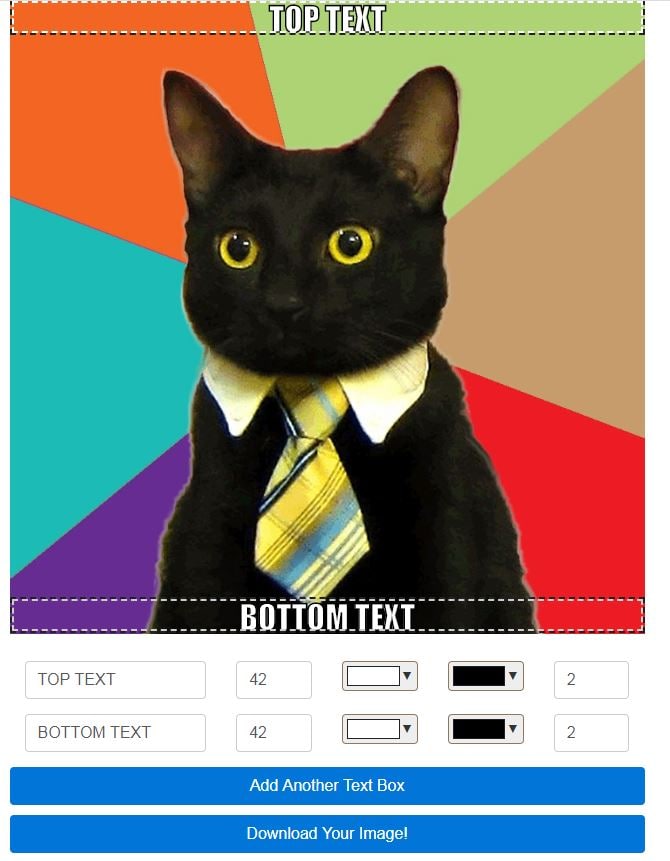
Conclusion
By using an online meme maker, you have the ability to create your own memes whenever you want. All you need is a source image and your idea for the text. Within minutes, the meme generator you are using will have your meme ready to download. Then you can share it with friends and save it on all your devices. And the best part is that you can do all of this with a meme maker online that is completely free!
[
Ollie Mattison
Ollie Mattison is a writer and a lover of all things video.
Follow @Ollie Mattison
Ollie Mattison
Mar 27, 2024• Proven solutions
Memes have become a central part of many online conversations. They pop up a lot on social media, especially platforms such as Twitter, Tumblr and Facebook . People even converse with each other using meme keyboards.
With memes taking over popular culture, you may want to make a meme for yourself. By using a meme maker, you can do just that! Here is a look at the top 10+ best meme maker online options that you can use for free.
10+ Best Meme Makers Online
1. Filmora Free Meme Generator
Filmora meme maker is a totally free meme generator without a watermark. Also, you don’t need to sign up or log in first to use it. It supports importing images, GIFs, and videos in one place. Just drag and drop to import, so easy to use. More importantly, if you want to select a white or black background to input the caption, Filmora meme maker can help you quickly. Changing text size, color and position is also available. After editing is done, just one click to export your work within a few seconds. You can also freely upload to social media platforms, like FB and IG.
- Place text anywhere (inside and outside of image)
- Support exporting to popular image and video formats, including jpg, png, gif, mp4
- It is totally free to use, no subscription or cost
[
3. Wondershare PixStudio
Wondershare PixStudio owns massive templates that can help you create your memes easily. You can feel free to upload your image and start to design it with text, colors and filters to the images.
Features:
- Free and easy to use.
- Ability to create memes with your images.
- Option to add filters to images for your memes.
- Option to change font and text color.
4. Quickmeme
Quickmeme is the best meme maker option for anyone who wants a simple experience, without too many frills. You can check out featured memes, which show you the most popular ones right now.
All you need to do to create a meme is go on “upload a funny” to start from scratch. If you want to select a famous picture and add your own text, you can do so using the “caption a meme” option.
Features:
- Create a meme with your own images or famous images.
- Login with Facebook to set up your account and save the memes you create.
5. MemeGenerator
One of the most popular tools for creating memes, MemeGenerator is the meme maker online that you can use when you want to add some funny captions to images. You can check out all the popular images that are being used to create memes by other people.
If you want to create a meme with one of those images, simply click on them or you can choose “create” to start making a meme with your own image or character.
Features:
- Create memes with custom images or characters.
- Add your own text to famous meme images.
- Send and share memes through the site.
6. Imgur
Imgur is mostly known as an image hosting platform. People will host images on Imgur so they can share them with friends or on social media. But there is also a meme creation tool that you can use on the site.
All you need to do is select one of the default images on the site, or use your own, and you can add the text that you want. Selecting the text to put at the top and bottom of the image is very easy with Imgur.
Features:
- Takes under a minute to create a meme with your own image or pre-selected ones.
- Imgur also offers an image hosting service.
7. Make a Meme
When you go on Make a Meme, you will immediately see images of all the most famous memes from around the world. You can click on those images, where you get an interface asking for the top text, bottom text, and your custom title. Then you click on “make a meme” and your image is ready.
You can even upload your own image and then add text to it in a similar way. You have the option to preview your memes before you create them as well.
Features:
- Create memes from custom images or popular ones.
- Add top and bottom text easily.
- Create custom meme titles.
- Preview memes before making them.
8. Livememe
Livememe is a meme generator that is very straightforward to use. When you visit the homepage, you will see a few selected images that are very popular. Click on the “create a meme” button and you will get a drop down menu that is thumbnails of all the popular memes.
You may select any of those images to create your own meme, or upload your own image and add the relevant text. You can save the image on your computer and even share it through the site.
Features:
- Includes nearly every popular meme as preselected images.
- Ability to create custom image memes.
- Easily share created memes.
9. Canva
Unlike other sites, Canva goes a step further and gives you professionally created templates that you can use for your memes. There are over a million stock photos available to you. It is a much larger selection than other sites.
But you can also upload your own image, add relevant text and then create the meme.
Features:
- Large collection of stock images.
- Ability to create memes with your own images.
- Option to add filters to images for your memes.
- Option to change font and text color.
10. iLoveIMG
iLoveIMG is one of the easiest sites to use if you want to create a meme. The homepage will let you upload an image or select a meme template to get started.
Text boxes are already present, but you can edit them with your own text and see exactly how they would look. If you want to add more lines of text, you can do that as well.
It is even possible to add an image on top of one image to take your meme game to a whole new level!
Features:
- Easy meme creation with uploaded or custom images.
- Ability to add more than two lines of text.
- Option to add an image on top of the existing image.
11. Meme Creator
With Meme Creator, you can recreate existing memes with the text of your choice, or upload images to make custom memes.
The site is very easy to use, which does not require you to create an account, and is completely free. It is possible to adjust the text size and color when you are using this meme generator, which is not always an option on these free tools.
Within a minute, you will have the custom meme that you can share with friends!
Features:
- Use preexisting and custom images for memes.
- Adjust the color and font size of both top and bottom text.
12. DIYLOL
Want to create a meme from images that already have become popular memes? Now you can do so with DIYLOL. All you need to do is pick the preexisting image that you like best, add your top and bottom text, and you are ready to go.
You can even adjust the font color and size for the top and bottom text. Then you can download the image to share with friends and family.
Features:
- Easy tool to create memes from preexisting images.
- Ability to adjust font size and color.
Conclusion
By using an online meme maker, you have the ability to create your own memes whenever you want. All you need is a source image and your idea for the text. Within minutes, the meme generator you are using will have your meme ready to download. Then you can share it with friends and save it on all your devices. And the best part is that you can do all of this with a meme maker online that is completely free!
[
Ollie Mattison
Ollie Mattison is a writer and a lover of all things video.
Follow @Ollie Mattison
Making Triggered Memes with Filmora Video Editor
How to Make a Triggered Meme?
Ollie Mattison
Mar 27, 2024• Proven solutions
It is no secret that we all lose our cool from time. It’s only natural, after all, the world can be a frustrating place. We’re all enraged by different things, some of us can’t stand pineapple on pizza while others explode when being pranked. What we often don’t realize is that being triggered in front of a camera makes us perfect meme material. Even though the majority of memes are still images, some of the most memorable memes ever created were GIFs or short videos.
Making the triggered meme is easy when you know how, so in this article, we are going to show you how to make your next potentially viral meme, in just a few easy steps.
Filmora offers an easy to use video editor named Filmora Video Editor to make video and gif memes, and an online free meme maker named Filmora FREE Online Meme Maker which allows you to create images, videos and gifs memes for free. The video tutorial below will show you how to make a triggered video meme with Filmora. Download it and try it by yourself now.
The Things You Need to Make a Triggered Meme
Preparation is key to almost every important thing in life, including making a triggered meme featuring your bestie. Before you can capitalize on that amazing footage of triggered people you first have to make sure you have everything you need to generate a meme. Okay, let’s get started with the essentials to making a fun and effective meme.
1. A Triggered Template
You have virtually unlimited resources at your disposal, as this meme template can be easily found through a quick Google search. There is even an Android app called Triggered Meme Maker , that lets you do what its name suggests, make triggered memes. Making your own template in Microsoft Paint (we will show you how to make it in this article later) or any other photo editing software is also an option if you want to select the color of the background, rather than work with what you can find online.
2. A Video Editing Software
Memes are short videos that rarely last longer than 30 seconds, which is why you don’t need a powerful video editing suite like Final Cut Pro or Adobe Premiere Pro to make a good meme. A software like Wondershare Filmora that is easy to use and yet packed with cool visual effects and useful tools is a better choice if you just want to have a little fun with a video you recorded.
3. The Sound for the Triggered Meme
This ingredient of a good meme is easy to forget, but music or any other type of sound can make your meme funnier. In most cases, you’ll want to keep at least a portion of the original audio, but adding sound effects at different points of the meme can have a comical effect. The Filmora’s Music Library can serve as your endless source of royalty free music and sounds .
Making a Triggered Meme Template in Microsoft Paint
Creating a meme template is an easy task that can be handled from the Microsoft Paint in a couple of minutes. When you launch the software, click on the Fill with color icon located in the Tools section of the Paint’s ribbon. Activating this option enables you to change the color of the background with a single click. Proceed to select the color of the background from the color palette located on the far right side of the ribbon. We recommend choosing shades of green because the background is going to be used for the Chroma Key effect. You can click on the Edit Colors icon if you want to find a perfect color tone for the background. Right-click anywhere on the canvas to change its color.
Now you just need to add the text to your template. Select the Text option in the Tools menu and then proceed to select the font or the size of your text in the Font menu. Make sure that the Opaque feature is enabled in the Background menu in order to change the color of the textbox background. Adjusting the Color 1 option in the Color Menu will enable you to choose the text color, while the Color 2 option lets you pick the color of the background. Type triggered in the textbox, and center the text by clicking on the TAB button on your keyboard a few times. Now you have everything you need to start creating your own triggered meme.
How to Make a Triggered Meme?
Once you’ve successfully created a triggered template you can move on to the next step of the meme making process.
1. Adding Media to a Project
Open Filmora in the Full Feature Mode and import all the files you’re going to need during the process of making a meme. The files you import to your project will be stored in the Media Panel. Add the video to the timeline by dropping it over the video track. You can then remove the unwanted parts of the clip or add a still frame to the end of the video to prolong the triggered effect of the meme. Still frames in Filmora can be created by clicking on the Snapshot icon, that is located below the Preview Panel.
2. Using the Green Screen Effect
Place the triggered template to the Picture-in-Picture track and try to position it at the exact place in the video where the person gets triggered. Click on the Green Screen icon located in the toolbar to gain access to the PIP Edit window. The Chroma Key (Green Screen) option will be selected by default, so you just have to check the ‘Make parts of the clip transparent’ box. The green background of the template will become transparent and you’ll be able to see parts of your video, with the triggered text displayed below it.
3. Enhancing Colors and Applying Effects
In order to highlight just how much a person in the video got triggered, you can change the vibrance and saturation in a portion of a video clip by clicking on the Edit icon in the toolbar. In addition, other software’s color correction tools like brightness, tint or contrast can also be used to highlight the triggered moment.
After you adjust the color values, you can click on the Effects icon if you want to add motion blur or camera shake effects. Click on the Shake option in the Effects panel to start browsing through different effects and click on the plus icon to add the effect to the clip you selected. The Distortion category in the Effects panel features a number of blur effects you can use to make the video more entertaining. You can adjust the properties of all the effects you add to your meme and control how much of the effect is applied to the video.
4. Adding Music and Text Overlays to Your Meme
Increasing the number of visual elements in the video can help you create a funnier meme. A single word can change the meaning of a meme so if you want to add additional comment besides noting that the person got triggered you can click on the Text icon and select the text overlay you like. Click on the plus icon that is displayed over the effect to add it to a video clip. A textbox will appear over the video in the Preview window and you can drag it around the screen to reposition it or rotate it. Enable the No Animation option if you want the text to just appear and disappear from the screen.
Sounds can add to the comical effect of a meme. Carefully select what type of music or sound you want to use for a meme since it can improve the quality of your meme. Simply drag the audio file you imported into Filmora and place it on the audio track and adjust its duration to match the duration of the video. If you don’t have your own music you can try some of the tracks featured in the software’s music library.
4. Exporting the Triggered Meme from Filmora
When your meme is ready to hit the social media, you can click on the Export button. In the Export window, you can choose any of the available file formats, but the formats best suited for memes are either MP4 or GIF. Click on the Settings icon in the Output Description menu to change the frame rate, resolution or the quality of the video. Wondershare Filmora lets you export videos directly to your YouTube channel or your Facebook account, so you don’t have to waste time on posting the meme after the export process is completed.
The software also offers the option to save a meme you created to your hard drive if you don’t want to post a meme on social media right away. You just have to click on the Export button after adjusting the output settings and wait for the file to be exported.
Conclusion
The precious memories of your friends being enraged by the silliest things can be turned into hilarious memes effortlessly. A video editing software like Wondershare Filmora gives you all the tools you’ll need to quickly generate a triggered meme, so you can focus on having fun with your friends. What’s your favorite method of making memes?
Ollie Mattison
Ollie Mattison is a writer and a lover of all things video.
Follow @Ollie Mattison
Ollie Mattison
Mar 27, 2024• Proven solutions
It is no secret that we all lose our cool from time. It’s only natural, after all, the world can be a frustrating place. We’re all enraged by different things, some of us can’t stand pineapple on pizza while others explode when being pranked. What we often don’t realize is that being triggered in front of a camera makes us perfect meme material. Even though the majority of memes are still images, some of the most memorable memes ever created were GIFs or short videos.
Making the triggered meme is easy when you know how, so in this article, we are going to show you how to make your next potentially viral meme, in just a few easy steps.
Filmora offers an easy to use video editor named Filmora Video Editor to make video and gif memes, and an online free meme maker named Filmora FREE Online Meme Maker which allows you to create images, videos and gifs memes for free. The video tutorial below will show you how to make a triggered video meme with Filmora. Download it and try it by yourself now.
The Things You Need to Make a Triggered Meme
Preparation is key to almost every important thing in life, including making a triggered meme featuring your bestie. Before you can capitalize on that amazing footage of triggered people you first have to make sure you have everything you need to generate a meme. Okay, let’s get started with the essentials to making a fun and effective meme.
1. A Triggered Template
You have virtually unlimited resources at your disposal, as this meme template can be easily found through a quick Google search. There is even an Android app called Triggered Meme Maker , that lets you do what its name suggests, make triggered memes. Making your own template in Microsoft Paint (we will show you how to make it in this article later) or any other photo editing software is also an option if you want to select the color of the background, rather than work with what you can find online.
2. A Video Editing Software
Memes are short videos that rarely last longer than 30 seconds, which is why you don’t need a powerful video editing suite like Final Cut Pro or Adobe Premiere Pro to make a good meme. A software like Wondershare Filmora that is easy to use and yet packed with cool visual effects and useful tools is a better choice if you just want to have a little fun with a video you recorded.
3. The Sound for the Triggered Meme
This ingredient of a good meme is easy to forget, but music or any other type of sound can make your meme funnier. In most cases, you’ll want to keep at least a portion of the original audio, but adding sound effects at different points of the meme can have a comical effect. The Filmora’s Music Library can serve as your endless source of royalty free music and sounds .
Making a Triggered Meme Template in Microsoft Paint
Creating a meme template is an easy task that can be handled from the Microsoft Paint in a couple of minutes. When you launch the software, click on the Fill with color icon located in the Tools section of the Paint’s ribbon. Activating this option enables you to change the color of the background with a single click. Proceed to select the color of the background from the color palette located on the far right side of the ribbon. We recommend choosing shades of green because the background is going to be used for the Chroma Key effect. You can click on the Edit Colors icon if you want to find a perfect color tone for the background. Right-click anywhere on the canvas to change its color.
Now you just need to add the text to your template. Select the Text option in the Tools menu and then proceed to select the font or the size of your text in the Font menu. Make sure that the Opaque feature is enabled in the Background menu in order to change the color of the textbox background. Adjusting the Color 1 option in the Color Menu will enable you to choose the text color, while the Color 2 option lets you pick the color of the background. Type triggered in the textbox, and center the text by clicking on the TAB button on your keyboard a few times. Now you have everything you need to start creating your own triggered meme.
How to Make a Triggered Meme?
Once you’ve successfully created a triggered template you can move on to the next step of the meme making process.
1. Adding Media to a Project
Open Filmora in the Full Feature Mode and import all the files you’re going to need during the process of making a meme. The files you import to your project will be stored in the Media Panel. Add the video to the timeline by dropping it over the video track. You can then remove the unwanted parts of the clip or add a still frame to the end of the video to prolong the triggered effect of the meme. Still frames in Filmora can be created by clicking on the Snapshot icon, that is located below the Preview Panel.
2. Using the Green Screen Effect
Place the triggered template to the Picture-in-Picture track and try to position it at the exact place in the video where the person gets triggered. Click on the Green Screen icon located in the toolbar to gain access to the PIP Edit window. The Chroma Key (Green Screen) option will be selected by default, so you just have to check the ‘Make parts of the clip transparent’ box. The green background of the template will become transparent and you’ll be able to see parts of your video, with the triggered text displayed below it.
3. Enhancing Colors and Applying Effects
In order to highlight just how much a person in the video got triggered, you can change the vibrance and saturation in a portion of a video clip by clicking on the Edit icon in the toolbar. In addition, other software’s color correction tools like brightness, tint or contrast can also be used to highlight the triggered moment.
After you adjust the color values, you can click on the Effects icon if you want to add motion blur or camera shake effects. Click on the Shake option in the Effects panel to start browsing through different effects and click on the plus icon to add the effect to the clip you selected. The Distortion category in the Effects panel features a number of blur effects you can use to make the video more entertaining. You can adjust the properties of all the effects you add to your meme and control how much of the effect is applied to the video.
4. Adding Music and Text Overlays to Your Meme
Increasing the number of visual elements in the video can help you create a funnier meme. A single word can change the meaning of a meme so if you want to add additional comment besides noting that the person got triggered you can click on the Text icon and select the text overlay you like. Click on the plus icon that is displayed over the effect to add it to a video clip. A textbox will appear over the video in the Preview window and you can drag it around the screen to reposition it or rotate it. Enable the No Animation option if you want the text to just appear and disappear from the screen.
Sounds can add to the comical effect of a meme. Carefully select what type of music or sound you want to use for a meme since it can improve the quality of your meme. Simply drag the audio file you imported into Filmora and place it on the audio track and adjust its duration to match the duration of the video. If you don’t have your own music you can try some of the tracks featured in the software’s music library.
4. Exporting the Triggered Meme from Filmora
When your meme is ready to hit the social media, you can click on the Export button. In the Export window, you can choose any of the available file formats, but the formats best suited for memes are either MP4 or GIF. Click on the Settings icon in the Output Description menu to change the frame rate, resolution or the quality of the video. Wondershare Filmora lets you export videos directly to your YouTube channel or your Facebook account, so you don’t have to waste time on posting the meme after the export process is completed.
The software also offers the option to save a meme you created to your hard drive if you don’t want to post a meme on social media right away. You just have to click on the Export button after adjusting the output settings and wait for the file to be exported.
Conclusion
The precious memories of your friends being enraged by the silliest things can be turned into hilarious memes effortlessly. A video editing software like Wondershare Filmora gives you all the tools you’ll need to quickly generate a triggered meme, so you can focus on having fun with your friends. What’s your favorite method of making memes?
Ollie Mattison
Ollie Mattison is a writer and a lover of all things video.
Follow @Ollie Mattison
Top 6 Animated Emoji Video Effects
6 Popular Animated Emoji Video Effects in 2024

Max Wales
Mar 27, 2024• Proven solutions
The daily grind of hard work, starting from dawn to dusk, has become overwhelming and mind-crushing. An average mind requires entertainment and recreation to work better and function properly. This brings us to the need for funny videos that make use of animated emoji to make our life more bearable.
Emojis like laughing emojis and thumbs-up emojis have a quirky way of increasing the serotonin levels in our body. Therefore, this article shall walk you through the top 6 animated emoji video effects presented by Wondershare Filmstock . In addition to this, there will be 8 peculiar ideas to make the video funny.
If you want to know the steps to edit video with animated emojis in Filmora, we have got you! So, without delaying it any longer, let us dig in!
- Part 1: Top 6 Animated Emoji Video Effects for Filmora Video Editor
- Part 2: 8 Ideas for Making Funny Videos with Animated Emoji
- Part 2: How to Edit Video with Animated Emoji in Filmora?
Part 1: Top 6 Animated Emoji Video Effects for Filmora Video Editor
The section shall revolve around the top 6animated emoji video effects that are presented by an online effects store known as Wondershare Filmstock. This website allows the user to have access to an unlimited range of effects, transitions, titles, graphics, elements, images, audio, and visual effects. One can unleash their creative ideas and download effects for every relevant situation.
Along with this, it is constantly growing and unique media with no fear of attribution. If this is not the ideal case scenario, then we don’t know what it will be! The following set of effects are the top 6 animated emoji video effects to incorporate in your YouTube introductory videos, TikTok clips, and Instagram stories or reels.
1. Animated Emoji Pack
Animated kiss emoji, animated dancing emoji, and laughing emoji, this emoji pack has covered your basics. With 24 elements, Animated Emoji Pack provides an easy way to express yourself and say it out loud using the language of emojis.
2. Emoji Stickers Pack
If you are on the verge of a nervous breakdown and require a stickers pack with 32 elements that include a crying emoji, this pack has to be your answer. In addition to this, this effect is 100% compatible with Wondershare Filmora 9.6 and above.
3. Message Bubbles Pack
With message and chat bubbles that make communication a lot faster and quick, allow me to introduce you to Message Bubbles Pack. It constitutes animated cute emoji faces and texting graphics to make your social media fun and interesting.
4. 3D Social Media Icons Pack
Incorporated with 12 titles, 60 elements, 4 overlays, and 6 transitions, 3D Social Media Icons Pack is sure to fill your shoes. One can have access to unlimited emoji animated in 3D animation and showcase themselves as the cool and classy one of the lot.
5. Cute Cartoon Emoji Pack
The Cartoon Emoji Pack is an amalgamation of a wide range of cartoon emojis to express yourself as best as you can. With the right choice of emoji, one can communicate themselves whilst using a total of 25 elements.
6. Reactions Stickers Pack
With a speech and thought bubble, Reaction Sticker Pack presents all sorts of reaction emojis and smileys. In addition to this, the template offers 11 titles, 4 overlays, 40 elements, and 2 transitions. Get ready to express your reactions in the funniest way.
Part 2: 8 Ideas for Making Funny Videos with Animated Emoji
The use of free animated emoji to make videos funny has become a thing now. Furthermore, it lets the user express themselves as a coping mechanism. Win-win situation, right? The article provides 8 fruitful ideas for making videos funny with these animated emojis. Let us have a look at them!

1. Face Swap with Animated Emoji
The first idea is sure to make the audience burst into laughter. For starters, one can swap their faces with animated emojis like an animated dancing emoji or a crying emoji. You can tell your audience what you are feeling right at the moment as you use those emojis and then show your real face.
2. Sharing a Story
One can share a funny story with their audience by using the power of animated emojis. They can explain what happened with a series of steps and incorporate emojis in the background that sync with the emotional reaction of the user as well as the audience.
3. Dream Wedding Video
The next idea is related to a wedding video. To make it funnier, the user can first create a video of the dream wedding planned for them. Combine it with the actual wedding video and then use 3D animated emojis to express how everything was messed up and, in the end, and didn’t go as planned.
4. Thoughts on Books and Netflix Series
The next idea is a workable and effective tool to make your video funnier. The content creator can make a video of a book he read or the Netflix series he watched and provide the audience with his thoughts. They can communicate the flaws of the movie or a book using animated sticker packs and gifs to make it funny and interesting.
5. Coworkers and Superiors Video
In this idea, the user can make a video showing his workplace and include all his superiors and coworkers. Afterward, he can edit the video by expressing himself what he actually feels about them and using different emojis to display the reaction of his coworkers in the video.
6. Video Techniques
The different video techniques can be used to make people laugh and be attracted to the video. For once, the user can quickly zoom in to the character when he is speaking to create a dramatic pull. In addition to this, one can also keep the camera on even after their dialogue delivery is concluded. This will capture an off-the-record reaction.
7. Capturing the Pets
The best idea yet is capturing the pets in the video. The user can record their pets doing insane and crazy things and insert emojis to bring a funny addition to the video. Along with this, one can use the thinking emoji to assume what their pet has been thinking at the moment.
8. A Random Day of your Life
One can add the element of surprise and laughter by making a video on their random day and how they want it to go. Record the video of your whole day and then combine it with a wide range of emojis such as crying emoji, laughing emoji, and kiss emoji.
Part 3: How to Edit Video with Animated Emoji in Filmora?
The last part of this article covers a brief introduction to a renowned video editing software and provides a step-by-step guideline to edit videos using animated emojis. Wondershare Filmora makes sure that the user has the right tools and mechanism to make their editing journey fun and reliable. It offers an effortless and user-friendly interface, a wide range of effects and transitions, and a motion tracking feature.
In addition to this, one can count on this software to change the backgrounds, insert split screens, discover filters and overlays, control speed, and personalize the creation. If you are all set to use this amazing video editing software, follow the procedure keenly to avoid any future inconvenience.
Step 1: Initiating the Project
Install Wondershare Filmora in your system and launch it as soon as the process concludes. Tap on the “New Project” tab on the welcome window of the software. Set the aspect ratio for your video. The resolution can be changed by clicking on the “File” option and then “Project Settings.”
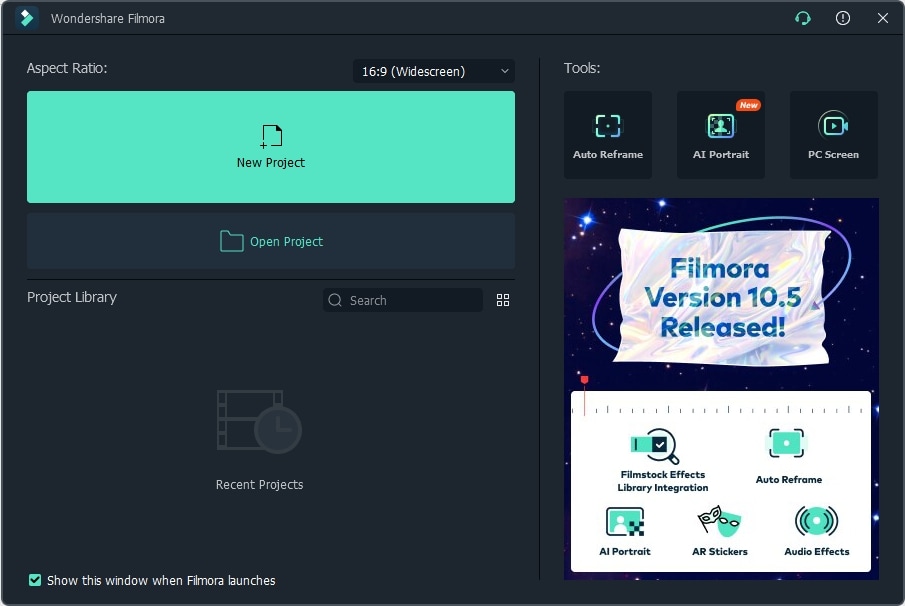
Step 2: Importing the Video
Now, tap on the “Import Media Files Here” menu option, which is located on the left side of the interface of Filmora. Tap on the targeted video to import it. Moving on, drag and drop the media file to the timeline.
Step 3: Processing the Video
Import the media files to the video track so that they can be manipulated. Now, process the video as you wish to. You can edit, trim, split, rotate, resize, crop, and combine videos.
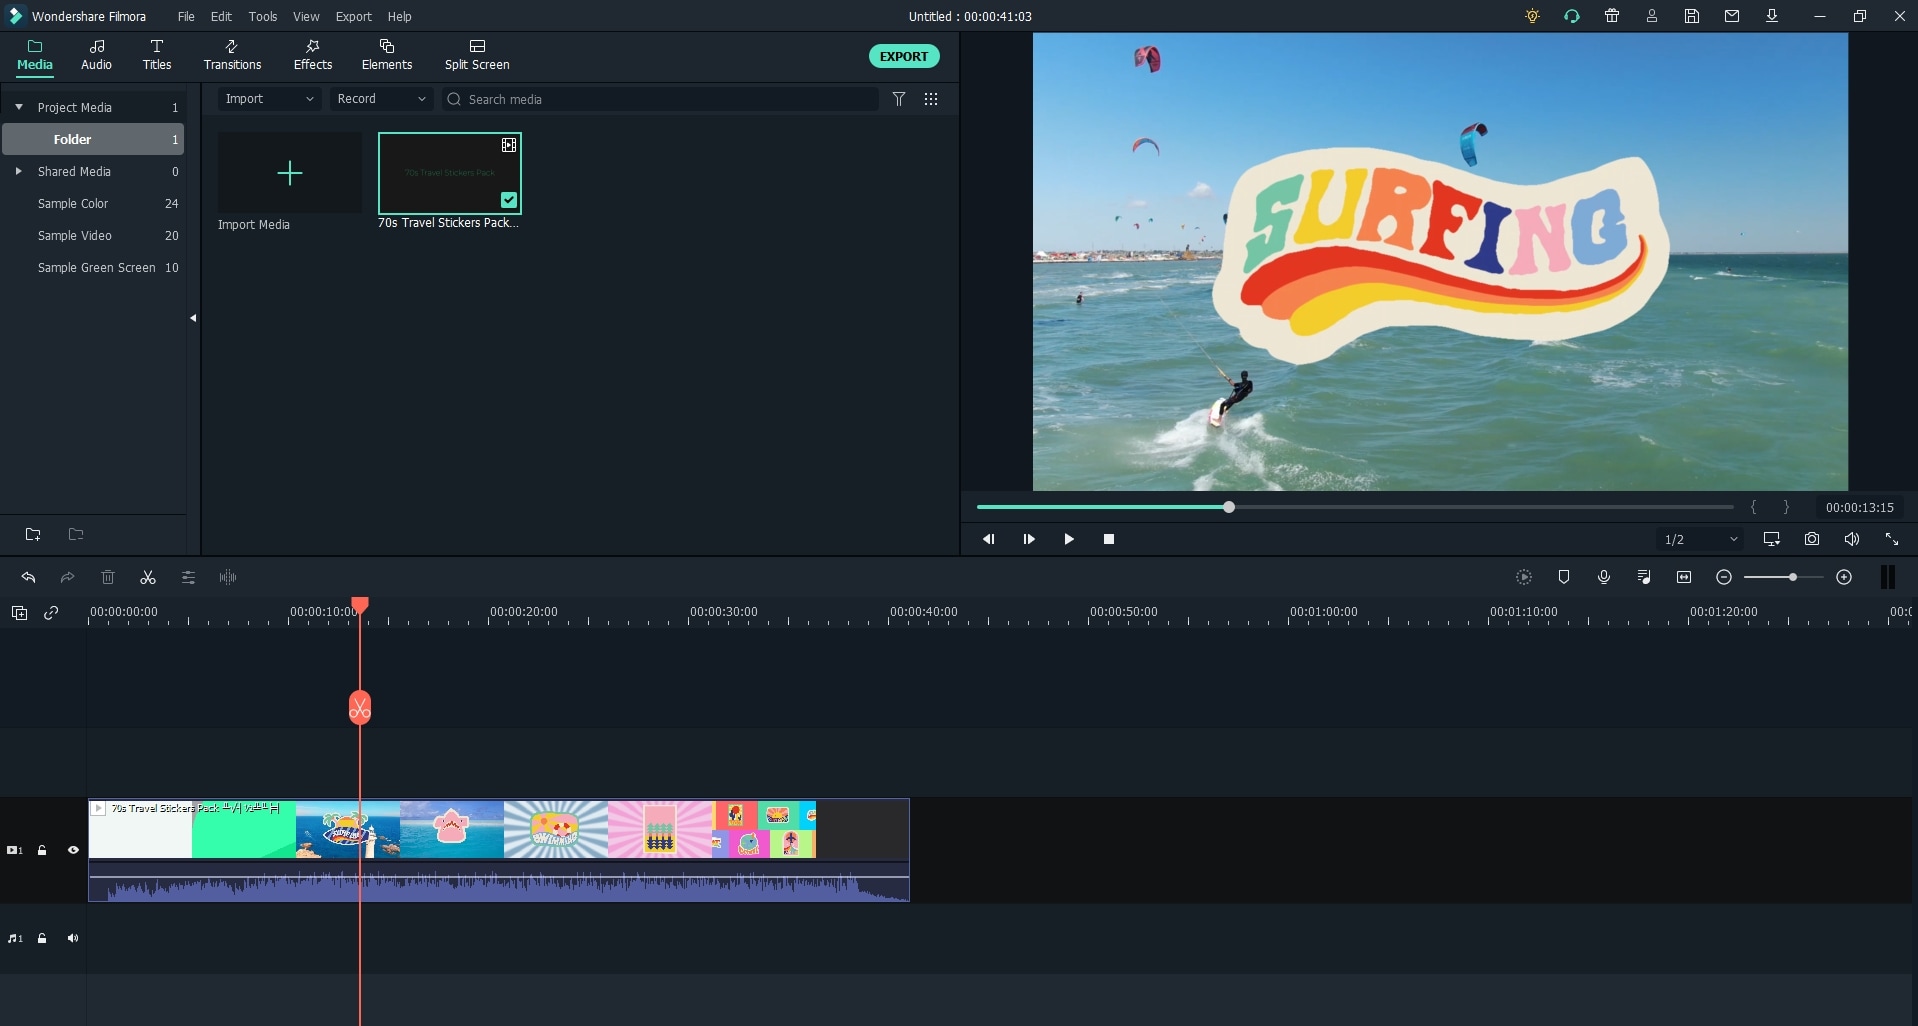
Step 4: Adding the Emoji
On the top left section of the window, navigate to the “Elements” tab. From there, pick out the “Emoji” category and browse a wide range of emojis. Drag and drop the emojis to your video. You can relocate and resize the emoji based on the video dimensions.
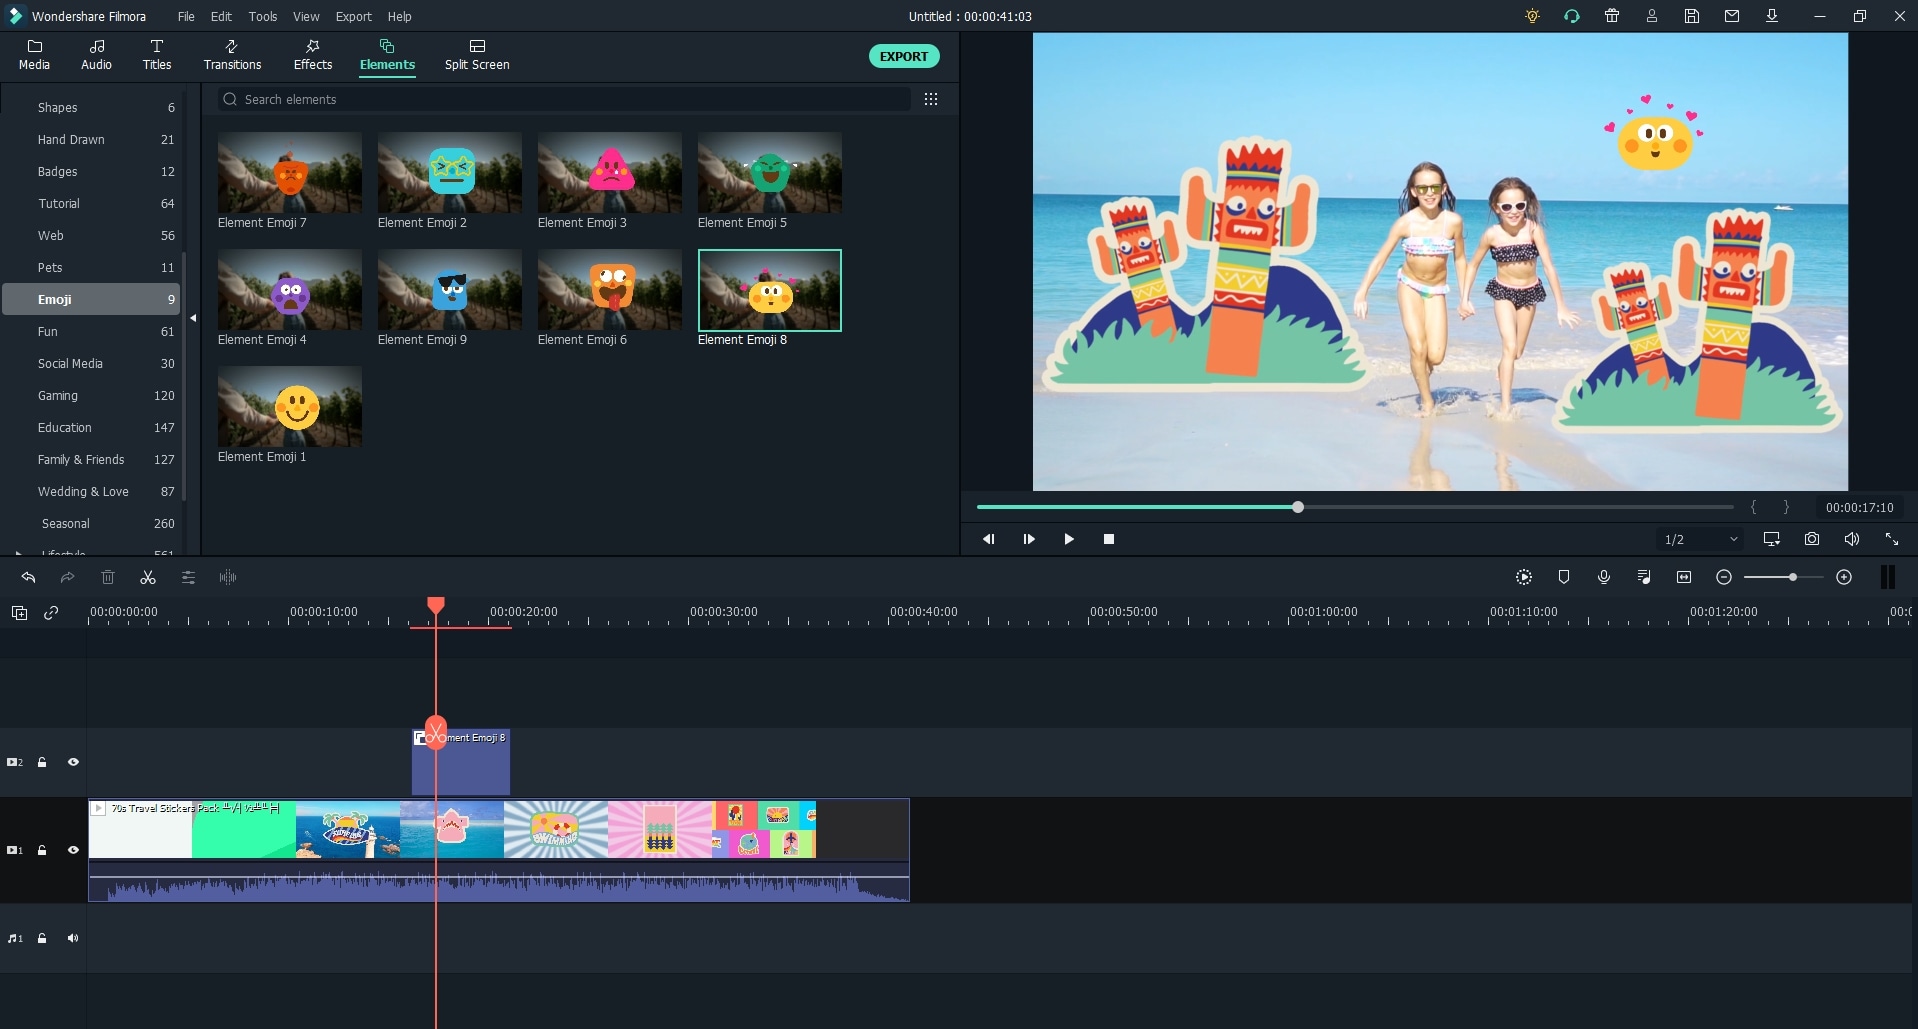
Step 5: Exporting the Video
Click on “Export,” located on the top right corner of the window. Pick out the output video format and hit “Export” to finalize the editing process.
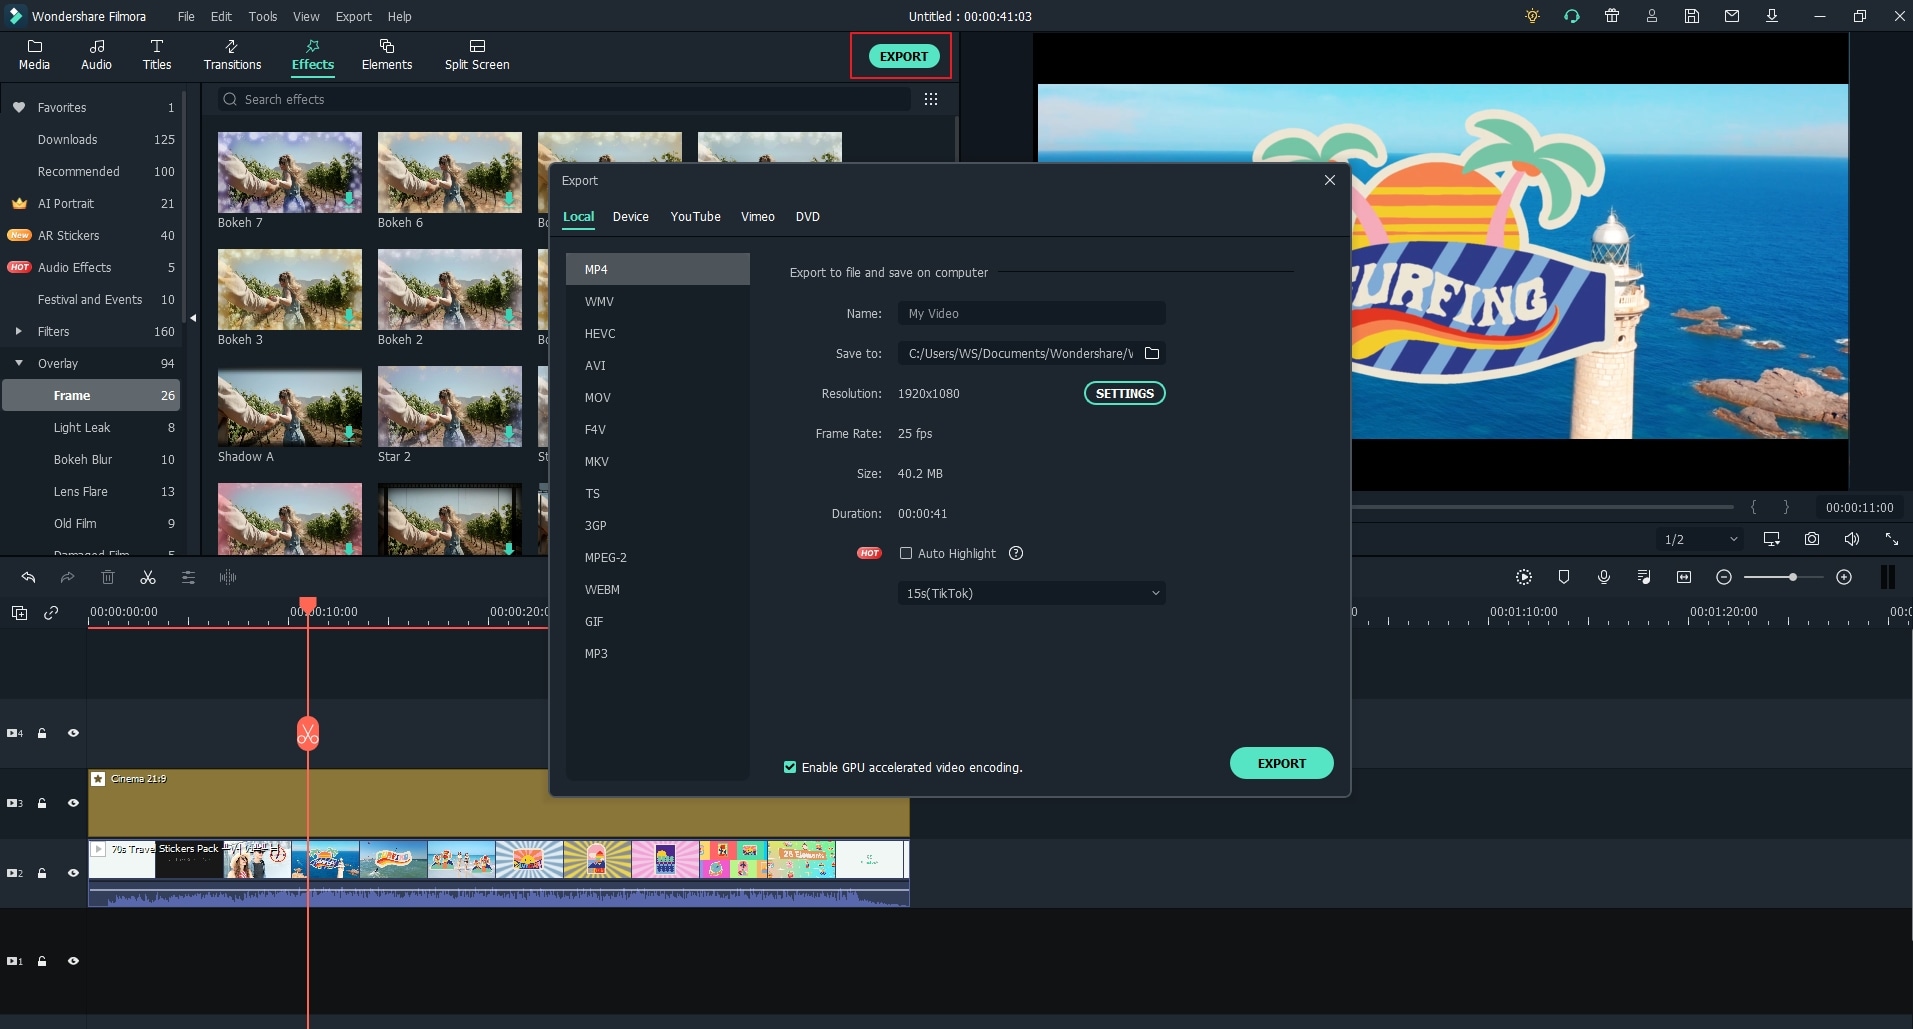
Wrapping Up
The article put forward a detailed description of 8 viable ideas that are sure to make the video funnier. Furthermore, Wondershare Filmstock was introduced as an online effects store, and Wondershare Filmora was presented as an amazing video editing software. One can have a look at the effects offered by Filmora in section 1 to make their videos interesting, funny, and watchable.
Max Wales
Max Wales is a writer and a lover of all things video.
Follow @Max Wales
Max Wales
Mar 27, 2024• Proven solutions
The daily grind of hard work, starting from dawn to dusk, has become overwhelming and mind-crushing. An average mind requires entertainment and recreation to work better and function properly. This brings us to the need for funny videos that make use of animated emoji to make our life more bearable.
Emojis like laughing emojis and thumbs-up emojis have a quirky way of increasing the serotonin levels in our body. Therefore, this article shall walk you through the top 6 animated emoji video effects presented by Wondershare Filmstock . In addition to this, there will be 8 peculiar ideas to make the video funny.
If you want to know the steps to edit video with animated emojis in Filmora, we have got you! So, without delaying it any longer, let us dig in!
- Part 1: Top 6 Animated Emoji Video Effects for Filmora Video Editor
- Part 2: 8 Ideas for Making Funny Videos with Animated Emoji
- Part 2: How to Edit Video with Animated Emoji in Filmora?
Part 1: Top 6 Animated Emoji Video Effects for Filmora Video Editor
The section shall revolve around the top 6animated emoji video effects that are presented by an online effects store known as Wondershare Filmstock. This website allows the user to have access to an unlimited range of effects, transitions, titles, graphics, elements, images, audio, and visual effects. One can unleash their creative ideas and download effects for every relevant situation.
Along with this, it is constantly growing and unique media with no fear of attribution. If this is not the ideal case scenario, then we don’t know what it will be! The following set of effects are the top 6 animated emoji video effects to incorporate in your YouTube introductory videos, TikTok clips, and Instagram stories or reels.
1. Animated Emoji Pack
Animated kiss emoji, animated dancing emoji, and laughing emoji, this emoji pack has covered your basics. With 24 elements, Animated Emoji Pack provides an easy way to express yourself and say it out loud using the language of emojis.
2. Emoji Stickers Pack
If you are on the verge of a nervous breakdown and require a stickers pack with 32 elements that include a crying emoji, this pack has to be your answer. In addition to this, this effect is 100% compatible with Wondershare Filmora 9.6 and above.
3. Message Bubbles Pack
With message and chat bubbles that make communication a lot faster and quick, allow me to introduce you to Message Bubbles Pack. It constitutes animated cute emoji faces and texting graphics to make your social media fun and interesting.
4. 3D Social Media Icons Pack
Incorporated with 12 titles, 60 elements, 4 overlays, and 6 transitions, 3D Social Media Icons Pack is sure to fill your shoes. One can have access to unlimited emoji animated in 3D animation and showcase themselves as the cool and classy one of the lot.
5. Cute Cartoon Emoji Pack
The Cartoon Emoji Pack is an amalgamation of a wide range of cartoon emojis to express yourself as best as you can. With the right choice of emoji, one can communicate themselves whilst using a total of 25 elements.
6. Reactions Stickers Pack
With a speech and thought bubble, Reaction Sticker Pack presents all sorts of reaction emojis and smileys. In addition to this, the template offers 11 titles, 4 overlays, 40 elements, and 2 transitions. Get ready to express your reactions in the funniest way.
Part 2: 8 Ideas for Making Funny Videos with Animated Emoji
The use of free animated emoji to make videos funny has become a thing now. Furthermore, it lets the user express themselves as a coping mechanism. Win-win situation, right? The article provides 8 fruitful ideas for making videos funny with these animated emojis. Let us have a look at them!
1. Face Swap with Animated Emoji
The first idea is sure to make the audience burst into laughter. For starters, one can swap their faces with animated emojis like an animated dancing emoji or a crying emoji. You can tell your audience what you are feeling right at the moment as you use those emojis and then show your real face.
2. Sharing a Story
One can share a funny story with their audience by using the power of animated emojis. They can explain what happened with a series of steps and incorporate emojis in the background that sync with the emotional reaction of the user as well as the audience.
3. Dream Wedding Video
The next idea is related to a wedding video. To make it funnier, the user can first create a video of the dream wedding planned for them. Combine it with the actual wedding video and then use 3D animated emojis to express how everything was messed up and, in the end, and didn’t go as planned.
4. Thoughts on Books and Netflix Series
The next idea is a workable and effective tool to make your video funnier. The content creator can make a video of a book he read or the Netflix series he watched and provide the audience with his thoughts. They can communicate the flaws of the movie or a book using animated sticker packs and gifs to make it funny and interesting.
5. Coworkers and Superiors Video
In this idea, the user can make a video showing his workplace and include all his superiors and coworkers. Afterward, he can edit the video by expressing himself what he actually feels about them and using different emojis to display the reaction of his coworkers in the video.
6. Video Techniques
The different video techniques can be used to make people laugh and be attracted to the video. For once, the user can quickly zoom in to the character when he is speaking to create a dramatic pull. In addition to this, one can also keep the camera on even after their dialogue delivery is concluded. This will capture an off-the-record reaction.
7. Capturing the Pets
The best idea yet is capturing the pets in the video. The user can record their pets doing insane and crazy things and insert emojis to bring a funny addition to the video. Along with this, one can use the thinking emoji to assume what their pet has been thinking at the moment.
8. A Random Day of your Life
One can add the element of surprise and laughter by making a video on their random day and how they want it to go. Record the video of your whole day and then combine it with a wide range of emojis such as crying emoji, laughing emoji, and kiss emoji.
Part 3: How to Edit Video with Animated Emoji in Filmora?
The last part of this article covers a brief introduction to a renowned video editing software and provides a step-by-step guideline to edit videos using animated emojis. Wondershare Filmora makes sure that the user has the right tools and mechanism to make their editing journey fun and reliable. It offers an effortless and user-friendly interface, a wide range of effects and transitions, and a motion tracking feature.
In addition to this, one can count on this software to change the backgrounds, insert split screens, discover filters and overlays, control speed, and personalize the creation. If you are all set to use this amazing video editing software, follow the procedure keenly to avoid any future inconvenience.
Step 1: Initiating the Project
Install Wondershare Filmora in your system and launch it as soon as the process concludes. Tap on the “New Project” tab on the welcome window of the software. Set the aspect ratio for your video. The resolution can be changed by clicking on the “File” option and then “Project Settings.”
Step 2: Importing the Video
Now, tap on the “Import Media Files Here” menu option, which is located on the left side of the interface of Filmora. Tap on the targeted video to import it. Moving on, drag and drop the media file to the timeline.
Step 3: Processing the Video
Import the media files to the video track so that they can be manipulated. Now, process the video as you wish to. You can edit, trim, split, rotate, resize, crop, and combine videos.
Step 4: Adding the Emoji
On the top left section of the window, navigate to the “Elements” tab. From there, pick out the “Emoji” category and browse a wide range of emojis. Drag and drop the emojis to your video. You can relocate and resize the emoji based on the video dimensions.
Step 5: Exporting the Video
Click on “Export,” located on the top right corner of the window. Pick out the output video format and hit “Export” to finalize the editing process.
Wrapping Up
The article put forward a detailed description of 8 viable ideas that are sure to make the video funnier. Furthermore, Wondershare Filmstock was introduced as an online effects store, and Wondershare Filmora was presented as an amazing video editing software. One can have a look at the effects offered by Filmora in section 1 to make their videos interesting, funny, and watchable.
Max Wales
Max Wales is a writer and a lover of all things video.
Follow @Max Wales
Also read:
- [Updated] How to Add Timestamps on YouTube Video Link for 2024
- [Updated] In 2024, Generate Laughter Giphy's Art
- [Updated] The Ultimate Guide to Video Cuts Windows Edition, Made Simple
- How Does AT&T Handle International Roaming Charges and Policies?
- In 2024, How to Unlock Nokia C12 Plus Phone without Google Account?
- New In 2024, Top 6 Animated Emoji Video Effects
- New What Is Emoji, In 2024
- Ultimate Guide: Returning Purchased Games via Steam's Customer Support
- Updated 10 Most Popular Minion Memes that Moms Are Crazy About for 2024
- Updated 2024 Approved How to Add Bitmoji to Keyboard? Complete Guide
- Updated 2024 Approved How to Make an Emoji of Yourself on Mobile ? Emoji Yourself
- Updated How to Make an Adorable Video for Your Babys First Year
- Windows 11 ISO抹錄到USB安全介面之上:三大有效技巧
- Title: New How to Make an Adorable Video for Your Babys First Year for 2024
- Author: Jan
- Created at : 2025-02-13 17:28:21
- Updated at : 2025-02-19 18:21:13
- Link: https://meme-emoji.techidaily.com/new-how-to-make-an-adorable-video-for-your-babys-first-year-for-2024/
- License: This work is licensed under CC BY-NC-SA 4.0.