
Updated In 2024, How to Burn Photos to DVD with Transitions and Music
How to Burn Photos to DVD with Transitions and Music
How to Burn Photos to DVD with Transitions and Music

Shanoon Cox
Mar 27, 2024• Proven solutions
Photos are precious memories not only for you but also for your family members. As time goes on, the photos might fade out and be unable to retrieve. To avoid this, burn photos to DVD will be a great idea to preserve family memories eternally.
This article will show you how to burn photos to DVD Slideshow with transition, titles and music quickly and easily by using Wondershare DVD Slideshow Builder Deluxe . It also provides some tips on how to burn photos to DVD.
Part 1: How to Burn Photos to DVD with Transition, Titles and Music
Wondershare DVD Slideshow Builder Deluxe can help you quickly create and burn photos to DVD. Download the free trial version this photo DVD maker first.

Step 1. Add Photo or Video Files
In Organize tab, simply click the “Add Files” button to open the browse window, find your files and import them into the program, you can drag and drop photos or videos to organize them on storyboard. Click the Expand button to get a larger viewer.

Step 2. Customize Photo Slideshow Transitions
Generally speaking, transition effects will be automatically inserted between every two photos/videos when you import the photos. But you can customize them by clicking the Personalize tab, then drag and drop a transition from the list to the thumbnail between two slides.
You are also able to add background music here: click the Music button and choose a music file from your computer.

Step 3. Choose DVD Menu
Now switch to Create tab to author a DVD menu from template and burn to DVD disc quickly:
- On the right hand side of the screen, double click on desired menu template to apply a DVD menu template.
- Click the Edit button under the preview windows to customize your DVD menu or right click on menu for more options.
- You can also make a professional DVD menu using dynamic DVD menu templates.
BTW, if you don’t want a DVD menu, just check the “Disable DVD Menu” option.

Step 4. Burn Photos to DVD Disc
Now click the Preview button beneath the preview window to make sure the photo DVD slideshow is exactly what you want. Go back to Personalize tab to change if necessary. After that, click “Burn” button to start burning your DVD slideshow to DVD.
You can also output photo slideshow to watch on Youtube, Mobile Phone, iPhone, PSP, etc. through options on the left. Below are the instructions to burn DVD for watch on TV:

- Insert a blank DVD disc, and do the following.
- Click “Burn to DVD”. Then specify the number of DVD copies. You can also choose to generate ISO Image files or DVD Folders.
- Make sure the PAL or NTSC TV Standard settings is right. If you don’t know which standard is used in your country, click the “Help” button. The wrong TV standard would cause playback incompatibility problem.
- Then click “Start” to burn DVD slideshow. If you have checked Create DVD Folder and/or Create DVD Image File options, the corresponding files will also be created to the specified folder.
Now sit back and relax, when burning complete, insert the created DVD disc into your DVD player to watch photo DVD slideshow on TV.
Learn more: User Guide of DVD Slideshow Builder Deluxe
Part 2: More Photo to DVD Tips
More about NTSC/PAL TV Standard
Nowadays, there are three video formats around the world. But each one is incompatible with others. For instance, NTSC is used in North America, Canada and Japan; while most of other regions PAL/SECAM. To apply TV Standard in DVD Slideshow Builder Deluxe , go to “Create“ -> Option tab and locate TV Standard option to select NTSC or PAL. If you are not sure which one to choose, please click “Help” button, select your country, then click “OK” , the program will choose the right TV standard for you.
Burn Photos to DVD/CD as Data Disc
If you only want to burn photo to DVD for backup and further use, you only need a burning photo to DVD software like ImgBurn (Free) or Nero (commercial). These software helps you burn all digital media files to DVD, of course you can burn photos to DVD for backup purpose. Notice that some photo DVD maker allows you burn slideshow as well as the original photos. This way, you turn photos to DVD slideshow with transition, and at the same time, backup photos to DVD for other uses.
Scan Photos to DVD - Digitize Photos
If you use traditional camera and have got loads of photos in album, you can scan photos to computer so that convert photo to digital format. Afterwards, you can get more from these digital photos, like backup photos to DVD, send to others as DVD gift, make a photo DVD show to play on TV, etc. All these could be done with your favorite photo DVD maker software. Now see how to transform your printed photos to digital first:
Select a good photo scanner -> Prepare your photos to scan -> Start photo scanning -> Adjust scanned photos
Scanning printed photos to computer is not an easy job. It needs patience and some tips and tricks. As you may know, some companies provide photo scanning service. For the Step 4, you can also adjust digital photos in your selected photo DVD maker. Anyway, you need to get your digital photos ready before you burn photos to DVD with transitions and music.
Shanoon Cox
Shanoon Cox is a writer and a lover of all things video.
Follow @Shanoon Cox
Shanoon Cox
Mar 27, 2024• Proven solutions
Photos are precious memories not only for you but also for your family members. As time goes on, the photos might fade out and be unable to retrieve. To avoid this, burn photos to DVD will be a great idea to preserve family memories eternally.
This article will show you how to burn photos to DVD Slideshow with transition, titles and music quickly and easily by using Wondershare DVD Slideshow Builder Deluxe . It also provides some tips on how to burn photos to DVD.
Part 1: How to Burn Photos to DVD with Transition, Titles and Music
Wondershare DVD Slideshow Builder Deluxe can help you quickly create and burn photos to DVD. Download the free trial version this photo DVD maker first.
Step 1. Add Photo or Video Files
In Organize tab, simply click the “Add Files” button to open the browse window, find your files and import them into the program, you can drag and drop photos or videos to organize them on storyboard. Click the Expand button to get a larger viewer.
Step 2. Customize Photo Slideshow Transitions
Generally speaking, transition effects will be automatically inserted between every two photos/videos when you import the photos. But you can customize them by clicking the Personalize tab, then drag and drop a transition from the list to the thumbnail between two slides.
You are also able to add background music here: click the Music button and choose a music file from your computer.
Step 3. Choose DVD Menu
Now switch to Create tab to author a DVD menu from template and burn to DVD disc quickly:
- On the right hand side of the screen, double click on desired menu template to apply a DVD menu template.
- Click the Edit button under the preview windows to customize your DVD menu or right click on menu for more options.
- You can also make a professional DVD menu using dynamic DVD menu templates.
BTW, if you don’t want a DVD menu, just check the “Disable DVD Menu” option.
Step 4. Burn Photos to DVD Disc
Now click the Preview button beneath the preview window to make sure the photo DVD slideshow is exactly what you want. Go back to Personalize tab to change if necessary. After that, click “Burn” button to start burning your DVD slideshow to DVD.
You can also output photo slideshow to watch on Youtube, Mobile Phone, iPhone, PSP, etc. through options on the left. Below are the instructions to burn DVD for watch on TV:
- Insert a blank DVD disc, and do the following.
- Click “Burn to DVD”. Then specify the number of DVD copies. You can also choose to generate ISO Image files or DVD Folders.
- Make sure the PAL or NTSC TV Standard settings is right. If you don’t know which standard is used in your country, click the “Help” button. The wrong TV standard would cause playback incompatibility problem.
- Then click “Start” to burn DVD slideshow. If you have checked Create DVD Folder and/or Create DVD Image File options, the corresponding files will also be created to the specified folder.
Now sit back and relax, when burning complete, insert the created DVD disc into your DVD player to watch photo DVD slideshow on TV.
Learn more: User Guide of DVD Slideshow Builder Deluxe
Part 2: More Photo to DVD Tips
More about NTSC/PAL TV Standard
Nowadays, there are three video formats around the world. But each one is incompatible with others. For instance, NTSC is used in North America, Canada and Japan; while most of other regions PAL/SECAM. To apply TV Standard in DVD Slideshow Builder Deluxe , go to “Create“ -> Option tab and locate TV Standard option to select NTSC or PAL. If you are not sure which one to choose, please click “Help” button, select your country, then click “OK” , the program will choose the right TV standard for you.
Burn Photos to DVD/CD as Data Disc
If you only want to burn photo to DVD for backup and further use, you only need a burning photo to DVD software like ImgBurn (Free) or Nero (commercial). These software helps you burn all digital media files to DVD, of course you can burn photos to DVD for backup purpose. Notice that some photo DVD maker allows you burn slideshow as well as the original photos. This way, you turn photos to DVD slideshow with transition, and at the same time, backup photos to DVD for other uses.
Scan Photos to DVD - Digitize Photos
If you use traditional camera and have got loads of photos in album, you can scan photos to computer so that convert photo to digital format. Afterwards, you can get more from these digital photos, like backup photos to DVD, send to others as DVD gift, make a photo DVD show to play on TV, etc. All these could be done with your favorite photo DVD maker software. Now see how to transform your printed photos to digital first:
Select a good photo scanner -> Prepare your photos to scan -> Start photo scanning -> Adjust scanned photos
Scanning printed photos to computer is not an easy job. It needs patience and some tips and tricks. As you may know, some companies provide photo scanning service. For the Step 4, you can also adjust digital photos in your selected photo DVD maker. Anyway, you need to get your digital photos ready before you burn photos to DVD with transitions and music.
Shanoon Cox
Shanoon Cox is a writer and a lover of all things video.
Follow @Shanoon Cox
How to Make a Photo Collage on Mac/iPhone Using iPhoto?
How to Make a Photo Collage on Mac/iPhone Using iPhoto?
Shanoon Cox
Mar 27, 2024• Proven solutions
iPhoto is a photo library familiar to iOS users. It can help you easily organize, store and sort images, and even make a slide show to help you enjoy photos. This is why, even though Apple no longer develops iPhoto, some people use it.
Update: On April 8, 2015, Apple has launched a new Photos app on OS X Yosemite, which means Apple has stopped developing iPhoto. However, if you like iPhoto, you can still use it.
The following will introduce how to use the iPhoto collage maker on Mac or iPhone. At the end of this article, iPhoto alternative software will serve as your reference.
Part 1: How to Make a Photo Collage in iPhoto?
Here are the quick steps to create a photo collage with iPhoto.
Step 1: Launch iPhoto and click “Events” in the side menu.
Step 2: Hold “Shift” and click each photo you want to include in your photo collage.
Step 3: Click the “+” button in the lower-left corner and select Card in the pop-up window.
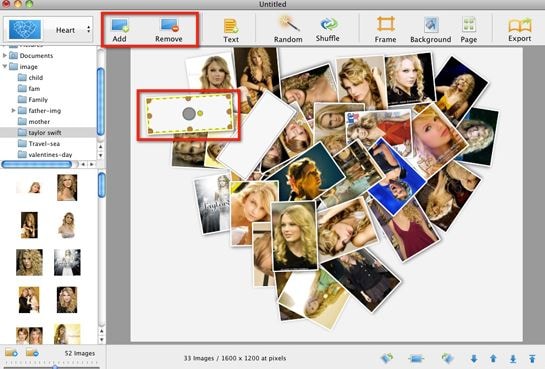
Step 4: Choose “Picture Collage”, which should be under the Any Occasion section if you are using the iPhoto 11.
Step 5: You’ll notice that all the templates are sorted based on the occasion.
Step 6: Drag photos to the template and pick a background, orientation and design.
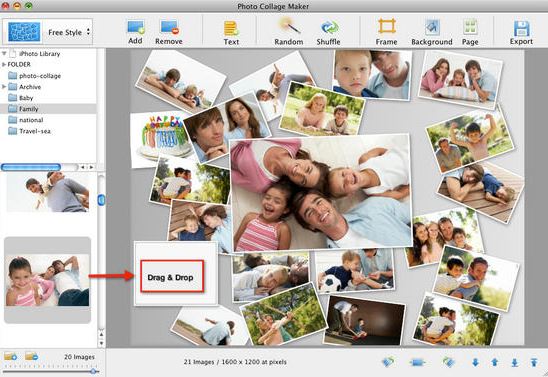
Step 7: Click the Buy button on the lower right-hand corner of the collage editor, or go to the Share menu and email it to yourself or family members.
But before you make a photo collage using iPhoto, here are some important things for you to know:
- Technically, iPhoto can’t make fancy photo collages like other Photo collages makers on Mac. So don’t expect too much of it. iPhoto only creates greeting cards with a simple collage layout.
- The templates iPhoto offers are quite limited and ordinary that you might feel a little disappointed.
- iPhoto offers no share options to save photo collages to desktop or to post on Facebook, which is a basic feature of picture collage editor.
Part 2: What Replaces iPhoto on Mac/iPhone?
Since iPhoto’s functions are not sufficient, we will introduce some alternative collage makers that you may be interested in.
Alternative to Make a Short Video, Slideshow, or Photo Collage: Wondershare Filmora
If there are too many photos to save or share with friends and family, you can use these images to make short videos to better collage and share. Filmora can do this for you, through which you can easily crop, add effects, split the screen, and merge photos. In order to make the “photo video” lively and exciting, you can also add music, audio, animation, title, music, etc. to it.


Alternative to Organize, Store, and Sort Images: iCloud
Migrating your photos to iCloud is a wise choice. iCloud is the best photo storage for iOS or Mac users. You don’t need to download other apps or software. Just allow iCloud to back up the photo’s library in the settings.
The best thing is that you can view iCloud photos anytime and anywhere after logging in to your iCloud account. You can also automatically share photos with others by opening “Shared Album”. However, if there are too many photos, a paid subscription may be required to upgrade the storage space.
Conclusion
Above are the steps to make a photo collage using iPhoto on Mac/iPhone. We also list alternative methods to meet the different needs of the Photo library. So, if this isn’t quite what you’re looking for, you can also use some online photo collage service instead. If you want to have more fun editing photo stories, welcome to download Filmora and make more memorable and interesting videos.
Shanoon Cox
Shanoon Cox is a writer and a lover of all things video.
Follow @Shanoon Cox
Shanoon Cox
Mar 27, 2024• Proven solutions
iPhoto is a photo library familiar to iOS users. It can help you easily organize, store and sort images, and even make a slide show to help you enjoy photos. This is why, even though Apple no longer develops iPhoto, some people use it.
Update: On April 8, 2015, Apple has launched a new Photos app on OS X Yosemite, which means Apple has stopped developing iPhoto. However, if you like iPhoto, you can still use it.
The following will introduce how to use the iPhoto collage maker on Mac or iPhone. At the end of this article, iPhoto alternative software will serve as your reference.
Part 1: How to Make a Photo Collage in iPhoto?
Here are the quick steps to create a photo collage with iPhoto.
Step 1: Launch iPhoto and click “Events” in the side menu.
Step 2: Hold “Shift” and click each photo you want to include in your photo collage.
Step 3: Click the “+” button in the lower-left corner and select Card in the pop-up window.
Step 4: Choose “Picture Collage”, which should be under the Any Occasion section if you are using the iPhoto 11.
Step 5: You’ll notice that all the templates are sorted based on the occasion.
Step 6: Drag photos to the template and pick a background, orientation and design.
Step 7: Click the Buy button on the lower right-hand corner of the collage editor, or go to the Share menu and email it to yourself or family members.
But before you make a photo collage using iPhoto, here are some important things for you to know:
- Technically, iPhoto can’t make fancy photo collages like other Photo collages makers on Mac. So don’t expect too much of it. iPhoto only creates greeting cards with a simple collage layout.
- The templates iPhoto offers are quite limited and ordinary that you might feel a little disappointed.
- iPhoto offers no share options to save photo collages to desktop or to post on Facebook, which is a basic feature of picture collage editor.
Part 2: What Replaces iPhoto on Mac/iPhone?
Since iPhoto’s functions are not sufficient, we will introduce some alternative collage makers that you may be interested in.
Alternative to Make a Short Video, Slideshow, or Photo Collage: Wondershare Filmora
If there are too many photos to save or share with friends and family, you can use these images to make short videos to better collage and share. Filmora can do this for you, through which you can easily crop, add effects, split the screen, and merge photos. In order to make the “photo video” lively and exciting, you can also add music, audio, animation, title, music, etc. to it.
Alternative to Organize, Store, and Sort Images: iCloud
Migrating your photos to iCloud is a wise choice. iCloud is the best photo storage for iOS or Mac users. You don’t need to download other apps or software. Just allow iCloud to back up the photo’s library in the settings.
The best thing is that you can view iCloud photos anytime and anywhere after logging in to your iCloud account. You can also automatically share photos with others by opening “Shared Album”. However, if there are too many photos, a paid subscription may be required to upgrade the storage space.
Conclusion
Above are the steps to make a photo collage using iPhoto on Mac/iPhone. We also list alternative methods to meet the different needs of the Photo library. So, if this isn’t quite what you’re looking for, you can also use some online photo collage service instead. If you want to have more fun editing photo stories, welcome to download Filmora and make more memorable and interesting videos.
Shanoon Cox
Shanoon Cox is a writer and a lover of all things video.
Follow @Shanoon Cox
What Is Emoji?
What Is Emoji?
Shanoon Cox
Mar 27, 2024• Proven solutions
If you ever wondered what is emoji, and how the term relates (or unrelates) to its elder sibling emoticon, you are at the right place. In the following sections, you will learn some quite interesting facts about the two, what different types of emojis are available, and what do they mean.
Because understanding the meaning of emojis is more important as compared to knowing what is an emoji itself, here you will get all the related details, relevant answers, and some best practice tips.
Part 1: What Is an Emoji?
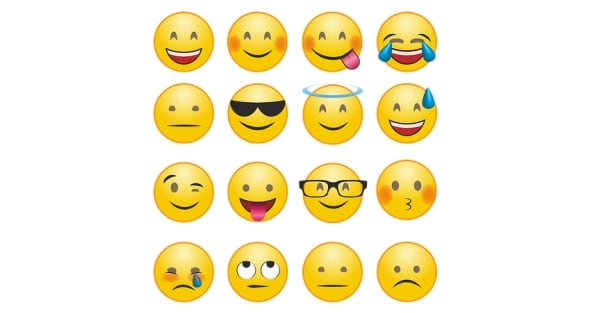
In a nutshell, an emoji is a graphical image that reflects a certain facial expression. Emojis are created using a drawing tool, and are incorporated into a unique 16-bit Unicode in order to make them compatible with operating systems of the most common devices and platforms like iOS, Android, macOS, and Windows.
In addition to being merely a picture, emojis are also animated to exaggerate the message senders’ emotions. You can find a couple of decent examples of such animations while using Skype messenger.
The reason behind emojis being more popular than the emoticons used earlier is the close resemblance of the former to the real-like expressions that they reflect when sent to a recipient. Therefore, it would be safe to say that a single emoji could be worth several sentences while texting if used correctly.
Part 2: What are the Differences Between Emojis and Emoticons?
As explained earlier, the emojis are graphical and sometimes animated Unicode illustrations that can be included in the text messages as objects.
On the other hand, the emoticons are formed using the ASCII characters, and no specific coding is required at the users’ side to create them. Simply put, an emoticon can be easily added to a text message or even to an email merely by using a combination of letters on the keyboard.
For instance, to create an emoticon of a smiley face, all you need to do is, type a colon sign along with a closing brace. (E.g. Typing a : and ) without space will become a smiling face, a : and ( will form a sad face, and so on).
To be clearer, emojis can be considered an advanced, better, and evolved version of emoticons. While the latter can be formed using simple characters like letters and symbols, the former is inserted as an object in the text messages.
Part 3: Where to Find the Meaning of Emojis?
Once you have understood what emoji is, it is now time to learn what the emojis mean. This part is imperative to ensure you don’t send a wrong emotional expression to your friends or family members, and get into some awkward situation after that.
Below is a list of some useful online websites and dictionaries that can help you find correct emojis along with their meanings to make your text conversation more meaningful and interesting:
1. Emojipedia
Emojipedia is an online library that holds several emojis. All the emojis that the portal has are placed in their corresponding categories.
Another section on the landing page of the website contains some of the most popular emojis, i.e. those that are mostly used by the texters during their conversions. Furthermore, the name of the emoji is present right next to it, and the entire part is hyperlinked which when clicked, takes you to a new page that has all the details about the object including its meaning, alternate names, and a button to copy the emoji to the clip board. The copied element can then be pasted in the text input field of a compatible messenger such as Facebook.
2. EMOJI DICTIONARY
https://www.dictionary.com/e/emoji/
EMOJI DICTIONARY is another online portal that contains almost all the commonly used emojis. The upper section of the page is dedicated to ‘Featured Terms’ with a slider that has all the featured emojis. The next segment lists all the categories other than emojis.
The bottom area of the landing page has all the emojis along with their names and/or the supported devices. All the names in the section are hyperlinked that open a new page when clicked, and show all the details such as examples, usage, and origin related to that particular emoji.
3. Emoji Dictionary
https://emojidictionary.emojifoundation.com/
This one is unique in its own way as in along with listing the most popular emojis and their names and definitions, it also allows you to include your own information in case you know something other than what is already present.
In addition to displaying the top emojis right on the landing page, the portal also has a category list where each segment holds its corresponding objects. This helps in locating your favorite elements easily and quickly. Furthermore, when you click an emoji, a new page opens up with all its definition from different aspects such as nouns, verbs, etc., along with a ‘Copy’ button that lets you copy the image to the clipboard, and use it on a compatible messaging app.
4. EmojiMeanings
https://www.emojimeanings.net/
The landing page of EmojiMeanings is populated with all the categories where each holds several relevant emojis, thus making it easier for the users to find and learn their meaning. The home page also has complete information about what emojis are, how they are different from emoticons, and what does the term ‘smiley’ actually mean.
When you click a category, a new page opens up with three major columns titled as ‘Emoji’, ‘Meaning’, and ‘Unicode’ that show an emoji itself, explain what it means, and what Unicode is used to form it respectively. All the emojis on EmojiMeanings are usually compatible with WhatsApp and Facebook.
5. HotEmoji
https://hotemoji.com/emoji-meanings.html
HotEmoji is yet another online portal that lists almost all the emojis along with their meanings. Each entry is hyperlinked which when clicked opens a new web page dedicated to that particular emoji where all the details about it are mentioned.
The new page also has a ‘Copy’ button that can be used to copy the object to the clipboard, and then the element can be pasted onto any compatible messenger during a text conversation.
Part 4: How to Find Emoji on Any Device?
While locating and inserting emojis on any messaging app on your smartphone is fairly simple as the messenger already has an icon that opens the entire emoji library when tapped, things are a bit tricky while using a Mac or Windows PC. Therefore, the following points explain how to find and use emojis on the computer running any of these operating systems:
How to Find Emojis on Windows 8 and Windows 10
On Windows 8 or Windows 10 computers, click the ‘Keyboard’ icon that is present in the ‘Notification area’ at the bottom-right corner of the screen, i.e. right side of the taskbar. When the list of emojis appears, you can click your favorite one and use it in the messenger.
How to Find Emojis on macOS
While using a Mac computer, you can open the app you want to add an emoji to, and then press the ctrl + cmd + spacebar keys on the keyboard.
Part 5: Most Common Emoji Categories
Some of the most commonly used categories that you must know after understanding what is an emoji include:
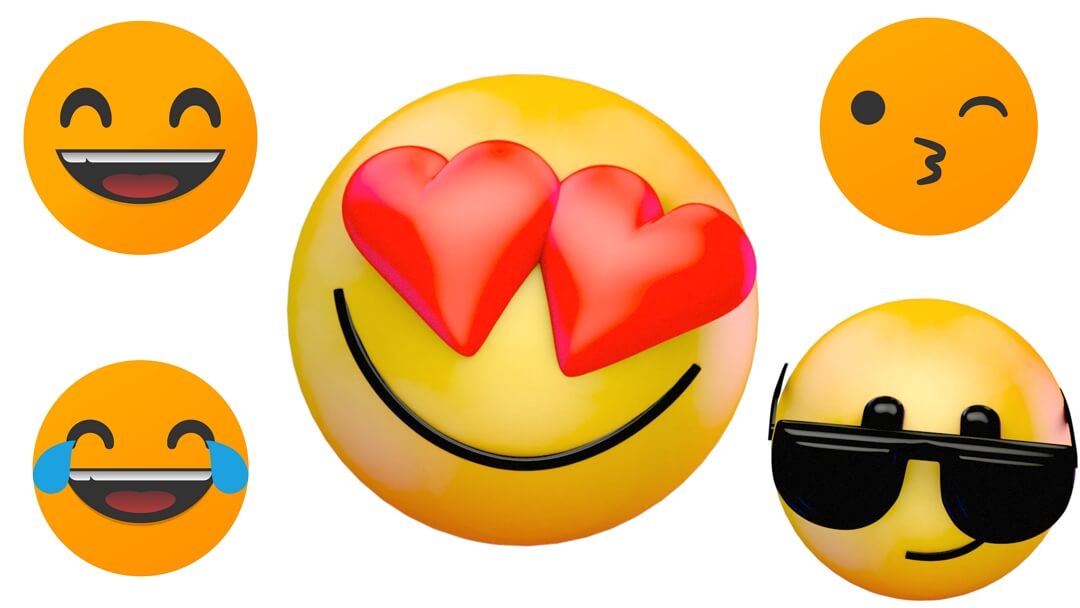
- Smileys & People – Holds the images of faces reflecting facial expressions and the vector images/animations of some popular people
- Animals & Nature – Contains the images/animations of animals and other natural elements such as trees, rocks, mountains, etc.
- Food & Drink – This category has vector images of beautifully decorated and well-aligned wine glasses, soft drink cans, pizza slices, etc.
- Activity – Has the emojis that reflect certain actions such as dance stances, walking, running, etc.
- Travel & Places – Is equipped with vectors of transportation mediums and locations such as trains, buses, buildings, banks, etc.
- Objects – Is populated with miscellaneous objects like a pair of shoes, suits, clocks, socks, etc.
- Symbols – This one consists of different types of symbols such as an equal to sign, stop sign, delta symbol, and many more
- Flags – This category contains flags of almost all the countries of the world. These emojis are mostly used to illustrate your current or destination location for reference
Part 6: Tips of Using Emojis
It is always a good idea to use emojis every now and then. However, using too many of them in your conversation might make the entire text look overly populated, and your communication partner may lose interest in you. Therefore, understanding when and how to use emojis is as important as it is to know what the emoji means.
Add Emojis to Video with Filmora
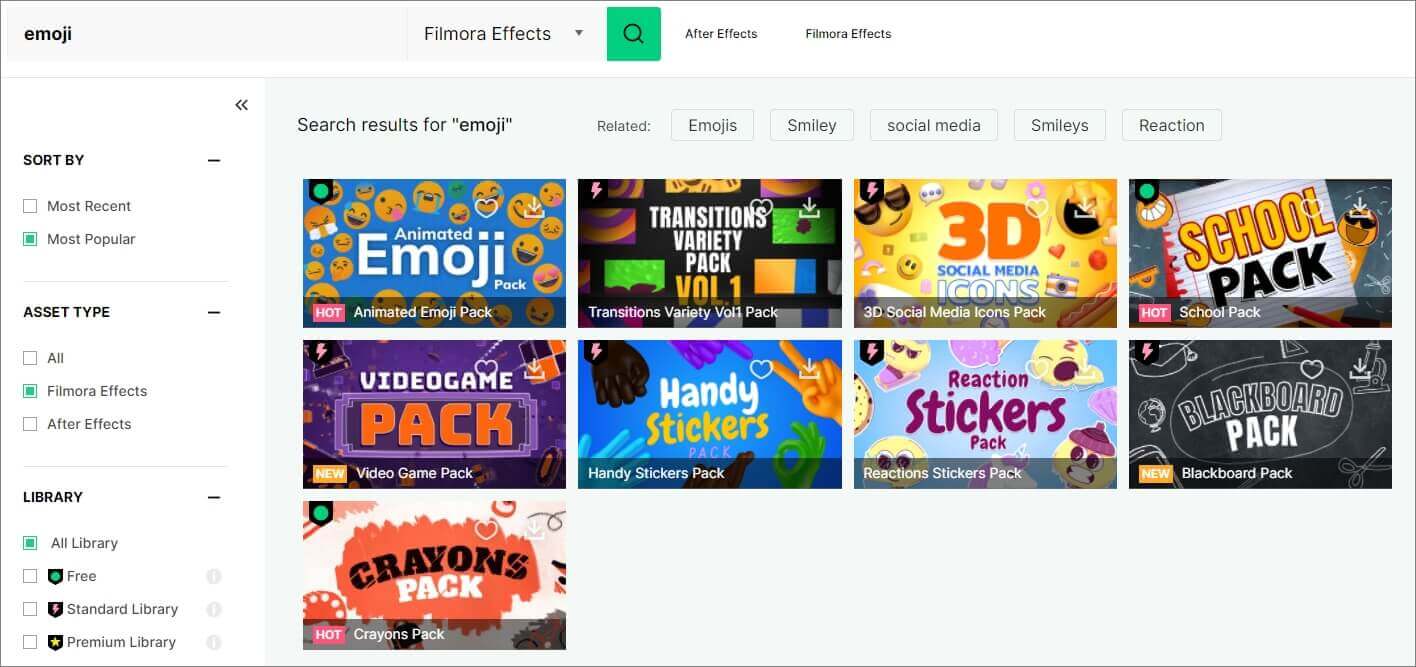
If you want to add animated emojis to video and share on social media, then Filmora is a good choice. Besides the built-in free animated emojis under Effects tab, you will also find some free or paid animated emojis or stickers on the effects store Filmstock. Download the free trial version of Filmora and create videos with fun.
Shanoon Cox
Shanoon Cox is a writer and a lover of all things video.
Follow @Shanoon Cox
Shanoon Cox
Mar 27, 2024• Proven solutions
If you ever wondered what is emoji, and how the term relates (or unrelates) to its elder sibling emoticon, you are at the right place. In the following sections, you will learn some quite interesting facts about the two, what different types of emojis are available, and what do they mean.
Because understanding the meaning of emojis is more important as compared to knowing what is an emoji itself, here you will get all the related details, relevant answers, and some best practice tips.
Part 1: What Is an Emoji?
In a nutshell, an emoji is a graphical image that reflects a certain facial expression. Emojis are created using a drawing tool, and are incorporated into a unique 16-bit Unicode in order to make them compatible with operating systems of the most common devices and platforms like iOS, Android, macOS, and Windows.
In addition to being merely a picture, emojis are also animated to exaggerate the message senders’ emotions. You can find a couple of decent examples of such animations while using Skype messenger.
The reason behind emojis being more popular than the emoticons used earlier is the close resemblance of the former to the real-like expressions that they reflect when sent to a recipient. Therefore, it would be safe to say that a single emoji could be worth several sentences while texting if used correctly.
Part 2: What are the Differences Between Emojis and Emoticons?
As explained earlier, the emojis are graphical and sometimes animated Unicode illustrations that can be included in the text messages as objects.
On the other hand, the emoticons are formed using the ASCII characters, and no specific coding is required at the users’ side to create them. Simply put, an emoticon can be easily added to a text message or even to an email merely by using a combination of letters on the keyboard.
For instance, to create an emoticon of a smiley face, all you need to do is, type a colon sign along with a closing brace. (E.g. Typing a : and ) without space will become a smiling face, a : and ( will form a sad face, and so on).
To be clearer, emojis can be considered an advanced, better, and evolved version of emoticons. While the latter can be formed using simple characters like letters and symbols, the former is inserted as an object in the text messages.
Part 3: Where to Find the Meaning of Emojis?
Once you have understood what emoji is, it is now time to learn what the emojis mean. This part is imperative to ensure you don’t send a wrong emotional expression to your friends or family members, and get into some awkward situation after that.
Below is a list of some useful online websites and dictionaries that can help you find correct emojis along with their meanings to make your text conversation more meaningful and interesting:
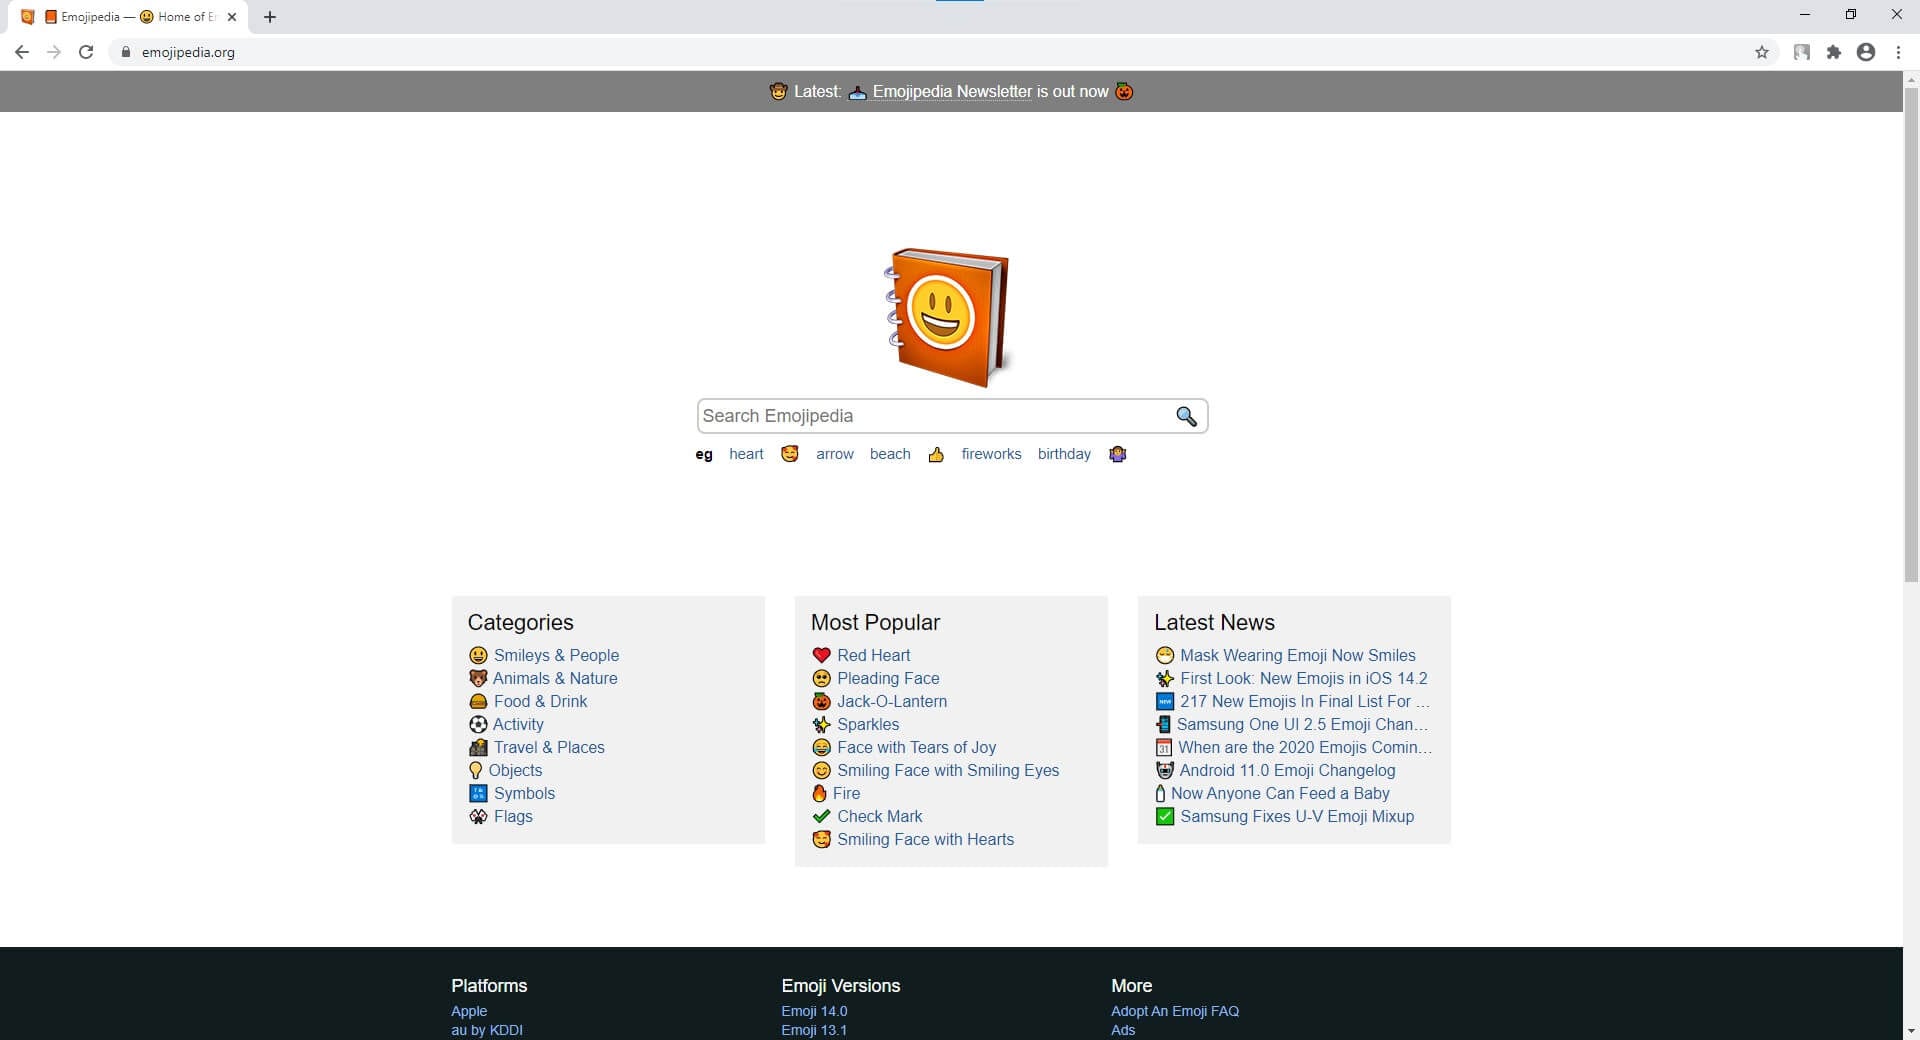
1. Emojipedia
Emojipedia is an online library that holds several emojis. All the emojis that the portal has are placed in their corresponding categories.
Another section on the landing page of the website contains some of the most popular emojis, i.e. those that are mostly used by the texters during their conversions. Furthermore, the name of the emoji is present right next to it, and the entire part is hyperlinked which when clicked, takes you to a new page that has all the details about the object including its meaning, alternate names, and a button to copy the emoji to the clip board. The copied element can then be pasted in the text input field of a compatible messenger such as Facebook.
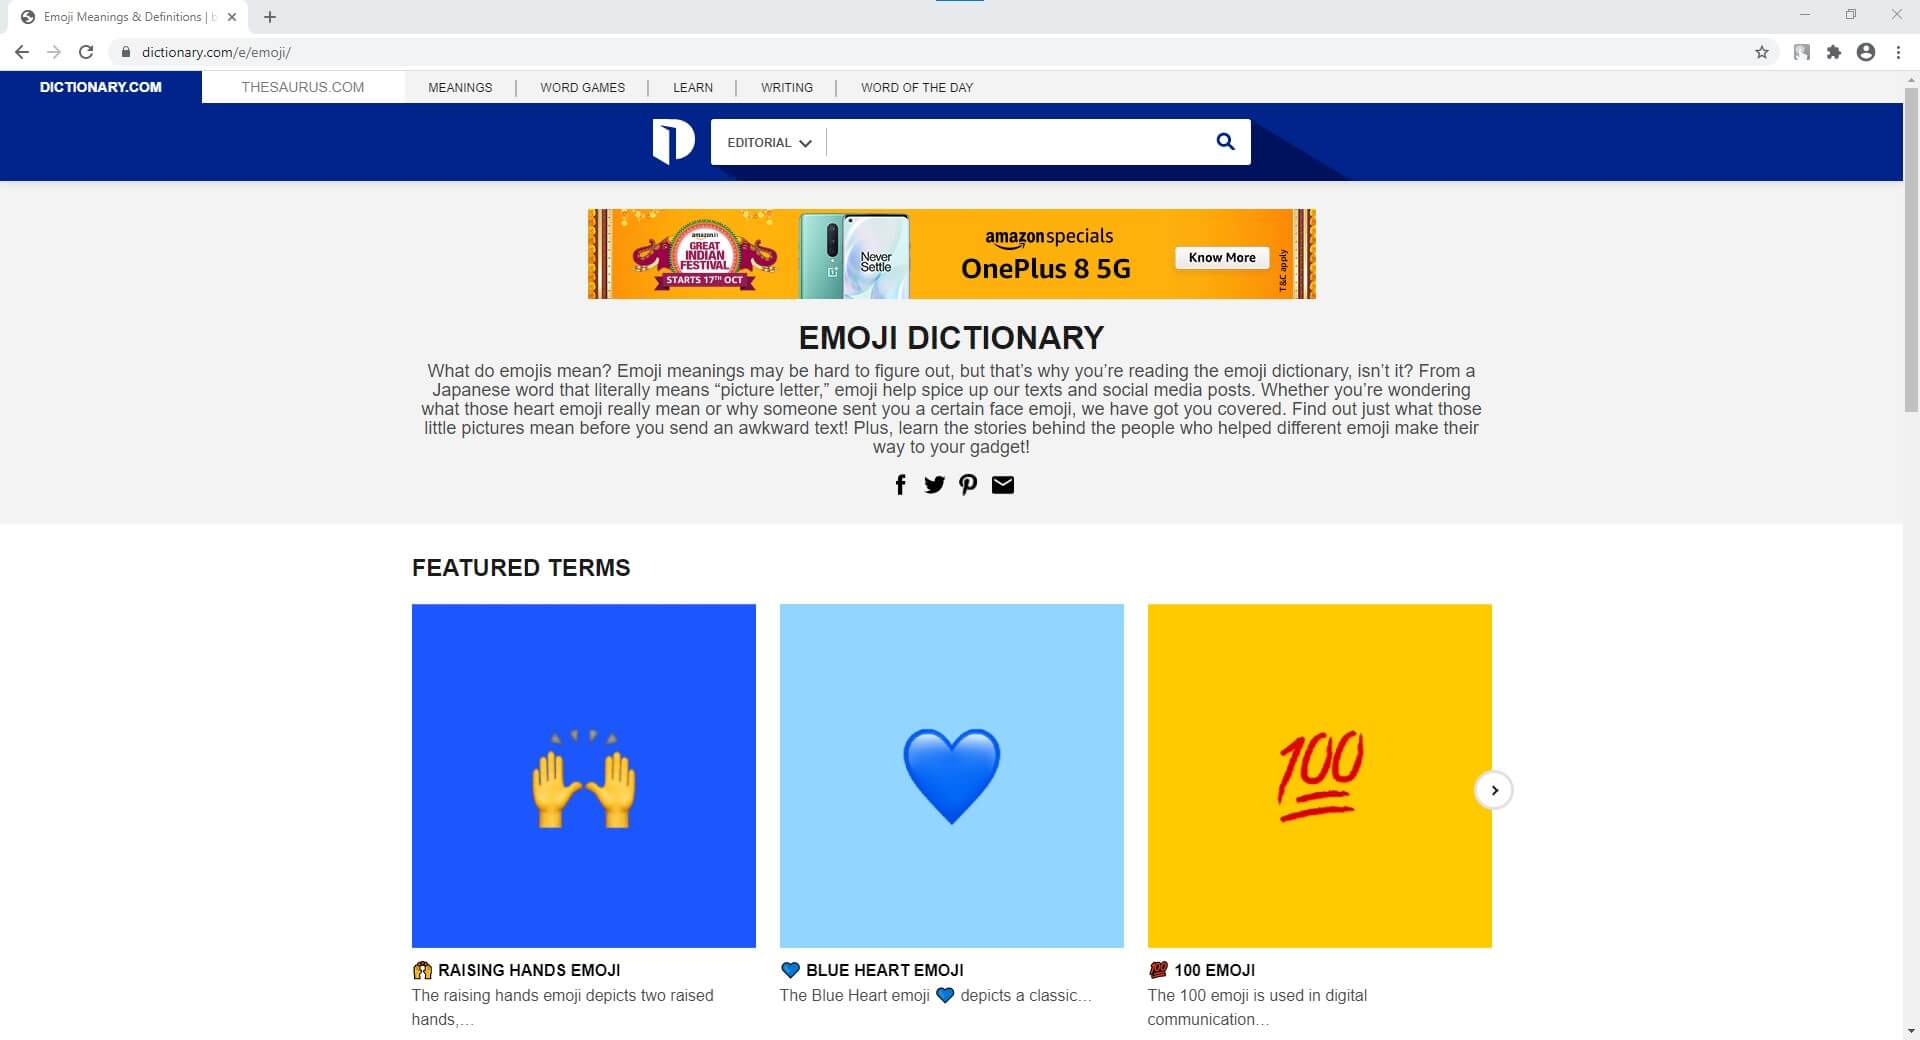
2. EMOJI DICTIONARY
https://www.dictionary.com/e/emoji/
EMOJI DICTIONARY is another online portal that contains almost all the commonly used emojis. The upper section of the page is dedicated to ‘Featured Terms’ with a slider that has all the featured emojis. The next segment lists all the categories other than emojis.
The bottom area of the landing page has all the emojis along with their names and/or the supported devices. All the names in the section are hyperlinked that open a new page when clicked, and show all the details such as examples, usage, and origin related to that particular emoji.
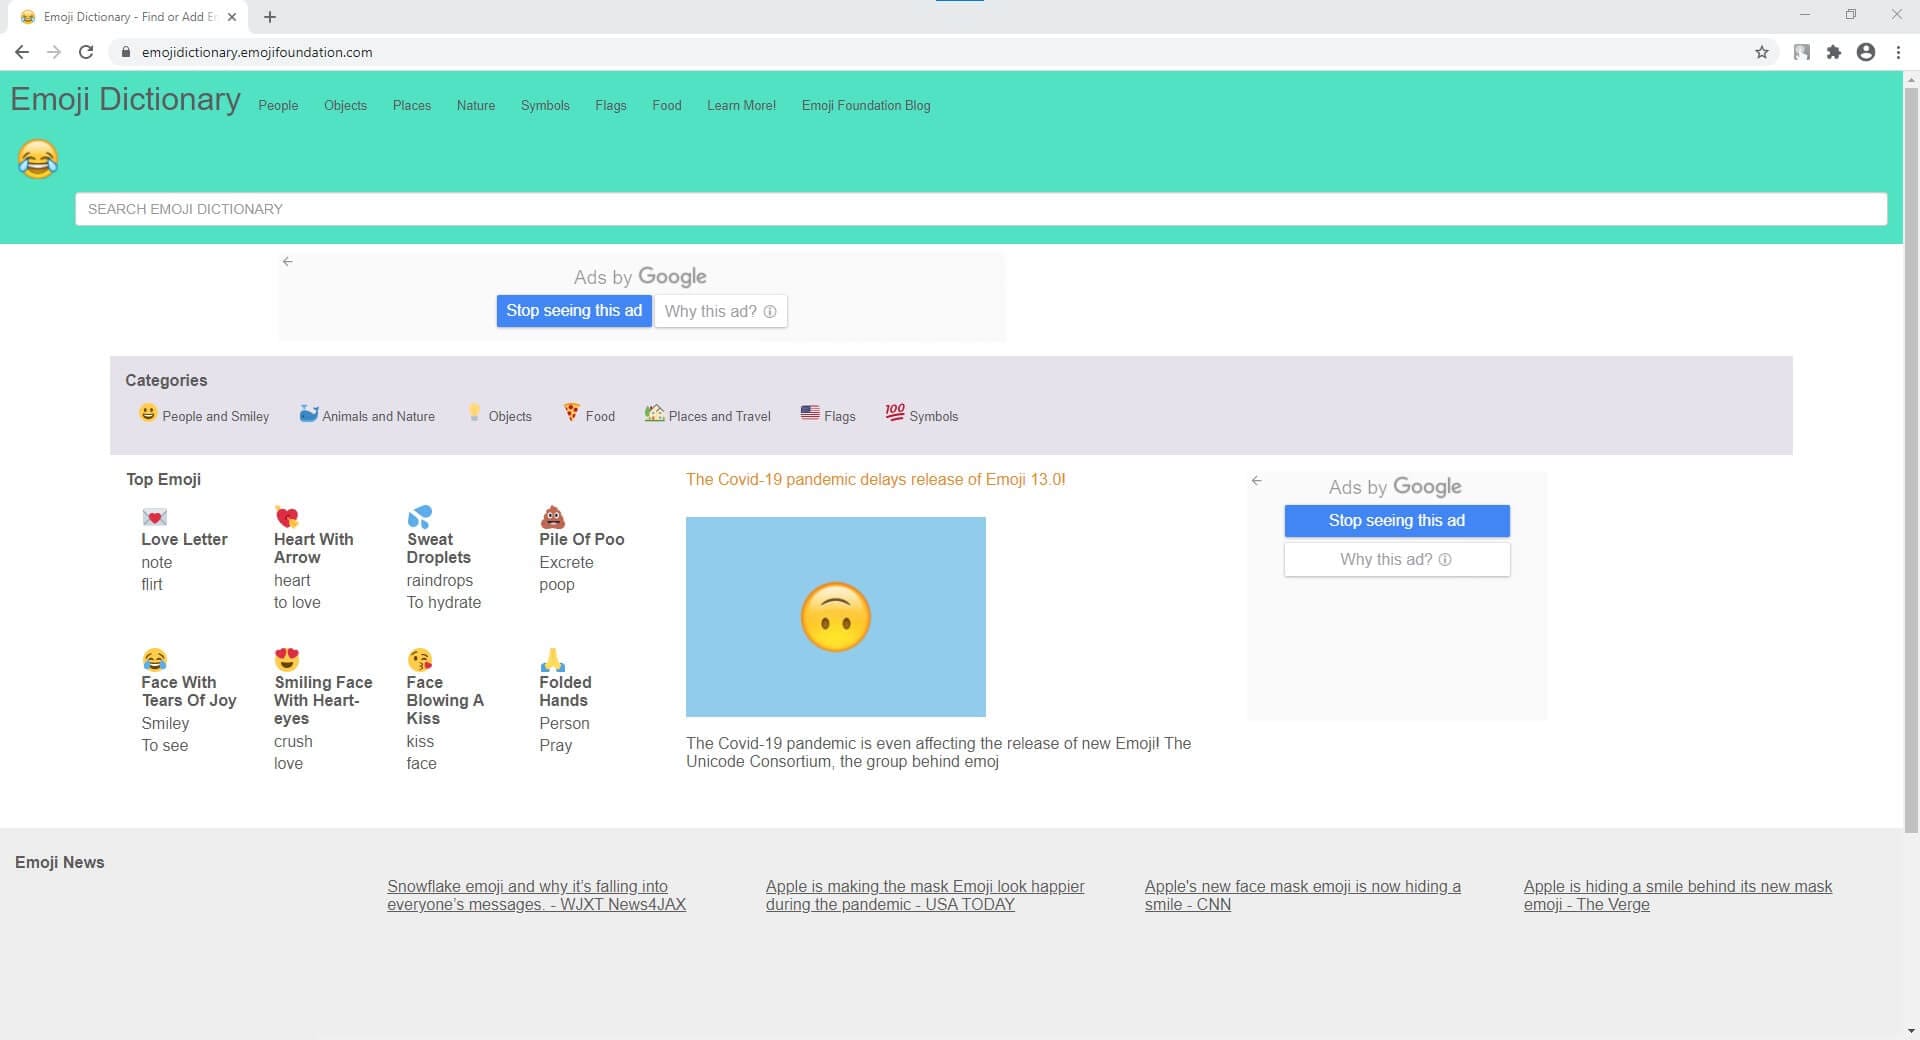
3. Emoji Dictionary
https://emojidictionary.emojifoundation.com/
This one is unique in its own way as in along with listing the most popular emojis and their names and definitions, it also allows you to include your own information in case you know something other than what is already present.
In addition to displaying the top emojis right on the landing page, the portal also has a category list where each segment holds its corresponding objects. This helps in locating your favorite elements easily and quickly. Furthermore, when you click an emoji, a new page opens up with all its definition from different aspects such as nouns, verbs, etc., along with a ‘Copy’ button that lets you copy the image to the clipboard, and use it on a compatible messaging app.
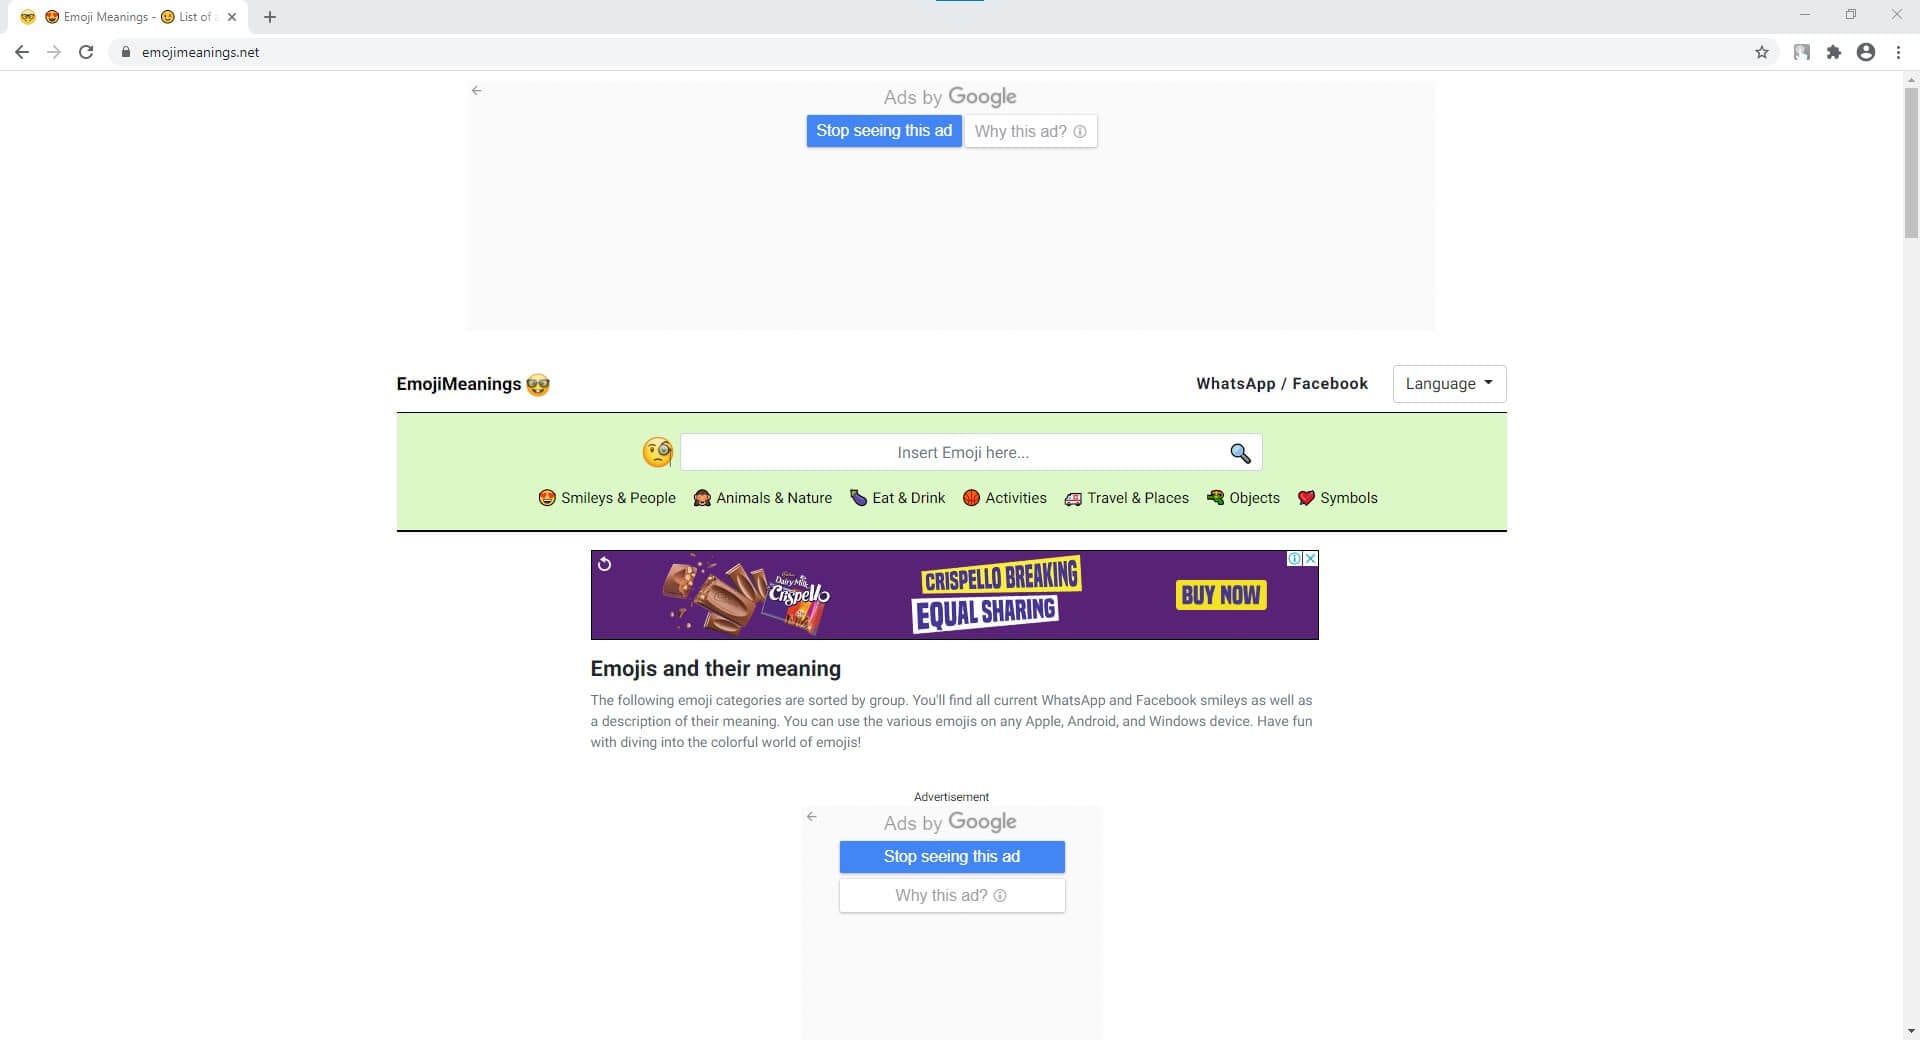
4. EmojiMeanings
https://www.emojimeanings.net/
The landing page of EmojiMeanings is populated with all the categories where each holds several relevant emojis, thus making it easier for the users to find and learn their meaning. The home page also has complete information about what emojis are, how they are different from emoticons, and what does the term ‘smiley’ actually mean.
When you click a category, a new page opens up with three major columns titled as ‘Emoji’, ‘Meaning’, and ‘Unicode’ that show an emoji itself, explain what it means, and what Unicode is used to form it respectively. All the emojis on EmojiMeanings are usually compatible with WhatsApp and Facebook.
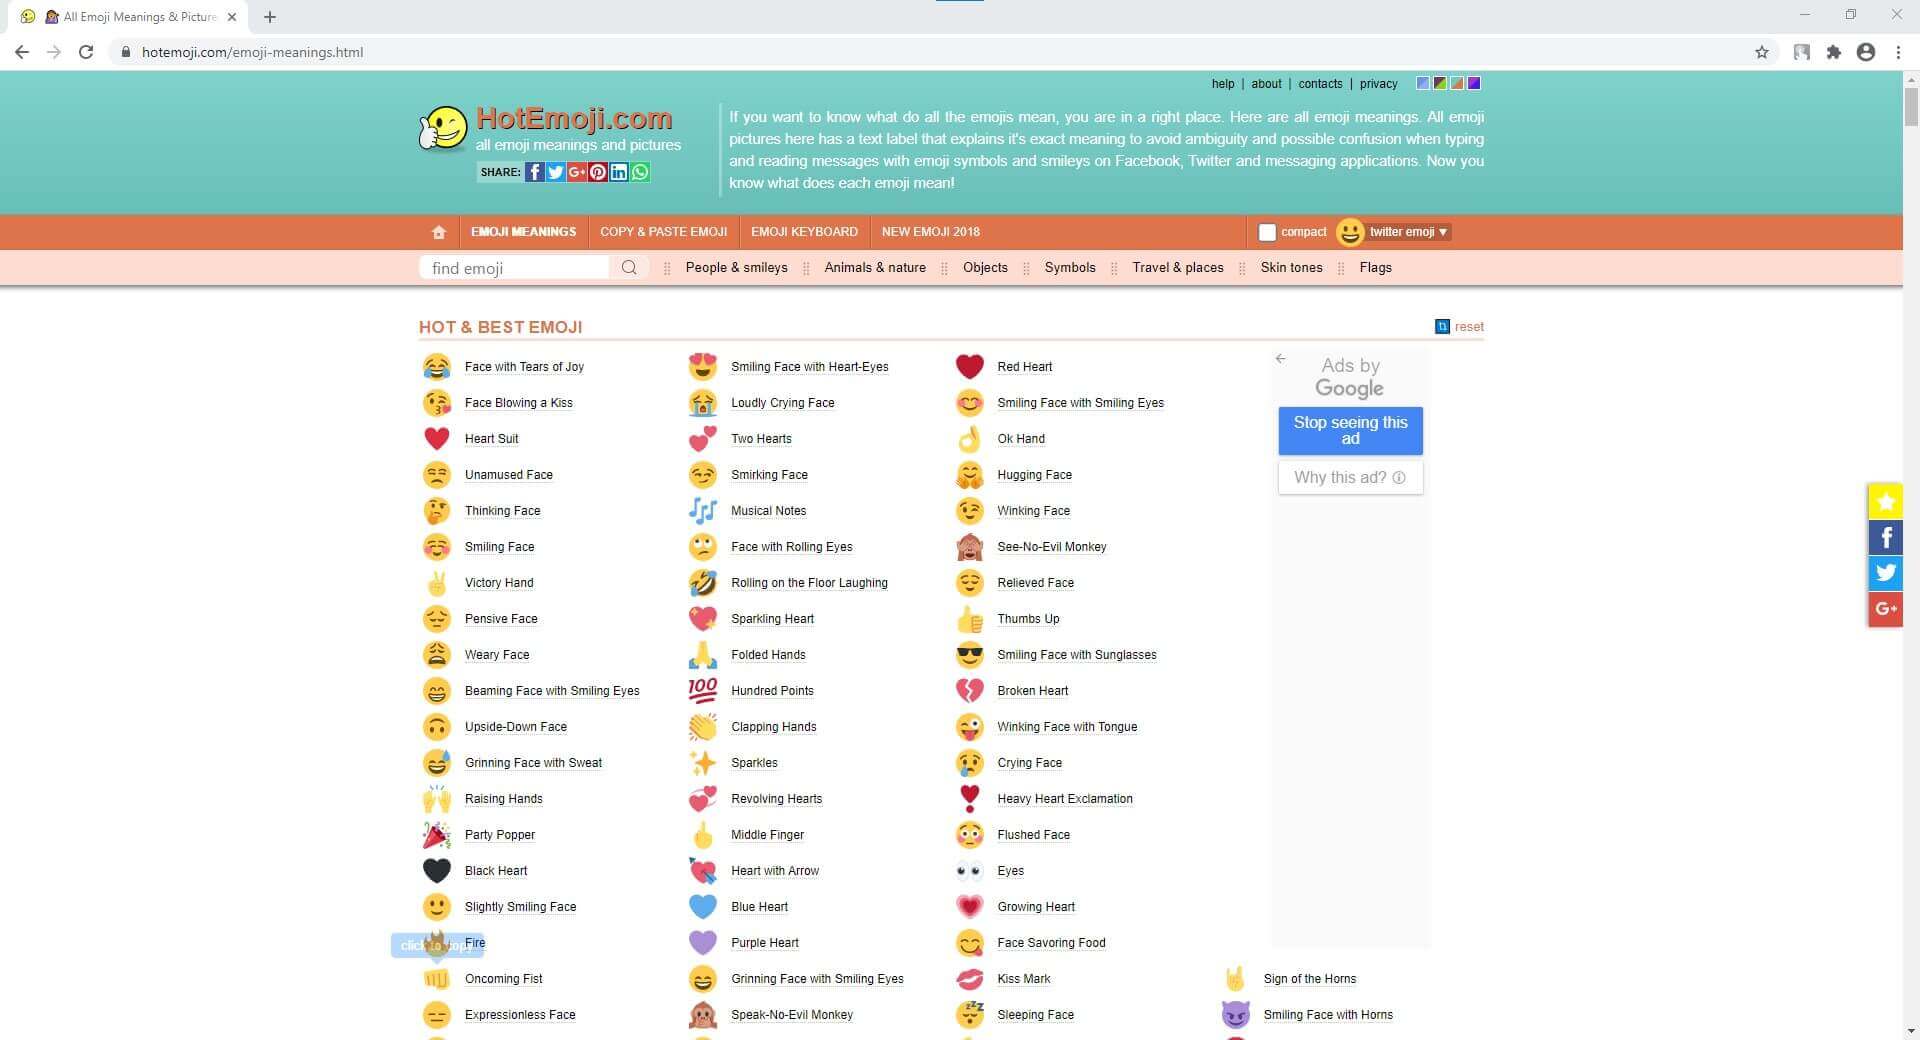
5. HotEmoji
https://hotemoji.com/emoji-meanings.html
HotEmoji is yet another online portal that lists almost all the emojis along with their meanings. Each entry is hyperlinked which when clicked opens a new web page dedicated to that particular emoji where all the details about it are mentioned.
The new page also has a ‘Copy’ button that can be used to copy the object to the clipboard, and then the element can be pasted onto any compatible messenger during a text conversation.
Part 4: How to Find Emoji on Any Device?
While locating and inserting emojis on any messaging app on your smartphone is fairly simple as the messenger already has an icon that opens the entire emoji library when tapped, things are a bit tricky while using a Mac or Windows PC. Therefore, the following points explain how to find and use emojis on the computer running any of these operating systems:
How to Find Emojis on Windows 8 and Windows 10
On Windows 8 or Windows 10 computers, click the ‘Keyboard’ icon that is present in the ‘Notification area’ at the bottom-right corner of the screen, i.e. right side of the taskbar. When the list of emojis appears, you can click your favorite one and use it in the messenger.
How to Find Emojis on macOS
While using a Mac computer, you can open the app you want to add an emoji to, and then press the ctrl + cmd + spacebar keys on the keyboard.
Part 5: Most Common Emoji Categories
Some of the most commonly used categories that you must know after understanding what is an emoji include:
- Smileys & People – Holds the images of faces reflecting facial expressions and the vector images/animations of some popular people
- Animals & Nature – Contains the images/animations of animals and other natural elements such as trees, rocks, mountains, etc.
- Food & Drink – This category has vector images of beautifully decorated and well-aligned wine glasses, soft drink cans, pizza slices, etc.
- Activity – Has the emojis that reflect certain actions such as dance stances, walking, running, etc.
- Travel & Places – Is equipped with vectors of transportation mediums and locations such as trains, buses, buildings, banks, etc.
- Objects – Is populated with miscellaneous objects like a pair of shoes, suits, clocks, socks, etc.
- Symbols – This one consists of different types of symbols such as an equal to sign, stop sign, delta symbol, and many more
- Flags – This category contains flags of almost all the countries of the world. These emojis are mostly used to illustrate your current or destination location for reference
Part 6: Tips of Using Emojis
It is always a good idea to use emojis every now and then. However, using too many of them in your conversation might make the entire text look overly populated, and your communication partner may lose interest in you. Therefore, understanding when and how to use emojis is as important as it is to know what the emoji means.
Add Emojis to Video with Filmora
If you want to add animated emojis to video and share on social media, then Filmora is a good choice. Besides the built-in free animated emojis under Effects tab, you will also find some free or paid animated emojis or stickers on the effects store Filmstock. Download the free trial version of Filmora and create videos with fun.
Shanoon Cox
Shanoon Cox is a writer and a lover of all things video.
Follow @Shanoon Cox
Shanoon Cox
Mar 27, 2024• Proven solutions
If you ever wondered what is emoji, and how the term relates (or unrelates) to its elder sibling emoticon, you are at the right place. In the following sections, you will learn some quite interesting facts about the two, what different types of emojis are available, and what do they mean.
Because understanding the meaning of emojis is more important as compared to knowing what is an emoji itself, here you will get all the related details, relevant answers, and some best practice tips.
Part 1: What Is an Emoji?
In a nutshell, an emoji is a graphical image that reflects a certain facial expression. Emojis are created using a drawing tool, and are incorporated into a unique 16-bit Unicode in order to make them compatible with operating systems of the most common devices and platforms like iOS, Android, macOS, and Windows.
In addition to being merely a picture, emojis are also animated to exaggerate the message senders’ emotions. You can find a couple of decent examples of such animations while using Skype messenger.
The reason behind emojis being more popular than the emoticons used earlier is the close resemblance of the former to the real-like expressions that they reflect when sent to a recipient. Therefore, it would be safe to say that a single emoji could be worth several sentences while texting if used correctly.
Part 2: What are the Differences Between Emojis and Emoticons?
As explained earlier, the emojis are graphical and sometimes animated Unicode illustrations that can be included in the text messages as objects.
On the other hand, the emoticons are formed using the ASCII characters, and no specific coding is required at the users’ side to create them. Simply put, an emoticon can be easily added to a text message or even to an email merely by using a combination of letters on the keyboard.
For instance, to create an emoticon of a smiley face, all you need to do is, type a colon sign along with a closing brace. (E.g. Typing a : and ) without space will become a smiling face, a : and ( will form a sad face, and so on).
To be clearer, emojis can be considered an advanced, better, and evolved version of emoticons. While the latter can be formed using simple characters like letters and symbols, the former is inserted as an object in the text messages.
Part 3: Where to Find the Meaning of Emojis?
Once you have understood what emoji is, it is now time to learn what the emojis mean. This part is imperative to ensure you don’t send a wrong emotional expression to your friends or family members, and get into some awkward situation after that.
Below is a list of some useful online websites and dictionaries that can help you find correct emojis along with their meanings to make your text conversation more meaningful and interesting:
1. Emojipedia
Emojipedia is an online library that holds several emojis. All the emojis that the portal has are placed in their corresponding categories.
Another section on the landing page of the website contains some of the most popular emojis, i.e. those that are mostly used by the texters during their conversions. Furthermore, the name of the emoji is present right next to it, and the entire part is hyperlinked which when clicked, takes you to a new page that has all the details about the object including its meaning, alternate names, and a button to copy the emoji to the clip board. The copied element can then be pasted in the text input field of a compatible messenger such as Facebook.
2. EMOJI DICTIONARY
https://www.dictionary.com/e/emoji/
EMOJI DICTIONARY is another online portal that contains almost all the commonly used emojis. The upper section of the page is dedicated to ‘Featured Terms’ with a slider that has all the featured emojis. The next segment lists all the categories other than emojis.
The bottom area of the landing page has all the emojis along with their names and/or the supported devices. All the names in the section are hyperlinked that open a new page when clicked, and show all the details such as examples, usage, and origin related to that particular emoji.
3. Emoji Dictionary
https://emojidictionary.emojifoundation.com/
This one is unique in its own way as in along with listing the most popular emojis and their names and definitions, it also allows you to include your own information in case you know something other than what is already present.
In addition to displaying the top emojis right on the landing page, the portal also has a category list where each segment holds its corresponding objects. This helps in locating your favorite elements easily and quickly. Furthermore, when you click an emoji, a new page opens up with all its definition from different aspects such as nouns, verbs, etc., along with a ‘Copy’ button that lets you copy the image to the clipboard, and use it on a compatible messaging app.
4. EmojiMeanings
https://www.emojimeanings.net/
The landing page of EmojiMeanings is populated with all the categories where each holds several relevant emojis, thus making it easier for the users to find and learn their meaning. The home page also has complete information about what emojis are, how they are different from emoticons, and what does the term ‘smiley’ actually mean.
When you click a category, a new page opens up with three major columns titled as ‘Emoji’, ‘Meaning’, and ‘Unicode’ that show an emoji itself, explain what it means, and what Unicode is used to form it respectively. All the emojis on EmojiMeanings are usually compatible with WhatsApp and Facebook.
5. HotEmoji
https://hotemoji.com/emoji-meanings.html
HotEmoji is yet another online portal that lists almost all the emojis along with their meanings. Each entry is hyperlinked which when clicked opens a new web page dedicated to that particular emoji where all the details about it are mentioned.
The new page also has a ‘Copy’ button that can be used to copy the object to the clipboard, and then the element can be pasted onto any compatible messenger during a text conversation.
Part 4: How to Find Emoji on Any Device?
While locating and inserting emojis on any messaging app on your smartphone is fairly simple as the messenger already has an icon that opens the entire emoji library when tapped, things are a bit tricky while using a Mac or Windows PC. Therefore, the following points explain how to find and use emojis on the computer running any of these operating systems:
How to Find Emojis on Windows 8 and Windows 10
On Windows 8 or Windows 10 computers, click the ‘Keyboard’ icon that is present in the ‘Notification area’ at the bottom-right corner of the screen, i.e. right side of the taskbar. When the list of emojis appears, you can click your favorite one and use it in the messenger.
How to Find Emojis on macOS
While using a Mac computer, you can open the app you want to add an emoji to, and then press the ctrl + cmd + spacebar keys on the keyboard.
Part 5: Most Common Emoji Categories
Some of the most commonly used categories that you must know after understanding what is an emoji include:
- Smileys & People – Holds the images of faces reflecting facial expressions and the vector images/animations of some popular people
- Animals & Nature – Contains the images/animations of animals and other natural elements such as trees, rocks, mountains, etc.
- Food & Drink – This category has vector images of beautifully decorated and well-aligned wine glasses, soft drink cans, pizza slices, etc.
- Activity – Has the emojis that reflect certain actions such as dance stances, walking, running, etc.
- Travel & Places – Is equipped with vectors of transportation mediums and locations such as trains, buses, buildings, banks, etc.
- Objects – Is populated with miscellaneous objects like a pair of shoes, suits, clocks, socks, etc.
- Symbols – This one consists of different types of symbols such as an equal to sign, stop sign, delta symbol, and many more
- Flags – This category contains flags of almost all the countries of the world. These emojis are mostly used to illustrate your current or destination location for reference
Part 6: Tips of Using Emojis
It is always a good idea to use emojis every now and then. However, using too many of them in your conversation might make the entire text look overly populated, and your communication partner may lose interest in you. Therefore, understanding when and how to use emojis is as important as it is to know what the emoji means.
Add Emojis to Video with Filmora
If you want to add animated emojis to video and share on social media, then Filmora is a good choice. Besides the built-in free animated emojis under Effects tab, you will also find some free or paid animated emojis or stickers on the effects store Filmstock. Download the free trial version of Filmora and create videos with fun.
Shanoon Cox
Shanoon Cox is a writer and a lover of all things video.
Follow @Shanoon Cox
How to Make a Video Meme with 4 Best Meme Video Makers
How to Make a Video Meme with 4 Best Meme Video Makers

Ollie Mattison
Mar 27, 2024• Proven solutions
Being a new trend in the market, memes are ruling the Internet like never before. If you want to make your own video meme and facing issues in that, then you have reached the right place. You don’t need to be a pro at graphics or video editing . All that you need is a preferred video and the content you want to use along with as text and the rest is a smooth walk.
In this article, we are going to explain you, how to create memes using videos in different ways. Stay tuned for more!
- Part1: How to create a video meme with Filmora meme maker
- Part2: How to create a video meme with Filmora online meme maker
- Part3: How to create a video meme with Kapwing
- Part4: How to create a video meme with Blurbiz
Part 1: How to create a video meme with Filmora meme maker
You can also create a more vivid video meme with Filmora meme maker . It is such a handy video editing tool which enables you to create your own meme in just three steps. You can download the software first and follow the steps below:
Read more: Easy Steps to Create a Meme [Photo & Video Memes]
Part 2: How to create a video meme with Filmora online meme maker
If you are unsure about how to make video memes without download software, then rush to Filmora online meme maker . It would certainly help you to the great extent. This online meme maker can create image, GIF, and video memes with interesting fonts.
It processes videos memes faster than the counterparts. It comes with advanced decoder and encoder for fast action. You can directly upload videos using URL. The output formats are flexible and you can convert video to GIF. You can add text, edit fonts and move them freely as you desire. More importantly, no watermark in the outputted video.
Here is the guide for creating best video meme using Filmora online meme maker –
Step 1: Browse the official website to access Filmora online meme maker. Drag and drop or click to import video. Filmora meme maker can decode the video from the uploaded link itself.

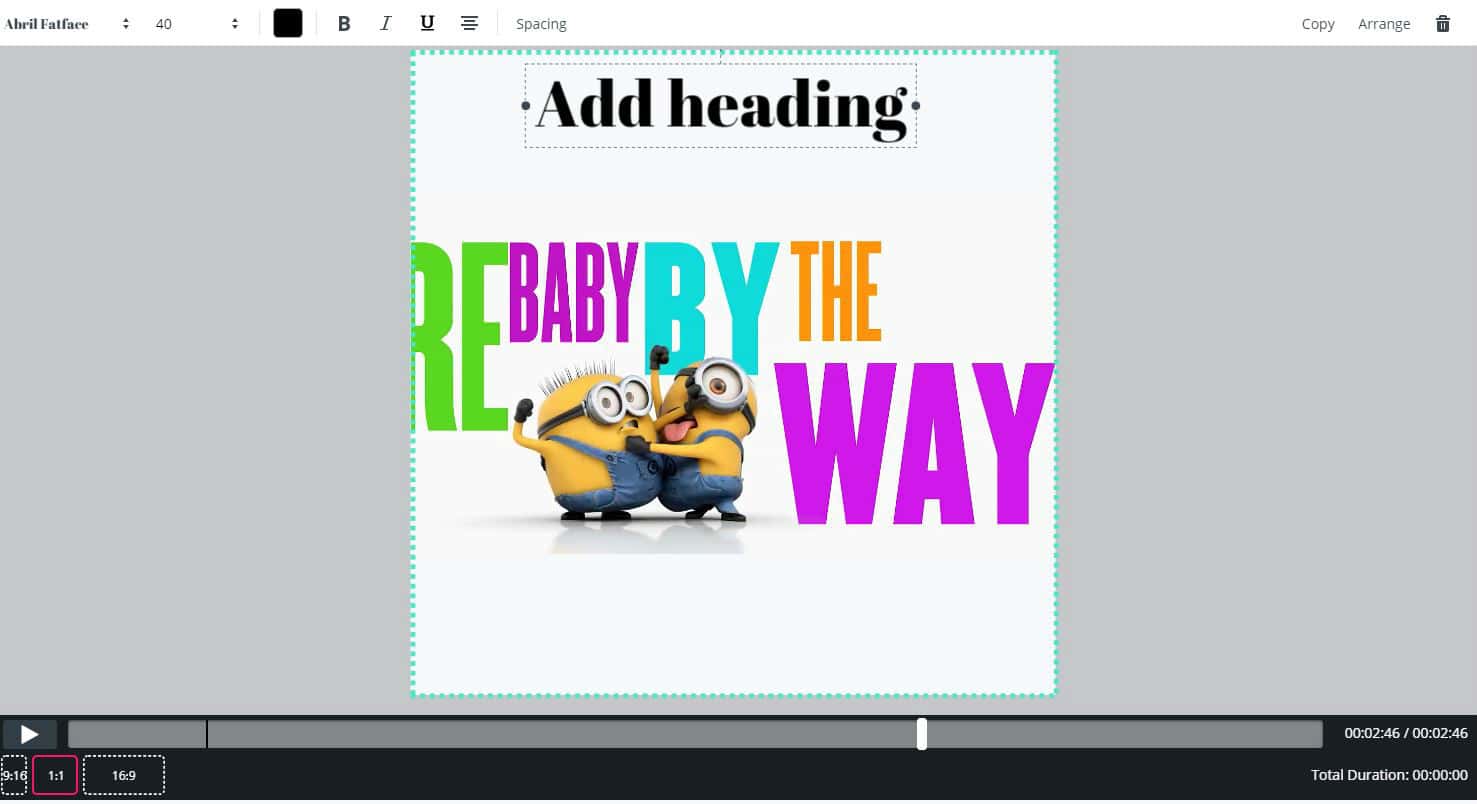
Step 2: Navigate to the meme editor page once you have selected the video (GIF/image as well). From the left panel, customize your video meme. You can use Filmora video trimmer for cutting the video to fit your needs. Add text, alter fonts and preview the changes.

Step 3: Once you are done with your editing, click on the ‘CREATE’ button and let the change get applied on your video meme. Hit ‘DOWNLOAD’ after that and share your video meme on Facebook, Instagram, or Reddit.

Part 3: How to create a video meme with Blurbiz
When you want to make your own video meme, Blurbiz can also come in handy. However, it requires you to sign up first to use. The process needs you to first signup using your company name, name, email ID and password. Then the confirmation link is sent to your email. Once you tap the link then only your account gets activated. The free trial is available only for a week. You can create a video, image or GIF meme. It allows you to add content, drag and drop text, adjust it before saving it.
Here is a quick guide –
Step 1: Browse Blurbiz first and then enter name, email, password, and company name and press ‘Sign Up’.
Step 2: Once the confirmation mail is sent to your email, click the link to activate your user ID. You will be guided to the main page of the program. Click ‘Create Project’ and hit ‘Create’ after selecting a name.
Step 3: Click ‘+ Add Media Files’ and select a video. Tap ‘Open’ to upload video and then hit ‘EDIT’. Press the ‘Text’ tab and then edit and add various texts. Click ‘Complete’ and then ‘Download’ once the video is processed.
Part 4: How to create a video meme with Kapwing
Kapwing is one of the online meme video makers. It can also create memes with images. Though, it is a free meme maker, it will have a watermark. If you want to have the watermark removed, you need to sign up for a subscription. Though, the regular version needs no login to edit or create memes. It takes lot of time to process and create a meme out of your video.
Here is the quick guide for Kapwing –
Step 1: Browse for Kapwing and then upload a video.
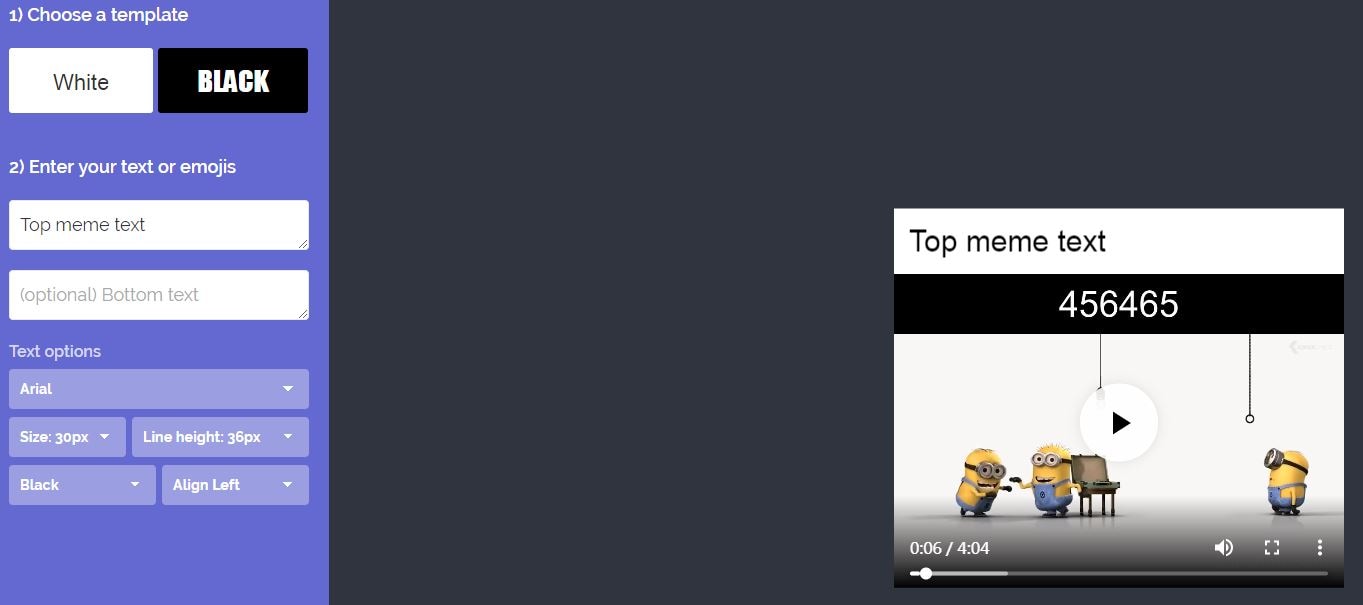
Step 2: Now, select a template ‘Black’ or ‘White’, enter header and footer text and emojis. Edit the text and define the font style, size and height.
Step 3: Hit the ‘CREATE’ button and wait till the output is generated. You need to wait and then tap ‘Download image’ to save the video meme on your PC.
Final Comments
Now that you are well aware of the process involving how to create a video meme, why don’t you start it with Filmora meme maker ?
As you know that, this is one of the most effective meme maker available in the market. It doesn’t require you to sign up and has a very intuitive interface too. All that you need to do is upload the video, add text, edit fonts and then you are all set with a rib tickling meme without watermark. You don’t need to download the software.
Ollie Mattison
Ollie Mattison is a writer and a lover of all things video.
Follow @Ollie Mattison
Ollie Mattison
Mar 27, 2024• Proven solutions
Being a new trend in the market, memes are ruling the Internet like never before. If you want to make your own video meme and facing issues in that, then you have reached the right place. You don’t need to be a pro at graphics or video editing . All that you need is a preferred video and the content you want to use along with as text and the rest is a smooth walk.
In this article, we are going to explain you, how to create memes using videos in different ways. Stay tuned for more!
- Part1: How to create a video meme with Filmora meme maker
- Part2: How to create a video meme with Filmora online meme maker
- Part3: How to create a video meme with Kapwing
- Part4: How to create a video meme with Blurbiz
Part 1: How to create a video meme with Filmora meme maker
You can also create a more vivid video meme with Filmora meme maker . It is such a handy video editing tool which enables you to create your own meme in just three steps. You can download the software first and follow the steps below:
Read more: Easy Steps to Create a Meme [Photo & Video Memes]
Part 2: How to create a video meme with Filmora online meme maker
If you are unsure about how to make video memes without download software, then rush to Filmora online meme maker . It would certainly help you to the great extent. This online meme maker can create image, GIF, and video memes with interesting fonts.
It processes videos memes faster than the counterparts. It comes with advanced decoder and encoder for fast action. You can directly upload videos using URL. The output formats are flexible and you can convert video to GIF. You can add text, edit fonts and move them freely as you desire. More importantly, no watermark in the outputted video.
Here is the guide for creating best video meme using Filmora online meme maker –
Step 1: Browse the official website to access Filmora online meme maker. Drag and drop or click to import video. Filmora meme maker can decode the video from the uploaded link itself.
Step 2: Navigate to the meme editor page once you have selected the video (GIF/image as well). From the left panel, customize your video meme. You can use Filmora video trimmer for cutting the video to fit your needs. Add text, alter fonts and preview the changes.
Step 3: Once you are done with your editing, click on the ‘CREATE’ button and let the change get applied on your video meme. Hit ‘DOWNLOAD’ after that and share your video meme on Facebook, Instagram, or Reddit.
Part 3: How to create a video meme with Blurbiz
When you want to make your own video meme, Blurbiz can also come in handy. However, it requires you to sign up first to use. The process needs you to first signup using your company name, name, email ID and password. Then the confirmation link is sent to your email. Once you tap the link then only your account gets activated. The free trial is available only for a week. You can create a video, image or GIF meme. It allows you to add content, drag and drop text, adjust it before saving it.
Here is a quick guide –
Step 1: Browse Blurbiz first and then enter name, email, password, and company name and press ‘Sign Up’.
Step 2: Once the confirmation mail is sent to your email, click the link to activate your user ID. You will be guided to the main page of the program. Click ‘Create Project’ and hit ‘Create’ after selecting a name.
Step 3: Click ‘+ Add Media Files’ and select a video. Tap ‘Open’ to upload video and then hit ‘EDIT’. Press the ‘Text’ tab and then edit and add various texts. Click ‘Complete’ and then ‘Download’ once the video is processed.
Part 4: How to create a video meme with Kapwing
Kapwing is one of the online meme video makers. It can also create memes with images. Though, it is a free meme maker, it will have a watermark. If you want to have the watermark removed, you need to sign up for a subscription. Though, the regular version needs no login to edit or create memes. It takes lot of time to process and create a meme out of your video.
Here is the quick guide for Kapwing –
Step 1: Browse for Kapwing and then upload a video.
Step 2: Now, select a template ‘Black’ or ‘White’, enter header and footer text and emojis. Edit the text and define the font style, size and height.
Step 3: Hit the ‘CREATE’ button and wait till the output is generated. You need to wait and then tap ‘Download image’ to save the video meme on your PC.
Final Comments
Now that you are well aware of the process involving how to create a video meme, why don’t you start it with Filmora meme maker ?
As you know that, this is one of the most effective meme maker available in the market. It doesn’t require you to sign up and has a very intuitive interface too. All that you need to do is upload the video, add text, edit fonts and then you are all set with a rib tickling meme without watermark. You don’t need to download the software.
Ollie Mattison
Ollie Mattison is a writer and a lover of all things video.
Follow @Ollie Mattison
Top 10 Free Emoji Websites to Download Emojis Online
Top 10 Free Emoji Websites to Download Emojis Online
Shanoon Cox
Mar 27, 2024• Proven solutions
With the rise of social media and online conversations gifs, emojis, memes have taken a huge slot. A lot could be expressed without typing a word, just send an emoji and it will do everything for you on that chat. Sometimes we need a collection of emoji and we try to download emojis so that we can use them frequently without searching for them, a right emoji at the right time can do wonders. People today are very curious about sending many thoughts in one word so no one can do that but emojis. In this guide, you will learn about the best emoji websites and how can you download emojis for free on your device to use them later.

Table of Content:
- 10 Free Emoji Websites to Download/Get Emojis Online
- Add Emojis to Your Video with Wondershare Filmora
10 Free Emoji Websites to Download/Get Emojis Online
Now, you are all set to get the best emoji websites to download emojis and save them on your device and use them for a brilliant sense of humor. These emoji websites are specially curated and tested so that you don’t have to think twice before making an effort.
- 1. Getemoji
- 2. Pixabay
- 3. Emojicopy
- 4. iemoji
- 5. Emojipedia
- 6. Copy and Paste Emoji
- 7. Emojiterra
- 8. Emojiforu
- 9. Coolsymbol
- 10. Joypixels
1. Getemoji
Getemoji a great emoji website to copy and paste and save emojis on your social media profiles. Be it our computer or mobile phone get emoji is compatible with all the operating systems and Chrome browsers. You can go to the website and scroll through thousands of free emojis to select from and copy the best emoji to your chats and captions to create an impact.
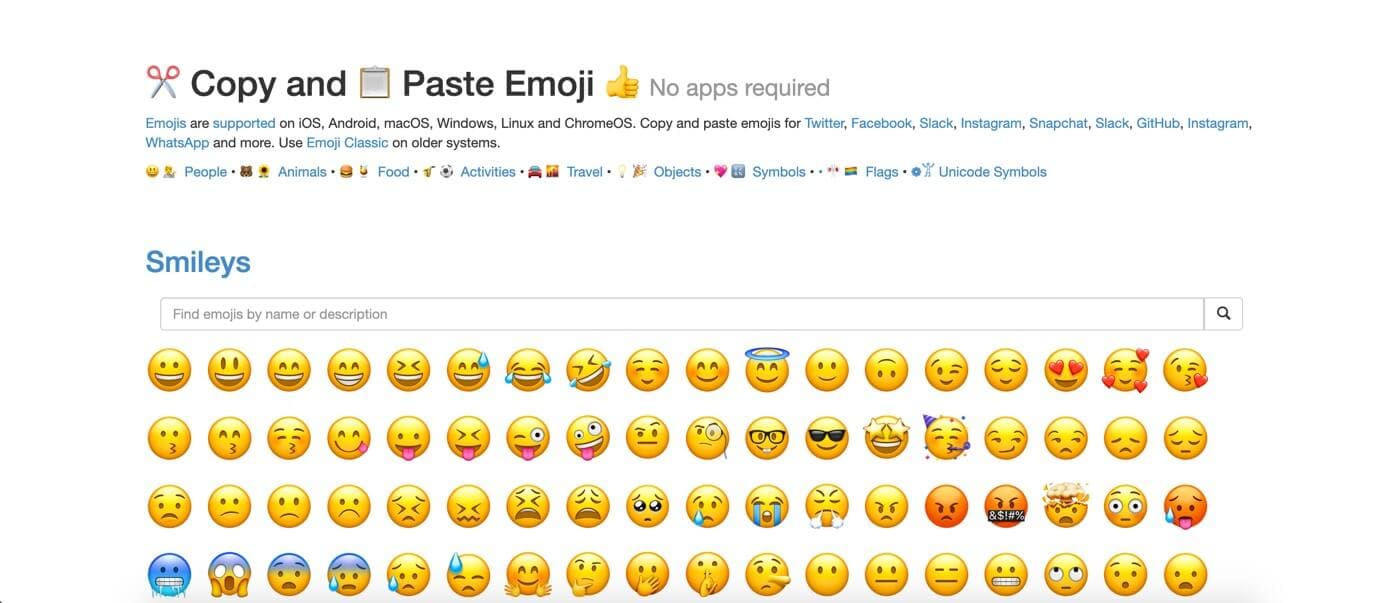
2. Pixabay
Pixabay is primarily an image website where you can download images of all kinds depending upon your requirement. Now, the emoji on this website are available in a huge quantity where you need to search for the best emoji and you will get the high-resolution emoji that you can download, save or copy-paste directly to the chat or caption on your social media channels.

3. Emojicopy
Emojicopy is another website where you can find the best emoji and copy them to your chats and caption text easily from the browser. Emojicopy is just like other websites where you can get a lot of emojis to choose from and select one. Though it’s a simple website the thumbnail option on the header section makes it easier to navigate through a lot of different emojis on this website.
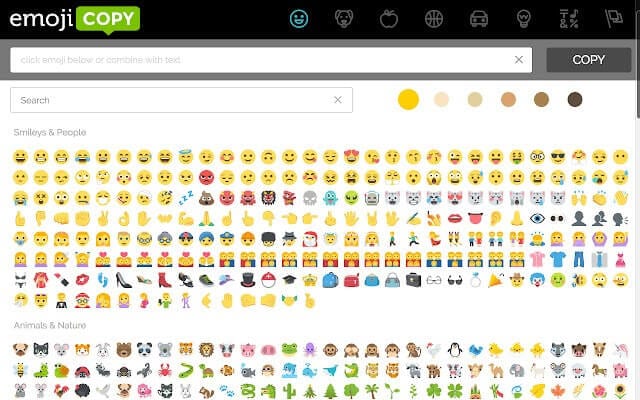
4. iemoji
iemoji is something different from all the other websites that you have surfed until as it has some unique features to rely on. You can select the best emoji and tweak its skin tone and theme type before you use it on your social media channels. The best part about this website is that it provides the feature of sending an emoji as SMS and email to anyone and that is something brilliant when it comes to sharing.
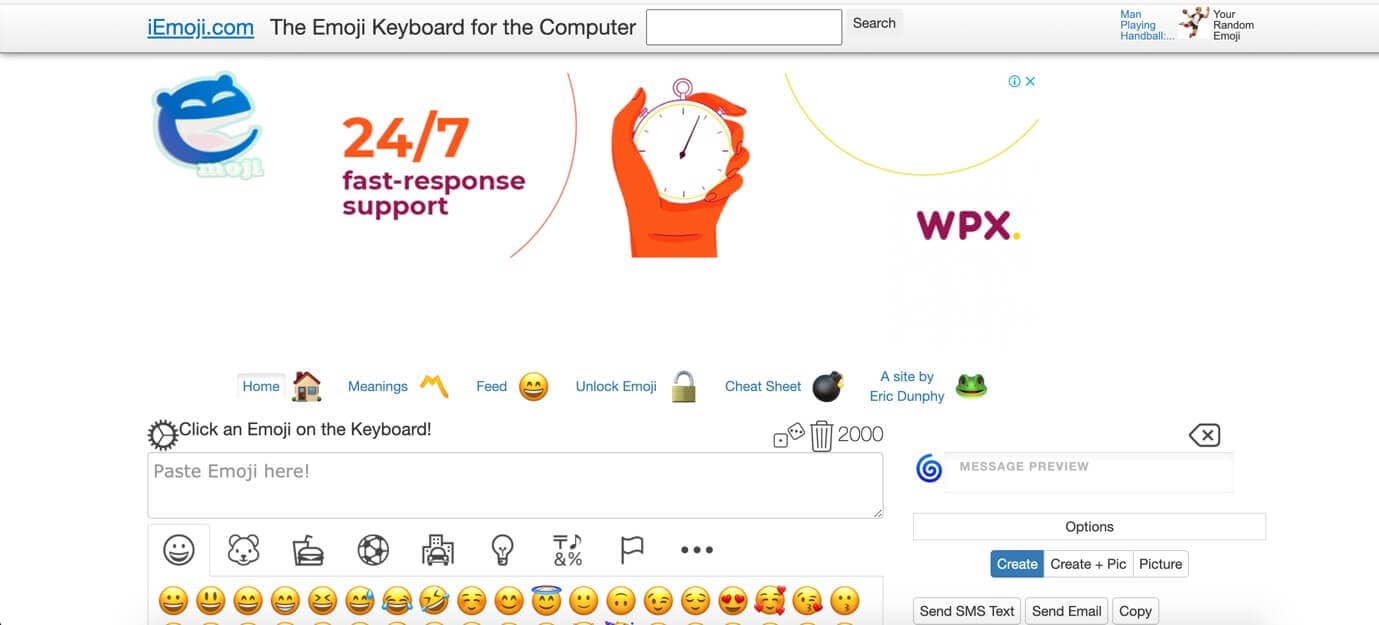
5. Emojipedia
Emojipedia is another bible for emoji lovers, as the name suggests the interface of this website is quite like Wikipedia and you can get a huge library of emojis in different categories. The best part about this website is the categorization based on the platforms you are using or the device that you are running an app on. Emojipedia updates its database and you can find the Unicode version if you are looking for one. Overall, this website is quite technical and you can get all the emojis and technical items related to emojis if you are looking for one.

6. Copy and Paste Emoji
Copy and Paste Emoji is an emoji website where you will get a huge collection of emojis to use on your chat windows that would certainly amaze your friends and loved ones. As the name suggests, you can copy and paste emojis to your social media channels from this website. This website has a huge collection of emojis and all the images are listed on the main page so that it’s easy to navigate and you can copy-paste the emojis on all the devices as this website is supported by Windows, iOS, Android, and macOS.
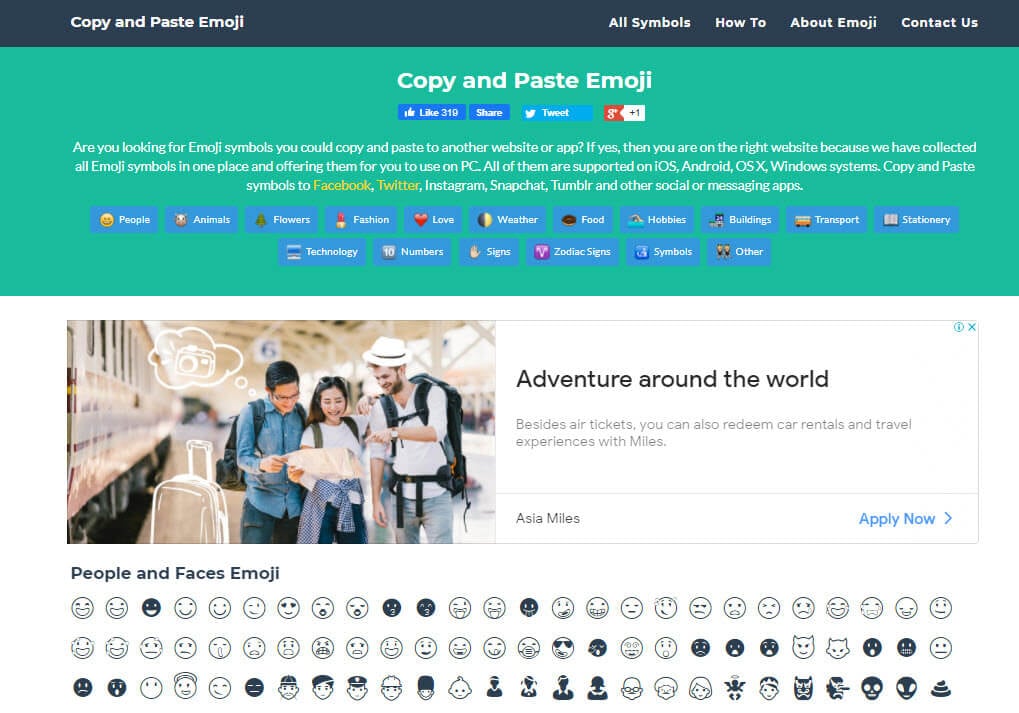
7. Emojiterra
Emojiterra is an emoji website with a collection of over 3304 emojis and images with their meanings. The website has a smooth interface where you can use the online keyboard to type the message and add emojis to it and later on you can copy-paste that message on your social media chats or captions. Apart from English, the website is available in 5 different languages and that makes this website stand out among its competitors.
8. Emojiforu
Emojiforu is a good website for emojis and messages created using many emojis in a chatbox. If you are looking for some cool emojis and the long text messages that are created using some keyboard shortcuts, then this is the website that you are looking for. You can easily copy and paste any emoji that you like to your social media profiles. On this website, you will get some of the best emojis directly copied on your chat windows as the website also provides some cool tips on how you can create emojis on your chat windows with some simple buttons on your keyboard.
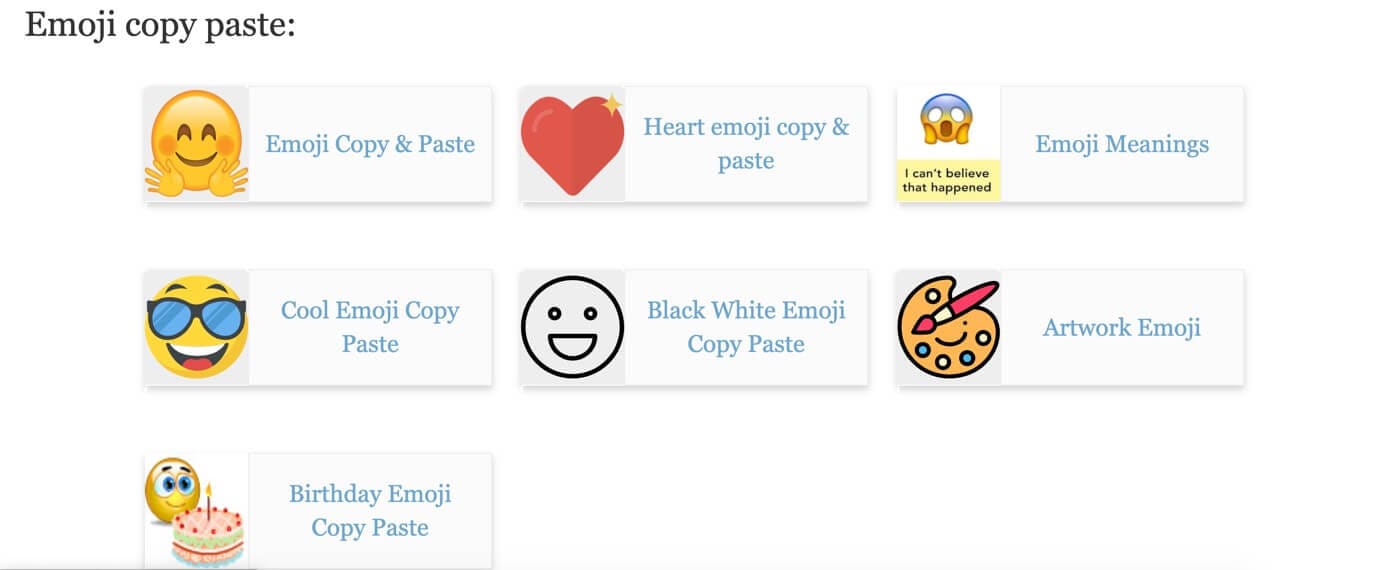
9. Coolsymbol
Coolsymbol is a great website for emojis and other features that includes cool fonts, text decorator, big text generator, character counter, etc. There are a lot of features on this website that would certainly make you happy. Just create the best art and copy it to the social media platform that you are using. No doubt, this website has some great features that are really nice to use.

10. Joypixels
Joypixels is another great website that recently got rebranded in the emoji industry. Like the other websites listed this website also allows you to copy and paste cool emojis but there is one better feature that makes it stand apart and that is the chrome extension. You can download the jo pixel chrome extension and the rest is history. Now, if you are surfing social media sites from your browser then you don’t need to wait and worry, the chrome extension has all the features to serve your purpose.
![]()
Add Emojis to Your Video with Wondershare Filmora
Wondershare Filmora is a powerful video editing tool that comes with inbuilt effects that helps a professional to create amazing videos with the features it has. The most powerful feature it has includes the transitions, filters, motion elements, blending modes, and a free media library to soundtrack to your clips. Filmora comes in handy with some great features like 3D LUTs and Advanced color correction to give sharp look to your video and image files. These are just selected features that are mentioned here, there are unlimited features on the dashboard that would certainly amaze you.
1. Download and install Filmora on your computer.
2. Open Filmora, import your video to the Filmora media library and drag the video clip on the timeline that you want to edit with emojis.
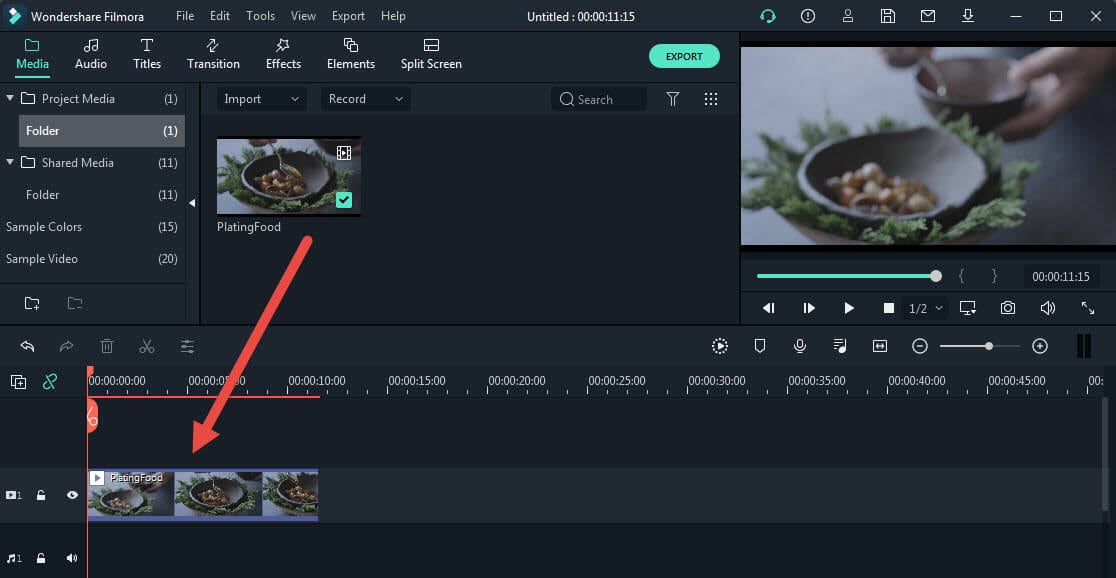
3. Now, navigate to the Elements tab, then go to Included-Emoji, and you can download free emojis and add it to your video.

4. Or you can access Wondershare Filmstock (Filmora’s effects store) to download the free animated emoji pack to get more animated emojis.
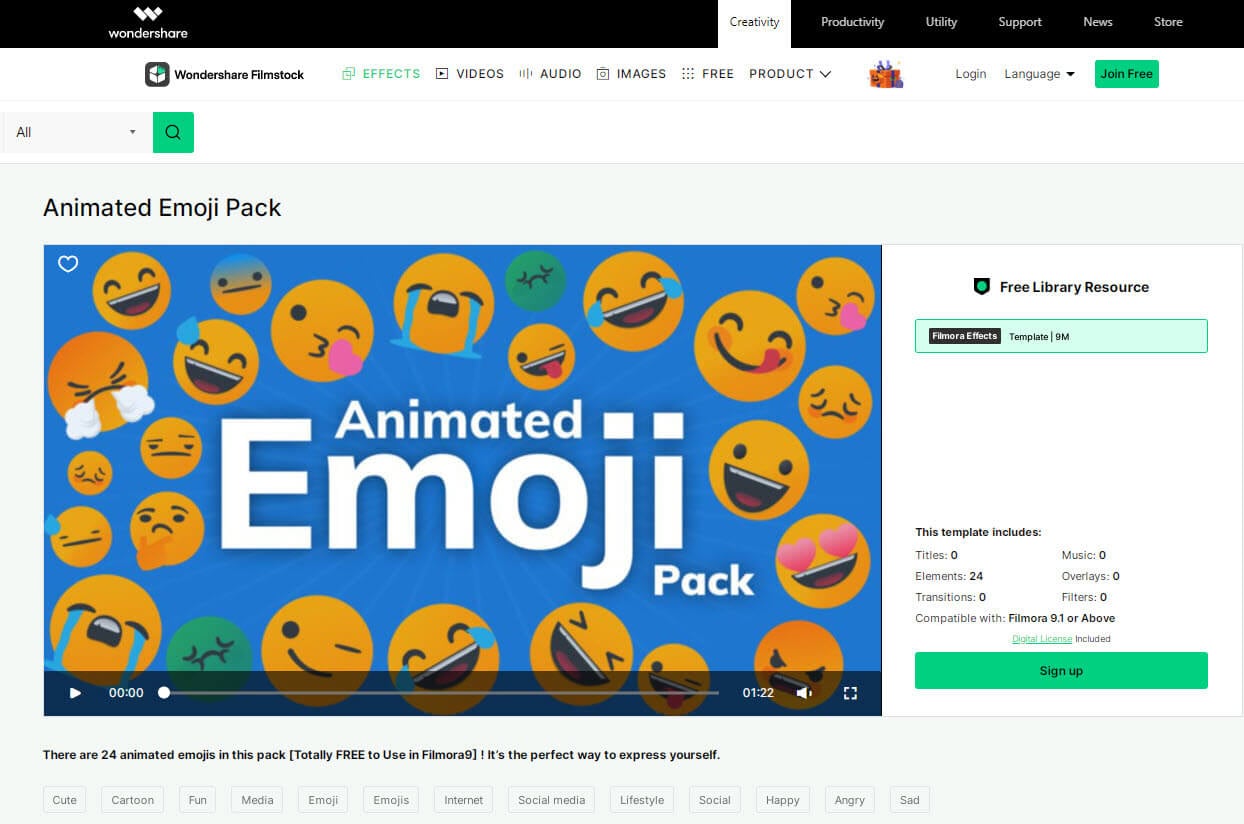
5. Then simply add the emoji to the timeline. You can resize, rotate, color tune the emoji, or even add two or more emojis to the video as you like.
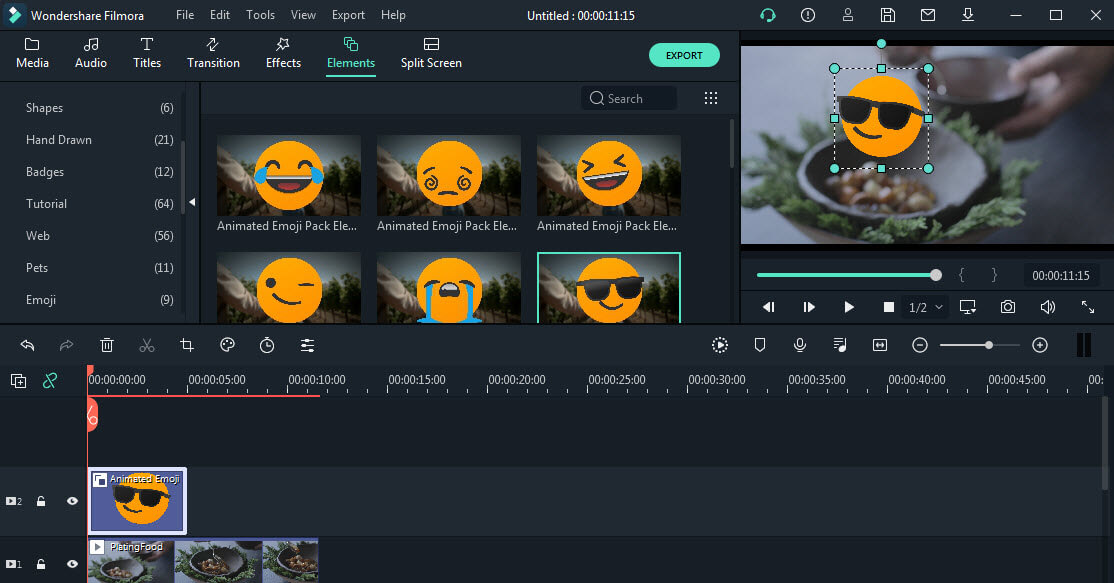
6. Once done, click the Export button to export the video to your local device, or you can upload it to YouTube directly.

Bonus tip: Create an Animation Video with Anireel
Anireel provides a faster and smoother animated video creation experience with customizable elements to bring anyone’s imagination to life. All you have to do is choose your script, input the content, and Anireel will instantly match your script to rich animation explainer scenes, convert the text into voice-over, and generate a vivid, complete animation video.

Conclusion
Emoji websites are hard to find and it’s even harder to find a website that allows you to download emojis and save emojis for later use. The guide has been great and there are 10 websites that you can utilize to get emojis, fonts, text decorators, and whatnot, and to make the social media integration easy for you because when you are chatting with a friend and a good line needs some decoration then no one can do that better than emojis. So, what are you waiting for, just go and check out these websites and let us know in the comment section about your favorite website?
Shanoon Cox
Shanoon Cox is a writer and a lover of all things video.
Follow @Shanoon Cox
Shanoon Cox
Mar 27, 2024• Proven solutions
With the rise of social media and online conversations gifs, emojis, memes have taken a huge slot. A lot could be expressed without typing a word, just send an emoji and it will do everything for you on that chat. Sometimes we need a collection of emoji and we try to download emojis so that we can use them frequently without searching for them, a right emoji at the right time can do wonders. People today are very curious about sending many thoughts in one word so no one can do that but emojis. In this guide, you will learn about the best emoji websites and how can you download emojis for free on your device to use them later.
Table of Content:
- 10 Free Emoji Websites to Download/Get Emojis Online
- Add Emojis to Your Video with Wondershare Filmora
10 Free Emoji Websites to Download/Get Emojis Online
Now, you are all set to get the best emoji websites to download emojis and save them on your device and use them for a brilliant sense of humor. These emoji websites are specially curated and tested so that you don’t have to think twice before making an effort.
- 1. Getemoji
- 2. Pixabay
- 3. Emojicopy
- 4. iemoji
- 5. Emojipedia
- 6. Copy and Paste Emoji
- 7. Emojiterra
- 8. Emojiforu
- 9. Coolsymbol
- 10. Joypixels
1. Getemoji
Getemoji a great emoji website to copy and paste and save emojis on your social media profiles. Be it our computer or mobile phone get emoji is compatible with all the operating systems and Chrome browsers. You can go to the website and scroll through thousands of free emojis to select from and copy the best emoji to your chats and captions to create an impact.
2. Pixabay
Pixabay is primarily an image website where you can download images of all kinds depending upon your requirement. Now, the emoji on this website are available in a huge quantity where you need to search for the best emoji and you will get the high-resolution emoji that you can download, save or copy-paste directly to the chat or caption on your social media channels.
3. Emojicopy
Emojicopy is another website where you can find the best emoji and copy them to your chats and caption text easily from the browser. Emojicopy is just like other websites where you can get a lot of emojis to choose from and select one. Though it’s a simple website the thumbnail option on the header section makes it easier to navigate through a lot of different emojis on this website.
4. iemoji
iemoji is something different from all the other websites that you have surfed until as it has some unique features to rely on. You can select the best emoji and tweak its skin tone and theme type before you use it on your social media channels. The best part about this website is that it provides the feature of sending an emoji as SMS and email to anyone and that is something brilliant when it comes to sharing.
5. Emojipedia
Emojipedia is another bible for emoji lovers, as the name suggests the interface of this website is quite like Wikipedia and you can get a huge library of emojis in different categories. The best part about this website is the categorization based on the platforms you are using or the device that you are running an app on. Emojipedia updates its database and you can find the Unicode version if you are looking for one. Overall, this website is quite technical and you can get all the emojis and technical items related to emojis if you are looking for one.
6. Copy and Paste Emoji
Copy and Paste Emoji is an emoji website where you will get a huge collection of emojis to use on your chat windows that would certainly amaze your friends and loved ones. As the name suggests, you can copy and paste emojis to your social media channels from this website. This website has a huge collection of emojis and all the images are listed on the main page so that it’s easy to navigate and you can copy-paste the emojis on all the devices as this website is supported by Windows, iOS, Android, and macOS.
7. Emojiterra
Emojiterra is an emoji website with a collection of over 3304 emojis and images with their meanings. The website has a smooth interface where you can use the online keyboard to type the message and add emojis to it and later on you can copy-paste that message on your social media chats or captions. Apart from English, the website is available in 5 different languages and that makes this website stand out among its competitors.
8. Emojiforu
Emojiforu is a good website for emojis and messages created using many emojis in a chatbox. If you are looking for some cool emojis and the long text messages that are created using some keyboard shortcuts, then this is the website that you are looking for. You can easily copy and paste any emoji that you like to your social media profiles. On this website, you will get some of the best emojis directly copied on your chat windows as the website also provides some cool tips on how you can create emojis on your chat windows with some simple buttons on your keyboard.
9. Coolsymbol
Coolsymbol is a great website for emojis and other features that includes cool fonts, text decorator, big text generator, character counter, etc. There are a lot of features on this website that would certainly make you happy. Just create the best art and copy it to the social media platform that you are using. No doubt, this website has some great features that are really nice to use.
10. Joypixels
Joypixels is another great website that recently got rebranded in the emoji industry. Like the other websites listed this website also allows you to copy and paste cool emojis but there is one better feature that makes it stand apart and that is the chrome extension. You can download the jo pixel chrome extension and the rest is history. Now, if you are surfing social media sites from your browser then you don’t need to wait and worry, the chrome extension has all the features to serve your purpose.
![]()
Add Emojis to Your Video with Wondershare Filmora
Wondershare Filmora is a powerful video editing tool that comes with inbuilt effects that helps a professional to create amazing videos with the features it has. The most powerful feature it has includes the transitions, filters, motion elements, blending modes, and a free media library to soundtrack to your clips. Filmora comes in handy with some great features like 3D LUTs and Advanced color correction to give sharp look to your video and image files. These are just selected features that are mentioned here, there are unlimited features on the dashboard that would certainly amaze you.
1. Download and install Filmora on your computer.
2. Open Filmora, import your video to the Filmora media library and drag the video clip on the timeline that you want to edit with emojis.
3. Now, navigate to the Elements tab, then go to Included-Emoji, and you can download free emojis and add it to your video.
4. Or you can access Wondershare Filmstock (Filmora’s effects store) to download the free animated emoji pack to get more animated emojis.
5. Then simply add the emoji to the timeline. You can resize, rotate, color tune the emoji, or even add two or more emojis to the video as you like.
6. Once done, click the Export button to export the video to your local device, or you can upload it to YouTube directly.
Bonus tip: Create an Animation Video with Anireel
Anireel provides a faster and smoother animated video creation experience with customizable elements to bring anyone’s imagination to life. All you have to do is choose your script, input the content, and Anireel will instantly match your script to rich animation explainer scenes, convert the text into voice-over, and generate a vivid, complete animation video.
Conclusion
Emoji websites are hard to find and it’s even harder to find a website that allows you to download emojis and save emojis for later use. The guide has been great and there are 10 websites that you can utilize to get emojis, fonts, text decorators, and whatnot, and to make the social media integration easy for you because when you are chatting with a friend and a good line needs some decoration then no one can do that better than emojis. So, what are you waiting for, just go and check out these websites and let us know in the comment section about your favorite website?
Shanoon Cox
Shanoon Cox is a writer and a lover of all things video.
Follow @Shanoon Cox
Best Photo Slideshow Maker: How to Make a Photo Slideshow [2023 Update]
Best Photo Slideshow Maker: How to Make a Photo Slideshow
Shanoon Cox
Mar 27, 2024• Proven solutions
Have you ever taken so many photos for your family, friends and special events? One fun-filled way of sharing them is to make a photo slideshow. That helps back up the memories in your life. What’s more, it can all be done in just a few simple clicks if you use slideshow maker like DVD Slideshow Builder Deluxe . With this programs, you can easily weave photos and video into work of art to amaze anyone. Here let’s see how to easily and creatively make a photo slideshow and burn to DVD with these all-in-one slideshow tools.
Download and run DVD slideshow builder , then follow the steps below to see how to make a photo slideshow.
Ways for Photo Slidehow making
Step 1. Add photo or video files to the photo slideshow maker
After running the photo slideshow maker, you’ll start from the “Organize” tab. On the interface, there are two Add Files buttons any of which you can click to add your photos and videos. Then just drag and drop photos or videos to arrange their order on storyboard. If you want to edit the photos, click “Edit” to add effects, crop photos, repair red-eye or add caption.
Tip: To have a large viewe of all the files, click the “Expand” button on top right corner of storyboard.
Step 2. Customize the slideshow like background music and transitions
When importing your files, more than 100 transition effects will be randomly and automatically applied between every two photo or video. However, you can change them anytime in the “Personalize” tab. Just drag and drop a transition from the list to the thumbnail between two slides. You can also add effects, motion or intro/credit as you like.
Adding music can greatly enhance the vibe of your photo slideshow. To achieve this, click “Music” on the storyboard. This photo slideshow maker enables you to add several different pieces of music according to your needs. If you want to add your own voice, just click “Voice Over” to record and then add it to the slideshow.
Step 3 Create photo slideshow and burn to DVD

Go to the “Create” tab and click the “Preview” button to make sure the photo slideshow is good enough. Go back to Personalize tab to change if necessary. When you are happy with the result, choose the options on the left to export photo slideshow to DVD, PC, portable devices, etc. You can also directly upload slideshow to Youtube and send message to Facebook and Twitter friends.
Now sit back and relax, it’ll only take a while to get your photo slideshow for sharing anywhere.
Shanoon Cox
Shanoon Cox is a writer and a lover of all things video.
Follow @Shanoon Cox
Shanoon Cox
Mar 27, 2024• Proven solutions
Have you ever taken so many photos for your family, friends and special events? One fun-filled way of sharing them is to make a photo slideshow. That helps back up the memories in your life. What’s more, it can all be done in just a few simple clicks if you use slideshow maker like DVD Slideshow Builder Deluxe . With this programs, you can easily weave photos and video into work of art to amaze anyone. Here let’s see how to easily and creatively make a photo slideshow and burn to DVD with these all-in-one slideshow tools.
Download and run DVD slideshow builder , then follow the steps below to see how to make a photo slideshow.
Ways for Photo Slidehow making
Step 1. Add photo or video files to the photo slideshow maker
After running the photo slideshow maker, you’ll start from the “Organize” tab. On the interface, there are two Add Files buttons any of which you can click to add your photos and videos. Then just drag and drop photos or videos to arrange their order on storyboard. If you want to edit the photos, click “Edit” to add effects, crop photos, repair red-eye or add caption.
Tip: To have a large viewe of all the files, click the “Expand” button on top right corner of storyboard.
Step 2. Customize the slideshow like background music and transitions
When importing your files, more than 100 transition effects will be randomly and automatically applied between every two photo or video. However, you can change them anytime in the “Personalize” tab. Just drag and drop a transition from the list to the thumbnail between two slides. You can also add effects, motion or intro/credit as you like.
Adding music can greatly enhance the vibe of your photo slideshow. To achieve this, click “Music” on the storyboard. This photo slideshow maker enables you to add several different pieces of music according to your needs. If you want to add your own voice, just click “Voice Over” to record and then add it to the slideshow.
Step 3 Create photo slideshow and burn to DVD
Go to the “Create” tab and click the “Preview” button to make sure the photo slideshow is good enough. Go back to Personalize tab to change if necessary. When you are happy with the result, choose the options on the left to export photo slideshow to DVD, PC, portable devices, etc. You can also directly upload slideshow to Youtube and send message to Facebook and Twitter friends.
Now sit back and relax, it’ll only take a while to get your photo slideshow for sharing anywhere.
Shanoon Cox
Shanoon Cox is a writer and a lover of all things video.
Follow @Shanoon Cox
Also read:
- [New] 2024 Approved Can You Store High-Quality Videos in 128Gb?
- [New] Content Strategy Unleashed - Top 8 YouTube Ranks Explored
- [New] The Ultimate Blueprint for Seamless Eco-Screen Integration
- [Updated] Giggle Galaxy Most Shared Content on Both Platforms for 2024
- Get More From Your Garden Getaways This Memorial Day – Find Outdoor Televisions on Sale at Walmart | Tips for Top-Tier Setup.
- How to Add Emojis To Discord for 2024
- How To Become A Travel Vlogger | The Ultimate Guide of Travel Vlogging
- Is ChatGPT a Viable Tool for Error-Checking Written Material?
- New 2024 Approved Top 10 Best Free Manga Sites to Read Online
- New Best 10 Emoji Apps to Emoji Yourself-Make an Emoji of Yourself for 2024
- New In 2024, How to Make a Funny Meme on MacBook
- Step-by-Step Guide to Correcting the Persistent Minecraft Error: Exiting with Code Zero
- Updated 2024 Approved Best Emoji Removers to Remove Emojis From Pictures Online/PC/Mobile
- Updated How to Make a iMovie Photo Slideshow with Music, In 2024
- Updated How to Make Memes with White Background Step by Step
- Title: Updated In 2024, How to Burn Photos to DVD with Transitions and Music
- Author: Jan
- Created at : 2025-02-14 18:31:14
- Updated at : 2025-02-19 18:05:23
- Link: https://meme-emoji.techidaily.com/updated-in-2024-how-to-burn-photos-to-dvd-with-transitions-and-music/
- License: This work is licensed under CC BY-NC-SA 4.0.