
Updated In 2024, How to Add Bitmoji to Keyboard? Complete Guide
How to Add Bitmoji to Keyboard? [Complete Guide]
Emojis have made it so much better for people to express themselves. Let’s say someone compliments you on a chat app; you can use a smiley emoji to tell that you are happy. At the same time, an angry emoji lets you express that you are angry.
Apart from the generic emojis that you can find in your chat applications, Bitmoji enables you to customize your character and share it with people you chat with. Bitmoji is fun, but do you know how to add it to a keyboard? If you don’t, don’t worry, this post will help you understand how to do that.
In this article
02 How to Add and Use Bitmoji to iPhone Keyboard?
03 How to Get the Bitmoji Keyboard on Android?
04 How to Install and Use Bitmoji on Windows and Mac?
Part 1: What is Bitmoji?
If you are new to Bitmoji, you may wonder what it is? Bitmoji is essentially your own personal emoji. You can create a cartoon version of yourself and share it with people to make the conversation fun. So, what one does is create an avatar of themselves and give it all kinds of expressions.
Then, you can create comics using your Bitmoji, use it to express yourself while having a chat, and even use it as a reaction. Anyone who is done using the same old emojis has started using Bitmoji because it’s a lot more fun.
Now, let’s learn how to create your very own Bitmoji.
Step 1: First, go to the App Store or Play store and download the Bitmoji application.
Step 2: Once downloaded, launch the app and start making an avatar or your Bitmoji.
Step 3: Pick a skin color, hair color, chin, nose, hairstyle, jawline, and more.

Once your Bitmoji is created, you are all set to use the Bitmoji as stickers. Moreover, the app lets you dress your Bitmoji as you want as well. Let it have different expressions and postures because that’s how it’s going to be fun! After your Bitmoji is added, the next thing to do is enable Bitmoji on the keyboard of the device you are using.
Part 2: How to Add and Use Bitmoji to iPhone Keyboard?
Since you have learned how to create a Bimoji, it’s time to learn the steps to use it on your iPhone keyboard. Unfortunately, just by downloading the app, it won’t reflect on the keyboard directly. Instead, you will have to follow a few steps to add Bitmoji to the keyboard. Here’s what you need to do.
Step 1: Launch your iPhone and click on the Settings option.
Step 2: Now, go to the General option and click on the Keyboard option.

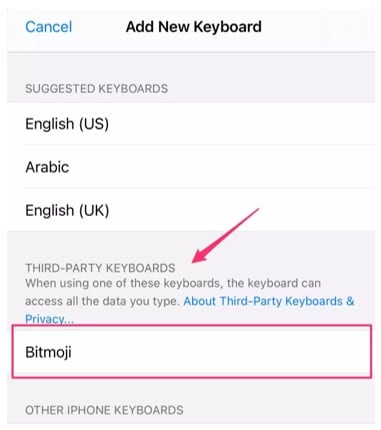
Step 3: When the Keyboard page opens, click on the option that says Keyboards and then click on Add New Keyboard.
Step 4: You will see the Third Party Keyboards option. There, you need to click on Bitmoji.
Step 5: Now, toggle the option that says Allow Full Access. Once you do that, you will see a small pop-up. Click on the Allow option.
And that’s it. Bitmoji will be added to the iPhone keyboard. Open any messaging app and click on the globe and hold it for a few seconds. When you see Bitmoji, click on that, and you will be able to use Bitmoji stickers.
Part 3: How to Get the Bitmoji Keyboard on Android?
Bitmoji is available for Android users as well. Before you begin to use it, go through the first part again and download the app. Then create your Bitmoji, as explained earlier. You can send Bitmojis directly from the app itself, but if you plan to use Bitmoji regularly, getting the Bitmoji keyboard makes sense. So, once you are done, follow the following steps to get the Bitmoji keyboard on Android.
Step 1: Launch the Bitmoji app. Click on the Keyboard option that you see at the bottom of the Bitmoji app screen.
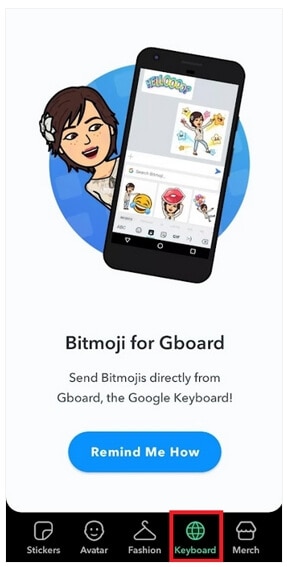
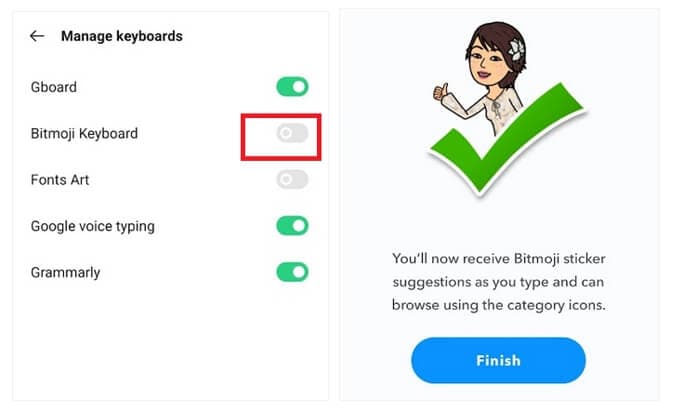
Step 2: Install Bitmoji keyboard and give permission to your phone to use Bitmoji keyboard. Bitmoji will notify you when the Bitmoji keyboard gets activated.
You are all done. Now, use the Bitmoji keyboard to chat with your family members and friends and make everything fun and exciting.
Part 4: How to Install and Use Bitmoji on Windows and Mac?
If you want to use Bitmoji on Windows and Mac, you will have to use the Google Chrome browser. If you already have the Google Chrome browser, carry on with the steps explained below; otherwise, get the browser before starting.
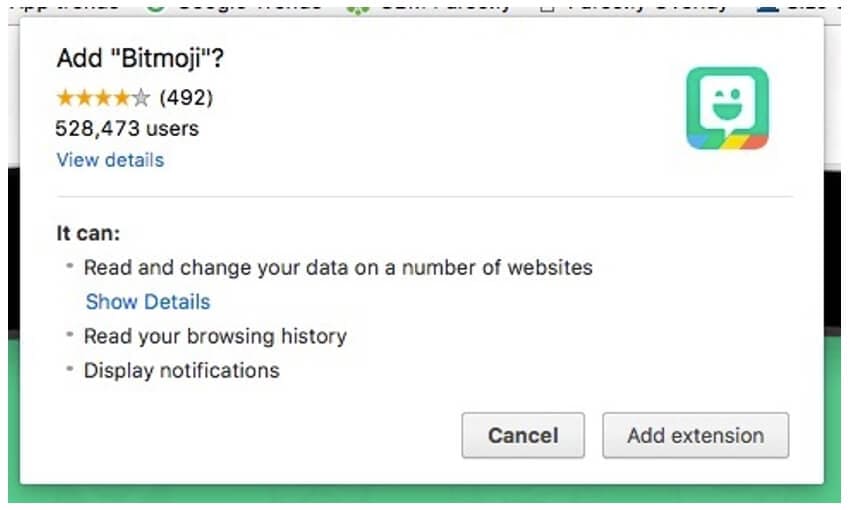
Step 1: Go to Chrome Extension and install Bitmoji for Chrome Extension.
Step 2: You will have to sign in to Bitmoji. If you want to add Bitmoji to Gmail, click on add Bitmoji to Gmail.
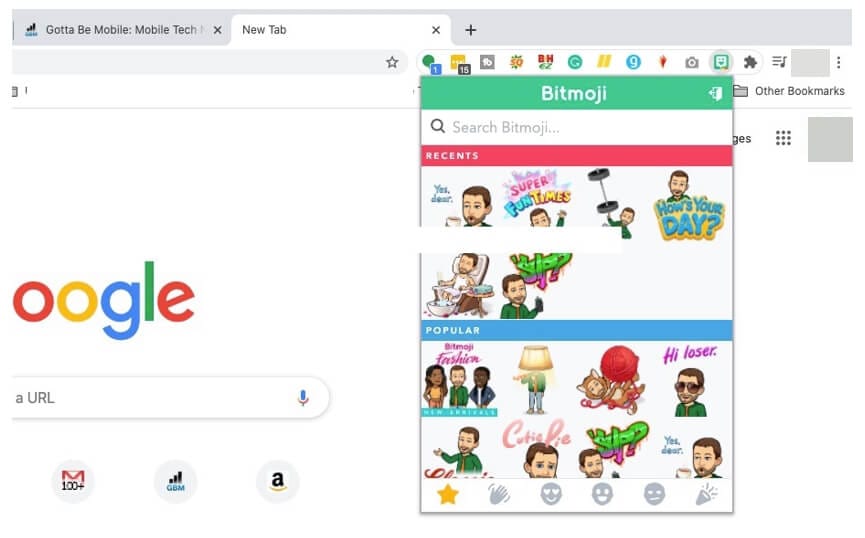
After you are done following the three easy steps, you will see Bitmoji is installed. To start using it, move the cursor to the upper corner of the browser and click on the Bitmoji icon. Next, you will see the Bitmojis. Choose any Bitmoji, copy it, and paste it on Gmail or instant messaging applications.
Part 5: Where can You Use Bitmoji?
Bitmojis can be used on different platforms. All you need to do is enable Bitmoji keyboard on your iPhone or Android phone or Windows and Mac computers and use it on various social media platforms. For example, use Snapchat to send Bitmojis for different types of occasions.
If you are an iPhone user, you can share fun Bitmojis through iMessage. On a computer, you can use these Bitmojis on Facebook or other instant messaging platforms. You can drag and drop the Bitmoji sticker or copy it to share it with your friends.
If you are a working professional and want to lighten the mood of your Slack workspace, use Bitmojis to make your coworkers feel relaxed. Plus, this can be a great way to make someone feel pumped up. Like that, there are many other platforms to use Bitmojis!
Related: Best Free Apps to Get Emojis on iPhone and Android
Conclusion
So, there you go. We have finally reached the end of this guide. We hope you have found this post interesting and will face no hassle using the Bitmoji keyboard on different devices. Get the Bitmoji app if you haven’t downloaded it yet and make your conversations fun and enjoyable!
02 How to Add and Use Bitmoji to iPhone Keyboard?
03 How to Get the Bitmoji Keyboard on Android?
04 How to Install and Use Bitmoji on Windows and Mac?
Part 1: What is Bitmoji?
If you are new to Bitmoji, you may wonder what it is? Bitmoji is essentially your own personal emoji. You can create a cartoon version of yourself and share it with people to make the conversation fun. So, what one does is create an avatar of themselves and give it all kinds of expressions.
Then, you can create comics using your Bitmoji, use it to express yourself while having a chat, and even use it as a reaction. Anyone who is done using the same old emojis has started using Bitmoji because it’s a lot more fun.
Now, let’s learn how to create your very own Bitmoji.
Step 1: First, go to the App Store or Play store and download the Bitmoji application.
Step 2: Once downloaded, launch the app and start making an avatar or your Bitmoji.
Step 3: Pick a skin color, hair color, chin, nose, hairstyle, jawline, and more.
Once your Bitmoji is created, you are all set to use the Bitmoji as stickers. Moreover, the app lets you dress your Bitmoji as you want as well. Let it have different expressions and postures because that’s how it’s going to be fun! After your Bitmoji is added, the next thing to do is enable Bitmoji on the keyboard of the device you are using.
Part 2: How to Add and Use Bitmoji to iPhone Keyboard?
Since you have learned how to create a Bimoji, it’s time to learn the steps to use it on your iPhone keyboard. Unfortunately, just by downloading the app, it won’t reflect on the keyboard directly. Instead, you will have to follow a few steps to add Bitmoji to the keyboard. Here’s what you need to do.
Step 1: Launch your iPhone and click on the Settings option.
Step 2: Now, go to the General option and click on the Keyboard option.
Step 3: When the Keyboard page opens, click on the option that says Keyboards and then click on Add New Keyboard.
Step 4: You will see the Third Party Keyboards option. There, you need to click on Bitmoji.
Step 5: Now, toggle the option that says Allow Full Access. Once you do that, you will see a small pop-up. Click on the Allow option.
And that’s it. Bitmoji will be added to the iPhone keyboard. Open any messaging app and click on the globe and hold it for a few seconds. When you see Bitmoji, click on that, and you will be able to use Bitmoji stickers.
Part 3: How to Get the Bitmoji Keyboard on Android?
Bitmoji is available for Android users as well. Before you begin to use it, go through the first part again and download the app. Then create your Bitmoji, as explained earlier. You can send Bitmojis directly from the app itself, but if you plan to use Bitmoji regularly, getting the Bitmoji keyboard makes sense. So, once you are done, follow the following steps to get the Bitmoji keyboard on Android.
Step 1: Launch the Bitmoji app. Click on the Keyboard option that you see at the bottom of the Bitmoji app screen.
Step 2: Install Bitmoji keyboard and give permission to your phone to use Bitmoji keyboard. Bitmoji will notify you when the Bitmoji keyboard gets activated.
You are all done. Now, use the Bitmoji keyboard to chat with your family members and friends and make everything fun and exciting.
Part 4: How to Install and Use Bitmoji on Windows and Mac?
If you want to use Bitmoji on Windows and Mac, you will have to use the Google Chrome browser. If you already have the Google Chrome browser, carry on with the steps explained below; otherwise, get the browser before starting.
Step 1: Go to Chrome Extension and install Bitmoji for Chrome Extension.
Step 2: You will have to sign in to Bitmoji. If you want to add Bitmoji to Gmail, click on add Bitmoji to Gmail.
After you are done following the three easy steps, you will see Bitmoji is installed. To start using it, move the cursor to the upper corner of the browser and click on the Bitmoji icon. Next, you will see the Bitmojis. Choose any Bitmoji, copy it, and paste it on Gmail or instant messaging applications.
Part 5: Where can You Use Bitmoji?
Bitmojis can be used on different platforms. All you need to do is enable Bitmoji keyboard on your iPhone or Android phone or Windows and Mac computers and use it on various social media platforms. For example, use Snapchat to send Bitmojis for different types of occasions.
If you are an iPhone user, you can share fun Bitmojis through iMessage. On a computer, you can use these Bitmojis on Facebook or other instant messaging platforms. You can drag and drop the Bitmoji sticker or copy it to share it with your friends.
If you are a working professional and want to lighten the mood of your Slack workspace, use Bitmojis to make your coworkers feel relaxed. Plus, this can be a great way to make someone feel pumped up. Like that, there are many other platforms to use Bitmojis!
Related: Best Free Apps to Get Emojis on iPhone and Android
Conclusion
So, there you go. We have finally reached the end of this guide. We hope you have found this post interesting and will face no hassle using the Bitmoji keyboard on different devices. Get the Bitmoji app if you haven’t downloaded it yet and make your conversations fun and enjoyable!
How to Make an Adorable Video for Your Baby’s First Year
How to Make an Adorable Video for Your Baby’s First Year

Ollie Mattison
Mar 27, 2024• Proven solutions
Your baby grows up very fast and being able to see him grow is maybe one of the most interesting and exciting moments in your life. Documenting the first year is amazing and it will surely offer you an extraordinary value so try to do that the best way you can. Imagine how touched your child would be when he/she, at the age of 18, watch something like this:
How to make the baby’s first year video
Filming tips
Shooting a good baby’s first year video can take a little bit of preparation and it will surely offer you an extraordinary experience in the long run. It will also help offer you an incredible value to begin with which is always impressive.
Stabilize the camera - The first thing you need to do is to stabilize the camera. Using a tripod can be the best option here so take your time and results will be great for sure. Of course, placing the camera on your counter will also help, so try to keep that in mind as it can indeed be a very good option to begin with.
Lighting - You will also have to play with the proper lighting setup. A good light will help you get much better results and even though it can take some time to get the best experience, it really is a truly amazing option that you do not want to miss.
Focus - Of course, focus on the baby. Yes, focus but don’t zoom in and out all the time. Find a good pattern that will help keep the baby steady and do all in your power to get the best results. Granted, it will take some time to get good results but don’t rush it otherwise the experience will not be as good as you would expect.
Audio - Moreover, audio should be your focus here as well. Take the time and do something good here, a good audio will always pay off very well so get a good audio setup if you want to obtain a stellar experience.
Props - Also, we recommend you to use props. These can really make a good video and they will even add in some much needed fun to your setup. Try to find the best possible props and add them in your video. Some good prop examples would be a stuffed animal, a toy, maybe even the family pet. All of these are great and well worth your time.
Editing tips
Once you finished capturing the movie, you will have to go to editing. This is where you have to use a good video editing tool that will help provide a good baby’s first year video in the end. With that in mind, Wondershare Filmora can be the tool of choice as it offers you all the features you need in order to create a good baby video.
=“” style=”width: 100%; height: 278.438px;”;
 Download Mac Version ](https://tools.techidaily.com/wondershare/filmora/download/ )
Adjust saturation - You should try to use the app in order to adjust the saturation as this can lead to some very bad results if you’re not careful. Find the proper saturation levels and opt for them right away.
Trim, cut, or split - If needed, split, cut or even trim the video. There will be times when you will need the reversing effect as well. All of these effects are accessible via the Wondershare Filmora video app.
Advanced editing - Plus, you will also need to apply a green screen effect as this will help you place your baby in a variety of funny locations, be it a funny MV or a Hollywood movie. The app can also help you clone the baby with PIP effects and you can also use it to add filters, overlays or text.
Wondershare Filmora will offer you an extraordinary set of tools and it will bring in front a very good value right from the start. The interface of the app is user friendly and you will have no problem using it as you see fit. Also, you can create the baby’s first year video on both Mac and Windows as the app supports both platforms. It also delivers immediate support for camcorders and smartphones so you can use any device you want for video capture. With its help you can share videos to DVD or YouTube too if you so desire. Don’t hesitate and access this great tool as fast as possible to get a good outcome!
Ollie Mattison
Ollie Mattison is a writer and a lover of all things video.
Follow @Ollie Mattison
Ollie Mattison
Mar 27, 2024• Proven solutions
Your baby grows up very fast and being able to see him grow is maybe one of the most interesting and exciting moments in your life. Documenting the first year is amazing and it will surely offer you an extraordinary value so try to do that the best way you can. Imagine how touched your child would be when he/she, at the age of 18, watch something like this:
How to make the baby’s first year video
Filming tips
Shooting a good baby’s first year video can take a little bit of preparation and it will surely offer you an extraordinary experience in the long run. It will also help offer you an incredible value to begin with which is always impressive.
Stabilize the camera - The first thing you need to do is to stabilize the camera. Using a tripod can be the best option here so take your time and results will be great for sure. Of course, placing the camera on your counter will also help, so try to keep that in mind as it can indeed be a very good option to begin with.
Lighting - You will also have to play with the proper lighting setup. A good light will help you get much better results and even though it can take some time to get the best experience, it really is a truly amazing option that you do not want to miss.
Focus - Of course, focus on the baby. Yes, focus but don’t zoom in and out all the time. Find a good pattern that will help keep the baby steady and do all in your power to get the best results. Granted, it will take some time to get good results but don’t rush it otherwise the experience will not be as good as you would expect.
Audio - Moreover, audio should be your focus here as well. Take the time and do something good here, a good audio will always pay off very well so get a good audio setup if you want to obtain a stellar experience.
Props - Also, we recommend you to use props. These can really make a good video and they will even add in some much needed fun to your setup. Try to find the best possible props and add them in your video. Some good prop examples would be a stuffed animal, a toy, maybe even the family pet. All of these are great and well worth your time.
Editing tips
Once you finished capturing the movie, you will have to go to editing. This is where you have to use a good video editing tool that will help provide a good baby’s first year video in the end. With that in mind, Wondershare Filmora can be the tool of choice as it offers you all the features you need in order to create a good baby video.
=“” style=”width: 100%; height: 278.438px;”;
Download Mac Version ](https://tools.techidaily.com/wondershare/filmora/download/ )
Adjust saturation - You should try to use the app in order to adjust the saturation as this can lead to some very bad results if you’re not careful. Find the proper saturation levels and opt for them right away.
Trim, cut, or split - If needed, split, cut or even trim the video. There will be times when you will need the reversing effect as well. All of these effects are accessible via the Wondershare Filmora video app.
Advanced editing - Plus, you will also need to apply a green screen effect as this will help you place your baby in a variety of funny locations, be it a funny MV or a Hollywood movie. The app can also help you clone the baby with PIP effects and you can also use it to add filters, overlays or text.
Wondershare Filmora will offer you an extraordinary set of tools and it will bring in front a very good value right from the start. The interface of the app is user friendly and you will have no problem using it as you see fit. Also, you can create the baby’s first year video on both Mac and Windows as the app supports both platforms. It also delivers immediate support for camcorders and smartphones so you can use any device you want for video capture. With its help you can share videos to DVD or YouTube too if you so desire. Don’t hesitate and access this great tool as fast as possible to get a good outcome!
Ollie Mattison
Ollie Mattison is a writer and a lover of all things video.
Follow @Ollie Mattison
Mocking Sponge Bob Meme Generator
Mocking Sponge Bob Meme Generator
Ollie Mattison
Mar 27, 2024• Proven solutions
The still frame taken from the episode titled ‘Little Yellow Book’ of the animated series SpongeBob SquarePants has gone viral a few years ago, and since then it has become one of the funniest memes used to mock all sorts of private and public issues. If you’d like to learn how to make the Mocking SpongeBob meme, you’ve come to the right place, because in this article we’re going to show you how you can accomplish this using Filmora Online Meme Maker .
Making The Mocking SpongeBob Meme
Attention: This post only provides the solutions to make memes for personal and non-commercial purpose. Since any redistribution without the approval of the copyright owners may violate the copyright laws, you’d better refer to the copyright laws in your country before doing so.
There are hundreds of online meme generators you can use to quickly make a great joke or depict a situation you frequently find yourself in, but a large portion of these platforms watermark your memes, which can be frustrating at times. That’s why we recommend using Filmora Online Meme Maker that lets you generate the mocking SpongeBob meme and all other types of memes for free. Here’s how to make a mocking SpongeBob meme is just a few simple steps without having to register or create an account.
Step 1 – Uploading the SpongeBob Meme Template
Filmora Meme Maker offers you 2 ways to upload images, videos, and gifs.
- Drop a file or click the + icon to upload your upload
- Enter the URL of your media file to upload
You can find the sponge bobbmeme templates on a number of platforms, such as Imgur and Know Your Meme . Or you can click the “Copy the image” link below and the image link will be copied automatically.

Copy the image
Then, go to https://filmora.wondershare.com/meme-maker/ insert the image link you just copied by press Ctrl+V, click on the Upload button to start the upload process and wait until the template is uploaded.

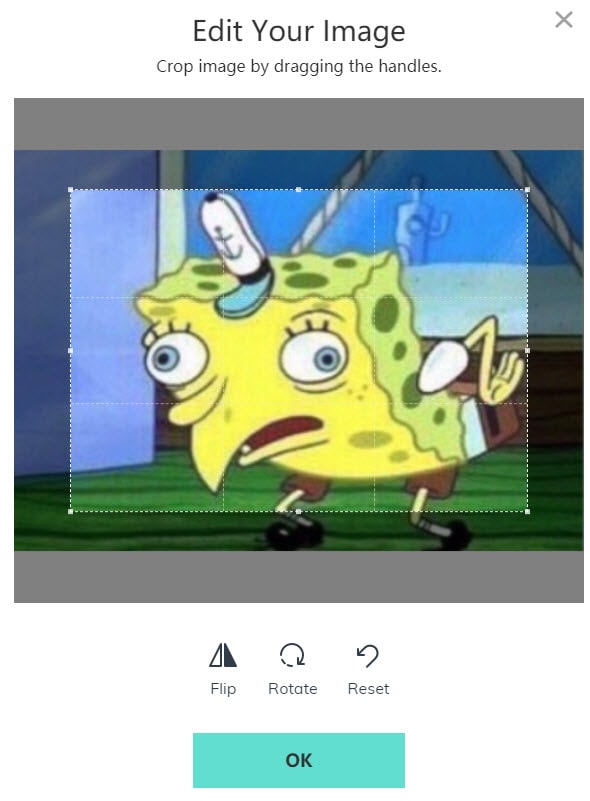
The Edit Your Image window will pop up on the screen if you decide to upload the template from a compute, so you can just drag one of the handles to crop it. If you want, you can rotate or flip the picture, before you hit the OK button.
Step 2 – Adding Text to the Meme
The Editing panel will appear on the screen, with the SpongeBob picture displayed in the middle of the screen. On the left side of the webpage, you’ll be able to see the Text Inside and Text Outside tools that let you choose the position of the text in the picture. Select the Outside Text option because a great majority of Mocking SpongeBob memes doesn’t feature text within the image. Below these tools you can find Top and Bottom text boxes, so you can just choose the position of the text and then insert it into appropriate boxes.
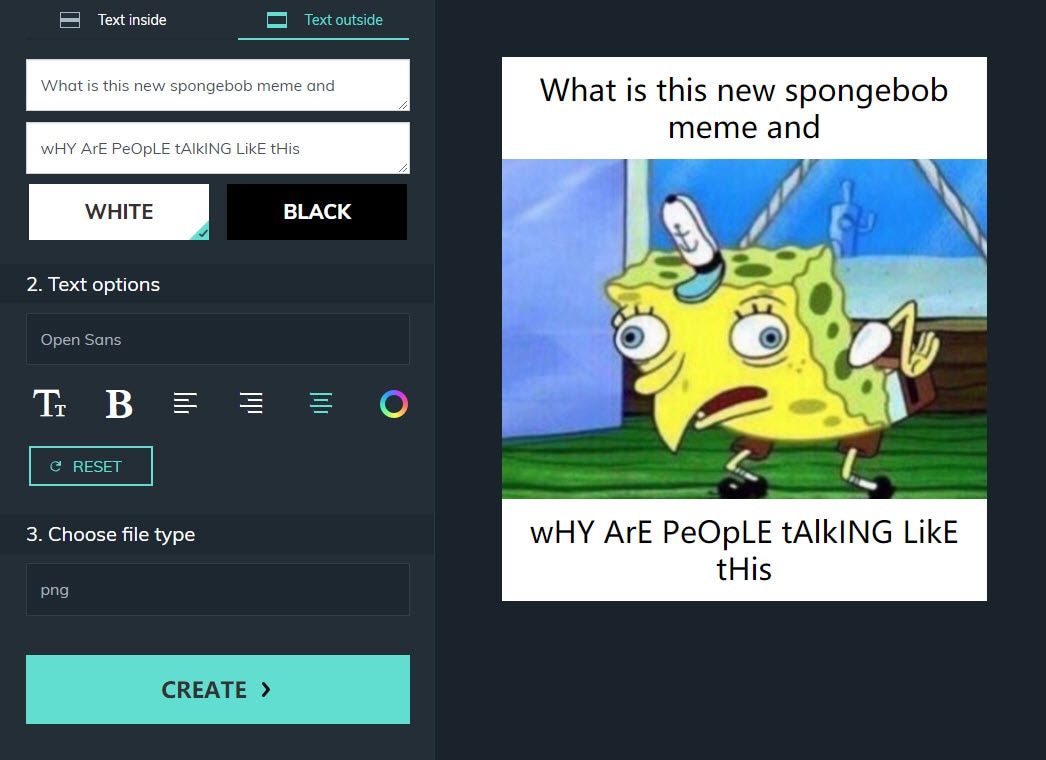
There is a lot of fonts to choose from, and you can easily select the text size, change the color of the text or align the text. After customizing the texts you can choose the file type since the Filmora Online Meme Maker lets you generate GIFs, videos and images.
Step 3 – Export and Download the Mocking SpongeBob Meme
Click on the Create button once you’re happy with the results, then click on the Download button to save it to your computer and upload it to your social media account. If you’re using a Smartphone you can tap on the Share button and select a social media platform on which you want to post your mocking SpongeBob meme.

Conclusion
Combining text and images is easy with the Filmora Online Maker since you just have to choose the position and the style of the text and download the meme. However, coming up with great jokes that will make the meme viral is up to you. What is your favorite mocking SpongeBob meme? Leave a comment below and let us know.
Ollie Mattison
Ollie Mattison is a writer and a lover of all things video.
Follow @Ollie Mattison
Ollie Mattison
Mar 27, 2024• Proven solutions
The still frame taken from the episode titled ‘Little Yellow Book’ of the animated series SpongeBob SquarePants has gone viral a few years ago, and since then it has become one of the funniest memes used to mock all sorts of private and public issues. If you’d like to learn how to make the Mocking SpongeBob meme, you’ve come to the right place, because in this article we’re going to show you how you can accomplish this using Filmora Online Meme Maker .
Making The Mocking SpongeBob Meme
Attention: This post only provides the solutions to make memes for personal and non-commercial purpose. Since any redistribution without the approval of the copyright owners may violate the copyright laws, you’d better refer to the copyright laws in your country before doing so.
There are hundreds of online meme generators you can use to quickly make a great joke or depict a situation you frequently find yourself in, but a large portion of these platforms watermark your memes, which can be frustrating at times. That’s why we recommend using Filmora Online Meme Maker that lets you generate the mocking SpongeBob meme and all other types of memes for free. Here’s how to make a mocking SpongeBob meme is just a few simple steps without having to register or create an account.
Step 1 – Uploading the SpongeBob Meme Template
Filmora Meme Maker offers you 2 ways to upload images, videos, and gifs.
- Drop a file or click the + icon to upload your upload
- Enter the URL of your media file to upload
You can find the sponge bobbmeme templates on a number of platforms, such as Imgur and Know Your Meme . Or you can click the “Copy the image” link below and the image link will be copied automatically.
Copy the image
Then, go to https://filmora.wondershare.com/meme-maker/ insert the image link you just copied by press Ctrl+V, click on the Upload button to start the upload process and wait until the template is uploaded.
The Edit Your Image window will pop up on the screen if you decide to upload the template from a compute, so you can just drag one of the handles to crop it. If you want, you can rotate or flip the picture, before you hit the OK button.
Step 2 – Adding Text to the Meme
The Editing panel will appear on the screen, with the SpongeBob picture displayed in the middle of the screen. On the left side of the webpage, you’ll be able to see the Text Inside and Text Outside tools that let you choose the position of the text in the picture. Select the Outside Text option because a great majority of Mocking SpongeBob memes doesn’t feature text within the image. Below these tools you can find Top and Bottom text boxes, so you can just choose the position of the text and then insert it into appropriate boxes.
There is a lot of fonts to choose from, and you can easily select the text size, change the color of the text or align the text. After customizing the texts you can choose the file type since the Filmora Online Meme Maker lets you generate GIFs, videos and images.
Step 3 – Export and Download the Mocking SpongeBob Meme
Click on the Create button once you’re happy with the results, then click on the Download button to save it to your computer and upload it to your social media account. If you’re using a Smartphone you can tap on the Share button and select a social media platform on which you want to post your mocking SpongeBob meme.
Conclusion
Combining text and images is easy with the Filmora Online Maker since you just have to choose the position and the style of the text and download the meme. However, coming up with great jokes that will make the meme viral is up to you. What is your favorite mocking SpongeBob meme? Leave a comment below and let us know.
Ollie Mattison
Ollie Mattison is a writer and a lover of all things video.
Follow @Ollie Mattison
FREE 10 Websites to Watch Cartoon Online in HD
FREE 10 Websites to Watch Cartoon Online in HD

Shanoon Cox
Mar 27, 2024• Proven solutions


People love watching cartoons irrespective of their age; a kid is always alive inside us, as shown by the Share of Cartoon Network Viewer by Age . Cartoons are a great stress buster and can help people relax in times of strain, especially 2D animation . However, it can be a painstaking task to find some decent free websites to watch cartoons online in HD. To facilitate your quest to find the best free sites to watch cartoons online, I’ve compiled a list of free online resources that quickly offer high-definition streaming of cartoons. And I will also show you a fantastic tool that can help you cartoon yourself.
- 15 Apps to Cartoon Yourself with Ease [iPhone & Android]
- 10 Free Websites to Watch Cartoon Online
- The 15 Best Apps to Turn Photos into Cartoons and Sketches
Here are 10 websites where you can watch cartoons online. They are listed in no particular order:
- 1. Gogoanime
- 2. YouTube
- 3. Toonjet
- 4. WatchCartoonOnline.com
- 5. KissAnime
- 6. Cartoonito
- 7. Cartoon Network
- 8. Disney Junior
- 9. Nickelodeon
- 10. Fox
1. Gogoanime
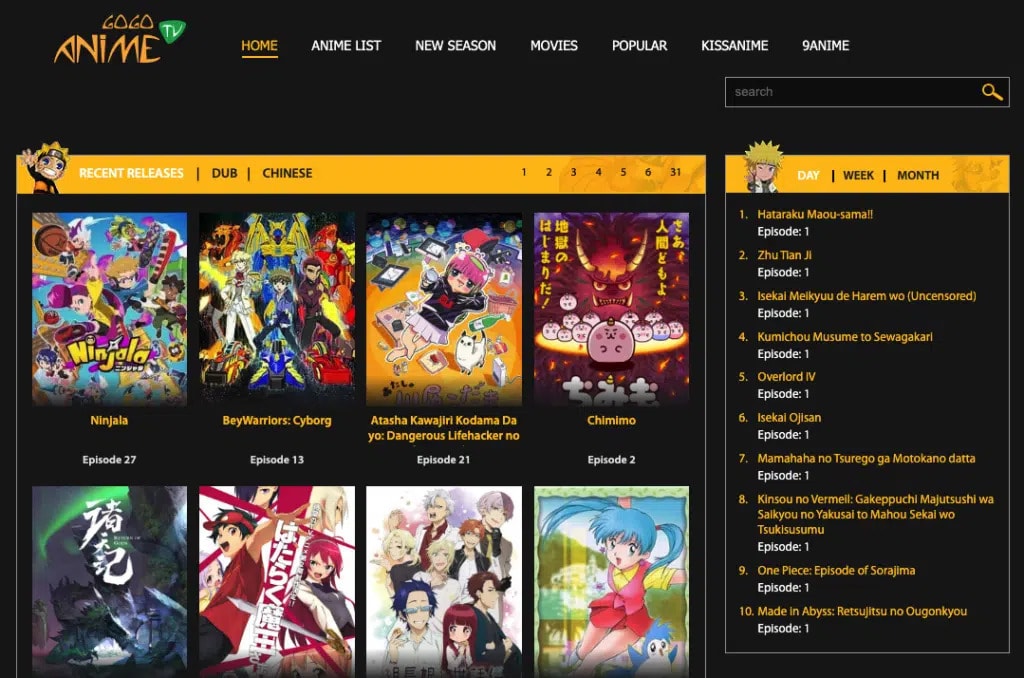
Gogoanime is a free website to watch cartoons online that allows anyone to stream their favorite cartoon in HD quality. The website has an expansive library of cartoons and makes it easier for users to just stick to a single site while sating their cartoon cravings. The website is user-friendly and can be accessed on any device, including smartphones.
Everyone has a favorite show, and at Gogoanime, you get the opportunity to watch cartoons online of your preferred choice, whether new or old. The categorization on the site is pretty impressive, allowing viewers to filter out cartoons either by the studio, character, show name, by series, and making it easier for cartoon lovers to find the cartoons of their craving.
Do I have to sign up?
No, there’s no need for any viewer to sign up before streaming. Anyone can just go to the website and view their favorite cartoon show.
Is it free?
Yes, a free website to watch cartoons.
How many types of cartoons are available?
There are limitless types of cartoons available for you to watch. You have the facility to filter out the cartoon with several parameters such as by name in the search bar, studios, and characters.
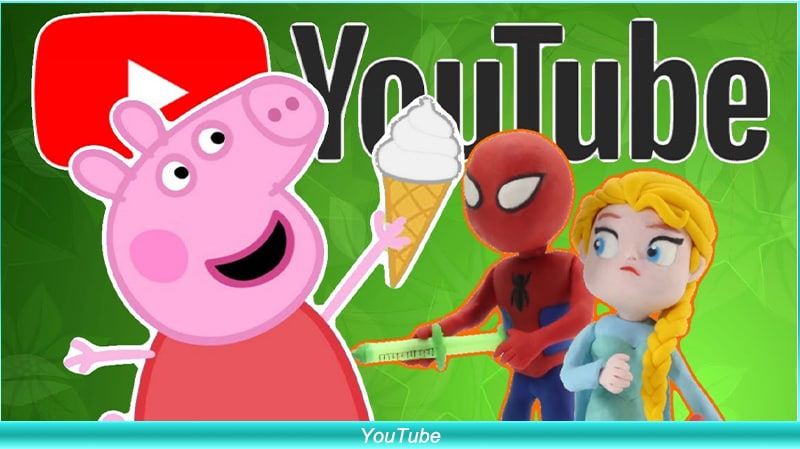
2. YouTube
Don’t forget you can also watch cartoons on YouTube, including 2D animation ! YouTube is a massive platform with an expansive cartoons library, making it a top free website to watch cartoons online. YouTube has a vast number of daily active users, crossing 30 million, and has over 5 billion videos collection. You can find any type of cartoon and all the possible categories just by searching the name or category in the YouTube search bar.
YouTube even has created a kid’s app for curating cartoons and kid-themed videos onto a separate mobile app designed for children. YouTube has collected a massive database of cartoon videos that anyone can watch for free. There are numerous dedicated channels for cartoon movies and series. You can also find animated feature films and random creative cartoons from graphic professionals around the world.
Do I need to sign up?
The site works perfectly without signing up, but if you sign up, you can resume watching cartoons where you left them last time.
Is it free?
Yes, YouTube is free for everyone. However, there’s a premium version of YouTube where you get to enjoy ad-free streaming and can even play it in the background. And be able to download all the cartoon videos.
How many types of cartoons are available?
YouTube has no limitations on the type of cartoons and has virtually every kind of cartoon you can think.
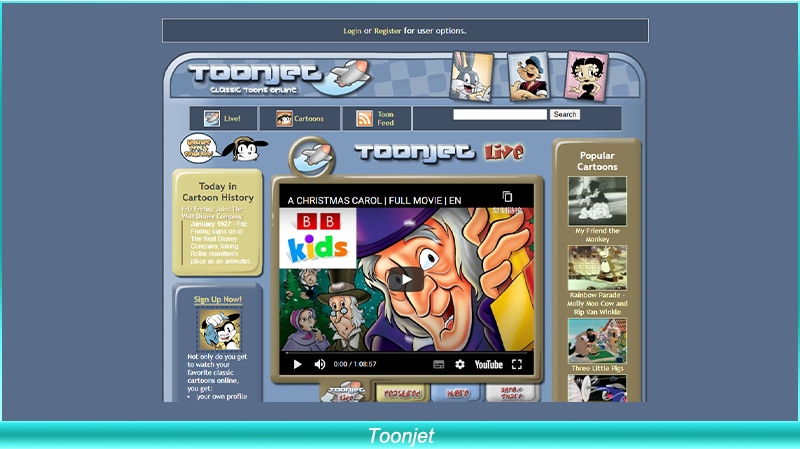
3. Toonjet
Toonjet is another free website to watch cartoons online. The website is dedicated to classic cartoon fare with all the legendary cartoons collection from Cartoon Network’s Tom and Jerry to Disney’s Mickey Mouse. The site also has a bunch of contemporary cartoons like the Pokemon and Samurai Jack series. The ToonJet site allows you to give feedback on any of the episodes and rate the cartoons.
Do I need to sign up?
There is an option to register and sign in to maintain a history of all your watched cartoons. But if you don’t want to sign up, you can still enjoy the cartoons without any limitations.
Is it free?
The Toonjet website is free, and you don’t have to pay for any subscription.
How many types of cartoons are available?
The website has a massive collection of classics. So, you will mainly find all the masterpieces from the 80’s and 90’s era.
4. WatchCartoonOnline.com
On WatchCartoonOnline, you just have to search for the cartoon you’re looking for and kaboom you can start watching your favorite cartoon online for free. The interface is highly interactive and easy to navigate. Like with any other free website, you’ll have to live with a few ads here and there. The cartoons are divided into categories like dubbed, subbed, movies, series, and other cartoon types. The website has been banned in some countries, and you will have to use a VPN to access the site.
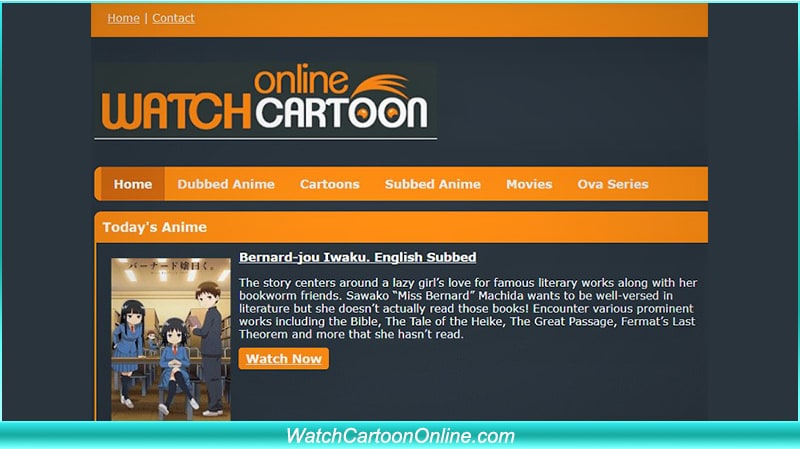
Image source: Mesheble website
Do I need to sign up?
Is it Free?
Yes, the website is free for everyone to enjoy free cartoons.
How many types of cartoons are available?
Cartoons are divided into several categories that make it easier for you to explore your favorite cartoon.
5. KissAnime
KissAnime is an amazingly designed website hosting a considerable archive of cartoons. The site has earned its place in the top free websites to watch cartoons online with an impressive user interface and ease of searching through the cartoon library. You can filter cartoons by series, movies, genres, ongoing, or with advanced filtering options. Though the site has some annoying ad policies that always bug the viewer; otherwise, the website has high-speed playback and streaming of cartoons.

Do I need to sign up?
No, you don’t need to sign up to enjoy the vast array of cartoons. There is a sign-up option for users to enjoy more filtering options.
Is it free?
The website is free, and anyone can watch cartoons easily.
How many types of cartoons are available?
There are almost every kind and genre of cartoons available on the site, such as comedy, action, sci-fi, adventure, fantasy, and much more.
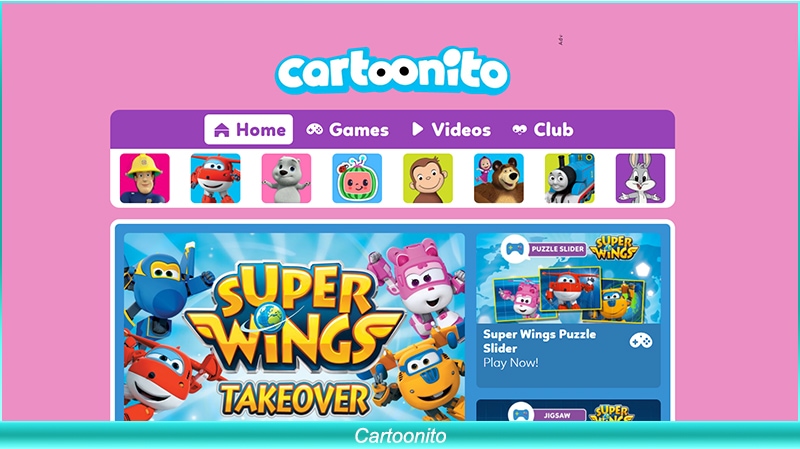
6. Cartoonito
Cartoonito is an all-in-one entertainment solution for children. The website has animated cartoons as well as Cartoonito club tales performed by real children to teach something or crack a joke for children across the screen. There is a list of songs and different learning materials for children. Cartoonito makes an educational flair to the website where cartoons become the medium of learning for children along with light entertainment. You can leave your kid in front of this website and let him explore the activities of his interest.
Do I need to sign up?
No need to sign up.
Is it free?
Yes, the website is free to watch cartoons online.
How many types of cartoons are available?
There are numerous types of cartoons and cartoon games available on the site.
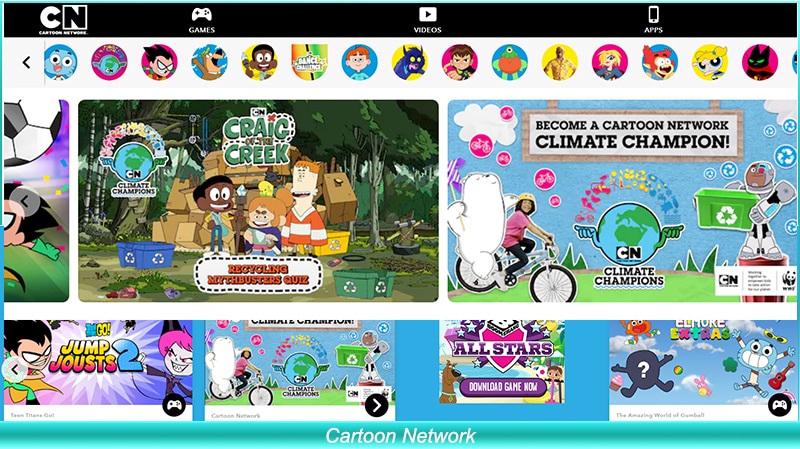
7. Cartoon Network
Cartoon Network is easily the favorite website for children to watch cartoons online. The site has more than thirty thousand films and cartoon videos, and more are uploaded daily. Not only children but adults alike can enjoy the cartoons from this website. A fantastic feature of this website is that you can filter out videos by the character of your liking. There are no pop-up advertisements during the cartoon playback.
Do I need to sign up?
No, you don’t have to sign up.
Is it free?
The website ensures a free cartoon streaming service.
How many types of cartoons are available?
You can find any cartoon ever produced and aired by Cartoon Network on the website. So, there are numerous types of cartoons available on the site.
8. Disney Junior
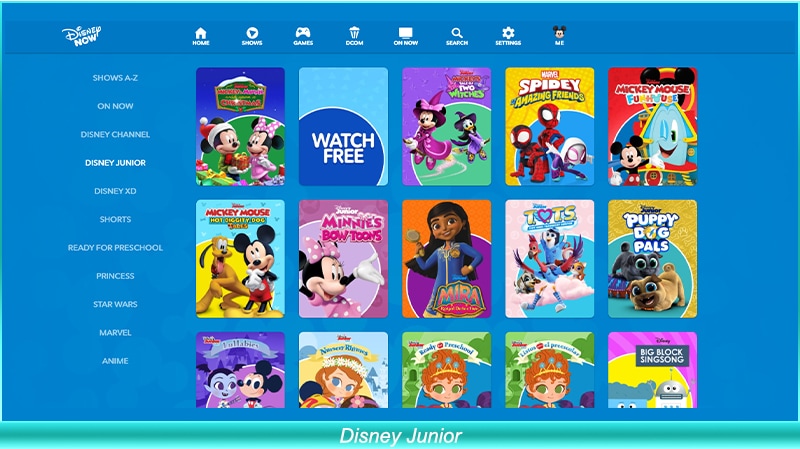
Disney network is a pioneer of cartoons as we see it today. On the Disney Junior website, you will find several fantastic treats for your cartoon cravings. You can enjoy all the cartoons categorized as free by Disney. You can search through all the shows by name from A to Z and find the show you love the most. Some of the famous cartoons such as Mickey Mouse, Donald Duck, and more are freely available on the website in HD. The Disney Junior website is blocked in some countries like India, so you’ll have to use a VPN to watch your favorite cartoon online.
Do I need to sign up?
No, Disney Junior doesn’t require you to sign up.
Is it free?
Yes, the collection in the Disney Junior is free for everyone.
How many types of cartoons are available?
There are many categories and types of cartoons available on the website to enjoy.
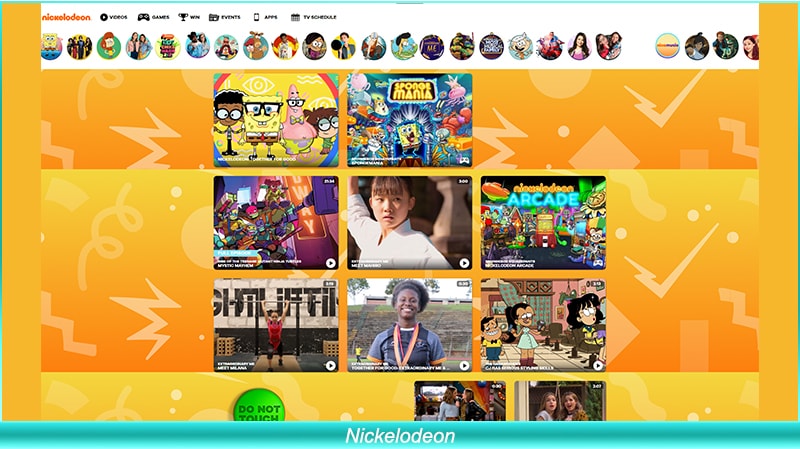
9. Nickelodeon
Nick is an excellent and famous platform for kids to enjoy cartoons online in HD for free. The user interface is straightforward and designed with vivid and striking colors to attract children’s attention. The collection of cartoons available on the site is limited to only Nickelodeon cartoons and allows you to listen to the radio or play numerous online games on the site. The site will enable you to search for your favorite cartoon as well as watch new videos and TV shows on the website.
Do I need to sign up?
No, you don’t need to sign up for streaming cartoons.
Is it free?
Yes, the website is free to watch cartoons online.
How many types of cartoons are available?
As a veteran in the cartoon industry, Nickelodeon has a vast array of cartoon types for everyone to enjoy.
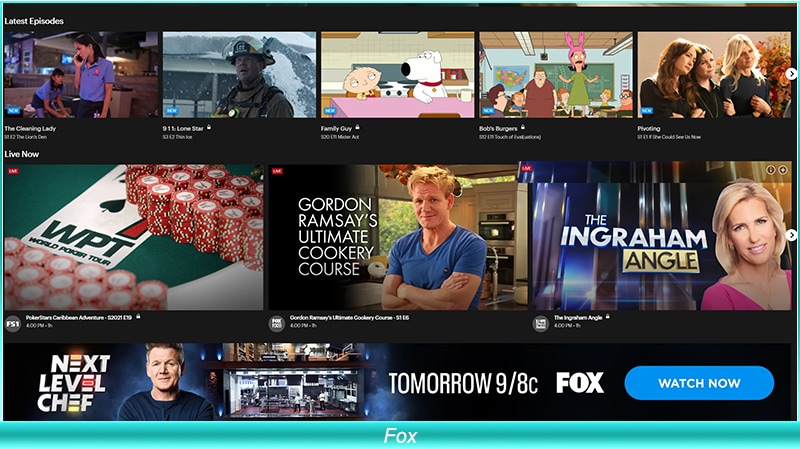
10. Fox
Fox is another fantastic entertainment website where you can watch free cartoons online in HD. Cartoon lovers will undoubtedly enjoy surfing this website as you can easily find the latest cartoons on Fox. It hosts some of the popular cartoon TV programs such as Bob’s Burgers, Family Guy, The Simpsons, and much more.
、
Do I need to sign up?
The website allows you free access for 60 minutes. After that, you will have to connect with your TV provider to enjoy unlimited streaming from the site.
Is it free?
Partially allows you access for an hour.
How many types of cartoons are available?
The website has a limited animated cartoons archive, but the ones available are highly famous and enjoyable.
![]()
A cross-platform for making videos anywhere for all creators

Why your video editing isn’t good enough? How about some creative inspo?
- 100 Million+ Users
- 150+ Countries and Regions
- 4 Million+ Social Media Followers
- 5 Million+ Stock Media for Use
* Secure Download

Bonus tip: create an animation video with Anireel
Anireel is the simplest animated video maker software. Users can create intuitive, fun, and innovative animation-centric explainer videos using many customizable elements for knowledge base and communication. You can use a drag-and-drop editor to add props, actions, characters, and audio to videos. There are pre-set animation templates for the main users to utilize and benefit from.

Conclusion
Cartoons are everyone’s favorite leisure activity, that is, children or adults alike. No one can say they don’t enjoy the tinge of joyous feeling and serenity cartoons bring with them. To satiate your craving for cartoons, you can try to see more cartoon characters to expand field of view and animate your photo online with awesome tools . We also roamed the world of video editing to create a refreshing cartoon of ourselves, or some people will call it a portrait because Wondershare Filmora creates a perfect effect of being a hand-drawn image. So, enjoy the cartoons on any of the websites mentioned here, and let us know which one is your favorite for watching cartoons online.
Shanoon Cox
Shanoon Cox is a writer and a lover of all things video.
Follow @Shanoon Cox
Shanoon Cox
Mar 27, 2024• Proven solutions
People love watching cartoons irrespective of their age; a kid is always alive inside us, as shown by the Share of Cartoon Network Viewer by Age . Cartoons are a great stress buster and can help people relax in times of strain, especially 2D animation . However, it can be a painstaking task to find some decent free websites to watch cartoons online in HD. To facilitate your quest to find the best free sites to watch cartoons online, I’ve compiled a list of free online resources that quickly offer high-definition streaming of cartoons. And I will also show you a fantastic tool that can help you cartoon yourself.
- 15 Apps to Cartoon Yourself with Ease [iPhone & Android]
- 10 Free Websites to Watch Cartoon Online
- The 15 Best Apps to Turn Photos into Cartoons and Sketches
Here are 10 websites where you can watch cartoons online. They are listed in no particular order:
- 1. Gogoanime
- 2. YouTube
- 3. Toonjet
- 4. WatchCartoonOnline.com
- 5. KissAnime
- 6. Cartoonito
- 7. Cartoon Network
- 8. Disney Junior
- 9. Nickelodeon
- 10. Fox
1. Gogoanime
Gogoanime is a free website to watch cartoons online that allows anyone to stream their favorite cartoon in HD quality. The website has an expansive library of cartoons and makes it easier for users to just stick to a single site while sating their cartoon cravings. The website is user-friendly and can be accessed on any device, including smartphones.
Everyone has a favorite show, and at Gogoanime, you get the opportunity to watch cartoons online of your preferred choice, whether new or old. The categorization on the site is pretty impressive, allowing viewers to filter out cartoons either by the studio, character, show name, by series, and making it easier for cartoon lovers to find the cartoons of their craving.
Do I have to sign up?
No, there’s no need for any viewer to sign up before streaming. Anyone can just go to the website and view their favorite cartoon show.
Is it free?
Yes, a free website to watch cartoons.
How many types of cartoons are available?
There are limitless types of cartoons available for you to watch. You have the facility to filter out the cartoon with several parameters such as by name in the search bar, studios, and characters.
2. YouTube
Don’t forget you can also watch cartoons on YouTube, including 2D animation ! YouTube is a massive platform with an expansive cartoons library, making it a top free website to watch cartoons online. YouTube has a vast number of daily active users, crossing 30 million, and has over 5 billion videos collection. You can find any type of cartoon and all the possible categories just by searching the name or category in the YouTube search bar.
YouTube even has created a kid’s app for curating cartoons and kid-themed videos onto a separate mobile app designed for children. YouTube has collected a massive database of cartoon videos that anyone can watch for free. There are numerous dedicated channels for cartoon movies and series. You can also find animated feature films and random creative cartoons from graphic professionals around the world.
Do I need to sign up?
The site works perfectly without signing up, but if you sign up, you can resume watching cartoons where you left them last time.
Is it free?
Yes, YouTube is free for everyone. However, there’s a premium version of YouTube where you get to enjoy ad-free streaming and can even play it in the background. And be able to download all the cartoon videos.
How many types of cartoons are available?
YouTube has no limitations on the type of cartoons and has virtually every kind of cartoon you can think.
3. Toonjet
Toonjet is another free website to watch cartoons online. The website is dedicated to classic cartoon fare with all the legendary cartoons collection from Cartoon Network’s Tom and Jerry to Disney’s Mickey Mouse. The site also has a bunch of contemporary cartoons like the Pokemon and Samurai Jack series. The ToonJet site allows you to give feedback on any of the episodes and rate the cartoons.
Do I need to sign up?
There is an option to register and sign in to maintain a history of all your watched cartoons. But if you don’t want to sign up, you can still enjoy the cartoons without any limitations.
Is it free?
The Toonjet website is free, and you don’t have to pay for any subscription.
How many types of cartoons are available?
The website has a massive collection of classics. So, you will mainly find all the masterpieces from the 80’s and 90’s era.
4. WatchCartoonOnline.com
On WatchCartoonOnline, you just have to search for the cartoon you’re looking for and kaboom you can start watching your favorite cartoon online for free. The interface is highly interactive and easy to navigate. Like with any other free website, you’ll have to live with a few ads here and there. The cartoons are divided into categories like dubbed, subbed, movies, series, and other cartoon types. The website has been banned in some countries, and you will have to use a VPN to access the site.
Image source: Mesheble website
Do I need to sign up?
Is it Free?
Yes, the website is free for everyone to enjoy free cartoons.
How many types of cartoons are available?
Cartoons are divided into several categories that make it easier for you to explore your favorite cartoon.
5. KissAnime
KissAnime is an amazingly designed website hosting a considerable archive of cartoons. The site has earned its place in the top free websites to watch cartoons online with an impressive user interface and ease of searching through the cartoon library. You can filter cartoons by series, movies, genres, ongoing, or with advanced filtering options. Though the site has some annoying ad policies that always bug the viewer; otherwise, the website has high-speed playback and streaming of cartoons.
Do I need to sign up?
No, you don’t need to sign up to enjoy the vast array of cartoons. There is a sign-up option for users to enjoy more filtering options.
Is it free?
The website is free, and anyone can watch cartoons easily.
How many types of cartoons are available?
There are almost every kind and genre of cartoons available on the site, such as comedy, action, sci-fi, adventure, fantasy, and much more.
6. Cartoonito
Cartoonito is an all-in-one entertainment solution for children. The website has animated cartoons as well as Cartoonito club tales performed by real children to teach something or crack a joke for children across the screen. There is a list of songs and different learning materials for children. Cartoonito makes an educational flair to the website where cartoons become the medium of learning for children along with light entertainment. You can leave your kid in front of this website and let him explore the activities of his interest.
Do I need to sign up?
No need to sign up.
Is it free?
Yes, the website is free to watch cartoons online.
How many types of cartoons are available?
There are numerous types of cartoons and cartoon games available on the site.
7. Cartoon Network
Cartoon Network is easily the favorite website for children to watch cartoons online. The site has more than thirty thousand films and cartoon videos, and more are uploaded daily. Not only children but adults alike can enjoy the cartoons from this website. A fantastic feature of this website is that you can filter out videos by the character of your liking. There are no pop-up advertisements during the cartoon playback.
Do I need to sign up?
No, you don’t have to sign up.
Is it free?
The website ensures a free cartoon streaming service.
How many types of cartoons are available?
You can find any cartoon ever produced and aired by Cartoon Network on the website. So, there are numerous types of cartoons available on the site.
8. Disney Junior
Disney network is a pioneer of cartoons as we see it today. On the Disney Junior website, you will find several fantastic treats for your cartoon cravings. You can enjoy all the cartoons categorized as free by Disney. You can search through all the shows by name from A to Z and find the show you love the most. Some of the famous cartoons such as Mickey Mouse, Donald Duck, and more are freely available on the website in HD. The Disney Junior website is blocked in some countries like India, so you’ll have to use a VPN to watch your favorite cartoon online.
Do I need to sign up?
No, Disney Junior doesn’t require you to sign up.
Is it free?
Yes, the collection in the Disney Junior is free for everyone.
How many types of cartoons are available?
There are many categories and types of cartoons available on the website to enjoy.
9. Nickelodeon
Nick is an excellent and famous platform for kids to enjoy cartoons online in HD for free. The user interface is straightforward and designed with vivid and striking colors to attract children’s attention. The collection of cartoons available on the site is limited to only Nickelodeon cartoons and allows you to listen to the radio or play numerous online games on the site. The site will enable you to search for your favorite cartoon as well as watch new videos and TV shows on the website.
Do I need to sign up?
No, you don’t need to sign up for streaming cartoons.
Is it free?
Yes, the website is free to watch cartoons online.
How many types of cartoons are available?
As a veteran in the cartoon industry, Nickelodeon has a vast array of cartoon types for everyone to enjoy.
10. Fox
Fox is another fantastic entertainment website where you can watch free cartoons online in HD. Cartoon lovers will undoubtedly enjoy surfing this website as you can easily find the latest cartoons on Fox. It hosts some of the popular cartoon TV programs such as Bob’s Burgers, Family Guy, The Simpsons, and much more.
、
Do I need to sign up?
The website allows you free access for 60 minutes. After that, you will have to connect with your TV provider to enjoy unlimited streaming from the site.
Is it free?
Partially allows you access for an hour.
How many types of cartoons are available?
The website has a limited animated cartoons archive, but the ones available are highly famous and enjoyable.
![]()
A cross-platform for making videos anywhere for all creators
Why your video editing isn’t good enough? How about some creative inspo?
- 100 Million+ Users
- 150+ Countries and Regions
- 4 Million+ Social Media Followers
- 5 Million+ Stock Media for Use
* Secure Download
Bonus tip: create an animation video with Anireel
Anireel is the simplest animated video maker software. Users can create intuitive, fun, and innovative animation-centric explainer videos using many customizable elements for knowledge base and communication. You can use a drag-and-drop editor to add props, actions, characters, and audio to videos. There are pre-set animation templates for the main users to utilize and benefit from.
Conclusion
Cartoons are everyone’s favorite leisure activity, that is, children or adults alike. No one can say they don’t enjoy the tinge of joyous feeling and serenity cartoons bring with them. To satiate your craving for cartoons, you can try to see more cartoon characters to expand field of view and animate your photo online with awesome tools . We also roamed the world of video editing to create a refreshing cartoon of ourselves, or some people will call it a portrait because Wondershare Filmora creates a perfect effect of being a hand-drawn image. So, enjoy the cartoons on any of the websites mentioned here, and let us know which one is your favorite for watching cartoons online.
Shanoon Cox
Shanoon Cox is a writer and a lover of all things video.
Follow @Shanoon Cox
How to Add Emojis To Discord
How to Add Emojis To Discord

Richard Bennett
Mar 27, 2024• Proven solutions
Who doesn’t like emoticons? They are fun, easy to use, and, best of all, highly expressive of your emotions that you cannot convey over messages otherwise.
A 2019 survey shows 70% of mobile users used emoji in texting or on social media daily. This shows the popularity of emoji in our world today.
Similarly, as a Discord user, you must have come across thousands of emoji in it. These are images uploaded on the server and called custom emojis that this gaming community can use for effective communication with friends and other players.
With the emoji and gaming industry growing, it is safe to say that discord emoji’s popularity and use will only increase.
Read ahead to see how you can add emojis on Discord if you want to have fun chats with your friends too.
- Part 1: Adding and Sending Emoji To Chat On Discord?
- Part 2: Adding Emojis To Discord Channel Name Or Nickname?
- Part 3: Adding Custom Emojis To Discord Server On Windows/Mac?
- Part 4: Adding Custom Emojis To Discord Server On iPhone And Android?
- Part 5: Managing Emojis in Discord Server
Part 1: How to Add and Send Emoji To Chat On Discord?
One of the best things about Discord’s emoji feature is that there are two ways to add them. You can either access emoji on the Discord account or upload them yourself.
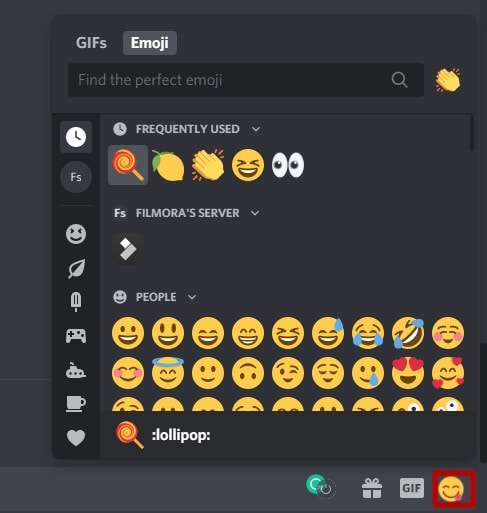
You can access the emoji menu for all Discord platforms by pressing the grey smiley face next to the message box. This will be on the right of the box for desktops, and for mobile apps, it will be on the left.
Discord-exclusive and standard emoji are present in the emoji menu, along with a part that keeps track of your most-used emoji.
On the other hand, you can also add custom emoticons to your Discord server if you have permission to do so.
Once you add and access the emoji on your device, select the one you want to send to your friends and press enter to send.
Part 2: How to Add Emojis To Discord Channel Name Or Nickname?
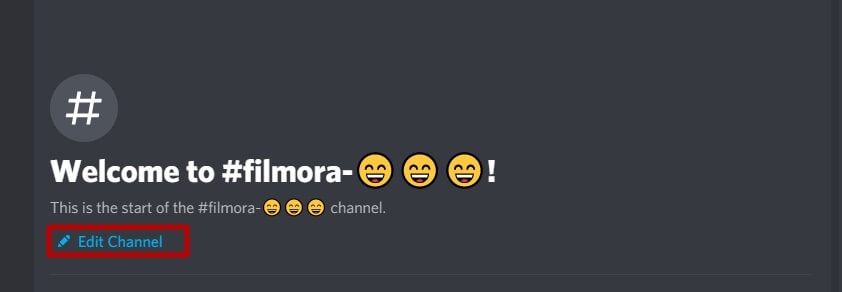
As an owner of a Discord channel, it is easy for you to add emoji to Discord. Follow the steps below to figure out how to add emojis to Discord channels:
- Use the emoji list to find the one you want to use in your channel name.
- Select the emoji “browser” column and copy it either with the mouse or “Ctrl + C” on the keyboard.
- Access your Discord server, right-click the channel where the emoji will be and use the dropdown menu to select the “Edit Channel.”
- In the “Channel Name” box, past the selected emoji using “Ctrl + V” from the keyboard.
- Select “Save Changes” to save the name with the emoji.
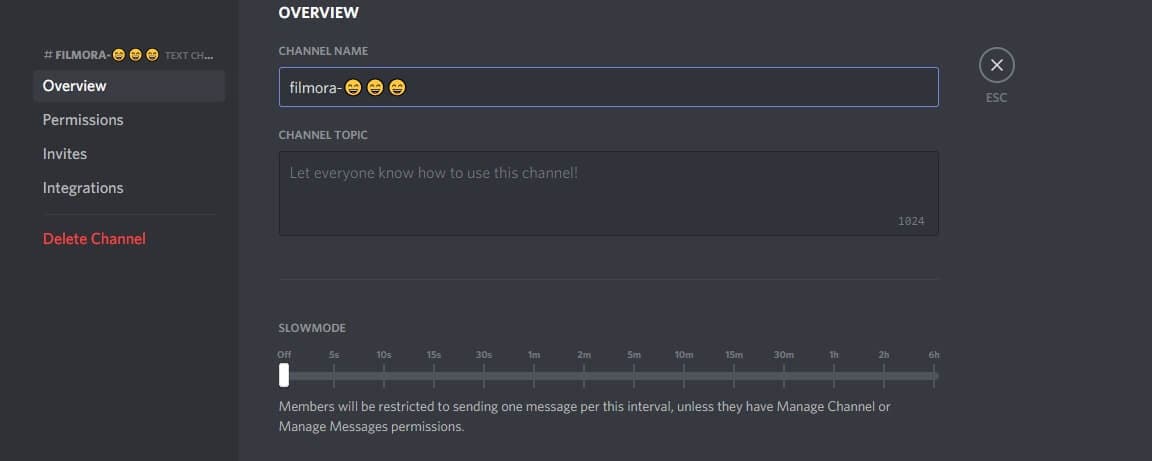
Part 3: How to Add Custom Emojis To Discord Server On Windows/Mac?
You can add custom emoji on Discord, but only if you are a server owner or administrator. Use the Discord server settings on either the desktop versions for Windows or Mac or the Discord Website.
Follow the steps below for either platform:
- Access your Discord server to begin and press the arrow pointing down in the channel list with the server name—Press “Server Settings” in the menu

- As the server’s settings open, you can add custom emojis in the “Emoji” tab. You can find a requirements list at the top that includes emoji names with a minimum of two characters and a file size limit of 256 KB. You can add fifty normal and an additional fifty animated emoji GIFs using the standard servers
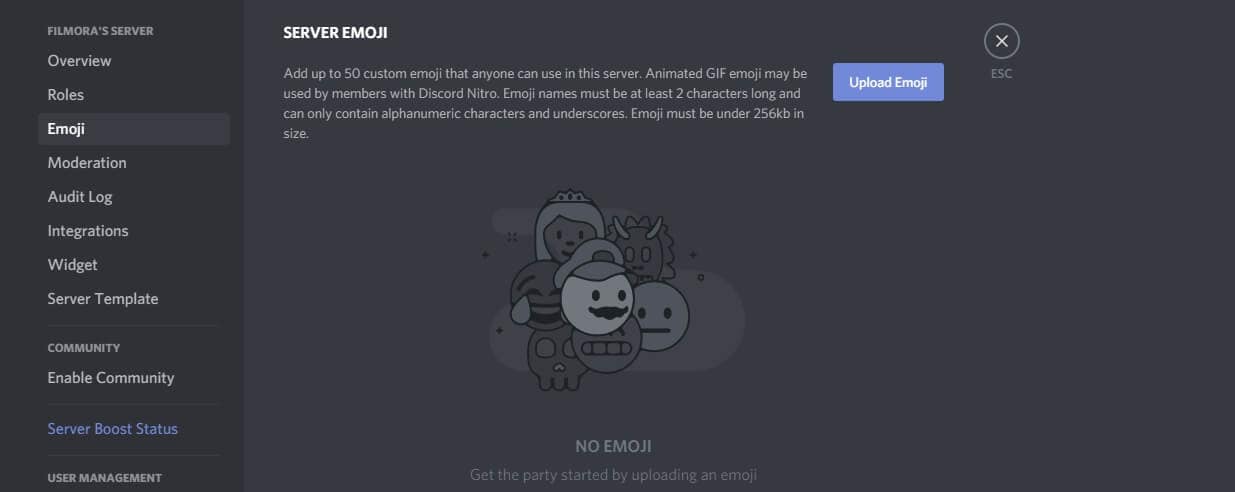
- Select “Upload Emoji” to insert a custom emoji, either standard or animated
- With the help of your device’s local storage, upload the file. However, for the emoji to be added to the lists, the file should align with Discord’s requirements.
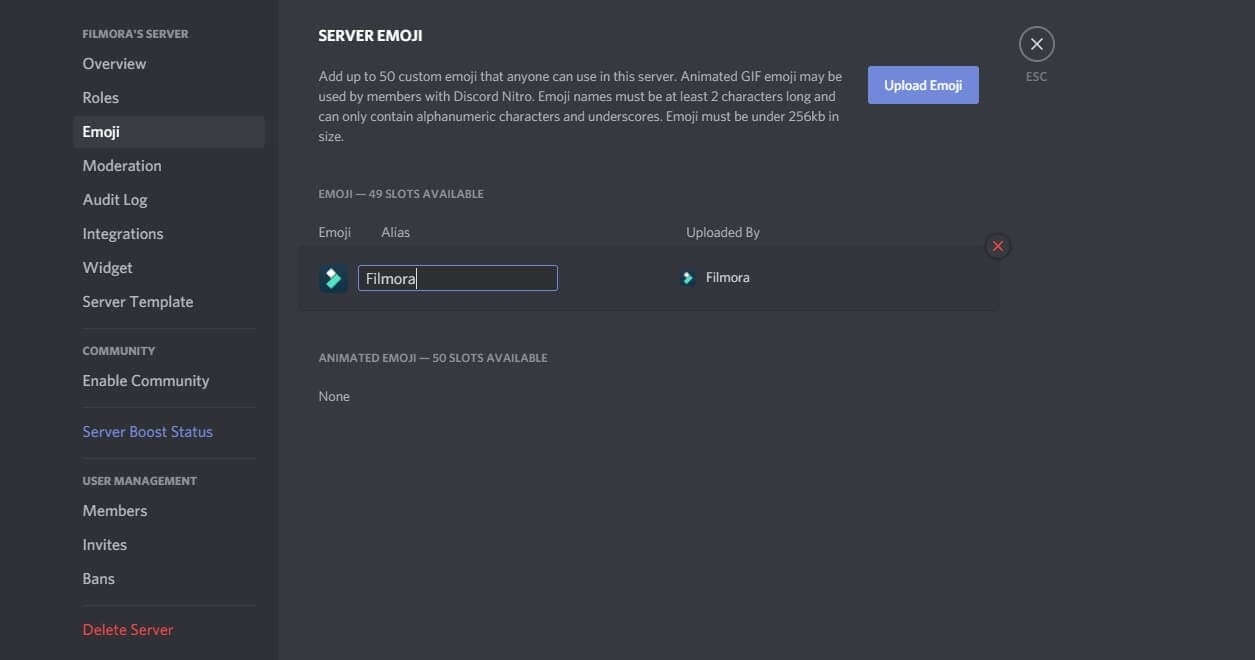
- For every emoji image that you upload, an alias tag will be created for that custom emoji using the file’s name. This tag is used to update a message with an emoji.
- A default alias name like this can be replaced by selecting the “Alias” box with the custom emoji and then creating a new name.
- Enjoy your emoji in chats as soon as you upload them to the Discord server!
Boost your server with Discord Nitro subscribers today to insert more than the standard fifty emoji!
Part 4: How to Add Custom Emojis To Discord Server On iPhone And Android?
How cool is it that you can add custom emoji to your smartphone as well? Whether you have an iPhone or an Android, you can use the same menu as Windows and Mac to upload emoji.
Discord’s interface is similar across all devices, so the following steps work on Android and Apple.
- Begin by opening the app on your device to access the server. Press the hamburger menu located at the top left in an open server and channel.
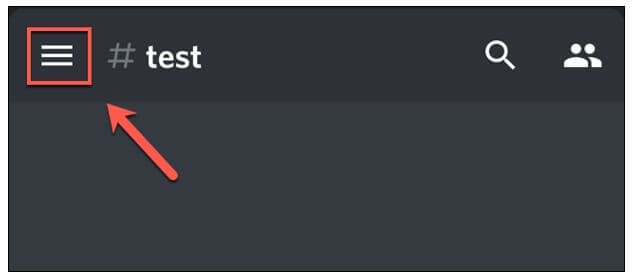
- As the channel and server list opens for Discord, you can see a three-dot menu right next to the channel list with the server name. Tap on it to proceed.
- To get to your server settings, press “Settings” in the Discord server menu that shows up.
- Under the “Server Settings” menu, select “Emoji” to access the custom emoji settings.
- As the “Emoji” menu opens, you can see an emoji requirement list
- Press “Upload Emoji” to upload any emoji that aligns with these requirements
- Press the custom emoji file, tap “Crop” if it needs cropping, and then use the “Upload” option
- After you upload the emoji file, replace the alias tag by tapping on it. This will redirect you to that specific emoji’s settings
- Type the name you want using the “Alias” box to create the tag used to insert emoji in messages
- Save this new tag with the “Save” icon placed in the bottom right
- Any changes you make to the custom emoji’s alias are applied to it instantly for your use.
Emoji bring fun to the conversations you have with friends, and it is very easy to add them to your server as well. These show up in the emoji pop-up list once you add them. The chat message bar contains the emoji icon from where you can access them.
It is essential to name your emoji with only alphanumeric characters and underscores using at least two characters.
The Discord emoji size is 32x32 pixels, so even if you upload up to 128x128 pixel size emojis, they will be resized to the default dimensions. Furthermore, emoji file sizes are at most 256kb.
If you want to use custom emojis, you can’t do so without a Nitro subscription because it is only functional on the server they are uploaded to. Even if you find a way to access the emoji from some other server, only its text code will be visible.
If you attempt to use the Emoji Picker to pick an emoji, you’ll get the following message:
Bonus: How to Manage Emoji in Discord Server?
You can’t remove or add emoji specific to a server on your own as a member. You need the server owner to toggle the permission of Manager Emoji in your domain.
On the other hand, as a server owner, you can give others this role with the following steps.
- Open Roles: Open the Server Settings and select “Roles” from the menu on the side.
- Toggle Manage Emoji: Pick the role you want to apply the permission to, and then toggle emoji’s slider to “on,” save changes, and you’re done!
FAQs About Discord Emojis
1. Why Do I See Grey Emoji In The Emoji Menu?
Greyed-out emoji in the menu means that either those emoji are animated, or you don’t have the permission to post them on other servers.
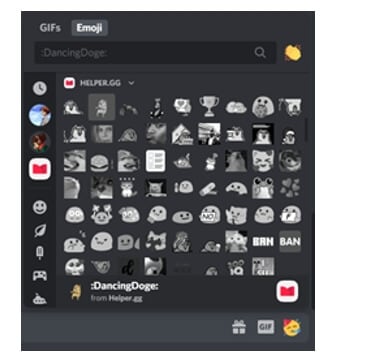
2. How Can I Get More Custom Emoji On The Server?
You can upload 50 emojis to your Discord server. But if you want more options, you need a Discord Nitro subscription to boost your server specs.
3. What Is The Discord Emoji Size?
Discord allows you to upload an emoji of up to 128x128 pixels, but it will resize it to 32x32 since that is its standard size.
Conclusion
Emojis make any chat fun, and where gaming is involved, they help you communicate better with your friends.
Discord has thousands of custom emojis that you can easily add to your server through your computer, whether it is your chat or the channel name. Follow our guide for a seamless process to add emoji to Discord and make your gaming experience better!
Richard Bennett
Richard Bennett is a writer and a lover of all things video.
Follow @Richard Bennett
Richard Bennett
Mar 27, 2024• Proven solutions
Who doesn’t like emoticons? They are fun, easy to use, and, best of all, highly expressive of your emotions that you cannot convey over messages otherwise.
A 2019 survey shows 70% of mobile users used emoji in texting or on social media daily. This shows the popularity of emoji in our world today.
Similarly, as a Discord user, you must have come across thousands of emoji in it. These are images uploaded on the server and called custom emojis that this gaming community can use for effective communication with friends and other players.
With the emoji and gaming industry growing, it is safe to say that discord emoji’s popularity and use will only increase.
Read ahead to see how you can add emojis on Discord if you want to have fun chats with your friends too.
- Part 1: Adding and Sending Emoji To Chat On Discord?
- Part 2: Adding Emojis To Discord Channel Name Or Nickname?
- Part 3: Adding Custom Emojis To Discord Server On Windows/Mac?
- Part 4: Adding Custom Emojis To Discord Server On iPhone And Android?
- Part 5: Managing Emojis in Discord Server
Part 1: How to Add and Send Emoji To Chat On Discord?
One of the best things about Discord’s emoji feature is that there are two ways to add them. You can either access emoji on the Discord account or upload them yourself.
You can access the emoji menu for all Discord platforms by pressing the grey smiley face next to the message box. This will be on the right of the box for desktops, and for mobile apps, it will be on the left.
Discord-exclusive and standard emoji are present in the emoji menu, along with a part that keeps track of your most-used emoji.
On the other hand, you can also add custom emoticons to your Discord server if you have permission to do so.
Once you add and access the emoji on your device, select the one you want to send to your friends and press enter to send.
Part 2: How to Add Emojis To Discord Channel Name Or Nickname?
As an owner of a Discord channel, it is easy for you to add emoji to Discord. Follow the steps below to figure out how to add emojis to Discord channels:
- Use the emoji list to find the one you want to use in your channel name.
- Select the emoji “browser” column and copy it either with the mouse or “Ctrl + C” on the keyboard.
- Access your Discord server, right-click the channel where the emoji will be and use the dropdown menu to select the “Edit Channel.”
- In the “Channel Name” box, past the selected emoji using “Ctrl + V” from the keyboard.
- Select “Save Changes” to save the name with the emoji.
Part 3: How to Add Custom Emojis To Discord Server On Windows/Mac?
You can add custom emoji on Discord, but only if you are a server owner or administrator. Use the Discord server settings on either the desktop versions for Windows or Mac or the Discord Website.
Follow the steps below for either platform:
- Access your Discord server to begin and press the arrow pointing down in the channel list with the server name—Press “Server Settings” in the menu
- As the server’s settings open, you can add custom emojis in the “Emoji” tab. You can find a requirements list at the top that includes emoji names with a minimum of two characters and a file size limit of 256 KB. You can add fifty normal and an additional fifty animated emoji GIFs using the standard servers
- Select “Upload Emoji” to insert a custom emoji, either standard or animated
- With the help of your device’s local storage, upload the file. However, for the emoji to be added to the lists, the file should align with Discord’s requirements.
- For every emoji image that you upload, an alias tag will be created for that custom emoji using the file’s name. This tag is used to update a message with an emoji.
- A default alias name like this can be replaced by selecting the “Alias” box with the custom emoji and then creating a new name.
- Enjoy your emoji in chats as soon as you upload them to the Discord server!
Boost your server with Discord Nitro subscribers today to insert more than the standard fifty emoji!
Part 4: How to Add Custom Emojis To Discord Server On iPhone And Android?
How cool is it that you can add custom emoji to your smartphone as well? Whether you have an iPhone or an Android, you can use the same menu as Windows and Mac to upload emoji.
Discord’s interface is similar across all devices, so the following steps work on Android and Apple.
- Begin by opening the app on your device to access the server. Press the hamburger menu located at the top left in an open server and channel.
- As the channel and server list opens for Discord, you can see a three-dot menu right next to the channel list with the server name. Tap on it to proceed.
- To get to your server settings, press “Settings” in the Discord server menu that shows up.
- Under the “Server Settings” menu, select “Emoji” to access the custom emoji settings.
- As the “Emoji” menu opens, you can see an emoji requirement list
- Press “Upload Emoji” to upload any emoji that aligns with these requirements
- Press the custom emoji file, tap “Crop” if it needs cropping, and then use the “Upload” option
- After you upload the emoji file, replace the alias tag by tapping on it. This will redirect you to that specific emoji’s settings
- Type the name you want using the “Alias” box to create the tag used to insert emoji in messages
- Save this new tag with the “Save” icon placed in the bottom right
- Any changes you make to the custom emoji’s alias are applied to it instantly for your use.
Emoji bring fun to the conversations you have with friends, and it is very easy to add them to your server as well. These show up in the emoji pop-up list once you add them. The chat message bar contains the emoji icon from where you can access them.
It is essential to name your emoji with only alphanumeric characters and underscores using at least two characters.
The Discord emoji size is 32x32 pixels, so even if you upload up to 128x128 pixel size emojis, they will be resized to the default dimensions. Furthermore, emoji file sizes are at most 256kb.
If you want to use custom emojis, you can’t do so without a Nitro subscription because it is only functional on the server they are uploaded to. Even if you find a way to access the emoji from some other server, only its text code will be visible.
If you attempt to use the Emoji Picker to pick an emoji, you’ll get the following message:
Bonus: How to Manage Emoji in Discord Server?
You can’t remove or add emoji specific to a server on your own as a member. You need the server owner to toggle the permission of Manager Emoji in your domain.
On the other hand, as a server owner, you can give others this role with the following steps.
- Open Roles: Open the Server Settings and select “Roles” from the menu on the side.
- Toggle Manage Emoji: Pick the role you want to apply the permission to, and then toggle emoji’s slider to “on,” save changes, and you’re done!
FAQs About Discord Emojis
1. Why Do I See Grey Emoji In The Emoji Menu?
Greyed-out emoji in the menu means that either those emoji are animated, or you don’t have the permission to post them on other servers.
2. How Can I Get More Custom Emoji On The Server?
You can upload 50 emojis to your Discord server. But if you want more options, you need a Discord Nitro subscription to boost your server specs.
3. What Is The Discord Emoji Size?
Discord allows you to upload an emoji of up to 128x128 pixels, but it will resize it to 32x32 since that is its standard size.
Conclusion
Emojis make any chat fun, and where gaming is involved, they help you communicate better with your friends.
Discord has thousands of custom emojis that you can easily add to your server through your computer, whether it is your chat or the channel name. Follow our guide for a seamless process to add emoji to Discord and make your gaming experience better!
Richard Bennett
Richard Bennett is a writer and a lover of all things video.
Follow @Richard Bennett
How to Make a Wonderful Video Slideshow with Your Travel Photos
How to Make Video Slideshow with Your Travel Photos
Ollie Mattison
Mar 27, 2024• Proven solutions
We all love traveling and for a good reason. It allows us to relax, it removes the pressure from our life and it just makes the entire experience a lot better. But if you are a fan of taking picture while travelling, why not try to create a video slideshow with your images? This is one of the best and most original ways you can use it in order to share your travels with others. It works magically and it manages to bring in front some of those unique moments. However, you do need to have the proper tools when you want to create such a slideshow, but that’s great as we are here to help you with that.
How can you create a travel slideshow with travel photos
Things you need to know before creating it
Before you create the travel slideshow you have to keep in mind a few things. If you don’t then the results will not be as good as you expect. You have to be committed to the idea of having the best results and as long as you do that the outcome will be very well worth it.
You need to try and consider your audience because based on that the slideshow will have a specific format. You also need to think about telling a story as that will make it a lot more interesting other than just having a bunch of images aligned together in a non-meaningful manner.
Wondershare Filmora – The best tool to create a video slideshow with your travel photos
But one has to wonder, what tool should you use to create such a travel slideshow? Wondershare Filmora is the application of choice in this regard because it does help offer a huge variety of amazing features that all add up in order to deliver great value!
- Wondershare Filmora is great for beginners as it makes editing a breeze thanks to the stellar interface
- It also integrates transitions as well as filters and effects. It provides you with a refined set of tools that help maintain a good focus on results.
- It helps you add sound effects and a variety of music types to help you with the story.
- You can burn the result to DVD or you can share it on social media and YouTube/Vimeo among others right from within the app.
How can you create video slideshows with Wondershare Filmora?
Creating a unique slideshow video with this tool is actually very easy and it does provide you with a huge amount of value should you choose to use it. Here are several things you need to consider when making a travel slideshow video. First, choose the right music for the travel slideshow; second, adjust the duration of the photos; third, transitions and effects.
Here are the steps you need to focus on when creating a travel slideshow video with Wondershare Filmora:
Filmstock Stock Media Library ](https://filmstock.wondershare.com/creative-theme-tourism?spm=rs.filmora%5Fweb&source%5Fchannel=seo%5Farticle )
Step 1: Download and install Wondershare Filmora, then open it.
Add all the travel photos into the applications. You can add in multiple folders in order to make sorting the images a lot easier.
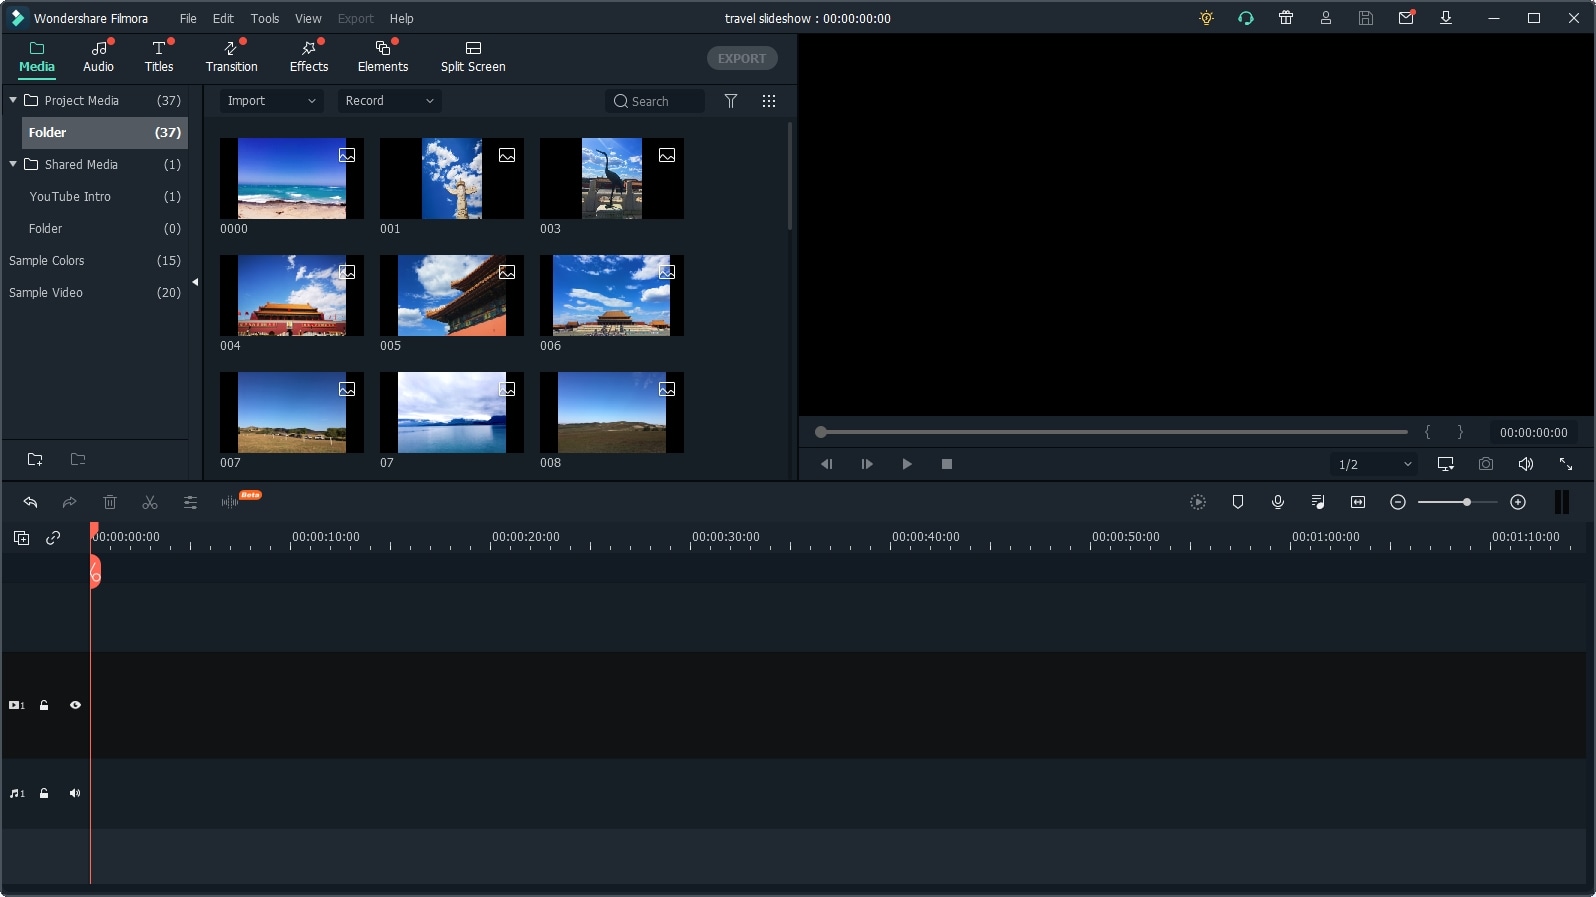
Next, set up the photo duration to the desired length, so that you don’t need to adjust the photo duration one by one.

Step 2: Now, it’s time to determine and add music in the background. Add some sounds and royalty-free music in Wondershare Filmora and then use the media library to help you give more of an impact to the entire experience.

If you want to sync the photo to the background music, you can use the Beat Detection tool in Filmora and mark the highlights accordingly.
Step 3: Once you did that, you will have to drag and then drop the images directly to the timeline. Here is where you can change things like saturation, hue, brightness, contrast and other features.
You can also rotate the images and crop them if you see fit. If some of the travel photos have different aspect ratios, you can select Crop to Fit so all the photos will be in the same aspect ratio without blackbar.
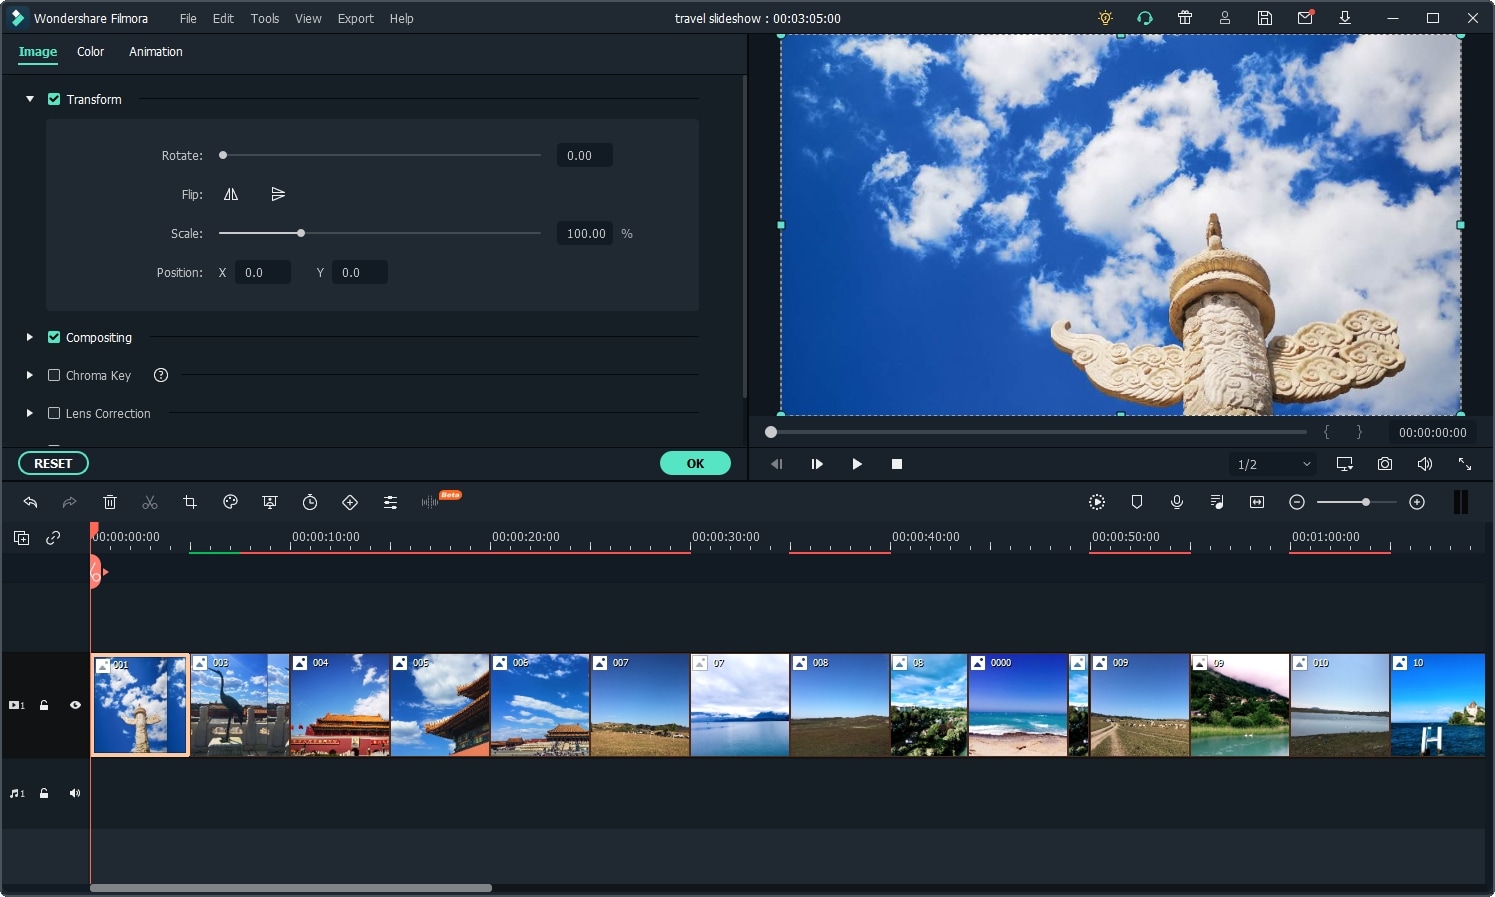
Step 4: At this point, you do need to try and add transitions between each of the images.
When you are done with that, you have to select the filters and overlays that will help you make your travel slideshow look better. This is an important step and you do want to spend a good amount of time with it.
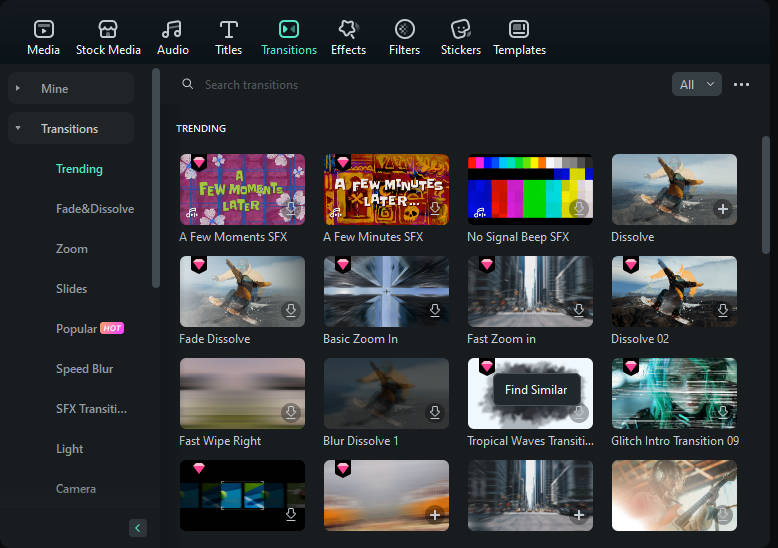
Step 5: Lastly, you will have to export the slideshow as you see fit, but you also have the option to share it on YouTube if you so desire.

Conclusion
Wondershare Filmora is a very good application for those that want a unique, fun travel slideshow. It allows you to get all the tools and high-quality features that you need in order to take the experience to the next level. We recommend you to check it out right away as it’s well worth the investment!
Download Mac Version ](https://tools.techidaily.com/wondershare/filmora/download/ )
Ollie Mattison
Ollie Mattison is a writer and a lover of all things video.
Follow @Ollie Mattison
Ollie Mattison
Mar 27, 2024• Proven solutions
We all love traveling and for a good reason. It allows us to relax, it removes the pressure from our life and it just makes the entire experience a lot better. But if you are a fan of taking picture while travelling, why not try to create a video slideshow with your images? This is one of the best and most original ways you can use it in order to share your travels with others. It works magically and it manages to bring in front some of those unique moments. However, you do need to have the proper tools when you want to create such a slideshow, but that’s great as we are here to help you with that.
How can you create a travel slideshow with travel photos
Things you need to know before creating it
Before you create the travel slideshow you have to keep in mind a few things. If you don’t then the results will not be as good as you expect. You have to be committed to the idea of having the best results and as long as you do that the outcome will be very well worth it.
You need to try and consider your audience because based on that the slideshow will have a specific format. You also need to think about telling a story as that will make it a lot more interesting other than just having a bunch of images aligned together in a non-meaningful manner.
Wondershare Filmora – The best tool to create a video slideshow with your travel photos
But one has to wonder, what tool should you use to create such a travel slideshow? Wondershare Filmora is the application of choice in this regard because it does help offer a huge variety of amazing features that all add up in order to deliver great value!
- Wondershare Filmora is great for beginners as it makes editing a breeze thanks to the stellar interface
- It also integrates transitions as well as filters and effects. It provides you with a refined set of tools that help maintain a good focus on results.
- It helps you add sound effects and a variety of music types to help you with the story.
- You can burn the result to DVD or you can share it on social media and YouTube/Vimeo among others right from within the app.
How can you create video slideshows with Wondershare Filmora?
Creating a unique slideshow video with this tool is actually very easy and it does provide you with a huge amount of value should you choose to use it. Here are several things you need to consider when making a travel slideshow video. First, choose the right music for the travel slideshow; second, adjust the duration of the photos; third, transitions and effects.
Here are the steps you need to focus on when creating a travel slideshow video with Wondershare Filmora:
Filmstock Stock Media Library ](https://filmstock.wondershare.com/creative-theme-tourism?spm=rs.filmora%5Fweb&source%5Fchannel=seo%5Farticle )
Step 1: Download and install Wondershare Filmora, then open it.
Add all the travel photos into the applications. You can add in multiple folders in order to make sorting the images a lot easier.
Next, set up the photo duration to the desired length, so that you don’t need to adjust the photo duration one by one.
Step 2: Now, it’s time to determine and add music in the background. Add some sounds and royalty-free music in Wondershare Filmora and then use the media library to help you give more of an impact to the entire experience.
If you want to sync the photo to the background music, you can use the Beat Detection tool in Filmora and mark the highlights accordingly.
Step 3: Once you did that, you will have to drag and then drop the images directly to the timeline. Here is where you can change things like saturation, hue, brightness, contrast and other features.
You can also rotate the images and crop them if you see fit. If some of the travel photos have different aspect ratios, you can select Crop to Fit so all the photos will be in the same aspect ratio without blackbar.
Step 4: At this point, you do need to try and add transitions between each of the images.
When you are done with that, you have to select the filters and overlays that will help you make your travel slideshow look better. This is an important step and you do want to spend a good amount of time with it.
Step 5: Lastly, you will have to export the slideshow as you see fit, but you also have the option to share it on YouTube if you so desire.
Conclusion
Wondershare Filmora is a very good application for those that want a unique, fun travel slideshow. It allows you to get all the tools and high-quality features that you need in order to take the experience to the next level. We recommend you to check it out right away as it’s well worth the investment!
Download Mac Version ](https://tools.techidaily.com/wondershare/filmora/download/ )
Ollie Mattison
Ollie Mattison is a writer and a lover of all things video.
Follow @Ollie Mattison
How to Make a Photo Collage on Mac/iPhone Using iPhoto?
How to Make a Photo Collage on Mac/iPhone Using iPhoto?
Shanoon Cox
Mar 27, 2024• Proven solutions
iPhoto is a photo library familiar to iOS users. It can help you easily organize, store and sort images, and even make a slide show to help you enjoy photos. This is why, even though Apple no longer develops iPhoto, some people use it.
Update: On April 8, 2015, Apple has launched a new Photos app on OS X Yosemite, which means Apple has stopped developing iPhoto. However, if you like iPhoto, you can still use it.
The following will introduce how to use the iPhoto collage maker on Mac or iPhone. At the end of this article, iPhoto alternative software will serve as your reference.
Part 1: How to Make a Photo Collage in iPhoto?
Here are the quick steps to create a photo collage with iPhoto.
Step 1: Launch iPhoto and click “Events” in the side menu.
Step 2: Hold “Shift” and click each photo you want to include in your photo collage.
Step 3: Click the “+” button in the lower-left corner and select Card in the pop-up window.
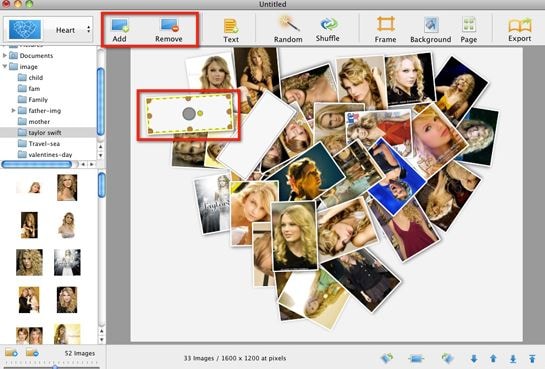
Step 4: Choose “Picture Collage”, which should be under the Any Occasion section if you are using the iPhoto 11.
Step 5: You’ll notice that all the templates are sorted based on the occasion.
Step 6: Drag photos to the template and pick a background, orientation and design.
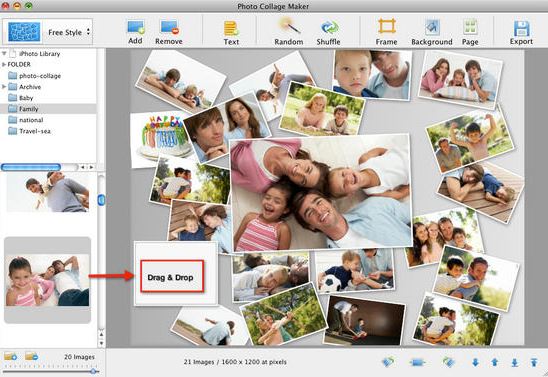
Step 7: Click the Buy button on the lower right-hand corner of the collage editor, or go to the Share menu and email it to yourself or family members.
But before you make a photo collage using iPhoto, here are some important things for you to know:
- Technically, iPhoto can’t make fancy photo collages like other Photo collages makers on Mac. So don’t expect too much of it. iPhoto only creates greeting cards with a simple collage layout.
- The templates iPhoto offers are quite limited and ordinary that you might feel a little disappointed.
- iPhoto offers no share options to save photo collages to desktop or to post on Facebook, which is a basic feature of picture collage editor.
Part 2: What Replaces iPhoto on Mac/iPhone?
Since iPhoto’s functions are not sufficient, we will introduce some alternative collage makers that you may be interested in.
Alternative to Make a Short Video, Slideshow, or Photo Collage: Wondershare Filmora
If there are too many photos to save or share with friends and family, you can use these images to make short videos to better collage and share. Filmora can do this for you, through which you can easily crop, add effects, split the screen, and merge photos. In order to make the “photo video” lively and exciting, you can also add music, audio, animation, title, music, etc. to it.
Alternative to Organize, Store, and Sort Images: iCloud
Migrating your photos to iCloud is a wise choice. iCloud is the best photo storage for iOS or Mac users. You don’t need to download other apps or software. Just allow iCloud to back up the photo’s library in the settings.
The best thing is that you can view iCloud photos anytime and anywhere after logging in to your iCloud account. You can also automatically share photos with others by opening “Shared Album”. However, if there are too many photos, a paid subscription may be required to upgrade the storage space.
Conclusion
Above are the steps to make a photo collage using iPhoto on Mac/iPhone. We also list alternative methods to meet the different needs of the Photo library. So, if this isn’t quite what you’re looking for, you can also use some online photo collage service instead. If you want to have more fun editing photo stories, welcome to download Filmora and make more memorable and interesting videos.
Shanoon Cox
Shanoon Cox is a writer and a lover of all things video.
Follow @Shanoon Cox
Shanoon Cox
Mar 27, 2024• Proven solutions
iPhoto is a photo library familiar to iOS users. It can help you easily organize, store and sort images, and even make a slide show to help you enjoy photos. This is why, even though Apple no longer develops iPhoto, some people use it.
Update: On April 8, 2015, Apple has launched a new Photos app on OS X Yosemite, which means Apple has stopped developing iPhoto. However, if you like iPhoto, you can still use it.
The following will introduce how to use the iPhoto collage maker on Mac or iPhone. At the end of this article, iPhoto alternative software will serve as your reference.
Part 1: How to Make a Photo Collage in iPhoto?
Here are the quick steps to create a photo collage with iPhoto.
Step 1: Launch iPhoto and click “Events” in the side menu.
Step 2: Hold “Shift” and click each photo you want to include in your photo collage.
Step 3: Click the “+” button in the lower-left corner and select Card in the pop-up window.
Step 4: Choose “Picture Collage”, which should be under the Any Occasion section if you are using the iPhoto 11.
Step 5: You’ll notice that all the templates are sorted based on the occasion.
Step 6: Drag photos to the template and pick a background, orientation and design.
Step 7: Click the Buy button on the lower right-hand corner of the collage editor, or go to the Share menu and email it to yourself or family members.
But before you make a photo collage using iPhoto, here are some important things for you to know:
- Technically, iPhoto can’t make fancy photo collages like other Photo collages makers on Mac. So don’t expect too much of it. iPhoto only creates greeting cards with a simple collage layout.
- The templates iPhoto offers are quite limited and ordinary that you might feel a little disappointed.
- iPhoto offers no share options to save photo collages to desktop or to post on Facebook, which is a basic feature of picture collage editor.
Part 2: What Replaces iPhoto on Mac/iPhone?
Since iPhoto’s functions are not sufficient, we will introduce some alternative collage makers that you may be interested in.
Alternative to Make a Short Video, Slideshow, or Photo Collage: Wondershare Filmora
If there are too many photos to save or share with friends and family, you can use these images to make short videos to better collage and share. Filmora can do this for you, through which you can easily crop, add effects, split the screen, and merge photos. In order to make the “photo video” lively and exciting, you can also add music, audio, animation, title, music, etc. to it.
Alternative to Organize, Store, and Sort Images: iCloud
Migrating your photos to iCloud is a wise choice. iCloud is the best photo storage for iOS or Mac users. You don’t need to download other apps or software. Just allow iCloud to back up the photo’s library in the settings.
The best thing is that you can view iCloud photos anytime and anywhere after logging in to your iCloud account. You can also automatically share photos with others by opening “Shared Album”. However, if there are too many photos, a paid subscription may be required to upgrade the storage space.
Conclusion
Above are the steps to make a photo collage using iPhoto on Mac/iPhone. We also list alternative methods to meet the different needs of the Photo library. So, if this isn’t quite what you’re looking for, you can also use some online photo collage service instead. If you want to have more fun editing photo stories, welcome to download Filmora and make more memorable and interesting videos.
Shanoon Cox
Shanoon Cox is a writer and a lover of all things video.
Follow @Shanoon Cox
Also read:
- [New] 2024 Approved Joining Google Meet From Computer/Phone
- [New] In 2024, Amazon Prime and Twitter Most Shared & Liked Shows, '23
- [New] In 2024, Future of FB Ads Predictions
- [New] Seamless Cinema Experience Free & Paid iPhones App List
- [Updated] Live Content Keepers - Facebook Update for 2024
- 2024 Approved Elevate Your Facebook Chronicles with Gratuitous Upgrades
- Groundbreaking Alternatives to the Conventional FBX Recorder Games
- New How to Record and Edit an Animoji or Memoji Karaoke Music Video, In 2024
- New In 2024, How to Make a Photo Collage Using iPhoto?
- Produce Personalized Internet Chuckles
- Updated 20 Wonderful Stop Motion Ideas for Beginners and Kids - Filmora
- Updated 2024 Approved How to Record and Edit an Animoji or Memoji Karaoke Music Video?
- Updated 2024 Approved IOS&Android Best Apps to Create Animoji and Memoji Videos
- Updated Best iOS and Android Apps You Can Use to Create Animoji and Memoji Videos for 2024
- Updated In 2024, How to Record and Edit an Animoji or Memoji Karaoke Music Video?
- Vlogventures in Cosmetics How to Create Your Fashion-Forward Channel for 2024
- Title: Updated In 2024, How to Add Bitmoji to Keyboard? Complete Guide
- Author: Jan
- Created at : 2025-02-17 17:35:39
- Updated at : 2025-02-19 16:07:18
- Link: https://meme-emoji.techidaily.com/updated-in-2024-how-to-add-bitmoji-to-keyboard-complete-guide/
- License: This work is licensed under CC BY-NC-SA 4.0.