
Updated In 2024, Best 10 Emoji Makers to Create Your Own Emojis PC/Online/Android/iPhone
Best 10 Emoji Makers to Create Your Own Emojis [PC/Online/Android/iPhone]
Best 10 Emoji Makers to Create Your Own Emojis [PC/Online/Android/iPhone]

Shanoon Cox
Mar 27, 2024• Proven solutions
In this generation of online chatting and social media, emoji plays a big role in making our conversation easier and interesting. It helps people to express feelings or convey something in a better way than words or sentences ever could. Adding an emoji to chat, video or photo brings more fun to the content and the type of emojis different individuals prefer to use will be different.
Want to create your own emoji? So there is a need for emoji makers that can help to create customized emojis depending on everyone’s likes.
There are a lot of emoji makers in the online market that offers a bundle of pre-packed emoji as well as help you to create emoji of your choice. These tools help you to create your own emoji on whichever theme you wish providing a lot of customizing options.
- Part 1: Best 10 Emoji Makers to Create Your Own Emojis
- Part 2: Add Emojis to Your Video with Wondershare Filmora
Part 1: Best 10 Emoji Makers to Create Your Own Emojis
Most people around the world use emoji in their conversations, whether it be chats, comments on social media, writing blogs, etc. But the type of emojis preferred by different people may vary and sometimes the default emojis available might not be enough to express what they wish to. Hence there is a need for creating more emoji, depending on each individual’s taste.
This is where the emoji makers come in. Here we will discuss the top 10 emoji makers that can be used to create attractive emojis for sharing on social media platforms.
- [1. Emoji-maker.com(Online)](#emoji maker1)
- [2. piZap Emoji Maker(Online)](#emoji maker2)
- [3. Flat Icons Emoji Maker(Online)](#emoji maker3)
- [4. Labeley.com(Online)](#emoji maker4)
- [5. Disney Emoji Maker (Online)](#emoji maker5)
- [6. Animated Emoji Maker (Android app)](#emoji maker6)
- [7. Elite Emoji (Android app)](#emoji maker7)
- [8. Boomoji (Android app)](#emoji maker8)
- [9. Zmoji (iPhone app)](#emoji maker9)
- [10. Emojily (iPhone app)](#emoji maker10)
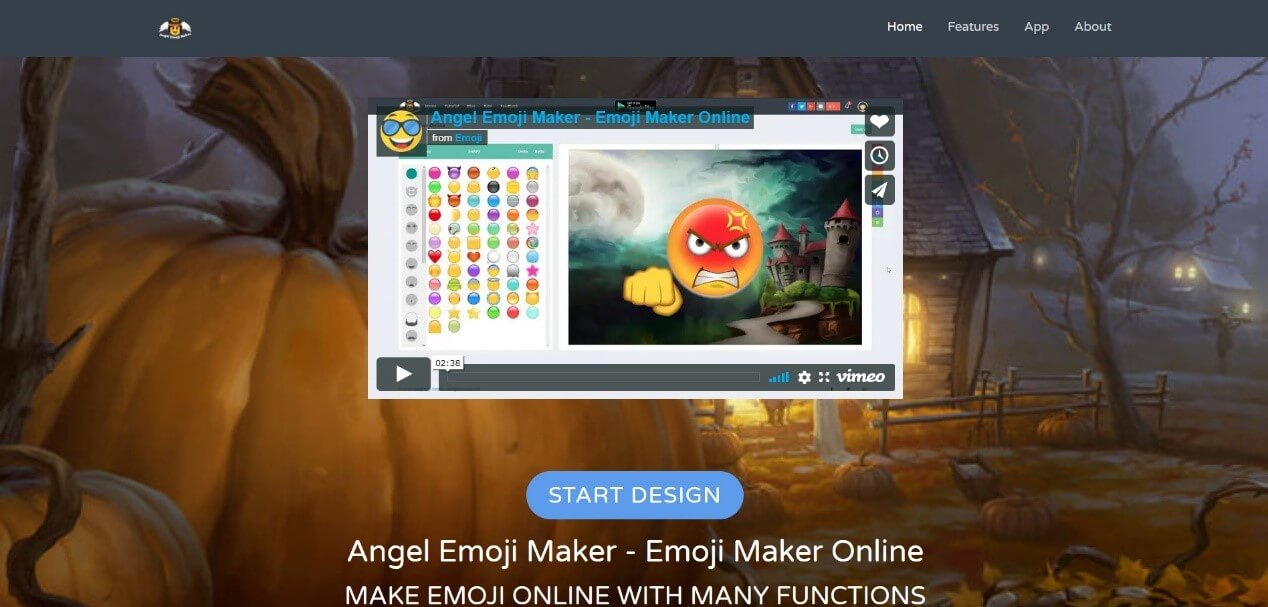
1. Emoji-maker.com(Online)
Emoji maker.com is an online told that provides a lot of beautiful and unique emoji editing options to the users.
Price:
- Free
Features:
- Offers a wide variety of emoji shapes
- Allows to customize emojis in a match to the user’s face
- Has an Emoji text function, that allows adding text to any emoji
- Provides a lot of emoji background options
- Provides multiple saving options for the emojis you have created
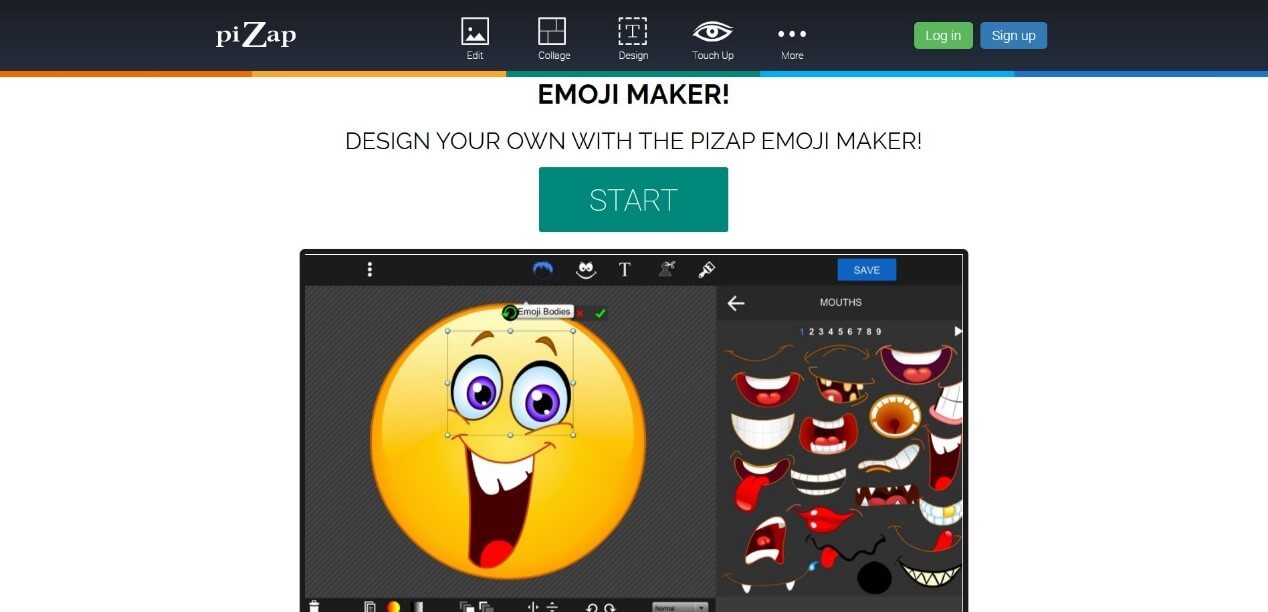
2. piZap Emoji Maker(Online)
piZap Emoji Maker is an online editor that has extensive emoji features that can help you to create awesome emojis. However, before you can do something, a mandatory signing in is required by this editor.
Price:
- Free
- Extra Features - piZap PRO for $5.99 per month or $35.88 per year
Features:
- All in one tool that can be used to create emoji, edit photos, create memes, etc.
- 6 million stock images
- Vibrant, colorful filters exclusive to this tool
- About 367 font options
3. Flat Icons Emoji Maker(Online)
Flat Icons Emoji is one of the simplest tools that are available to you for creating customized emojis of your choice.
![]()
Price:
- Free
- Premium bundle offers for $79 or $3710 (depends on the packs you choose)
Features:
- Offers a lot of shape options
- Provides a good collection of icon bundles for free
- Options to download both in PNG and SVG formats
- Easy editing and saving options
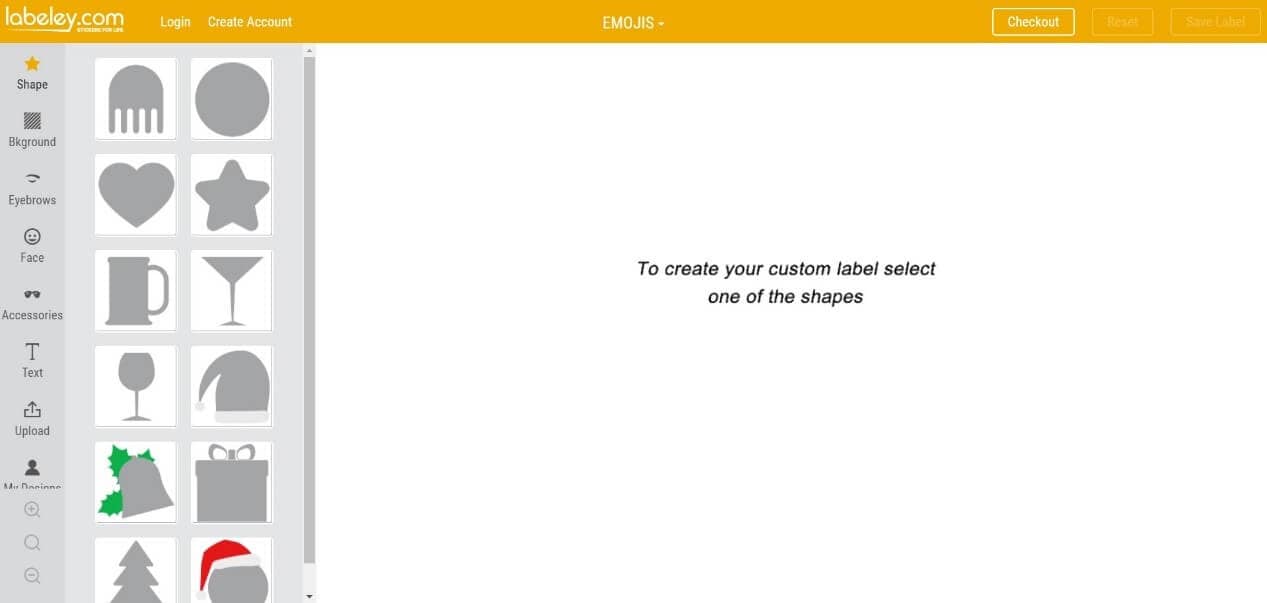
4. Labeley.com(Online)
Labeley.com is an online tool that allows you to design the emoji that you desire as well as provide you with printed copies of your design for an amount.
Price:
- Free
Features:
- Cool designing features and options for emoji
- Allows to save edits and make changes to it afterward
- Provides a set of beautiful artwork collections
- Provides “ print and delivery” option if you need physical copies of the emoji you designed (chargeable)
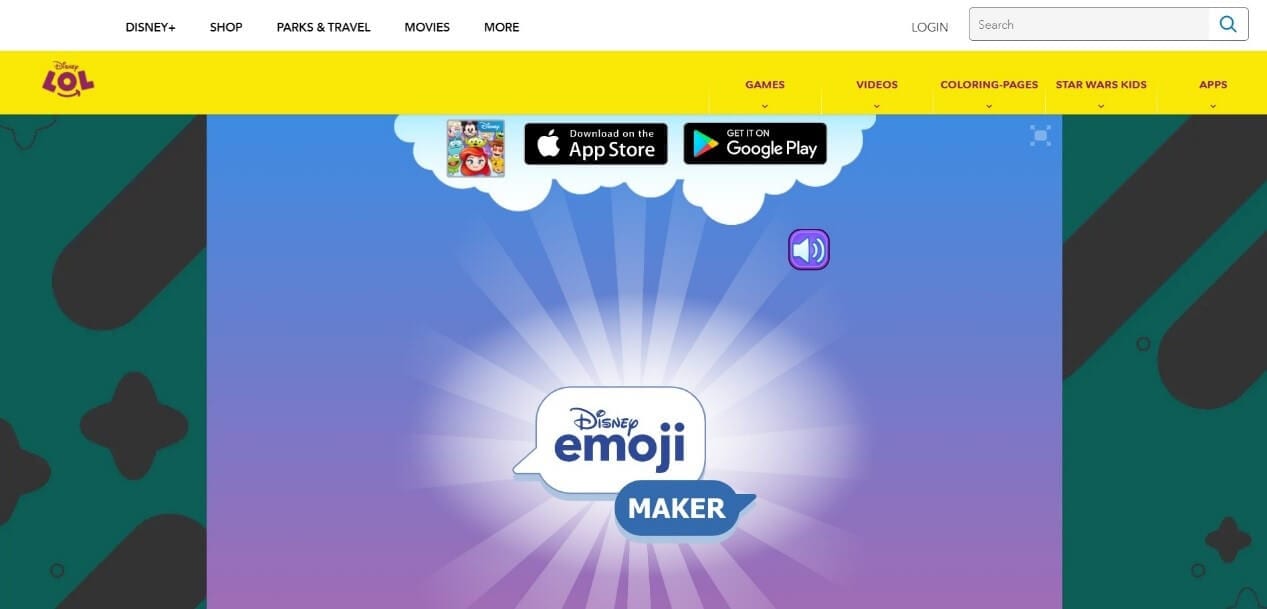
5. Disney Emoji Maker (Online)
As the name indicates, Disney Emoji Maker allows you to customize emoji based on some Disney characters. This emoji maker itself is very fun to use.
Price:
- Free
Features:
- An amazing user interface
- A variety of emoji features to add
- Apt for kids as well as grownups
- Easy export of the created emoji
6. Animated Emoji Maker (Android app)
Animated Emoji Maker is a tool that allows you to create wonderful emojis on any android devices without much effort.

Price:
- Free
Features:
- Allows to create normal as well as animated emoji
- Different characters like a cat, fox, dog, pig, panda chicken, monkey are available to create emoji
- Allows to customize emoji according to the user’s appearance
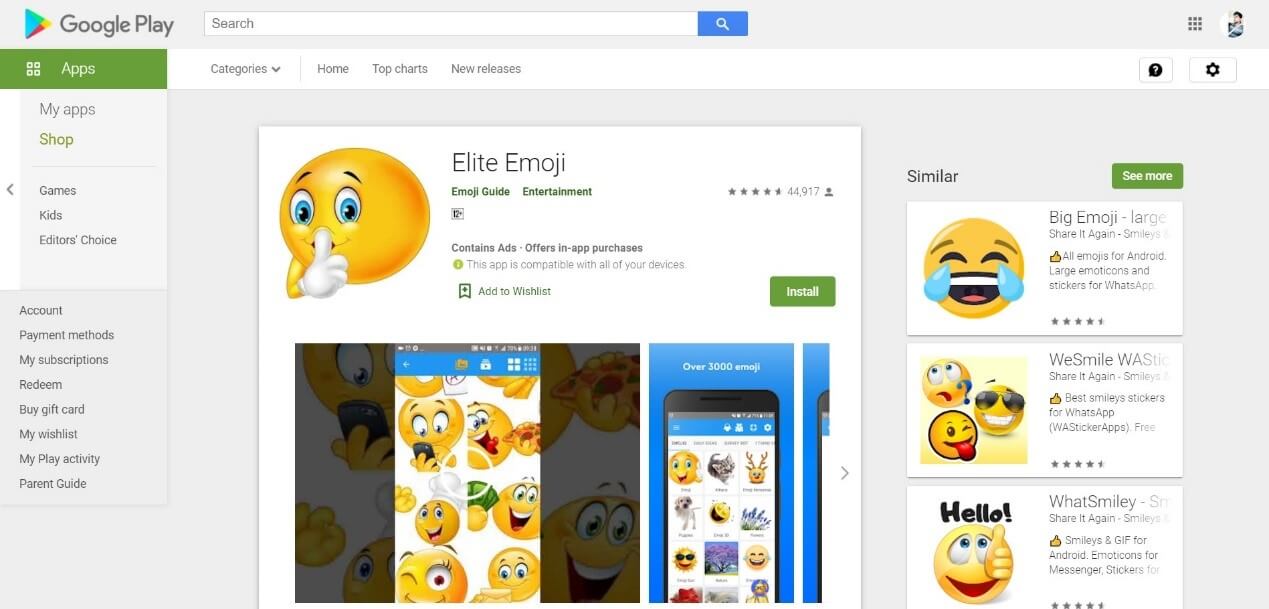
7. Elite Emoji (Android app)
Elite Emoji is an android tool that will allow you to create high-quality emoji that can be used to express ideas and emotions in your conversations.
Price:
- Free
Features
- 2000+ emoji options to choose from
- Single touch sharing in social media platforms like WhatsApp, Messenger, Instagram, etc.
- Ober 5000+ default messages to add to emojis
- Emoji suggestions, taking into account the personality traits of each user
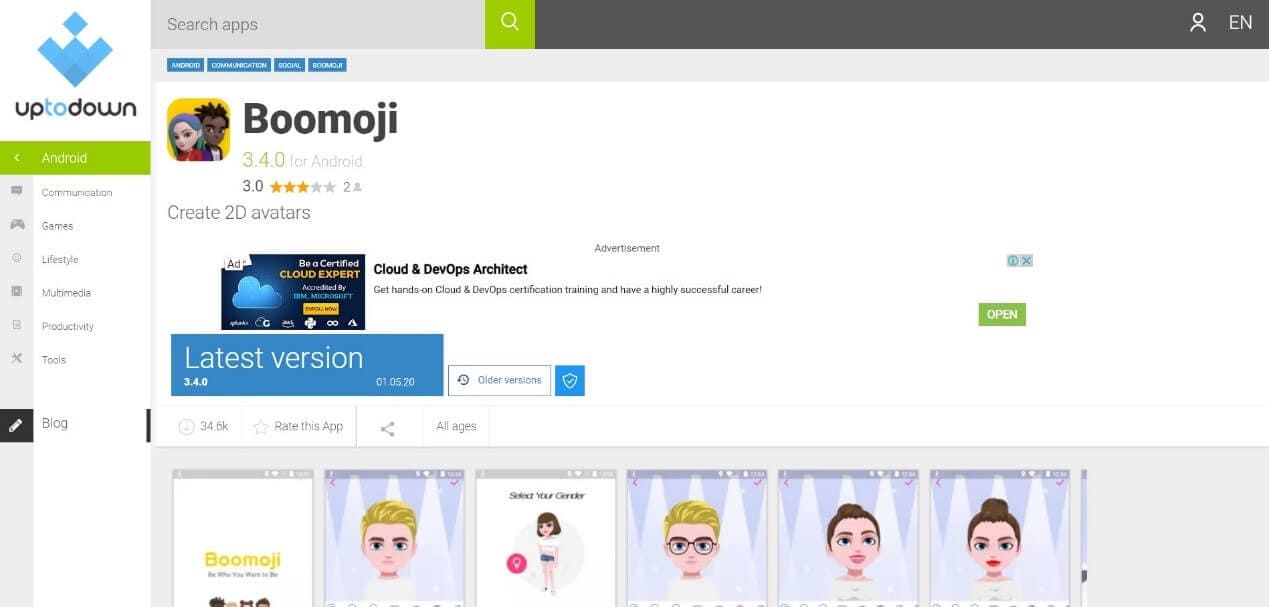
8. Boomoji (Android app)
Boomoji is a free Android application that will allow you to create fun avatar type emoji of your choice.
Price:
- Free
Features:
- A ton of characteristics to edit
- Allows to create exact animate clones of the users
- Direct sharing into social media networks
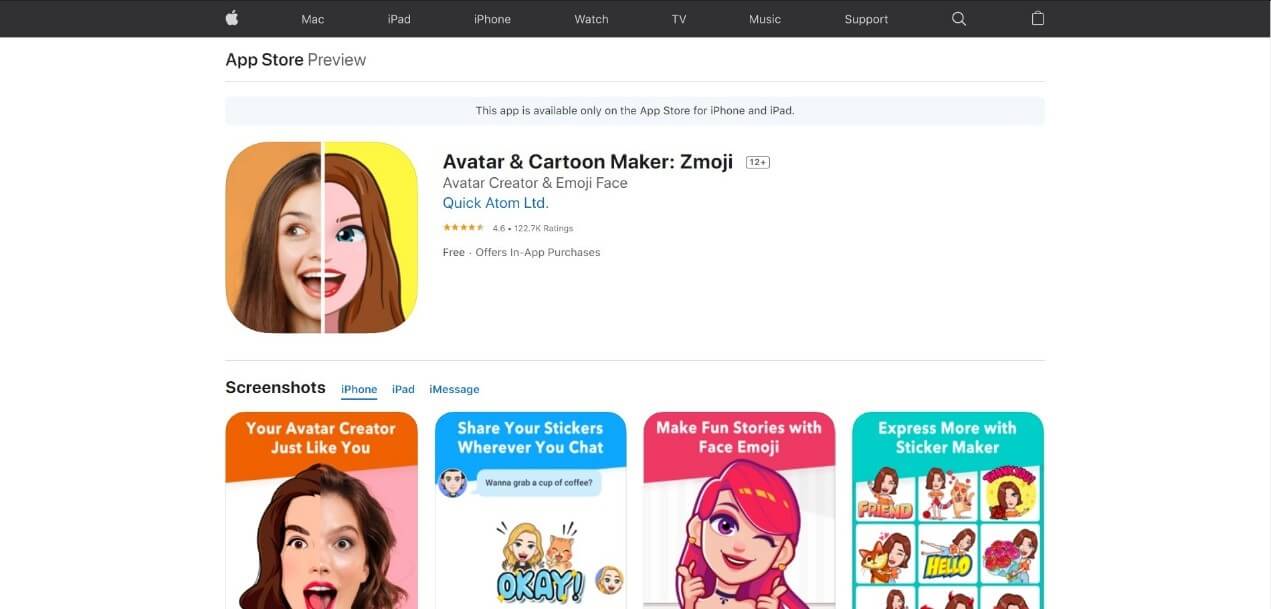
9. Zmoji (iPhone app)
Zmoji is an iPhone tool that allows you to create and customize emojis that you need for any social interactions.
Price:
- Free
- Zmoji Premium for $99.9 per year
Features:
- Quick and easy creation of expressive avatars and emoji
- Create an animated avatar resembling the user appearance
- A number of fashionable options and facial features are available
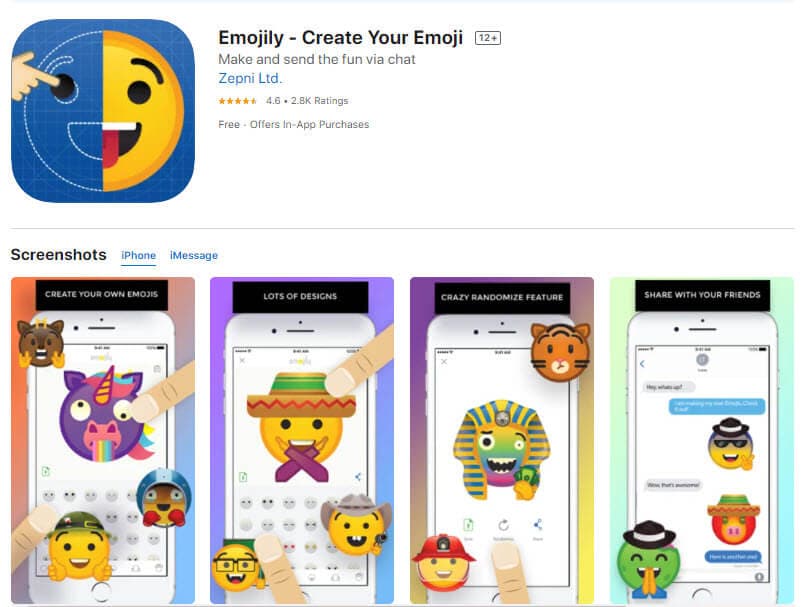
10. Emojily (iPhone app)
Emojily is a fun tool that provides a large number of crazy emoji features. It is a free iPhone application that allows the sharing of the edited emoji on any platform.
Price:
- Free
- $0.99 for unlocking single emoji packs
- $3.99 for unlocking all packs
Features:
- A ton of items to choose from to create unique emoji
- An application provided keyboard to use the emoji
- A variety of design options
Part 2: Add Emojis to Your Video with Wondershare Filmora
Wondershare Filmora is an all in one video editing application that offers a ton of video editing options and features, with the addition of interesting emojis that can be used to create wonderful videos. Some of the best features of Filmora include a number of animated titles, motion tracking, animation keyframing, vide effects, enhanced video stabilization, noise removal, noise effects, and much more.
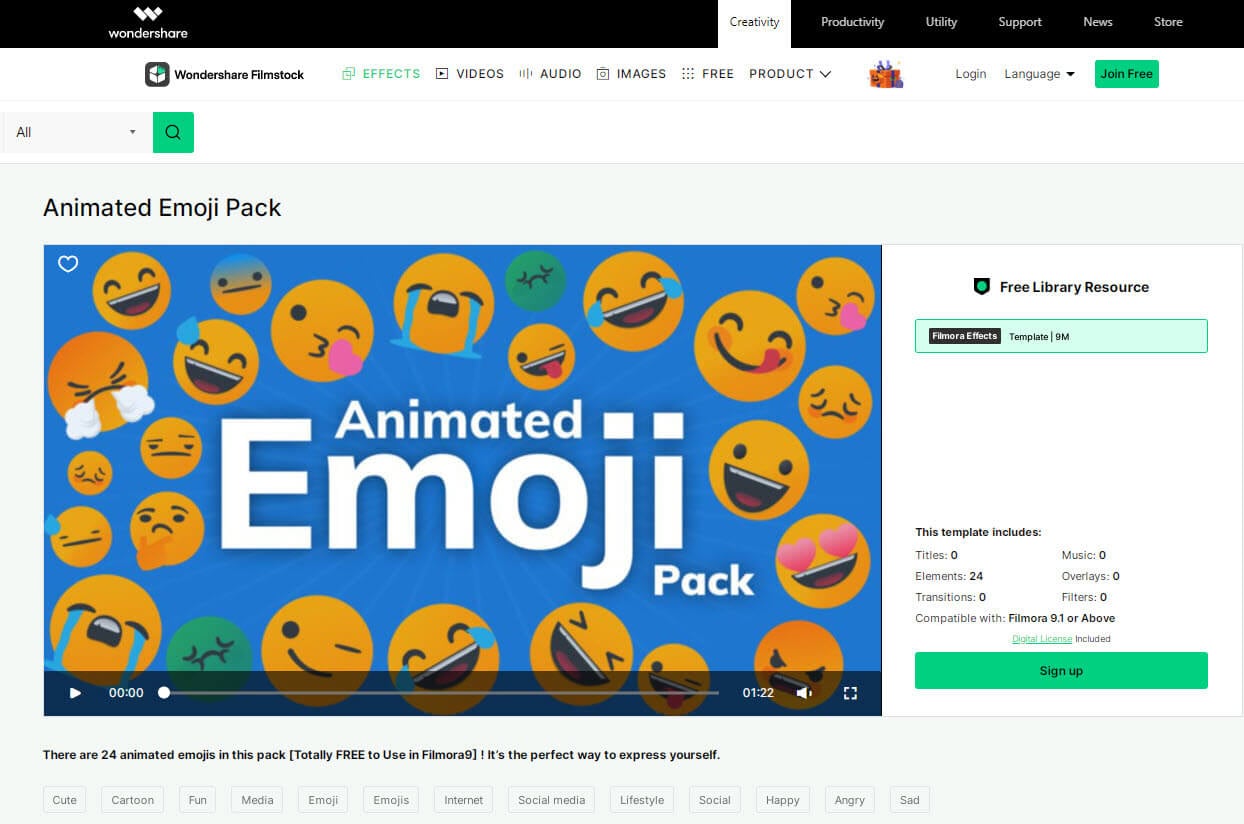
The Filmora application offers 9 inbuilt emojis within the tool and more emojis of different genres can be accessed by downloading the Animated Emoji Pack from the Filmstock effects store.
Adding emoji to videos has been a trend for some time. It is fun as well as allows the creator to express his ideas or feelings without the use of long texts and not offending the viewers in any way. So, let’s see how Filmora can be used to add emoji to any videos.


Steps to Follow:
1. Download and install Wondershare Filmora on your PC.

2. Create a New Project and add the video that needs to be edited to the Filmora timeline.
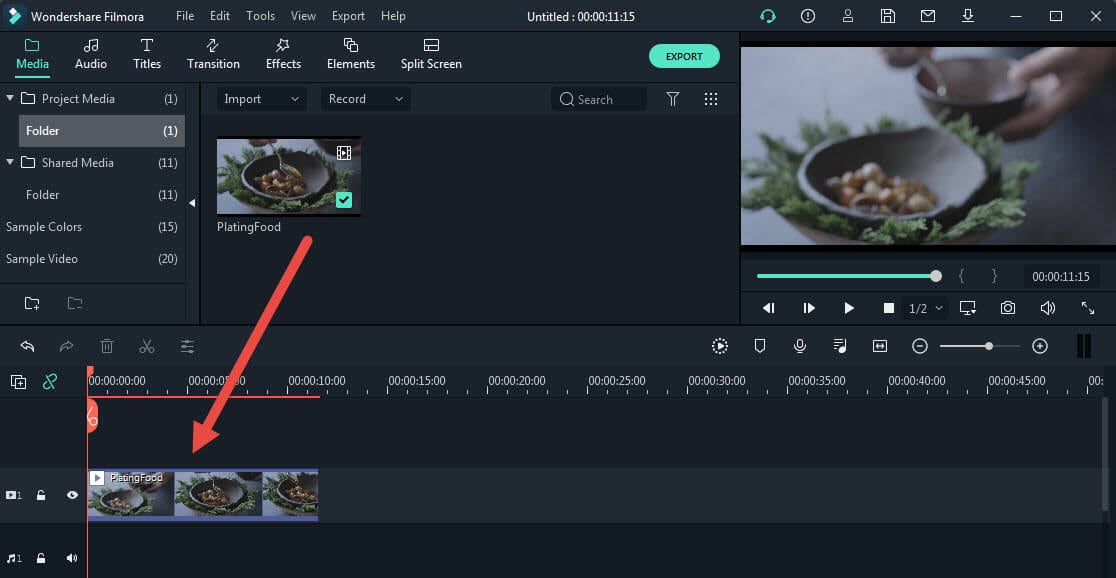
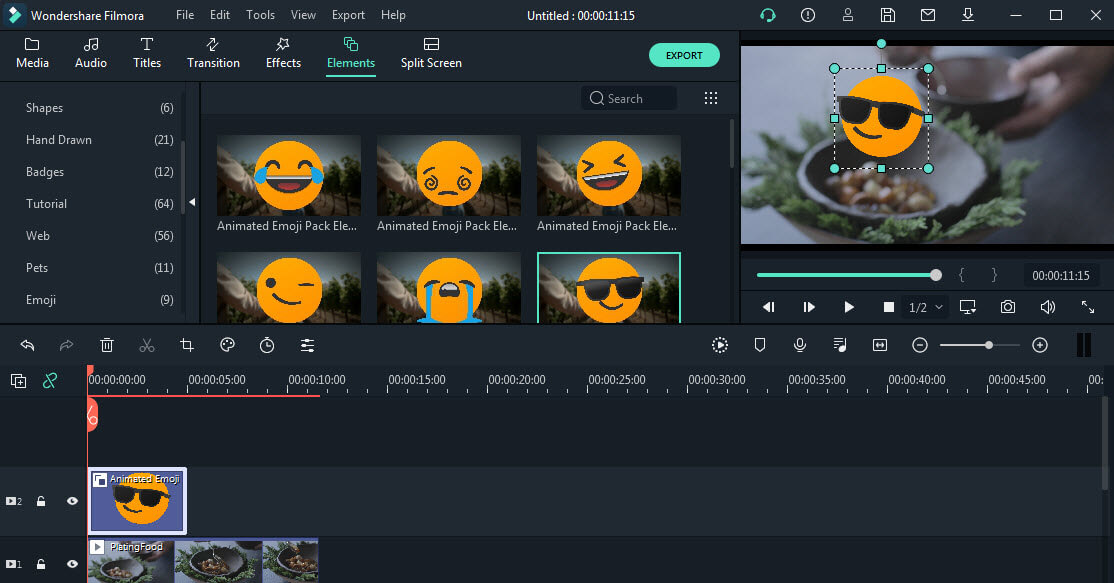
3. Tap on the Elements tab at the top and tap on the Emoji category on the side. A list of emoji elements will be displayed to you.

4. Or you can go to Wondershare Filmstock (Filmora’s effects store), find the free Animated Emoji Pack and download more emojis.
5. Select the emoji you like and drag and drop it just above the video on your timeline.
6. Adjust the position, duration, or size of the emoji if needed. Then preview the results and make changes if necessary.

7. After that, tap on the Export tab and save the video to any location of your choice.

Conclusion
Emoji is a wonderful way of expressing one’s ideas or feelings towards something on social media platforms like WhatsApp, YouTube, Facebook, etc. Most often the emoji provided by these applications may not be enough to express ourselves and hence there will be a need for creating or downloading more emoji. A list of the best 10 emoji creator apps has been listed above for you.
The use of emoji is not limited to just chats and comments, they are also used on images and videos. Filmora is an application that can be used to add emoji to video to make it more attractive and appealing.
We hope this article has been helpful to you. Please let us know what you think about our suggestion in the comment box below.
Shanoon Cox
Shanoon Cox is a writer and a lover of all things video.
Follow @Shanoon Cox
Shanoon Cox
Mar 27, 2024• Proven solutions
In this generation of online chatting and social media, emoji plays a big role in making our conversation easier and interesting. It helps people to express feelings or convey something in a better way than words or sentences ever could. Adding an emoji to chat, video or photo brings more fun to the content and the type of emojis different individuals prefer to use will be different.
Want to create your own emoji? So there is a need for emoji makers that can help to create customized emojis depending on everyone’s likes.
There are a lot of emoji makers in the online market that offers a bundle of pre-packed emoji as well as help you to create emoji of your choice. These tools help you to create your own emoji on whichever theme you wish providing a lot of customizing options.
- Part 1: Best 10 Emoji Makers to Create Your Own Emojis
- Part 2: Add Emojis to Your Video with Wondershare Filmora
Part 1: Best 10 Emoji Makers to Create Your Own Emojis
Most people around the world use emoji in their conversations, whether it be chats, comments on social media, writing blogs, etc. But the type of emojis preferred by different people may vary and sometimes the default emojis available might not be enough to express what they wish to. Hence there is a need for creating more emoji, depending on each individual’s taste.
This is where the emoji makers come in. Here we will discuss the top 10 emoji makers that can be used to create attractive emojis for sharing on social media platforms.
- [1. Emoji-maker.com(Online)](#emoji maker1)
- [2. piZap Emoji Maker(Online)](#emoji maker2)
- [3. Flat Icons Emoji Maker(Online)](#emoji maker3)
- [4. Labeley.com(Online)](#emoji maker4)
- [5. Disney Emoji Maker (Online)](#emoji maker5)
- [6. Animated Emoji Maker (Android app)](#emoji maker6)
- [7. Elite Emoji (Android app)](#emoji maker7)
- [8. Boomoji (Android app)](#emoji maker8)
- [9. Zmoji (iPhone app)](#emoji maker9)
- [10. Emojily (iPhone app)](#emoji maker10)
1. Emoji-maker.com(Online)
Emoji maker.com is an online told that provides a lot of beautiful and unique emoji editing options to the users.
Price:
- Free
Features:
- Offers a wide variety of emoji shapes
- Allows to customize emojis in a match to the user’s face
- Has an Emoji text function, that allows adding text to any emoji
- Provides a lot of emoji background options
- Provides multiple saving options for the emojis you have created
2. piZap Emoji Maker(Online)
piZap Emoji Maker is an online editor that has extensive emoji features that can help you to create awesome emojis. However, before you can do something, a mandatory signing in is required by this editor.
Price:
- Free
- Extra Features - piZap PRO for $5.99 per month or $35.88 per year
Features:
- All in one tool that can be used to create emoji, edit photos, create memes, etc.
- 6 million stock images
- Vibrant, colorful filters exclusive to this tool
- About 367 font options
3. Flat Icons Emoji Maker(Online)
Flat Icons Emoji is one of the simplest tools that are available to you for creating customized emojis of your choice.
![]()
Price:
- Free
- Premium bundle offers for $79 or $3710 (depends on the packs you choose)
Features:
- Offers a lot of shape options
- Provides a good collection of icon bundles for free
- Options to download both in PNG and SVG formats
- Easy editing and saving options
4. Labeley.com(Online)
Labeley.com is an online tool that allows you to design the emoji that you desire as well as provide you with printed copies of your design for an amount.
Price:
- Free
Features:
- Cool designing features and options for emoji
- Allows to save edits and make changes to it afterward
- Provides a set of beautiful artwork collections
- Provides “ print and delivery” option if you need physical copies of the emoji you designed (chargeable)
5. Disney Emoji Maker (Online)
As the name indicates, Disney Emoji Maker allows you to customize emoji based on some Disney characters. This emoji maker itself is very fun to use.
Price:
- Free
Features:
- An amazing user interface
- A variety of emoji features to add
- Apt for kids as well as grownups
- Easy export of the created emoji
6. Animated Emoji Maker (Android app)
Animated Emoji Maker is a tool that allows you to create wonderful emojis on any android devices without much effort.

Price:
- Free
Features:
- Allows to create normal as well as animated emoji
- Different characters like a cat, fox, dog, pig, panda chicken, monkey are available to create emoji
- Allows to customize emoji according to the user’s appearance
7. Elite Emoji (Android app)
Elite Emoji is an android tool that will allow you to create high-quality emoji that can be used to express ideas and emotions in your conversations.
Price:
- Free
Features
- 2000+ emoji options to choose from
- Single touch sharing in social media platforms like WhatsApp, Messenger, Instagram, etc.
- Ober 5000+ default messages to add to emojis
- Emoji suggestions, taking into account the personality traits of each user
8. Boomoji (Android app)
Boomoji is a free Android application that will allow you to create fun avatar type emoji of your choice.
Price:
- Free
Features:
- A ton of characteristics to edit
- Allows to create exact animate clones of the users
- Direct sharing into social media networks
9. Zmoji (iPhone app)
Zmoji is an iPhone tool that allows you to create and customize emojis that you need for any social interactions.
Price:
- Free
- Zmoji Premium for $99.9 per year
Features:
- Quick and easy creation of expressive avatars and emoji
- Create an animated avatar resembling the user appearance
- A number of fashionable options and facial features are available
10. Emojily (iPhone app)
Emojily is a fun tool that provides a large number of crazy emoji features. It is a free iPhone application that allows the sharing of the edited emoji on any platform.
Price:
- Free
- $0.99 for unlocking single emoji packs
- $3.99 for unlocking all packs
Features:
- A ton of items to choose from to create unique emoji
- An application provided keyboard to use the emoji
- A variety of design options
Part 2: Add Emojis to Your Video with Wondershare Filmora
Wondershare Filmora is an all in one video editing application that offers a ton of video editing options and features, with the addition of interesting emojis that can be used to create wonderful videos. Some of the best features of Filmora include a number of animated titles, motion tracking, animation keyframing, vide effects, enhanced video stabilization, noise removal, noise effects, and much more.
The Filmora application offers 9 inbuilt emojis within the tool and more emojis of different genres can be accessed by downloading the Animated Emoji Pack from the Filmstock effects store.
Adding emoji to videos has been a trend for some time. It is fun as well as allows the creator to express his ideas or feelings without the use of long texts and not offending the viewers in any way. So, let’s see how Filmora can be used to add emoji to any videos.
Steps to Follow:
1. Download and install Wondershare Filmora on your PC.
2. Create a New Project and add the video that needs to be edited to the Filmora timeline.
3. Tap on the Elements tab at the top and tap on the Emoji category on the side. A list of emoji elements will be displayed to you.
4. Or you can go to Wondershare Filmstock (Filmora’s effects store), find the free Animated Emoji Pack and download more emojis.
5. Select the emoji you like and drag and drop it just above the video on your timeline.
6. Adjust the position, duration, or size of the emoji if needed. Then preview the results and make changes if necessary.
7. After that, tap on the Export tab and save the video to any location of your choice.
Conclusion
Emoji is a wonderful way of expressing one’s ideas or feelings towards something on social media platforms like WhatsApp, YouTube, Facebook, etc. Most often the emoji provided by these applications may not be enough to express ourselves and hence there will be a need for creating or downloading more emoji. A list of the best 10 emoji creator apps has been listed above for you.
The use of emoji is not limited to just chats and comments, they are also used on images and videos. Filmora is an application that can be used to add emoji to video to make it more attractive and appealing.
We hope this article has been helpful to you. Please let us know what you think about our suggestion in the comment box below.
Shanoon Cox
Shanoon Cox is a writer and a lover of all things video.
Follow @Shanoon Cox
Shanoon Cox
Mar 27, 2024• Proven solutions
In this generation of online chatting and social media, emoji plays a big role in making our conversation easier and interesting. It helps people to express feelings or convey something in a better way than words or sentences ever could. Adding an emoji to chat, video or photo brings more fun to the content and the type of emojis different individuals prefer to use will be different.
Want to create your own emoji? So there is a need for emoji makers that can help to create customized emojis depending on everyone’s likes.
There are a lot of emoji makers in the online market that offers a bundle of pre-packed emoji as well as help you to create emoji of your choice. These tools help you to create your own emoji on whichever theme you wish providing a lot of customizing options.
- Part 1: Best 10 Emoji Makers to Create Your Own Emojis
- Part 2: Add Emojis to Your Video with Wondershare Filmora
Part 1: Best 10 Emoji Makers to Create Your Own Emojis
Most people around the world use emoji in their conversations, whether it be chats, comments on social media, writing blogs, etc. But the type of emojis preferred by different people may vary and sometimes the default emojis available might not be enough to express what they wish to. Hence there is a need for creating more emoji, depending on each individual’s taste.
This is where the emoji makers come in. Here we will discuss the top 10 emoji makers that can be used to create attractive emojis for sharing on social media platforms.
- [1. Emoji-maker.com(Online)](#emoji maker1)
- [2. piZap Emoji Maker(Online)](#emoji maker2)
- [3. Flat Icons Emoji Maker(Online)](#emoji maker3)
- [4. Labeley.com(Online)](#emoji maker4)
- [5. Disney Emoji Maker (Online)](#emoji maker5)
- [6. Animated Emoji Maker (Android app)](#emoji maker6)
- [7. Elite Emoji (Android app)](#emoji maker7)
- [8. Boomoji (Android app)](#emoji maker8)
- [9. Zmoji (iPhone app)](#emoji maker9)
- [10. Emojily (iPhone app)](#emoji maker10)
1. Emoji-maker.com(Online)
Emoji maker.com is an online told that provides a lot of beautiful and unique emoji editing options to the users.
Price:
- Free
Features:
- Offers a wide variety of emoji shapes
- Allows to customize emojis in a match to the user’s face
- Has an Emoji text function, that allows adding text to any emoji
- Provides a lot of emoji background options
- Provides multiple saving options for the emojis you have created
2. piZap Emoji Maker(Online)
piZap Emoji Maker is an online editor that has extensive emoji features that can help you to create awesome emojis. However, before you can do something, a mandatory signing in is required by this editor.
Price:
- Free
- Extra Features - piZap PRO for $5.99 per month or $35.88 per year
Features:
- All in one tool that can be used to create emoji, edit photos, create memes, etc.
- 6 million stock images
- Vibrant, colorful filters exclusive to this tool
- About 367 font options
3. Flat Icons Emoji Maker(Online)
Flat Icons Emoji is one of the simplest tools that are available to you for creating customized emojis of your choice.
![]()
Price:
- Free
- Premium bundle offers for $79 or $3710 (depends on the packs you choose)
Features:
- Offers a lot of shape options
- Provides a good collection of icon bundles for free
- Options to download both in PNG and SVG formats
- Easy editing and saving options
4. Labeley.com(Online)
Labeley.com is an online tool that allows you to design the emoji that you desire as well as provide you with printed copies of your design for an amount.
Price:
- Free
Features:
- Cool designing features and options for emoji
- Allows to save edits and make changes to it afterward
- Provides a set of beautiful artwork collections
- Provides “ print and delivery” option if you need physical copies of the emoji you designed (chargeable)
5. Disney Emoji Maker (Online)
As the name indicates, Disney Emoji Maker allows you to customize emoji based on some Disney characters. This emoji maker itself is very fun to use.
Price:
- Free
Features:
- An amazing user interface
- A variety of emoji features to add
- Apt for kids as well as grownups
- Easy export of the created emoji
6. Animated Emoji Maker (Android app)
Animated Emoji Maker is a tool that allows you to create wonderful emojis on any android devices without much effort.
Price:
- Free
Features:
- Allows to create normal as well as animated emoji
- Different characters like a cat, fox, dog, pig, panda chicken, monkey are available to create emoji
- Allows to customize emoji according to the user’s appearance
7. Elite Emoji (Android app)
Elite Emoji is an android tool that will allow you to create high-quality emoji that can be used to express ideas and emotions in your conversations.
Price:
- Free
Features
- 2000+ emoji options to choose from
- Single touch sharing in social media platforms like WhatsApp, Messenger, Instagram, etc.
- Ober 5000+ default messages to add to emojis
- Emoji suggestions, taking into account the personality traits of each user
8. Boomoji (Android app)
Boomoji is a free Android application that will allow you to create fun avatar type emoji of your choice.
Price:
- Free
Features:
- A ton of characteristics to edit
- Allows to create exact animate clones of the users
- Direct sharing into social media networks
9. Zmoji (iPhone app)
Zmoji is an iPhone tool that allows you to create and customize emojis that you need for any social interactions.
Price:
- Free
- Zmoji Premium for $99.9 per year
Features:
- Quick and easy creation of expressive avatars and emoji
- Create an animated avatar resembling the user appearance
- A number of fashionable options and facial features are available
10. Emojily (iPhone app)
Emojily is a fun tool that provides a large number of crazy emoji features. It is a free iPhone application that allows the sharing of the edited emoji on any platform.
Price:
- Free
- $0.99 for unlocking single emoji packs
- $3.99 for unlocking all packs
Features:
- A ton of items to choose from to create unique emoji
- An application provided keyboard to use the emoji
- A variety of design options
Part 2: Add Emojis to Your Video with Wondershare Filmora
Wondershare Filmora is an all in one video editing application that offers a ton of video editing options and features, with the addition of interesting emojis that can be used to create wonderful videos. Some of the best features of Filmora include a number of animated titles, motion tracking, animation keyframing, vide effects, enhanced video stabilization, noise removal, noise effects, and much more.
The Filmora application offers 9 inbuilt emojis within the tool and more emojis of different genres can be accessed by downloading the Animated Emoji Pack from the Filmstock effects store.
Adding emoji to videos has been a trend for some time. It is fun as well as allows the creator to express his ideas or feelings without the use of long texts and not offending the viewers in any way. So, let’s see how Filmora can be used to add emoji to any videos.
Steps to Follow:
1. Download and install Wondershare Filmora on your PC.
2. Create a New Project and add the video that needs to be edited to the Filmora timeline.
3. Tap on the Elements tab at the top and tap on the Emoji category on the side. A list of emoji elements will be displayed to you.
4. Or you can go to Wondershare Filmstock (Filmora’s effects store), find the free Animated Emoji Pack and download more emojis.
5. Select the emoji you like and drag and drop it just above the video on your timeline.
6. Adjust the position, duration, or size of the emoji if needed. Then preview the results and make changes if necessary.
7. After that, tap on the Export tab and save the video to any location of your choice.
Conclusion
Emoji is a wonderful way of expressing one’s ideas or feelings towards something on social media platforms like WhatsApp, YouTube, Facebook, etc. Most often the emoji provided by these applications may not be enough to express ourselves and hence there will be a need for creating or downloading more emoji. A list of the best 10 emoji creator apps has been listed above for you.
The use of emoji is not limited to just chats and comments, they are also used on images and videos. Filmora is an application that can be used to add emoji to video to make it more attractive and appealing.
We hope this article has been helpful to you. Please let us know what you think about our suggestion in the comment box below.
Shanoon Cox
Shanoon Cox is a writer and a lover of all things video.
Follow @Shanoon Cox
8 Best Meme Maker App to Create Memes with Your Own Picture
8 Best Meme Maker App to Create Memes with Your Own Picture

Ollie Mattison
Mar 27, 2024• Proven solutions
The memes are the most popular and trendy things at present, and many marketers also want to know the memes marketing . But, creating memes needs creativity and sometimes can be difficult. Luckily, the meme maker app helps to create memes easily. However, there are many such tools and only a few can be trusted.
Do you know how to make memes with your own picture? Here are the best 8 images and video memes creator apps for Android and iPhone.
However, if you want to make a meme online, Filmora meme maker is your ultimate solution. It helps you make image, GIF and video memes directly without watermark. It is totally FREE to use and no sign up. You can change text size, color and position to create caption when you are editing. You can also put text inside or outside in GIF. Just with a few clicks, your meme is done . Try it now!
- Part1: The Best Meme Maker App On Android
- Part2: The Best Meme Maker App For iPhone
- Part3: How To Make Memes With Your Own Picture
Comparison table
Here is a comparison table that you can have a quick reference.
| Support system | Compatibility | Size | Pros | |
|---|---|---|---|---|
| GATM Meme Generator | Android | Android 19 and above | 13M | Quick sharing options |
| 9GAG | Android | Varies with device | Varies with device | Get creative with meme-making in website |
| Memedroid | Android | 4.1 and up | 13M | Active online community of gifs and memes lovers |
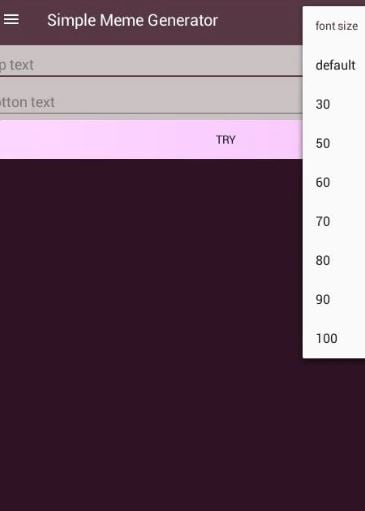
| Simple Meme Generator | Android | 4.1 and up | 12M | Customize color, texts and fonts |
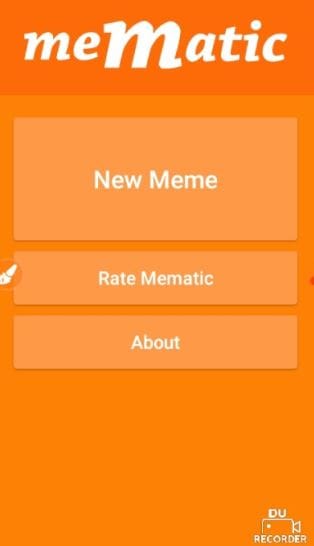
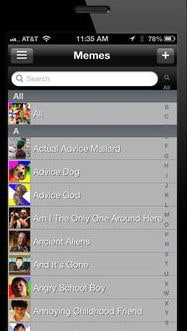
| Mematic | iOS | 10.3 or later | 87.7 MB | A tenor search option for you |
| Meme Factory | iOS | 4.3 or later | 11.4 MB | Regular meme templates updated |
| Memes Generator + Meme Creator | iOS | 9.0 or later | 91.8 MB | Awesome stickers to use |
| Meme Generator | iOS | 8.0 or later | 73.8 MB | 500 high-quality memes and sample captions |
Part 1: The Best Meme Maker App On Android
1. GATM Meme Generator
The GATM Meme Generator offers semi-frequent updates and you can choose from hundreds of popular as well as browsable memes to create and share with your friends.
Pros
- Offers gallery of images or Create meme using your own images
- Get a live preview of the memes while creating
- Quick sharing options and saving to SD card option
- Easy to use
Cons
- Watermarks on the free version of this meme maker app
- Free versions of this video memes creator app contain ads
2. 9GAG
This video meme creator app is the perfect one for spending time, laugh, and also make friends. It is an easy to use app maker and loads quickly without wasting your time.
Pros
- Enjoy anywhere and at any point of time with thorough laugh riot 9GAG
- Easy sharing of the trendiest memes in Facebook, Twitter, Instagram, Whatsapp and more
- Discuss any topic with this healthiest addiction and connect with millions
- Get creative with meme-making and if chosen by 9GAG, you get fame instantly
Cons
- Gifs and videos take time to load
- Difficulty in downloading large images

3. Memedroid
It is an old meme maker app that features all the general bunch of new as well as old memes ready for creating. You may also choose from your own images to create gifs and memes and caption them to laugh out loud.
Pros
- Create memes for any occasions from your own images
- Greatest online community of gifs and memes lovers
- Creating memes is easy with this video memes creator app
- Constantly updated funny content
- Multi language support Spanish, English, Portuguese, Polish, Russian, French, and Italian language support
Cons
- Very little features
- Crashes several times
4. Simple Meme Generator
Creating high-quality comical gifs and memes from ordinary images is possible with this Simple Meme Generator. Just use the images saved on your Android device to upload and add funny texts at the top and bottom of the image and create funny memes.
Pros
- Simple to use
- Use your own photos, ideas, and texts
- Customize color, texts, fonts, and more
Cons
- Watermark on the memes created
- Use your own creativity to create memes from your own images and videos
Part 2: The Best Meme Maker App For iPhone
5. Mematic
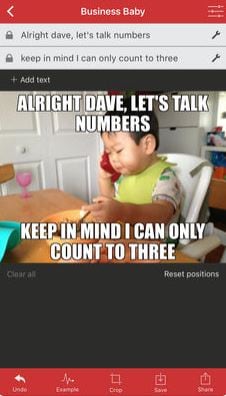
A descent meme maker app, Mematic contains a good library of meme templates. From classic to the newest, there is a huge range of templates available or you may use your own images for creating memes.
Pros
- Simple user interface
- A tenor search option
- Easy sharing option
Cons
- Get access to all features only in pro option that is billed monthly
- Ads are present in the free option
- Occasional bug can slow down the access
6. Meme Factory
An easy to use video memes creator app, Meme Factory is a great tool to create memes and gifs easily. Creating memes, sharing it with friends, and having fun becomes very simple when you use the Meme Factory app.
Pros
- Browse from several funny user-uploaded advice animals and memes
- Regular meme templates updated
- More than 125 meme templates or use your own image
- Sort memes by random, popular, recent
Cons
- Too many ads to disturb your creating
7. Memes Generator + Meme Creator
Millions of people enjoy this meme maker app. It is an easy and quick way of creating memes in just a few taps. You do not need a photoshop app or other photo editors with Memes Generator+Meme Creator app.
Pros
- A massive library of stock photos memes
- You can add your own close caption quotes
- You may add your own watermark
- Awesome stickers available
Cons
- Without opting for premium services, the subscriptions are often wrongly charged
- Unlimited access only for premium account users

8. Meme Generator
You can find several meme categories with this meme maker app. For creating the funny memes, use Meme Generator and share with your friends on Instagram, Dropbox, Whatsapp, Facebook, and more.
Pros
- You get over 500 high-quality memes and sample captions
- Adjust size and color
- Multiple fonts to choose from
- Search or filter option to find your required memes easily
- No watermarks
Cons
- Ads appear if the subscription of $2 is not paid and if you avail this free video memes creator app
Part 3: How To Make Memes With Your Own Picture
Are you bored of trying the common memes template available on the various apps? Try out making funny memes from your own image with Meme Generator . Do you know how to make memes with your own picture? All the meme maker app has the feature of creating memes with your own picture and it also gives you the clear direction on the process of creating it. Here is the step by step guide.
Step 1: Open the app. Click on the plus sign at the top right corner of the app screen. If other apps are being used, check for the option that lets you upload your image. There might be a cam or plus option or written as use your photo or custom meme, etc.
Step 2: Next, choose your image from the gallery or take a photo directly. The app will ask for your permission to access your camera or library. You may click on the OK button. Select the image, you wish to create the meme with.
Step 3: Then, edit the caption by clicking on the text bars above. You may further customize by checking out the icons on the top right corner to change the style of the image and the text. Once you are satisfied with the meme that you created, tap save and then share.

Conclusion
Memes are fun as it lets you laugh and be happy. The meme maker app is the best way to create meme not only choosing from the template but also with your own picture. Try the above apps to create funny memes and also learn how to make memes with your own picture.
Ollie Mattison
Ollie Mattison is a writer and a lover of all things video.
Follow @Ollie Mattison
Ollie Mattison
Mar 27, 2024• Proven solutions
The memes are the most popular and trendy things at present, and many marketers also want to know the memes marketing . But, creating memes needs creativity and sometimes can be difficult. Luckily, the meme maker app helps to create memes easily. However, there are many such tools and only a few can be trusted.
Do you know how to make memes with your own picture? Here are the best 8 images and video memes creator apps for Android and iPhone.
However, if you want to make a meme online, Filmora meme maker is your ultimate solution. It helps you make image, GIF and video memes directly without watermark. It is totally FREE to use and no sign up. You can change text size, color and position to create caption when you are editing. You can also put text inside or outside in GIF. Just with a few clicks, your meme is done . Try it now!
- Part1: The Best Meme Maker App On Android
- Part2: The Best Meme Maker App For iPhone
- Part3: How To Make Memes With Your Own Picture
Comparison table
Here is a comparison table that you can have a quick reference.
| Support system | Compatibility | Size | Pros | |
|---|---|---|---|---|
| GATM Meme Generator | Android | Android 19 and above | 13M | Quick sharing options |
| 9GAG | Android | Varies with device | Varies with device | Get creative with meme-making in website |
| Memedroid | Android | 4.1 and up | 13M | Active online community of gifs and memes lovers |
| Simple Meme Generator | Android | 4.1 and up | 12M | Customize color, texts and fonts |
| Mematic | iOS | 10.3 or later | 87.7 MB | A tenor search option for you |
| Meme Factory | iOS | 4.3 or later | 11.4 MB | Regular meme templates updated |
| Memes Generator + Meme Creator | iOS | 9.0 or later | 91.8 MB | Awesome stickers to use |
| Meme Generator | iOS | 8.0 or later | 73.8 MB | 500 high-quality memes and sample captions |
Part 1: The Best Meme Maker App On Android
1. GATM Meme Generator
The GATM Meme Generator offers semi-frequent updates and you can choose from hundreds of popular as well as browsable memes to create and share with your friends.
Pros
- Offers gallery of images or Create meme using your own images
- Get a live preview of the memes while creating
- Quick sharing options and saving to SD card option
- Easy to use
Cons
- Watermarks on the free version of this meme maker app
- Free versions of this video memes creator app contain ads
2. 9GAG
This video meme creator app is the perfect one for spending time, laugh, and also make friends. It is an easy to use app maker and loads quickly without wasting your time.
Pros
- Enjoy anywhere and at any point of time with thorough laugh riot 9GAG
- Easy sharing of the trendiest memes in Facebook, Twitter, Instagram, Whatsapp and more
- Discuss any topic with this healthiest addiction and connect with millions
- Get creative with meme-making and if chosen by 9GAG, you get fame instantly
Cons
- Gifs and videos take time to load
- Difficulty in downloading large images
3. Memedroid
It is an old meme maker app that features all the general bunch of new as well as old memes ready for creating. You may also choose from your own images to create gifs and memes and caption them to laugh out loud.
Pros
- Create memes for any occasions from your own images
- Greatest online community of gifs and memes lovers
- Creating memes is easy with this video memes creator app
- Constantly updated funny content
- Multi language support Spanish, English, Portuguese, Polish, Russian, French, and Italian language support
Cons
- Very little features
- Crashes several times
4. Simple Meme Generator
Creating high-quality comical gifs and memes from ordinary images is possible with this Simple Meme Generator. Just use the images saved on your Android device to upload and add funny texts at the top and bottom of the image and create funny memes.
Pros
- Simple to use
- Use your own photos, ideas, and texts
- Customize color, texts, fonts, and more
Cons
- Watermark on the memes created
- Use your own creativity to create memes from your own images and videos
Part 2: The Best Meme Maker App For iPhone
5. Mematic
A descent meme maker app, Mematic contains a good library of meme templates. From classic to the newest, there is a huge range of templates available or you may use your own images for creating memes.
Pros
- Simple user interface
- A tenor search option
- Easy sharing option
Cons
- Get access to all features only in pro option that is billed monthly
- Ads are present in the free option
- Occasional bug can slow down the access
6. Meme Factory
An easy to use video memes creator app, Meme Factory is a great tool to create memes and gifs easily. Creating memes, sharing it with friends, and having fun becomes very simple when you use the Meme Factory app.
Pros
- Browse from several funny user-uploaded advice animals and memes
- Regular meme templates updated
- More than 125 meme templates or use your own image
- Sort memes by random, popular, recent
Cons
- Too many ads to disturb your creating
7. Memes Generator + Meme Creator
Millions of people enjoy this meme maker app. It is an easy and quick way of creating memes in just a few taps. You do not need a photoshop app or other photo editors with Memes Generator+Meme Creator app.
Pros
- A massive library of stock photos memes
- You can add your own close caption quotes
- You may add your own watermark
- Awesome stickers available
Cons
- Without opting for premium services, the subscriptions are often wrongly charged
- Unlimited access only for premium account users
8. Meme Generator
You can find several meme categories with this meme maker app. For creating the funny memes, use Meme Generator and share with your friends on Instagram, Dropbox, Whatsapp, Facebook, and more.
Pros
- You get over 500 high-quality memes and sample captions
- Adjust size and color
- Multiple fonts to choose from
- Search or filter option to find your required memes easily
- No watermarks
Cons
- Ads appear if the subscription of $2 is not paid and if you avail this free video memes creator app
Part 3: How To Make Memes With Your Own Picture
Are you bored of trying the common memes template available on the various apps? Try out making funny memes from your own image with Meme Generator . Do you know how to make memes with your own picture? All the meme maker app has the feature of creating memes with your own picture and it also gives you the clear direction on the process of creating it. Here is the step by step guide.
Step 1: Open the app. Click on the plus sign at the top right corner of the app screen. If other apps are being used, check for the option that lets you upload your image. There might be a cam or plus option or written as use your photo or custom meme, etc.
Step 2: Next, choose your image from the gallery or take a photo directly. The app will ask for your permission to access your camera or library. You may click on the OK button. Select the image, you wish to create the meme with.
Step 3: Then, edit the caption by clicking on the text bars above. You may further customize by checking out the icons on the top right corner to change the style of the image and the text. Once you are satisfied with the meme that you created, tap save and then share.
Conclusion
Memes are fun as it lets you laugh and be happy. The meme maker app is the best way to create meme not only choosing from the template but also with your own picture. Try the above apps to create funny memes and also learn how to make memes with your own picture.
Ollie Mattison
Ollie Mattison is a writer and a lover of all things video.
Follow @Ollie Mattison
How to Make a Photo Collage on Mac/iPhone Using iPhoto?
How to Make a Photo Collage on Mac/iPhone Using iPhoto?
Shanoon Cox
Mar 27, 2024• Proven solutions
iPhoto is a photo library familiar to iOS users. It can help you easily organize, store and sort images, and even make a slide show to help you enjoy photos. This is why, even though Apple no longer develops iPhoto, some people use it.
Update: On April 8, 2015, Apple has launched a new Photos app on OS X Yosemite, which means Apple has stopped developing iPhoto. However, if you like iPhoto, you can still use it.
The following will introduce how to use the iPhoto collage maker on Mac or iPhone. At the end of this article, iPhoto alternative software will serve as your reference.
Part 1: How to Make a Photo Collage in iPhoto?
Here are the quick steps to create a photo collage with iPhoto.
Step 1: Launch iPhoto and click “Events” in the side menu.
Step 2: Hold “Shift” and click each photo you want to include in your photo collage.
Step 3: Click the “+” button in the lower-left corner and select Card in the pop-up window.
Step 4: Choose “Picture Collage”, which should be under the Any Occasion section if you are using the iPhoto 11.
Step 5: You’ll notice that all the templates are sorted based on the occasion.
Step 6: Drag photos to the template and pick a background, orientation and design.
Step 7: Click the Buy button on the lower right-hand corner of the collage editor, or go to the Share menu and email it to yourself or family members.
But before you make a photo collage using iPhoto, here are some important things for you to know:
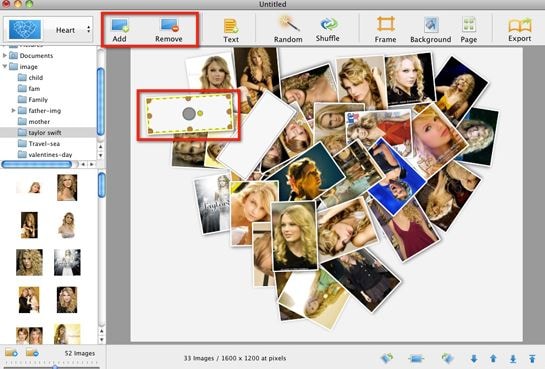
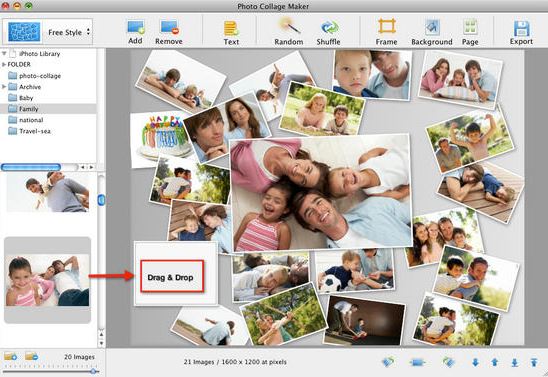
- Technically, iPhoto can’t make fancy photo collages like other Photo collages makers on Mac. So don’t expect too much of it. iPhoto only creates greeting cards with a simple collage layout.
- The templates iPhoto offers are quite limited and ordinary that you might feel a little disappointed.
- iPhoto offers no share options to save photo collages to desktop or to post on Facebook, which is a basic feature of picture collage editor.
Part 2: What Replaces iPhoto on Mac/iPhone?
Since iPhoto’s functions are not sufficient, we will introduce some alternative collage makers that you may be interested in.
Alternative to Make a Short Video, Slideshow, or Photo Collage: Wondershare Filmora
If there are too many photos to save or share with friends and family, you can use these images to make short videos to better collage and share. Filmora can do this for you, through which you can easily crop, add effects, split the screen, and merge photos. In order to make the “photo video” lively and exciting, you can also add music, audio, animation, title, music, etc. to it.
Alternative to Organize, Store, and Sort Images: iCloud
Migrating your photos to iCloud is a wise choice. iCloud is the best photo storage for iOS or Mac users. You don’t need to download other apps or software. Just allow iCloud to back up the photo’s library in the settings.
The best thing is that you can view iCloud photos anytime and anywhere after logging in to your iCloud account. You can also automatically share photos with others by opening “Shared Album”. However, if there are too many photos, a paid subscription may be required to upgrade the storage space.
Conclusion
Above are the steps to make a photo collage using iPhoto on Mac/iPhone. We also list alternative methods to meet the different needs of the Photo library. So, if this isn’t quite what you’re looking for, you can also use some online photo collage service instead. If you want to have more fun editing photo stories, welcome to download Filmora and make more memorable and interesting videos.
Shanoon Cox
Shanoon Cox is a writer and a lover of all things video.
Follow @Shanoon Cox
Shanoon Cox
Mar 27, 2024• Proven solutions
iPhoto is a photo library familiar to iOS users. It can help you easily organize, store and sort images, and even make a slide show to help you enjoy photos. This is why, even though Apple no longer develops iPhoto, some people use it.
Update: On April 8, 2015, Apple has launched a new Photos app on OS X Yosemite, which means Apple has stopped developing iPhoto. However, if you like iPhoto, you can still use it.
The following will introduce how to use the iPhoto collage maker on Mac or iPhone. At the end of this article, iPhoto alternative software will serve as your reference.
Part 1: How to Make a Photo Collage in iPhoto?
Here are the quick steps to create a photo collage with iPhoto.
Step 1: Launch iPhoto and click “Events” in the side menu.
Step 2: Hold “Shift” and click each photo you want to include in your photo collage.
Step 3: Click the “+” button in the lower-left corner and select Card in the pop-up window.
Step 4: Choose “Picture Collage”, which should be under the Any Occasion section if you are using the iPhoto 11.
Step 5: You’ll notice that all the templates are sorted based on the occasion.
Step 6: Drag photos to the template and pick a background, orientation and design.
Step 7: Click the Buy button on the lower right-hand corner of the collage editor, or go to the Share menu and email it to yourself or family members.
But before you make a photo collage using iPhoto, here are some important things for you to know:
- Technically, iPhoto can’t make fancy photo collages like other Photo collages makers on Mac. So don’t expect too much of it. iPhoto only creates greeting cards with a simple collage layout.
- The templates iPhoto offers are quite limited and ordinary that you might feel a little disappointed.
- iPhoto offers no share options to save photo collages to desktop or to post on Facebook, which is a basic feature of picture collage editor.
Part 2: What Replaces iPhoto on Mac/iPhone?
Since iPhoto’s functions are not sufficient, we will introduce some alternative collage makers that you may be interested in.
Alternative to Make a Short Video, Slideshow, or Photo Collage: Wondershare Filmora
If there are too many photos to save or share with friends and family, you can use these images to make short videos to better collage and share. Filmora can do this for you, through which you can easily crop, add effects, split the screen, and merge photos. In order to make the “photo video” lively and exciting, you can also add music, audio, animation, title, music, etc. to it.
Alternative to Organize, Store, and Sort Images: iCloud
Migrating your photos to iCloud is a wise choice. iCloud is the best photo storage for iOS or Mac users. You don’t need to download other apps or software. Just allow iCloud to back up the photo’s library in the settings.
The best thing is that you can view iCloud photos anytime and anywhere after logging in to your iCloud account. You can also automatically share photos with others by opening “Shared Album”. However, if there are too many photos, a paid subscription may be required to upgrade the storage space.
Conclusion
Above are the steps to make a photo collage using iPhoto on Mac/iPhone. We also list alternative methods to meet the different needs of the Photo library. So, if this isn’t quite what you’re looking for, you can also use some online photo collage service instead. If you want to have more fun editing photo stories, welcome to download Filmora and make more memorable and interesting videos.
Shanoon Cox
Shanoon Cox is a writer and a lover of all things video.
Follow @Shanoon Cox
How to Make Video Slideshow with Your Travel Photos
How to Make Video Slideshow with Your Travel Photos
Ollie Mattison
Mar 27, 2024• Proven solutions
We all love traveling and for a good reason. It allows us to relax, it removes the pressure from our life and it just makes the entire experience a lot better. But if you are a fan of taking picture while travelling, why not try to create a video slideshow with your images? This is one of the best and most original ways you can use it in order to share your travels with others. It works magically and it manages to bring in front some of those unique moments. However, you do need to have the proper tools when you want to create such a slideshow, but that’s great as we are here to help you with that.
How can you create a travel slideshow with travel photos
Things you need to know before creating it
Before you create the travel slideshow you have to keep in mind a few things. If you don’t then the results will not be as good as you expect. You have to be committed to the idea of having the best results and as long as you do that the outcome will be very well worth it.
You need to try and consider your audience because based on that the slideshow will have a specific format. You also need to think about telling a story as that will make it a lot more interesting other than just having a bunch of images aligned together in a non-meaningful manner.
Wondershare Filmora – The best tool to create a video slideshow with your travel photos
But one has to wonder, what tool should you use to create such a travel slideshow? Wondershare Filmora is the application of choice in this regard because it does help offer a huge variety of amazing features that all add up in order to deliver great value!
- Wondershare Filmora is great for beginners as it makes editing a breeze thanks to the stellar interface
- It also integrates transitions as well as filters and effects. It provides you with a refined set of tools that help maintain a good focus on results.
- It helps you add sound effects and a variety of music types to help you with the story.
- You can burn the result to DVD or you can share it on social media and YouTube/Vimeo among others right from within the app.
How can you create video slideshows with Wondershare Filmora?
Creating a unique slideshow video with this tool is actually very easy and it does provide you with a huge amount of value should you choose to use it. Here are several things you need to consider when making a travel slideshow video. First, choose the right music for the travel slideshow; second, adjust the duration of the photos; third, transitions and effects.
Here are the steps you need to focus on when creating a travel slideshow video with Wondershare Filmora:
Filmstock Stock Media Library ](https://filmstock.wondershare.com/creative-theme-tourism?spm=rs.filmora%5Fweb&source%5Fchannel=seo%5Farticle )
Step 1: Download and install Wondershare Filmora, then open it.
Add all the travel photos into the applications. You can add in multiple folders in order to make sorting the images a lot easier.
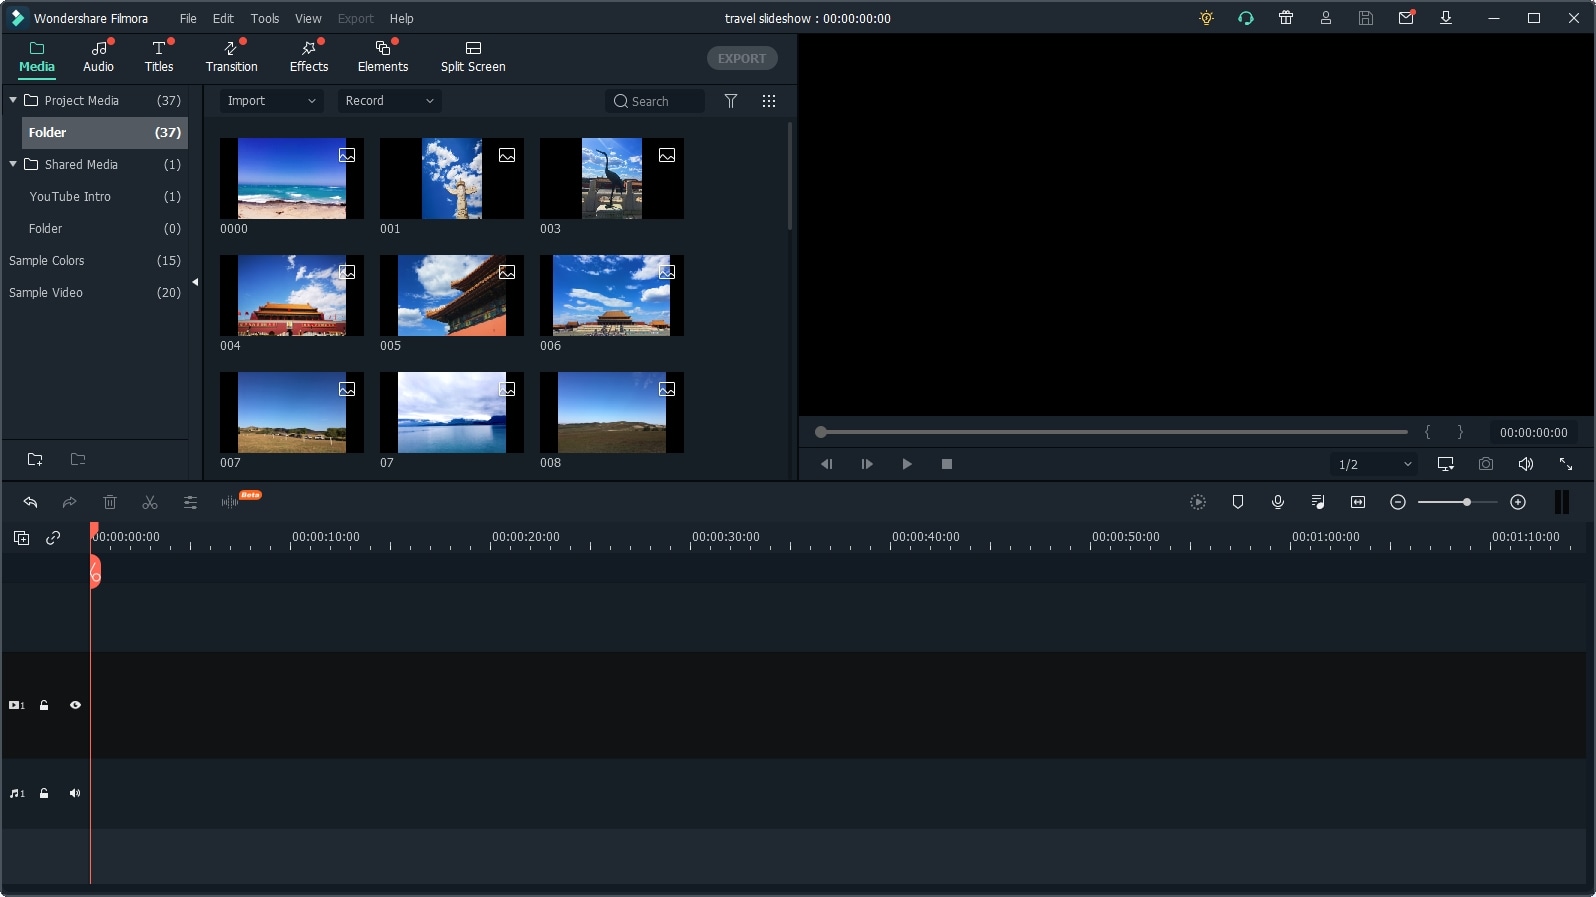
Next, set up the photo duration to the desired length, so that you don’t need to adjust the photo duration one by one.

Step 2: Now, it’s time to determine and add music in the background. Add some sounds and royalty-free music in Wondershare Filmora and then use the media library to help you give more of an impact to the entire experience.

If you want to sync the photo to the background music, you can use the Beat Detection tool in Filmora and mark the highlights accordingly.
Step 3: Once you did that, you will have to drag and then drop the images directly to the timeline. Here is where you can change things like saturation, hue, brightness, contrast and other features.
You can also rotate the images and crop them if you see fit. If some of the travel photos have different aspect ratios, you can select Crop to Fit so all the photos will be in the same aspect ratio without blackbar.
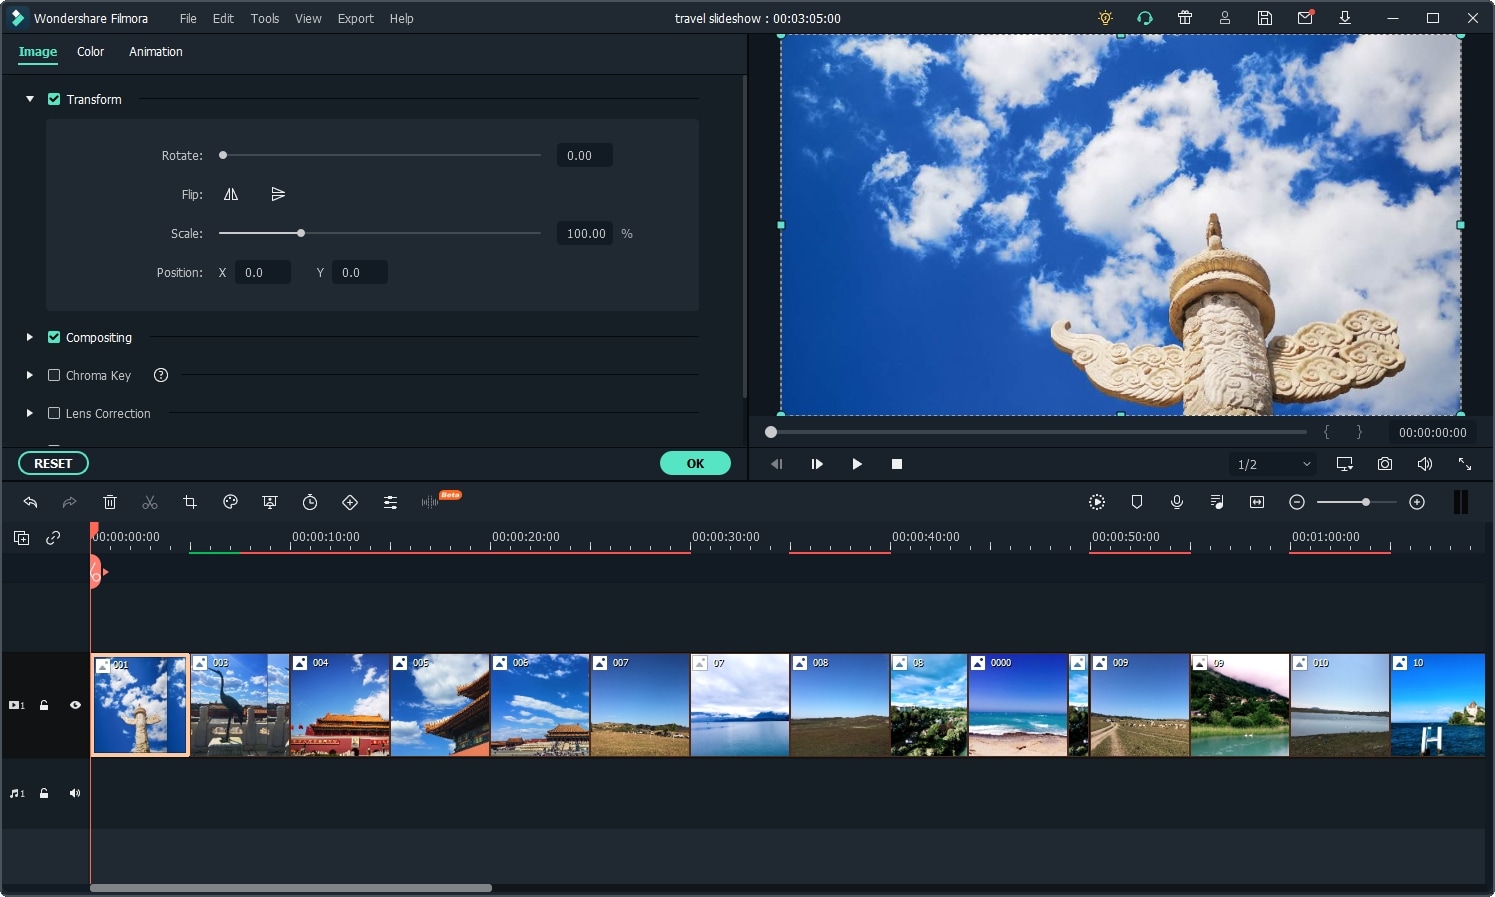
Step 4: At this point, you do need to try and add transitions between each of the images.
When you are done with that, you have to select the filters and overlays that will help you make your travel slideshow look better. This is an important step and you do want to spend a good amount of time with it.
Step 5: Lastly, you will have to export the slideshow as you see fit, but you also have the option to share it on YouTube if you so desire.

Conclusion
Wondershare Filmora is a very good application for those that want a unique, fun travel slideshow. It allows you to get all the tools and high-quality features that you need in order to take the experience to the next level. We recommend you to check it out right away as it’s well worth the investment!
Download Mac Version ](https://tools.techidaily.com/wondershare/filmora/download/ )
Ollie Mattison
Ollie Mattison is a writer and a lover of all things video.
Follow @Ollie Mattison
Ollie Mattison
Mar 27, 2024• Proven solutions
We all love traveling and for a good reason. It allows us to relax, it removes the pressure from our life and it just makes the entire experience a lot better. But if you are a fan of taking picture while travelling, why not try to create a video slideshow with your images? This is one of the best and most original ways you can use it in order to share your travels with others. It works magically and it manages to bring in front some of those unique moments. However, you do need to have the proper tools when you want to create such a slideshow, but that’s great as we are here to help you with that.
How can you create a travel slideshow with travel photos
Things you need to know before creating it
Before you create the travel slideshow you have to keep in mind a few things. If you don’t then the results will not be as good as you expect. You have to be committed to the idea of having the best results and as long as you do that the outcome will be very well worth it.
You need to try and consider your audience because based on that the slideshow will have a specific format. You also need to think about telling a story as that will make it a lot more interesting other than just having a bunch of images aligned together in a non-meaningful manner.
Wondershare Filmora – The best tool to create a video slideshow with your travel photos
But one has to wonder, what tool should you use to create such a travel slideshow? Wondershare Filmora is the application of choice in this regard because it does help offer a huge variety of amazing features that all add up in order to deliver great value!
- Wondershare Filmora is great for beginners as it makes editing a breeze thanks to the stellar interface
- It also integrates transitions as well as filters and effects. It provides you with a refined set of tools that help maintain a good focus on results.
- It helps you add sound effects and a variety of music types to help you with the story.
- You can burn the result to DVD or you can share it on social media and YouTube/Vimeo among others right from within the app.
How can you create video slideshows with Wondershare Filmora?
Creating a unique slideshow video with this tool is actually very easy and it does provide you with a huge amount of value should you choose to use it. Here are several things you need to consider when making a travel slideshow video. First, choose the right music for the travel slideshow; second, adjust the duration of the photos; third, transitions and effects.
Here are the steps you need to focus on when creating a travel slideshow video with Wondershare Filmora:
Filmstock Stock Media Library ](https://filmstock.wondershare.com/creative-theme-tourism?spm=rs.filmora%5Fweb&source%5Fchannel=seo%5Farticle )
Step 1: Download and install Wondershare Filmora, then open it.
Add all the travel photos into the applications. You can add in multiple folders in order to make sorting the images a lot easier.
Next, set up the photo duration to the desired length, so that you don’t need to adjust the photo duration one by one.
Step 2: Now, it’s time to determine and add music in the background. Add some sounds and royalty-free music in Wondershare Filmora and then use the media library to help you give more of an impact to the entire experience.
If you want to sync the photo to the background music, you can use the Beat Detection tool in Filmora and mark the highlights accordingly.
Step 3: Once you did that, you will have to drag and then drop the images directly to the timeline. Here is where you can change things like saturation, hue, brightness, contrast and other features.
You can also rotate the images and crop them if you see fit. If some of the travel photos have different aspect ratios, you can select Crop to Fit so all the photos will be in the same aspect ratio without blackbar.
Step 4: At this point, you do need to try and add transitions between each of the images.
When you are done with that, you have to select the filters and overlays that will help you make your travel slideshow look better. This is an important step and you do want to spend a good amount of time with it.
Step 5: Lastly, you will have to export the slideshow as you see fit, but you also have the option to share it on YouTube if you so desire.
Conclusion
Wondershare Filmora is a very good application for those that want a unique, fun travel slideshow. It allows you to get all the tools and high-quality features that you need in order to take the experience to the next level. We recommend you to check it out right away as it’s well worth the investment!
Download Mac Version ](https://tools.techidaily.com/wondershare/filmora/download/ )
Ollie Mattison
Ollie Mattison is a writer and a lover of all things video.
Follow @Ollie Mattison
How to Make Your Own Emoji in 2 Ways [Step-By Step Guide]
How to Make Your Own Emoji in 2 Ways [Step-by Step Guide]
Shanoon Cox
Mar 27, 2024• Proven solutions
The small yellow faces that we have come to call emojis are now rapidly being used on all platforms. Whether you’re sending an email or texting a friend, emoji is ever-present to spice up the conversation and give it an emotional touch. But these cliché emojis are now becoming dull, and the creative side in us is craving for something more personal and fun.
To satisfy that craving of being unique, you can now create your own emoji. Tease your friends with an emoji of their faces or custom-create an emoji that best expresses your facial expressions. The customized emoji can be an object or an emotion, while the only limitation is your imagination.
Let me show you how to make emoji that relates to your feelings and will help you transform your texting experience.
- Method 1: Make Your Own Emoji Using Online Emoji Maker
- Method 2: Make Your Own Emoji Using an Emoji Maker App
- Bonus Tip-Add Your Emoji to a Video Using Wondershare Filmora
Method 1: Make Your Own Emoji Using Online Emoji Maker
Emoji Maker is an online tool to quench your thirst for creativity. It is free and incredibly easy to use. You would think that it takes expertise to make your own emoji, but, fortunately, all it takes is imagination and a few clicks, of course.
You can create an emoji from the face shapes available or customize a funny emoji using your own or a friend’s face. You can finally take revenge by pasting the funniest mustache on your ex’s face or making them bald. (Savage, right?)
Better yet, you can make a superhero emoji of yourself and even change the background as if you’re in the sky. The functions of this Emoji Maker are countless and of a professional level. These customized emojis are bound to make you stand out in those group chats
Now, as promised, I will show you exactly how it’s done.
1. First of all, open Emoji Maker on your browser.
2. Select a sample shape and face. You can even upload your own selfie to use as a face.
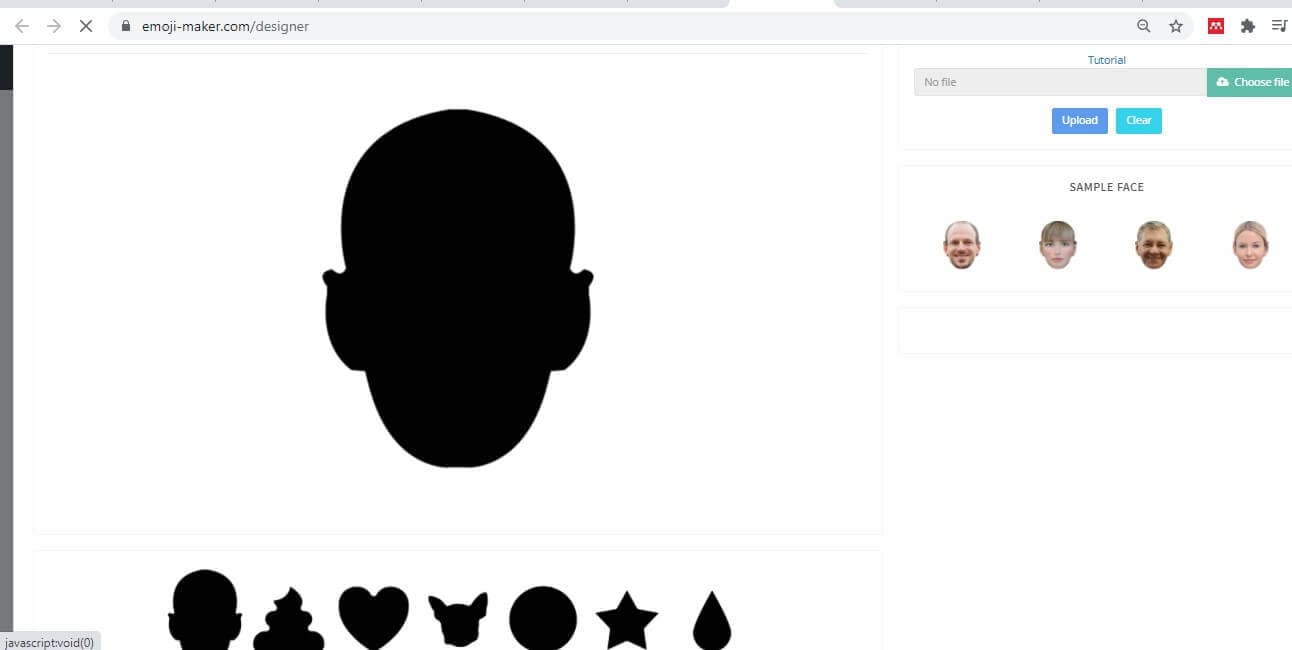
3. Now change the various features on the face such as eyes, hair, mustache, glasses, nose, etc
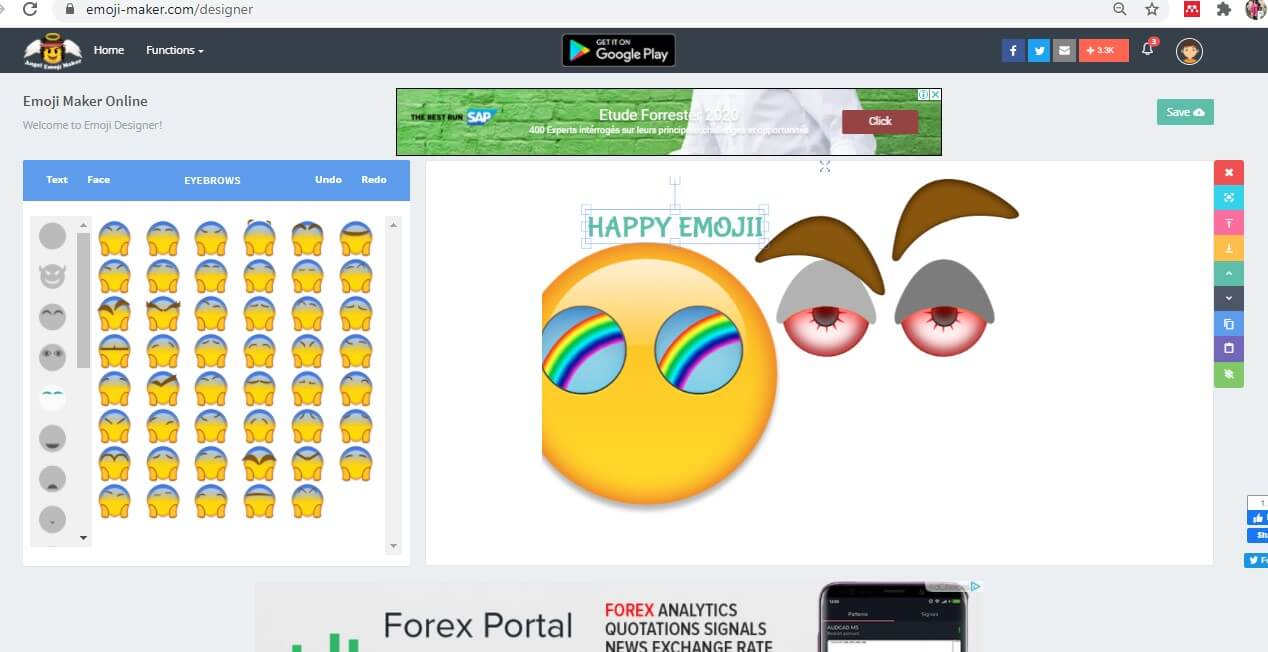
4. The undo and redo buttons are available for quick creations. The size of the emoji can be adjusted by clicking on the features and dragging it.
5. A panel on the right lets you copy, paste, or move the selected feature up, down, to the front or behind.
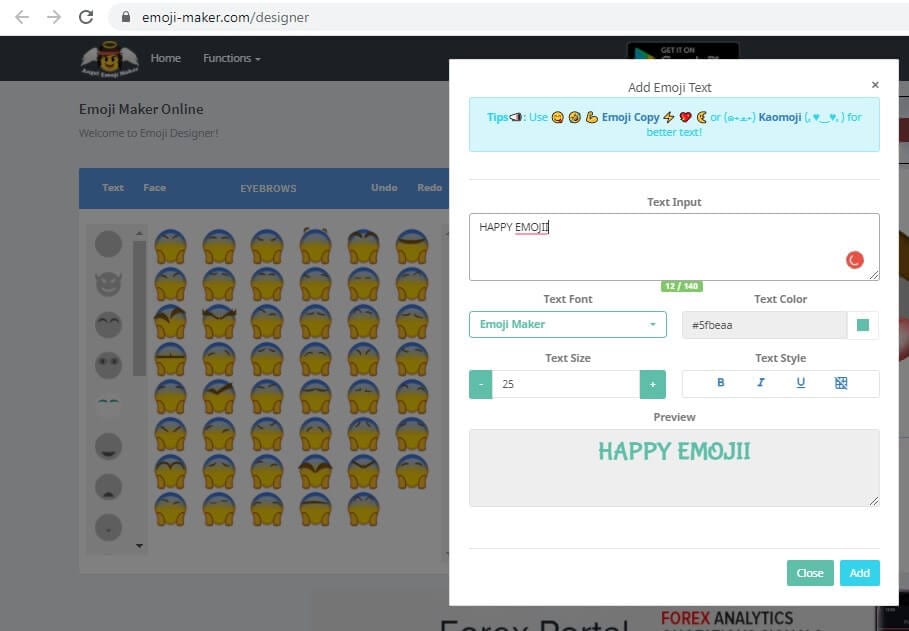
6. You can also click on the Text tab to insert a message with customized size, color, or font
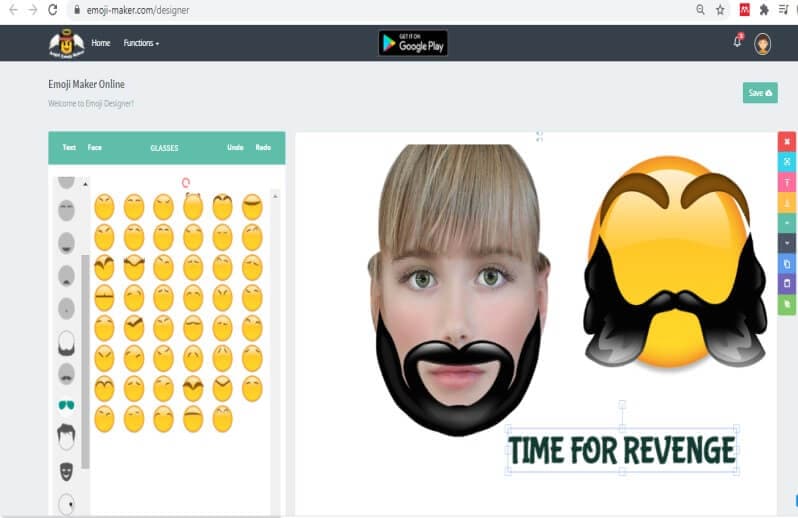
7. After customization, press Save in the top right corner. You can either directly save the emoji to your pc or crop to size and then save.
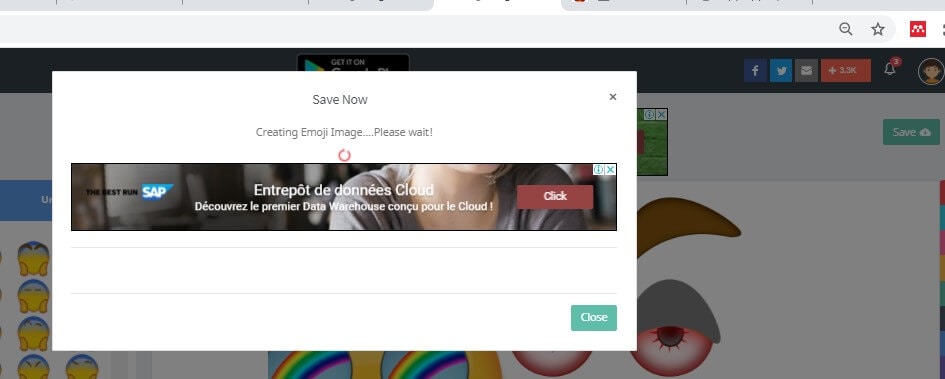
Method 2: Make Your Own Emoji Using an Emoji Maker App
Zmoji is an app that lets you create a whole range of personalized avatars of yourself. Imagine a collection of stickers of different emotions but all featuring you.
You can create your avatar manually or by using the facial recognition feature. Moreover, you can dress up the avatar to look just like you. There is a wide range of stylish clothes you can choose from. Be funky or silly, or be you. Who cares? It’s time for some fun.
Let there be a mini-you in a funny or silly position. Or a dancing avatar of you to express your delight or crying a pool of tears after a piece of bad news, next-level texting, right?
1. Download Zmoji or either your Android or Apple device. Launch it.
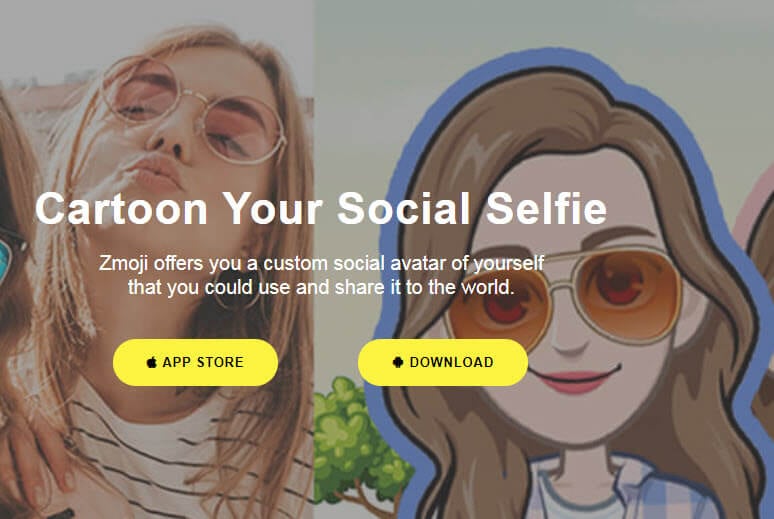
2. Choose your gender. Click on Facial Recognition and take a selfie to proceed. Or tap Manual Creation to create a face yourself.
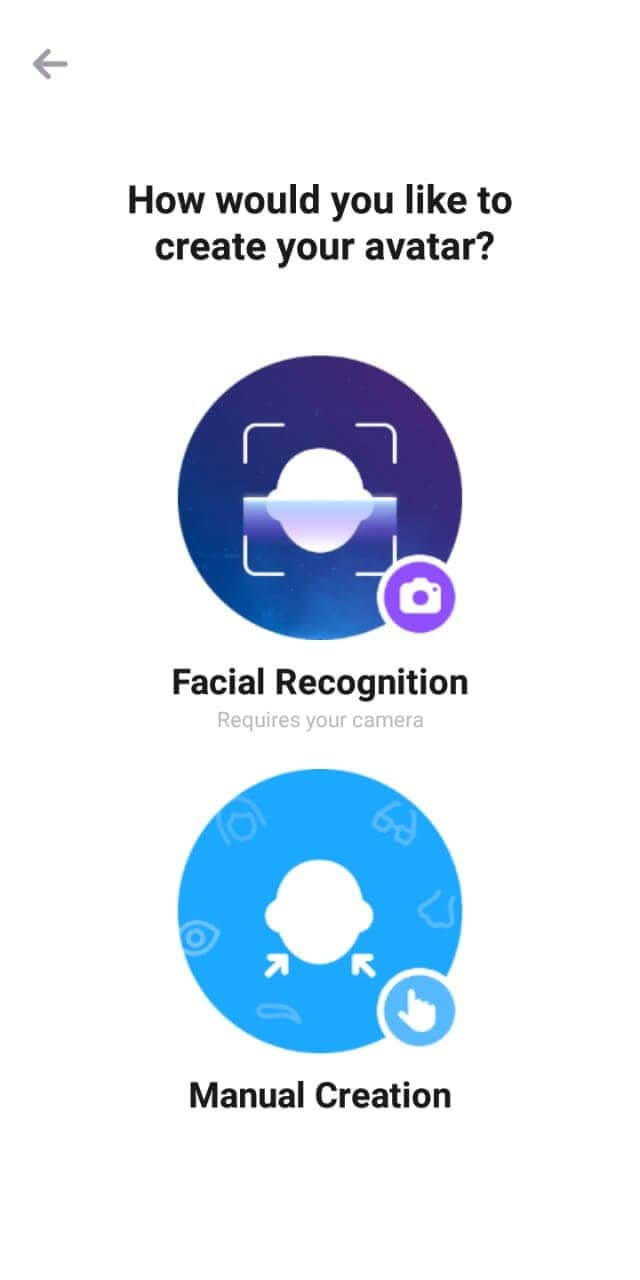
3. Choose from the variety of features to make the emoji look precisely like you. Click Save. You will also earn coins on creating an emoji that you can use to buy special features.
4. Now you can dress it up to match the real you and choose a pose that best fits your mood.
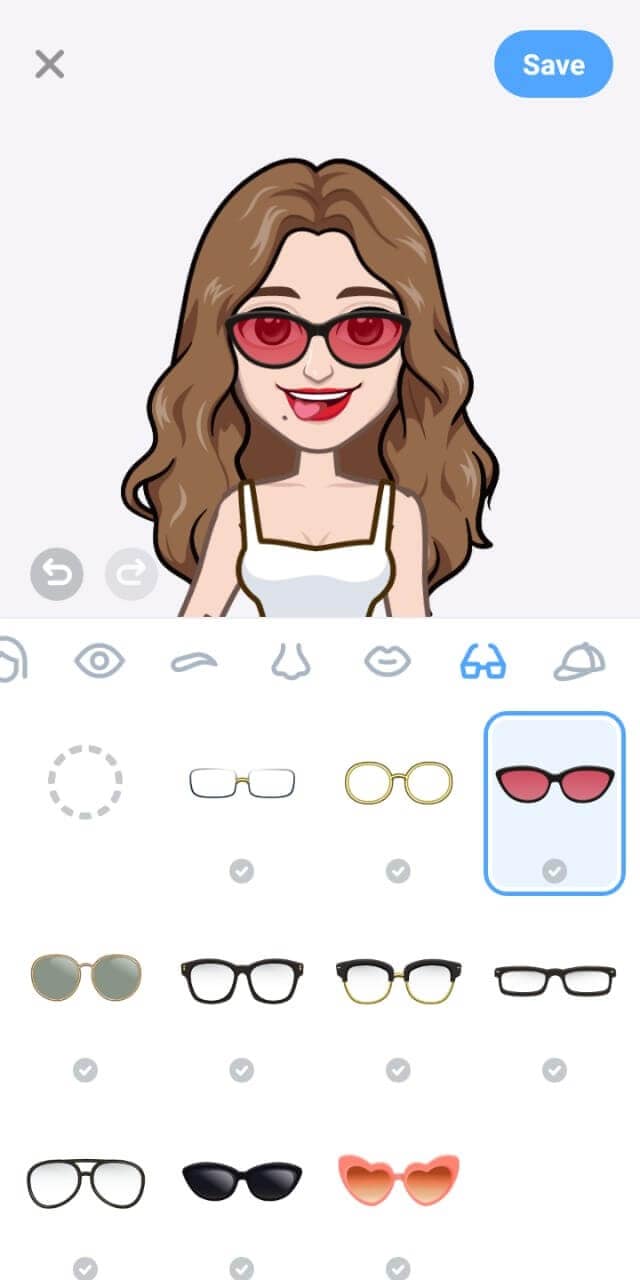
5. Click on Photobooth and choose a template to create a sticker of you just like that.

6. Once you are all dolled up, press Save or share the avatar directly on Facebook, Whatsapp, and Instagram, etc.
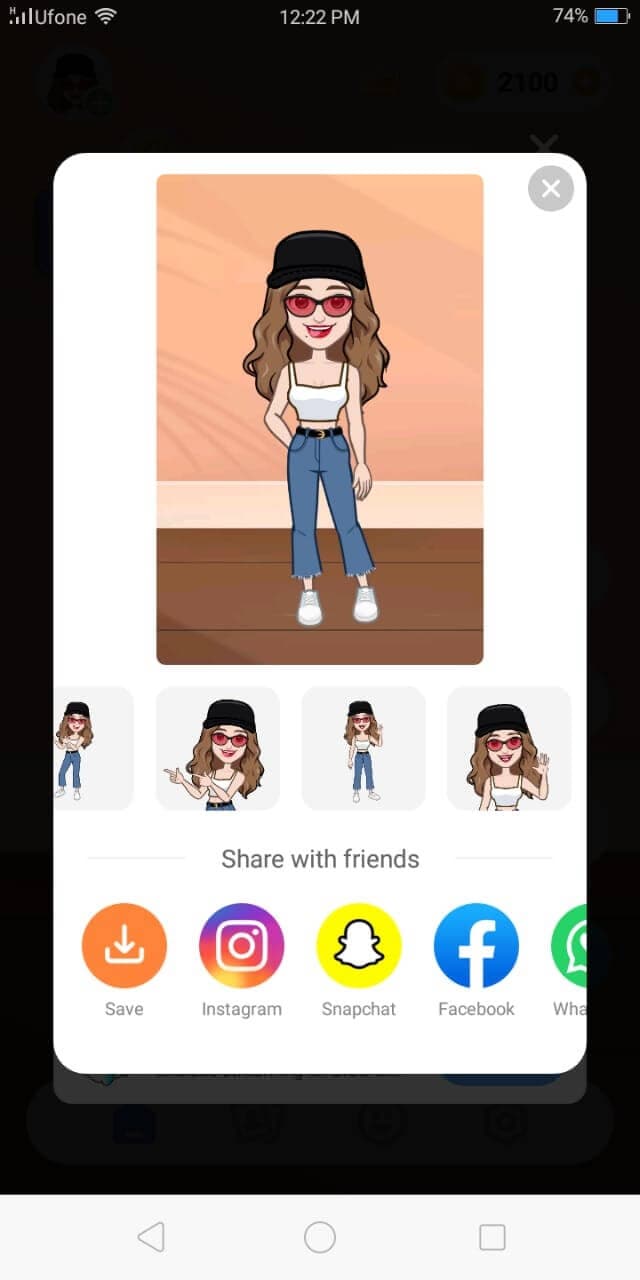
Bonus Tip-Add Your Emoji to a Video Using Wondershare Filmora
Wondershare Filmora, famous for its simple interface and professional video-making and editing tools, is here to save the day again. With the wide range of editing tools and effects that Filmora offers, I will show you how to create your own emoji and then enhance it further.
You can add the customized emoji or add other emojis from Filmora’s library. Motion effects and other special effects will give your video a refined and dramatic look, and the customized emoji will be a cherry on top.
Let’s surprise our friends with our unique creation!
1. Download and install Filmora. Launch it.
2. Click on File>Import Media to select the emoji you created as well as the video.
3. Drag and drop both onto the timeline.
4. In the viewer panel, adjust the size and location of the emoji.
5. Click on the emoji image in the timeline to change the values in Image, Color, and Motion. You can rotate the emoji or alter its color. You can even choose the motion of how the emoji comes in the video. This animated introduction of the emoji will give your video a dramatic look.
Finally, click Export, choose the destination folder, and the output format.
Conclusion
From creating unique emojis to creative avatars, you know it all now. We have walked you through how to make emoji in 2 easy ways. Now it’s up to you. You can use these customized emojis to add a spark to your conversations or attract followers to your brands. Based on your ease, choose any method and let the creativity in you take over.
Wondershare Filmora will help you create the kind of unique video you need to stand out. Just don’t forget to decorate your videos with your custom made emojis. You might get famous, who knows?
Shanoon Cox
Shanoon Cox is a writer and a lover of all things video.
Follow @Shanoon Cox
Shanoon Cox
Mar 27, 2024• Proven solutions
The small yellow faces that we have come to call emojis are now rapidly being used on all platforms. Whether you’re sending an email or texting a friend, emoji is ever-present to spice up the conversation and give it an emotional touch. But these cliché emojis are now becoming dull, and the creative side in us is craving for something more personal and fun.
To satisfy that craving of being unique, you can now create your own emoji. Tease your friends with an emoji of their faces or custom-create an emoji that best expresses your facial expressions. The customized emoji can be an object or an emotion, while the only limitation is your imagination.
Let me show you how to make emoji that relates to your feelings and will help you transform your texting experience.
- Method 1: Make Your Own Emoji Using Online Emoji Maker
- Method 2: Make Your Own Emoji Using an Emoji Maker App
- Bonus Tip-Add Your Emoji to a Video Using Wondershare Filmora
Method 1: Make Your Own Emoji Using Online Emoji Maker
Emoji Maker is an online tool to quench your thirst for creativity. It is free and incredibly easy to use. You would think that it takes expertise to make your own emoji, but, fortunately, all it takes is imagination and a few clicks, of course.
You can create an emoji from the face shapes available or customize a funny emoji using your own or a friend’s face. You can finally take revenge by pasting the funniest mustache on your ex’s face or making them bald. (Savage, right?)
Better yet, you can make a superhero emoji of yourself and even change the background as if you’re in the sky. The functions of this Emoji Maker are countless and of a professional level. These customized emojis are bound to make you stand out in those group chats
Now, as promised, I will show you exactly how it’s done.
1. First of all, open Emoji Maker on your browser.
2. Select a sample shape and face. You can even upload your own selfie to use as a face.
3. Now change the various features on the face such as eyes, hair, mustache, glasses, nose, etc
4. The undo and redo buttons are available for quick creations. The size of the emoji can be adjusted by clicking on the features and dragging it.
5. A panel on the right lets you copy, paste, or move the selected feature up, down, to the front or behind.
6. You can also click on the Text tab to insert a message with customized size, color, or font
7. After customization, press Save in the top right corner. You can either directly save the emoji to your pc or crop to size and then save.
Method 2: Make Your Own Emoji Using an Emoji Maker App
Zmoji is an app that lets you create a whole range of personalized avatars of yourself. Imagine a collection of stickers of different emotions but all featuring you.
You can create your avatar manually or by using the facial recognition feature. Moreover, you can dress up the avatar to look just like you. There is a wide range of stylish clothes you can choose from. Be funky or silly, or be you. Who cares? It’s time for some fun.
Let there be a mini-you in a funny or silly position. Or a dancing avatar of you to express your delight or crying a pool of tears after a piece of bad news, next-level texting, right?
1. Download Zmoji or either your Android or Apple device. Launch it.
2. Choose your gender. Click on Facial Recognition and take a selfie to proceed. Or tap Manual Creation to create a face yourself.
3. Choose from the variety of features to make the emoji look precisely like you. Click Save. You will also earn coins on creating an emoji that you can use to buy special features.
4. Now you can dress it up to match the real you and choose a pose that best fits your mood.
5. Click on Photobooth and choose a template to create a sticker of you just like that.
6. Once you are all dolled up, press Save or share the avatar directly on Facebook, Whatsapp, and Instagram, etc.
Bonus Tip-Add Your Emoji to a Video Using Wondershare Filmora
Wondershare Filmora, famous for its simple interface and professional video-making and editing tools, is here to save the day again. With the wide range of editing tools and effects that Filmora offers, I will show you how to create your own emoji and then enhance it further.
You can add the customized emoji or add other emojis from Filmora’s library. Motion effects and other special effects will give your video a refined and dramatic look, and the customized emoji will be a cherry on top.
Let’s surprise our friends with our unique creation!
1. Download and install Filmora. Launch it.
2. Click on File>Import Media to select the emoji you created as well as the video.
3. Drag and drop both onto the timeline.
4. In the viewer panel, adjust the size and location of the emoji.
5. Click on the emoji image in the timeline to change the values in Image, Color, and Motion. You can rotate the emoji or alter its color. You can even choose the motion of how the emoji comes in the video. This animated introduction of the emoji will give your video a dramatic look.
Finally, click Export, choose the destination folder, and the output format.
Conclusion
From creating unique emojis to creative avatars, you know it all now. We have walked you through how to make emoji in 2 easy ways. Now it’s up to you. You can use these customized emojis to add a spark to your conversations or attract followers to your brands. Based on your ease, choose any method and let the creativity in you take over.
Wondershare Filmora will help you create the kind of unique video you need to stand out. Just don’t forget to decorate your videos with your custom made emojis. You might get famous, who knows?
Shanoon Cox
Shanoon Cox is a writer and a lover of all things video.
Follow @Shanoon Cox
Add Emojis to Videos on YouTube/Facebook/Snapchat [Step by Step Guide]
Add Emojis to Videos on YouTube/Facebook/Snapchat [Step by Step Guide]

Liza Brown
Mar 27, 2024• Proven solutions
Emojis are a great way to express one’s emotion more vividly through a depiction rather than a plain conventional text. By the passage of time, the trend of using emoji on social media domain has drastically increased around the world. Since emoji are ubiquitous and its influence on culture is increasingly huge, using emoji has now become a trend.
A plain conventional text or video may not emphasize the meaning behind the phrase, but adding emoji to it is like adding a soul to the intentions behind the message. It helps outshine the theme and make a video more appealing at the same time.
So, with all this being known, let’s take a tour to a complete guide to how to accessorize a video on multiple social media domains and make it far more attractive and meaningful.
Best Tool to Help You Add Emojis to Videos in Few Clicks
Gamers, YouTubers and all other Mac and PC users who’d like to add a smiley or any other emoji to a video should try processing their footage with the Filmora video editor.
Performing basic video editing tasks like cutting or trimming the footage, choosing a soundtrack for a video or adding an emoji to a single shot or an entire sequence can all be completed in just a couple of clicks.
Filmora is free to download. Import your videos after you launch the software, you then can add any animated emojis into wherever you want. Have a try now! Emojis inside are so Cute!
How to Add Emojis to YouTube Videos?
You can now add emojis to any of the YouTube videos using an online free tool called Kapwing.
Below are the basic steps about how to add emojis to YouTube videos anywhere using Kapwing.
Step 1: Open free tool Meme Maker and tap on “get started”.
Step 2: Copy the link of the targeted YouTube video and paste the URL of your YouTube video.
Step 3: One of the ways to insert emoji using Kapwing is to directly upload an emoji having a transparent background. In the toolbar, click on “upload” and paste its URL there. The image will be placed onto the targeted video as an overlay by importing it. Another way to add emoji is to click “add text” where you will have options to insert emojis.
Step 4: You can now play around with editing options in Kapwing to adjust accordingly.
How to Use Emojis on YouTube?
YouTube provides you an option to insert emoji on your YouTube account description, tag and titles with great ease with the use of YouTube certified plugin, Tube Buddy.
Step 1: Install this plugin on chrome browser.
Step 2: Open “info and settings” option in your YouTube targeted video.
Step 3: Tap on description box, tags or title where an emoji icon will be shown. Tap on the emoji icon to display a list of emojis. You can also search for an emoji in the search bar.
How to Add Emojis in Snapchat Videos?
Step 1: Install Snapchat if you don’t already have it. Then run Snapchat.
Step 2: Record a video by keeping your fingers on the record button.
Step 3: Choose and tap an emoji of your choice to add in your video. Hold your fingers on emoji to place to the desired frame/clip of your recorded video.
Step 4: The emoji can be resized by dragging or pinching it in. You can add more than one emoji.
Image from iMore
How to Add Emojis to Facebook?
If you are wondering about how to add emojis to Facebook videos then, unfortunately, Facebook only offers “go live” option on Facebook where an emoji cannot be inserted. But you can insert emoji to Facebook status, comment or in your messenger conversation easily by following the step below for status:
Step 1: Click “what’s on your mind” to add new status on Facebook.
Step 2: At the bottom right side of the status box is an emoji icon. Click on it. This will open a list of emojis that you can choose as many as you want
Step 3: Click on the emoji icon back again to close the list when you are done. Click on post to share the post on your wall.
How to Add Emojis to Videos on iMovie?
Step 1: Search for the desired emoji on the internet with transparent background. Go to iMovie and select a clip of your video where you want to insert an emoji.
Step 2: Go to the “Import” option into the toolbar above, select your desired emoji from the list. This emoji will be added to the iMovie library.
Step 3: Click on that emoji. This overlays that emoji onto that video clip. You can scale the emoji up and down and drag it anywhere on the video.
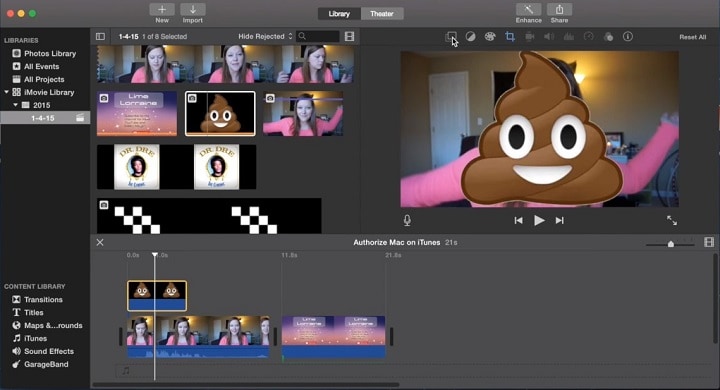
Image from YouSubtitles
How to Add Emojis to Videos Online?
Blurbiz, is an online application for editing YouTube, Instagram, Facebook and Snapchat videos. Just follow the steps below, then you can add emojis you want.
Step 1: Create and name the project in Blurbiz.
Step 2: Upload either your video, sticker or gif whichever you want an emoji to be placed in.
Step 3: Hover over the video and click on the “edit” button.
Step 4: Tap on “upload” at the top left side of the pane. Upload emoji with .png extension from your desktop.
Step 5: Drag and drop to overlay the emoji onto your video. Resize and position an emoji accordingly.
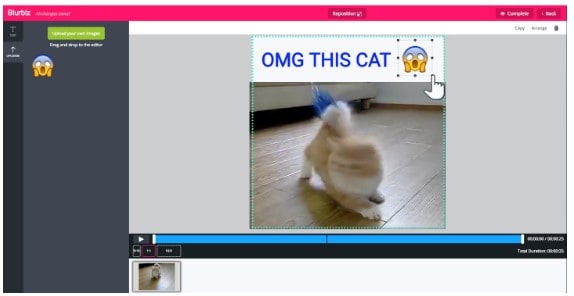
Step 6: Tap on “complete” at the top right corner when you are done. You can download an mp4 format video.
How to Add Emojis to Videos Android?
WeVideo , is an app to create and edit videos to the next level and provide one with ample special effects to add on to your videos.
Alongside using basic editing features like cutting, trimming or arranging video clips, you can amplify your editing game by adding emoji to your videos. Moreover, you can export your projects in high quality and share them on either Vimeo, YouTube or Dropbox.

Conclusion
Be it any video on any social media platform or your local device, with this thorough guide, you must be able to accessorize your video and take it to another level of emotional expression and message details in your video by using fun emojis.
Liza Brown
Liza Brown is a writer and a lover of all things video.
Follow @Liza Brown
Liza Brown
Mar 27, 2024• Proven solutions
Emojis are a great way to express one’s emotion more vividly through a depiction rather than a plain conventional text. By the passage of time, the trend of using emoji on social media domain has drastically increased around the world. Since emoji are ubiquitous and its influence on culture is increasingly huge, using emoji has now become a trend.
A plain conventional text or video may not emphasize the meaning behind the phrase, but adding emoji to it is like adding a soul to the intentions behind the message. It helps outshine the theme and make a video more appealing at the same time.
So, with all this being known, let’s take a tour to a complete guide to how to accessorize a video on multiple social media domains and make it far more attractive and meaningful.
Best Tool to Help You Add Emojis to Videos in Few Clicks
Gamers, YouTubers and all other Mac and PC users who’d like to add a smiley or any other emoji to a video should try processing their footage with the Filmora video editor.
Performing basic video editing tasks like cutting or trimming the footage, choosing a soundtrack for a video or adding an emoji to a single shot or an entire sequence can all be completed in just a couple of clicks.
Filmora is free to download. Import your videos after you launch the software, you then can add any animated emojis into wherever you want. Have a try now! Emojis inside are so Cute!
How to Add Emojis to YouTube Videos?
You can now add emojis to any of the YouTube videos using an online free tool called Kapwing.
Below are the basic steps about how to add emojis to YouTube videos anywhere using Kapwing.
Step 1: Open free tool Meme Maker and tap on “get started”.
Step 2: Copy the link of the targeted YouTube video and paste the URL of your YouTube video.
Step 3: One of the ways to insert emoji using Kapwing is to directly upload an emoji having a transparent background. In the toolbar, click on “upload” and paste its URL there. The image will be placed onto the targeted video as an overlay by importing it. Another way to add emoji is to click “add text” where you will have options to insert emojis.
Step 4: You can now play around with editing options in Kapwing to adjust accordingly.
How to Use Emojis on YouTube?
YouTube provides you an option to insert emoji on your YouTube account description, tag and titles with great ease with the use of YouTube certified plugin, Tube Buddy.
Step 1: Install this plugin on chrome browser.
Step 2: Open “info and settings” option in your YouTube targeted video.
Step 3: Tap on description box, tags or title where an emoji icon will be shown. Tap on the emoji icon to display a list of emojis. You can also search for an emoji in the search bar.
How to Add Emojis in Snapchat Videos?
Step 1: Install Snapchat if you don’t already have it. Then run Snapchat.
Step 2: Record a video by keeping your fingers on the record button.
Step 3: Choose and tap an emoji of your choice to add in your video. Hold your fingers on emoji to place to the desired frame/clip of your recorded video.
Step 4: The emoji can be resized by dragging or pinching it in. You can add more than one emoji.
Image from iMore
How to Add Emojis to Facebook?
If you are wondering about how to add emojis to Facebook videos then, unfortunately, Facebook only offers “go live” option on Facebook where an emoji cannot be inserted. But you can insert emoji to Facebook status, comment or in your messenger conversation easily by following the step below for status:
Step 1: Click “what’s on your mind” to add new status on Facebook.
Step 2: At the bottom right side of the status box is an emoji icon. Click on it. This will open a list of emojis that you can choose as many as you want
Step 3: Click on the emoji icon back again to close the list when you are done. Click on post to share the post on your wall.
How to Add Emojis to Videos on iMovie?
Step 1: Search for the desired emoji on the internet with transparent background. Go to iMovie and select a clip of your video where you want to insert an emoji.
Step 2: Go to the “Import” option into the toolbar above, select your desired emoji from the list. This emoji will be added to the iMovie library.
Step 3: Click on that emoji. This overlays that emoji onto that video clip. You can scale the emoji up and down and drag it anywhere on the video.
Image from YouSubtitles
How to Add Emojis to Videos Online?
Blurbiz, is an online application for editing YouTube, Instagram, Facebook and Snapchat videos. Just follow the steps below, then you can add emojis you want.
Step 1: Create and name the project in Blurbiz.
Step 2: Upload either your video, sticker or gif whichever you want an emoji to be placed in.
Step 3: Hover over the video and click on the “edit” button.
Step 4: Tap on “upload” at the top left side of the pane. Upload emoji with .png extension from your desktop.
Step 5: Drag and drop to overlay the emoji onto your video. Resize and position an emoji accordingly.
Step 6: Tap on “complete” at the top right corner when you are done. You can download an mp4 format video.
How to Add Emojis to Videos Android?
WeVideo , is an app to create and edit videos to the next level and provide one with ample special effects to add on to your videos.
Alongside using basic editing features like cutting, trimming or arranging video clips, you can amplify your editing game by adding emoji to your videos. Moreover, you can export your projects in high quality and share them on either Vimeo, YouTube or Dropbox.
Conclusion
Be it any video on any social media platform or your local device, with this thorough guide, you must be able to accessorize your video and take it to another level of emotional expression and message details in your video by using fun emojis.
Liza Brown
Liza Brown is a writer and a lover of all things video.
Follow @Liza Brown
How to Make a iMovie Photo Slideshow with Music? [IMovie Tutorial]
How to Make a iMovie Photo Slideshow with Music? [iMovie Tutorial]
Shanoon Cox
Mar 27, 2024• Proven solutions
Makings a slideshow is a great way to share photos and videos with friends and families. The good news is that you can totally make a slideshow on Mac for free with iMovie. iMovie is the pre-installed program coming with every new Mac. It provides a simple yet professional way to make slideshow movies from your photos, videos, and music.
If you haven’t iMovie installed on your Mac yet, just go to iTunes and download it for free. In the following part, I’ll share with you the step-by-step tutorial on how to make a slideshow on Mac using the free video editing software iMovie.
If you are an iOS user, check our picks of best photo slideshow apps for iPhone or iPad.
Ways for iMovie Photo Slideshow with Music Making
To make a photo slideshow with music in iMovie, you can follow these steps.
1. Create a New Project
After launching iMovie, click the Project button and then click Create New. Select Movie to combine photos, videos and music to make a slideshow.

2. Import Photos, Videos, and Audio Files
Now go to the My Media tab and click the Import icon to add your photos, videos, and music to iMovie, in this way, you can import any media files from any location on your Mac. But if you have arranged all your videos, photos, and music tracks in the Photos app, you can just switch to Photos under the Libraries tab on the left to import.

3. Arrange Media in Timeline and Adjust
Now, it’s time to place all these photos and videos in the timeline in order and do some adjustments. You can use the Magic Wand tool to improve the photo quality automatically, do some color correction, or add a filter to the photo. If you preview the video clip, you will see more options that allow you to do more editing, such as changing speed.
4. Apply Transitions & Effects
Transitions and effects will help you to create a slideshow in a more professional way. Some transitions such as cross dissolve, fade and cross blur are very popular in the slideshow, but remember don’t use lots of different transitions in one slideshow since too many transitions will distract the viewer’s attention. To apply a transition in the slideshow, just drag and drop it between two photos in the timeline.

5. Add Titles and Text
Using some opener titles and credits at the beginning and ending part of your slideshow will make it cool as well. You can add some famous quotes and words to better demonstrate.
Just to the Titles tab and select one of the title templates and drop it to the timeline first and then write your own words in the preview window.

6. Add Music to Slideshow
You can download some royalty-free music and sound effects from websites such as Filmstock stock media library or iTunes or import your own audio as we said before to use it as the slideshow background music. To sync with the slideshow, you may need to trim and edit the audio accordingly. For detailed information about iMovie audio editing, you can check how to add background music to iMovie.
Filmstock Stock Media Library ](https://tools.techidaily.com/wondershare/filmora/download/ )
7. Export and Share Your Slideshow video
Play the slideshow and check the result in the preview window. If everything goes well, you can now export and share or save it. You can save the slideshow video in MP4 format, or share it to Vimeo or add the slideshow to Theater to load it on your other Apple devices so you can easily watch it on your iOS devices or Apple TV.
I hope the above tutorial about how to make a slideshow on iMovie will be helpful for your stunning slideshow creation.
If you’re running an old macOS version and having iPhoto installed on your Mac, here are the detailed steps about How to make slideshow in iMovie with iPhoto project.
Step 1. Import Photos from the iPhoto Library
iMovie works seamlessly with iPhoto. You are suggested to drag and drop photos from iPhoto to the iMovie project. If no library exists in iPhoto, create one and import photos to iPhoto first. To add videos, you could go to either “File/Import” or Event Library, and then drag and drop selected videos to the timeline.
After photos and videos are imported to the iMovie slideshow project, you can preview the raw slideshow simply by pressing Space bar on your keyboard. And then make adjustments to clips and transitions. For example, mouse over one clip or “double arrow” button and click on the settings icon, then you could access clip adjustment, video adjustment, transition adjustment, etc.

Step 2. Add Music to Your iMovie Slideshow Project
Music sets the tone of your slideshow. Adding musing to the iMovie slideshow is just as simple as adding photos and videos.
So click the audio icon in the bottom right corner, and drag and drop the desired audio file to the timeline. Multiple songs could be added to iMovie.
However, iMovie doesn’t support multiple soundtracks. If necessary, you need to combine multiple song tracks with an external audio editor before importing them to the iMovie slideshow. You can also apply audio effects and filter sound using an equalizer.

Step 3. Export Your iMovie Slideshow Video
iMovie makes sharing possibilities endless. For those who upload their videos online, iMovie allows users to directly upload to MobileMe Gallery, YouTube, Facebook, Vimeo, CNN iReport, etc.
If you select to share the iMovie slideshow using Media Browser, you will get a slideshow appeared in other Mac applications like iWeb. It’s a good idea to export the iMovie slideshow to iTunes so that you can play back slideshow quickly and easily sync with your mobile devices like iPhone, iPod, and iPad.

You may also like: How to Add Text with iMovie in Mac and iPhone >>
Recommendation: Create Slideshow on Mac with More Templates and Transitions with Filmora
If you want to make a slideshow with some templates on Mac, you can try Wondershare Filmora . Filmora can turn photos and videos into attractive slideshow videos with various inbuilt filters, transitions, elements, animations, effects, and overlays. Click the Free Download button and have a try.
Check the ultimate guide about making a slideshow with music and titles in Filmora .
If you are going to make a slideshow with music on Windows, you may need a slideshow-making tool to do it by yourself. Wondershare Filmora will also be a good choice. It helps you instantly make such an impressive slideshow from photos and videos for sharing virtually anywhere.
Shanoon Cox
Shanoon Cox is a writer and a lover of all things video.
Follow @Shanoon Cox
Shanoon Cox
Mar 27, 2024• Proven solutions
Makings a slideshow is a great way to share photos and videos with friends and families. The good news is that you can totally make a slideshow on Mac for free with iMovie. iMovie is the pre-installed program coming with every new Mac. It provides a simple yet professional way to make slideshow movies from your photos, videos, and music.
If you haven’t iMovie installed on your Mac yet, just go to iTunes and download it for free. In the following part, I’ll share with you the step-by-step tutorial on how to make a slideshow on Mac using the free video editing software iMovie.
If you are an iOS user, check our picks of best photo slideshow apps for iPhone or iPad.
Ways for iMovie Photo Slideshow with Music Making
To make a photo slideshow with music in iMovie, you can follow these steps.
1. Create a New Project
After launching iMovie, click the Project button and then click Create New. Select Movie to combine photos, videos and music to make a slideshow.
2. Import Photos, Videos, and Audio Files
Now go to the My Media tab and click the Import icon to add your photos, videos, and music to iMovie, in this way, you can import any media files from any location on your Mac. But if you have arranged all your videos, photos, and music tracks in the Photos app, you can just switch to Photos under the Libraries tab on the left to import.
3. Arrange Media in Timeline and Adjust
Now, it’s time to place all these photos and videos in the timeline in order and do some adjustments. You can use the Magic Wand tool to improve the photo quality automatically, do some color correction, or add a filter to the photo. If you preview the video clip, you will see more options that allow you to do more editing, such as changing speed.
4. Apply Transitions & Effects
Transitions and effects will help you to create a slideshow in a more professional way. Some transitions such as cross dissolve, fade and cross blur are very popular in the slideshow, but remember don’t use lots of different transitions in one slideshow since too many transitions will distract the viewer’s attention. To apply a transition in the slideshow, just drag and drop it between two photos in the timeline.
5. Add Titles and Text
Using some opener titles and credits at the beginning and ending part of your slideshow will make it cool as well. You can add some famous quotes and words to better demonstrate.
Just to the Titles tab and select one of the title templates and drop it to the timeline first and then write your own words in the preview window.
6. Add Music to Slideshow
You can download some royalty-free music and sound effects from websites such as Filmstock stock media library or iTunes or import your own audio as we said before to use it as the slideshow background music. To sync with the slideshow, you may need to trim and edit the audio accordingly. For detailed information about iMovie audio editing, you can check how to add background music to iMovie.
Filmstock Stock Media Library ](https://tools.techidaily.com/wondershare/filmora/download/ )
7. Export and Share Your Slideshow video
Play the slideshow and check the result in the preview window. If everything goes well, you can now export and share or save it. You can save the slideshow video in MP4 format, or share it to Vimeo or add the slideshow to Theater to load it on your other Apple devices so you can easily watch it on your iOS devices or Apple TV.
I hope the above tutorial about how to make a slideshow on iMovie will be helpful for your stunning slideshow creation.
If you’re running an old macOS version and having iPhoto installed on your Mac, here are the detailed steps about How to make slideshow in iMovie with iPhoto project.
Step 1. Import Photos from the iPhoto Library
iMovie works seamlessly with iPhoto. You are suggested to drag and drop photos from iPhoto to the iMovie project. If no library exists in iPhoto, create one and import photos to iPhoto first. To add videos, you could go to either “File/Import” or Event Library, and then drag and drop selected videos to the timeline.
After photos and videos are imported to the iMovie slideshow project, you can preview the raw slideshow simply by pressing Space bar on your keyboard. And then make adjustments to clips and transitions. For example, mouse over one clip or “double arrow” button and click on the settings icon, then you could access clip adjustment, video adjustment, transition adjustment, etc.
Step 2. Add Music to Your iMovie Slideshow Project
Music sets the tone of your slideshow. Adding musing to the iMovie slideshow is just as simple as adding photos and videos.
So click the audio icon in the bottom right corner, and drag and drop the desired audio file to the timeline. Multiple songs could be added to iMovie.
However, iMovie doesn’t support multiple soundtracks. If necessary, you need to combine multiple song tracks with an external audio editor before importing them to the iMovie slideshow. You can also apply audio effects and filter sound using an equalizer.
Step 3. Export Your iMovie Slideshow Video
iMovie makes sharing possibilities endless. For those who upload their videos online, iMovie allows users to directly upload to MobileMe Gallery, YouTube, Facebook, Vimeo, CNN iReport, etc.
If you select to share the iMovie slideshow using Media Browser, you will get a slideshow appeared in other Mac applications like iWeb. It’s a good idea to export the iMovie slideshow to iTunes so that you can play back slideshow quickly and easily sync with your mobile devices like iPhone, iPod, and iPad.
You may also like: How to Add Text with iMovie in Mac and iPhone >>
Recommendation: Create Slideshow on Mac with More Templates and Transitions with Filmora
If you want to make a slideshow with some templates on Mac, you can try Wondershare Filmora . Filmora can turn photos and videos into attractive slideshow videos with various inbuilt filters, transitions, elements, animations, effects, and overlays. Click the Free Download button and have a try.
Check the ultimate guide about making a slideshow with music and titles in Filmora .
If you are going to make a slideshow with music on Windows, you may need a slideshow-making tool to do it by yourself. Wondershare Filmora will also be a good choice. It helps you instantly make such an impressive slideshow from photos and videos for sharing virtually anywhere.
Shanoon Cox
Shanoon Cox is a writer and a lover of all things video.
Follow @Shanoon Cox
Also read:
- [New] 2024 Approved Breaking Into the Digital Age Mobile Streaming on Facebook
- [Updated] The Ultimate Screen Time Treasure Summer’s Top 10 Gems
- En Ligne - Transformer AVI en MKV Sans Frais À L'aide De VLC Et Handbrake !
- Ensure Full Functionality: Download Windows Drivers for Asus BT500 Bluetooth USB Device Today
- In 2024, Top 10 Storyboarding Software Free&Paid
- In 2024, Top 5 Car Locator Apps for OnePlus 12R | Dr.fone
- In 2024, Uncover Roblox Hidden Treasures with Zoom Techniques
- New 2024 Approved 7 Free Apps to Get Emojis on Android and iPhone
- Updated 2024 Approved 10 Best Memes Right Now (Include Image/ GIF/Video)
- Updated How to Make an Emoji of Yourself on Mobile ? Emoji Yourself for 2024
- Updated In 2024, 8 Best Meme Maker App to Create Memes with Your Own Picture
- Title: Updated In 2024, Best 10 Emoji Makers to Create Your Own Emojis PC/Online/Android/iPhone
- Author: Jan
- Created at : 2024-09-27 17:14:00
- Updated at : 2024-09-30 16:08:53
- Link: https://meme-emoji.techidaily.com/updated-in-2024-best-10-emoji-makers-to-create-your-own-emojis-pconlineandroidiphone/
- License: This work is licensed under CC BY-NC-SA 4.0.