
Updated In 2024, 20 Wonderful Stop Motion Ideas for Beginners and Kids - Filmora
20 Wonderful Stop Motion Ideas for Beginners and Kids - Filmora
20 Wonderful Stop Motion Ideas for Beginners and Kids

Shanoon Cox
Mar 27, 2024• Proven solutions
Stop motion is the most adoring animated presentation of the social media era on digital presence. You can express conceptual-based ideas and thoughtful messages in a storytelling frame. We will discuss and get an overview of the stop motion ideas of kids and stop motion ideas for beginners in this article.
Let’s dive into the subject line!
Stop motion animation could be a great idea while presenting a story that will take a short duration but carry a significant meaning. The meaning even you can portray easily with the animated objects, characters, figures, and the movement.
Here, the movement of the illustrated figures and characters is vital because the camera uses in stop motion repeatedly getting on or off. Many frames are created to portray the story you want to present to your audience during the on and off.
- Part 1: What are the Important Elements When Producing a Good Stop Motion Animation?
- Part 2: 20 Best Stop Animation Ideas for Kids and Beginners
Part 1: What are the Important Elements When Producing a Good Stop Motion Animation?
While you are dealing with the digital creative aspect, you need to have a subject line, plan, execution components, camera and knowledge about running the camera to show its movements. In short, these are the major elements you need to have grip before starting any stop motion animation.
The significant elements are:
- A thoughtful subject line: why people watch you stop motion animation, ask the question to yourself and decide a good subject line. If you want to show a story by moving a few objects, characters, and figures, the subject line must have a solid message you want to convey. Otherwise, you will never get your target audience.
- Proper planning: It is an old proverb that creativity is the messy thing in the world. But people will not watch it messy on the screen. How you present the complete story, what kinds of cameras and angles you need to use to get what you want, the background settings, any music you can add or not are part of the planning.
- Cameras and angles: A firm stand tripod, a stationary camera, and lots of careful movement of your object are important elements in stop motion animation. The lights and the angles of your camera decide the result of your efforts. Do not bump your camera during the shoot, or you may lose everything and begin from scratch, which is not a good idea at all. Lights and the shadow angle are even important in stop motion animation creation.
There are movements and shoot arrangements, like a few more major elements you must consider while planning to stop motion animation from escalating your creative aspect.
To create stop motion animation, beginners and kids require different objects. Among them, few things are common like cameras, tripods, lights etc. In the case of kids, you can start practicing at home with available items like a big table to keep objects on them. But for beginners, can start from a small studio with various angle lights and camera arrangements.
However, even for the beginner, the home could be the best option instead of a studio.
Part 2: 20 Best Stop Animation Ideas for Kids and Beginners
We will see the 20 best stop animation ideas for kids and beginners for the next few paragraphs. We will divide the section into two segments: easy stop motion ideas for beginners and amazing stop motion ideas for kids. As kids are small and tender, we mention them in the first column and then beginners.
1.Everyday Play Items
For Kids
Kids love to play with toys. But every day playing with the same toys brings boredom. Being a responsible parent, you must eradicate their boredom to teach him/them how to make stop motion with their daily playing toys. Place the toys over a table, fix the angle and place your mobile phone camera and start slow-moving and on and off the camera. It’s fun for kids to create something different that can go online.
For Beginners
Take a basket, collect a few items from your daily use like pin, comb, paperweight, vegetable cutter, knife, stationery items on the table. You can adjust your home lights and set your mobile camera or DSLR on the tripod. Create something based on your thought process with the objects, start on or off the camera and make a little move to create the animation over the video.
The process is quite basic yet useful to know the camera angles, the lights, and shadow collaboration to create the magic.
2.Lego stop motion
Lego is the legendary name in stop motion animation. The brick-style square figures or brickfilms your kid can create to lego stop motion. The creativity is unlimited, and your kid can express any story using lego animation.
Windows 10 with the latest version supports Lego animation. Your kid must know how to operate the Lego creation under your guidance.
For beginners: The best stop animation tries for the beginners, the Lego. You can create numerous characters, stories, and the message you want to convey through your animation creation. Lego is the best for beginners. You will get opportunities to experiment with the shadow and lights technique, animation movement tricks, and, if possible, voiceover gives you the perfect stop motion animation.
3.Claymation
For Kids
You will get clay toys in every household and every kid’s wardrobe. Every kid can prepare a figure out of those colorful clay bumps stored in their collection. If you hold the camera at an apt angle, place any clay figures and start camera roll on and off, a beautiful clip you can make.
For Beginners
You can make clay figures without hands or legs and make moves. Use a tripod and place it in front of those clay figures, put the lights on and start rolling the camera. The clays can depict a story without much of your efforts and involvement. The plus point of the claymation is you can use the same clay and make hundreds of stop motions and show the magic over the camera.
4.Whiteboard stop motion for kids
If your kids are good at sketching or drawing, or painting, a whiteboard becomes a great idea to make stop motion. The shape and size of the whiteboard give you enough space to draw a story and show it to your audience.
For beginners: A small sketch by a marker on the whiteboard, use the white space, place the camera on the tripod and start to roll on. The major plus point to using a whiteboard is the spacious object and the sketch you draw over the board. You can easily brief the subject line, using figures, characters and make a super stop motion to feed your creativity.
5.Sticky Notes stop motion for kids
You can create a sticky notes game or figures if you want to use the sticky notes board. Once you get the idea, you will never feel bored playing with sticky notes and create stop motion. But for the kids, it’s high-level creativity that needs attention and support from your elders.
For beginners: The notes can be a great idea to draw a story or the game we used to play in our childhood. You can add voiceover or the music at the time of final editing. The movement of the notes with the rhythm and music create a perfect stop motion for your beginning journey.
6.Paper-cut out stop motion idea for kids
The paper-cut-out stop motion is an interesting animation that easily grabs the watchers’ attention. You can prepare figures and characters by cutting papers or directly cutting figures from magazines, newspapers, and books and creating stop motion animation.
For the beginners: It could be really fun to cut the figures from books, magazines, newspapers and make the story and give the animation form. Here it would help if you held the camera from the top of the object to avoid the shadow. The playful manner of shadow and light is a very important thing in paper-cut-out stop motion. The camera position would decide how beautiful your stop motion creation will be. Perfect practice for beginners at home.
7.Floor motion or chalkboard motion for kids
The school classroom becomes our best play area if teachers are not around. Black or green boards become the best drawing space with white and colorful chalk. The same stance we can apply on the floor. You can draw figures and move on the floor and shoot. As a kid, you can take the help from your elder and create the motion of your choice.
For the beginners: For the beginners, the floor motion suits you best as you can use the space and set the camera and lights. You can draw the images and figures on the floor, place the camera as per the angle and start on and off. It is also a tricky stop motion idea for beginners to try at home to set the hands-on.
8.Boing Claymation or Replacement for kids
Boing claymation intrigues laughter if you can add good sound effects. Though kids prefer the replacement stop motion, it is a funny animation if you manage to create. Lots of creativity and lesser arrangements are required to make this category stop motion animation.
For the Beginners: If you try your hands to make some funny animation based on objects available at home, Boing claymation is the best option to start working on it. The objects you set need to move from one place to another and shoot at from a distance.
9.Human and shadow stop motion for kids
The most engaging stop motion ever is when you can use the human body and the shadow reflection to create the animation. Play with your friends on the playground, experiment with the shadow, and shoot it. Later add sound effects to create a stop motion animation to give surprise to your elder brother. How cool!
For beginners: You can start with your friends and create magic with shadow reflection and start your camera roll on it. You can do figure-centric stop motion or objective-related stop motion if you know how to utilize the sun rays, half of the job you have done so far.
10.Timelapse stop motion for kids
This category stop motion idea is to get concrete formation if you know how to set your device camera to click or shoot every time interval. The time setting is called timelapse, and it captures the movement of the object or formation of the object and captures the transformation or change. Being a kid, it’s great creativity to set the camera and capture those moments to create timelapse.
For beginners: In the professional world, several ad agencies take the help of time-lapse to show the transformation and the slow changes of the object they select. The transformation depicts a story that could frame on a device. The shoot will be on the time interval to frame the entire change.
11.Fruit stop motion ideas for kids
Kids do not prefer to have fruits after breakfast. To understand how important fruits are in our daily diet, you can create fruit stop motion animation. Fruits have different shapes and sizes. You can select anyone and can make stop motion. Place them on the table, shoot them from different angles, add titles in the final editing. Your stop motion animation is ready.
For beginners: To get into the kids’ world, you can start with the food and fruit is a great choice. Create a catchy subject line and make a message story with the fruits. As a beginner, it would be a challenge to get fit into the kids’ world. Give it a try!
12.Matchstick stop motion for kids
You can make something creative out of matchsticks and shoot them following a sequence and make a story. It’s a good idea to personify them and shoot them from different angles. As a kid, you can enjoy making them unified and create a story.
For beginners: Arrange matchstick and make a story out of those sticks is a great idea to begin your journey. You only need to craft a story based on the sticks, settings, camera, and lights. You can use the floor as well to decorate the story.
13.Paper animation for kids
Kids have lots of craftwork in school. You can utilize the extracurricular activities by making stop motion with paper and drawing over it. The idea is amazing, and your friends may feel jealous to watch your creativity.
For the beginners: Beginners can use anything on paper and create a stop motion of their choice. With paper, you can create a stop motion of the beautiful memory book or memory sequence that reminds you of a happy time with your family members.
14.Easy breakfast preparing stop motion for kids
Kids, when preparing something in the kitchen, can shoot the entire process and then set them in the following sequence. It’s the wisest decision to Make a stop motion to frame your creativity. You can even share or show it to your elders and friends and give them a surprise.
For beginners: Beginners can make the stop motion by shooting their cooking recipes. Sometimes you try something on the gas oven. Shoot your efforts, make a sequence and get the frame of stop motion. The creativity you can share on social media platforms.
15.Stop motion for Maths and Arts
School curriculum is a great idea to show your creative aspects. You can combine maths and arts and create any topic you want. Hand-made drawings, colors, a whiteboard, and a camera, you are all set to begin your project.
For beginners: Paper Cutting and making any object could be a great artistic creation. You can elevate your thinking process by arranging things and making a stop motion animation.
16.Stop motion with toys for kids
Check your wardrobe and get all the toys out from there. Set them as a story and roll on the camera. You can make your own toy story.
For the beginners: Remember what you made out in your college project? You can make Eskimo living and create stop motion. You can add your creativity and knowledge about their living style to make the animation more attractive and eye-catching.
![]()
A cross-platform for making videos anywhere for all creators
* Secure Download
Why your video editing isn’t good enough? How about some creative inspo?
- 100M+ Users
- 5M+ Stock Media for Use
- 4M+ Social Media Followers
- 150+ Countries and Regions

17.Drawing stop motion for kids
You can draw a picture, make a story out of it, place the camera, fix the light and shadow, and start shooting it. You can give a surprise to your drawing teacher as well by making the stop motion from your drawing book.
For beginners: Halloween stop motion is quite popular among beginners. It would be a great idea to give your friends an incredible and scary gift this Halloween. Cut the paper, draw the pictures, fix them as per the sequence of your story and make a stop motion. Don’t forget to shoot in a shadow, fewer lights needed to create the horror effects. You can add cold music to make it more horrific.
18.Halloween stop motion for kids
You can create a Halloween stop motion by making a craft. Using pumpkin, different pops to support your story and start to roll the camera. If it is a scary idea, use lights and then shoot.
For beginners: You can make course ads or promotions in the stop motion format. Content writing and the prospect in the industry you can show through the stop motion, asking your friend, or if possible, you stand in front of the camera and shoot it. It’s a good idea to promote education as well among the kids.
19.Christmas tree-making ideas for kids
You can make your Christmas a memorable one by making the Christmas tree stop motion. Decorate the tree and shoot them following a sequence and camera angle. Give a festive look to your Christmas tree and create a memorable stop motion this Christmas.
For beginners: As a beginner, you can try at the corner of the home, decorate the tree with lights, colorful papers, leaves, balls, stars and give an amazing look. The natural lights give different looks and feel to the animation in the corner, easily attracting viewers. You can add music to give a completely festive look.
20.Birthday card stop motion for kids
A birthday celebration is a great festival for any age kid. To make the celebration memorable, you can create a birthday card stop motion animation. You can add music to make it attractive and a joyful experience for you or your friend.
For beginners: College fest is a great opportunity to show your skill. You can create new ideas and form a stop motion to exhibit the idea and concept to your fellow friends and faculty members. Give your hands a try to make the fest an animated day.
Final Thought
You can give a shape to any idea if you know how to organize the stop motion systematically. Portray a beautiful story, arrange the stuff you need to express your ideas and concepts, and start shooting it. You can spread your work digitally by posting on various social media platforms.
Shanoon Cox
Shanoon Cox is a writer and a lover of all things video.
Follow @Shanoon Cox
Shanoon Cox
Mar 27, 2024• Proven solutions
Stop motion is the most adoring animated presentation of the social media era on digital presence. You can express conceptual-based ideas and thoughtful messages in a storytelling frame. We will discuss and get an overview of the stop motion ideas of kids and stop motion ideas for beginners in this article.
Let’s dive into the subject line!
Stop motion animation could be a great idea while presenting a story that will take a short duration but carry a significant meaning. The meaning even you can portray easily with the animated objects, characters, figures, and the movement.
Here, the movement of the illustrated figures and characters is vital because the camera uses in stop motion repeatedly getting on or off. Many frames are created to portray the story you want to present to your audience during the on and off.
- Part 1: What are the Important Elements When Producing a Good Stop Motion Animation?
- Part 2: 20 Best Stop Animation Ideas for Kids and Beginners
Part 1: What are the Important Elements When Producing a Good Stop Motion Animation?
While you are dealing with the digital creative aspect, you need to have a subject line, plan, execution components, camera and knowledge about running the camera to show its movements. In short, these are the major elements you need to have grip before starting any stop motion animation.
The significant elements are:
- A thoughtful subject line: why people watch you stop motion animation, ask the question to yourself and decide a good subject line. If you want to show a story by moving a few objects, characters, and figures, the subject line must have a solid message you want to convey. Otherwise, you will never get your target audience.
- Proper planning: It is an old proverb that creativity is the messy thing in the world. But people will not watch it messy on the screen. How you present the complete story, what kinds of cameras and angles you need to use to get what you want, the background settings, any music you can add or not are part of the planning.
- Cameras and angles: A firm stand tripod, a stationary camera, and lots of careful movement of your object are important elements in stop motion animation. The lights and the angles of your camera decide the result of your efforts. Do not bump your camera during the shoot, or you may lose everything and begin from scratch, which is not a good idea at all. Lights and the shadow angle are even important in stop motion animation creation.
There are movements and shoot arrangements, like a few more major elements you must consider while planning to stop motion animation from escalating your creative aspect.
To create stop motion animation, beginners and kids require different objects. Among them, few things are common like cameras, tripods, lights etc. In the case of kids, you can start practicing at home with available items like a big table to keep objects on them. But for beginners, can start from a small studio with various angle lights and camera arrangements.
However, even for the beginner, the home could be the best option instead of a studio.
Part 2: 20 Best Stop Animation Ideas for Kids and Beginners
We will see the 20 best stop animation ideas for kids and beginners for the next few paragraphs. We will divide the section into two segments: easy stop motion ideas for beginners and amazing stop motion ideas for kids. As kids are small and tender, we mention them in the first column and then beginners.
1.Everyday Play Items
For Kids
Kids love to play with toys. But every day playing with the same toys brings boredom. Being a responsible parent, you must eradicate their boredom to teach him/them how to make stop motion with their daily playing toys. Place the toys over a table, fix the angle and place your mobile phone camera and start slow-moving and on and off the camera. It’s fun for kids to create something different that can go online.
For Beginners
Take a basket, collect a few items from your daily use like pin, comb, paperweight, vegetable cutter, knife, stationery items on the table. You can adjust your home lights and set your mobile camera or DSLR on the tripod. Create something based on your thought process with the objects, start on or off the camera and make a little move to create the animation over the video.
The process is quite basic yet useful to know the camera angles, the lights, and shadow collaboration to create the magic.
2.Lego stop motion
Lego is the legendary name in stop motion animation. The brick-style square figures or brickfilms your kid can create to lego stop motion. The creativity is unlimited, and your kid can express any story using lego animation.
Windows 10 with the latest version supports Lego animation. Your kid must know how to operate the Lego creation under your guidance.
For beginners: The best stop animation tries for the beginners, the Lego. You can create numerous characters, stories, and the message you want to convey through your animation creation. Lego is the best for beginners. You will get opportunities to experiment with the shadow and lights technique, animation movement tricks, and, if possible, voiceover gives you the perfect stop motion animation.
3.Claymation
For Kids
You will get clay toys in every household and every kid’s wardrobe. Every kid can prepare a figure out of those colorful clay bumps stored in their collection. If you hold the camera at an apt angle, place any clay figures and start camera roll on and off, a beautiful clip you can make.
For Beginners
You can make clay figures without hands or legs and make moves. Use a tripod and place it in front of those clay figures, put the lights on and start rolling the camera. The clays can depict a story without much of your efforts and involvement. The plus point of the claymation is you can use the same clay and make hundreds of stop motions and show the magic over the camera.
4.Whiteboard stop motion for kids
If your kids are good at sketching or drawing, or painting, a whiteboard becomes a great idea to make stop motion. The shape and size of the whiteboard give you enough space to draw a story and show it to your audience.
For beginners: A small sketch by a marker on the whiteboard, use the white space, place the camera on the tripod and start to roll on. The major plus point to using a whiteboard is the spacious object and the sketch you draw over the board. You can easily brief the subject line, using figures, characters and make a super stop motion to feed your creativity.
5.Sticky Notes stop motion for kids
You can create a sticky notes game or figures if you want to use the sticky notes board. Once you get the idea, you will never feel bored playing with sticky notes and create stop motion. But for the kids, it’s high-level creativity that needs attention and support from your elders.
For beginners: The notes can be a great idea to draw a story or the game we used to play in our childhood. You can add voiceover or the music at the time of final editing. The movement of the notes with the rhythm and music create a perfect stop motion for your beginning journey.
6.Paper-cut out stop motion idea for kids
The paper-cut-out stop motion is an interesting animation that easily grabs the watchers’ attention. You can prepare figures and characters by cutting papers or directly cutting figures from magazines, newspapers, and books and creating stop motion animation.
For the beginners: It could be really fun to cut the figures from books, magazines, newspapers and make the story and give the animation form. Here it would help if you held the camera from the top of the object to avoid the shadow. The playful manner of shadow and light is a very important thing in paper-cut-out stop motion. The camera position would decide how beautiful your stop motion creation will be. Perfect practice for beginners at home.
7.Floor motion or chalkboard motion for kids
The school classroom becomes our best play area if teachers are not around. Black or green boards become the best drawing space with white and colorful chalk. The same stance we can apply on the floor. You can draw figures and move on the floor and shoot. As a kid, you can take the help from your elder and create the motion of your choice.
For the beginners: For the beginners, the floor motion suits you best as you can use the space and set the camera and lights. You can draw the images and figures on the floor, place the camera as per the angle and start on and off. It is also a tricky stop motion idea for beginners to try at home to set the hands-on.
8.Boing Claymation or Replacement for kids
Boing claymation intrigues laughter if you can add good sound effects. Though kids prefer the replacement stop motion, it is a funny animation if you manage to create. Lots of creativity and lesser arrangements are required to make this category stop motion animation.
For the Beginners: If you try your hands to make some funny animation based on objects available at home, Boing claymation is the best option to start working on it. The objects you set need to move from one place to another and shoot at from a distance.
9.Human and shadow stop motion for kids
The most engaging stop motion ever is when you can use the human body and the shadow reflection to create the animation. Play with your friends on the playground, experiment with the shadow, and shoot it. Later add sound effects to create a stop motion animation to give surprise to your elder brother. How cool!
For beginners: You can start with your friends and create magic with shadow reflection and start your camera roll on it. You can do figure-centric stop motion or objective-related stop motion if you know how to utilize the sun rays, half of the job you have done so far.
10.Timelapse stop motion for kids
This category stop motion idea is to get concrete formation if you know how to set your device camera to click or shoot every time interval. The time setting is called timelapse, and it captures the movement of the object or formation of the object and captures the transformation or change. Being a kid, it’s great creativity to set the camera and capture those moments to create timelapse.
For beginners: In the professional world, several ad agencies take the help of time-lapse to show the transformation and the slow changes of the object they select. The transformation depicts a story that could frame on a device. The shoot will be on the time interval to frame the entire change.
11.Fruit stop motion ideas for kids
Kids do not prefer to have fruits after breakfast. To understand how important fruits are in our daily diet, you can create fruit stop motion animation. Fruits have different shapes and sizes. You can select anyone and can make stop motion. Place them on the table, shoot them from different angles, add titles in the final editing. Your stop motion animation is ready.
For beginners: To get into the kids’ world, you can start with the food and fruit is a great choice. Create a catchy subject line and make a message story with the fruits. As a beginner, it would be a challenge to get fit into the kids’ world. Give it a try!
12.Matchstick stop motion for kids
You can make something creative out of matchsticks and shoot them following a sequence and make a story. It’s a good idea to personify them and shoot them from different angles. As a kid, you can enjoy making them unified and create a story.
For beginners: Arrange matchstick and make a story out of those sticks is a great idea to begin your journey. You only need to craft a story based on the sticks, settings, camera, and lights. You can use the floor as well to decorate the story.
13.Paper animation for kids
Kids have lots of craftwork in school. You can utilize the extracurricular activities by making stop motion with paper and drawing over it. The idea is amazing, and your friends may feel jealous to watch your creativity.
For the beginners: Beginners can use anything on paper and create a stop motion of their choice. With paper, you can create a stop motion of the beautiful memory book or memory sequence that reminds you of a happy time with your family members.
14.Easy breakfast preparing stop motion for kids
Kids, when preparing something in the kitchen, can shoot the entire process and then set them in the following sequence. It’s the wisest decision to Make a stop motion to frame your creativity. You can even share or show it to your elders and friends and give them a surprise.
For beginners: Beginners can make the stop motion by shooting their cooking recipes. Sometimes you try something on the gas oven. Shoot your efforts, make a sequence and get the frame of stop motion. The creativity you can share on social media platforms.
15.Stop motion for Maths and Arts
School curriculum is a great idea to show your creative aspects. You can combine maths and arts and create any topic you want. Hand-made drawings, colors, a whiteboard, and a camera, you are all set to begin your project.
For beginners: Paper Cutting and making any object could be a great artistic creation. You can elevate your thinking process by arranging things and making a stop motion animation.
16.Stop motion with toys for kids
Check your wardrobe and get all the toys out from there. Set them as a story and roll on the camera. You can make your own toy story.
For the beginners: Remember what you made out in your college project? You can make Eskimo living and create stop motion. You can add your creativity and knowledge about their living style to make the animation more attractive and eye-catching.
![]()
A cross-platform for making videos anywhere for all creators
* Secure Download
Why your video editing isn’t good enough? How about some creative inspo?
- 100M+ Users
- 5M+ Stock Media for Use
- 4M+ Social Media Followers
- 150+ Countries and Regions
17.Drawing stop motion for kids
You can draw a picture, make a story out of it, place the camera, fix the light and shadow, and start shooting it. You can give a surprise to your drawing teacher as well by making the stop motion from your drawing book.
For beginners: Halloween stop motion is quite popular among beginners. It would be a great idea to give your friends an incredible and scary gift this Halloween. Cut the paper, draw the pictures, fix them as per the sequence of your story and make a stop motion. Don’t forget to shoot in a shadow, fewer lights needed to create the horror effects. You can add cold music to make it more horrific.
18.Halloween stop motion for kids
You can create a Halloween stop motion by making a craft. Using pumpkin, different pops to support your story and start to roll the camera. If it is a scary idea, use lights and then shoot.
For beginners: You can make course ads or promotions in the stop motion format. Content writing and the prospect in the industry you can show through the stop motion, asking your friend, or if possible, you stand in front of the camera and shoot it. It’s a good idea to promote education as well among the kids.
19.Christmas tree-making ideas for kids
You can make your Christmas a memorable one by making the Christmas tree stop motion. Decorate the tree and shoot them following a sequence and camera angle. Give a festive look to your Christmas tree and create a memorable stop motion this Christmas.
For beginners: As a beginner, you can try at the corner of the home, decorate the tree with lights, colorful papers, leaves, balls, stars and give an amazing look. The natural lights give different looks and feel to the animation in the corner, easily attracting viewers. You can add music to give a completely festive look.
20.Birthday card stop motion for kids
A birthday celebration is a great festival for any age kid. To make the celebration memorable, you can create a birthday card stop motion animation. You can add music to make it attractive and a joyful experience for you or your friend.
For beginners: College fest is a great opportunity to show your skill. You can create new ideas and form a stop motion to exhibit the idea and concept to your fellow friends and faculty members. Give your hands a try to make the fest an animated day.
Final Thought
You can give a shape to any idea if you know how to organize the stop motion systematically. Portray a beautiful story, arrange the stuff you need to express your ideas and concepts, and start shooting it. You can spread your work digitally by posting on various social media platforms.
Shanoon Cox
Shanoon Cox is a writer and a lover of all things video.
Follow @Shanoon Cox
How to Make a Slideshow with Music
How to Make a Slideshow with Music
Shanoon Cox
Mar 27, 2024• Proven solutions
Nowadays, we tend to store our experiences of important occasions in photos and videos since cameras and camcorders are popular. To better preserve these sweet memories, make a slideshow with music, photos and videos is a good idea. It’s not as difficult as you think since all you need are: a good slideshow maker, photos and videos you want to show, music to go along with your slideshow. Here is a tutorial about how to make a slideshow with music with Wondershare Filmora video editor and Wondershare DVD Slideshow Builder .
Read more: 20 Best Slideshow Songs for Different Occasions [Royalty-Free]
How to create slideshow with music in Filmora?


Note: The video tutorial about how to make slideshow in minutes is created with the previous version of Filmora video editor. Most of the steps are similar and creating a music slideshow with the latest Filmora is very easy. As we said before, all you need is your photos and music tracks, then follow the steps below to start.
Step 1. Download Filmora and Run it
Click the Free Download button above to download and install Wondershare Filmora on your computer and then launch it.
In case you want to change the default aspect ratio setting in the splash screen, you can choose 9:16 for portrait mode, 1:1 for Instagram slideshow and more. And then click New Project to create a project to continue.
Step 2. Import Photos and Music
After that, you need to import all your photo and music media to the Media Library and then drag and drop them to the timeline directly. Filmora allows you to change the order the photos in the timeline, and the photo duration as well.
You can also rotate photos and crop them manually to fit your project.
Note: If you find some black bar on your photos in preview, it is recommended to change Photo Placement to Crop and Zoom under Preference before drag-n-drop to timeline.
Step 3. Add Transitions

There are hundreds of transitions available in Filmora which you should totally have a try. You can apply a specific transition between each selected photo, or apply random transitions to selected photos.
Filmora features more than 30 transitions especially for Slideshow, such as cross merge, cross split, swap and sweep clockwise. Of course, you can also use some 3D transition, ripple and dissolve, or speed blur transitions.
You can also adjust the transition duration accordingly.
To make your photos slideshow looks better, it is highly recommended to apply filters and overlays effects.
Step 4. Add background music
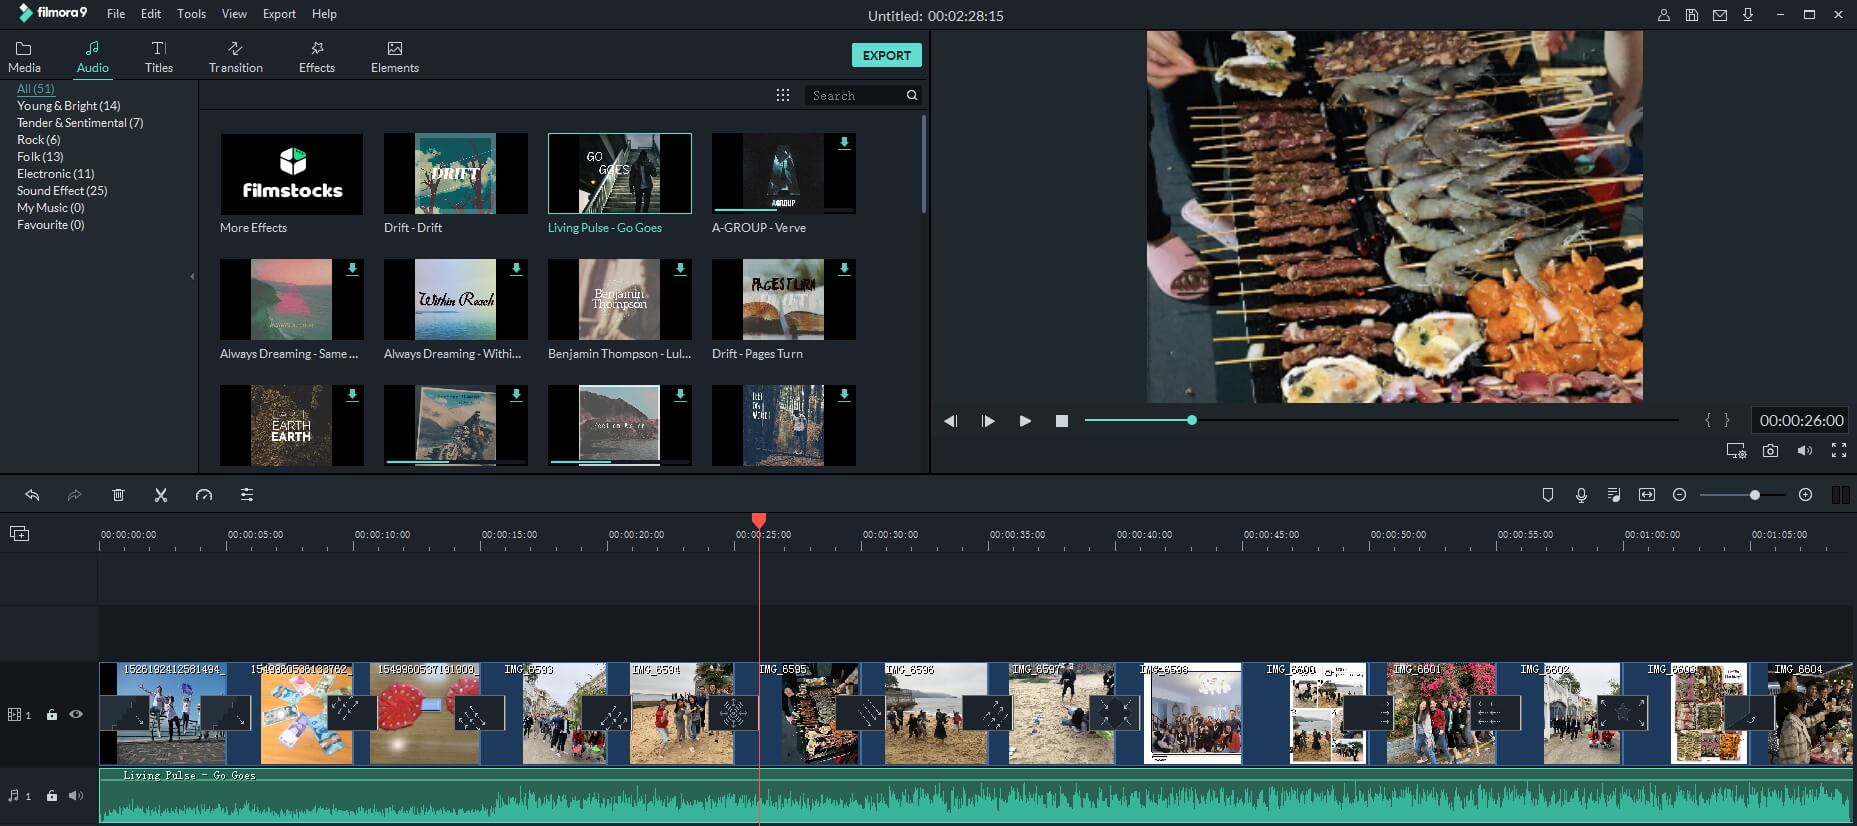
You can choose background music or sound effect from the inbuilt audio library in Filmora or drag and drop the music track file from computer to the timeline directly. Filmora features the voiceover recording tool which helps you to record your own voice easily.
Step 5. Export and Save
Finally, it’s time to save and export the music slideshow as you see fit. You have several options, you can save it on the computer in different formats, or you can share it to YouTube or Vimeo directly, or you can burn it to DVD.
Why choose Filmora to create music slideshow?
- Filmora supports most of popular image formats such as .jpg, .png, .bmp, .gif, .tif, and .tiff.
- Filmora allows you to crop, pan & zoom the slideshow manually or automatically by applying Pan & Zoom Photo Placement.
- Filmora has inbuilt music track and sound effect library, and stunning transitions, effects and elements presets.
- Filmora allows you to record your own voiceover and apply fade in and fade out effects.
- Besides creating photo slideshow, you can use it to create videos for both your YouTube marketing, daily sharing and business.
How to make a slideshow with DVD Slideshow Builder

Tips for Make a Slideshow with Music
1. Install slideshow software and import photos and videos
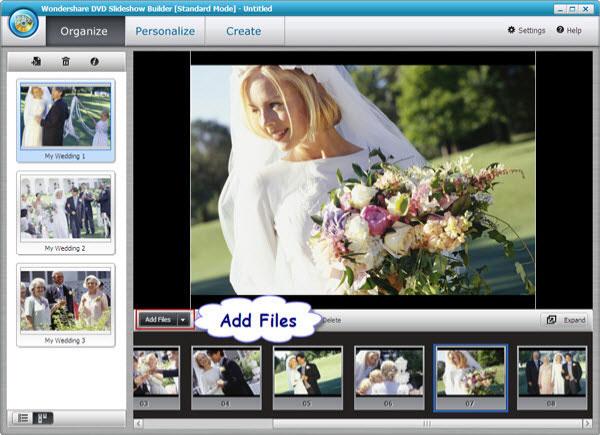
Install the software and import your digital photos to the storyboard by clicking ‘“Add Files” (there is no quantity limitation of photos). You can also add videos from computer or camera.
2. Add music to your photo slideshow
Go to the “Personalize” tab. Click “Music” toolbar to add background music or just drag the music to the background track. In the timeline, you can drag the slider to make the music best suit the photos and videos. If you need to edit the music, double click the clip and in the pop up window, trim music and adjust music volume as you like.
Tip: If you want to synchronize background music with the slideshow, click “Settings” (it’s on the right upper corner) and choose “Slideshow” tab, then tick the checkbox under the “Synchronize“. At last, click “OK” button.
3 .Select movie styles and add decorations
There are also 480+ free styles and transition effects that can be used for your picture slideshow with music in this tab. Choose your favorite styles and drag it on the photos. You can also add decoration text, clipart and effects on your digital photos. To make add more fun, you can also add intro movie and credit movie to your picture slideshow with music by clicking the “Intro/Credit” build-in button.

4 . Preview and save your slideshow with music
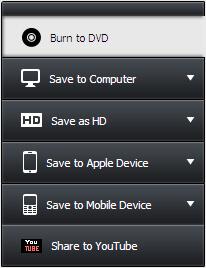
Go to “Publish” tab, you can preview the photo video by click the preview button first. Then publish it to the format you want. If you want to watch your photo slideshow with music to iPod or iPhone, you’d better publish it to MP4 format. This slideshow software also enables you to share your slideshow directly to YouTube by filling in the necessary information. Besides, you can burn DVD slideshow with music by clicking the “Burn to DVD” button and putting a DVD disc in your computer.
We shared two ways of making slideshow with music, whether you are using Filmora or DVD slideshow maker, leave a comment below and let me know your choice.
Shanoon Cox
Shanoon Cox is a writer and a lover of all things video.
Follow @Shanoon Cox
Shanoon Cox
Mar 27, 2024• Proven solutions
Nowadays, we tend to store our experiences of important occasions in photos and videos since cameras and camcorders are popular. To better preserve these sweet memories, make a slideshow with music, photos and videos is a good idea. It’s not as difficult as you think since all you need are: a good slideshow maker, photos and videos you want to show, music to go along with your slideshow. Here is a tutorial about how to make a slideshow with music with Wondershare Filmora video editor and Wondershare DVD Slideshow Builder .
Read more: 20 Best Slideshow Songs for Different Occasions [Royalty-Free]
How to create slideshow with music in Filmora?
Note: The video tutorial about how to make slideshow in minutes is created with the previous version of Filmora video editor. Most of the steps are similar and creating a music slideshow with the latest Filmora is very easy. As we said before, all you need is your photos and music tracks, then follow the steps below to start.
Step 1. Download Filmora and Run it
Click the Free Download button above to download and install Wondershare Filmora on your computer and then launch it.
In case you want to change the default aspect ratio setting in the splash screen, you can choose 9:16 for portrait mode, 1:1 for Instagram slideshow and more. And then click New Project to create a project to continue.
Step 2. Import Photos and Music
After that, you need to import all your photo and music media to the Media Library and then drag and drop them to the timeline directly. Filmora allows you to change the order the photos in the timeline, and the photo duration as well.
You can also rotate photos and crop them manually to fit your project.
Note: If you find some black bar on your photos in preview, it is recommended to change Photo Placement to Crop and Zoom under Preference before drag-n-drop to timeline.
Step 3. Add Transitions
There are hundreds of transitions available in Filmora which you should totally have a try. You can apply a specific transition between each selected photo, or apply random transitions to selected photos.
Filmora features more than 30 transitions especially for Slideshow, such as cross merge, cross split, swap and sweep clockwise. Of course, you can also use some 3D transition, ripple and dissolve, or speed blur transitions.
You can also adjust the transition duration accordingly.
To make your photos slideshow looks better, it is highly recommended to apply filters and overlays effects.
Step 4. Add background music
You can choose background music or sound effect from the inbuilt audio library in Filmora or drag and drop the music track file from computer to the timeline directly. Filmora features the voiceover recording tool which helps you to record your own voice easily.
Step 5. Export and Save
Finally, it’s time to save and export the music slideshow as you see fit. You have several options, you can save it on the computer in different formats, or you can share it to YouTube or Vimeo directly, or you can burn it to DVD.
Why choose Filmora to create music slideshow?
- Filmora supports most of popular image formats such as .jpg, .png, .bmp, .gif, .tif, and .tiff.
- Filmora allows you to crop, pan & zoom the slideshow manually or automatically by applying Pan & Zoom Photo Placement.
- Filmora has inbuilt music track and sound effect library, and stunning transitions, effects and elements presets.
- Filmora allows you to record your own voiceover and apply fade in and fade out effects.
- Besides creating photo slideshow, you can use it to create videos for both your YouTube marketing, daily sharing and business.
How to make a slideshow with DVD Slideshow Builder
Tips for Make a Slideshow with Music
1. Install slideshow software and import photos and videos
Install the software and import your digital photos to the storyboard by clicking ‘“Add Files” (there is no quantity limitation of photos). You can also add videos from computer or camera.
2. Add music to your photo slideshow
Go to the “Personalize” tab. Click “Music” toolbar to add background music or just drag the music to the background track. In the timeline, you can drag the slider to make the music best suit the photos and videos. If you need to edit the music, double click the clip and in the pop up window, trim music and adjust music volume as you like.
Tip: If you want to synchronize background music with the slideshow, click “Settings” (it’s on the right upper corner) and choose “Slideshow” tab, then tick the checkbox under the “Synchronize“. At last, click “OK” button.
3 .Select movie styles and add decorations
There are also 480+ free styles and transition effects that can be used for your picture slideshow with music in this tab. Choose your favorite styles and drag it on the photos. You can also add decoration text, clipart and effects on your digital photos. To make add more fun, you can also add intro movie and credit movie to your picture slideshow with music by clicking the “Intro/Credit” build-in button.
4 . Preview and save your slideshow with music
Go to “Publish” tab, you can preview the photo video by click the preview button first. Then publish it to the format you want. If you want to watch your photo slideshow with music to iPod or iPhone, you’d better publish it to MP4 format. This slideshow software also enables you to share your slideshow directly to YouTube by filling in the necessary information. Besides, you can burn DVD slideshow with music by clicking the “Burn to DVD” button and putting a DVD disc in your computer.
We shared two ways of making slideshow with music, whether you are using Filmora or DVD slideshow maker, leave a comment below and let me know your choice.
Shanoon Cox
Shanoon Cox is a writer and a lover of all things video.
Follow @Shanoon Cox
How to Make an Adorable Video for Your Baby’s First Year
How to Make an Adorable Video for Your Baby’s First Year

Ollie Mattison
Mar 27, 2024• Proven solutions
Your baby grows up very fast and being able to see him grow is maybe one of the most interesting and exciting moments in your life. Documenting the first year is amazing and it will surely offer you an extraordinary value so try to do that the best way you can. Imagine how touched your child would be when he/she, at the age of 18, watch something like this:
How to make the baby’s first year video
Filming tips
Shooting a good baby’s first year video can take a little bit of preparation and it will surely offer you an extraordinary experience in the long run. It will also help offer you an incredible value to begin with which is always impressive.
Stabilize the camera - The first thing you need to do is to stabilize the camera. Using a tripod can be the best option here so take your time and results will be great for sure. Of course, placing the camera on your counter will also help, so try to keep that in mind as it can indeed be a very good option to begin with.
Lighting - You will also have to play with the proper lighting setup. A good light will help you get much better results and even though it can take some time to get the best experience, it really is a truly amazing option that you do not want to miss.
Focus - Of course, focus on the baby. Yes, focus but don’t zoom in and out all the time. Find a good pattern that will help keep the baby steady and do all in your power to get the best results. Granted, it will take some time to get good results but don’t rush it otherwise the experience will not be as good as you would expect.
Audio - Moreover, audio should be your focus here as well. Take the time and do something good here, a good audio will always pay off very well so get a good audio setup if you want to obtain a stellar experience.
Props - Also, we recommend you to use props. These can really make a good video and they will even add in some much needed fun to your setup. Try to find the best possible props and add them in your video. Some good prop examples would be a stuffed animal, a toy, maybe even the family pet. All of these are great and well worth your time.
Editing tips
Once you finished capturing the movie, you will have to go to editing. This is where you have to use a good video editing tool that will help provide a good baby’s first year video in the end. With that in mind, Wondershare Filmora can be the tool of choice as it offers you all the features you need in order to create a good baby video.
=“” style=”width: 100%; height: 278.438px;”;
Download Mac Version ](https://tools.techidaily.com/wondershare/filmora/download/ )
Adjust saturation - You should try to use the app in order to adjust the saturation as this can lead to some very bad results if you’re not careful. Find the proper saturation levels and opt for them right away.
Trim, cut, or split - If needed, split, cut or even trim the video. There will be times when you will need the reversing effect as well. All of these effects are accessible via the Wondershare Filmora video app.
Advanced editing - Plus, you will also need to apply a green screen effect as this will help you place your baby in a variety of funny locations, be it a funny MV or a Hollywood movie. The app can also help you clone the baby with PIP effects and you can also use it to add filters, overlays or text.
Wondershare Filmora will offer you an extraordinary set of tools and it will bring in front a very good value right from the start. The interface of the app is user friendly and you will have no problem using it as you see fit. Also, you can create the baby’s first year video on both Mac and Windows as the app supports both platforms. It also delivers immediate support for camcorders and smartphones so you can use any device you want for video capture. With its help you can share videos to DVD or YouTube too if you so desire. Don’t hesitate and access this great tool as fast as possible to get a good outcome!
Ollie Mattison
Ollie Mattison is a writer and a lover of all things video.
Follow @Ollie Mattison
Ollie Mattison
Mar 27, 2024• Proven solutions
Your baby grows up very fast and being able to see him grow is maybe one of the most interesting and exciting moments in your life. Documenting the first year is amazing and it will surely offer you an extraordinary value so try to do that the best way you can. Imagine how touched your child would be when he/she, at the age of 18, watch something like this:
How to make the baby’s first year video
Filming tips
Shooting a good baby’s first year video can take a little bit of preparation and it will surely offer you an extraordinary experience in the long run. It will also help offer you an incredible value to begin with which is always impressive.
Stabilize the camera - The first thing you need to do is to stabilize the camera. Using a tripod can be the best option here so take your time and results will be great for sure. Of course, placing the camera on your counter will also help, so try to keep that in mind as it can indeed be a very good option to begin with.
Lighting - You will also have to play with the proper lighting setup. A good light will help you get much better results and even though it can take some time to get the best experience, it really is a truly amazing option that you do not want to miss.
Focus - Of course, focus on the baby. Yes, focus but don’t zoom in and out all the time. Find a good pattern that will help keep the baby steady and do all in your power to get the best results. Granted, it will take some time to get good results but don’t rush it otherwise the experience will not be as good as you would expect.
Audio - Moreover, audio should be your focus here as well. Take the time and do something good here, a good audio will always pay off very well so get a good audio setup if you want to obtain a stellar experience.
Props - Also, we recommend you to use props. These can really make a good video and they will even add in some much needed fun to your setup. Try to find the best possible props and add them in your video. Some good prop examples would be a stuffed animal, a toy, maybe even the family pet. All of these are great and well worth your time.
Editing tips
Once you finished capturing the movie, you will have to go to editing. This is where you have to use a good video editing tool that will help provide a good baby’s first year video in the end. With that in mind, Wondershare Filmora can be the tool of choice as it offers you all the features you need in order to create a good baby video.
=“” style=”width: 100%; height: 278.438px;”;
Download Mac Version ](https://tools.techidaily.com/wondershare/filmora/download/ )
Adjust saturation - You should try to use the app in order to adjust the saturation as this can lead to some very bad results if you’re not careful. Find the proper saturation levels and opt for them right away.
Trim, cut, or split - If needed, split, cut or even trim the video. There will be times when you will need the reversing effect as well. All of these effects are accessible via the Wondershare Filmora video app.
Advanced editing - Plus, you will also need to apply a green screen effect as this will help you place your baby in a variety of funny locations, be it a funny MV or a Hollywood movie. The app can also help you clone the baby with PIP effects and you can also use it to add filters, overlays or text.
Wondershare Filmora will offer you an extraordinary set of tools and it will bring in front a very good value right from the start. The interface of the app is user friendly and you will have no problem using it as you see fit. Also, you can create the baby’s first year video on both Mac and Windows as the app supports both platforms. It also delivers immediate support for camcorders and smartphones so you can use any device you want for video capture. With its help you can share videos to DVD or YouTube too if you so desire. Don’t hesitate and access this great tool as fast as possible to get a good outcome!
Ollie Mattison
Ollie Mattison is a writer and a lover of all things video.
Follow @Ollie Mattison
How to Add Emojis To Discord
How to Add Emojis To Discord

Richard Bennett
Mar 27, 2024• Proven solutions
Who doesn’t like emoticons? They are fun, easy to use, and, best of all, highly expressive of your emotions that you cannot convey over messages otherwise.
A 2019 survey shows 70% of mobile users used emoji in texting or on social media daily. This shows the popularity of emoji in our world today.
Similarly, as a Discord user, you must have come across thousands of emoji in it. These are images uploaded on the server and called custom emojis that this gaming community can use for effective communication with friends and other players.
With the emoji and gaming industry growing, it is safe to say that discord emoji’s popularity and use will only increase.
Read ahead to see how you can add emojis on Discord if you want to have fun chats with your friends too.
- Part 1: Adding and Sending Emoji To Chat On Discord?
- Part 2: Adding Emojis To Discord Channel Name Or Nickname?
- Part 3: Adding Custom Emojis To Discord Server On Windows/Mac?
- Part 4: Adding Custom Emojis To Discord Server On iPhone And Android?
- Part 5: Managing Emojis in Discord Server
Part 1: How to Add and Send Emoji To Chat On Discord?
One of the best things about Discord’s emoji feature is that there are two ways to add them. You can either access emoji on the Discord account or upload them yourself.
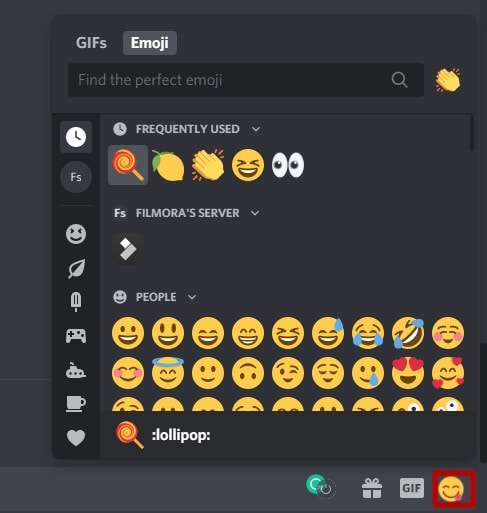
You can access the emoji menu for all Discord platforms by pressing the grey smiley face next to the message box. This will be on the right of the box for desktops, and for mobile apps, it will be on the left.
Discord-exclusive and standard emoji are present in the emoji menu, along with a part that keeps track of your most-used emoji.
On the other hand, you can also add custom emoticons to your Discord server if you have permission to do so.
Once you add and access the emoji on your device, select the one you want to send to your friends and press enter to send.
Part 2: How to Add Emojis To Discord Channel Name Or Nickname?
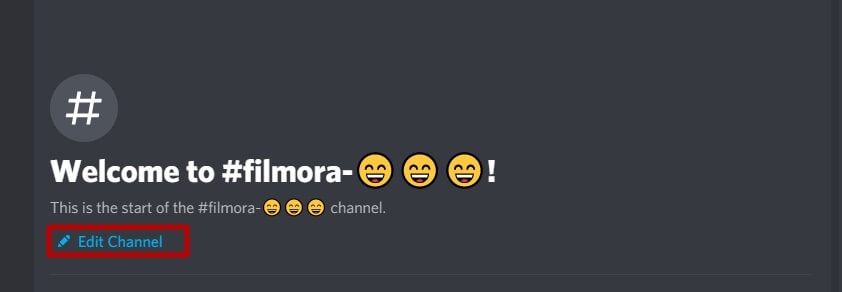
As an owner of a Discord channel, it is easy for you to add emoji to Discord. Follow the steps below to figure out how to add emojis to Discord channels:
- Use the emoji list to find the one you want to use in your channel name.
- Select the emoji “browser” column and copy it either with the mouse or “Ctrl + C” on the keyboard.
- Access your Discord server, right-click the channel where the emoji will be and use the dropdown menu to select the “Edit Channel.”
- In the “Channel Name” box, past the selected emoji using “Ctrl + V” from the keyboard.
- Select “Save Changes” to save the name with the emoji.
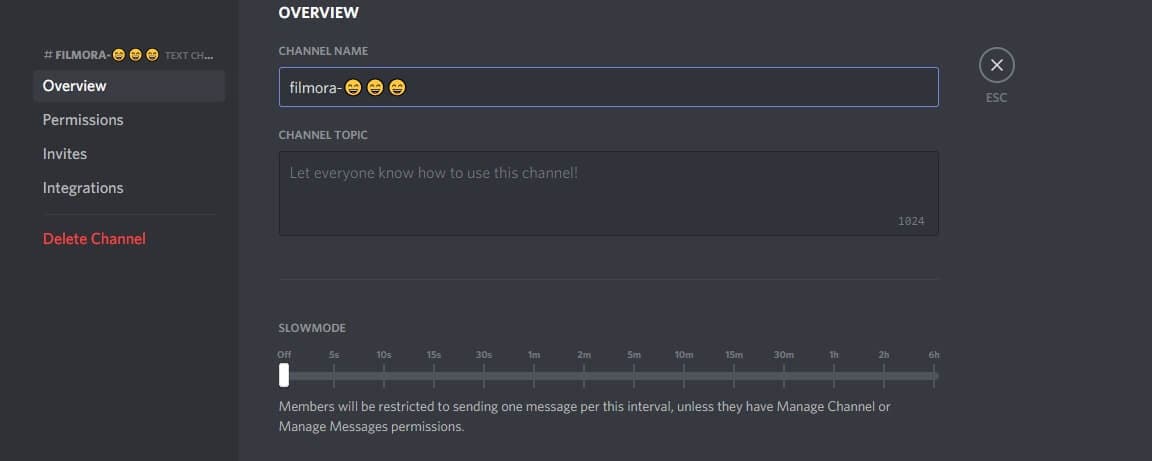
Part 3: How to Add Custom Emojis To Discord Server On Windows/Mac?
You can add custom emoji on Discord, but only if you are a server owner or administrator. Use the Discord server settings on either the desktop versions for Windows or Mac or the Discord Website.
Follow the steps below for either platform:
- Access your Discord server to begin and press the arrow pointing down in the channel list with the server name—Press “Server Settings” in the menu

- As the server’s settings open, you can add custom emojis in the “Emoji” tab. You can find a requirements list at the top that includes emoji names with a minimum of two characters and a file size limit of 256 KB. You can add fifty normal and an additional fifty animated emoji GIFs using the standard servers
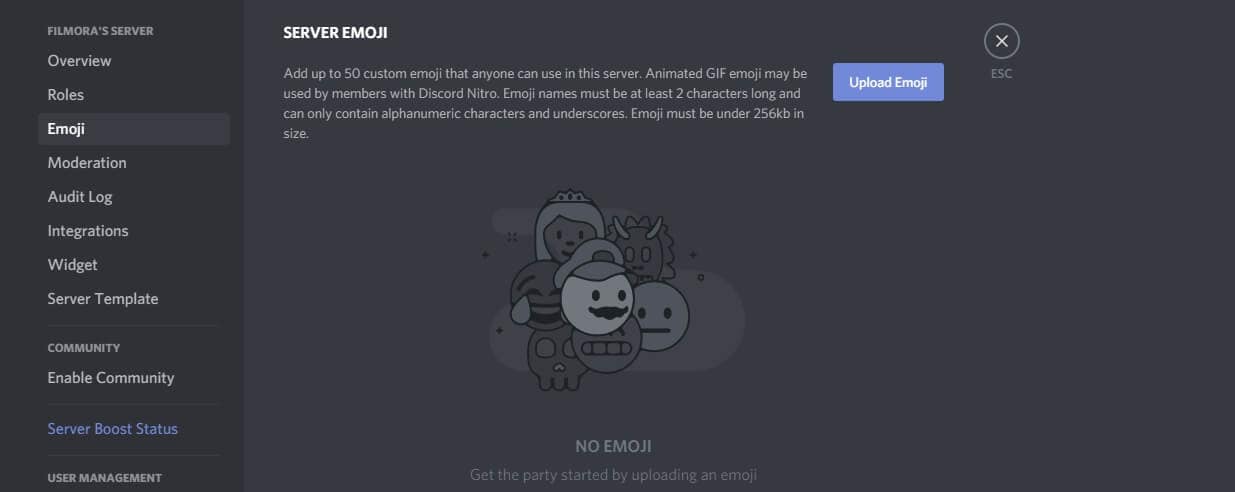
- Select “Upload Emoji” to insert a custom emoji, either standard or animated
- With the help of your device’s local storage, upload the file. However, for the emoji to be added to the lists, the file should align with Discord’s requirements.
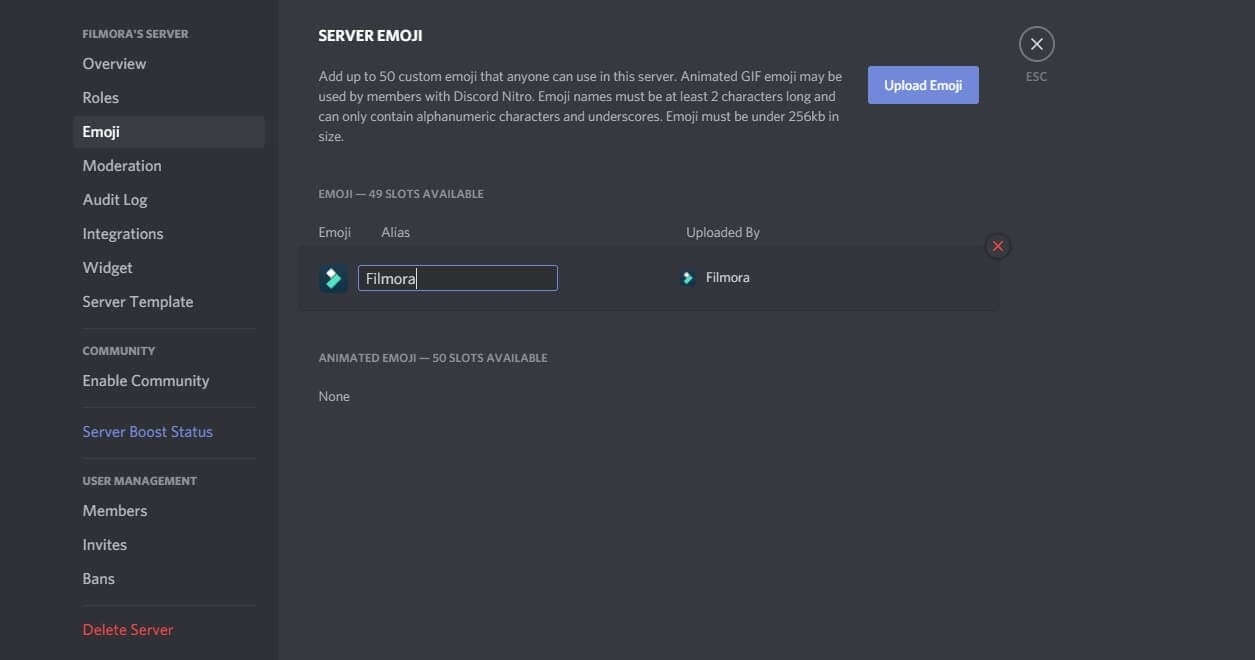
- For every emoji image that you upload, an alias tag will be created for that custom emoji using the file’s name. This tag is used to update a message with an emoji.
- A default alias name like this can be replaced by selecting the “Alias” box with the custom emoji and then creating a new name.
- Enjoy your emoji in chats as soon as you upload them to the Discord server!
Boost your server with Discord Nitro subscribers today to insert more than the standard fifty emoji!
Part 4: How to Add Custom Emojis To Discord Server On iPhone And Android?
How cool is it that you can add custom emoji to your smartphone as well? Whether you have an iPhone or an Android, you can use the same menu as Windows and Mac to upload emoji.
Discord’s interface is similar across all devices, so the following steps work on Android and Apple.
- Begin by opening the app on your device to access the server. Press the hamburger menu located at the top left in an open server and channel.
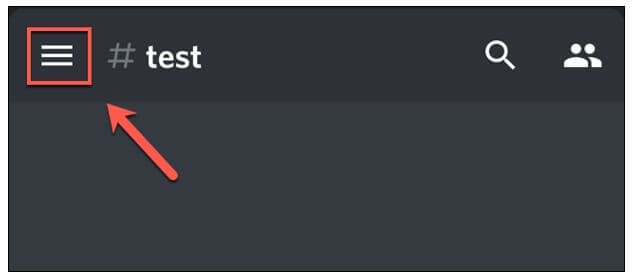
- As the channel and server list opens for Discord, you can see a three-dot menu right next to the channel list with the server name. Tap on it to proceed.
- To get to your server settings, press “Settings” in the Discord server menu that shows up.
- Under the “Server Settings” menu, select “Emoji” to access the custom emoji settings.
- As the “Emoji” menu opens, you can see an emoji requirement list
- Press “Upload Emoji” to upload any emoji that aligns with these requirements
- Press the custom emoji file, tap “Crop” if it needs cropping, and then use the “Upload” option
- After you upload the emoji file, replace the alias tag by tapping on it. This will redirect you to that specific emoji’s settings
- Type the name you want using the “Alias” box to create the tag used to insert emoji in messages
- Save this new tag with the “Save” icon placed in the bottom right
- Any changes you make to the custom emoji’s alias are applied to it instantly for your use.
Emoji bring fun to the conversations you have with friends, and it is very easy to add them to your server as well. These show up in the emoji pop-up list once you add them. The chat message bar contains the emoji icon from where you can access them.
It is essential to name your emoji with only alphanumeric characters and underscores using at least two characters.
The Discord emoji size is 32x32 pixels, so even if you upload up to 128x128 pixel size emojis, they will be resized to the default dimensions. Furthermore, emoji file sizes are at most 256kb.
If you want to use custom emojis, you can’t do so without a Nitro subscription because it is only functional on the server they are uploaded to. Even if you find a way to access the emoji from some other server, only its text code will be visible.
If you attempt to use the Emoji Picker to pick an emoji, you’ll get the following message:
Bonus: How to Manage Emoji in Discord Server?
You can’t remove or add emoji specific to a server on your own as a member. You need the server owner to toggle the permission of Manager Emoji in your domain.
On the other hand, as a server owner, you can give others this role with the following steps.
- Open Roles: Open the Server Settings and select “Roles” from the menu on the side.
- Toggle Manage Emoji: Pick the role you want to apply the permission to, and then toggle emoji’s slider to “on,” save changes, and you’re done!
FAQs About Discord Emojis
1. Why Do I See Grey Emoji In The Emoji Menu?
Greyed-out emoji in the menu means that either those emoji are animated, or you don’t have the permission to post them on other servers.
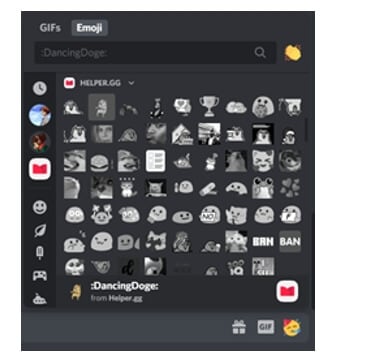
2. How Can I Get More Custom Emoji On The Server?
You can upload 50 emojis to your Discord server. But if you want more options, you need a Discord Nitro subscription to boost your server specs.
3. What Is The Discord Emoji Size?
Discord allows you to upload an emoji of up to 128x128 pixels, but it will resize it to 32x32 since that is its standard size.
Conclusion
Emojis make any chat fun, and where gaming is involved, they help you communicate better with your friends.
Discord has thousands of custom emojis that you can easily add to your server through your computer, whether it is your chat or the channel name. Follow our guide for a seamless process to add emoji to Discord and make your gaming experience better!
Richard Bennett
Richard Bennett is a writer and a lover of all things video.
Follow @Richard Bennett
Richard Bennett
Mar 27, 2024• Proven solutions
Who doesn’t like emoticons? They are fun, easy to use, and, best of all, highly expressive of your emotions that you cannot convey over messages otherwise.
A 2019 survey shows 70% of mobile users used emoji in texting or on social media daily. This shows the popularity of emoji in our world today.
Similarly, as a Discord user, you must have come across thousands of emoji in it. These are images uploaded on the server and called custom emojis that this gaming community can use for effective communication with friends and other players.
With the emoji and gaming industry growing, it is safe to say that discord emoji’s popularity and use will only increase.
Read ahead to see how you can add emojis on Discord if you want to have fun chats with your friends too.
- Part 1: Adding and Sending Emoji To Chat On Discord?
- Part 2: Adding Emojis To Discord Channel Name Or Nickname?
- Part 3: Adding Custom Emojis To Discord Server On Windows/Mac?
- Part 4: Adding Custom Emojis To Discord Server On iPhone And Android?
- Part 5: Managing Emojis in Discord Server
Part 1: How to Add and Send Emoji To Chat On Discord?
One of the best things about Discord’s emoji feature is that there are two ways to add them. You can either access emoji on the Discord account or upload them yourself.
You can access the emoji menu for all Discord platforms by pressing the grey smiley face next to the message box. This will be on the right of the box for desktops, and for mobile apps, it will be on the left.
Discord-exclusive and standard emoji are present in the emoji menu, along with a part that keeps track of your most-used emoji.
On the other hand, you can also add custom emoticons to your Discord server if you have permission to do so.
Once you add and access the emoji on your device, select the one you want to send to your friends and press enter to send.
Part 2: How to Add Emojis To Discord Channel Name Or Nickname?
As an owner of a Discord channel, it is easy for you to add emoji to Discord. Follow the steps below to figure out how to add emojis to Discord channels:
- Use the emoji list to find the one you want to use in your channel name.
- Select the emoji “browser” column and copy it either with the mouse or “Ctrl + C” on the keyboard.
- Access your Discord server, right-click the channel where the emoji will be and use the dropdown menu to select the “Edit Channel.”
- In the “Channel Name” box, past the selected emoji using “Ctrl + V” from the keyboard.
- Select “Save Changes” to save the name with the emoji.
Part 3: How to Add Custom Emojis To Discord Server On Windows/Mac?
You can add custom emoji on Discord, but only if you are a server owner or administrator. Use the Discord server settings on either the desktop versions for Windows or Mac or the Discord Website.
Follow the steps below for either platform:
- Access your Discord server to begin and press the arrow pointing down in the channel list with the server name—Press “Server Settings” in the menu
- As the server’s settings open, you can add custom emojis in the “Emoji” tab. You can find a requirements list at the top that includes emoji names with a minimum of two characters and a file size limit of 256 KB. You can add fifty normal and an additional fifty animated emoji GIFs using the standard servers
- Select “Upload Emoji” to insert a custom emoji, either standard or animated
- With the help of your device’s local storage, upload the file. However, for the emoji to be added to the lists, the file should align with Discord’s requirements.
- For every emoji image that you upload, an alias tag will be created for that custom emoji using the file’s name. This tag is used to update a message with an emoji.
- A default alias name like this can be replaced by selecting the “Alias” box with the custom emoji and then creating a new name.
- Enjoy your emoji in chats as soon as you upload them to the Discord server!
Boost your server with Discord Nitro subscribers today to insert more than the standard fifty emoji!
Part 4: How to Add Custom Emojis To Discord Server On iPhone And Android?
How cool is it that you can add custom emoji to your smartphone as well? Whether you have an iPhone or an Android, you can use the same menu as Windows and Mac to upload emoji.
Discord’s interface is similar across all devices, so the following steps work on Android and Apple.
- Begin by opening the app on your device to access the server. Press the hamburger menu located at the top left in an open server and channel.
- As the channel and server list opens for Discord, you can see a three-dot menu right next to the channel list with the server name. Tap on it to proceed.
- To get to your server settings, press “Settings” in the Discord server menu that shows up.
- Under the “Server Settings” menu, select “Emoji” to access the custom emoji settings.
- As the “Emoji” menu opens, you can see an emoji requirement list
- Press “Upload Emoji” to upload any emoji that aligns with these requirements
- Press the custom emoji file, tap “Crop” if it needs cropping, and then use the “Upload” option
- After you upload the emoji file, replace the alias tag by tapping on it. This will redirect you to that specific emoji’s settings
- Type the name you want using the “Alias” box to create the tag used to insert emoji in messages
- Save this new tag with the “Save” icon placed in the bottom right
- Any changes you make to the custom emoji’s alias are applied to it instantly for your use.
Emoji bring fun to the conversations you have with friends, and it is very easy to add them to your server as well. These show up in the emoji pop-up list once you add them. The chat message bar contains the emoji icon from where you can access them.
It is essential to name your emoji with only alphanumeric characters and underscores using at least two characters.
The Discord emoji size is 32x32 pixels, so even if you upload up to 128x128 pixel size emojis, they will be resized to the default dimensions. Furthermore, emoji file sizes are at most 256kb.
If you want to use custom emojis, you can’t do so without a Nitro subscription because it is only functional on the server they are uploaded to. Even if you find a way to access the emoji from some other server, only its text code will be visible.
If you attempt to use the Emoji Picker to pick an emoji, you’ll get the following message:
Bonus: How to Manage Emoji in Discord Server?
You can’t remove or add emoji specific to a server on your own as a member. You need the server owner to toggle the permission of Manager Emoji in your domain.
On the other hand, as a server owner, you can give others this role with the following steps.
- Open Roles: Open the Server Settings and select “Roles” from the menu on the side.
- Toggle Manage Emoji: Pick the role you want to apply the permission to, and then toggle emoji’s slider to “on,” save changes, and you’re done!
FAQs About Discord Emojis
1. Why Do I See Grey Emoji In The Emoji Menu?
Greyed-out emoji in the menu means that either those emoji are animated, or you don’t have the permission to post them on other servers.
2. How Can I Get More Custom Emoji On The Server?
You can upload 50 emojis to your Discord server. But if you want more options, you need a Discord Nitro subscription to boost your server specs.
3. What Is The Discord Emoji Size?
Discord allows you to upload an emoji of up to 128x128 pixels, but it will resize it to 32x32 since that is its standard size.
Conclusion
Emojis make any chat fun, and where gaming is involved, they help you communicate better with your friends.
Discord has thousands of custom emojis that you can easily add to your server through your computer, whether it is your chat or the channel name. Follow our guide for a seamless process to add emoji to Discord and make your gaming experience better!
Richard Bennett
Richard Bennett is a writer and a lover of all things video.
Follow @Richard Bennett
Best SolarMovie Alternatives-Watch Movies Free Online
Best SolarMovie Alternatives-Watch Movies Online
Shanoon Cox
Mar 27, 2024• Proven solutions
SolarMovie is an online video streaming site that offers a huge collection of movies and TV series. All these movies and shows can be streamed for free on SolarMovie. Furthermore, there is no registration required. Better yet, users can even download the movies in high quality.
However, some ISP’s have banned the SolarMovie website, and it might be inaccessible now. So, people are now on the lookout for a SolarMovie alternative that they can use to easily watch movie online.
To help with that, we have carefully curated a list of some of the top sites like SolarMovie.
- Best 10 SolarMovie Alternatives for You
- Bonus Tip- Make a Video with Wondershare Filmora Easy Movie Maker
Best 10 SolarMovie Alternatives for You
Even though there countless SolarMovie like websites on the internet, it can be pretty confusing to find the best one. Therefore, we have rounded up the top SolarMovie alternative sites for your ease.
- 1. Popcornflix
- 2. Tubi TV
- 3. Freeform
- 4. Netflix
- 5. Amazon Prime
- 6. Hulu
- 7. Yifymovies
- 8. CONtv
- 9. Aha Video
- 10. Vumoo
1. Popcornflix
One of the best SolarMovie alternative sites includes Popcornflix. It is a free HD streaming site through which users can watch movie online without having to register or subscribe. The range of movies available on this SolarMovie alternative is very extensive. Moreover, the movies are categorized as New Arrivals, Horror, Drama, Asian Action, to name a few. The categorization allows easy browsing and searching for the perfect movie. This SolarMovie alternative boasts a category of Popcornflix original movies as well that are exclusively available on this site. A search bar option further eases the task of finding a particular movie.

2. Tubi TV
Tubi TV is a top-notch SolarMovie alternative site. With a sleek and attractive interface, Tubi TV features a wide variety of movies available for free streaming. Also, the movies are classified into various sections based on Popularity, Genre, and many more. By selecting a title from the genre category like horror, lifestyle, or even stand-up comedy, users can easily find and watch movie online. This site might even be better than SolarMovie, as it has options to customize the resolution and the choice to display subtitles. An option of Add To My Playlist further makes this SolarMovie alternative an excellent site.
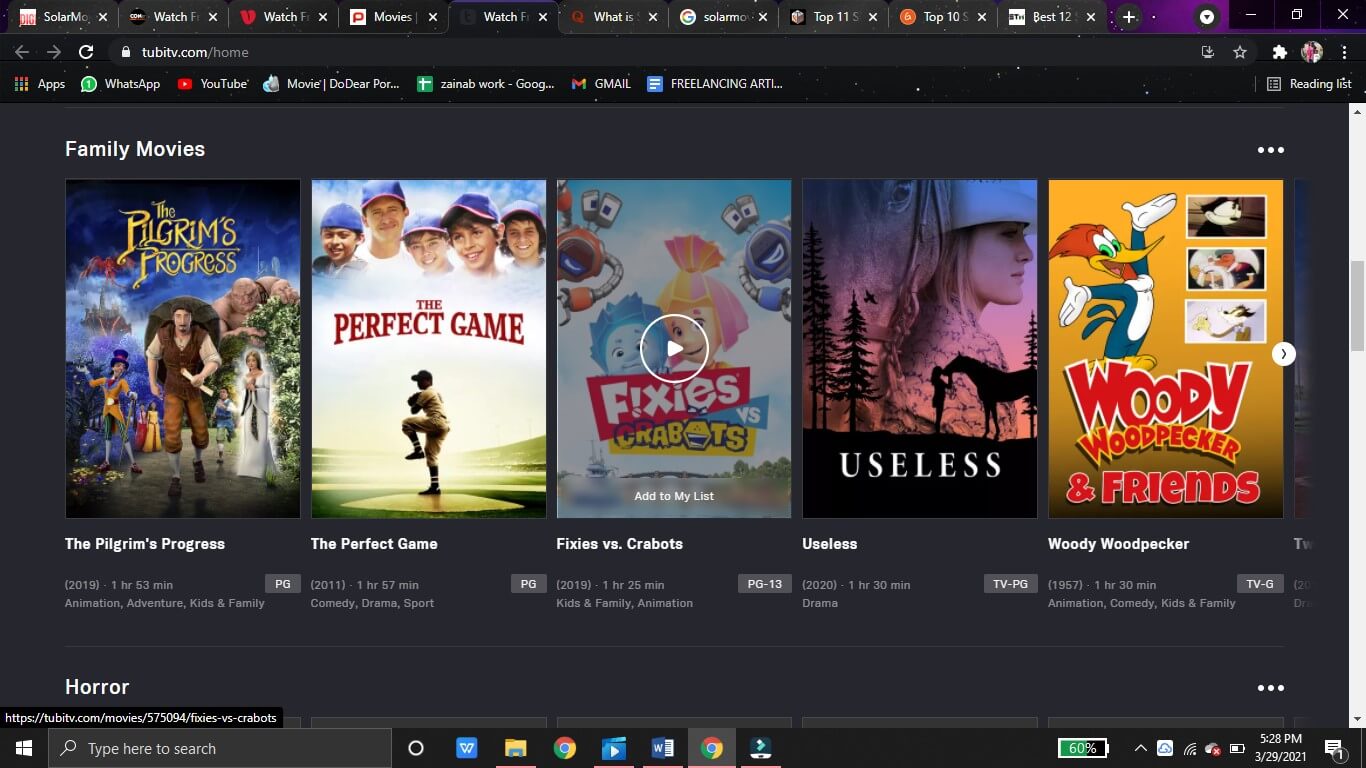
3. Freeform
Among the sites like SolarMovie, Freeform also tops the list. However, Freeform is a cable channel that requires users to access the endless movie library through their cable provider. But, this SolarMovie alternative has a huge collection of the latest as well as vintage movies. On Freeform, you can watch movie online just by clicking and selecting your cable provider. You can sign up for free to resume your movie streaming from where you left off. Freeform’s movies are creatively classified as Fierce and Funny, Familiar Faves, and Throwback.
4. Netflix
Netflix is an up-and-coming SolarMovie alternative that has dominated the online streaming sites owing to its vast movie library. Unlike SolarMovie, Netflix also produces many original movies that are available on the sites for HD streaming. Netflix, however, is not free. Users can watch movie online on Netflix by first registering for an account. After registering, users can sign in to watch movie online or download it in HD for offline streaming later. Furthermore, this SolarMovie alternative allows users to enjoy unlimited streaming on any device or platform.

5. Amazon Prime
Amazon Prime is yet another top-notch SolarMovie alternative. On this site, users can find an exclusive Amazon original movie collection. With an intuitive interface and easy browsing categories, Amazon Prime is the go-to site to watch movie online without any ads or any kind of hassle. The categorization is based on genre, awards, or audience, to name a few. Also, the movies can be added to a Watchlist for easy organization. But, to watch movie online on Amazon Prime, users are required to create an account and sign in. And unlike SolarMovie, Amazon Prime isn’t available for free streaming.
6. Hulu
Like SolarMovie, Hulu also boasts an extensive movie library. This library by Hulu is a mix of popular and classic movies. Also, it features a variety of Hulu original series and movies that you cannot find elsewhere. Whether you want to watch a thriller or a documentary, Hulu has got you covered. However, Hulu requires a paid subscription. Before subscription, you can activate a 30-day trial to weigh whether Hulu is the best SolarMovie alternative and if it is worth your time.
7. Yifymovies
Another amazing SolarMovie alternative is the Yifymovies site. This site rivals the SolarMovie website by featuring an up-to-date movie collection. What’s better, Yifymovies has classified its library into broad categories like adventure, animation, and documentary, etc. Users can also search by filtering out the movies on the basis of the year of release. All the movie titles contain a rating that helps the user decide whether that movie is worth their time or not. The video player in this SolarMovie alternative features the fast-forward and rewind option too. The only downside is that it has a few annoying pop-up ads.
8. CONtv
One of the best sites like SolarMovie includes CONtv. Although this SolarMovie-like site requires registration in order to watch movie online, the unique and up-to-date movie collection here makes it a very popular user’s choice. By signing up, users can also save their favorite movies to the watchlist. A premium account is available if users wish to stream and watch movie online without any annoying pop-ups and commercials. On this SolarMovie alternative, users can also have access to the latest anime series as well as classic movies.
9. Aha Video
Aha is a subscription-based movie streaming SolarMovie alternative. On this site, you can watch movie online for free. But, the premium content can only be accessed after the paid subscription is activated. Aha video can easily be used as a SolarMovie alternative as it offers a great variety of movies that users can enjoy in HD quality and low buffering time. Movies for every genre like romance, comedy, and action can be found on this site. Better yet, a category is also available for kids.
10. Vumoo
Vumoo is the last but not the least addition to our list of the best sites like SolarMovie. Vumoo features a multitude of movies ranging from horror to comedy. Users can easily find any kind of movie on this SolarMovie alternative. Users can watch movie online in HD quality through Vumoo. Furthermore, Vumoo is a free website that doesn’t require any signing up or registration. Users can just hop onto this SolarMovie like website and click to watch movie online. A major drawback is that the movies are not categorized, but that is countered by the searching option, which makes it easier to search a particular movie.
Bonus Tip- Make a Video with Wondershare Filmora Easy Movie Maker
Wondershare Filmora is a very powerful and comprehensive video editor for all kinds of edits. The user-friendly interface makes the editing process effortless. Users can easily add motion graphics, keyframe animations, and even color match with a single click.
1. First, download Wondershare Filmora on your device and launch it. Then, click on File and tap on Import Media Files to import the clip you want to edit.
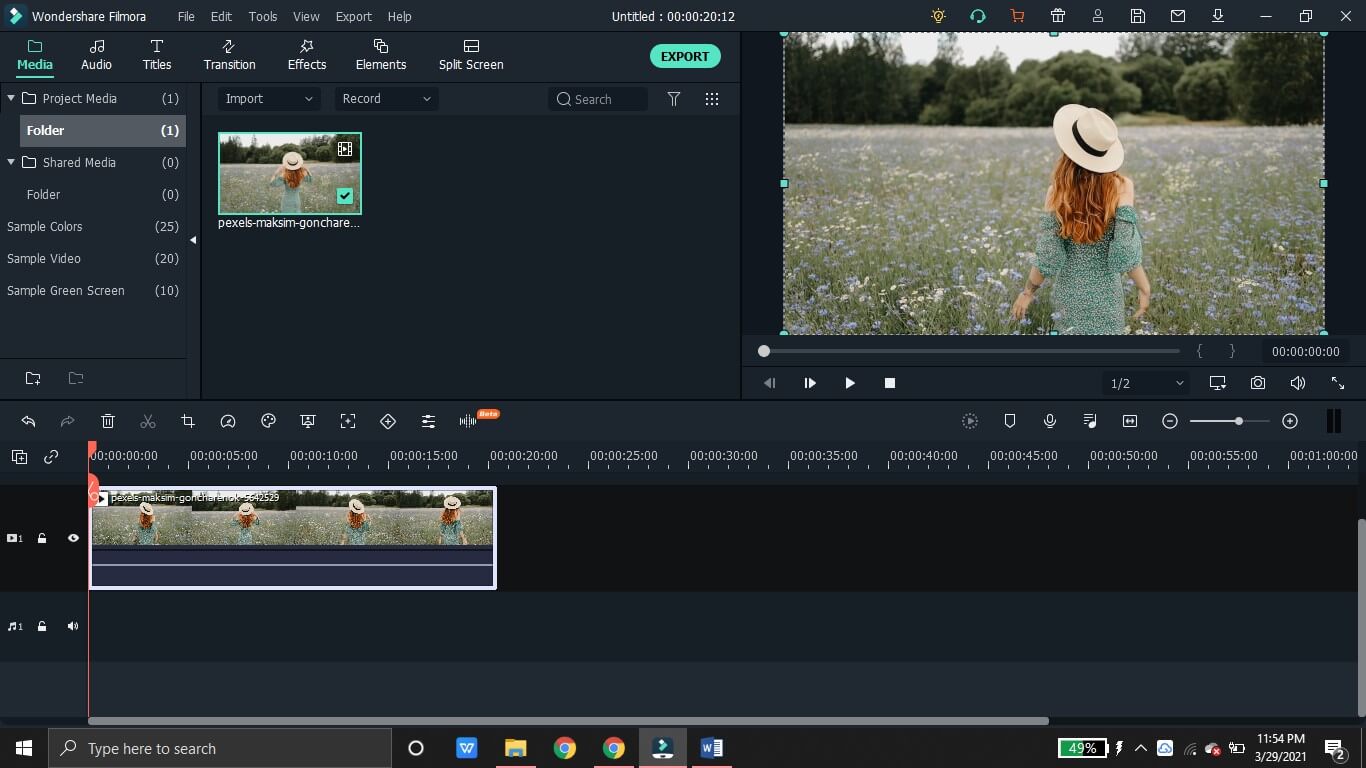
2. From the Titles section, you can choose a catchy template to compliment your video. By double-clicking on the title added to the timeline, you can access advanced settings to customize the title text, font size, color, etc. You can also animate the title to make it more dynamic.
3. If you like to give your videos a cinematic touch, you can add multiple transitions ranging from 3D, ripple and dissolve, speed blur to warp effects. Just click on the plus icon on the effect to add it to the timeline. Drag and adjust the duration of the effect.
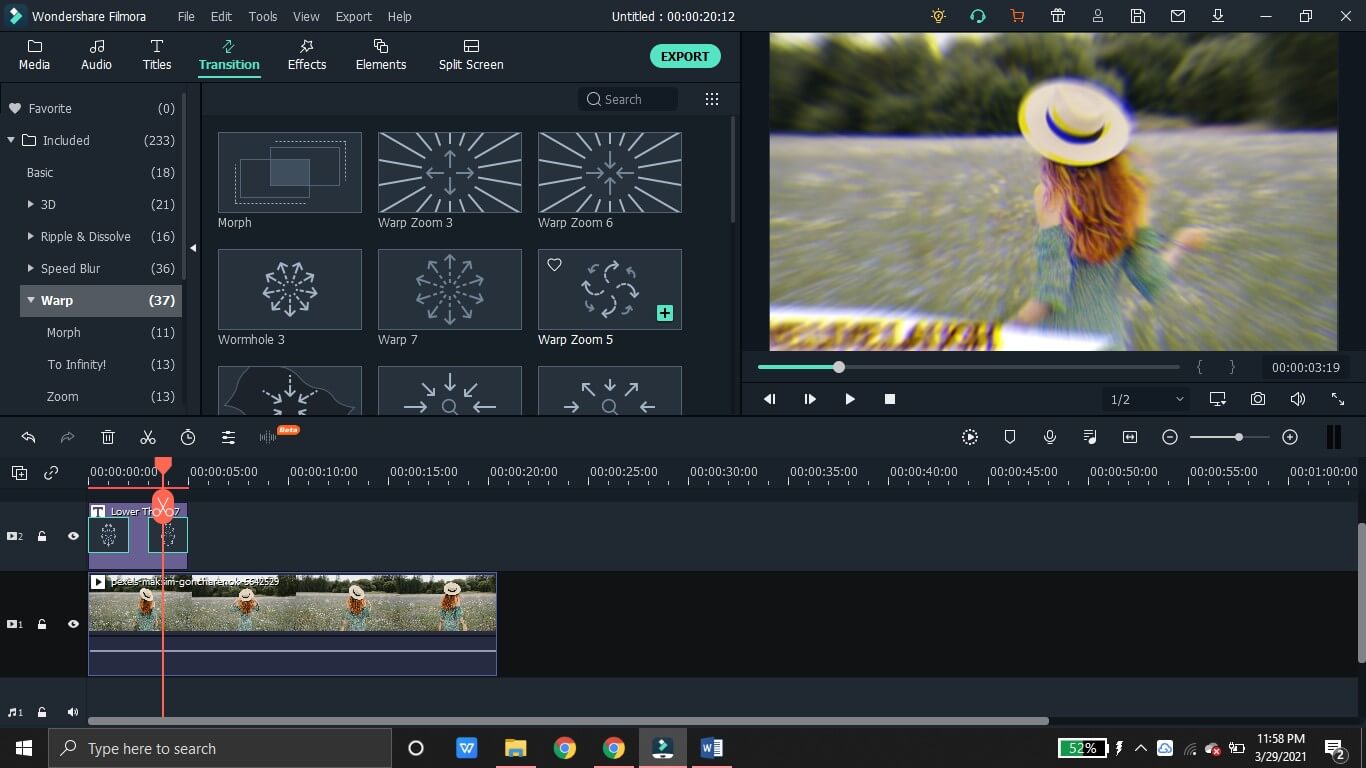
4. The Effects tab has various kinds of aesthetic filters and overlays. Choose a suitable overlay from the categories such as Frame, Bokeh Blur, Old Film etc.
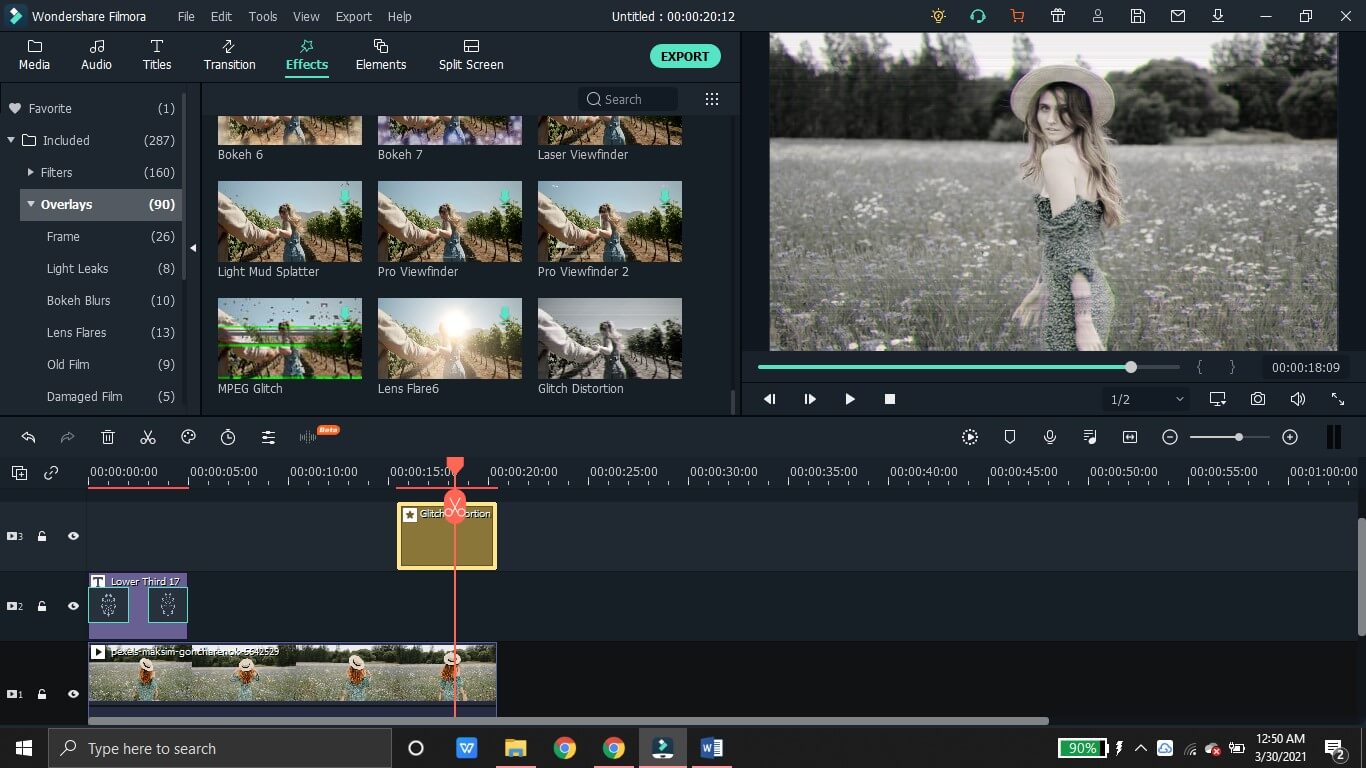
5. You can also make your videos very attractive by adding some colorful and appealing elements. From Badges to Hand Drawn icons, the Elements tab has a huge variety.
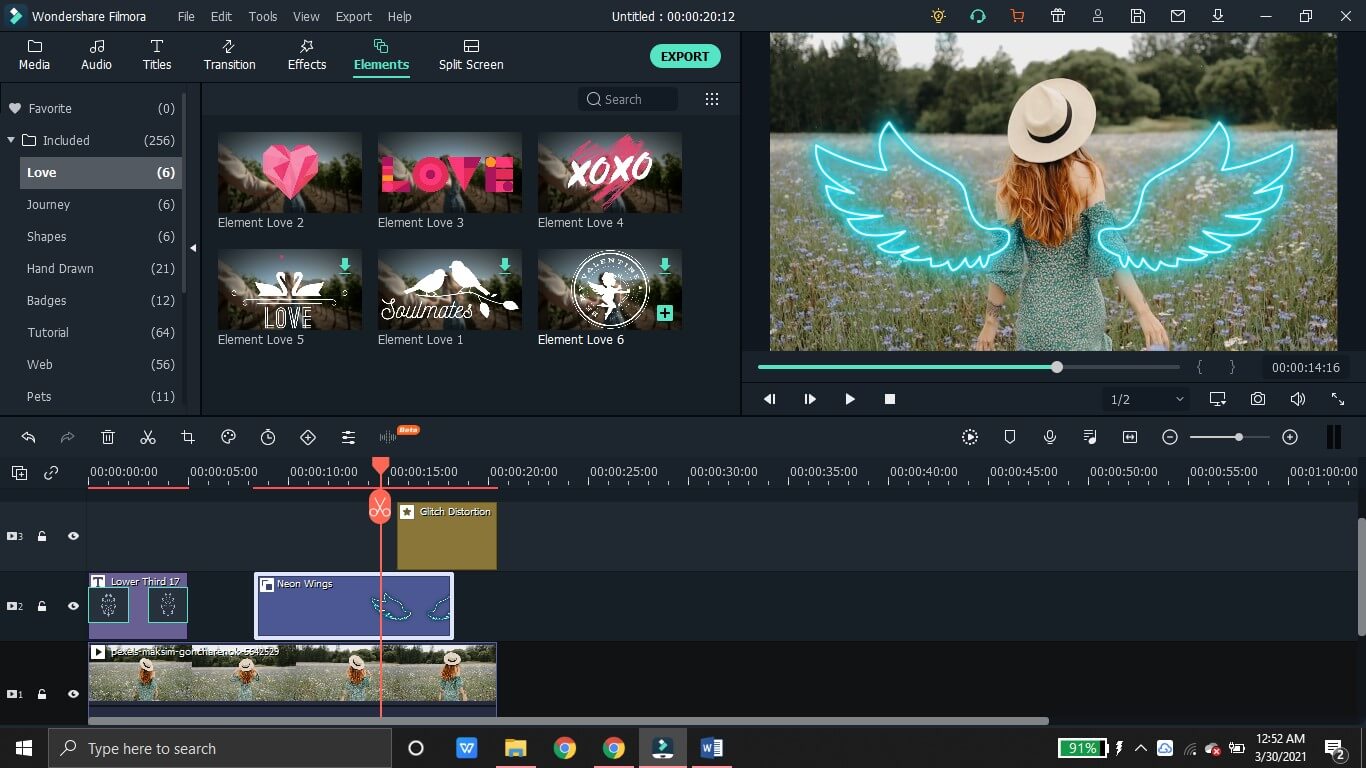
6. Finally, you can export the video and save it locally. Or, the video can be directly shared on the social media platforms like YouTube.

Summing up
Once again, you can enjoy limitless streaming of your favorite movies and shows. Thanks to the various sites like SolarMovie, you can watch movie online without any hassle. Just like SolarMovie, most of the sites we mentioned offer a huge movie library free of cost. And, there are multiple benefits associated with the SolarMovie alternative sites that range from the watchlist option to the resolution customization tool. So, you can go back to having a relaxing weekend by hopping on to the SolarMovie alternative site of your choice and watching some exciting movies. Go on and watch movie online on any device and enjoy!
Shanoon Cox
Shanoon Cox is a writer and a lover of all things video.
Follow @Shanoon Cox
Shanoon Cox
Mar 27, 2024• Proven solutions
SolarMovie is an online video streaming site that offers a huge collection of movies and TV series. All these movies and shows can be streamed for free on SolarMovie. Furthermore, there is no registration required. Better yet, users can even download the movies in high quality.
However, some ISP’s have banned the SolarMovie website, and it might be inaccessible now. So, people are now on the lookout for a SolarMovie alternative that they can use to easily watch movie online.
To help with that, we have carefully curated a list of some of the top sites like SolarMovie.
- Best 10 SolarMovie Alternatives for You
- Bonus Tip- Make a Video with Wondershare Filmora Easy Movie Maker
Best 10 SolarMovie Alternatives for You
Even though there countless SolarMovie like websites on the internet, it can be pretty confusing to find the best one. Therefore, we have rounded up the top SolarMovie alternative sites for your ease.
- 1. Popcornflix
- 2. Tubi TV
- 3. Freeform
- 4. Netflix
- 5. Amazon Prime
- 6. Hulu
- 7. Yifymovies
- 8. CONtv
- 9. Aha Video
- 10. Vumoo
1. Popcornflix
One of the best SolarMovie alternative sites includes Popcornflix. It is a free HD streaming site through which users can watch movie online without having to register or subscribe. The range of movies available on this SolarMovie alternative is very extensive. Moreover, the movies are categorized as New Arrivals, Horror, Drama, Asian Action, to name a few. The categorization allows easy browsing and searching for the perfect movie. This SolarMovie alternative boasts a category of Popcornflix original movies as well that are exclusively available on this site. A search bar option further eases the task of finding a particular movie.
2. Tubi TV
Tubi TV is a top-notch SolarMovie alternative site. With a sleek and attractive interface, Tubi TV features a wide variety of movies available for free streaming. Also, the movies are classified into various sections based on Popularity, Genre, and many more. By selecting a title from the genre category like horror, lifestyle, or even stand-up comedy, users can easily find and watch movie online. This site might even be better than SolarMovie, as it has options to customize the resolution and the choice to display subtitles. An option of Add To My Playlist further makes this SolarMovie alternative an excellent site.
3. Freeform
Among the sites like SolarMovie, Freeform also tops the list. However, Freeform is a cable channel that requires users to access the endless movie library through their cable provider. But, this SolarMovie alternative has a huge collection of the latest as well as vintage movies. On Freeform, you can watch movie online just by clicking and selecting your cable provider. You can sign up for free to resume your movie streaming from where you left off. Freeform’s movies are creatively classified as Fierce and Funny, Familiar Faves, and Throwback.
4. Netflix
Netflix is an up-and-coming SolarMovie alternative that has dominated the online streaming sites owing to its vast movie library. Unlike SolarMovie, Netflix also produces many original movies that are available on the sites for HD streaming. Netflix, however, is not free. Users can watch movie online on Netflix by first registering for an account. After registering, users can sign in to watch movie online or download it in HD for offline streaming later. Furthermore, this SolarMovie alternative allows users to enjoy unlimited streaming on any device or platform.
5. Amazon Prime
Amazon Prime is yet another top-notch SolarMovie alternative. On this site, users can find an exclusive Amazon original movie collection. With an intuitive interface and easy browsing categories, Amazon Prime is the go-to site to watch movie online without any ads or any kind of hassle. The categorization is based on genre, awards, or audience, to name a few. Also, the movies can be added to a Watchlist for easy organization. But, to watch movie online on Amazon Prime, users are required to create an account and sign in. And unlike SolarMovie, Amazon Prime isn’t available for free streaming.
6. Hulu
Like SolarMovie, Hulu also boasts an extensive movie library. This library by Hulu is a mix of popular and classic movies. Also, it features a variety of Hulu original series and movies that you cannot find elsewhere. Whether you want to watch a thriller or a documentary, Hulu has got you covered. However, Hulu requires a paid subscription. Before subscription, you can activate a 30-day trial to weigh whether Hulu is the best SolarMovie alternative and if it is worth your time.
7. Yifymovies
Another amazing SolarMovie alternative is the Yifymovies site. This site rivals the SolarMovie website by featuring an up-to-date movie collection. What’s better, Yifymovies has classified its library into broad categories like adventure, animation, and documentary, etc. Users can also search by filtering out the movies on the basis of the year of release. All the movie titles contain a rating that helps the user decide whether that movie is worth their time or not. The video player in this SolarMovie alternative features the fast-forward and rewind option too. The only downside is that it has a few annoying pop-up ads.
8. CONtv
One of the best sites like SolarMovie includes CONtv. Although this SolarMovie-like site requires registration in order to watch movie online, the unique and up-to-date movie collection here makes it a very popular user’s choice. By signing up, users can also save their favorite movies to the watchlist. A premium account is available if users wish to stream and watch movie online without any annoying pop-ups and commercials. On this SolarMovie alternative, users can also have access to the latest anime series as well as classic movies.
9. Aha Video
Aha is a subscription-based movie streaming SolarMovie alternative. On this site, you can watch movie online for free. But, the premium content can only be accessed after the paid subscription is activated. Aha video can easily be used as a SolarMovie alternative as it offers a great variety of movies that users can enjoy in HD quality and low buffering time. Movies for every genre like romance, comedy, and action can be found on this site. Better yet, a category is also available for kids.
10. Vumoo
Vumoo is the last but not the least addition to our list of the best sites like SolarMovie. Vumoo features a multitude of movies ranging from horror to comedy. Users can easily find any kind of movie on this SolarMovie alternative. Users can watch movie online in HD quality through Vumoo. Furthermore, Vumoo is a free website that doesn’t require any signing up or registration. Users can just hop onto this SolarMovie like website and click to watch movie online. A major drawback is that the movies are not categorized, but that is countered by the searching option, which makes it easier to search a particular movie.
Bonus Tip- Make a Video with Wondershare Filmora Easy Movie Maker
Wondershare Filmora is a very powerful and comprehensive video editor for all kinds of edits. The user-friendly interface makes the editing process effortless. Users can easily add motion graphics, keyframe animations, and even color match with a single click.
1. First, download Wondershare Filmora on your device and launch it. Then, click on File and tap on Import Media Files to import the clip you want to edit.
2. From the Titles section, you can choose a catchy template to compliment your video. By double-clicking on the title added to the timeline, you can access advanced settings to customize the title text, font size, color, etc. You can also animate the title to make it more dynamic.
3. If you like to give your videos a cinematic touch, you can add multiple transitions ranging from 3D, ripple and dissolve, speed blur to warp effects. Just click on the plus icon on the effect to add it to the timeline. Drag and adjust the duration of the effect.
4. The Effects tab has various kinds of aesthetic filters and overlays. Choose a suitable overlay from the categories such as Frame, Bokeh Blur, Old Film etc.
5. You can also make your videos very attractive by adding some colorful and appealing elements. From Badges to Hand Drawn icons, the Elements tab has a huge variety.
6. Finally, you can export the video and save it locally. Or, the video can be directly shared on the social media platforms like YouTube.
Summing up
Once again, you can enjoy limitless streaming of your favorite movies and shows. Thanks to the various sites like SolarMovie, you can watch movie online without any hassle. Just like SolarMovie, most of the sites we mentioned offer a huge movie library free of cost. And, there are multiple benefits associated with the SolarMovie alternative sites that range from the watchlist option to the resolution customization tool. So, you can go back to having a relaxing weekend by hopping on to the SolarMovie alternative site of your choice and watching some exciting movies. Go on and watch movie online on any device and enjoy!
Shanoon Cox
Shanoon Cox is a writer and a lover of all things video.
Follow @Shanoon Cox
How to Add Bitmoji to Keyboard?
Emojis have made it so much better for people to express themselves. Let’s say someone compliments you on a chat app; you can use a smiley emoji to tell that you are happy. At the same time, an angry emoji lets you express that you are angry.
Apart from the generic emojis that you can find in your chat applications, Bitmoji enables you to customize your character and share it with people you chat with. Bitmoji is fun, but do you know how to add it to a keyboard? If you don’t, don’t worry, this post will help you understand how to do that.
In this article
02 How to Add and Use Bitmoji to iPhone Keyboard?
03 How to Get the Bitmoji Keyboard on Android?
04 How to Install and Use Bitmoji on Windows and Mac?
Part 1: What is Bitmoji?
If you are new to Bitmoji, you may wonder what it is? Bitmoji is essentially your own personal emoji. You can create a cartoon version of yourself and share it with people to make the conversation fun. So, what one does is create an avatar of themselves and give it all kinds of expressions.
Then, you can create comics using your Bitmoji, use it to express yourself while having a chat, and even use it as a reaction. Anyone who is done using the same old emojis has started using Bitmoji because it’s a lot more fun.
Now, let’s learn how to create your very own Bitmoji.
Step 1: First, go to the App Store or Play store and download the Bitmoji application.
Step 2: Once downloaded, launch the app and start making an avatar or your Bitmoji.
Step 3: Pick a skin color, hair color, chin, nose, hairstyle, jawline, and more.

Once your Bitmoji is created, you are all set to use the Bitmoji as stickers. Moreover, the app lets you dress your Bitmoji as you want as well. Let it have different expressions and postures because that’s how it’s going to be fun! After your Bitmoji is added, the next thing to do is enable Bitmoji on the keyboard of the device you are using.
Part 2: How to Add and Use Bitmoji to iPhone Keyboard?
Since you have learned how to create a Bimoji, it’s time to learn the steps to use it on your iPhone keyboard. Unfortunately, just by downloading the app, it won’t reflect on the keyboard directly. Instead, you will have to follow a few steps to add Bitmoji to the keyboard. Here’s what you need to do.
Step 1: Launch your iPhone and click on the Settings option.
Step 2: Now, go to the General option and click on the Keyboard option.

Step 3: When the Keyboard page opens, click on the option that says Keyboards and then click on Add New Keyboard.
Step 4: You will see the Third Party Keyboards option. There, you need to click on Bitmoji.
Step 5: Now, toggle the option that says Allow Full Access. Once you do that, you will see a small pop-up. Click on the Allow option.
And that’s it. Bitmoji will be added to the iPhone keyboard. Open any messaging app and click on the globe and hold it for a few seconds. When you see Bitmoji, click on that, and you will be able to use Bitmoji stickers.
Part 3: How to Get the Bitmoji Keyboard on Android?
Bitmoji is available for Android users as well. Before you begin to use it, go through the first part again and download the app. Then create your Bitmoji, as explained earlier. You can send Bitmojis directly from the app itself, but if you plan to use Bitmoji regularly, getting the Bitmoji keyboard makes sense. So, once you are done, follow the following steps to get the Bitmoji keyboard on Android.
Step 1: Launch the Bitmoji app. Click on the Keyboard option that you see at the bottom of the Bitmoji app screen.
Step 2: Install Bitmoji keyboard and give permission to your phone to use Bitmoji keyboard. Bitmoji will notify you when the Bitmoji keyboard gets activated.
You are all done. Now, use the Bitmoji keyboard to chat with your family members and friends and make everything fun and exciting.
Part 4: How to Install and Use Bitmoji on Windows and Mac?
If you want to use Bitmoji on Windows and Mac, you will have to use the Google Chrome browser. If you already have the Google Chrome browser, carry on with the steps explained below; otherwise, get the browser before starting.
Step 1: Go to Chrome Extension and install Bitmoji for Chrome Extension.
Step 2: You will have to sign in to Bitmoji. If you want to add Bitmoji to Gmail, click on add Bitmoji to Gmail.
After you are done following the three easy steps, you will see Bitmoji is installed. To start using it, move the cursor to the upper corner of the browser and click on the Bitmoji icon. Next, you will see the Bitmojis. Choose any Bitmoji, copy it, and paste it on Gmail or instant messaging applications.
Part 5: Where can You Use Bitmoji?
Bitmojis can be used on different platforms. All you need to do is enable Bitmoji keyboard on your iPhone or Android phone or Windows and Mac computers and use it on various social media platforms. For example, use Snapchat to send Bitmojis for different types of occasions.
If you are an iPhone user, you can share fun Bitmojis through iMessage. On a computer, you can use these Bitmojis on Facebook or other instant messaging platforms. You can drag and drop the Bitmoji sticker or copy it to share it with your friends.
If you are a working professional and want to lighten the mood of your Slack workspace, use Bitmojis to make your coworkers feel relaxed. Plus, this can be a great way to make someone feel pumped up. Like that, there are many other platforms to use Bitmojis!
Related: Best Free Apps to Get Emojis on iPhone and Android
Conclusion
So, there you go. We have finally reached the end of this guide. We hope you have found this post interesting and will face no hassle using the Bitmoji keyboard on different devices. Get the Bitmoji app if you haven’t downloaded it yet and make your conversations fun and enjoyable!
02 How to Add and Use Bitmoji to iPhone Keyboard?
03 How to Get the Bitmoji Keyboard on Android?
04 How to Install and Use Bitmoji on Windows and Mac?
Part 1: What is Bitmoji?
If you are new to Bitmoji, you may wonder what it is? Bitmoji is essentially your own personal emoji. You can create a cartoon version of yourself and share it with people to make the conversation fun. So, what one does is create an avatar of themselves and give it all kinds of expressions.
Then, you can create comics using your Bitmoji, use it to express yourself while having a chat, and even use it as a reaction. Anyone who is done using the same old emojis has started using Bitmoji because it’s a lot more fun.
Now, let’s learn how to create your very own Bitmoji.
Step 1: First, go to the App Store or Play store and download the Bitmoji application.
Step 2: Once downloaded, launch the app and start making an avatar or your Bitmoji.
Step 3: Pick a skin color, hair color, chin, nose, hairstyle, jawline, and more.
Once your Bitmoji is created, you are all set to use the Bitmoji as stickers. Moreover, the app lets you dress your Bitmoji as you want as well. Let it have different expressions and postures because that’s how it’s going to be fun! After your Bitmoji is added, the next thing to do is enable Bitmoji on the keyboard of the device you are using.
Part 2: How to Add and Use Bitmoji to iPhone Keyboard?
Since you have learned how to create a Bimoji, it’s time to learn the steps to use it on your iPhone keyboard. Unfortunately, just by downloading the app, it won’t reflect on the keyboard directly. Instead, you will have to follow a few steps to add Bitmoji to the keyboard. Here’s what you need to do.
Step 1: Launch your iPhone and click on the Settings option.
Step 2: Now, go to the General option and click on the Keyboard option.
Step 3: When the Keyboard page opens, click on the option that says Keyboards and then click on Add New Keyboard.
Step 4: You will see the Third Party Keyboards option. There, you need to click on Bitmoji.
Step 5: Now, toggle the option that says Allow Full Access. Once you do that, you will see a small pop-up. Click on the Allow option.
And that’s it. Bitmoji will be added to the iPhone keyboard. Open any messaging app and click on the globe and hold it for a few seconds. When you see Bitmoji, click on that, and you will be able to use Bitmoji stickers.
Part 3: How to Get the Bitmoji Keyboard on Android?
Bitmoji is available for Android users as well. Before you begin to use it, go through the first part again and download the app. Then create your Bitmoji, as explained earlier. You can send Bitmojis directly from the app itself, but if you plan to use Bitmoji regularly, getting the Bitmoji keyboard makes sense. So, once you are done, follow the following steps to get the Bitmoji keyboard on Android.
Step 1: Launch the Bitmoji app. Click on the Keyboard option that you see at the bottom of the Bitmoji app screen.
Step 2: Install Bitmoji keyboard and give permission to your phone to use Bitmoji keyboard. Bitmoji will notify you when the Bitmoji keyboard gets activated.
You are all done. Now, use the Bitmoji keyboard to chat with your family members and friends and make everything fun and exciting.
Part 4: How to Install and Use Bitmoji on Windows and Mac?
If you want to use Bitmoji on Windows and Mac, you will have to use the Google Chrome browser. If you already have the Google Chrome browser, carry on with the steps explained below; otherwise, get the browser before starting.
Step 1: Go to Chrome Extension and install Bitmoji for Chrome Extension.
Step 2: You will have to sign in to Bitmoji. If you want to add Bitmoji to Gmail, click on add Bitmoji to Gmail.
After you are done following the three easy steps, you will see Bitmoji is installed. To start using it, move the cursor to the upper corner of the browser and click on the Bitmoji icon. Next, you will see the Bitmojis. Choose any Bitmoji, copy it, and paste it on Gmail or instant messaging applications.
Part 5: Where can You Use Bitmoji?
Bitmojis can be used on different platforms. All you need to do is enable Bitmoji keyboard on your iPhone or Android phone or Windows and Mac computers and use it on various social media platforms. For example, use Snapchat to send Bitmojis for different types of occasions.
If you are an iPhone user, you can share fun Bitmojis through iMessage. On a computer, you can use these Bitmojis on Facebook or other instant messaging platforms. You can drag and drop the Bitmoji sticker or copy it to share it with your friends.
If you are a working professional and want to lighten the mood of your Slack workspace, use Bitmojis to make your coworkers feel relaxed. Plus, this can be a great way to make someone feel pumped up. Like that, there are many other platforms to use Bitmojis!
Related: Best Free Apps to Get Emojis on iPhone and Android
Conclusion
So, there you go. We have finally reached the end of this guide. We hope you have found this post interesting and will face no hassle using the Bitmoji keyboard on different devices. Get the Bitmoji app if you haven’t downloaded it yet and make your conversations fun and enjoyable!
Best Photo Slideshow Maker: How to Make a Photo Slideshow
Best Photo Slideshow Maker: How to Make a Photo Slideshow
Shanoon Cox
Mar 27, 2024• Proven solutions
Have you ever taken so many photos for your family, friends and special events? One fun-filled way of sharing them is to make a photo slideshow. That helps back up the memories in your life. What’s more, it can all be done in just a few simple clicks if you use slideshow maker like DVD Slideshow Builder Deluxe . With this programs, you can easily weave photos and video into work of art to amaze anyone. Here let’s see how to easily and creatively make a photo slideshow and burn to DVD with these all-in-one slideshow tools.
Download and run DVD slideshow builder , then follow the steps below to see how to make a photo slideshow.
Ways for Photo Slidehow making
Step 1. Add photo or video files to the photo slideshow maker
After running the photo slideshow maker, you’ll start from the “Organize” tab. On the interface, there are two Add Files buttons any of which you can click to add your photos and videos. Then just drag and drop photos or videos to arrange their order on storyboard. If you want to edit the photos, click “Edit” to add effects, crop photos, repair red-eye or add caption.
Tip: To have a large viewe of all the files, click the “Expand” button on top right corner of storyboard.

Step 2. Customize the slideshow like background music and transitions
When importing your files, more than 100 transition effects will be randomly and automatically applied between every two photo or video. However, you can change them anytime in the “Personalize” tab. Just drag and drop a transition from the list to the thumbnail between two slides. You can also add effects, motion or intro/credit as you like.
Adding music can greatly enhance the vibe of your photo slideshow. To achieve this, click “Music” on the storyboard. This photo slideshow maker enables you to add several different pieces of music according to your needs. If you want to add your own voice, just click “Voice Over” to record and then add it to the slideshow.

Step 3 Create photo slideshow and burn to DVD

Go to the “Create” tab and click the “Preview” button to make sure the photo slideshow is good enough. Go back to Personalize tab to change if necessary. When you are happy with the result, choose the options on the left to export photo slideshow to DVD, PC, portable devices, etc. You can also directly upload slideshow to Youtube and send message to Facebook and Twitter friends.

Now sit back and relax, it’ll only take a while to get your photo slideshow for sharing anywhere.
Shanoon Cox
Shanoon Cox is a writer and a lover of all things video.
Follow @Shanoon Cox
Shanoon Cox
Mar 27, 2024• Proven solutions
Have you ever taken so many photos for your family, friends and special events? One fun-filled way of sharing them is to make a photo slideshow. That helps back up the memories in your life. What’s more, it can all be done in just a few simple clicks if you use slideshow maker like DVD Slideshow Builder Deluxe . With this programs, you can easily weave photos and video into work of art to amaze anyone. Here let’s see how to easily and creatively make a photo slideshow and burn to DVD with these all-in-one slideshow tools.
Download and run DVD slideshow builder , then follow the steps below to see how to make a photo slideshow.
Ways for Photo Slidehow making
Step 1. Add photo or video files to the photo slideshow maker
After running the photo slideshow maker, you’ll start from the “Organize” tab. On the interface, there are two Add Files buttons any of which you can click to add your photos and videos. Then just drag and drop photos or videos to arrange their order on storyboard. If you want to edit the photos, click “Edit” to add effects, crop photos, repair red-eye or add caption.
Tip: To have a large viewe of all the files, click the “Expand” button on top right corner of storyboard.
Step 2. Customize the slideshow like background music and transitions
When importing your files, more than 100 transition effects will be randomly and automatically applied between every two photo or video. However, you can change them anytime in the “Personalize” tab. Just drag and drop a transition from the list to the thumbnail between two slides. You can also add effects, motion or intro/credit as you like.
Adding music can greatly enhance the vibe of your photo slideshow. To achieve this, click “Music” on the storyboard. This photo slideshow maker enables you to add several different pieces of music according to your needs. If you want to add your own voice, just click “Voice Over” to record and then add it to the slideshow.
Step 3 Create photo slideshow and burn to DVD
Go to the “Create” tab and click the “Preview” button to make sure the photo slideshow is good enough. Go back to Personalize tab to change if necessary. When you are happy with the result, choose the options on the left to export photo slideshow to DVD, PC, portable devices, etc. You can also directly upload slideshow to Youtube and send message to Facebook and Twitter friends.
Now sit back and relax, it’ll only take a while to get your photo slideshow for sharing anywhere.
Shanoon Cox
Shanoon Cox is a writer and a lover of all things video.
Follow @Shanoon Cox
Also read:
- [Updated] Advanced HD Screen Capture Gadgets for 2024
- 8 Best Meme Maker App to Create Memes with Your Own Picture
- Cut to a New Beginning Four Fade Techniques for 2024
- Fake Android Location without Rooting For Your Samsung Galaxy A14 5G | Dr.fone
- How To Fix Unresponsive Phone Touchscreen Of Samsung Galaxy M34 5G | Dr.fone
- In 2024, Record Whole Page Visuals
- In 2024, The Future of PC Gaming Meet EIZO's CG318-4K
- New How to Record and Edit an Animoji or Memoji Karaoke Music Video for 2024
- New In 2024, Best 10 Free Manga Sites to Read Online
- Updated In 2024, How to Add Bitmoji to Keyboard? Complete Guide
- Updated In 2024, How to Make Video Slideshow with Your Travel Photos
- Title: Updated In 2024, 20 Wonderful Stop Motion Ideas for Beginners and Kids - Filmora
- Author: Jan
- Created at : 2025-02-17 16:45:08
- Updated at : 2025-02-19 18:23:47
- Link: https://meme-emoji.techidaily.com/updated-in-2024-20-wonderful-stop-motion-ideas-for-beginners-and-kids-filmora/
- License: This work is licensed under CC BY-NC-SA 4.0.