
Updated How to Record and Edit an Animoji or Memoji Karaoke Music Video, In 2024
Record and Edit an Animoji or Memoji Karaoke Music Video
How to Record and Edit an Animoji or Memoji Karaoke Music Video?

Liza Brown
Mar 27, 2024• Proven solutions
Becoming a superstar whose music is adored in every corner of the Earth is not something that can be achieved overnight. The rest of us, who only dream of worldwide fame can just enjoy our favorite songs and from time to time create animoji karaoke music videos for entertainment purposes. Read on if you are not sure what animojis are and how you can use them to create music videos from your iPhone or iPad, because in this article we are going to take you through each step of the process of making an animoji karaoke video.
First, let’s check some popular Memoji Karaoke video from YouTube. The Video below is from YouTuber Memoji Karaoke, enjoy.
What Exactly is The Difference Between Animojis and Memojis?
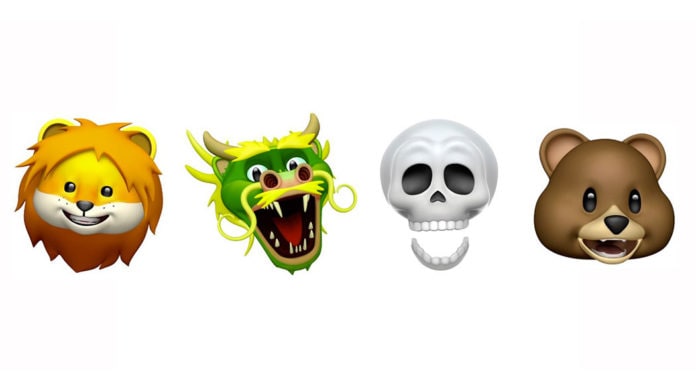
Animojis and Memojis have taken the world by storm since the first iPhone X model was released back in 2017. Both animojis and memojis utilize facial recognition technologies to track your movements and facial expressions and imitate them in a virtual environment. However, an animoji is a 3D emoji like a monkey, koala, tiger or a unicorn, while memojis are fully customizable avatars that let you create a character from scratch.
Memojis enable you to choose the character’s skin color, head, nose, ear shape or hairstyle, meaning that you can create as many new characters as you want effortlessly. Furthermore, you can add stickers or apply up to five different filters to animojis and memojis you share with your friends.

See best Memoji makers here: Top 8 Memoji Makers to Make a Memoji on PC, Android, and iPhone.
How to Set Up and Create Memojis?
Owners of iPhone X, iPhone XS, iPhone XS Max, and iPadPro can easily make new memojis from their devices. All you have to do in order to start creating a new memoji is open the messaging app, locate the iMessage AppStore icon, tap on it and then tap on the Animoji icon. By doing so you will gain access to all animojis that are available on iOS 12 or other versions of the iOS that support memojis and animojis. After tapping on the New Memoji icon you will be able to see the default character you can customize as you see fit.
You can now get creative and pick one of the countless skin tones, choose how old your character is going to be or select any of the available head, nose and ear shapes. Moreover, you can customize the eye color for each character you create, add eyewear, or decide whether or not your character is going to have facial hair. Once you’re finished customizing a new memoji, simply tap on the Done button and the character you’ve created is going to be saved in your animoji collection. You can edit, duplicate or delete the memojis by tapping on the three dot icon or you can use them as camera overlays and share them with your friends.
How to Make a Memoji or Animoji Karaoke Music Video?
Once you’ve created a memoji you will have to record thirty-second videos in order to be able to send them as messages. After the recording session is completed, you can review the material you’ve produced, and decide if you are happy with the result or if you want to do another take. The only downside is that you can’t play music from your iPhone or your iPad while you’re recording, which means that you have to play the song you want to cover from another device such as a computer or the stereo system.
Read this article to learn more about Animoji: The Ultimate Guide of How to Use Animoji on iPhone X.
It is worth noting that knowing the lyrics of the song is going to improve the quality of the karaoke music video you’re producing significantly, so rehearsing a song few times before you hit the record button may be a good idea if you don’t know its lyrics by heart.
When you’re ready, launch the iMessage app and choose an animoji or memoji character you’re going to be in the video. Don’t record karaoke videos in the full-screen mode because the record button is going to cover a significant portion of the screen, which can complicate the video editing process. Optionally, you download and install the Animoji Studio app if you want to record videos that are longer than thirty seconds, but you might need some time to get used to making karaoke videos with this app.
Proceed to record your 30-second video or activate the Screen Recording option from the Control Center if you want to capture a karaoke video that exceeds that limit. If you like the results you can simply send the video you’ve created as a message, but you can also transfer the file to your computer and edit from a video editing software like Filmora.
Import the memoji video file you’ve transferred to your computer into Filmora after you’ve created a new project. You can do this from the software’s Media panel by clicking on the Import drop-down menu and choosing the Import Media Files option. Place the video file on the timeline and then cut or trim all parts of the clip you don’t want to include in the final cut of your memoji karaoke video. Filmora offers a vast number of different opening titles, end credits, audio and visual effects and transitions that can all help you create a visually attractive karaoke video.
Moreover, you can duplicate an animoji or memoji and create a duet in just a few simple clicks. The editor’s powerful audio editing tools enable you to add a high-quality audio file to your project or sound effects that can make your video more entertaining. Click on the Export button to choose the output destination, format, resolution and aspect ratio for the karaoke video you’ve just created. Filmora lets you export videos directly to your YouTube or Vimeo channel, which can be quite handy if you want to share your memoji videos online immediately after you’ve completed the video editing process.


List of iPhones and iPads that Support Animojis and Memojis
| Face ID | Animoji | Memoji |
|---|---|---|
| iPhone X | iPhone X | iPhone X (iOS 12 or later required) |
| iPhone XR | iPhone XR | iPhone XR |
| iPhone XS | iPhone XS | iPhone XS |
| iPhone XS Max | iPhone XS Max | iPhone XS Max |
| iPad Pro 12.9-inch (3rd generation) | iPad Pro 12.9-inch (3rd generation) | iPad Pro 12.9-inch (3rd generation) |
| iPad Pro 11-inch or above | iPad Pro 11-inch | iPad Pro 11-inch |
Unfortunately, Face ID feature, as well as animojis and memojis, are relatively novel additions on iOS-based devices, and you won’t be able to create memoji or animoji karaoke videos from the iMessages app unless you have one of the following iPhone or iPad models.
The list of iPhone and iPad models that offer the Face ID, Animoji and Memoji Features
Older models of iPhones, iPods, and iPads that have the latest version of iOS installed can only receive animoji and memoji messages, but it is not possible to create these messages with them. In case you are using an older model of an iPhone or an iPad but you still want to create animoji and memoji karaoke videos you can find a simple solution to your problem below.
Supermoji – The Emoji App
A powerful and intuitive app like Supermoji enables you to create karaoke music videos that feature your favorite animoji and memoji characters with ease. Creating animated 3D models won’t take too much of your time if you choose to download and install this app on your device, but after a three-day trial period, you’ll have to opt for one of the available subscription models. A weekly subscription costs $9.99, while you must pay $29.99 for a monthly subscription, which makes the Supermoji app a bit pricy. Alternatively, you can try Facemoji or Emoji Face Recorder apps, but the results you’ll get can be a bit underwhelming when compared to the animojis and memojis created from the iMessages app.
Conclusion
Creating funny animoji and memoji karaoke music videos is a new trend that can only grow in popularity in the future. However, this feature is only available on recent iPhone and iPad models, but there are a number of third-party apps that enable you to create this type of video even if you are using an older iPhone or iPad model. Do you like using memoji and animoji animations to create karaoke videos you share with your friends on social media? Leave a comment below and share your opinions with us.
Liza Brown
Liza Brown is a writer and a lover of all things video.
Follow @Liza Brown
Liza Brown
Mar 27, 2024• Proven solutions
Becoming a superstar whose music is adored in every corner of the Earth is not something that can be achieved overnight. The rest of us, who only dream of worldwide fame can just enjoy our favorite songs and from time to time create animoji karaoke music videos for entertainment purposes. Read on if you are not sure what animojis are and how you can use them to create music videos from your iPhone or iPad, because in this article we are going to take you through each step of the process of making an animoji karaoke video.
First, let’s check some popular Memoji Karaoke video from YouTube. The Video below is from YouTuber Memoji Karaoke, enjoy.
What Exactly is The Difference Between Animojis and Memojis?
Animojis and Memojis have taken the world by storm since the first iPhone X model was released back in 2017. Both animojis and memojis utilize facial recognition technologies to track your movements and facial expressions and imitate them in a virtual environment. However, an animoji is a 3D emoji like a monkey, koala, tiger or a unicorn, while memojis are fully customizable avatars that let you create a character from scratch.
Memojis enable you to choose the character’s skin color, head, nose, ear shape or hairstyle, meaning that you can create as many new characters as you want effortlessly. Furthermore, you can add stickers or apply up to five different filters to animojis and memojis you share with your friends.
See best Memoji makers here: Top 8 Memoji Makers to Make a Memoji on PC, Android, and iPhone.
How to Set Up and Create Memojis?
Owners of iPhone X, iPhone XS, iPhone XS Max, and iPadPro can easily make new memojis from their devices. All you have to do in order to start creating a new memoji is open the messaging app, locate the iMessage AppStore icon, tap on it and then tap on the Animoji icon. By doing so you will gain access to all animojis that are available on iOS 12 or other versions of the iOS that support memojis and animojis. After tapping on the New Memoji icon you will be able to see the default character you can customize as you see fit.
You can now get creative and pick one of the countless skin tones, choose how old your character is going to be or select any of the available head, nose and ear shapes. Moreover, you can customize the eye color for each character you create, add eyewear, or decide whether or not your character is going to have facial hair. Once you’re finished customizing a new memoji, simply tap on the Done button and the character you’ve created is going to be saved in your animoji collection. You can edit, duplicate or delete the memojis by tapping on the three dot icon or you can use them as camera overlays and share them with your friends.
How to Make a Memoji or Animoji Karaoke Music Video?
Once you’ve created a memoji you will have to record thirty-second videos in order to be able to send them as messages. After the recording session is completed, you can review the material you’ve produced, and decide if you are happy with the result or if you want to do another take. The only downside is that you can’t play music from your iPhone or your iPad while you’re recording, which means that you have to play the song you want to cover from another device such as a computer or the stereo system.
Read this article to learn more about Animoji: The Ultimate Guide of How to Use Animoji on iPhone X.
It is worth noting that knowing the lyrics of the song is going to improve the quality of the karaoke music video you’re producing significantly, so rehearsing a song few times before you hit the record button may be a good idea if you don’t know its lyrics by heart.
When you’re ready, launch the iMessage app and choose an animoji or memoji character you’re going to be in the video. Don’t record karaoke videos in the full-screen mode because the record button is going to cover a significant portion of the screen, which can complicate the video editing process. Optionally, you download and install the Animoji Studio app if you want to record videos that are longer than thirty seconds, but you might need some time to get used to making karaoke videos with this app.
Proceed to record your 30-second video or activate the Screen Recording option from the Control Center if you want to capture a karaoke video that exceeds that limit. If you like the results you can simply send the video you’ve created as a message, but you can also transfer the file to your computer and edit from a video editing software like Filmora.
Import the memoji video file you’ve transferred to your computer into Filmora after you’ve created a new project. You can do this from the software’s Media panel by clicking on the Import drop-down menu and choosing the Import Media Files option. Place the video file on the timeline and then cut or trim all parts of the clip you don’t want to include in the final cut of your memoji karaoke video. Filmora offers a vast number of different opening titles, end credits, audio and visual effects and transitions that can all help you create a visually attractive karaoke video.
Moreover, you can duplicate an animoji or memoji and create a duet in just a few simple clicks. The editor’s powerful audio editing tools enable you to add a high-quality audio file to your project or sound effects that can make your video more entertaining. Click on the Export button to choose the output destination, format, resolution and aspect ratio for the karaoke video you’ve just created. Filmora lets you export videos directly to your YouTube or Vimeo channel, which can be quite handy if you want to share your memoji videos online immediately after you’ve completed the video editing process.
List of iPhones and iPads that Support Animojis and Memojis
| Face ID | Animoji | Memoji |
|---|---|---|
| iPhone X | iPhone X | iPhone X (iOS 12 or later required) |
| iPhone XR | iPhone XR | iPhone XR |
| iPhone XS | iPhone XS | iPhone XS |
| iPhone XS Max | iPhone XS Max | iPhone XS Max |
| iPad Pro 12.9-inch (3rd generation) | iPad Pro 12.9-inch (3rd generation) | iPad Pro 12.9-inch (3rd generation) |
| iPad Pro 11-inch or above | iPad Pro 11-inch | iPad Pro 11-inch |
Unfortunately, Face ID feature, as well as animojis and memojis, are relatively novel additions on iOS-based devices, and you won’t be able to create memoji or animoji karaoke videos from the iMessages app unless you have one of the following iPhone or iPad models.
The list of iPhone and iPad models that offer the Face ID, Animoji and Memoji Features
Older models of iPhones, iPods, and iPads that have the latest version of iOS installed can only receive animoji and memoji messages, but it is not possible to create these messages with them. In case you are using an older model of an iPhone or an iPad but you still want to create animoji and memoji karaoke videos you can find a simple solution to your problem below.
Supermoji – The Emoji App
A powerful and intuitive app like Supermoji enables you to create karaoke music videos that feature your favorite animoji and memoji characters with ease. Creating animated 3D models won’t take too much of your time if you choose to download and install this app on your device, but after a three-day trial period, you’ll have to opt for one of the available subscription models. A weekly subscription costs $9.99, while you must pay $29.99 for a monthly subscription, which makes the Supermoji app a bit pricy. Alternatively, you can try Facemoji or Emoji Face Recorder apps, but the results you’ll get can be a bit underwhelming when compared to the animojis and memojis created from the iMessages app.
Conclusion
Creating funny animoji and memoji karaoke music videos is a new trend that can only grow in popularity in the future. However, this feature is only available on recent iPhone and iPad models, but there are a number of third-party apps that enable you to create this type of video even if you are using an older iPhone or iPad model. Do you like using memoji and animoji animations to create karaoke videos you share with your friends on social media? Leave a comment below and share your opinions with us.
Liza Brown
Liza Brown is a writer and a lover of all things video.
Follow @Liza Brown
How to Add Emojis To Discord
How to Add Emojis To Discord

Richard Bennett
Mar 27, 2024• Proven solutions
Who doesn’t like emoticons? They are fun, easy to use, and, best of all, highly expressive of your emotions that you cannot convey over messages otherwise.
A 2019 survey shows 70% of mobile users used emoji in texting or on social media daily. This shows the popularity of emoji in our world today.
Similarly, as a Discord user, you must have come across thousands of emoji in it. These are images uploaded on the server and called custom emojis that this gaming community can use for effective communication with friends and other players.
With the emoji and gaming industry growing, it is safe to say that discord emoji’s popularity and use will only increase.
Read ahead to see how you can add emojis on Discord if you want to have fun chats with your friends too.
- Part 1: Adding and Sending Emoji To Chat On Discord?
- Part 2: Adding Emojis To Discord Channel Name Or Nickname?
- Part 3: Adding Custom Emojis To Discord Server On Windows/Mac?
- Part 4: Adding Custom Emojis To Discord Server On iPhone And Android?
- Part 5: Managing Emojis in Discord Server
Part 1: How to Add and Send Emoji To Chat On Discord?
One of the best things about Discord’s emoji feature is that there are two ways to add them. You can either access emoji on the Discord account or upload them yourself.
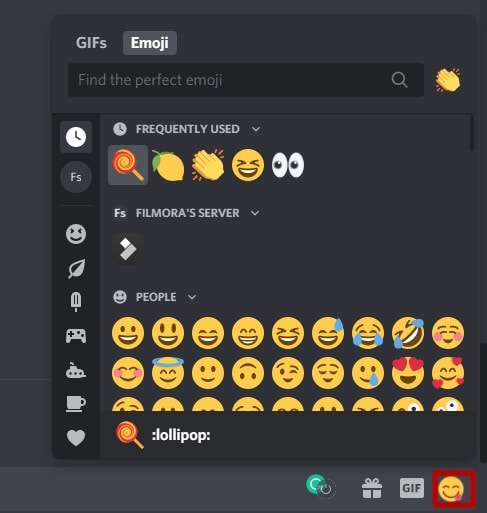
You can access the emoji menu for all Discord platforms by pressing the grey smiley face next to the message box. This will be on the right of the box for desktops, and for mobile apps, it will be on the left.
Discord-exclusive and standard emoji are present in the emoji menu, along with a part that keeps track of your most-used emoji.
On the other hand, you can also add custom emoticons to your Discord server if you have permission to do so.
Once you add and access the emoji on your device, select the one you want to send to your friends and press enter to send.
Part 2: How to Add Emojis To Discord Channel Name Or Nickname?
As an owner of a Discord channel, it is easy for you to add emoji to Discord. Follow the steps below to figure out how to add emojis to Discord channels:
- Use the emoji list to find the one you want to use in your channel name.
- Select the emoji “browser” column and copy it either with the mouse or “Ctrl + C” on the keyboard.
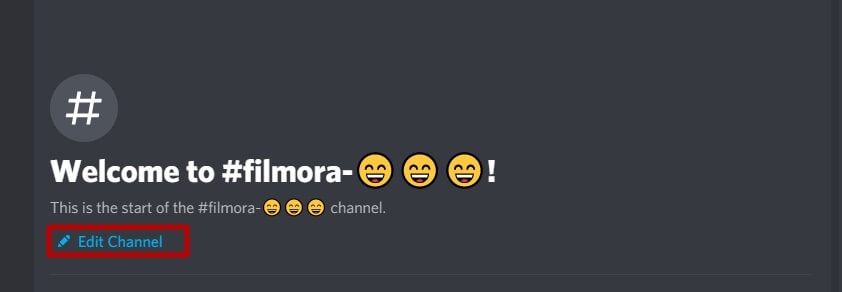
- Access your Discord server, right-click the channel where the emoji will be and use the dropdown menu to select the “Edit Channel.”
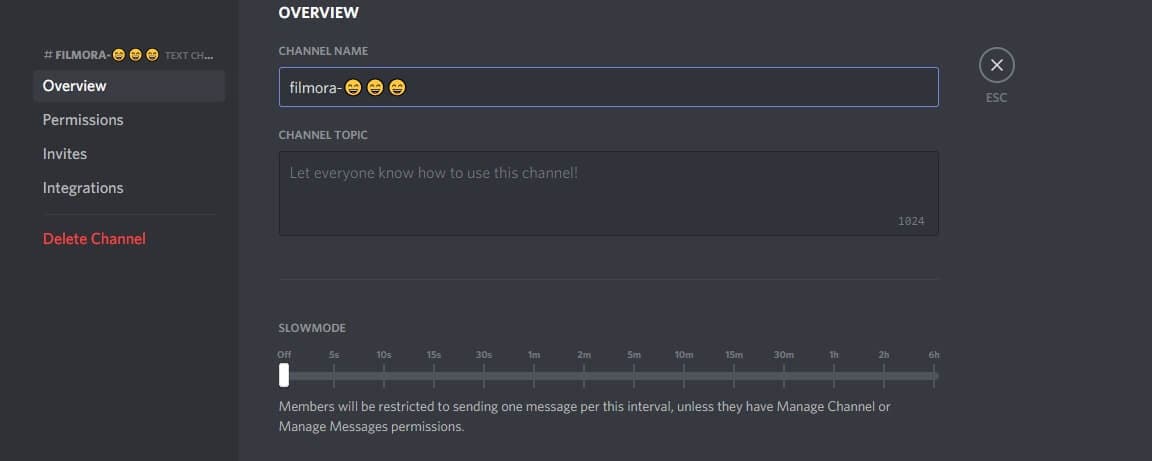
- In the “Channel Name” box, past the selected emoji using “Ctrl + V” from the keyboard.
- Select “Save Changes” to save the name with the emoji.
Part 3: How to Add Custom Emojis To Discord Server On Windows/Mac?
You can add custom emoji on Discord, but only if you are a server owner or administrator. Use the Discord server settings on either the desktop versions for Windows or Mac or the Discord Website.
Follow the steps below for either platform:
- Access your Discord server to begin and press the arrow pointing down in the channel list with the server name—Press “Server Settings” in the menu

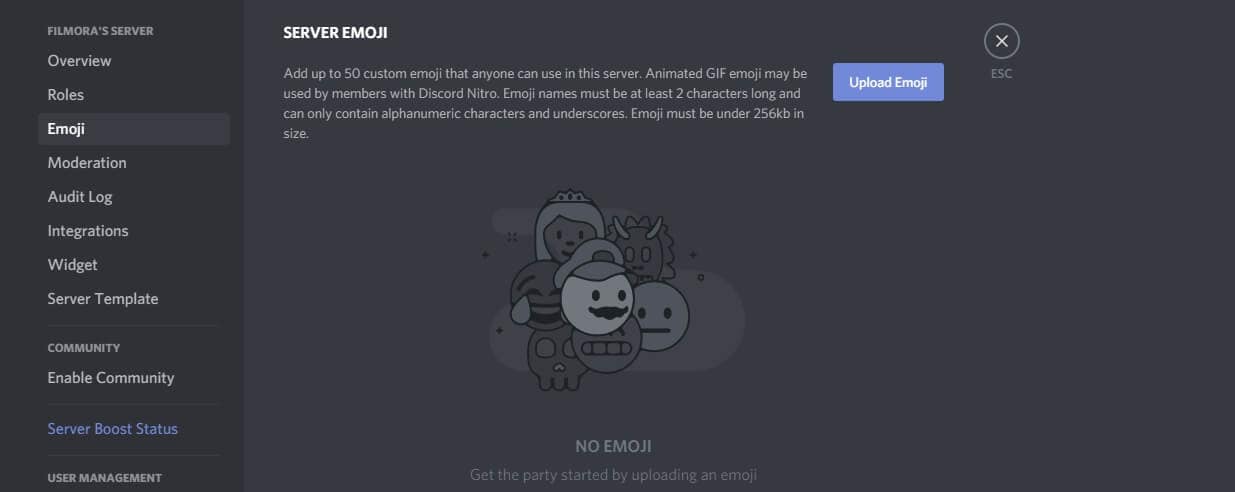
- As the server’s settings open, you can add custom emojis in the “Emoji” tab. You can find a requirements list at the top that includes emoji names with a minimum of two characters and a file size limit of 256 KB. You can add fifty normal and an additional fifty animated emoji GIFs using the standard servers
- Select “Upload Emoji” to insert a custom emoji, either standard or animated
- With the help of your device’s local storage, upload the file. However, for the emoji to be added to the lists, the file should align with Discord’s requirements.
- For every emoji image that you upload, an alias tag will be created for that custom emoji using the file’s name. This tag is used to update a message with an emoji.
- A default alias name like this can be replaced by selecting the “Alias” box with the custom emoji and then creating a new name.
- Enjoy your emoji in chats as soon as you upload them to the Discord server!
Boost your server with Discord Nitro subscribers today to insert more than the standard fifty emoji!
Part 4: How to Add Custom Emojis To Discord Server On iPhone And Android?
How cool is it that you can add custom emoji to your smartphone as well? Whether you have an iPhone or an Android, you can use the same menu as Windows and Mac to upload emoji.
Discord’s interface is similar across all devices, so the following steps work on Android and Apple.
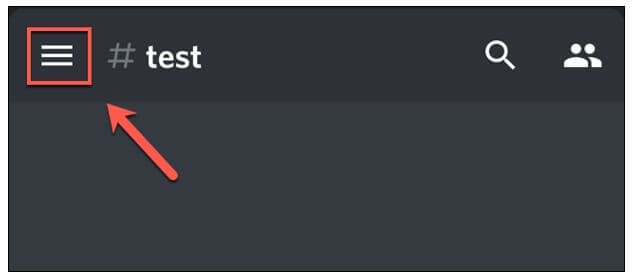
- Begin by opening the app on your device to access the server. Press the hamburger menu located at the top left in an open server and channel.
- As the channel and server list opens for Discord, you can see a three-dot menu right next to the channel list with the server name. Tap on it to proceed.
- To get to your server settings, press “Settings” in the Discord server menu that shows up.
- Under the “Server Settings” menu, select “Emoji” to access the custom emoji settings.
- As the “Emoji” menu opens, you can see an emoji requirement list
- Press “Upload Emoji” to upload any emoji that aligns with these requirements
- Press the custom emoji file, tap “Crop” if it needs cropping, and then use the “Upload” option
- After you upload the emoji file, replace the alias tag by tapping on it. This will redirect you to that specific emoji’s settings
- Type the name you want using the “Alias” box to create the tag used to insert emoji in messages
- Save this new tag with the “Save” icon placed in the bottom right
- Any changes you make to the custom emoji’s alias are applied to it instantly for your use.
Emoji bring fun to the conversations you have with friends, and it is very easy to add them to your server as well. These show up in the emoji pop-up list once you add them. The chat message bar contains the emoji icon from where you can access them.
It is essential to name your emoji with only alphanumeric characters and underscores using at least two characters.
The Discord emoji size is 32x32 pixels, so even if you upload up to 128x128 pixel size emojis, they will be resized to the default dimensions. Furthermore, emoji file sizes are at most 256kb.
If you want to use custom emojis, you can’t do so without a Nitro subscription because it is only functional on the server they are uploaded to. Even if you find a way to access the emoji from some other server, only its text code will be visible.
If you attempt to use the Emoji Picker to pick an emoji, you’ll get the following message:
Bonus: How to Manage Emoji in Discord Server?
You can’t remove or add emoji specific to a server on your own as a member. You need the server owner to toggle the permission of Manager Emoji in your domain.
On the other hand, as a server owner, you can give others this role with the following steps.
- Open Roles: Open the Server Settings and select “Roles” from the menu on the side.
- Toggle Manage Emoji: Pick the role you want to apply the permission to, and then toggle emoji’s slider to “on,” save changes, and you’re done!
FAQs About Discord Emojis
1. Why Do I See Grey Emoji In The Emoji Menu?
Greyed-out emoji in the menu means that either those emoji are animated, or you don’t have the permission to post them on other servers.
2. How Can I Get More Custom Emoji On The Server?
You can upload 50 emojis to your Discord server. But if you want more options, you need a Discord Nitro subscription to boost your server specs.
3. What Is The Discord Emoji Size?
Discord allows you to upload an emoji of up to 128x128 pixels, but it will resize it to 32x32 since that is its standard size.
Conclusion
Emojis make any chat fun, and where gaming is involved, they help you communicate better with your friends.
Discord has thousands of custom emojis that you can easily add to your server through your computer, whether it is your chat or the channel name. Follow our guide for a seamless process to add emoji to Discord and make your gaming experience better!
Richard Bennett
Richard Bennett is a writer and a lover of all things video.
Follow @Richard Bennett
Richard Bennett
Mar 27, 2024• Proven solutions
Who doesn’t like emoticons? They are fun, easy to use, and, best of all, highly expressive of your emotions that you cannot convey over messages otherwise.
A 2019 survey shows 70% of mobile users used emoji in texting or on social media daily. This shows the popularity of emoji in our world today.
Similarly, as a Discord user, you must have come across thousands of emoji in it. These are images uploaded on the server and called custom emojis that this gaming community can use for effective communication with friends and other players.
With the emoji and gaming industry growing, it is safe to say that discord emoji’s popularity and use will only increase.
Read ahead to see how you can add emojis on Discord if you want to have fun chats with your friends too.
- Part 1: Adding and Sending Emoji To Chat On Discord?
- Part 2: Adding Emojis To Discord Channel Name Or Nickname?
- Part 3: Adding Custom Emojis To Discord Server On Windows/Mac?
- Part 4: Adding Custom Emojis To Discord Server On iPhone And Android?
- Part 5: Managing Emojis in Discord Server
Part 1: How to Add and Send Emoji To Chat On Discord?
One of the best things about Discord’s emoji feature is that there are two ways to add them. You can either access emoji on the Discord account or upload them yourself.
You can access the emoji menu for all Discord platforms by pressing the grey smiley face next to the message box. This will be on the right of the box for desktops, and for mobile apps, it will be on the left.
Discord-exclusive and standard emoji are present in the emoji menu, along with a part that keeps track of your most-used emoji.
On the other hand, you can also add custom emoticons to your Discord server if you have permission to do so.
Once you add and access the emoji on your device, select the one you want to send to your friends and press enter to send.
Part 2: How to Add Emojis To Discord Channel Name Or Nickname?
As an owner of a Discord channel, it is easy for you to add emoji to Discord. Follow the steps below to figure out how to add emojis to Discord channels:
- Use the emoji list to find the one you want to use in your channel name.
- Select the emoji “browser” column and copy it either with the mouse or “Ctrl + C” on the keyboard.
- Access your Discord server, right-click the channel where the emoji will be and use the dropdown menu to select the “Edit Channel.”
- In the “Channel Name” box, past the selected emoji using “Ctrl + V” from the keyboard.
- Select “Save Changes” to save the name with the emoji.
Part 3: How to Add Custom Emojis To Discord Server On Windows/Mac?
You can add custom emoji on Discord, but only if you are a server owner or administrator. Use the Discord server settings on either the desktop versions for Windows or Mac or the Discord Website.
Follow the steps below for either platform:
- Access your Discord server to begin and press the arrow pointing down in the channel list with the server name—Press “Server Settings” in the menu
- As the server’s settings open, you can add custom emojis in the “Emoji” tab. You can find a requirements list at the top that includes emoji names with a minimum of two characters and a file size limit of 256 KB. You can add fifty normal and an additional fifty animated emoji GIFs using the standard servers
- Select “Upload Emoji” to insert a custom emoji, either standard or animated
- With the help of your device’s local storage, upload the file. However, for the emoji to be added to the lists, the file should align with Discord’s requirements.
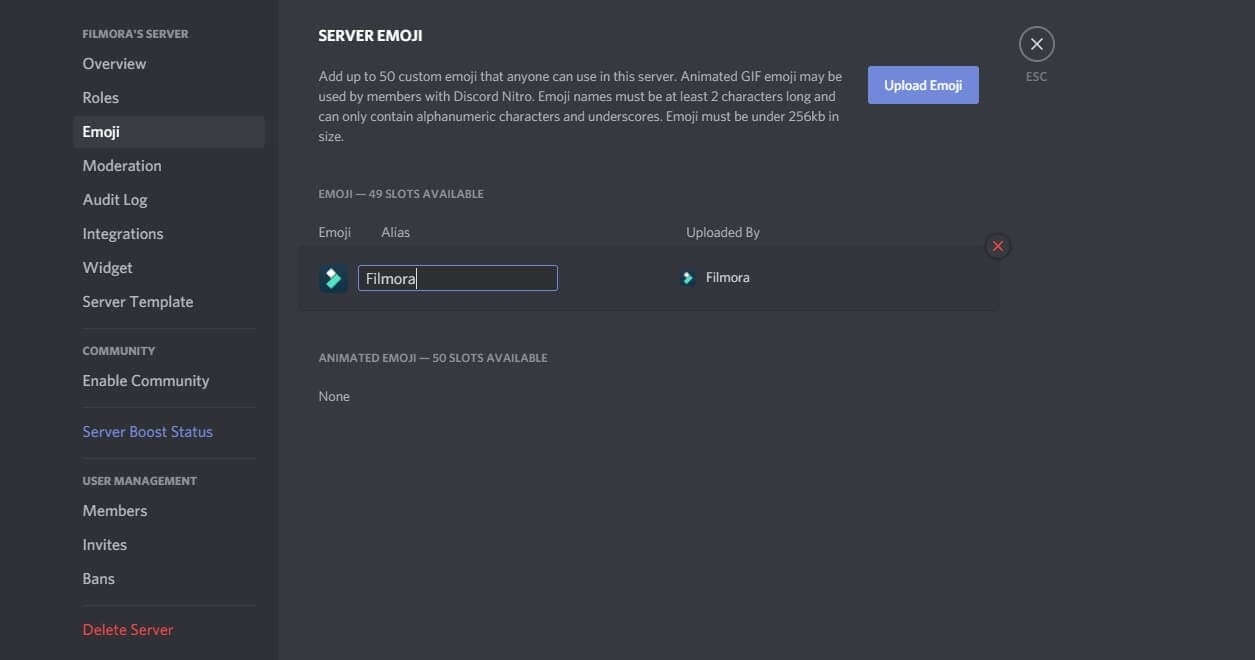
- For every emoji image that you upload, an alias tag will be created for that custom emoji using the file’s name. This tag is used to update a message with an emoji.
- A default alias name like this can be replaced by selecting the “Alias” box with the custom emoji and then creating a new name.
- Enjoy your emoji in chats as soon as you upload them to the Discord server!
Boost your server with Discord Nitro subscribers today to insert more than the standard fifty emoji!
Part 4: How to Add Custom Emojis To Discord Server On iPhone And Android?
How cool is it that you can add custom emoji to your smartphone as well? Whether you have an iPhone or an Android, you can use the same menu as Windows and Mac to upload emoji.
Discord’s interface is similar across all devices, so the following steps work on Android and Apple.
- Begin by opening the app on your device to access the server. Press the hamburger menu located at the top left in an open server and channel.
- As the channel and server list opens for Discord, you can see a three-dot menu right next to the channel list with the server name. Tap on it to proceed.
- To get to your server settings, press “Settings” in the Discord server menu that shows up.
- Under the “Server Settings” menu, select “Emoji” to access the custom emoji settings.
- As the “Emoji” menu opens, you can see an emoji requirement list
- Press “Upload Emoji” to upload any emoji that aligns with these requirements
- Press the custom emoji file, tap “Crop” if it needs cropping, and then use the “Upload” option
- After you upload the emoji file, replace the alias tag by tapping on it. This will redirect you to that specific emoji’s settings
- Type the name you want using the “Alias” box to create the tag used to insert emoji in messages
- Save this new tag with the “Save” icon placed in the bottom right
- Any changes you make to the custom emoji’s alias are applied to it instantly for your use.
Emoji bring fun to the conversations you have with friends, and it is very easy to add them to your server as well. These show up in the emoji pop-up list once you add them. The chat message bar contains the emoji icon from where you can access them.
It is essential to name your emoji with only alphanumeric characters and underscores using at least two characters.
The Discord emoji size is 32x32 pixels, so even if you upload up to 128x128 pixel size emojis, they will be resized to the default dimensions. Furthermore, emoji file sizes are at most 256kb.
If you want to use custom emojis, you can’t do so without a Nitro subscription because it is only functional on the server they are uploaded to. Even if you find a way to access the emoji from some other server, only its text code will be visible.
If you attempt to use the Emoji Picker to pick an emoji, you’ll get the following message:
Bonus: How to Manage Emoji in Discord Server?
You can’t remove or add emoji specific to a server on your own as a member. You need the server owner to toggle the permission of Manager Emoji in your domain.
On the other hand, as a server owner, you can give others this role with the following steps.
- Open Roles: Open the Server Settings and select “Roles” from the menu on the side.
- Toggle Manage Emoji: Pick the role you want to apply the permission to, and then toggle emoji’s slider to “on,” save changes, and you’re done!
FAQs About Discord Emojis
1. Why Do I See Grey Emoji In The Emoji Menu?
Greyed-out emoji in the menu means that either those emoji are animated, or you don’t have the permission to post them on other servers.
2. How Can I Get More Custom Emoji On The Server?
You can upload 50 emojis to your Discord server. But if you want more options, you need a Discord Nitro subscription to boost your server specs.
3. What Is The Discord Emoji Size?
Discord allows you to upload an emoji of up to 128x128 pixels, but it will resize it to 32x32 since that is its standard size.
Conclusion
Emojis make any chat fun, and where gaming is involved, they help you communicate better with your friends.
Discord has thousands of custom emojis that you can easily add to your server through your computer, whether it is your chat or the channel name. Follow our guide for a seamless process to add emoji to Discord and make your gaming experience better!
Richard Bennett
Richard Bennett is a writer and a lover of all things video.
Follow @Richard Bennett
Richard Bennett
Mar 27, 2024• Proven solutions
Who doesn’t like emoticons? They are fun, easy to use, and, best of all, highly expressive of your emotions that you cannot convey over messages otherwise.
A 2019 survey shows 70% of mobile users used emoji in texting or on social media daily. This shows the popularity of emoji in our world today.
Similarly, as a Discord user, you must have come across thousands of emoji in it. These are images uploaded on the server and called custom emojis that this gaming community can use for effective communication with friends and other players.
With the emoji and gaming industry growing, it is safe to say that discord emoji’s popularity and use will only increase.
Read ahead to see how you can add emojis on Discord if you want to have fun chats with your friends too.
- Part 1: Adding and Sending Emoji To Chat On Discord?
- Part 2: Adding Emojis To Discord Channel Name Or Nickname?
- Part 3: Adding Custom Emojis To Discord Server On Windows/Mac?
- Part 4: Adding Custom Emojis To Discord Server On iPhone And Android?
- Part 5: Managing Emojis in Discord Server
Part 1: How to Add and Send Emoji To Chat On Discord?
One of the best things about Discord’s emoji feature is that there are two ways to add them. You can either access emoji on the Discord account or upload them yourself.
You can access the emoji menu for all Discord platforms by pressing the grey smiley face next to the message box. This will be on the right of the box for desktops, and for mobile apps, it will be on the left.
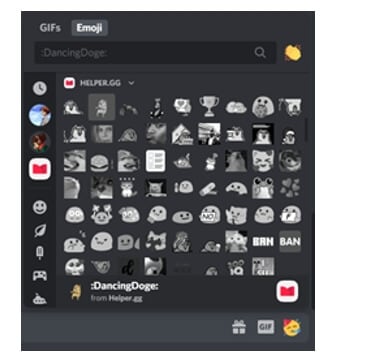
Discord-exclusive and standard emoji are present in the emoji menu, along with a part that keeps track of your most-used emoji.
On the other hand, you can also add custom emoticons to your Discord server if you have permission to do so.
Once you add and access the emoji on your device, select the one you want to send to your friends and press enter to send.
Part 2: How to Add Emojis To Discord Channel Name Or Nickname?
As an owner of a Discord channel, it is easy for you to add emoji to Discord. Follow the steps below to figure out how to add emojis to Discord channels:
- Use the emoji list to find the one you want to use in your channel name.
- Select the emoji “browser” column and copy it either with the mouse or “Ctrl + C” on the keyboard.
- Access your Discord server, right-click the channel where the emoji will be and use the dropdown menu to select the “Edit Channel.”
- In the “Channel Name” box, past the selected emoji using “Ctrl + V” from the keyboard.
- Select “Save Changes” to save the name with the emoji.
Part 3: How to Add Custom Emojis To Discord Server On Windows/Mac?
You can add custom emoji on Discord, but only if you are a server owner or administrator. Use the Discord server settings on either the desktop versions for Windows or Mac or the Discord Website.
Follow the steps below for either platform:
- Access your Discord server to begin and press the arrow pointing down in the channel list with the server name—Press “Server Settings” in the menu
- As the server’s settings open, you can add custom emojis in the “Emoji” tab. You can find a requirements list at the top that includes emoji names with a minimum of two characters and a file size limit of 256 KB. You can add fifty normal and an additional fifty animated emoji GIFs using the standard servers
- Select “Upload Emoji” to insert a custom emoji, either standard or animated
- With the help of your device’s local storage, upload the file. However, for the emoji to be added to the lists, the file should align with Discord’s requirements.
- For every emoji image that you upload, an alias tag will be created for that custom emoji using the file’s name. This tag is used to update a message with an emoji.
- A default alias name like this can be replaced by selecting the “Alias” box with the custom emoji and then creating a new name.
- Enjoy your emoji in chats as soon as you upload them to the Discord server!
Boost your server with Discord Nitro subscribers today to insert more than the standard fifty emoji!
Part 4: How to Add Custom Emojis To Discord Server On iPhone And Android?
How cool is it that you can add custom emoji to your smartphone as well? Whether you have an iPhone or an Android, you can use the same menu as Windows and Mac to upload emoji.
Discord’s interface is similar across all devices, so the following steps work on Android and Apple.
- Begin by opening the app on your device to access the server. Press the hamburger menu located at the top left in an open server and channel.
- As the channel and server list opens for Discord, you can see a three-dot menu right next to the channel list with the server name. Tap on it to proceed.
- To get to your server settings, press “Settings” in the Discord server menu that shows up.
- Under the “Server Settings” menu, select “Emoji” to access the custom emoji settings.
- As the “Emoji” menu opens, you can see an emoji requirement list
- Press “Upload Emoji” to upload any emoji that aligns with these requirements
- Press the custom emoji file, tap “Crop” if it needs cropping, and then use the “Upload” option
- After you upload the emoji file, replace the alias tag by tapping on it. This will redirect you to that specific emoji’s settings
- Type the name you want using the “Alias” box to create the tag used to insert emoji in messages
- Save this new tag with the “Save” icon placed in the bottom right
- Any changes you make to the custom emoji’s alias are applied to it instantly for your use.
Emoji bring fun to the conversations you have with friends, and it is very easy to add them to your server as well. These show up in the emoji pop-up list once you add them. The chat message bar contains the emoji icon from where you can access them.
It is essential to name your emoji with only alphanumeric characters and underscores using at least two characters.
The Discord emoji size is 32x32 pixels, so even if you upload up to 128x128 pixel size emojis, they will be resized to the default dimensions. Furthermore, emoji file sizes are at most 256kb.
If you want to use custom emojis, you can’t do so without a Nitro subscription because it is only functional on the server they are uploaded to. Even if you find a way to access the emoji from some other server, only its text code will be visible.
If you attempt to use the Emoji Picker to pick an emoji, you’ll get the following message:
Bonus: How to Manage Emoji in Discord Server?
You can’t remove or add emoji specific to a server on your own as a member. You need the server owner to toggle the permission of Manager Emoji in your domain.
On the other hand, as a server owner, you can give others this role with the following steps.
- Open Roles: Open the Server Settings and select “Roles” from the menu on the side.
- Toggle Manage Emoji: Pick the role you want to apply the permission to, and then toggle emoji’s slider to “on,” save changes, and you’re done!
FAQs About Discord Emojis
1. Why Do I See Grey Emoji In The Emoji Menu?
Greyed-out emoji in the menu means that either those emoji are animated, or you don’t have the permission to post them on other servers.
2. How Can I Get More Custom Emoji On The Server?
You can upload 50 emojis to your Discord server. But if you want more options, you need a Discord Nitro subscription to boost your server specs.
3. What Is The Discord Emoji Size?
Discord allows you to upload an emoji of up to 128x128 pixels, but it will resize it to 32x32 since that is its standard size.
Conclusion
Emojis make any chat fun, and where gaming is involved, they help you communicate better with your friends.
Discord has thousands of custom emojis that you can easily add to your server through your computer, whether it is your chat or the channel name. Follow our guide for a seamless process to add emoji to Discord and make your gaming experience better!
Richard Bennett
Richard Bennett is a writer and a lover of all things video.
Follow @Richard Bennett
Richard Bennett
Mar 27, 2024• Proven solutions
Who doesn’t like emoticons? They are fun, easy to use, and, best of all, highly expressive of your emotions that you cannot convey over messages otherwise.
A 2019 survey shows 70% of mobile users used emoji in texting or on social media daily. This shows the popularity of emoji in our world today.
Similarly, as a Discord user, you must have come across thousands of emoji in it. These are images uploaded on the server and called custom emojis that this gaming community can use for effective communication with friends and other players.
With the emoji and gaming industry growing, it is safe to say that discord emoji’s popularity and use will only increase.
Read ahead to see how you can add emojis on Discord if you want to have fun chats with your friends too.
- Part 1: Adding and Sending Emoji To Chat On Discord?
- Part 2: Adding Emojis To Discord Channel Name Or Nickname?
- Part 3: Adding Custom Emojis To Discord Server On Windows/Mac?
- Part 4: Adding Custom Emojis To Discord Server On iPhone And Android?
- Part 5: Managing Emojis in Discord Server
Part 1: How to Add and Send Emoji To Chat On Discord?
One of the best things about Discord’s emoji feature is that there are two ways to add them. You can either access emoji on the Discord account or upload them yourself.
You can access the emoji menu for all Discord platforms by pressing the grey smiley face next to the message box. This will be on the right of the box for desktops, and for mobile apps, it will be on the left.
Discord-exclusive and standard emoji are present in the emoji menu, along with a part that keeps track of your most-used emoji.
On the other hand, you can also add custom emoticons to your Discord server if you have permission to do so.
Once you add and access the emoji on your device, select the one you want to send to your friends and press enter to send.
Part 2: How to Add Emojis To Discord Channel Name Or Nickname?
As an owner of a Discord channel, it is easy for you to add emoji to Discord. Follow the steps below to figure out how to add emojis to Discord channels:
- Use the emoji list to find the one you want to use in your channel name.
- Select the emoji “browser” column and copy it either with the mouse or “Ctrl + C” on the keyboard.
- Access your Discord server, right-click the channel where the emoji will be and use the dropdown menu to select the “Edit Channel.”
- In the “Channel Name” box, past the selected emoji using “Ctrl + V” from the keyboard.
- Select “Save Changes” to save the name with the emoji.
Part 3: How to Add Custom Emojis To Discord Server On Windows/Mac?
You can add custom emoji on Discord, but only if you are a server owner or administrator. Use the Discord server settings on either the desktop versions for Windows or Mac or the Discord Website.
Follow the steps below for either platform:
- Access your Discord server to begin and press the arrow pointing down in the channel list with the server name—Press “Server Settings” in the menu
- As the server’s settings open, you can add custom emojis in the “Emoji” tab. You can find a requirements list at the top that includes emoji names with a minimum of two characters and a file size limit of 256 KB. You can add fifty normal and an additional fifty animated emoji GIFs using the standard servers
- Select “Upload Emoji” to insert a custom emoji, either standard or animated
- With the help of your device’s local storage, upload the file. However, for the emoji to be added to the lists, the file should align with Discord’s requirements.
- For every emoji image that you upload, an alias tag will be created for that custom emoji using the file’s name. This tag is used to update a message with an emoji.
- A default alias name like this can be replaced by selecting the “Alias” box with the custom emoji and then creating a new name.
- Enjoy your emoji in chats as soon as you upload them to the Discord server!
Boost your server with Discord Nitro subscribers today to insert more than the standard fifty emoji!
Part 4: How to Add Custom Emojis To Discord Server On iPhone And Android?
How cool is it that you can add custom emoji to your smartphone as well? Whether you have an iPhone or an Android, you can use the same menu as Windows and Mac to upload emoji.
Discord’s interface is similar across all devices, so the following steps work on Android and Apple.
- Begin by opening the app on your device to access the server. Press the hamburger menu located at the top left in an open server and channel.
- As the channel and server list opens for Discord, you can see a three-dot menu right next to the channel list with the server name. Tap on it to proceed.
- To get to your server settings, press “Settings” in the Discord server menu that shows up.
- Under the “Server Settings” menu, select “Emoji” to access the custom emoji settings.
- As the “Emoji” menu opens, you can see an emoji requirement list
- Press “Upload Emoji” to upload any emoji that aligns with these requirements
- Press the custom emoji file, tap “Crop” if it needs cropping, and then use the “Upload” option
- After you upload the emoji file, replace the alias tag by tapping on it. This will redirect you to that specific emoji’s settings
- Type the name you want using the “Alias” box to create the tag used to insert emoji in messages
- Save this new tag with the “Save” icon placed in the bottom right
- Any changes you make to the custom emoji’s alias are applied to it instantly for your use.
Emoji bring fun to the conversations you have with friends, and it is very easy to add them to your server as well. These show up in the emoji pop-up list once you add them. The chat message bar contains the emoji icon from where you can access them.
It is essential to name your emoji with only alphanumeric characters and underscores using at least two characters.
The Discord emoji size is 32x32 pixels, so even if you upload up to 128x128 pixel size emojis, they will be resized to the default dimensions. Furthermore, emoji file sizes are at most 256kb.
If you want to use custom emojis, you can’t do so without a Nitro subscription because it is only functional on the server they are uploaded to. Even if you find a way to access the emoji from some other server, only its text code will be visible.
If you attempt to use the Emoji Picker to pick an emoji, you’ll get the following message:
Bonus: How to Manage Emoji in Discord Server?
You can’t remove or add emoji specific to a server on your own as a member. You need the server owner to toggle the permission of Manager Emoji in your domain.
On the other hand, as a server owner, you can give others this role with the following steps.
- Open Roles: Open the Server Settings and select “Roles” from the menu on the side.
- Toggle Manage Emoji: Pick the role you want to apply the permission to, and then toggle emoji’s slider to “on,” save changes, and you’re done!
FAQs About Discord Emojis
1. Why Do I See Grey Emoji In The Emoji Menu?
Greyed-out emoji in the menu means that either those emoji are animated, or you don’t have the permission to post them on other servers.
2. How Can I Get More Custom Emoji On The Server?
You can upload 50 emojis to your Discord server. But if you want more options, you need a Discord Nitro subscription to boost your server specs.
3. What Is The Discord Emoji Size?
Discord allows you to upload an emoji of up to 128x128 pixels, but it will resize it to 32x32 since that is its standard size.
Conclusion
Emojis make any chat fun, and where gaming is involved, they help you communicate better with your friends.
Discord has thousands of custom emojis that you can easily add to your server through your computer, whether it is your chat or the channel name. Follow our guide for a seamless process to add emoji to Discord and make your gaming experience better!
Richard Bennett
Richard Bennett is a writer and a lover of all things video.
Follow @Richard Bennett
How to Make a iMovie Photo Slideshow with Music?
How to Make a iMovie Photo Slideshow with Music? [iMovie Tutorial]

Shanoon Cox
Mar 27, 2024• Proven solutions
Makings a slideshow is a great way to share photos and videos with friends and families. The good news is that you can totally make a slideshow on Mac for free with iMovie. iMovie is the pre-installed program coming with every new Mac. It provides a simple yet professional way to make slideshow movies from your photos, videos, and music.
If you haven’t iMovie installed on your Mac yet, just go to iTunes and download it for free. In the following part, I’ll share with you the step-by-step tutorial on how to make a slideshow on Mac using the free video editing software iMovie.
If you are an iOS user, check our picks of best photo slideshow apps for iPhone or iPad.
Ways for iMovie Photo Slideshow with Music Making
To make a photo slideshow with music in iMovie, you can follow these steps.
1. Create a New Project
After launching iMovie, click the Project button and then click Create New. Select Movie to combine photos, videos and music to make a slideshow.

2. Import Photos, Videos, and Audio Files
Now go to the My Media tab and click the Import icon to add your photos, videos, and music to iMovie, in this way, you can import any media files from any location on your Mac. But if you have arranged all your videos, photos, and music tracks in the Photos app, you can just switch to Photos under the Libraries tab on the left to import.

3. Arrange Media in Timeline and Adjust
Now, it’s time to place all these photos and videos in the timeline in order and do some adjustments. You can use the Magic Wand tool to improve the photo quality automatically, do some color correction, or add a filter to the photo. If you preview the video clip, you will see more options that allow you to do more editing, such as changing speed.
4. Apply Transitions & Effects
Transitions and effects will help you to create a slideshow in a more professional way. Some transitions such as cross dissolve, fade and cross blur are very popular in the slideshow, but remember don’t use lots of different transitions in one slideshow since too many transitions will distract the viewer’s attention. To apply a transition in the slideshow, just drag and drop it between two photos in the timeline.

5. Add Titles and Text
Using some opener titles and credits at the beginning and ending part of your slideshow will make it cool as well. You can add some famous quotes and words to better demonstrate.
Just to the Titles tab and select one of the title templates and drop it to the timeline first and then write your own words in the preview window.

6. Add Music to Slideshow
You can download some royalty-free music and sound effects from websites such as Filmstock stock media library or iTunes or import your own audio as we said before to use it as the slideshow background music. To sync with the slideshow, you may need to trim and edit the audio accordingly. For detailed information about iMovie audio editing, you can check how to add background music to iMovie.
Filmstock Stock Media Library ](https://tools.techidaily.com/wondershare/filmora/download/ )
7. Export and Share Your Slideshow video
Play the slideshow and check the result in the preview window. If everything goes well, you can now export and share or save it. You can save the slideshow video in MP4 format, or share it to Vimeo or add the slideshow to Theater to load it on your other Apple devices so you can easily watch it on your iOS devices or Apple TV.
I hope the above tutorial about how to make a slideshow on iMovie will be helpful for your stunning slideshow creation.
If you’re running an old macOS version and having iPhoto installed on your Mac, here are the detailed steps about How to make slideshow in iMovie with iPhoto project.
Step 1. Import Photos from the iPhoto Library
iMovie works seamlessly with iPhoto. You are suggested to drag and drop photos from iPhoto to the iMovie project. If no library exists in iPhoto, create one and import photos to iPhoto first. To add videos, you could go to either “File/Import” or Event Library, and then drag and drop selected videos to the timeline.
After photos and videos are imported to the iMovie slideshow project, you can preview the raw slideshow simply by pressing Space bar on your keyboard. And then make adjustments to clips and transitions. For example, mouse over one clip or “double arrow” button and click on the settings icon, then you could access clip adjustment, video adjustment, transition adjustment, etc.

Step 2. Add Music to Your iMovie Slideshow Project
Music sets the tone of your slideshow. Adding musing to the iMovie slideshow is just as simple as adding photos and videos.
So click the audio icon in the bottom right corner, and drag and drop the desired audio file to the timeline. Multiple songs could be added to iMovie.
However, iMovie doesn’t support multiple soundtracks. If necessary, you need to combine multiple song tracks with an external audio editor before importing them to the iMovie slideshow. You can also apply audio effects and filter sound using an equalizer.

Step 3. Export Your iMovie Slideshow Video
iMovie makes sharing possibilities endless. For those who upload their videos online, iMovie allows users to directly upload to MobileMe Gallery, YouTube, Facebook, Vimeo, CNN iReport, etc.
If you select to share the iMovie slideshow using Media Browser, you will get a slideshow appeared in other Mac applications like iWeb. It’s a good idea to export the iMovie slideshow to iTunes so that you can play back slideshow quickly and easily sync with your mobile devices like iPhone, iPod, and iPad.

You may also like: How to Add Text with iMovie in Mac and iPhone >>
Recommendation: Create Slideshow on Mac with More Templates and Transitions with Filmora
If you want to make a slideshow with some templates on Mac, you can try Wondershare Filmora . Filmora can turn photos and videos into attractive slideshow videos with various inbuilt filters, transitions, elements, animations, effects, and overlays. Click the Free Download button and have a try.
Check the ultimate guide about making a slideshow with music and titles in Filmora .
If you are going to make a slideshow with music on Windows, you may need a slideshow-making tool to do it by yourself. Wondershare Filmora will also be a good choice. It helps you instantly make such an impressive slideshow from photos and videos for sharing virtually anywhere.
Shanoon Cox
Shanoon Cox is a writer and a lover of all things video.
Follow @Shanoon Cox
Shanoon Cox
Mar 27, 2024• Proven solutions
Makings a slideshow is a great way to share photos and videos with friends and families. The good news is that you can totally make a slideshow on Mac for free with iMovie. iMovie is the pre-installed program coming with every new Mac. It provides a simple yet professional way to make slideshow movies from your photos, videos, and music.
If you haven’t iMovie installed on your Mac yet, just go to iTunes and download it for free. In the following part, I’ll share with you the step-by-step tutorial on how to make a slideshow on Mac using the free video editing software iMovie.
If you are an iOS user, check our picks of best photo slideshow apps for iPhone or iPad.
Ways for iMovie Photo Slideshow with Music Making
To make a photo slideshow with music in iMovie, you can follow these steps.
1. Create a New Project
After launching iMovie, click the Project button and then click Create New. Select Movie to combine photos, videos and music to make a slideshow.
2. Import Photos, Videos, and Audio Files
Now go to the My Media tab and click the Import icon to add your photos, videos, and music to iMovie, in this way, you can import any media files from any location on your Mac. But if you have arranged all your videos, photos, and music tracks in the Photos app, you can just switch to Photos under the Libraries tab on the left to import.
3. Arrange Media in Timeline and Adjust
Now, it’s time to place all these photos and videos in the timeline in order and do some adjustments. You can use the Magic Wand tool to improve the photo quality automatically, do some color correction, or add a filter to the photo. If you preview the video clip, you will see more options that allow you to do more editing, such as changing speed.
4. Apply Transitions & Effects
Transitions and effects will help you to create a slideshow in a more professional way. Some transitions such as cross dissolve, fade and cross blur are very popular in the slideshow, but remember don’t use lots of different transitions in one slideshow since too many transitions will distract the viewer’s attention. To apply a transition in the slideshow, just drag and drop it between two photos in the timeline.
5. Add Titles and Text
Using some opener titles and credits at the beginning and ending part of your slideshow will make it cool as well. You can add some famous quotes and words to better demonstrate.
Just to the Titles tab and select one of the title templates and drop it to the timeline first and then write your own words in the preview window.
6. Add Music to Slideshow
You can download some royalty-free music and sound effects from websites such as Filmstock stock media library or iTunes or import your own audio as we said before to use it as the slideshow background music. To sync with the slideshow, you may need to trim and edit the audio accordingly. For detailed information about iMovie audio editing, you can check how to add background music to iMovie.
Filmstock Stock Media Library ](https://tools.techidaily.com/wondershare/filmora/download/ )
7. Export and Share Your Slideshow video
Play the slideshow and check the result in the preview window. If everything goes well, you can now export and share or save it. You can save the slideshow video in MP4 format, or share it to Vimeo or add the slideshow to Theater to load it on your other Apple devices so you can easily watch it on your iOS devices or Apple TV.
I hope the above tutorial about how to make a slideshow on iMovie will be helpful for your stunning slideshow creation.
If you’re running an old macOS version and having iPhoto installed on your Mac, here are the detailed steps about How to make slideshow in iMovie with iPhoto project.
Step 1. Import Photos from the iPhoto Library
iMovie works seamlessly with iPhoto. You are suggested to drag and drop photos from iPhoto to the iMovie project. If no library exists in iPhoto, create one and import photos to iPhoto first. To add videos, you could go to either “File/Import” or Event Library, and then drag and drop selected videos to the timeline.
After photos and videos are imported to the iMovie slideshow project, you can preview the raw slideshow simply by pressing Space bar on your keyboard. And then make adjustments to clips and transitions. For example, mouse over one clip or “double arrow” button and click on the settings icon, then you could access clip adjustment, video adjustment, transition adjustment, etc.
Step 2. Add Music to Your iMovie Slideshow Project
Music sets the tone of your slideshow. Adding musing to the iMovie slideshow is just as simple as adding photos and videos.
So click the audio icon in the bottom right corner, and drag and drop the desired audio file to the timeline. Multiple songs could be added to iMovie.
However, iMovie doesn’t support multiple soundtracks. If necessary, you need to combine multiple song tracks with an external audio editor before importing them to the iMovie slideshow. You can also apply audio effects and filter sound using an equalizer.
Step 3. Export Your iMovie Slideshow Video
iMovie makes sharing possibilities endless. For those who upload their videos online, iMovie allows users to directly upload to MobileMe Gallery, YouTube, Facebook, Vimeo, CNN iReport, etc.
If you select to share the iMovie slideshow using Media Browser, you will get a slideshow appeared in other Mac applications like iWeb. It’s a good idea to export the iMovie slideshow to iTunes so that you can play back slideshow quickly and easily sync with your mobile devices like iPhone, iPod, and iPad.
You may also like: How to Add Text with iMovie in Mac and iPhone >>
Recommendation: Create Slideshow on Mac with More Templates and Transitions with Filmora
If you want to make a slideshow with some templates on Mac, you can try Wondershare Filmora . Filmora can turn photos and videos into attractive slideshow videos with various inbuilt filters, transitions, elements, animations, effects, and overlays. Click the Free Download button and have a try.
Check the ultimate guide about making a slideshow with music and titles in Filmora .
If you are going to make a slideshow with music on Windows, you may need a slideshow-making tool to do it by yourself. Wondershare Filmora will also be a good choice. It helps you instantly make such an impressive slideshow from photos and videos for sharing virtually anywhere.
Shanoon Cox
Shanoon Cox is a writer and a lover of all things video.
Follow @Shanoon Cox
How to Make a Photo Collage Using iPhoto?
How to Make a Photo Collage on Mac/iPhone Using iPhoto?
Shanoon Cox
Mar 27, 2024• Proven solutions
iPhoto is a photo library familiar to iOS users. It can help you easily organize, store and sort images, and even make a slide show to help you enjoy photos. This is why, even though Apple no longer develops iPhoto, some people use it.
Update: On April 8, 2015, Apple has launched a new Photos app on OS X Yosemite, which means Apple has stopped developing iPhoto. However, if you like iPhoto, you can still use it.
The following will introduce how to use the iPhoto collage maker on Mac or iPhone. At the end of this article, iPhoto alternative software will serve as your reference.
Part 1: How to Make a Photo Collage in iPhoto?
Here are the quick steps to create a photo collage with iPhoto.
Step 1: Launch iPhoto and click “Events” in the side menu.
Step 2: Hold “Shift” and click each photo you want to include in your photo collage.
Step 3: Click the “+” button in the lower-left corner and select Card in the pop-up window.
Step 4: Choose “Picture Collage”, which should be under the Any Occasion section if you are using the iPhoto 11.
Step 5: You’ll notice that all the templates are sorted based on the occasion.
Step 6: Drag photos to the template and pick a background, orientation and design.
Step 7: Click the Buy button on the lower right-hand corner of the collage editor, or go to the Share menu and email it to yourself or family members.
But before you make a photo collage using iPhoto, here are some important things for you to know:
- Technically, iPhoto can’t make fancy photo collages like other Photo collages makers on Mac. So don’t expect too much of it. iPhoto only creates greeting cards with a simple collage layout.
- The templates iPhoto offers are quite limited and ordinary that you might feel a little disappointed.
- iPhoto offers no share options to save photo collages to desktop or to post on Facebook, which is a basic feature of picture collage editor.
Part 2: What Replaces iPhoto on Mac/iPhone?
Since iPhoto’s functions are not sufficient, we will introduce some alternative collage makers that you may be interested in.
Alternative to Make a Short Video, Slideshow, or Photo Collage: Wondershare Filmora
If there are too many photos to save or share with friends and family, you can use these images to make short videos to better collage and share. Filmora can do this for you, through which you can easily crop, add effects, split the screen, and merge photos. In order to make the “photo video” lively and exciting, you can also add music, audio, animation, title, music, etc. to it.
Alternative to Organize, Store, and Sort Images: iCloud
Migrating your photos to iCloud is a wise choice. iCloud is the best photo storage for iOS or Mac users. You don’t need to download other apps or software. Just allow iCloud to back up the photo’s library in the settings.
The best thing is that you can view iCloud photos anytime and anywhere after logging in to your iCloud account. You can also automatically share photos with others by opening “Shared Album”. However, if there are too many photos, a paid subscription may be required to upgrade the storage space.
Conclusion
Above are the steps to make a photo collage using iPhoto on Mac/iPhone. We also list alternative methods to meet the different needs of the Photo library. So, if this isn’t quite what you’re looking for, you can also use some online photo collage service instead. If you want to have more fun editing photo stories, welcome to download Filmora and make more memorable and interesting videos.
Shanoon Cox
Shanoon Cox is a writer and a lover of all things video.
Follow @Shanoon Cox
Shanoon Cox
Mar 27, 2024• Proven solutions
iPhoto is a photo library familiar to iOS users. It can help you easily organize, store and sort images, and even make a slide show to help you enjoy photos. This is why, even though Apple no longer develops iPhoto, some people use it.
Update: On April 8, 2015, Apple has launched a new Photos app on OS X Yosemite, which means Apple has stopped developing iPhoto. However, if you like iPhoto, you can still use it.
The following will introduce how to use the iPhoto collage maker on Mac or iPhone. At the end of this article, iPhoto alternative software will serve as your reference.
Part 1: How to Make a Photo Collage in iPhoto?
Here are the quick steps to create a photo collage with iPhoto.
Step 1: Launch iPhoto and click “Events” in the side menu.
Step 2: Hold “Shift” and click each photo you want to include in your photo collage.
Step 3: Click the “+” button in the lower-left corner and select Card in the pop-up window.
Step 4: Choose “Picture Collage”, which should be under the Any Occasion section if you are using the iPhoto 11.
Step 5: You’ll notice that all the templates are sorted based on the occasion.
Step 6: Drag photos to the template and pick a background, orientation and design.
Step 7: Click the Buy button on the lower right-hand corner of the collage editor, or go to the Share menu and email it to yourself or family members.
But before you make a photo collage using iPhoto, here are some important things for you to know:
- Technically, iPhoto can’t make fancy photo collages like other Photo collages makers on Mac. So don’t expect too much of it. iPhoto only creates greeting cards with a simple collage layout.
- The templates iPhoto offers are quite limited and ordinary that you might feel a little disappointed.
- iPhoto offers no share options to save photo collages to desktop or to post on Facebook, which is a basic feature of picture collage editor.
Part 2: What Replaces iPhoto on Mac/iPhone?
Since iPhoto’s functions are not sufficient, we will introduce some alternative collage makers that you may be interested in.
Alternative to Make a Short Video, Slideshow, or Photo Collage: Wondershare Filmora
If there are too many photos to save or share with friends and family, you can use these images to make short videos to better collage and share. Filmora can do this for you, through which you can easily crop, add effects, split the screen, and merge photos. In order to make the “photo video” lively and exciting, you can also add music, audio, animation, title, music, etc. to it.
Alternative to Organize, Store, and Sort Images: iCloud
Migrating your photos to iCloud is a wise choice. iCloud is the best photo storage for iOS or Mac users. You don’t need to download other apps or software. Just allow iCloud to back up the photo’s library in the settings.
The best thing is that you can view iCloud photos anytime and anywhere after logging in to your iCloud account. You can also automatically share photos with others by opening “Shared Album”. However, if there are too many photos, a paid subscription may be required to upgrade the storage space.
Conclusion
Above are the steps to make a photo collage using iPhoto on Mac/iPhone. We also list alternative methods to meet the different needs of the Photo library. So, if this isn’t quite what you’re looking for, you can also use some online photo collage service instead. If you want to have more fun editing photo stories, welcome to download Filmora and make more memorable and interesting videos.
Shanoon Cox
Shanoon Cox is a writer and a lover of all things video.
Follow @Shanoon Cox
10 Most Popular Minion Memes that Moms Are Crazy About
10 Most Popular Minion Memes that Moms are Crazy About
Liza Brown
Mar 27, 2024• Proven solutions
Minions have successfully occupied global pop culture. In 2015, Universal Pictures made a record by spending $600 million on Minions marketing, partnering with Tic Tac, Converse, Amazon, and McDonald’s. In addition, minions were an inspiration for numerous products, creating a kind of signifier for their film and signifying a sense that they were “freaking everywhere.”
They’ve also infiltrated the Internet. The Minions’ abstractness let them known as ripe for meme-ing, which you can combine with any joke, idiom, or feeling.
A Minion meme is rarely crude, and generally, they are helpful for self-deprecating jabs or fart-jokes at one’s cooking.
Leading with the fact, we’ll discuss all the minion memes, how to make them, and their different types.
- Part 1: Who Invented Minion Memes?
- Part 2: Top 10 Minion Memes of 2021
- Part 3: Create Memes with a Free Minion Meme Generator
Part 1: Who Invented Minion Memes?
Who is to blame for pushing things down my throat day after day? It would be simple enough to blame Obama, Universal Studios, or even the guy who invented Minions, Pierre Coffin. But none of them is actually at fault. They were only providing humankind with the weapon, and humanity chose to use that evil weapon.
There have been loads of discussions about how Minions have dishonored the excellent name of the meme, rendering humor and creativity obsolete. But we are still entirely astonished as to why Minions shine from the big screen and leaked all over smartphones.
Part 2: Top 10 Minion Memes of 2021
The delayed-release “Minions: The Rise of Gru” is no laughing concern, but there’ll be miles into smiles with or top collection of minion memes that include all funny minion memes, Facebook minion memes, and more.
So, let’s dive into them without further ado!
1.Magnetos
We are all familiar with the “X-Men” installations/movies and the sometimes the supervillain and evil-doer Magneto, who is smart enough to control iron?
Source: sidomexentertainment.com
2.Cereal Killer
Cereal Killer is one of the most hilarious and well-thought-out Minion memes on the list.
Source: sidomexentertainment.com
3.Fall in Love
You will fall in love with this funny Facebook Minion meme. It begins slow; you can’t tell where it is heading to but grow; you are on the rolling floor.

4.A Minion poem
What’s the best way to include this cute, crazy evil minion poem? Enjoy!

5.Your Minions Would Like to Say Happy Birthday!!! - Happy Birthday Minion Meme

Source: 2happybirthday.com
6.Happy Birthday!! You are on in a Minion - Happy Birthday Minion Meme

7.Chasing my dream
You know, when people act some fantastic stuff but mean something else, like when they say “would die” if they don’t eat that Chicken kebab! Even though it uses the literal word, it does not mean they die over a chicken wing piece; they exaggerate.

8.A Vegan Zombie
Ever met a zombie that hates meat? The one who likes to eat earthworms, grass, and grubs? Have you encountered a zombie? Well, we haven’t.
9.Best Cook
Nothing like a finger-licking dish for a healthy “roasted dinner.”

10.Mum Hack
So what’s the fastest way to get down the children? Well, that can be the mobile hotspot. Turn that beautiful technology on and look for the children to rush you for the password… True?
Part 3: Create Memes with a Free Minion Meme Generator
With memes taking over entirely famous culture, you may be looking for a minion meme generator for yourself. By considering the use o meme maker, you can do just that!
Filmora meme maker is a free minion meme generator without a watermark.
Also, there’s no need to log in or sign up first to use it. It supports importing an image, video, and GIF in one place. Just drag them to import, so simple to use. Essentially, if you want to choose a black or white background to input a caption, the Filmora minion meme generator can help you quickly.
You can change the text color, size, and position of your meme.
After editing is over, it allows you to export your work within a few seconds. In addition, you can also freely upload to some social media platforms, like IG, FB, and others.
- Enter text anywhere (inside and outside of image)
- Support exporting to popular video and photo formats, such as jpg, png, gif, mp4
- It is entirely free to use, without any subscription cost.
Conclusion
Finally, we all agree that Minions, undoubtedly, are adorable short-sized, yellow, and clumsy but cute creatures, which, if used properly for minion memes, can motivate, cheer and improve a person’s mood. They always try to shove in distinct words that generally make it a blow-off. And that can be awkward and odd as well.
However, as a bonus tip, we’ve mentioned all kinds of minion memes, including a free minion meme generator. So, try out these special memes through meme generators and let us know if you find our content helpful and valuable.
Liza Brown
Liza Brown is a writer and a lover of all things video.
Follow @Liza Brown
Liza Brown
Mar 27, 2024• Proven solutions
Minions have successfully occupied global pop culture. In 2015, Universal Pictures made a record by spending $600 million on Minions marketing, partnering with Tic Tac, Converse, Amazon, and McDonald’s. In addition, minions were an inspiration for numerous products, creating a kind of signifier for their film and signifying a sense that they were “freaking everywhere.”
They’ve also infiltrated the Internet. The Minions’ abstractness let them known as ripe for meme-ing, which you can combine with any joke, idiom, or feeling.
A Minion meme is rarely crude, and generally, they are helpful for self-deprecating jabs or fart-jokes at one’s cooking.
Leading with the fact, we’ll discuss all the minion memes, how to make them, and their different types.
- Part 1: Who Invented Minion Memes?
- Part 2: Top 10 Minion Memes of 2021
- Part 3: Create Memes with a Free Minion Meme Generator
Part 1: Who Invented Minion Memes?
Who is to blame for pushing things down my throat day after day? It would be simple enough to blame Obama, Universal Studios, or even the guy who invented Minions, Pierre Coffin. But none of them is actually at fault. They were only providing humankind with the weapon, and humanity chose to use that evil weapon.
There have been loads of discussions about how Minions have dishonored the excellent name of the meme, rendering humor and creativity obsolete. But we are still entirely astonished as to why Minions shine from the big screen and leaked all over smartphones.
Part 2: Top 10 Minion Memes of 2021
The delayed-release “Minions: The Rise of Gru” is no laughing concern, but there’ll be miles into smiles with or top collection of minion memes that include all funny minion memes, Facebook minion memes, and more.
So, let’s dive into them without further ado!
1.Magnetos
We are all familiar with the “X-Men” installations/movies and the sometimes the supervillain and evil-doer Magneto, who is smart enough to control iron?
Source: sidomexentertainment.com
2.Cereal Killer
Cereal Killer is one of the most hilarious and well-thought-out Minion memes on the list.
Source: sidomexentertainment.com
3.Fall in Love
You will fall in love with this funny Facebook Minion meme. It begins slow; you can’t tell where it is heading to but grow; you are on the rolling floor.
4.A Minion poem
What’s the best way to include this cute, crazy evil minion poem? Enjoy!
5.Your Minions Would Like to Say Happy Birthday!!! - Happy Birthday Minion Meme
Source: 2happybirthday.com
6.Happy Birthday!! You are on in a Minion - Happy Birthday Minion Meme
7.Chasing my dream
You know, when people act some fantastic stuff but mean something else, like when they say “would die” if they don’t eat that Chicken kebab! Even though it uses the literal word, it does not mean they die over a chicken wing piece; they exaggerate.
8.A Vegan Zombie
Ever met a zombie that hates meat? The one who likes to eat earthworms, grass, and grubs? Have you encountered a zombie? Well, we haven’t.
9.Best Cook
Nothing like a finger-licking dish for a healthy “roasted dinner.”
10.Mum Hack
So what’s the fastest way to get down the children? Well, that can be the mobile hotspot. Turn that beautiful technology on and look for the children to rush you for the password… True?
Part 3: Create Memes with a Free Minion Meme Generator
With memes taking over entirely famous culture, you may be looking for a minion meme generator for yourself. By considering the use o meme maker, you can do just that!
Filmora meme maker is a free minion meme generator without a watermark.
Also, there’s no need to log in or sign up first to use it. It supports importing an image, video, and GIF in one place. Just drag them to import, so simple to use. Essentially, if you want to choose a black or white background to input a caption, the Filmora minion meme generator can help you quickly.
You can change the text color, size, and position of your meme.
After editing is over, it allows you to export your work within a few seconds. In addition, you can also freely upload to some social media platforms, like IG, FB, and others.
- Enter text anywhere (inside and outside of image)
- Support exporting to popular video and photo formats, such as jpg, png, gif, mp4
- It is entirely free to use, without any subscription cost.
Conclusion
Finally, we all agree that Minions, undoubtedly, are adorable short-sized, yellow, and clumsy but cute creatures, which, if used properly for minion memes, can motivate, cheer and improve a person’s mood. They always try to shove in distinct words that generally make it a blow-off. And that can be awkward and odd as well.
However, as a bonus tip, we’ve mentioned all kinds of minion memes, including a free minion meme generator. So, try out these special memes through meme generators and let us know if you find our content helpful and valuable.
Liza Brown
Liza Brown is a writer and a lover of all things video.
Follow @Liza Brown
How to Make Your Own Emoji in 2 Ways [Step-By Step Guide]
How to Make Your Own Emoji in 2 Ways [Step-by Step Guide]
Shanoon Cox
Mar 27, 2024• Proven solutions
The small yellow faces that we have come to call emojis are now rapidly being used on all platforms. Whether you’re sending an email or texting a friend, emoji is ever-present to spice up the conversation and give it an emotional touch. But these cliché emojis are now becoming dull, and the creative side in us is craving for something more personal and fun.
To satisfy that craving of being unique, you can now create your own emoji. Tease your friends with an emoji of their faces or custom-create an emoji that best expresses your facial expressions. The customized emoji can be an object or an emotion, while the only limitation is your imagination.
Let me show you how to make emoji that relates to your feelings and will help you transform your texting experience.
- Method 1: Make Your Own Emoji Using Online Emoji Maker
- Method 2: Make Your Own Emoji Using an Emoji Maker App
- Bonus Tip-Add Your Emoji to a Video Using Wondershare Filmora
Method 1: Make Your Own Emoji Using Online Emoji Maker
Emoji Maker is an online tool to quench your thirst for creativity. It is free and incredibly easy to use. You would think that it takes expertise to make your own emoji, but, fortunately, all it takes is imagination and a few clicks, of course.
You can create an emoji from the face shapes available or customize a funny emoji using your own or a friend’s face. You can finally take revenge by pasting the funniest mustache on your ex’s face or making them bald. (Savage, right?)
Better yet, you can make a superhero emoji of yourself and even change the background as if you’re in the sky. The functions of this Emoji Maker are countless and of a professional level. These customized emojis are bound to make you stand out in those group chats
Now, as promised, I will show you exactly how it’s done.
1. First of all, open Emoji Maker on your browser.
2. Select a sample shape and face. You can even upload your own selfie to use as a face.
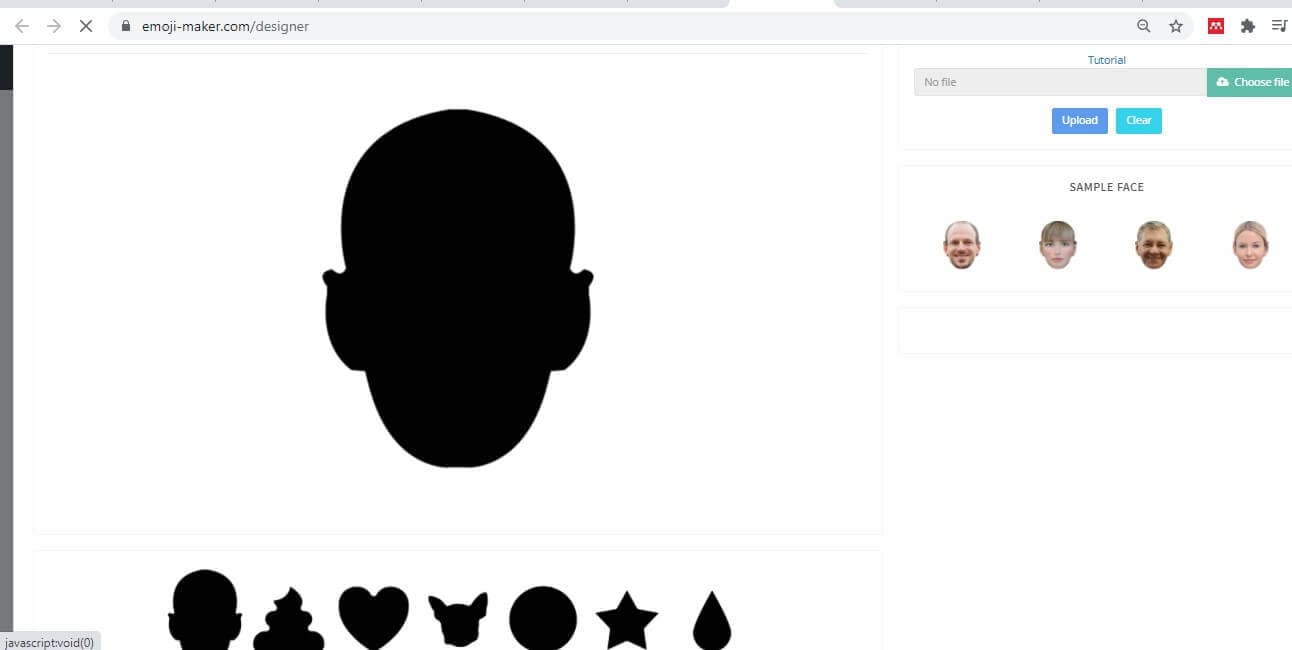
3. Now change the various features on the face such as eyes, hair, mustache, glasses, nose, etc
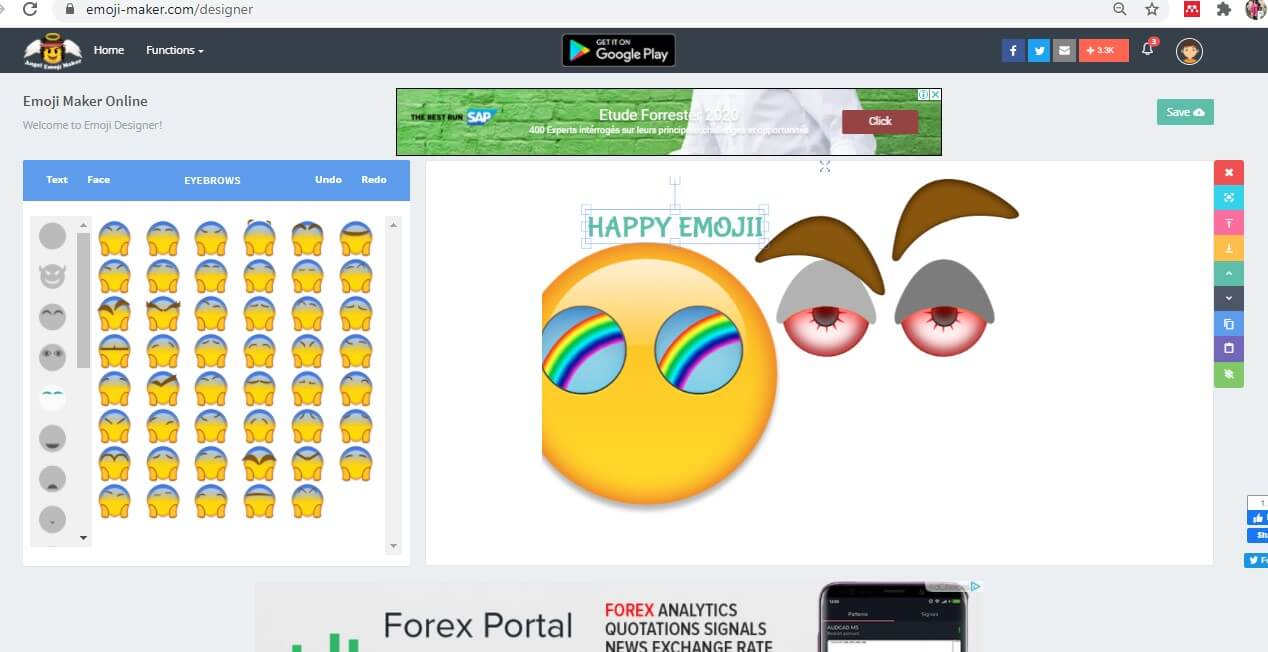
4. The undo and redo buttons are available for quick creations. The size of the emoji can be adjusted by clicking on the features and dragging it.
5. A panel on the right lets you copy, paste, or move the selected feature up, down, to the front or behind.
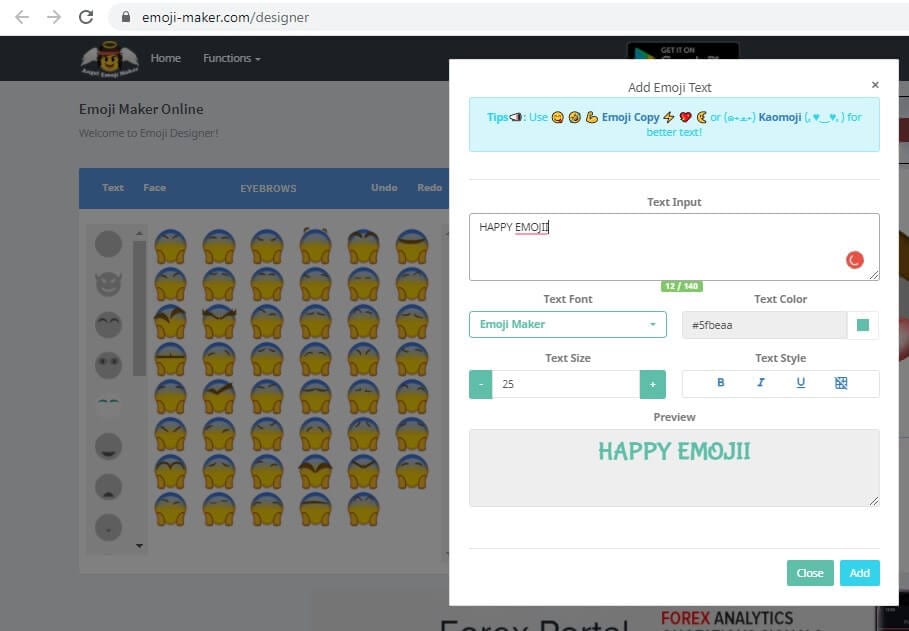
6. You can also click on the Text tab to insert a message with customized size, color, or font
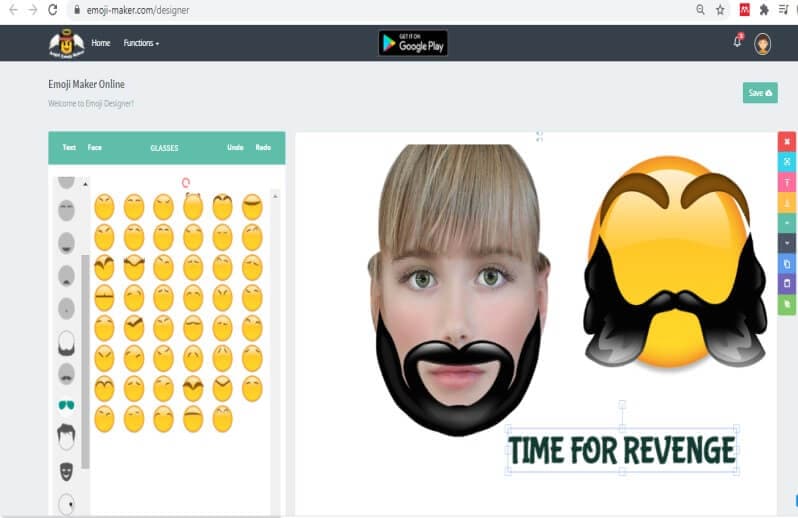
7. After customization, press Save in the top right corner. You can either directly save the emoji to your pc or crop to size and then save.
Method 2: Make Your Own Emoji Using an Emoji Maker App
Zmoji is an app that lets you create a whole range of personalized avatars of yourself. Imagine a collection of stickers of different emotions but all featuring you.
You can create your avatar manually or by using the facial recognition feature. Moreover, you can dress up the avatar to look just like you. There is a wide range of stylish clothes you can choose from. Be funky or silly, or be you. Who cares? It’s time for some fun.
Let there be a mini-you in a funny or silly position. Or a dancing avatar of you to express your delight or crying a pool of tears after a piece of bad news, next-level texting, right?
1. Download Zmoji or either your Android or Apple device. Launch it.
2. Choose your gender. Click on Facial Recognition and take a selfie to proceed. Or tap Manual Creation to create a face yourself.
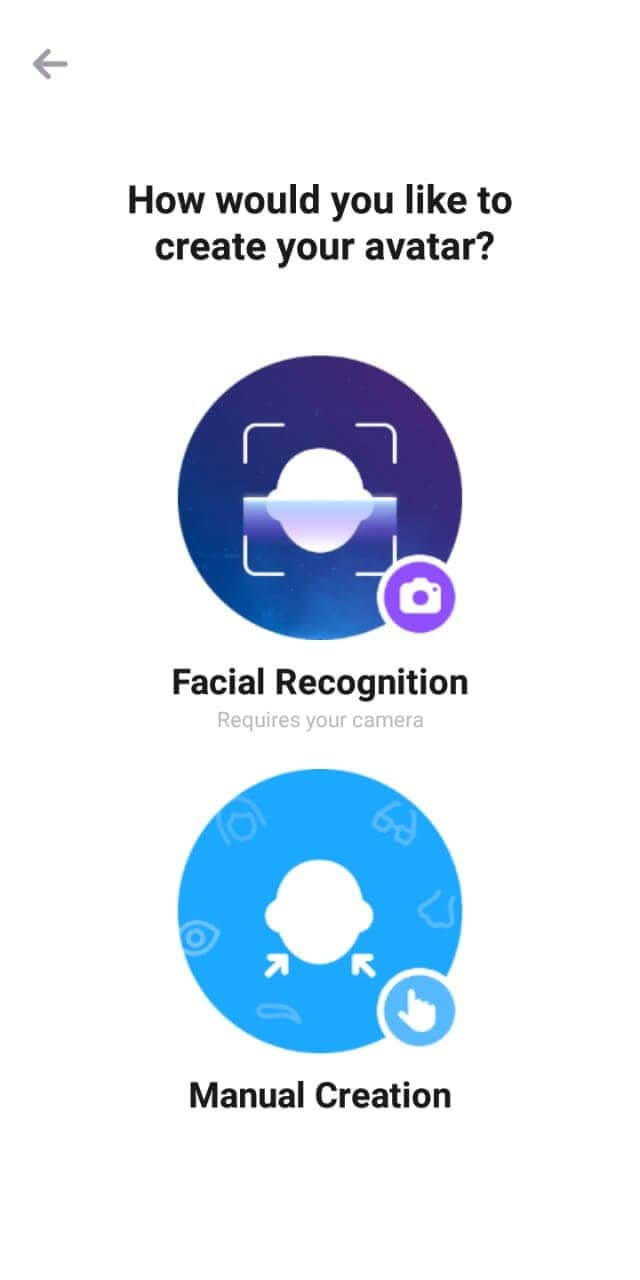
3. Choose from the variety of features to make the emoji look precisely like you. Click Save. You will also earn coins on creating an emoji that you can use to buy special features.
4. Now you can dress it up to match the real you and choose a pose that best fits your mood.
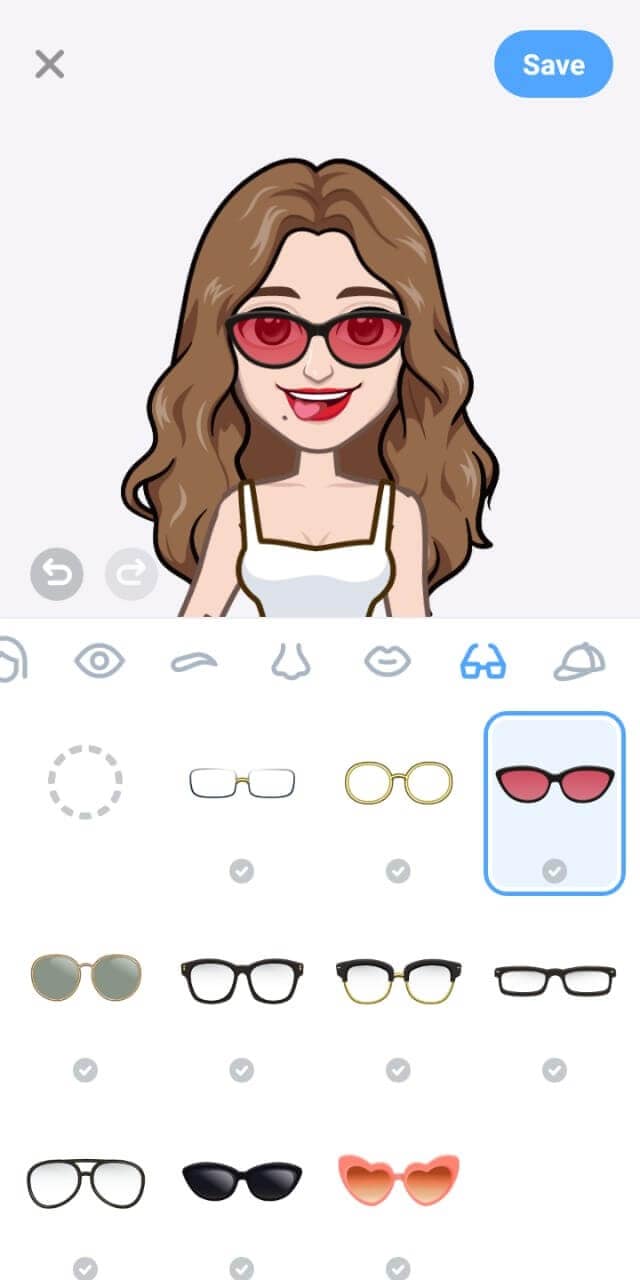
5. Click on Photobooth and choose a template to create a sticker of you just like that.
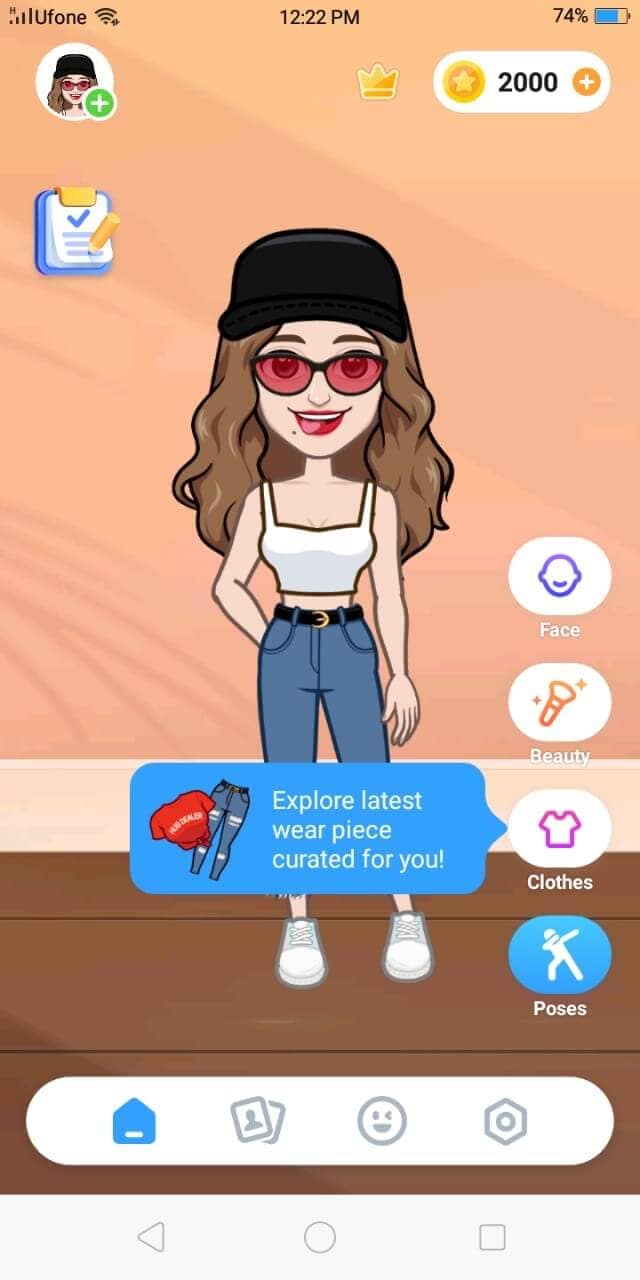
6. Once you are all dolled up, press Save or share the avatar directly on Facebook, Whatsapp, and Instagram, etc.
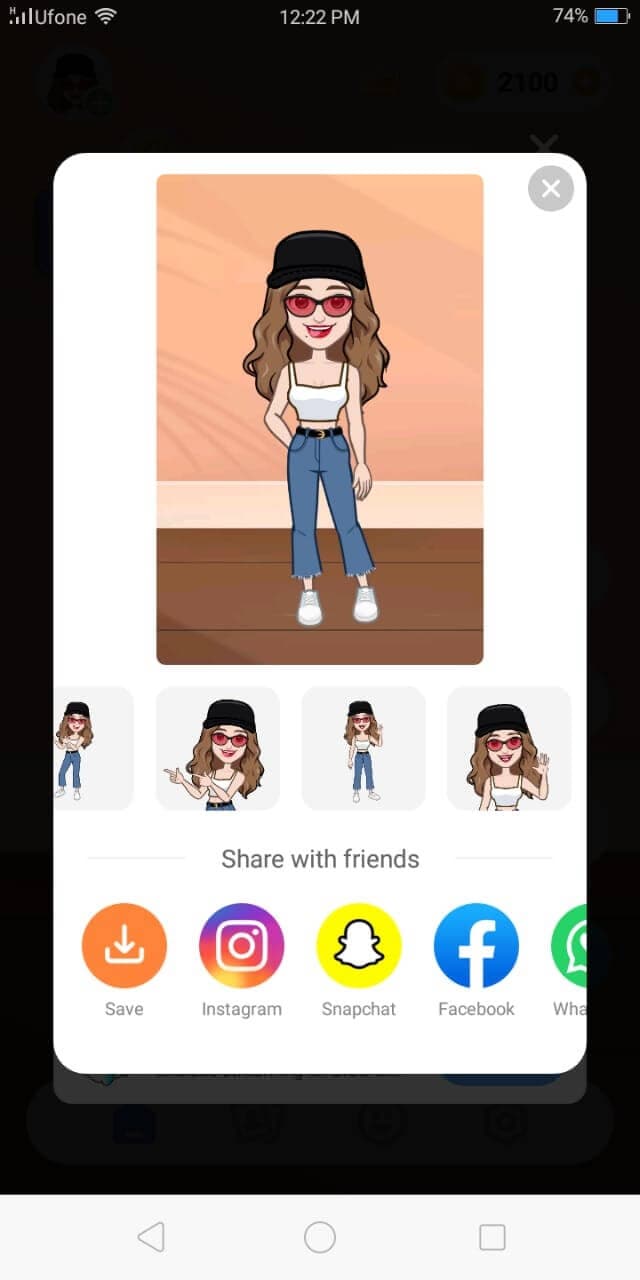
Bonus Tip-Add Your Emoji to a Video Using Wondershare Filmora
Wondershare Filmora, famous for its simple interface and professional video-making and editing tools, is here to save the day again. With the wide range of editing tools and effects that Filmora offers, I will show you how to create your own emoji and then enhance it further.
You can add the customized emoji or add other emojis from Filmora’s library. Motion effects and other special effects will give your video a refined and dramatic look, and the customized emoji will be a cherry on top.
Let’s surprise our friends with our unique creation!
1. Download and install Filmora. Launch it.
2. Click on File>Import Media to select the emoji you created as well as the video.
3. Drag and drop both onto the timeline.
4. In the viewer panel, adjust the size and location of the emoji.
5. Click on the emoji image in the timeline to change the values in Image, Color, and Motion. You can rotate the emoji or alter its color. You can even choose the motion of how the emoji comes in the video. This animated introduction of the emoji will give your video a dramatic look.
Finally, click Export, choose the destination folder, and the output format.
Conclusion
From creating unique emojis to creative avatars, you know it all now. We have walked you through how to make emoji in 2 easy ways. Now it’s up to you. You can use these customized emojis to add a spark to your conversations or attract followers to your brands. Based on your ease, choose any method and let the creativity in you take over.
Wondershare Filmora will help you create the kind of unique video you need to stand out. Just don’t forget to decorate your videos with your custom made emojis. You might get famous, who knows?
Shanoon Cox
Shanoon Cox is a writer and a lover of all things video.
Follow @Shanoon Cox
Shanoon Cox
Mar 27, 2024• Proven solutions
The small yellow faces that we have come to call emojis are now rapidly being used on all platforms. Whether you’re sending an email or texting a friend, emoji is ever-present to spice up the conversation and give it an emotional touch. But these cliché emojis are now becoming dull, and the creative side in us is craving for something more personal and fun.
To satisfy that craving of being unique, you can now create your own emoji. Tease your friends with an emoji of their faces or custom-create an emoji that best expresses your facial expressions. The customized emoji can be an object or an emotion, while the only limitation is your imagination.
Let me show you how to make emoji that relates to your feelings and will help you transform your texting experience.
- Method 1: Make Your Own Emoji Using Online Emoji Maker
- Method 2: Make Your Own Emoji Using an Emoji Maker App
- Bonus Tip-Add Your Emoji to a Video Using Wondershare Filmora
Method 1: Make Your Own Emoji Using Online Emoji Maker
Emoji Maker is an online tool to quench your thirst for creativity. It is free and incredibly easy to use. You would think that it takes expertise to make your own emoji, but, fortunately, all it takes is imagination and a few clicks, of course.
You can create an emoji from the face shapes available or customize a funny emoji using your own or a friend’s face. You can finally take revenge by pasting the funniest mustache on your ex’s face or making them bald. (Savage, right?)
Better yet, you can make a superhero emoji of yourself and even change the background as if you’re in the sky. The functions of this Emoji Maker are countless and of a professional level. These customized emojis are bound to make you stand out in those group chats
Now, as promised, I will show you exactly how it’s done.
1. First of all, open Emoji Maker on your browser.
2. Select a sample shape and face. You can even upload your own selfie to use as a face.
3. Now change the various features on the face such as eyes, hair, mustache, glasses, nose, etc
4. The undo and redo buttons are available for quick creations. The size of the emoji can be adjusted by clicking on the features and dragging it.
5. A panel on the right lets you copy, paste, or move the selected feature up, down, to the front or behind.
6. You can also click on the Text tab to insert a message with customized size, color, or font
7. After customization, press Save in the top right corner. You can either directly save the emoji to your pc or crop to size and then save.
Method 2: Make Your Own Emoji Using an Emoji Maker App
Zmoji is an app that lets you create a whole range of personalized avatars of yourself. Imagine a collection of stickers of different emotions but all featuring you.
You can create your avatar manually or by using the facial recognition feature. Moreover, you can dress up the avatar to look just like you. There is a wide range of stylish clothes you can choose from. Be funky or silly, or be you. Who cares? It’s time for some fun.
Let there be a mini-you in a funny or silly position. Or a dancing avatar of you to express your delight or crying a pool of tears after a piece of bad news, next-level texting, right?
1. Download Zmoji or either your Android or Apple device. Launch it.
2. Choose your gender. Click on Facial Recognition and take a selfie to proceed. Or tap Manual Creation to create a face yourself.
3. Choose from the variety of features to make the emoji look precisely like you. Click Save. You will also earn coins on creating an emoji that you can use to buy special features.
4. Now you can dress it up to match the real you and choose a pose that best fits your mood.
5. Click on Photobooth and choose a template to create a sticker of you just like that.
6. Once you are all dolled up, press Save or share the avatar directly on Facebook, Whatsapp, and Instagram, etc.
Bonus Tip-Add Your Emoji to a Video Using Wondershare Filmora
Wondershare Filmora, famous for its simple interface and professional video-making and editing tools, is here to save the day again. With the wide range of editing tools and effects that Filmora offers, I will show you how to create your own emoji and then enhance it further.
You can add the customized emoji or add other emojis from Filmora’s library. Motion effects and other special effects will give your video a refined and dramatic look, and the customized emoji will be a cherry on top.
Let’s surprise our friends with our unique creation!
1. Download and install Filmora. Launch it.
2. Click on File>Import Media to select the emoji you created as well as the video.
3. Drag and drop both onto the timeline.
4. In the viewer panel, adjust the size and location of the emoji.
5. Click on the emoji image in the timeline to change the values in Image, Color, and Motion. You can rotate the emoji or alter its color. You can even choose the motion of how the emoji comes in the video. This animated introduction of the emoji will give your video a dramatic look.
Finally, click Export, choose the destination folder, and the output format.
Conclusion
From creating unique emojis to creative avatars, you know it all now. We have walked you through how to make emoji in 2 easy ways. Now it’s up to you. You can use these customized emojis to add a spark to your conversations or attract followers to your brands. Based on your ease, choose any method and let the creativity in you take over.
Wondershare Filmora will help you create the kind of unique video you need to stand out. Just don’t forget to decorate your videos with your custom made emojis. You might get famous, who knows?
Shanoon Cox
Shanoon Cox is a writer and a lover of all things video.
Follow @Shanoon Cox
10 Best Meme Makers Online (Free to Use)
Top 12 Best Meme Makers Online for FREE

Ollie Mattison
Mar 27, 2024• Proven solutions
Memes have become a central part of many online conversations. They pop up a lot on social media, especially platforms such as Twitter, Tumblr and Facebook . People even converse with each other using meme keyboards.
With memes taking over popular culture, you may want to make a meme for yourself. By using a meme maker, you can do just that! Here is a look at the top 10+ best meme maker online options that you can use for free.
10+ Best Meme Makers Online
1. Filmora Free Meme Generator
Filmora meme maker is a totally free meme generator without a watermark. Also, you don’t need to sign up or log in first to use it. It supports importing images, GIFs, and videos in one place. Just drag and drop to import, so easy to use. More importantly, if you want to select a white or black background to input the caption, Filmora meme maker can help you quickly. Changing text size, color and position is also available. After editing is done, just one click to export your work within a few seconds. You can also freely upload to social media platforms, like FB and IG.
- Place text anywhere (inside and outside of image)
- Support exporting to popular image and video formats, including jpg, png, gif, mp4
- It is totally free to use, no subscription or cost
[
3. Wondershare PixStudio
Wondershare PixStudio owns massive templates that can help you create your memes easily. You can feel free to upload your image and start to design it with text, colors and filters to the images.
Features:
- Free and easy to use.
- Ability to create memes with your images.
- Option to add filters to images for your memes.
- Option to change font and text color.
4. Quickmeme
Quickmeme is the best meme maker option for anyone who wants a simple experience, without too many frills. You can check out featured memes, which show you the most popular ones right now.
All you need to do to create a meme is go on “upload a funny” to start from scratch. If you want to select a famous picture and add your own text, you can do so using the “caption a meme” option.
Features:
- Create a meme with your own images or famous images.
- Login with Facebook to set up your account and save the memes you create.
5. MemeGenerator
One of the most popular tools for creating memes, MemeGenerator is the meme maker online that you can use when you want to add some funny captions to images. You can check out all the popular images that are being used to create memes by other people.
If you want to create a meme with one of those images, simply click on them or you can choose “create” to start making a meme with your own image or character.
Features:
- Create memes with custom images or characters.
- Add your own text to famous meme images.
- Send and share memes through the site.

6. Imgur
Imgur is mostly known as an image hosting platform. People will host images on Imgur so they can share them with friends or on social media. But there is also a meme creation tool that you can use on the site.
All you need to do is select one of the default images on the site, or use your own, and you can add the text that you want. Selecting the text to put at the top and bottom of the image is very easy with Imgur.
Features:
- Takes under a minute to create a meme with your own image or pre-selected ones.
- Imgur also offers an image hosting service.
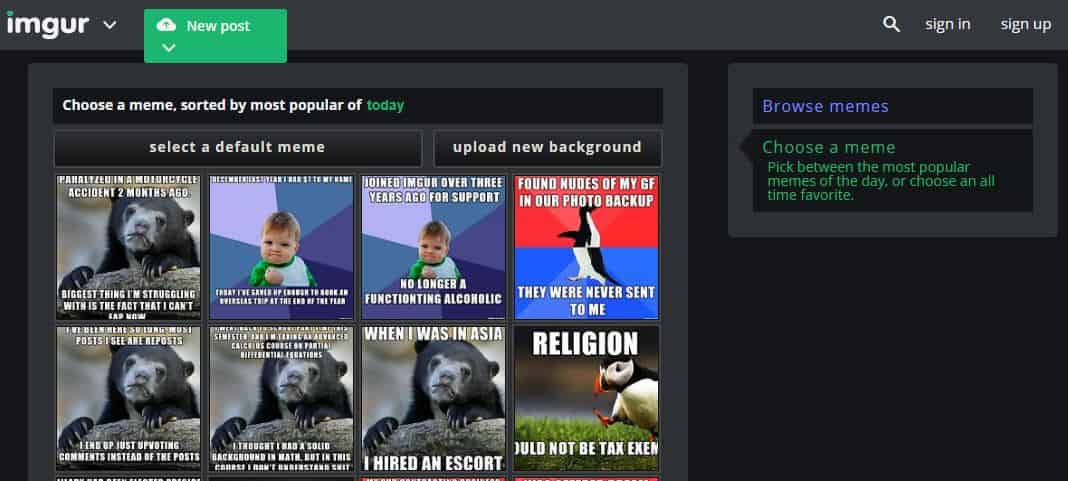
7. Make a Meme
When you go on Make a Meme, you will immediately see images of all the most famous memes from around the world. You can click on those images, where you get an interface asking for the top text, bottom text, and your custom title. Then you click on “make a meme” and your image is ready.
You can even upload your own image and then add text to it in a similar way. You have the option to preview your memes before you create them as well.
Features:
- Create memes from custom images or popular ones.
- Add top and bottom text easily.
- Create custom meme titles.
- Preview memes before making them.
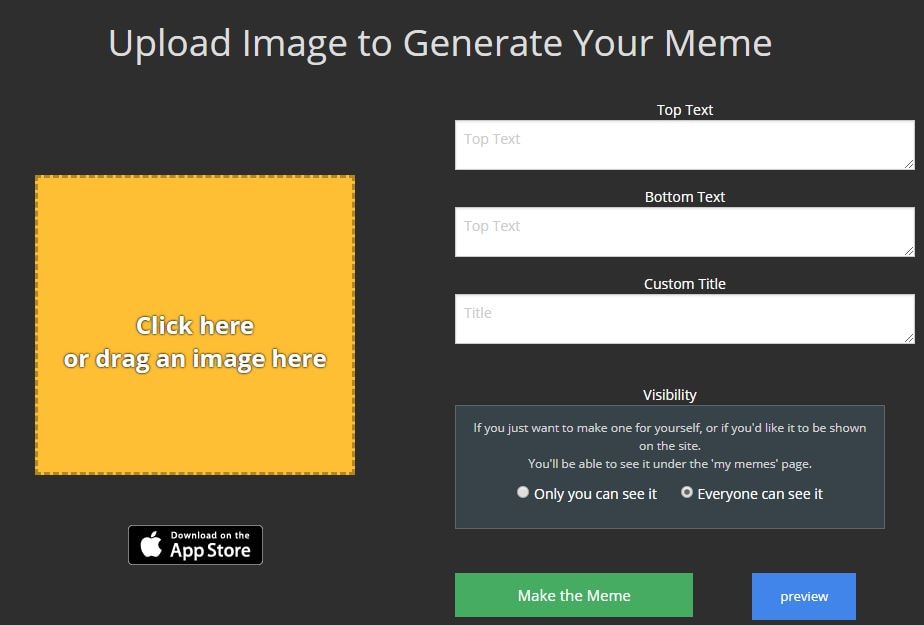
8. Livememe
Livememe is a meme generator that is very straightforward to use. When you visit the homepage, you will see a few selected images that are very popular. Click on the “create a meme” button and you will get a drop down menu that is thumbnails of all the popular memes.
You may select any of those images to create your own meme, or upload your own image and add the relevant text. You can save the image on your computer and even share it through the site.
Features:
- Includes nearly every popular meme as preselected images.
- Ability to create custom image memes.
- Easily share created memes.
9. Canva
Unlike other sites, Canva goes a step further and gives you professionally created templates that you can use for your memes. There are over a million stock photos available to you. It is a much larger selection than other sites.
But you can also upload your own image, add relevant text and then create the meme.
Features:
- Large collection of stock images.
- Ability to create memes with your own images.
- Option to add filters to images for your memes.
- Option to change font and text color.
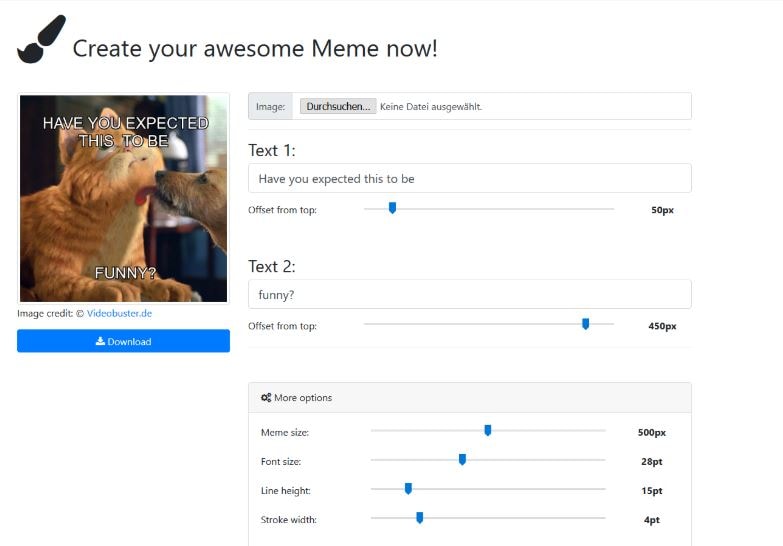
10. iLoveIMG
iLoveIMG is one of the easiest sites to use if you want to create a meme. The homepage will let you upload an image or select a meme template to get started.
Text boxes are already present, but you can edit them with your own text and see exactly how they would look. If you want to add more lines of text, you can do that as well.
It is even possible to add an image on top of one image to take your meme game to a whole new level!
Features:
- Easy meme creation with uploaded or custom images.
- Ability to add more than two lines of text.
- Option to add an image on top of the existing image.
11. Meme Creator
With Meme Creator, you can recreate existing memes with the text of your choice, or upload images to make custom memes.
The site is very easy to use, which does not require you to create an account, and is completely free. It is possible to adjust the text size and color when you are using this meme generator, which is not always an option on these free tools.
Within a minute, you will have the custom meme that you can share with friends!
Features:
- Use preexisting and custom images for memes.
- Adjust the color and font size of both top and bottom text.
12. DIYLOL
Want to create a meme from images that already have become popular memes? Now you can do so with DIYLOL. All you need to do is pick the preexisting image that you like best, add your top and bottom text, and you are ready to go.
You can even adjust the font color and size for the top and bottom text. Then you can download the image to share with friends and family.
Features:
- Easy tool to create memes from preexisting images.
- Ability to adjust font size and color.
Conclusion
By using an online meme maker, you have the ability to create your own memes whenever you want. All you need is a source image and your idea for the text. Within minutes, the meme generator you are using will have your meme ready to download. Then you can share it with friends and save it on all your devices. And the best part is that you can do all of this with a meme maker online that is completely free!
[
Ollie Mattison
Ollie Mattison is a writer and a lover of all things video.
Follow @Ollie Mattison
Ollie Mattison
Mar 27, 2024• Proven solutions
Memes have become a central part of many online conversations. They pop up a lot on social media, especially platforms such as Twitter, Tumblr and Facebook . People even converse with each other using meme keyboards.
With memes taking over popular culture, you may want to make a meme for yourself. By using a meme maker, you can do just that! Here is a look at the top 10+ best meme maker online options that you can use for free.
10+ Best Meme Makers Online
1. Filmora Free Meme Generator
Filmora meme maker is a totally free meme generator without a watermark. Also, you don’t need to sign up or log in first to use it. It supports importing images, GIFs, and videos in one place. Just drag and drop to import, so easy to use. More importantly, if you want to select a white or black background to input the caption, Filmora meme maker can help you quickly. Changing text size, color and position is also available. After editing is done, just one click to export your work within a few seconds. You can also freely upload to social media platforms, like FB and IG.
- Place text anywhere (inside and outside of image)
- Support exporting to popular image and video formats, including jpg, png, gif, mp4
- It is totally free to use, no subscription or cost
[
3. Wondershare PixStudio
Wondershare PixStudio owns massive templates that can help you create your memes easily. You can feel free to upload your image and start to design it with text, colors and filters to the images.
Features:
- Free and easy to use.
- Ability to create memes with your images.
- Option to add filters to images for your memes.
- Option to change font and text color.
4. Quickmeme
Quickmeme is the best meme maker option for anyone who wants a simple experience, without too many frills. You can check out featured memes, which show you the most popular ones right now.
All you need to do to create a meme is go on “upload a funny” to start from scratch. If you want to select a famous picture and add your own text, you can do so using the “caption a meme” option.
Features:
- Create a meme with your own images or famous images.
- Login with Facebook to set up your account and save the memes you create.
5. MemeGenerator
One of the most popular tools for creating memes, MemeGenerator is the meme maker online that you can use when you want to add some funny captions to images. You can check out all the popular images that are being used to create memes by other people.
If you want to create a meme with one of those images, simply click on them or you can choose “create” to start making a meme with your own image or character.
Features:
- Create memes with custom images or characters.
- Add your own text to famous meme images.
- Send and share memes through the site.
6. Imgur
Imgur is mostly known as an image hosting platform. People will host images on Imgur so they can share them with friends or on social media. But there is also a meme creation tool that you can use on the site.
All you need to do is select one of the default images on the site, or use your own, and you can add the text that you want. Selecting the text to put at the top and bottom of the image is very easy with Imgur.
Features:
- Takes under a minute to create a meme with your own image or pre-selected ones.
- Imgur also offers an image hosting service.
7. Make a Meme
When you go on Make a Meme, you will immediately see images of all the most famous memes from around the world. You can click on those images, where you get an interface asking for the top text, bottom text, and your custom title. Then you click on “make a meme” and your image is ready.
You can even upload your own image and then add text to it in a similar way. You have the option to preview your memes before you create them as well.
Features:
- Create memes from custom images or popular ones.
- Add top and bottom text easily.
- Create custom meme titles.
- Preview memes before making them.
8. Livememe
Livememe is a meme generator that is very straightforward to use. When you visit the homepage, you will see a few selected images that are very popular. Click on the “create a meme” button and you will get a drop down menu that is thumbnails of all the popular memes.
You may select any of those images to create your own meme, or upload your own image and add the relevant text. You can save the image on your computer and even share it through the site.
Features:
- Includes nearly every popular meme as preselected images.
- Ability to create custom image memes.
- Easily share created memes.
9. Canva
Unlike other sites, Canva goes a step further and gives you professionally created templates that you can use for your memes. There are over a million stock photos available to you. It is a much larger selection than other sites.
But you can also upload your own image, add relevant text and then create the meme.
Features:
- Large collection of stock images.
- Ability to create memes with your own images.
- Option to add filters to images for your memes.
- Option to change font and text color.
10. iLoveIMG
iLoveIMG is one of the easiest sites to use if you want to create a meme. The homepage will let you upload an image or select a meme template to get started.
Text boxes are already present, but you can edit them with your own text and see exactly how they would look. If you want to add more lines of text, you can do that as well.
It is even possible to add an image on top of one image to take your meme game to a whole new level!
Features:
- Easy meme creation with uploaded or custom images.
- Ability to add more than two lines of text.
- Option to add an image on top of the existing image.
11. Meme Creator
With Meme Creator, you can recreate existing memes with the text of your choice, or upload images to make custom memes.
The site is very easy to use, which does not require you to create an account, and is completely free. It is possible to adjust the text size and color when you are using this meme generator, which is not always an option on these free tools.
Within a minute, you will have the custom meme that you can share with friends!
Features:
- Use preexisting and custom images for memes.
- Adjust the color and font size of both top and bottom text.
12. DIYLOL
Want to create a meme from images that already have become popular memes? Now you can do so with DIYLOL. All you need to do is pick the preexisting image that you like best, add your top and bottom text, and you are ready to go.
You can even adjust the font color and size for the top and bottom text. Then you can download the image to share with friends and family.
Features:
- Easy tool to create memes from preexisting images.
- Ability to adjust font size and color.
Conclusion
By using an online meme maker, you have the ability to create your own memes whenever you want. All you need is a source image and your idea for the text. Within minutes, the meme generator you are using will have your meme ready to download. Then you can share it with friends and save it on all your devices. And the best part is that you can do all of this with a meme maker online that is completely free!
[
Ollie Mattison
Ollie Mattison is a writer and a lover of all things video.
Follow @Ollie Mattison
Also read:
- [New] 2024 Approved The Lasting Way to Disconnect From YouTube Shorts
- [New] In 2024, The Ultimate Guide to Effective Screen Recording with Tunefab
- [Updated] The Essentials for Becoming a Top-Notch Interviewer
- 2024 Approved How to Add Emojis To Discord
- Best Photo Slideshow Maker How to Make a Photo Slideshow for 2024
- Generating the Nut Button Meme for 2024
- How to Send and Fake Live Location on Facebook Messenger Of your Poco F5 Pro 5G | Dr.fone
- Resolving Valorant's Perpetual Buffering Issue - A Step-by-Step Guide
- Updated How to Make a Slideshow with Music
- Title: Updated How to Record and Edit an Animoji or Memoji Karaoke Music Video, In 2024
- Author: Jan
- Created at : 2025-02-13 17:11:15
- Updated at : 2025-02-19 17:20:01
- Link: https://meme-emoji.techidaily.com/updated-how-to-record-and-edit-an-animoji-or-memoji-karaoke-music-video-in-2024/
- License: This work is licensed under CC BY-NC-SA 4.0.