
Updated How to Burn Photos to DVD with Transitions and Music
How to Burn Photos to DVD with Transitions and Music
How to Burn Photos to DVD with Transitions and Music

Shanoon Cox
Mar 27, 2024• Proven solutions
Photos are precious memories not only for you but also for your family members. As time goes on, the photos might fade out and be unable to retrieve. To avoid this, burn photos to DVD will be a great idea to preserve family memories eternally.
This article will show you how to burn photos to DVD Slideshow with transition, titles and music quickly and easily by using Wondershare DVD Slideshow Builder Deluxe . It also provides some tips on how to burn photos to DVD.
Part 1: How to Burn Photos to DVD with Transition, Titles and Music
Wondershare DVD Slideshow Builder Deluxe can help you quickly create and burn photos to DVD. Download the free trial version this photo DVD maker first.

Step 1. Add Photo or Video Files
In Organize tab, simply click the “Add Files” button to open the browse window, find your files and import them into the program, you can drag and drop photos or videos to organize them on storyboard. Click the Expand button to get a larger viewer.

Step 2. Customize Photo Slideshow Transitions
Generally speaking, transition effects will be automatically inserted between every two photos/videos when you import the photos. But you can customize them by clicking the Personalize tab, then drag and drop a transition from the list to the thumbnail between two slides.
You are also able to add background music here: click the Music button and choose a music file from your computer.

Step 3. Choose DVD Menu
Now switch to Create tab to author a DVD menu from template and burn to DVD disc quickly:
- On the right hand side of the screen, double click on desired menu template to apply a DVD menu template.
- Click the Edit button under the preview windows to customize your DVD menu or right click on menu for more options.
- You can also make a professional DVD menu using dynamic DVD menu templates.
BTW, if you don’t want a DVD menu, just check the “Disable DVD Menu” option.

Step 4. Burn Photos to DVD Disc
Now click the Preview button beneath the preview window to make sure the photo DVD slideshow is exactly what you want. Go back to Personalize tab to change if necessary. After that, click “Burn” button to start burning your DVD slideshow to DVD.
You can also output photo slideshow to watch on Youtube, Mobile Phone, iPhone, PSP, etc. through options on the left. Below are the instructions to burn DVD for watch on TV:

- Insert a blank DVD disc, and do the following.
- Click “Burn to DVD”. Then specify the number of DVD copies. You can also choose to generate ISO Image files or DVD Folders.
- Make sure the PAL or NTSC TV Standard settings is right. If you don’t know which standard is used in your country, click the “Help” button. The wrong TV standard would cause playback incompatibility problem.
- Then click “Start” to burn DVD slideshow. If you have checked Create DVD Folder and/or Create DVD Image File options, the corresponding files will also be created to the specified folder.
Now sit back and relax, when burning complete, insert the created DVD disc into your DVD player to watch photo DVD slideshow on TV.
Learn more: User Guide of DVD Slideshow Builder Deluxe
Part 2: More Photo to DVD Tips
More about NTSC/PAL TV Standard
Nowadays, there are three video formats around the world. But each one is incompatible with others. For instance, NTSC is used in North America, Canada and Japan; while most of other regions PAL/SECAM. To apply TV Standard in DVD Slideshow Builder Deluxe , go to “Create“ -> Option tab and locate TV Standard option to select NTSC or PAL. If you are not sure which one to choose, please click “Help” button, select your country, then click “OK” , the program will choose the right TV standard for you.
Burn Photos to DVD/CD as Data Disc
If you only want to burn photo to DVD for backup and further use, you only need a burning photo to DVD software like ImgBurn (Free) or Nero (commercial). These software helps you burn all digital media files to DVD, of course you can burn photos to DVD for backup purpose. Notice that some photo DVD maker allows you burn slideshow as well as the original photos. This way, you turn photos to DVD slideshow with transition, and at the same time, backup photos to DVD for other uses.
Scan Photos to DVD - Digitize Photos
If you use traditional camera and have got loads of photos in album, you can scan photos to computer so that convert photo to digital format. Afterwards, you can get more from these digital photos, like backup photos to DVD, send to others as DVD gift, make a photo DVD show to play on TV, etc. All these could be done with your favorite photo DVD maker software. Now see how to transform your printed photos to digital first:
Select a good photo scanner -> Prepare your photos to scan -> Start photo scanning -> Adjust scanned photos
Scanning printed photos to computer is not an easy job. It needs patience and some tips and tricks. As you may know, some companies provide photo scanning service. For the Step 4, you can also adjust digital photos in your selected photo DVD maker. Anyway, you need to get your digital photos ready before you burn photos to DVD with transitions and music.
Shanoon Cox
Shanoon Cox is a writer and a lover of all things video.
Follow @Shanoon Cox
Shanoon Cox
Mar 27, 2024• Proven solutions
Photos are precious memories not only for you but also for your family members. As time goes on, the photos might fade out and be unable to retrieve. To avoid this, burn photos to DVD will be a great idea to preserve family memories eternally.
This article will show you how to burn photos to DVD Slideshow with transition, titles and music quickly and easily by using Wondershare DVD Slideshow Builder Deluxe . It also provides some tips on how to burn photos to DVD.
Part 1: How to Burn Photos to DVD with Transition, Titles and Music
Wondershare DVD Slideshow Builder Deluxe can help you quickly create and burn photos to DVD. Download the free trial version this photo DVD maker first.
Step 1. Add Photo or Video Files
In Organize tab, simply click the “Add Files” button to open the browse window, find your files and import them into the program, you can drag and drop photos or videos to organize them on storyboard. Click the Expand button to get a larger viewer.
Step 2. Customize Photo Slideshow Transitions
Generally speaking, transition effects will be automatically inserted between every two photos/videos when you import the photos. But you can customize them by clicking the Personalize tab, then drag and drop a transition from the list to the thumbnail between two slides.
You are also able to add background music here: click the Music button and choose a music file from your computer.
Step 3. Choose DVD Menu
Now switch to Create tab to author a DVD menu from template and burn to DVD disc quickly:
- On the right hand side of the screen, double click on desired menu template to apply a DVD menu template.
- Click the Edit button under the preview windows to customize your DVD menu or right click on menu for more options.
- You can also make a professional DVD menu using dynamic DVD menu templates.
BTW, if you don’t want a DVD menu, just check the “Disable DVD Menu” option.
Step 4. Burn Photos to DVD Disc
Now click the Preview button beneath the preview window to make sure the photo DVD slideshow is exactly what you want. Go back to Personalize tab to change if necessary. After that, click “Burn” button to start burning your DVD slideshow to DVD.
You can also output photo slideshow to watch on Youtube, Mobile Phone, iPhone, PSP, etc. through options on the left. Below are the instructions to burn DVD for watch on TV:
- Insert a blank DVD disc, and do the following.
- Click “Burn to DVD”. Then specify the number of DVD copies. You can also choose to generate ISO Image files or DVD Folders.
- Make sure the PAL or NTSC TV Standard settings is right. If you don’t know which standard is used in your country, click the “Help” button. The wrong TV standard would cause playback incompatibility problem.
- Then click “Start” to burn DVD slideshow. If you have checked Create DVD Folder and/or Create DVD Image File options, the corresponding files will also be created to the specified folder.
Now sit back and relax, when burning complete, insert the created DVD disc into your DVD player to watch photo DVD slideshow on TV.
Learn more: User Guide of DVD Slideshow Builder Deluxe
Part 2: More Photo to DVD Tips
More about NTSC/PAL TV Standard
Nowadays, there are three video formats around the world. But each one is incompatible with others. For instance, NTSC is used in North America, Canada and Japan; while most of other regions PAL/SECAM. To apply TV Standard in DVD Slideshow Builder Deluxe , go to “Create“ -> Option tab and locate TV Standard option to select NTSC or PAL. If you are not sure which one to choose, please click “Help” button, select your country, then click “OK” , the program will choose the right TV standard for you.
Burn Photos to DVD/CD as Data Disc
If you only want to burn photo to DVD for backup and further use, you only need a burning photo to DVD software like ImgBurn (Free) or Nero (commercial). These software helps you burn all digital media files to DVD, of course you can burn photos to DVD for backup purpose. Notice that some photo DVD maker allows you burn slideshow as well as the original photos. This way, you turn photos to DVD slideshow with transition, and at the same time, backup photos to DVD for other uses.
Scan Photos to DVD - Digitize Photos
If you use traditional camera and have got loads of photos in album, you can scan photos to computer so that convert photo to digital format. Afterwards, you can get more from these digital photos, like backup photos to DVD, send to others as DVD gift, make a photo DVD show to play on TV, etc. All these could be done with your favorite photo DVD maker software. Now see how to transform your printed photos to digital first:
Select a good photo scanner -> Prepare your photos to scan -> Start photo scanning -> Adjust scanned photos
Scanning printed photos to computer is not an easy job. It needs patience and some tips and tricks. As you may know, some companies provide photo scanning service. For the Step 4, you can also adjust digital photos in your selected photo DVD maker. Anyway, you need to get your digital photos ready before you burn photos to DVD with transitions and music.
Shanoon Cox
Shanoon Cox is a writer and a lover of all things video.
Follow @Shanoon Cox
Shanoon Cox
Mar 27, 2024• Proven solutions
Photos are precious memories not only for you but also for your family members. As time goes on, the photos might fade out and be unable to retrieve. To avoid this, burn photos to DVD will be a great idea to preserve family memories eternally.
This article will show you how to burn photos to DVD Slideshow with transition, titles and music quickly and easily by using Wondershare DVD Slideshow Builder Deluxe . It also provides some tips on how to burn photos to DVD.
Part 1: How to Burn Photos to DVD with Transition, Titles and Music
Wondershare DVD Slideshow Builder Deluxe can help you quickly create and burn photos to DVD. Download the free trial version this photo DVD maker first.
Step 1. Add Photo or Video Files
In Organize tab, simply click the “Add Files” button to open the browse window, find your files and import them into the program, you can drag and drop photos or videos to organize them on storyboard. Click the Expand button to get a larger viewer.

Step 2. Customize Photo Slideshow Transitions
Generally speaking, transition effects will be automatically inserted between every two photos/videos when you import the photos. But you can customize them by clicking the Personalize tab, then drag and drop a transition from the list to the thumbnail between two slides.
You are also able to add background music here: click the Music button and choose a music file from your computer.
Step 3. Choose DVD Menu
Now switch to Create tab to author a DVD menu from template and burn to DVD disc quickly:
- On the right hand side of the screen, double click on desired menu template to apply a DVD menu template.
- Click the Edit button under the preview windows to customize your DVD menu or right click on menu for more options.
- You can also make a professional DVD menu using dynamic DVD menu templates.
BTW, if you don’t want a DVD menu, just check the “Disable DVD Menu” option.
Step 4. Burn Photos to DVD Disc
Now click the Preview button beneath the preview window to make sure the photo DVD slideshow is exactly what you want. Go back to Personalize tab to change if necessary. After that, click “Burn” button to start burning your DVD slideshow to DVD.
You can also output photo slideshow to watch on Youtube, Mobile Phone, iPhone, PSP, etc. through options on the left. Below are the instructions to burn DVD for watch on TV:
- Insert a blank DVD disc, and do the following.
- Click “Burn to DVD”. Then specify the number of DVD copies. You can also choose to generate ISO Image files or DVD Folders.
- Make sure the PAL or NTSC TV Standard settings is right. If you don’t know which standard is used in your country, click the “Help” button. The wrong TV standard would cause playback incompatibility problem.
- Then click “Start” to burn DVD slideshow. If you have checked Create DVD Folder and/or Create DVD Image File options, the corresponding files will also be created to the specified folder.
Now sit back and relax, when burning complete, insert the created DVD disc into your DVD player to watch photo DVD slideshow on TV.
Learn more: User Guide of DVD Slideshow Builder Deluxe
Part 2: More Photo to DVD Tips
More about NTSC/PAL TV Standard
Nowadays, there are three video formats around the world. But each one is incompatible with others. For instance, NTSC is used in North America, Canada and Japan; while most of other regions PAL/SECAM. To apply TV Standard in DVD Slideshow Builder Deluxe , go to “Create“ -> Option tab and locate TV Standard option to select NTSC or PAL. If you are not sure which one to choose, please click “Help” button, select your country, then click “OK” , the program will choose the right TV standard for you.
Burn Photos to DVD/CD as Data Disc
If you only want to burn photo to DVD for backup and further use, you only need a burning photo to DVD software like ImgBurn (Free) or Nero (commercial). These software helps you burn all digital media files to DVD, of course you can burn photos to DVD for backup purpose. Notice that some photo DVD maker allows you burn slideshow as well as the original photos. This way, you turn photos to DVD slideshow with transition, and at the same time, backup photos to DVD for other uses.
Scan Photos to DVD - Digitize Photos
If you use traditional camera and have got loads of photos in album, you can scan photos to computer so that convert photo to digital format. Afterwards, you can get more from these digital photos, like backup photos to DVD, send to others as DVD gift, make a photo DVD show to play on TV, etc. All these could be done with your favorite photo DVD maker software. Now see how to transform your printed photos to digital first:
Select a good photo scanner -> Prepare your photos to scan -> Start photo scanning -> Adjust scanned photos
Scanning printed photos to computer is not an easy job. It needs patience and some tips and tricks. As you may know, some companies provide photo scanning service. For the Step 4, you can also adjust digital photos in your selected photo DVD maker. Anyway, you need to get your digital photos ready before you burn photos to DVD with transitions and music.
Shanoon Cox
Shanoon Cox is a writer and a lover of all things video.
Follow @Shanoon Cox
Top 10 Best Free Manga Sites to Read Online
Top 10 Best Free Manga Sites to Read Online

Ollie Mattison
Mar 27, 2024• Proven solutions


a
Comic books, also known as manga in Japanese, have been an important part of the country’s culture for a long time. Manga is one of the most popular forms of entertainment throughout the world. You won’t find anything like Japanese manga anywhere else in the world in terms of its unique graphics and stories. Manga is popular both in Japan and all over the world due to the very same reasons.
If you are a manga fan and would like to read manga online, you can find many websites that offer the latest manga editions and are free to access. However, there are few places in the world where you can buy these comic book series. To read their favorite manga series at any time, people often search online for free manga sites to read free of charge.
In this article, we will share a list of the 12 best free manga sites where you can easily read your favorite comic books.
1. MangaFox
MangaFox is among the best and most popular manga sites. The website was launched in 2008. Manga fans will find a vast collection of old and new series on this site. You can use MangaFox for free. It is very easy to use and has a very simple user interface. Additionally, when reading manga, users won’t see advertisements.

Features:
- It is not necessary to sign up or register in order to access the comics. All you have to do is browse the site and start reading.
- The site has millions of users and is one of the most popular sites for comics.
- Reading on the go is possible. Mobile users can browse the website from their smartphones and continue reading on the go.
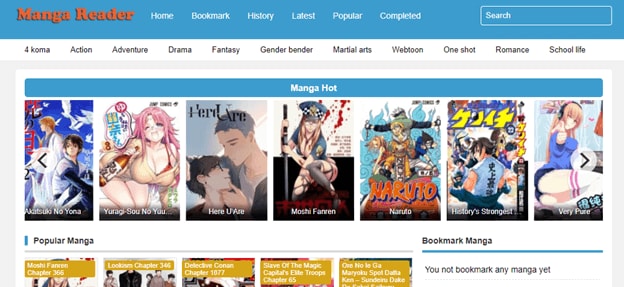
2. MangaReader
Mangaareader is another best and most popular manga website. There are no charges for using the platform. There are a good number of manga collections on Mangaareader. Among other genres, it allows users to read manga without worrying about adventure, action, or fantasy. Using this platform may, however, result in sponsored advertisements.
It is very nice to see the website in such a light green color. Simple, user-friendly, and intuitive user interface. Popular manga updates and the latest manga updates can be found on the homepage. On the right side, you can also find old manga series.
Features:
- As of now, it is the best website to read free manga online. You will also find the newest editions and comics.
- Getting your favorite comics is easy because there’s no need to register.
- All comics are free to download. Thus, it enjoys international popularity as well.
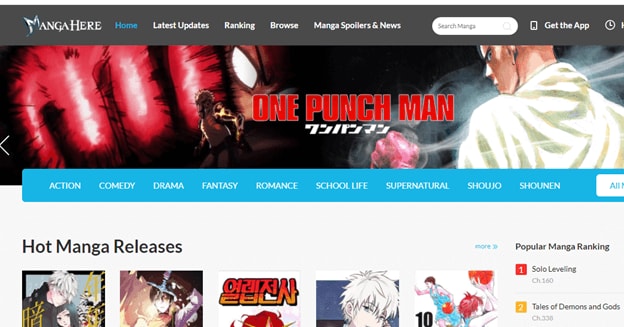
3. MangaHere
MangaHere is another excellent manga site on the Internet. With a wide range of manga in different genres like romantic comedies, girls, drama, school life, teens, action, fantasy, and staining, it has it all. In addition to manga news, MangaHere provides leaked manga. New manga episodes or series are regularly added to this website by the administrators.
As with other manga websites, the interface of MangaHere looks quite similar. A section featuring manga news, hot manga releases, and the latest updates can be found on the homepage.
Features:
- This site provides the latest spoilers and news on manga.
- Manga stories for adults are available in a massive collection. Those seeking this type of content will find it here.
- This website is accessible from a smartphone. The website supports all types of OS.
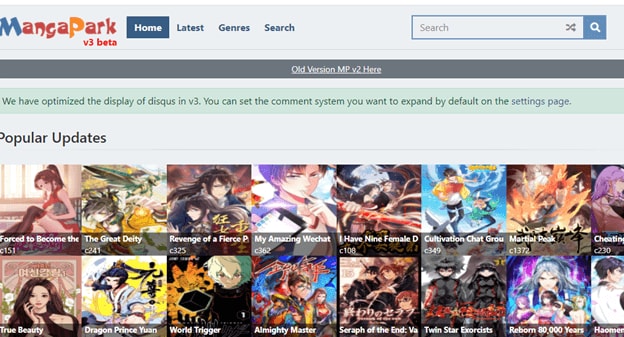
4. MangaPark
There’s no shortage of free comic books online at Manga Park. This website also offers almost all types of comics. Comics include action, school life, romance, horror, thrillers, comedy, drama, and more types of comics. Each comic is categorized properly, including letters, number of views, ratings, and the latest comic.
Features:
- In a clear grid pattern, MangaPark presents all popular comic books and the most recent comic releases.
- Your favorite comics and themes can be marked as favorites with a free account.
- You can view all the previous comics chapters by clicking on the history button.
- Find out which is the best website for reading manga.
- There is no need to register or sign up.
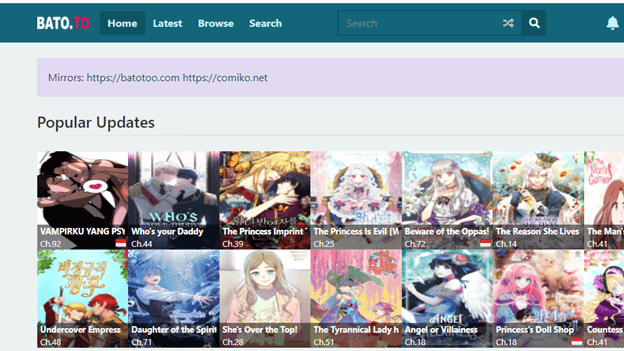
5. BATO.TO
A bit more fancy and appealing than Manga Reader, BATO features a different interface. Manga Comics can be found here, including romance, action, sports, sci-fi, and other genres. The website Bato.to is popular, and it is not subject to sudden downtime like many other manga sites. You can upload manga to this open-source website and help improve the collection.
Features:
- There’s much Manga on Bato.to, and there’s a great community for you to interact with.
- Despite its unorganized nature, the website still accomplishes its objective.
- This website offers a variety of free manga for you to read.
- Additionally, there is a section for recent releases and updates.
- It lets you narrow your search using advanced filters.
- There are four types of filters: style, demographics, status, and genre.
6. Manga Kakalot
There is a website called MangaKakalot that offers a clearer and more sophisticated user experience. To access the most entertaining manga comic collection online, visitors must first create a free account on the website. With high-quality images and an updated collection that is constantly updated, you’ll always find the most recent issues. Visitors will find it very easy to search the series on this website because it is well laid out.
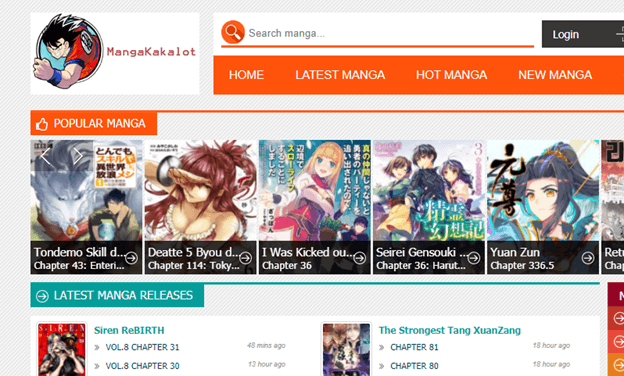
Features:
- Manga’s homepage has links to its latest version.
- There are all types of manga available, from action comics to mystery, mystery and romance manga.
- Also, the manga series are listed alphabetically, along with their completion status.
- It is possible to read manga on Mangakalot.
- All Comics on the homepage are displayed in a grid pattern, and the site has a simple and minimalistic look.
- Reading manga online is best at this site.
7. Otakusmash.com
Because of the easy navigation interface and the extensive collection of Manga collections on this site, we have included it in our list of best manga sites. You can browse Top 100 Action Adventure Manga, Top 50 Sports Manga, Top 50 Romantic Manga, and more on this website.
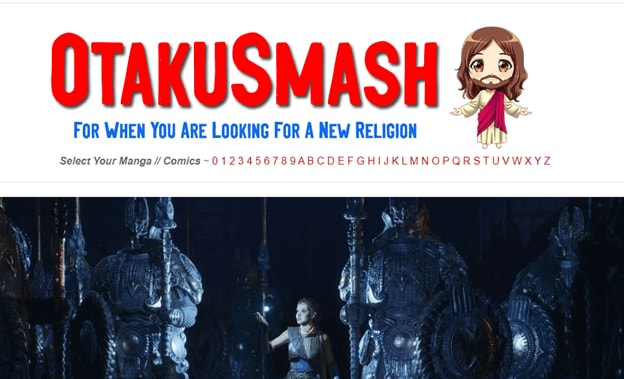
Features:
- The site is quite easy to navigate.
- You can also find online comics and download anime besides reading manga on the website.
- You can also download anime wallpapers from this website.
- You can find anime news, new mangas, and wishlist on the right section of the website.
8. Mngdoom.com
A site that can certainly be considered one of the best manga sites is Manga Doom. With new comics and chapters added every hour, it has a huge database and keeps growing in popularity. This website does not charge for the back-end work or for sharing premium content. While it does contain advertisements, they are not intrusive or creepy as those on other sites.

Features:
- The Manga Doom interface is simple, and it has a search bar at the top, which allows you to find manga without any hassles easily.
- Using this platform will allow you to meet people with similar interests all over the world.
- Overall you can find plenty of good mangas on this website.
- The library of mangas keeps growing every day so you won’t get bored.
9. Manga Freak
A good number of audiences find it useful and enjoy it, despite the advertisements. There is a huge database of comics on Manga Freak. Manga Freak is unique in that it is updated far more frequently than other dead websites. New content is consistently posted on this manga website. The content on this site can be read and accessed for free
Features:
- The website has a dark theme that gives it a very calm look.
- Although you see some annoying ads still it is worth reading.
- There is a huge library of mangas available on this website.
- You can also search for your desired mangas using the search bar on the top left side.
10. Comixology.com
Our next platform is Comixology. Amazon assists Comixology in its operations. Marvel Comics, DCU, Manga, and other digital comics are available here. Coximology, therefore, has a diverse comic book collection. The other great feature of this website is that they host every graphic novel in their library in English. The prices for comics and manga on Comixology are incredibly reasonable. You can also find many free comics on websites for which you don’t need to pay anything. Sadly, they do not have any options for renting. The website is also incredibly easy to navigate and looks very premium. We rate this manga site among the top on our list today.
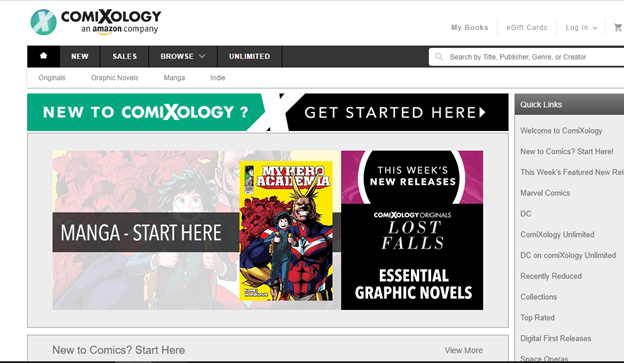
Features:
- Supported by Amazon.
- Offers a diverse range of comics and mangas.
- Clean website layout.
- Easy to access and use.
Final Verdict
So, in this article, we shared a detailed list of the best free manga sites where you can read mangas online. All these websites are very popular among manga fans, and if you are a manga lover, you will have an amazing experience on these websites.
Ollie Mattison
Ollie Mattison is a writer and a lover of all things video.
Follow @Ollie Mattison
Ollie Mattison
Mar 27, 2024• Proven solutions
a
Comic books, also known as manga in Japanese, have been an important part of the country’s culture for a long time. Manga is one of the most popular forms of entertainment throughout the world. You won’t find anything like Japanese manga anywhere else in the world in terms of its unique graphics and stories. Manga is popular both in Japan and all over the world due to the very same reasons.
If you are a manga fan and would like to read manga online, you can find many websites that offer the latest manga editions and are free to access. However, there are few places in the world where you can buy these comic book series. To read their favorite manga series at any time, people often search online for free manga sites to read free of charge.
In this article, we will share a list of the 12 best free manga sites where you can easily read your favorite comic books.
1. MangaFox
MangaFox is among the best and most popular manga sites. The website was launched in 2008. Manga fans will find a vast collection of old and new series on this site. You can use MangaFox for free. It is very easy to use and has a very simple user interface. Additionally, when reading manga, users won’t see advertisements.
Features:
- It is not necessary to sign up or register in order to access the comics. All you have to do is browse the site and start reading.
- The site has millions of users and is one of the most popular sites for comics.
- Reading on the go is possible. Mobile users can browse the website from their smartphones and continue reading on the go.
2. MangaReader
Mangaareader is another best and most popular manga website. There are no charges for using the platform. There are a good number of manga collections on Mangaareader. Among other genres, it allows users to read manga without worrying about adventure, action, or fantasy. Using this platform may, however, result in sponsored advertisements.
It is very nice to see the website in such a light green color. Simple, user-friendly, and intuitive user interface. Popular manga updates and the latest manga updates can be found on the homepage. On the right side, you can also find old manga series.
Features:
- As of now, it is the best website to read free manga online. You will also find the newest editions and comics.
- Getting your favorite comics is easy because there’s no need to register.
- All comics are free to download. Thus, it enjoys international popularity as well.
3. MangaHere
MangaHere is another excellent manga site on the Internet. With a wide range of manga in different genres like romantic comedies, girls, drama, school life, teens, action, fantasy, and staining, it has it all. In addition to manga news, MangaHere provides leaked manga. New manga episodes or series are regularly added to this website by the administrators.
As with other manga websites, the interface of MangaHere looks quite similar. A section featuring manga news, hot manga releases, and the latest updates can be found on the homepage.
Features:
- This site provides the latest spoilers and news on manga.
- Manga stories for adults are available in a massive collection. Those seeking this type of content will find it here.
- This website is accessible from a smartphone. The website supports all types of OS.
4. MangaPark
There’s no shortage of free comic books online at Manga Park. This website also offers almost all types of comics. Comics include action, school life, romance, horror, thrillers, comedy, drama, and more types of comics. Each comic is categorized properly, including letters, number of views, ratings, and the latest comic.
Features:
- In a clear grid pattern, MangaPark presents all popular comic books and the most recent comic releases.
- Your favorite comics and themes can be marked as favorites with a free account.
- You can view all the previous comics chapters by clicking on the history button.
- Find out which is the best website for reading manga.
- There is no need to register or sign up.
5. BATO.TO
A bit more fancy and appealing than Manga Reader, BATO features a different interface. Manga Comics can be found here, including romance, action, sports, sci-fi, and other genres. The website Bato.to is popular, and it is not subject to sudden downtime like many other manga sites. You can upload manga to this open-source website and help improve the collection.
Features:
- There’s much Manga on Bato.to, and there’s a great community for you to interact with.
- Despite its unorganized nature, the website still accomplishes its objective.
- This website offers a variety of free manga for you to read.
- Additionally, there is a section for recent releases and updates.
- It lets you narrow your search using advanced filters.
- There are four types of filters: style, demographics, status, and genre.
6. Manga Kakalot
There is a website called MangaKakalot that offers a clearer and more sophisticated user experience. To access the most entertaining manga comic collection online, visitors must first create a free account on the website. With high-quality images and an updated collection that is constantly updated, you’ll always find the most recent issues. Visitors will find it very easy to search the series on this website because it is well laid out.
Features:
- Manga’s homepage has links to its latest version.
- There are all types of manga available, from action comics to mystery, mystery and romance manga.
- Also, the manga series are listed alphabetically, along with their completion status.
- It is possible to read manga on Mangakalot.
- All Comics on the homepage are displayed in a grid pattern, and the site has a simple and minimalistic look.
- Reading manga online is best at this site.
7. Otakusmash.com
Because of the easy navigation interface and the extensive collection of Manga collections on this site, we have included it in our list of best manga sites. You can browse Top 100 Action Adventure Manga, Top 50 Sports Manga, Top 50 Romantic Manga, and more on this website.
Features:
- The site is quite easy to navigate.
- You can also find online comics and download anime besides reading manga on the website.
- You can also download anime wallpapers from this website.
- You can find anime news, new mangas, and wishlist on the right section of the website.
8. Mngdoom.com
A site that can certainly be considered one of the best manga sites is Manga Doom. With new comics and chapters added every hour, it has a huge database and keeps growing in popularity. This website does not charge for the back-end work or for sharing premium content. While it does contain advertisements, they are not intrusive or creepy as those on other sites.
Features:
- The Manga Doom interface is simple, and it has a search bar at the top, which allows you to find manga without any hassles easily.
- Using this platform will allow you to meet people with similar interests all over the world.
- Overall you can find plenty of good mangas on this website.
- The library of mangas keeps growing every day so you won’t get bored.
9. Manga Freak
A good number of audiences find it useful and enjoy it, despite the advertisements. There is a huge database of comics on Manga Freak. Manga Freak is unique in that it is updated far more frequently than other dead websites. New content is consistently posted on this manga website. The content on this site can be read and accessed for free
Features:
- The website has a dark theme that gives it a very calm look.
- Although you see some annoying ads still it is worth reading.
- There is a huge library of mangas available on this website.
- You can also search for your desired mangas using the search bar on the top left side.
10. Comixology.com
Our next platform is Comixology. Amazon assists Comixology in its operations. Marvel Comics, DCU, Manga, and other digital comics are available here. Coximology, therefore, has a diverse comic book collection. The other great feature of this website is that they host every graphic novel in their library in English. The prices for comics and manga on Comixology are incredibly reasonable. You can also find many free comics on websites for which you don’t need to pay anything. Sadly, they do not have any options for renting. The website is also incredibly easy to navigate and looks very premium. We rate this manga site among the top on our list today.
Features:
- Supported by Amazon.
- Offers a diverse range of comics and mangas.
- Clean website layout.
- Easy to access and use.
Final Verdict
So, in this article, we shared a detailed list of the best free manga sites where you can read mangas online. All these websites are very popular among manga fans, and if you are a manga lover, you will have an amazing experience on these websites.
Ollie Mattison
Ollie Mattison is a writer and a lover of all things video.
Follow @Ollie Mattison
How to Make a iMovie Photo Slideshow with Music? [IMovie Tutorial]
How to Make a iMovie Photo Slideshow with Music? [iMovie Tutorial]
Shanoon Cox
Mar 27, 2024• Proven solutions
Makings a slideshow is a great way to share photos and videos with friends and families. The good news is that you can totally make a slideshow on Mac for free with iMovie. iMovie is the pre-installed program coming with every new Mac. It provides a simple yet professional way to make slideshow movies from your photos, videos, and music.
If you haven’t iMovie installed on your Mac yet, just go to iTunes and download it for free. In the following part, I’ll share with you the step-by-step tutorial on how to make a slideshow on Mac using the free video editing software iMovie.
If you are an iOS user, check our picks of best photo slideshow apps for iPhone or iPad.
Ways for iMovie Photo Slideshow with Music Making
To make a photo slideshow with music in iMovie, you can follow these steps.
1. Create a New Project
After launching iMovie, click the Project button and then click Create New. Select Movie to combine photos, videos and music to make a slideshow.

2. Import Photos, Videos, and Audio Files
Now go to the My Media tab and click the Import icon to add your photos, videos, and music to iMovie, in this way, you can import any media files from any location on your Mac. But if you have arranged all your videos, photos, and music tracks in the Photos app, you can just switch to Photos under the Libraries tab on the left to import.

3. Arrange Media in Timeline and Adjust
Now, it’s time to place all these photos and videos in the timeline in order and do some adjustments. You can use the Magic Wand tool to improve the photo quality automatically, do some color correction, or add a filter to the photo. If you preview the video clip, you will see more options that allow you to do more editing, such as changing speed.
4. Apply Transitions & Effects
Transitions and effects will help you to create a slideshow in a more professional way. Some transitions such as cross dissolve, fade and cross blur are very popular in the slideshow, but remember don’t use lots of different transitions in one slideshow since too many transitions will distract the viewer’s attention. To apply a transition in the slideshow, just drag and drop it between two photos in the timeline.

5. Add Titles and Text
Using some opener titles and credits at the beginning and ending part of your slideshow will make it cool as well. You can add some famous quotes and words to better demonstrate.
Just to the Titles tab and select one of the title templates and drop it to the timeline first and then write your own words in the preview window.

6. Add Music to Slideshow
You can download some royalty-free music and sound effects from websites such as Filmstock stock media library or iTunes or import your own audio as we said before to use it as the slideshow background music. To sync with the slideshow, you may need to trim and edit the audio accordingly. For detailed information about iMovie audio editing, you can check how to add background music to iMovie.
Filmstock Stock Media Library ](https://tools.techidaily.com/wondershare/filmora/download/ )
7. Export and Share Your Slideshow video
Play the slideshow and check the result in the preview window. If everything goes well, you can now export and share or save it. You can save the slideshow video in MP4 format, or share it to Vimeo or add the slideshow to Theater to load it on your other Apple devices so you can easily watch it on your iOS devices or Apple TV.
I hope the above tutorial about how to make a slideshow on iMovie will be helpful for your stunning slideshow creation.
If you’re running an old macOS version and having iPhoto installed on your Mac, here are the detailed steps about How to make slideshow in iMovie with iPhoto project.
Step 1. Import Photos from the iPhoto Library
iMovie works seamlessly with iPhoto. You are suggested to drag and drop photos from iPhoto to the iMovie project. If no library exists in iPhoto, create one and import photos to iPhoto first. To add videos, you could go to either “File/Import” or Event Library, and then drag and drop selected videos to the timeline.
After photos and videos are imported to the iMovie slideshow project, you can preview the raw slideshow simply by pressing Space bar on your keyboard. And then make adjustments to clips and transitions. For example, mouse over one clip or “double arrow” button and click on the settings icon, then you could access clip adjustment, video adjustment, transition adjustment, etc.

Step 2. Add Music to Your iMovie Slideshow Project
Music sets the tone of your slideshow. Adding musing to the iMovie slideshow is just as simple as adding photos and videos.
So click the audio icon in the bottom right corner, and drag and drop the desired audio file to the timeline. Multiple songs could be added to iMovie.
However, iMovie doesn’t support multiple soundtracks. If necessary, you need to combine multiple song tracks with an external audio editor before importing them to the iMovie slideshow. You can also apply audio effects and filter sound using an equalizer.

Step 3. Export Your iMovie Slideshow Video
iMovie makes sharing possibilities endless. For those who upload their videos online, iMovie allows users to directly upload to MobileMe Gallery, YouTube, Facebook, Vimeo, CNN iReport, etc.
If you select to share the iMovie slideshow using Media Browser, you will get a slideshow appeared in other Mac applications like iWeb. It’s a good idea to export the iMovie slideshow to iTunes so that you can play back slideshow quickly and easily sync with your mobile devices like iPhone, iPod, and iPad.

You may also like: How to Add Text with iMovie in Mac and iPhone >>
Recommendation: Create Slideshow on Mac with More Templates and Transitions with Filmora
If you want to make a slideshow with some templates on Mac, you can try Wondershare Filmora . Filmora can turn photos and videos into attractive slideshow videos with various inbuilt filters, transitions, elements, animations, effects, and overlays. Click the Free Download button and have a try.
Check the ultimate guide about making a slideshow with music and titles in Filmora .
If you are going to make a slideshow with music on Windows, you may need a slideshow-making tool to do it by yourself. Wondershare Filmora will also be a good choice. It helps you instantly make such an impressive slideshow from photos and videos for sharing virtually anywhere.
Shanoon Cox
Shanoon Cox is a writer and a lover of all things video.
Follow @Shanoon Cox
Shanoon Cox
Mar 27, 2024• Proven solutions
Makings a slideshow is a great way to share photos and videos with friends and families. The good news is that you can totally make a slideshow on Mac for free with iMovie. iMovie is the pre-installed program coming with every new Mac. It provides a simple yet professional way to make slideshow movies from your photos, videos, and music.
If you haven’t iMovie installed on your Mac yet, just go to iTunes and download it for free. In the following part, I’ll share with you the step-by-step tutorial on how to make a slideshow on Mac using the free video editing software iMovie.
If you are an iOS user, check our picks of best photo slideshow apps for iPhone or iPad.
Ways for iMovie Photo Slideshow with Music Making
To make a photo slideshow with music in iMovie, you can follow these steps.
1. Create a New Project
After launching iMovie, click the Project button and then click Create New. Select Movie to combine photos, videos and music to make a slideshow.
2. Import Photos, Videos, and Audio Files
Now go to the My Media tab and click the Import icon to add your photos, videos, and music to iMovie, in this way, you can import any media files from any location on your Mac. But if you have arranged all your videos, photos, and music tracks in the Photos app, you can just switch to Photos under the Libraries tab on the left to import.
3. Arrange Media in Timeline and Adjust
Now, it’s time to place all these photos and videos in the timeline in order and do some adjustments. You can use the Magic Wand tool to improve the photo quality automatically, do some color correction, or add a filter to the photo. If you preview the video clip, you will see more options that allow you to do more editing, such as changing speed.
4. Apply Transitions & Effects
Transitions and effects will help you to create a slideshow in a more professional way. Some transitions such as cross dissolve, fade and cross blur are very popular in the slideshow, but remember don’t use lots of different transitions in one slideshow since too many transitions will distract the viewer’s attention. To apply a transition in the slideshow, just drag and drop it between two photos in the timeline.
5. Add Titles and Text
Using some opener titles and credits at the beginning and ending part of your slideshow will make it cool as well. You can add some famous quotes and words to better demonstrate.
Just to the Titles tab and select one of the title templates and drop it to the timeline first and then write your own words in the preview window.
6. Add Music to Slideshow
You can download some royalty-free music and sound effects from websites such as Filmstock stock media library or iTunes or import your own audio as we said before to use it as the slideshow background music. To sync with the slideshow, you may need to trim and edit the audio accordingly. For detailed information about iMovie audio editing, you can check how to add background music to iMovie.
Filmstock Stock Media Library ](https://tools.techidaily.com/wondershare/filmora/download/ )
7. Export and Share Your Slideshow video
Play the slideshow and check the result in the preview window. If everything goes well, you can now export and share or save it. You can save the slideshow video in MP4 format, or share it to Vimeo or add the slideshow to Theater to load it on your other Apple devices so you can easily watch it on your iOS devices or Apple TV.
I hope the above tutorial about how to make a slideshow on iMovie will be helpful for your stunning slideshow creation.
If you’re running an old macOS version and having iPhoto installed on your Mac, here are the detailed steps about How to make slideshow in iMovie with iPhoto project.
Step 1. Import Photos from the iPhoto Library
iMovie works seamlessly with iPhoto. You are suggested to drag and drop photos from iPhoto to the iMovie project. If no library exists in iPhoto, create one and import photos to iPhoto first. To add videos, you could go to either “File/Import” or Event Library, and then drag and drop selected videos to the timeline.
After photos and videos are imported to the iMovie slideshow project, you can preview the raw slideshow simply by pressing Space bar on your keyboard. And then make adjustments to clips and transitions. For example, mouse over one clip or “double arrow” button and click on the settings icon, then you could access clip adjustment, video adjustment, transition adjustment, etc.
Step 2. Add Music to Your iMovie Slideshow Project
Music sets the tone of your slideshow. Adding musing to the iMovie slideshow is just as simple as adding photos and videos.
So click the audio icon in the bottom right corner, and drag and drop the desired audio file to the timeline. Multiple songs could be added to iMovie.
However, iMovie doesn’t support multiple soundtracks. If necessary, you need to combine multiple song tracks with an external audio editor before importing them to the iMovie slideshow. You can also apply audio effects and filter sound using an equalizer.
Step 3. Export Your iMovie Slideshow Video
iMovie makes sharing possibilities endless. For those who upload their videos online, iMovie allows users to directly upload to MobileMe Gallery, YouTube, Facebook, Vimeo, CNN iReport, etc.
If you select to share the iMovie slideshow using Media Browser, you will get a slideshow appeared in other Mac applications like iWeb. It’s a good idea to export the iMovie slideshow to iTunes so that you can play back slideshow quickly and easily sync with your mobile devices like iPhone, iPod, and iPad.
You may also like: How to Add Text with iMovie in Mac and iPhone >>
Recommendation: Create Slideshow on Mac with More Templates and Transitions with Filmora
If you want to make a slideshow with some templates on Mac, you can try Wondershare Filmora . Filmora can turn photos and videos into attractive slideshow videos with various inbuilt filters, transitions, elements, animations, effects, and overlays. Click the Free Download button and have a try.
Check the ultimate guide about making a slideshow with music and titles in Filmora .
If you are going to make a slideshow with music on Windows, you may need a slideshow-making tool to do it by yourself. Wondershare Filmora will also be a good choice. It helps you instantly make such an impressive slideshow from photos and videos for sharing virtually anywhere.
Shanoon Cox
Shanoon Cox is a writer and a lover of all things video.
Follow @Shanoon Cox
10 Best Memes Right Now (Include Image/ GIF/Video)
10 Trending Memes In 2024 Right Now (Include Image/ GIF/Video)
Ollie Mattison
Mar 27, 2024• Proven solutions
With several popular memes doing rounds on the Internet this year, 2019 can be said the “best memes year”. The memes are the latest things that speak louder than any other words. You get just 140 characters on Twitter which might not be enough for what you wish to post but, a powerful meme with a strong caption can do what any simple words cannot do. This is what each of the people is doing today.
When the meme is just released and hot like fire, each one of you wishes to use it. Below are by far the 10 best memes that you would definitely like to check out. Let’s laugh and have fun, forgetting all the stress of life.
Part 1: 10 Best Memes In 2024
1. Steven Crowder’s “Change My Mind” Campus Sign
The conservative podcaster Steven Crowder tweeted an image on 16th February 2018 which went on to become one of the funniest memes of 2018. It had Crowder’s photograph behind a table poster that read “Male Privilege is a myth / Change My Mind”. The image had a backdrop of the Texas Christian University and he tweeted it with a caption, “Hello @TCU. Come one come all. #ChangeMyMind.”
The image was tweeted as part of Crowder’s YouTube and podcast promotions where various viewpoints of Crowder are opposed by the people and they convince him of these issues. This post garnered around 6400 likes and 900 retweets in just 4 days.
2. Gru’s Plan
When Despicable Me was released on July 9, 2010, Gru, the protagonist in the film shows a presentation of stealing a moon and notice a drawing of himself where he is sitting on the toilet in between the pages of the presentation.
The memes of this comic show a startling presentation with a 3rd page, where the panel of Gru looks back at the board in complete bewilderment. FieldMarshalSixDans, a Redditor used screencaps from the film and posted a four-panel version meme which was re-posted. It reaped about 250 comments and above 18000 votes in 1 day.
3. American Chopper Argument
In the year 2009, the YouTube channel Shemrock Nursery Rhymes created a meme of the nursery rhymes Johny Johny Yes Papa. This rhyme is a popular one featured under animated amateur music video. It shows a small boy who tries to steal sugar and confronted by his father for not taking permission.
In July 2009, Shemrock YouTube channel created best memes for this video by using the clips of Johny Johny and used the audio of another nursery rhymes Twinkle Twinkle which collected over 2.9 million views in the first 6 years of its posting.
4. Who Killed Hannibal?
It is a skit from the Eric Andre Show, also known as Eric Andre Shooting Hannibal Buress where Eric Andre, the host of the show can be seen shooting a gun multiple times and asking on camera Who Killed Hannibal?
It was actually a joke during the Season 2, episode 6 of The Eric Andre Show. It turned out to be the best memes of this year when the famous dialogue “Who Killed Hannibal” was replaced by “Why would X do this?” in a variety of expressive template.

5. Walmart Yodel Boy
The Walmart Yodel Boy is a video that was filmed in a Walmart on 24th March 2018. It was the video of the 12-year-old child artist, Mason Ramsay singing “Lovesick Blues”. He is better known for Hank Williams impressions. This video from the concert was uploaded from a YouTube account named ViralHog. This song started being remixed with several other captions and went viral in no time and is considered one of the best memes of this year.
6. Is this a pigeon?
A shot from the anime series “The Brave Fighter of Sun Fighbird” had a scene in episode 3 of season 1 where professor Hiroshi Amano creates a human android, Yutaro Katori. While explaining mother Nature, Yutaro Katori thinks a butterfly to be a pigeon. One of the best memes is created when the reaction of this scene with the quote is used widely to show a confused expression on Tumblr.
7. LeBron James’s NBA Finals Reaction
This is a video during the NBA finals when J.R.Smith, a player from Cleveland Cavaliers kept dribbling in the last 5 important seconds of the game against the Golden State Warriors and the time ran out. This is when Smith’s teammate Lebron James showed his utter disappointment and pointed out his mistake by stretching out his arms.
The reaction from James became the best memes of this year. As soon as the game was over, Lebron James’ reaction with caption started doing rounds on the Twitter that emoted disappointment and frustration. It garnered 29000 likes and 8800 retweets.
8. Tired Spongebob
Tired Spongebob is the lead character of the Spongebob Squarepants which used to air in the year 1999 and was from Episode 1. It is a still image of Spongebob where it appears to be out of breath and naked. Twitter has made this image popular by using it for showing exhaustion.

9. Tide Pods
Tide Pods is one of the best memes that shows how tide pods are compared to bleach drinking in the memes. When Procter Gamble launched its new product tide pods laundary detergent in 2012 it appeared like some flavored fruit snack due to its packaging.
Unfortunately, the attractive packaging of these laundry detergent capsules led to children consuming it and increasing calls to the poison control center. So, the Tide Pod eating memes are used to mock and compare it with the poisonous food and drinks in the online circuit.
10. Green M&M Bambi Copypasta
While a Tumblr post comment and response the Green M&M Bambi Copypasta was used and went on to be amongst the top 10 best memes of the year so far. Here the person role-plays the character of the Green M&M and demands a game named Bambi from the Gamestop on Play Station 2.
The aggressive character and dominating tone of the post have stirred several variations. The Green M&M role plays in the similar demanding tone of the character started doing the rounds on the online platform since then.
Or you may want to make a trending meme, like red glowing eye, please read this article: How to create a red glowing eyes effect in videos?
Part 2: Recommended Tool to Make Memes
The newest addition in the Filmora family is the Filmora Online Meme Maker that lets you create funny and best memes completely free. It is being widely used by all the meme lovers and is packed with some of the best features. GIF, image and video memes are all supported to make.
From adding texts with the use of both internal and external sources to adjusting size and color, the Filmora Online Meme Maker comes with an intuitive interface, several video effects, and a range of editing tools. It is easy to use and an amazing tool for creating the best meme. It also lets you import video from YouTube and Vimeo and there are no watermarks even when used free. Try it now!
Ollie Mattison
Ollie Mattison is a writer and a lover of all things video.
Follow @Ollie Mattison
Ollie Mattison
Mar 27, 2024• Proven solutions
With several popular memes doing rounds on the Internet this year, 2019 can be said the “best memes year”. The memes are the latest things that speak louder than any other words. You get just 140 characters on Twitter which might not be enough for what you wish to post but, a powerful meme with a strong caption can do what any simple words cannot do. This is what each of the people is doing today.
When the meme is just released and hot like fire, each one of you wishes to use it. Below are by far the 10 best memes that you would definitely like to check out. Let’s laugh and have fun, forgetting all the stress of life.
Part 1: 10 Best Memes In 2024
1. Steven Crowder’s “Change My Mind” Campus Sign
The conservative podcaster Steven Crowder tweeted an image on 16th February 2018 which went on to become one of the funniest memes of 2018. It had Crowder’s photograph behind a table poster that read “Male Privilege is a myth / Change My Mind”. The image had a backdrop of the Texas Christian University and he tweeted it with a caption, “Hello @TCU. Come one come all. #ChangeMyMind.”
The image was tweeted as part of Crowder’s YouTube and podcast promotions where various viewpoints of Crowder are opposed by the people and they convince him of these issues. This post garnered around 6400 likes and 900 retweets in just 4 days.
2. Gru’s Plan
When Despicable Me was released on July 9, 2010, Gru, the protagonist in the film shows a presentation of stealing a moon and notice a drawing of himself where he is sitting on the toilet in between the pages of the presentation.
The memes of this comic show a startling presentation with a 3rd page, where the panel of Gru looks back at the board in complete bewilderment. FieldMarshalSixDans, a Redditor used screencaps from the film and posted a four-panel version meme which was re-posted. It reaped about 250 comments and above 18000 votes in 1 day.
3. American Chopper Argument
In the year 2009, the YouTube channel Shemrock Nursery Rhymes created a meme of the nursery rhymes Johny Johny Yes Papa. This rhyme is a popular one featured under animated amateur music video. It shows a small boy who tries to steal sugar and confronted by his father for not taking permission.
In July 2009, Shemrock YouTube channel created best memes for this video by using the clips of Johny Johny and used the audio of another nursery rhymes Twinkle Twinkle which collected over 2.9 million views in the first 6 years of its posting.
4. Who Killed Hannibal?
It is a skit from the Eric Andre Show, also known as Eric Andre Shooting Hannibal Buress where Eric Andre, the host of the show can be seen shooting a gun multiple times and asking on camera Who Killed Hannibal?
It was actually a joke during the Season 2, episode 6 of The Eric Andre Show. It turned out to be the best memes of this year when the famous dialogue “Who Killed Hannibal” was replaced by “Why would X do this?” in a variety of expressive template.
5. Walmart Yodel Boy
The Walmart Yodel Boy is a video that was filmed in a Walmart on 24th March 2018. It was the video of the 12-year-old child artist, Mason Ramsay singing “Lovesick Blues”. He is better known for Hank Williams impressions. This video from the concert was uploaded from a YouTube account named ViralHog. This song started being remixed with several other captions and went viral in no time and is considered one of the best memes of this year.
6. Is this a pigeon?
A shot from the anime series “The Brave Fighter of Sun Fighbird” had a scene in episode 3 of season 1 where professor Hiroshi Amano creates a human android, Yutaro Katori. While explaining mother Nature, Yutaro Katori thinks a butterfly to be a pigeon. One of the best memes is created when the reaction of this scene with the quote is used widely to show a confused expression on Tumblr.
7. LeBron James’s NBA Finals Reaction
This is a video during the NBA finals when J.R.Smith, a player from Cleveland Cavaliers kept dribbling in the last 5 important seconds of the game against the Golden State Warriors and the time ran out. This is when Smith’s teammate Lebron James showed his utter disappointment and pointed out his mistake by stretching out his arms.
The reaction from James became the best memes of this year. As soon as the game was over, Lebron James’ reaction with caption started doing rounds on the Twitter that emoted disappointment and frustration. It garnered 29000 likes and 8800 retweets.
8. Tired Spongebob
Tired Spongebob is the lead character of the Spongebob Squarepants which used to air in the year 1999 and was from Episode 1. It is a still image of Spongebob where it appears to be out of breath and naked. Twitter has made this image popular by using it for showing exhaustion.
9. Tide Pods
Tide Pods is one of the best memes that shows how tide pods are compared to bleach drinking in the memes. When Procter Gamble launched its new product tide pods laundary detergent in 2012 it appeared like some flavored fruit snack due to its packaging.
Unfortunately, the attractive packaging of these laundry detergent capsules led to children consuming it and increasing calls to the poison control center. So, the Tide Pod eating memes are used to mock and compare it with the poisonous food and drinks in the online circuit.
10. Green M&M Bambi Copypasta
While a Tumblr post comment and response the Green M&M Bambi Copypasta was used and went on to be amongst the top 10 best memes of the year so far. Here the person role-plays the character of the Green M&M and demands a game named Bambi from the Gamestop on Play Station 2.
The aggressive character and dominating tone of the post have stirred several variations. The Green M&M role plays in the similar demanding tone of the character started doing the rounds on the online platform since then.
Or you may want to make a trending meme, like red glowing eye, please read this article: How to create a red glowing eyes effect in videos?
Part 2: Recommended Tool to Make Memes
The newest addition in the Filmora family is the Filmora Online Meme Maker that lets you create funny and best memes completely free. It is being widely used by all the meme lovers and is packed with some of the best features. GIF, image and video memes are all supported to make.
From adding texts with the use of both internal and external sources to adjusting size and color, the Filmora Online Meme Maker comes with an intuitive interface, several video effects, and a range of editing tools. It is easy to use and an amazing tool for creating the best meme. It also lets you import video from YouTube and Vimeo and there are no watermarks even when used free. Try it now!
Ollie Mattison
Ollie Mattison is a writer and a lover of all things video.
Follow @Ollie Mattison
How to Make a Meme (Step by Step)
How to Make a Meme (Step by Step)
Ollie Mattison
Mar 27, 2024• Proven solutions
When you browse the Internet, memes are practically everywhere. These memes are found in varied forms, ranging from video meme, to GIF and images. Through memes you can express your ideas in a creative and humorous way. In case your business requires meme marketing and you have no clue about how to make a meme then there is n nothing to worry about. We are here to ease off your stress.
In this article we are going to help you create the most effective memes. Stay tuned for more.
- Part1: Research meme first
- Part2: Think about your content
- Part3: Create memes right now
- Part4: Tips on making a popular meme
Part 1: Research meme first
1. Know your memes
Understanding and knowing what exactly your meme needs to do can be achieved by observing the recent the viral memes in the market. The recent viral memes would inspire your new creation to make a better meme evoking funnier emotions. There might be a specific meme that has garnered ample exposure over the social media and has been trending for weeks. You can gauge by studying them that whether your idea has been already implemented by any of them or it’s a fresh idea that you can use to strengthen your meme marketing.
2. Focus on popular stuff
While you are making memes, it’s important to refer popular movies, series, events, books, video games, comic characters etc. for enhancing the humor in memes . Funny videos about kids, accident videos and bike crashes, etc. with the right filter makes memes relatable. You can even spread a social message with a fun factor using video memes.
Part 2: Think about your content
1. Be Funny
Entertainment value is of utmost priority when you are planning for a successful meme. Though, making memes relatable to the audience is a key factor, you don’t need to be serious, just for the sake of it. Your meme should carry a witty and funny tone. You need to pick the copy and language meeting to the parameters we have just elaborated in this section.
2. Keep it short
Owning to the short attention span of online users, your memes need to be pretty short, without missing the message. While you are thinking how to make a meme, keep in mind that your meme should strike the right chord with the audience and impress them at the first place. Catchy phrases, captions from popular comic series or a funny TV show that is relatable to most people can help you create an amazing image, GIF or video meme.
Part 3: Create memes right now
When you are in a dilemma about how to make a meme or a video meme to be specific, you would require an effective meme maker tool . As without having a reliable tool for editing your video memes, it is not possible to transform your ideas into funny memes. We recommend Filmora online meme maker to materialize your idea.
Filmora meme maker is an online tool which you can use for completely free. Creating image, GIF and video memes is possible with this online program without requiring much time. Moreover, you don’t have to login to create your video memes. One of the most intuitive programs that require no tedious process, but simple drag and drop and click actions for importing GIF, image, and video. Apart from that you get the flexibility to add text inside or out of the text, GIF or video as per your heart’s content. Altering the text color and size is also possible with Filmora.
You don’t have to download online videos, as it supports YouTube and Vimeo video link. All that you need to do is copy and paste the URL for creating online video material with ease, without the hassle of downloading it to your computer and then working on it.
Here comes the detailed guide for Filmora online meme maker to create a video meme –
Step 1: Import image, GIF or video
Browse to the Filmora online meme maker website and then tap on ‘Click here to upload’ or drag to import material. You can even import YouTube and Vimeo links for creating video memes.

Step 2: Edit memes
Once you have selected the video/GIF/image you navigate to the meme editor page, you can customize your meme by tapping the tools on the left panel. The preview window there will show the changes you are doing to the imported item. Play with the text color and size in the meme and keep what suits you the most. Also, you can decide whether you wish to input text inside or outside and the file format for your meme can also be selected from this editor page.
Tips: Humorous or ironic text turns memes more popular, and don’t forget to select fonts that perfectly blend with the caption and background of the text and overall meme.

Step 3: Export and share
At last, tap on the ‘CREATE’ button once you are happy with the creation. Allow some time, so that the meme is generated with all the aspects you have incorporated to it. Once done, hit the ‘DOWNLOAD’ button and save the meme. Well, now that everything is on point, you can share it across social media platforms such as Reddit, Facebook, or Instagram.

Part 4: Tips on making a popular meme
1. Traditional and dank memes are popular, but video memes is on trend now
Though, the market is flooding with wide subcategories of memes, some of them are really taking the internet by storm. For making a popular meme that brings more exposure for your brand, you need to focus on the trending ones .
The main categories of memes are –
Traditional (normie) – This category of memes contain stock photo or viral video/movie/magazine screenshot. The photos and texts on them perfectly sync with the right visual tone.
Dank memes – They involve humor which is out of context. They also revive a dying meme or one that is pretty old and not in use by continuously overusing it.
2. Reddit is a great place to share
You shouldn’t let go of any opportunity that comes your way. You need to share them at the right place and Reddit undoubtedly has an upper hand in that case. When you have the right content gain through it!
R/Memes – It is a subreddit where you can share your meme after researching and creating it. But, be sure that here you need to share your own creation, not someone else’s copyright products.
R/DankMemes – This one is more focused at quality. You can look here to find out the most popular memes. You might plan to post your memes after they get significantly popular over the internet and then post them or lose mass downvotes. This space helps you how to perfectly analyze and then post your meme on the right time.
Conclusion
Once we are thorough with this article, we are confident that you understood how to make a meme. And, there is no doubt that opting for Filmora online meme maker will surely help you gain popularity over the internet. This tool is quick to use and requires no space to get stored on your PC. So, now you have one awesome tool for helping you out in meme making and being popular!
Ollie Mattison
Ollie Mattison is a writer and a lover of all things video.
Follow @Ollie Mattison
Ollie Mattison
Mar 27, 2024• Proven solutions
When you browse the Internet, memes are practically everywhere. These memes are found in varied forms, ranging from video meme, to GIF and images. Through memes you can express your ideas in a creative and humorous way. In case your business requires meme marketing and you have no clue about how to make a meme then there is n nothing to worry about. We are here to ease off your stress.
In this article we are going to help you create the most effective memes. Stay tuned for more.
- Part1: Research meme first
- Part2: Think about your content
- Part3: Create memes right now
- Part4: Tips on making a popular meme
Part 1: Research meme first
1. Know your memes
Understanding and knowing what exactly your meme needs to do can be achieved by observing the recent the viral memes in the market. The recent viral memes would inspire your new creation to make a better meme evoking funnier emotions. There might be a specific meme that has garnered ample exposure over the social media and has been trending for weeks. You can gauge by studying them that whether your idea has been already implemented by any of them or it’s a fresh idea that you can use to strengthen your meme marketing.
2. Focus on popular stuff
While you are making memes, it’s important to refer popular movies, series, events, books, video games, comic characters etc. for enhancing the humor in memes . Funny videos about kids, accident videos and bike crashes, etc. with the right filter makes memes relatable. You can even spread a social message with a fun factor using video memes.
Part 2: Think about your content
1. Be Funny
Entertainment value is of utmost priority when you are planning for a successful meme. Though, making memes relatable to the audience is a key factor, you don’t need to be serious, just for the sake of it. Your meme should carry a witty and funny tone. You need to pick the copy and language meeting to the parameters we have just elaborated in this section.
2. Keep it short
Owning to the short attention span of online users, your memes need to be pretty short, without missing the message. While you are thinking how to make a meme, keep in mind that your meme should strike the right chord with the audience and impress them at the first place. Catchy phrases, captions from popular comic series or a funny TV show that is relatable to most people can help you create an amazing image, GIF or video meme.
Part 3: Create memes right now
When you are in a dilemma about how to make a meme or a video meme to be specific, you would require an effective meme maker tool . As without having a reliable tool for editing your video memes, it is not possible to transform your ideas into funny memes. We recommend Filmora online meme maker to materialize your idea.
Filmora meme maker is an online tool which you can use for completely free. Creating image, GIF and video memes is possible with this online program without requiring much time. Moreover, you don’t have to login to create your video memes. One of the most intuitive programs that require no tedious process, but simple drag and drop and click actions for importing GIF, image, and video. Apart from that you get the flexibility to add text inside or out of the text, GIF or video as per your heart’s content. Altering the text color and size is also possible with Filmora.
You don’t have to download online videos, as it supports YouTube and Vimeo video link. All that you need to do is copy and paste the URL for creating online video material with ease, without the hassle of downloading it to your computer and then working on it.
Here comes the detailed guide for Filmora online meme maker to create a video meme –
Step 1: Import image, GIF or video
Browse to the Filmora online meme maker website and then tap on ‘Click here to upload’ or drag to import material. You can even import YouTube and Vimeo links for creating video memes.
Step 2: Edit memes
Once you have selected the video/GIF/image you navigate to the meme editor page, you can customize your meme by tapping the tools on the left panel. The preview window there will show the changes you are doing to the imported item. Play with the text color and size in the meme and keep what suits you the most. Also, you can decide whether you wish to input text inside or outside and the file format for your meme can also be selected from this editor page.
Tips: Humorous or ironic text turns memes more popular, and don’t forget to select fonts that perfectly blend with the caption and background of the text and overall meme.
Step 3: Export and share
At last, tap on the ‘CREATE’ button once you are happy with the creation. Allow some time, so that the meme is generated with all the aspects you have incorporated to it. Once done, hit the ‘DOWNLOAD’ button and save the meme. Well, now that everything is on point, you can share it across social media platforms such as Reddit, Facebook, or Instagram.
Part 4: Tips on making a popular meme
1. Traditional and dank memes are popular, but video memes is on trend now
Though, the market is flooding with wide subcategories of memes, some of them are really taking the internet by storm. For making a popular meme that brings more exposure for your brand, you need to focus on the trending ones .
The main categories of memes are –
Traditional (normie) – This category of memes contain stock photo or viral video/movie/magazine screenshot. The photos and texts on them perfectly sync with the right visual tone.
Dank memes – They involve humor which is out of context. They also revive a dying meme or one that is pretty old and not in use by continuously overusing it.
2. Reddit is a great place to share
You shouldn’t let go of any opportunity that comes your way. You need to share them at the right place and Reddit undoubtedly has an upper hand in that case. When you have the right content gain through it!
R/Memes – It is a subreddit where you can share your meme after researching and creating it. But, be sure that here you need to share your own creation, not someone else’s copyright products.
R/DankMemes – This one is more focused at quality. You can look here to find out the most popular memes. You might plan to post your memes after they get significantly popular over the internet and then post them or lose mass downvotes. This space helps you how to perfectly analyze and then post your meme on the right time.
Conclusion
Once we are thorough with this article, we are confident that you understood how to make a meme. And, there is no doubt that opting for Filmora online meme maker will surely help you gain popularity over the internet. This tool is quick to use and requires no space to get stored on your PC. So, now you have one awesome tool for helping you out in meme making and being popular!
Ollie Mattison
Ollie Mattison is a writer and a lover of all things video.
Follow @Ollie Mattison
How to Add Emojis To Discord on Desktop Computer and Mobile
How to Add Emojis To Discord

Richard Bennett
Mar 27, 2024• Proven solutions
Who doesn’t like emoticons? They are fun, easy to use, and, best of all, highly expressive of your emotions that you cannot convey over messages otherwise.
A 2019 survey shows 70% of mobile users used emoji in texting or on social media daily. This shows the popularity of emoji in our world today.
Similarly, as a Discord user, you must have come across thousands of emoji in it. These are images uploaded on the server and called custom emojis that this gaming community can use for effective communication with friends and other players.
With the emoji and gaming industry growing, it is safe to say that discord emoji’s popularity and use will only increase.
Read ahead to see how you can add emojis on Discord if you want to have fun chats with your friends too.
- Part 1: Adding and Sending Emoji To Chat On Discord?
- Part 2: Adding Emojis To Discord Channel Name Or Nickname?
- Part 3: Adding Custom Emojis To Discord Server On Windows/Mac?
- Part 4: Adding Custom Emojis To Discord Server On iPhone And Android?
- Part 5: Managing Emojis in Discord Server
Part 1: How to Add and Send Emoji To Chat On Discord?
One of the best things about Discord’s emoji feature is that there are two ways to add them. You can either access emoji on the Discord account or upload them yourself.
You can access the emoji menu for all Discord platforms by pressing the grey smiley face next to the message box. This will be on the right of the box for desktops, and for mobile apps, it will be on the left.
Discord-exclusive and standard emoji are present in the emoji menu, along with a part that keeps track of your most-used emoji.
On the other hand, you can also add custom emoticons to your Discord server if you have permission to do so.
Once you add and access the emoji on your device, select the one you want to send to your friends and press enter to send.
Part 2: How to Add Emojis To Discord Channel Name Or Nickname?
As an owner of a Discord channel, it is easy for you to add emoji to Discord. Follow the steps below to figure out how to add emojis to Discord channels:
- Use the emoji list to find the one you want to use in your channel name.
- Select the emoji “browser” column and copy it either with the mouse or “Ctrl + C” on the keyboard.
- Access your Discord server, right-click the channel where the emoji will be and use the dropdown menu to select the “Edit Channel.”
- In the “Channel Name” box, past the selected emoji using “Ctrl + V” from the keyboard.
- Select “Save Changes” to save the name with the emoji.
Part 3: How to Add Custom Emojis To Discord Server On Windows/Mac?
You can add custom emoji on Discord, but only if you are a server owner or administrator. Use the Discord server settings on either the desktop versions for Windows or Mac or the Discord Website.
Follow the steps below for either platform:
- Access your Discord server to begin and press the arrow pointing down in the channel list with the server name—Press “Server Settings” in the menu

- As the server’s settings open, you can add custom emojis in the “Emoji” tab. You can find a requirements list at the top that includes emoji names with a minimum of two characters and a file size limit of 256 KB. You can add fifty normal and an additional fifty animated emoji GIFs using the standard servers
- Select “Upload Emoji” to insert a custom emoji, either standard or animated
- With the help of your device’s local storage, upload the file. However, for the emoji to be added to the lists, the file should align with Discord’s requirements.
- For every emoji image that you upload, an alias tag will be created for that custom emoji using the file’s name. This tag is used to update a message with an emoji.
- A default alias name like this can be replaced by selecting the “Alias” box with the custom emoji and then creating a new name.
- Enjoy your emoji in chats as soon as you upload them to the Discord server!
Boost your server with Discord Nitro subscribers today to insert more than the standard fifty emoji!
Part 4: How to Add Custom Emojis To Discord Server On iPhone And Android?
How cool is it that you can add custom emoji to your smartphone as well? Whether you have an iPhone or an Android, you can use the same menu as Windows and Mac to upload emoji.
Discord’s interface is similar across all devices, so the following steps work on Android and Apple.
- Begin by opening the app on your device to access the server. Press the hamburger menu located at the top left in an open server and channel.
- As the channel and server list opens for Discord, you can see a three-dot menu right next to the channel list with the server name. Tap on it to proceed.
- To get to your server settings, press “Settings” in the Discord server menu that shows up.
- Under the “Server Settings” menu, select “Emoji” to access the custom emoji settings.
- As the “Emoji” menu opens, you can see an emoji requirement list
- Press “Upload Emoji” to upload any emoji that aligns with these requirements
- Press the custom emoji file, tap “Crop” if it needs cropping, and then use the “Upload” option
- After you upload the emoji file, replace the alias tag by tapping on it. This will redirect you to that specific emoji’s settings
- Type the name you want using the “Alias” box to create the tag used to insert emoji in messages
- Save this new tag with the “Save” icon placed in the bottom right
- Any changes you make to the custom emoji’s alias are applied to it instantly for your use.
Emoji bring fun to the conversations you have with friends, and it is very easy to add them to your server as well. These show up in the emoji pop-up list once you add them. The chat message bar contains the emoji icon from where you can access them.
It is essential to name your emoji with only alphanumeric characters and underscores using at least two characters.
The Discord emoji size is 32x32 pixels, so even if you upload up to 128x128 pixel size emojis, they will be resized to the default dimensions. Furthermore, emoji file sizes are at most 256kb.
If you want to use custom emojis, you can’t do so without a Nitro subscription because it is only functional on the server they are uploaded to. Even if you find a way to access the emoji from some other server, only its text code will be visible.
If you attempt to use the Emoji Picker to pick an emoji, you’ll get the following message:
Bonus: How to Manage Emoji in Discord Server?
You can’t remove or add emoji specific to a server on your own as a member. You need the server owner to toggle the permission of Manager Emoji in your domain.
On the other hand, as a server owner, you can give others this role with the following steps.
- Open Roles: Open the Server Settings and select “Roles” from the menu on the side.
- Toggle Manage Emoji: Pick the role you want to apply the permission to, and then toggle emoji’s slider to “on,” save changes, and you’re done!
FAQs About Discord Emojis
1. Why Do I See Grey Emoji In The Emoji Menu?
Greyed-out emoji in the menu means that either those emoji are animated, or you don’t have the permission to post them on other servers.
2. How Can I Get More Custom Emoji On The Server?
You can upload 50 emojis to your Discord server. But if you want more options, you need a Discord Nitro subscription to boost your server specs.
3. What Is The Discord Emoji Size?
Discord allows you to upload an emoji of up to 128x128 pixels, but it will resize it to 32x32 since that is its standard size.
Conclusion
Emojis make any chat fun, and where gaming is involved, they help you communicate better with your friends.
Discord has thousands of custom emojis that you can easily add to your server through your computer, whether it is your chat or the channel name. Follow our guide for a seamless process to add emoji to Discord and make your gaming experience better!
Richard Bennett
Richard Bennett is a writer and a lover of all things video.
Follow @Richard Bennett
Richard Bennett
Mar 27, 2024• Proven solutions
Who doesn’t like emoticons? They are fun, easy to use, and, best of all, highly expressive of your emotions that you cannot convey over messages otherwise.
A 2019 survey shows 70% of mobile users used emoji in texting or on social media daily. This shows the popularity of emoji in our world today.
Similarly, as a Discord user, you must have come across thousands of emoji in it. These are images uploaded on the server and called custom emojis that this gaming community can use for effective communication with friends and other players.
With the emoji and gaming industry growing, it is safe to say that discord emoji’s popularity and use will only increase.
Read ahead to see how you can add emojis on Discord if you want to have fun chats with your friends too.
- Part 1: Adding and Sending Emoji To Chat On Discord?
- Part 2: Adding Emojis To Discord Channel Name Or Nickname?
- Part 3: Adding Custom Emojis To Discord Server On Windows/Mac?
- Part 4: Adding Custom Emojis To Discord Server On iPhone And Android?
- Part 5: Managing Emojis in Discord Server
Part 1: How to Add and Send Emoji To Chat On Discord?
One of the best things about Discord’s emoji feature is that there are two ways to add them. You can either access emoji on the Discord account or upload them yourself.
You can access the emoji menu for all Discord platforms by pressing the grey smiley face next to the message box. This will be on the right of the box for desktops, and for mobile apps, it will be on the left.
Discord-exclusive and standard emoji are present in the emoji menu, along with a part that keeps track of your most-used emoji.
On the other hand, you can also add custom emoticons to your Discord server if you have permission to do so.
Once you add and access the emoji on your device, select the one you want to send to your friends and press enter to send.
Part 2: How to Add Emojis To Discord Channel Name Or Nickname?
As an owner of a Discord channel, it is easy for you to add emoji to Discord. Follow the steps below to figure out how to add emojis to Discord channels:
- Use the emoji list to find the one you want to use in your channel name.
- Select the emoji “browser” column and copy it either with the mouse or “Ctrl + C” on the keyboard.
- Access your Discord server, right-click the channel where the emoji will be and use the dropdown menu to select the “Edit Channel.”
- In the “Channel Name” box, past the selected emoji using “Ctrl + V” from the keyboard.
- Select “Save Changes” to save the name with the emoji.
Part 3: How to Add Custom Emojis To Discord Server On Windows/Mac?
You can add custom emoji on Discord, but only if you are a server owner or administrator. Use the Discord server settings on either the desktop versions for Windows or Mac or the Discord Website.
Follow the steps below for either platform:
- Access your Discord server to begin and press the arrow pointing down in the channel list with the server name—Press “Server Settings” in the menu
- As the server’s settings open, you can add custom emojis in the “Emoji” tab. You can find a requirements list at the top that includes emoji names with a minimum of two characters and a file size limit of 256 KB. You can add fifty normal and an additional fifty animated emoji GIFs using the standard servers
- Select “Upload Emoji” to insert a custom emoji, either standard or animated
- With the help of your device’s local storage, upload the file. However, for the emoji to be added to the lists, the file should align with Discord’s requirements.
- For every emoji image that you upload, an alias tag will be created for that custom emoji using the file’s name. This tag is used to update a message with an emoji.
- A default alias name like this can be replaced by selecting the “Alias” box with the custom emoji and then creating a new name.
- Enjoy your emoji in chats as soon as you upload them to the Discord server!
Boost your server with Discord Nitro subscribers today to insert more than the standard fifty emoji!
Part 4: How to Add Custom Emojis To Discord Server On iPhone And Android?
How cool is it that you can add custom emoji to your smartphone as well? Whether you have an iPhone or an Android, you can use the same menu as Windows and Mac to upload emoji.
Discord’s interface is similar across all devices, so the following steps work on Android and Apple.
- Begin by opening the app on your device to access the server. Press the hamburger menu located at the top left in an open server and channel.
- As the channel and server list opens for Discord, you can see a three-dot menu right next to the channel list with the server name. Tap on it to proceed.
- To get to your server settings, press “Settings” in the Discord server menu that shows up.
- Under the “Server Settings” menu, select “Emoji” to access the custom emoji settings.
- As the “Emoji” menu opens, you can see an emoji requirement list
- Press “Upload Emoji” to upload any emoji that aligns with these requirements
- Press the custom emoji file, tap “Crop” if it needs cropping, and then use the “Upload” option
- After you upload the emoji file, replace the alias tag by tapping on it. This will redirect you to that specific emoji’s settings
- Type the name you want using the “Alias” box to create the tag used to insert emoji in messages
- Save this new tag with the “Save” icon placed in the bottom right
- Any changes you make to the custom emoji’s alias are applied to it instantly for your use.
Emoji bring fun to the conversations you have with friends, and it is very easy to add them to your server as well. These show up in the emoji pop-up list once you add them. The chat message bar contains the emoji icon from where you can access them.
It is essential to name your emoji with only alphanumeric characters and underscores using at least two characters.
The Discord emoji size is 32x32 pixels, so even if you upload up to 128x128 pixel size emojis, they will be resized to the default dimensions. Furthermore, emoji file sizes are at most 256kb.
If you want to use custom emojis, you can’t do so without a Nitro subscription because it is only functional on the server they are uploaded to. Even if you find a way to access the emoji from some other server, only its text code will be visible.
If you attempt to use the Emoji Picker to pick an emoji, you’ll get the following message:
Bonus: How to Manage Emoji in Discord Server?
You can’t remove or add emoji specific to a server on your own as a member. You need the server owner to toggle the permission of Manager Emoji in your domain.
On the other hand, as a server owner, you can give others this role with the following steps.
- Open Roles: Open the Server Settings and select “Roles” from the menu on the side.
- Toggle Manage Emoji: Pick the role you want to apply the permission to, and then toggle emoji’s slider to “on,” save changes, and you’re done!
FAQs About Discord Emojis
1. Why Do I See Grey Emoji In The Emoji Menu?
Greyed-out emoji in the menu means that either those emoji are animated, or you don’t have the permission to post them on other servers.
2. How Can I Get More Custom Emoji On The Server?
You can upload 50 emojis to your Discord server. But if you want more options, you need a Discord Nitro subscription to boost your server specs.
3. What Is The Discord Emoji Size?
Discord allows you to upload an emoji of up to 128x128 pixels, but it will resize it to 32x32 since that is its standard size.
Conclusion
Emojis make any chat fun, and where gaming is involved, they help you communicate better with your friends.
Discord has thousands of custom emojis that you can easily add to your server through your computer, whether it is your chat or the channel name. Follow our guide for a seamless process to add emoji to Discord and make your gaming experience better!
Richard Bennett
Richard Bennett is a writer and a lover of all things video.
Follow @Richard Bennett
How to Make an Adorable Video for Your Baby’s First Year
How to Make an Adorable Video for Your Baby’s First Year
Ollie Mattison
Mar 27, 2024• Proven solutions
Your baby grows up very fast and being able to see him grow is maybe one of the most interesting and exciting moments in your life. Documenting the first year is amazing and it will surely offer you an extraordinary value so try to do that the best way you can. Imagine how touched your child would be when he/she, at the age of 18, watch something like this:
How to make the baby’s first year video
Filming tips
Shooting a good baby’s first year video can take a little bit of preparation and it will surely offer you an extraordinary experience in the long run. It will also help offer you an incredible value to begin with which is always impressive.
Stabilize the camera - The first thing you need to do is to stabilize the camera. Using a tripod can be the best option here so take your time and results will be great for sure. Of course, placing the camera on your counter will also help, so try to keep that in mind as it can indeed be a very good option to begin with.
Lighting - You will also have to play with the proper lighting setup. A good light will help you get much better results and even though it can take some time to get the best experience, it really is a truly amazing option that you do not want to miss.
Focus - Of course, focus on the baby. Yes, focus but don’t zoom in and out all the time. Find a good pattern that will help keep the baby steady and do all in your power to get the best results. Granted, it will take some time to get good results but don’t rush it otherwise the experience will not be as good as you would expect.
Audio - Moreover, audio should be your focus here as well. Take the time and do something good here, a good audio will always pay off very well so get a good audio setup if you want to obtain a stellar experience.
Props - Also, we recommend you to use props. These can really make a good video and they will even add in some much needed fun to your setup. Try to find the best possible props and add them in your video. Some good prop examples would be a stuffed animal, a toy, maybe even the family pet. All of these are great and well worth your time.
Editing tips
Once you finished capturing the movie, you will have to go to editing. This is where you have to use a good video editing tool that will help provide a good baby’s first year video in the end. With that in mind, Wondershare Filmora can be the tool of choice as it offers you all the features you need in order to create a good baby video.
=“” style=”width: 100%; height: 278.438px;”;
Download Mac Version ](https://tools.techidaily.com/wondershare/filmora/download/ )
Adjust saturation - You should try to use the app in order to adjust the saturation as this can lead to some very bad results if you’re not careful. Find the proper saturation levels and opt for them right away.
Trim, cut, or split - If needed, split, cut or even trim the video. There will be times when you will need the reversing effect as well. All of these effects are accessible via the Wondershare Filmora video app.
Advanced editing - Plus, you will also need to apply a green screen effect as this will help you place your baby in a variety of funny locations, be it a funny MV or a Hollywood movie. The app can also help you clone the baby with PIP effects and you can also use it to add filters, overlays or text.
Wondershare Filmora will offer you an extraordinary set of tools and it will bring in front a very good value right from the start. The interface of the app is user friendly and you will have no problem using it as you see fit. Also, you can create the baby’s first year video on both Mac and Windows as the app supports both platforms. It also delivers immediate support for camcorders and smartphones so you can use any device you want for video capture. With its help you can share videos to DVD or YouTube too if you so desire. Don’t hesitate and access this great tool as fast as possible to get a good outcome!
Ollie Mattison
Ollie Mattison is a writer and a lover of all things video.
Follow @Ollie Mattison
Ollie Mattison
Mar 27, 2024• Proven solutions
Your baby grows up very fast and being able to see him grow is maybe one of the most interesting and exciting moments in your life. Documenting the first year is amazing and it will surely offer you an extraordinary value so try to do that the best way you can. Imagine how touched your child would be when he/she, at the age of 18, watch something like this:
How to make the baby’s first year video
Filming tips
Shooting a good baby’s first year video can take a little bit of preparation and it will surely offer you an extraordinary experience in the long run. It will also help offer you an incredible value to begin with which is always impressive.
Stabilize the camera - The first thing you need to do is to stabilize the camera. Using a tripod can be the best option here so take your time and results will be great for sure. Of course, placing the camera on your counter will also help, so try to keep that in mind as it can indeed be a very good option to begin with.
Lighting - You will also have to play with the proper lighting setup. A good light will help you get much better results and even though it can take some time to get the best experience, it really is a truly amazing option that you do not want to miss.
Focus - Of course, focus on the baby. Yes, focus but don’t zoom in and out all the time. Find a good pattern that will help keep the baby steady and do all in your power to get the best results. Granted, it will take some time to get good results but don’t rush it otherwise the experience will not be as good as you would expect.
Audio - Moreover, audio should be your focus here as well. Take the time and do something good here, a good audio will always pay off very well so get a good audio setup if you want to obtain a stellar experience.
Props - Also, we recommend you to use props. These can really make a good video and they will even add in some much needed fun to your setup. Try to find the best possible props and add them in your video. Some good prop examples would be a stuffed animal, a toy, maybe even the family pet. All of these are great and well worth your time.
Editing tips
Once you finished capturing the movie, you will have to go to editing. This is where you have to use a good video editing tool that will help provide a good baby’s first year video in the end. With that in mind, Wondershare Filmora can be the tool of choice as it offers you all the features you need in order to create a good baby video.
=“” style=”width: 100%; height: 278.438px;”;
Download Mac Version ](https://tools.techidaily.com/wondershare/filmora/download/ )
Adjust saturation - You should try to use the app in order to adjust the saturation as this can lead to some very bad results if you’re not careful. Find the proper saturation levels and opt for them right away.
Trim, cut, or split - If needed, split, cut or even trim the video. There will be times when you will need the reversing effect as well. All of these effects are accessible via the Wondershare Filmora video app.
Advanced editing - Plus, you will also need to apply a green screen effect as this will help you place your baby in a variety of funny locations, be it a funny MV or a Hollywood movie. The app can also help you clone the baby with PIP effects and you can also use it to add filters, overlays or text.
Wondershare Filmora will offer you an extraordinary set of tools and it will bring in front a very good value right from the start. The interface of the app is user friendly and you will have no problem using it as you see fit. Also, you can create the baby’s first year video on both Mac and Windows as the app supports both platforms. It also delivers immediate support for camcorders and smartphones so you can use any device you want for video capture. With its help you can share videos to DVD or YouTube too if you so desire. Don’t hesitate and access this great tool as fast as possible to get a good outcome!
Ollie Mattison
Ollie Mattison is a writer and a lover of all things video.
Follow @Ollie Mattison
Also read:
- [New] Missing Video Functionality in Sony A6400
- [Updated] 2024 Approved Win10's Best Screen Capture and Recording Options
- 2024 Approved How to Make a Triggered Meme?
- 3 Easy Ways to Factory Reset a Locked iPhone 11 Pro Max Without iTunes
- 5 Apps To Help You Meet People And Make Friends
- Best Methods to Enjoy Apple Music on Your iPhone
- Get the Best Performance: Download HP Printer Drivers Now
- How Can Oppo A18Mirror Share to PC? | Dr.fone
- How to Burn Photos to DVD with Transitions and Music
- How to Make a FLV Photo Slideshow with Music for 2024
- In 2024, How to Make an Emoji of Yourself on Android and iPhone Emoji Yourself
- Updated 10 Popular Cartoon Characters That Should Top Your List
- Updated 2024 Approved Best SolarMovie Alternatives-Watch Movies Online
- Updated In 2024, Top 10 Best Free Manga Sites to Read Online
- WinX DVD 소프트웨어 사용자 지침 최신 스타일
- Title: Updated How to Burn Photos to DVD with Transitions and Music
- Author: Jan
- Created at : 2024-09-30 05:54:22
- Updated at : 2024-10-05 21:41:02
- Link: https://meme-emoji.techidaily.com/updated-how-to-burn-photos-to-dvd-with-transitions-and-music/
- License: This work is licensed under CC BY-NC-SA 4.0.