
:max_bytes(150000):strip_icc():format(webp)/YoungAsianmanusinglaptopandreadingnewspaperonplane-59960904685fbe00103478bd.jpg)
Updated Burn Photos to DVD | How to Burn Photos to DVD with Transitions and Music
Burn Photos to DVD | How to Burn Photos to DVD with Transitions and Music
How to Burn Photos to DVD with Transitions and Music

Shanoon Cox
Mar 27, 2024• Proven solutions
Photos are precious memories not only for you but also for your family members. As time goes on, the photos might fade out and be unable to retrieve. To avoid this, burn photos to DVD will be a great idea to preserve family memories eternally.
This article will show you how to burn photos to DVD Slideshowwith transition, titles and music quickly and easily by using Wondershare DVD Slideshow Builder Deluxe . It also provides some tips on how to burn photos to DVD.
Part 1: How to Burn Photos to DVD with Transition, Titles and Music
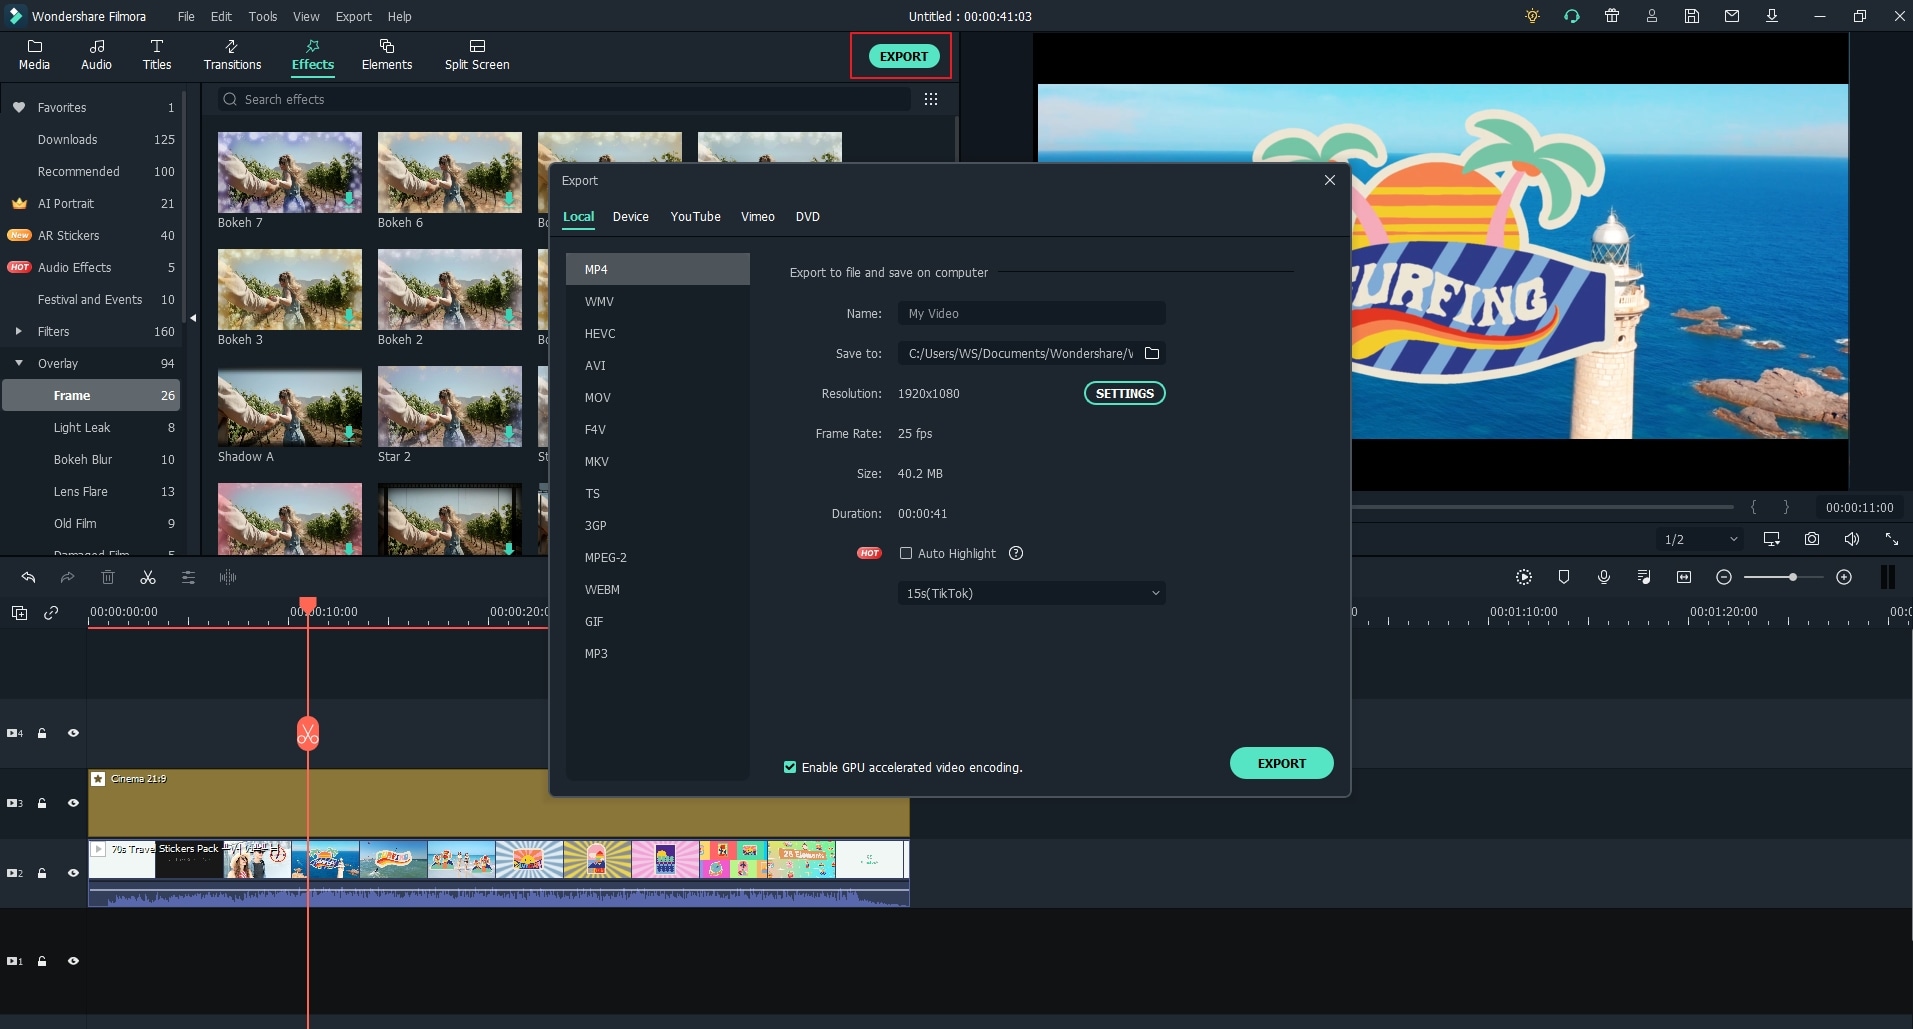
Wondershare DVD Slideshow Builder Deluxe can help you quickly create and burn photos to DVD. Download the free trial version this photo DVD maker first.

Step 1. Add Photo or Video Files
In Organize tab, simply click the “Add Files” button to open the browse window, find your files and import them into the program, you can drag and drop photos or videos to organize them on storyboard. Click the Expand button to get a larger viewer.

Step 2. Customize Photo Slideshow Transitions
Generally speaking, transition effects will be automatically inserted between every two photos/videos when you import the photos. But you can customize them by clicking the Personalize tab, then drag and drop a transition from the list to the thumbnail between two slides.
You are also able to add background music here: click the Music button and choose a music file from your computer.

Step 3. Choose DVD Menu
Now switch to Create tab to author a DVD menu from template and burn to DVD disc quickly:
- On the right hand side of the screen, double click on desired menu template to apply a DVD menu template.
- Click the Edit button under the preview windows to customize your DVD menu or right click on menu for more options.
- You can also make a professional DVD menu using dynamic DVD menu templates.
BTW, if you don’t want a DVD menu, just check the “Disable DVD Menu” option.

Step 4. Burn Photos to DVD Disc
Now click the Preview button beneath the preview window to make sure the photo DVD slideshow is exactly what you want. Go back to Personalize tab to change if necessary. After that, click “Burn” button to start burning your DVD slideshow to DVD.
You can also output photo slideshow to watch on Youtube, Mobile Phone, iPhone, PSP, etc. through options on the left. Below are the instructions to burn DVD for watch on TV:

- Insert a blank DVD disc, and do the following.
- Click “Burn to DVD”. Then specify the number of DVD copies. You can also choose to generate ISO Image files or DVD Folders.
- Make sure the PAL or NTSC TV Standard settings is right. If you don’t know which standard is used in your country, click the “Help” button. The wrong TV standard would cause playback incompatibility problem.
- Then click “Start” to burn DVD slideshow. If you have checked Create DVD Folder and/or Create DVD Image File options, the corresponding files will also be created to the specified folder.
Now sit back and relax, when burning complete, insert the created DVD disc into your DVD player to watch photo DVD slideshow on TV.
Learn more: User Guide of DVD Slideshow Builder Deluxe
Part 2: More Photo to DVD Tips
More about NTSC/PAL TV Standard
Nowadays, there are three video formats around the world. But each one is incompatible with others. For instance, NTSC is used in North America, Canada and Japan; while most of other regions PAL/SECAM. To apply TV Standard in DVD Slideshow Builder Deluxe , go to “Create“ -> Option tab and locate TV Standard option to select NTSC or PAL. If you are not sure which one to choose, please click “Help” button, select your country, then click “OK” , the program will choose the right TV standard for you.
Burn Photos to DVD/CD as Data Disc
If you only want to burn photo to DVD for backup and further use, you only need a burning photo to DVD software like ImgBurn (Free) or Nero (commercial). These software helps you burn all digital media files to DVD, of course you can burn photos to DVD for backup purpose. Notice that some photo DVD maker allows you burn slideshow as well as the original photos. This way, you turn photos to DVD slideshow with transition, and at the same time, backup photos to DVD for other uses.
Scan Photos to DVD - Digitize Photos
If you use traditional camera and have got loads of photos in album, you can scan photos to computer so that convert photo to digital format. Afterwards, you can get more from these digital photos, like backup photos to DVD, send to others as DVD gift, make a photo DVD show to play on TV, etc. All these could be done with your favorite photo DVD maker software. Now see how to transform your printed photos to digital first:
Select a good photo scanner -> Prepare your photos to scan -> Start photo scanning -> Adjust scanned photos
Scanning printed photos to computer is not an easy job. It needs patience and some tips and tricks. As you may know, some companies provide photo scanning service. For the Step 4, you can also adjust digital photos in your selected photo DVD maker. Anyway, you need to get your digital photos ready before you burn photos to DVD with transitions and music.
Shanoon Cox
Shanoon Cox is a writer and a lover of all things video.
Follow @Shanoon Cox
Shanoon Cox
Mar 27, 2024• Proven solutions
Photos are precious memories not only for you but also for your family members. As time goes on, the photos might fade out and be unable to retrieve. To avoid this, burn photos to DVD will be a great idea to preserve family memories eternally.
This article will show you how to burn photos to DVD Slideshowwith transition, titles and music quickly and easily by using Wondershare DVD Slideshow Builder Deluxe . It also provides some tips on how to burn photos to DVD.
Part 1: How to Burn Photos to DVD with Transition, Titles and Music
Wondershare DVD Slideshow Builder Deluxe can help you quickly create and burn photos to DVD. Download the free trial version this photo DVD maker first.
Step 1. Add Photo or Video Files
In Organize tab, simply click the “Add Files” button to open the browse window, find your files and import them into the program, you can drag and drop photos or videos to organize them on storyboard. Click the Expand button to get a larger viewer.
Step 2. Customize Photo Slideshow Transitions
Generally speaking, transition effects will be automatically inserted between every two photos/videos when you import the photos. But you can customize them by clicking the Personalize tab, then drag and drop a transition from the list to the thumbnail between two slides.
You are also able to add background music here: click the Music button and choose a music file from your computer.
Step 3. Choose DVD Menu
Now switch to Create tab to author a DVD menu from template and burn to DVD disc quickly:
- On the right hand side of the screen, double click on desired menu template to apply a DVD menu template.
- Click the Edit button under the preview windows to customize your DVD menu or right click on menu for more options.
- You can also make a professional DVD menu using dynamic DVD menu templates.
BTW, if you don’t want a DVD menu, just check the “Disable DVD Menu” option.
Step 4. Burn Photos to DVD Disc
Now click the Preview button beneath the preview window to make sure the photo DVD slideshow is exactly what you want. Go back to Personalize tab to change if necessary. After that, click “Burn” button to start burning your DVD slideshow to DVD.
You can also output photo slideshow to watch on Youtube, Mobile Phone, iPhone, PSP, etc. through options on the left. Below are the instructions to burn DVD for watch on TV:
- Insert a blank DVD disc, and do the following.
- Click “Burn to DVD”. Then specify the number of DVD copies. You can also choose to generate ISO Image files or DVD Folders.
- Make sure the PAL or NTSC TV Standard settings is right. If you don’t know which standard is used in your country, click the “Help” button. The wrong TV standard would cause playback incompatibility problem.
- Then click “Start” to burn DVD slideshow. If you have checked Create DVD Folder and/or Create DVD Image File options, the corresponding files will also be created to the specified folder.
Now sit back and relax, when burning complete, insert the created DVD disc into your DVD player to watch photo DVD slideshow on TV.
Learn more: User Guide of DVD Slideshow Builder Deluxe
Part 2: More Photo to DVD Tips
More about NTSC/PAL TV Standard
Nowadays, there are three video formats around the world. But each one is incompatible with others. For instance, NTSC is used in North America, Canada and Japan; while most of other regions PAL/SECAM. To apply TV Standard in DVD Slideshow Builder Deluxe , go to “Create“ -> Option tab and locate TV Standard option to select NTSC or PAL. If you are not sure which one to choose, please click “Help” button, select your country, then click “OK” , the program will choose the right TV standard for you.
Burn Photos to DVD/CD as Data Disc
If you only want to burn photo to DVD for backup and further use, you only need a burning photo to DVD software like ImgBurn (Free) or Nero (commercial). These software helps you burn all digital media files to DVD, of course you can burn photos to DVD for backup purpose. Notice that some photo DVD maker allows you burn slideshow as well as the original photos. This way, you turn photos to DVD slideshow with transition, and at the same time, backup photos to DVD for other uses.
Scan Photos to DVD - Digitize Photos
If you use traditional camera and have got loads of photos in album, you can scan photos to computer so that convert photo to digital format. Afterwards, you can get more from these digital photos, like backup photos to DVD, send to others as DVD gift, make a photo DVD show to play on TV, etc. All these could be done with your favorite photo DVD maker software. Now see how to transform your printed photos to digital first:
Select a good photo scanner -> Prepare your photos to scan -> Start photo scanning -> Adjust scanned photos
Scanning printed photos to computer is not an easy job. It needs patience and some tips and tricks. As you may know, some companies provide photo scanning service. For the Step 4, you can also adjust digital photos in your selected photo DVD maker. Anyway, you need to get your digital photos ready before you burn photos to DVD with transitions and music.
Shanoon Cox
Shanoon Cox is a writer and a lover of all things video.
Follow @Shanoon Cox
Top 5 Best Websites to Add Emojis to Photo Online
Are you in love with those funny emojis you see in messenger apps and want to add them to your images too? Guess what? You can add emojis to photos online conveniently through a few websites. Emojis enhance how a picture looks instantly.
People can use an emoji on a friend’s image to make them look funny or hide their face with a smiley emoji. Why upload boring and the same kind of photos all the time when emojis can add the much-needed magical touch? So, if you want to add emoji to photos online, look no further and learn about the best websites that allow you do that easily.
In this article
01 Top 5 Websites to Add Emojis to Photo Online
02 How to Add Emojis to Photo on Wondershare Filmora
Part 1: Top 5 Websites to Add Emojis to Photo Online
#1: Kapwing

One of the best websites is Kapwing, which lets you add emojis to any photo you want. Kapwing is an easy-to-use online tool, which means you will not have to download any tool. But to start using it, you will have to sign up. You can do that by using your Google ID. When it comes to the number of emojis it has, it boasts more than 250 different emojis. It lets you add custom emojis; let’s say you have a pack of custom emojis with you that you want to use; you can do that effortlessly.
Key Features
- It’s an online tool and free to use.
- You need to sign up to save your work.
- It has more than 250 emojis to choose from.
- Kapwing is easy to use.
Steps to Follow to Use Kapwing
Step 1: Visit the official website of Kapwing. You will see the Start Editing option; please click on that.
Step 2: You will see the workspace with an option that says “click to upload.” Click on it.
Step 3: Now, upload a photo that you want to add the emoji too. The image will be uploaded.
Step 4: To add an emoji, look towards the left menu, and you will see the Add Media option. Click on that.
Step 5: You will see the upload, projects, and emojis options. Click on the emojis option.
Step 6: Emojis will appear. Click on one, and it will be uploaded to the main photo. You can drag, shrink, zoom, or rotate the emoji used. You can add as many emojis you want.
Related: How to make a slo-mo video on Kapwing
#2: Image Online.Co

The next good online tool that you can try is Image Online.Co. It’s a pretty basic tool that lets you upload a photo and add an emoji the right way. It has more than 100 emojis, which is not a lot. But features all the popular emojis that will suit all kinds of images. And it allows you to add your custom emojis, which is why people prefer to use Image Online.Co. Using it is very easy, and the interface of the online tool is easy to understand.
Key Features
- It is a 100% free online tool that won’t ask you to sign up or log in.
- The tool has 100+ emojis to choose from.
- The interface is easy to understand.
- The tool is easy to use.
Steps to Follow to Use Image Online.Co
Step 1: Visit https://emoji.imageonline.co/ , which is their official website.
Step 2: Click on the Select Photo option, else directly drop an image from your local folder.
Step 3: If you want, you can add a custom emoji that you already have.
Step 4: Add an emoji from the right menu and rotate or zoom in or zoom out.
#3: Canva

Canva is arguably one of the best ways to make your photos look better. This tool has tons of features, and the best part is that you can customize a picture with an emoji using one of their templates. It has 250+ emojis and lets you add your customized emoji. And to start using Canva, you will have to sign up.
Key Features
- Canva has more than 250 emojis.
- It lets you edit your photos to enhance their quality.
- One-month free trial.
- You can choose from different templates.
Steps to Follow to Use Canva
Step 1: First, visit https://www.canva.com/ and sign up using your Facebook account or Gmail.
Step 2: Choose the kind of work you would like to do, and you will be taken to the photo editing page.
Step 3: Upload an image and click on the more option.
Step 4: Click on the emoji option and choose an emoji to add to the image. To save, click on the download option.
Related: How to Animate Pictures in Canva
#4: PiZap

PiZap is a photo editing tool that lets you add emojis too. To start using, you will have to log in or sign up. You can use your Facebook, Twitter, or Google account to sign up. It provides you with various graphics, fonts, and other photo editing features to make the image look better than before. The basic tool comes for free and has 232 emojis currently.
Key Features
- The basic tool comes for free.
- There are numerous emojis to choose from.
- The image quality doesn’t lose its original quality.
- Using the tool is easy, and the interface is intuitive.
Steps to Follow to Use PiZap
Step 1: Visit www.pizap.com and click on the try for free option.
Step 2: Click on the edit photo option, and upload an image.
Step 3: From the left-side toolbar, click on the Graphics option. Scroll a bit, and you will see the emoji section.
Step 4: Click on any of the emojis you like to add to the photo. You can adjust the emojis as you want.
#5: Pixelied
![]()
The last website that we have is Pixelied. The free tool will let you edit your image and add emojis, which will be enough if you don’t want many features. Using the tool is easy, and the emojis Pixelied has are great. They are different than general emojis and look better! Plus, the tool provides 300+ fantastic emojis.
Key Features
- The tool has an excellent collection of emojis.
- Adding emojis is extremely easy.
- It is free to use and doesn’t require any photo editing experience.
- The tool also offers various photo editing features.
How to Use Pixelied?
Step 1: Visit pixelied.com and click on the Upload Your Image option.
Step 2: On the left, you will find tons of icons. Use the search bar and type emojis.
Step 3: Browse through the emojis and click on one that you like. You can use multiple emojis, too, if you want. To save, click on the download option.
Part 2: How to Add Emojis to Photo on Wondershare Filmora
Filmora video editor provides tons of emojis that you can add for free, so you can add them to photos directly. What’s more, you can also upload your own emoji and use it in Filmora. All you need to do is download the tool on your Windows or Mac computer and start using it to add an emoji. There are two ways to go about it:
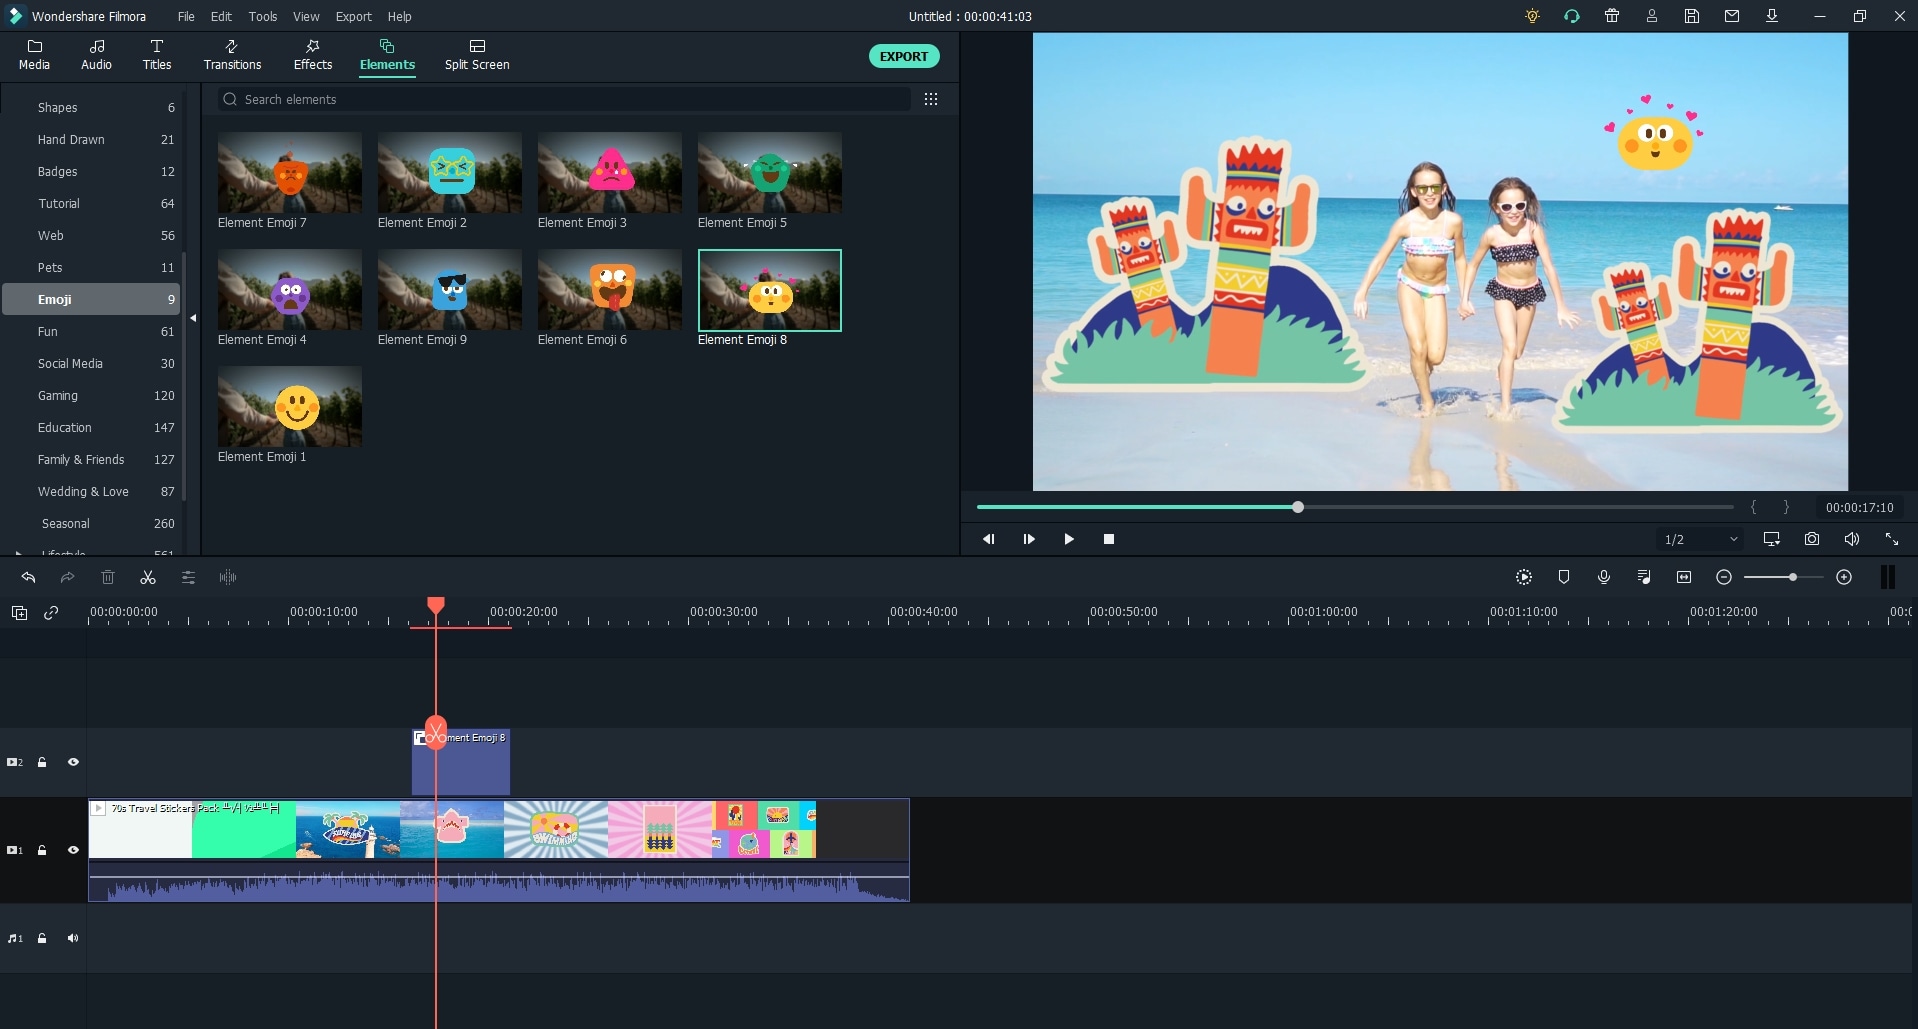
Use Emojis from Elements

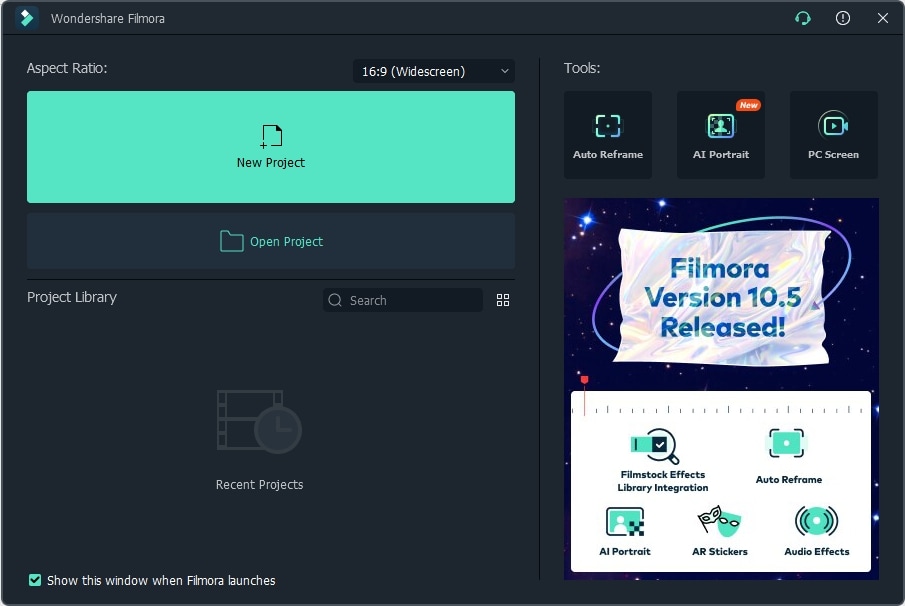
Step 1: Launch Wondershare Filmora and click on create a new project.
Step 2: Click on the Elements option on the top and use the search bar to search for emojis.
Step 3: Click on any of the emojis that you like and adjust them.
Step 4: To save the photo with emojis, just click the camera icon to take a screenshot .
The video below shows the animated emojis that you can try in Filmora, take a look and have fun.
For Win 7 or later (64-bit)
For macOS 10.12 or later
Upload Your Own Emoji
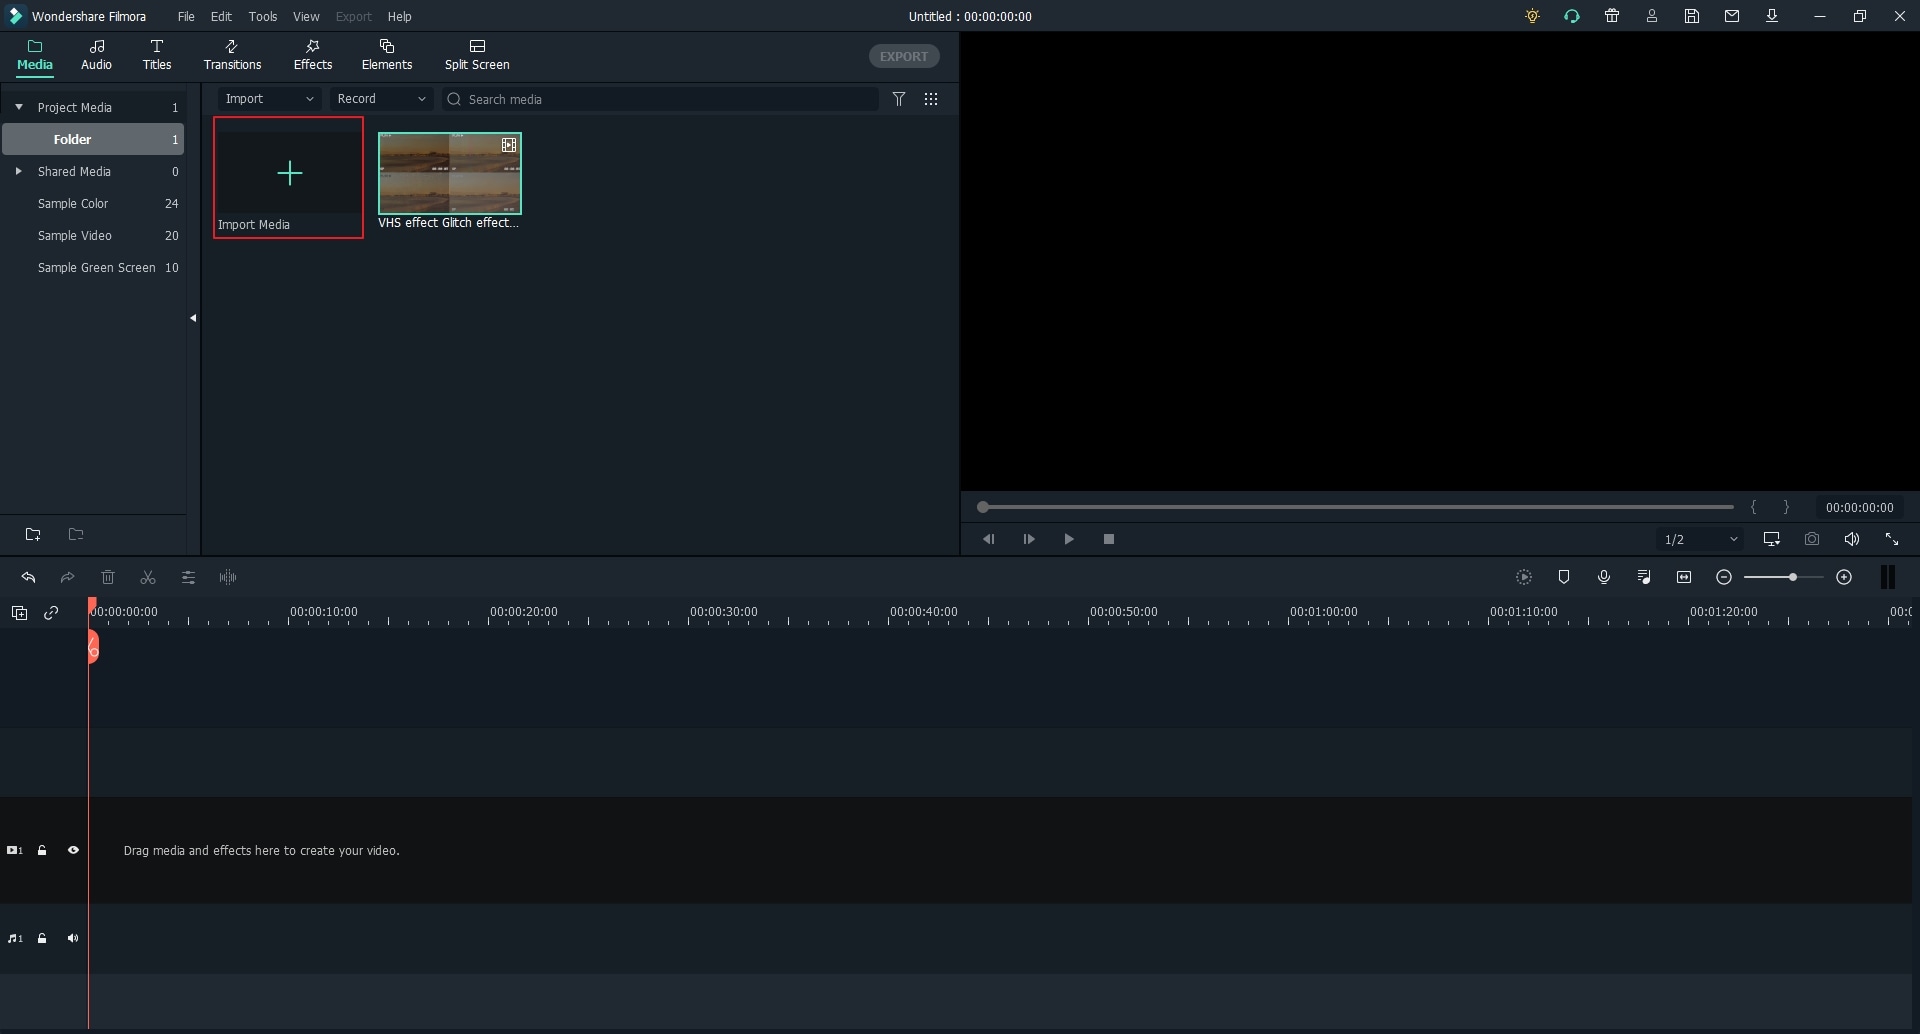
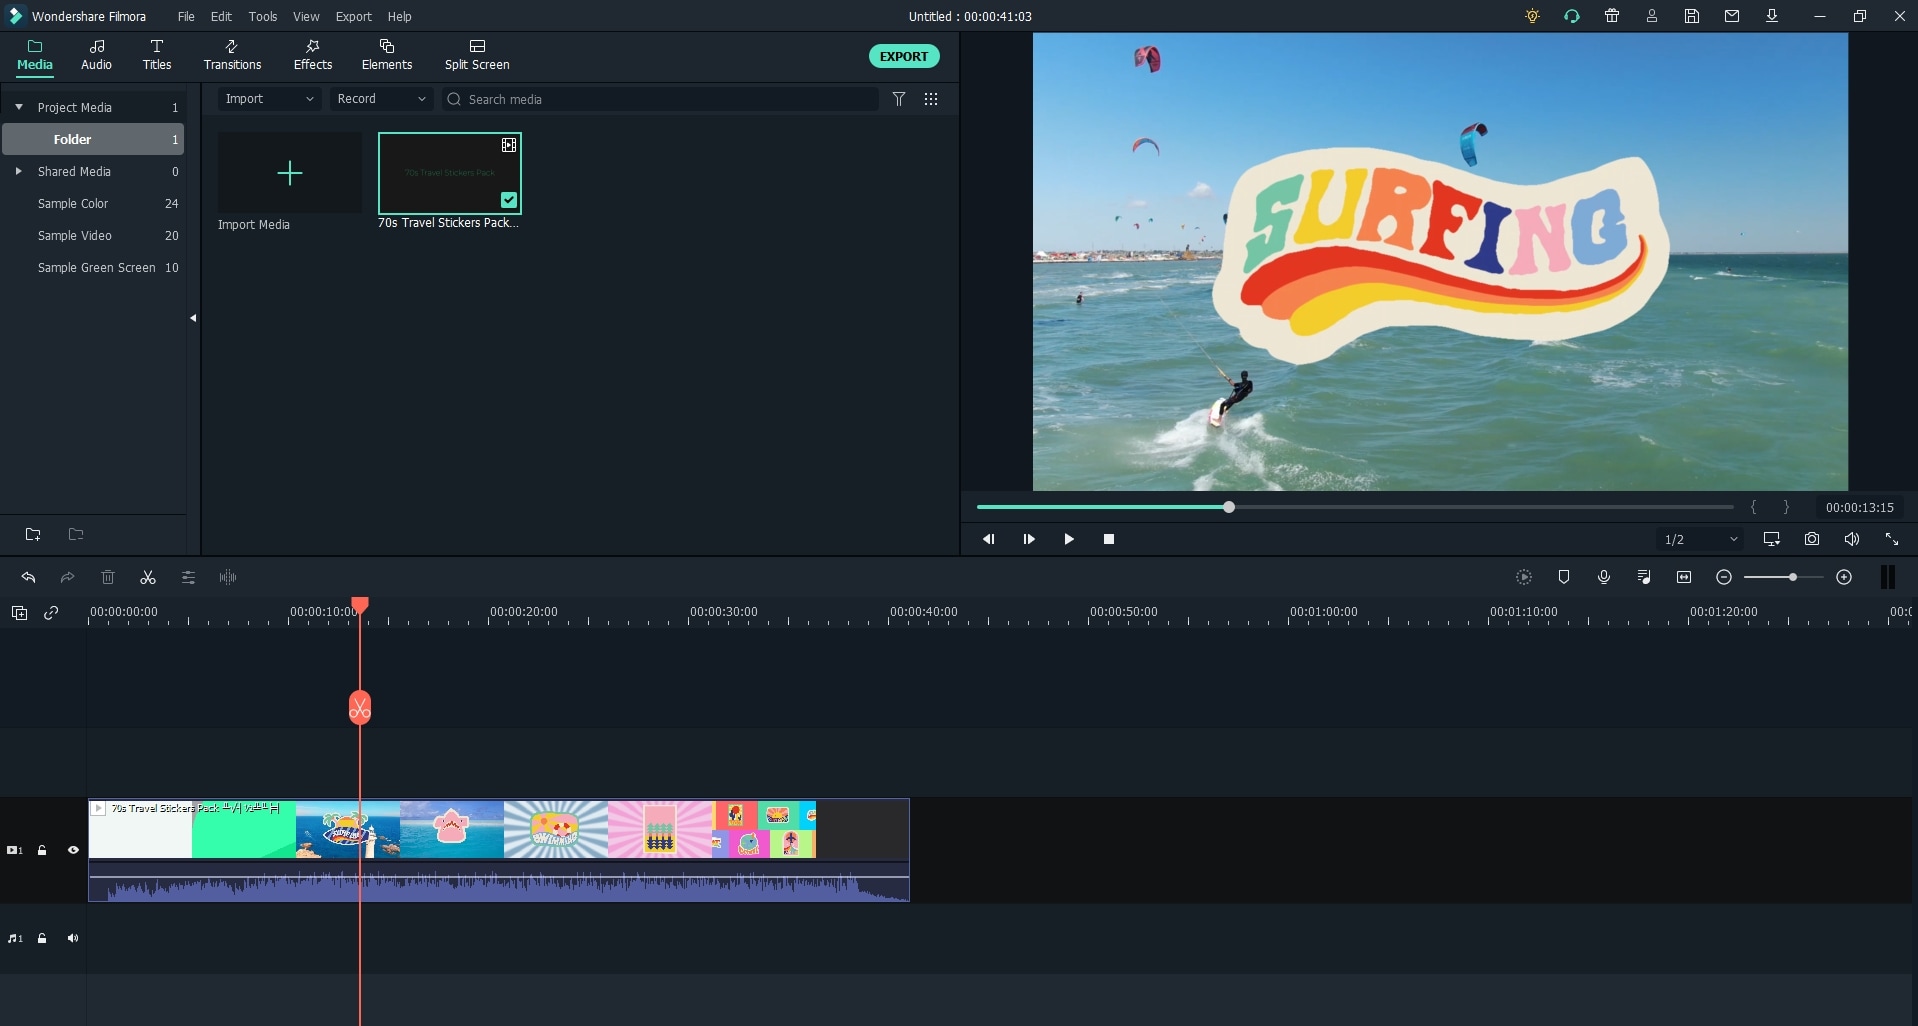
Step 1: Launch Wondershare Filmora and add both the emoji and photo.
Step 2: Drag both of them into the timeline.
Step 3: Use the viewer panel to adjust the size of the emoji.

For Win 7 or later (64-bit)
For macOS 10.12 or later
Besides adding emojis to photos or videos, you can also add stickers to videos in Filmora to have fun.
Conclusion
And that’s how you can add an emoji to a photo online easily. You can try all five websites to add emojis to your photos, and if you want, you can download Wondershare Filmora to further edit the image. So, try these tools and make your photo look fun and fantastic!
02 How to Add Emojis to Photo on Wondershare Filmora
Part 1: Top 5 Websites to Add Emojis to Photo Online
#1: Kapwing
One of the best websites is Kapwing, which lets you add emojis to any photo you want. Kapwing is an easy-to-use online tool, which means you will not have to download any tool. But to start using it, you will have to sign up. You can do that by using your Google ID. When it comes to the number of emojis it has, it boasts more than 250 different emojis. It lets you add custom emojis; let’s say you have a pack of custom emojis with you that you want to use; you can do that effortlessly.
Key Features
- It’s an online tool and free to use.
- You need to sign up to save your work.
- It has more than 250 emojis to choose from.
- Kapwing is easy to use.
Steps to Follow to Use Kapwing
Step 1: Visit the official website of Kapwing. You will see the Start Editing option; please click on that.
Step 2: You will see the workspace with an option that says “click to upload.” Click on it.
Step 3: Now, upload a photo that you want to add the emoji too. The image will be uploaded.
Step 4: To add an emoji, look towards the left menu, and you will see the Add Media option. Click on that.
Step 5: You will see the upload, projects, and emojis options. Click on the emojis option.
Step 6: Emojis will appear. Click on one, and it will be uploaded to the main photo. You can drag, shrink, zoom, or rotate the emoji used. You can add as many emojis you want.
Related: How to make a slo-mo video on Kapwing
#2: Image Online.Co
The next good online tool that you can try is Image Online.Co. It’s a pretty basic tool that lets you upload a photo and add an emoji the right way. It has more than 100 emojis, which is not a lot. But features all the popular emojis that will suit all kinds of images. And it allows you to add your custom emojis, which is why people prefer to use Image Online.Co. Using it is very easy, and the interface of the online tool is easy to understand.
Key Features
- It is a 100% free online tool that won’t ask you to sign up or log in.
- The tool has 100+ emojis to choose from.
- The interface is easy to understand.
- The tool is easy to use.
Steps to Follow to Use Image Online.Co
Step 1: Visit https://emoji.imageonline.co/ , which is their official website.
Step 2: Click on the Select Photo option, else directly drop an image from your local folder.
Step 3: If you want, you can add a custom emoji that you already have.
Step 4: Add an emoji from the right menu and rotate or zoom in or zoom out.
#3: Canva
Canva is arguably one of the best ways to make your photos look better. This tool has tons of features, and the best part is that you can customize a picture with an emoji using one of their templates. It has 250+ emojis and lets you add your customized emoji. And to start using Canva, you will have to sign up.
Key Features
- Canva has more than 250 emojis.
- It lets you edit your photos to enhance their quality.
- One-month free trial.
- You can choose from different templates.
Steps to Follow to Use Canva
Step 1: First, visit https://www.canva.com/ and sign up using your Facebook account or Gmail.
Step 2: Choose the kind of work you would like to do, and you will be taken to the photo editing page.
Step 3: Upload an image and click on the more option.
Step 4: Click on the emoji option and choose an emoji to add to the image. To save, click on the download option.
Related: How to Animate Pictures in Canva
#4: PiZap
PiZap is a photo editing tool that lets you add emojis too. To start using, you will have to log in or sign up. You can use your Facebook, Twitter, or Google account to sign up. It provides you with various graphics, fonts, and other photo editing features to make the image look better than before. The basic tool comes for free and has 232 emojis currently.
Key Features
- The basic tool comes for free.
- There are numerous emojis to choose from.
- The image quality doesn’t lose its original quality.
- Using the tool is easy, and the interface is intuitive.
Steps to Follow to Use PiZap
Step 1: Visit www.pizap.com and click on the try for free option.
Step 2: Click on the edit photo option, and upload an image.
Step 3: From the left-side toolbar, click on the Graphics option. Scroll a bit, and you will see the emoji section.
Step 4: Click on any of the emojis you like to add to the photo. You can adjust the emojis as you want.
#5: Pixelied
![]()
The last website that we have is Pixelied. The free tool will let you edit your image and add emojis, which will be enough if you don’t want many features. Using the tool is easy, and the emojis Pixelied has are great. They are different than general emojis and look better! Plus, the tool provides 300+ fantastic emojis.
Key Features
- The tool has an excellent collection of emojis.
- Adding emojis is extremely easy.
- It is free to use and doesn’t require any photo editing experience.
- The tool also offers various photo editing features.
How to Use Pixelied?
Step 1: Visit pixelied.com and click on the Upload Your Image option.
Step 2: On the left, you will find tons of icons. Use the search bar and type emojis.
Step 3: Browse through the emojis and click on one that you like. You can use multiple emojis, too, if you want. To save, click on the download option.
Part 2: How to Add Emojis to Photo on Wondershare Filmora
Filmora video editor provides tons of emojis that you can add for free, so you can add them to photos directly. What’s more, you can also upload your own emoji and use it in Filmora. All you need to do is download the tool on your Windows or Mac computer and start using it to add an emoji. There are two ways to go about it:
Use Emojis from Elements
Step 1: Launch Wondershare Filmora and click on create a new project.
Step 2: Click on the Elements option on the top and use the search bar to search for emojis.
Step 3: Click on any of the emojis that you like and adjust them.
Step 4: To save the photo with emojis, just click the camera icon to take a screenshot .
The video below shows the animated emojis that you can try in Filmora, take a look and have fun.
For Win 7 or later (64-bit)
For macOS 10.12 or later
Upload Your Own Emoji
Step 1: Launch Wondershare Filmora and add both the emoji and photo.
Step 2: Drag both of them into the timeline.
Step 3: Use the viewer panel to adjust the size of the emoji.
For Win 7 or later (64-bit)
For macOS 10.12 or later
Besides adding emojis to photos or videos, you can also add stickers to videos in Filmora to have fun.
Conclusion
And that’s how you can add an emoji to a photo online easily. You can try all five websites to add emojis to your photos, and if you want, you can download Wondershare Filmora to further edit the image. So, try these tools and make your photo look fun and fantastic!
6 Popular Animated Emoji Video Effects
6 Popular Animated Emoji Video Effects in 2024

Max Wales
Mar 27, 2024• Proven solutions
The daily grind of hard work, starting from dawn to dusk, has become overwhelming and mind-crushing. An average mind requires entertainment and recreation to work better and function properly. This brings us to the need for funny videos that make use of animated emoji to make our life more bearable.
Emojis like laughing emojis and thumbs-up emojis have a quirky way of increasing the serotonin levels in our body. Therefore, this article shall walk you through the top 6 animated emoji video effects presented by Wondershare Filmstock . In addition to this, there will be 8 peculiar ideas to make the video funny.
If you want to know the steps to edit video with animated emojis in Filmora, we have got you! So, without delaying it any longer, let us dig in!
- Part 1: Top 6 Animated Emoji Video Effects for Filmora Video Editor
- Part 2: 8 Ideas for Making Funny Videos with Animated Emoji
- Part 2: How to Edit Video with Animated Emoji in Filmora?
Part 1: Top 6 Animated Emoji Video Effects for Filmora Video Editor
The section shall revolve around the top 6animated emoji video effects that are presented by an online effects store known as Wondershare Filmstock. This website allows the user to have access to an unlimited range of effects, transitions, titles, graphics, elements, images, audio, and visual effects. One can unleash their creative ideas and download effects for every relevant situation.
Along with this, it is constantly growing and unique media with no fear of attribution. If this is not the ideal case scenario, then we don’t know what it will be! The following set of effects are the top 6 animated emoji video effects to incorporate in your YouTube introductory videos, TikTok clips, and Instagram stories or reels.
1. Animated Emoji Pack
Animated kiss emoji, animated dancing emoji, and laughing emoji, this emoji pack has covered your basics. With 24 elements, Animated Emoji Pack provides an easy way to express yourself and say it out loud using the language of emojis.
2. Emoji Stickers Pack
If you are on the verge of a nervous breakdown and require a stickers pack with 32 elements that include a crying emoji, this pack has to be your answer. In addition to this, this effect is 100% compatible with Wondershare Filmora 9.6 and above.
3. Message Bubbles Pack
With message and chat bubbles that make communication a lot faster and quick, allow me to introduce you to Message Bubbles Pack. It constitutes animated cute emoji faces and texting graphics to make your social media fun and interesting.
4. 3D Social Media Icons Pack
Incorporated with 12 titles, 60 elements, 4 overlays, and 6 transitions, 3D Social Media Icons Pack is sure to fill your shoes. One can have access to unlimited emoji animated in 3D animation and showcase themselves as the cool and classy one of the lot.
5. Cute Cartoon Emoji Pack
The Cartoon Emoji Pack is an amalgamation of a wide range of cartoon emojis to express yourself as best as you can. With the right choice of emoji, one can communicate themselves whilst using a total of 25 elements.
6. Reactions Stickers Pack
With a speech and thought bubble, Reaction Sticker Pack presents all sorts of reaction emojis and smileys. In addition to this, the template offers 11 titles, 4 overlays, 40 elements, and 2 transitions. Get ready to express your reactions in the funniest way.
Part 2: 8 Ideas for Making Funny Videos with Animated Emoji
The use of free animated emoji to make videos funny has become a thing now. Furthermore, it lets the user express themselves as a coping mechanism. Win-win situation, right? The article provides 8 fruitful ideas for making videos funny with these animated emojis. Let us have a look at them!

1. Face Swap with Animated Emoji
The first idea is sure to make the audience burst into laughter. For starters, one can swap their faces with animated emojis like an animated dancing emoji or a crying emoji. You can tell your audience what you are feeling right at the moment as you use those emojis and then show your real face.
2. Sharing a Story
One can share a funny story with their audience by using the power of animated emojis. They can explain what happened with a series of steps and incorporate emojis in the background that sync with the emotional reaction of the user as well as the audience.
3. Dream Wedding Video
The next idea is related to a wedding video. To make it funnier, the user can first create a video of the dream wedding planned for them. Combine it with the actual wedding video and then use 3D animated emojis to express how everything was messed up and, in the end, and didn’t go as planned.
4. Thoughts on Books and Netflix Series
The next idea is a workable and effective tool to make your video funnier. The content creator can make a video of a book he read or the Netflix series he watched and provide the audience with his thoughts. They can communicate the flaws of the movie or a book using animated sticker packs and gifs to make it funny and interesting.
5. Coworkers and Superiors Video
In this idea, the user can make a video showing his workplace and include all his superiors and coworkers. Afterward, he can edit the video by expressing himself what he actually feels about them and using different emojis to display the reaction of his coworkers in the video.
6. Video Techniques
The different video techniques can be used to make people laugh and be attracted to the video. For once, the user can quickly zoom in to the character when he is speaking to create a dramatic pull. In addition to this, one can also keep the camera on even after their dialogue delivery is concluded. This will capture an off-the-record reaction.
7. Capturing the Pets
The best idea yet is capturing the pets in the video. The user can record their pets doing insane and crazy things and insert emojis to bring a funny addition to the video. Along with this, one can use the thinking emoji to assume what their pet has been thinking at the moment.
8. A Random Day of your Life
One can add the element of surprise and laughter by making a video on their random day and how they want it to go. Record the video of your whole day and then combine it with a wide range of emojis such as crying emoji, laughing emoji, and kiss emoji.
Part 3: How to Edit Video with Animated Emoji in Filmora?
The last part of this article covers a brief introduction to a renowned video editing software and provides a step-by-step guideline to edit videos using animated emojis. Wondershare Filmora makes sure that the user has the right tools and mechanism to make their editing journey fun and reliable. It offers an effortless and user-friendly interface, a wide range of effects and transitions, and a motion tracking feature.


In addition to this, one can count on this software to change the backgrounds, insert split screens, discover filters and overlays, control speed, and personalize the creation. If you are all set to use this amazing video editing software, follow the procedure keenly to avoid any future inconvenience.
Step 1: Initiating the Project
Install Wondershare Filmora in your system and launch it as soon as the process concludes. Tap on the “New Project” tab on the welcome window of the software. Set the aspect ratio for your video. The resolution can be changed by clicking on the “File” option and then “Project Settings.”
Step 2: Importing the Video
Now, tap on the “Import Media Files Here” menu option, which is located on the left side of the interface of Filmora. Tap on the targeted video to import it. Moving on, drag and drop the media file to the timeline.
Step 3: Processing the Video
Import the media files to the video track so that they can be manipulated. Now, process the video as you wish to. You can edit, trim, split, rotate, resize, crop, and combine videos.
Step 4: Adding the Emoji
On the top left section of the window, navigate to the “Elements” tab. From there, pick out the “Emoji” category and browse a wide range of emojis. Drag and drop the emojis to your video. You can relocate and resize the emoji based on the video dimensions.
Step 5: Exporting the Video
Click on “Export,” located on the top right corner of the window. Pick out the output video format and hit “Export” to finalize the editing process.
Wrapping Up
The article put forward a detailed description of 8 viable ideas that are sure to make the video funnier. Furthermore, Wondershare Filmstock was introduced as an online effects store, and Wondershare Filmora was presented as an amazing video editing software. One can have a look at the effects offered by Filmora in section 1 to make their videos interesting, funny, and watchable.
Max Wales
Max Wales is a writer and a lover of all things video.
Follow @Max Wales
Max Wales
Mar 27, 2024• Proven solutions
The daily grind of hard work, starting from dawn to dusk, has become overwhelming and mind-crushing. An average mind requires entertainment and recreation to work better and function properly. This brings us to the need for funny videos that make use of animated emoji to make our life more bearable.
Emojis like laughing emojis and thumbs-up emojis have a quirky way of increasing the serotonin levels in our body. Therefore, this article shall walk you through the top 6 animated emoji video effects presented by Wondershare Filmstock . In addition to this, there will be 8 peculiar ideas to make the video funny.
If you want to know the steps to edit video with animated emojis in Filmora, we have got you! So, without delaying it any longer, let us dig in!
- Part 1: Top 6 Animated Emoji Video Effects for Filmora Video Editor
- Part 2: 8 Ideas for Making Funny Videos with Animated Emoji
- Part 2: How to Edit Video with Animated Emoji in Filmora?
Part 1: Top 6 Animated Emoji Video Effects for Filmora Video Editor
The section shall revolve around the top 6animated emoji video effects that are presented by an online effects store known as Wondershare Filmstock. This website allows the user to have access to an unlimited range of effects, transitions, titles, graphics, elements, images, audio, and visual effects. One can unleash their creative ideas and download effects for every relevant situation.
Along with this, it is constantly growing and unique media with no fear of attribution. If this is not the ideal case scenario, then we don’t know what it will be! The following set of effects are the top 6 animated emoji video effects to incorporate in your YouTube introductory videos, TikTok clips, and Instagram stories or reels.
1. Animated Emoji Pack
Animated kiss emoji, animated dancing emoji, and laughing emoji, this emoji pack has covered your basics. With 24 elements, Animated Emoji Pack provides an easy way to express yourself and say it out loud using the language of emojis.
2. Emoji Stickers Pack
If you are on the verge of a nervous breakdown and require a stickers pack with 32 elements that include a crying emoji, this pack has to be your answer. In addition to this, this effect is 100% compatible with Wondershare Filmora 9.6 and above.
3. Message Bubbles Pack
With message and chat bubbles that make communication a lot faster and quick, allow me to introduce you to Message Bubbles Pack. It constitutes animated cute emoji faces and texting graphics to make your social media fun and interesting.
4. 3D Social Media Icons Pack
Incorporated with 12 titles, 60 elements, 4 overlays, and 6 transitions, 3D Social Media Icons Pack is sure to fill your shoes. One can have access to unlimited emoji animated in 3D animation and showcase themselves as the cool and classy one of the lot.
5. Cute Cartoon Emoji Pack
The Cartoon Emoji Pack is an amalgamation of a wide range of cartoon emojis to express yourself as best as you can. With the right choice of emoji, one can communicate themselves whilst using a total of 25 elements.
6. Reactions Stickers Pack
With a speech and thought bubble, Reaction Sticker Pack presents all sorts of reaction emojis and smileys. In addition to this, the template offers 11 titles, 4 overlays, 40 elements, and 2 transitions. Get ready to express your reactions in the funniest way.
Part 2: 8 Ideas for Making Funny Videos with Animated Emoji
The use of free animated emoji to make videos funny has become a thing now. Furthermore, it lets the user express themselves as a coping mechanism. Win-win situation, right? The article provides 8 fruitful ideas for making videos funny with these animated emojis. Let us have a look at them!
1. Face Swap with Animated Emoji
The first idea is sure to make the audience burst into laughter. For starters, one can swap their faces with animated emojis like an animated dancing emoji or a crying emoji. You can tell your audience what you are feeling right at the moment as you use those emojis and then show your real face.
2. Sharing a Story
One can share a funny story with their audience by using the power of animated emojis. They can explain what happened with a series of steps and incorporate emojis in the background that sync with the emotional reaction of the user as well as the audience.
3. Dream Wedding Video
The next idea is related to a wedding video. To make it funnier, the user can first create a video of the dream wedding planned for them. Combine it with the actual wedding video and then use 3D animated emojis to express how everything was messed up and, in the end, and didn’t go as planned.
4. Thoughts on Books and Netflix Series
The next idea is a workable and effective tool to make your video funnier. The content creator can make a video of a book he read or the Netflix series he watched and provide the audience with his thoughts. They can communicate the flaws of the movie or a book using animated sticker packs and gifs to make it funny and interesting.
5. Coworkers and Superiors Video
In this idea, the user can make a video showing his workplace and include all his superiors and coworkers. Afterward, he can edit the video by expressing himself what he actually feels about them and using different emojis to display the reaction of his coworkers in the video.
6. Video Techniques
The different video techniques can be used to make people laugh and be attracted to the video. For once, the user can quickly zoom in to the character when he is speaking to create a dramatic pull. In addition to this, one can also keep the camera on even after their dialogue delivery is concluded. This will capture an off-the-record reaction.
7. Capturing the Pets
The best idea yet is capturing the pets in the video. The user can record their pets doing insane and crazy things and insert emojis to bring a funny addition to the video. Along with this, one can use the thinking emoji to assume what their pet has been thinking at the moment.
8. A Random Day of your Life
One can add the element of surprise and laughter by making a video on their random day and how they want it to go. Record the video of your whole day and then combine it with a wide range of emojis such as crying emoji, laughing emoji, and kiss emoji.
Part 3: How to Edit Video with Animated Emoji in Filmora?
The last part of this article covers a brief introduction to a renowned video editing software and provides a step-by-step guideline to edit videos using animated emojis. Wondershare Filmora makes sure that the user has the right tools and mechanism to make their editing journey fun and reliable. It offers an effortless and user-friendly interface, a wide range of effects and transitions, and a motion tracking feature.
In addition to this, one can count on this software to change the backgrounds, insert split screens, discover filters and overlays, control speed, and personalize the creation. If you are all set to use this amazing video editing software, follow the procedure keenly to avoid any future inconvenience.
Step 1: Initiating the Project
Install Wondershare Filmora in your system and launch it as soon as the process concludes. Tap on the “New Project” tab on the welcome window of the software. Set the aspect ratio for your video. The resolution can be changed by clicking on the “File” option and then “Project Settings.”
Step 2: Importing the Video
Now, tap on the “Import Media Files Here” menu option, which is located on the left side of the interface of Filmora. Tap on the targeted video to import it. Moving on, drag and drop the media file to the timeline.
Step 3: Processing the Video
Import the media files to the video track so that they can be manipulated. Now, process the video as you wish to. You can edit, trim, split, rotate, resize, crop, and combine videos.
Step 4: Adding the Emoji
On the top left section of the window, navigate to the “Elements” tab. From there, pick out the “Emoji” category and browse a wide range of emojis. Drag and drop the emojis to your video. You can relocate and resize the emoji based on the video dimensions.
Step 5: Exporting the Video
Click on “Export,” located on the top right corner of the window. Pick out the output video format and hit “Export” to finalize the editing process.
Wrapping Up
The article put forward a detailed description of 8 viable ideas that are sure to make the video funnier. Furthermore, Wondershare Filmstock was introduced as an online effects store, and Wondershare Filmora was presented as an amazing video editing software. One can have a look at the effects offered by Filmora in section 1 to make their videos interesting, funny, and watchable.
Max Wales
Max Wales is a writer and a lover of all things video.
Follow @Max Wales
How to Make a FLV Photo Slideshow with Music
How to Make a FLV Photo Slideshow
Shanoon Cox
Mar 27, 2024• Proven solutions
FLV slideshow is a suitable way to share photos and videos online due to its small size and reasonable quality. Wondershare DVD Slideshow Builder brings more convenience to instantly make a slideshow with music , photos and lets you create FLV videos, as well as other video formats. You can create a FLV slideshow in easy steps as below.
Easy Guide to Make FLV Slideshow with Music
1 Import Photos & Video and Music for FLV Slideshow
Install and launch the slideshow maker, go to Organize tab and import your photos, videos and music files. Transitions between adjacent slides will be used. But you can change them by following step 2.
2 Apply Transition and Motion Effect
This slideshow maker includes more than 100 transition effects for slides switch. Before applying, double-click transition thumbnail to preview in player on the right. You could also randomize transitions or apply one transition to all slides in FLV slideshow.
3 Save Photo Slideshow to FLV Video
Select Flash Video format as the output and make advanced settings by clicking Settings button. Finally, click Burn and wail a while, you get your FLV video to sharing on YouTube, Facebook, MySpace, Mobile Phone. Alternatively, play FLV video on computer via stand-alone FLV player.
FLV Slideshow Tips
For more detailed settings of FLV slideshow, click Settings button and specify various options, like encoder, resolution, frame rate, bit rate and audio settings.
To play FLV slideshow on Nokia mobile phone, you should set encode type to Nokia FLV series (*.flv). Once created, upload flv to Nokia phone or online and view FLV slideshow using FLV player or web browser plugin.
You could also upload FLV slideshow to YouTube to share with more people. FLV videos are perfectly supported by YouTube.
More: Convert All Popular Formats to FLV
Wondershare DVD Slideshow Builder Deluxe supports all popular video formats. Therefore, you can import videos that need to change format, and save it in another format. It’s not only a DVD slideshow maker, but only powerful FLV converter. For detailed supported input formats, check video format references.
More: Convert FLV to MP4, AVI, MOV, MPEG or Burn FLV to DVD
You could also import FLV to DVD Slideshow Builder Deluxe and save it as MP4, AVI, MOV and 3GP, or even burn FLV video to DVD with beautiful DVD menus. For detailed supported output formats, check video format references. Here, I recommended to save FLV to MP4 for its comprehensive support on various devices, such as iPhone, iPod, Apple TV, Gphone, Nokia phone, LG phone, PSP, Palm, Zune, etc.
About FLV Video (Flash Video)
Flash Video (*.FLV ) is a container file format used to deliver video over the internet using Adobe Flash Player versions 6-10 (developed by Macromedia). Flash Video content may also be embedded within SWF files. FLV videos are widely used by international companies, including YouTube, Google Video, Yahoo! Video, metacafe, Reuters.com, and many other news providers. Flash Video could be watched on most operating systems, via the Adobe Flash Player and web browser plugin, or desired third-party FLV Players.
Shanoon Cox
Shanoon Cox is a writer and a lover of all things video.
Follow @Shanoon Cox
Shanoon Cox
Mar 27, 2024• Proven solutions
FLV slideshow is a suitable way to share photos and videos online due to its small size and reasonable quality. Wondershare DVD Slideshow Builder brings more convenience to instantly make a slideshow with music , photos and lets you create FLV videos, as well as other video formats. You can create a FLV slideshow in easy steps as below.
Easy Guide to Make FLV Slideshow with Music
1 Import Photos & Video and Music for FLV Slideshow
Install and launch the slideshow maker, go to Organize tab and import your photos, videos and music files. Transitions between adjacent slides will be used. But you can change them by following step 2.
2 Apply Transition and Motion Effect
This slideshow maker includes more than 100 transition effects for slides switch. Before applying, double-click transition thumbnail to preview in player on the right. You could also randomize transitions or apply one transition to all slides in FLV slideshow.
3 Save Photo Slideshow to FLV Video
Select Flash Video format as the output and make advanced settings by clicking Settings button. Finally, click Burn and wail a while, you get your FLV video to sharing on YouTube, Facebook, MySpace, Mobile Phone. Alternatively, play FLV video on computer via stand-alone FLV player.
FLV Slideshow Tips
For more detailed settings of FLV slideshow, click Settings button and specify various options, like encoder, resolution, frame rate, bit rate and audio settings.
To play FLV slideshow on Nokia mobile phone, you should set encode type to Nokia FLV series (*.flv). Once created, upload flv to Nokia phone or online and view FLV slideshow using FLV player or web browser plugin.
You could also upload FLV slideshow to YouTube to share with more people. FLV videos are perfectly supported by YouTube.
More: Convert All Popular Formats to FLV
Wondershare DVD Slideshow Builder Deluxe supports all popular video formats. Therefore, you can import videos that need to change format, and save it in another format. It’s not only a DVD slideshow maker, but only powerful FLV converter. For detailed supported input formats, check video format references.
More: Convert FLV to MP4, AVI, MOV, MPEG or Burn FLV to DVD
You could also import FLV to DVD Slideshow Builder Deluxe and save it as MP4, AVI, MOV and 3GP, or even burn FLV video to DVD with beautiful DVD menus. For detailed supported output formats, check video format references. Here, I recommended to save FLV to MP4 for its comprehensive support on various devices, such as iPhone, iPod, Apple TV, Gphone, Nokia phone, LG phone, PSP, Palm, Zune, etc.
About FLV Video (Flash Video)
Flash Video (*.FLV ) is a container file format used to deliver video over the internet using Adobe Flash Player versions 6-10 (developed by Macromedia). Flash Video content may also be embedded within SWF files. FLV videos are widely used by international companies, including YouTube, Google Video, Yahoo! Video, metacafe, Reuters.com, and many other news providers. Flash Video could be watched on most operating systems, via the Adobe Flash Player and web browser plugin, or desired third-party FLV Players.
Shanoon Cox
Shanoon Cox is a writer and a lover of all things video.
Follow @Shanoon Cox
Record and Edit an Animoji or Memoji Karaoke Music Video
How to Record and Edit an Animoji or Memoji Karaoke Music Video?

Liza Brown
Mar 27, 2024• Proven solutions
Becoming a superstar whose music is adored in every corner of the Earth is not something that can be achieved overnight. The rest of us, who only dream of worldwide fame can just enjoy our favorite songs and from time to time create animoji karaoke music videos for entertainment purposes. Read on if you are not sure what animojis are and how you can use them to create music videos from your iPhone or iPad, because in this article we are going to take you through each step of the process of making an animoji karaoke video.
First, let’s check some popular Memoji Karaoke video from YouTube. The Video below is from YouTuber Memoji Karaoke, enjoy.
What Exactly is The Difference Between Animojis and Memojis?
Animojis and Memojis have taken the world by storm since the first iPhone X model was released back in 2017. Both animojis and memojis utilize facial recognition technologies to track your movements and facial expressions and imitate them in a virtual environment. However, an animoji is a 3D emoji like a monkey, koala, tiger or a unicorn, while memojis are fully customizable avatars that let you create a character from scratch.
Memojis enable you to choose the character’s skin color, head, nose, ear shape or hairstyle, meaning that you can create as many new characters as you want effortlessly. Furthermore, you can add stickers or apply up to five different filters to animojis and memojis you share with your friends.

See best Memoji makers here: Top 8 Memoji Makers to Make a Memoji on PC, Android, and iPhone.
How to Set Up and Create Memojis?
Owners of iPhone X, iPhone XS, iPhone XS Max, and iPadPro can easily make new memojis from their devices. All you have to do in order to start creating a new memoji is open the messaging app, locate the iMessage AppStore icon, tap on it and then tap on the Animoji icon. By doing so you will gain access to all animojis that are available on iOS 12 or other versions of the iOS that support memojis and animojis. After tapping on the New Memoji icon you will be able to see the default character you can customize as you see fit.
You can now get creative and pick one of the countless skin tones, choose how old your character is going to be or select any of the available head, nose and ear shapes. Moreover, you can customize the eye color for each character you create, add eyewear, or decide whether or not your character is going to have facial hair. Once you’re finished customizing a new memoji, simply tap on the Done button and the character you’ve created is going to be saved in your animoji collection. You can edit, duplicate or delete the memojis by tapping on the three dot icon or you can use them as camera overlays and share them with your friends.
How to Make a Memoji or Animoji Karaoke Music Video?
Once you’ve created a memoji you will have to record thirty-second videos in order to be able to send them as messages. After the recording session is completed, you can review the material you’ve produced, and decide if you are happy with the result or if you want to do another take. The only downside is that you can’t play music from your iPhone or your iPad while you’re recording, which means that you have to play the song you want to cover from another device such as a computer or the stereo system.
Read this article to learn more about Animoji: The Ultimate Guide of How to Use Animoji on iPhone X.
It is worth noting that knowing the lyrics of the song is going to improve the quality of the karaoke music video you’re producing significantly, so rehearsing a song few times before you hit the record button may be a good idea if you don’t know its lyrics by heart.
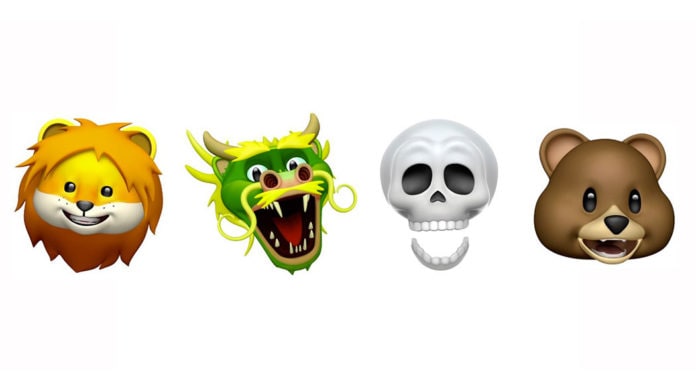
When you’re ready, launch the iMessage app and choose an animoji or memoji character you’re going to be in the video. Don’t record karaoke videos in the full-screen mode because the record button is going to cover a significant portion of the screen, which can complicate the video editing process. Optionally, you download and install the Animoji Studio app if you want to record videos that are longer than thirty seconds, but you might need some time to get used to making karaoke videos with this app.
Proceed to record your 30-second video or activate the Screen Recording option from the Control Center if you want to capture a karaoke video that exceeds that limit. If you like the results you can simply send the video you’ve created as a message, but you can also transfer the file to your computer and edit from a video editing software like Filmora.
Import the memoji video file you’ve transferred to your computer into Filmora after you’ve created a new project. You can do this from the software’s Media panel by clicking on the Import drop-down menu and choosing the Import Media Files option. Place the video file on the timeline and then cut or trim all parts of the clip you don’t want to include in the final cut of your memoji karaoke video. Filmora offers a vast number of different opening titles, end credits, audio and visual effects and transitions that can all help you create a visually attractive karaoke video.
Moreover, you can duplicate an animoji or memoji and create a duet in just a few simple clicks. The editor’s powerful audio editing tools enable you to add a high-quality audio file to your project or sound effects that can make your video more entertaining. Click on the Export button to choose the output destination, format, resolution and aspect ratio for the karaoke video you’ve just created. Filmora lets you export videos directly to your YouTube or Vimeo channel, which can be quite handy if you want to share your memoji videos online immediately after you’ve completed the video editing process.
List of iPhones and iPads that Support Animojis and Memojis
| Face ID | Animoji | Memoji |
|---|---|---|
| iPhone X | iPhone X | iPhone X (iOS 12 or later required) |
| iPhone XR | iPhone XR | iPhone XR |
| iPhone XS | iPhone XS | iPhone XS |
| iPhone XS Max | iPhone XS Max | iPhone XS Max |
| iPad Pro 12.9-inch (3rd generation) | iPad Pro 12.9-inch (3rd generation) | iPad Pro 12.9-inch (3rd generation) |
| iPad Pro 11-inch or above | iPad Pro 11-inch | iPad Pro 11-inch |
Unfortunately, Face ID feature, as well as animojis and memojis, are relatively novel additions on iOS-based devices, and you won’t be able to create memoji or animoji karaoke videos from the iMessages app unless you have one of the following iPhone or iPad models.
The list of iPhone and iPad models that offer the Face ID, Animoji and Memoji Features
Older models of iPhones, iPods, and iPads that have the latest version of iOS installed can only receive animoji and memoji messages, but it is not possible to create these messages with them. In case you are using an older model of an iPhone or an iPad but you still want to create animoji and memoji karaoke videos you can find a simple solution to your problem below.
Supermoji – The Emoji App – The Best App for Creation of Animoji and Memoji Music Videos on Old Versions of iPhones and iPads
A powerful and intuitive app like Supermoji enables you to create karaoke music videos that feature your favorite animoji and memoji characters with ease. Creating animated 3D models won’t take too much of your time if you choose to download and install this app on your device, but after a three-day trial period, you’ll have to opt for one of the available subscription models. A weekly subscription costs $9.99, while you must pay $29.99 for a monthly subscription, which makes the Supermoji app a bit pricy. Alternatively, you can try Facemoji or Emoji Face Recorder apps, but the results you’ll get can be a bit underwhelming when compared to the animojis and memojis created from the iMessages app.
Conclusion
Creating funny animoji and memoji karaoke music videos is a new trend that can only grow in popularity in the future. However, this feature is only available on recent iPhone and iPad models, but there are a number of third-party apps that enable you to create this type of video even if you are using an older iPhone or iPad model. Do you like using memoji and animoji animations to create karaoke videos you share with your friends on social media? Leave a comment below and share your opinions with us.
Liza Brown
Liza Brown is a writer and a lover of all things video.
Follow @Liza Brown
Liza Brown
Mar 27, 2024• Proven solutions
Becoming a superstar whose music is adored in every corner of the Earth is not something that can be achieved overnight. The rest of us, who only dream of worldwide fame can just enjoy our favorite songs and from time to time create animoji karaoke music videos for entertainment purposes. Read on if you are not sure what animojis are and how you can use them to create music videos from your iPhone or iPad, because in this article we are going to take you through each step of the process of making an animoji karaoke video.
First, let’s check some popular Memoji Karaoke video from YouTube. The Video below is from YouTuber Memoji Karaoke, enjoy.
What Exactly is The Difference Between Animojis and Memojis?
Animojis and Memojis have taken the world by storm since the first iPhone X model was released back in 2017. Both animojis and memojis utilize facial recognition technologies to track your movements and facial expressions and imitate them in a virtual environment. However, an animoji is a 3D emoji like a monkey, koala, tiger or a unicorn, while memojis are fully customizable avatars that let you create a character from scratch.
Memojis enable you to choose the character’s skin color, head, nose, ear shape or hairstyle, meaning that you can create as many new characters as you want effortlessly. Furthermore, you can add stickers or apply up to five different filters to animojis and memojis you share with your friends.
See best Memoji makers here: Top 8 Memoji Makers to Make a Memoji on PC, Android, and iPhone.
How to Set Up and Create Memojis?
Owners of iPhone X, iPhone XS, iPhone XS Max, and iPadPro can easily make new memojis from their devices. All you have to do in order to start creating a new memoji is open the messaging app, locate the iMessage AppStore icon, tap on it and then tap on the Animoji icon. By doing so you will gain access to all animojis that are available on iOS 12 or other versions of the iOS that support memojis and animojis. After tapping on the New Memoji icon you will be able to see the default character you can customize as you see fit.
You can now get creative and pick one of the countless skin tones, choose how old your character is going to be or select any of the available head, nose and ear shapes. Moreover, you can customize the eye color for each character you create, add eyewear, or decide whether or not your character is going to have facial hair. Once you’re finished customizing a new memoji, simply tap on the Done button and the character you’ve created is going to be saved in your animoji collection. You can edit, duplicate or delete the memojis by tapping on the three dot icon or you can use them as camera overlays and share them with your friends.
How to Make a Memoji or Animoji Karaoke Music Video?
Once you’ve created a memoji you will have to record thirty-second videos in order to be able to send them as messages. After the recording session is completed, you can review the material you’ve produced, and decide if you are happy with the result or if you want to do another take. The only downside is that you can’t play music from your iPhone or your iPad while you’re recording, which means that you have to play the song you want to cover from another device such as a computer or the stereo system.
Read this article to learn more about Animoji: The Ultimate Guide of How to Use Animoji on iPhone X.
It is worth noting that knowing the lyrics of the song is going to improve the quality of the karaoke music video you’re producing significantly, so rehearsing a song few times before you hit the record button may be a good idea if you don’t know its lyrics by heart.
When you’re ready, launch the iMessage app and choose an animoji or memoji character you’re going to be in the video. Don’t record karaoke videos in the full-screen mode because the record button is going to cover a significant portion of the screen, which can complicate the video editing process. Optionally, you download and install the Animoji Studio app if you want to record videos that are longer than thirty seconds, but you might need some time to get used to making karaoke videos with this app.
Proceed to record your 30-second video or activate the Screen Recording option from the Control Center if you want to capture a karaoke video that exceeds that limit. If you like the results you can simply send the video you’ve created as a message, but you can also transfer the file to your computer and edit from a video editing software like Filmora.
Import the memoji video file you’ve transferred to your computer into Filmora after you’ve created a new project. You can do this from the software’s Media panel by clicking on the Import drop-down menu and choosing the Import Media Files option. Place the video file on the timeline and then cut or trim all parts of the clip you don’t want to include in the final cut of your memoji karaoke video. Filmora offers a vast number of different opening titles, end credits, audio and visual effects and transitions that can all help you create a visually attractive karaoke video.
Moreover, you can duplicate an animoji or memoji and create a duet in just a few simple clicks. The editor’s powerful audio editing tools enable you to add a high-quality audio file to your project or sound effects that can make your video more entertaining. Click on the Export button to choose the output destination, format, resolution and aspect ratio for the karaoke video you’ve just created. Filmora lets you export videos directly to your YouTube or Vimeo channel, which can be quite handy if you want to share your memoji videos online immediately after you’ve completed the video editing process.
List of iPhones and iPads that Support Animojis and Memojis
| Face ID | Animoji | Memoji |
|---|---|---|
| iPhone X | iPhone X | iPhone X (iOS 12 or later required) |
| iPhone XR | iPhone XR | iPhone XR |
| iPhone XS | iPhone XS | iPhone XS |
| iPhone XS Max | iPhone XS Max | iPhone XS Max |
| iPad Pro 12.9-inch (3rd generation) | iPad Pro 12.9-inch (3rd generation) | iPad Pro 12.9-inch (3rd generation) |
| iPad Pro 11-inch or above | iPad Pro 11-inch | iPad Pro 11-inch |
Unfortunately, Face ID feature, as well as animojis and memojis, are relatively novel additions on iOS-based devices, and you won’t be able to create memoji or animoji karaoke videos from the iMessages app unless you have one of the following iPhone or iPad models.
The list of iPhone and iPad models that offer the Face ID, Animoji and Memoji Features
Older models of iPhones, iPods, and iPads that have the latest version of iOS installed can only receive animoji and memoji messages, but it is not possible to create these messages with them. In case you are using an older model of an iPhone or an iPad but you still want to create animoji and memoji karaoke videos you can find a simple solution to your problem below.
Supermoji – The Emoji App – The Best App for Creation of Animoji and Memoji Music Videos on Old Versions of iPhones and iPads
A powerful and intuitive app like Supermoji enables you to create karaoke music videos that feature your favorite animoji and memoji characters with ease. Creating animated 3D models won’t take too much of your time if you choose to download and install this app on your device, but after a three-day trial period, you’ll have to opt for one of the available subscription models. A weekly subscription costs $9.99, while you must pay $29.99 for a monthly subscription, which makes the Supermoji app a bit pricy. Alternatively, you can try Facemoji or Emoji Face Recorder apps, but the results you’ll get can be a bit underwhelming when compared to the animojis and memojis created from the iMessages app.
Conclusion
Creating funny animoji and memoji karaoke music videos is a new trend that can only grow in popularity in the future. However, this feature is only available on recent iPhone and iPad models, but there are a number of third-party apps that enable you to create this type of video even if you are using an older iPhone or iPad model. Do you like using memoji and animoji animations to create karaoke videos you share with your friends on social media? Leave a comment below and share your opinions with us.
Liza Brown
Liza Brown is a writer and a lover of all things video.
Follow @Liza Brown
How to Add and Custom Slack Emoji-Wondershare Filmora
How to Add and Custom Slack Emoji-Wondershare Filmora
Shanoon Cox
Mar 27, 2024• Proven solutions
A Slack emoji is just like the emojis you usually use on Whatsapp, Messenger, or other chatting platforms. There is a wide range of emojis you can use to express yourself better or lighten the working environment.
Plus, the option to create a custom Slack emoji makes it more interesting. You can use it to create a new and unique Slack emoji to personalize your chatting experience. Why write long texts when you can just add Slack emoji to say it all?
Let me show you the ropes on how to create a custom Slack emoji and make your chatting experience more fun.
- Part 1: How to Add Slack Emoji
- Part 2: How to Custom Slack Emoji
- Bonus Tip-Edit Emoji and Add Emoji to Your Video
Part 1: How to Add Slack Emoji
At Slack, you can find a Slack emoji for every emotion or occasion. Finding the perfect Slack emoji is as easy as browsing through the categorized sections. Better yet, the option to search for a Slack emoji makes it a cakewalk to get the exact Slack emoji to express oneself.
Also, you can add Slack emoji with a single tap. And it allows you to add unlimited Slack emoji in one message.
Let me show you how to add Slack emoji in a few quick steps:
1.Download and open Slack on your desktop or smartphone.
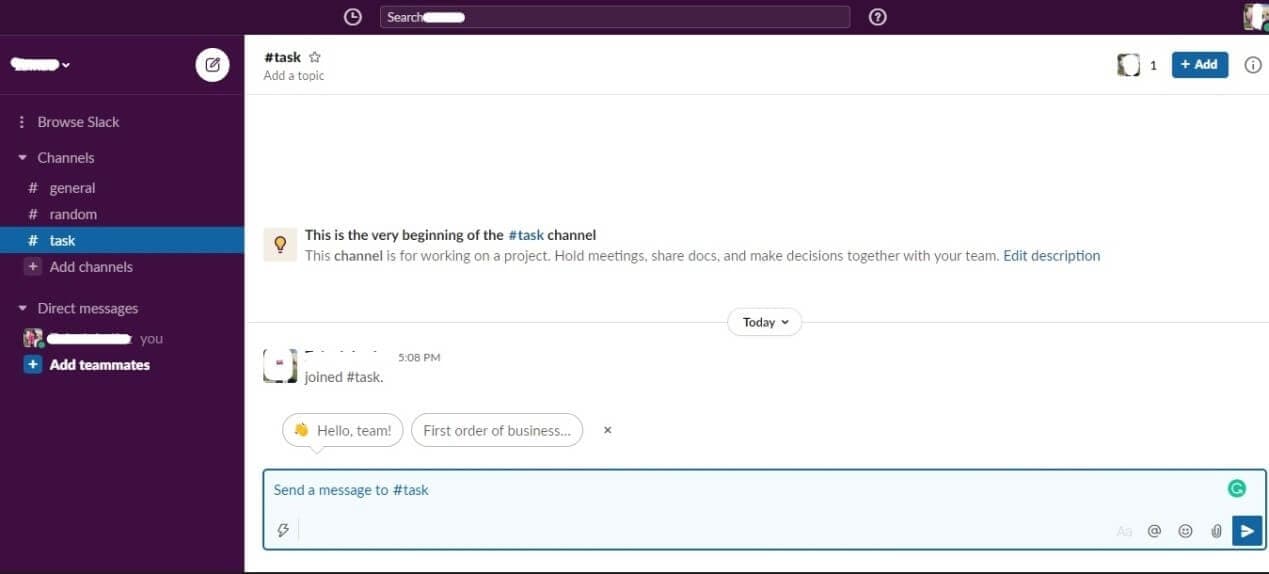
2.To add a Slack emoji, click on the Smiley face icon in the bottom right corner of the message box
3.Browse through the categories to find the right Slack emoji for your message. In the search bar, type the kind of emoji you are looking for to find it faster.
4.Click on the Hand icon in the bottom right corner to choose the default skin tone for all your emojis. Finally, to add Slack emoji to your message, just tap on it. Add as many Slack emoji as you like just by tapping on them.
Part 2: How to Custom Slack Emoji
Using the commonly used emojis can get boring. Sometimes, even the Slack emoji collection falls short in expressing the exact feeling you wish to convey. However, the good news is that you can easily create a custom Slack emoji without any hassle.
A Slack custom emoji can range from your own picture to any other image. You can create a personalized custom Slack emoji to crack inside jokes or create your brand icon Slack emoji.
Here’s how to create an awesome custom Slack emoji-
1.On your workspace, click on your company name or icon to open the settings drop-down menu. Tap on Settings&Administration<Customize.
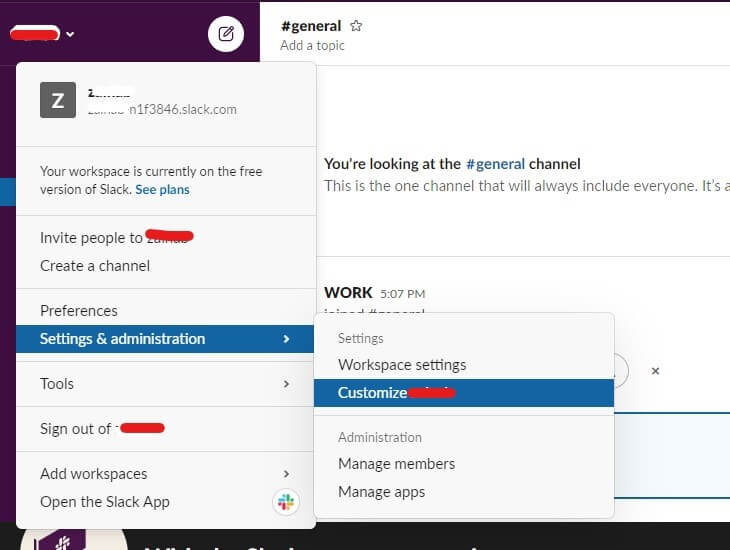
2.A new window will pop open. In the Emoji tab, click on Add Custom Emoji.
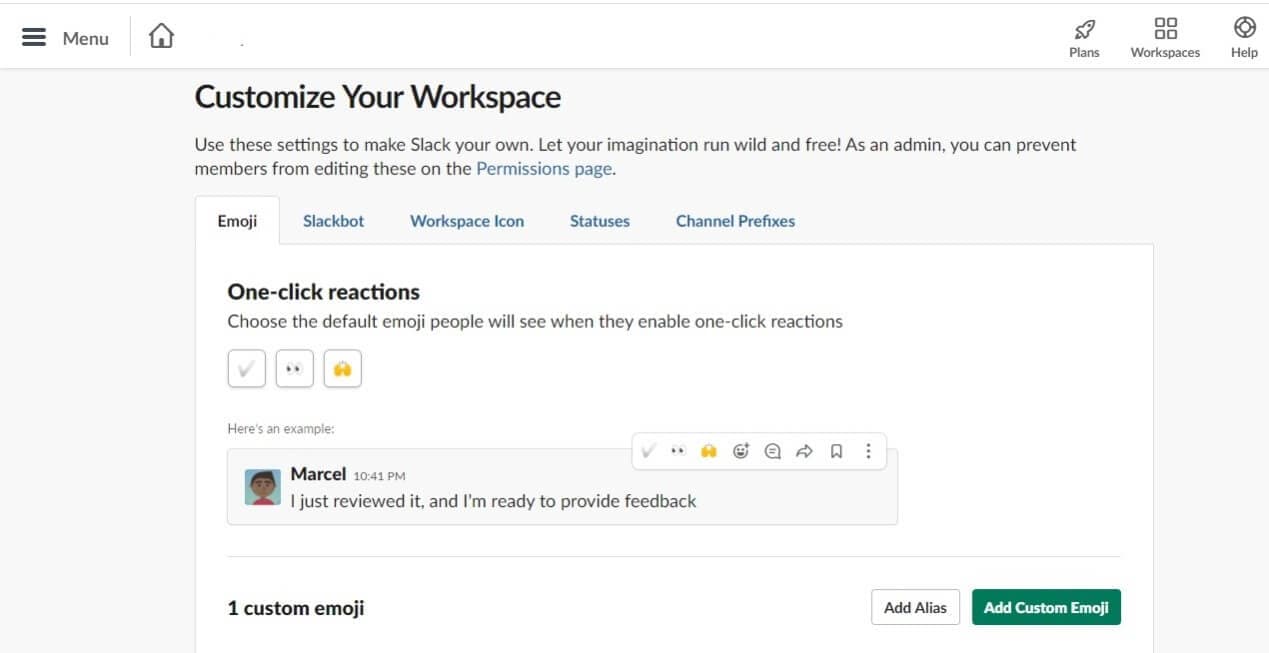
3.Here you can upload any image to make your custom Slack emoji. Click on Upload Image to select a file.
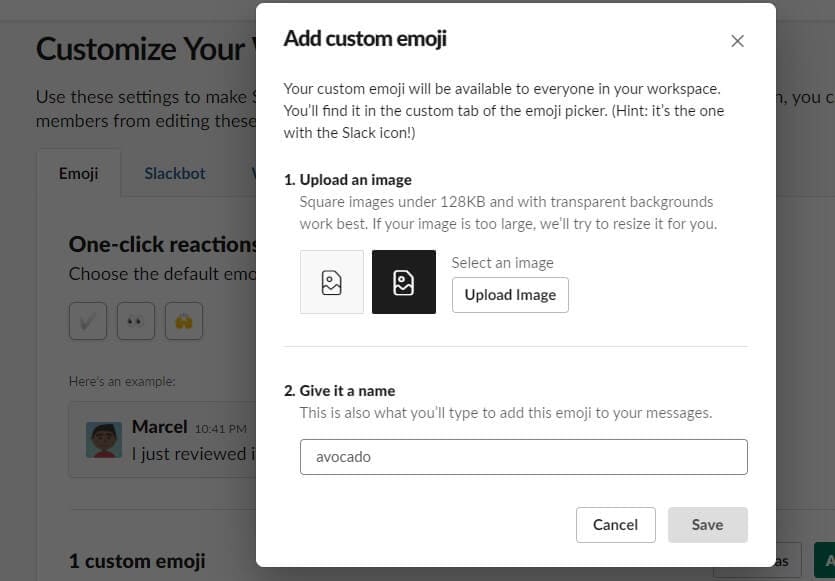
4.Then, give your emoji a name so you can easily find the custom Slack emoji while chatting. Click Save to finish.
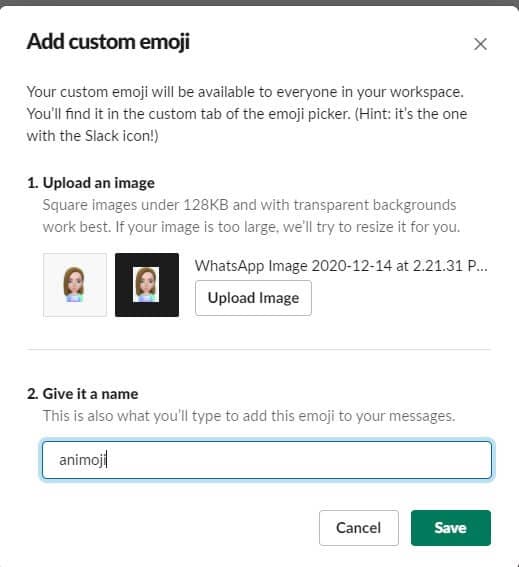
5.Now, go back to the workspace and click on the Smiley icon. Type the custom Slack emoji name to find it and click to send it.
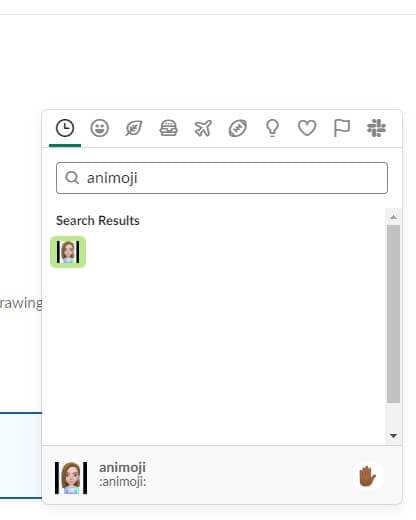
Bonus Tip-Edit Emoji and Add Emoji to Your Video
Now, let me present a top-notch video editor to help you add Slack emoji to your video without needing any editing experience.
Wondershare Filmora is a powerful video editor with a highly intuitive interface. It is loaded with high-end editing tools that are incredibly easy to use. You can add keyframe animations to make your videos more dynamic with a single click. Motion tracking allows you to track the specified object’s movements throughout the video, even allowing you to blur certain parts of the video. From the Effects tab, you can add cinematic effects to your videos, or you can easily color match all your scenes with one tap or apply noise reduction.
If you wish to edit or add custom Slack emoji to your video, you can import the image to Filmora and then drag it to the track above the video in the timeline. You can then add animations or motion tracking to adjust the custom Slack emoji. Cool transitions and color adjustments can also be made to make the video more appealing and unique. Special effects or catchy captions are just a tap away to help you create stunning videos
Conclusion
With the introduction of emojis, the need for writing long messages has diminished. Using a Slack emoji can turn your conversations around and make them more interesting. Chatting has never been easier or more fun.
Add Slack emoji or react to what others have to say. It’s time to create a custom Slack emoji to wow your friends and colleagues with tiny emojis that are exclusive to just you. If you want to spice up your work chats, just add Slack emoji and enjoy.
Try out Wondershare Filmora to add Slack emoji to your videos to make them unique.
Shanoon Cox
Shanoon Cox is a writer and a lover of all things video.
Follow @Shanoon Cox
Shanoon Cox
Mar 27, 2024• Proven solutions
A Slack emoji is just like the emojis you usually use on Whatsapp, Messenger, or other chatting platforms. There is a wide range of emojis you can use to express yourself better or lighten the working environment.
Plus, the option to create a custom Slack emoji makes it more interesting. You can use it to create a new and unique Slack emoji to personalize your chatting experience. Why write long texts when you can just add Slack emoji to say it all?
Let me show you the ropes on how to create a custom Slack emoji and make your chatting experience more fun.
- Part 1: How to Add Slack Emoji
- Part 2: How to Custom Slack Emoji
- Bonus Tip-Edit Emoji and Add Emoji to Your Video
Part 1: How to Add Slack Emoji
At Slack, you can find a Slack emoji for every emotion or occasion. Finding the perfect Slack emoji is as easy as browsing through the categorized sections. Better yet, the option to search for a Slack emoji makes it a cakewalk to get the exact Slack emoji to express oneself.
Also, you can add Slack emoji with a single tap. And it allows you to add unlimited Slack emoji in one message.
Let me show you how to add Slack emoji in a few quick steps:
1.Download and open Slack on your desktop or smartphone.
2.To add a Slack emoji, click on the Smiley face icon in the bottom right corner of the message box
3.Browse through the categories to find the right Slack emoji for your message. In the search bar, type the kind of emoji you are looking for to find it faster.
4.Click on the Hand icon in the bottom right corner to choose the default skin tone for all your emojis. Finally, to add Slack emoji to your message, just tap on it. Add as many Slack emoji as you like just by tapping on them.
Part 2: How to Custom Slack Emoji
Using the commonly used emojis can get boring. Sometimes, even the Slack emoji collection falls short in expressing the exact feeling you wish to convey. However, the good news is that you can easily create a custom Slack emoji without any hassle.
A Slack custom emoji can range from your own picture to any other image. You can create a personalized custom Slack emoji to crack inside jokes or create your brand icon Slack emoji.
Here’s how to create an awesome custom Slack emoji-
1.On your workspace, click on your company name or icon to open the settings drop-down menu. Tap on Settings&Administration<Customize.
2.A new window will pop open. In the Emoji tab, click on Add Custom Emoji.
3.Here you can upload any image to make your custom Slack emoji. Click on Upload Image to select a file.
4.Then, give your emoji a name so you can easily find the custom Slack emoji while chatting. Click Save to finish.
5.Now, go back to the workspace and click on the Smiley icon. Type the custom Slack emoji name to find it and click to send it.
Bonus Tip-Edit Emoji and Add Emoji to Your Video
Now, let me present a top-notch video editor to help you add Slack emoji to your video without needing any editing experience.
Wondershare Filmora is a powerful video editor with a highly intuitive interface. It is loaded with high-end editing tools that are incredibly easy to use. You can add keyframe animations to make your videos more dynamic with a single click. Motion tracking allows you to track the specified object’s movements throughout the video, even allowing you to blur certain parts of the video. From the Effects tab, you can add cinematic effects to your videos, or you can easily color match all your scenes with one tap or apply noise reduction.
If you wish to edit or add custom Slack emoji to your video, you can import the image to Filmora and then drag it to the track above the video in the timeline. You can then add animations or motion tracking to adjust the custom Slack emoji. Cool transitions and color adjustments can also be made to make the video more appealing and unique. Special effects or catchy captions are just a tap away to help you create stunning videos
Conclusion
With the introduction of emojis, the need for writing long messages has diminished. Using a Slack emoji can turn your conversations around and make them more interesting. Chatting has never been easier or more fun.
Add Slack emoji or react to what others have to say. It’s time to create a custom Slack emoji to wow your friends and colleagues with tiny emojis that are exclusive to just you. If you want to spice up your work chats, just add Slack emoji and enjoy.
Try out Wondershare Filmora to add Slack emoji to your videos to make them unique.
Shanoon Cox
Shanoon Cox is a writer and a lover of all things video.
Follow @Shanoon Cox
How to Make a iMovie Photo Slideshow with Music?
How to Make a iMovie Photo Slideshow with Music? [iMovie Tutorial]
Shanoon Cox
Mar 27, 2024• Proven solutions
Makings a slideshow is a great way to share photos and videos with friends and families. The good news is that you can totally make a slideshow on Mac for free with iMovie. iMovie is the pre-installed program coming with every new Mac. It provides a simple yet professional way to make slideshow movies from your photos, videos, and music.
If you haven’t iMovie installed on your Mac yet, just go to iTunes and download it for free. In the following part, I’ll share with you the step-by-step tutorial on how to make a slideshow on Mac using the free video editing software iMovie.
If you are an iOS user, check our picks of best photo slideshow apps for iPhone or iPad.
Ways for iMovie Photo Slideshow with Music Making
To make a photo slideshow with music in iMovie, you can follow these steps.
1. Create a New Project
After launching iMovie, click the Project button and then click Create New. Select Movie to combine photos, videos and music to make a slideshow.

2. Import Photos, Videos, and Audio Files
Now go to the My Media tab and click the Import icon to add your photos, videos, and music to iMovie, in this way, you can import any media files from any location on your Mac. But if you have arranged all your videos, photos, and music tracks in the Photos app, you can just switch to Photos under the Libraries tab on the left to import.

3. Arrange Media in Timeline and Adjust
Now, it’s time to place all these photos and videos in the timeline in order and do some adjustments. You can use the Magic Wand tool to improve the photo quality automatically, do some color correction, or add a filter to the photo. If you preview the video clip, you will see more options that allow you to do more editing, such as changing speed.
4. Apply Transitions & Effects
Transitions and effects will help you to create a slideshow in a more professional way. Some transitions such as cross dissolve, fade and cross blur are very popular in the slideshow, but remember don’t use lots of different transitions in one slideshow since too many transitions will distract the viewer’s attention. To apply a transition in the slideshow, just drag and drop it between two photos in the timeline.

5. Add Titles and Text
Using some opener titles and credits at the beginning and ending part of your slideshow will make it cool as well. You can add some famous quotes and words to better demonstrate.
Just to the Titles tab and select one of the title templates and drop it to the timeline first and then write your own words in the preview window.

6. Add Music to Slideshow
You can download some royalty-free music and sound effects from websites such as Filmstock stock media library or iTunes or import your own audio as we said before to use it as the slideshow background music. To sync with the slideshow, you may need to trim and edit the audio accordingly. For detailed information about iMovie audio editing, you can checkhow to add background music to iMovie.
Filmstock Stock Media Library ](https://tools.techidaily.com/wondershare/filmora/download/ )
7. Export and Share Your Slideshow video
Play the slideshow and check the result in the preview window. If everything goes well, you can now export and share or save it. You can save the slideshow video in MP4 format, or share it to Vimeo or add the slideshow to Theater to load it on your other Apple devices so you can easily watch it on your iOS devices or Apple TV.
I hope the above tutorial about how to make a slideshow on iMovie will be helpful for your stunning slideshow creation.
If you’re running an old macOS version and having iPhoto installed on your Mac, here are the detailed steps about How to make slideshow in iMovie with iPhoto project.
Step 1. Import Photos from the iPhoto Library
iMovie works seamlessly with iPhoto. You are suggested to drag and drop photos from iPhoto to the iMovie project. If no library exists in iPhoto, create one and import photos to iPhoto first. To add videos, you could go to either “File/Import” or Event Library, and then drag and drop selected videos to the timeline.
After photos and videos are imported to the iMovie slideshow project, you can preview the raw slideshow simply by pressing Space bar on your keyboard. And then make adjustments to clips and transitions. For example, mouse over one clip or “double arrow” button and click on the settings icon, then you could access clip adjustment, video adjustment, transition adjustment, etc.

Step 2. Add Music to Your iMovie Slideshow Project
Music sets the tone of your slideshow. Adding musing to the iMovie slideshow is just as simple as adding photos and videos.
So click the audio icon in the bottom right corner, and drag and drop the desired audio file to the timeline. Multiple songs could be added to iMovie.
However, iMovie doesn’t support multiple soundtracks. If necessary, you need to combine multiple song tracks with an external audio editor before importing them to the iMovie slideshow. You can also apply audio effects and filter sound using an equalizer.

Step 3. Export Your iMovie Slideshow Video
iMovie makes sharing possibilities endless. For those who upload their videos online, iMovie allows users to directly upload to MobileMe Gallery, YouTube, Facebook, Vimeo, CNN iReport, etc.
If you select to share the iMovie slideshow using Media Browser, you will get a slideshow appeared in other Mac applications like iWeb. It’s a good idea to export the iMovie slideshow to iTunes so that you can play back slideshow quickly and easily sync with your mobile devices like iPhone, iPod, and iPad.

You may also like: How to Add Text with iMovie in Mac and iPhone >>
Recommendation: Create Slideshow on Mac with More Templates and Transitions with Filmora
If you want to make a slideshow with some templates on Mac, you can try Wondershare Filmora . Filmora can turn photos and videos into attractive slideshow videos with various inbuilt filters, transitions, elements, animations, effects, and overlays. Click the Free Download button and have a try.
Check the ultimate guide about making a slideshow with music and titles in Filmora .
If you are going to make a slideshow with music on Windows, you may need a slideshow-making tool to do it by yourself. Wondershare Filmora will also be a good choice. It helps you instantly make such an impressive slideshow from photos and videos for sharing virtually anywhere.
Shanoon Cox
Shanoon Cox is a writer and a lover of all things video.
Follow @Shanoon Cox
Shanoon Cox
Mar 27, 2024• Proven solutions
Makings a slideshow is a great way to share photos and videos with friends and families. The good news is that you can totally make a slideshow on Mac for free with iMovie. iMovie is the pre-installed program coming with every new Mac. It provides a simple yet professional way to make slideshow movies from your photos, videos, and music.
If you haven’t iMovie installed on your Mac yet, just go to iTunes and download it for free. In the following part, I’ll share with you the step-by-step tutorial on how to make a slideshow on Mac using the free video editing software iMovie.
If you are an iOS user, check our picks of best photo slideshow apps for iPhone or iPad.
Ways for iMovie Photo Slideshow with Music Making
To make a photo slideshow with music in iMovie, you can follow these steps.
1. Create a New Project
After launching iMovie, click the Project button and then click Create New. Select Movie to combine photos, videos and music to make a slideshow.
2. Import Photos, Videos, and Audio Files
Now go to the My Media tab and click the Import icon to add your photos, videos, and music to iMovie, in this way, you can import any media files from any location on your Mac. But if you have arranged all your videos, photos, and music tracks in the Photos app, you can just switch to Photos under the Libraries tab on the left to import.
3. Arrange Media in Timeline and Adjust
Now, it’s time to place all these photos and videos in the timeline in order and do some adjustments. You can use the Magic Wand tool to improve the photo quality automatically, do some color correction, or add a filter to the photo. If you preview the video clip, you will see more options that allow you to do more editing, such as changing speed.
4. Apply Transitions & Effects
Transitions and effects will help you to create a slideshow in a more professional way. Some transitions such as cross dissolve, fade and cross blur are very popular in the slideshow, but remember don’t use lots of different transitions in one slideshow since too many transitions will distract the viewer’s attention. To apply a transition in the slideshow, just drag and drop it between two photos in the timeline.
5. Add Titles and Text
Using some opener titles and credits at the beginning and ending part of your slideshow will make it cool as well. You can add some famous quotes and words to better demonstrate.
Just to the Titles tab and select one of the title templates and drop it to the timeline first and then write your own words in the preview window.
6. Add Music to Slideshow
You can download some royalty-free music and sound effects from websites such as Filmstock stock media library or iTunes or import your own audio as we said before to use it as the slideshow background music. To sync with the slideshow, you may need to trim and edit the audio accordingly. For detailed information about iMovie audio editing, you can checkhow to add background music to iMovie.
Filmstock Stock Media Library ](https://tools.techidaily.com/wondershare/filmora/download/ )
7. Export and Share Your Slideshow video
Play the slideshow and check the result in the preview window. If everything goes well, you can now export and share or save it. You can save the slideshow video in MP4 format, or share it to Vimeo or add the slideshow to Theater to load it on your other Apple devices so you can easily watch it on your iOS devices or Apple TV.
I hope the above tutorial about how to make a slideshow on iMovie will be helpful for your stunning slideshow creation.
If you’re running an old macOS version and having iPhoto installed on your Mac, here are the detailed steps about How to make slideshow in iMovie with iPhoto project.
Step 1. Import Photos from the iPhoto Library
iMovie works seamlessly with iPhoto. You are suggested to drag and drop photos from iPhoto to the iMovie project. If no library exists in iPhoto, create one and import photos to iPhoto first. To add videos, you could go to either “File/Import” or Event Library, and then drag and drop selected videos to the timeline.
After photos and videos are imported to the iMovie slideshow project, you can preview the raw slideshow simply by pressing Space bar on your keyboard. And then make adjustments to clips and transitions. For example, mouse over one clip or “double arrow” button and click on the settings icon, then you could access clip adjustment, video adjustment, transition adjustment, etc.
Step 2. Add Music to Your iMovie Slideshow Project
Music sets the tone of your slideshow. Adding musing to the iMovie slideshow is just as simple as adding photos and videos.
So click the audio icon in the bottom right corner, and drag and drop the desired audio file to the timeline. Multiple songs could be added to iMovie.
However, iMovie doesn’t support multiple soundtracks. If necessary, you need to combine multiple song tracks with an external audio editor before importing them to the iMovie slideshow. You can also apply audio effects and filter sound using an equalizer.
Step 3. Export Your iMovie Slideshow Video
iMovie makes sharing possibilities endless. For those who upload their videos online, iMovie allows users to directly upload to MobileMe Gallery, YouTube, Facebook, Vimeo, CNN iReport, etc.
If you select to share the iMovie slideshow using Media Browser, you will get a slideshow appeared in other Mac applications like iWeb. It’s a good idea to export the iMovie slideshow to iTunes so that you can play back slideshow quickly and easily sync with your mobile devices like iPhone, iPod, and iPad.
You may also like: How to Add Text with iMovie in Mac and iPhone >>
Recommendation: Create Slideshow on Mac with More Templates and Transitions with Filmora
If you want to make a slideshow with some templates on Mac, you can try Wondershare Filmora . Filmora can turn photos and videos into attractive slideshow videos with various inbuilt filters, transitions, elements, animations, effects, and overlays. Click the Free Download button and have a try.
Check the ultimate guide about making a slideshow with music and titles in Filmora .
If you are going to make a slideshow with music on Windows, you may need a slideshow-making tool to do it by yourself. Wondershare Filmora will also be a good choice. It helps you instantly make such an impressive slideshow from photos and videos for sharing virtually anywhere.
Shanoon Cox
Shanoon Cox is a writer and a lover of all things video.
Follow @Shanoon Cox
Also read:
- New 2024 Approved Best Websites to Add Emojis to Photos Online
- Updated 10 Best Meme Makers Online (Free to Use) for 2024
- New 2024 Approved How to Add Stickers to WhatsApp-The Ultimate Guide
- New 10 Free Online Sticker Makers to Make Your Own Stickers for 2024
- 2024 Approved How to Add and Custom Slack Emoji-Wondershare Filmora
- Updated In 2024, How to Make a iMovie Photo Slideshow with Music?
- New Best 10 Free Manga Sites to Read Online
- Updated How to Make a Triggered Meme?
- Updated How to Make Memes on iPhone and Android for 2024
- 2024 Approved 6 Popular Animated Emoji Video Effects
- Updated In 2024, 10 Popular Cartoon Characters That Should Top Your List 2023 Updated
- 2024 Approved How to Add Emojis To Discord on Desktop Computer and Mobile
- What Is Emoji and What Does It Mean, In 2024
- How to Add Bitmoji to Keyboard? Complete Guide for 2024
- 2024 Approved How to Use Emojis on Windows
- 2024 Approved How Add Emojis/Stickers to Videos on PC/Mac/Mobile/Online
- New 2024 Approved IOS&Android Best Apps to Create Animoji and Memoji Videos
- Updated Top 10 Storyboarding Software Free&Paid for 2024
- Updated Record and Edit an Animoji or Memoji Karaoke Music Video for 2024
- 10 Trending Memes Right Now (Include Image/ GIF/Video) for 2024
- New In 2024, Record and Edit an Animoji or Memoji Karaoke Music Video
- New How to Make Memes with White Background Step by Step
- New 2024 Approved Top 10 Storyboarding Software
- New How to Make a Photo Collage Using iPhoto, In 2024
- 7 Free Apps to Get Emojis on Android and iPhone for 2024
- Updated How to Make an Emoji of Yourself on Android and iPhone Emoji Yourself for 2024
- Updated 2024 Approved Best 10 Emoji Makers to Create Your Own EmojisPC/Online/Android/iPhone
- New 10 Best Memes Right Now (Include Image/ GIF/Video)
- Updated 2024 Approved Burn Photos to DVD | How to Burn Photos to DVD with Transitions and Music
- What Is Emoji, In 2024
- New 2024 Approved Top 5 Best Websites to Add Emojis to Photo Online
- Top 6 Animated Emoji Video Effects
- Updated How to Make a Video Meme with 4 Best Meme Video Makers for 2024
- New Is This a Pigeon Meme Generator for 2024
- Updated Top 10 Storyboarding Software for 2024
- In 2024, How to Make an Adorable Video for Your Babys First Year
- New Top 10 Best Free Manga Sites to Read Online for 2024
- New Best SolarMovie Alternatives-Watch Movies Free Online for 2024
- In 2024, iSpoofer is not working On Honor X50 GT? Fixed | Dr.fone
- How To Transfer WhatsApp From iPhone 14 to other iPhone 14 devices? | Dr.fone
- Unlock Apple iPhone 7 Plus With Forgotten Passcode Different Methods You Can Try
- Unlock locked iPhone 8 by restoring it to default settings
- In 2024, How to Unlock Infinix Note 30 Phone Pattern Lock without Factory Reset
- 3 Ways to Unlock iPhone 8 without Passcode or Face ID
- How to Change Spotify Location After Moving to Another Country On Asus ROG Phone 8 Pro | Dr.fone
- In 2024, How to Transfer Contacts from Motorola Moto G23 To Phone | Dr.fone
- How to Get and Use Pokemon Go Promo Codes On Huawei P60 | Dr.fone
- How to Stop Life360 from Tracking You On Xiaomi Redmi Note 12 5G? | Dr.fone
- Best Android Data Recovery - Undelete Lost Messages from Lava Yuva 3
- In 2024, What Is a SIM Network Unlock PIN? Get Your Motorola Razr 40 Ultra Phone Network-Ready
- In 2024, 9 Mind-Blowing Tricks to Hatch Eggs in Pokemon Go Without Walking On Samsung Galaxy A15 5G | Dr.fone
- Change Location on Yik Yak For your Nokia XR21 to Enjoy More Fun | Dr.fone
- How to Track a Lost Oppo A78 5G for Free? | Dr.fone
- In 2024, How to Spy on Text Messages from Computer & Realme 11 Pro+ | Dr.fone
- In 2024, 3 Ways to Unlock Your iPhone XS Max for Free
- In 2024, Process of Screen Sharing Vivo Y78+ to PC- Detailed Steps | Dr.fone
- Fix Apple iPhone 15 Plus Stuck on Data Transfer Verified Solution! | Dr.fone
- Why does the pokemon go battle league not available On Realme 11 Pro | Dr.fone
- In 2024, Fake the Location to Get Around the MLB Blackouts on Poco C65 | Dr.fone
- Fixed Microsoft Excel 2013 Cannot Access the File Error | Stellar
- Title: Updated Burn Photos to DVD | How to Burn Photos to DVD with Transitions and Music
- Author: Jan
- Created at : 2024-04-21 07:48:16
- Updated at : 2024-04-22 07:48:16
- Link: https://meme-emoji.techidaily.com/updated-burn-photos-to-dvd-how-to-burn-photos-to-dvd-with-transitions-and-music/
- License: This work is licensed under CC BY-NC-SA 4.0.
