
Updated Best Photo Slideshow Maker How to Make a Photo Slideshow 2023 Update
Best Photo Slideshow Maker: How to Make a Photo Slideshow [2023 Update]
Best Photo Slideshow Maker: How to Make a Photo Slideshow

Shanoon Cox
Mar 27, 2024• Proven solutions
Have you ever taken so many photos for your family, friends and special events? One fun-filled way of sharing them is to make a photo slideshow. That helps back up the memories in your life. What’s more, it can all be done in just a few simple clicks if you use slideshow maker like DVD Slideshow Builder Deluxe . With this programs, you can easily weave photos and video into work of art to amaze anyone. Here let’s see how to easily and creatively make a photo slideshow and burn to DVD with these all-in-one slideshow tools.
Download and run DVD slideshow builder , then follow the steps below to see how to make a photo slideshow.

Ways for Photo Slidehow making
Step 1. Add photo or video files to the photo slideshow maker
After running the photo slideshow maker, you’ll start from the “Organize” tab. On the interface, there are two Add Files buttons any of which you can click to add your photos and videos. Then just drag and drop photos or videos to arrange their order on storyboard. If you want to edit the photos, click “Edit” to add effects, crop photos, repair red-eye or add caption.
Tip: To have a large viewe of all the files, click the “Expand” button on top right corner of storyboard.

Step 2. Customize the slideshow like background music and transitions
When importing your files, more than 100 transition effects will be randomly and automatically applied between every two photo or video. However, you can change them anytime in the “Personalize” tab. Just drag and drop a transition from the list to the thumbnail between two slides. You can also add effects, motion or intro/credit as you like.
Adding music can greatly enhance the vibe of your photo slideshow. To achieve this, click “Music” on the storyboard. This photo slideshow maker enables you to add several different pieces of music according to your needs. If you want to add your own voice, just click “Voice Over” to record and then add it to the slideshow.

Step 3 Create photo slideshow and burn to DVD

Go to the “Create” tab and click the “Preview” button to make sure the photo slideshow is good enough. Go back to Personalize tab to change if necessary. When you are happy with the result, choose the options on the left to export photo slideshow to DVD, PC, portable devices, etc. You can also directly upload slideshow to Youtube and send message to Facebook and Twitter friends.

Now sit back and relax, it’ll only take a while to get your photo slideshow for sharing anywhere.
Shanoon Cox
Shanoon Cox is a writer and a lover of all things video.
Follow @Shanoon Cox
Shanoon Cox
Mar 27, 2024• Proven solutions
Have you ever taken so many photos for your family, friends and special events? One fun-filled way of sharing them is to make a photo slideshow. That helps back up the memories in your life. What’s more, it can all be done in just a few simple clicks if you use slideshow maker like DVD Slideshow Builder Deluxe . With this programs, you can easily weave photos and video into work of art to amaze anyone. Here let’s see how to easily and creatively make a photo slideshow and burn to DVD with these all-in-one slideshow tools.
Download and run DVD slideshow builder , then follow the steps below to see how to make a photo slideshow.
Ways for Photo Slidehow making
Step 1. Add photo or video files to the photo slideshow maker
After running the photo slideshow maker, you’ll start from the “Organize” tab. On the interface, there are two Add Files buttons any of which you can click to add your photos and videos. Then just drag and drop photos or videos to arrange their order on storyboard. If you want to edit the photos, click “Edit” to add effects, crop photos, repair red-eye or add caption.
Tip: To have a large viewe of all the files, click the “Expand” button on top right corner of storyboard.
Step 2. Customize the slideshow like background music and transitions
When importing your files, more than 100 transition effects will be randomly and automatically applied between every two photo or video. However, you can change them anytime in the “Personalize” tab. Just drag and drop a transition from the list to the thumbnail between two slides. You can also add effects, motion or intro/credit as you like.
Adding music can greatly enhance the vibe of your photo slideshow. To achieve this, click “Music” on the storyboard. This photo slideshow maker enables you to add several different pieces of music according to your needs. If you want to add your own voice, just click “Voice Over” to record and then add it to the slideshow.
Step 3 Create photo slideshow and burn to DVD
Go to the “Create” tab and click the “Preview” button to make sure the photo slideshow is good enough. Go back to Personalize tab to change if necessary. When you are happy with the result, choose the options on the left to export photo slideshow to DVD, PC, portable devices, etc. You can also directly upload slideshow to Youtube and send message to Facebook and Twitter friends.
Now sit back and relax, it’ll only take a while to get your photo slideshow for sharing anywhere.

Shanoon Cox
Shanoon Cox is a writer and a lover of all things video.
Follow @Shanoon Cox
Shanoon Cox
Mar 27, 2024• Proven solutions
Have you ever taken so many photos for your family, friends and special events? One fun-filled way of sharing them is to make a photo slideshow. That helps back up the memories in your life. What’s more, it can all be done in just a few simple clicks if you use slideshow maker like DVD Slideshow Builder Deluxe . With this programs, you can easily weave photos and video into work of art to amaze anyone. Here let’s see how to easily and creatively make a photo slideshow and burn to DVD with these all-in-one slideshow tools.
Download and run DVD slideshow builder , then follow the steps below to see how to make a photo slideshow.
Ways for Photo Slidehow making
Step 1. Add photo or video files to the photo slideshow maker
After running the photo slideshow maker, you’ll start from the “Organize” tab. On the interface, there are two Add Files buttons any of which you can click to add your photos and videos. Then just drag and drop photos or videos to arrange their order on storyboard. If you want to edit the photos, click “Edit” to add effects, crop photos, repair red-eye or add caption.
Tip: To have a large viewe of all the files, click the “Expand” button on top right corner of storyboard.
Step 2. Customize the slideshow like background music and transitions
When importing your files, more than 100 transition effects will be randomly and automatically applied between every two photo or video. However, you can change them anytime in the “Personalize” tab. Just drag and drop a transition from the list to the thumbnail between two slides. You can also add effects, motion or intro/credit as you like.
Adding music can greatly enhance the vibe of your photo slideshow. To achieve this, click “Music” on the storyboard. This photo slideshow maker enables you to add several different pieces of music according to your needs. If you want to add your own voice, just click “Voice Over” to record and then add it to the slideshow.
Step 3 Create photo slideshow and burn to DVD
Go to the “Create” tab and click the “Preview” button to make sure the photo slideshow is good enough. Go back to Personalize tab to change if necessary. When you are happy with the result, choose the options on the left to export photo slideshow to DVD, PC, portable devices, etc. You can also directly upload slideshow to Youtube and send message to Facebook and Twitter friends.
Now sit back and relax, it’ll only take a while to get your photo slideshow for sharing anywhere.
Shanoon Cox
Shanoon Cox is a writer and a lover of all things video.
Follow @Shanoon Cox
How to Make a iMovie Photo Slideshow with Music?
How to Make a iMovie Photo Slideshow with Music? [iMovie Tutorial]
Shanoon Cox
Mar 27, 2024• Proven solutions
Makings a slideshow is a great way to share photos and videos with friends and families. The good news is that you can totally make a slideshow on Mac for free with iMovie. iMovie is the pre-installed program coming with every new Mac. It provides a simple yet professional way to make slideshow movies from your photos, videos, and music.
If you haven’t iMovie installed on your Mac yet, just go to iTunes and download it for free. In the following part, I’ll share with you the step-by-step tutorial on how to make a slideshow on Mac using the free video editing software iMovie.
If you are an iOS user, check our picks of best photo slideshow apps for iPhone or iPad.
Ways for iMovie Photo Slideshow with Music Making
To make a photo slideshow with music in iMovie, you can follow these steps.
1. Create a New Project
After launching iMovie, click the Project button and then click Create New. Select Movie to combine photos, videos and music to make a slideshow.

2. Import Photos, Videos, and Audio Files
Now go to the My Media tab and click the Import icon to add your photos, videos, and music to iMovie, in this way, you can import any media files from any location on your Mac. But if you have arranged all your videos, photos, and music tracks in the Photos app, you can just switch to Photos under the Libraries tab on the left to import.

3. Arrange Media in Timeline and Adjust
Now, it’s time to place all these photos and videos in the timeline in order and do some adjustments. You can use the Magic Wand tool to improve the photo quality automatically, do some color correction, or add a filter to the photo. If you preview the video clip, you will see more options that allow you to do more editing, such as changing speed.
4. Apply Transitions & Effects
Transitions and effects will help you to create a slideshow in a more professional way. Some transitions such as cross dissolve, fade and cross blur are very popular in the slideshow, but remember don’t use lots of different transitions in one slideshow since too many transitions will distract the viewer’s attention. To apply a transition in the slideshow, just drag and drop it between two photos in the timeline.

5. Add Titles and Text
Using some opener titles and credits at the beginning and ending part of your slideshow will make it cool as well. You can add some famous quotes and words to better demonstrate.
Just to the Titles tab and select one of the title templates and drop it to the timeline first and then write your own words in the preview window.

6. Add Music to Slideshow
You can download some royalty-free music and sound effects from websites such as Filmstock stock media library or iTunes or import your own audio as we said before to use it as the slideshow background music. To sync with the slideshow, you may need to trim and edit the audio accordingly. For detailed information about iMovie audio editing, you can check how to add background music to iMovie.
Filmstock Stock Media Library ](https://tools.techidaily.com/wondershare/filmora/download/ )
7. Export and Share Your Slideshow video
Play the slideshow and check the result in the preview window. If everything goes well, you can now export and share or save it. You can save the slideshow video in MP4 format, or share it to Vimeo or add the slideshow to Theater to load it on your other Apple devices so you can easily watch it on your iOS devices or Apple TV.
I hope the above tutorial about how to make a slideshow on iMovie will be helpful for your stunning slideshow creation.
If you’re running an old macOS version and having iPhoto installed on your Mac, here are the detailed steps about How to make slideshow in iMovie with iPhoto project.
Step 1. Import Photos from the iPhoto Library
iMovie works seamlessly with iPhoto. You are suggested to drag and drop photos from iPhoto to the iMovie project. If no library exists in iPhoto, create one and import photos to iPhoto first. To add videos, you could go to either “File/Import” or Event Library, and then drag and drop selected videos to the timeline.
After photos and videos are imported to the iMovie slideshow project, you can preview the raw slideshow simply by pressing Space bar on your keyboard. And then make adjustments to clips and transitions. For example, mouse over one clip or “double arrow” button and click on the settings icon, then you could access clip adjustment, video adjustment, transition adjustment, etc.

Step 2. Add Music to Your iMovie Slideshow Project
Music sets the tone of your slideshow. Adding musing to the iMovie slideshow is just as simple as adding photos and videos.
So click the audio icon in the bottom right corner, and drag and drop the desired audio file to the timeline. Multiple songs could be added to iMovie.
However, iMovie doesn’t support multiple soundtracks. If necessary, you need to combine multiple song tracks with an external audio editor before importing them to the iMovie slideshow. You can also apply audio effects and filter sound using an equalizer.

Step 3. Export Your iMovie Slideshow Video
iMovie makes sharing possibilities endless. For those who upload their videos online, iMovie allows users to directly upload to MobileMe Gallery, YouTube, Facebook, Vimeo, CNN iReport, etc.
If you select to share the iMovie slideshow using Media Browser, you will get a slideshow appeared in other Mac applications like iWeb. It’s a good idea to export the iMovie slideshow to iTunes so that you can play back slideshow quickly and easily sync with your mobile devices like iPhone, iPod, and iPad.

You may also like: How to Add Text with iMovie in Mac and iPhone >>
Recommendation: Create Slideshow on Mac with More Templates and Transitions with Filmora
If you want to make a slideshow with some templates on Mac, you can try Wondershare Filmora . Filmora can turn photos and videos into attractive slideshow videos with various inbuilt filters, transitions, elements, animations, effects, and overlays. Click the Free Download button and have a try.


Check the ultimate guide about making a slideshow with music and titles in Filmora .
If you are going to make a slideshow with music on Windows, you may need a slideshow-making tool to do it by yourself. Wondershare Filmora will also be a good choice. It helps you instantly make such an impressive slideshow from photos and videos for sharing virtually anywhere.
Shanoon Cox
Shanoon Cox is a writer and a lover of all things video.
Follow @Shanoon Cox
Shanoon Cox
Mar 27, 2024• Proven solutions
Makings a slideshow is a great way to share photos and videos with friends and families. The good news is that you can totally make a slideshow on Mac for free with iMovie. iMovie is the pre-installed program coming with every new Mac. It provides a simple yet professional way to make slideshow movies from your photos, videos, and music.
If you haven’t iMovie installed on your Mac yet, just go to iTunes and download it for free. In the following part, I’ll share with you the step-by-step tutorial on how to make a slideshow on Mac using the free video editing software iMovie.
If you are an iOS user, check our picks of best photo slideshow apps for iPhone or iPad.
Ways for iMovie Photo Slideshow with Music Making
To make a photo slideshow with music in iMovie, you can follow these steps.
1. Create a New Project
After launching iMovie, click the Project button and then click Create New. Select Movie to combine photos, videos and music to make a slideshow.
2. Import Photos, Videos, and Audio Files
Now go to the My Media tab and click the Import icon to add your photos, videos, and music to iMovie, in this way, you can import any media files from any location on your Mac. But if you have arranged all your videos, photos, and music tracks in the Photos app, you can just switch to Photos under the Libraries tab on the left to import.
3. Arrange Media in Timeline and Adjust
Now, it’s time to place all these photos and videos in the timeline in order and do some adjustments. You can use the Magic Wand tool to improve the photo quality automatically, do some color correction, or add a filter to the photo. If you preview the video clip, you will see more options that allow you to do more editing, such as changing speed.
4. Apply Transitions & Effects
Transitions and effects will help you to create a slideshow in a more professional way. Some transitions such as cross dissolve, fade and cross blur are very popular in the slideshow, but remember don’t use lots of different transitions in one slideshow since too many transitions will distract the viewer’s attention. To apply a transition in the slideshow, just drag and drop it between two photos in the timeline.
5. Add Titles and Text
Using some opener titles and credits at the beginning and ending part of your slideshow will make it cool as well. You can add some famous quotes and words to better demonstrate.
Just to the Titles tab and select one of the title templates and drop it to the timeline first and then write your own words in the preview window.
6. Add Music to Slideshow
You can download some royalty-free music and sound effects from websites such as Filmstock stock media library or iTunes or import your own audio as we said before to use it as the slideshow background music. To sync with the slideshow, you may need to trim and edit the audio accordingly. For detailed information about iMovie audio editing, you can check how to add background music to iMovie.
Filmstock Stock Media Library ](https://tools.techidaily.com/wondershare/filmora/download/ )
7. Export and Share Your Slideshow video
Play the slideshow and check the result in the preview window. If everything goes well, you can now export and share or save it. You can save the slideshow video in MP4 format, or share it to Vimeo or add the slideshow to Theater to load it on your other Apple devices so you can easily watch it on your iOS devices or Apple TV.
I hope the above tutorial about how to make a slideshow on iMovie will be helpful for your stunning slideshow creation.
If you’re running an old macOS version and having iPhoto installed on your Mac, here are the detailed steps about How to make slideshow in iMovie with iPhoto project.
Step 1. Import Photos from the iPhoto Library
iMovie works seamlessly with iPhoto. You are suggested to drag and drop photos from iPhoto to the iMovie project. If no library exists in iPhoto, create one and import photos to iPhoto first. To add videos, you could go to either “File/Import” or Event Library, and then drag and drop selected videos to the timeline.
After photos and videos are imported to the iMovie slideshow project, you can preview the raw slideshow simply by pressing Space bar on your keyboard. And then make adjustments to clips and transitions. For example, mouse over one clip or “double arrow” button and click on the settings icon, then you could access clip adjustment, video adjustment, transition adjustment, etc.
Step 2. Add Music to Your iMovie Slideshow Project
Music sets the tone of your slideshow. Adding musing to the iMovie slideshow is just as simple as adding photos and videos.
So click the audio icon in the bottom right corner, and drag and drop the desired audio file to the timeline. Multiple songs could be added to iMovie.
However, iMovie doesn’t support multiple soundtracks. If necessary, you need to combine multiple song tracks with an external audio editor before importing them to the iMovie slideshow. You can also apply audio effects and filter sound using an equalizer.
Step 3. Export Your iMovie Slideshow Video
iMovie makes sharing possibilities endless. For those who upload their videos online, iMovie allows users to directly upload to MobileMe Gallery, YouTube, Facebook, Vimeo, CNN iReport, etc.
If you select to share the iMovie slideshow using Media Browser, you will get a slideshow appeared in other Mac applications like iWeb. It’s a good idea to export the iMovie slideshow to iTunes so that you can play back slideshow quickly and easily sync with your mobile devices like iPhone, iPod, and iPad.
You may also like: How to Add Text with iMovie in Mac and iPhone >>
Recommendation: Create Slideshow on Mac with More Templates and Transitions with Filmora
If you want to make a slideshow with some templates on Mac, you can try Wondershare Filmora . Filmora can turn photos and videos into attractive slideshow videos with various inbuilt filters, transitions, elements, animations, effects, and overlays. Click the Free Download button and have a try.
Check the ultimate guide about making a slideshow with music and titles in Filmora .
If you are going to make a slideshow with music on Windows, you may need a slideshow-making tool to do it by yourself. Wondershare Filmora will also be a good choice. It helps you instantly make such an impressive slideshow from photos and videos for sharing virtually anywhere.
Shanoon Cox
Shanoon Cox is a writer and a lover of all things video.
Follow @Shanoon Cox
Top 10 Best Free Manga Sites to Read Online
Top 10 Best Free Manga Sites to Read Online

Ollie Mattison
Mar 27, 2024• Proven solutions
a
Comic books, also known as manga in Japanese, have been an important part of the country’s culture for a long time. Manga is one of the most popular forms of entertainment throughout the world. You won’t find anything like Japanese manga anywhere else in the world in terms of its unique graphics and stories. Manga is popular both in Japan and all over the world due to the very same reasons.
If you are a manga fan and would like to read manga online, you can find many websites that offer the latest manga editions and are free to access. However, there are few places in the world where you can buy these comic book series. To read their favorite manga series at any time, people often search online for free manga sites to read free of charge.
In this article, we will share a list of the 12 best free manga sites where you can easily read your favorite comic books.
1. MangaFox
MangaFox is among the best and most popular manga sites. The website was launched in 2008. Manga fans will find a vast collection of old and new series on this site. You can use MangaFox for free. It is very easy to use and has a very simple user interface. Additionally, when reading manga, users won’t see advertisements.

Features:
- It is not necessary to sign up or register in order to access the comics. All you have to do is browse the site and start reading.
- The site has millions of users and is one of the most popular sites for comics.
- Reading on the go is possible. Mobile users can browse the website from their smartphones and continue reading on the go.
2. MangaReader
Mangaareader is another best and most popular manga website. There are no charges for using the platform. There are a good number of manga collections on Mangaareader. Among other genres, it allows users to read manga without worrying about adventure, action, or fantasy. Using this platform may, however, result in sponsored advertisements.
It is very nice to see the website in such a light green color. Simple, user-friendly, and intuitive user interface. Popular manga updates and the latest manga updates can be found on the homepage. On the right side, you can also find old manga series.
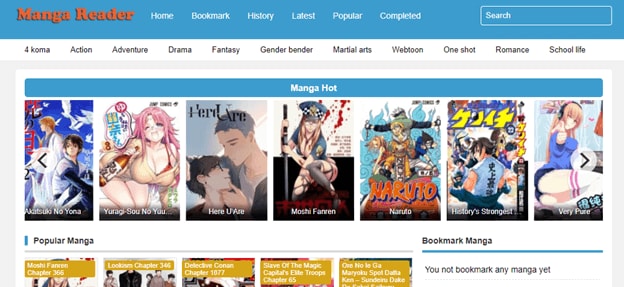
Features:
- As of now, it is the best website to read free manga online. You will also find the newest editions and comics.
- Getting your favorite comics is easy because there’s no need to register.
- All comics are free to download. Thus, it enjoys international popularity as well.
3. MangaHere
MangaHere is another excellent manga site on the Internet. With a wide range of manga in different genres like romantic comedies, girls, drama, school life, teens, action, fantasy, and staining, it has it all. In addition to manga news, MangaHere provides leaked manga. New manga episodes or series are regularly added to this website by the administrators.
As with other manga websites, the interface of MangaHere looks quite similar. A section featuring manga news, hot manga releases, and the latest updates can be found on the homepage.
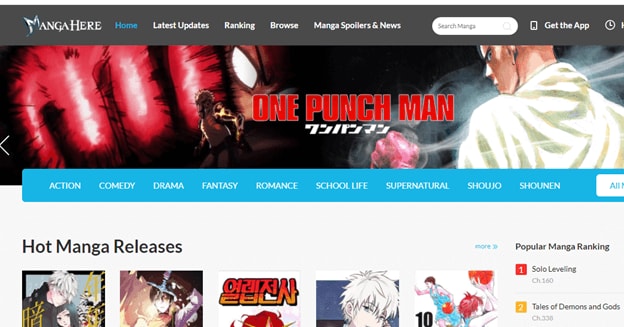
Features:
- This site provides the latest spoilers and news on manga.
- Manga stories for adults are available in a massive collection. Those seeking this type of content will find it here.
- This website is accessible from a smartphone. The website supports all types of OS.
4. MangaPark
There’s no shortage of free comic books online at Manga Park. This website also offers almost all types of comics. Comics include action, school life, romance, horror, thrillers, comedy, drama, and more types of comics. Each comic is categorized properly, including letters, number of views, ratings, and the latest comic.
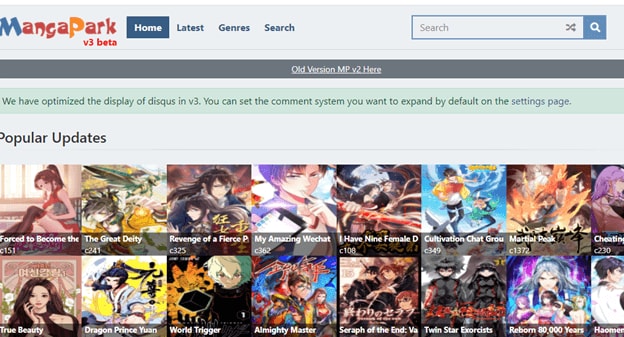
Features:
- In a clear grid pattern, MangaPark presents all popular comic books and the most recent comic releases.
- Your favorite comics and themes can be marked as favorites with a free account.
- You can view all the previous comics chapters by clicking on the history button.
- Find out which is the best website for reading manga.
- There is no need to register or sign up.
5. BATO.TO
A bit more fancy and appealing than Manga Reader, BATO features a different interface. Manga Comics can be found here, including romance, action, sports, sci-fi, and other genres. The website Bato.to is popular, and it is not subject to sudden downtime like many other manga sites. You can upload manga to this open-source website and help improve the collection.
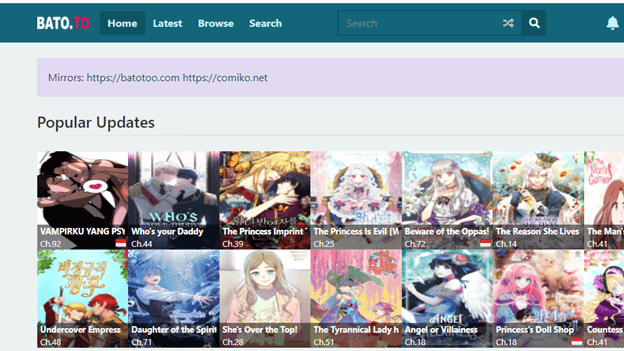
Features:
- There’s much Manga on Bato.to, and there’s a great community for you to interact with.
- Despite its unorganized nature, the website still accomplishes its objective.
- This website offers a variety of free manga for you to read.
- Additionally, there is a section for recent releases and updates.
- It lets you narrow your search using advanced filters.
- There are four types of filters: style, demographics, status, and genre.
6. Manga Kakalot
There is a website called MangaKakalot that offers a clearer and more sophisticated user experience. To access the most entertaining manga comic collection online, visitors must first create a free account on the website. With high-quality images and an updated collection that is constantly updated, you’ll always find the most recent issues. Visitors will find it very easy to search the series on this website because it is well laid out.
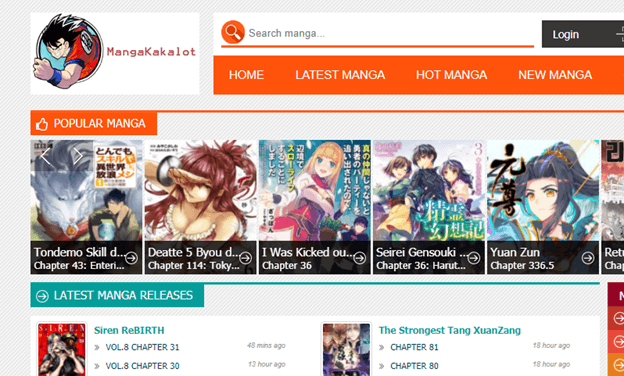
Features:
- Manga’s homepage has links to its latest version.
- There are all types of manga available, from action comics to mystery, mystery and romance manga.
- Also, the manga series are listed alphabetically, along with their completion status.
- It is possible to read manga on Mangakalot.
- All Comics on the homepage are displayed in a grid pattern, and the site has a simple and minimalistic look.
- Reading manga online is best at this site.
7. Otakusmash.com
Because of the easy navigation interface and the extensive collection of Manga collections on this site, we have included it in our list of best manga sites. You can browse Top 100 Action Adventure Manga, Top 50 Sports Manga, Top 50 Romantic Manga, and more on this website.
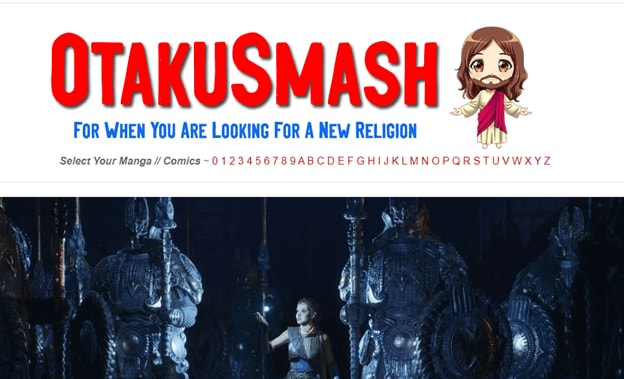
Features:
- The site is quite easy to navigate.
- You can also find online comics and download anime besides reading manga on the website.
- You can also download anime wallpapers from this website.
- You can find anime news, new mangas, and wishlist on the right section of the website.
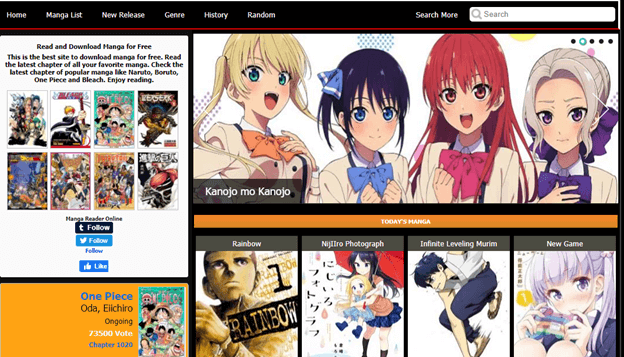
8. Mngdoom.com
A site that can certainly be considered one of the best manga sites is Manga Doom. With new comics and chapters added every hour, it has a huge database and keeps growing in popularity. This website does not charge for the back-end work or for sharing premium content. While it does contain advertisements, they are not intrusive or creepy as those on other sites.

Features:
- The Manga Doom interface is simple, and it has a search bar at the top, which allows you to find manga without any hassles easily.
- Using this platform will allow you to meet people with similar interests all over the world.
- Overall you can find plenty of good mangas on this website.
- The library of mangas keeps growing every day so you won’t get bored.
9. Manga Freak
A good number of audiences find it useful and enjoy it, despite the advertisements. There is a huge database of comics on Manga Freak. Manga Freak is unique in that it is updated far more frequently than other dead websites. New content is consistently posted on this manga website. The content on this site can be read and accessed for free
Features:
- The website has a dark theme that gives it a very calm look.
- Although you see some annoying ads still it is worth reading.
- There is a huge library of mangas available on this website.
- You can also search for your desired mangas using the search bar on the top left side.
10. Comixology.com
Our next platform is Comixology. Amazon assists Comixology in its operations. Marvel Comics, DCU, Manga, and other digital comics are available here. Coximology, therefore, has a diverse comic book collection. The other great feature of this website is that they host every graphic novel in their library in English. The prices for comics and manga on Comixology are incredibly reasonable. You can also find many free comics on websites for which you don’t need to pay anything. Sadly, they do not have any options for renting. The website is also incredibly easy to navigate and looks very premium. We rate this manga site among the top on our list today.
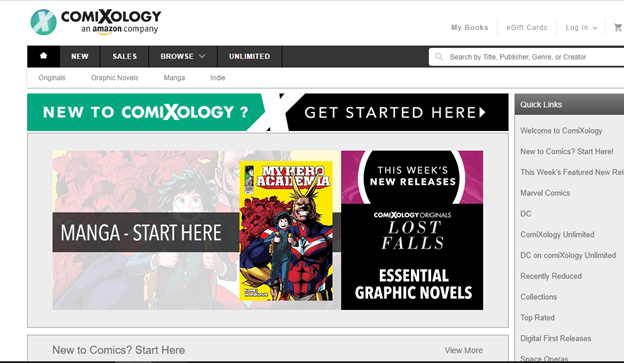
Features:
- Supported by Amazon.
- Offers a diverse range of comics and mangas.
- Clean website layout.
- Easy to access and use.
Final Verdict
So, in this article, we shared a detailed list of the best free manga sites where you can read mangas online. All these websites are very popular among manga fans, and if you are a manga lover, you will have an amazing experience on these websites.
Ollie Mattison
Ollie Mattison is a writer and a lover of all things video.
Follow @Ollie Mattison
Ollie Mattison
Mar 27, 2024• Proven solutions
a
Comic books, also known as manga in Japanese, have been an important part of the country’s culture for a long time. Manga is one of the most popular forms of entertainment throughout the world. You won’t find anything like Japanese manga anywhere else in the world in terms of its unique graphics and stories. Manga is popular both in Japan and all over the world due to the very same reasons.
If you are a manga fan and would like to read manga online, you can find many websites that offer the latest manga editions and are free to access. However, there are few places in the world where you can buy these comic book series. To read their favorite manga series at any time, people often search online for free manga sites to read free of charge.
In this article, we will share a list of the 12 best free manga sites where you can easily read your favorite comic books.
1. MangaFox
MangaFox is among the best and most popular manga sites. The website was launched in 2008. Manga fans will find a vast collection of old and new series on this site. You can use MangaFox for free. It is very easy to use and has a very simple user interface. Additionally, when reading manga, users won’t see advertisements.
Features:
- It is not necessary to sign up or register in order to access the comics. All you have to do is browse the site and start reading.
- The site has millions of users and is one of the most popular sites for comics.
- Reading on the go is possible. Mobile users can browse the website from their smartphones and continue reading on the go.
2. MangaReader
Mangaareader is another best and most popular manga website. There are no charges for using the platform. There are a good number of manga collections on Mangaareader. Among other genres, it allows users to read manga without worrying about adventure, action, or fantasy. Using this platform may, however, result in sponsored advertisements.
It is very nice to see the website in such a light green color. Simple, user-friendly, and intuitive user interface. Popular manga updates and the latest manga updates can be found on the homepage. On the right side, you can also find old manga series.
Features:
- As of now, it is the best website to read free manga online. You will also find the newest editions and comics.
- Getting your favorite comics is easy because there’s no need to register.
- All comics are free to download. Thus, it enjoys international popularity as well.
3. MangaHere
MangaHere is another excellent manga site on the Internet. With a wide range of manga in different genres like romantic comedies, girls, drama, school life, teens, action, fantasy, and staining, it has it all. In addition to manga news, MangaHere provides leaked manga. New manga episodes or series are regularly added to this website by the administrators.
As with other manga websites, the interface of MangaHere looks quite similar. A section featuring manga news, hot manga releases, and the latest updates can be found on the homepage.
Features:
- This site provides the latest spoilers and news on manga.
- Manga stories for adults are available in a massive collection. Those seeking this type of content will find it here.
- This website is accessible from a smartphone. The website supports all types of OS.
4. MangaPark
There’s no shortage of free comic books online at Manga Park. This website also offers almost all types of comics. Comics include action, school life, romance, horror, thrillers, comedy, drama, and more types of comics. Each comic is categorized properly, including letters, number of views, ratings, and the latest comic.
Features:
- In a clear grid pattern, MangaPark presents all popular comic books and the most recent comic releases.
- Your favorite comics and themes can be marked as favorites with a free account.
- You can view all the previous comics chapters by clicking on the history button.
- Find out which is the best website for reading manga.
- There is no need to register or sign up.
5. BATO.TO
A bit more fancy and appealing than Manga Reader, BATO features a different interface. Manga Comics can be found here, including romance, action, sports, sci-fi, and other genres. The website Bato.to is popular, and it is not subject to sudden downtime like many other manga sites. You can upload manga to this open-source website and help improve the collection.
Features:
- There’s much Manga on Bato.to, and there’s a great community for you to interact with.
- Despite its unorganized nature, the website still accomplishes its objective.
- This website offers a variety of free manga for you to read.
- Additionally, there is a section for recent releases and updates.
- It lets you narrow your search using advanced filters.
- There are four types of filters: style, demographics, status, and genre.
6. Manga Kakalot
There is a website called MangaKakalot that offers a clearer and more sophisticated user experience. To access the most entertaining manga comic collection online, visitors must first create a free account on the website. With high-quality images and an updated collection that is constantly updated, you’ll always find the most recent issues. Visitors will find it very easy to search the series on this website because it is well laid out.
Features:
- Manga’s homepage has links to its latest version.
- There are all types of manga available, from action comics to mystery, mystery and romance manga.
- Also, the manga series are listed alphabetically, along with their completion status.
- It is possible to read manga on Mangakalot.
- All Comics on the homepage are displayed in a grid pattern, and the site has a simple and minimalistic look.
- Reading manga online is best at this site.
7. Otakusmash.com
Because of the easy navigation interface and the extensive collection of Manga collections on this site, we have included it in our list of best manga sites. You can browse Top 100 Action Adventure Manga, Top 50 Sports Manga, Top 50 Romantic Manga, and more on this website.
Features:
- The site is quite easy to navigate.
- You can also find online comics and download anime besides reading manga on the website.
- You can also download anime wallpapers from this website.
- You can find anime news, new mangas, and wishlist on the right section of the website.
8. Mngdoom.com
A site that can certainly be considered one of the best manga sites is Manga Doom. With new comics and chapters added every hour, it has a huge database and keeps growing in popularity. This website does not charge for the back-end work or for sharing premium content. While it does contain advertisements, they are not intrusive or creepy as those on other sites.
Features:
- The Manga Doom interface is simple, and it has a search bar at the top, which allows you to find manga without any hassles easily.
- Using this platform will allow you to meet people with similar interests all over the world.
- Overall you can find plenty of good mangas on this website.
- The library of mangas keeps growing every day so you won’t get bored.
9. Manga Freak
A good number of audiences find it useful and enjoy it, despite the advertisements. There is a huge database of comics on Manga Freak. Manga Freak is unique in that it is updated far more frequently than other dead websites. New content is consistently posted on this manga website. The content on this site can be read and accessed for free
Features:
- The website has a dark theme that gives it a very calm look.
- Although you see some annoying ads still it is worth reading.
- There is a huge library of mangas available on this website.
- You can also search for your desired mangas using the search bar on the top left side.
10. Comixology.com
Our next platform is Comixology. Amazon assists Comixology in its operations. Marvel Comics, DCU, Manga, and other digital comics are available here. Coximology, therefore, has a diverse comic book collection. The other great feature of this website is that they host every graphic novel in their library in English. The prices for comics and manga on Comixology are incredibly reasonable. You can also find many free comics on websites for which you don’t need to pay anything. Sadly, they do not have any options for renting. The website is also incredibly easy to navigate and looks very premium. We rate this manga site among the top on our list today.
Features:
- Supported by Amazon.
- Offers a diverse range of comics and mangas.
- Clean website layout.
- Easy to access and use.
Final Verdict
So, in this article, we shared a detailed list of the best free manga sites where you can read mangas online. All these websites are very popular among manga fans, and if you are a manga lover, you will have an amazing experience on these websites.
Ollie Mattison
Ollie Mattison is a writer and a lover of all things video.
Follow @Ollie Mattison
How to Edit Memoji on Android and iPhone
How to Edit Memoji on Android and iPhone
Shanoon Cox
Mar 27, 2024• Proven solutions
A memoji is simply the cartoon avatar of you. You can easily learn how to edit memoji and make a custom memoji that is the exact mirror image of you. From eye color to freckles, you can add every feature that makes the memoji look like a mini cartoon version of you
Since a custom memoji is a more personalized way to express our emotions, it can be the perfect way to add a hint of humor to conversations. Everyone loves a unique sticker, especially if it looks like them. So, you can take help from our guide on how to change memoji and take your texting experience to the next level.
- Bonus Tip-Memoji VS Emoji
- Part 1: How to Edit Memoji on iPhone
- Part 2: How to Edit Memoji on Android
Bonus Tip—Memoji VS Emoji
Now you must be wondering what the difference between a memoji and emoji is. Well, there is the first major difference, which is that a memoji is the cartoon avatar of you, whereas an emoji is just around yellow-faced cartoon with various expressions
1.The memoji is solely based on a human face, but an emoji can be any object, place, or even a symbol. While you can mostly craft a custom emoji personalized to your style and likings, emojis are limited. Custom memoji can also be dressed and decorated to serve as the perfect mini-version of you, complete from earrings to freckles.
2.Moreover, almost everyone has the same set of emojis. But since memojis are created to look like a person, everyone has a very unique pack of memojis looking like the cartoon version of them.
Despite the differences, both memojis and emojis carry equal significance and can spice up your texting experience in hilarious ways.
Part 1: How to Edit Memoji on iPhone
Majority of you might be iPhone users and so it’s only fair to show you some easy ways on how to edit memoji on your iPhone. There are two ways to create a custom memoji and then edit it. Lets dive in!
Method 1: Edit Memoji in the Built-in Editor
The introduction of iOS13 has made it possible for the majority of iPhone users to create or edit their memojis as they like. But in order to use this built-in editor to create a custom memoji, make sure that your device is updated to iOS13.
In this Apple-exclusive editor, the steps are pretty straightforward. But to help you further, I will walk you along with the steps in detail
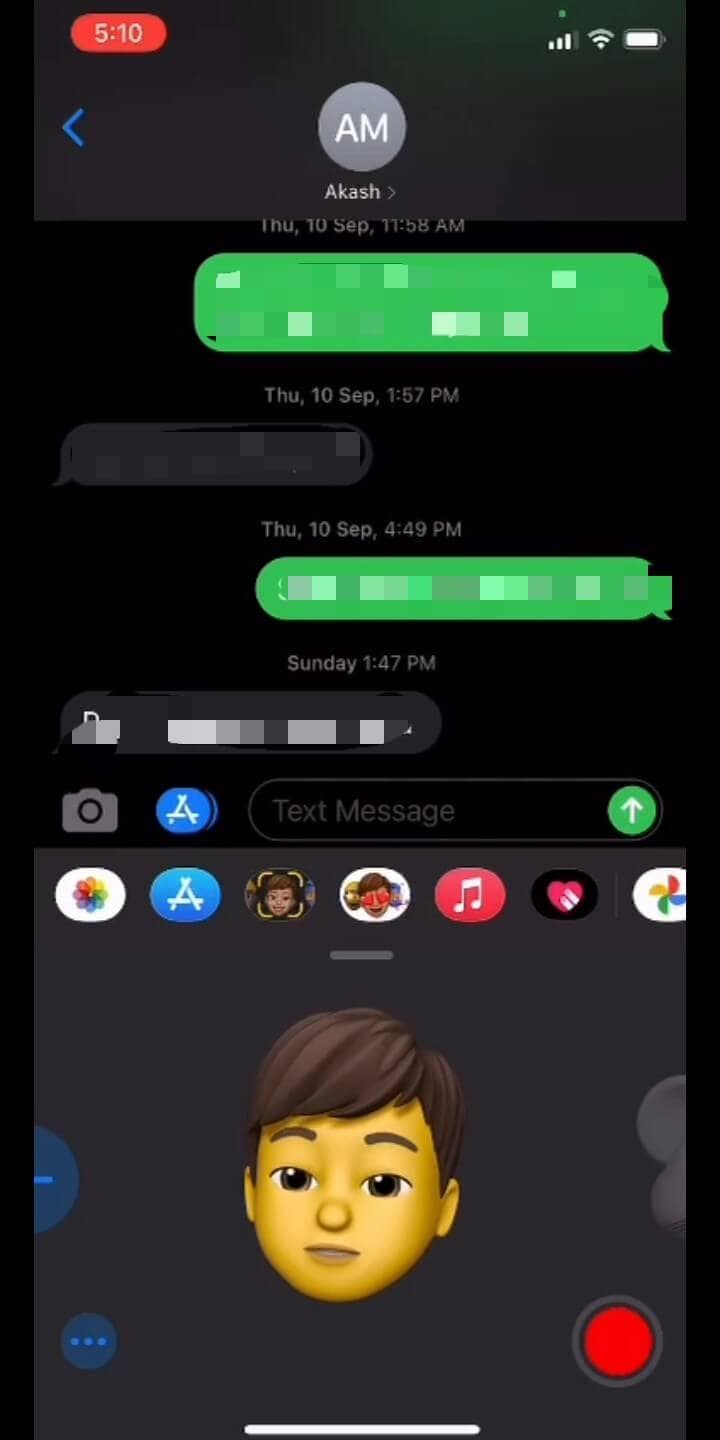
- Go to the iMessages and open a new message tab or a previous conversation and tap the Appstoreicon to reveal the app bar. Hit the Animoji icon represented by the three heads
![]()
- Choose the memoji you wish to edit and click the three dots in the bottom left corner. Click Editon the pop-up dialogue box. You can also tap on Duplicate to copy the same memoji.
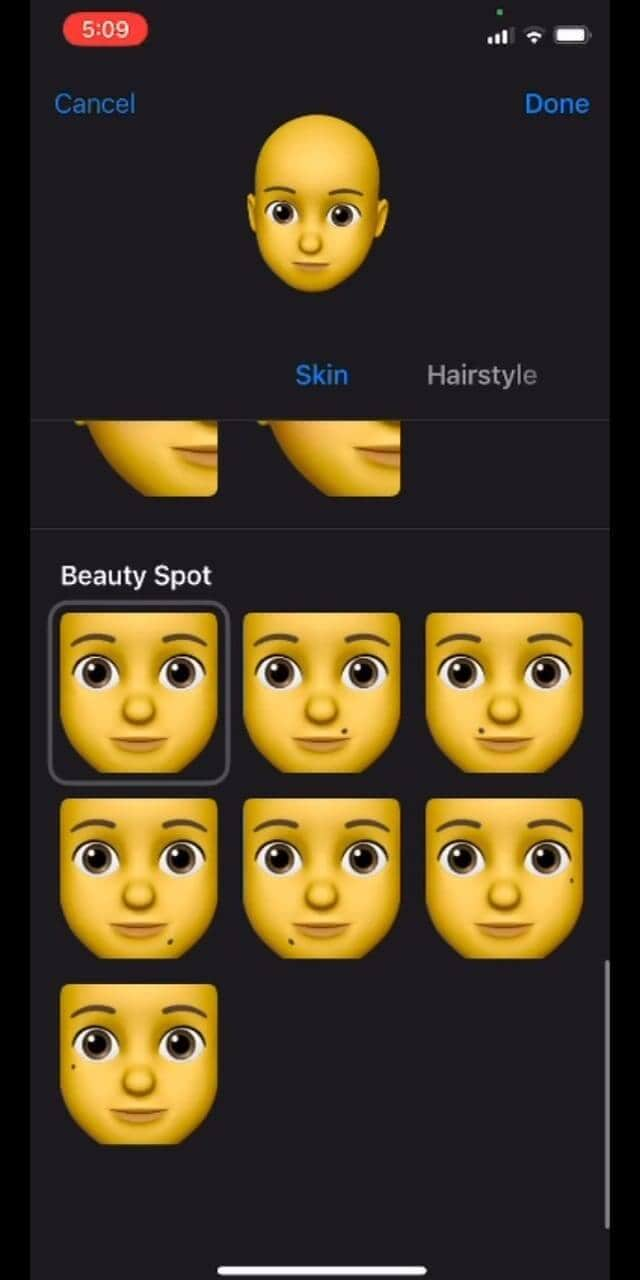
- Now you will be given various options to craft a custom memoji that looks exactly like you, right down to every detail. Click on the Skintab to change the skin color, add freckles or a beauty spot
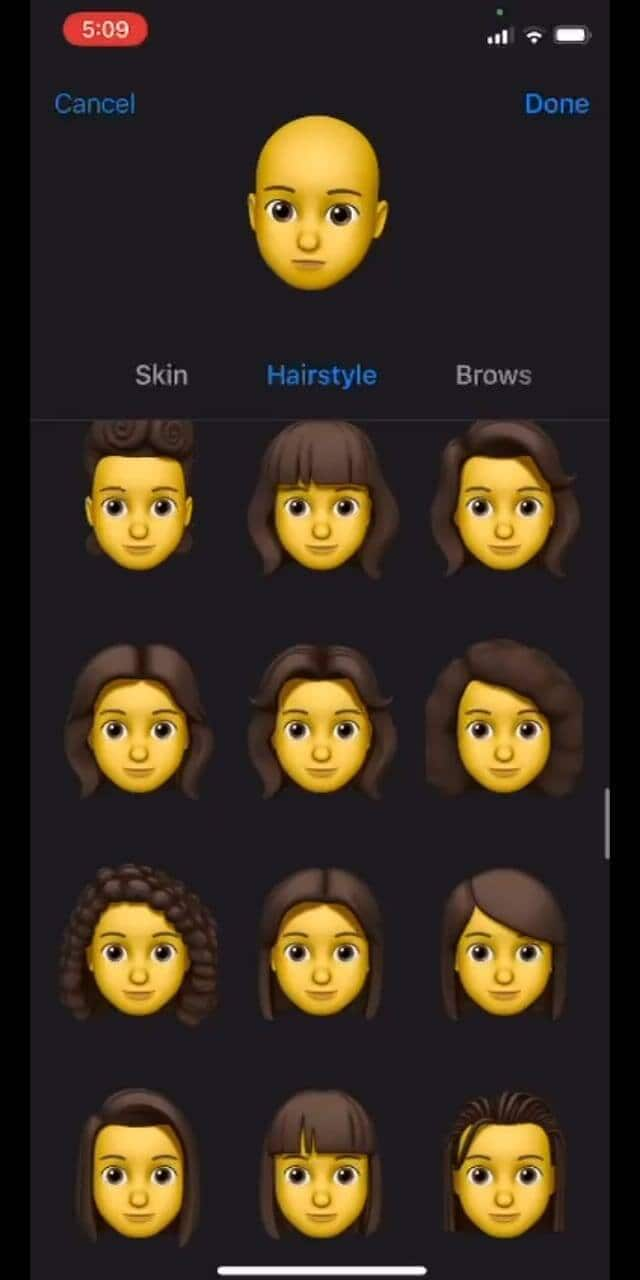
- Choose the hairstyleand hair color that suits you the best
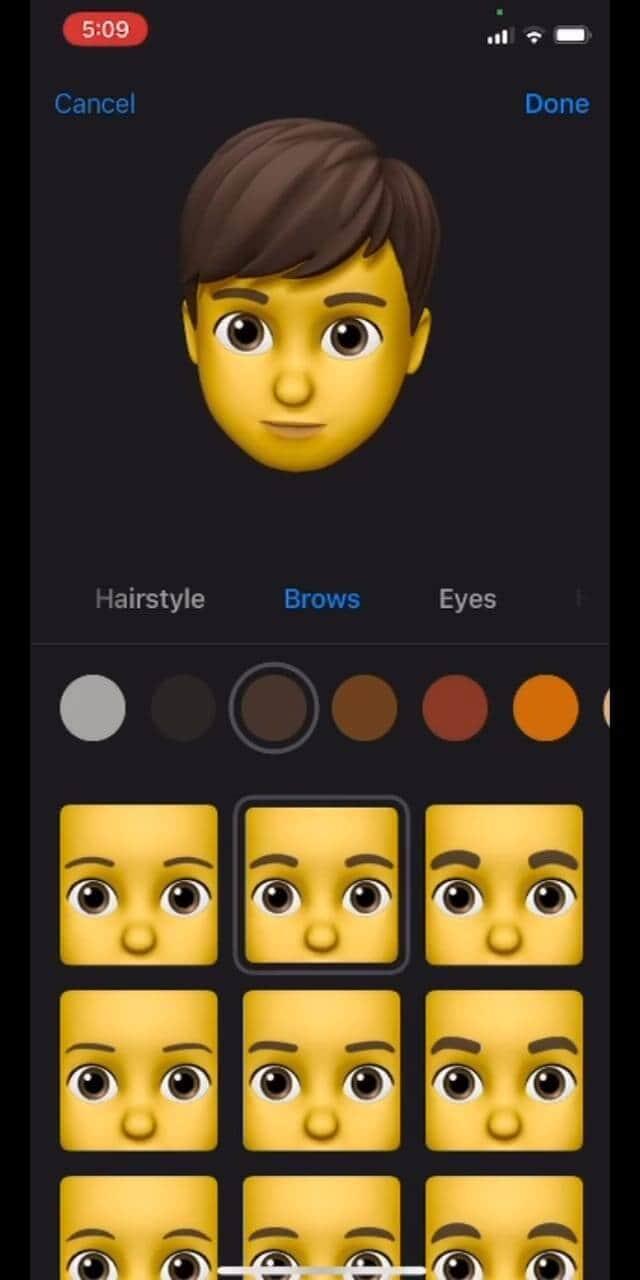
- In the Browstab, select your brow style. Go through all the tabs to choose the perfect headwear, glasses, or even AirPods to create the perfect custom memoji
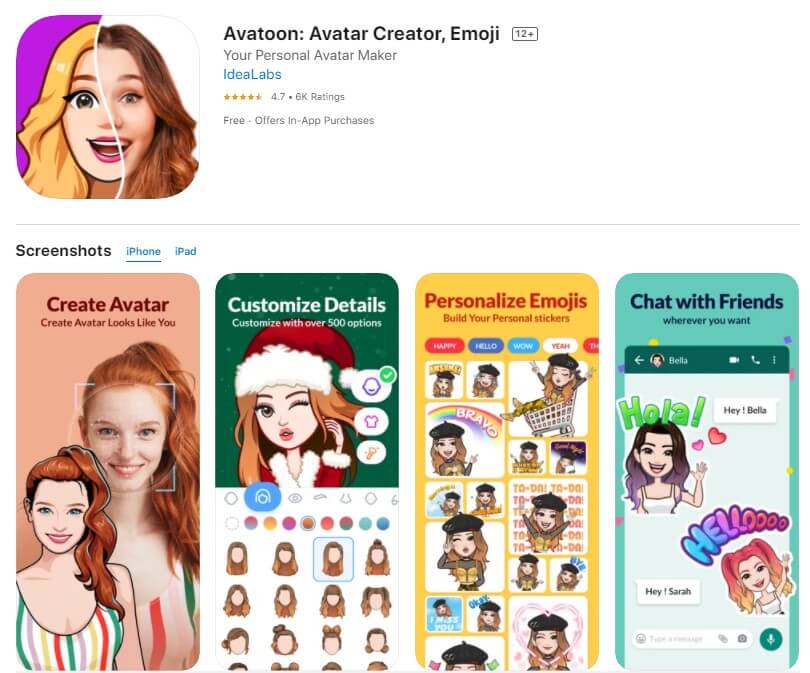
Method 2: Edit Memoji Using the Avatoon App
Avatoon is a great memoji maker app that lets you edit memoji from scratch and has an extensive collection of features you can choose from to make the cartoon look exactly like you. You can even auto-create a memoji by taking a selfie, and Avatoon will do the rest. In manual creation, you can select every detail from eyelashes, tattoos, headwear, and even jewelry.
Let me show the easy ways how to edit memoji using Avatoons powerful tools
- Firstly, download launch Avatoon.
- Choose Manual Creationto create a personalized custom emoji
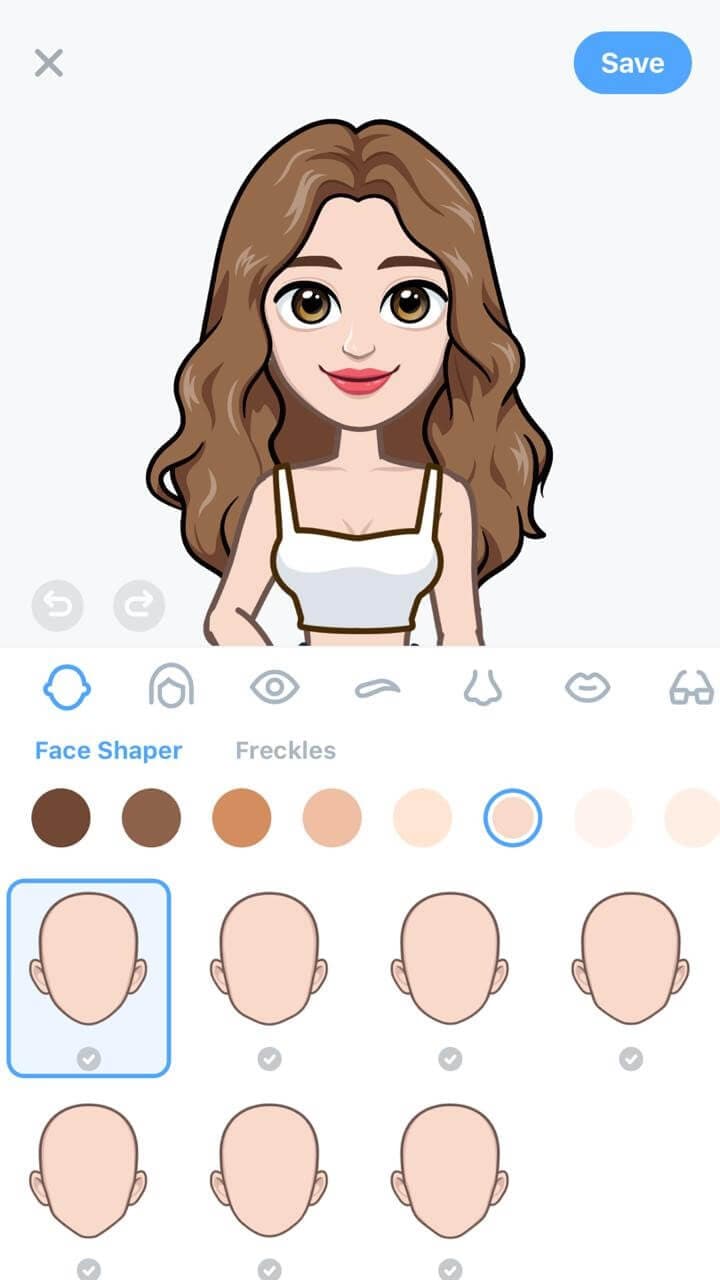
- Now you can choose your face shape, hairstyle, eyes, brows, etc. Add headwear or glasses that depict your style
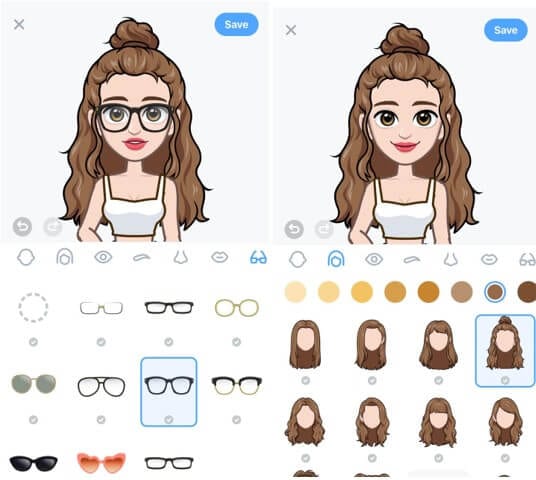
- Now that you have created a basic cartoon self, you can add much finer details by using coins.
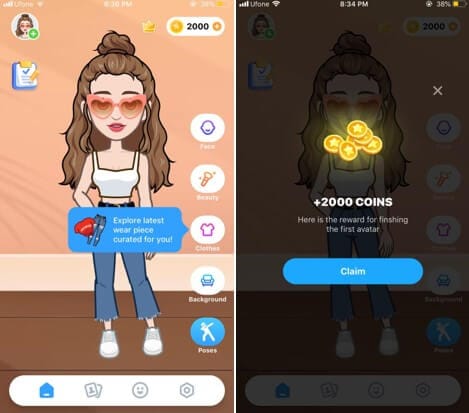
- Click on the Photobooth at the bottom to choose a cool background for your memoji.
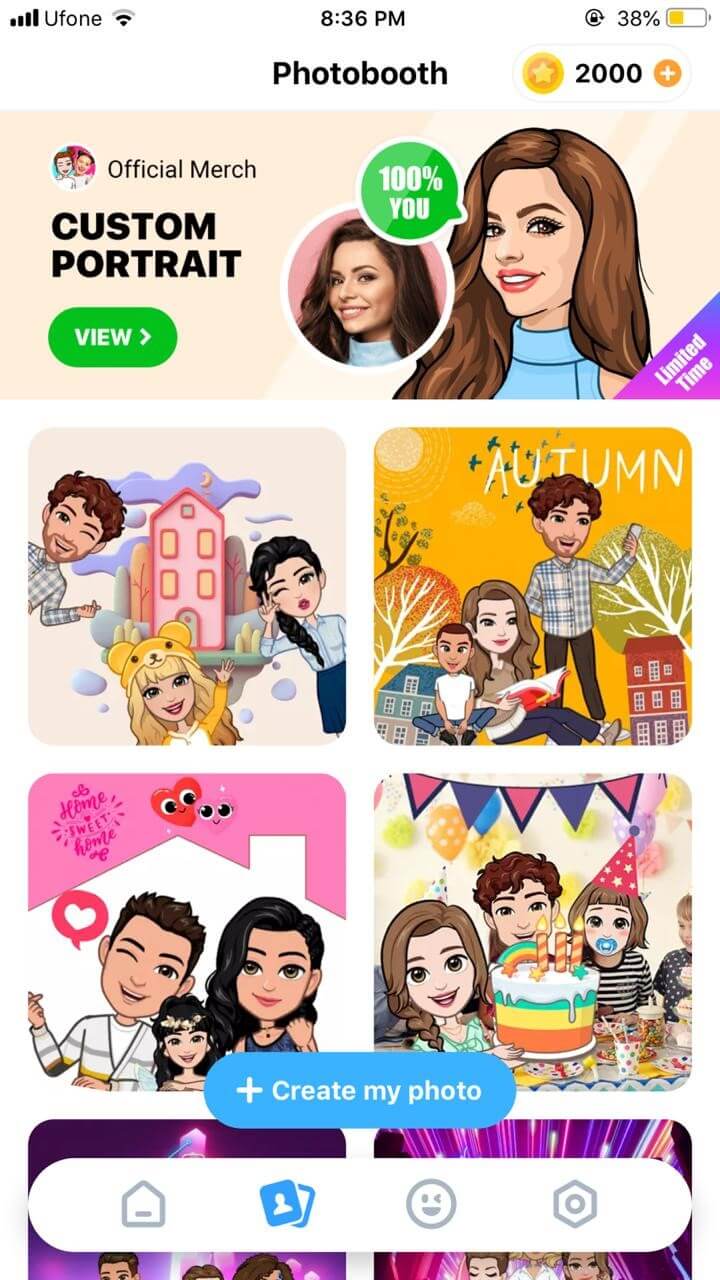
- Once you have decorated the memoji, tap on Poses, choose the mood you like and instantly share via different sharing platforms
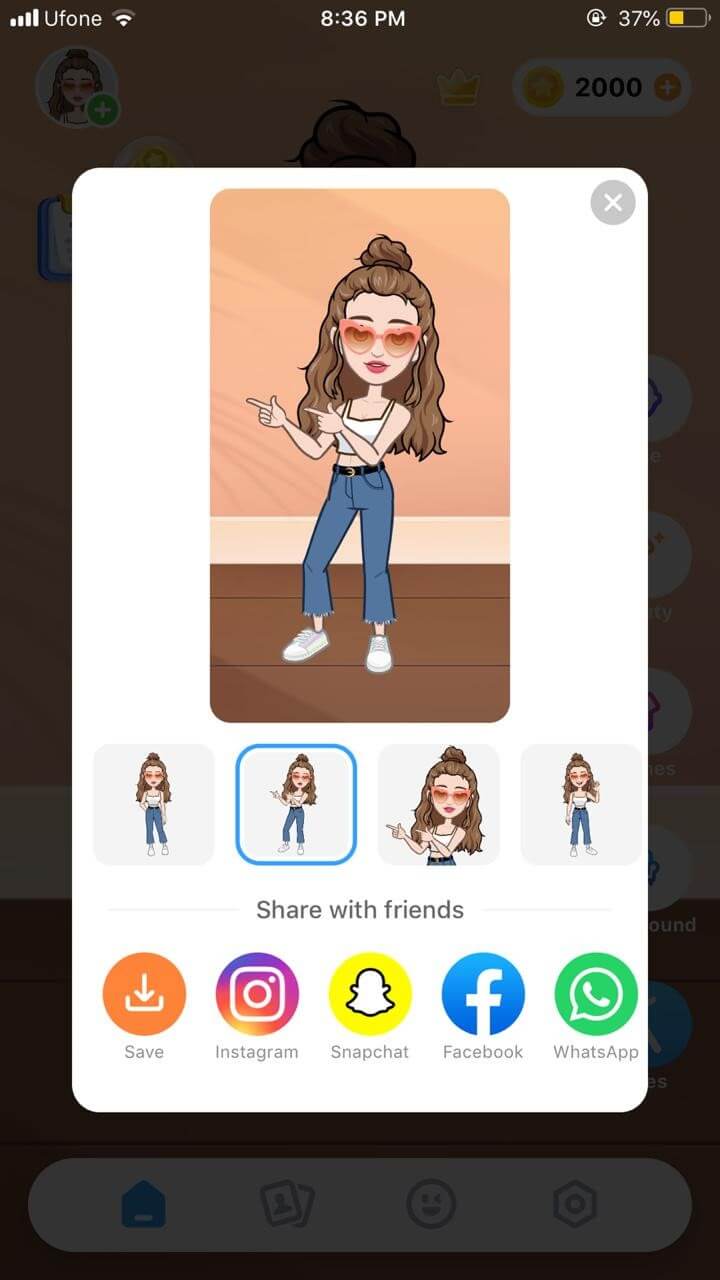
Part 2: How to Edit Memoji on Android
MojiPop is an amazing free app to make a custom emoji. It is packed with stickers and animated caricatures for every mood or emotion. Just take a selfie and start communicating using your cartoon face. You can even edit your memojis to suit your style. Then send the memoji to your friends to surprise them with a hilarious custom memoji
If you’re wondering how to edit memoji, here’s a short guide for you:
- Launch MojiPop and click on Create Avatar. Either take a selfie or choose an existing image from your gallery. Specify the age group.
![]()
- MojiPop instantly displays avatar styles, choose one that best fits you and click Next
![]()
- Select different features in tabs for hair, eyes, headwear to make the custom memoji look just like you. Click Confirmto save it.
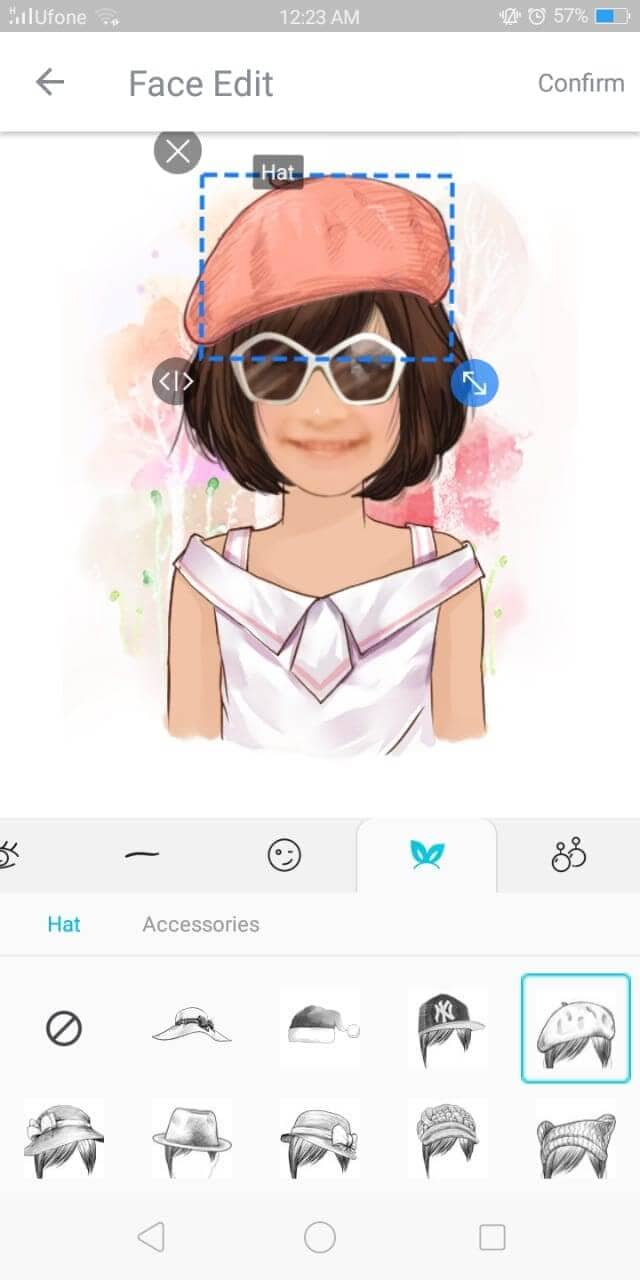
- In the Discovertab, choose a gif template to wish someone or express your feelings.

- Click on the Share icon and choose the platform for instant sharing

Ready to Edit Memoji by Yourself?
Are you ready to make your conversations more interesting and engaging using custom memojis? Because who doesn’t love a mini version of themselves displaying how happy or angry they feel? What better to communicate without saying a word?
And we hope that our short tutorial on how to edit memoji helps you create different versions of yourself to express yourself better.
Now that you know how to edit memoji to your liking, what are you waiting for? Go on to edit and create a hilarious avatar of yourself and enjoy texting
Shanoon Cox
Shanoon Cox is a writer and a lover of all things video.
Follow @Shanoon Cox
Shanoon Cox
Mar 27, 2024• Proven solutions
A memoji is simply the cartoon avatar of you. You can easily learn how to edit memoji and make a custom memoji that is the exact mirror image of you. From eye color to freckles, you can add every feature that makes the memoji look like a mini cartoon version of you
Since a custom memoji is a more personalized way to express our emotions, it can be the perfect way to add a hint of humor to conversations. Everyone loves a unique sticker, especially if it looks like them. So, you can take help from our guide on how to change memoji and take your texting experience to the next level.
- Bonus Tip-Memoji VS Emoji
- Part 1: How to Edit Memoji on iPhone
- Part 2: How to Edit Memoji on Android
Bonus Tip—Memoji VS Emoji
Now you must be wondering what the difference between a memoji and emoji is. Well, there is the first major difference, which is that a memoji is the cartoon avatar of you, whereas an emoji is just around yellow-faced cartoon with various expressions
1.The memoji is solely based on a human face, but an emoji can be any object, place, or even a symbol. While you can mostly craft a custom emoji personalized to your style and likings, emojis are limited. Custom memoji can also be dressed and decorated to serve as the perfect mini-version of you, complete from earrings to freckles.
2.Moreover, almost everyone has the same set of emojis. But since memojis are created to look like a person, everyone has a very unique pack of memojis looking like the cartoon version of them.
Despite the differences, both memojis and emojis carry equal significance and can spice up your texting experience in hilarious ways.
Part 1: How to Edit Memoji on iPhone
Majority of you might be iPhone users and so it’s only fair to show you some easy ways on how to edit memoji on your iPhone. There are two ways to create a custom memoji and then edit it. Lets dive in!
Method 1: Edit Memoji in the Built-in Editor
The introduction of iOS13 has made it possible for the majority of iPhone users to create or edit their memojis as they like. But in order to use this built-in editor to create a custom memoji, make sure that your device is updated to iOS13.
In this Apple-exclusive editor, the steps are pretty straightforward. But to help you further, I will walk you along with the steps in detail
- Go to the iMessages and open a new message tab or a previous conversation and tap the Appstoreicon to reveal the app bar. Hit the Animoji icon represented by the three heads
![]()
- Choose the memoji you wish to edit and click the three dots in the bottom left corner. Click Editon the pop-up dialogue box. You can also tap on Duplicate to copy the same memoji.
- Now you will be given various options to craft a custom memoji that looks exactly like you, right down to every detail. Click on the Skintab to change the skin color, add freckles or a beauty spot
- Choose the hairstyleand hair color that suits you the best
- In the Browstab, select your brow style. Go through all the tabs to choose the perfect headwear, glasses, or even AirPods to create the perfect custom memoji
Method 2: Edit Memoji Using the Avatoon App
Avatoon is a great memoji maker app that lets you edit memoji from scratch and has an extensive collection of features you can choose from to make the cartoon look exactly like you. You can even auto-create a memoji by taking a selfie, and Avatoon will do the rest. In manual creation, you can select every detail from eyelashes, tattoos, headwear, and even jewelry.
Let me show the easy ways how to edit memoji using Avatoons powerful tools
- Firstly, download launch Avatoon.
- Choose Manual Creationto create a personalized custom emoji
- Now you can choose your face shape, hairstyle, eyes, brows, etc. Add headwear or glasses that depict your style
- Now that you have created a basic cartoon self, you can add much finer details by using coins.
- Click on the Photobooth at the bottom to choose a cool background for your memoji.
- Once you have decorated the memoji, tap on Poses, choose the mood you like and instantly share via different sharing platforms
Part 2: How to Edit Memoji on Android
MojiPop is an amazing free app to make a custom emoji. It is packed with stickers and animated caricatures for every mood or emotion. Just take a selfie and start communicating using your cartoon face. You can even edit your memojis to suit your style. Then send the memoji to your friends to surprise them with a hilarious custom memoji
If you’re wondering how to edit memoji, here’s a short guide for you:
- Launch MojiPop and click on Create Avatar. Either take a selfie or choose an existing image from your gallery. Specify the age group.
![]()
- MojiPop instantly displays avatar styles, choose one that best fits you and click Next
![]()
- Select different features in tabs for hair, eyes, headwear to make the custom memoji look just like you. Click Confirmto save it.
- In the Discovertab, choose a gif template to wish someone or express your feelings.
- Click on the Share icon and choose the platform for instant sharing
Ready to Edit Memoji by Yourself?
Are you ready to make your conversations more interesting and engaging using custom memojis? Because who doesn’t love a mini version of themselves displaying how happy or angry they feel? What better to communicate without saying a word?
And we hope that our short tutorial on how to edit memoji helps you create different versions of yourself to express yourself better.
Now that you know how to edit memoji to your liking, what are you waiting for? Go on to edit and create a hilarious avatar of yourself and enjoy texting
Shanoon Cox
Shanoon Cox is a writer and a lover of all things video.
Follow @Shanoon Cox
Burn Photos to DVD | How to Burn Photos to DVD with Transitions and Music
How to Burn Photos to DVD with Transitions and Music
Shanoon Cox
Mar 27, 2024• Proven solutions
Photos are precious memories not only for you but also for your family members. As time goes on, the photos might fade out and be unable to retrieve. To avoid this, burn photos to DVD will be a great idea to preserve family memories eternally.
This article will show you how to burn photos to DVD Slideshow with transition, titles and music quickly and easily by using Wondershare DVD Slideshow Builder Deluxe . It also provides some tips on how to burn photos to DVD.
Part 1: How to Burn Photos to DVD with Transition, Titles and Music
Wondershare DVD Slideshow Builder Deluxe can help you quickly create and burn photos to DVD. Download the free trial version this photo DVD maker first.
Step 1. Add Photo or Video Files
In Organize tab, simply click the “Add Files” button to open the browse window, find your files and import them into the program, you can drag and drop photos or videos to organize them on storyboard. Click the Expand button to get a larger viewer.
Step 2. Customize Photo Slideshow Transitions
Generally speaking, transition effects will be automatically inserted between every two photos/videos when you import the photos. But you can customize them by clicking the Personalize tab, then drag and drop a transition from the list to the thumbnail between two slides.
You are also able to add background music here: click the Music button and choose a music file from your computer.
Step 3. Choose DVD Menu
Now switch to Create tab to author a DVD menu from template and burn to DVD disc quickly:
- On the right hand side of the screen, double click on desired menu template to apply a DVD menu template.
- Click the Edit button under the preview windows to customize your DVD menu or right click on menu for more options.
- You can also make a professional DVD menu using dynamic DVD menu templates.
BTW, if you don’t want a DVD menu, just check the “Disable DVD Menu” option.
Step 4. Burn Photos to DVD Disc
Now click the Preview button beneath the preview window to make sure the photo DVD slideshow is exactly what you want. Go back to Personalize tab to change if necessary. After that, click “Burn” button to start burning your DVD slideshow to DVD.
You can also output photo slideshow to watch on Youtube, Mobile Phone, iPhone, PSP, etc. through options on the left. Below are the instructions to burn DVD for watch on TV:

- Insert a blank DVD disc, and do the following.
- Click “Burn to DVD”. Then specify the number of DVD copies. You can also choose to generate ISO Image files or DVD Folders.
- Make sure the PAL or NTSC TV Standard settings is right. If you don’t know which standard is used in your country, click the “Help” button. The wrong TV standard would cause playback incompatibility problem.
- Then click “Start” to burn DVD slideshow. If you have checked Create DVD Folder and/or Create DVD Image File options, the corresponding files will also be created to the specified folder.
Now sit back and relax, when burning complete, insert the created DVD disc into your DVD player to watch photo DVD slideshow on TV.
Learn more: User Guide of DVD Slideshow Builder Deluxe
Part 2: More Photo to DVD Tips
More about NTSC/PAL TV Standard
Nowadays, there are three video formats around the world. But each one is incompatible with others. For instance, NTSC is used in North America, Canada and Japan; while most of other regions PAL/SECAM. To apply TV Standard in DVD Slideshow Builder Deluxe , go to “Create“ -> Option tab and locate TV Standard option to select NTSC or PAL. If you are not sure which one to choose, please click “Help” button, select your country, then click “OK” , the program will choose the right TV standard for you.
Burn Photos to DVD/CD as Data Disc
If you only want to burn photo to DVD for backup and further use, you only need a burning photo to DVD software like ImgBurn (Free) or Nero (commercial). These software helps you burn all digital media files to DVD, of course you can burn photos to DVD for backup purpose. Notice that some photo DVD maker allows you burn slideshow as well as the original photos. This way, you turn photos to DVD slideshow with transition, and at the same time, backup photos to DVD for other uses.
Scan Photos to DVD - Digitize Photos
If you use traditional camera and have got loads of photos in album, you can scan photos to computer so that convert photo to digital format. Afterwards, you can get more from these digital photos, like backup photos to DVD, send to others as DVD gift, make a photo DVD show to play on TV, etc. All these could be done with your favorite photo DVD maker software. Now see how to transform your printed photos to digital first:
Select a good photo scanner -> Prepare your photos to scan -> Start photo scanning -> Adjust scanned photos
Scanning printed photos to computer is not an easy job. It needs patience and some tips and tricks. As you may know, some companies provide photo scanning service. For the Step 4, you can also adjust digital photos in your selected photo DVD maker. Anyway, you need to get your digital photos ready before you burn photos to DVD with transitions and music.
Shanoon Cox
Shanoon Cox is a writer and a lover of all things video.
Follow @Shanoon Cox
Shanoon Cox
Mar 27, 2024• Proven solutions
Photos are precious memories not only for you but also for your family members. As time goes on, the photos might fade out and be unable to retrieve. To avoid this, burn photos to DVD will be a great idea to preserve family memories eternally.
This article will show you how to burn photos to DVD Slideshow with transition, titles and music quickly and easily by using Wondershare DVD Slideshow Builder Deluxe . It also provides some tips on how to burn photos to DVD.
Part 1: How to Burn Photos to DVD with Transition, Titles and Music
Wondershare DVD Slideshow Builder Deluxe can help you quickly create and burn photos to DVD. Download the free trial version this photo DVD maker first.
Step 1. Add Photo or Video Files
In Organize tab, simply click the “Add Files” button to open the browse window, find your files and import them into the program, you can drag and drop photos or videos to organize them on storyboard. Click the Expand button to get a larger viewer.
Step 2. Customize Photo Slideshow Transitions
Generally speaking, transition effects will be automatically inserted between every two photos/videos when you import the photos. But you can customize them by clicking the Personalize tab, then drag and drop a transition from the list to the thumbnail between two slides.
You are also able to add background music here: click the Music button and choose a music file from your computer.
Step 3. Choose DVD Menu
Now switch to Create tab to author a DVD menu from template and burn to DVD disc quickly:
- On the right hand side of the screen, double click on desired menu template to apply a DVD menu template.
- Click the Edit button under the preview windows to customize your DVD menu or right click on menu for more options.
- You can also make a professional DVD menu using dynamic DVD menu templates.
BTW, if you don’t want a DVD menu, just check the “Disable DVD Menu” option.
Step 4. Burn Photos to DVD Disc
Now click the Preview button beneath the preview window to make sure the photo DVD slideshow is exactly what you want. Go back to Personalize tab to change if necessary. After that, click “Burn” button to start burning your DVD slideshow to DVD.
You can also output photo slideshow to watch on Youtube, Mobile Phone, iPhone, PSP, etc. through options on the left. Below are the instructions to burn DVD for watch on TV:
- Insert a blank DVD disc, and do the following.
- Click “Burn to DVD”. Then specify the number of DVD copies. You can also choose to generate ISO Image files or DVD Folders.
- Make sure the PAL or NTSC TV Standard settings is right. If you don’t know which standard is used in your country, click the “Help” button. The wrong TV standard would cause playback incompatibility problem.
- Then click “Start” to burn DVD slideshow. If you have checked Create DVD Folder and/or Create DVD Image File options, the corresponding files will also be created to the specified folder.
Now sit back and relax, when burning complete, insert the created DVD disc into your DVD player to watch photo DVD slideshow on TV.
Learn more: User Guide of DVD Slideshow Builder Deluxe
Part 2: More Photo to DVD Tips
More about NTSC/PAL TV Standard
Nowadays, there are three video formats around the world. But each one is incompatible with others. For instance, NTSC is used in North America, Canada and Japan; while most of other regions PAL/SECAM. To apply TV Standard in DVD Slideshow Builder Deluxe , go to “Create“ -> Option tab and locate TV Standard option to select NTSC or PAL. If you are not sure which one to choose, please click “Help” button, select your country, then click “OK” , the program will choose the right TV standard for you.
Burn Photos to DVD/CD as Data Disc
If you only want to burn photo to DVD for backup and further use, you only need a burning photo to DVD software like ImgBurn (Free) or Nero (commercial). These software helps you burn all digital media files to DVD, of course you can burn photos to DVD for backup purpose. Notice that some photo DVD maker allows you burn slideshow as well as the original photos. This way, you turn photos to DVD slideshow with transition, and at the same time, backup photos to DVD for other uses.
Scan Photos to DVD - Digitize Photos
If you use traditional camera and have got loads of photos in album, you can scan photos to computer so that convert photo to digital format. Afterwards, you can get more from these digital photos, like backup photos to DVD, send to others as DVD gift, make a photo DVD show to play on TV, etc. All these could be done with your favorite photo DVD maker software. Now see how to transform your printed photos to digital first:
Select a good photo scanner -> Prepare your photos to scan -> Start photo scanning -> Adjust scanned photos
Scanning printed photos to computer is not an easy job. It needs patience and some tips and tricks. As you may know, some companies provide photo scanning service. For the Step 4, you can also adjust digital photos in your selected photo DVD maker. Anyway, you need to get your digital photos ready before you burn photos to DVD with transitions and music.
Shanoon Cox
Shanoon Cox is a writer and a lover of all things video.
Follow @Shanoon Cox
Best SolarMovie Alternatives-Watch Movies Online
Best SolarMovie Alternatives-Watch Movies Online
Shanoon Cox
Mar 27, 2024• Proven solutions
SolarMovie is an online video streaming site that offers a huge collection of movies and TV series. All these movies and shows can be streamed for free on SolarMovie. Furthermore, there is no registration required. Better yet, users can even download the movies in high quality.
However, some ISP’s have banned the SolarMovie website, and it might be inaccessible now. So, people are now on the lookout for a SolarMovie alternative that they can use to easily watch movie online.
To help with that, we have carefully curated a list of some of the top sites like SolarMovie.
- Best 10 SolarMovie Alternatives for You
- Bonus Tip- Make a Video with Wondershare Filmora Easy Movie Maker
Best 10 SolarMovie Alternatives for You
Even though there countless SolarMovie like websites on the internet, it can be pretty confusing to find the best one. Therefore, we have rounded up the top SolarMovie alternative sites for your ease.
- 1. Popcornflix
- 2. Tubi TV
- 3. Freeform
- 4. Netflix
- 5. Amazon Prime
- 6. Hulu
- 7. Yifymovies
- 8. CONtv
- 9. Aha Video
- 10. Vumoo
1. Popcornflix
One of the best SolarMovie alternative sites includes Popcornflix. It is a free HD streaming site through which users can watch movie online without having to register or subscribe. The range of movies available on this SolarMovie alternative is very extensive. Moreover, the movies are categorized as New Arrivals, Horror, Drama, Asian Action, to name a few. The categorization allows easy browsing and searching for the perfect movie. This SolarMovie alternative boasts a category of Popcornflix original movies as well that are exclusively available on this site. A search bar option further eases the task of finding a particular movie.

2. Tubi TV
Tubi TV is a top-notch SolarMovie alternative site. With a sleek and attractive interface, Tubi TV features a wide variety of movies available for free streaming. Also, the movies are classified into various sections based on Popularity, Genre, and many more. By selecting a title from the genre category like horror, lifestyle, or even stand-up comedy, users can easily find and watch movie online. This site might even be better than SolarMovie, as it has options to customize the resolution and the choice to display subtitles. An option of Add To My Playlist further makes this SolarMovie alternative an excellent site.
3. Freeform
Among the sites like SolarMovie, Freeform also tops the list. However, Freeform is a cable channel that requires users to access the endless movie library through their cable provider. But, this SolarMovie alternative has a huge collection of the latest as well as vintage movies. On Freeform, you can watch movie online just by clicking and selecting your cable provider. You can sign up for free to resume your movie streaming from where you left off. Freeform’s movies are creatively classified as Fierce and Funny, Familiar Faves, and Throwback.
4. Netflix
Netflix is an up-and-coming SolarMovie alternative that has dominated the online streaming sites owing to its vast movie library. Unlike SolarMovie, Netflix also produces many original movies that are available on the sites for HD streaming. Netflix, however, is not free. Users can watch movie online on Netflix by first registering for an account. After registering, users can sign in to watch movie online or download it in HD for offline streaming later. Furthermore, this SolarMovie alternative allows users to enjoy unlimited streaming on any device or platform.

5. Amazon Prime
Amazon Prime is yet another top-notch SolarMovie alternative. On this site, users can find an exclusive Amazon original movie collection. With an intuitive interface and easy browsing categories, Amazon Prime is the go-to site to watch movie online without any ads or any kind of hassle. The categorization is based on genre, awards, or audience, to name a few. Also, the movies can be added to a Watchlist for easy organization. But, to watch movie online on Amazon Prime, users are required to create an account and sign in. And unlike SolarMovie, Amazon Prime isn’t available for free streaming.
6. Hulu
Like SolarMovie, Hulu also boasts an extensive movie library. This library by Hulu is a mix of popular and classic movies. Also, it features a variety of Hulu original series and movies that you cannot find elsewhere. Whether you want to watch a thriller or a documentary, Hulu has got you covered. However, Hulu requires a paid subscription. Before subscription, you can activate a 30-day trial to weigh whether Hulu is the best SolarMovie alternative and if it is worth your time.
7. Yifymovies
Another amazing SolarMovie alternative is the Yifymovies site. This site rivals the SolarMovie website by featuring an up-to-date movie collection. What’s better, Yifymovies has classified its library into broad categories like adventure, animation, and documentary, etc. Users can also search by filtering out the movies on the basis of the year of release. All the movie titles contain a rating that helps the user decide whether that movie is worth their time or not. The video player in this SolarMovie alternative features the fast-forward and rewind option too. The only downside is that it has a few annoying pop-up ads.
8. CONtv
One of the best sites like SolarMovie includes CONtv. Although this SolarMovie-like site requires registration in order to watch movie online, the unique and up-to-date movie collection here makes it a very popular user’s choice. By signing up, users can also save their favorite movies to the watchlist. A premium account is available if users wish to stream and watch movie online without any annoying pop-ups and commercials. On this SolarMovie alternative, users can also have access to the latest anime series as well as classic movies.
9. Aha Video
Aha is a subscription-based movie streaming SolarMovie alternative. On this site, you can watch movie online for free. But, the premium content can only be accessed after the paid subscription is activated. Aha video can easily be used as a SolarMovie alternative as it offers a great variety of movies that users can enjoy in HD quality and low buffering time. Movies for every genre like romance, comedy, and action can be found on this site. Better yet, a category is also available for kids.
10. Vumoo
Vumoo is the last but not the least addition to our list of the best sites like SolarMovie. Vumoo features a multitude of movies ranging from horror to comedy. Users can easily find any kind of movie on this SolarMovie alternative. Users can watch movie online in HD quality through Vumoo. Furthermore, Vumoo is a free website that doesn’t require any signing up or registration. Users can just hop onto this SolarMovie like website and click to watch movie online. A major drawback is that the movies are not categorized, but that is countered by the searching option, which makes it easier to search a particular movie.
Bonus Tip- Make a Video with Wondershare Filmora Easy Movie Maker
Wondershare Filmora is a very powerful and comprehensive video editor for all kinds of edits. The user-friendly interface makes the editing process effortless. Users can easily add motion graphics, keyframe animations, and even color match with a single click.
1. First, download Wondershare Filmora on your device and launch it. Then, click on File and tap on Import Media Files to import the clip you want to edit.
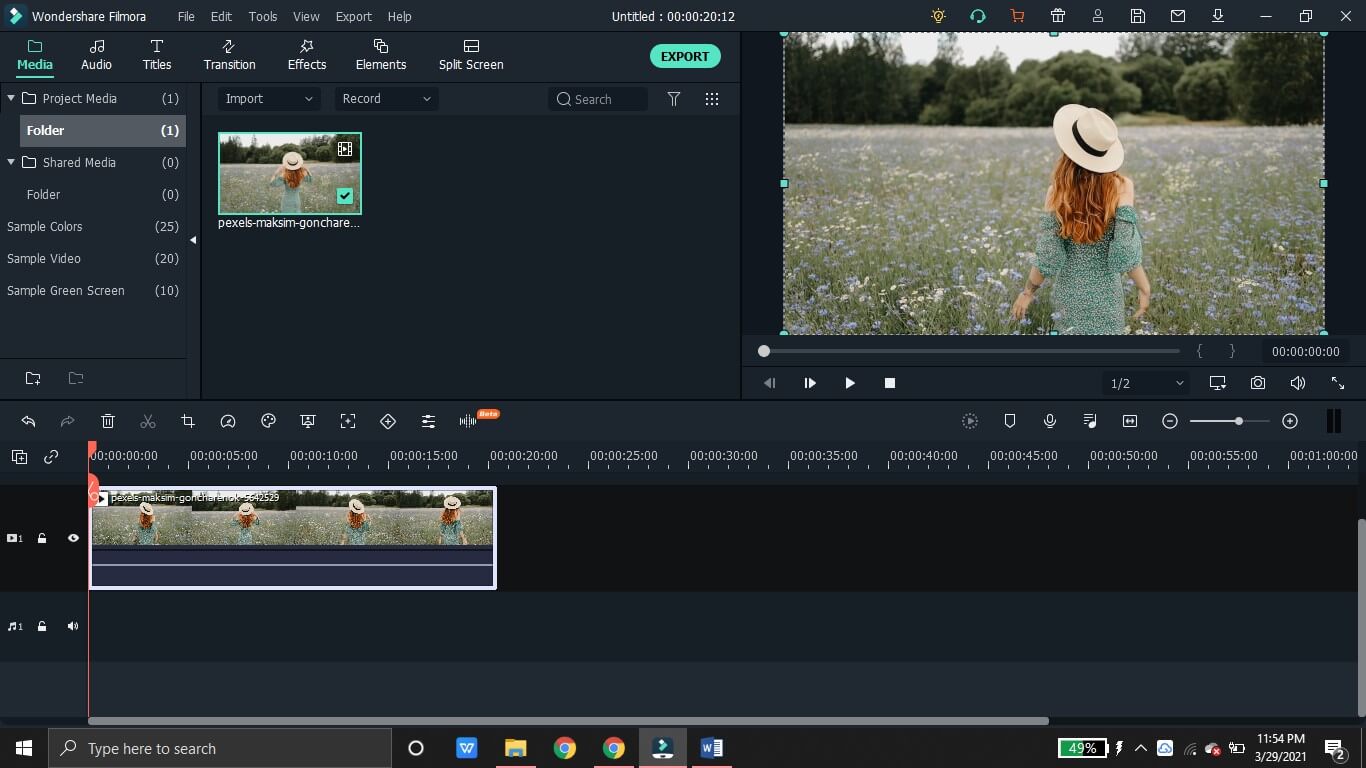
2. From the Titles section, you can choose a catchy template to compliment your video. By double-clicking on the title added to the timeline, you can access advanced settings to customize the title text, font size, color, etc. You can also animate the title to make it more dynamic.
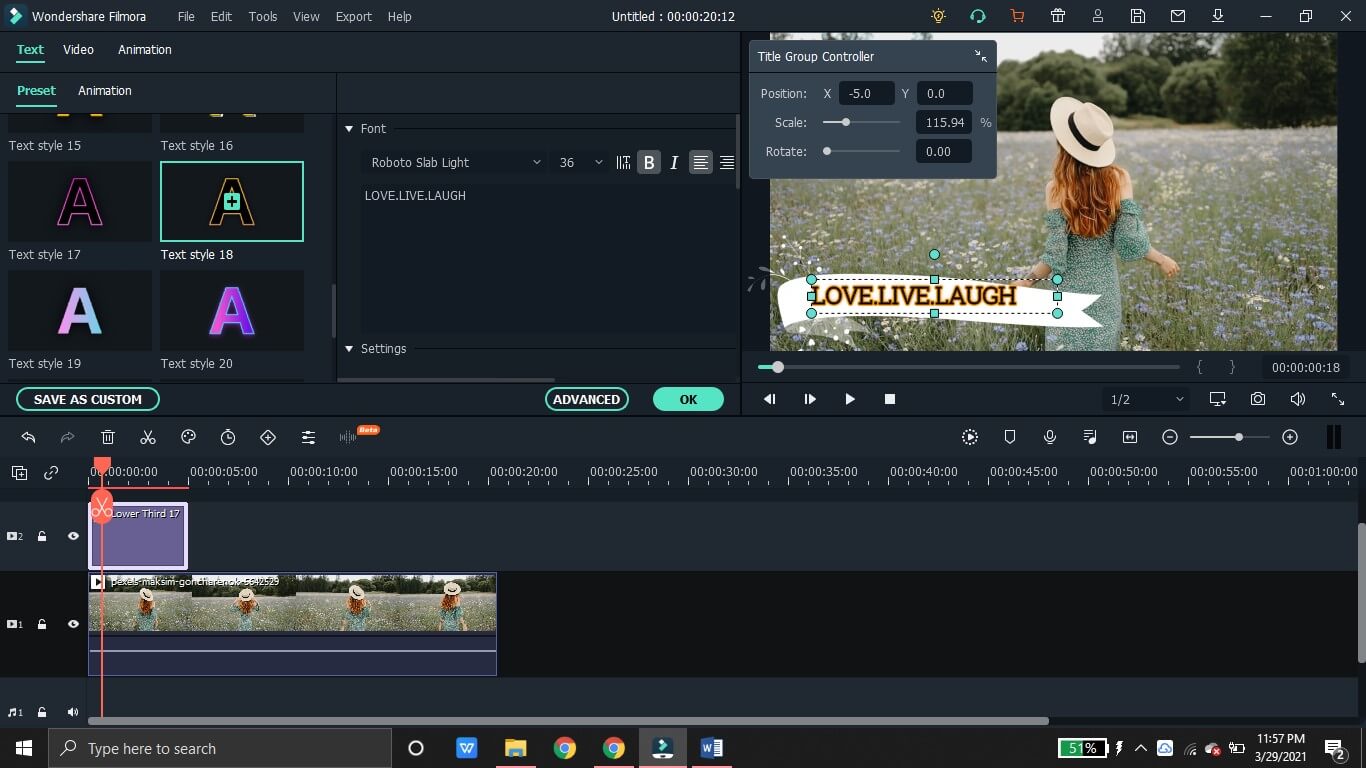
3. If you like to give your videos a cinematic touch, you can add multiple transitions ranging from 3D, ripple and dissolve, speed blur to warp effects. Just click on the plus icon on the effect to add it to the timeline. Drag and adjust the duration of the effect.
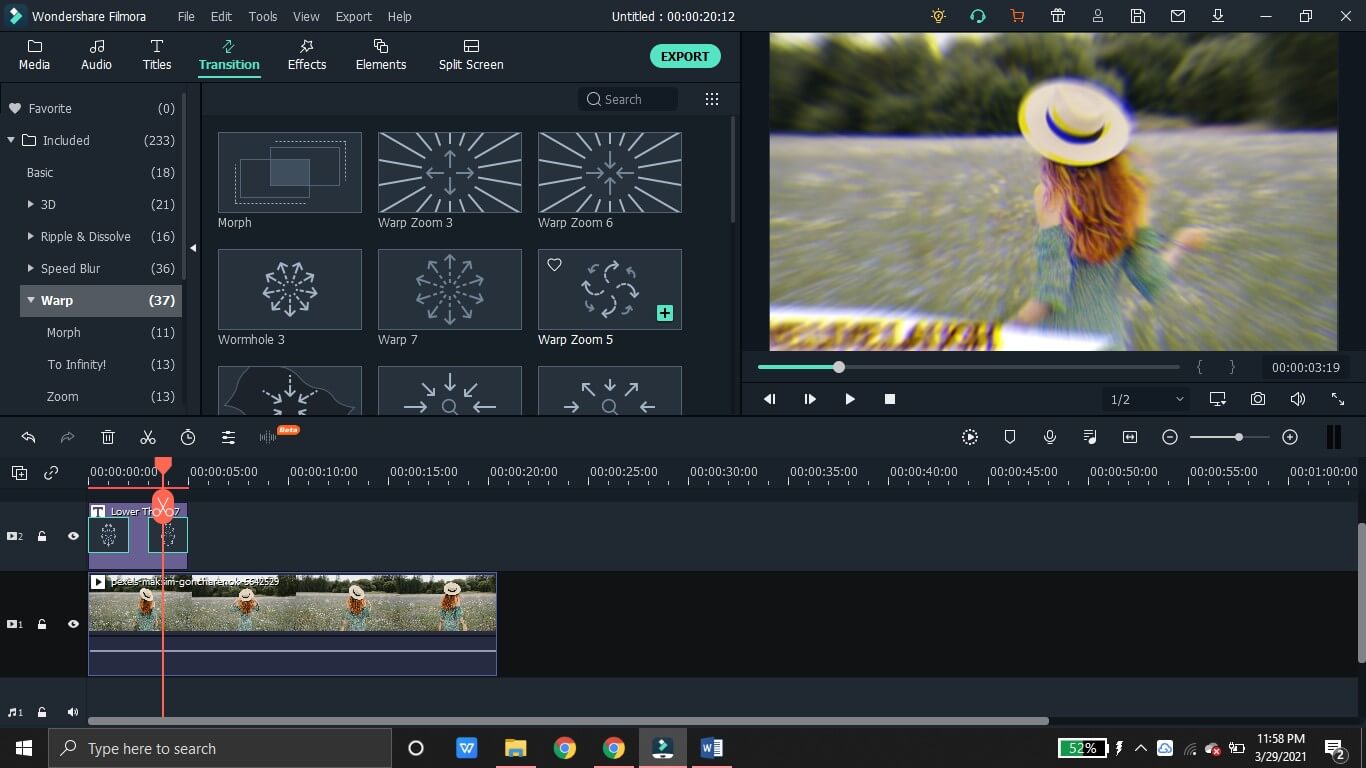
4. The Effects tab has various kinds of aesthetic filters and overlays. Choose a suitable overlay from the categories such as Frame, Bokeh Blur, Old Film etc.
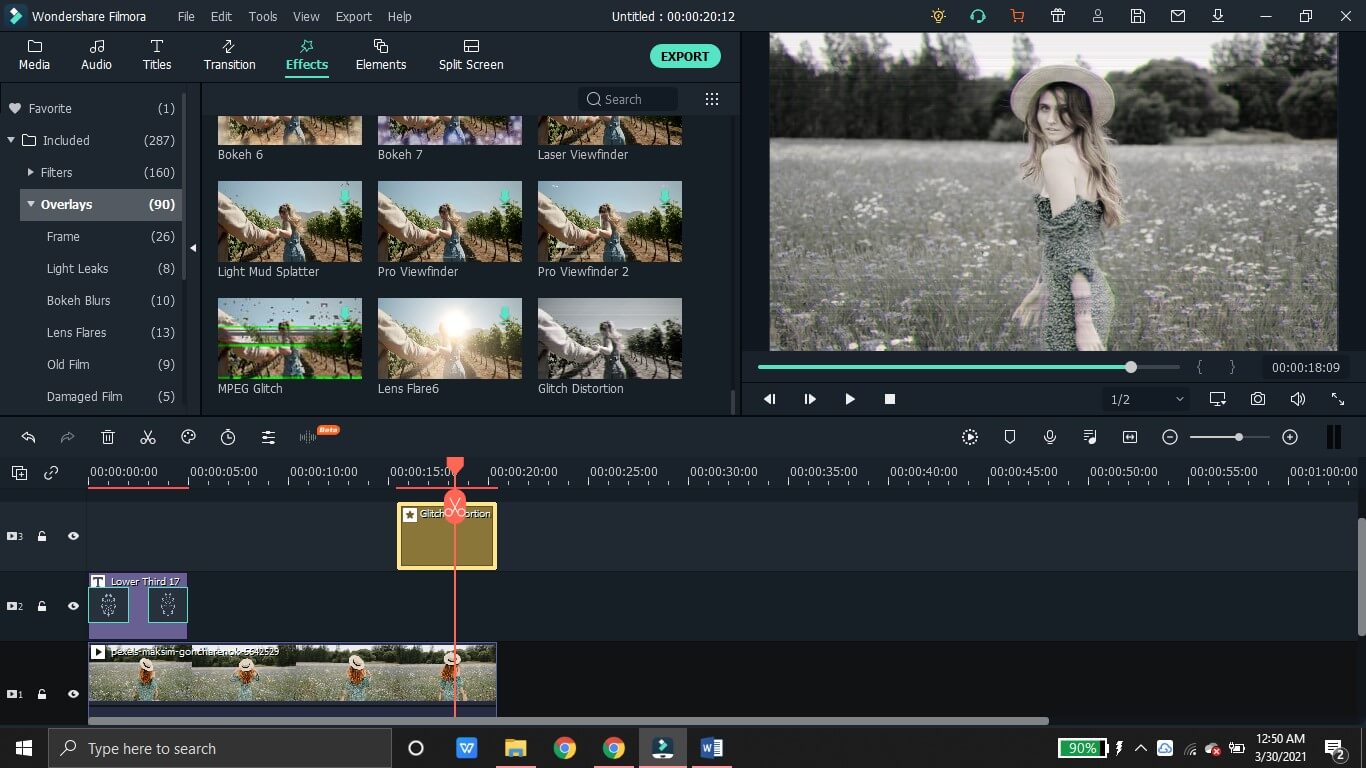
5. You can also make your videos very attractive by adding some colorful and appealing elements. From Badges to Hand Drawn icons, the Elements tab has a huge variety.
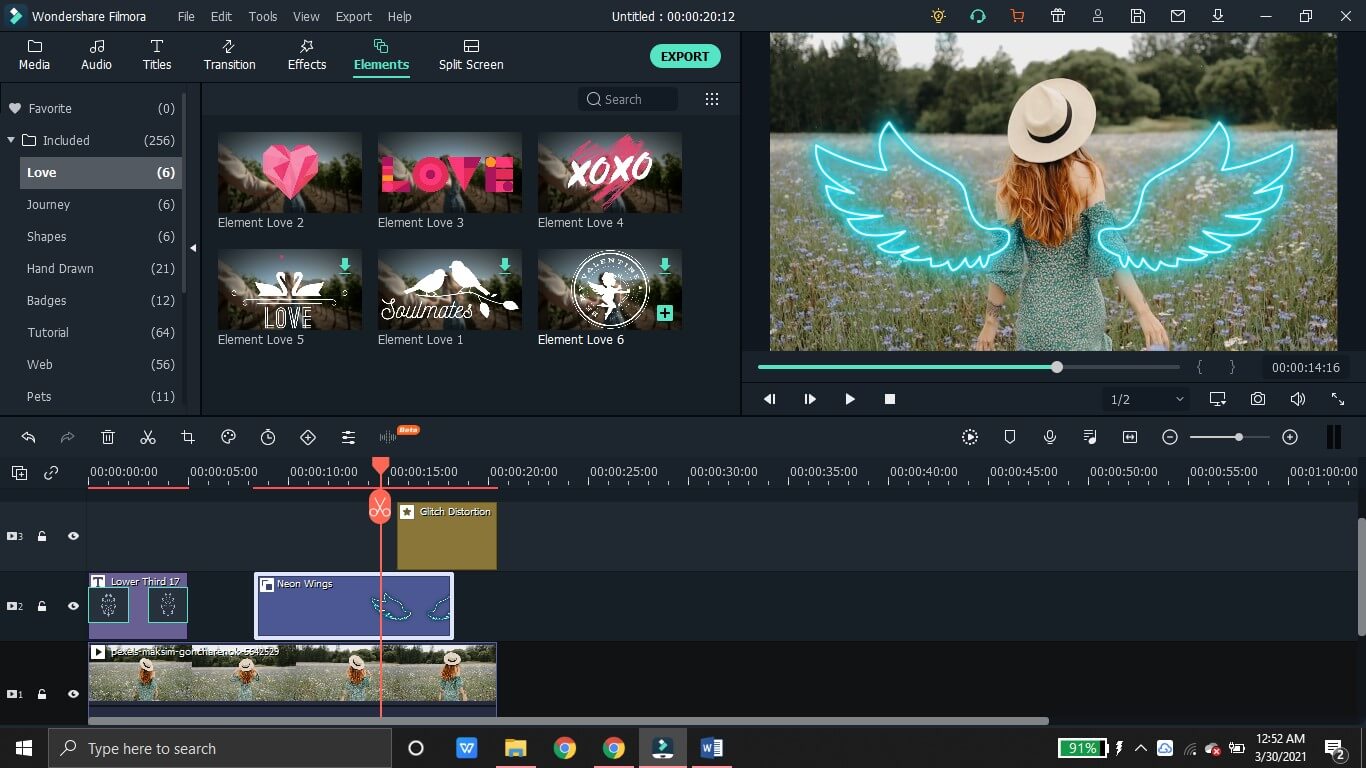
6. Finally, you can export the video and save it locally. Or, the video can be directly shared on the social media platforms like YouTube.

Summing up
Once again, you can enjoy limitless streaming of your favorite movies and shows. Thanks to the various sites like SolarMovie, you can watch movie online without any hassle. Just like SolarMovie, most of the sites we mentioned offer a huge movie library free of cost. And, there are multiple benefits associated with the SolarMovie alternative sites that range from the watchlist option to the resolution customization tool. So, you can go back to having a relaxing weekend by hopping on to the SolarMovie alternative site of your choice and watching some exciting movies. Go on and watch movie online on any device and enjoy!
Shanoon Cox
Shanoon Cox is a writer and a lover of all things video.
Follow @Shanoon Cox
Shanoon Cox
Mar 27, 2024• Proven solutions
SolarMovie is an online video streaming site that offers a huge collection of movies and TV series. All these movies and shows can be streamed for free on SolarMovie. Furthermore, there is no registration required. Better yet, users can even download the movies in high quality.
However, some ISP’s have banned the SolarMovie website, and it might be inaccessible now. So, people are now on the lookout for a SolarMovie alternative that they can use to easily watch movie online.
To help with that, we have carefully curated a list of some of the top sites like SolarMovie.
- Best 10 SolarMovie Alternatives for You
- Bonus Tip- Make a Video with Wondershare Filmora Easy Movie Maker
Best 10 SolarMovie Alternatives for You
Even though there countless SolarMovie like websites on the internet, it can be pretty confusing to find the best one. Therefore, we have rounded up the top SolarMovie alternative sites for your ease.
- 1. Popcornflix
- 2. Tubi TV
- 3. Freeform
- 4. Netflix
- 5. Amazon Prime
- 6. Hulu
- 7. Yifymovies
- 8. CONtv
- 9. Aha Video
- 10. Vumoo
1. Popcornflix
One of the best SolarMovie alternative sites includes Popcornflix. It is a free HD streaming site through which users can watch movie online without having to register or subscribe. The range of movies available on this SolarMovie alternative is very extensive. Moreover, the movies are categorized as New Arrivals, Horror, Drama, Asian Action, to name a few. The categorization allows easy browsing and searching for the perfect movie. This SolarMovie alternative boasts a category of Popcornflix original movies as well that are exclusively available on this site. A search bar option further eases the task of finding a particular movie.
2. Tubi TV
Tubi TV is a top-notch SolarMovie alternative site. With a sleek and attractive interface, Tubi TV features a wide variety of movies available for free streaming. Also, the movies are classified into various sections based on Popularity, Genre, and many more. By selecting a title from the genre category like horror, lifestyle, or even stand-up comedy, users can easily find and watch movie online. This site might even be better than SolarMovie, as it has options to customize the resolution and the choice to display subtitles. An option of Add To My Playlist further makes this SolarMovie alternative an excellent site.
3. Freeform
Among the sites like SolarMovie, Freeform also tops the list. However, Freeform is a cable channel that requires users to access the endless movie library through their cable provider. But, this SolarMovie alternative has a huge collection of the latest as well as vintage movies. On Freeform, you can watch movie online just by clicking and selecting your cable provider. You can sign up for free to resume your movie streaming from where you left off. Freeform’s movies are creatively classified as Fierce and Funny, Familiar Faves, and Throwback.
4. Netflix
Netflix is an up-and-coming SolarMovie alternative that has dominated the online streaming sites owing to its vast movie library. Unlike SolarMovie, Netflix also produces many original movies that are available on the sites for HD streaming. Netflix, however, is not free. Users can watch movie online on Netflix by first registering for an account. After registering, users can sign in to watch movie online or download it in HD for offline streaming later. Furthermore, this SolarMovie alternative allows users to enjoy unlimited streaming on any device or platform.
5. Amazon Prime
Amazon Prime is yet another top-notch SolarMovie alternative. On this site, users can find an exclusive Amazon original movie collection. With an intuitive interface and easy browsing categories, Amazon Prime is the go-to site to watch movie online without any ads or any kind of hassle. The categorization is based on genre, awards, or audience, to name a few. Also, the movies can be added to a Watchlist for easy organization. But, to watch movie online on Amazon Prime, users are required to create an account and sign in. And unlike SolarMovie, Amazon Prime isn’t available for free streaming.
6. Hulu
Like SolarMovie, Hulu also boasts an extensive movie library. This library by Hulu is a mix of popular and classic movies. Also, it features a variety of Hulu original series and movies that you cannot find elsewhere. Whether you want to watch a thriller or a documentary, Hulu has got you covered. However, Hulu requires a paid subscription. Before subscription, you can activate a 30-day trial to weigh whether Hulu is the best SolarMovie alternative and if it is worth your time.
7. Yifymovies
Another amazing SolarMovie alternative is the Yifymovies site. This site rivals the SolarMovie website by featuring an up-to-date movie collection. What’s better, Yifymovies has classified its library into broad categories like adventure, animation, and documentary, etc. Users can also search by filtering out the movies on the basis of the year of release. All the movie titles contain a rating that helps the user decide whether that movie is worth their time or not. The video player in this SolarMovie alternative features the fast-forward and rewind option too. The only downside is that it has a few annoying pop-up ads.
8. CONtv
One of the best sites like SolarMovie includes CONtv. Although this SolarMovie-like site requires registration in order to watch movie online, the unique and up-to-date movie collection here makes it a very popular user’s choice. By signing up, users can also save their favorite movies to the watchlist. A premium account is available if users wish to stream and watch movie online without any annoying pop-ups and commercials. On this SolarMovie alternative, users can also have access to the latest anime series as well as classic movies.
9. Aha Video
Aha is a subscription-based movie streaming SolarMovie alternative. On this site, you can watch movie online for free. But, the premium content can only be accessed after the paid subscription is activated. Aha video can easily be used as a SolarMovie alternative as it offers a great variety of movies that users can enjoy in HD quality and low buffering time. Movies for every genre like romance, comedy, and action can be found on this site. Better yet, a category is also available for kids.
10. Vumoo
Vumoo is the last but not the least addition to our list of the best sites like SolarMovie. Vumoo features a multitude of movies ranging from horror to comedy. Users can easily find any kind of movie on this SolarMovie alternative. Users can watch movie online in HD quality through Vumoo. Furthermore, Vumoo is a free website that doesn’t require any signing up or registration. Users can just hop onto this SolarMovie like website and click to watch movie online. A major drawback is that the movies are not categorized, but that is countered by the searching option, which makes it easier to search a particular movie.
Bonus Tip- Make a Video with Wondershare Filmora Easy Movie Maker
Wondershare Filmora is a very powerful and comprehensive video editor for all kinds of edits. The user-friendly interface makes the editing process effortless. Users can easily add motion graphics, keyframe animations, and even color match with a single click.
1. First, download Wondershare Filmora on your device and launch it. Then, click on File and tap on Import Media Files to import the clip you want to edit.
2. From the Titles section, you can choose a catchy template to compliment your video. By double-clicking on the title added to the timeline, you can access advanced settings to customize the title text, font size, color, etc. You can also animate the title to make it more dynamic.
3. If you like to give your videos a cinematic touch, you can add multiple transitions ranging from 3D, ripple and dissolve, speed blur to warp effects. Just click on the plus icon on the effect to add it to the timeline. Drag and adjust the duration of the effect.
4. The Effects tab has various kinds of aesthetic filters and overlays. Choose a suitable overlay from the categories such as Frame, Bokeh Blur, Old Film etc.
5. You can also make your videos very attractive by adding some colorful and appealing elements. From Badges to Hand Drawn icons, the Elements tab has a huge variety.
6. Finally, you can export the video and save it locally. Or, the video can be directly shared on the social media platforms like YouTube.
Summing up
Once again, you can enjoy limitless streaming of your favorite movies and shows. Thanks to the various sites like SolarMovie, you can watch movie online without any hassle. Just like SolarMovie, most of the sites we mentioned offer a huge movie library free of cost. And, there are multiple benefits associated with the SolarMovie alternative sites that range from the watchlist option to the resolution customization tool. So, you can go back to having a relaxing weekend by hopping on to the SolarMovie alternative site of your choice and watching some exciting movies. Go on and watch movie online on any device and enjoy!
Shanoon Cox
Shanoon Cox is a writer and a lover of all things video.
Follow @Shanoon Cox
How to Add Emojis To Discord on Desktop Computer and Mobile
How to Add Emojis To Discord

Richard Bennett
Mar 27, 2024• Proven solutions
Who doesn’t like emoticons? They are fun, easy to use, and, best of all, highly expressive of your emotions that you cannot convey over messages otherwise.
A 2019 survey shows 70% of mobile users used emoji in texting or on social media daily. This shows the popularity of emoji in our world today.
Similarly, as a Discord user, you must have come across thousands of emoji in it. These are images uploaded on the server and called custom emojis that this gaming community can use for effective communication with friends and other players.
With the emoji and gaming industry growing, it is safe to say that discord emoji’s popularity and use will only increase.
Read ahead to see how you can add emojis on Discord if you want to have fun chats with your friends too.
- Part 1: Adding and Sending Emoji To Chat On Discord?
- Part 2: Adding Emojis To Discord Channel Name Or Nickname?
- Part 3: Adding Custom Emojis To Discord Server On Windows/Mac?
- Part 4: Adding Custom Emojis To Discord Server On iPhone And Android?
- Part 5: Managing Emojis in Discord Server
Part 1: How to Add and Send Emoji To Chat On Discord?
One of the best things about Discord’s emoji feature is that there are two ways to add them. You can either access emoji on the Discord account or upload them yourself.
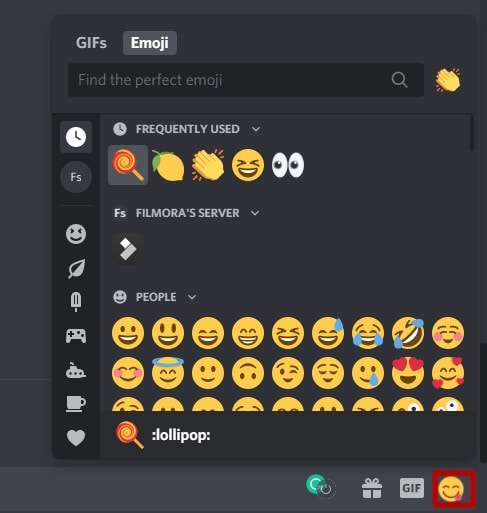
You can access the emoji menu for all Discord platforms by pressing the grey smiley face next to the message box. This will be on the right of the box for desktops, and for mobile apps, it will be on the left.
Discord-exclusive and standard emoji are present in the emoji menu, along with a part that keeps track of your most-used emoji.
On the other hand, you can also add custom emoticons to your Discord server if you have permission to do so.
Once you add and access the emoji on your device, select the one you want to send to your friends and press enter to send.
Part 2: How to Add Emojis To Discord Channel Name Or Nickname?
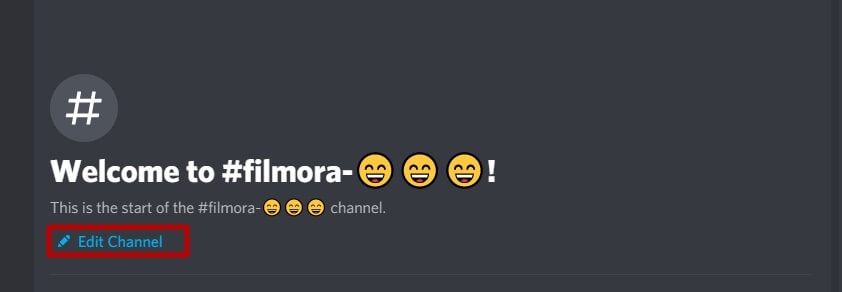
As an owner of a Discord channel, it is easy for you to add emoji to Discord. Follow the steps below to figure out how to add emojis to Discord channels:
- Use the emoji list to find the one you want to use in your channel name.
- Select the emoji “browser” column and copy it either with the mouse or “Ctrl + C” on the keyboard.
- Access your Discord server, right-click the channel where the emoji will be and use the dropdown menu to select the “Edit Channel.”
- In the “Channel Name” box, past the selected emoji using “Ctrl + V” from the keyboard.
- Select “Save Changes” to save the name with the emoji.
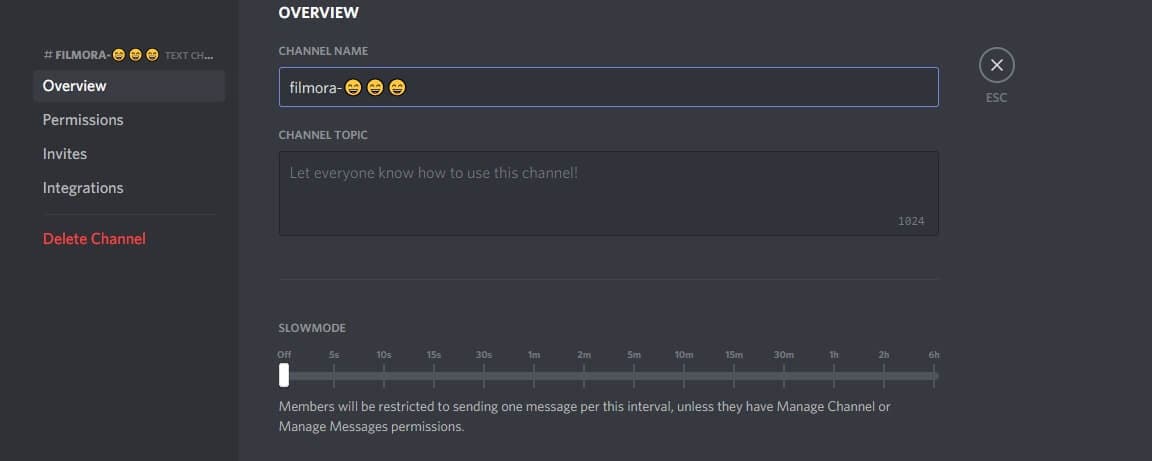
Part 3: How to Add Custom Emojis To Discord Server On Windows/Mac?
You can add custom emoji on Discord, but only if you are a server owner or administrator. Use the Discord server settings on either the desktop versions for Windows or Mac or the Discord Website.
Follow the steps below for either platform:
- Access your Discord server to begin and press the arrow pointing down in the channel list with the server name—Press “Server Settings” in the menu

- As the server’s settings open, you can add custom emojis in the “Emoji” tab. You can find a requirements list at the top that includes emoji names with a minimum of two characters and a file size limit of 256 KB. You can add fifty normal and an additional fifty animated emoji GIFs using the standard servers
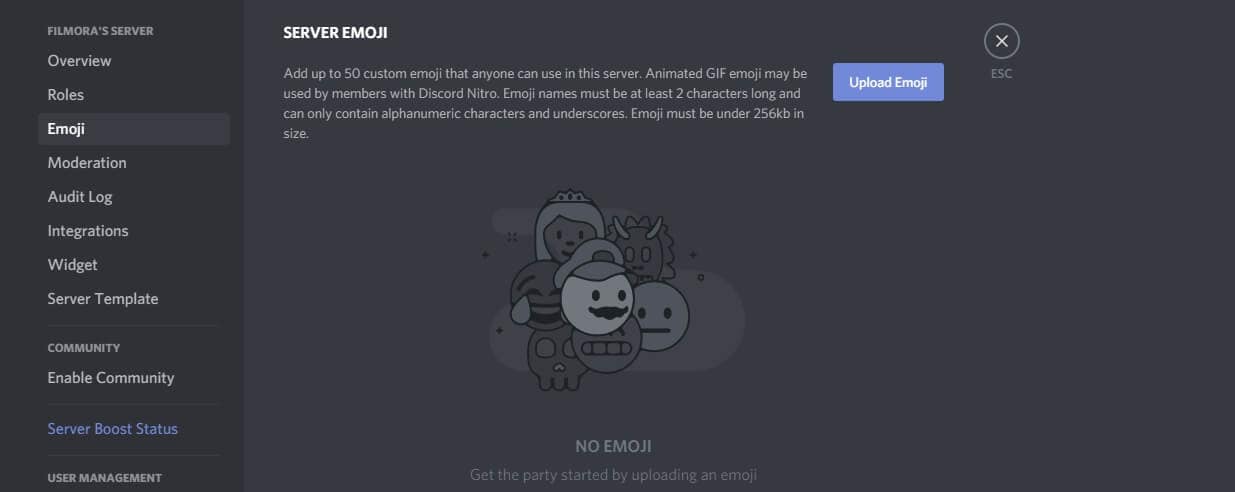
- Select “Upload Emoji” to insert a custom emoji, either standard or animated
- With the help of your device’s local storage, upload the file. However, for the emoji to be added to the lists, the file should align with Discord’s requirements.
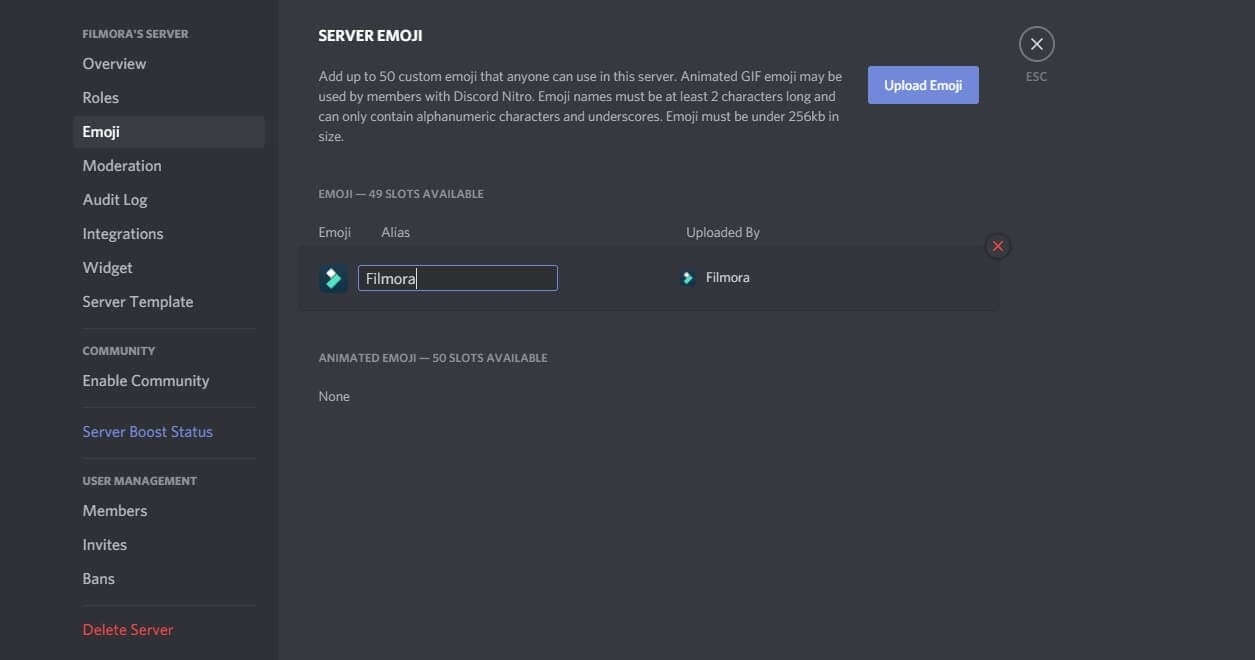
- For every emoji image that you upload, an alias tag will be created for that custom emoji using the file’s name. This tag is used to update a message with an emoji.
- A default alias name like this can be replaced by selecting the “Alias” box with the custom emoji and then creating a new name.
- Enjoy your emoji in chats as soon as you upload them to the Discord server!
Boost your server with Discord Nitro subscribers today to insert more than the standard fifty emoji!
Part 4: How to Add Custom Emojis To Discord Server On iPhone And Android?
How cool is it that you can add custom emoji to your smartphone as well? Whether you have an iPhone or an Android, you can use the same menu as Windows and Mac to upload emoji.
Discord’s interface is similar across all devices, so the following steps work on Android and Apple.
- Begin by opening the app on your device to access the server. Press the hamburger menu located at the top left in an open server and channel.
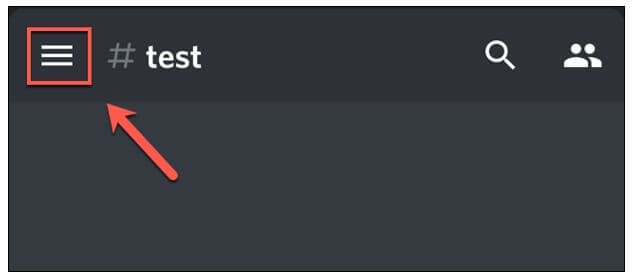
- As the channel and server list opens for Discord, you can see a three-dot menu right next to the channel list with the server name. Tap on it to proceed.
- To get to your server settings, press “Settings” in the Discord server menu that shows up.
- Under the “Server Settings” menu, select “Emoji” to access the custom emoji settings.
- As the “Emoji” menu opens, you can see an emoji requirement list
- Press “Upload Emoji” to upload any emoji that aligns with these requirements
- Press the custom emoji file, tap “Crop” if it needs cropping, and then use the “Upload” option
- After you upload the emoji file, replace the alias tag by tapping on it. This will redirect you to that specific emoji’s settings
- Type the name you want using the “Alias” box to create the tag used to insert emoji in messages
- Save this new tag with the “Save” icon placed in the bottom right
- Any changes you make to the custom emoji’s alias are applied to it instantly for your use.
Emoji bring fun to the conversations you have with friends, and it is very easy to add them to your server as well. These show up in the emoji pop-up list once you add them. The chat message bar contains the emoji icon from where you can access them.
It is essential to name your emoji with only alphanumeric characters and underscores using at least two characters.
The Discord emoji size is 32x32 pixels, so even if you upload up to 128x128 pixel size emojis, they will be resized to the default dimensions. Furthermore, emoji file sizes are at most 256kb.
If you want to use custom emojis, you can’t do so without a Nitro subscription because it is only functional on the server they are uploaded to. Even if you find a way to access the emoji from some other server, only its text code will be visible.
If you attempt to use the Emoji Picker to pick an emoji, you’ll get the following message:
Bonus: How to Manage Emoji in Discord Server?
You can’t remove or add emoji specific to a server on your own as a member. You need the server owner to toggle the permission of Manager Emoji in your domain.
On the other hand, as a server owner, you can give others this role with the following steps.
- Open Roles: Open the Server Settings and select “Roles” from the menu on the side.
- Toggle Manage Emoji: Pick the role you want to apply the permission to, and then toggle emoji’s slider to “on,” save changes, and you’re done!
FAQs About Discord Emojis
1. Why Do I See Grey Emoji In The Emoji Menu?
Greyed-out emoji in the menu means that either those emoji are animated, or you don’t have the permission to post them on other servers.
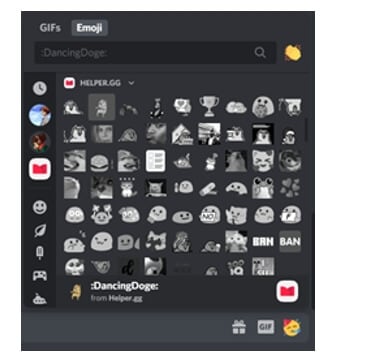
2. How Can I Get More Custom Emoji On The Server?
You can upload 50 emojis to your Discord server. But if you want more options, you need a Discord Nitro subscription to boost your server specs.
3. What Is The Discord Emoji Size?
Discord allows you to upload an emoji of up to 128x128 pixels, but it will resize it to 32x32 since that is its standard size.
Conclusion
Emojis make any chat fun, and where gaming is involved, they help you communicate better with your friends.
Discord has thousands of custom emojis that you can easily add to your server through your computer, whether it is your chat or the channel name. Follow our guide for a seamless process to add emoji to Discord and make your gaming experience better!
Richard Bennett
Richard Bennett is a writer and a lover of all things video.
Follow @Richard Bennett
Richard Bennett
Mar 27, 2024• Proven solutions
Who doesn’t like emoticons? They are fun, easy to use, and, best of all, highly expressive of your emotions that you cannot convey over messages otherwise.
A 2019 survey shows 70% of mobile users used emoji in texting or on social media daily. This shows the popularity of emoji in our world today.
Similarly, as a Discord user, you must have come across thousands of emoji in it. These are images uploaded on the server and called custom emojis that this gaming community can use for effective communication with friends and other players.
With the emoji and gaming industry growing, it is safe to say that discord emoji’s popularity and use will only increase.
Read ahead to see how you can add emojis on Discord if you want to have fun chats with your friends too.
- Part 1: Adding and Sending Emoji To Chat On Discord?
- Part 2: Adding Emojis To Discord Channel Name Or Nickname?
- Part 3: Adding Custom Emojis To Discord Server On Windows/Mac?
- Part 4: Adding Custom Emojis To Discord Server On iPhone And Android?
- Part 5: Managing Emojis in Discord Server
Part 1: How to Add and Send Emoji To Chat On Discord?
One of the best things about Discord’s emoji feature is that there are two ways to add them. You can either access emoji on the Discord account or upload them yourself.
You can access the emoji menu for all Discord platforms by pressing the grey smiley face next to the message box. This will be on the right of the box for desktops, and for mobile apps, it will be on the left.
Discord-exclusive and standard emoji are present in the emoji menu, along with a part that keeps track of your most-used emoji.
On the other hand, you can also add custom emoticons to your Discord server if you have permission to do so.
Once you add and access the emoji on your device, select the one you want to send to your friends and press enter to send.
Part 2: How to Add Emojis To Discord Channel Name Or Nickname?
As an owner of a Discord channel, it is easy for you to add emoji to Discord. Follow the steps below to figure out how to add emojis to Discord channels:
- Use the emoji list to find the one you want to use in your channel name.
- Select the emoji “browser” column and copy it either with the mouse or “Ctrl + C” on the keyboard.
- Access your Discord server, right-click the channel where the emoji will be and use the dropdown menu to select the “Edit Channel.”
- In the “Channel Name” box, past the selected emoji using “Ctrl + V” from the keyboard.
- Select “Save Changes” to save the name with the emoji.
Part 3: How to Add Custom Emojis To Discord Server On Windows/Mac?
You can add custom emoji on Discord, but only if you are a server owner or administrator. Use the Discord server settings on either the desktop versions for Windows or Mac or the Discord Website.
Follow the steps below for either platform:
- Access your Discord server to begin and press the arrow pointing down in the channel list with the server name—Press “Server Settings” in the menu
- As the server’s settings open, you can add custom emojis in the “Emoji” tab. You can find a requirements list at the top that includes emoji names with a minimum of two characters and a file size limit of 256 KB. You can add fifty normal and an additional fifty animated emoji GIFs using the standard servers
- Select “Upload Emoji” to insert a custom emoji, either standard or animated
- With the help of your device’s local storage, upload the file. However, for the emoji to be added to the lists, the file should align with Discord’s requirements.
- For every emoji image that you upload, an alias tag will be created for that custom emoji using the file’s name. This tag is used to update a message with an emoji.
- A default alias name like this can be replaced by selecting the “Alias” box with the custom emoji and then creating a new name.
- Enjoy your emoji in chats as soon as you upload them to the Discord server!
Boost your server with Discord Nitro subscribers today to insert more than the standard fifty emoji!
Part 4: How to Add Custom Emojis To Discord Server On iPhone And Android?
How cool is it that you can add custom emoji to your smartphone as well? Whether you have an iPhone or an Android, you can use the same menu as Windows and Mac to upload emoji.
Discord’s interface is similar across all devices, so the following steps work on Android and Apple.
- Begin by opening the app on your device to access the server. Press the hamburger menu located at the top left in an open server and channel.
- As the channel and server list opens for Discord, you can see a three-dot menu right next to the channel list with the server name. Tap on it to proceed.
- To get to your server settings, press “Settings” in the Discord server menu that shows up.
- Under the “Server Settings” menu, select “Emoji” to access the custom emoji settings.
- As the “Emoji” menu opens, you can see an emoji requirement list
- Press “Upload Emoji” to upload any emoji that aligns with these requirements
- Press the custom emoji file, tap “Crop” if it needs cropping, and then use the “Upload” option
- After you upload the emoji file, replace the alias tag by tapping on it. This will redirect you to that specific emoji’s settings
- Type the name you want using the “Alias” box to create the tag used to insert emoji in messages
- Save this new tag with the “Save” icon placed in the bottom right
- Any changes you make to the custom emoji’s alias are applied to it instantly for your use.
Emoji bring fun to the conversations you have with friends, and it is very easy to add them to your server as well. These show up in the emoji pop-up list once you add them. The chat message bar contains the emoji icon from where you can access them.
It is essential to name your emoji with only alphanumeric characters and underscores using at least two characters.
The Discord emoji size is 32x32 pixels, so even if you upload up to 128x128 pixel size emojis, they will be resized to the default dimensions. Furthermore, emoji file sizes are at most 256kb.
If you want to use custom emojis, you can’t do so without a Nitro subscription because it is only functional on the server they are uploaded to. Even if you find a way to access the emoji from some other server, only its text code will be visible.
If you attempt to use the Emoji Picker to pick an emoji, you’ll get the following message:
Bonus: How to Manage Emoji in Discord Server?
You can’t remove or add emoji specific to a server on your own as a member. You need the server owner to toggle the permission of Manager Emoji in your domain.
On the other hand, as a server owner, you can give others this role with the following steps.
- Open Roles: Open the Server Settings and select “Roles” from the menu on the side.
- Toggle Manage Emoji: Pick the role you want to apply the permission to, and then toggle emoji’s slider to “on,” save changes, and you’re done!
FAQs About Discord Emojis
1. Why Do I See Grey Emoji In The Emoji Menu?
Greyed-out emoji in the menu means that either those emoji are animated, or you don’t have the permission to post them on other servers.
2. How Can I Get More Custom Emoji On The Server?
You can upload 50 emojis to your Discord server. But if you want more options, you need a Discord Nitro subscription to boost your server specs.
3. What Is The Discord Emoji Size?
Discord allows you to upload an emoji of up to 128x128 pixels, but it will resize it to 32x32 since that is its standard size.
Conclusion
Emojis make any chat fun, and where gaming is involved, they help you communicate better with your friends.
Discord has thousands of custom emojis that you can easily add to your server through your computer, whether it is your chat or the channel name. Follow our guide for a seamless process to add emoji to Discord and make your gaming experience better!
Richard Bennett
Richard Bennett is a writer and a lover of all things video.
Follow @Richard Bennett
Also read:
- [New] In 2024, Real-Time Recording for Gamers Explained
- [Updated] 2024 Approved Nocturnal Nuances Essential Tips for Moonlit Portraiture
- Burn Photos to DVD | How to Burn Photos to DVD with Transitions and Music for 2024
- FREE 10 Websites to Watch Cartoon Online in HD
- IDevice Audio Mastery Stepwise Recording of Voices
- In 2024, Leap Into the Future Adopting macOS 11 Big Sur
- In 2024, Pros' Picks Best Microphones for ASMR Recording
- Interpretation and Correction of Error Code 30005
- New How to Make a Photo Collage Using iPhoto for 2024
- New In 2024, 10 Funniest Subreddits to Find Hilarious Memes (Picked)
- New What Is Emoji and What Does It Mean for 2024
- Tag with Your Favorite Show Podcast on IG for 2024
- Techniques for Flawless Live Broadcasting of RL Games
- The Photographer's Guide to Enhancing iPhone Photos with iOS 16'S New Cutout Functionality
- Updated How Add Emojis/Stickers to Videos on PC/Mac/Mobile/Online
- Updated In 2024, How to Add Emojis To Discord on Desktop Computer and Mobile
- Updated In 2024, How to Add Stickers to WhatsApp-The Ultimate Guide
- Title: Updated Best Photo Slideshow Maker How to Make a Photo Slideshow 2023 Update
- Author: Jan
- Created at : 2024-09-27 17:06:51
- Updated at : 2024-09-30 21:04:55
- Link: https://meme-emoji.techidaily.com/updated-best-photo-slideshow-maker-how-to-make-a-photo-slideshow-2023-update/
- License: This work is licensed under CC BY-NC-SA 4.0.