
Updated 2024 Approved How to Make a FLV Photo Slideshow
How to Make a FLV Photo Slideshow
How to Make a FLV Photo Slideshow

Shanoon Cox
Mar 27, 2024• Proven solutions
FLV slideshow is a suitable way to share photos and videos online due to its small size and reasonable quality. Wondershare DVD Slideshow Builder brings more convenience to instantly make a slideshow with music , photos and lets you create FLV videos, as well as other video formats. You can create a FLV slideshow in easy steps as below.
Easy Guide to Make FLV Slideshow with Music

1 Import Photos & Video and Music for FLV Slideshow
Install and launch the slideshow maker, go to Organize tab and import your photos, videos and music files. Transitions between adjacent slides will be used. But you can change them by following step 2.
2 Apply Transition and Motion Effect
This slideshow maker includes more than 100 transition effects for slides switch. Before applying, double-click transition thumbnail to preview in player on the right. You could also randomize transitions or apply one transition to all slides in FLV slideshow.

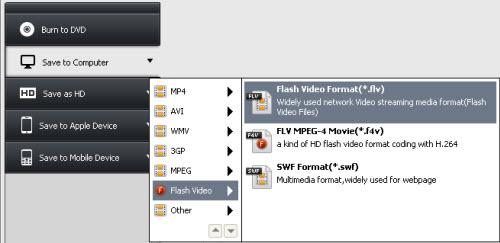
3 Save Photo Slideshow to FLV Video
Select Flash Video format as the output and make advanced settings by clicking Settings button. Finally, click Burn and wail a while, you get your FLV video to sharing on YouTube, Facebook, MySpace, Mobile Phone. Alternatively, play FLV video on computer via stand-alone FLV player.
FLV Slideshow Tips
For more detailed settings of FLV slideshow, click Settings button and specify various options, like encoder, resolution, frame rate, bit rate and audio settings.
To play FLV slideshow on Nokia mobile phone, you should set encode type to Nokia FLV series (*.flv). Once created, upload flv to Nokia phone or online and view FLV slideshow using FLV player or web browser plugin.
You could also upload FLV slideshow to YouTube to share with more people. FLV videos are perfectly supported by YouTube.
More: Convert All Popular Formats to FLV
Wondershare DVD Slideshow Builder Deluxe supports all popular video formats. Therefore, you can import videos that need to change format, and save it in another format. It’s not only a DVD slideshow maker, but only powerful FLV converter. For detailed supported input formats, check video format references.
More: Convert FLV to MP4, AVI, MOV, MPEG or Burn FLV to DVD
You could also import FLV to DVD Slideshow Builder Deluxe and save it as MP4, AVI, MOV and 3GP, or even burn FLV video to DVD with beautiful DVD menus. For detailed supported output formats, check video format references. Here, I recommended to save FLV to MP4 for its comprehensive support on various devices, such as iPhone, iPod, Apple TV, Gphone, Nokia phone, LG phone, PSP, Palm, Zune, etc.
About FLV Video (Flash Video)
Flash Video (*.FLV) is a container file format used to deliver video over the internet using Adobe Flash Player versions 6-10 (developed by Macromedia). Flash Video content may also be embedded within SWF files. FLV videos are widely used by international companies, including YouTube, Google Video, Yahoo! Video, metacafe, Reuters.com, and many other news providers. Flash Video could be watched on most operating systems, via the Adobe Flash Player and web browser plugin, or desired third-party FLV Players.
Shanoon Cox
Shanoon Cox is a writer and a lover of all things video.
Follow @Shanoon Cox
Shanoon Cox
Mar 27, 2024• Proven solutions
FLV slideshow is a suitable way to share photos and videos online due to its small size and reasonable quality. Wondershare DVD Slideshow Builder brings more convenience to instantly make a slideshow with music , photos and lets you create FLV videos, as well as other video formats. You can create a FLV slideshow in easy steps as below.
Easy Guide to Make FLV Slideshow with Music
1 Import Photos & Video and Music for FLV Slideshow
Install and launch the slideshow maker, go to Organize tab and import your photos, videos and music files. Transitions between adjacent slides will be used. But you can change them by following step 2.
2 Apply Transition and Motion Effect
This slideshow maker includes more than 100 transition effects for slides switch. Before applying, double-click transition thumbnail to preview in player on the right. You could also randomize transitions or apply one transition to all slides in FLV slideshow.
3 Save Photo Slideshow to FLV Video
Select Flash Video format as the output and make advanced settings by clicking Settings button. Finally, click Burn and wail a while, you get your FLV video to sharing on YouTube, Facebook, MySpace, Mobile Phone. Alternatively, play FLV video on computer via stand-alone FLV player.
FLV Slideshow Tips
For more detailed settings of FLV slideshow, click Settings button and specify various options, like encoder, resolution, frame rate, bit rate and audio settings.
To play FLV slideshow on Nokia mobile phone, you should set encode type to Nokia FLV series (*.flv). Once created, upload flv to Nokia phone or online and view FLV slideshow using FLV player or web browser plugin.
You could also upload FLV slideshow to YouTube to share with more people. FLV videos are perfectly supported by YouTube.
More: Convert All Popular Formats to FLV
Wondershare DVD Slideshow Builder Deluxe supports all popular video formats. Therefore, you can import videos that need to change format, and save it in another format. It’s not only a DVD slideshow maker, but only powerful FLV converter. For detailed supported input formats, check video format references.
More: Convert FLV to MP4, AVI, MOV, MPEG or Burn FLV to DVD
You could also import FLV to DVD Slideshow Builder Deluxe and save it as MP4, AVI, MOV and 3GP, or even burn FLV video to DVD with beautiful DVD menus. For detailed supported output formats, check video format references. Here, I recommended to save FLV to MP4 for its comprehensive support on various devices, such as iPhone, iPod, Apple TV, Gphone, Nokia phone, LG phone, PSP, Palm, Zune, etc.
About FLV Video (Flash Video)
Flash Video (*.FLV) is a container file format used to deliver video over the internet using Adobe Flash Player versions 6-10 (developed by Macromedia). Flash Video content may also be embedded within SWF files. FLV videos are widely used by international companies, including YouTube, Google Video, Yahoo! Video, metacafe, Reuters.com, and many other news providers. Flash Video could be watched on most operating systems, via the Adobe Flash Player and web browser plugin, or desired third-party FLV Players.
Shanoon Cox
Shanoon Cox is a writer and a lover of all things video.
Follow @Shanoon Cox
How to Make a iMovie Photo Slideshow with Music?
How to Make a iMovie Photo Slideshow with Music? [iMovie Tutorial]
Shanoon Cox
Mar 27, 2024• Proven solutions
Makings a slideshow is a great way to share photos and videos with friends and families. The good news is that you can totally make a slideshow on Mac for free with iMovie. iMovie is the pre-installed program coming with every new Mac. It provides a simple yet professional way to make slideshow movies from your photos, videos, and music.
If you haven’t iMovie installed on your Mac yet, just go to iTunes and download it for free. In the following part, I’ll share with you the step-by-step tutorial on how to make a slideshow on Mac using the free video editing software iMovie.
If you are an iOS user, check our picks of best photo slideshow apps for iPhone or iPad.
Ways for iMovie Photo Slideshow with Music Making
To make a photo slideshow with music in iMovie, you can follow these steps.
1. Create a New Project
After launching iMovie, click the Project button and then click Create New. Select Movie to combine photos, videos and music to make a slideshow.

2. Import Photos, Videos, and Audio Files
Now go to the My Media tab and click the Import icon to add your photos, videos, and music to iMovie, in this way, you can import any media files from any location on your Mac. But if you have arranged all your videos, photos, and music tracks in the Photos app, you can just switch to Photos under the Libraries tab on the left to import.

3. Arrange Media in Timeline and Adjust
Now, it’s time to place all these photos and videos in the timeline in order and do some adjustments. You can use the Magic Wand tool to improve the photo quality automatically, do some color correction, or add a filter to the photo. If you preview the video clip, you will see more options that allow you to do more editing, such as changing speed.
4. Apply Transitions & Effects
Transitions and effects will help you to create a slideshow in a more professional way. Some transitions such as cross dissolve, fade and cross blur are very popular in the slideshow, but remember don’t use lots of different transitions in one slideshow since too many transitions will distract the viewer’s attention. To apply a transition in the slideshow, just drag and drop it between two photos in the timeline.

5. Add Titles and Text
Using some opener titles and credits at the beginning and ending part of your slideshow will make it cool as well. You can add some famous quotes and words to better demonstrate.
Just to the Titles tab and select one of the title templates and drop it to the timeline first and then write your own words in the preview window.

6. Add Music to Slideshow
You can download some royalty-free music and sound effects from websites such as Filmstock stock media library or iTunes or import your own audio as we said before to use it as the slideshow background music. To sync with the slideshow, you may need to trim and edit the audio accordingly. For detailed information about iMovie audio editing, you can check how to add background music to iMovie.
Filmstock Stock Media Library ](https://tools.techidaily.com/wondershare/filmora/download/ )
7. Export and Share Your Slideshow video
Play the slideshow and check the result in the preview window. If everything goes well, you can now export and share or save it. You can save the slideshow video in MP4 format, or share it to Vimeo or add the slideshow to Theater to load it on your other Apple devices so you can easily watch it on your iOS devices or Apple TV.
I hope the above tutorial about how to make a slideshow on iMovie will be helpful for your stunning slideshow creation.
If you’re running an old macOS version and having iPhoto installed on your Mac, here are the detailed steps about How to make slideshow in iMovie with iPhoto project.
Step 1. Import Photos from the iPhoto Library
iMovie works seamlessly with iPhoto. You are suggested to drag and drop photos from iPhoto to the iMovie project. If no library exists in iPhoto, create one and import photos to iPhoto first. To add videos, you could go to either “File/Import” or Event Library, and then drag and drop selected videos to the timeline.
After photos and videos are imported to the iMovie slideshow project, you can preview the raw slideshow simply by pressing Space bar on your keyboard. And then make adjustments to clips and transitions. For example, mouse over one clip or “double arrow” button and click on the settings icon, then you could access clip adjustment, video adjustment, transition adjustment, etc.

Step 2. Add Music to Your iMovie Slideshow Project
Music sets the tone of your slideshow. Adding musing to the iMovie slideshow is just as simple as adding photos and videos.
So click the audio icon in the bottom right corner, and drag and drop the desired audio file to the timeline. Multiple songs could be added to iMovie.
However, iMovie doesn’t support multiple soundtracks. If necessary, you need to combine multiple song tracks with an external audio editor before importing them to the iMovie slideshow. You can also apply audio effects and filter sound using an equalizer.

Step 3. Export Your iMovie Slideshow Video
iMovie makes sharing possibilities endless. For those who upload their videos online, iMovie allows users to directly upload to MobileMe Gallery, YouTube, Facebook, Vimeo, CNN iReport, etc.
If you select to share the iMovie slideshow using Media Browser, you will get a slideshow appeared in other Mac applications like iWeb. It’s a good idea to export the iMovie slideshow to iTunes so that you can play back slideshow quickly and easily sync with your mobile devices like iPhone, iPod, and iPad.

You may also like: How to Add Text with iMovie in Mac and iPhone >>
Recommendation: Create Slideshow on Mac with More Templates and Transitions with Filmora
If you want to make a slideshow with some templates on Mac, you can try Wondershare Filmora . Filmora can turn photos and videos into attractive slideshow videos with various inbuilt filters, transitions, elements, animations, effects, and overlays. Click the Free Download button and have a try.


Check the ultimate guide about making a slideshow with music and titles in Filmora .
If you are going to make a slideshow with music on Windows, you may need a slideshow-making tool to do it by yourself. Wondershare Filmora will also be a good choice. It helps you instantly make such an impressive slideshow from photos and videos for sharing virtually anywhere.
Shanoon Cox
Shanoon Cox is a writer and a lover of all things video.
Follow @Shanoon Cox
Shanoon Cox
Mar 27, 2024• Proven solutions
Makings a slideshow is a great way to share photos and videos with friends and families. The good news is that you can totally make a slideshow on Mac for free with iMovie. iMovie is the pre-installed program coming with every new Mac. It provides a simple yet professional way to make slideshow movies from your photos, videos, and music.
If you haven’t iMovie installed on your Mac yet, just go to iTunes and download it for free. In the following part, I’ll share with you the step-by-step tutorial on how to make a slideshow on Mac using the free video editing software iMovie.
If you are an iOS user, check our picks of best photo slideshow apps for iPhone or iPad.
Ways for iMovie Photo Slideshow with Music Making
To make a photo slideshow with music in iMovie, you can follow these steps.
1. Create a New Project
After launching iMovie, click the Project button and then click Create New. Select Movie to combine photos, videos and music to make a slideshow.
2. Import Photos, Videos, and Audio Files
Now go to the My Media tab and click the Import icon to add your photos, videos, and music to iMovie, in this way, you can import any media files from any location on your Mac. But if you have arranged all your videos, photos, and music tracks in the Photos app, you can just switch to Photos under the Libraries tab on the left to import.
3. Arrange Media in Timeline and Adjust
Now, it’s time to place all these photos and videos in the timeline in order and do some adjustments. You can use the Magic Wand tool to improve the photo quality automatically, do some color correction, or add a filter to the photo. If you preview the video clip, you will see more options that allow you to do more editing, such as changing speed.
4. Apply Transitions & Effects
Transitions and effects will help you to create a slideshow in a more professional way. Some transitions such as cross dissolve, fade and cross blur are very popular in the slideshow, but remember don’t use lots of different transitions in one slideshow since too many transitions will distract the viewer’s attention. To apply a transition in the slideshow, just drag and drop it between two photos in the timeline.
5. Add Titles and Text
Using some opener titles and credits at the beginning and ending part of your slideshow will make it cool as well. You can add some famous quotes and words to better demonstrate.
Just to the Titles tab and select one of the title templates and drop it to the timeline first and then write your own words in the preview window.
6. Add Music to Slideshow
You can download some royalty-free music and sound effects from websites such as Filmstock stock media library or iTunes or import your own audio as we said before to use it as the slideshow background music. To sync with the slideshow, you may need to trim and edit the audio accordingly. For detailed information about iMovie audio editing, you can check how to add background music to iMovie.
Filmstock Stock Media Library ](https://tools.techidaily.com/wondershare/filmora/download/ )
7. Export and Share Your Slideshow video
Play the slideshow and check the result in the preview window. If everything goes well, you can now export and share or save it. You can save the slideshow video in MP4 format, or share it to Vimeo or add the slideshow to Theater to load it on your other Apple devices so you can easily watch it on your iOS devices or Apple TV.
I hope the above tutorial about how to make a slideshow on iMovie will be helpful for your stunning slideshow creation.
If you’re running an old macOS version and having iPhoto installed on your Mac, here are the detailed steps about How to make slideshow in iMovie with iPhoto project.
Step 1. Import Photos from the iPhoto Library
iMovie works seamlessly with iPhoto. You are suggested to drag and drop photos from iPhoto to the iMovie project. If no library exists in iPhoto, create one and import photos to iPhoto first. To add videos, you could go to either “File/Import” or Event Library, and then drag and drop selected videos to the timeline.
After photos and videos are imported to the iMovie slideshow project, you can preview the raw slideshow simply by pressing Space bar on your keyboard. And then make adjustments to clips and transitions. For example, mouse over one clip or “double arrow” button and click on the settings icon, then you could access clip adjustment, video adjustment, transition adjustment, etc.
Step 2. Add Music to Your iMovie Slideshow Project
Music sets the tone of your slideshow. Adding musing to the iMovie slideshow is just as simple as adding photos and videos.
So click the audio icon in the bottom right corner, and drag and drop the desired audio file to the timeline. Multiple songs could be added to iMovie.
However, iMovie doesn’t support multiple soundtracks. If necessary, you need to combine multiple song tracks with an external audio editor before importing them to the iMovie slideshow. You can also apply audio effects and filter sound using an equalizer.
Step 3. Export Your iMovie Slideshow Video
iMovie makes sharing possibilities endless. For those who upload their videos online, iMovie allows users to directly upload to MobileMe Gallery, YouTube, Facebook, Vimeo, CNN iReport, etc.
If you select to share the iMovie slideshow using Media Browser, you will get a slideshow appeared in other Mac applications like iWeb. It’s a good idea to export the iMovie slideshow to iTunes so that you can play back slideshow quickly and easily sync with your mobile devices like iPhone, iPod, and iPad.
You may also like: How to Add Text with iMovie in Mac and iPhone >>
Recommendation: Create Slideshow on Mac with More Templates and Transitions with Filmora
If you want to make a slideshow with some templates on Mac, you can try Wondershare Filmora . Filmora can turn photos and videos into attractive slideshow videos with various inbuilt filters, transitions, elements, animations, effects, and overlays. Click the Free Download button and have a try.
Check the ultimate guide about making a slideshow with music and titles in Filmora .
If you are going to make a slideshow with music on Windows, you may need a slideshow-making tool to do it by yourself. Wondershare Filmora will also be a good choice. It helps you instantly make such an impressive slideshow from photos and videos for sharing virtually anywhere.
Shanoon Cox
Shanoon Cox is a writer and a lover of all things video.
Follow @Shanoon Cox
Best SolarMovie Alternatives-Watch Movies Free Online
Best SolarMovie Alternatives-Watch Movies Online
Shanoon Cox
Mar 27, 2024• Proven solutions
SolarMovie is an online video streaming site that offers a huge collection of movies and TV series. All these movies and shows can be streamed for free on SolarMovie. Furthermore, there is no registration required. Better yet, users can even download the movies in high quality.
However, some ISP’s have banned the SolarMovie website, and it might be inaccessible now. So, people are now on the lookout for a SolarMovie alternative that they can use to easily watch movie online.
To help with that, we have carefully curated a list of some of the top sites like SolarMovie.
- Best 10 SolarMovie Alternatives for You
- Bonus Tip- Make a Video with Wondershare Filmora Easy Movie Maker
Best 10 SolarMovie Alternatives for You
Even though there countless SolarMovie like websites on the internet, it can be pretty confusing to find the best one. Therefore, we have rounded up the top SolarMovie alternative sites for your ease.
- 1. Popcornflix
- 2. Tubi TV
- 3. Freeform
- 4. Netflix
- 5. Amazon Prime
- 6. Hulu
- 7. Yifymovies
- 8. CONtv
- 9. Aha Video
- 10. Vumoo
1. Popcornflix
One of the best SolarMovie alternative sites includes Popcornflix. It is a free HD streaming site through which users can watch movie online without having to register or subscribe. The range of movies available on this SolarMovie alternative is very extensive. Moreover, the movies are categorized as New Arrivals, Horror, Drama, Asian Action, to name a few. The categorization allows easy browsing and searching for the perfect movie. This SolarMovie alternative boasts a category of Popcornflix original movies as well that are exclusively available on this site. A search bar option further eases the task of finding a particular movie.

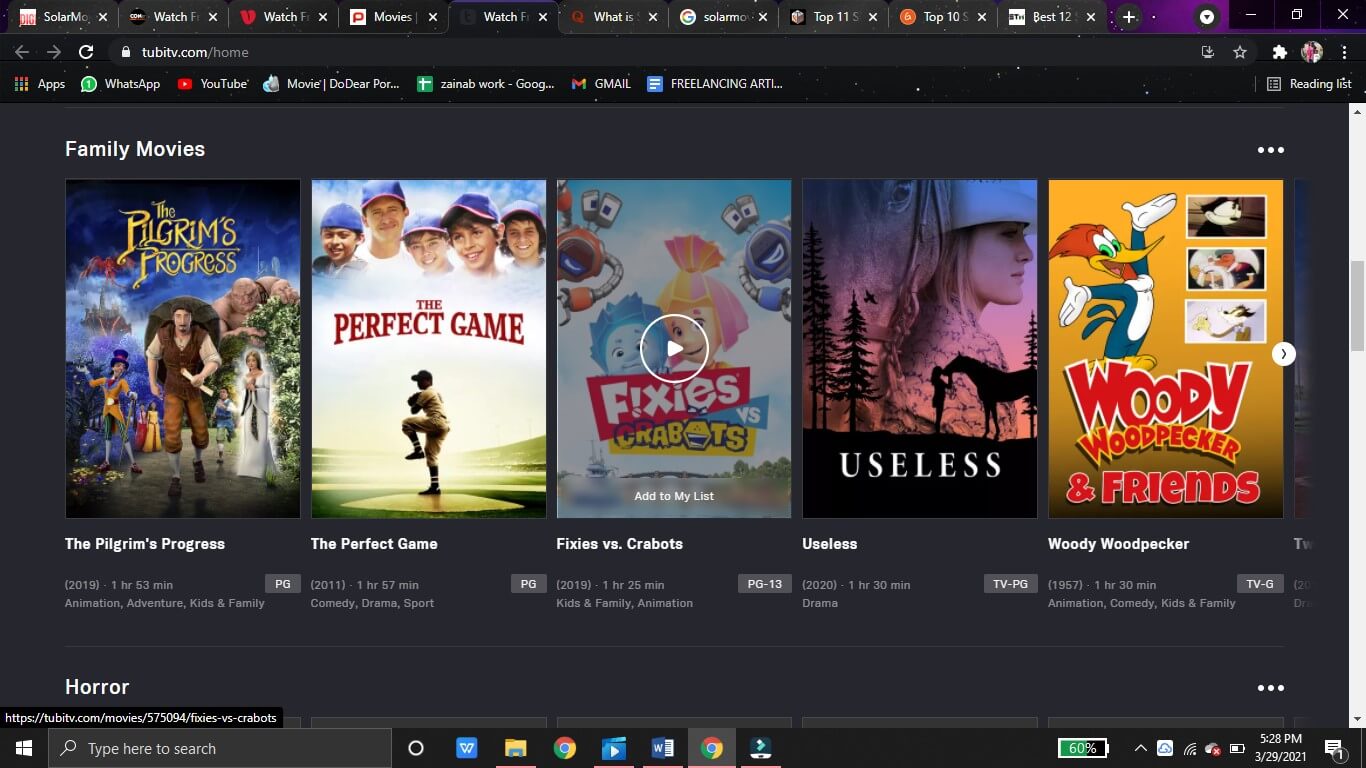
2. Tubi TV
Tubi TV is a top-notch SolarMovie alternative site. With a sleek and attractive interface, Tubi TV features a wide variety of movies available for free streaming. Also, the movies are classified into various sections based on Popularity, Genre, and many more. By selecting a title from the genre category like horror, lifestyle, or even stand-up comedy, users can easily find and watch movie online. This site might even be better than SolarMovie, as it has options to customize the resolution and the choice to display subtitles. An option of Add To My Playlist further makes this SolarMovie alternative an excellent site.
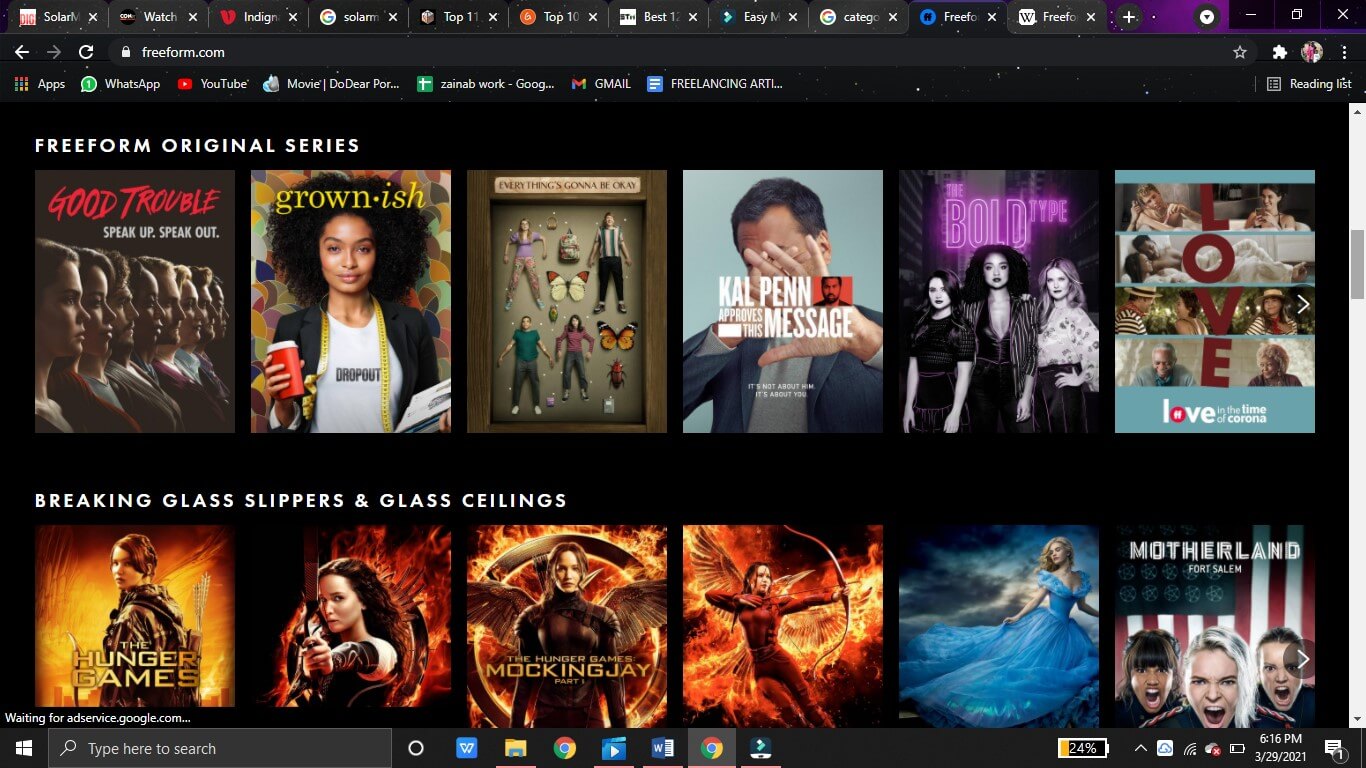
3. Freeform
Among the sites like SolarMovie, Freeform also tops the list. However, Freeform is a cable channel that requires users to access the endless movie library through their cable provider. But, this SolarMovie alternative has a huge collection of the latest as well as vintage movies. On Freeform, you can watch movie online just by clicking and selecting your cable provider. You can sign up for free to resume your movie streaming from where you left off. Freeform’s movies are creatively classified as Fierce and Funny, Familiar Faves, and Throwback.
4. Netflix
Netflix is an up-and-coming SolarMovie alternative that has dominated the online streaming sites owing to its vast movie library. Unlike SolarMovie, Netflix also produces many original movies that are available on the sites for HD streaming. Netflix, however, is not free. Users can watch movie online on Netflix by first registering for an account. After registering, users can sign in to watch movie online or download it in HD for offline streaming later. Furthermore, this SolarMovie alternative allows users to enjoy unlimited streaming on any device or platform.

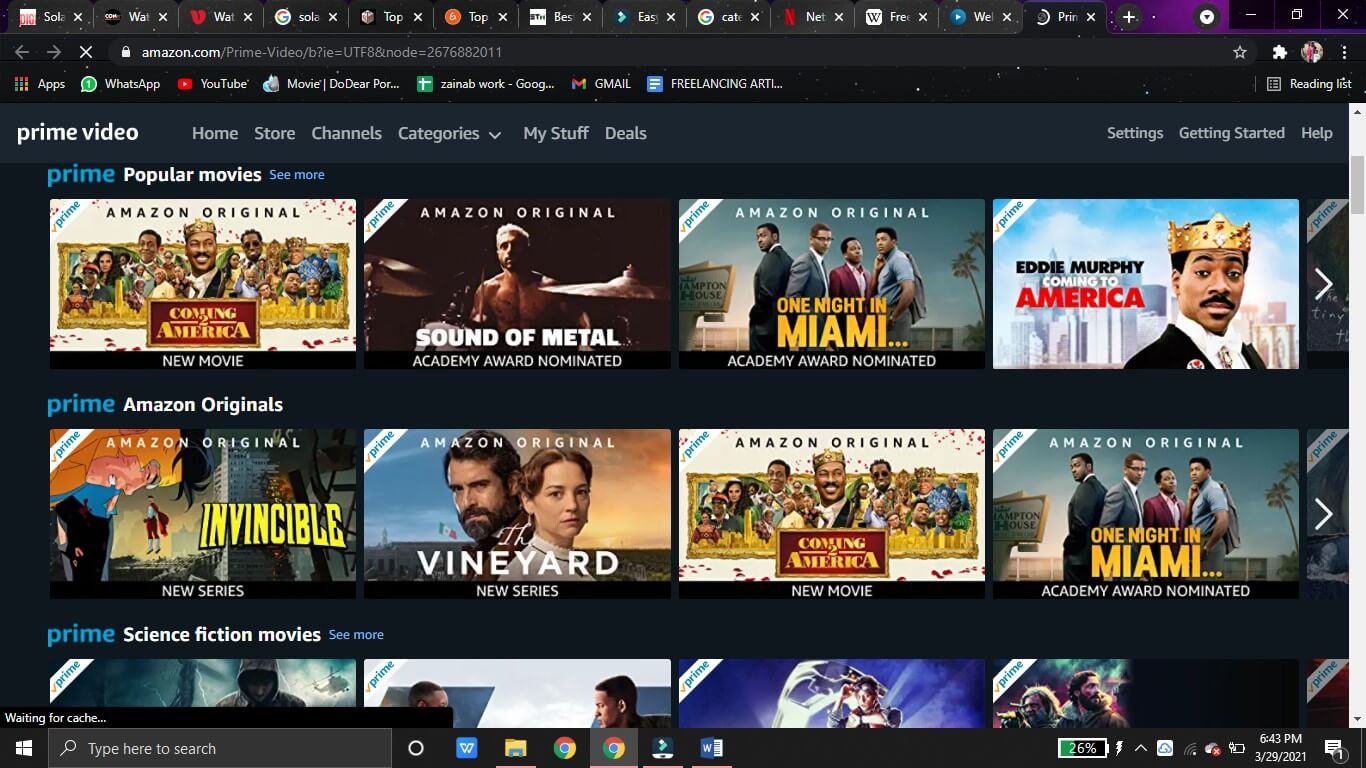
5. Amazon Prime
Amazon Prime is yet another top-notch SolarMovie alternative. On this site, users can find an exclusive Amazon original movie collection. With an intuitive interface and easy browsing categories, Amazon Prime is the go-to site to watch movie online without any ads or any kind of hassle. The categorization is based on genre, awards, or audience, to name a few. Also, the movies can be added to a Watchlist for easy organization. But, to watch movie online on Amazon Prime, users are required to create an account and sign in. And unlike SolarMovie, Amazon Prime isn’t available for free streaming.
6. Hulu
Like SolarMovie, Hulu also boasts an extensive movie library. This library by Hulu is a mix of popular and classic movies. Also, it features a variety of Hulu original series and movies that you cannot find elsewhere. Whether you want to watch a thriller or a documentary, Hulu has got you covered. However, Hulu requires a paid subscription. Before subscription, you can activate a 30-day trial to weigh whether Hulu is the best SolarMovie alternative and if it is worth your time.
7. Yifymovies
Another amazing SolarMovie alternative is the Yifymovies site. This site rivals the SolarMovie website by featuring an up-to-date movie collection. What’s better, Yifymovies has classified its library into broad categories like adventure, animation, and documentary, etc. Users can also search by filtering out the movies on the basis of the year of release. All the movie titles contain a rating that helps the user decide whether that movie is worth their time or not. The video player in this SolarMovie alternative features the fast-forward and rewind option too. The only downside is that it has a few annoying pop-up ads.
8. CONtv
One of the best sites like SolarMovie includes CONtv. Although this SolarMovie-like site requires registration in order to watch movie online, the unique and up-to-date movie collection here makes it a very popular user’s choice. By signing up, users can also save their favorite movies to the watchlist. A premium account is available if users wish to stream and watch movie online without any annoying pop-ups and commercials. On this SolarMovie alternative, users can also have access to the latest anime series as well as classic movies.
9. Aha Video
Aha is a subscription-based movie streaming SolarMovie alternative. On this site, you can watch movie online for free. But, the premium content can only be accessed after the paid subscription is activated. Aha video can easily be used as a SolarMovie alternative as it offers a great variety of movies that users can enjoy in HD quality and low buffering time. Movies for every genre like romance, comedy, and action can be found on this site. Better yet, a category is also available for kids.
10. Vumoo
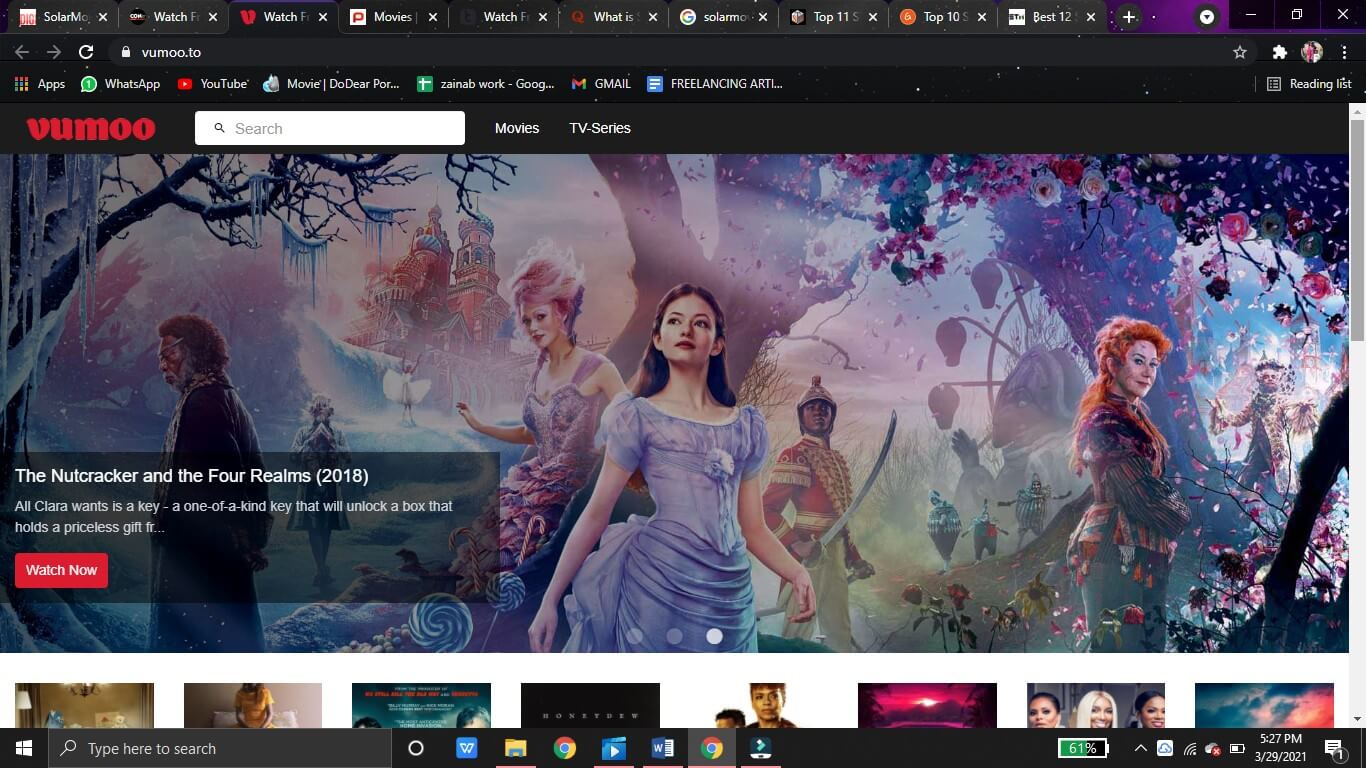
Vumoo is the last but not the least addition to our list of the best sites like SolarMovie. Vumoo features a multitude of movies ranging from horror to comedy. Users can easily find any kind of movie on this SolarMovie alternative. Users can watch movie online in HD quality through Vumoo. Furthermore, Vumoo is a free website that doesn’t require any signing up or registration. Users can just hop onto this SolarMovie like website and click to watch movie online. A major drawback is that the movies are not categorized, but that is countered by the searching option, which makes it easier to search a particular movie.
Bonus Tip- Make a Video with Wondershare Filmora Easy Movie Maker
Wondershare Filmora is a very powerful and comprehensive video editor for all kinds of edits. The user-friendly interface makes the editing process effortless. Users can easily add motion graphics, keyframe animations, and even color match with a single click.
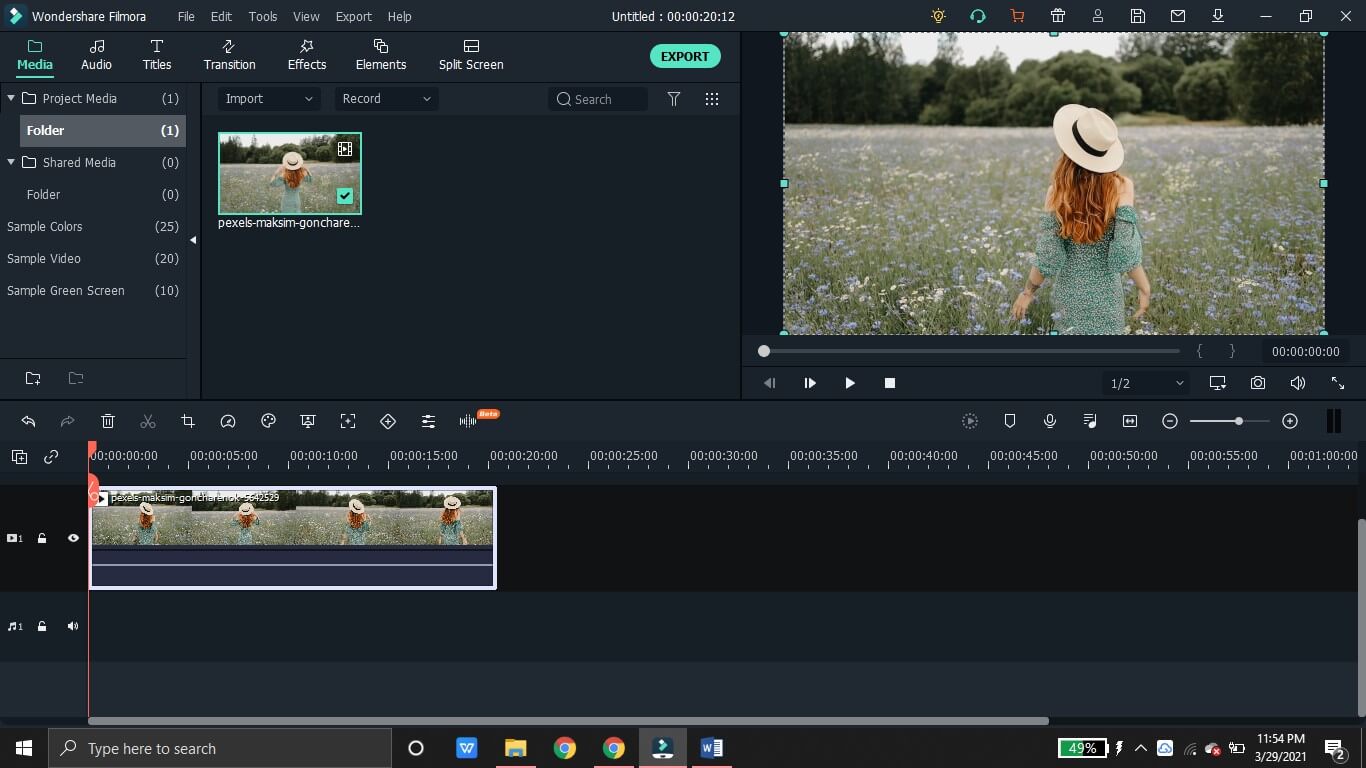
1. First, download Wondershare Filmora on your device and launch it. Then, click on File and tap on Import Media Files to import the clip you want to edit.
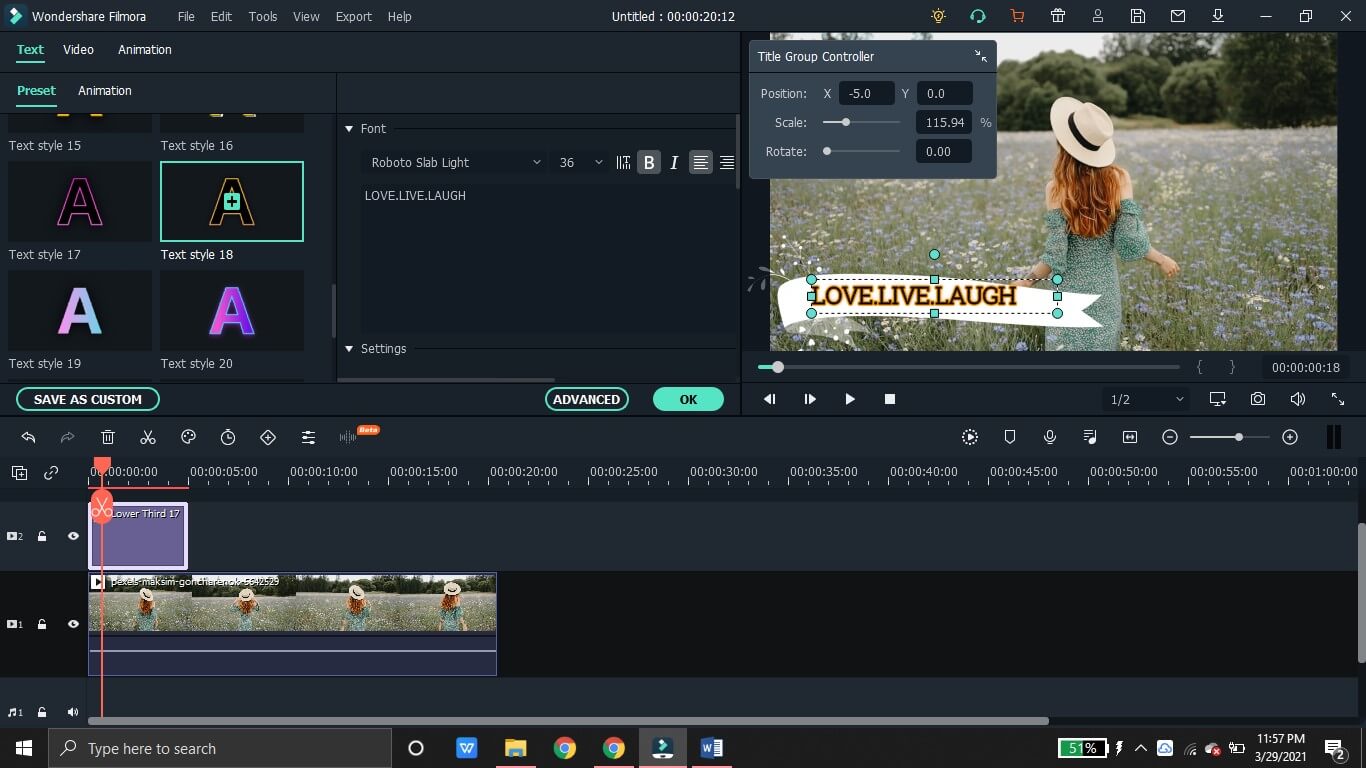
2. From the Titles section, you can choose a catchy template to compliment your video. By double-clicking on the title added to the timeline, you can access advanced settings to customize the title text, font size, color, etc. You can also animate the title to make it more dynamic.
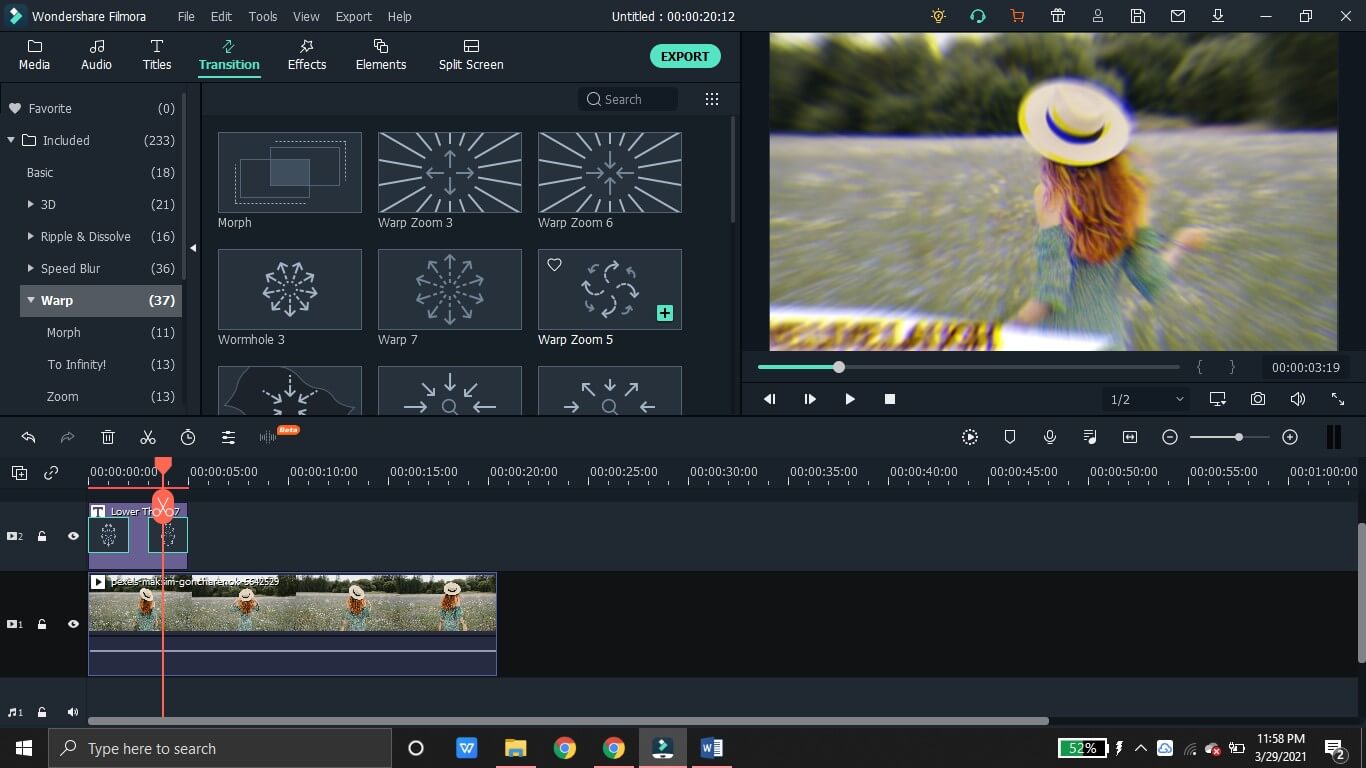
3. If you like to give your videos a cinematic touch, you can add multiple transitions ranging from 3D, ripple and dissolve, speed blur to warp effects. Just click on the plus icon on the effect to add it to the timeline. Drag and adjust the duration of the effect.
4. The Effects tab has various kinds of aesthetic filters and overlays. Choose a suitable overlay from the categories such as Frame, Bokeh Blur, Old Film etc.
5. You can also make your videos very attractive by adding some colorful and appealing elements. From Badges to Hand Drawn icons, the Elements tab has a huge variety.
6. Finally, you can export the video and save it locally. Or, the video can be directly shared on the social media platforms like YouTube.

Summing up
Once again, you can enjoy limitless streaming of your favorite movies and shows. Thanks to the various sites like SolarMovie, you can watch movie online without any hassle. Just like SolarMovie, most of the sites we mentioned offer a huge movie library free of cost. And, there are multiple benefits associated with the SolarMovie alternative sites that range from the watchlist option to the resolution customization tool. So, you can go back to having a relaxing weekend by hopping on to the SolarMovie alternative site of your choice and watching some exciting movies. Go on and watch movie online on any device and enjoy!
Shanoon Cox
Shanoon Cox is a writer and a lover of all things video.
Follow @Shanoon Cox
Shanoon Cox
Mar 27, 2024• Proven solutions
SolarMovie is an online video streaming site that offers a huge collection of movies and TV series. All these movies and shows can be streamed for free on SolarMovie. Furthermore, there is no registration required. Better yet, users can even download the movies in high quality.
However, some ISP’s have banned the SolarMovie website, and it might be inaccessible now. So, people are now on the lookout for a SolarMovie alternative that they can use to easily watch movie online.
To help with that, we have carefully curated a list of some of the top sites like SolarMovie.
- Best 10 SolarMovie Alternatives for You
- Bonus Tip- Make a Video with Wondershare Filmora Easy Movie Maker
Best 10 SolarMovie Alternatives for You
Even though there countless SolarMovie like websites on the internet, it can be pretty confusing to find the best one. Therefore, we have rounded up the top SolarMovie alternative sites for your ease.
- 1. Popcornflix
- 2. Tubi TV
- 3. Freeform
- 4. Netflix
- 5. Amazon Prime
- 6. Hulu
- 7. Yifymovies
- 8. CONtv
- 9. Aha Video
- 10. Vumoo
1. Popcornflix
One of the best SolarMovie alternative sites includes Popcornflix. It is a free HD streaming site through which users can watch movie online without having to register or subscribe. The range of movies available on this SolarMovie alternative is very extensive. Moreover, the movies are categorized as New Arrivals, Horror, Drama, Asian Action, to name a few. The categorization allows easy browsing and searching for the perfect movie. This SolarMovie alternative boasts a category of Popcornflix original movies as well that are exclusively available on this site. A search bar option further eases the task of finding a particular movie.
2. Tubi TV
Tubi TV is a top-notch SolarMovie alternative site. With a sleek and attractive interface, Tubi TV features a wide variety of movies available for free streaming. Also, the movies are classified into various sections based on Popularity, Genre, and many more. By selecting a title from the genre category like horror, lifestyle, or even stand-up comedy, users can easily find and watch movie online. This site might even be better than SolarMovie, as it has options to customize the resolution and the choice to display subtitles. An option of Add To My Playlist further makes this SolarMovie alternative an excellent site.
3. Freeform
Among the sites like SolarMovie, Freeform also tops the list. However, Freeform is a cable channel that requires users to access the endless movie library through their cable provider. But, this SolarMovie alternative has a huge collection of the latest as well as vintage movies. On Freeform, you can watch movie online just by clicking and selecting your cable provider. You can sign up for free to resume your movie streaming from where you left off. Freeform’s movies are creatively classified as Fierce and Funny, Familiar Faves, and Throwback.
4. Netflix
Netflix is an up-and-coming SolarMovie alternative that has dominated the online streaming sites owing to its vast movie library. Unlike SolarMovie, Netflix also produces many original movies that are available on the sites for HD streaming. Netflix, however, is not free. Users can watch movie online on Netflix by first registering for an account. After registering, users can sign in to watch movie online or download it in HD for offline streaming later. Furthermore, this SolarMovie alternative allows users to enjoy unlimited streaming on any device or platform.
5. Amazon Prime
Amazon Prime is yet another top-notch SolarMovie alternative. On this site, users can find an exclusive Amazon original movie collection. With an intuitive interface and easy browsing categories, Amazon Prime is the go-to site to watch movie online without any ads or any kind of hassle. The categorization is based on genre, awards, or audience, to name a few. Also, the movies can be added to a Watchlist for easy organization. But, to watch movie online on Amazon Prime, users are required to create an account and sign in. And unlike SolarMovie, Amazon Prime isn’t available for free streaming.
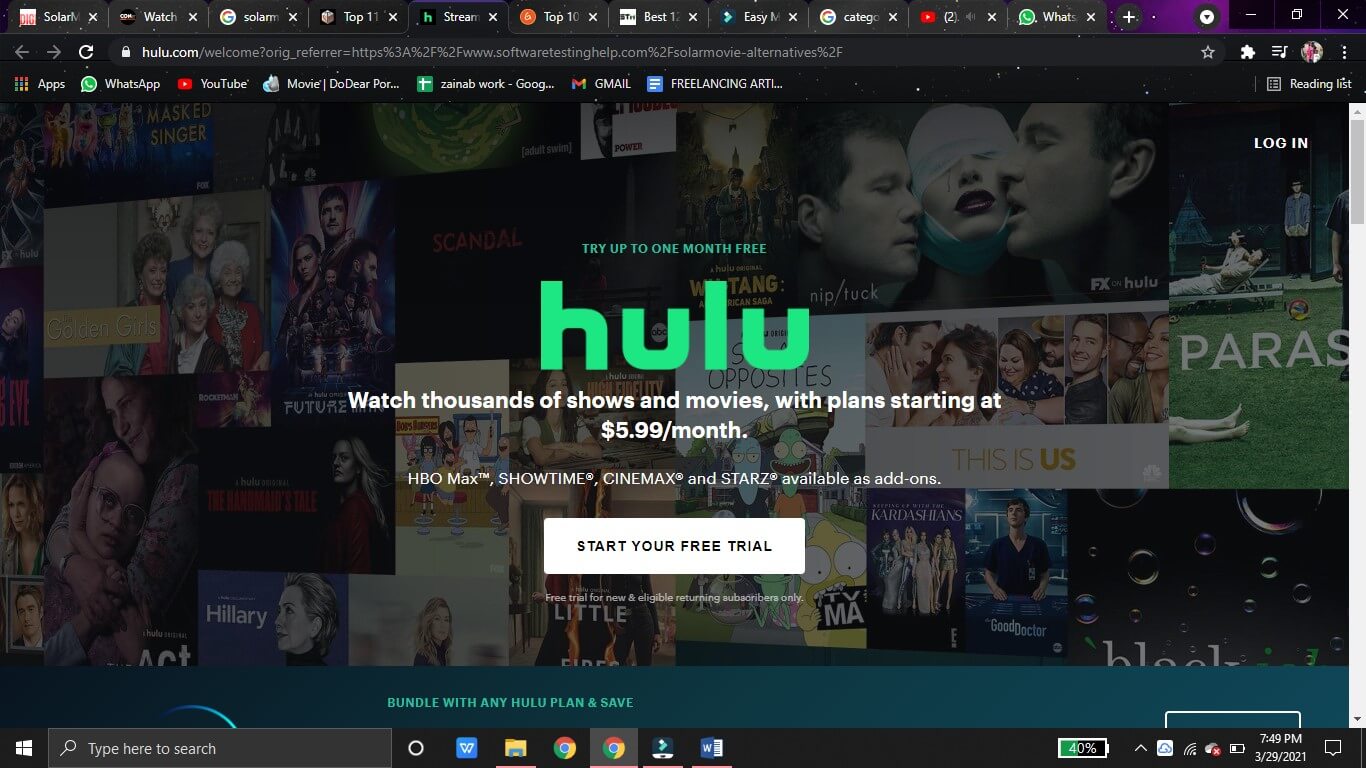
6. Hulu
Like SolarMovie, Hulu also boasts an extensive movie library. This library by Hulu is a mix of popular and classic movies. Also, it features a variety of Hulu original series and movies that you cannot find elsewhere. Whether you want to watch a thriller or a documentary, Hulu has got you covered. However, Hulu requires a paid subscription. Before subscription, you can activate a 30-day trial to weigh whether Hulu is the best SolarMovie alternative and if it is worth your time.
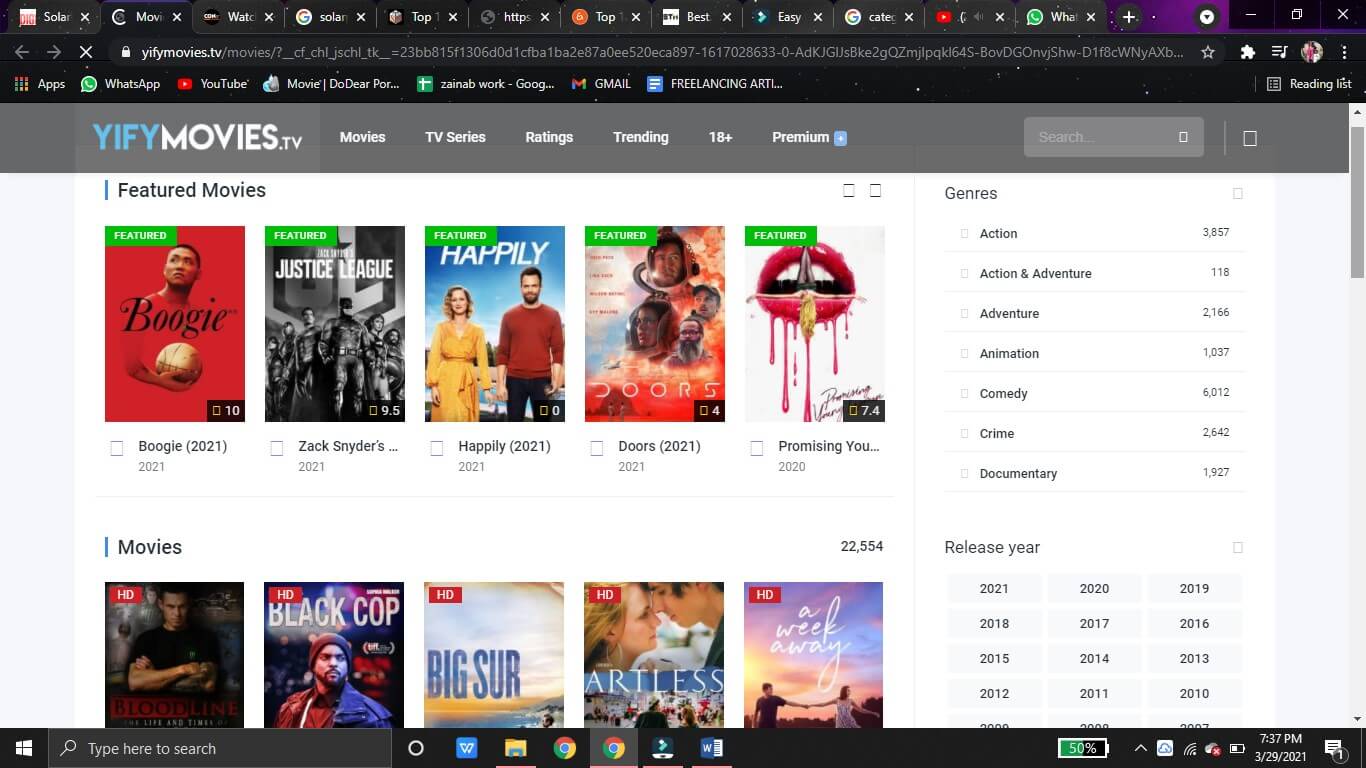
7. Yifymovies
Another amazing SolarMovie alternative is the Yifymovies site. This site rivals the SolarMovie website by featuring an up-to-date movie collection. What’s better, Yifymovies has classified its library into broad categories like adventure, animation, and documentary, etc. Users can also search by filtering out the movies on the basis of the year of release. All the movie titles contain a rating that helps the user decide whether that movie is worth their time or not. The video player in this SolarMovie alternative features the fast-forward and rewind option too. The only downside is that it has a few annoying pop-up ads.
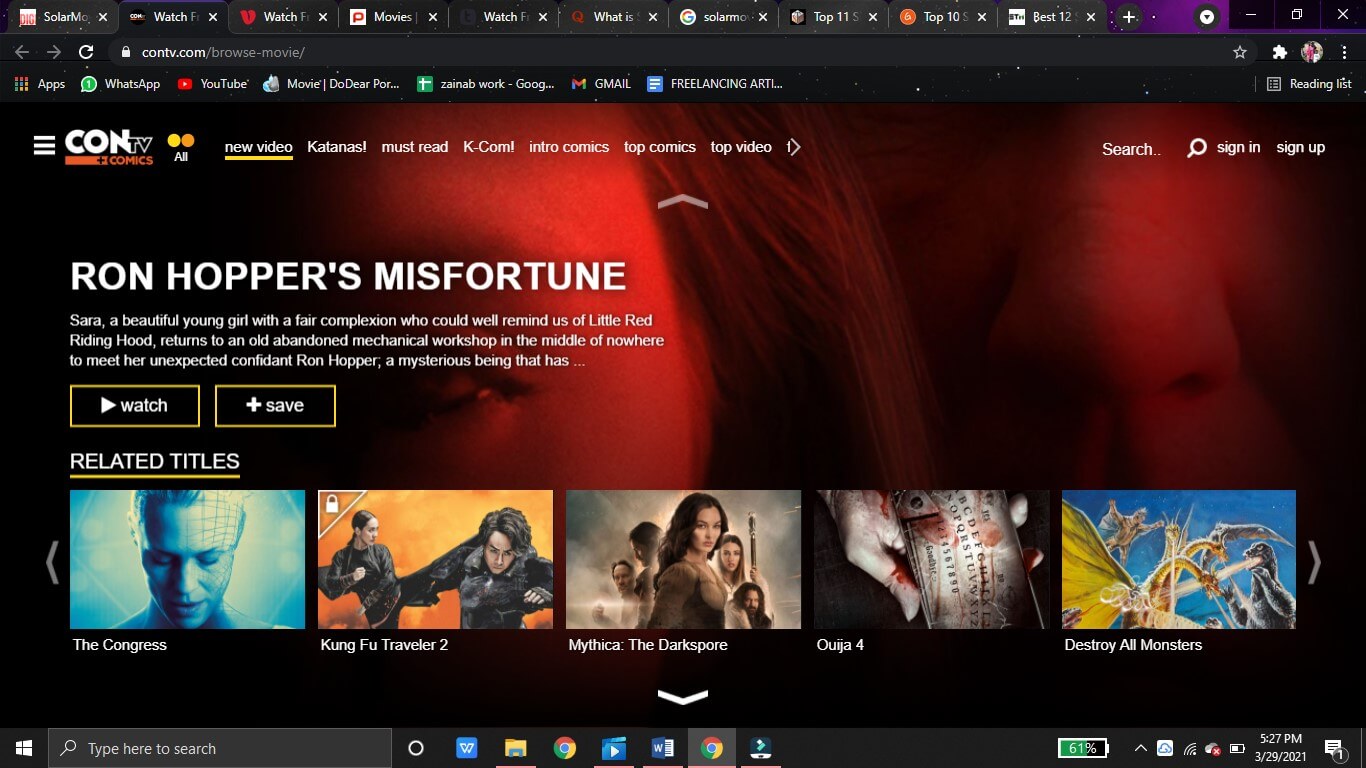
8. CONtv
One of the best sites like SolarMovie includes CONtv. Although this SolarMovie-like site requires registration in order to watch movie online, the unique and up-to-date movie collection here makes it a very popular user’s choice. By signing up, users can also save their favorite movies to the watchlist. A premium account is available if users wish to stream and watch movie online without any annoying pop-ups and commercials. On this SolarMovie alternative, users can also have access to the latest anime series as well as classic movies.
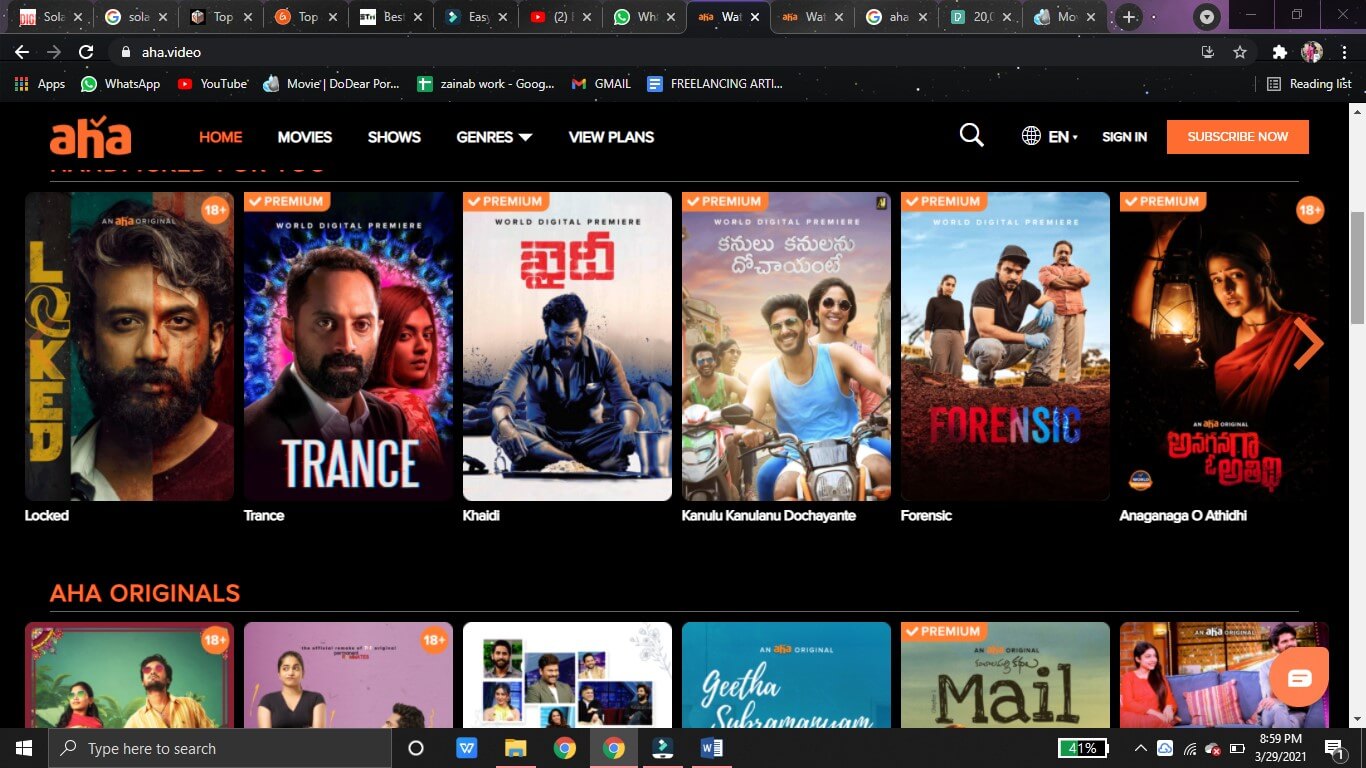
9. Aha Video
Aha is a subscription-based movie streaming SolarMovie alternative. On this site, you can watch movie online for free. But, the premium content can only be accessed after the paid subscription is activated. Aha video can easily be used as a SolarMovie alternative as it offers a great variety of movies that users can enjoy in HD quality and low buffering time. Movies for every genre like romance, comedy, and action can be found on this site. Better yet, a category is also available for kids.
10. Vumoo
Vumoo is the last but not the least addition to our list of the best sites like SolarMovie. Vumoo features a multitude of movies ranging from horror to comedy. Users can easily find any kind of movie on this SolarMovie alternative. Users can watch movie online in HD quality through Vumoo. Furthermore, Vumoo is a free website that doesn’t require any signing up or registration. Users can just hop onto this SolarMovie like website and click to watch movie online. A major drawback is that the movies are not categorized, but that is countered by the searching option, which makes it easier to search a particular movie.
Bonus Tip- Make a Video with Wondershare Filmora Easy Movie Maker
Wondershare Filmora is a very powerful and comprehensive video editor for all kinds of edits. The user-friendly interface makes the editing process effortless. Users can easily add motion graphics, keyframe animations, and even color match with a single click.
1. First, download Wondershare Filmora on your device and launch it. Then, click on File and tap on Import Media Files to import the clip you want to edit.
2. From the Titles section, you can choose a catchy template to compliment your video. By double-clicking on the title added to the timeline, you can access advanced settings to customize the title text, font size, color, etc. You can also animate the title to make it more dynamic.
3. If you like to give your videos a cinematic touch, you can add multiple transitions ranging from 3D, ripple and dissolve, speed blur to warp effects. Just click on the plus icon on the effect to add it to the timeline. Drag and adjust the duration of the effect.
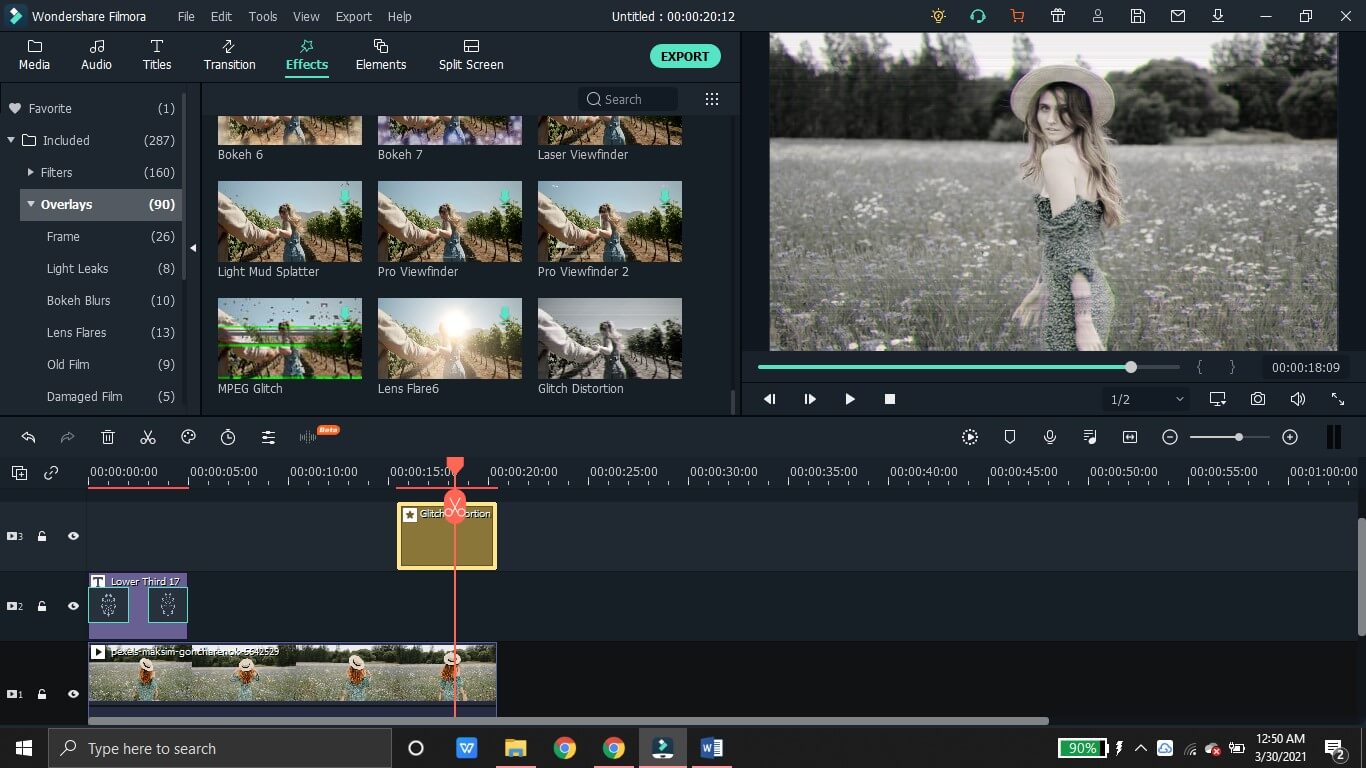
4. The Effects tab has various kinds of aesthetic filters and overlays. Choose a suitable overlay from the categories such as Frame, Bokeh Blur, Old Film etc.
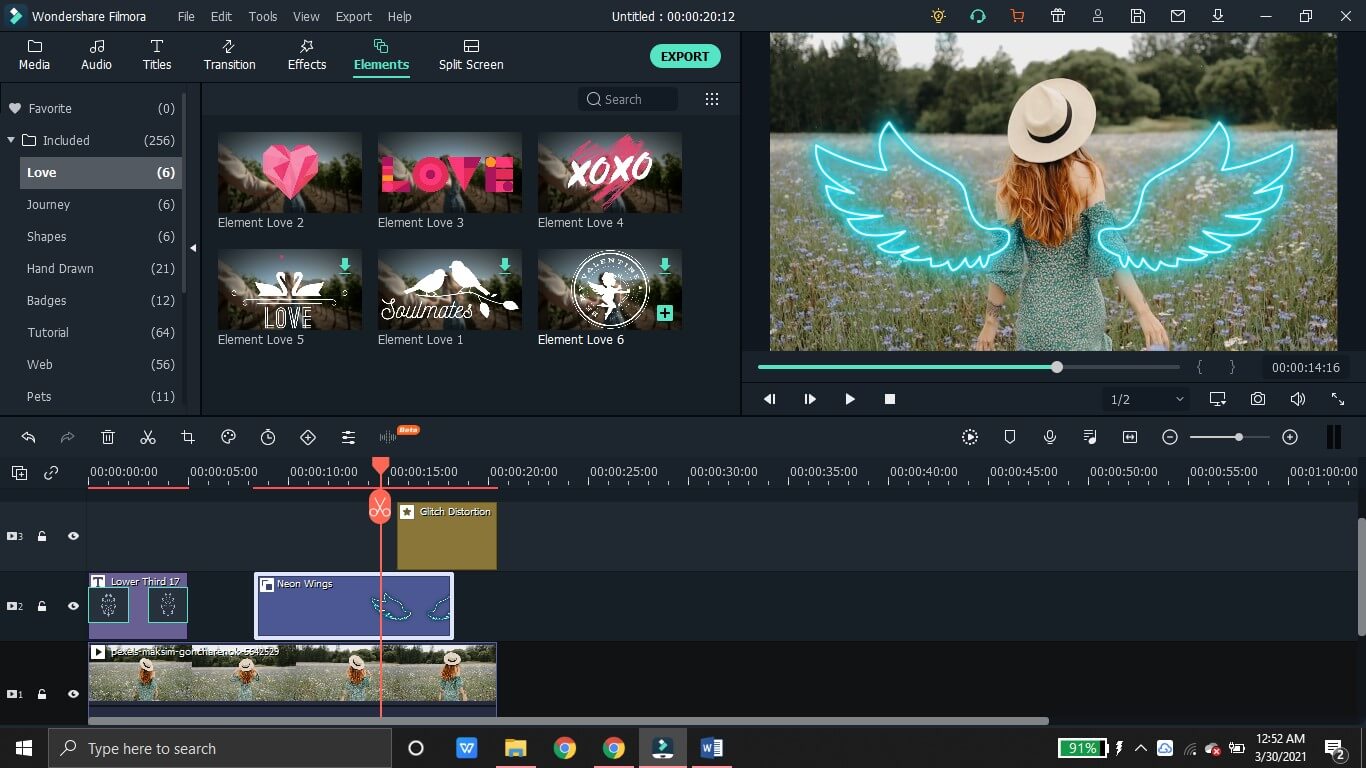
5. You can also make your videos very attractive by adding some colorful and appealing elements. From Badges to Hand Drawn icons, the Elements tab has a huge variety.
6. Finally, you can export the video and save it locally. Or, the video can be directly shared on the social media platforms like YouTube.
Summing up
Once again, you can enjoy limitless streaming of your favorite movies and shows. Thanks to the various sites like SolarMovie, you can watch movie online without any hassle. Just like SolarMovie, most of the sites we mentioned offer a huge movie library free of cost. And, there are multiple benefits associated with the SolarMovie alternative sites that range from the watchlist option to the resolution customization tool. So, you can go back to having a relaxing weekend by hopping on to the SolarMovie alternative site of your choice and watching some exciting movies. Go on and watch movie online on any device and enjoy!
Shanoon Cox
Shanoon Cox is a writer and a lover of all things video.
Follow @Shanoon Cox
Shanoon Cox
Mar 27, 2024• Proven solutions
SolarMovie is an online video streaming site that offers a huge collection of movies and TV series. All these movies and shows can be streamed for free on SolarMovie. Furthermore, there is no registration required. Better yet, users can even download the movies in high quality.
However, some ISP’s have banned the SolarMovie website, and it might be inaccessible now. So, people are now on the lookout for a SolarMovie alternative that they can use to easily watch movie online.
To help with that, we have carefully curated a list of some of the top sites like SolarMovie.
- Best 10 SolarMovie Alternatives for You
- Bonus Tip- Make a Video with Wondershare Filmora Easy Movie Maker
Best 10 SolarMovie Alternatives for You
Even though there countless SolarMovie like websites on the internet, it can be pretty confusing to find the best one. Therefore, we have rounded up the top SolarMovie alternative sites for your ease.
- 1. Popcornflix
- 2. Tubi TV
- 3. Freeform
- 4. Netflix
- 5. Amazon Prime
- 6. Hulu
- 7. Yifymovies
- 8. CONtv
- 9. Aha Video
- 10. Vumoo
1. Popcornflix
One of the best SolarMovie alternative sites includes Popcornflix. It is a free HD streaming site through which users can watch movie online without having to register or subscribe. The range of movies available on this SolarMovie alternative is very extensive. Moreover, the movies are categorized as New Arrivals, Horror, Drama, Asian Action, to name a few. The categorization allows easy browsing and searching for the perfect movie. This SolarMovie alternative boasts a category of Popcornflix original movies as well that are exclusively available on this site. A search bar option further eases the task of finding a particular movie.
2. Tubi TV
Tubi TV is a top-notch SolarMovie alternative site. With a sleek and attractive interface, Tubi TV features a wide variety of movies available for free streaming. Also, the movies are classified into various sections based on Popularity, Genre, and many more. By selecting a title from the genre category like horror, lifestyle, or even stand-up comedy, users can easily find and watch movie online. This site might even be better than SolarMovie, as it has options to customize the resolution and the choice to display subtitles. An option of Add To My Playlist further makes this SolarMovie alternative an excellent site.
3. Freeform
Among the sites like SolarMovie, Freeform also tops the list. However, Freeform is a cable channel that requires users to access the endless movie library through their cable provider. But, this SolarMovie alternative has a huge collection of the latest as well as vintage movies. On Freeform, you can watch movie online just by clicking and selecting your cable provider. You can sign up for free to resume your movie streaming from where you left off. Freeform’s movies are creatively classified as Fierce and Funny, Familiar Faves, and Throwback.
4. Netflix
Netflix is an up-and-coming SolarMovie alternative that has dominated the online streaming sites owing to its vast movie library. Unlike SolarMovie, Netflix also produces many original movies that are available on the sites for HD streaming. Netflix, however, is not free. Users can watch movie online on Netflix by first registering for an account. After registering, users can sign in to watch movie online or download it in HD for offline streaming later. Furthermore, this SolarMovie alternative allows users to enjoy unlimited streaming on any device or platform.
5. Amazon Prime
Amazon Prime is yet another top-notch SolarMovie alternative. On this site, users can find an exclusive Amazon original movie collection. With an intuitive interface and easy browsing categories, Amazon Prime is the go-to site to watch movie online without any ads or any kind of hassle. The categorization is based on genre, awards, or audience, to name a few. Also, the movies can be added to a Watchlist for easy organization. But, to watch movie online on Amazon Prime, users are required to create an account and sign in. And unlike SolarMovie, Amazon Prime isn’t available for free streaming.
6. Hulu
Like SolarMovie, Hulu also boasts an extensive movie library. This library by Hulu is a mix of popular and classic movies. Also, it features a variety of Hulu original series and movies that you cannot find elsewhere. Whether you want to watch a thriller or a documentary, Hulu has got you covered. However, Hulu requires a paid subscription. Before subscription, you can activate a 30-day trial to weigh whether Hulu is the best SolarMovie alternative and if it is worth your time.
7. Yifymovies
Another amazing SolarMovie alternative is the Yifymovies site. This site rivals the SolarMovie website by featuring an up-to-date movie collection. What’s better, Yifymovies has classified its library into broad categories like adventure, animation, and documentary, etc. Users can also search by filtering out the movies on the basis of the year of release. All the movie titles contain a rating that helps the user decide whether that movie is worth their time or not. The video player in this SolarMovie alternative features the fast-forward and rewind option too. The only downside is that it has a few annoying pop-up ads.
8. CONtv
One of the best sites like SolarMovie includes CONtv. Although this SolarMovie-like site requires registration in order to watch movie online, the unique and up-to-date movie collection here makes it a very popular user’s choice. By signing up, users can also save their favorite movies to the watchlist. A premium account is available if users wish to stream and watch movie online without any annoying pop-ups and commercials. On this SolarMovie alternative, users can also have access to the latest anime series as well as classic movies.
9. Aha Video
Aha is a subscription-based movie streaming SolarMovie alternative. On this site, you can watch movie online for free. But, the premium content can only be accessed after the paid subscription is activated. Aha video can easily be used as a SolarMovie alternative as it offers a great variety of movies that users can enjoy in HD quality and low buffering time. Movies for every genre like romance, comedy, and action can be found on this site. Better yet, a category is also available for kids.
10. Vumoo
Vumoo is the last but not the least addition to our list of the best sites like SolarMovie. Vumoo features a multitude of movies ranging from horror to comedy. Users can easily find any kind of movie on this SolarMovie alternative. Users can watch movie online in HD quality through Vumoo. Furthermore, Vumoo is a free website that doesn’t require any signing up or registration. Users can just hop onto this SolarMovie like website and click to watch movie online. A major drawback is that the movies are not categorized, but that is countered by the searching option, which makes it easier to search a particular movie.
Bonus Tip- Make a Video with Wondershare Filmora Easy Movie Maker
Wondershare Filmora is a very powerful and comprehensive video editor for all kinds of edits. The user-friendly interface makes the editing process effortless. Users can easily add motion graphics, keyframe animations, and even color match with a single click.
1. First, download Wondershare Filmora on your device and launch it. Then, click on File and tap on Import Media Files to import the clip you want to edit.
2. From the Titles section, you can choose a catchy template to compliment your video. By double-clicking on the title added to the timeline, you can access advanced settings to customize the title text, font size, color, etc. You can also animate the title to make it more dynamic.
3. If you like to give your videos a cinematic touch, you can add multiple transitions ranging from 3D, ripple and dissolve, speed blur to warp effects. Just click on the plus icon on the effect to add it to the timeline. Drag and adjust the duration of the effect.
4. The Effects tab has various kinds of aesthetic filters and overlays. Choose a suitable overlay from the categories such as Frame, Bokeh Blur, Old Film etc.
5. You can also make your videos very attractive by adding some colorful and appealing elements. From Badges to Hand Drawn icons, the Elements tab has a huge variety.
6. Finally, you can export the video and save it locally. Or, the video can be directly shared on the social media platforms like YouTube.
Summing up
Once again, you can enjoy limitless streaming of your favorite movies and shows. Thanks to the various sites like SolarMovie, you can watch movie online without any hassle. Just like SolarMovie, most of the sites we mentioned offer a huge movie library free of cost. And, there are multiple benefits associated with the SolarMovie alternative sites that range from the watchlist option to the resolution customization tool. So, you can go back to having a relaxing weekend by hopping on to the SolarMovie alternative site of your choice and watching some exciting movies. Go on and watch movie online on any device and enjoy!
Shanoon Cox
Shanoon Cox is a writer and a lover of all things video.
Follow @Shanoon Cox
How to Make a Funny Meme on MacBook
How to Make a Funny Meme on MacBook

Liza Brown
Dec 14, 2023• Proven solutions
Everyone these days is living and breathing over the internet. One of the most popular things over the internet is a meme. No matter where you look on social media, you are going to come across memes. Funny memes or memes provoking sadness, there is a lot. You might love memes, but you might not have the idea that there are different kinds of memes.
There are different types of memes, such as image memes, video memes, and GIF memes. The table below is going to show you the difference between the three.
| Image Meme | Video Meme | GIF Meme |
|---|---|---|
| Static Images | Videos | Moving Static Images |
| Contains Text | Contain Text | Contains Text |
| Contains No Music | Contain Music | Contains No Music |
| Isn’t Animated | Isn’t Animated | Animated |
How to Make a GIF or a Video Meme on Mac?
If you want to create a video or GIF meme on your Mac device, here are the steps that you need to follow.
- Find Your Video or Image
When you are looking to make a meme, you will have to collect the video. However, if you are planning to create a GIF meme, you have to find the right picture. You can use the videos and images that you have in the Mac image gallery.
In case you are using a video editor, you can access their official site for some images to create your meme.
- Find Caption
Now, you have to think of a captioning for the meme. This can be serious or funny when you make meme.
- Add the Caption
The first thing that you need to do is open the image or video that you have saved on the laptop. As soon as you click on the ‘Markup icon’ you will find a display bar pop-up. Look for icon ‘T’ to click and then insert the text you want.
When you click on the ‘T’ icon, a text box is going to appear over the picture. Click on the box labeled ‘Text’ for bringing inserting the caption.
If you want, you can change the alignment, color, italics, bolding, font, and underline, too.
- Save the Meme
Now that you have created your desired meme, save it on your Mac device. Then share the final product on the social media platform.
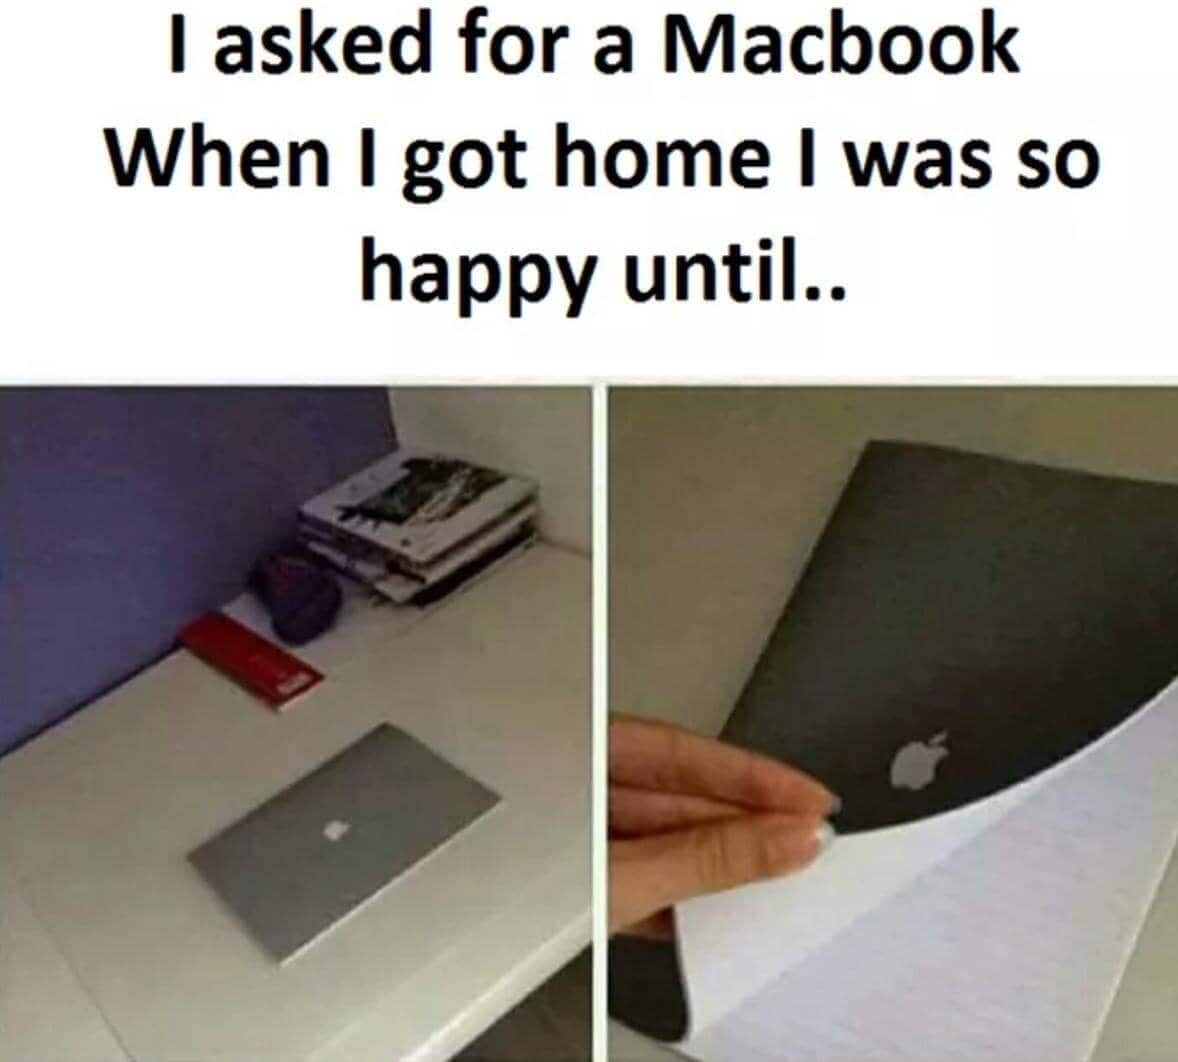
Steps of Creating Video or GIF Meme Using FilmoraX
You can also use a video editor to create your Video or make meme in GIF. With FilmoraX, it is easy to do so. In case you want to make meme, but are new to this process, then FilmoraX is just the perfect tool for you. With the help of this meme maker, you can easily create a video, GIF, and image memes.
FilmoraX can process memes much faster than its counterparts. It comes with an advanced encoder or decoder that ensures fast action. The video editor lets you upload videos with the help of a URL. Its output format is highly flexible and will convert your video to GIF in no time. With its help, you can edit fonts, add text, and move them as you want. What’s more, the video editor doesn’t include a watermark in the video.
Here is a guide that will help you to create the funny video meme using FilmoraX on your Mac device.
- Download and Install FilmoraX
The first thing that you have to do is download and install FilmoraX on Mac in case you do not have it already.
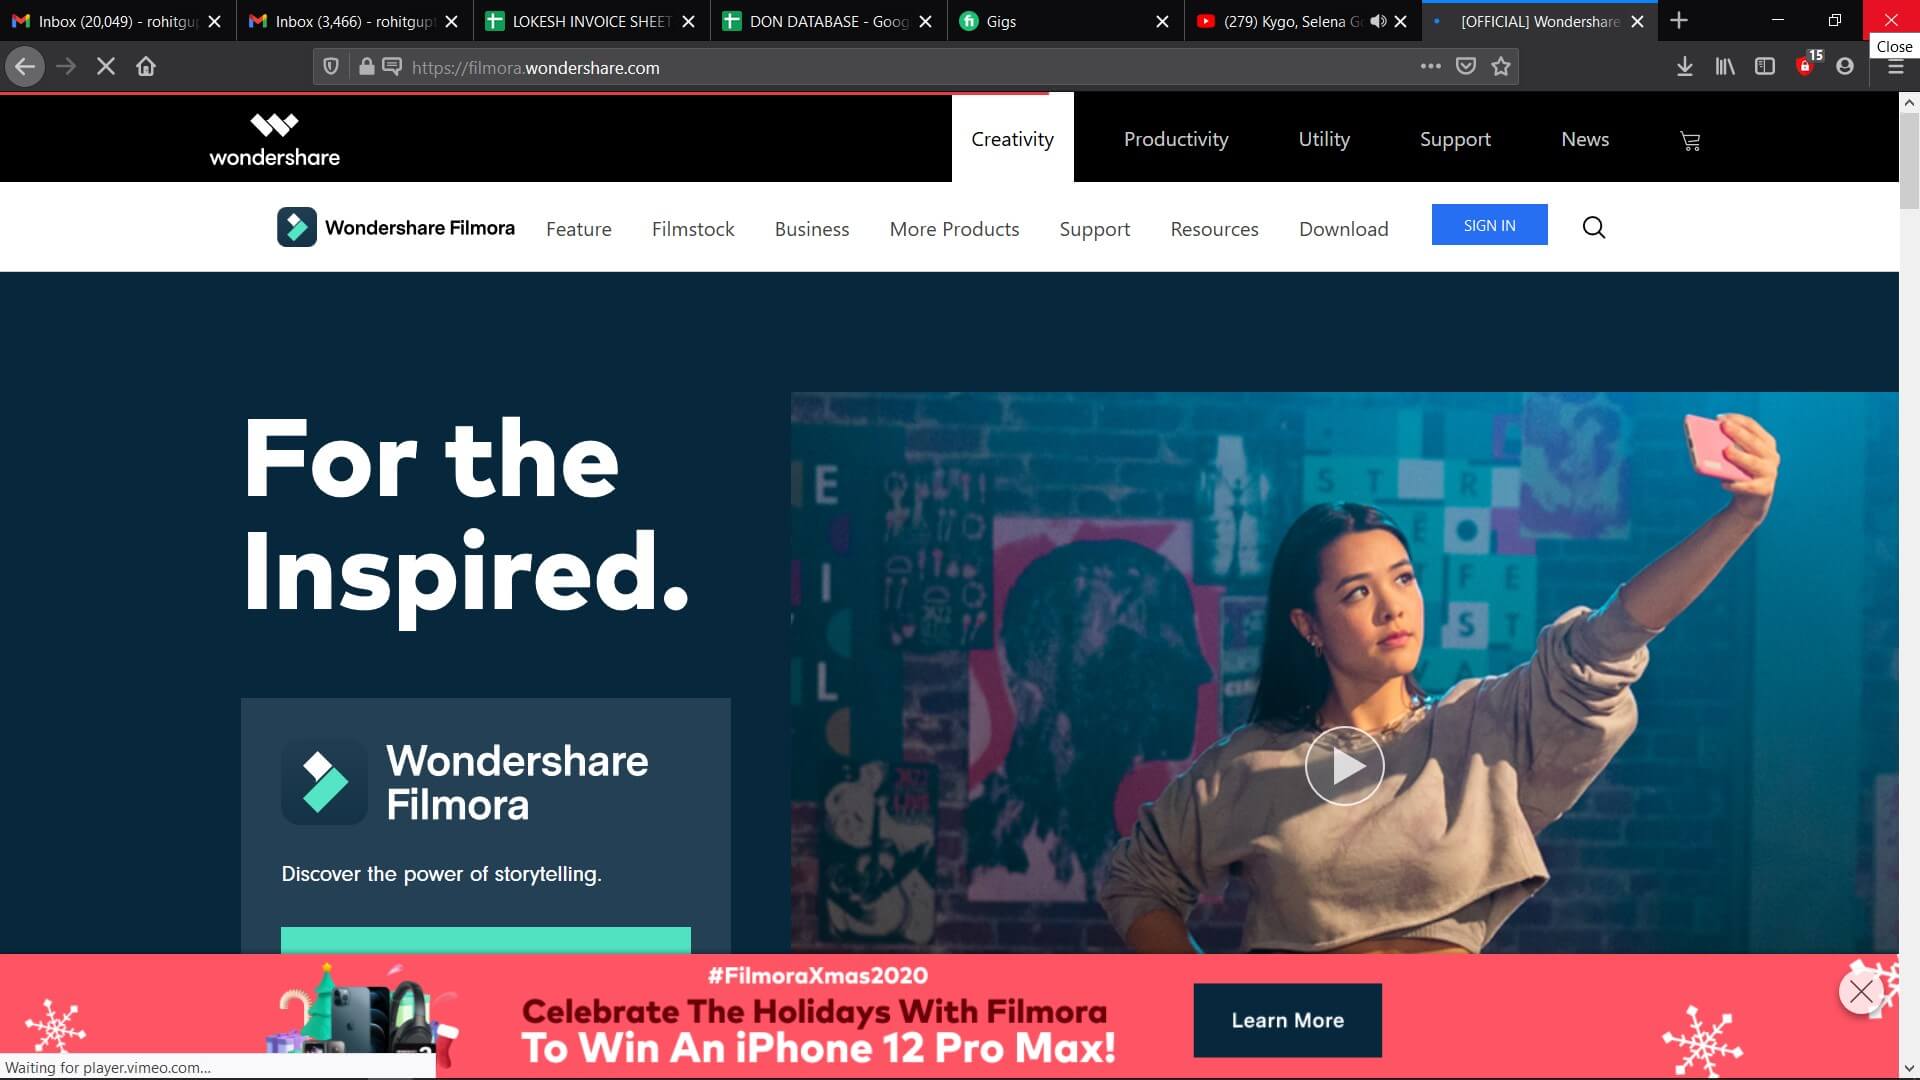
- Drag and Drop the Video
Now that you have the meme maker, drag and drop on the video that you want. This will import the video to the meme maker.
- Edit the Video with Funny Text or stickers
Go to the meme editor page when you are done choosing the video, image, or GIF. Now, from the left panel, you have to customize the video meme. You can also use the FilmoraX video trimmer to cut the video as per your requirements. Add texts, alter fonts, and preview the changes that you have made.
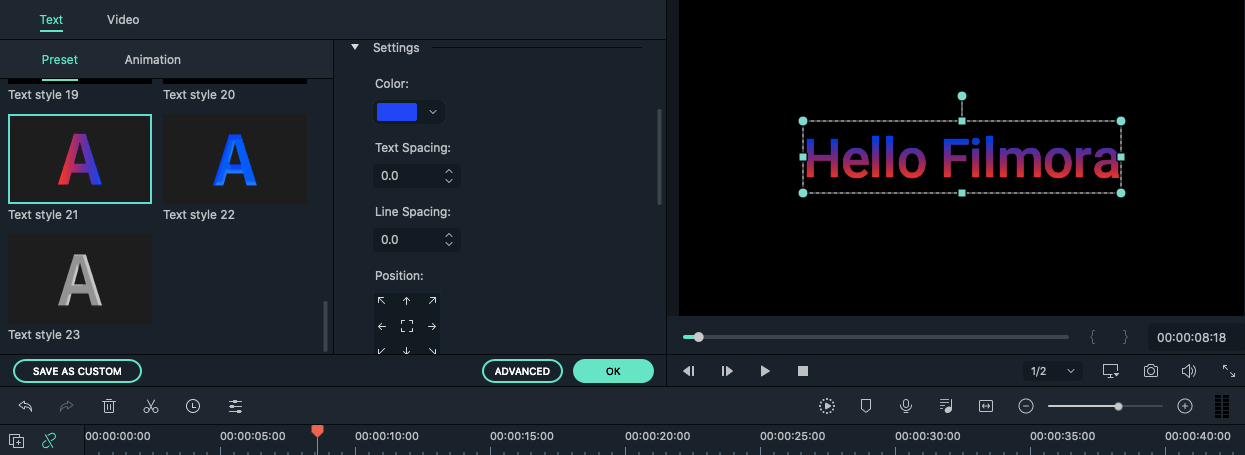
- Export
When you are done making the change, you have to click on the ‘Export’ button to apply the changes to the video meme. After you have shared the meme on your social media pages, download it.

Ingredients to Make an Effective Meme
Memes keep gaining far-reaching traction. Businesses can join in on creating memes that will be suitable for their brand. However, while creating a meme, a business or an individual needs to keep a few things in mind.
- Be Witty
The point of a meme is basically to be fun and silly. However, in the depth of it, you will find a witty connotation. This ties it to something more grave and important. So, the subject matter of the meme doesn’t have to be serious, but if you relate it to a far-reaching topic adding a witty comment will make the meme popular.
- Creating Memes off Existing and Successful Trends
You should play off the existing trend. This is a popular method that is used by many across the web. By adapting a video in trend, you can add your own spin to it. This method is particularly known as memejacking.
- Use Good Quality Video and Images
You might think that for a meme you do not quality video or image. However, that is not true. Even the picture frame that you are adding is important. Keep in mind that everything inside the meme is communicating something. The absence of something is also communicating certain things. Hence, unless you really mean to post a bad quality video or photo, make sure you do your best to get top-quality content.
- Consider If It Works for the Audience
There is an audience for everything over the social media channels. However, meme-makers often tend to forget how personal it is. So, when you are making a joke, you have to make sure others are getting it. Simply because something is in trend, you shouldn’t go for it. You should only post it if it works for the brand of your profile.
Conclusion
Memes can be of different types but what matters the most is they make the viewers laugh. If you keep the above tips in mind, you will be able to make a meme successfully. By using a meme maker like FilmoraX , the job becomes even easier.
Learn More: 10 Best Meme Maker App or Website You Need to Know>>>
Liza Brown
Liza Brown is a writer and a lover of all things video.
Follow @Liza Brown
Liza Brown
Dec 14, 2023• Proven solutions
Everyone these days is living and breathing over the internet. One of the most popular things over the internet is a meme. No matter where you look on social media, you are going to come across memes. Funny memes or memes provoking sadness, there is a lot. You might love memes, but you might not have the idea that there are different kinds of memes.
There are different types of memes, such as image memes, video memes, and GIF memes. The table below is going to show you the difference between the three.
| Image Meme | Video Meme | GIF Meme |
|---|---|---|
| Static Images | Videos | Moving Static Images |
| Contains Text | Contain Text | Contains Text |
| Contains No Music | Contain Music | Contains No Music |
| Isn’t Animated | Isn’t Animated | Animated |
How to Make a GIF or a Video Meme on Mac?
If you want to create a video or GIF meme on your Mac device, here are the steps that you need to follow.
- Find Your Video or Image
When you are looking to make a meme, you will have to collect the video. However, if you are planning to create a GIF meme, you have to find the right picture. You can use the videos and images that you have in the Mac image gallery.
In case you are using a video editor, you can access their official site for some images to create your meme.
- Find Caption
Now, you have to think of a captioning for the meme. This can be serious or funny when you make meme.
- Add the Caption
The first thing that you need to do is open the image or video that you have saved on the laptop. As soon as you click on the ‘Markup icon’ you will find a display bar pop-up. Look for icon ‘T’ to click and then insert the text you want.
When you click on the ‘T’ icon, a text box is going to appear over the picture. Click on the box labeled ‘Text’ for bringing inserting the caption.
If you want, you can change the alignment, color, italics, bolding, font, and underline, too.
- Save the Meme
Now that you have created your desired meme, save it on your Mac device. Then share the final product on the social media platform.
Steps of Creating Video or GIF Meme Using FilmoraX
You can also use a video editor to create your Video or make meme in GIF. With FilmoraX, it is easy to do so. In case you want to make meme, but are new to this process, then FilmoraX is just the perfect tool for you. With the help of this meme maker, you can easily create a video, GIF, and image memes.
FilmoraX can process memes much faster than its counterparts. It comes with an advanced encoder or decoder that ensures fast action. The video editor lets you upload videos with the help of a URL. Its output format is highly flexible and will convert your video to GIF in no time. With its help, you can edit fonts, add text, and move them as you want. What’s more, the video editor doesn’t include a watermark in the video.
Here is a guide that will help you to create the funny video meme using FilmoraX on your Mac device.
- Download and Install FilmoraX
The first thing that you have to do is download and install FilmoraX on Mac in case you do not have it already.
- Drag and Drop the Video
Now that you have the meme maker, drag and drop on the video that you want. This will import the video to the meme maker.
- Edit the Video with Funny Text or stickers
Go to the meme editor page when you are done choosing the video, image, or GIF. Now, from the left panel, you have to customize the video meme. You can also use the FilmoraX video trimmer to cut the video as per your requirements. Add texts, alter fonts, and preview the changes that you have made.
- Export
When you are done making the change, you have to click on the ‘Export’ button to apply the changes to the video meme. After you have shared the meme on your social media pages, download it.
Ingredients to Make an Effective Meme
Memes keep gaining far-reaching traction. Businesses can join in on creating memes that will be suitable for their brand. However, while creating a meme, a business or an individual needs to keep a few things in mind.
- Be Witty
The point of a meme is basically to be fun and silly. However, in the depth of it, you will find a witty connotation. This ties it to something more grave and important. So, the subject matter of the meme doesn’t have to be serious, but if you relate it to a far-reaching topic adding a witty comment will make the meme popular.
- Creating Memes off Existing and Successful Trends
You should play off the existing trend. This is a popular method that is used by many across the web. By adapting a video in trend, you can add your own spin to it. This method is particularly known as memejacking.
- Use Good Quality Video and Images
You might think that for a meme you do not quality video or image. However, that is not true. Even the picture frame that you are adding is important. Keep in mind that everything inside the meme is communicating something. The absence of something is also communicating certain things. Hence, unless you really mean to post a bad quality video or photo, make sure you do your best to get top-quality content.
- Consider If It Works for the Audience
There is an audience for everything over the social media channels. However, meme-makers often tend to forget how personal it is. So, when you are making a joke, you have to make sure others are getting it. Simply because something is in trend, you shouldn’t go for it. You should only post it if it works for the brand of your profile.
Conclusion
Memes can be of different types but what matters the most is they make the viewers laugh. If you keep the above tips in mind, you will be able to make a meme successfully. By using a meme maker like FilmoraX , the job becomes even easier.
Learn More: 10 Best Meme Maker App or Website You Need to Know>>>
Liza Brown
Liza Brown is a writer and a lover of all things video.
Follow @Liza Brown
Top 10 Free Emoji Websites to Download Emojis Online
Top 10 Free Emoji Websites to Download Emojis Online
Shanoon Cox
Mar 27, 2024• Proven solutions
With the rise of social media and online conversations gifs, emojis, memes have taken a huge slot. A lot could be expressed without typing a word, just send an emoji and it will do everything for you on that chat. Sometimes we need a collection of emoji and we try to download emojis so that we can use them frequently without searching for them, a right emoji at the right time can do wonders. People today are very curious about sending many thoughts in one word so no one can do that but emojis. In this guide, you will learn about the best emoji websites and how can you download emojis for free on your device to use them later.

Table of Content:
- 10 Free Emoji Websites to Download/Get Emojis Online
- Add Emojis to Your Video with Wondershare Filmora
10 Free Emoji Websites to Download/Get Emojis Online
Now, you are all set to get the best emoji websites to download emojis and save them on your device and use them for a brilliant sense of humor. These emoji websites are specially curated and tested so that you don’t have to think twice before making an effort.
- 1. Getemoji
- 2. Pixabay
- 3. Emojicopy
- 4. iemoji
- 5. Emojipedia
- 6. Copy and Paste Emoji
- 7. Emojiterra
- 8. Emojiforu
- 9. Coolsymbol
- 10. Joypixels
1. Getemoji
Getemoji a great emoji website to copy and paste and save emojis on your social media profiles. Be it our computer or mobile phone get emoji is compatible with all the operating systems and Chrome browsers. You can go to the website and scroll through thousands of free emojis to select from and copy the best emoji to your chats and captions to create an impact.
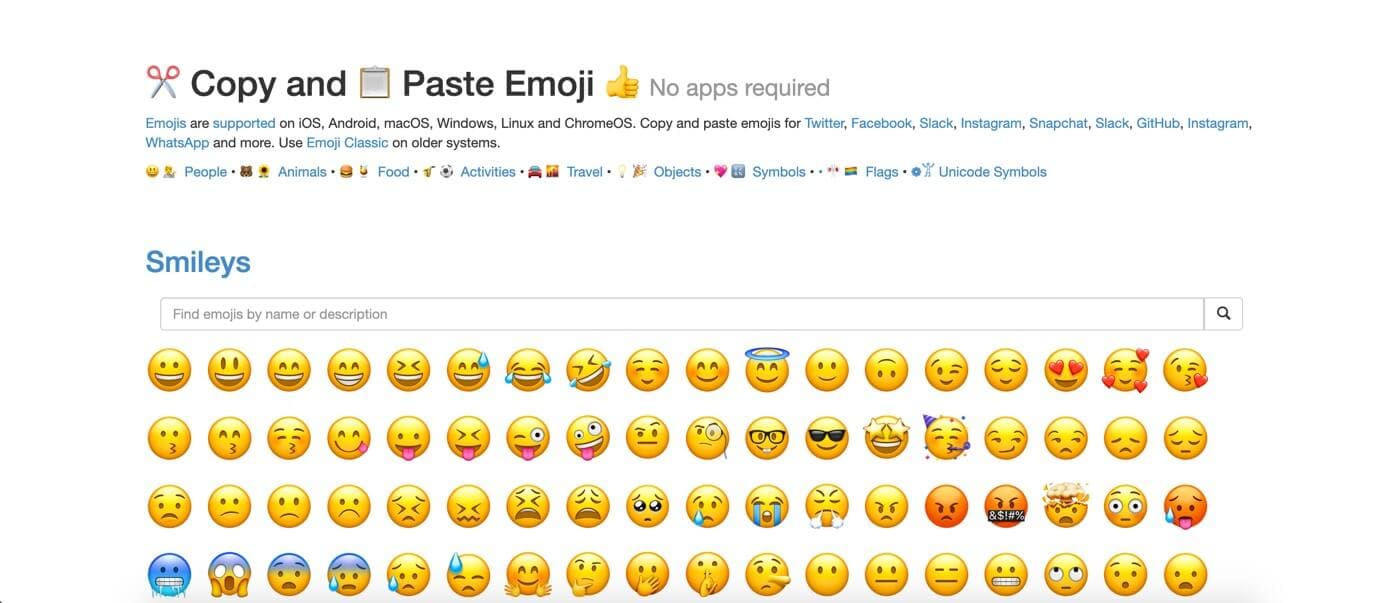
2. Pixabay
Pixabay is primarily an image website where you can download images of all kinds depending upon your requirement. Now, the emoji on this website are available in a huge quantity where you need to search for the best emoji and you will get the high-resolution emoji that you can download, save or copy-paste directly to the chat or caption on your social media channels.

3. Emojicopy
Emojicopy is another website where you can find the best emoji and copy them to your chats and caption text easily from the browser. Emojicopy is just like other websites where you can get a lot of emojis to choose from and select one. Though it’s a simple website the thumbnail option on the header section makes it easier to navigate through a lot of different emojis on this website.
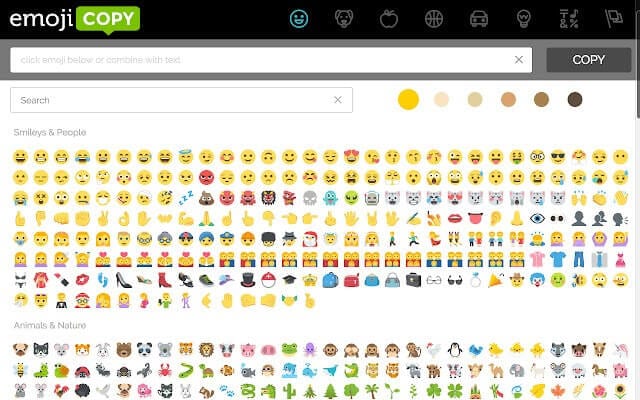
4. iemoji
iemoji is something different from all the other websites that you have surfed until as it has some unique features to rely on. You can select the best emoji and tweak its skin tone and theme type before you use it on your social media channels. The best part about this website is that it provides the feature of sending an emoji as SMS and email to anyone and that is something brilliant when it comes to sharing.
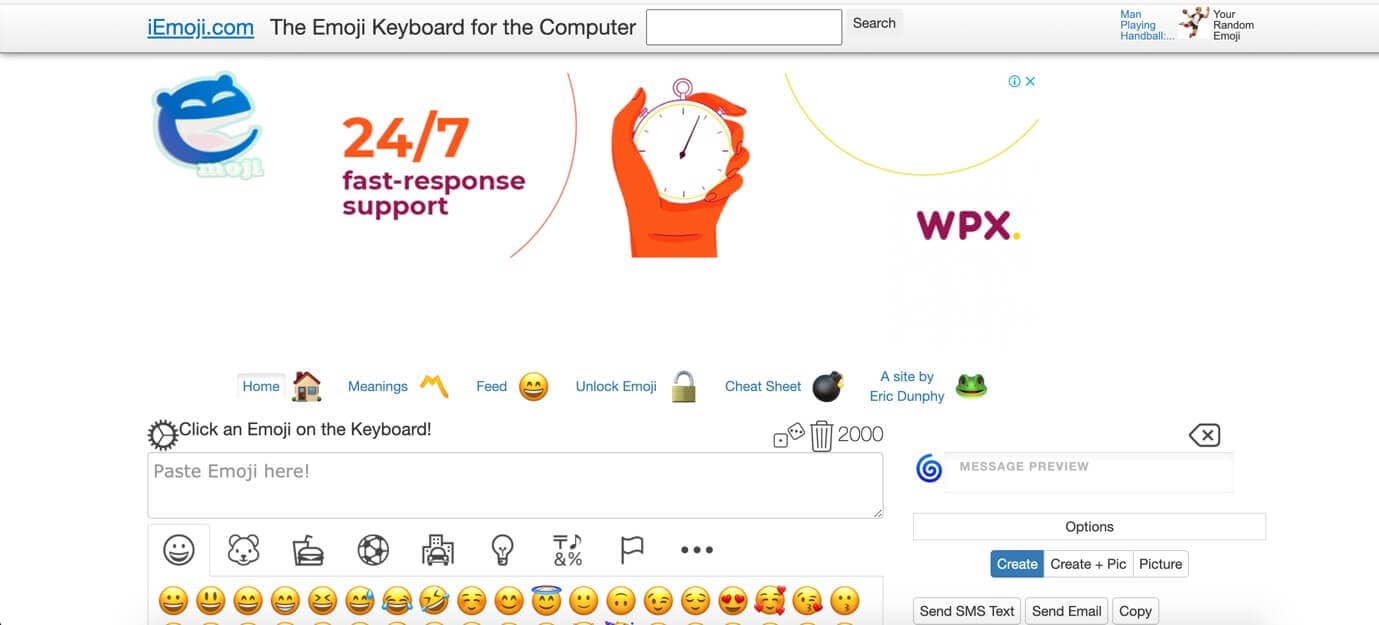
5. Emojipedia
Emojipedia is another bible for emoji lovers, as the name suggests the interface of this website is quite like Wikipedia and you can get a huge library of emojis in different categories. The best part about this website is the categorization based on the platforms you are using or the device that you are running an app on. Emojipedia updates its database and you can find the Unicode version if you are looking for one. Overall, this website is quite technical and you can get all the emojis and technical items related to emojis if you are looking for one.

6. Copy and Paste Emoji
Copy and Paste Emoji is an emoji website where you will get a huge collection of emojis to use on your chat windows that would certainly amaze your friends and loved ones. As the name suggests, you can copy and paste emojis to your social media channels from this website. This website has a huge collection of emojis and all the images are listed on the main page so that it’s easy to navigate and you can copy-paste the emojis on all the devices as this website is supported by Windows, iOS, Android, and macOS.
7. Emojiterra
Emojiterra is an emoji website with a collection of over 3304 emojis and images with their meanings. The website has a smooth interface where you can use the online keyboard to type the message and add emojis to it and later on you can copy-paste that message on your social media chats or captions. Apart from English, the website is available in 5 different languages and that makes this website stand out among its competitors.
8. Emojiforu
Emojiforu is a good website for emojis and messages created using many emojis in a chatbox. If you are looking for some cool emojis and the long text messages that are created using some keyboard shortcuts, then this is the website that you are looking for. You can easily copy and paste any emoji that you like to your social media profiles. On this website, you will get some of the best emojis directly copied on your chat windows as the website also provides some cool tips on how you can create emojis on your chat windows with some simple buttons on your keyboard.
9. Coolsymbol
Coolsymbol is a great website for emojis and other features that includes cool fonts, text decorator, big text generator, character counter, etc. There are a lot of features on this website that would certainly make you happy. Just create the best art and copy it to the social media platform that you are using. No doubt, this website has some great features that are really nice to use.

10. Joypixels
Joypixels is another great website that recently got rebranded in the emoji industry. Like the other websites listed this website also allows you to copy and paste cool emojis but there is one better feature that makes it stand apart and that is the chrome extension. You can download the jo pixel chrome extension and the rest is history. Now, if you are surfing social media sites from your browser then you don’t need to wait and worry, the chrome extension has all the features to serve your purpose.
![]()
Add Emojis to Your Video with Wondershare Filmora
Wondershare Filmora is a powerful video editing tool that comes with inbuilt effects that helps a professional to create amazing videos with the features it has. The most powerful feature it has includes the transitions, filters, motion elements, blending modes, and a free media library to soundtrack to your clips. Filmora comes in handy with some great features like 3D LUTs and Advanced color correction to give sharp look to your video and image files. These are just selected features that are mentioned here, there are unlimited features on the dashboard that would certainly amaze you.
1. Download and install Filmora on your computer.
2. Open Filmora, import your video to the Filmora media library and drag the video clip on the timeline that you want to edit with emojis.
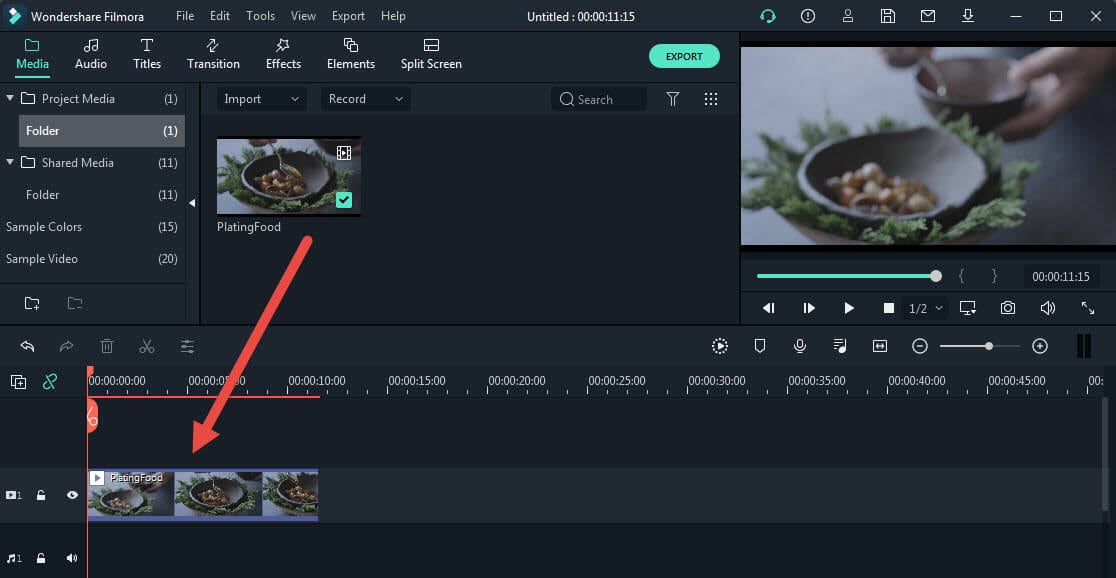
3. Now, navigate to the Elements tab, then go to Included-Emoji, and you can download free emojis and add it to your video.

4. Or you can access Wondershare Filmstock (Filmora’s effects store) to download the free animated emoji pack to get more animated emojis.
5. Then simply add the emoji to the timeline. You can resize, rotate, color tune the emoji, or even add two or more emojis to the video as you like.
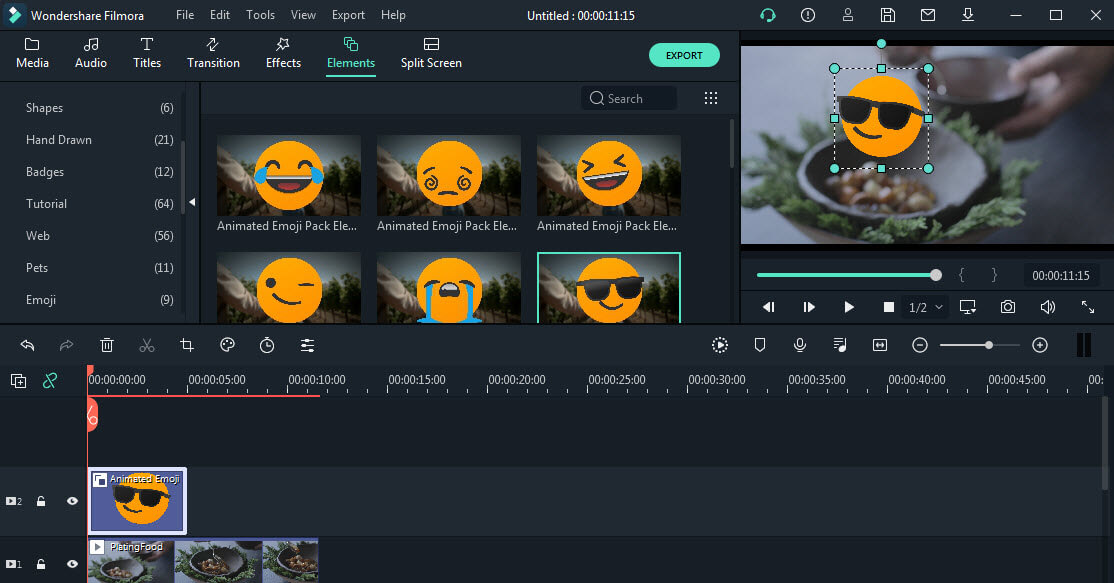
6. Once done, click the Export button to export the video to your local device, or you can upload it to YouTube directly.

Bonus tip: Create an Animation Video with Anireel
Anireel provides a faster and smoother animated video creation experience with customizable elements to bring anyone’s imagination to life. All you have to do is choose your script, input the content, and Anireel will instantly match your script to rich animation explainer scenes, convert the text into voice-over, and generate a vivid, complete animation video.

Conclusion
Emoji websites are hard to find and it’s even harder to find a website that allows you to download emojis and save emojis for later use. The guide has been great and there are 10 websites that you can utilize to get emojis, fonts, text decorators, and whatnot, and to make the social media integration easy for you because when you are chatting with a friend and a good line needs some decoration then no one can do that better than emojis. So, what are you waiting for, just go and check out these websites and let us know in the comment section about your favorite website?
Shanoon Cox
Shanoon Cox is a writer and a lover of all things video.
Follow @Shanoon Cox
Shanoon Cox
Mar 27, 2024• Proven solutions
With the rise of social media and online conversations gifs, emojis, memes have taken a huge slot. A lot could be expressed without typing a word, just send an emoji and it will do everything for you on that chat. Sometimes we need a collection of emoji and we try to download emojis so that we can use them frequently without searching for them, a right emoji at the right time can do wonders. People today are very curious about sending many thoughts in one word so no one can do that but emojis. In this guide, you will learn about the best emoji websites and how can you download emojis for free on your device to use them later.
Table of Content:
- 10 Free Emoji Websites to Download/Get Emojis Online
- Add Emojis to Your Video with Wondershare Filmora
10 Free Emoji Websites to Download/Get Emojis Online
Now, you are all set to get the best emoji websites to download emojis and save them on your device and use them for a brilliant sense of humor. These emoji websites are specially curated and tested so that you don’t have to think twice before making an effort.
- 1. Getemoji
- 2. Pixabay
- 3. Emojicopy
- 4. iemoji
- 5. Emojipedia
- 6. Copy and Paste Emoji
- 7. Emojiterra
- 8. Emojiforu
- 9. Coolsymbol
- 10. Joypixels
1. Getemoji
Getemoji a great emoji website to copy and paste and save emojis on your social media profiles. Be it our computer or mobile phone get emoji is compatible with all the operating systems and Chrome browsers. You can go to the website and scroll through thousands of free emojis to select from and copy the best emoji to your chats and captions to create an impact.
2. Pixabay
Pixabay is primarily an image website where you can download images of all kinds depending upon your requirement. Now, the emoji on this website are available in a huge quantity where you need to search for the best emoji and you will get the high-resolution emoji that you can download, save or copy-paste directly to the chat or caption on your social media channels.
3. Emojicopy
Emojicopy is another website where you can find the best emoji and copy them to your chats and caption text easily from the browser. Emojicopy is just like other websites where you can get a lot of emojis to choose from and select one. Though it’s a simple website the thumbnail option on the header section makes it easier to navigate through a lot of different emojis on this website.
4. iemoji
iemoji is something different from all the other websites that you have surfed until as it has some unique features to rely on. You can select the best emoji and tweak its skin tone and theme type before you use it on your social media channels. The best part about this website is that it provides the feature of sending an emoji as SMS and email to anyone and that is something brilliant when it comes to sharing.
5. Emojipedia
Emojipedia is another bible for emoji lovers, as the name suggests the interface of this website is quite like Wikipedia and you can get a huge library of emojis in different categories. The best part about this website is the categorization based on the platforms you are using or the device that you are running an app on. Emojipedia updates its database and you can find the Unicode version if you are looking for one. Overall, this website is quite technical and you can get all the emojis and technical items related to emojis if you are looking for one.
6. Copy and Paste Emoji
Copy and Paste Emoji is an emoji website where you will get a huge collection of emojis to use on your chat windows that would certainly amaze your friends and loved ones. As the name suggests, you can copy and paste emojis to your social media channels from this website. This website has a huge collection of emojis and all the images are listed on the main page so that it’s easy to navigate and you can copy-paste the emojis on all the devices as this website is supported by Windows, iOS, Android, and macOS.
7. Emojiterra
Emojiterra is an emoji website with a collection of over 3304 emojis and images with their meanings. The website has a smooth interface where you can use the online keyboard to type the message and add emojis to it and later on you can copy-paste that message on your social media chats or captions. Apart from English, the website is available in 5 different languages and that makes this website stand out among its competitors.
8. Emojiforu
Emojiforu is a good website for emojis and messages created using many emojis in a chatbox. If you are looking for some cool emojis and the long text messages that are created using some keyboard shortcuts, then this is the website that you are looking for. You can easily copy and paste any emoji that you like to your social media profiles. On this website, you will get some of the best emojis directly copied on your chat windows as the website also provides some cool tips on how you can create emojis on your chat windows with some simple buttons on your keyboard.
9. Coolsymbol
Coolsymbol is a great website for emojis and other features that includes cool fonts, text decorator, big text generator, character counter, etc. There are a lot of features on this website that would certainly make you happy. Just create the best art and copy it to the social media platform that you are using. No doubt, this website has some great features that are really nice to use.
10. Joypixels
Joypixels is another great website that recently got rebranded in the emoji industry. Like the other websites listed this website also allows you to copy and paste cool emojis but there is one better feature that makes it stand apart and that is the chrome extension. You can download the jo pixel chrome extension and the rest is history. Now, if you are surfing social media sites from your browser then you don’t need to wait and worry, the chrome extension has all the features to serve your purpose.
![]()
Add Emojis to Your Video with Wondershare Filmora
Wondershare Filmora is a powerful video editing tool that comes with inbuilt effects that helps a professional to create amazing videos with the features it has. The most powerful feature it has includes the transitions, filters, motion elements, blending modes, and a free media library to soundtrack to your clips. Filmora comes in handy with some great features like 3D LUTs and Advanced color correction to give sharp look to your video and image files. These are just selected features that are mentioned here, there are unlimited features on the dashboard that would certainly amaze you.
1. Download and install Filmora on your computer.
2. Open Filmora, import your video to the Filmora media library and drag the video clip on the timeline that you want to edit with emojis.
3. Now, navigate to the Elements tab, then go to Included-Emoji, and you can download free emojis and add it to your video.
4. Or you can access Wondershare Filmstock (Filmora’s effects store) to download the free animated emoji pack to get more animated emojis.
5. Then simply add the emoji to the timeline. You can resize, rotate, color tune the emoji, or even add two or more emojis to the video as you like.
6. Once done, click the Export button to export the video to your local device, or you can upload it to YouTube directly.
Bonus tip: Create an Animation Video with Anireel
Anireel provides a faster and smoother animated video creation experience with customizable elements to bring anyone’s imagination to life. All you have to do is choose your script, input the content, and Anireel will instantly match your script to rich animation explainer scenes, convert the text into voice-over, and generate a vivid, complete animation video.
Conclusion
Emoji websites are hard to find and it’s even harder to find a website that allows you to download emojis and save emojis for later use. The guide has been great and there are 10 websites that you can utilize to get emojis, fonts, text decorators, and whatnot, and to make the social media integration easy for you because when you are chatting with a friend and a good line needs some decoration then no one can do that better than emojis. So, what are you waiting for, just go and check out these websites and let us know in the comment section about your favorite website?
Shanoon Cox
Shanoon Cox is a writer and a lover of all things video.
Follow @Shanoon Cox
How to Make an Emoji of Yourself on Android and iPhone [Emoji Yourself]
How to Make an Emoji of Yourself on Android and iPhone [Emoji Yourself]
Shanoon Cox
Mar 27, 2024• Proven solutions
The introduction of stickers and emojis have transformed the texting experience—no more boring texts. Just make an emoji of yourself in every mood and instantly express yourself in a better and funnier way.
Whether you own an iPhone or an Android device, you can easily emoji yourself that exactly mimics your appearance and reaction. It’s time to up your chatting game and make exciting emojis.
In this article, we will show you how to amaze your friends by teaching you to make an emoji of yourself in no time.
Part 1: Make an Emoji of Yourself on iPhone
iPhone has now introduced a fun feature that lets you make an emoji of yourself, the exact mirror image of you, just smaller and animated.
Here’s how you can make an emoji of yourself in 2 easy ways:
Method 1-By the iPhone Message app
iPhone has now introduced an in-built feature to let you make an emoji of yourself without having to download any other apps. However, you can only make an emoji of yourself in iOS 13 or later.
For the lucky lot of you, let me walk you through how to make an emoji of yourself in a few simple steps:
1.Open your iMessages. Go to a previous chat or tap the New Message Make sure your Appstore icon is toggled on to display the app tray. Hit the Animoji icon, represented by the monkey. Swipe to find the + plus sign for New Memoji to emoji yourself.

2.Now you can make an emoji of yourself by adding even the smallest details. Start by selecting your skin color. You can even add freckles or adjust your skin color’s warmth or paleness with a slider.

3.Hairstyle-Select the style that mimics the real you or goes for your dream hair-do.

4.Head Shape-Select the age group from kids, adults, old, and your face cut by choosing the chin that best fits you.

5.Nose & Lips- After selecting your eye color, shape, and brows, choose a nose shape and a lipstick color and intensity.

6.Eyewear/Headwear-Add glasses, adjust tint shade, color, and choose a hat, cap, or turban as you like. Finally, click Done to save the emoji.

Method 2-Using the Avatoon app
If you want to make an emoji of yourself that is more fun and personalized, from your dress to your pose, Avatoon is your way to go. With more than 500 customizable options, Avatoon lets you make an emoji of yourself meticulously, allowing you add avid details that pave the way for a hilariously amazing texting experience
1.Install and launch Avatoon app.
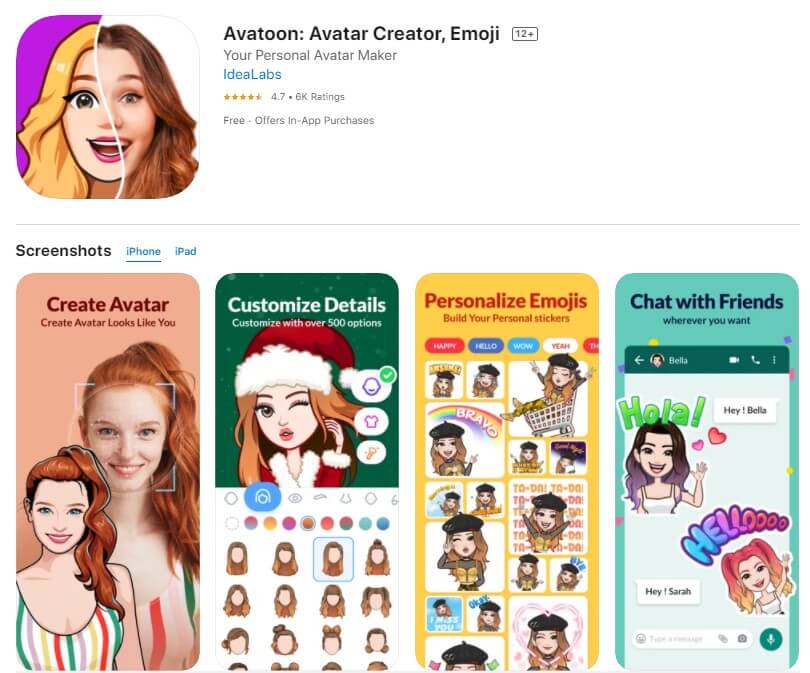
2.Now, choose the face shape that best matches your features and also select your face color. Add freckles(if you have any).

3.Next up is the hairstyle. There is a range of hairstyles from straight to wavy. Pick one you like best. You can choose the eye shape, color, brow, nose, lips, and finally, add some funky or formal eyewear to complete the look. Press Save.
4.After you make an emoji of yourself, you can further fine-tune it by adding detailed features and accessories using coins. Choose a stylish dress for your avatar from the Clothes tab or add a fun background.
5.Click on Photoboothto fit your emoji in a themed photo for an event or celebration.
6.Click on Poses and select your pose and share directly to any social media platform or save to phone.
Part 2: Make an Emoji of Yourself on Android
Now you can make an emoji of yourself even on an Android phone with the Mirror emoji app. Take your texting experience to the next level. Quickly make an emoji of yourself and wow your friends and family with the cute mini version of yourself.
1.Install and launch Mirror. Now, to make an emoji of yourself for your current look, take a selfie or click the gallery icon to choose an existing image to emoji yourself.

2.Click the left one to make an original avatar or the right one if you wish to make an emoji of yourself as an anime. Click Next.

3.Now, customize your emoji. Add a hairstyle, choose your glasses, cap, headphones, turban, scarf, or even devil horns.

4.Customize your dress color to your liking. Then, click Next.

5.Once you make an emoji of yourself, Mirror will display a range of fun stickers for instant sharing.

6.Click on any sticker, choose a mood using the emojis displayed and click to share or save to the device.

7.In the Sticker backstab, choose a themed sticker set and click Add to WhatsApp.

Conclusion-Ready to Emoji Yourself?
With texts being taken over by stickers and emojis, it’s high time for you to enter the league. Make an emoji of yourself in different moods and add funny backgrounds to express yourself fully and hilariously.
Use the in-built iPhone feature or a powerful app to make an emoji of yourself stand out from the crowd of mainstream messages. And take inspiration from our guide to surprise your friends with an emoji that looks exactly like you, just a bit smaller.
Here, we recommend Wondershare Filmora , due to its AR camera feature, which makes taking selfies more interesting. This AR camera function includes animoji and memoji avatars for a fun and excellent video.
Go on and make an emoji of yourself. Show your friends how awesome and unique you are with a beautifully personalized emoji.
Good luck!
Shanoon Cox
Shanoon Cox is a writer and a lover of all things video.
Follow @Shanoon Cox
Shanoon Cox
Mar 27, 2024• Proven solutions
The introduction of stickers and emojis have transformed the texting experience—no more boring texts. Just make an emoji of yourself in every mood and instantly express yourself in a better and funnier way.
Whether you own an iPhone or an Android device, you can easily emoji yourself that exactly mimics your appearance and reaction. It’s time to up your chatting game and make exciting emojis.
In this article, we will show you how to amaze your friends by teaching you to make an emoji of yourself in no time.
Part 1: Make an Emoji of Yourself on iPhone
iPhone has now introduced a fun feature that lets you make an emoji of yourself, the exact mirror image of you, just smaller and animated.
Here’s how you can make an emoji of yourself in 2 easy ways:
Method 1-By the iPhone Message app
iPhone has now introduced an in-built feature to let you make an emoji of yourself without having to download any other apps. However, you can only make an emoji of yourself in iOS 13 or later.
For the lucky lot of you, let me walk you through how to make an emoji of yourself in a few simple steps:
1.Open your iMessages. Go to a previous chat or tap the New Message Make sure your Appstore icon is toggled on to display the app tray. Hit the Animoji icon, represented by the monkey. Swipe to find the + plus sign for New Memoji to emoji yourself.
2.Now you can make an emoji of yourself by adding even the smallest details. Start by selecting your skin color. You can even add freckles or adjust your skin color’s warmth or paleness with a slider.
3.Hairstyle-Select the style that mimics the real you or goes for your dream hair-do.
4.Head Shape-Select the age group from kids, adults, old, and your face cut by choosing the chin that best fits you.
5.Nose & Lips- After selecting your eye color, shape, and brows, choose a nose shape and a lipstick color and intensity.
6.Eyewear/Headwear-Add glasses, adjust tint shade, color, and choose a hat, cap, or turban as you like. Finally, click Done to save the emoji.
Method 2-Using the Avatoon app
If you want to make an emoji of yourself that is more fun and personalized, from your dress to your pose, Avatoon is your way to go. With more than 500 customizable options, Avatoon lets you make an emoji of yourself meticulously, allowing you add avid details that pave the way for a hilariously amazing texting experience
1.Install and launch Avatoon app.
2.Now, choose the face shape that best matches your features and also select your face color. Add freckles(if you have any).
3.Next up is the hairstyle. There is a range of hairstyles from straight to wavy. Pick one you like best. You can choose the eye shape, color, brow, nose, lips, and finally, add some funky or formal eyewear to complete the look. Press Save.
4.After you make an emoji of yourself, you can further fine-tune it by adding detailed features and accessories using coins. Choose a stylish dress for your avatar from the Clothes tab or add a fun background.
5.Click on Photoboothto fit your emoji in a themed photo for an event or celebration.
6.Click on Poses and select your pose and share directly to any social media platform or save to phone.
Part 2: Make an Emoji of Yourself on Android
Now you can make an emoji of yourself even on an Android phone with the Mirror emoji app. Take your texting experience to the next level. Quickly make an emoji of yourself and wow your friends and family with the cute mini version of yourself.
1.Install and launch Mirror. Now, to make an emoji of yourself for your current look, take a selfie or click the gallery icon to choose an existing image to emoji yourself.
2.Click the left one to make an original avatar or the right one if you wish to make an emoji of yourself as an anime. Click Next.
3.Now, customize your emoji. Add a hairstyle, choose your glasses, cap, headphones, turban, scarf, or even devil horns.
4.Customize your dress color to your liking. Then, click Next.
5.Once you make an emoji of yourself, Mirror will display a range of fun stickers for instant sharing.
6.Click on any sticker, choose a mood using the emojis displayed and click to share or save to the device.
7.In the Sticker backstab, choose a themed sticker set and click Add to WhatsApp.
Conclusion-Ready to Emoji Yourself?
With texts being taken over by stickers and emojis, it’s high time for you to enter the league. Make an emoji of yourself in different moods and add funny backgrounds to express yourself fully and hilariously.
Use the in-built iPhone feature or a powerful app to make an emoji of yourself stand out from the crowd of mainstream messages. And take inspiration from our guide to surprise your friends with an emoji that looks exactly like you, just a bit smaller.
Here, we recommend Wondershare Filmora , due to its AR camera feature, which makes taking selfies more interesting. This AR camera function includes animoji and memoji avatars for a fun and excellent video.
Go on and make an emoji of yourself. Show your friends how awesome and unique you are with a beautifully personalized emoji.
Good luck!
Shanoon Cox
Shanoon Cox is a writer and a lover of all things video.
Follow @Shanoon Cox
How to Burn Photos to DVD with Transitions and Music
How to Burn Photos to DVD with Transitions and Music
Shanoon Cox
Mar 27, 2024• Proven solutions
Photos are precious memories not only for you but also for your family members. As time goes on, the photos might fade out and be unable to retrieve. To avoid this, burn photos to DVD will be a great idea to preserve family memories eternally.
This article will show you how to burn photos to DVD Slideshow with transition, titles and music quickly and easily by using Wondershare DVD Slideshow Builder Deluxe . It also provides some tips on how to burn photos to DVD.
Part 1: How to Burn Photos to DVD with Transition, Titles and Music
Wondershare DVD Slideshow Builder Deluxe can help you quickly create and burn photos to DVD. Download the free trial version this photo DVD maker first.
Step 1. Add Photo or Video Files
In Organize tab, simply click the “Add Files” button to open the browse window, find your files and import them into the program, you can drag and drop photos or videos to organize them on storyboard. Click the Expand button to get a larger viewer.

Step 2. Customize Photo Slideshow Transitions
Generally speaking, transition effects will be automatically inserted between every two photos/videos when you import the photos. But you can customize them by clicking the Personalize tab, then drag and drop a transition from the list to the thumbnail between two slides.
You are also able to add background music here: click the Music button and choose a music file from your computer.

Step 3. Choose DVD Menu
Now switch to Create tab to author a DVD menu from template and burn to DVD disc quickly:
- On the right hand side of the screen, double click on desired menu template to apply a DVD menu template.
- Click the Edit button under the preview windows to customize your DVD menu or right click on menu for more options.
- You can also make a professional DVD menu using dynamic DVD menu templates.
BTW, if you don’t want a DVD menu, just check the “Disable DVD Menu” option.

Step 4. Burn Photos to DVD Disc
Now click the Preview button beneath the preview window to make sure the photo DVD slideshow is exactly what you want. Go back to Personalize tab to change if necessary. After that, click “Burn” button to start burning your DVD slideshow to DVD.
You can also output photo slideshow to watch on Youtube, Mobile Phone, iPhone, PSP, etc. through options on the left. Below are the instructions to burn DVD for watch on TV:

- Insert a blank DVD disc, and do the following.
- Click “Burn to DVD”. Then specify the number of DVD copies. You can also choose to generate ISO Image files or DVD Folders.
- Make sure the PAL or NTSC TV Standard settings is right. If you don’t know which standard is used in your country, click the “Help” button. The wrong TV standard would cause playback incompatibility problem.
- Then click “Start” to burn DVD slideshow. If you have checked Create DVD Folder and/or Create DVD Image File options, the corresponding files will also be created to the specified folder.
Now sit back and relax, when burning complete, insert the created DVD disc into your DVD player to watch photo DVD slideshow on TV.
Learn more: User Guide of DVD Slideshow Builder Deluxe
Part 2: More Photo to DVD Tips
More about NTSC/PAL TV Standard
Nowadays, there are three video formats around the world. But each one is incompatible with others. For instance, NTSC is used in North America, Canada and Japan; while most of other regions PAL/SECAM. To apply TV Standard in DVD Slideshow Builder Deluxe , go to “Create“ -> Option tab and locate TV Standard option to select NTSC or PAL. If you are not sure which one to choose, please click “Help” button, select your country, then click “OK” , the program will choose the right TV standard for you.
Burn Photos to DVD/CD as Data Disc
If you only want to burn photo to DVD for backup and further use, you only need a burning photo to DVD software like ImgBurn (Free) or Nero (commercial). These software helps you burn all digital media files to DVD, of course you can burn photos to DVD for backup purpose. Notice that some photo DVD maker allows you burn slideshow as well as the original photos. This way, you turn photos to DVD slideshow with transition, and at the same time, backup photos to DVD for other uses.
Scan Photos to DVD - Digitize Photos
If you use traditional camera and have got loads of photos in album, you can scan photos to computer so that convert photo to digital format. Afterwards, you can get more from these digital photos, like backup photos to DVD, send to others as DVD gift, make a photo DVD show to play on TV, etc. All these could be done with your favorite photo DVD maker software. Now see how to transform your printed photos to digital first:
Select a good photo scanner -> Prepare your photos to scan -> Start photo scanning -> Adjust scanned photos
Scanning printed photos to computer is not an easy job. It needs patience and some tips and tricks. As you may know, some companies provide photo scanning service. For the Step 4, you can also adjust digital photos in your selected photo DVD maker. Anyway, you need to get your digital photos ready before you burn photos to DVD with transitions and music.
Shanoon Cox
Shanoon Cox is a writer and a lover of all things video.
Follow @Shanoon Cox
Shanoon Cox
Mar 27, 2024• Proven solutions
Photos are precious memories not only for you but also for your family members. As time goes on, the photos might fade out and be unable to retrieve. To avoid this, burn photos to DVD will be a great idea to preserve family memories eternally.
This article will show you how to burn photos to DVD Slideshow with transition, titles and music quickly and easily by using Wondershare DVD Slideshow Builder Deluxe . It also provides some tips on how to burn photos to DVD.
Part 1: How to Burn Photos to DVD with Transition, Titles and Music
Wondershare DVD Slideshow Builder Deluxe can help you quickly create and burn photos to DVD. Download the free trial version this photo DVD maker first.
Step 1. Add Photo or Video Files
In Organize tab, simply click the “Add Files” button to open the browse window, find your files and import them into the program, you can drag and drop photos or videos to organize them on storyboard. Click the Expand button to get a larger viewer.
Step 2. Customize Photo Slideshow Transitions
Generally speaking, transition effects will be automatically inserted between every two photos/videos when you import the photos. But you can customize them by clicking the Personalize tab, then drag and drop a transition from the list to the thumbnail between two slides.
You are also able to add background music here: click the Music button and choose a music file from your computer.
Step 3. Choose DVD Menu
Now switch to Create tab to author a DVD menu from template and burn to DVD disc quickly:
- On the right hand side of the screen, double click on desired menu template to apply a DVD menu template.
- Click the Edit button under the preview windows to customize your DVD menu or right click on menu for more options.
- You can also make a professional DVD menu using dynamic DVD menu templates.
BTW, if you don’t want a DVD menu, just check the “Disable DVD Menu” option.
Step 4. Burn Photos to DVD Disc
Now click the Preview button beneath the preview window to make sure the photo DVD slideshow is exactly what you want. Go back to Personalize tab to change if necessary. After that, click “Burn” button to start burning your DVD slideshow to DVD.
You can also output photo slideshow to watch on Youtube, Mobile Phone, iPhone, PSP, etc. through options on the left. Below are the instructions to burn DVD for watch on TV:
- Insert a blank DVD disc, and do the following.
- Click “Burn to DVD”. Then specify the number of DVD copies. You can also choose to generate ISO Image files or DVD Folders.
- Make sure the PAL or NTSC TV Standard settings is right. If you don’t know which standard is used in your country, click the “Help” button. The wrong TV standard would cause playback incompatibility problem.
- Then click “Start” to burn DVD slideshow. If you have checked Create DVD Folder and/or Create DVD Image File options, the corresponding files will also be created to the specified folder.
Now sit back and relax, when burning complete, insert the created DVD disc into your DVD player to watch photo DVD slideshow on TV.
Learn more: User Guide of DVD Slideshow Builder Deluxe
Part 2: More Photo to DVD Tips
More about NTSC/PAL TV Standard
Nowadays, there are three video formats around the world. But each one is incompatible with others. For instance, NTSC is used in North America, Canada and Japan; while most of other regions PAL/SECAM. To apply TV Standard in DVD Slideshow Builder Deluxe , go to “Create“ -> Option tab and locate TV Standard option to select NTSC or PAL. If you are not sure which one to choose, please click “Help” button, select your country, then click “OK” , the program will choose the right TV standard for you.
Burn Photos to DVD/CD as Data Disc
If you only want to burn photo to DVD for backup and further use, you only need a burning photo to DVD software like ImgBurn (Free) or Nero (commercial). These software helps you burn all digital media files to DVD, of course you can burn photos to DVD for backup purpose. Notice that some photo DVD maker allows you burn slideshow as well as the original photos. This way, you turn photos to DVD slideshow with transition, and at the same time, backup photos to DVD for other uses.
Scan Photos to DVD - Digitize Photos
If you use traditional camera and have got loads of photos in album, you can scan photos to computer so that convert photo to digital format. Afterwards, you can get more from these digital photos, like backup photos to DVD, send to others as DVD gift, make a photo DVD show to play on TV, etc. All these could be done with your favorite photo DVD maker software. Now see how to transform your printed photos to digital first:
Select a good photo scanner -> Prepare your photos to scan -> Start photo scanning -> Adjust scanned photos
Scanning printed photos to computer is not an easy job. It needs patience and some tips and tricks. As you may know, some companies provide photo scanning service. For the Step 4, you can also adjust digital photos in your selected photo DVD maker. Anyway, you need to get your digital photos ready before you burn photos to DVD with transitions and music.
Shanoon Cox
Shanoon Cox is a writer and a lover of all things video.
Follow @Shanoon Cox
Also read:
- [New] Boost Your Videos With These YouTube SEO Tools for 2024
- [Updated] 2024 Approved A Beginner's Guide to Elevating Auditory Experiences on YouTube
- [Updated] Enhancing Interactivity Tips for Hosting Splitting-Screen Events on Facebook for 2024
- [Updated] Technique to Implement YouTube Playlists Smoothly Into Web Pages
- [Updated] The Ultimate Guide to Adding Time Markers on YouTubes
- Distracted Boyfriend Meme Generator for 2024
- Living the Spiritual Principles of Health and Well-Being | Free Book
- New 2024 Approved Best Emoji Removers to Remove Emojis From Pictures Online/PC/Mobile
- New How to Make a FLV Photo Slideshow
- New Top 6 Animated Emoji Video Effects
- The Ultimate Guide to Inshot on PCs and Laptops for 2024
- Three Solutions to Hard Reset Tecno Pova 5 Pro? | Dr.fone
- Update Utility for HP Officejet P-4630
- Updated 2024 Approved How to Use Emojis on Windows 10 and Windows 11?
- Updated 8 Best Meme Maker App to Create Memes with Your Own Picture for 2024
- Updated Best Photo Slideshow Maker How to Make a Photo Slideshow
- Updated In 2024, Best Emoji Removers to Remove Emojis From Pictures
- Title: Updated 2024 Approved How to Make a FLV Photo Slideshow
- Author: Jan
- Created at : 2025-02-12 16:58:02
- Updated at : 2025-02-19 17:30:47
- Link: https://meme-emoji.techidaily.com/updated-2024-approved-how-to-make-a-flv-photo-slideshow/
- License: This work is licensed under CC BY-NC-SA 4.0.