
Updated 2024 Approved Best 10 Emoji Makers to Create Your Own EmojisPC/Online/Android/iPhone
Best 10 Emoji Makers to Create Your Own Emojis [PC/Online/Android/iPhone]
Best 10 Emoji Makers to Create Your Own Emojis [PC/Online/Android/iPhone]

Shanoon Cox
Mar 27, 2024• Proven solutions
In this generation of online chatting and social media, emoji plays a big role in making our conversation easier and interesting. It helps people to express feelings or convey something in a better way than words or sentences ever could. Adding an emoji to chat, video or photo brings more fun to the content and the type of emojis different individuals prefer to use will be different.
Want to create your own emoji? So there is a need for emoji makers that can help to create customized emojis depending on everyone’s likes.
There are a lot of emoji makers in the online market that offers a bundle of pre-packed emoji as well as help you to create emoji of your choice. These tools help you to create your own emoji on whichever theme you wish providing a lot of customizing options.
- Part 1: Best 10 Emoji Makers to Create Your Own Emojis
- Part 2: Add Emojis to Your Video with Wondershare Filmora
Part 1: Best 10 Emoji Makers to Create Your Own Emojis
Most people around the world use emoji in their conversations, whether it be chats, comments on social media, writing blogs, etc. But the type of emojis preferred by different people may vary and sometimes the default emojis available might not be enough to express what they wish to. Hence there is a need for creating more emoji, depending on each individual’s taste.
This is where the emoji makers come in. Here we will discuss the top 10 emoji makers that can be used to create attractive emojis for sharing on social media platforms.
- [1. Emoji-maker.com(Online)](#emoji maker1)
- [2. piZap Emoji Maker(Online)](#emoji maker2)
- [3. Flat Icons Emoji Maker(Online)](#emoji maker3)
- [4. Labeley.com(Online)](#emoji maker4)
- [5. Disney Emoji Maker (Online)](#emoji maker5)
- [6. Animated Emoji Maker (Android app)](#emoji maker6)
- [7. Elite Emoji (Android app)](#emoji maker7)
- [8. Boomoji (Android app)](#emoji maker8)
- [9. Zmoji (iPhone app)](#emoji maker9)
- [10. Emojily (iPhone app)](#emoji maker10)
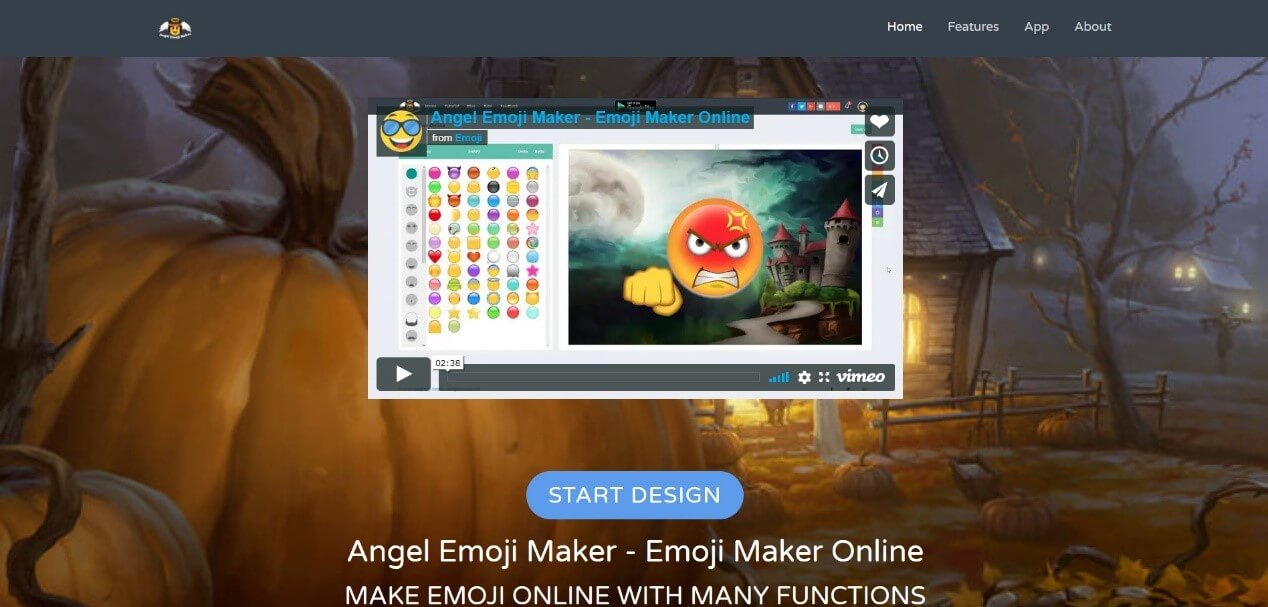
1. Emoji-maker.com(Online)
Emoji maker.com is an online told that provides a lot of beautiful and unique emoji editing options to the users.
Price:
- Free
Features:
- Offers a wide variety of emoji shapes
- Allows to customize emojis in a match to the user’s face
- Has an Emoji text function, that allows adding text to any emoji
- Provides a lot of emoji background options
- Provides multiple saving options for the emojis you have created
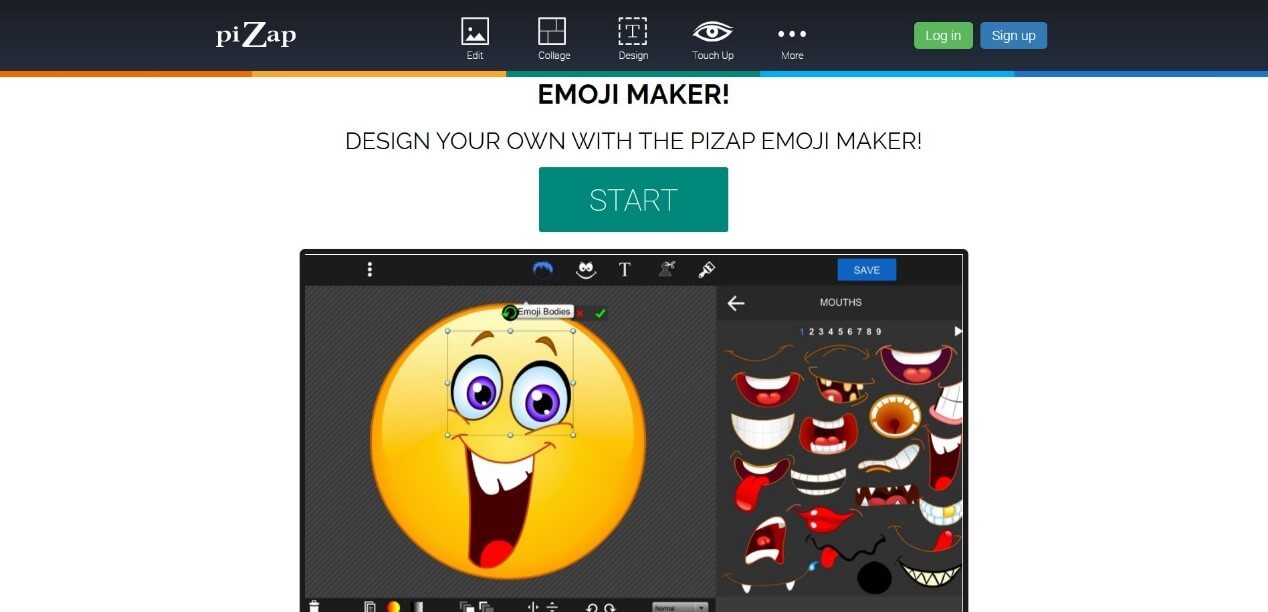
2. piZap Emoji Maker(Online)
piZap Emoji Maker is an online editor that has extensive emoji features that can help you to create awesome emojis. However, before you can do something, a mandatory signing in is required by this editor.
Price:
- Free
- Extra Features - piZap PRO for $5.99 per month or $35.88 per year
Features:
- All in one tool that can be used to create emoji, edit photos, create memes, etc.
- 6 million stock images
- Vibrant, colorful filters exclusive to this tool
- About 367 font options
3. Flat Icons Emoji Maker(Online)
Flat Icons Emoji is one of the simplest tools that are available to you for creating customized emojis of your choice.
![]()
Price:
- Free
- Premium bundle offers for $79 or $3710 (depends on the packs you choose)
Features:
- Offers a lot of shape options
- Provides a good collection of icon bundles for free
- Options to download both in PNG and SVG formats
- Easy editing and saving options
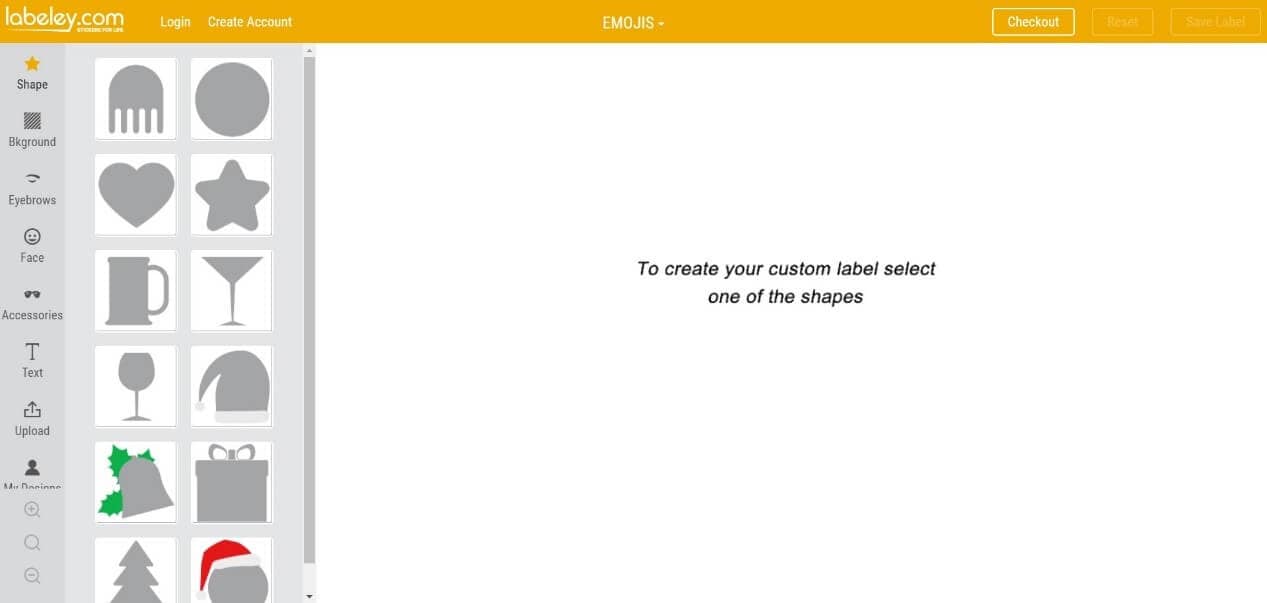
4. Labeley.com(Online)
Labeley.com is an online tool that allows you to design the emoji that you desire as well as provide you with printed copies of your design for an amount.
Price:
- Free
Features:
- Cool designing features and options for emoji
- Allows to save edits and make changes to it afterward
- Provides a set of beautiful artwork collections
- Provides “ print and delivery” option if you need physical copies of the emoji you designed (chargeable)
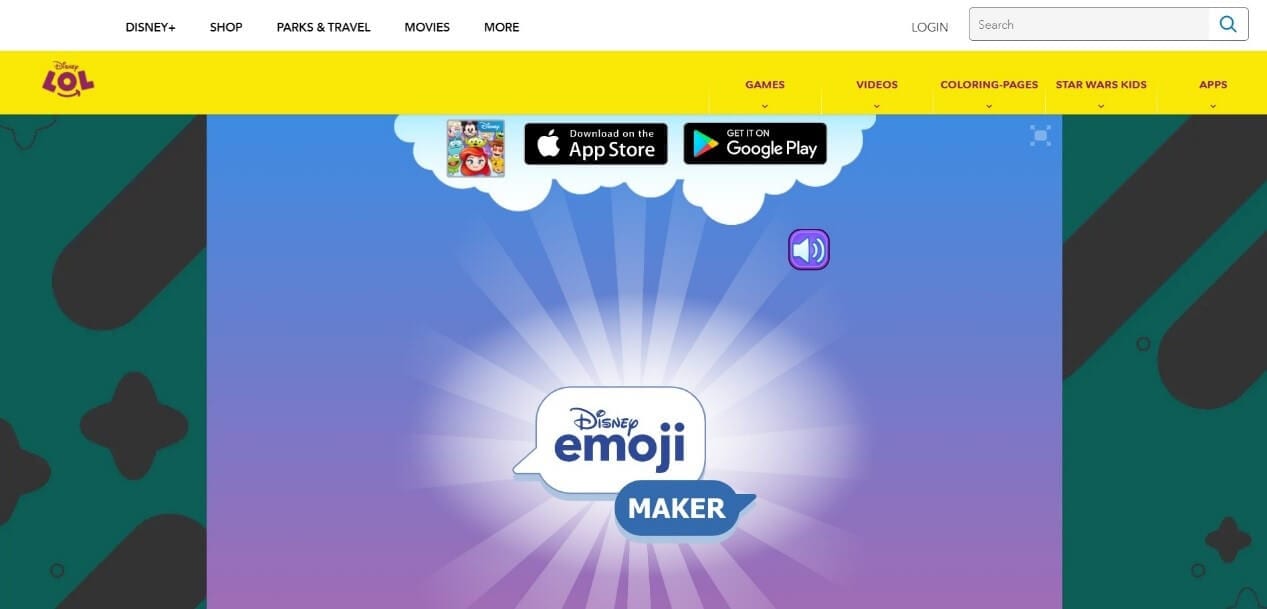
5. Disney Emoji Maker (Online)
As the name indicates, Disney Emoji Maker allows you to customize emoji based on some Disney characters. This emoji maker itself is very fun to use.
Price:
- Free
Features:
- An amazing user interface
- A variety of emoji features to add
- Apt for kids as well as grownups
- Easy export of the created emoji
6. Animated Emoji Maker (Android app)
Animated Emoji Maker is a tool that allows you to create wonderful emojis on any android devices without much effort.

Price:
- Free
Features:
- Allows to create normal as well as animated emoji
- Different characters like a cat, fox, dog, pig, panda chicken, monkey are available to create emoji
- Allows to customize emoji according to the user’s appearance
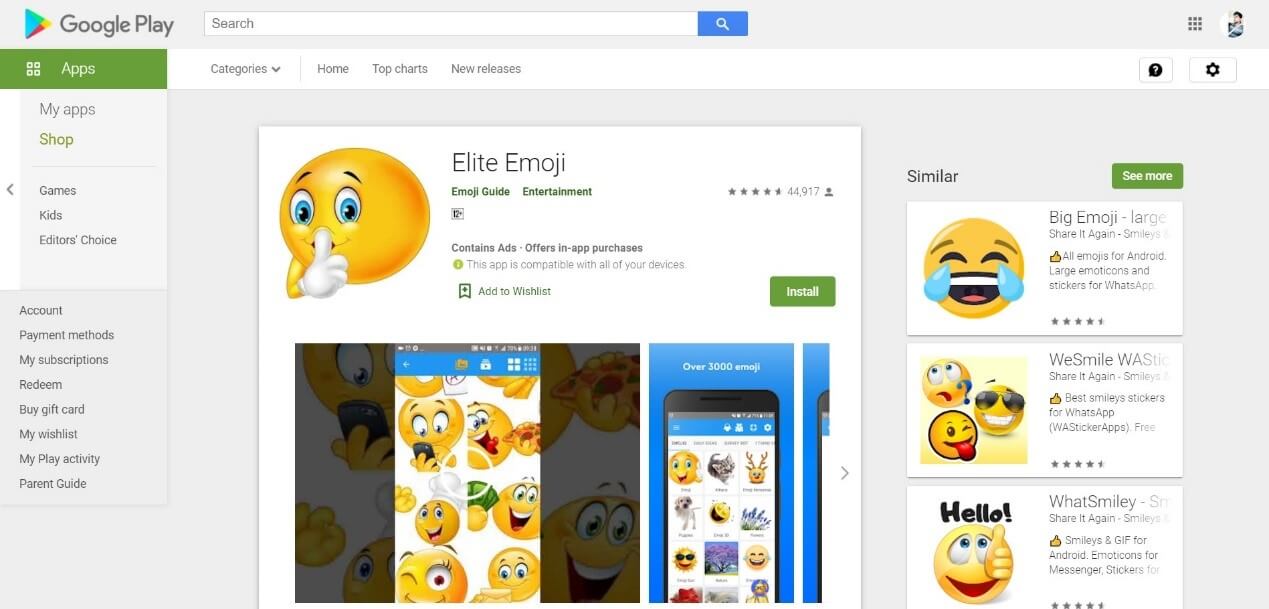
7. Elite Emoji (Android app)
Elite Emoji is an android tool that will allow you to create high-quality emoji that can be used to express ideas and emotions in your conversations.
Price:
- Free
Features
- 2000+ emoji options to choose from
- Single touch sharing in social media platforms like WhatsApp, Messenger, Instagram, etc.
- Ober 5000+ default messages to add to emojis
- Emoji suggestions, taking into account the personality traits of each user
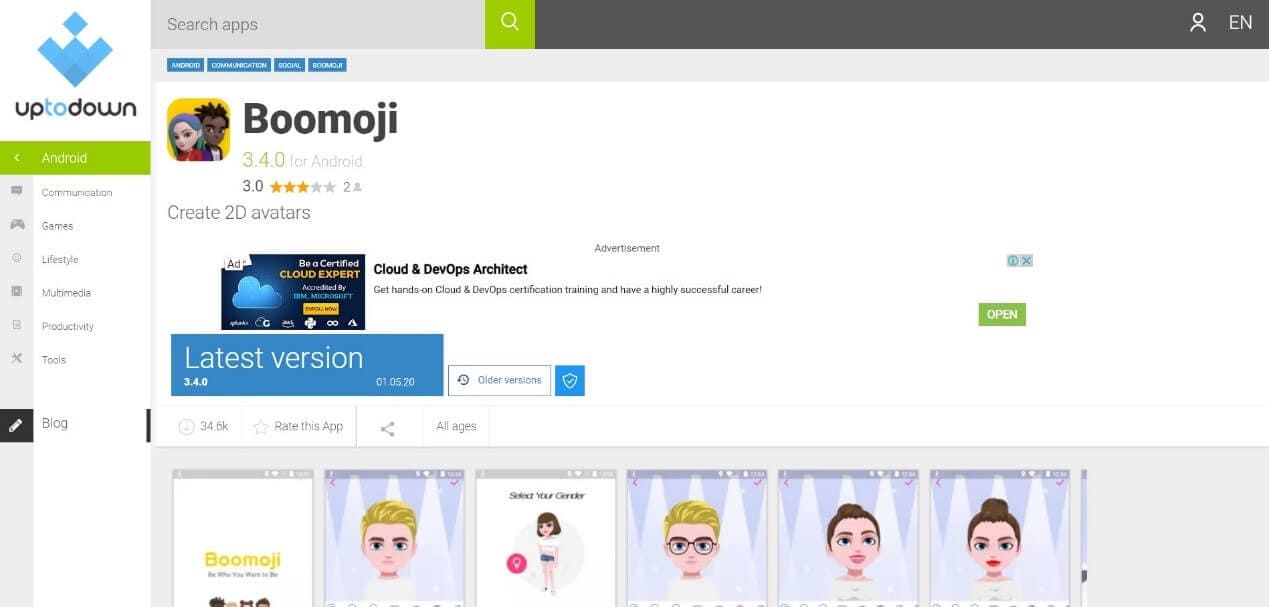
8. Boomoji (Android app)
Boomoji is a free Android application that will allow you to create fun avatar type emoji of your choice.
Price:
- Free
Features:
- A ton of characteristics to edit
- Allows to create exact animate clones of the users
- Direct sharing into social media networks
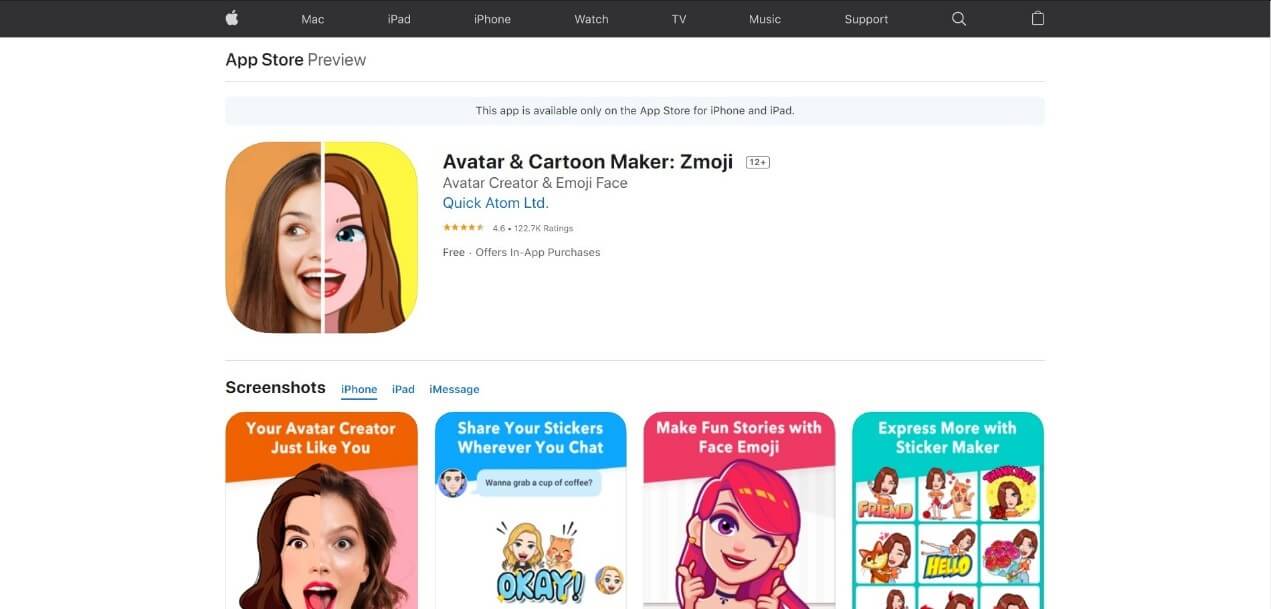
9. Zmoji (iPhone app)
Zmoji is an iPhone tool that allows you to create and customize emojis that you need for any social interactions.
Price:
- Free
- Zmoji Premium for $99.9 per year
Features:
- Quick and easy creation of expressive avatars and emoji
- Create an animated avatar resembling the user appearance
- A number of fashionable options and facial features are available
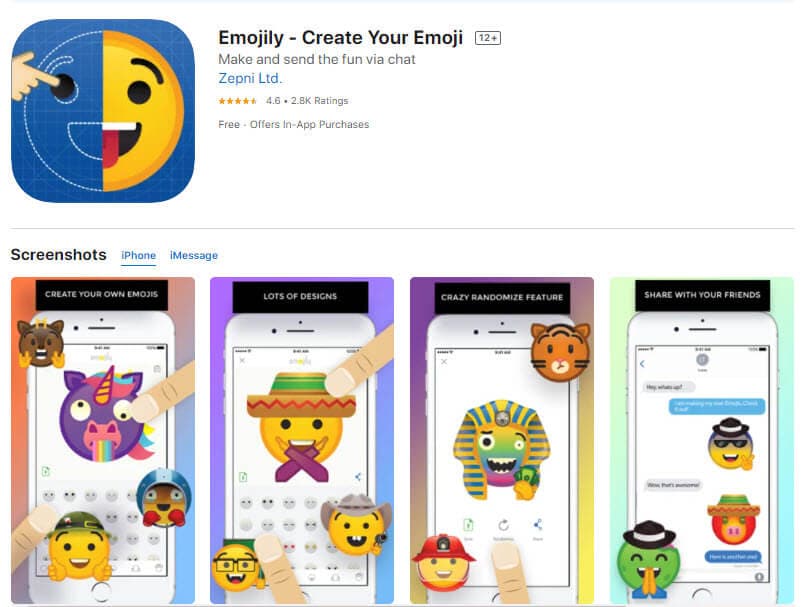
10. Emojily (iPhone app)
Emojily is a fun tool that provides a large number of crazy emoji features. It is a free iPhone application that allows the sharing of the edited emoji on any platform.
Price:
- Free
- $0.99 for unlocking single emoji packs
- $3.99 for unlocking all packs
Features:
- A ton of items to choose from to create unique emoji
- An application provided keyboard to use the emoji
- A variety of design options
Part 2: Add Emojis to Your Video with Wondershare Filmora
Wondershare Filmora is an all in one video editing application that offers a ton of video editing options and features, with the addition of interesting emojis that can be used to create wonderful videos. Some of the best features of Filmora include a number of animated titles, motion tracking, animation keyframing, vide effects, enhanced video stabilization, noise removal, noise effects, and much more.
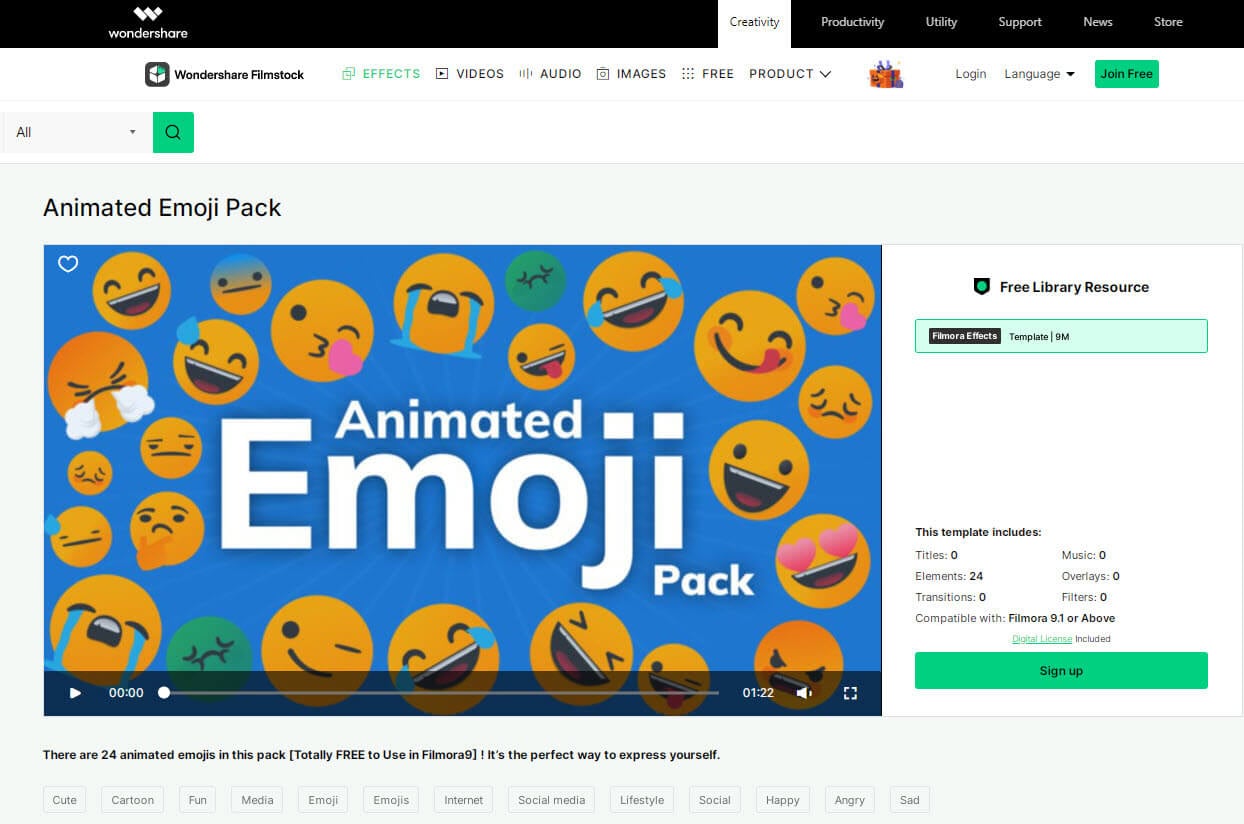
The Filmora application offers 9 inbuilt emojis within the tool and more emojis of different genres can be accessed by downloading the Animated Emoji Pack from the Filmstock effects store.
Adding emoji to videos has been a trend for some time. It is fun as well as allows the creator to express his ideas or feelings without the use of long texts and not offending the viewers in any way. So, let’s see how Filmora can be used to add emoji to any videos.


Steps to Follow:
1. Download and install Wondershare Filmora on your PC.

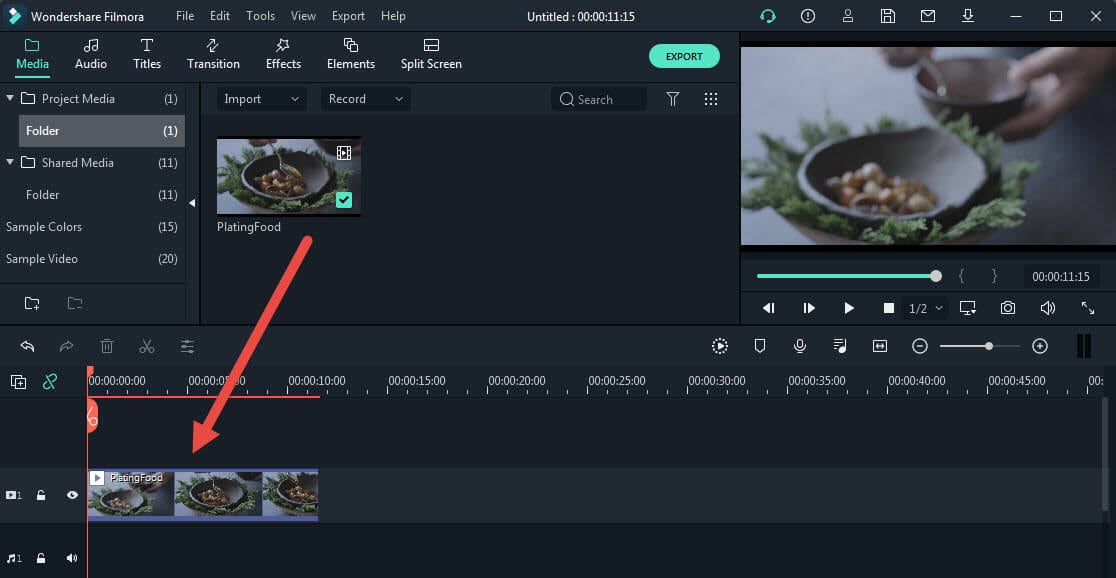
2. Create a New Project and add the video that needs to be edited to the Filmora timeline.
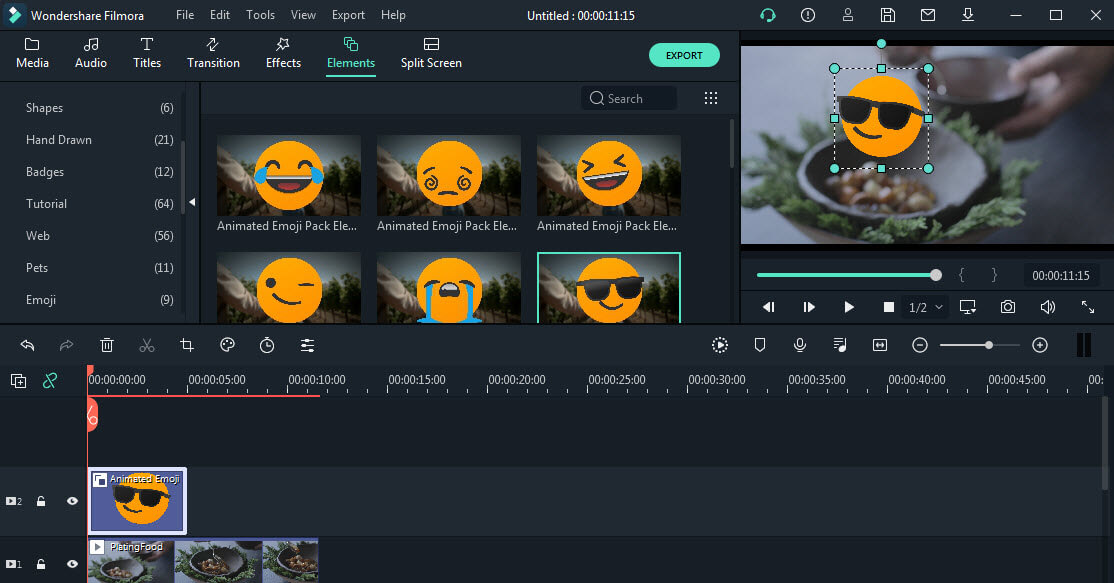
3. Tap on the Elements tab at the top and tap on the Emoji category on the side. A list of emoji elements will be displayed to you.

4. Or you can go to Wondershare Filmstock (Filmora’s effects store), find the free Animated Emoji Pack and download more emojis.
5. Select the emoji you like and drag and drop it just above the video on your timeline.
6. Adjust the position, duration, or size of the emoji if needed. Then preview the results and make changes if necessary.

7. After that, tap on the Export tab and save the video to any location of your choice.

Conclusion
Emoji is a wonderful way of expressing one’s ideas or feelings towards something on social media platforms like WhatsApp, YouTube, Facebook, etc. Most often the emoji provided by these applications may not be enough to express ourselves and hence there will be a need for creating or downloading more emoji. A list of the best 10 emoji creator apps has been listed above for you.
The use of emoji is not limited to just chats and comments, they are also used on images and videos. Filmora is an application that can be used to add emoji to video to make it more attractive and appealing.
We hope this article has been helpful to you. Please let us know what you think about our suggestion in the comment box below.
Shanoon Cox
Shanoon Cox is a writer and a lover of all things video.
Follow @Shanoon Cox
Shanoon Cox
Mar 27, 2024• Proven solutions
In this generation of online chatting and social media, emoji plays a big role in making our conversation easier and interesting. It helps people to express feelings or convey something in a better way than words or sentences ever could. Adding an emoji to chat, video or photo brings more fun to the content and the type of emojis different individuals prefer to use will be different.
Want to create your own emoji? So there is a need for emoji makers that can help to create customized emojis depending on everyone’s likes.
There are a lot of emoji makers in the online market that offers a bundle of pre-packed emoji as well as help you to create emoji of your choice. These tools help you to create your own emoji on whichever theme you wish providing a lot of customizing options.
- Part 1: Best 10 Emoji Makers to Create Your Own Emojis
- Part 2: Add Emojis to Your Video with Wondershare Filmora
Part 1: Best 10 Emoji Makers to Create Your Own Emojis
Most people around the world use emoji in their conversations, whether it be chats, comments on social media, writing blogs, etc. But the type of emojis preferred by different people may vary and sometimes the default emojis available might not be enough to express what they wish to. Hence there is a need for creating more emoji, depending on each individual’s taste.
This is where the emoji makers come in. Here we will discuss the top 10 emoji makers that can be used to create attractive emojis for sharing on social media platforms.
- [1. Emoji-maker.com(Online)](#emoji maker1)
- [2. piZap Emoji Maker(Online)](#emoji maker2)
- [3. Flat Icons Emoji Maker(Online)](#emoji maker3)
- [4. Labeley.com(Online)](#emoji maker4)
- [5. Disney Emoji Maker (Online)](#emoji maker5)
- [6. Animated Emoji Maker (Android app)](#emoji maker6)
- [7. Elite Emoji (Android app)](#emoji maker7)
- [8. Boomoji (Android app)](#emoji maker8)
- [9. Zmoji (iPhone app)](#emoji maker9)
- [10. Emojily (iPhone app)](#emoji maker10)
1. Emoji-maker.com(Online)
Emoji maker.com is an online told that provides a lot of beautiful and unique emoji editing options to the users.
Price:
- Free
Features:
- Offers a wide variety of emoji shapes
- Allows to customize emojis in a match to the user’s face
- Has an Emoji text function, that allows adding text to any emoji
- Provides a lot of emoji background options
- Provides multiple saving options for the emojis you have created
2. piZap Emoji Maker(Online)
piZap Emoji Maker is an online editor that has extensive emoji features that can help you to create awesome emojis. However, before you can do something, a mandatory signing in is required by this editor.

Price:
- Free
- Extra Features - piZap PRO for $5.99 per month or $35.88 per year
Features:
- All in one tool that can be used to create emoji, edit photos, create memes, etc.
- 6 million stock images
- Vibrant, colorful filters exclusive to this tool
- About 367 font options
3. Flat Icons Emoji Maker(Online)
Flat Icons Emoji is one of the simplest tools that are available to you for creating customized emojis of your choice.
![]()
Price:
- Free
- Premium bundle offers for $79 or $3710 (depends on the packs you choose)
Features:
- Offers a lot of shape options
- Provides a good collection of icon bundles for free
- Options to download both in PNG and SVG formats
- Easy editing and saving options
4. Labeley.com(Online)
Labeley.com is an online tool that allows you to design the emoji that you desire as well as provide you with printed copies of your design for an amount.
Price:
- Free
Features:
- Cool designing features and options for emoji
- Allows to save edits and make changes to it afterward
- Provides a set of beautiful artwork collections
- Provides “ print and delivery” option if you need physical copies of the emoji you designed (chargeable)
5. Disney Emoji Maker (Online)
As the name indicates, Disney Emoji Maker allows you to customize emoji based on some Disney characters. This emoji maker itself is very fun to use.
Price:
- Free
Features:
- An amazing user interface
- A variety of emoji features to add
- Apt for kids as well as grownups
- Easy export of the created emoji
6. Animated Emoji Maker (Android app)
Animated Emoji Maker is a tool that allows you to create wonderful emojis on any android devices without much effort.
Price:
- Free
Features:
- Allows to create normal as well as animated emoji
- Different characters like a cat, fox, dog, pig, panda chicken, monkey are available to create emoji
- Allows to customize emoji according to the user’s appearance
7. Elite Emoji (Android app)
Elite Emoji is an android tool that will allow you to create high-quality emoji that can be used to express ideas and emotions in your conversations.
Price:
- Free
Features
- 2000+ emoji options to choose from
- Single touch sharing in social media platforms like WhatsApp, Messenger, Instagram, etc.
- Ober 5000+ default messages to add to emojis
- Emoji suggestions, taking into account the personality traits of each user
8. Boomoji (Android app)
Boomoji is a free Android application that will allow you to create fun avatar type emoji of your choice.
Price:
- Free
Features:
- A ton of characteristics to edit
- Allows to create exact animate clones of the users
- Direct sharing into social media networks
9. Zmoji (iPhone app)
Zmoji is an iPhone tool that allows you to create and customize emojis that you need for any social interactions.
Price:
- Free
- Zmoji Premium for $99.9 per year
Features:
- Quick and easy creation of expressive avatars and emoji
- Create an animated avatar resembling the user appearance
- A number of fashionable options and facial features are available
10. Emojily (iPhone app)
Emojily is a fun tool that provides a large number of crazy emoji features. It is a free iPhone application that allows the sharing of the edited emoji on any platform.
Price:
- Free
- $0.99 for unlocking single emoji packs
- $3.99 for unlocking all packs
Features:
- A ton of items to choose from to create unique emoji
- An application provided keyboard to use the emoji
- A variety of design options
Part 2: Add Emojis to Your Video with Wondershare Filmora
Wondershare Filmora is an all in one video editing application that offers a ton of video editing options and features, with the addition of interesting emojis that can be used to create wonderful videos. Some of the best features of Filmora include a number of animated titles, motion tracking, animation keyframing, vide effects, enhanced video stabilization, noise removal, noise effects, and much more.
The Filmora application offers 9 inbuilt emojis within the tool and more emojis of different genres can be accessed by downloading the Animated Emoji Pack from the Filmstock effects store.
Adding emoji to videos has been a trend for some time. It is fun as well as allows the creator to express his ideas or feelings without the use of long texts and not offending the viewers in any way. So, let’s see how Filmora can be used to add emoji to any videos.
Steps to Follow:
1. Download and install Wondershare Filmora on your PC.
2. Create a New Project and add the video that needs to be edited to the Filmora timeline.
3. Tap on the Elements tab at the top and tap on the Emoji category on the side. A list of emoji elements will be displayed to you.
4. Or you can go to Wondershare Filmstock (Filmora’s effects store), find the free Animated Emoji Pack and download more emojis.
5. Select the emoji you like and drag and drop it just above the video on your timeline.
6. Adjust the position, duration, or size of the emoji if needed. Then preview the results and make changes if necessary.
7. After that, tap on the Export tab and save the video to any location of your choice.
Conclusion
Emoji is a wonderful way of expressing one’s ideas or feelings towards something on social media platforms like WhatsApp, YouTube, Facebook, etc. Most often the emoji provided by these applications may not be enough to express ourselves and hence there will be a need for creating or downloading more emoji. A list of the best 10 emoji creator apps has been listed above for you.
The use of emoji is not limited to just chats and comments, they are also used on images and videos. Filmora is an application that can be used to add emoji to video to make it more attractive and appealing.
We hope this article has been helpful to you. Please let us know what you think about our suggestion in the comment box below.
Shanoon Cox
Shanoon Cox is a writer and a lover of all things video.
Follow @Shanoon Cox
Shanoon Cox
Mar 27, 2024• Proven solutions
In this generation of online chatting and social media, emoji plays a big role in making our conversation easier and interesting. It helps people to express feelings or convey something in a better way than words or sentences ever could. Adding an emoji to chat, video or photo brings more fun to the content and the type of emojis different individuals prefer to use will be different.
Want to create your own emoji? So there is a need for emoji makers that can help to create customized emojis depending on everyone’s likes.
There are a lot of emoji makers in the online market that offers a bundle of pre-packed emoji as well as help you to create emoji of your choice. These tools help you to create your own emoji on whichever theme you wish providing a lot of customizing options.
- Part 1: Best 10 Emoji Makers to Create Your Own Emojis
- Part 2: Add Emojis to Your Video with Wondershare Filmora
Part 1: Best 10 Emoji Makers to Create Your Own Emojis
Most people around the world use emoji in their conversations, whether it be chats, comments on social media, writing blogs, etc. But the type of emojis preferred by different people may vary and sometimes the default emojis available might not be enough to express what they wish to. Hence there is a need for creating more emoji, depending on each individual’s taste.
This is where the emoji makers come in. Here we will discuss the top 10 emoji makers that can be used to create attractive emojis for sharing on social media platforms.
- [1. Emoji-maker.com(Online)](#emoji maker1)
- [2. piZap Emoji Maker(Online)](#emoji maker2)
- [3. Flat Icons Emoji Maker(Online)](#emoji maker3)
- [4. Labeley.com(Online)](#emoji maker4)
- [5. Disney Emoji Maker (Online)](#emoji maker5)
- [6. Animated Emoji Maker (Android app)](#emoji maker6)
- [7. Elite Emoji (Android app)](#emoji maker7)
- [8. Boomoji (Android app)](#emoji maker8)
- [9. Zmoji (iPhone app)](#emoji maker9)
- [10. Emojily (iPhone app)](#emoji maker10)
1. Emoji-maker.com(Online)
Emoji maker.com is an online told that provides a lot of beautiful and unique emoji editing options to the users.
Price:
- Free
Features:
- Offers a wide variety of emoji shapes
- Allows to customize emojis in a match to the user’s face
- Has an Emoji text function, that allows adding text to any emoji
- Provides a lot of emoji background options
- Provides multiple saving options for the emojis you have created
2. piZap Emoji Maker(Online)
piZap Emoji Maker is an online editor that has extensive emoji features that can help you to create awesome emojis. However, before you can do something, a mandatory signing in is required by this editor.
Price:
- Free
- Extra Features - piZap PRO for $5.99 per month or $35.88 per year
Features:
- All in one tool that can be used to create emoji, edit photos, create memes, etc.
- 6 million stock images
- Vibrant, colorful filters exclusive to this tool
- About 367 font options
3. Flat Icons Emoji Maker(Online)
Flat Icons Emoji is one of the simplest tools that are available to you for creating customized emojis of your choice.
![]()
Price:
- Free
- Premium bundle offers for $79 or $3710 (depends on the packs you choose)
Features:
- Offers a lot of shape options
- Provides a good collection of icon bundles for free
- Options to download both in PNG and SVG formats
- Easy editing and saving options
4. Labeley.com(Online)
Labeley.com is an online tool that allows you to design the emoji that you desire as well as provide you with printed copies of your design for an amount.
Price:
- Free
Features:
- Cool designing features and options for emoji
- Allows to save edits and make changes to it afterward
- Provides a set of beautiful artwork collections
- Provides “ print and delivery” option if you need physical copies of the emoji you designed (chargeable)
5. Disney Emoji Maker (Online)
As the name indicates, Disney Emoji Maker allows you to customize emoji based on some Disney characters. This emoji maker itself is very fun to use.
Price:
- Free
Features:
- An amazing user interface
- A variety of emoji features to add
- Apt for kids as well as grownups
- Easy export of the created emoji
6. Animated Emoji Maker (Android app)
Animated Emoji Maker is a tool that allows you to create wonderful emojis on any android devices without much effort.
Price:
- Free
Features:
- Allows to create normal as well as animated emoji
- Different characters like a cat, fox, dog, pig, panda chicken, monkey are available to create emoji
- Allows to customize emoji according to the user’s appearance
7. Elite Emoji (Android app)
Elite Emoji is an android tool that will allow you to create high-quality emoji that can be used to express ideas and emotions in your conversations.
Price:
- Free
Features
- 2000+ emoji options to choose from
- Single touch sharing in social media platforms like WhatsApp, Messenger, Instagram, etc.
- Ober 5000+ default messages to add to emojis
- Emoji suggestions, taking into account the personality traits of each user
8. Boomoji (Android app)
Boomoji is a free Android application that will allow you to create fun avatar type emoji of your choice.
Price:
- Free
Features:
- A ton of characteristics to edit
- Allows to create exact animate clones of the users
- Direct sharing into social media networks
9. Zmoji (iPhone app)
Zmoji is an iPhone tool that allows you to create and customize emojis that you need for any social interactions.
Price:
- Free
- Zmoji Premium for $99.9 per year
Features:
- Quick and easy creation of expressive avatars and emoji
- Create an animated avatar resembling the user appearance
- A number of fashionable options and facial features are available
10. Emojily (iPhone app)
Emojily is a fun tool that provides a large number of crazy emoji features. It is a free iPhone application that allows the sharing of the edited emoji on any platform.
Price:
- Free
- $0.99 for unlocking single emoji packs
- $3.99 for unlocking all packs
Features:
- A ton of items to choose from to create unique emoji
- An application provided keyboard to use the emoji
- A variety of design options
Part 2: Add Emojis to Your Video with Wondershare Filmora
Wondershare Filmora is an all in one video editing application that offers a ton of video editing options and features, with the addition of interesting emojis that can be used to create wonderful videos. Some of the best features of Filmora include a number of animated titles, motion tracking, animation keyframing, vide effects, enhanced video stabilization, noise removal, noise effects, and much more.
The Filmora application offers 9 inbuilt emojis within the tool and more emojis of different genres can be accessed by downloading the Animated Emoji Pack from the Filmstock effects store.
Adding emoji to videos has been a trend for some time. It is fun as well as allows the creator to express his ideas or feelings without the use of long texts and not offending the viewers in any way. So, let’s see how Filmora can be used to add emoji to any videos.
Steps to Follow:
1. Download and install Wondershare Filmora on your PC.
2. Create a New Project and add the video that needs to be edited to the Filmora timeline.
3. Tap on the Elements tab at the top and tap on the Emoji category on the side. A list of emoji elements will be displayed to you.
4. Or you can go to Wondershare Filmstock (Filmora’s effects store), find the free Animated Emoji Pack and download more emojis.
5. Select the emoji you like and drag and drop it just above the video on your timeline.
6. Adjust the position, duration, or size of the emoji if needed. Then preview the results and make changes if necessary.
7. After that, tap on the Export tab and save the video to any location of your choice.
Conclusion
Emoji is a wonderful way of expressing one’s ideas or feelings towards something on social media platforms like WhatsApp, YouTube, Facebook, etc. Most often the emoji provided by these applications may not be enough to express ourselves and hence there will be a need for creating or downloading more emoji. A list of the best 10 emoji creator apps has been listed above for you.
The use of emoji is not limited to just chats and comments, they are also used on images and videos. Filmora is an application that can be used to add emoji to video to make it more attractive and appealing.
We hope this article has been helpful to you. Please let us know what you think about our suggestion in the comment box below.
Shanoon Cox
Shanoon Cox is a writer and a lover of all things video.
Follow @Shanoon Cox
How to Make a Slideshow with Music
How to Make a Slideshow with Music
Shanoon Cox
Mar 27, 2024• Proven solutions
Nowadays, we tend to store our experiences of important occasions in photos and videos since cameras and camcorders are popular. To better preserve these sweet memories, make a slideshow with music, photos and videos is a good idea. It’s not as difficult as you think since all you need are: a good slideshow maker, photos and videos you want to show, music to go along with your slideshow. Here is a tutorial about how to make a slideshow with music with Wondershare Filmora video editor and Wondershare DVD Slideshow Builder .
Read more: 20 Best Slideshow Songs for Different Occasions [Royalty-Free]
How to create slideshow with music in Filmora?
Note: The video tutorial about how to make slideshow in minutes is created with the previous version of Filmora video editor. Most of the steps are similar and creating a music slideshow with the latest Filmora is very easy. As we said before, all you need is your photos and music tracks, then follow the steps below to start.
Step 1. Download Filmora and Run it
Click the Free Download button above to download and install Wondershare Filmora on your computer and then launch it.
In case you want to change the default aspect ratio setting in the splash screen, you can choose 9:16 for portrait mode, 1:1 for Instagram slideshow and more. And then click New Project to create a project to continue.
Step 2. Import Photos and Music
After that, you need to import all your photo and music media to the Media Library and then drag and drop them to the timeline directly. Filmora allows you to change the order the photos in the timeline, and the photo duration as well.
You can also rotate photos and crop them manually to fit your project.
Note: If you find some black bar on your photos in preview, it is recommended to change Photo Placement to Crop and Zoom under Preference before drag-n-drop to timeline.
Step 3. Add Transitions

There are hundreds of transitions available in Filmora which you should totally have a try. You can apply a specific transition between each selected photo, or apply random transitions to selected photos.
Filmora features more than 30 transitions especially for Slideshow, such as cross merge, cross split, swap and sweep clockwise. Of course, you can also use some 3D transition, ripple and dissolve, or speed blur transitions.
You can also adjust the transition duration accordingly.
To make your photos slideshow looks better, it is highly recommended to apply filters and overlays effects.
Step 4. Add background music
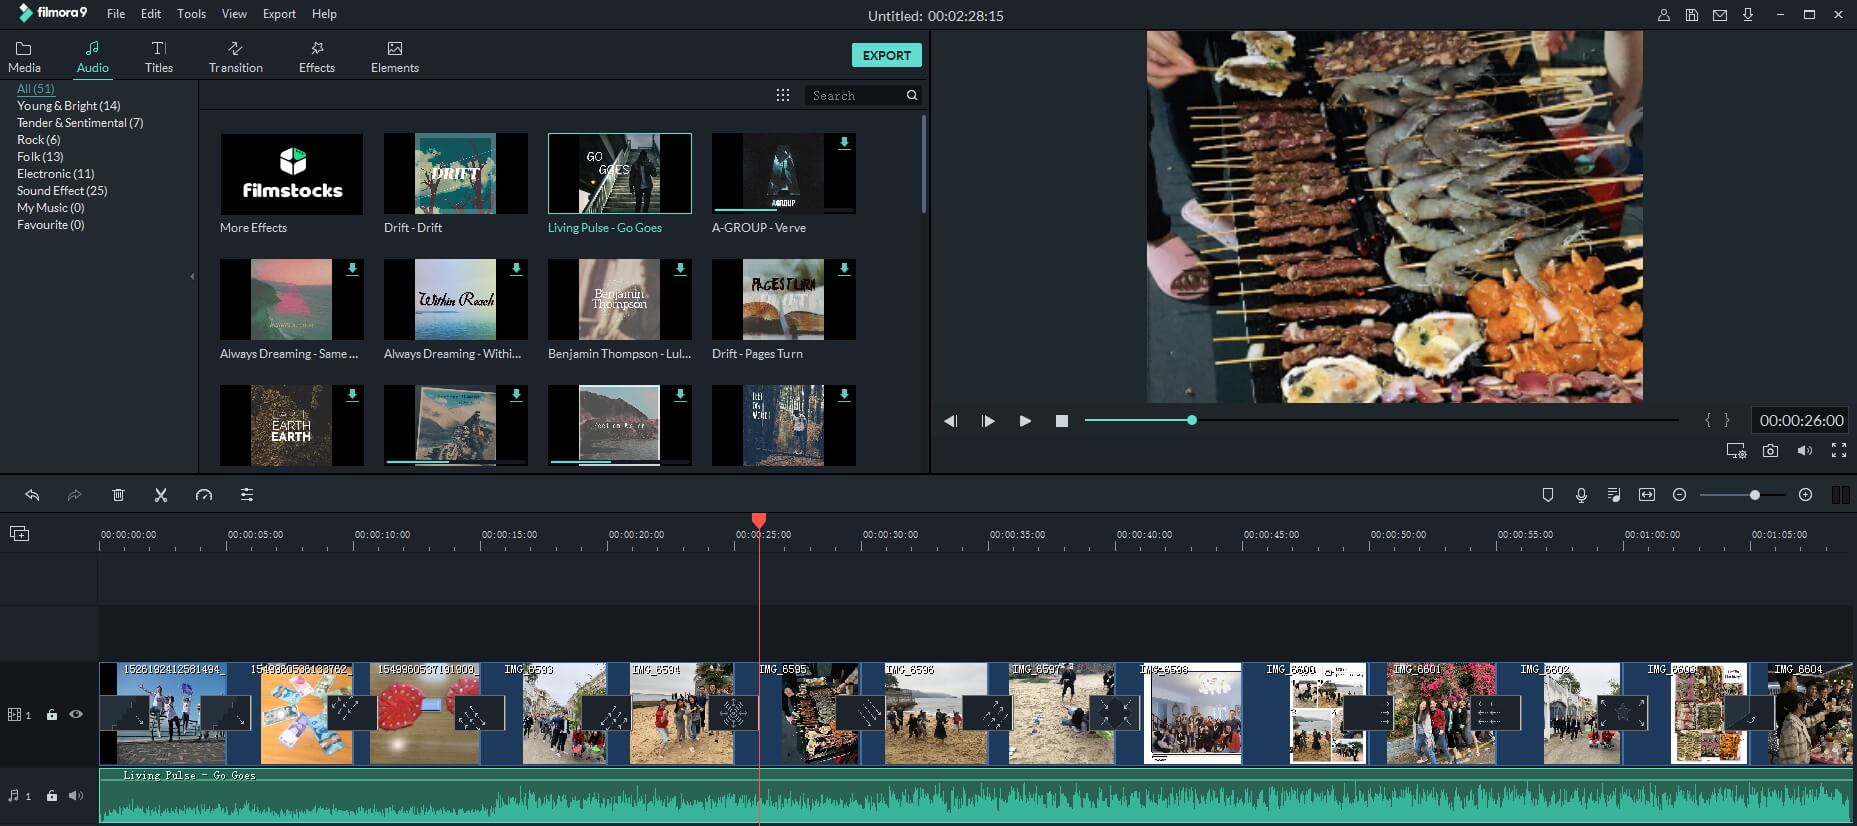
You can choose background music or sound effect from the inbuilt audio library in Filmora or drag and drop the music track file from computer to the timeline directly. Filmora features the voiceover recording tool which helps you to record your own voice easily.
Step 5. Export and Save
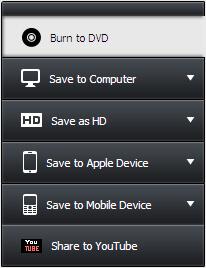
Finally, it’s time to save and export the music slideshow as you see fit. You have several options, you can save it on the computer in different formats, or you can share it to YouTube or Vimeo directly, or you can burn it to DVD.
Why choose Filmora to create music slideshow?
- Filmora supports most of popular image formats such as .jpg, .png, .bmp, .gif, .tif, and .tiff.
- Filmora allows you to crop, pan & zoom the slideshow manually or automatically by applying Pan & Zoom Photo Placement.
- Filmora has inbuilt music track and sound effect library, and stunning transitions, effects and elements presets.
- Filmora allows you to record your own voiceover and apply fade in and fade out effects.
- Besides creating photo slideshow, you can use it to create videos for both your YouTube marketing, daily sharing and business.
How to make a slideshow with DVD Slideshow Builder

Tips for Make a Slideshow with Music
1. Install slideshow software and import photos and videos
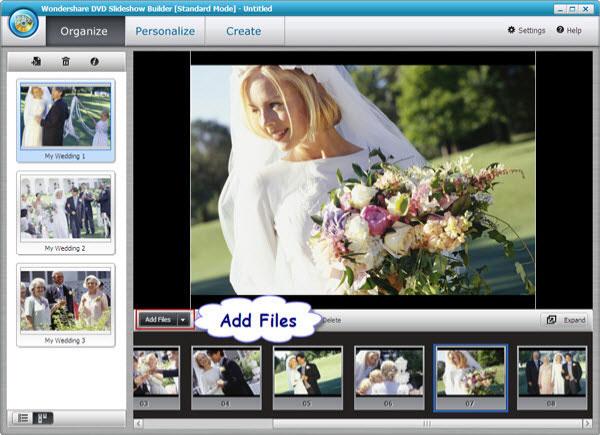
Install the software and import your digital photos to the storyboard by clicking ‘“Add Files” (there is no quantity limitation of photos). You can also add videos from computer or camera.
2. Add music to your photo slideshow
Go to the “Personalize” tab. Click “Music” toolbar to add background music or just drag the music to the background track. In the timeline, you can drag the slider to make the music best suit the photos and videos. If you need to edit the music, double click the clip and in the pop up window, trim music and adjust music volume as you like.
Tip: If you want to synchronize background music with the slideshow, click “Settings” (it’s on the right upper corner) and choose “Slideshow” tab, then tick the checkbox under the “Synchronize“. At last, click “OK” button.
3 .Select movie styles and add decorations
There are also 480+ free styles and transition effects that can be used for your picture slideshow with music in this tab. Choose your favorite styles and drag it on the photos. You can also add decoration text, clipart and effects on your digital photos. To make add more fun, you can also add intro movie and credit movie to your picture slideshow with music by clicking the “Intro/Credit” build-in button.

4 . Preview and save your slideshow with music
Go to “Publish” tab, you can preview the photo video by click the preview button first. Then publish it to the format you want. If you want to watch your photo slideshow with music to iPod or iPhone, you’d better publish it to MP4 format. This slideshow software also enables you to share your slideshow directly to YouTube by filling in the necessary information. Besides, you can burn DVD slideshow with music by clicking the “Burn to DVD” button and putting a DVD disc in your computer.
We shared two ways of making slideshow with music, whether you are using Filmora or DVD slideshow maker, leave a comment below and let me know your choice.
Shanoon Cox
Shanoon Cox is a writer and a lover of all things video.
Follow @Shanoon Cox
Shanoon Cox
Mar 27, 2024• Proven solutions
Nowadays, we tend to store our experiences of important occasions in photos and videos since cameras and camcorders are popular. To better preserve these sweet memories, make a slideshow with music, photos and videos is a good idea. It’s not as difficult as you think since all you need are: a good slideshow maker, photos and videos you want to show, music to go along with your slideshow. Here is a tutorial about how to make a slideshow with music with Wondershare Filmora video editor and Wondershare DVD Slideshow Builder .
Read more: 20 Best Slideshow Songs for Different Occasions [Royalty-Free]
How to create slideshow with music in Filmora?
Note: The video tutorial about how to make slideshow in minutes is created with the previous version of Filmora video editor. Most of the steps are similar and creating a music slideshow with the latest Filmora is very easy. As we said before, all you need is your photos and music tracks, then follow the steps below to start.
Step 1. Download Filmora and Run it
Click the Free Download button above to download and install Wondershare Filmora on your computer and then launch it.
In case you want to change the default aspect ratio setting in the splash screen, you can choose 9:16 for portrait mode, 1:1 for Instagram slideshow and more. And then click New Project to create a project to continue.
Step 2. Import Photos and Music
After that, you need to import all your photo and music media to the Media Library and then drag and drop them to the timeline directly. Filmora allows you to change the order the photos in the timeline, and the photo duration as well.
You can also rotate photos and crop them manually to fit your project.
Note: If you find some black bar on your photos in preview, it is recommended to change Photo Placement to Crop and Zoom under Preference before drag-n-drop to timeline.
Step 3. Add Transitions
There are hundreds of transitions available in Filmora which you should totally have a try. You can apply a specific transition between each selected photo, or apply random transitions to selected photos.
Filmora features more than 30 transitions especially for Slideshow, such as cross merge, cross split, swap and sweep clockwise. Of course, you can also use some 3D transition, ripple and dissolve, or speed blur transitions.
You can also adjust the transition duration accordingly.
To make your photos slideshow looks better, it is highly recommended to apply filters and overlays effects.
Step 4. Add background music
You can choose background music or sound effect from the inbuilt audio library in Filmora or drag and drop the music track file from computer to the timeline directly. Filmora features the voiceover recording tool which helps you to record your own voice easily.
Step 5. Export and Save
Finally, it’s time to save and export the music slideshow as you see fit. You have several options, you can save it on the computer in different formats, or you can share it to YouTube or Vimeo directly, or you can burn it to DVD.
Why choose Filmora to create music slideshow?
- Filmora supports most of popular image formats such as .jpg, .png, .bmp, .gif, .tif, and .tiff.
- Filmora allows you to crop, pan & zoom the slideshow manually or automatically by applying Pan & Zoom Photo Placement.
- Filmora has inbuilt music track and sound effect library, and stunning transitions, effects and elements presets.
- Filmora allows you to record your own voiceover and apply fade in and fade out effects.
- Besides creating photo slideshow, you can use it to create videos for both your YouTube marketing, daily sharing and business.
How to make a slideshow with DVD Slideshow Builder
Tips for Make a Slideshow with Music
1. Install slideshow software and import photos and videos
Install the software and import your digital photos to the storyboard by clicking ‘“Add Files” (there is no quantity limitation of photos). You can also add videos from computer or camera.
2. Add music to your photo slideshow
Go to the “Personalize” tab. Click “Music” toolbar to add background music or just drag the music to the background track. In the timeline, you can drag the slider to make the music best suit the photos and videos. If you need to edit the music, double click the clip and in the pop up window, trim music and adjust music volume as you like.
Tip: If you want to synchronize background music with the slideshow, click “Settings” (it’s on the right upper corner) and choose “Slideshow” tab, then tick the checkbox under the “Synchronize“. At last, click “OK” button.
3 .Select movie styles and add decorations
There are also 480+ free styles and transition effects that can be used for your picture slideshow with music in this tab. Choose your favorite styles and drag it on the photos. You can also add decoration text, clipart and effects on your digital photos. To make add more fun, you can also add intro movie and credit movie to your picture slideshow with music by clicking the “Intro/Credit” build-in button.
4 . Preview and save your slideshow with music
Go to “Publish” tab, you can preview the photo video by click the preview button first. Then publish it to the format you want. If you want to watch your photo slideshow with music to iPod or iPhone, you’d better publish it to MP4 format. This slideshow software also enables you to share your slideshow directly to YouTube by filling in the necessary information. Besides, you can burn DVD slideshow with music by clicking the “Burn to DVD” button and putting a DVD disc in your computer.
We shared two ways of making slideshow with music, whether you are using Filmora or DVD slideshow maker, leave a comment below and let me know your choice.
Shanoon Cox
Shanoon Cox is a writer and a lover of all things video.
Follow @Shanoon Cox
How to Make a Meme (Step by Step)
How to Make a Meme (Step by Step)

Ollie Mattison
Mar 27, 2024• Proven solutions
When you browse the Internet, memes are practically everywhere. These memes are found in varied forms, ranging from video meme, to GIF and images. Through memes you can express your ideas in a creative and humorous way. In case your business requires meme marketing and you have no clue about how to make a meme then there is n nothing to worry about. We are here to ease off your stress.
In this article we are going to help you create the most effective memes. Stay tuned for more.
- Part1: Research meme first
- Part2: Think about your content
- Part3: Create memes right now
- Part4: Tips on making a popular meme
Part 1: Research meme first
1. Know your memes
Understanding and knowing what exactly your meme needs to do can be achieved by observing the recent the viral memes in the market. The recent viral memes would inspire your new creation to make a better meme evoking funnier emotions. There might be a specific meme that has garnered ample exposure over the social media and has been trending for weeks. You can gauge by studying them that whether your idea has been already implemented by any of them or it’s a fresh idea that you can use to strengthen your meme marketing.
2. Focus on popular stuff
While you are making memes, it’s important to refer popular movies, series, events, books, video games, comic characters etc. for enhancing the humor in memes . Funny videos about kids, accident videos and bike crashes, etc. with the right filter makes memes relatable. You can even spread a social message with a fun factor using video memes.
Part 2: Think about your content
1. Be Funny
Entertainment value is of utmost priority when you are planning for a successful meme. Though, making memes relatable to the audience is a key factor, you don’t need to be serious, just for the sake of it. Your meme should carry a witty and funny tone. You need to pick the copy and language meeting to the parameters we have just elaborated in this section.
2. Keep it short
Owning to the short attention span of online users, your memes need to be pretty short, without missing the message. While you are thinking how to make a meme, keep in mind that your meme should strike the right chord with the audience and impress them at the first place. Catchy phrases, captions from popular comic series or a funny TV show that is relatable to most people can help you create an amazing image, GIF or video meme.
Part 3: Create memes right now
When you are in a dilemma about how to make a meme or a video meme to be specific, you would require an effective meme maker tool . As without having a reliable tool for editing your video memes, it is not possible to transform your ideas into funny memes. We recommend Filmora online meme maker to materialize your idea.
Filmora meme maker is an online tool which you can use for completely free. Creating image, GIF and video memes is possible with this online program without requiring much time. Moreover, you don’t have to login to create your video memes. One of the most intuitive programs that require no tedious process, but simple drag and drop and click actions for importing GIF, image, and video. Apart from that you get the flexibility to add text inside or out of the text, GIF or video as per your heart’s content. Altering the text color and size is also possible with Filmora.
You don’t have to download online videos, as it supports YouTube and Vimeo video link. All that you need to do is copy and paste the URL for creating online video material with ease, without the hassle of downloading it to your computer and then working on it.
Here comes the detailed guide for Filmora online meme maker to create a video meme –
Step 1: Import image, GIF or video
Browse to the Filmora online meme maker website and then tap on ‘Click here to upload’ or drag to import material. You can even import YouTube and Vimeo links for creating video memes.

Step 2: Edit memes
Once you have selected the video/GIF/image you navigate to the meme editor page, you can customize your meme by tapping the tools on the left panel. The preview window there will show the changes you are doing to the imported item. Play with the text color and size in the meme and keep what suits you the most. Also, you can decide whether you wish to input text inside or outside and the file format for your meme can also be selected from this editor page.
Tips: Humorous or ironic text turns memes more popular, and don’t forget to select fonts that perfectly blend with the caption and background of the text and overall meme.

Step 3: Export and share
At last, tap on the ‘CREATE’ button once you are happy with the creation. Allow some time, so that the meme is generated with all the aspects you have incorporated to it. Once done, hit the ‘DOWNLOAD’ button and save the meme. Well, now that everything is on point, you can share it across social media platforms such as Reddit, Facebook, or Instagram.

Part 4: Tips on making a popular meme
1. Traditional and dank memes are popular, but video memes is on trend now
Though, the market is flooding with wide subcategories of memes, some of them are really taking the internet by storm. For making a popular meme that brings more exposure for your brand, you need to focus on the trending ones .
The main categories of memes are –
Traditional (normie) – This category of memes contain stock photo or viral video/movie/magazine screenshot. The photos and texts on them perfectly sync with the right visual tone.
Dank memes – They involve humor which is out of context. They also revive a dying meme or one that is pretty old and not in use by continuously overusing it.
2. Reddit is a great place to share
You shouldn’t let go of any opportunity that comes your way. You need to share them at the right place and Reddit undoubtedly has an upper hand in that case. When you have the right content gain through it – It is a subreddit where you can share your meme after researching and creating it. But, be sure that here you need to share your own creation, not someone else’s copyright products.
R/DankMemes – This one is more focused at quality. You can look here to find out the most popular memes. You might plan to post your memes after they get significantly popular over the internet and then post them or lose mass downvotes. This space helps you how to perfectly analyze and then post your meme on the right time.
Conclusion
Once we are thorough with this article, we are confident that you understood how to make a meme. And, there is no doubt that opting for Filmora online meme maker will surely help you gain popularity over the internet. This tool is quick to use and requires no space to get stored on your PC. So, now you have one awesome tool for helping you out in meme making and being popular!
Ollie Mattison
Ollie Mattison is a writer and a lover of all things video.
Follow @Ollie Mattison
Ollie Mattison
Mar 27, 2024• Proven solutions
When you browse the Internet, memes are practically everywhere. These memes are found in varied forms, ranging from video meme, to GIF and images. Through memes you can express your ideas in a creative and humorous way. In case your business requires meme marketing and you have no clue about how to make a meme then there is n nothing to worry about. We are here to ease off your stress.
In this article we are going to help you create the most effective memes. Stay tuned for more.
- Part1: Research meme first
- Part2: Think about your content
- Part3: Create memes right now
- Part4: Tips on making a popular meme
Part 1: Research meme first
1. Know your memes
Understanding and knowing what exactly your meme needs to do can be achieved by observing the recent the viral memes in the market. The recent viral memes would inspire your new creation to make a better meme evoking funnier emotions. There might be a specific meme that has garnered ample exposure over the social media and has been trending for weeks. You can gauge by studying them that whether your idea has been already implemented by any of them or it’s a fresh idea that you can use to strengthen your meme marketing.
2. Focus on popular stuff
While you are making memes, it’s important to refer popular movies, series, events, books, video games, comic characters etc. for enhancing the humor in memes . Funny videos about kids, accident videos and bike crashes, etc. with the right filter makes memes relatable. You can even spread a social message with a fun factor using video memes.
Part 2: Think about your content
1. Be Funny
Entertainment value is of utmost priority when you are planning for a successful meme. Though, making memes relatable to the audience is a key factor, you don’t need to be serious, just for the sake of it. Your meme should carry a witty and funny tone. You need to pick the copy and language meeting to the parameters we have just elaborated in this section.
2. Keep it short
Owning to the short attention span of online users, your memes need to be pretty short, without missing the message. While you are thinking how to make a meme, keep in mind that your meme should strike the right chord with the audience and impress them at the first place. Catchy phrases, captions from popular comic series or a funny TV show that is relatable to most people can help you create an amazing image, GIF or video meme.
Part 3: Create memes right now
When you are in a dilemma about how to make a meme or a video meme to be specific, you would require an effective meme maker tool . As without having a reliable tool for editing your video memes, it is not possible to transform your ideas into funny memes. We recommend Filmora online meme maker to materialize your idea.
Filmora meme maker is an online tool which you can use for completely free. Creating image, GIF and video memes is possible with this online program without requiring much time. Moreover, you don’t have to login to create your video memes. One of the most intuitive programs that require no tedious process, but simple drag and drop and click actions for importing GIF, image, and video. Apart from that you get the flexibility to add text inside or out of the text, GIF or video as per your heart’s content. Altering the text color and size is also possible with Filmora.
You don’t have to download online videos, as it supports YouTube and Vimeo video link. All that you need to do is copy and paste the URL for creating online video material with ease, without the hassle of downloading it to your computer and then working on it.
Here comes the detailed guide for Filmora online meme maker to create a video meme –
Step 1: Import image, GIF or video
Browse to the Filmora online meme maker website and then tap on ‘Click here to upload’ or drag to import material. You can even import YouTube and Vimeo links for creating video memes.
Step 2: Edit memes
Once you have selected the video/GIF/image you navigate to the meme editor page, you can customize your meme by tapping the tools on the left panel. The preview window there will show the changes you are doing to the imported item. Play with the text color and size in the meme and keep what suits you the most. Also, you can decide whether you wish to input text inside or outside and the file format for your meme can also be selected from this editor page.
Tips: Humorous or ironic text turns memes more popular, and don’t forget to select fonts that perfectly blend with the caption and background of the text and overall meme.
Step 3: Export and share
At last, tap on the ‘CREATE’ button once you are happy with the creation. Allow some time, so that the meme is generated with all the aspects you have incorporated to it. Once done, hit the ‘DOWNLOAD’ button and save the meme. Well, now that everything is on point, you can share it across social media platforms such as Reddit, Facebook, or Instagram.
Part 4: Tips on making a popular meme
1. Traditional and dank memes are popular, but video memes is on trend now
Though, the market is flooding with wide subcategories of memes, some of them are really taking the internet by storm. For making a popular meme that brings more exposure for your brand, you need to focus on the trending ones .
The main categories of memes are –
Traditional (normie) – This category of memes contain stock photo or viral video/movie/magazine screenshot. The photos and texts on them perfectly sync with the right visual tone.
Dank memes – They involve humor which is out of context. They also revive a dying meme or one that is pretty old and not in use by continuously overusing it.
2. Reddit is a great place to share
You shouldn’t let go of any opportunity that comes your way. You need to share them at the right place and Reddit undoubtedly has an upper hand in that case. When you have the right content gain through it – It is a subreddit where you can share your meme after researching and creating it. But, be sure that here you need to share your own creation, not someone else’s copyright products.
R/DankMemes – This one is more focused at quality. You can look here to find out the most popular memes. You might plan to post your memes after they get significantly popular over the internet and then post them or lose mass downvotes. This space helps you how to perfectly analyze and then post your meme on the right time.
Conclusion
Once we are thorough with this article, we are confident that you understood how to make a meme. And, there is no doubt that opting for Filmora online meme maker will surely help you gain popularity over the internet. This tool is quick to use and requires no space to get stored on your PC. So, now you have one awesome tool for helping you out in meme making and being popular!
Ollie Mattison
Ollie Mattison is a writer and a lover of all things video.
Follow @Ollie Mattison
20 Wonderful Stop Motion Ideas for Beginners and Kids - Filmora
20 Wonderful Stop Motion Ideas for Beginners and Kids
Shanoon Cox
Mar 27, 2024• Proven solutions
Stop motion is the most adoring animated presentation of the social media era on digital presence. You can express conceptual-based ideas and thoughtful messages in a storytelling frame. We will discuss and get an overview of the stop motion ideas of kids and stop motion ideas for beginners in this article.
Let’s dive into the subject line!
Stop motion animation could be a great idea while presenting a story that will take a short duration but carry a significant meaning. The meaning even you can portray easily with the animated objects, characters, figures, and the movement.
Here, the movement of the illustrated figures and characters is vital because the camera uses in stop motion repeatedly getting on or off. Many frames are created to portray the story you want to present to your audience during the on and off.
- Part 1: What are the Important Elements When Producing a Good Stop Motion Animation?
- Part 2: 20 Best Stop Animation Ideas for Kids and Beginners
Part 1: What are the Important Elements When Producing a Good Stop Motion Animation?
While you are dealing with the digital creative aspect, you need to have a subject line, plan, execution components, camera and knowledge about running the camera to show its movements. In short, these are the major elements you need to have grip before starting any stop motion animation.
The significant elements are:
- A thoughtful subject line: why people watch you stop motion animation, ask the question to yourself and decide a good subject line. If you want to show a story by moving a few objects, characters, and figures, the subject line must have a solid message you want to convey. Otherwise, you will never get your target audience.
- Proper planning: It is an old proverb that creativity is the messy thing in the world. But people will not watch it messy on the screen. How you present the complete story, what kinds of cameras and angles you need to use to get what you want, the background settings, any music you can add or not are part of the planning.
- Cameras and angles: A firm stand tripod, a stationary camera, and lots of careful movement of your object are important elements in stop motion animation. The lights and the angles of your camera decide the result of your efforts. Do not bump your camera during the shoot, or you may lose everything and begin from scratch, which is not a good idea at all. Lights and the shadow angle are even important in stop motion animation creation.
There are movements and shoot arrangements, like a few more major elements you must consider while planning to stop motion animation from escalating your creative aspect.
To create stop motion animation, beginners and kids require different objects. Among them, few things are common like cameras, tripods, lights etc. In the case of kids, you can start practicing at home with available items like a big table to keep objects on them. But for beginners, can start from a small studio with various angle lights and camera arrangements.
However, even for the beginner, the home could be the best option instead of a studio.
Part 2: 20 Best Stop Animation Ideas for Kids and Beginners
We will see the 20 best stop animation ideas for kids and beginners for the next few paragraphs. We will divide the section into two segments: easy stop motion ideas for beginners and amazing stop motion ideas for kids. As kids are small and tender, we mention them in the first column and then beginners.
1.Everyday Play Items
For Kids
Kids love to play with toys. But every day playing with the same toys brings boredom. Being a responsible parent, you must eradicate their boredom to teach him/them how to make stop motion with their daily playing toys. Place the toys over a table, fix the angle and place your mobile phone camera and start slow-moving and on and off the camera. It’s fun for kids to create something different that can go online.
For Beginners
Take a basket, collect a few items from your daily use like pin, comb, paperweight, vegetable cutter, knife, stationery items on the table. You can adjust your home lights and set your mobile camera or DSLR on the tripod. Create something based on your thought process with the objects, start on or off the camera and make a little move to create the animation over the video.
The process is quite basic yet useful to know the camera angles, the lights, and shadow collaboration to create the magic.
2.Lego stop motion
Lego is the legendary name in stop motion animation. The brick-style square figures or brickfilms your kid can create to lego stop motion. The creativity is unlimited, and your kid can express any story using lego animation.
Windows 10 with the latest version supports Lego animation. Your kid must know how to operate the Lego creation under your guidance.
For beginners: The best stop animation tries for the beginners, the Lego. You can create numerous characters, stories, and the message you want to convey through your animation creation. Lego is the best for beginners. You will get opportunities to experiment with the shadow and lights technique, animation movement tricks, and, if possible, voiceover gives you the perfect stop motion animation.
3.Claymation
For Kids
You will get clay toys in every household and every kid’s wardrobe. Every kid can prepare a figure out of those colorful clay bumps stored in their collection. If you hold the camera at an apt angle, place any clay figures and start camera roll on and off, a beautiful clip you can make.
For Beginners
You can make clay figures without hands or legs and make moves. Use a tripod and place it in front of those clay figures, put the lights on and start rolling the camera. The clays can depict a story without much of your efforts and involvement. The plus point of the claymation is you can use the same clay and make hundreds of stop motions and show the magic over the camera.
4.Whiteboard stop motion for kids
If your kids are good at sketching or drawing, or painting, a whiteboard becomes a great idea to make stop motion. The shape and size of the whiteboard give you enough space to draw a story and show it to your audience.
For beginners: A small sketch by a marker on the whiteboard, use the white space, place the camera on the tripod and start to roll on. The major plus point to using a whiteboard is the spacious object and the sketch you draw over the board. You can easily brief the subject line, using figures, characters and make a super stop motion to feed your creativity.
5.Sticky Notes stop motion for kids
You can create a sticky notes game or figures if you want to use the sticky notes board. Once you get the idea, you will never feel bored playing with sticky notes and create stop motion. But for the kids, it’s high-level creativity that needs attention and support from your elders.
For beginners: The notes can be a great idea to draw a story or the game we used to play in our childhood. You can add voiceover or the music at the time of final editing. The movement of the notes with the rhythm and music create a perfect stop motion for your beginning journey.
6.Paper-cut out stop motion idea for kids
The paper-cut-out stop motion is an interesting animation that easily grabs the watchers’ attention. You can prepare figures and characters by cutting papers or directly cutting figures from magazines, newspapers, and books and creating stop motion animation.
For the beginners: It could be really fun to cut the figures from books, magazines, newspapers and make the story and give the animation form. Here it would help if you held the camera from the top of the object to avoid the shadow. The playful manner of shadow and light is a very important thing in paper-cut-out stop motion. The camera position would decide how beautiful your stop motion creation will be. Perfect practice for beginners at home.
7.Floor motion or chalkboard motion for kids
The school classroom becomes our best play area if teachers are not around. Black or green boards become the best drawing space with white and colorful chalk. The same stance we can apply on the floor. You can draw figures and move on the floor and shoot. As a kid, you can take the help from your elder and create the motion of your choice.
For the beginners: For the beginners, the floor motion suits you best as you can use the space and set the camera and lights. You can draw the images and figures on the floor, place the camera as per the angle and start on and off. It is also a tricky stop motion idea for beginners to try at home to set the hands-on.
8.Boing Claymation or Replacement for kids
Boing claymation intrigues laughter if you can add good sound effects. Though kids prefer the replacement stop motion, it is a funny animation if you manage to create. Lots of creativity and lesser arrangements are required to make this category stop motion animation.
For the Beginners: If you try your hands to make some funny animation based on objects available at home, Boing claymation is the best option to start working on it. The objects you set need to move from one place to another and shoot at from a distance.
9.Human and shadow stop motion for kids
The most engaging stop motion ever is when you can use the human body and the shadow reflection to create the animation. Play with your friends on the playground, experiment with the shadow, and shoot it. Later add sound effects to create a stop motion animation to give surprise to your elder brother. How cool!
For beginners: You can start with your friends and create magic with shadow reflection and start your camera roll on it. You can do figure-centric stop motion or objective-related stop motion if you know how to utilize the sun rays, half of the job you have done so far.
10.Timelapse stop motion for kids
This category stop motion idea is to get concrete formation if you know how to set your device camera to click or shoot every time interval. The time setting is called timelapse, and it captures the movement of the object or formation of the object and captures the transformation or change. Being a kid, it’s great creativity to set the camera and capture those moments to create timelapse.
For beginners: In the professional world, several ad agencies take the help of time-lapse to show the transformation and the slow changes of the object they select. The transformation depicts a story that could frame on a device. The shoot will be on the time interval to frame the entire change.
11.Fruit stop motion ideas for kids
Kids do not prefer to have fruits after breakfast. To understand how important fruits are in our daily diet, you can create fruit stop motion animation. Fruits have different shapes and sizes. You can select anyone and can make stop motion. Place them on the table, shoot them from different angles, add titles in the final editing. Your stop motion animation is ready.
For beginners: To get into the kids’ world, you can start with the food and fruit is a great choice. Create a catchy subject line and make a message story with the fruits. As a beginner, it would be a challenge to get fit into the kids’ world. Give it a try!
12.Matchstick stop motion for kids
You can make something creative out of matchsticks and shoot them following a sequence and make a story. It’s a good idea to personify them and shoot them from different angles. As a kid, you can enjoy making them unified and create a story.
For beginners: Arrange matchstick and make a story out of those sticks is a great idea to begin your journey. You only need to craft a story based on the sticks, settings, camera, and lights. You can use the floor as well to decorate the story.
13.Paper animation for kids
Kids have lots of craftwork in school. You can utilize the extracurricular activities by making stop motion with paper and drawing over it. The idea is amazing, and your friends may feel jealous to watch your creativity.
For the beginners: Beginners can use anything on paper and create a stop motion of their choice. With paper, you can create a stop motion of the beautiful memory book or memory sequence that reminds you of a happy time with your family members.
14.Easy breakfast preparing stop motion for kids
Kids, when preparing something in the kitchen, can shoot the entire process and then set them in the following sequence. It’s the wisest decision to Make a stop motion to frame your creativity. You can even share or show it to your elders and friends and give them a surprise.
For beginners: Beginners can make the stop motion by shooting their cooking recipes. Sometimes you try something on the gas oven. Shoot your efforts, make a sequence and get the frame of stop motion. The creativity you can share on social media platforms.
15.Stop motion for Maths and Arts
School curriculum is a great idea to show your creative aspects. You can combine maths and arts and create any topic you want. Hand-made drawings, colors, a whiteboard, and a camera, you are all set to begin your project.
For beginners: Paper Cutting and making any object could be a great artistic creation. You can elevate your thinking process by arranging things and making a stop motion animation.
16.Stop motion with toys for kids
Check your wardrobe and get all the toys out from there. Set them as a story and roll on the camera. You can make your own toy story.
For the beginners: Remember what you made out in your college project? You can make Eskimo living and create stop motion. You can add your creativity and knowledge about their living style to make the animation more attractive and eye-catching.
![]()
A cross-platform for making videos anywhere for all creators
* Secure Download
Why your video editing isn’t good enough? How about some creative inspo?
- 100M+ Users
- 5M+ Stock Media for Use
- 4M+ Social Media Followers
- 150+ Countries and Regions

17.Drawing stop motion for kids
You can draw a picture, make a story out of it, place the camera, fix the light and shadow, and start shooting it. You can give a surprise to your drawing teacher as well by making the stop motion from your drawing book.
For beginners: Halloween stop motion is quite popular among beginners. It would be a great idea to give your friends an incredible and scary gift this Halloween. Cut the paper, draw the pictures, fix them as per the sequence of your story and make a stop motion. Don’t forget to shoot in a shadow, fewer lights needed to create the horror effects. You can add cold music to make it more horrific.
18.Halloween stop motion for kids
You can create a Halloween stop motion by making a craft. Using pumpkin, different pops to support your story and start to roll the camera. If it is a scary idea, use lights and then shoot.
For beginners: You can make course ads or promotions in the stop motion format. Content writing and the prospect in the industry you can show through the stop motion, asking your friend, or if possible, you stand in front of the camera and shoot it. It’s a good idea to promote education as well among the kids.
19.Christmas tree-making ideas for kids
You can make your Christmas a memorable one by making the Christmas tree stop motion. Decorate the tree and shoot them following a sequence and camera angle. Give a festive look to your Christmas tree and create a memorable stop motion this Christmas.
For beginners: As a beginner, you can try at the corner of the home, decorate the tree with lights, colorful papers, leaves, balls, stars and give an amazing look. The natural lights give different looks and feel to the animation in the corner, easily attracting viewers. You can add music to give a completely festive look.
20.Birthday card stop motion for kids
A birthday celebration is a great festival for any age kid. To make the celebration memorable, you can create a birthday card stop motion animation. You can add music to make it attractive and a joyful experience for you or your friend.
For beginners: College fest is a great opportunity to show your skill. You can create new ideas and form a stop motion to exhibit the idea and concept to your fellow friends and faculty members. Give your hands a try to make the fest an animated day.
Final Thought
You can give a shape to any idea if you know how to organize the stop motion systematically. Portray a beautiful story, arrange the stuff you need to express your ideas and concepts, and start shooting it. You can spread your work digitally by posting on various social media platforms.
Shanoon Cox
Shanoon Cox is a writer and a lover of all things video.
Follow @Shanoon Cox
Shanoon Cox
Mar 27, 2024• Proven solutions
Stop motion is the most adoring animated presentation of the social media era on digital presence. You can express conceptual-based ideas and thoughtful messages in a storytelling frame. We will discuss and get an overview of the stop motion ideas of kids and stop motion ideas for beginners in this article.
Let’s dive into the subject line!
Stop motion animation could be a great idea while presenting a story that will take a short duration but carry a significant meaning. The meaning even you can portray easily with the animated objects, characters, figures, and the movement.
Here, the movement of the illustrated figures and characters is vital because the camera uses in stop motion repeatedly getting on or off. Many frames are created to portray the story you want to present to your audience during the on and off.
- Part 1: What are the Important Elements When Producing a Good Stop Motion Animation?
- Part 2: 20 Best Stop Animation Ideas for Kids and Beginners
Part 1: What are the Important Elements When Producing a Good Stop Motion Animation?
While you are dealing with the digital creative aspect, you need to have a subject line, plan, execution components, camera and knowledge about running the camera to show its movements. In short, these are the major elements you need to have grip before starting any stop motion animation.
The significant elements are:
- A thoughtful subject line: why people watch you stop motion animation, ask the question to yourself and decide a good subject line. If you want to show a story by moving a few objects, characters, and figures, the subject line must have a solid message you want to convey. Otherwise, you will never get your target audience.
- Proper planning: It is an old proverb that creativity is the messy thing in the world. But people will not watch it messy on the screen. How you present the complete story, what kinds of cameras and angles you need to use to get what you want, the background settings, any music you can add or not are part of the planning.
- Cameras and angles: A firm stand tripod, a stationary camera, and lots of careful movement of your object are important elements in stop motion animation. The lights and the angles of your camera decide the result of your efforts. Do not bump your camera during the shoot, or you may lose everything and begin from scratch, which is not a good idea at all. Lights and the shadow angle are even important in stop motion animation creation.
There are movements and shoot arrangements, like a few more major elements you must consider while planning to stop motion animation from escalating your creative aspect.
To create stop motion animation, beginners and kids require different objects. Among them, few things are common like cameras, tripods, lights etc. In the case of kids, you can start practicing at home with available items like a big table to keep objects on them. But for beginners, can start from a small studio with various angle lights and camera arrangements.
However, even for the beginner, the home could be the best option instead of a studio.
Part 2: 20 Best Stop Animation Ideas for Kids and Beginners
We will see the 20 best stop animation ideas for kids and beginners for the next few paragraphs. We will divide the section into two segments: easy stop motion ideas for beginners and amazing stop motion ideas for kids. As kids are small and tender, we mention them in the first column and then beginners.
1.Everyday Play Items
For Kids
Kids love to play with toys. But every day playing with the same toys brings boredom. Being a responsible parent, you must eradicate their boredom to teach him/them how to make stop motion with their daily playing toys. Place the toys over a table, fix the angle and place your mobile phone camera and start slow-moving and on and off the camera. It’s fun for kids to create something different that can go online.
For Beginners
Take a basket, collect a few items from your daily use like pin, comb, paperweight, vegetable cutter, knife, stationery items on the table. You can adjust your home lights and set your mobile camera or DSLR on the tripod. Create something based on your thought process with the objects, start on or off the camera and make a little move to create the animation over the video.
The process is quite basic yet useful to know the camera angles, the lights, and shadow collaboration to create the magic.
2.Lego stop motion
Lego is the legendary name in stop motion animation. The brick-style square figures or brickfilms your kid can create to lego stop motion. The creativity is unlimited, and your kid can express any story using lego animation.
Windows 10 with the latest version supports Lego animation. Your kid must know how to operate the Lego creation under your guidance.
For beginners: The best stop animation tries for the beginners, the Lego. You can create numerous characters, stories, and the message you want to convey through your animation creation. Lego is the best for beginners. You will get opportunities to experiment with the shadow and lights technique, animation movement tricks, and, if possible, voiceover gives you the perfect stop motion animation.
3.Claymation
For Kids
You will get clay toys in every household and every kid’s wardrobe. Every kid can prepare a figure out of those colorful clay bumps stored in their collection. If you hold the camera at an apt angle, place any clay figures and start camera roll on and off, a beautiful clip you can make.
For Beginners
You can make clay figures without hands or legs and make moves. Use a tripod and place it in front of those clay figures, put the lights on and start rolling the camera. The clays can depict a story without much of your efforts and involvement. The plus point of the claymation is you can use the same clay and make hundreds of stop motions and show the magic over the camera.
4.Whiteboard stop motion for kids
If your kids are good at sketching or drawing, or painting, a whiteboard becomes a great idea to make stop motion. The shape and size of the whiteboard give you enough space to draw a story and show it to your audience.
For beginners: A small sketch by a marker on the whiteboard, use the white space, place the camera on the tripod and start to roll on. The major plus point to using a whiteboard is the spacious object and the sketch you draw over the board. You can easily brief the subject line, using figures, characters and make a super stop motion to feed your creativity.
5.Sticky Notes stop motion for kids
You can create a sticky notes game or figures if you want to use the sticky notes board. Once you get the idea, you will never feel bored playing with sticky notes and create stop motion. But for the kids, it’s high-level creativity that needs attention and support from your elders.
For beginners: The notes can be a great idea to draw a story or the game we used to play in our childhood. You can add voiceover or the music at the time of final editing. The movement of the notes with the rhythm and music create a perfect stop motion for your beginning journey.
6.Paper-cut out stop motion idea for kids
The paper-cut-out stop motion is an interesting animation that easily grabs the watchers’ attention. You can prepare figures and characters by cutting papers or directly cutting figures from magazines, newspapers, and books and creating stop motion animation.
For the beginners: It could be really fun to cut the figures from books, magazines, newspapers and make the story and give the animation form. Here it would help if you held the camera from the top of the object to avoid the shadow. The playful manner of shadow and light is a very important thing in paper-cut-out stop motion. The camera position would decide how beautiful your stop motion creation will be. Perfect practice for beginners at home.
7.Floor motion or chalkboard motion for kids
The school classroom becomes our best play area if teachers are not around. Black or green boards become the best drawing space with white and colorful chalk. The same stance we can apply on the floor. You can draw figures and move on the floor and shoot. As a kid, you can take the help from your elder and create the motion of your choice.
For the beginners: For the beginners, the floor motion suits you best as you can use the space and set the camera and lights. You can draw the images and figures on the floor, place the camera as per the angle and start on and off. It is also a tricky stop motion idea for beginners to try at home to set the hands-on.
8.Boing Claymation or Replacement for kids
Boing claymation intrigues laughter if you can add good sound effects. Though kids prefer the replacement stop motion, it is a funny animation if you manage to create. Lots of creativity and lesser arrangements are required to make this category stop motion animation.
For the Beginners: If you try your hands to make some funny animation based on objects available at home, Boing claymation is the best option to start working on it. The objects you set need to move from one place to another and shoot at from a distance.
9.Human and shadow stop motion for kids
The most engaging stop motion ever is when you can use the human body and the shadow reflection to create the animation. Play with your friends on the playground, experiment with the shadow, and shoot it. Later add sound effects to create a stop motion animation to give surprise to your elder brother. How cool!
For beginners: You can start with your friends and create magic with shadow reflection and start your camera roll on it. You can do figure-centric stop motion or objective-related stop motion if you know how to utilize the sun rays, half of the job you have done so far.
10.Timelapse stop motion for kids
This category stop motion idea is to get concrete formation if you know how to set your device camera to click or shoot every time interval. The time setting is called timelapse, and it captures the movement of the object or formation of the object and captures the transformation or change. Being a kid, it’s great creativity to set the camera and capture those moments to create timelapse.
For beginners: In the professional world, several ad agencies take the help of time-lapse to show the transformation and the slow changes of the object they select. The transformation depicts a story that could frame on a device. The shoot will be on the time interval to frame the entire change.
11.Fruit stop motion ideas for kids
Kids do not prefer to have fruits after breakfast. To understand how important fruits are in our daily diet, you can create fruit stop motion animation. Fruits have different shapes and sizes. You can select anyone and can make stop motion. Place them on the table, shoot them from different angles, add titles in the final editing. Your stop motion animation is ready.
For beginners: To get into the kids’ world, you can start with the food and fruit is a great choice. Create a catchy subject line and make a message story with the fruits. As a beginner, it would be a challenge to get fit into the kids’ world. Give it a try!
12.Matchstick stop motion for kids
You can make something creative out of matchsticks and shoot them following a sequence and make a story. It’s a good idea to personify them and shoot them from different angles. As a kid, you can enjoy making them unified and create a story.
For beginners: Arrange matchstick and make a story out of those sticks is a great idea to begin your journey. You only need to craft a story based on the sticks, settings, camera, and lights. You can use the floor as well to decorate the story.
13.Paper animation for kids
Kids have lots of craftwork in school. You can utilize the extracurricular activities by making stop motion with paper and drawing over it. The idea is amazing, and your friends may feel jealous to watch your creativity.
For the beginners: Beginners can use anything on paper and create a stop motion of their choice. With paper, you can create a stop motion of the beautiful memory book or memory sequence that reminds you of a happy time with your family members.
14.Easy breakfast preparing stop motion for kids
Kids, when preparing something in the kitchen, can shoot the entire process and then set them in the following sequence. It’s the wisest decision to Make a stop motion to frame your creativity. You can even share or show it to your elders and friends and give them a surprise.
For beginners: Beginners can make the stop motion by shooting their cooking recipes. Sometimes you try something on the gas oven. Shoot your efforts, make a sequence and get the frame of stop motion. The creativity you can share on social media platforms.
15.Stop motion for Maths and Arts
School curriculum is a great idea to show your creative aspects. You can combine maths and arts and create any topic you want. Hand-made drawings, colors, a whiteboard, and a camera, you are all set to begin your project.
For beginners: Paper Cutting and making any object could be a great artistic creation. You can elevate your thinking process by arranging things and making a stop motion animation.
16.Stop motion with toys for kids
Check your wardrobe and get all the toys out from there. Set them as a story and roll on the camera. You can make your own toy story.
For the beginners: Remember what you made out in your college project? You can make Eskimo living and create stop motion. You can add your creativity and knowledge about their living style to make the animation more attractive and eye-catching.
![]()
A cross-platform for making videos anywhere for all creators
* Secure Download
Why your video editing isn’t good enough? How about some creative inspo?
- 100M+ Users
- 5M+ Stock Media for Use
- 4M+ Social Media Followers
- 150+ Countries and Regions
17.Drawing stop motion for kids
You can draw a picture, make a story out of it, place the camera, fix the light and shadow, and start shooting it. You can give a surprise to your drawing teacher as well by making the stop motion from your drawing book.
For beginners: Halloween stop motion is quite popular among beginners. It would be a great idea to give your friends an incredible and scary gift this Halloween. Cut the paper, draw the pictures, fix them as per the sequence of your story and make a stop motion. Don’t forget to shoot in a shadow, fewer lights needed to create the horror effects. You can add cold music to make it more horrific.
18.Halloween stop motion for kids
You can create a Halloween stop motion by making a craft. Using pumpkin, different pops to support your story and start to roll the camera. If it is a scary idea, use lights and then shoot.
For beginners: You can make course ads or promotions in the stop motion format. Content writing and the prospect in the industry you can show through the stop motion, asking your friend, or if possible, you stand in front of the camera and shoot it. It’s a good idea to promote education as well among the kids.
19.Christmas tree-making ideas for kids
You can make your Christmas a memorable one by making the Christmas tree stop motion. Decorate the tree and shoot them following a sequence and camera angle. Give a festive look to your Christmas tree and create a memorable stop motion this Christmas.
For beginners: As a beginner, you can try at the corner of the home, decorate the tree with lights, colorful papers, leaves, balls, stars and give an amazing look. The natural lights give different looks and feel to the animation in the corner, easily attracting viewers. You can add music to give a completely festive look.
20.Birthday card stop motion for kids
A birthday celebration is a great festival for any age kid. To make the celebration memorable, you can create a birthday card stop motion animation. You can add music to make it attractive and a joyful experience for you or your friend.
For beginners: College fest is a great opportunity to show your skill. You can create new ideas and form a stop motion to exhibit the idea and concept to your fellow friends and faculty members. Give your hands a try to make the fest an animated day.
Final Thought
You can give a shape to any idea if you know how to organize the stop motion systematically. Portray a beautiful story, arrange the stuff you need to express your ideas and concepts, and start shooting it. You can spread your work digitally by posting on various social media platforms.
Shanoon Cox
Shanoon Cox is a writer and a lover of all things video.
Follow @Shanoon Cox
Best Emoji Removers to Remove Emojis From Pictures [Online/PC/Mobile]
Thanks to technology, editing photos have become easy. You can crop and rotate a photo, add filters, and even add emojis. While removing emojis is easy while you are editing an image and have not saved your work, but what if you have and want to get rid of the emojis you added to the picture? How to go about that?
So, if you want to remove an emoji from a picture and the picture is already saved, don’t worry; this post will help you learn about the top ways to remove it. Keep reading!
Related: How to Remove Unwanted Objects from Photo
In this article
01 Best Emoji Removers Online to Remove Emojis from Pictures
02 Best Emoji Removers on Windows/Mac Computer
03 Best Emoji Remover Apps on iPhone and Android
Part 1: Best Emoji Removers Online to Remove Emojis from Pictures
1. Inpaint
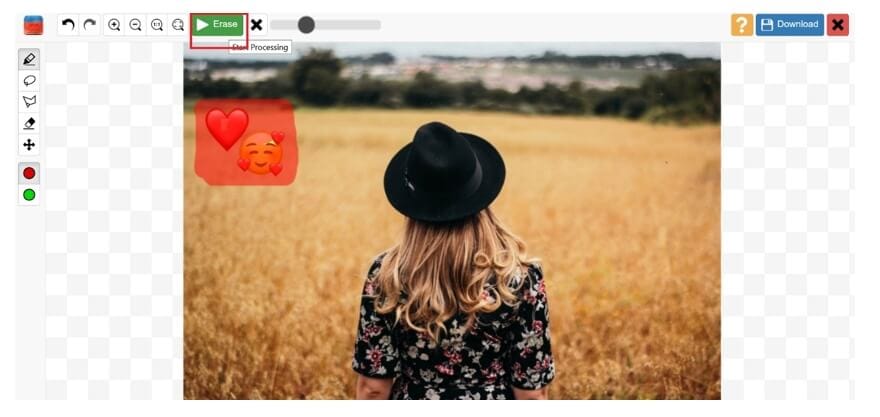
So, the first online emoji remover that you can try is Inpaint. This is a simple to use tool and will remove unwanted objects, such as emojis, from a picture by intelligently filling it with textures that match the surrounding image data.
The image formats Inpaint accepts are JPG, WebP, and PNG. Just remember to use only the recommended image formats, and you can start using them right away. You don’t need to log in or sign up to start using it.
Features
- An online tool that removes unwanted objects quickly.
- You don’t need to sign up or log in.
- It accepts JPG, PNG, and WebP formats.
- 4.2MP is the maximum image resolution.
Website: https://theinpaint.com/
2. Pixlr
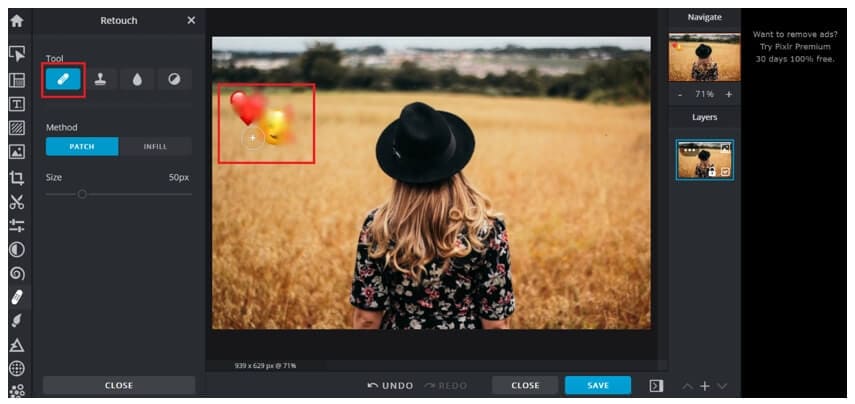
The next popular online tool is Pixlr. Pixlr is a popular photo editing tool that allows you to fix your pictures as well. You can use the tool online either using your computer web browser or mobile.
Whatever works for you. It doesn’t only let you remove emojis but erase background as well. But since you want to remove emojis, you will have to add the image and click on the retouch button from the toolbar. Then, you need to click on the image multiple times so that its surroundings overlap the emojis.
Features
- Pixlr can be used on both mobile and web browsers.
- Multiple photo editing tools are available.
- Removes emojis by blending them with the surroundings.
- Using Pixlr is easy and convenient.
Website: https://pixlr.com/
3. Fotor

Fotor is a professional photo editing tool, which lets you clone an emoji with a part of the image. The online tool asks you to sign up using your Google account to save your work. So, if you want to know how to remove emoji from a photo, you can use the clone feature.
Once you upload an image with emojis, move your cursor to the tool section in the left menu bar. Scroll down, and you will see the Clone option. Touch one part of the image that you want to use instead of the emoji. The first dot will be the area you want to clone and place the second dot on the emoji. And all done.
Website: https://www.fotor.com/
Features
- You can clone the emoji to remove it.
- A professional tool with lots of editing features.
- One needs to sign up or log in before using Fotor.
- The tool retains the original picture quality.
Related: Best Online Photo Editors
Part 2: Best Emoji Removers on Windows/Mac Computer
1. Adobe Photoshop
Adobe Photoshop is arguably one of the best photo editing tools that only allows you to enhance a photo but fix issues, such as removing emojis, unwanted objects, and so on. Adobe Photoshop is a professional tool and might not be the best for those new to it, but if you have used Adobe Photoshop earlier, you can use the Lasso Tool or the Marqueel Tool, which you will find on the left toolbar to remove emojis and unwanted items. Once done, save the image, and yes, the original picture quality will be retained.
Key Features
- A professional photo editing tool.
- It has multiple photo editing features and lets you remove emojis.
- You can draw on the emoji with a pen or pencil.
- It autosaves your work.
2. Wondershare Fotophire
Wondershare Fotophire is a fantastic photo editing tool that works magically on all kinds of images. Whether your photo is loaded with multiple emojis, you can remove them easily using Fotophire. If you are thinking about how to remove emojis from pictures using Fotophire, it’s pretty easy.
You need to clone any part of the image, and the tool will automatically use its algorithm to fill the emoji with its surroundings so that the filled area looks natural and blends well with the rest of the photo. Fotophire is a good option for both beginners and pros.
Key Features
- It removes all kinds of unwanted objects from an image, including emojis.
- Using Fotophire is easy and convenient.
- A good tool for both pros and beginners.
- Background doesn’t get impacted, and the original image quality remains intact.
3. GIMP
GIMP is a free and open-source photo editor, which allows you to remove emojis from a photo. It is available for Windows, macOS, GNU/Linux, and other operating systems. GIMP has been designed for everyone who would want their picture to look better.
If you wish to manipulate a high-quality image, you don’t have to worry about that because it accepts bigger-size photos as well. GIMP lets you clone an area and use that part on the emoji. You can also adjust the opacity of the cloned item depending on your requirements.
Key Features
- It lets you clone the surrounding area to hide an emoji.
- Accepts all the top image formats.
- It doesn’t pixelate the image after editing it.
- A free tool to use with lots of photo editing features.
4. Jihosoft Photo Eraser
Jihosoft Photo Eraser is a good photo editor tool that removes emojis or unwanted objects from an image by analyzing the surroundings. Once done, it will fill the selected emojis with the intelligently-generated textures. If you no longer want the emojis to be there is an image, Jihosoft Photo Eraser will be an ideal tool to use. The tool’s primary purpose is to remove unwanted items from an image, which is why it is an excellent software to go for.
Key Features
- It removes unwanted objects, such as emojis, from a photo.
- It allows the cloning of things to replace emojis.
- Using Jihosoft Photo Eraser is easy.
- The photo quality remains intact.
Part 3: Best Emoji Remover Apps on iPhone and Android
1. Snapseed
Snapseed is a photo editing app that is available for both iPhone and Android users. It has a masking feature, which lets you mask any object in a photo, including an emoji. Snapseed is a good tool to get rid of unwanted items from any image.
It has around 29 photo editing tools, which will help a user to enhance the photo quality. Using it is very easy because all the tools are readily available on the main screen. You just need to select the right tool and get started with the work.
Key Features
- It helps in removing emojis and unwanted objects from a photo.
- It works on both RAW and JPG files.
- It has multiple photo editing tools.
- Using Snapseed is easy.
2. AirBrush
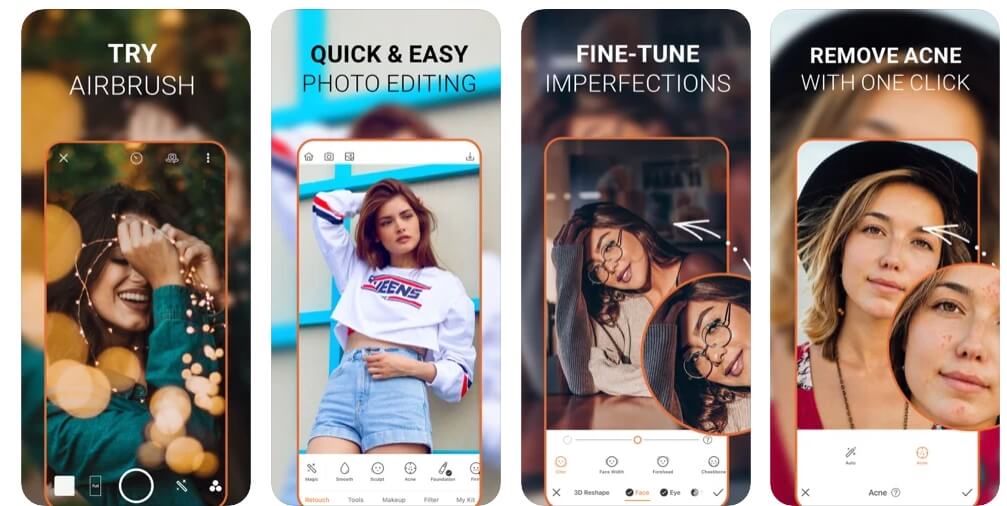
AirBrush is a leading photo editing tool for iPhone users and has a high rating of 4.9. The tool makes editing an image effortlessly. If you don’t want the emojis to ruin your photo, use AirBrush to deal with it quickly. Moreover, it lets you edit your photos further, for example, remove blemishes, make the image look smooth and glowing, add filters to give it a magical touch, and so much more! The tool has quite a lot of features that you will like.
Key Features
- It removes emojis and unwanted objects from an image.
- Using AirBrush is easy.
- It removes emojis quickly.
- It has many photo editing tools.
3. TouchRetouch
If you are looking for a professional photo editing tool that will let you do much more than just remove emojis, you should try TouchRetouch. You can use it to remove unwanted items, such as emojis, lines, blemishes, imperfections, and more.
It has a rating of 4.8, which is great looking at the kind of photo editing features TouchRetouch offers. No matter what objects you want to get rid of in your photo, TouchRetouch can let you do that easily.
Key Features
- It removes all kinds of unwanted objects quickly.
- It provides you with a single-flick line removal function.
- TouchRetouch is easy to use.
- It offers easy to understand tutorials.
FAQ About Removing Emojis from Pictures
How Do I Remove an Emoji from a Hidden Face?
It depends on the kind of tool you have picked. Typically, the tool will let you select the emoji and mask it with its surroundings to blend in well. So, let’s say you are on a dating site and you can’t see how the person looks like because they have hidden their face with an emoji.
In such a case, even if you use an emoji remover tool, it won’t show the actual face, instead replace it with the surrounding. Emoji removal tools are for personal use only.
Conclusion
So, now you know about the easy ways to remove emojis from pictures. Try any of the tools and remove unwanted objects and emojis from any photo you want. The tools that we have listed here are trusted by many and are easy to use.
02 Best Emoji Removers on Windows/Mac Computer
03 Best Emoji Remover Apps on iPhone and Android
Part 1: Best Emoji Removers Online to Remove Emojis from Pictures
1. Inpaint
So, the first online emoji remover that you can try is Inpaint. This is a simple to use tool and will remove unwanted objects, such as emojis, from a picture by intelligently filling it with textures that match the surrounding image data.
The image formats Inpaint accepts are JPG, WebP, and PNG. Just remember to use only the recommended image formats, and you can start using them right away. You don’t need to log in or sign up to start using it.
Features
- An online tool that removes unwanted objects quickly.
- You don’t need to sign up or log in.
- It accepts JPG, PNG, and WebP formats.
- 4.2MP is the maximum image resolution.
Website: https://theinpaint.com/
2. Pixlr
The next popular online tool is Pixlr. Pixlr is a popular photo editing tool that allows you to fix your pictures as well. You can use the tool online either using your computer web browser or mobile.
Whatever works for you. It doesn’t only let you remove emojis but erase background as well. But since you want to remove emojis, you will have to add the image and click on the retouch button from the toolbar. Then, you need to click on the image multiple times so that its surroundings overlap the emojis.
Features
- Pixlr can be used on both mobile and web browsers.
- Multiple photo editing tools are available.
- Removes emojis by blending them with the surroundings.
- Using Pixlr is easy and convenient.
Website: https://pixlr.com/
3. Fotor
Fotor is a professional photo editing tool, which lets you clone an emoji with a part of the image. The online tool asks you to sign up using your Google account to save your work. So, if you want to know how to remove emoji from a photo, you can use the clone feature.
Once you upload an image with emojis, move your cursor to the tool section in the left menu bar. Scroll down, and you will see the Clone option. Touch one part of the image that you want to use instead of the emoji. The first dot will be the area you want to clone and place the second dot on the emoji. And all done.
Website: https://www.fotor.com/
Features
- You can clone the emoji to remove it.
- A professional tool with lots of editing features.
- One needs to sign up or log in before using Fotor.
- The tool retains the original picture quality.
Related: Best Online Photo Editors
Part 2: Best Emoji Removers on Windows/Mac Computer
1. Adobe Photoshop
Adobe Photoshop is arguably one of the best photo editing tools that only allows you to enhance a photo but fix issues, such as removing emojis, unwanted objects, and so on. Adobe Photoshop is a professional tool and might not be the best for those new to it, but if you have used Adobe Photoshop earlier, you can use the Lasso Tool or the Marqueel Tool, which you will find on the left toolbar to remove emojis and unwanted items. Once done, save the image, and yes, the original picture quality will be retained.
Key Features
- A professional photo editing tool.
- It has multiple photo editing features and lets you remove emojis.
- You can draw on the emoji with a pen or pencil.
- It autosaves your work.
2. Wondershare Fotophire
Wondershare Fotophire is a fantastic photo editing tool that works magically on all kinds of images. Whether your photo is loaded with multiple emojis, you can remove them easily using Fotophire. If you are thinking about how to remove emojis from pictures using Fotophire, it’s pretty easy.
You need to clone any part of the image, and the tool will automatically use its algorithm to fill the emoji with its surroundings so that the filled area looks natural and blends well with the rest of the photo. Fotophire is a good option for both beginners and pros.
Key Features
- It removes all kinds of unwanted objects from an image, including emojis.
- Using Fotophire is easy and convenient.
- A good tool for both pros and beginners.
- Background doesn’t get impacted, and the original image quality remains intact.
3. GIMP
GIMP is a free and open-source photo editor, which allows you to remove emojis from a photo. It is available for Windows, macOS, GNU/Linux, and other operating systems. GIMP has been designed for everyone who would want their picture to look better.
If you wish to manipulate a high-quality image, you don’t have to worry about that because it accepts bigger-size photos as well. GIMP lets you clone an area and use that part on the emoji. You can also adjust the opacity of the cloned item depending on your requirements.
Key Features
- It lets you clone the surrounding area to hide an emoji.
- Accepts all the top image formats.
- It doesn’t pixelate the image after editing it.
- A free tool to use with lots of photo editing features.
4. Jihosoft Photo Eraser
Jihosoft Photo Eraser is a good photo editor tool that removes emojis or unwanted objects from an image by analyzing the surroundings. Once done, it will fill the selected emojis with the intelligently-generated textures. If you no longer want the emojis to be there is an image, Jihosoft Photo Eraser will be an ideal tool to use. The tool’s primary purpose is to remove unwanted items from an image, which is why it is an excellent software to go for.
Key Features
- It removes unwanted objects, such as emojis, from a photo.
- It allows the cloning of things to replace emojis.
- Using Jihosoft Photo Eraser is easy.
- The photo quality remains intact.
Part 3: Best Emoji Remover Apps on iPhone and Android
1. Snapseed
Snapseed is a photo editing app that is available for both iPhone and Android users. It has a masking feature, which lets you mask any object in a photo, including an emoji. Snapseed is a good tool to get rid of unwanted items from any image.
It has around 29 photo editing tools, which will help a user to enhance the photo quality. Using it is very easy because all the tools are readily available on the main screen. You just need to select the right tool and get started with the work.
Key Features
- It helps in removing emojis and unwanted objects from a photo.
- It works on both RAW and JPG files.
- It has multiple photo editing tools.
- Using Snapseed is easy.
2. AirBrush
AirBrush is a leading photo editing tool for iPhone users and has a high rating of 4.9. The tool makes editing an image effortlessly. If you don’t want the emojis to ruin your photo, use AirBrush to deal with it quickly. Moreover, it lets you edit your photos further, for example, remove blemishes, make the image look smooth and glowing, add filters to give it a magical touch, and so much more! The tool has quite a lot of features that you will like.
Key Features
- It removes emojis and unwanted objects from an image.
- Using AirBrush is easy.
- It removes emojis quickly.
- It has many photo editing tools.
3. TouchRetouch
If you are looking for a professional photo editing tool that will let you do much more than just remove emojis, you should try TouchRetouch. You can use it to remove unwanted items, such as emojis, lines, blemishes, imperfections, and more.
It has a rating of 4.8, which is great looking at the kind of photo editing features TouchRetouch offers. No matter what objects you want to get rid of in your photo, TouchRetouch can let you do that easily.
Key Features
- It removes all kinds of unwanted objects quickly.
- It provides you with a single-flick line removal function.
- TouchRetouch is easy to use.
- It offers easy to understand tutorials.
FAQ About Removing Emojis from Pictures
How Do I Remove an Emoji from a Hidden Face?
It depends on the kind of tool you have picked. Typically, the tool will let you select the emoji and mask it with its surroundings to blend in well. So, let’s say you are on a dating site and you can’t see how the person looks like because they have hidden their face with an emoji.
In such a case, even if you use an emoji remover tool, it won’t show the actual face, instead replace it with the surrounding. Emoji removal tools are for personal use only.
Conclusion
So, now you know about the easy ways to remove emojis from pictures. Try any of the tools and remove unwanted objects and emojis from any photo you want. The tools that we have listed here are trusted by many and are easy to use.
How to Use Emojis on Windows 10 and Windows 11?
If you ever wondered how to use emojis on Windows, or since when the emojis are around and what is their significance, you will find all your answers here. Because Windows 10 offers a great range of emojis that help you express your feelings and reactions in fewer words, they have recently gained a decent level of popularity, mostly amongst youngsters and millennials.
With that said, in the following sections, you will learn how to use emojis on Windows 10 using both keyboard shortcuts and touch keyboard, how to get emojis on Windows 10 to make your text or conversation look more versatile, and what new has been added to the latest operating system released by Microsoft, i.e., Windows 11.
In this article
01 Part 1: The History of Emojis in Windows
02 Part 2: How to Use Emojis with Keyboard Shortcuts
03 Part 3: How to Use Emojis on Windows PC with Touch Keyboard
04 Part 4: What’s New in Emojis in Windows 11
05 Part 5: How to Get More Emojis in Windows 11
Part 1: The History of Emojis in Windows
Although emojis are present in some form or the other since the mid-‘90s, they were not quite popular back then. With the evolution of smartphones, these iconic characters got attention from the then-teenagers. Seeing this, in 2012, Microsoft introduced the first-ever set of black-and-white emojis with the release of Windows 8, and after some time, the company also added the same to Windows 7 that was rolled out along with the updates for the OS.
With the release of Windows 10 in 2015, a wide range of full-fledged colored emojis was introduced and received a large number of positive reactions from the users. As of today, emojis have become an integral part of everyone’s day-to-day text conversation, be it on Skype, WhatsApp, Facebook, or any other such platform.
Part 2: How to Use Emojis with Keyboard Shortcuts
A keyboard shortcut is a combination of two or more keys that are pressed simultaneously to trigger a pre-assigned event or action. A good example of a keyboard shortcut is ‘Ctrl + S’ which, when pressed, saves the document you’re working on.
While learning the process of how to use emoji in Windows 10, it is equally imperative to memorize the shortcut keys to insert those icons without taking your hands off the keyboard. This not only saves your time, but it also prevents you from going through the lengthy process of opening the emojis keyboard, navigating through all the available icons to choose the one you’re looking for, and then clicking it to insert in the document or conversation.
Nevertheless, it would be a good idea to learn how to launch the emojis keyboard, and the process is simple. All you need to do is:
- Make sure that your keyboard cursor is in an app that can accept text inputs. A text editor like MS Word or WordPad could be a good example
- Press the Windows + ; (semicolon) or Windows + . (period) keys together to open the emojis keyboard

Once the keyboard is open, you can click any of the available emojis to insert it in your conversion or text content.
As for the shortcuts, depending on the type of expression you want to convey, there could be thousands of them. Some of the commonly used emojis and their universal shortcut keys for both Windows 10 and Windows 11 include:
: (colon) + ) (right brace) will create a smiley face
: (colon) + ( (left brace) will create a sad face
: (colon) + ; (semicolon) will create a wink face
…and so on. You can conduct a quick online search to get the entire list of keyboard shortcuts and the emojis that they will create. For your convenience, a link from the Microsoft official website is given below:
Part 3: How to Use Emojis on Windows PC with Touch Keyboard
If you have Microsoft Surface or any other device that has Windows 10 or Windows 11 installed on it, and can accept inputs via touch keyboard, you can enable the feature in the operating system, and then use the touch keyboard to add emojis to your conversion or content. You can follow the instructions given below to enable touch keyboard, and then learn how to use emojis on Windows 11 or Windows 10 via touch:
- Right-click anywhere on the taskbar (Windows 11 is used here for demonstration), and then click Taskbar settings

- From the right area of the Settings window that opens next, scroll down to the Taskbar corner icons section, and then turn on the Touch keyboard switch

- Launch an app that can accept text inputs, e.g., a text editor, chatting app, etc. Click or tap the Touch keyboard icon from the notification area that is present at the bottom-right corner of the screen.

- Click or tap the Emojis icon from the upper-left corner of the touch keyboard that opens up, and then touch your preferred emoji to add it to your text or conversation.

Part 4: What’s New in Emojis in Windows 11
In addition to learning how to use emojis on Windows 10, it is also important to know what’s new with them or the emojis panel in Windows 11, the latest operating system released by Microsoft this year, i.e., 2021.
In Windows 11, although you can launch the emojis keyboard using the same shortcuts, i.e., ‘Windows + .’ or ‘Windows + ;’ keys as mentioned earlier, the emojis keyboard itself has four sections, namely:
- Emojis – Contains various emojis and smileys
- GIF – Gives you access to various animated GIFs from Tenor
- Kamojis – Lets you add the ASCII characters for emojis, e.g., :-) or :-(
- Symbols – To add important symbols to your text, e.g., ©, ®, etc.
In addition to this, the 2D Clippy emoji has also been introduced with Windows 11, and can be located by launching the emojis keyboard, and typing ‘Clippy’.
Part 5: How to Get More Emojis in Windows 11
If the built-in emoji library doesn’t contain your favorite expressions, you can always get several more by following the instructions given below:
- Launch your favorite web browser on Windows 11, and then go to http://www.iemoji.com/
- Click an emoji from the available options or copy one from your favorite portal, and paste it in the Paste Emoji here field

- Review the emoji in the MESSAGE PREVIEW field, and click Create from the Options section to generate the emoji that can be sent as a message or image

- Alternatively, click Copy from the Options section itself, and then go to the text editor or any other portal you want to use the emoji in, and press Ctrl + V to paste and insert the emoji in your conversation or text without any hassle.

Conclusion
While the emojis were introduced to Windows as late as 2012, Windows 11 has a wide range of these virtual objects or faces for various occasions and to convey different expressions respectively. Furthermore, Windows 11 also gives you access to Tenor’s GIFs, and ASCII characters with particular combinations to represent the emojis, as it was done back in the days of button-operated cellphones.
Also, if the built-in emoji keyboard doesn’t have your favorite expressions and smileys, you can always generate your custom ones by going to http://www.iemoji.com/ , and using the options that the website offers. All in all, it’s easy to learn how to use emojis on Windows as long as you have access to the correct tutorial that explains the process in an easy manner.
02 Part 2: How to Use Emojis with Keyboard Shortcuts
03 Part 3: How to Use Emojis on Windows PC with Touch Keyboard
04 Part 4: What’s New in Emojis in Windows 11
05 Part 5: How to Get More Emojis in Windows 11
Part 1: The History of Emojis in Windows
Although emojis are present in some form or the other since the mid-‘90s, they were not quite popular back then. With the evolution of smartphones, these iconic characters got attention from the then-teenagers. Seeing this, in 2012, Microsoft introduced the first-ever set of black-and-white emojis with the release of Windows 8, and after some time, the company also added the same to Windows 7 that was rolled out along with the updates for the OS.
With the release of Windows 10 in 2015, a wide range of full-fledged colored emojis was introduced and received a large number of positive reactions from the users. As of today, emojis have become an integral part of everyone’s day-to-day text conversation, be it on Skype, WhatsApp, Facebook, or any other such platform.
Part 2: How to Use Emojis with Keyboard Shortcuts
A keyboard shortcut is a combination of two or more keys that are pressed simultaneously to trigger a pre-assigned event or action. A good example of a keyboard shortcut is ‘Ctrl + S’ which, when pressed, saves the document you’re working on.
While learning the process of how to use emoji in Windows 10, it is equally imperative to memorize the shortcut keys to insert those icons without taking your hands off the keyboard. This not only saves your time, but it also prevents you from going through the lengthy process of opening the emojis keyboard, navigating through all the available icons to choose the one you’re looking for, and then clicking it to insert in the document or conversation.
Nevertheless, it would be a good idea to learn how to launch the emojis keyboard, and the process is simple. All you need to do is:
- Make sure that your keyboard cursor is in an app that can accept text inputs. A text editor like MS Word or WordPad could be a good example
- Press the Windows + ; (semicolon) or Windows + . (period) keys together to open the emojis keyboard
Once the keyboard is open, you can click any of the available emojis to insert it in your conversion or text content.
As for the shortcuts, depending on the type of expression you want to convey, there could be thousands of them. Some of the commonly used emojis and their universal shortcut keys for both Windows 10 and Windows 11 include:
: (colon) + ) (right brace) will create a smiley face
: (colon) + ( (left brace) will create a sad face
: (colon) + ; (semicolon) will create a wink face
…and so on. You can conduct a quick online search to get the entire list of keyboard shortcuts and the emojis that they will create. For your convenience, a link from the Microsoft official website is given below:
Part 3: How to Use Emojis on Windows PC with Touch Keyboard
If you have Microsoft Surface or any other device that has Windows 10 or Windows 11 installed on it, and can accept inputs via touch keyboard, you can enable the feature in the operating system, and then use the touch keyboard to add emojis to your conversion or content. You can follow the instructions given below to enable touch keyboard, and then learn how to use emojis on Windows 11 or Windows 10 via touch:
- Right-click anywhere on the taskbar (Windows 11 is used here for demonstration), and then click Taskbar settings
- From the right area of the Settings window that opens next, scroll down to the Taskbar corner icons section, and then turn on the Touch keyboard switch
- Launch an app that can accept text inputs, e.g., a text editor, chatting app, etc. Click or tap the Touch keyboard icon from the notification area that is present at the bottom-right corner of the screen.
- Click or tap the Emojis icon from the upper-left corner of the touch keyboard that opens up, and then touch your preferred emoji to add it to your text or conversation.
Part 4: What’s New in Emojis in Windows 11
In addition to learning how to use emojis on Windows 10, it is also important to know what’s new with them or the emojis panel in Windows 11, the latest operating system released by Microsoft this year, i.e., 2021.
In Windows 11, although you can launch the emojis keyboard using the same shortcuts, i.e., ‘Windows + .’ or ‘Windows + ;’ keys as mentioned earlier, the emojis keyboard itself has four sections, namely:
- Emojis – Contains various emojis and smileys
- GIF – Gives you access to various animated GIFs from Tenor
- Kamojis – Lets you add the ASCII characters for emojis, e.g., :-) or :-(
- Symbols – To add important symbols to your text, e.g., ©, ®, etc.
In addition to this, the 2D Clippy emoji has also been introduced with Windows 11, and can be located by launching the emojis keyboard, and typing ‘Clippy’.
Part 5: How to Get More Emojis in Windows 11
If the built-in emoji library doesn’t contain your favorite expressions, you can always get several more by following the instructions given below:
- Launch your favorite web browser on Windows 11, and then go to http://www.iemoji.com/
- Click an emoji from the available options or copy one from your favorite portal, and paste it in the Paste Emoji here field
- Review the emoji in the MESSAGE PREVIEW field, and click Create from the Options section to generate the emoji that can be sent as a message or image
- Alternatively, click Copy from the Options section itself, and then go to the text editor or any other portal you want to use the emoji in, and press Ctrl + V to paste and insert the emoji in your conversation or text without any hassle.
Conclusion
While the emojis were introduced to Windows as late as 2012, Windows 11 has a wide range of these virtual objects or faces for various occasions and to convey different expressions respectively. Furthermore, Windows 11 also gives you access to Tenor’s GIFs, and ASCII characters with particular combinations to represent the emojis, as it was done back in the days of button-operated cellphones.
Also, if the built-in emoji keyboard doesn’t have your favorite expressions and smileys, you can always generate your custom ones by going to http://www.iemoji.com/ , and using the options that the website offers. All in all, it’s easy to learn how to use emojis on Windows as long as you have access to the correct tutorial that explains the process in an easy manner.
Also read:
- [Updated] In 2024, Comparing YouTube and Dailymotion Notable Contrasts
- 2024 Approved Best iOS and Android Apps You Can Use to Create Animoji and Memoji Videos
- 2024 Approved Download Premium-Quality Designs at No Cost – For YouTube Creators
- 2024 Approved Perfected Techniques for High-Quality WebP to JPG Conversion
- How to Burn Photos to DVD with Transitions and Music for 2024
- New In 2024, 10 Popular Cartoon Characters That Should Top Your List
- New In 2024, How to Add Emojis To Discord
- Step-by-Step Guide: Updating Your Intel HD Graphics 5500 Drivers
- Unplugged Gaming Success: Essential Tips for Streamlined Steam Games in Offline Mode
- Which is the Best Fake GPS Joystick App On Itel P40? | Dr.fone
- Title: Updated 2024 Approved Best 10 Emoji Makers to Create Your Own EmojisPC/Online/Android/iPhone
- Author: Jan
- Created at : 2024-09-27 20:05:30
- Updated at : 2024-09-30 17:36:49
- Link: https://meme-emoji.techidaily.com/updated-2024-approved-best-10-emoji-makers-to-create-your-own-emojispconlineandroidiphone/
- License: This work is licensed under CC BY-NC-SA 4.0.