
New Top 10 Storyboarding Software Free&Paid
Top 10 Storyboarding Software [Free&Paid]
Top 10 Storyboarding Software in 2024

Liza Brown
Mar 27, 2024• Proven solutions
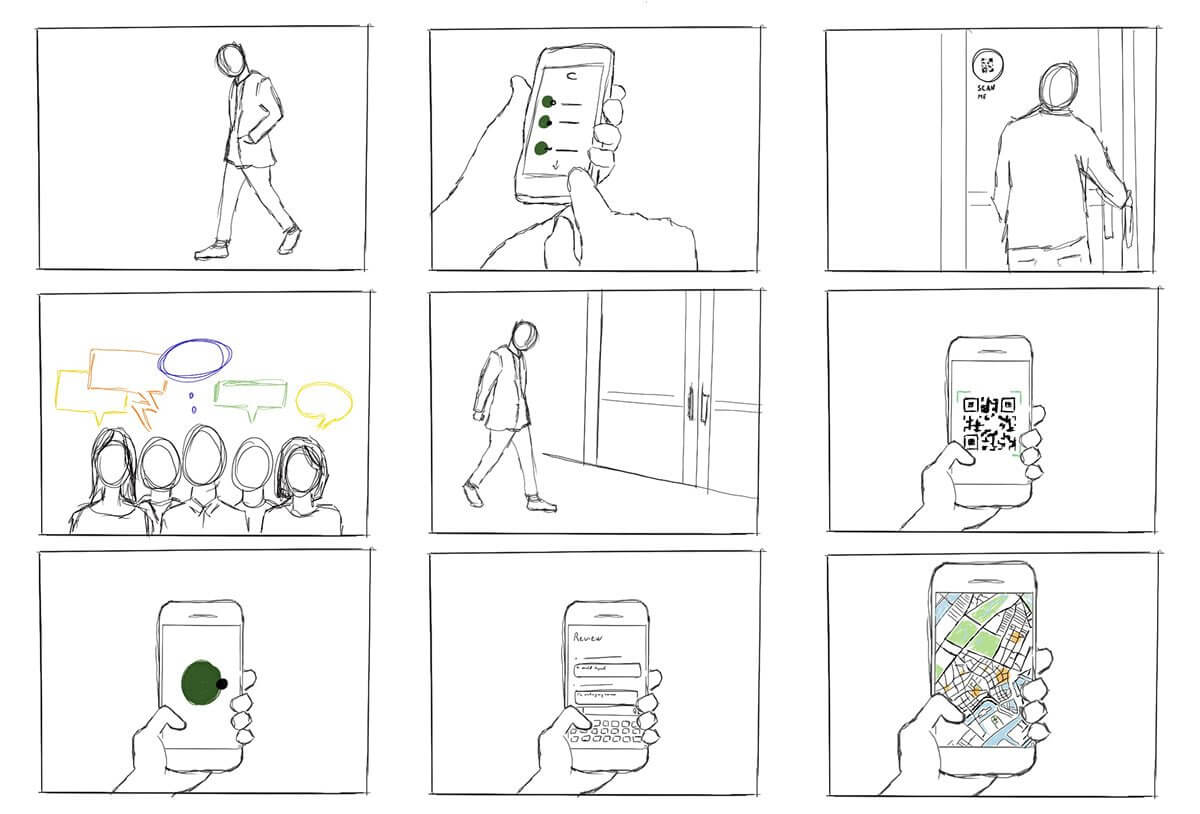
Several different creative sectors rely on storyboarding for their creative process, including filmmakers and animators and UX designers, game designers, and creative directors. However, the process of hand-drawing each frame or shot can take a great deal of time if you have to do it by hand. Our goal is to make storyboarding easier and more efficient by bringing you this list of free and paid tools, storyboarding software, and apps.
You can add text, sound, and script to your original sketches with these tools (or make use of assets from a library if you do not have time to sketch your own). Alternatively, you can share your storyboarding progress within the project, either by a link or a PDF - or get immediate feedback. Finally, you can continue working from anywhere with apps that work across multiple devices - desktop, mobile, and tablet.
No matter what kind of tool you prefer, from a simple 2D sketch tool like Make Storyboard to a 3D drawing tool like Storyboard Pro, you’ll find the best options on this page.
You might be interested in:
1. Storyboarder by Wonder Unit
Price: Free
Platforms: Windows, Mac, and Linux.
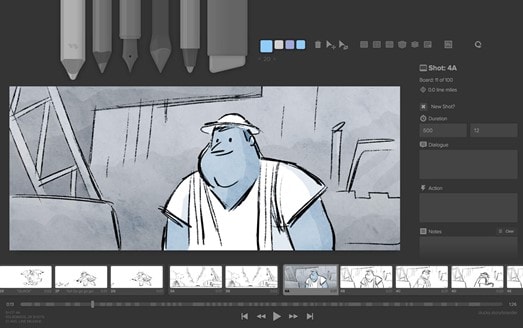
If you’re on a smaller budget, Storyboarder is an excellent option. It’s free and open-source. In the program’s clean interface, you have all the tools you need, so drawing shapes and characters is a breeze. In addition to writing dialogue, you can also enter timing information and the type of shot.
The Storyboarder and Photoshop apps integrate seamlessly, which means you can refine your board in Photoshop and have it updated in Storyboarder. In addition, you can export videos to Premiere, Final Cut, Avid, PDF, or Animated GIF from this software.
2. Toon Boom Storyboard Pro
Price: $60/mo or $999 one-time fee
Platforms: Mac, Windows
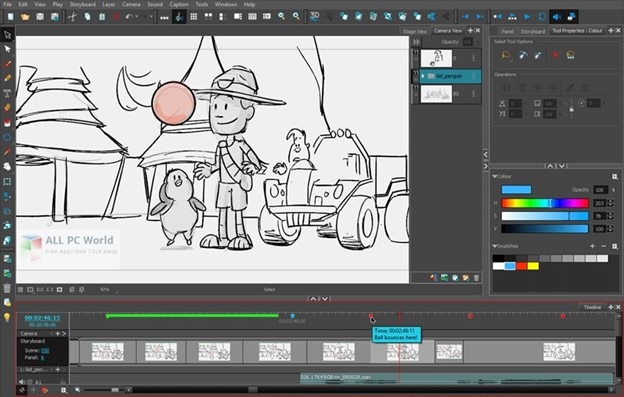
Toon Boom Storyboard Pro is the complete opposite of free. A standout among storyboarding programs, it’s also one of the most expensive. However, in most studios, boarding and animating is done using Toon Boom, so you may want to learn about this if you’d like to break into the industry. As a result, the monthly fee is a lot lower than the initial cost, allowing most people to take advantage of the service.
You can use Toon Boom for a month and test the waters before committing yourself to a huge license fee. How can you benefit from this program? Sketching and animation go hand-in-hand in this process. Drawing your boards and seeing how they would animate is a great way to test your script while making sure you’re on target with your scenes.
The program is primarily designed for animators. It can be used for ad agencies and for making small skits. Nevertheless, the Story Flow tool makes switching between board and script for writers incredibly easy. In addition to creating dynamic camera movements, you can also use some 3D effects that work well for 3D animators. Create layered panels in Photoshop quickly and easily by importing Final Draft scripts. There is plenty of support available for all the common programs in the art industry.
3. Plot
Price: $10/month (14 days Free Trial Available)
Platforms: Windows, Linux, and Mac

Storytelling is super easy with the plot. There are no limits to the number of boards, projects, and users you can have. With some nice features targeted toward animators, it is a web-based storyboarding app for beginners.
A drawing pane is available on whichever operating system you run this program on. Drawing your frames this way also lets you add dialogues and stage directions directly to your project. In addition, it is easy to move through different scenes in the app because it is visual. You can click and drag pieces around to change the scene. It couldn’t be easier.
In addition to the collaboration features, we consider it to be exceptional and above the norm for products in this price range. As long as you have a desktop program to work on your drawings, you’ll have more control. When you import the drawings into Plot, you can then arrange them accordingly. Hence, you’ve still got collaborative features with online management of very detailed drawings.
4. FrameForge Storyboard Studio
Price: $498.95 one-time fee or $12.99/month (Core Edition); $799 one-time fee or $24.99/month (Professional Edition)
Platforms: Windows, Mac, and Android.
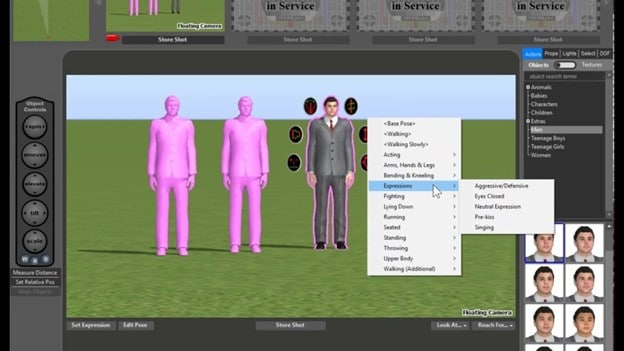
Even without animation, drawing, or highly technical computer skills, your team can benefit from FrameForge, with HBO, Netflix, and BBC as users.
There are two versions of FrameForge’s product: Core and Professional. Professional offers planning capabilities (down to the inch) for dollies and cranes. Scripts from any program can be imported into the software. In addition to movement arrows, framing notes, angle of view, focal length, and more, the storyboards ensure that your video team understands all aspects of production, from preparation to post-production.
Mobile users can use it on any mobile device, and PowerPoint presentations can be downloaded as a final product. Team members who want to produce more elaborate and lengthy videos for entertainment purposes might find FrameForge useful.
5. Studiobinder
Price: $29/month (Indie); $49/month (Professional); $99/month (Studio) Free Trial is also available.
Platform: Windows, Linux, and Mac.
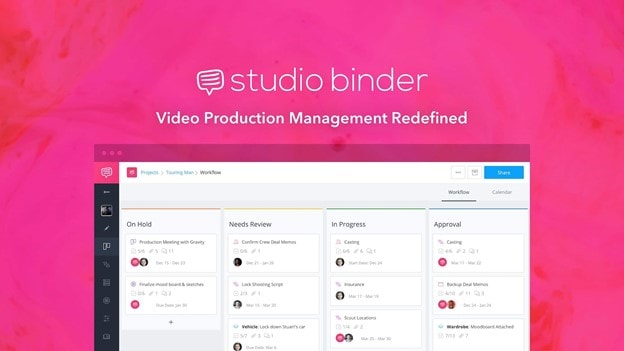
Visualizations can be personalized at every level in Studiobinder. Filters can be used to sort columns, order scenes, add images, adjust aspect ratios, color code images, and add notes to locations. In addition, project management features such as task assignment and commenting help Studiobinder make collaboration easy.
Also, the platform includes a handy presentation mode so you can show your team your projects. The company boasts impressive clients such as BuzzFeed, ESPN, and CBS Interactive. Team members who need to collaborate on various stages of the video production process and who prefer customizable tools should take advantage of this option.
6. Boords
Price: $12-$24/month
Platforms: Windows, Linux, and Mac

In the software industry, online SaaS products have quickly become the norm. While desktop programs are not going away, we see more and more web-based options such as Boards that provide unique solutions.
The Boards software is a native storyboard platform that provides tons of free templates and collaboration tools. In addition, clients can log into their projects and add comments directly from their computers.
For teams working together on a project, you may also set up multiple user accounts. Storyboards in Boords can be presented in animatic form before being animated, thanks to flexible frame sizes and tons of free templates.
Despite the affordable monthly price, this product works on every major operating system. It is rare to find a program that offers this much functionality at such an affordable price. Boords is an excellent solution for collaborative work. You can try it for a while until you decide if it’s right for you, but there is no commitment involved.
7. makeStoryboard
Price: Free; $12/month (Professional); $36/month (Team)
Platforms: Windows, and Mac.

MakeStoryboard provides a simple, straightforward interface for uploading camera shots, drawing stick figures with its built-in tool, and incorporating text for scene details if you are not interested in the fancier options in the list. In addition, any drawing tablet can be used with marker, pencil, and pen tools.
Additional details unique to your team and use case can also be entered in custom text fields. Then, using a PDF format, you can export your storyboard when you’re ready to pitch. Finally, stakeholders can review it using a private link without requiring an account in an alternative method. The best part is that it has a free subscription plan, making it an excellent option for teams on a small budget.
8. Canva
Price: Free
Platforms: Works on all major Operating Systems

It doesn’t have to be stressful to create a storyboard, and Canva makes it easy with a large library of templates, millions of stock photos (or the ability to upload your own), and color frames. The font type, colors, headers, and subheaders can be customized.
If you’re working on a script or design with someone else, you can grant access to collaborate, and when you’re done you can share the design through email or as a PDF. On the other hand, if your team needs an easy and simple tool to manage simpler projects or get started with storyboarding, this may be your best choice.
9. PanelForge
Price: Free (Public Beta); $7.31/month (Pro); $1,411/year (Studio)
Platforms: Works on all Major Operating Systems
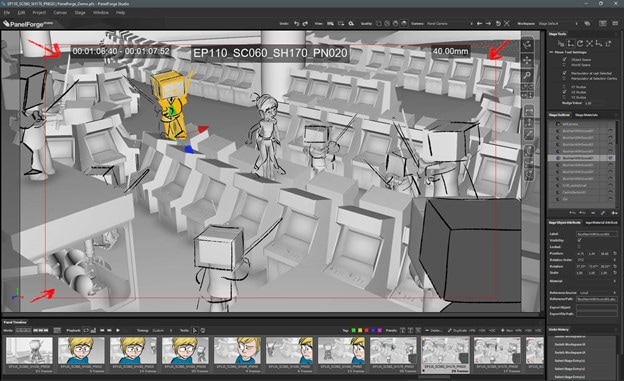
PanelForge delivers a feature-rich, drag-and-drop storyboarding solution with flexible frames and drag-and-drop tools. Storyboarding is free to try and offers a suite of paid plans for anyone working on animatics and more complex projects.
Drawings and 3D designs can both be created with PanelForge. Aside from creating animatics, you can also import and export files from Adobe Premiere and Final Cut Pro. The PanelForge tool is ideal for experienced marketers and storyboarders familiar with visualization tools.
10. Adobe Photoshop
Price: $9.99/mo
Platforms: Mac and Windows.
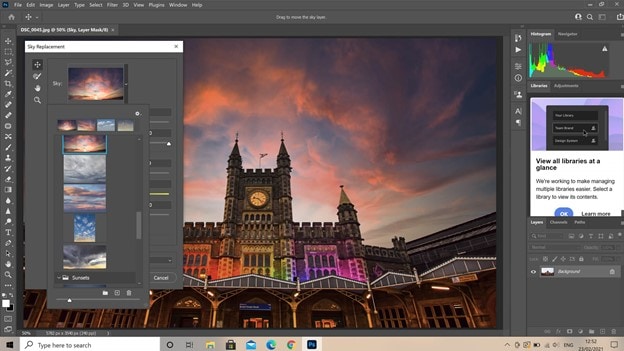
I think it will stay around for a long time. It’s been around for 20+ years. Yet, doesn’t it seem funny how Photoshop can be used for so much more than photo editing? In addition to storyboarding, we see it used for digital painting, pixel art, etc. The digital drawing capability of PS is the same as that of other programs. There are now more brushes available for the PS environment, so there’s even more support.
Additionally, you can download free storyboard templates in PSD format for Photoshop. This program doesn’t need too much explanation because every artist is already aware of it. However, Linux users are most likely to be disappointed by the lack of support.
Conclusion
So, these are some of the best free and paid to storyboard software that you can find in 2021. Each piece of software has its own characteristics and way of being used. In the end, it all depends upon your usage and preferences to decide which software you will use to achieve your goals. If you have enough budget then you can work with paid tools as they offer more features. If you have limited or no budget, you can try to free tools as they offer pretty good features.


Liza Brown
Liza Brown is a writer and a lover of all things video.
Follow @Liza Brown
Liza Brown
Mar 27, 2024• Proven solutions
Several different creative sectors rely on storyboarding for their creative process, including filmmakers and animators and UX designers, game designers, and creative directors. However, the process of hand-drawing each frame or shot can take a great deal of time if you have to do it by hand. Our goal is to make storyboarding easier and more efficient by bringing you this list of free and paid tools, storyboarding software, and apps.
You can add text, sound, and script to your original sketches with these tools (or make use of assets from a library if you do not have time to sketch your own). Alternatively, you can share your storyboarding progress within the project, either by a link or a PDF - or get immediate feedback. Finally, you can continue working from anywhere with apps that work across multiple devices - desktop, mobile, and tablet.
No matter what kind of tool you prefer, from a simple 2D sketch tool like Make Storyboard to a 3D drawing tool like Storyboard Pro, you’ll find the best options on this page.
You might be interested in:
1. Storyboarder by Wonder Unit
Price: Free
Platforms: Windows, Mac, and Linux.
If you’re on a smaller budget, Storyboarder is an excellent option. It’s free and open-source. In the program’s clean interface, you have all the tools you need, so drawing shapes and characters is a breeze. In addition to writing dialogue, you can also enter timing information and the type of shot.
The Storyboarder and Photoshop apps integrate seamlessly, which means you can refine your board in Photoshop and have it updated in Storyboarder. In addition, you can export videos to Premiere, Final Cut, Avid, PDF, or Animated GIF from this software.
2. Toon Boom Storyboard Pro
Price: $60/mo or $999 one-time fee
Platforms: Mac, Windows
Toon Boom Storyboard Pro is the complete opposite of free. A standout among storyboarding programs, it’s also one of the most expensive. However, in most studios, boarding and animating is done using Toon Boom, so you may want to learn about this if you’d like to break into the industry. As a result, the monthly fee is a lot lower than the initial cost, allowing most people to take advantage of the service.
You can use Toon Boom for a month and test the waters before committing yourself to a huge license fee. How can you benefit from this program? Sketching and animation go hand-in-hand in this process. Drawing your boards and seeing how they would animate is a great way to test your script while making sure you’re on target with your scenes.
The program is primarily designed for animators. It can be used for ad agencies and for making small skits. Nevertheless, the Story Flow tool makes switching between board and script for writers incredibly easy. In addition to creating dynamic camera movements, you can also use some 3D effects that work well for 3D animators. Create layered panels in Photoshop quickly and easily by importing Final Draft scripts. There is plenty of support available for all the common programs in the art industry.
3. Plot
Price: $10/month (14 days Free Trial Available)
Platforms: Windows, Linux, and Mac
Storytelling is super easy with the plot. There are no limits to the number of boards, projects, and users you can have. With some nice features targeted toward animators, it is a web-based storyboarding app for beginners.
A drawing pane is available on whichever operating system you run this program on. Drawing your frames this way also lets you add dialogues and stage directions directly to your project. In addition, it is easy to move through different scenes in the app because it is visual. You can click and drag pieces around to change the scene. It couldn’t be easier.
In addition to the collaboration features, we consider it to be exceptional and above the norm for products in this price range. As long as you have a desktop program to work on your drawings, you’ll have more control. When you import the drawings into Plot, you can then arrange them accordingly. Hence, you’ve still got collaborative features with online management of very detailed drawings.
4. FrameForge Storyboard Studio
Price: $498.95 one-time fee or $12.99/month (Core Edition); $799 one-time fee or $24.99/month (Professional Edition)
Platforms: Windows, Mac, and Android.
Even without animation, drawing, or highly technical computer skills, your team can benefit from FrameForge, with HBO, Netflix, and BBC as users.
There are two versions of FrameForge’s product: Core and Professional. Professional offers planning capabilities (down to the inch) for dollies and cranes. Scripts from any program can be imported into the software. In addition to movement arrows, framing notes, angle of view, focal length, and more, the storyboards ensure that your video team understands all aspects of production, from preparation to post-production.
Mobile users can use it on any mobile device, and PowerPoint presentations can be downloaded as a final product. Team members who want to produce more elaborate and lengthy videos for entertainment purposes might find FrameForge useful.
5. Studiobinder
Price: $29/month (Indie); $49/month (Professional); $99/month (Studio) Free Trial is also available.
Platform: Windows, Linux, and Mac.
Visualizations can be personalized at every level in Studiobinder. Filters can be used to sort columns, order scenes, add images, adjust aspect ratios, color code images, and add notes to locations. In addition, project management features such as task assignment and commenting help Studiobinder make collaboration easy.
Also, the platform includes a handy presentation mode so you can show your team your projects. The company boasts impressive clients such as BuzzFeed, ESPN, and CBS Interactive. Team members who need to collaborate on various stages of the video production process and who prefer customizable tools should take advantage of this option.
6. Boords
Price: $12-$24/month
Platforms: Windows, Linux, and Mac
In the software industry, online SaaS products have quickly become the norm. While desktop programs are not going away, we see more and more web-based options such as Boards that provide unique solutions.
The Boards software is a native storyboard platform that provides tons of free templates and collaboration tools. In addition, clients can log into their projects and add comments directly from their computers.
For teams working together on a project, you may also set up multiple user accounts. Storyboards in Boords can be presented in animatic form before being animated, thanks to flexible frame sizes and tons of free templates.
Despite the affordable monthly price, this product works on every major operating system. It is rare to find a program that offers this much functionality at such an affordable price. Boords is an excellent solution for collaborative work. You can try it for a while until you decide if it’s right for you, but there is no commitment involved.
7. makeStoryboard
Price: Free; $12/month (Professional); $36/month (Team)
Platforms: Windows, and Mac.
MakeStoryboard provides a simple, straightforward interface for uploading camera shots, drawing stick figures with its built-in tool, and incorporating text for scene details if you are not interested in the fancier options in the list. In addition, any drawing tablet can be used with marker, pencil, and pen tools.
Additional details unique to your team and use case can also be entered in custom text fields. Then, using a PDF format, you can export your storyboard when you’re ready to pitch. Finally, stakeholders can review it using a private link without requiring an account in an alternative method. The best part is that it has a free subscription plan, making it an excellent option for teams on a small budget.
8. Canva
Price: Free
Platforms: Works on all major Operating Systems
It doesn’t have to be stressful to create a storyboard, and Canva makes it easy with a large library of templates, millions of stock photos (or the ability to upload your own), and color frames. The font type, colors, headers, and subheaders can be customized.
If you’re working on a script or design with someone else, you can grant access to collaborate, and when you’re done you can share the design through email or as a PDF. On the other hand, if your team needs an easy and simple tool to manage simpler projects or get started with storyboarding, this may be your best choice.
9. PanelForge
Price: Free (Public Beta); $7.31/month (Pro); $1,411/year (Studio)
Platforms: Works on all Major Operating Systems
PanelForge delivers a feature-rich, drag-and-drop storyboarding solution with flexible frames and drag-and-drop tools. Storyboarding is free to try and offers a suite of paid plans for anyone working on animatics and more complex projects.
Drawings and 3D designs can both be created with PanelForge. Aside from creating animatics, you can also import and export files from Adobe Premiere and Final Cut Pro. The PanelForge tool is ideal for experienced marketers and storyboarders familiar with visualization tools.
10. Adobe Photoshop
Price: $9.99/mo
Platforms: Mac and Windows.
I think it will stay around for a long time. It’s been around for 20+ years. Yet, doesn’t it seem funny how Photoshop can be used for so much more than photo editing? In addition to storyboarding, we see it used for digital painting, pixel art, etc. The digital drawing capability of PS is the same as that of other programs. There are now more brushes available for the PS environment, so there’s even more support.
Additionally, you can download free storyboard templates in PSD format for Photoshop. This program doesn’t need too much explanation because every artist is already aware of it. However, Linux users are most likely to be disappointed by the lack of support.
Conclusion
So, these are some of the best free and paid to storyboard software that you can find in 2021. Each piece of software has its own characteristics and way of being used. In the end, it all depends upon your usage and preferences to decide which software you will use to achieve your goals. If you have enough budget then you can work with paid tools as they offer more features. If you have limited or no budget, you can try to free tools as they offer pretty good features.
Liza Brown
Liza Brown is a writer and a lover of all things video.
Follow @Liza Brown
How to Record and Edit an Animoji or Memoji Karaoke Music Video?
How to Record and Edit an Animoji or Memoji Karaoke Music Video?
Liza Brown
Mar 27, 2024• Proven solutions
Becoming a superstar whose music is adored in every corner of the Earth is not something that can be achieved overnight. The rest of us, who only dream of worldwide fame can just enjoy our favorite songs and from time to time create animoji karaoke music videos for entertainment purposes. Read on if you are not sure what animojis are and how you can use them to create music videos from your iPhone or iPad, because in this article we are going to take you through each step of the process of making an animoji karaoke video.
First, let’s check some popular Memoji Karaoke video from YouTube. The Video below is from YouTuber Memoji Karaoke, enjoy.
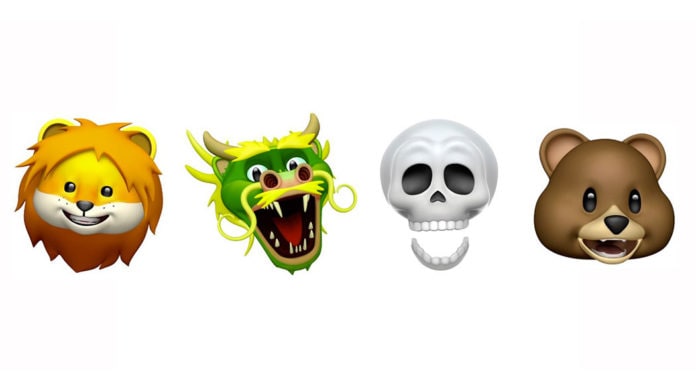
What Exactly is The Difference Between Animojis and Memojis?
Animojis and Memojis have taken the world by storm since the first iPhone X model was released back in 2017. Both animojis and memojis utilize facial recognition technologies to track your movements and facial expressions and imitate them in a virtual environment. However, an animoji is a 3D emoji like a monkey, koala, tiger or a unicorn, while memojis are fully customizable avatars that let you create a character from scratch.
Memojis enable you to choose the character’s skin color, head, nose, ear shape or hairstyle, meaning that you can create as many new characters as you want effortlessly. Furthermore, you can add stickers or apply up to five different filters to animojis and memojis you share with your friends.

See best Memoji makers here: Top 8 Memoji Makers to Make a Memoji on PC, Android, and iPhone.
How to Set Up and Create Memojis?
Owners of iPhone X, iPhone XS, iPhone XS Max, and iPadPro can easily make new memojis from their devices. All you have to do in order to start creating a new memoji is open the messaging app, locate the iMessage AppStore icon, tap on it and then tap on the Animoji icon. By doing so you will gain access to all animojis that are available on iOS 12 or other versions of the iOS that support memojis and animojis. After tapping on the New Memoji icon you will be able to see the default character you can customize as you see fit.
You can now get creative and pick one of the countless skin tones, choose how old your character is going to be or select any of the available head, nose and ear shapes. Moreover, you can customize the eye color for each character you create, add eyewear, or decide whether or not your character is going to have facial hair. Once you’re finished customizing a new memoji, simply tap on the Done button and the character you’ve created is going to be saved in your animoji collection. You can edit, duplicate or delete the memojis by tapping on the three dot icon or you can use them as camera overlays and share them with your friends.
How to Make a Memoji or Animoji Karaoke Music Video?
Once you’ve created a memoji you will have to record thirty-second videos in order to be able to send them as messages. After the recording session is completed, you can review the material you’ve produced, and decide if you are happy with the result or if you want to do another take. The only downside is that you can’t play music from your iPhone or your iPad while you’re recording, which means that you have to play the song you want to cover from another device such as a computer or the stereo system.
Read this article to learn more about Animoji: The Ultimate Guide of How to Use Animoji on iPhone X.
It is worth noting that knowing the lyrics of the song is going to improve the quality of the karaoke music video you’re producing significantly, so rehearsing a song few times before you hit the record button may be a good idea if you don’t know its lyrics by heart.
When you’re ready, launch the iMessage app and choose an animoji or memoji character you’re going to be in the video. Don’t record karaoke videos in the full-screen mode because the record button is going to cover a significant portion of the screen, which can complicate the video editing process. Optionally, you download and install the Animoji Studio app if you want to record videos that are longer than thirty seconds, but you might need some time to get used to making karaoke videos with this app.
Proceed to record your 30-second video or activate the Screen Recording option from the Control Center if you want to capture a karaoke video that exceeds that limit. If you like the results you can simply send the video you’ve created as a message, but you can also transfer the file to your computer and edit from a video editing software like Filmora.
Import the memoji video file you’ve transferred to your computer into Filmora after you’ve created a new project. You can do this from the software’s Media panel by clicking on the Import drop-down menu and choosing the Import Media Files option. Place the video file on the timeline and then cut or trim all parts of the clip you don’t want to include in the final cut of your memoji karaoke video. Filmora offers a vast number of different opening titles, end credits, audio and visual effects and transitions that can all help you create a visually attractive karaoke video.
Moreover, you can duplicate an animoji or memoji and create a duet in just a few simple clicks. The editor’s powerful audio editing tools enable you to add a high-quality audio file to your project or sound effects that can make your video more entertaining. Click on the Export button to choose the output destination, format, resolution and aspect ratio for the karaoke video you’ve just created. Filmora lets you export videos directly to your YouTube or Vimeo channel, which can be quite handy if you want to share your memoji videos online immediately after you’ve completed the video editing process.
List of iPhones and iPads that Support Animojis and Memojis
| Face ID | Animoji | Memoji |
|---|---|---|
| iPhone X | iPhone X | iPhone X (iOS 12 or later required) |
| iPhone XR | iPhone XR | iPhone XR |
| iPhone XS | iPhone XS | iPhone XS |
| iPhone XS Max | iPhone XS Max | iPhone XS Max |
| iPad Pro 12.9-inch (3rd generation) | iPad Pro 12.9-inch (3rd generation) | iPad Pro 12.9-inch (3rd generation) |
| iPad Pro 11-inch or above | iPad Pro 11-inch | iPad Pro 11-inch |
Unfortunately, Face ID feature, as well as animojis and memojis, are relatively novel additions on iOS-based devices, and you won’t be able to create memoji or animoji karaoke videos from the iMessages app unless you have one of the following iPhone or iPad models.
The list of iPhone and iPad models that offer the Face ID, Animoji and Memoji Features
Older models of iPhones, iPods, and iPads that have the latest version of iOS installed can only receive animoji and memoji messages, but it is not possible to create these messages with them. In case you are using an older model of an iPhone or an iPad but you still want to create animoji and memoji karaoke videos you can find a simple solution to your problem below.
Supermoji – The Emoji App
A powerful and intuitive app like Supermoji enables you to create karaoke music videos that feature your favorite animoji and memoji characters with ease. Creating animated 3D models won’t take too much of your time if you choose to download and install this app on your device, but after a three-day trial period, you’ll have to opt for one of the available subscription models. A weekly subscription costs $9.99, while you must pay $29.99 for a monthly subscription, which makes the Supermoji app a bit pricy. Alternatively, you can try Facemoji or Emoji Face Recorder apps, but the results you’ll get can be a bit underwhelming when compared to the animojis and memojis created from the iMessages app.
Conclusion
Creating funny animoji and memoji karaoke music videos is a new trend that can only grow in popularity in the future. However, this feature is only available on recent iPhone and iPad models, but there are a number of third-party apps that enable you to create this type of video even if you are using an older iPhone or iPad model. Do you like using memoji and animoji animations to create karaoke videos you share with your friends on social media? Leave a comment below and share your opinions with us.
Liza Brown
Liza Brown is a writer and a lover of all things video.
Follow @Liza Brown
Liza Brown
Mar 27, 2024• Proven solutions
Becoming a superstar whose music is adored in every corner of the Earth is not something that can be achieved overnight. The rest of us, who only dream of worldwide fame can just enjoy our favorite songs and from time to time create animoji karaoke music videos for entertainment purposes. Read on if you are not sure what animojis are and how you can use them to create music videos from your iPhone or iPad, because in this article we are going to take you through each step of the process of making an animoji karaoke video.
First, let’s check some popular Memoji Karaoke video from YouTube. The Video below is from YouTuber Memoji Karaoke, enjoy.
What Exactly is The Difference Between Animojis and Memojis?
Animojis and Memojis have taken the world by storm since the first iPhone X model was released back in 2017. Both animojis and memojis utilize facial recognition technologies to track your movements and facial expressions and imitate them in a virtual environment. However, an animoji is a 3D emoji like a monkey, koala, tiger or a unicorn, while memojis are fully customizable avatars that let you create a character from scratch.
Memojis enable you to choose the character’s skin color, head, nose, ear shape or hairstyle, meaning that you can create as many new characters as you want effortlessly. Furthermore, you can add stickers or apply up to five different filters to animojis and memojis you share with your friends.
See best Memoji makers here: Top 8 Memoji Makers to Make a Memoji on PC, Android, and iPhone.
How to Set Up and Create Memojis?
Owners of iPhone X, iPhone XS, iPhone XS Max, and iPadPro can easily make new memojis from their devices. All you have to do in order to start creating a new memoji is open the messaging app, locate the iMessage AppStore icon, tap on it and then tap on the Animoji icon. By doing so you will gain access to all animojis that are available on iOS 12 or other versions of the iOS that support memojis and animojis. After tapping on the New Memoji icon you will be able to see the default character you can customize as you see fit.
You can now get creative and pick one of the countless skin tones, choose how old your character is going to be or select any of the available head, nose and ear shapes. Moreover, you can customize the eye color for each character you create, add eyewear, or decide whether or not your character is going to have facial hair. Once you’re finished customizing a new memoji, simply tap on the Done button and the character you’ve created is going to be saved in your animoji collection. You can edit, duplicate or delete the memojis by tapping on the three dot icon or you can use them as camera overlays and share them with your friends.
How to Make a Memoji or Animoji Karaoke Music Video?
Once you’ve created a memoji you will have to record thirty-second videos in order to be able to send them as messages. After the recording session is completed, you can review the material you’ve produced, and decide if you are happy with the result or if you want to do another take. The only downside is that you can’t play music from your iPhone or your iPad while you’re recording, which means that you have to play the song you want to cover from another device such as a computer or the stereo system.
Read this article to learn more about Animoji: The Ultimate Guide of How to Use Animoji on iPhone X.
It is worth noting that knowing the lyrics of the song is going to improve the quality of the karaoke music video you’re producing significantly, so rehearsing a song few times before you hit the record button may be a good idea if you don’t know its lyrics by heart.
When you’re ready, launch the iMessage app and choose an animoji or memoji character you’re going to be in the video. Don’t record karaoke videos in the full-screen mode because the record button is going to cover a significant portion of the screen, which can complicate the video editing process. Optionally, you download and install the Animoji Studio app if you want to record videos that are longer than thirty seconds, but you might need some time to get used to making karaoke videos with this app.
Proceed to record your 30-second video or activate the Screen Recording option from the Control Center if you want to capture a karaoke video that exceeds that limit. If you like the results you can simply send the video you’ve created as a message, but you can also transfer the file to your computer and edit from a video editing software like Filmora.
Import the memoji video file you’ve transferred to your computer into Filmora after you’ve created a new project. You can do this from the software’s Media panel by clicking on the Import drop-down menu and choosing the Import Media Files option. Place the video file on the timeline and then cut or trim all parts of the clip you don’t want to include in the final cut of your memoji karaoke video. Filmora offers a vast number of different opening titles, end credits, audio and visual effects and transitions that can all help you create a visually attractive karaoke video.
Moreover, you can duplicate an animoji or memoji and create a duet in just a few simple clicks. The editor’s powerful audio editing tools enable you to add a high-quality audio file to your project or sound effects that can make your video more entertaining. Click on the Export button to choose the output destination, format, resolution and aspect ratio for the karaoke video you’ve just created. Filmora lets you export videos directly to your YouTube or Vimeo channel, which can be quite handy if you want to share your memoji videos online immediately after you’ve completed the video editing process.
List of iPhones and iPads that Support Animojis and Memojis
| Face ID | Animoji | Memoji |
|---|---|---|
| iPhone X | iPhone X | iPhone X (iOS 12 or later required) |
| iPhone XR | iPhone XR | iPhone XR |
| iPhone XS | iPhone XS | iPhone XS |
| iPhone XS Max | iPhone XS Max | iPhone XS Max |
| iPad Pro 12.9-inch (3rd generation) | iPad Pro 12.9-inch (3rd generation) | iPad Pro 12.9-inch (3rd generation) |
| iPad Pro 11-inch or above | iPad Pro 11-inch | iPad Pro 11-inch |
Unfortunately, Face ID feature, as well as animojis and memojis, are relatively novel additions on iOS-based devices, and you won’t be able to create memoji or animoji karaoke videos from the iMessages app unless you have one of the following iPhone or iPad models.
The list of iPhone and iPad models that offer the Face ID, Animoji and Memoji Features
Older models of iPhones, iPods, and iPads that have the latest version of iOS installed can only receive animoji and memoji messages, but it is not possible to create these messages with them. In case you are using an older model of an iPhone or an iPad but you still want to create animoji and memoji karaoke videos you can find a simple solution to your problem below.
Supermoji – The Emoji App
A powerful and intuitive app like Supermoji enables you to create karaoke music videos that feature your favorite animoji and memoji characters with ease. Creating animated 3D models won’t take too much of your time if you choose to download and install this app on your device, but after a three-day trial period, you’ll have to opt for one of the available subscription models. A weekly subscription costs $9.99, while you must pay $29.99 for a monthly subscription, which makes the Supermoji app a bit pricy. Alternatively, you can try Facemoji or Emoji Face Recorder apps, but the results you’ll get can be a bit underwhelming when compared to the animojis and memojis created from the iMessages app.
Conclusion
Creating funny animoji and memoji karaoke music videos is a new trend that can only grow in popularity in the future. However, this feature is only available on recent iPhone and iPad models, but there are a number of third-party apps that enable you to create this type of video even if you are using an older iPhone or iPad model. Do you like using memoji and animoji animations to create karaoke videos you share with your friends on social media? Leave a comment below and share your opinions with us.
Liza Brown
Liza Brown is a writer and a lover of all things video.
Follow @Liza Brown
How to Make Memes on iPhone and Android
How to Make Memes on iPhone and Android

Ollie Mattison
Mar 27, 2024• Proven solutions
With growing demand on the internet, memes are spreading like wildfire. In case you want to promote your brand using various types of relatable memes that would drive more traffic for your website, then there is good news for you. It doesn’t matter, whether you own an Android or iOS device. We will help you out in learning how to make memes on iPhone/Android in this article. Keep reading!
- Part1: How to make memes on iPhone with Meme Generator
- Part2: How to make memes on Android with Memedroid
- Part3: Recommended - Making memes with Filmora meme maker online
Part 1: How to make memes on iPhone with Meme Generator
While planning to create memes on your iPhone, you might find Meme Generator as the most suitable tool. It helps you create hilarious memes and allows you to share on social media platforms like Twitter, Facebook, Messenger, Instagram, Dropbox, E-mail, Snapchat etc. you get 500 plus memes with example captions under different categories.
You can customize memes using your own photos and adding text, alter size and color of text using 10 different fonts. You can crop the image, move it, add border to it, filter/search memes, and scroll through each meme category. There are no watermark or auto upload of memes to protect your privacy. Here is the detailed guide –
Step 1: Install Meme Generator from App Store on your iPhone and launch the app.
Step 2: Tap on the 3 horizontal lines on the top-left corner to browse memes. If you know the name, then search a meme and click on it.
Step 3: Use the example text or hit the ‘Text’ bar to add or edit your caption. Press the icons over the top-right corner for customizing your meme photo and caption options.

Step 4: Tap on the ‘Save’ or ‘Share’ button, once you are done editing the meme. You can find the meme on your ‘Photos’ app.
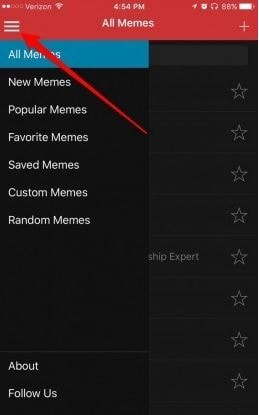
Part 2: How to make memes on Android with Memedroid
If you are wondering how to make memes on Android, then take the Memedroid app into consideration. You can create photos and GIF memes, jokes, avatars, graphics etc. with this app. There are numerous memes uploaded everyday on the app and you get the chance to let people vote for your meme too.
You get to use popular templates such as evil toddler, attached girlfriend, surprised koala with hilarious designs. The best rated memes are in the top gallery and you get the main gallery with latest funny memes too. You can design and save your memes and share them or download, it’s up to you. It supports a wide variety of languages such as English, French, Spanish, Italian, Portuguese etc.
Here are the steps for how to make memes on Android –
Step 1: Download and install the app on your mobile and launch it. Click on ‘Meme Factory’ to pick the background image and then you can swipe to explore the other features too. Alternatively, you can add your own photos if Meme factory was not of your choice. Hit ‘Upload Zone’ instead of ‘Meme Factory’ and register for a free account. On the ‘Upload’ screen, tap the ‘Select An Image’ button to pick a photo within 330MB size
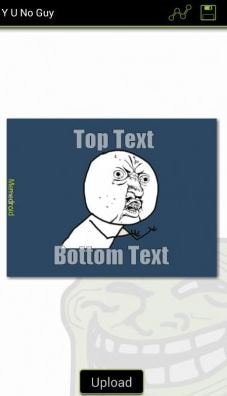
Step 2: After selecting the background image, add captions at the top and bottom of the image. The ‘SAVE’ button can be found on the top-right, tap that to save. Likewise, for sharing the meme, hit the ‘SHARE’ button located at the bottom of the screen.
Step 3: Add tags and accept the ‘Terms of Service’ followed by ‘Send’ button. Wait a while, to get you meme ready for your audience.
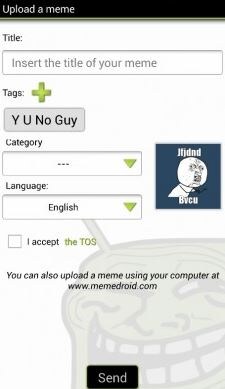
Part 3: Recommended - Making memes with Filmora meme maker online
In order to make memes on iPhone/Android, you need a mobile device. But, what if you have a computer on which you need to create a meme? Well, Filmora meme maker is the apt choice for you. You don’t need to download apps or software on your Pc. It is the ultimate online solution.
Brief steps to introduce making memes. You can create image, GIF, and video memes adding nice fonts. It processes video/GIF/image memes rapidly than the competitors. Adding texts, fonts and altering font colors is so easy with it.
Here is the detailed guide to make memes on Android –
Step 1: Visit the official Filmora website and look for Filmora online meme maker. Import videos by dragging and dropping to the Filmora interface. You can even add online links to videos in order to upload them.

Step 2: After selecting the video/photo/GIF move to the meme editor page and customize your video meme using tools from the left pane. Include text, change fonts and then you can preview the changes.

Step 3: Tap on the ‘CREATE’ button to apply the changes, when you are satisfied. Press the ‘DOWNLOAD’ button and then share your meme on social media sites.

Conclusion
Coming towards the end of the article, we have discovered that Filmora creates brilliant memes and that too, in no time. No lengthy or annoying processes, nor you need apps that eat up your phone memory. Life is blissfully funny with meme making on Filmora.
Ollie Mattison
Ollie Mattison is a writer and a lover of all things video.
Follow @Ollie Mattison
Ollie Mattison
Mar 27, 2024• Proven solutions
With growing demand on the internet, memes are spreading like wildfire. In case you want to promote your brand using various types of relatable memes that would drive more traffic for your website, then there is good news for you. It doesn’t matter, whether you own an Android or iOS device. We will help you out in learning how to make memes on iPhone/Android in this article. Keep reading!
- Part1: How to make memes on iPhone with Meme Generator
- Part2: How to make memes on Android with Memedroid
- Part3: Recommended - Making memes with Filmora meme maker online
Part 1: How to make memes on iPhone with Meme Generator
While planning to create memes on your iPhone, you might find Meme Generator as the most suitable tool. It helps you create hilarious memes and allows you to share on social media platforms like Twitter, Facebook, Messenger, Instagram, Dropbox, E-mail, Snapchat etc. you get 500 plus memes with example captions under different categories.
You can customize memes using your own photos and adding text, alter size and color of text using 10 different fonts. You can crop the image, move it, add border to it, filter/search memes, and scroll through each meme category. There are no watermark or auto upload of memes to protect your privacy. Here is the detailed guide –
Step 1: Install Meme Generator from App Store on your iPhone and launch the app.
Step 2: Tap on the 3 horizontal lines on the top-left corner to browse memes. If you know the name, then search a meme and click on it.
Step 3: Use the example text or hit the ‘Text’ bar to add or edit your caption. Press the icons over the top-right corner for customizing your meme photo and caption options.
Step 4: Tap on the ‘Save’ or ‘Share’ button, once you are done editing the meme. You can find the meme on your ‘Photos’ app.
Part 2: How to make memes on Android with Memedroid
If you are wondering how to make memes on Android, then take the Memedroid app into consideration. You can create photos and GIF memes, jokes, avatars, graphics etc. with this app. There are numerous memes uploaded everyday on the app and you get the chance to let people vote for your meme too.
You get to use popular templates such as evil toddler, attached girlfriend, surprised koala with hilarious designs. The best rated memes are in the top gallery and you get the main gallery with latest funny memes too. You can design and save your memes and share them or download, it’s up to you. It supports a wide variety of languages such as English, French, Spanish, Italian, Portuguese etc.
Here are the steps for how to make memes on Android –
Step 1: Download and install the app on your mobile and launch it. Click on ‘Meme Factory’ to pick the background image and then you can swipe to explore the other features too. Alternatively, you can add your own photos if Meme factory was not of your choice. Hit ‘Upload Zone’ instead of ‘Meme Factory’ and register for a free account. On the ‘Upload’ screen, tap the ‘Select An Image’ button to pick a photo within 330MB size
Step 2: After selecting the background image, add captions at the top and bottom of the image. The ‘SAVE’ button can be found on the top-right, tap that to save. Likewise, for sharing the meme, hit the ‘SHARE’ button located at the bottom of the screen.
Step 3: Add tags and accept the ‘Terms of Service’ followed by ‘Send’ button. Wait a while, to get you meme ready for your audience.
Part 3: Recommended - Making memes with Filmora meme maker online
In order to make memes on iPhone/Android, you need a mobile device. But, what if you have a computer on which you need to create a meme? Well, Filmora meme maker is the apt choice for you. You don’t need to download apps or software on your Pc. It is the ultimate online solution.
Brief steps to introduce making memes. You can create image, GIF, and video memes adding nice fonts. It processes video/GIF/image memes rapidly than the competitors. Adding texts, fonts and altering font colors is so easy with it.
Here is the detailed guide to make memes on Android –
Step 1: Visit the official Filmora website and look for Filmora online meme maker. Import videos by dragging and dropping to the Filmora interface. You can even add online links to videos in order to upload them.
Step 2: After selecting the video/photo/GIF move to the meme editor page and customize your video meme using tools from the left pane. Include text, change fonts and then you can preview the changes.
Step 3: Tap on the ‘CREATE’ button to apply the changes, when you are satisfied. Press the ‘DOWNLOAD’ button and then share your meme on social media sites.
Conclusion
Coming towards the end of the article, we have discovered that Filmora creates brilliant memes and that too, in no time. No lengthy or annoying processes, nor you need apps that eat up your phone memory. Life is blissfully funny with meme making on Filmora.
Ollie Mattison
Ollie Mattison is a writer and a lover of all things video.
Follow @Ollie Mattison
Best 10 Emoji Makers to Create Your Own Emojis [PC/Online/Android/iPhone]
Best 10 Emoji Makers to Create Your Own Emojis [PC/Online/Android/iPhone]

Shanoon Cox
Mar 27, 2024• Proven solutions
In this generation of online chatting and social media, emoji plays a big role in making our conversation easier and interesting. It helps people to express feelings or convey something in a better way than words or sentences ever could. Adding an emoji to chat, video or photo brings more fun to the content and the type of emojis different individuals prefer to use will be different.
Want to create your own emoji? So there is a need for emoji makers that can help to create customized emojis depending on everyone’s likes.
There are a lot of emoji makers in the online market that offers a bundle of pre-packed emoji as well as help you to create emoji of your choice. These tools help you to create your own emoji on whichever theme you wish providing a lot of customizing options.
- Part 1: Best 10 Emoji Makers to Create Your Own Emojis
- Part 2: Add Emojis to Your Video with Wondershare Filmora
Part 1: Best 10 Emoji Makers to Create Your Own Emojis
Most people around the world use emoji in their conversations, whether it be chats, comments on social media, writing blogs, etc. But the type of emojis preferred by different people may vary and sometimes the default emojis available might not be enough to express what they wish to. Hence there is a need for creating more emoji, depending on each individual’s taste.
This is where the emoji makers come in. Here we will discuss the top 10 emoji makers that can be used to create attractive emojis for sharing on social media platforms.
- [1. Emoji-maker.com(Online)](#emoji maker1)
- [2. piZap Emoji Maker(Online)](#emoji maker2)
- [3. Flat Icons Emoji Maker(Online)](#emoji maker3)
- [4. Labeley.com(Online)](#emoji maker4)
- [5. Disney Emoji Maker (Online)](#emoji maker5)
- [6. Animated Emoji Maker (Android app)](#emoji maker6)
- [7. Elite Emoji (Android app)](#emoji maker7)
- [8. Boomoji (Android app)](#emoji maker8)
- [9. Zmoji (iPhone app)](#emoji maker9)
- [10. Emojily (iPhone app)](#emoji maker10)
1. Emoji-maker.com(Online)
Emoji maker.com is an online told that provides a lot of beautiful and unique emoji editing options to the users.
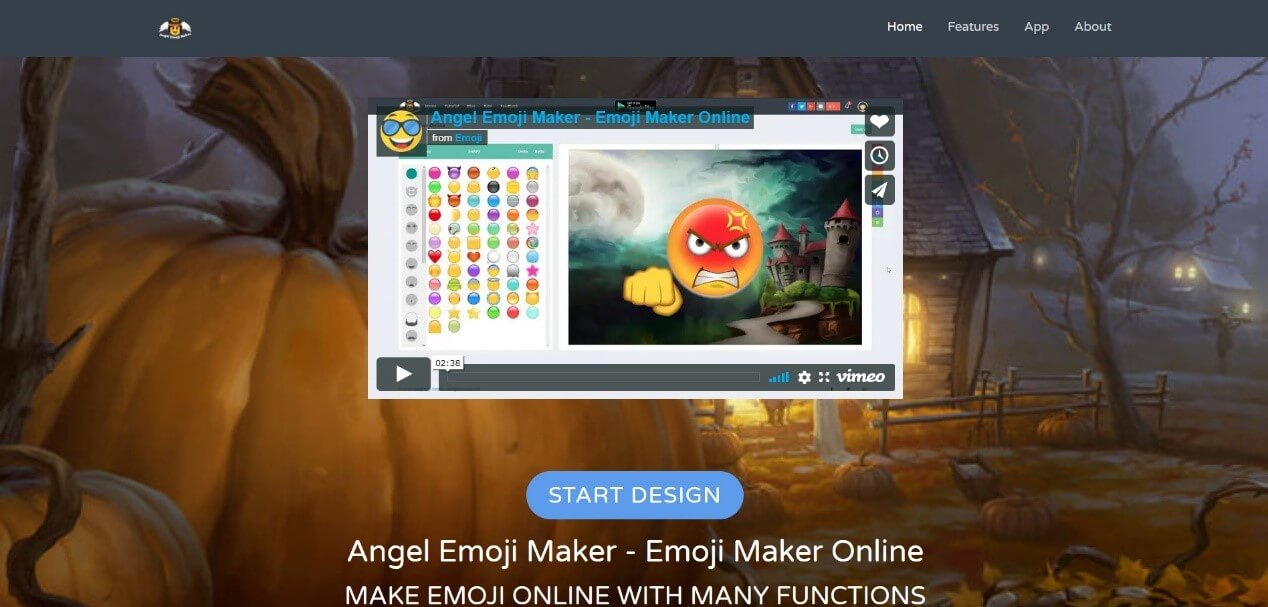
Price:
- Free
Features:
- Offers a wide variety of emoji shapes
- Allows to customize emojis in a match to the user’s face
- Has an Emoji text function, that allows adding text to any emoji
- Provides a lot of emoji background options
- Provides multiple saving options for the emojis you have created
2. piZap Emoji Maker(Online)
piZap Emoji Maker is an online editor that has extensive emoji features that can help you to create awesome emojis. However, before you can do something, a mandatory signing in is required by this editor.
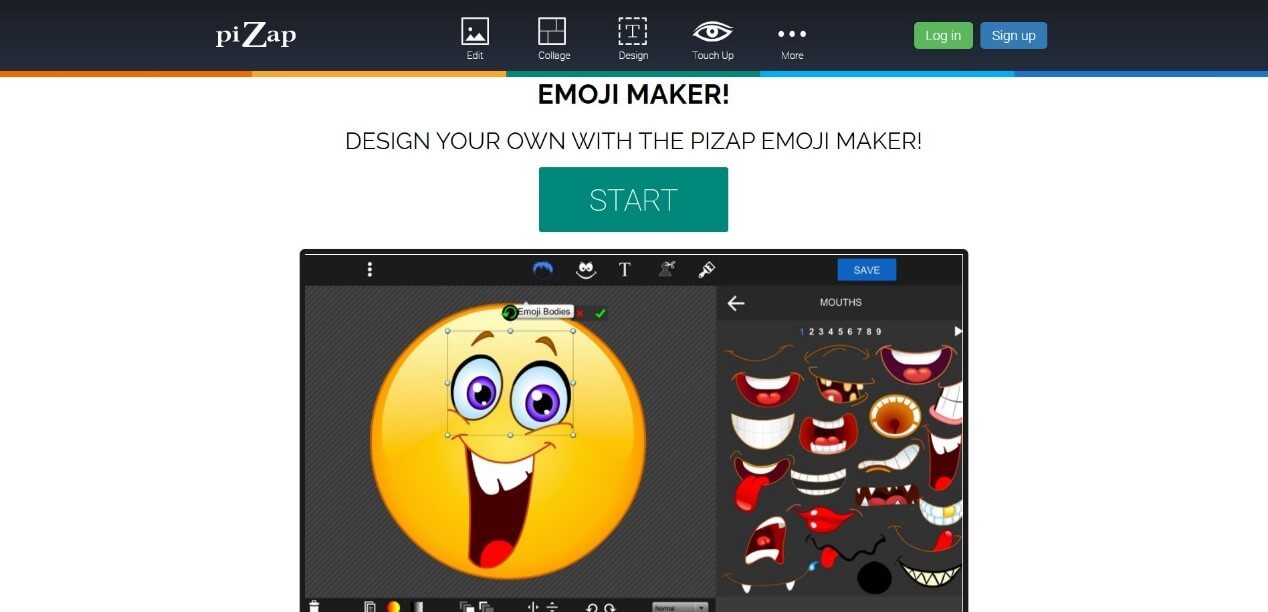
Price:
- Free
- Extra Features - piZap PRO for $5.99 per month or $35.88 per year
Features:
- All in one tool that can be used to create emoji, edit photos, create memes, etc.
- 6 million stock images
- Vibrant, colorful filters exclusive to this tool
- About 367 font options
3. Flat Icons Emoji Maker(Online)
Flat Icons Emoji is one of the simplest tools that are available to you for creating customized emojis of your choice.
![]()
Price:
- Free
- Premium bundle offers for $79 or $3710 (depends on the packs you choose)
Features:
- Offers a lot of shape options
- Provides a good collection of icon bundles for free
- Options to download both in PNG and SVG formats
- Easy editing and saving options
4. Labeley.com(Online)
Labeley.com is an online tool that allows you to design the emoji that you desire as well as provide you with printed copies of your design for an amount.
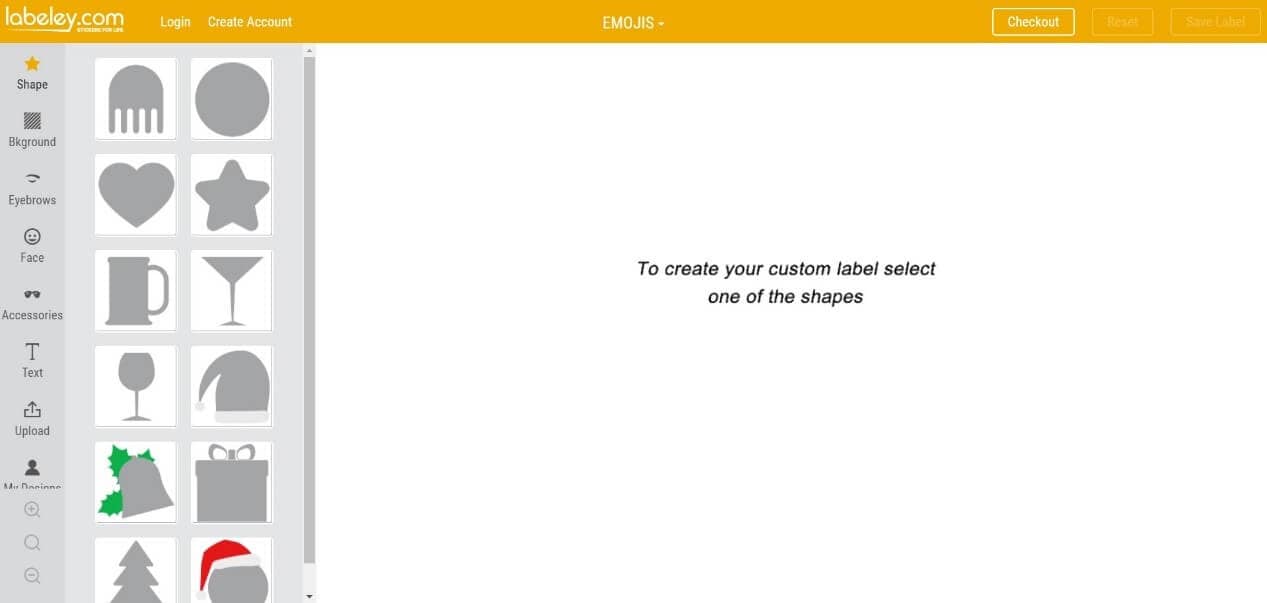
Price:
- Free
Features:
- Cool designing features and options for emoji
- Allows to save edits and make changes to it afterward
- Provides a set of beautiful artwork collections
- Provides “ print and delivery” option if you need physical copies of the emoji you designed (chargeable)
5. Disney Emoji Maker (Online)
As the name indicates, Disney Emoji Maker allows you to customize emoji based on some Disney characters. This emoji maker itself is very fun to use.
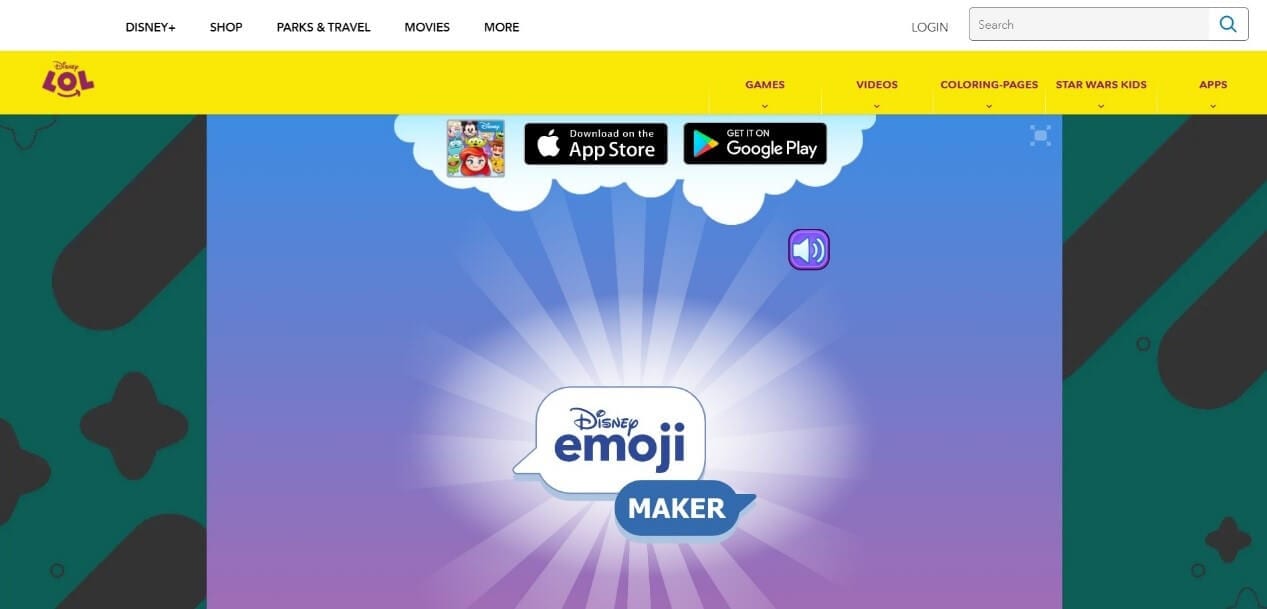
Price:
- Free
Features:
- An amazing user interface
- A variety of emoji features to add
- Apt for kids as well as grownups
- Easy export of the created emoji
6. Animated Emoji Maker (Android app)
Animated Emoji Maker is a tool that allows you to create wonderful emojis on any android devices without much effort.

Price:
- Free
Features:
- Allows to create normal as well as animated emoji
- Different characters like a cat, fox, dog, pig, panda chicken, monkey are available to create emoji
- Allows to customize emoji according to the user’s appearance
7. Elite Emoji (Android app)
Elite Emoji is an android tool that will allow you to create high-quality emoji that can be used to express ideas and emotions in your conversations.
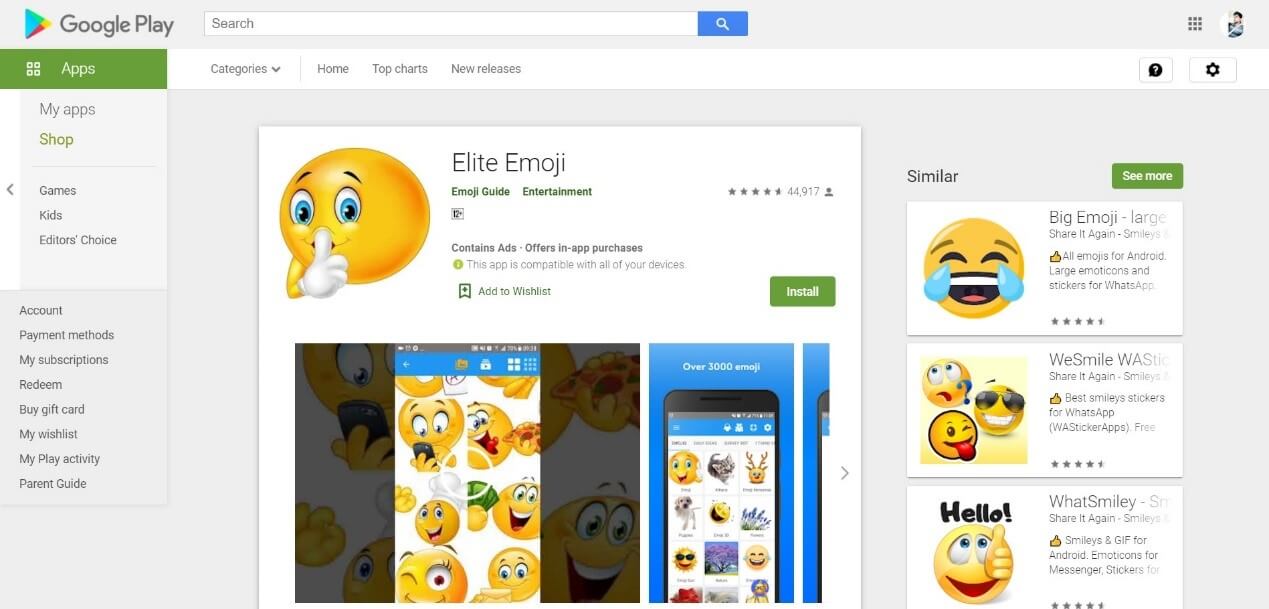
Price:
- Free
Features
- 2000+ emoji options to choose from
- Single touch sharing in social media platforms like WhatsApp, Messenger, Instagram, etc.
- Ober 5000+ default messages to add to emojis
- Emoji suggestions, taking into account the personality traits of each user
8. Boomoji (Android app)
Boomoji is a free Android application that will allow you to create fun avatar type emoji of your choice.
Price:
- Free
Features:
- A ton of characteristics to edit
- Allows to create exact animate clones of the users
- Direct sharing into social media networks
9. Zmoji (iPhone app)
Zmoji is an iPhone tool that allows you to create and customize emojis that you need for any social interactions.
Price:
- Free
- Zmoji Premium for $99.9 per year
Features:
- Quick and easy creation of expressive avatars and emoji
- Create an animated avatar resembling the user appearance
- A number of fashionable options and facial features are available
10. Emojily (iPhone app)
Emojily is a fun tool that provides a large number of crazy emoji features. It is a free iPhone application that allows the sharing of the edited emoji on any platform.
Price:
- Free
- $0.99 for unlocking single emoji packs
- $3.99 for unlocking all packs
Features:
- A ton of items to choose from to create unique emoji
- An application provided keyboard to use the emoji
- A variety of design options
Part 2: Add Emojis to Your Video with Wondershare Filmora
Wondershare Filmora is an all in one video editing application that offers a ton of video editing options and features, with the addition of interesting emojis that can be used to create wonderful videos. Some of the best features of Filmora include a number of animated titles, motion tracking, animation keyframing, vide effects, enhanced video stabilization, noise removal, noise effects, and much more.
The Filmora application offers 9 inbuilt emojis within the tool and more emojis of different genres can be accessed by downloading the Animated Emoji Pack from the Filmstock effects store.
Adding emoji to videos has been a trend for some time. It is fun as well as allows the creator to express his ideas or feelings without the use of long texts and not offending the viewers in any way. So, let’s see how Filmora can be used to add emoji to any videos.
Steps to Follow:
1. Download and install Wondershare Filmora on your PC.

2. Create a New Project and add the video that needs to be edited to the Filmora timeline.
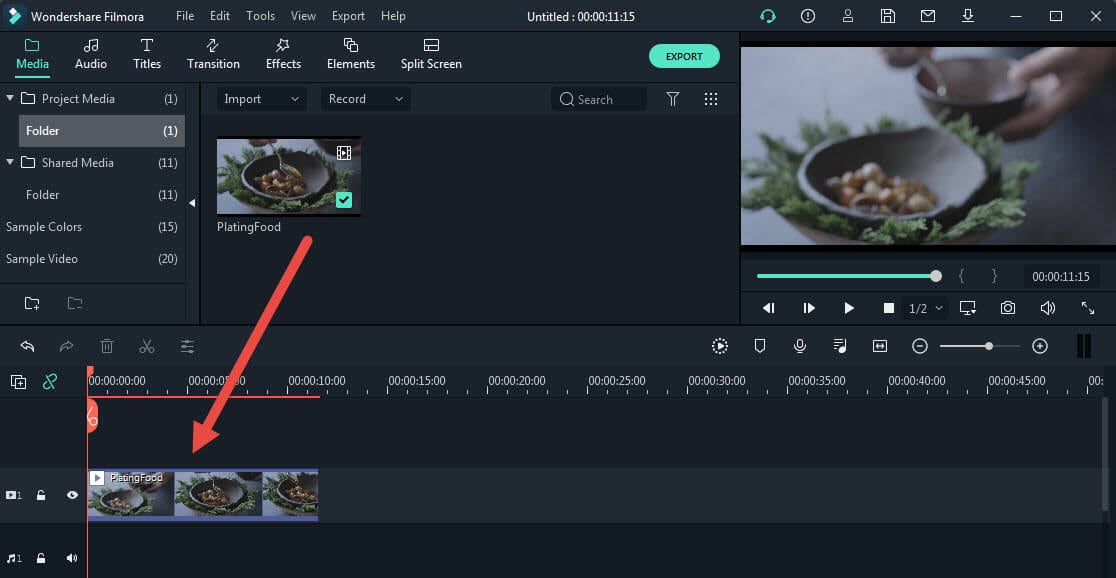
3. Tap on the Elements tab at the top and tap on the Emoji category on the side. A list of emoji elements will be displayed to you.

4. Or you can go to Wondershare Filmstock (Filmora’s effects store), find the free Animated Emoji Pack and download more emojis.
5. Select the emoji you like and drag and drop it just above the video on your timeline.
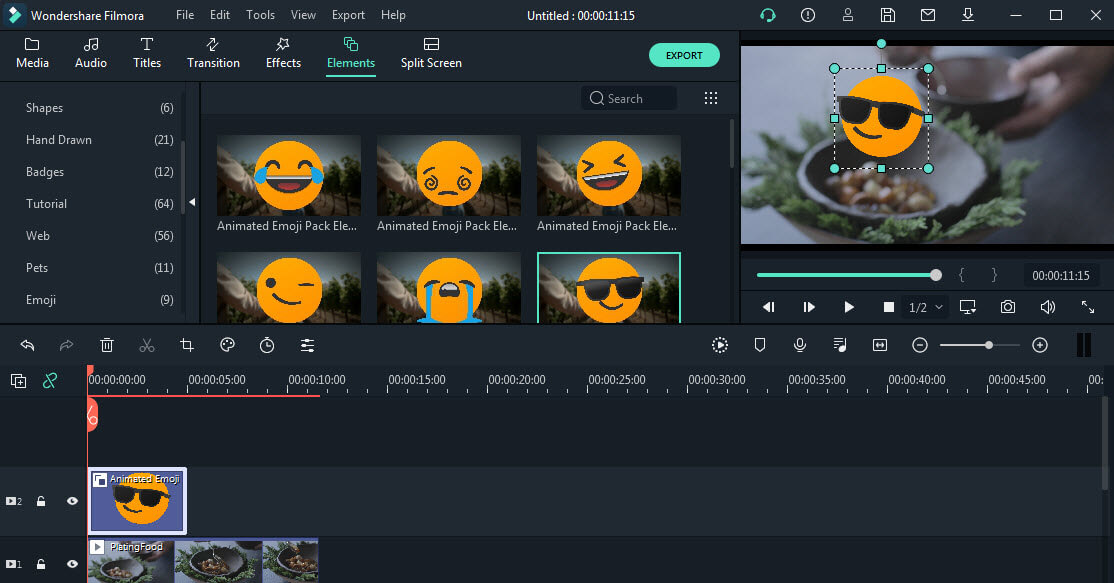
6. Adjust the position, duration, or size of the emoji if needed. Then preview the results and make changes if necessary.

7. After that, tap on the Export tab and save the video to any location of your choice.

Conclusion
Emoji is a wonderful way of expressing one’s ideas or feelings towards something on social media platforms like WhatsApp, YouTube, Facebook, etc. Most often the emoji provided by these applications may not be enough to express ourselves and hence there will be a need for creating or downloading more emoji. A list of the best 10 emoji creator apps has been listed above for you.
The use of emoji is not limited to just chats and comments, they are also used on images and videos. Filmora is an application that can be used to add emoji to video to make it more attractive and appealing.
We hope this article has been helpful to you. Please let us know what you think about our suggestion in the comment box below.
Shanoon Cox
Shanoon Cox is a writer and a lover of all things video.
Follow @Shanoon Cox
Shanoon Cox
Mar 27, 2024• Proven solutions
In this generation of online chatting and social media, emoji plays a big role in making our conversation easier and interesting. It helps people to express feelings or convey something in a better way than words or sentences ever could. Adding an emoji to chat, video or photo brings more fun to the content and the type of emojis different individuals prefer to use will be different.
Want to create your own emoji? So there is a need for emoji makers that can help to create customized emojis depending on everyone’s likes.
There are a lot of emoji makers in the online market that offers a bundle of pre-packed emoji as well as help you to create emoji of your choice. These tools help you to create your own emoji on whichever theme you wish providing a lot of customizing options.
- Part 1: Best 10 Emoji Makers to Create Your Own Emojis
- Part 2: Add Emojis to Your Video with Wondershare Filmora
Part 1: Best 10 Emoji Makers to Create Your Own Emojis
Most people around the world use emoji in their conversations, whether it be chats, comments on social media, writing blogs, etc. But the type of emojis preferred by different people may vary and sometimes the default emojis available might not be enough to express what they wish to. Hence there is a need for creating more emoji, depending on each individual’s taste.
This is where the emoji makers come in. Here we will discuss the top 10 emoji makers that can be used to create attractive emojis for sharing on social media platforms.
- [1. Emoji-maker.com(Online)](#emoji maker1)
- [2. piZap Emoji Maker(Online)](#emoji maker2)
- [3. Flat Icons Emoji Maker(Online)](#emoji maker3)
- [4. Labeley.com(Online)](#emoji maker4)
- [5. Disney Emoji Maker (Online)](#emoji maker5)
- [6. Animated Emoji Maker (Android app)](#emoji maker6)
- [7. Elite Emoji (Android app)](#emoji maker7)
- [8. Boomoji (Android app)](#emoji maker8)
- [9. Zmoji (iPhone app)](#emoji maker9)
- [10. Emojily (iPhone app)](#emoji maker10)
1. Emoji-maker.com(Online)
Emoji maker.com is an online told that provides a lot of beautiful and unique emoji editing options to the users.
Price:
- Free
Features:
- Offers a wide variety of emoji shapes
- Allows to customize emojis in a match to the user’s face
- Has an Emoji text function, that allows adding text to any emoji
- Provides a lot of emoji background options
- Provides multiple saving options for the emojis you have created
2. piZap Emoji Maker(Online)
piZap Emoji Maker is an online editor that has extensive emoji features that can help you to create awesome emojis. However, before you can do something, a mandatory signing in is required by this editor.
Price:
- Free
- Extra Features - piZap PRO for $5.99 per month or $35.88 per year
Features:
- All in one tool that can be used to create emoji, edit photos, create memes, etc.
- 6 million stock images
- Vibrant, colorful filters exclusive to this tool
- About 367 font options
3. Flat Icons Emoji Maker(Online)
Flat Icons Emoji is one of the simplest tools that are available to you for creating customized emojis of your choice.
![]()
Price:
- Free
- Premium bundle offers for $79 or $3710 (depends on the packs you choose)
Features:
- Offers a lot of shape options
- Provides a good collection of icon bundles for free
- Options to download both in PNG and SVG formats
- Easy editing and saving options
4. Labeley.com(Online)
Labeley.com is an online tool that allows you to design the emoji that you desire as well as provide you with printed copies of your design for an amount.
Price:
- Free
Features:
- Cool designing features and options for emoji
- Allows to save edits and make changes to it afterward
- Provides a set of beautiful artwork collections
- Provides “ print and delivery” option if you need physical copies of the emoji you designed (chargeable)
5. Disney Emoji Maker (Online)
As the name indicates, Disney Emoji Maker allows you to customize emoji based on some Disney characters. This emoji maker itself is very fun to use.
Price:
- Free
Features:
- An amazing user interface
- A variety of emoji features to add
- Apt for kids as well as grownups
- Easy export of the created emoji
6. Animated Emoji Maker (Android app)
Animated Emoji Maker is a tool that allows you to create wonderful emojis on any android devices without much effort.
Price:
- Free
Features:
- Allows to create normal as well as animated emoji
- Different characters like a cat, fox, dog, pig, panda chicken, monkey are available to create emoji
- Allows to customize emoji according to the user’s appearance
7. Elite Emoji (Android app)
Elite Emoji is an android tool that will allow you to create high-quality emoji that can be used to express ideas and emotions in your conversations.
Price:
- Free
Features
- 2000+ emoji options to choose from
- Single touch sharing in social media platforms like WhatsApp, Messenger, Instagram, etc.
- Ober 5000+ default messages to add to emojis
- Emoji suggestions, taking into account the personality traits of each user
8. Boomoji (Android app)
Boomoji is a free Android application that will allow you to create fun avatar type emoji of your choice.
Price:
- Free
Features:
- A ton of characteristics to edit
- Allows to create exact animate clones of the users
- Direct sharing into social media networks
9. Zmoji (iPhone app)
Zmoji is an iPhone tool that allows you to create and customize emojis that you need for any social interactions.
Price:
- Free
- Zmoji Premium for $99.9 per year
Features:
- Quick and easy creation of expressive avatars and emoji
- Create an animated avatar resembling the user appearance
- A number of fashionable options and facial features are available
10. Emojily (iPhone app)
Emojily is a fun tool that provides a large number of crazy emoji features. It is a free iPhone application that allows the sharing of the edited emoji on any platform.
Price:
- Free
- $0.99 for unlocking single emoji packs
- $3.99 for unlocking all packs
Features:
- A ton of items to choose from to create unique emoji
- An application provided keyboard to use the emoji
- A variety of design options
Part 2: Add Emojis to Your Video with Wondershare Filmora
Wondershare Filmora is an all in one video editing application that offers a ton of video editing options and features, with the addition of interesting emojis that can be used to create wonderful videos. Some of the best features of Filmora include a number of animated titles, motion tracking, animation keyframing, vide effects, enhanced video stabilization, noise removal, noise effects, and much more.
The Filmora application offers 9 inbuilt emojis within the tool and more emojis of different genres can be accessed by downloading the Animated Emoji Pack from the Filmstock effects store.
Adding emoji to videos has been a trend for some time. It is fun as well as allows the creator to express his ideas or feelings without the use of long texts and not offending the viewers in any way. So, let’s see how Filmora can be used to add emoji to any videos.
Steps to Follow:
1. Download and install Wondershare Filmora on your PC.
2. Create a New Project and add the video that needs to be edited to the Filmora timeline.
3. Tap on the Elements tab at the top and tap on the Emoji category on the side. A list of emoji elements will be displayed to you.
4. Or you can go to Wondershare Filmstock (Filmora’s effects store), find the free Animated Emoji Pack and download more emojis.
5. Select the emoji you like and drag and drop it just above the video on your timeline.
6. Adjust the position, duration, or size of the emoji if needed. Then preview the results and make changes if necessary.
7. After that, tap on the Export tab and save the video to any location of your choice.
Conclusion
Emoji is a wonderful way of expressing one’s ideas or feelings towards something on social media platforms like WhatsApp, YouTube, Facebook, etc. Most often the emoji provided by these applications may not be enough to express ourselves and hence there will be a need for creating or downloading more emoji. A list of the best 10 emoji creator apps has been listed above for you.
The use of emoji is not limited to just chats and comments, they are also used on images and videos. Filmora is an application that can be used to add emoji to video to make it more attractive and appealing.
We hope this article has been helpful to you. Please let us know what you think about our suggestion in the comment box below.
Shanoon Cox
Shanoon Cox is a writer and a lover of all things video.
Follow @Shanoon Cox
Add Emojis to Videos on YouTube/Facebook/Snapchat [Step by Step Guide]
Add Emojis to Videos on YouTube/Facebook/Snapchat [Step by Step Guide]
Liza Brown
Mar 27, 2024• Proven solutions
Emojis are a great way to express one’s emotion more vividly through a depiction rather than a plain conventional text. By the passage of time, the trend of using emoji on social media domain has drastically increased around the world. Since emoji are ubiquitous and its influence on culture is increasingly huge, using emoji has now become a trend.
A plain conventional text or video may not emphasize the meaning behind the phrase, but adding emoji to it is like adding a soul to the intentions behind the message. It helps outshine the theme and make a video more appealing at the same time.
So, with all this being known, let’s take a tour to a complete guide to how to accessorize a video on multiple social media domains and make it far more attractive and meaningful.
Best Tool to Help You Add Emojis to Videos in Few Clicks
Gamers, YouTubers and all other Mac and PC users who’d like to add a smiley or any other emoji to a video should try processing their footage with the Filmora video editor.
Performing basic video editing tasks like cutting or trimming the footage, choosing a soundtrack for a video or adding an emoji to a single shot or an entire sequence can all be completed in just a couple of clicks.
Filmora is free to download. Import your videos after you launch the software, you then can add any animated emojis into wherever you want. Have a try now! Emojis inside are so Cute!
How to Add Emojis to YouTube Videos?
You can now add emojis to any of the YouTube videos using an online free tool called Kapwing.
Below are the basic steps about how to add emojis to YouTube videos anywhere using Kapwing.
Step 1: Open free tool Meme Maker and tap on “get started”.
Step 2: Copy the link of the targeted YouTube video and paste the URL of your YouTube video.
Step 3: One of the ways to insert emoji using Kapwing is to directly upload an emoji having a transparent background. In the toolbar, click on “upload” and paste its URL there. The image will be placed onto the targeted video as an overlay by importing it. Another way to add emoji is to click “add text” where you will have options to insert emojis.
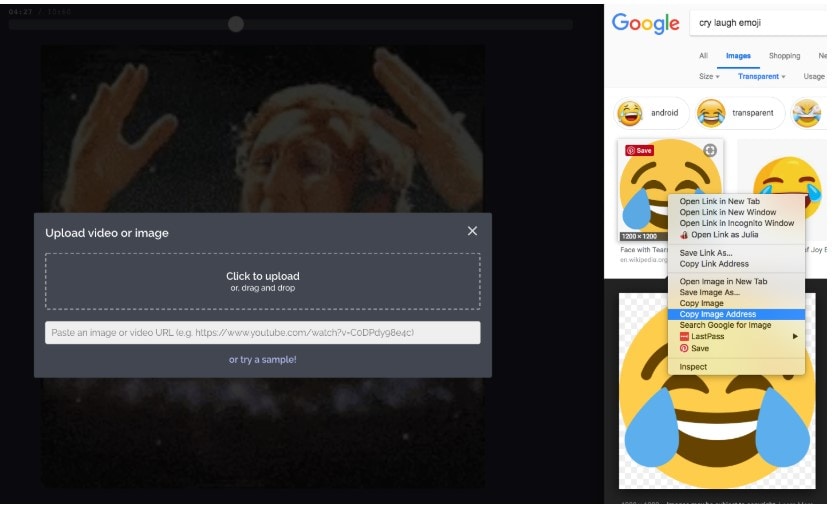
Step 4: You can now play around with editing options in Kapwing to adjust accordingly.
How to Use Emojis on YouTube?
YouTube provides you an option to insert emoji on your YouTube account description, tag and titles with great ease with the use of YouTube certified plugin, Tube Buddy.
Step 1: Install this plugin on chrome browser.
Step 2: Open “info and settings” option in your YouTube targeted video.
Step 3: Tap on description box, tags or title where an emoji icon will be shown. Tap on the emoji icon to display a list of emojis. You can also search for an emoji in the search bar.
How to Add Emojis in Snapchat Videos?
Step 1: Install Snapchat if you don’t already have it. Then run Snapchat.
Step 2: Record a video by keeping your fingers on the record button.
Step 3: Choose and tap an emoji of your choice to add in your video. Hold your fingers on emoji to place to the desired frame/clip of your recorded video.
Step 4: The emoji can be resized by dragging or pinching it in. You can add more than one emoji.
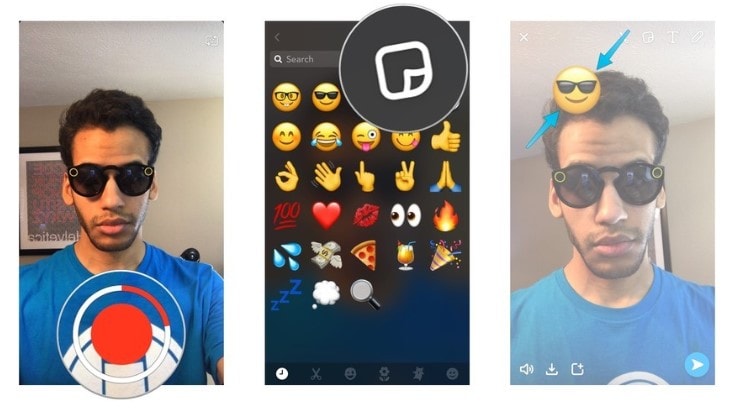
Image from iMore
How to Add Emojis to Facebook?
If you are wondering about how to add emojis to Facebook videos then, unfortunately, Facebook only offers “go live” option on Facebook where an emoji cannot be inserted. But you can insert emoji to Facebook status, comment or in your messenger conversation easily by following the step below for status:
Step 1: Click “what’s on your mind” to add new status on Facebook.
Step 2: At the bottom right side of the status box is an emoji icon. Click on it. This will open a list of emojis that you can choose as many as you want
Step 3: Click on the emoji icon back again to close the list when you are done. Click on post to share the post on your wall.
How to Add Emojis to Videos on iMovie?
Step 1: Search for the desired emoji on the internet with transparent background. Go to iMovie and select a clip of your video where you want to insert an emoji.
Step 2: Go to the “Import” option into the toolbar above, select your desired emoji from the list. This emoji will be added to the iMovie library.
Step 3: Click on that emoji. This overlays that emoji onto that video clip. You can scale the emoji up and down and drag it anywhere on the video.
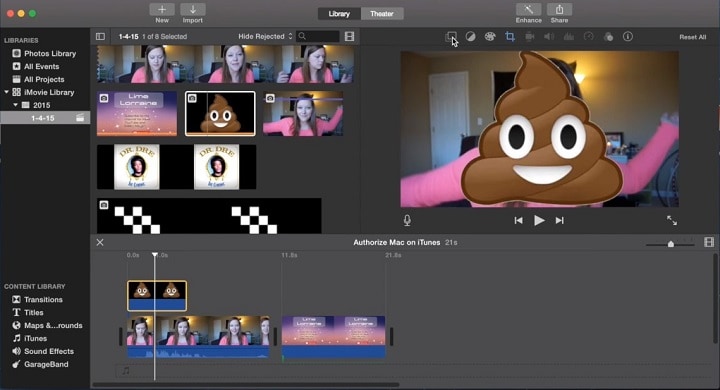
Image from YouSubtitles
How to Add Emojis to Videos Online?
Blurbiz, is an online application for editing YouTube, Instagram, Facebook and Snapchat videos. Just follow the steps below, then you can add emojis you want.
Step 1: Create and name the project in Blurbiz.
Step 2: Upload either your video, sticker or gif whichever you want an emoji to be placed in.
Step 3: Hover over the video and click on the “edit” button.
Step 4: Tap on “upload” at the top left side of the pane. Upload emoji with .png extension from your desktop.
Step 5: Drag and drop to overlay the emoji onto your video. Resize and position an emoji accordingly.
Step 6: Tap on “complete” at the top right corner when you are done. You can download an mp4 format video.
How to Add Emojis to Videos Android?
WeVideo , is an app to create and edit videos to the next level and provide one with ample special effects to add on to your videos.
Alongside using basic editing features like cutting, trimming or arranging video clips, you can amplify your editing game by adding emoji to your videos. Moreover, you can export your projects in high quality and share them on either Vimeo, YouTube or Dropbox.

Conclusion
Be it any video on any social media platform or your local device, with this thorough guide, you must be able to accessorize your video and take it to another level of emotional expression and message details in your video by using fun emojis.
Liza Brown
Liza Brown is a writer and a lover of all things video.
Follow @Liza Brown
Liza Brown
Mar 27, 2024• Proven solutions
Emojis are a great way to express one’s emotion more vividly through a depiction rather than a plain conventional text. By the passage of time, the trend of using emoji on social media domain has drastically increased around the world. Since emoji are ubiquitous and its influence on culture is increasingly huge, using emoji has now become a trend.
A plain conventional text or video may not emphasize the meaning behind the phrase, but adding emoji to it is like adding a soul to the intentions behind the message. It helps outshine the theme and make a video more appealing at the same time.
So, with all this being known, let’s take a tour to a complete guide to how to accessorize a video on multiple social media domains and make it far more attractive and meaningful.
Best Tool to Help You Add Emojis to Videos in Few Clicks
Gamers, YouTubers and all other Mac and PC users who’d like to add a smiley or any other emoji to a video should try processing their footage with the Filmora video editor.
Performing basic video editing tasks like cutting or trimming the footage, choosing a soundtrack for a video or adding an emoji to a single shot or an entire sequence can all be completed in just a couple of clicks.
Filmora is free to download. Import your videos after you launch the software, you then can add any animated emojis into wherever you want. Have a try now! Emojis inside are so Cute!
How to Add Emojis to YouTube Videos?
You can now add emojis to any of the YouTube videos using an online free tool called Kapwing.
Below are the basic steps about how to add emojis to YouTube videos anywhere using Kapwing.
Step 1: Open free tool Meme Maker and tap on “get started”.
Step 2: Copy the link of the targeted YouTube video and paste the URL of your YouTube video.
Step 3: One of the ways to insert emoji using Kapwing is to directly upload an emoji having a transparent background. In the toolbar, click on “upload” and paste its URL there. The image will be placed onto the targeted video as an overlay by importing it. Another way to add emoji is to click “add text” where you will have options to insert emojis.
Step 4: You can now play around with editing options in Kapwing to adjust accordingly.
How to Use Emojis on YouTube?
YouTube provides you an option to insert emoji on your YouTube account description, tag and titles with great ease with the use of YouTube certified plugin, Tube Buddy.
Step 1: Install this plugin on chrome browser.
Step 2: Open “info and settings” option in your YouTube targeted video.
Step 3: Tap on description box, tags or title where an emoji icon will be shown. Tap on the emoji icon to display a list of emojis. You can also search for an emoji in the search bar.
How to Add Emojis in Snapchat Videos?
Step 1: Install Snapchat if you don’t already have it. Then run Snapchat.
Step 2: Record a video by keeping your fingers on the record button.
Step 3: Choose and tap an emoji of your choice to add in your video. Hold your fingers on emoji to place to the desired frame/clip of your recorded video.
Step 4: The emoji can be resized by dragging or pinching it in. You can add more than one emoji.
Image from iMore
How to Add Emojis to Facebook?
If you are wondering about how to add emojis to Facebook videos then, unfortunately, Facebook only offers “go live” option on Facebook where an emoji cannot be inserted. But you can insert emoji to Facebook status, comment or in your messenger conversation easily by following the step below for status:
Step 1: Click “what’s on your mind” to add new status on Facebook.
Step 2: At the bottom right side of the status box is an emoji icon. Click on it. This will open a list of emojis that you can choose as many as you want
Step 3: Click on the emoji icon back again to close the list when you are done. Click on post to share the post on your wall.
How to Add Emojis to Videos on iMovie?
Step 1: Search for the desired emoji on the internet with transparent background. Go to iMovie and select a clip of your video where you want to insert an emoji.
Step 2: Go to the “Import” option into the toolbar above, select your desired emoji from the list. This emoji will be added to the iMovie library.
Step 3: Click on that emoji. This overlays that emoji onto that video clip. You can scale the emoji up and down and drag it anywhere on the video.
Image from YouSubtitles
How to Add Emojis to Videos Online?
Blurbiz, is an online application for editing YouTube, Instagram, Facebook and Snapchat videos. Just follow the steps below, then you can add emojis you want.
Step 1: Create and name the project in Blurbiz.
Step 2: Upload either your video, sticker or gif whichever you want an emoji to be placed in.
Step 3: Hover over the video and click on the “edit” button.
Step 4: Tap on “upload” at the top left side of the pane. Upload emoji with .png extension from your desktop.
Step 5: Drag and drop to overlay the emoji onto your video. Resize and position an emoji accordingly.
Step 6: Tap on “complete” at the top right corner when you are done. You can download an mp4 format video.
How to Add Emojis to Videos Android?
WeVideo , is an app to create and edit videos to the next level and provide one with ample special effects to add on to your videos.
Alongside using basic editing features like cutting, trimming or arranging video clips, you can amplify your editing game by adding emoji to your videos. Moreover, you can export your projects in high quality and share them on either Vimeo, YouTube or Dropbox.
Conclusion
Be it any video on any social media platform or your local device, with this thorough guide, you must be able to accessorize your video and take it to another level of emotional expression and message details in your video by using fun emojis.
Liza Brown
Liza Brown is a writer and a lover of all things video.
Follow @Liza Brown
How to Make a Meme (Step by Step)
How to Make a Meme (Step by Step)
Ollie Mattison
Mar 27, 2024• Proven solutions
When you browse the Internet, memes are practically everywhere. These memes are found in varied forms, ranging from video meme, to GIF and images. Through memes you can express your ideas in a creative and humorous way. In case your business requires meme marketing and you have no clue about how to make a meme then there is n nothing to worry about. We are here to ease off your stress.
In this article we are going to help you create the most effective memes. Stay tuned for more.
- Part1: Research meme first
- Part2: Think about your content
- Part3: Create memes right now
- Part4: Tips on making a popular meme
Part 1: Research meme first
1. Know your memes
Understanding and knowing what exactly your meme needs to do can be achieved by observing the recent the viral memes in the market. The recent viral memes would inspire your new creation to make a better meme evoking funnier emotions. There might be a specific meme that has garnered ample exposure over the social media and has been trending for weeks. You can gauge by studying them that whether your idea has been already implemented by any of them or it’s a fresh idea that you can use to strengthen your meme marketing.

2. Focus on popular stuff
While you are making memes, it’s important to refer popular movies, series, events, books, video games, comic characters etc. for enhancing the humor in memes . Funny videos about kids, accident videos and bike crashes, etc. with the right filter makes memes relatable. You can even spread a social message with a fun factor using video memes.
Part 2: Think about your content
1. Be Funny
Entertainment value is of utmost priority when you are planning for a successful meme. Though, making memes relatable to the audience is a key factor, you don’t need to be serious, just for the sake of it. Your meme should carry a witty and funny tone. You need to pick the copy and language meeting to the parameters we have just elaborated in this section.
2. Keep it short
Owning to the short attention span of online users, your memes need to be pretty short, without missing the message. While you are thinking how to make a meme, keep in mind that your meme should strike the right chord with the audience and impress them at the first place. Catchy phrases, captions from popular comic series or a funny TV show that is relatable to most people can help you create an amazing image, GIF or video meme.
Part 3: Create memes right now
When you are in a dilemma about how to make a meme or a video meme to be specific, you would require an effective meme maker tool . As without having a reliable tool for editing your video memes, it is not possible to transform your ideas into funny memes. We recommend Filmora online meme maker to materialize your idea.
Filmora meme maker is an online tool which you can use for completely free. Creating image, GIF and video memes is possible with this online program without requiring much time. Moreover, you don’t have to login to create your video memes. One of the most intuitive programs that require no tedious process, but simple drag and drop and click actions for importing GIF, image, and video. Apart from that you get the flexibility to add text inside or out of the text, GIF or video as per your heart’s content. Altering the text color and size is also possible with Filmora.
You don’t have to download online videos, as it supports YouTube and Vimeo video link. All that you need to do is copy and paste the URL for creating online video material with ease, without the hassle of downloading it to your computer and then working on it.
Here comes the detailed guide for Filmora online meme maker to create a video meme –
Step 1: Import image, GIF or video
Browse to the Filmora online meme maker website and then tap on ‘Click here to upload’ or drag to import material. You can even import YouTube and Vimeo links for creating video memes.
Step 2: Edit memes
Once you have selected the video/GIF/image you navigate to the meme editor page, you can customize your meme by tapping the tools on the left panel. The preview window there will show the changes you are doing to the imported item. Play with the text color and size in the meme and keep what suits you the most. Also, you can decide whether you wish to input text inside or outside and the file format for your meme can also be selected from this editor page.
Tips: Humorous or ironic text turns memes more popular, and don’t forget to select fonts that perfectly blend with the caption and background of the text and overall meme.
Step 3: Export and share
At last, tap on the ‘CREATE’ button once you are happy with the creation. Allow some time, so that the meme is generated with all the aspects you have incorporated to it. Once done, hit the ‘DOWNLOAD’ button and save the meme. Well, now that everything is on point, you can share it across social media platforms such as Reddit, Facebook, or Instagram.
Part 4: Tips on making a popular meme
1. Traditional and dank memes are popular, but video memes is on trend now
Though, the market is flooding with wide subcategories of memes, some of them are really taking the internet by storm. For making a popular meme that brings more exposure for your brand, you need to focus on the trending ones .
The main categories of memes are –
Traditional (normie) – This category of memes contain stock photo or viral video/movie/magazine screenshot. The photos and texts on them perfectly sync with the right visual tone.
Dank memes – They involve humor which is out of context. They also revive a dying meme or one that is pretty old and not in use by continuously overusing it.
2. Reddit is a great place to share
You shouldn’t let go of any opportunity that comes your way. You need to share them at the right place and Reddit undoubtedly has an upper hand in that case. When you have the right content gain through it!
R/Memes – It is a subreddit where you can share your meme after researching and creating it. But, be sure that here you need to share your own creation, not someone else’s copyright products.
R/DankMemes – This one is more focused at quality. You can look here to find out the most popular memes. You might plan to post your memes after they get significantly popular over the internet and then post them or lose mass downvotes. This space helps you how to perfectly analyze and then post your meme on the right time.
Conclusion
Once we are thorough with this article, we are confident that you understood how to make a meme. And, there is no doubt that opting for Filmora online meme maker will surely help you gain popularity over the internet. This tool is quick to use and requires no space to get stored on your PC. So, now you have one awesome tool for helping you out in meme making and being popular!
Ollie Mattison
Ollie Mattison is a writer and a lover of all things video.
Follow @Ollie Mattison
Ollie Mattison
Mar 27, 2024• Proven solutions
When you browse the Internet, memes are practically everywhere. These memes are found in varied forms, ranging from video meme, to GIF and images. Through memes you can express your ideas in a creative and humorous way. In case your business requires meme marketing and you have no clue about how to make a meme then there is n nothing to worry about. We are here to ease off your stress.
In this article we are going to help you create the most effective memes. Stay tuned for more.
- Part1: Research meme first
- Part2: Think about your content
- Part3: Create memes right now
- Part4: Tips on making a popular meme
Part 1: Research meme first
1. Know your memes
Understanding and knowing what exactly your meme needs to do can be achieved by observing the recent the viral memes in the market. The recent viral memes would inspire your new creation to make a better meme evoking funnier emotions. There might be a specific meme that has garnered ample exposure over the social media and has been trending for weeks. You can gauge by studying them that whether your idea has been already implemented by any of them or it’s a fresh idea that you can use to strengthen your meme marketing.
2. Focus on popular stuff
While you are making memes, it’s important to refer popular movies, series, events, books, video games, comic characters etc. for enhancing the humor in memes . Funny videos about kids, accident videos and bike crashes, etc. with the right filter makes memes relatable. You can even spread a social message with a fun factor using video memes.
Part 2: Think about your content
1. Be Funny
Entertainment value is of utmost priority when you are planning for a successful meme. Though, making memes relatable to the audience is a key factor, you don’t need to be serious, just for the sake of it. Your meme should carry a witty and funny tone. You need to pick the copy and language meeting to the parameters we have just elaborated in this section.
2. Keep it short
Owning to the short attention span of online users, your memes need to be pretty short, without missing the message. While you are thinking how to make a meme, keep in mind that your meme should strike the right chord with the audience and impress them at the first place. Catchy phrases, captions from popular comic series or a funny TV show that is relatable to most people can help you create an amazing image, GIF or video meme.
Part 3: Create memes right now
When you are in a dilemma about how to make a meme or a video meme to be specific, you would require an effective meme maker tool . As without having a reliable tool for editing your video memes, it is not possible to transform your ideas into funny memes. We recommend Filmora online meme maker to materialize your idea.
Filmora meme maker is an online tool which you can use for completely free. Creating image, GIF and video memes is possible with this online program without requiring much time. Moreover, you don’t have to login to create your video memes. One of the most intuitive programs that require no tedious process, but simple drag and drop and click actions for importing GIF, image, and video. Apart from that you get the flexibility to add text inside or out of the text, GIF or video as per your heart’s content. Altering the text color and size is also possible with Filmora.
You don’t have to download online videos, as it supports YouTube and Vimeo video link. All that you need to do is copy and paste the URL for creating online video material with ease, without the hassle of downloading it to your computer and then working on it.
Here comes the detailed guide for Filmora online meme maker to create a video meme –
Step 1: Import image, GIF or video
Browse to the Filmora online meme maker website and then tap on ‘Click here to upload’ or drag to import material. You can even import YouTube and Vimeo links for creating video memes.
Step 2: Edit memes
Once you have selected the video/GIF/image you navigate to the meme editor page, you can customize your meme by tapping the tools on the left panel. The preview window there will show the changes you are doing to the imported item. Play with the text color and size in the meme and keep what suits you the most. Also, you can decide whether you wish to input text inside or outside and the file format for your meme can also be selected from this editor page.
Tips: Humorous or ironic text turns memes more popular, and don’t forget to select fonts that perfectly blend with the caption and background of the text and overall meme.
Step 3: Export and share
At last, tap on the ‘CREATE’ button once you are happy with the creation. Allow some time, so that the meme is generated with all the aspects you have incorporated to it. Once done, hit the ‘DOWNLOAD’ button and save the meme. Well, now that everything is on point, you can share it across social media platforms such as Reddit, Facebook, or Instagram.
Part 4: Tips on making a popular meme
1. Traditional and dank memes are popular, but video memes is on trend now
Though, the market is flooding with wide subcategories of memes, some of them are really taking the internet by storm. For making a popular meme that brings more exposure for your brand, you need to focus on the trending ones .
The main categories of memes are –
Traditional (normie) – This category of memes contain stock photo or viral video/movie/magazine screenshot. The photos and texts on them perfectly sync with the right visual tone.
Dank memes – They involve humor which is out of context. They also revive a dying meme or one that is pretty old and not in use by continuously overusing it.
2. Reddit is a great place to share
You shouldn’t let go of any opportunity that comes your way. You need to share them at the right place and Reddit undoubtedly has an upper hand in that case. When you have the right content gain through it!
R/Memes – It is a subreddit where you can share your meme after researching and creating it. But, be sure that here you need to share your own creation, not someone else’s copyright products.
R/DankMemes – This one is more focused at quality. You can look here to find out the most popular memes. You might plan to post your memes after they get significantly popular over the internet and then post them or lose mass downvotes. This space helps you how to perfectly analyze and then post your meme on the right time.
Conclusion
Once we are thorough with this article, we are confident that you understood how to make a meme. And, there is no doubt that opting for Filmora online meme maker will surely help you gain popularity over the internet. This tool is quick to use and requires no space to get stored on your PC. So, now you have one awesome tool for helping you out in meme making and being popular!
Ollie Mattison
Ollie Mattison is a writer and a lover of all things video.
Follow @Ollie Mattison
How to Make a iMovie Photo Slideshow with Music? [IMovie Tutorial]
How to Make a iMovie Photo Slideshow with Music? [iMovie Tutorial]
Shanoon Cox
Mar 27, 2024• Proven solutions
Makings a slideshow is a great way to share photos and videos with friends and families. The good news is that you can totally make a slideshow on Mac for free with iMovie. iMovie is the pre-installed program coming with every new Mac. It provides a simple yet professional way to make slideshow movies from your photos, videos, and music.
If you haven’t iMovie installed on your Mac yet, just go to iTunes and download it for free. In the following part, I’ll share with you the step-by-step tutorial on how to make a slideshow on Mac using the free video editing software iMovie.
If you are an iOS user, check our picks of best photo slideshow apps for iPhone or iPad.
Ways for iMovie Photo Slideshow with Music Making
To make a photo slideshow with music in iMovie, you can follow these steps.
1. Create a New Project
After launching iMovie, click the Project button and then click Create New. Select Movie to combine photos, videos and music to make a slideshow.

2. Import Photos, Videos, and Audio Files
Now go to the My Media tab and click the Import icon to add your photos, videos, and music to iMovie, in this way, you can import any media files from any location on your Mac. But if you have arranged all your videos, photos, and music tracks in the Photos app, you can just switch to Photos under the Libraries tab on the left to import.

3. Arrange Media in Timeline and Adjust
Now, it’s time to place all these photos and videos in the timeline in order and do some adjustments. You can use the Magic Wand tool to improve the photo quality automatically, do some color correction, or add a filter to the photo. If you preview the video clip, you will see more options that allow you to do more editing, such as changing speed.
4. Apply Transitions & Effects
Transitions and effects will help you to create a slideshow in a more professional way. Some transitions such as cross dissolve, fade and cross blur are very popular in the slideshow, but remember don’t use lots of different transitions in one slideshow since too many transitions will distract the viewer’s attention. To apply a transition in the slideshow, just drag and drop it between two photos in the timeline.

5. Add Titles and Text
Using some opener titles and credits at the beginning and ending part of your slideshow will make it cool as well. You can add some famous quotes and words to better demonstrate.
Just to the Titles tab and select one of the title templates and drop it to the timeline first and then write your own words in the preview window.

6. Add Music to Slideshow
You can download some royalty-free music and sound effects from websites such as Filmstock stock media library or iTunes or import your own audio as we said before to use it as the slideshow background music. To sync with the slideshow, you may need to trim and edit the audio accordingly. For detailed information about iMovie audio editing, you can check how to add background music to iMovie.
Filmstock Stock Media Library ](https://tools.techidaily.com/wondershare/filmora/download/ )
7. Export and Share Your Slideshow video
Play the slideshow and check the result in the preview window. If everything goes well, you can now export and share or save it. You can save the slideshow video in MP4 format, or share it to Vimeo or add the slideshow to Theater to load it on your other Apple devices so you can easily watch it on your iOS devices or Apple TV.
I hope the above tutorial about how to make a slideshow on iMovie will be helpful for your stunning slideshow creation.
If you’re running an old macOS version and having iPhoto installed on your Mac, here are the detailed steps about How to make slideshow in iMovie with iPhoto project.
Step 1. Import Photos from the iPhoto Library
iMovie works seamlessly with iPhoto. You are suggested to drag and drop photos from iPhoto to the iMovie project. If no library exists in iPhoto, create one and import photos to iPhoto first. To add videos, you could go to either “File/Import” or Event Library, and then drag and drop selected videos to the timeline.
After photos and videos are imported to the iMovie slideshow project, you can preview the raw slideshow simply by pressing Space bar on your keyboard. And then make adjustments to clips and transitions. For example, mouse over one clip or “double arrow” button and click on the settings icon, then you could access clip adjustment, video adjustment, transition adjustment, etc.

Step 2. Add Music to Your iMovie Slideshow Project
Music sets the tone of your slideshow. Adding musing to the iMovie slideshow is just as simple as adding photos and videos.
So click the audio icon in the bottom right corner, and drag and drop the desired audio file to the timeline. Multiple songs could be added to iMovie.
However, iMovie doesn’t support multiple soundtracks. If necessary, you need to combine multiple song tracks with an external audio editor before importing them to the iMovie slideshow. You can also apply audio effects and filter sound using an equalizer.

Step 3. Export Your iMovie Slideshow Video
iMovie makes sharing possibilities endless. For those who upload their videos online, iMovie allows users to directly upload to MobileMe Gallery, YouTube, Facebook, Vimeo, CNN iReport, etc.
If you select to share the iMovie slideshow using Media Browser, you will get a slideshow appeared in other Mac applications like iWeb. It’s a good idea to export the iMovie slideshow to iTunes so that you can play back slideshow quickly and easily sync with your mobile devices like iPhone, iPod, and iPad.

You may also like: How to Add Text with iMovie in Mac and iPhone >>
Recommendation: Create Slideshow on Mac with More Templates and Transitions with Filmora
If you want to make a slideshow with some templates on Mac, you can try Wondershare Filmora . Filmora can turn photos and videos into attractive slideshow videos with various inbuilt filters, transitions, elements, animations, effects, and overlays. Click the Free Download button and have a try.
Check the ultimate guide about making a slideshow with music and titles in Filmora .
If you are going to make a slideshow with music on Windows, you may need a slideshow-making tool to do it by yourself. Wondershare Filmora will also be a good choice. It helps you instantly make such an impressive slideshow from photos and videos for sharing virtually anywhere.
Shanoon Cox
Shanoon Cox is a writer and a lover of all things video.
Follow @Shanoon Cox
Shanoon Cox
Mar 27, 2024• Proven solutions
Makings a slideshow is a great way to share photos and videos with friends and families. The good news is that you can totally make a slideshow on Mac for free with iMovie. iMovie is the pre-installed program coming with every new Mac. It provides a simple yet professional way to make slideshow movies from your photos, videos, and music.
If you haven’t iMovie installed on your Mac yet, just go to iTunes and download it for free. In the following part, I’ll share with you the step-by-step tutorial on how to make a slideshow on Mac using the free video editing software iMovie.
If you are an iOS user, check our picks of best photo slideshow apps for iPhone or iPad.
Ways for iMovie Photo Slideshow with Music Making
To make a photo slideshow with music in iMovie, you can follow these steps.
1. Create a New Project
After launching iMovie, click the Project button and then click Create New. Select Movie to combine photos, videos and music to make a slideshow.
2. Import Photos, Videos, and Audio Files
Now go to the My Media tab and click the Import icon to add your photos, videos, and music to iMovie, in this way, you can import any media files from any location on your Mac. But if you have arranged all your videos, photos, and music tracks in the Photos app, you can just switch to Photos under the Libraries tab on the left to import.
3. Arrange Media in Timeline and Adjust
Now, it’s time to place all these photos and videos in the timeline in order and do some adjustments. You can use the Magic Wand tool to improve the photo quality automatically, do some color correction, or add a filter to the photo. If you preview the video clip, you will see more options that allow you to do more editing, such as changing speed.
4. Apply Transitions & Effects
Transitions and effects will help you to create a slideshow in a more professional way. Some transitions such as cross dissolve, fade and cross blur are very popular in the slideshow, but remember don’t use lots of different transitions in one slideshow since too many transitions will distract the viewer’s attention. To apply a transition in the slideshow, just drag and drop it between two photos in the timeline.
5. Add Titles and Text
Using some opener titles and credits at the beginning and ending part of your slideshow will make it cool as well. You can add some famous quotes and words to better demonstrate.
Just to the Titles tab and select one of the title templates and drop it to the timeline first and then write your own words in the preview window.
6. Add Music to Slideshow
You can download some royalty-free music and sound effects from websites such as Filmstock stock media library or iTunes or import your own audio as we said before to use it as the slideshow background music. To sync with the slideshow, you may need to trim and edit the audio accordingly. For detailed information about iMovie audio editing, you can check how to add background music to iMovie.
Filmstock Stock Media Library ](https://tools.techidaily.com/wondershare/filmora/download/ )
7. Export and Share Your Slideshow video
Play the slideshow and check the result in the preview window. If everything goes well, you can now export and share or save it. You can save the slideshow video in MP4 format, or share it to Vimeo or add the slideshow to Theater to load it on your other Apple devices so you can easily watch it on your iOS devices or Apple TV.
I hope the above tutorial about how to make a slideshow on iMovie will be helpful for your stunning slideshow creation.
If you’re running an old macOS version and having iPhoto installed on your Mac, here are the detailed steps about How to make slideshow in iMovie with iPhoto project.
Step 1. Import Photos from the iPhoto Library
iMovie works seamlessly with iPhoto. You are suggested to drag and drop photos from iPhoto to the iMovie project. If no library exists in iPhoto, create one and import photos to iPhoto first. To add videos, you could go to either “File/Import” or Event Library, and then drag and drop selected videos to the timeline.
After photos and videos are imported to the iMovie slideshow project, you can preview the raw slideshow simply by pressing Space bar on your keyboard. And then make adjustments to clips and transitions. For example, mouse over one clip or “double arrow” button and click on the settings icon, then you could access clip adjustment, video adjustment, transition adjustment, etc.
Step 2. Add Music to Your iMovie Slideshow Project
Music sets the tone of your slideshow. Adding musing to the iMovie slideshow is just as simple as adding photos and videos.
So click the audio icon in the bottom right corner, and drag and drop the desired audio file to the timeline. Multiple songs could be added to iMovie.
However, iMovie doesn’t support multiple soundtracks. If necessary, you need to combine multiple song tracks with an external audio editor before importing them to the iMovie slideshow. You can also apply audio effects and filter sound using an equalizer.
Step 3. Export Your iMovie Slideshow Video
iMovie makes sharing possibilities endless. For those who upload their videos online, iMovie allows users to directly upload to MobileMe Gallery, YouTube, Facebook, Vimeo, CNN iReport, etc.
If you select to share the iMovie slideshow using Media Browser, you will get a slideshow appeared in other Mac applications like iWeb. It’s a good idea to export the iMovie slideshow to iTunes so that you can play back slideshow quickly and easily sync with your mobile devices like iPhone, iPod, and iPad.
You may also like: How to Add Text with iMovie in Mac and iPhone >>
Recommendation: Create Slideshow on Mac with More Templates and Transitions with Filmora
If you want to make a slideshow with some templates on Mac, you can try Wondershare Filmora . Filmora can turn photos and videos into attractive slideshow videos with various inbuilt filters, transitions, elements, animations, effects, and overlays. Click the Free Download button and have a try.
Check the ultimate guide about making a slideshow with music and titles in Filmora .
If you are going to make a slideshow with music on Windows, you may need a slideshow-making tool to do it by yourself. Wondershare Filmora will also be a good choice. It helps you instantly make such an impressive slideshow from photos and videos for sharing virtually anywhere.
Shanoon Cox
Shanoon Cox is a writer and a lover of all things video.
Follow @Shanoon Cox
Also read:
- [New] 2024 Approved Unlocking Creativity Top 20 Vlogger Themes
- [Updated] In 2024, Top 10 Best Screen Recorders for Mac
- 2024 Approved How to Make a FLV Photo Slideshow
- 2024 Approved How to Make Your Own Emoji in 2 Ways Step-By Step Guide
- 25 Cute Memes to Make You Feel Better for 2024
- 7 Ways to Unlock a Locked Vivo Y100t Phone
- Choosing the Finest Webcams - Our Expert Guide
- Get the New CanoScan LiDE 220 Drivers – Free Download & Update Guide
- How to Add Bitmoji to Keyboard for 2024
- How to Overcome the LS-0013 Startup Failure in Fortnite – A Comprehensive Guide
- How to Use Emojis on Windows 10 and Windows 11, In 2024
- In 2024, 5 Ways To Teach You To Transfer Files from Infinix Hot 40 Pro to Other Android Devices Easily | Dr.fone
- In 2024, Best iOS and Android Apps You Can Use to Create Animoji and Memoji Videos
- Leveraging Cookiebot Technology for Dynamic Content Customization
- Pioneering Open Worlds Worth Your Time
- Updated How to Add Emojis To Discord
- Updated Is This a Pigeon Meme Generator for 2024
- Title: New Top 10 Storyboarding Software Free&Paid
- Author: Jan
- Created at : 2024-09-28 21:40:35
- Updated at : 2024-09-30 20:49:05
- Link: https://meme-emoji.techidaily.com/new-top-10-storyboarding-software-freeandpaid/
- License: This work is licensed under CC BY-NC-SA 4.0.