
New In 2024, Top 5 Best Websites to Add Emojis to Photo Online
Top 5 Best Websites to Add Emojis to Photo Online
Are you in love with those funny emojis you see in messenger apps and want to add them to your images too? Guess what? You can add emojis to photos online conveniently through a few websites. Emojis enhance how a picture looks instantly.
People can use an emoji on a friend’s image to make them look funny or hide their face with a smiley emoji. Why upload boring and the same kind of photos all the time when emojis can add the much-needed magical touch? So, if you want to add emoji to photos online, look no further and learn about the best websites that allow you do that easily.
In this article
01 Top 5 Websites to Add Emojis to Photo Online
02 How to Add Emojis to Photo on Wondershare Filmora
Part 1: Top 5 Websites to Add Emojis to Photo Online
#1: Kapwing

One of the best websites is Kapwing, which lets you add emojis to any photo you want. Kapwing is an easy-to-use online tool, which means you will not have to download any tool. But to start using it, you will have to sign up. You can do that by using your Google ID. When it comes to the number of emojis it has, it boasts more than 250 different emojis. It lets you add custom emojis; let’s say you have a pack of custom emojis with you that you want to use; you can do that effortlessly.
Key Features
- It’s an online tool and free to use.
- You need to sign up to save your work.
- It has more than 250 emojis to choose from.
- Kapwing is easy to use.
Steps to Follow to Use Kapwing
Step 1: Visit the official website of Kapwing. You will see the Start Editing option; please click on that.
Step 2: You will see the workspace with an option that says “click to upload.” Click on it.
Step 3: Now, upload a photo that you want to add the emoji too. The image will be uploaded.
Step 4: To add an emoji, look towards the left menu, and you will see the Add Media option. Click on that.
Step 5: You will see the upload, projects, and emojis options. Click on the emojis option.
Step 6: Emojis will appear. Click on one, and it will be uploaded to the main photo. You can drag, shrink, zoom, or rotate the emoji used. You can add as many emojis you want.
Related: How to make a slo-mo video on Kapwing
#2: Image Online.Co

The next good online tool that you can try is Image Online.Co. It’s a pretty basic tool that lets you upload a photo and add an emoji the right way. It has more than 100 emojis, which is not a lot. But features all the popular emojis that will suit all kinds of images. And it allows you to add your custom emojis, which is why people prefer to use Image Online.Co. Using it is very easy, and the interface of the online tool is easy to understand.
Key Features
- It is a 100% free online tool that won’t ask you to sign up or log in.
- The tool has 100+ emojis to choose from.
- The interface is easy to understand.
- The tool is easy to use.
Steps to Follow to Use Image Online.Co
Step 1: Visit https://emoji.imageonline.co/ , which is their official website.
Step 2: Click on the Select Photo option, else directly drop an image from your local folder.
Step 3: If you want, you can add a custom emoji that you already have.
Step 4: Add an emoji from the right menu and rotate or zoom in or zoom out.
#3: Canva

Canva is arguably one of the best ways to make your photos look better. This tool has tons of features, and the best part is that you can customize a picture with an emoji using one of their templates. It has 250+ emojis and lets you add your customized emoji. And to start using Canva, you will have to sign up.
Key Features
- Canva has more than 250 emojis.
- It lets you edit your photos to enhance their quality.
- One-month free trial.
- You can choose from different templates.
Steps to Follow to Use Canva
Step 1: First, visit https://www.canva.com/ and sign up using your Facebook account or Gmail.
Step 2: Choose the kind of work you would like to do, and you will be taken to the photo editing page.
Step 3: Upload an image and click on the more option.
Step 4: Click on the emoji option and choose an emoji to add to the image. To save, click on the download option.
Related: How to Animate Pictures in Canva
#4: PiZap

PiZap is a photo editing tool that lets you add emojis too. To start using, you will have to log in or sign up. You can use your Facebook, Twitter, or Google account to sign up. It provides you with various graphics, fonts, and other photo editing features to make the image look better than before. The basic tool comes for free and has 232 emojis currently.
Key Features
- The basic tool comes for free.
- There are numerous emojis to choose from.
- The image quality doesn’t lose its original quality.
- Using the tool is easy, and the interface is intuitive.
Steps to Follow to Use PiZap
Step 1: Visit www.pizap.com and click on the try for free option.
Step 2: Click on the edit photo option, and upload an image.
Step 3: From the left-side toolbar, click on the Graphics option. Scroll a bit, and you will see the emoji section.
Step 4: Click on any of the emojis you like to add to the photo. You can adjust the emojis as you want.
#5: Pixelied
![]()
The last website that we have is Pixelied. The free tool will let you edit your image and add emojis, which will be enough if you don’t want many features. Using the tool is easy, and the emojis Pixelied has are great. They are different than general emojis and look better! Plus, the tool provides 300+ fantastic emojis.
Key Features
- The tool has an excellent collection of emojis.
- Adding emojis is extremely easy.
- It is free to use and doesn’t require any photo editing experience.
- The tool also offers various photo editing features.
How to Use Pixelied?
Step 1: Visit pixelied.com and click on the Upload Your Image option.
Step 2: On the left, you will find tons of icons. Use the search bar and type emojis.
Step 3: Browse through the emojis and click on one that you like. You can use multiple emojis, too, if you want. To save, click on the download option.
Part 2: How to Add Emojis to Photo on Wondershare Filmora
Filmora video editor provides tons of emojis that you can add for free, so you can add them to photos directly. What’s more, you can also upload your own emoji and use it in Filmora. All you need to do is download the tool on your Windows or Mac computer and start using it to add an emoji. There are two ways to go about it:
Use Emojis from Elements

Step 1: Launch Wondershare Filmora and click on create a new project.
Step 2: Click on the Elements option on the top and use the search bar to search for emojis.
Step 3: Click on any of the emojis that you like and adjust them.
Step 4: To save the photo with emojis, just click the camera icon to take a screenshot .
The video below shows the animated emojis that you can try in Filmora, take a look and have fun.
For Win 7 or later (64-bit)
For macOS 10.12 or later
Upload Your Own Emoji
Step 1: Launch Wondershare Filmora and add both the emoji and photo.
Step 2: Drag both of them into the timeline.
Step 3: Use the viewer panel to adjust the size of the emoji.

For Win 7 or later (64-bit)
For macOS 10.12 or later
Besides adding emojis to photos or videos, you can also add stickers to videos in Filmora to have fun.
Conclusion
And that’s how you can add an emoji to a photo online easily. You can try all five websites to add emojis to your photos, and if you want, you can download Wondershare Filmora to further edit the image. So, try these tools and make your photo look fun and fantastic!
02 How to Add Emojis to Photo on Wondershare Filmora
Part 1: Top 5 Websites to Add Emojis to Photo Online
#1: Kapwing
One of the best websites is Kapwing, which lets you add emojis to any photo you want. Kapwing is an easy-to-use online tool, which means you will not have to download any tool. But to start using it, you will have to sign up. You can do that by using your Google ID. When it comes to the number of emojis it has, it boasts more than 250 different emojis. It lets you add custom emojis; let’s say you have a pack of custom emojis with you that you want to use; you can do that effortlessly.
Key Features
- It’s an online tool and free to use.
- You need to sign up to save your work.
- It has more than 250 emojis to choose from.
- Kapwing is easy to use.
Steps to Follow to Use Kapwing
Step 1: Visit the official website of Kapwing. You will see the Start Editing option; please click on that.
Step 2: You will see the workspace with an option that says “click to upload.” Click on it.
Step 3: Now, upload a photo that you want to add the emoji too. The image will be uploaded.
Step 4: To add an emoji, look towards the left menu, and you will see the Add Media option. Click on that.
Step 5: You will see the upload, projects, and emojis options. Click on the emojis option.
Step 6: Emojis will appear. Click on one, and it will be uploaded to the main photo. You can drag, shrink, zoom, or rotate the emoji used. You can add as many emojis you want.
Related: How to make a slo-mo video on Kapwing
#2: Image Online.Co
The next good online tool that you can try is Image Online.Co. It’s a pretty basic tool that lets you upload a photo and add an emoji the right way. It has more than 100 emojis, which is not a lot. But features all the popular emojis that will suit all kinds of images. And it allows you to add your custom emojis, which is why people prefer to use Image Online.Co. Using it is very easy, and the interface of the online tool is easy to understand.
Key Features
- It is a 100% free online tool that won’t ask you to sign up or log in.
- The tool has 100+ emojis to choose from.
- The interface is easy to understand.
- The tool is easy to use.
Steps to Follow to Use Image Online.Co
Step 1: Visit https://emoji.imageonline.co/ , which is their official website.
Step 2: Click on the Select Photo option, else directly drop an image from your local folder.
Step 3: If you want, you can add a custom emoji that you already have.
Step 4: Add an emoji from the right menu and rotate or zoom in or zoom out.
#3: Canva
Canva is arguably one of the best ways to make your photos look better. This tool has tons of features, and the best part is that you can customize a picture with an emoji using one of their templates. It has 250+ emojis and lets you add your customized emoji. And to start using Canva, you will have to sign up.
Key Features
- Canva has more than 250 emojis.
- It lets you edit your photos to enhance their quality.
- One-month free trial.
- You can choose from different templates.
Steps to Follow to Use Canva
Step 1: First, visit https://www.canva.com/ and sign up using your Facebook account or Gmail.
Step 2: Choose the kind of work you would like to do, and you will be taken to the photo editing page.
Step 3: Upload an image and click on the more option.
Step 4: Click on the emoji option and choose an emoji to add to the image. To save, click on the download option.
Related: How to Animate Pictures in Canva
#4: PiZap
PiZap is a photo editing tool that lets you add emojis too. To start using, you will have to log in or sign up. You can use your Facebook, Twitter, or Google account to sign up. It provides you with various graphics, fonts, and other photo editing features to make the image look better than before. The basic tool comes for free and has 232 emojis currently.
Key Features
- The basic tool comes for free.
- There are numerous emojis to choose from.
- The image quality doesn’t lose its original quality.
- Using the tool is easy, and the interface is intuitive.
Steps to Follow to Use PiZap
Step 1: Visit www.pizap.com and click on the try for free option.
Step 2: Click on the edit photo option, and upload an image.
Step 3: From the left-side toolbar, click on the Graphics option. Scroll a bit, and you will see the emoji section.
Step 4: Click on any of the emojis you like to add to the photo. You can adjust the emojis as you want.
#5: Pixelied
![]()
The last website that we have is Pixelied. The free tool will let you edit your image and add emojis, which will be enough if you don’t want many features. Using the tool is easy, and the emojis Pixelied has are great. They are different than general emojis and look better! Plus, the tool provides 300+ fantastic emojis.
Key Features
- The tool has an excellent collection of emojis.
- Adding emojis is extremely easy.
- It is free to use and doesn’t require any photo editing experience.
- The tool also offers various photo editing features.
How to Use Pixelied?
Step 1: Visit pixelied.com and click on the Upload Your Image option.
Step 2: On the left, you will find tons of icons. Use the search bar and type emojis.
Step 3: Browse through the emojis and click on one that you like. You can use multiple emojis, too, if you want. To save, click on the download option.
Part 2: How to Add Emojis to Photo on Wondershare Filmora
Filmora video editor provides tons of emojis that you can add for free, so you can add them to photos directly. What’s more, you can also upload your own emoji and use it in Filmora. All you need to do is download the tool on your Windows or Mac computer and start using it to add an emoji. There are two ways to go about it:
Use Emojis from Elements
Step 1: Launch Wondershare Filmora and click on create a new project.
Step 2: Click on the Elements option on the top and use the search bar to search for emojis.
Step 3: Click on any of the emojis that you like and adjust them.
Step 4: To save the photo with emojis, just click the camera icon to take a screenshot .
The video below shows the animated emojis that you can try in Filmora, take a look and have fun.
For Win 7 or later (64-bit)
For macOS 10.12 or later
Upload Your Own Emoji
Step 1: Launch Wondershare Filmora and add both the emoji and photo.
Step 2: Drag both of them into the timeline.
Step 3: Use the viewer panel to adjust the size of the emoji.
For Win 7 or later (64-bit)
For macOS 10.12 or later
Besides adding emojis to photos or videos, you can also add stickers to videos in Filmora to have fun.
Conclusion
And that’s how you can add an emoji to a photo online easily. You can try all five websites to add emojis to your photos, and if you want, you can download Wondershare Filmora to further edit the image. So, try these tools and make your photo look fun and fantastic!
How to Make a Video Meme with 4 Best Meme Video Makers
How to Make a Video Meme with 4 Best Meme Video Makers

Ollie Mattison
Mar 27, 2024• Proven solutions
Being a new trend in the market, memes are ruling the Internet like never before. If you want to make your own video meme and facing issues in that, then you have reached the right place. You don’t need to be a pro at graphics or video editing . All that you need is a preferred video and the content you want to use along with as text and the rest is a smooth walk.
In this article, we are going to explain you, how to create memes using videos in different ways. Stay tuned for more!
- Part1: How to create a video meme with Filmora meme maker
- Part2: How to create a video meme with Filmora online meme maker
- Part3: How to create a video meme with Kapwing
- Part4: How to create a video meme with Blurbiz
Part 1: How to create a video meme with Filmora meme maker
You can also create a more vivid video meme with Filmora meme maker . It is such a handy video editing tool which enables you to create your own meme in just three steps. You can download the software first and follow the steps below:
Read more: Easy Steps to Create a Meme [Photo & Video Memes]
Part 2: How to create a video meme with Filmora online meme maker
If you are unsure about how to make video memes without download software, then rush to Filmora online meme maker . It would certainly help you to the great extent. This online meme maker can create image, GIF, and video memes with interesting fonts.
It processes videos memes faster than the counterparts. It comes with advanced decoder and encoder for fast action. You can directly upload videos using URL. The output formats are flexible and you can convert video to GIF. You can add text, edit fonts and move them freely as you desire. More importantly, no watermark in the outputted video.
Here is the guide for creating best video meme using Filmora online meme maker –
Step 1: Browse the official website to access Filmora online meme maker. Drag and drop or click to import video. Filmora meme maker can decode the video from the uploaded link itself.

Step 2: Navigate to the meme editor page once you have selected the video (GIF/image as well). From the left panel, customize your video meme. You can use Filmora video trimmer for cutting the video to fit your needs. Add text, alter fonts and preview the changes.

Step 3: Once you are done with your editing, click on the ‘CREATE’ button and let the change get applied on your video meme. Hit ‘DOWNLOAD’ after that and share your video meme on Facebook, Instagram, or Reddit.

Part 3: How to create a video meme with Blurbiz
When you want to make your own video meme, Blurbiz can also come in handy. However, it requires you to sign up first to use. The process needs you to first signup using your company name, name, email ID and password. Then the confirmation link is sent to your email. Once you tap the link then only your account gets activated. The free trial is available only for a week. You can create a video, image or GIF meme. It allows you to add content, drag and drop text, adjust it before saving it.
Here is a quick guide –
Step 1: Browse Blurbiz first and then enter name, email, password, and company name and press ‘Sign Up’.
Step 2: Once the confirmation mail is sent to your email, click the link to activate your user ID. You will be guided to the main page of the program. Click ‘Create Project’ and hit ‘Create’ after selecting a name.
Step 3: Click ‘+ Add Media Files’ and select a video. Tap ‘Open’ to upload video and then hit ‘EDIT’. Press the ‘Text’ tab and then edit and add various texts. Click ‘Complete’ and then ‘Download’ once the video is processed.
Part 4: How to create a video meme with Kapwing
Kapwing is one of the online meme video makers. It can also create memes with images. Though, it is a free meme maker, it will have a watermark. If you want to have the watermark removed, you need to sign up for a subscription. Though, the regular version needs no login to edit or create memes. It takes lot of time to process and create a meme out of your video.
Here is the quick guide for Kapwing –
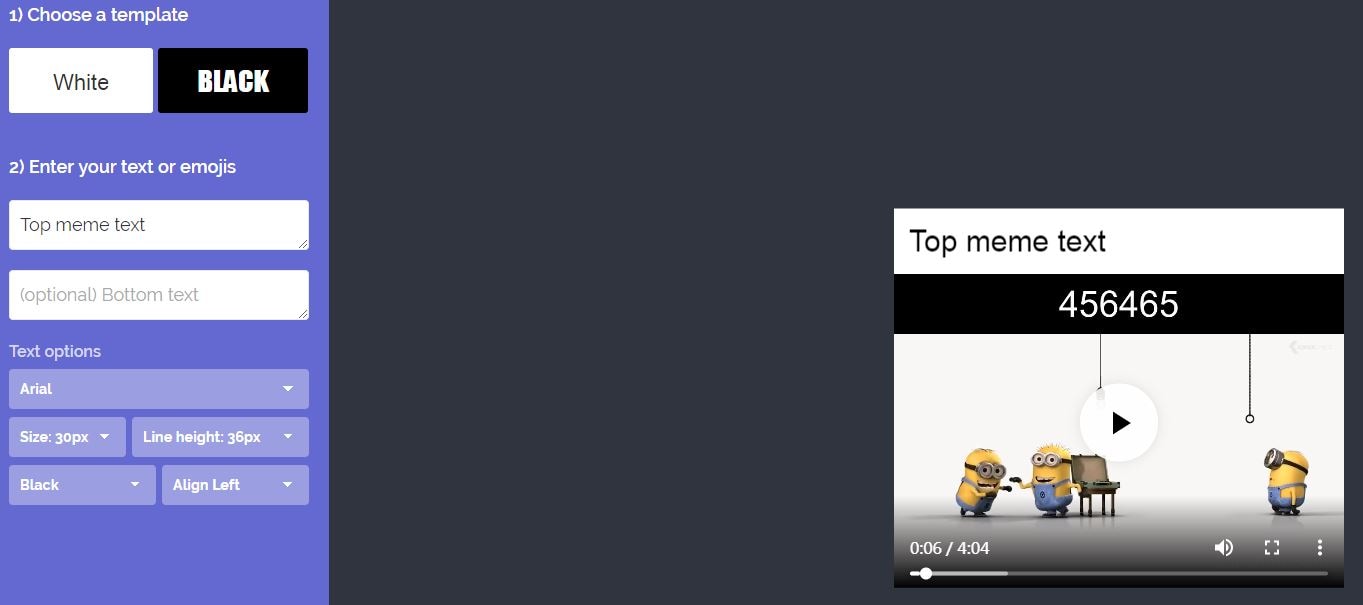
Step 1: Browse for Kapwing and then upload a video.
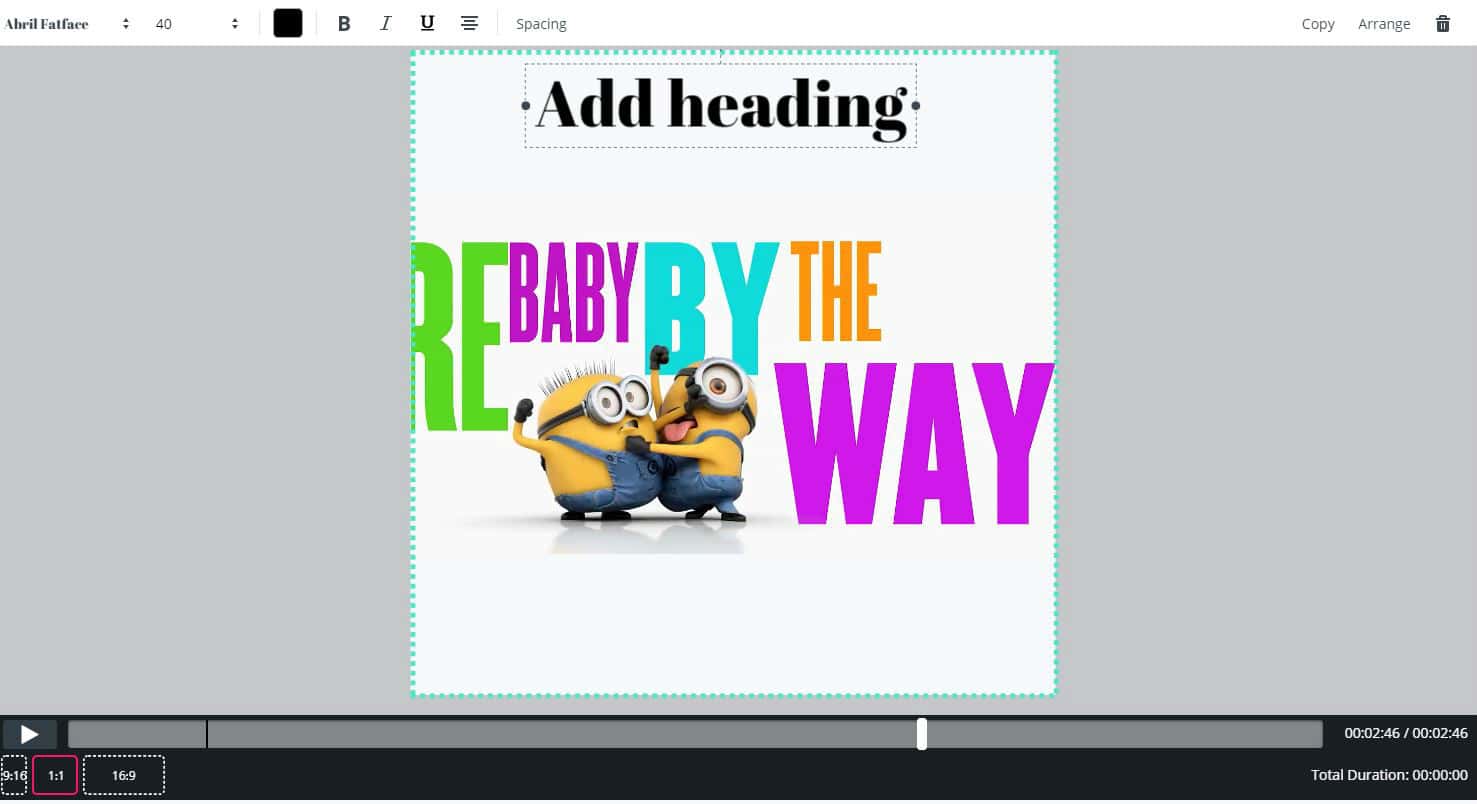
Step 2: Now, select a template ‘Black’ or ‘White’, enter header and footer text and emojis. Edit the text and define the font style, size and height.
Step 3: Hit the ‘CREATE’ button and wait till the output is generated. You need to wait and then tap ‘Download image’ to save the video meme on your PC.
Final Comments
Now that you are well aware of the process involving how to create a video meme, why don’t you start it with Filmora meme maker ?
As you know that, this is one of the most effective meme maker available in the market. It doesn’t require you to sign up and has a very intuitive interface too. All that you need to do is upload the video, add text, edit fonts and then you are all set with a rib tickling meme without watermark. You don’t need to download the software.
Ollie Mattison
Ollie Mattison is a writer and a lover of all things video.
Follow @Ollie Mattison
Ollie Mattison
Mar 27, 2024• Proven solutions
Being a new trend in the market, memes are ruling the Internet like never before. If you want to make your own video meme and facing issues in that, then you have reached the right place. You don’t need to be a pro at graphics or video editing . All that you need is a preferred video and the content you want to use along with as text and the rest is a smooth walk.
In this article, we are going to explain you, how to create memes using videos in different ways. Stay tuned for more!
- Part1: How to create a video meme with Filmora meme maker
- Part2: How to create a video meme with Filmora online meme maker
- Part3: How to create a video meme with Kapwing
- Part4: How to create a video meme with Blurbiz
Part 1: How to create a video meme with Filmora meme maker
You can also create a more vivid video meme with Filmora meme maker . It is such a handy video editing tool which enables you to create your own meme in just three steps. You can download the software first and follow the steps below:
Read more: Easy Steps to Create a Meme [Photo & Video Memes]
Part 2: How to create a video meme with Filmora online meme maker
If you are unsure about how to make video memes without download software, then rush to Filmora online meme maker . It would certainly help you to the great extent. This online meme maker can create image, GIF, and video memes with interesting fonts.
It processes videos memes faster than the counterparts. It comes with advanced decoder and encoder for fast action. You can directly upload videos using URL. The output formats are flexible and you can convert video to GIF. You can add text, edit fonts and move them freely as you desire. More importantly, no watermark in the outputted video.
Here is the guide for creating best video meme using Filmora online meme maker –
Step 1: Browse the official website to access Filmora online meme maker. Drag and drop or click to import video. Filmora meme maker can decode the video from the uploaded link itself.
Step 2: Navigate to the meme editor page once you have selected the video (GIF/image as well). From the left panel, customize your video meme. You can use Filmora video trimmer for cutting the video to fit your needs. Add text, alter fonts and preview the changes.
Step 3: Once you are done with your editing, click on the ‘CREATE’ button and let the change get applied on your video meme. Hit ‘DOWNLOAD’ after that and share your video meme on Facebook, Instagram, or Reddit.
Part 3: How to create a video meme with Blurbiz
When you want to make your own video meme, Blurbiz can also come in handy. However, it requires you to sign up first to use. The process needs you to first signup using your company name, name, email ID and password. Then the confirmation link is sent to your email. Once you tap the link then only your account gets activated. The free trial is available only for a week. You can create a video, image or GIF meme. It allows you to add content, drag and drop text, adjust it before saving it.
Here is a quick guide –
Step 1: Browse Blurbiz first and then enter name, email, password, and company name and press ‘Sign Up’.
Step 2: Once the confirmation mail is sent to your email, click the link to activate your user ID. You will be guided to the main page of the program. Click ‘Create Project’ and hit ‘Create’ after selecting a name.
Step 3: Click ‘+ Add Media Files’ and select a video. Tap ‘Open’ to upload video and then hit ‘EDIT’. Press the ‘Text’ tab and then edit and add various texts. Click ‘Complete’ and then ‘Download’ once the video is processed.
Part 4: How to create a video meme with Kapwing
Kapwing is one of the online meme video makers. It can also create memes with images. Though, it is a free meme maker, it will have a watermark. If you want to have the watermark removed, you need to sign up for a subscription. Though, the regular version needs no login to edit or create memes. It takes lot of time to process and create a meme out of your video.
Here is the quick guide for Kapwing –
Step 1: Browse for Kapwing and then upload a video.
Step 2: Now, select a template ‘Black’ or ‘White’, enter header and footer text and emojis. Edit the text and define the font style, size and height.
Step 3: Hit the ‘CREATE’ button and wait till the output is generated. You need to wait and then tap ‘Download image’ to save the video meme on your PC.
Final Comments
Now that you are well aware of the process involving how to create a video meme, why don’t you start it with Filmora meme maker ?
As you know that, this is one of the most effective meme maker available in the market. It doesn’t require you to sign up and has a very intuitive interface too. All that you need to do is upload the video, add text, edit fonts and then you are all set with a rib tickling meme without watermark. You don’t need to download the software.
Ollie Mattison
Ollie Mattison is a writer and a lover of all things video.
Follow @Ollie Mattison
How to Make Memoji Talk-Make Memoji Video On Your Own
How to Make Memoji Talk-Make Memoji Video On Your Own

Shanoon Cox
Mar 27, 2024• Proven solutions
Memojis are the 3D virtual caricatures customized to look exactly like you. Much like an animoji, memoji can mimic your facial as well as body movements. Using a memoji to convey your messages is an exciting and fun concept that is novel and unique to your personality. But, how to make memoji talk?
Well, that’s the fun part. We will walk you through the steps on how to make memoji talk in 5 simple steps. And if you’re worried about how to make memoji talk on an Android phone, don’t fret. We have the perfect solution for that too.
Read ahead to start learning how to make memoji talk.
- Part 1: How to Make Memoji Talk on iPhone
- Part 2: How to Make Memoji Talk on Android
- Bonus tip-Add Memoji to Your Video with Wondershare Filmora
Part 1: How to Make Memoji Talk on iPhone
Now you can make a talking memoji that mimics your expressions as well as your movements. Cool, right? And if you don’t know how to make memoji talk, you will be a master at it by the end of this article.
Here’s a guide on how to make memoji talk in 5 easy steps:
1.Open imessages. Go to New Message or open an existing conversation. If you don’t see the app tray above the keyboard, click on the App storeicon to reveal the hidden apps.
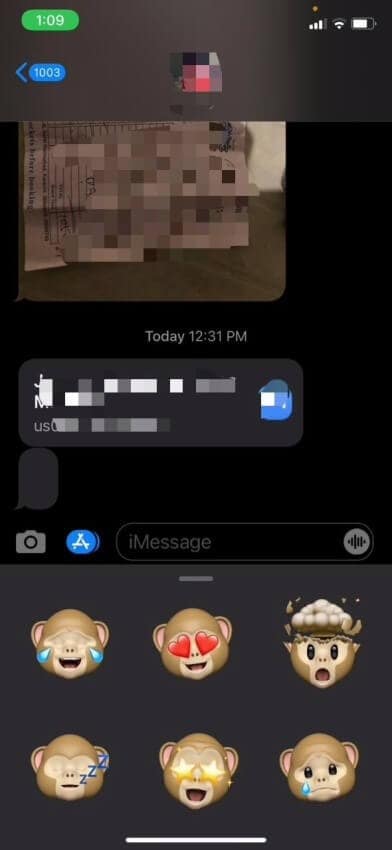
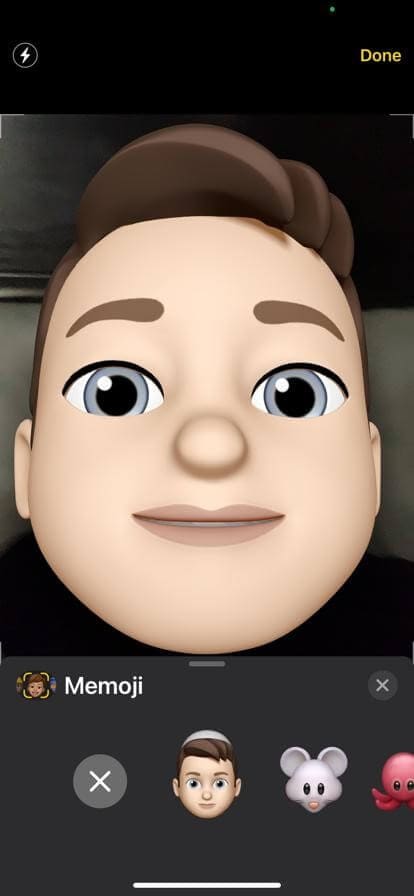
2.Now, in the app tray, click on the three-headed icon to see your memoji. If you record right there, it will just be a basic memoji head limited to a 30-second video. But, since we want more than that, click on the camera icon.
![]()
3.Now, switch to selfie mode and click on the Staricon for Effects in the bottom left corner for more options
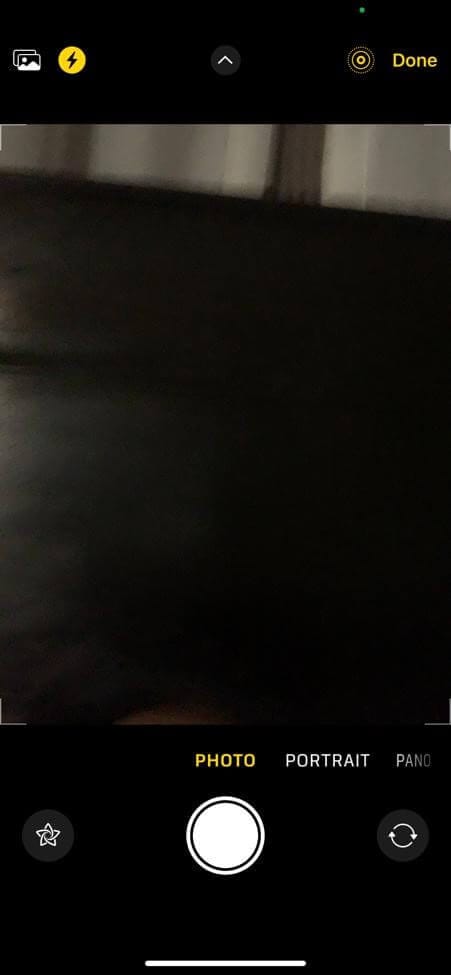
4.Click on the Animoji icon and choose the custom memoji you like to record with. Tap to start recording. Click Doneonce you finish recording.
5.The recorded talking memoji will be automatically sent to the opened chat and will also be saved to your gallery for easy sharing to other contacts or other platforms.

Part 2: How to Make Memoji Talk on Android
Well, we know how to make memoji talk on an iPhone, but what about Android users?
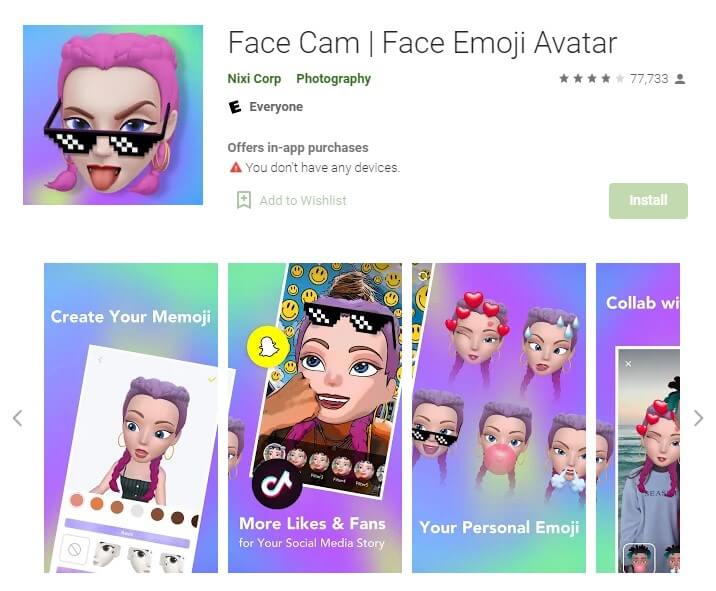
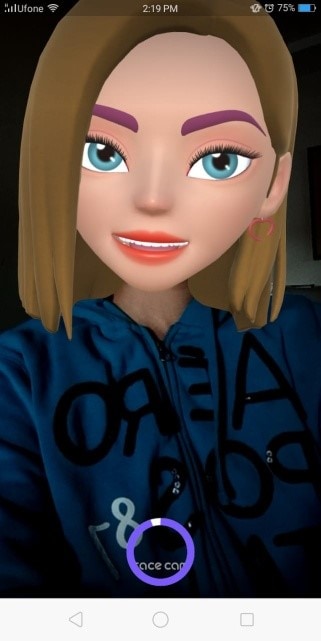
Since Android has no in-built option to make or record a talking memoji, you will need some outside help. Face Cam is an amazing app and solution to your worries. Even if you have no idea how to make memoji video, Face Cam’s user-friendly interface lets you easily understand how to make memoji talk. Plus, you can also personalize your memoji in a fun way
Let’s see how to make memoji talk on Android phones-
1.Install and launch Face Cam on your smartphone.
2.Now, make a custom memoji that looks like you. Select the hairstyle, face shape, eye color, accessories, etc. Tap the Tickicon to proceed.
3.Click on the filter tab to reveal filters. Choose the filter you would like to apply.
4.Tap and hold the record button to make your video.
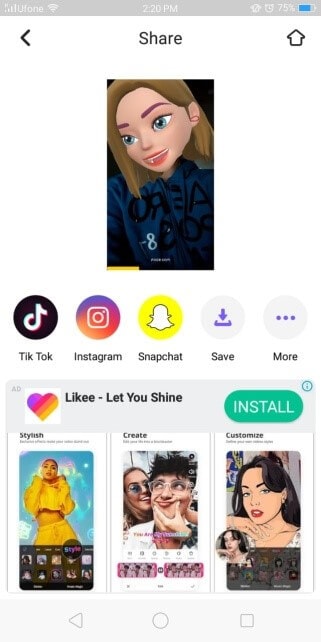
5.Finally, you can tap on the Savebutton to save the video to your gallery. You can also tap on the social media icons to share instantly.
Bonus tip-Add Memoji to Your Video with Wondershare Filmora
Wanna add emoji to your video? Now here is a bonus tip for you!
Filmora is a highly professional video editor with an incredibly intuitive and easy-to-use interface. It is packed with high-end editing tools such as keyframe animations, split-screen effect, cloning, etc. There is a range of aesthetic filters and cool special effects to give your videos a cinematic touch. One key feature is motion tracking. Once you learn how to make memoji talk, you can use your memoji sticker in any video. You will be able to paste your sticker onto your face that will follow it through the clip with easy and swift motion tracking.


Follow these steps:
1.Install and launch Wondershare Filmora. Import the video and memoji sticker to Filmora.
2.Drag the video to video track one and the sticker to the video track 2. And you can click on the sticker and adjust its size and position.
3.Double click on the video in the timeline to open settings. In the Videotab, select motion tracking, choose the area or person you want to track, and click Start Tracking.
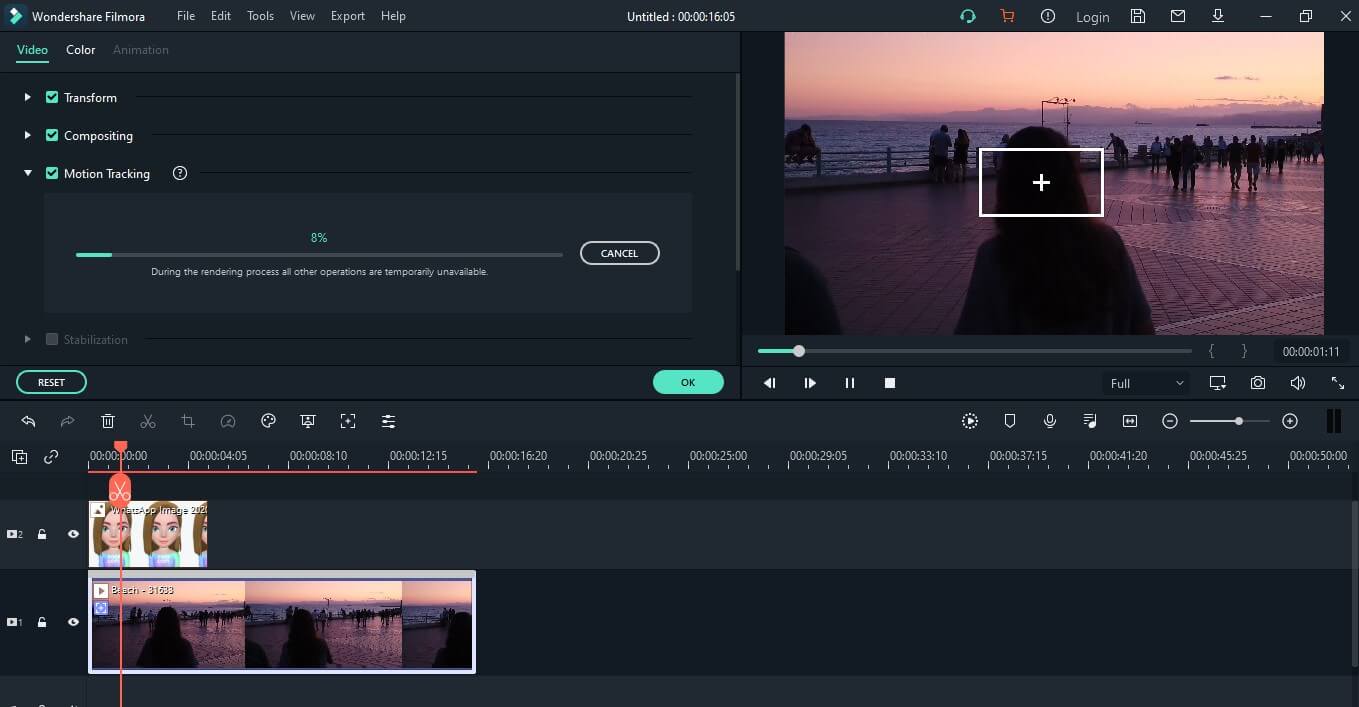
4.Now, choose the element. Open the drop-down menu and select the sticker memoji. Click Okto complete.

5.Finally, click Export. Choose the destination, format, and resolution and press Export.

Conclusion
Texting and virtual communication has now been redefined with the advent of emojis and memojis. So, you need to step up your game by learning how to make memoji talk and enter the exciting world of endless possibilities.
If you were unaware of how to make memoji talk, you must be a master at it by now. The 5 simple steps on how to make memoji video are easy to grasp and fun to try. So, don’t waste any time and start making talking memojis to share laughter. Take help from our ultimate guide on how to make memoji talk and express yourself hilariously and uniquely
Shanoon Cox
Shanoon Cox is a writer and a lover of all things video.
Follow @Shanoon Cox
Shanoon Cox
Mar 27, 2024• Proven solutions
Memojis are the 3D virtual caricatures customized to look exactly like you. Much like an animoji, memoji can mimic your facial as well as body movements. Using a memoji to convey your messages is an exciting and fun concept that is novel and unique to your personality. But, how to make memoji talk?
Well, that’s the fun part. We will walk you through the steps on how to make memoji talk in 5 simple steps. And if you’re worried about how to make memoji talk on an Android phone, don’t fret. We have the perfect solution for that too.
Read ahead to start learning how to make memoji talk.
- Part 1: How to Make Memoji Talk on iPhone
- Part 2: How to Make Memoji Talk on Android
- Bonus tip-Add Memoji to Your Video with Wondershare Filmora
Part 1: How to Make Memoji Talk on iPhone
Now you can make a talking memoji that mimics your expressions as well as your movements. Cool, right? And if you don’t know how to make memoji talk, you will be a master at it by the end of this article.
Here’s a guide on how to make memoji talk in 5 easy steps:
1.Open imessages. Go to New Message or open an existing conversation. If you don’t see the app tray above the keyboard, click on the App storeicon to reveal the hidden apps.
2.Now, in the app tray, click on the three-headed icon to see your memoji. If you record right there, it will just be a basic memoji head limited to a 30-second video. But, since we want more than that, click on the camera icon.
![]()
3.Now, switch to selfie mode and click on the Staricon for Effects in the bottom left corner for more options
4.Click on the Animoji icon and choose the custom memoji you like to record with. Tap to start recording. Click Doneonce you finish recording.
5.The recorded talking memoji will be automatically sent to the opened chat and will also be saved to your gallery for easy sharing to other contacts or other platforms.
Part 2: How to Make Memoji Talk on Android
Well, we know how to make memoji talk on an iPhone, but what about Android users?
Since Android has no in-built option to make or record a talking memoji, you will need some outside help. Face Cam is an amazing app and solution to your worries. Even if you have no idea how to make memoji video, Face Cam’s user-friendly interface lets you easily understand how to make memoji talk. Plus, you can also personalize your memoji in a fun way
Let’s see how to make memoji talk on Android phones-
1.Install and launch Face Cam on your smartphone.
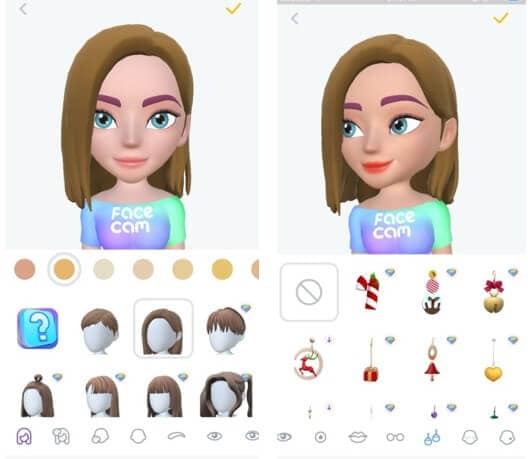
2.Now, make a custom memoji that looks like you. Select the hairstyle, face shape, eye color, accessories, etc. Tap the Tickicon to proceed.
3.Click on the filter tab to reveal filters. Choose the filter you would like to apply.
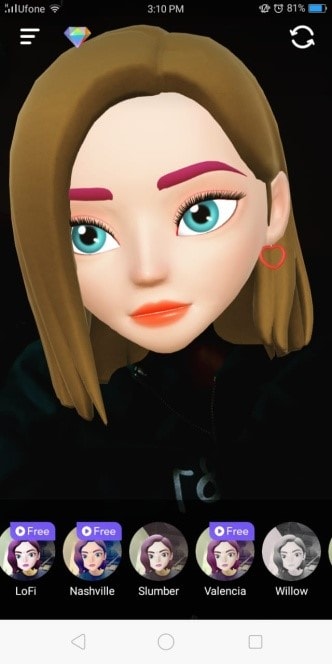
4.Tap and hold the record button to make your video.
5.Finally, you can tap on the Savebutton to save the video to your gallery. You can also tap on the social media icons to share instantly.
Bonus tip-Add Memoji to Your Video with Wondershare Filmora
Wanna add emoji to your video? Now here is a bonus tip for you!
Filmora is a highly professional video editor with an incredibly intuitive and easy-to-use interface. It is packed with high-end editing tools such as keyframe animations, split-screen effect, cloning, etc. There is a range of aesthetic filters and cool special effects to give your videos a cinematic touch. One key feature is motion tracking. Once you learn how to make memoji talk, you can use your memoji sticker in any video. You will be able to paste your sticker onto your face that will follow it through the clip with easy and swift motion tracking.
Follow these steps:
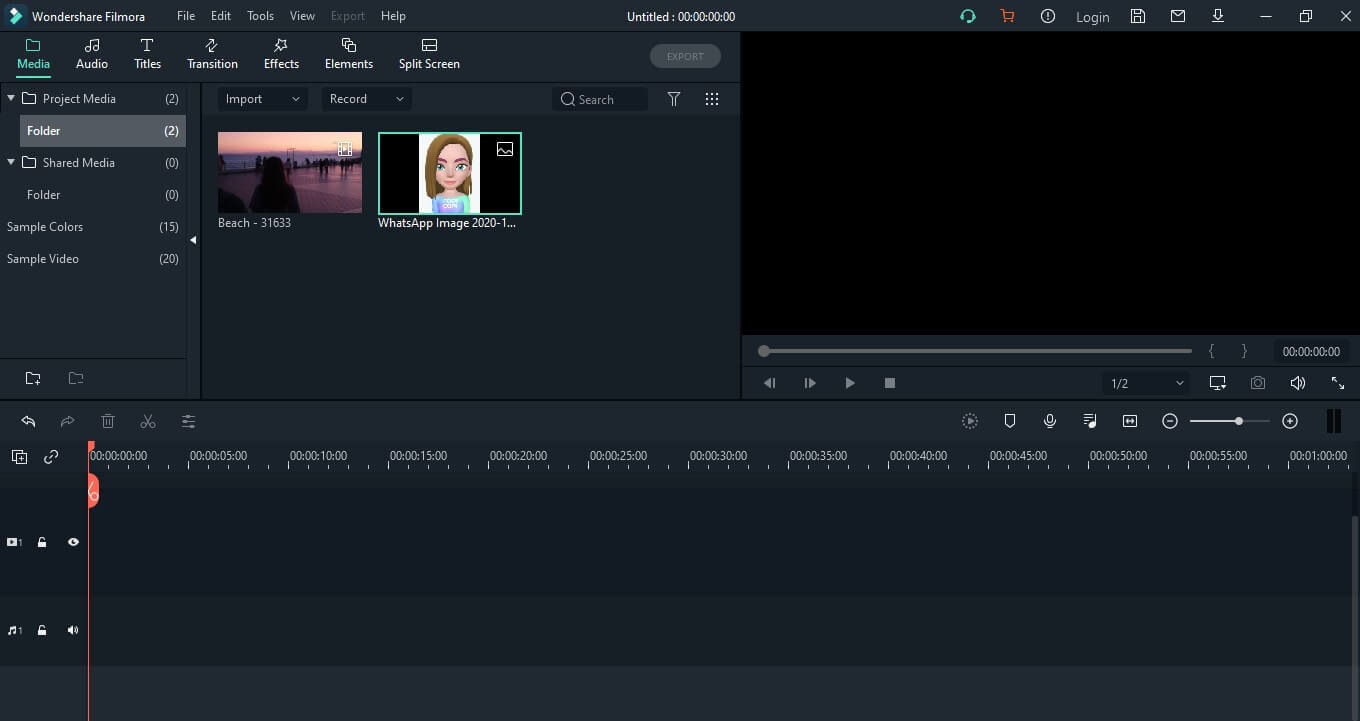
1.Install and launch Wondershare Filmora. Import the video and memoji sticker to Filmora.
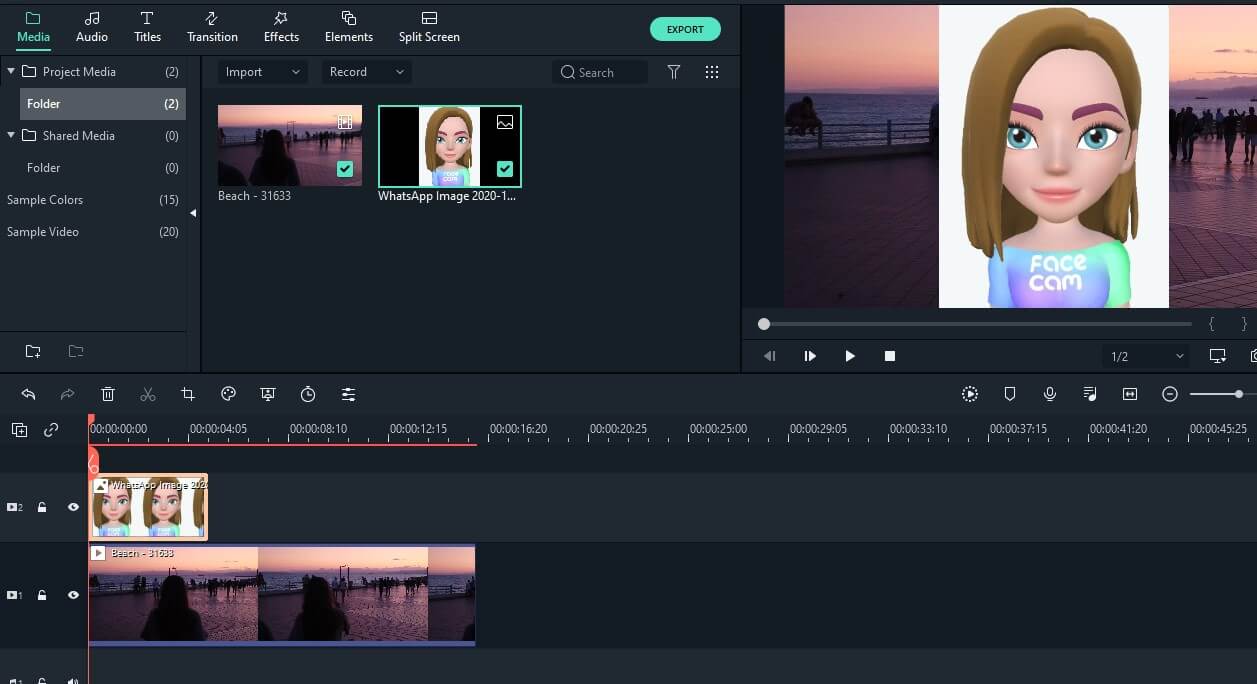
2.Drag the video to video track one and the sticker to the video track 2. And you can click on the sticker and adjust its size and position.
3.Double click on the video in the timeline to open settings. In the Videotab, select motion tracking, choose the area or person you want to track, and click Start Tracking.
4.Now, choose the element. Open the drop-down menu and select the sticker memoji. Click Okto complete.
5.Finally, click Export. Choose the destination, format, and resolution and press Export.
Conclusion
Texting and virtual communication has now been redefined with the advent of emojis and memojis. So, you need to step up your game by learning how to make memoji talk and enter the exciting world of endless possibilities.
If you were unaware of how to make memoji talk, you must be a master at it by now. The 5 simple steps on how to make memoji video are easy to grasp and fun to try. So, don’t waste any time and start making talking memojis to share laughter. Take help from our ultimate guide on how to make memoji talk and express yourself hilariously and uniquely
Shanoon Cox
Shanoon Cox is a writer and a lover of all things video.
Follow @Shanoon Cox
Shanoon Cox
Mar 27, 2024• Proven solutions
Memojis are the 3D virtual caricatures customized to look exactly like you. Much like an animoji, memoji can mimic your facial as well as body movements. Using a memoji to convey your messages is an exciting and fun concept that is novel and unique to your personality. But, how to make memoji talk?
Well, that’s the fun part. We will walk you through the steps on how to make memoji talk in 5 simple steps. And if you’re worried about how to make memoji talk on an Android phone, don’t fret. We have the perfect solution for that too.
Read ahead to start learning how to make memoji talk.
- Part 1: How to Make Memoji Talk on iPhone
- Part 2: How to Make Memoji Talk on Android
- Bonus tip-Add Memoji to Your Video with Wondershare Filmora
Part 1: How to Make Memoji Talk on iPhone
Now you can make a talking memoji that mimics your expressions as well as your movements. Cool, right? And if you don’t know how to make memoji talk, you will be a master at it by the end of this article.
Here’s a guide on how to make memoji talk in 5 easy steps:
1.Open imessages. Go to New Message or open an existing conversation. If you don’t see the app tray above the keyboard, click on the App storeicon to reveal the hidden apps.
2.Now, in the app tray, click on the three-headed icon to see your memoji. If you record right there, it will just be a basic memoji head limited to a 30-second video. But, since we want more than that, click on the camera icon.
![]()
3.Now, switch to selfie mode and click on the Staricon for Effects in the bottom left corner for more options
4.Click on the Animoji icon and choose the custom memoji you like to record with. Tap to start recording. Click Doneonce you finish recording.
5.The recorded talking memoji will be automatically sent to the opened chat and will also be saved to your gallery for easy sharing to other contacts or other platforms.
Part 2: How to Make Memoji Talk on Android
Well, we know how to make memoji talk on an iPhone, but what about Android users?
Since Android has no in-built option to make or record a talking memoji, you will need some outside help. Face Cam is an amazing app and solution to your worries. Even if you have no idea how to make memoji video, Face Cam’s user-friendly interface lets you easily understand how to make memoji talk. Plus, you can also personalize your memoji in a fun way
Let’s see how to make memoji talk on Android phones-
1.Install and launch Face Cam on your smartphone.
2.Now, make a custom memoji that looks like you. Select the hairstyle, face shape, eye color, accessories, etc. Tap the Tickicon to proceed.
3.Click on the filter tab to reveal filters. Choose the filter you would like to apply.
4.Tap and hold the record button to make your video.
5.Finally, you can tap on the Savebutton to save the video to your gallery. You can also tap on the social media icons to share instantly.
Bonus tip-Add Memoji to Your Video with Wondershare Filmora
Wanna add emoji to your video? Now here is a bonus tip for you!
Filmora is a highly professional video editor with an incredibly intuitive and easy-to-use interface. It is packed with high-end editing tools such as keyframe animations, split-screen effect, cloning, etc. There is a range of aesthetic filters and cool special effects to give your videos a cinematic touch. One key feature is motion tracking. Once you learn how to make memoji talk, you can use your memoji sticker in any video. You will be able to paste your sticker onto your face that will follow it through the clip with easy and swift motion tracking.
Follow these steps:
1.Install and launch Wondershare Filmora. Import the video and memoji sticker to Filmora.
2.Drag the video to video track one and the sticker to the video track 2. And you can click on the sticker and adjust its size and position.
3.Double click on the video in the timeline to open settings. In the Videotab, select motion tracking, choose the area or person you want to track, and click Start Tracking.
4.Now, choose the element. Open the drop-down menu and select the sticker memoji. Click Okto complete.
5.Finally, click Export. Choose the destination, format, and resolution and press Export.
Conclusion
Texting and virtual communication has now been redefined with the advent of emojis and memojis. So, you need to step up your game by learning how to make memoji talk and enter the exciting world of endless possibilities.
If you were unaware of how to make memoji talk, you must be a master at it by now. The 5 simple steps on how to make memoji video are easy to grasp and fun to try. So, don’t waste any time and start making talking memojis to share laughter. Take help from our ultimate guide on how to make memoji talk and express yourself hilariously and uniquely
Shanoon Cox
Shanoon Cox is a writer and a lover of all things video.
Follow @Shanoon Cox
Best Photo Slideshow Maker: How to Make a Photo Slideshow
Best Photo Slideshow Maker: How to Make a Photo Slideshow
Shanoon Cox
Mar 27, 2024• Proven solutions
Have you ever taken so many photos for your family, friends and special events? One fun-filled way of sharing them is to make a photo slideshow. That helps back up the memories in your life. What’s more, it can all be done in just a few simple clicks if you use slideshow maker like DVD Slideshow Builder Deluxe . With this programs, you can easily weave photos and video into work of art to amaze anyone. Here let’s see how to easily and creatively make a photo slideshow and burn to DVD with these all-in-one slideshow tools.
Download and run DVD slideshow builder , then follow the steps below to see how to make a photo slideshow.

Ways for Photo Slidehow making
Step 1. Add photo or video files to the photo slideshow maker
After running the photo slideshow maker, you’ll start from the “Organize” tab. On the interface, there are two Add Files buttons any of which you can click to add your photos and videos. Then just drag and drop photos or videos to arrange their order on storyboard. If you want to edit the photos, click “Edit” to add effects, crop photos, repair red-eye or add caption.
Tip: To have a large viewe of all the files, click the “Expand” button on top right corner of storyboard.

Step 2. Customize the slideshow like background music and transitions
When importing your files, more than 100 transition effects will be randomly and automatically applied between every two photo or video. However, you can change them anytime in the “Personalize” tab. Just drag and drop a transition from the list to the thumbnail between two slides. You can also add effects, motion or intro/credit as you like.
Adding music can greatly enhance the vibe of your photo slideshow. To achieve this, click “Music” on the storyboard. This photo slideshow maker enables you to add several different pieces of music according to your needs. If you want to add your own voice, just click “Voice Over” to record and then add it to the slideshow.

Step 3 Create photo slideshow and burn to DVD

Go to the “Create” tab and click the “Preview” button to make sure the photo slideshow is good enough. Go back to Personalize tab to change if necessary. When you are happy with the result, choose the options on the left to export photo slideshow to DVD, PC, portable devices, etc. You can also directly upload slideshow to Youtube and send message to Facebook and Twitter friends.

Now sit back and relax, it’ll only take a while to get your photo slideshow for sharing anywhere.
Shanoon Cox
Shanoon Cox is a writer and a lover of all things video.
Follow @Shanoon Cox
Shanoon Cox
Mar 27, 2024• Proven solutions
Have you ever taken so many photos for your family, friends and special events? One fun-filled way of sharing them is to make a photo slideshow. That helps back up the memories in your life. What’s more, it can all be done in just a few simple clicks if you use slideshow maker like DVD Slideshow Builder Deluxe . With this programs, you can easily weave photos and video into work of art to amaze anyone. Here let’s see how to easily and creatively make a photo slideshow and burn to DVD with these all-in-one slideshow tools.
Download and run DVD slideshow builder , then follow the steps below to see how to make a photo slideshow.
Ways for Photo Slidehow making
Step 1. Add photo or video files to the photo slideshow maker
After running the photo slideshow maker, you’ll start from the “Organize” tab. On the interface, there are two Add Files buttons any of which you can click to add your photos and videos. Then just drag and drop photos or videos to arrange their order on storyboard. If you want to edit the photos, click “Edit” to add effects, crop photos, repair red-eye or add caption.
Tip: To have a large viewe of all the files, click the “Expand” button on top right corner of storyboard.
Step 2. Customize the slideshow like background music and transitions
When importing your files, more than 100 transition effects will be randomly and automatically applied between every two photo or video. However, you can change them anytime in the “Personalize” tab. Just drag and drop a transition from the list to the thumbnail between two slides. You can also add effects, motion or intro/credit as you like.
Adding music can greatly enhance the vibe of your photo slideshow. To achieve this, click “Music” on the storyboard. This photo slideshow maker enables you to add several different pieces of music according to your needs. If you want to add your own voice, just click “Voice Over” to record and then add it to the slideshow.
Step 3 Create photo slideshow and burn to DVD
Go to the “Create” tab and click the “Preview” button to make sure the photo slideshow is good enough. Go back to Personalize tab to change if necessary. When you are happy with the result, choose the options on the left to export photo slideshow to DVD, PC, portable devices, etc. You can also directly upload slideshow to Youtube and send message to Facebook and Twitter friends.
Now sit back and relax, it’ll only take a while to get your photo slideshow for sharing anywhere.
Shanoon Cox
Shanoon Cox is a writer and a lover of all things video.
Follow @Shanoon Cox
Record and Edit an Animoji or Memoji Karaoke Music Video
How to Record and Edit an Animoji or Memoji Karaoke Music Video?

Liza Brown
Mar 27, 2024• Proven solutions
Becoming a superstar whose music is adored in every corner of the Earth is not something that can be achieved overnight. The rest of us, who only dream of worldwide fame can just enjoy our favorite songs and from time to time create animoji karaoke music videos for entertainment purposes. Read on if you are not sure what animojis are and how you can use them to create music videos from your iPhone or iPad, because in this article we are going to take you through each step of the process of making an animoji karaoke video.
First, let’s check some popular Memoji Karaoke video from YouTube. The Video below is from YouTuber Memoji Karaoke, enjoy.
What Exactly is The Difference Between Animojis and Memojis?
Animojis and Memojis have taken the world by storm since the first iPhone X model was released back in 2017. Both animojis and memojis utilize facial recognition technologies to track your movements and facial expressions and imitate them in a virtual environment. However, an animoji is a 3D emoji like a monkey, koala, tiger or a unicorn, while memojis are fully customizable avatars that let you create a character from scratch.
Memojis enable you to choose the character’s skin color, head, nose, ear shape or hairstyle, meaning that you can create as many new characters as you want effortlessly. Furthermore, you can add stickers or apply up to five different filters to animojis and memojis you share with your friends.

See best Memoji makers here: Top 8 Memoji Makers to Make a Memoji on PC, Android, and iPhone.
How to Set Up and Create Memojis?
Owners of iPhone X, iPhone XS, iPhone XS Max, and iPadPro can easily make new memojis from their devices. All you have to do in order to start creating a new memoji is open the messaging app, locate the iMessage AppStore icon, tap on it and then tap on the Animoji icon. By doing so you will gain access to all animojis that are available on iOS 12 or other versions of the iOS that support memojis and animojis. After tapping on the New Memoji icon you will be able to see the default character you can customize as you see fit.
You can now get creative and pick one of the countless skin tones, choose how old your character is going to be or select any of the available head, nose and ear shapes. Moreover, you can customize the eye color for each character you create, add eyewear, or decide whether or not your character is going to have facial hair. Once you’re finished customizing a new memoji, simply tap on the Done button and the character you’ve created is going to be saved in your animoji collection. You can edit, duplicate or delete the memojis by tapping on the three dot icon or you can use them as camera overlays and share them with your friends.
How to Make a Memoji or Animoji Karaoke Music Video?
Once you’ve created a memoji you will have to record thirty-second videos in order to be able to send them as messages. After the recording session is completed, you can review the material you’ve produced, and decide if you are happy with the result or if you want to do another take. The only downside is that you can’t play music from your iPhone or your iPad while you’re recording, which means that you have to play the song you want to cover from another device such as a computer or the stereo system.
Read this article to learn more about Animoji: The Ultimate Guide of How to Use Animoji on iPhone X.
It is worth noting that knowing the lyrics of the song is going to improve the quality of the karaoke music video you’re producing significantly, so rehearsing a song few times before you hit the record button may be a good idea if you don’t know its lyrics by heart.
When you’re ready, launch the iMessage app and choose an animoji or memoji character you’re going to be in the video. Don’t record karaoke videos in the full-screen mode because the record button is going to cover a significant portion of the screen, which can complicate the video editing process. Optionally, you download and install the Animoji Studio app if you want to record videos that are longer than thirty seconds, but you might need some time to get used to making karaoke videos with this app.
Proceed to record your 30-second video or activate the Screen Recording option from the Control Center if you want to capture a karaoke video that exceeds that limit. If you like the results you can simply send the video you’ve created as a message, but you can also transfer the file to your computer and edit from a video editing software like Filmora.
Import the memoji video file you’ve transferred to your computer into Filmora after you’ve created a new project. You can do this from the software’s Media panel by clicking on the Import drop-down menu and choosing the Import Media Files option. Place the video file on the timeline and then cut or trim all parts of the clip you don’t want to include in the final cut of your memoji karaoke video. Filmora offers a vast number of different opening titles, end credits, audio and visual effects and transitions that can all help you create a visually attractive karaoke video.
Moreover, you can duplicate an animoji or memoji and create a duet in just a few simple clicks. The editor’s powerful audio editing tools enable you to add a high-quality audio file to your project or sound effects that can make your video more entertaining. Click on the Export button to choose the output destination, format, resolution and aspect ratio for the karaoke video you’ve just created. Filmora lets you export videos directly to your YouTube or Vimeo channel, which can be quite handy if you want to share your memoji videos online immediately after you’ve completed the video editing process.
List of iPhones and iPads that Support Animojis and Memojis
| Face ID | Animoji | Memoji |
|---|---|---|
| iPhone X | iPhone X | iPhone X (iOS 12 or later required) |
| iPhone XR | iPhone XR | iPhone XR |
| iPhone XS | iPhone XS | iPhone XS |
| iPhone XS Max | iPhone XS Max | iPhone XS Max |
| iPad Pro 12.9-inch (3rd generation) | iPad Pro 12.9-inch (3rd generation) | iPad Pro 12.9-inch (3rd generation) |
| iPad Pro 11-inch or above | iPad Pro 11-inch | iPad Pro 11-inch |
Unfortunately, Face ID feature, as well as animojis and memojis, are relatively novel additions on iOS-based devices, and you won’t be able to create memoji or animoji karaoke videos from the iMessages app unless you have one of the following iPhone or iPad models.
The list of iPhone and iPad models that offer the Face ID, Animoji and Memoji Features
Older models of iPhones, iPods, and iPads that have the latest version of iOS installed can only receive animoji and memoji messages, but it is not possible to create these messages with them. In case you are using an older model of an iPhone or an iPad but you still want to create animoji and memoji karaoke videos you can find a simple solution to your problem below.
Supermoji – The Emoji App
A powerful and intuitive app like Supermoji enables you to create karaoke music videos that feature your favorite animoji and memoji characters with ease. Creating animated 3D models won’t take too much of your time if you choose to download and install this app on your device, but after a three-day trial period, you’ll have to opt for one of the available subscription models. A weekly subscription costs $9.99, while you must pay $29.99 for a monthly subscription, which makes the Supermoji app a bit pricy. Alternatively, you can try Facemoji or Emoji Face Recorder apps, but the results you’ll get can be a bit underwhelming when compared to the animojis and memojis created from the iMessages app.
Conclusion
Creating funny animoji and memoji karaoke music videos is a new trend that can only grow in popularity in the future. However, this feature is only available on recent iPhone and iPad models, but there are a number of third-party apps that enable you to create this type of video even if you are using an older iPhone or iPad model. Do you like using memoji and animoji animations to create karaoke videos you share with your friends on social media? Leave a comment below and share your opinions with us.
Liza Brown
Liza Brown is a writer and a lover of all things video.
Follow @Liza Brown
Liza Brown
Mar 27, 2024• Proven solutions
Becoming a superstar whose music is adored in every corner of the Earth is not something that can be achieved overnight. The rest of us, who only dream of worldwide fame can just enjoy our favorite songs and from time to time create animoji karaoke music videos for entertainment purposes. Read on if you are not sure what animojis are and how you can use them to create music videos from your iPhone or iPad, because in this article we are going to take you through each step of the process of making an animoji karaoke video.
First, let’s check some popular Memoji Karaoke video from YouTube. The Video below is from YouTuber Memoji Karaoke, enjoy.
What Exactly is The Difference Between Animojis and Memojis?
Animojis and Memojis have taken the world by storm since the first iPhone X model was released back in 2017. Both animojis and memojis utilize facial recognition technologies to track your movements and facial expressions and imitate them in a virtual environment. However, an animoji is a 3D emoji like a monkey, koala, tiger or a unicorn, while memojis are fully customizable avatars that let you create a character from scratch.
Memojis enable you to choose the character’s skin color, head, nose, ear shape or hairstyle, meaning that you can create as many new characters as you want effortlessly. Furthermore, you can add stickers or apply up to five different filters to animojis and memojis you share with your friends.
See best Memoji makers here: Top 8 Memoji Makers to Make a Memoji on PC, Android, and iPhone.
How to Set Up and Create Memojis?
Owners of iPhone X, iPhone XS, iPhone XS Max, and iPadPro can easily make new memojis from their devices. All you have to do in order to start creating a new memoji is open the messaging app, locate the iMessage AppStore icon, tap on it and then tap on the Animoji icon. By doing so you will gain access to all animojis that are available on iOS 12 or other versions of the iOS that support memojis and animojis. After tapping on the New Memoji icon you will be able to see the default character you can customize as you see fit.
You can now get creative and pick one of the countless skin tones, choose how old your character is going to be or select any of the available head, nose and ear shapes. Moreover, you can customize the eye color for each character you create, add eyewear, or decide whether or not your character is going to have facial hair. Once you’re finished customizing a new memoji, simply tap on the Done button and the character you’ve created is going to be saved in your animoji collection. You can edit, duplicate or delete the memojis by tapping on the three dot icon or you can use them as camera overlays and share them with your friends.
How to Make a Memoji or Animoji Karaoke Music Video?
Once you’ve created a memoji you will have to record thirty-second videos in order to be able to send them as messages. After the recording session is completed, you can review the material you’ve produced, and decide if you are happy with the result or if you want to do another take. The only downside is that you can’t play music from your iPhone or your iPad while you’re recording, which means that you have to play the song you want to cover from another device such as a computer or the stereo system.
Read this article to learn more about Animoji: The Ultimate Guide of How to Use Animoji on iPhone X.
It is worth noting that knowing the lyrics of the song is going to improve the quality of the karaoke music video you’re producing significantly, so rehearsing a song few times before you hit the record button may be a good idea if you don’t know its lyrics by heart.
When you’re ready, launch the iMessage app and choose an animoji or memoji character you’re going to be in the video. Don’t record karaoke videos in the full-screen mode because the record button is going to cover a significant portion of the screen, which can complicate the video editing process. Optionally, you download and install the Animoji Studio app if you want to record videos that are longer than thirty seconds, but you might need some time to get used to making karaoke videos with this app.
Proceed to record your 30-second video or activate the Screen Recording option from the Control Center if you want to capture a karaoke video that exceeds that limit. If you like the results you can simply send the video you’ve created as a message, but you can also transfer the file to your computer and edit from a video editing software like Filmora.
Import the memoji video file you’ve transferred to your computer into Filmora after you’ve created a new project. You can do this from the software’s Media panel by clicking on the Import drop-down menu and choosing the Import Media Files option. Place the video file on the timeline and then cut or trim all parts of the clip you don’t want to include in the final cut of your memoji karaoke video. Filmora offers a vast number of different opening titles, end credits, audio and visual effects and transitions that can all help you create a visually attractive karaoke video.
Moreover, you can duplicate an animoji or memoji and create a duet in just a few simple clicks. The editor’s powerful audio editing tools enable you to add a high-quality audio file to your project or sound effects that can make your video more entertaining. Click on the Export button to choose the output destination, format, resolution and aspect ratio for the karaoke video you’ve just created. Filmora lets you export videos directly to your YouTube or Vimeo channel, which can be quite handy if you want to share your memoji videos online immediately after you’ve completed the video editing process.
List of iPhones and iPads that Support Animojis and Memojis
| Face ID | Animoji | Memoji |
|---|---|---|
| iPhone X | iPhone X | iPhone X (iOS 12 or later required) |
| iPhone XR | iPhone XR | iPhone XR |
| iPhone XS | iPhone XS | iPhone XS |
| iPhone XS Max | iPhone XS Max | iPhone XS Max |
| iPad Pro 12.9-inch (3rd generation) | iPad Pro 12.9-inch (3rd generation) | iPad Pro 12.9-inch (3rd generation) |
| iPad Pro 11-inch or above | iPad Pro 11-inch | iPad Pro 11-inch |
Unfortunately, Face ID feature, as well as animojis and memojis, are relatively novel additions on iOS-based devices, and you won’t be able to create memoji or animoji karaoke videos from the iMessages app unless you have one of the following iPhone or iPad models.
The list of iPhone and iPad models that offer the Face ID, Animoji and Memoji Features
Older models of iPhones, iPods, and iPads that have the latest version of iOS installed can only receive animoji and memoji messages, but it is not possible to create these messages with them. In case you are using an older model of an iPhone or an iPad but you still want to create animoji and memoji karaoke videos you can find a simple solution to your problem below.
Supermoji – The Emoji App
A powerful and intuitive app like Supermoji enables you to create karaoke music videos that feature your favorite animoji and memoji characters with ease. Creating animated 3D models won’t take too much of your time if you choose to download and install this app on your device, but after a three-day trial period, you’ll have to opt for one of the available subscription models. A weekly subscription costs $9.99, while you must pay $29.99 for a monthly subscription, which makes the Supermoji app a bit pricy. Alternatively, you can try Facemoji or Emoji Face Recorder apps, but the results you’ll get can be a bit underwhelming when compared to the animojis and memojis created from the iMessages app.
Conclusion
Creating funny animoji and memoji karaoke music videos is a new trend that can only grow in popularity in the future. However, this feature is only available on recent iPhone and iPad models, but there are a number of third-party apps that enable you to create this type of video even if you are using an older iPhone or iPad model. Do you like using memoji and animoji animations to create karaoke videos you share with your friends on social media? Leave a comment below and share your opinions with us.
Liza Brown
Liza Brown is a writer and a lover of all things video.
Follow @Liza Brown
Is This a Pigeon Meme Generator
Is This a Pigeon Meme Generator
Ollie Mattison
Mar 27, 2024• Proven solutions
Have you ever been so confused that you thought that a butterfly is a pigeon? Apparently, the main protagonist of The Brave Fighter of Sun Fighbird from the Japanese anime TV series has. In an episode that was released in January 1991, Yutaro Katori seriously asked ‘is this a pigeon?’ while looking at a butterfly. At first, everyone thought that it was just a poor translation, but it turned out that the translation was correct, which turned this still frame into a meme as early as 2011.
After a while, the Is This a Pigeon meme came out of fashion, but at the beginning of 2018, it went viral again. Today the meme is used to express all sorts of confusing opinions, that range from popular culture references to philosophical questions. If you’re utterly confused in certain situations or if you simply like making Is This a Pigeon meme, you’re at the right place because in this article we’re going to show you how you can generate these memes in a couple of simple steps.
How to Make Is This a Pigeon Meme?
There are hundreds of meme makers online, but some of them watermark your memes, require you to create an account or want to charge you for the service. That’s why we recommend using Filmora Online Meme Maker that is free to use, produces watermark-free memes, and it doesn’t require you to sign in. Here’s how you can make a meme with this online meme maker:
1. Importing Images
You can copy the picture’s URL by clicking ‘Copy the image’ link below the image and import the template into the Filmora Online Meme Maker directly from the web.

Copy the image
If you choose to upload a photo from your computer or a Smartphone, you can just drag and drop the file from a folder to the webpage or you can click on the + icon and navigate to the folder on your hard drive where the template is stored. Fimora Online Meme Maker also lets you use GIFs and videos to generate memes.

2. Adding the Text to the Meme
Immediately after the image is uploaded, a new page will load, where you can add the text to the meme you’re creating. The text in the Is this a pigeon meme is usually inside the picture so you can just select the Text Inside option and proceed to insert the text into the text boxes below.
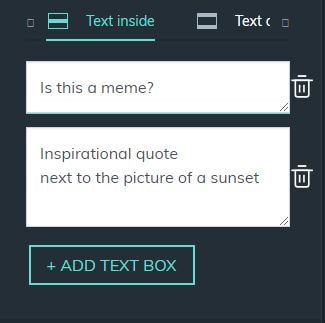
You can add as many text boxes as you want, and you can drag the text displayed across the picture and place it where ever you want. When creating the Is this a Pigeon meme, the text that refers to the source of the confusion should be next to the butterfly, while the question is most often located near the bottom of the picture. Optionally, you can reveal who is asking the question by adding me, my mom or Darth Vader next to the character in the picture.
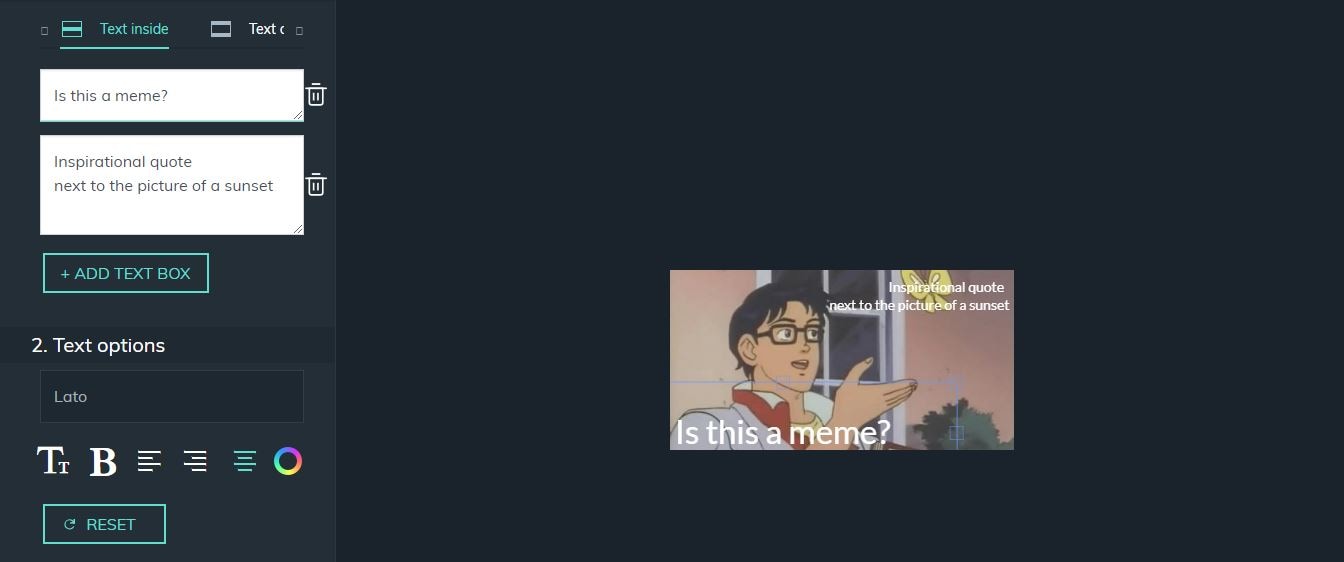
In the Text Options menu, you can adjust the size of the text in each text box individually, change its color or choose between standard text alignment options. Hit the Create button when you’re done and wait for a new page to load.
3. Downloading Memes
Click on the download button to add a new meme to your collection. Sharing files directly to social media from Filmora Online Meme Maker is not an option if you’re making memes from a Mac or PC computer.
Conclusion
Being confused can be hilarious, which is one of the reasons why Is this a Pigeon meme has been so popular over the course of the last year. Generating a meme is easy, so you can focus on finding an appropriate joke for this type of meme. Do you often make Is this a Pigeon memes? Leave a comment and share your favorites with us.
Ollie Mattison
Ollie Mattison is a writer and a lover of all things video.
Follow @Ollie Mattison
Ollie Mattison
Mar 27, 2024• Proven solutions
Have you ever been so confused that you thought that a butterfly is a pigeon? Apparently, the main protagonist of The Brave Fighter of Sun Fighbird from the Japanese anime TV series has. In an episode that was released in January 1991, Yutaro Katori seriously asked ‘is this a pigeon?’ while looking at a butterfly. At first, everyone thought that it was just a poor translation, but it turned out that the translation was correct, which turned this still frame into a meme as early as 2011.
After a while, the Is This a Pigeon meme came out of fashion, but at the beginning of 2018, it went viral again. Today the meme is used to express all sorts of confusing opinions, that range from popular culture references to philosophical questions. If you’re utterly confused in certain situations or if you simply like making Is This a Pigeon meme, you’re at the right place because in this article we’re going to show you how you can generate these memes in a couple of simple steps.
How to Make Is This a Pigeon Meme?
There are hundreds of meme makers online, but some of them watermark your memes, require you to create an account or want to charge you for the service. That’s why we recommend using Filmora Online Meme Maker that is free to use, produces watermark-free memes, and it doesn’t require you to sign in. Here’s how you can make a meme with this online meme maker:
1. Importing Images
You can copy the picture’s URL by clicking ‘Copy the image’ link below the image and import the template into the Filmora Online Meme Maker directly from the web.
Copy the image
If you choose to upload a photo from your computer or a Smartphone, you can just drag and drop the file from a folder to the webpage or you can click on the + icon and navigate to the folder on your hard drive where the template is stored. Fimora Online Meme Maker also lets you use GIFs and videos to generate memes.
2. Adding the Text to the Meme
Immediately after the image is uploaded, a new page will load, where you can add the text to the meme you’re creating. The text in the Is this a pigeon meme is usually inside the picture so you can just select the Text Inside option and proceed to insert the text into the text boxes below.
You can add as many text boxes as you want, and you can drag the text displayed across the picture and place it where ever you want. When creating the Is this a Pigeon meme, the text that refers to the source of the confusion should be next to the butterfly, while the question is most often located near the bottom of the picture. Optionally, you can reveal who is asking the question by adding me, my mom or Darth Vader next to the character in the picture.
In the Text Options menu, you can adjust the size of the text in each text box individually, change its color or choose between standard text alignment options. Hit the Create button when you’re done and wait for a new page to load.
3. Downloading Memes
Click on the download button to add a new meme to your collection. Sharing files directly to social media from Filmora Online Meme Maker is not an option if you’re making memes from a Mac or PC computer.
Conclusion
Being confused can be hilarious, which is one of the reasons why Is this a Pigeon meme has been so popular over the course of the last year. Generating a meme is easy, so you can focus on finding an appropriate joke for this type of meme. Do you often make Is this a Pigeon memes? Leave a comment and share your favorites with us.
Ollie Mattison
Ollie Mattison is a writer and a lover of all things video.
Follow @Ollie Mattison
Burn Photos to DVD | How to Burn Photos to DVD with Transitions and Music
How to Burn Photos to DVD with Transitions and Music
Shanoon Cox
Mar 27, 2024• Proven solutions
Photos are precious memories not only for you but also for your family members. As time goes on, the photos might fade out and be unable to retrieve. To avoid this, burn photos to DVD will be a great idea to preserve family memories eternally.
This article will show you how to burn photos to DVD Slideshow with transition, titles and music quickly and easily by using Wondershare DVD Slideshow Builder Deluxe . It also provides some tips on how to burn photos to DVD.
Part 1: How to Burn Photos to DVD with Transition, Titles and Music
Wondershare DVD Slideshow Builder Deluxe can help you quickly create and burn photos to DVD. Download the free trial version this photo DVD maker first.
Step 1. Add Photo or Video Files
In Organize tab, simply click the “Add Files” button to open the browse window, find your files and import them into the program, you can drag and drop photos or videos to organize them on storyboard. Click the Expand button to get a larger viewer.
Step 2. Customize Photo Slideshow Transitions
Generally speaking, transition effects will be automatically inserted between every two photos/videos when you import the photos. But you can customize them by clicking the Personalize tab, then drag and drop a transition from the list to the thumbnail between two slides.
You are also able to add background music here: click the Music button and choose a music file from your computer.
Step 3. Choose DVD Menu
Now switch to Create tab to author a DVD menu from template and burn to DVD disc quickly:
- On the right hand side of the screen, double click on desired menu template to apply a DVD menu template.
- Click the Edit button under the preview windows to customize your DVD menu or right click on menu for more options.
- You can also make a professional DVD menu using dynamic DVD menu templates.
BTW, if you don’t want a DVD menu, just check the “Disable DVD Menu” option.
Step 4. Burn Photos to DVD Disc
Now click the Preview button beneath the preview window to make sure the photo DVD slideshow is exactly what you want. Go back to Personalize tab to change if necessary. After that, click “Burn” button to start burning your DVD slideshow to DVD.
You can also output photo slideshow to watch on Youtube, Mobile Phone, iPhone, PSP, etc. through options on the left. Below are the instructions to burn DVD for watch on TV:

- Insert a blank DVD disc, and do the following.
- Click “Burn to DVD”. Then specify the number of DVD copies. You can also choose to generate ISO Image files or DVD Folders.
- Make sure the PAL or NTSC TV Standard settings is right. If you don’t know which standard is used in your country, click the “Help” button. The wrong TV standard would cause playback incompatibility problem.
- Then click “Start” to burn DVD slideshow. If you have checked Create DVD Folder and/or Create DVD Image File options, the corresponding files will also be created to the specified folder.
Now sit back and relax, when burning complete, insert the created DVD disc into your DVD player to watch photo DVD slideshow on TV.
Learn more: User Guide of DVD Slideshow Builder Deluxe
Part 2: More Photo to DVD Tips
More about NTSC/PAL TV Standard
Nowadays, there are three video formats around the world. But each one is incompatible with others. For instance, NTSC is used in North America, Canada and Japan; while most of other regions PAL/SECAM. To apply TV Standard in DVD Slideshow Builder Deluxe , go to “Create“ -> Option tab and locate TV Standard option to select NTSC or PAL. If you are not sure which one to choose, please click “Help” button, select your country, then click “OK” , the program will choose the right TV standard for you.
Burn Photos to DVD/CD as Data Disc
If you only want to burn photo to DVD for backup and further use, you only need a burning photo to DVD software like ImgBurn (Free) or Nero (commercial). These software helps you burn all digital media files to DVD, of course you can burn photos to DVD for backup purpose. Notice that some photo DVD maker allows you burn slideshow as well as the original photos. This way, you turn photos to DVD slideshow with transition, and at the same time, backup photos to DVD for other uses.
Scan Photos to DVD - Digitize Photos
If you use traditional camera and have got loads of photos in album, you can scan photos to computer so that convert photo to digital format. Afterwards, you can get more from these digital photos, like backup photos to DVD, send to others as DVD gift, make a photo DVD show to play on TV, etc. All these could be done with your favorite photo DVD maker software. Now see how to transform your printed photos to digital first:
Select a good photo scanner -> Prepare your photos to scan -> Start photo scanning -> Adjust scanned photos
Scanning printed photos to computer is not an easy job. It needs patience and some tips and tricks. As you may know, some companies provide photo scanning service. For the Step 4, you can also adjust digital photos in your selected photo DVD maker. Anyway, you need to get your digital photos ready before you burn photos to DVD with transitions and music.
Shanoon Cox
Shanoon Cox is a writer and a lover of all things video.
Follow @Shanoon Cox
Shanoon Cox
Mar 27, 2024• Proven solutions
Photos are precious memories not only for you but also for your family members. As time goes on, the photos might fade out and be unable to retrieve. To avoid this, burn photos to DVD will be a great idea to preserve family memories eternally.
This article will show you how to burn photos to DVD Slideshow with transition, titles and music quickly and easily by using Wondershare DVD Slideshow Builder Deluxe . It also provides some tips on how to burn photos to DVD.
Part 1: How to Burn Photos to DVD with Transition, Titles and Music
Wondershare DVD Slideshow Builder Deluxe can help you quickly create and burn photos to DVD. Download the free trial version this photo DVD maker first.
Step 1. Add Photo or Video Files
In Organize tab, simply click the “Add Files” button to open the browse window, find your files and import them into the program, you can drag and drop photos or videos to organize them on storyboard. Click the Expand button to get a larger viewer.
Step 2. Customize Photo Slideshow Transitions
Generally speaking, transition effects will be automatically inserted between every two photos/videos when you import the photos. But you can customize them by clicking the Personalize tab, then drag and drop a transition from the list to the thumbnail between two slides.
You are also able to add background music here: click the Music button and choose a music file from your computer.
Step 3. Choose DVD Menu
Now switch to Create tab to author a DVD menu from template and burn to DVD disc quickly:
- On the right hand side of the screen, double click on desired menu template to apply a DVD menu template.
- Click the Edit button under the preview windows to customize your DVD menu or right click on menu for more options.
- You can also make a professional DVD menu using dynamic DVD menu templates.
BTW, if you don’t want a DVD menu, just check the “Disable DVD Menu” option.
Step 4. Burn Photos to DVD Disc
Now click the Preview button beneath the preview window to make sure the photo DVD slideshow is exactly what you want. Go back to Personalize tab to change if necessary. After that, click “Burn” button to start burning your DVD slideshow to DVD.
You can also output photo slideshow to watch on Youtube, Mobile Phone, iPhone, PSP, etc. through options on the left. Below are the instructions to burn DVD for watch on TV:
- Insert a blank DVD disc, and do the following.
- Click “Burn to DVD”. Then specify the number of DVD copies. You can also choose to generate ISO Image files or DVD Folders.
- Make sure the PAL or NTSC TV Standard settings is right. If you don’t know which standard is used in your country, click the “Help” button. The wrong TV standard would cause playback incompatibility problem.
- Then click “Start” to burn DVD slideshow. If you have checked Create DVD Folder and/or Create DVD Image File options, the corresponding files will also be created to the specified folder.
Now sit back and relax, when burning complete, insert the created DVD disc into your DVD player to watch photo DVD slideshow on TV.
Learn more: User Guide of DVD Slideshow Builder Deluxe
Part 2: More Photo to DVD Tips
More about NTSC/PAL TV Standard
Nowadays, there are three video formats around the world. But each one is incompatible with others. For instance, NTSC is used in North America, Canada and Japan; while most of other regions PAL/SECAM. To apply TV Standard in DVD Slideshow Builder Deluxe , go to “Create“ -> Option tab and locate TV Standard option to select NTSC or PAL. If you are not sure which one to choose, please click “Help” button, select your country, then click “OK” , the program will choose the right TV standard for you.
Burn Photos to DVD/CD as Data Disc
If you only want to burn photo to DVD for backup and further use, you only need a burning photo to DVD software like ImgBurn (Free) or Nero (commercial). These software helps you burn all digital media files to DVD, of course you can burn photos to DVD for backup purpose. Notice that some photo DVD maker allows you burn slideshow as well as the original photos. This way, you turn photos to DVD slideshow with transition, and at the same time, backup photos to DVD for other uses.
Scan Photos to DVD - Digitize Photos
If you use traditional camera and have got loads of photos in album, you can scan photos to computer so that convert photo to digital format. Afterwards, you can get more from these digital photos, like backup photos to DVD, send to others as DVD gift, make a photo DVD show to play on TV, etc. All these could be done with your favorite photo DVD maker software. Now see how to transform your printed photos to digital first:
Select a good photo scanner -> Prepare your photos to scan -> Start photo scanning -> Adjust scanned photos
Scanning printed photos to computer is not an easy job. It needs patience and some tips and tricks. As you may know, some companies provide photo scanning service. For the Step 4, you can also adjust digital photos in your selected photo DVD maker. Anyway, you need to get your digital photos ready before you burn photos to DVD with transitions and music.
Shanoon Cox
Shanoon Cox is a writer and a lover of all things video.
Follow @Shanoon Cox
Also read:
- [New] Prime Locations for YouTube Content Exposure
- 2024 Approved 10 Best Memes Right Now (Include Image/ GIF/Video)
- 2024 Approved A Closer Look at the Metaverse 6 Deep-Dive Examples Reviewed
- Canon MG3600 Printer Drivers: Free Downloads and Update Tips
- How to Enjoy Every Flight of Dragons: The Proper Order for Viewing How to Train Your Dragon Movies
- How to Turn Off Google Location to Stop Tracking You on Motorola G54 5G | Dr.fone
- In 2024, Why does the pokemon go battle league not available On Tecno Spark 10 5G | Dr.fone
- New 2024 Approved 10 Popular Cartoon Characters That Should Top Your List 2023 Updated
- New 2024 Approved Best SolarMovie Alternatives-Watch Movies Free Online
- Step-by-Step Guide: Reactivating Your AirPods When Resetting Fails
- Step-by-Step Guide: Setting Up Your Samsung Soundbar with Television
- Updated Best SolarMovie Alternatives-Watch Movies Online for 2024
- Updated In 2024, 10 Free Online Sticker Makers to Make Your Own Stickers
- Title: New In 2024, Top 5 Best Websites to Add Emojis to Photo Online
- Author: Jan
- Created at : 2025-01-20 16:01:21
- Updated at : 2025-01-27 17:15:29
- Link: https://meme-emoji.techidaily.com/new-in-2024-top-5-best-websites-to-add-emojis-to-photo-online/
- License: This work is licensed under CC BY-NC-SA 4.0.