
New In 2024, Top 10 Storyboarding Software
Top 10 Storyboarding Software
Top 10 Storyboarding Software in 2024

Liza Brown
Mar 27, 2024• Proven solutions
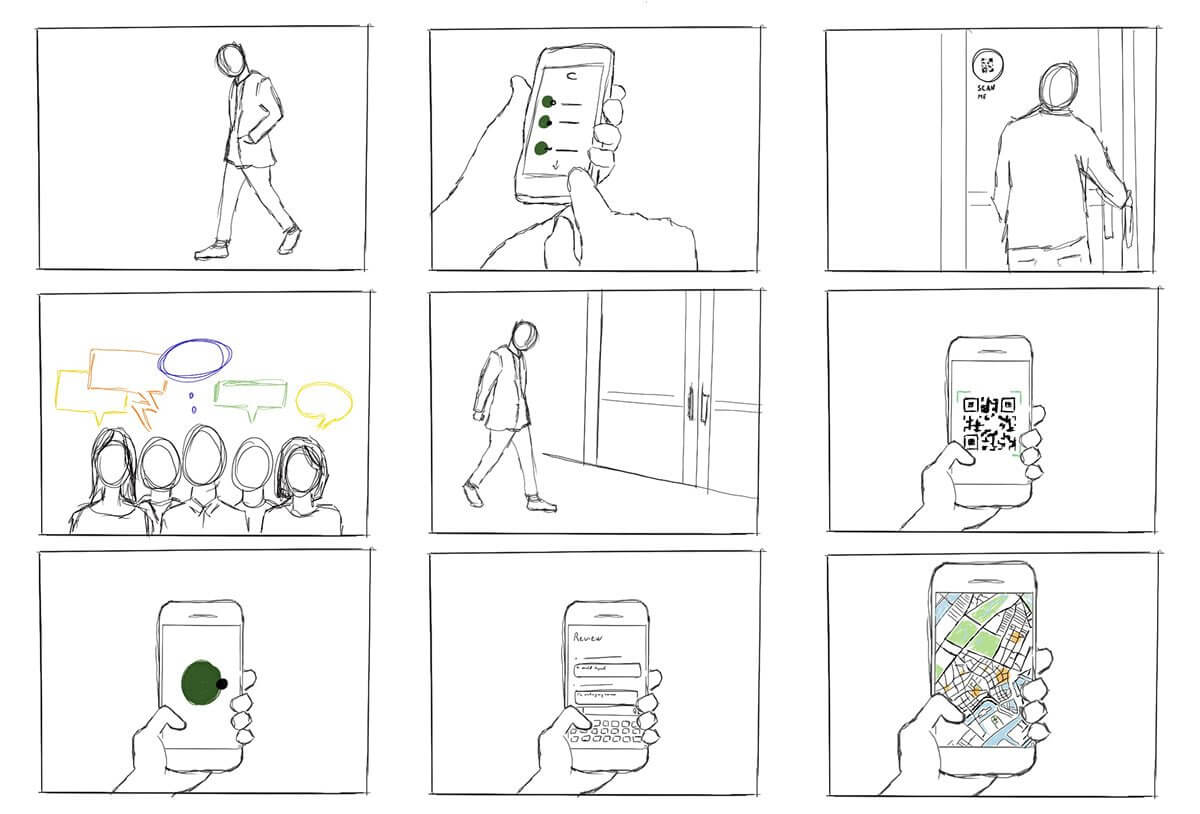
Several different creative sectors rely on storyboarding for their creative process, including filmmakers and animators and UX designers, game designers, and creative directors. However, the process of hand-drawing each frame or shot can take a great deal of time if you have to do it by hand. Our goal is to make storyboarding easier and more efficient by bringing you this list of free and paid tools, storyboarding software, and apps.
You can add text, sound, and script to your original sketches with these tools (or make use of assets from a library if you do not have time to sketch your own). Alternatively, you can share your storyboarding progress within the project, either by a link or a PDF - or get immediate feedback. Finally, you can continue working from anywhere with apps that work across multiple devices - desktop, mobile, and tablet.
No matter what kind of tool you prefer, from a simple 2D sketch tool like Make Storyboard to a 3D drawing tool like Storyboard Pro, you’ll find the best options on this page.
You might be interested in:
1. Storyboarder by Wonder Unit
Price: Free
Platforms: Windows, Mac, and Linux.
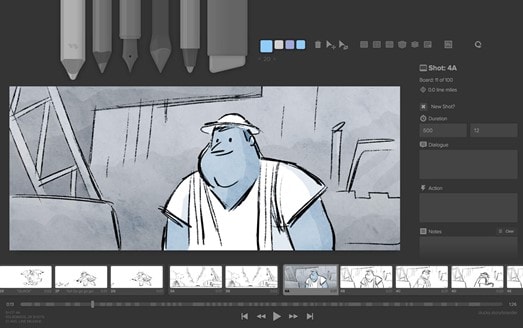
If you’re on a smaller budget, Storyboarder is an excellent option. It’s free and open-source. In the program’s clean interface, you have all the tools you need, so drawing shapes and characters is a breeze. In addition to writing dialogue, you can also enter timing information and the type of shot.
The Storyboarder and Photoshop apps integrate seamlessly, which means you can refine your board in Photoshop and have it updated in Storyboarder. In addition, you can export videos to Premiere, Final Cut, Avid, PDF, or Animated GIF from this software.
2. Toon Boom Storyboard Pro
Price: $60/mo or $999 one-time fee
Platforms: Mac, Windows
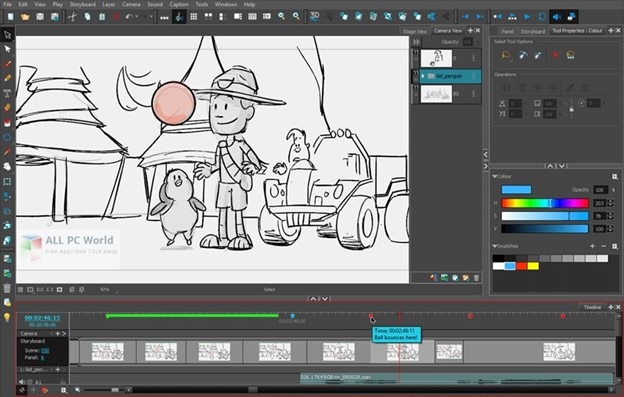
Toon Boom Storyboard Pro is the complete opposite of free. A standout among storyboarding programs, it’s also one of the most expensive. However, in most studios, boarding and animating is done using Toon Boom, so you may want to learn about this if you’d like to break into the industry. As a result, the monthly fee is a lot lower than the initial cost, allowing most people to take advantage of the service.
You can use Toon Boom for a month and test the waters before committing yourself to a huge license fee. How can you benefit from this program? Sketching and animation go hand-in-hand in this process. Drawing your boards and seeing how they would animate is a great way to test your script while making sure you’re on target with your scenes.
The program is primarily designed for animators. It can be used for ad agencies and for making small skits. Nevertheless, the Story Flow tool makes switching between board and script for writers incredibly easy. In addition to creating dynamic camera movements, you can also use some 3D effects that work well for 3D animators. Create layered panels in Photoshop quickly and easily by importing Final Draft scripts. There is plenty of support available for all the common programs in the art industry.
3. Plot
Price: $10/month (14 days Free Trial Available)
Platforms: Windows, Linux, and Mac

Storytelling is super easy with the plot. There are no limits to the number of boards, projects, and users you can have. With some nice features targeted toward animators, it is a web-based storyboarding app for beginners.
A drawing pane is available on whichever operating system you run this program on. Drawing your frames this way also lets you add dialogues and stage directions directly to your project. In addition, it is easy to move through different scenes in the app because it is visual. You can click and drag pieces around to change the scene. It couldn’t be easier.
In addition to the collaboration features, we consider it to be exceptional and above the norm for products in this price range. As long as you have a desktop program to work on your drawings, you’ll have more control. When you import the drawings into Plot, you can then arrange them accordingly. Hence, you’ve still got collaborative features with online management of very detailed drawings.
4. FrameForge Storyboard Studio
Price: $498.95 one-time fee or $12.99/month (Core Edition); $799 one-time fee or $24.99/month (Professional Edition)
Platforms: Windows, Mac, and Android.
Even without animation, drawing, or highly technical computer skills, your team can benefit from FrameForge, with HBO, Netflix, and BBC as users.
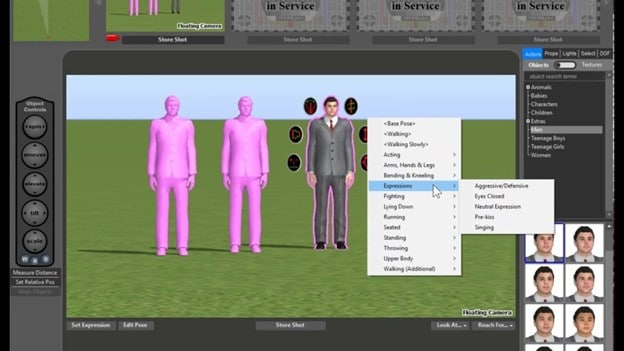
There are two versions of FrameForge’s product: Core and Professional. Professional offers planning capabilities (down to the inch) for dollies and cranes. Scripts from any program can be imported into the software. In addition to movement arrows, framing notes, angle of view, focal length, and more, the storyboards ensure that your video team understands all aspects of production, from preparation to post-production.
Mobile users can use it on any mobile device, and PowerPoint presentations can be downloaded as a final product. Team members who want to produce more elaborate and lengthy videos for entertainment purposes might find FrameForge useful.
5. Studiobinder
Price: $29/month (Indie); $49/month (Professional); $99/month (Studio) Free Trial is also available.
Platform: Windows, Linux, and Mac.
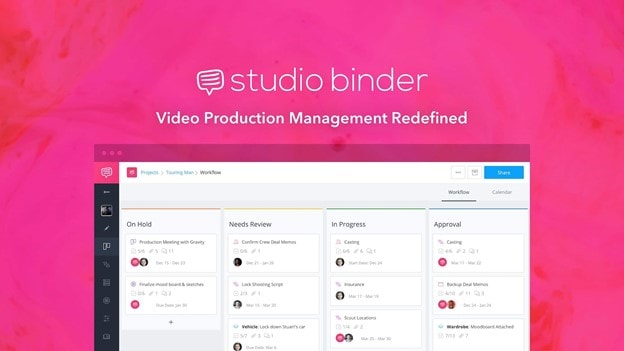
Visualizations can be personalized at every level in Studiobinder. Filters can be used to sort columns, order scenes, add images, adjust aspect ratios, color code images, and add notes to locations. In addition, project management features such as task assignment and commenting help Studiobinder make collaboration easy.
Also, the platform includes a handy presentation mode so you can show your team your projects. The company boasts impressive clients such as BuzzFeed, ESPN, and CBS Interactive. Team members who need to collaborate on various stages of the video production process and who prefer customizable tools should take advantage of this option.
6. Boords
Price: $12-$24/month
Platforms: Windows, Linux, and Mac

In the software industry, online SaaS products have quickly become the norm. While desktop programs are not going away, we see more and more web-based options such as Boards that provide unique solutions.
The Boards software is a native storyboard platform that provides tons of free templates and collaboration tools. In addition, clients can log into their projects and add comments directly from their computers.
For teams working together on a project, you may also set up multiple user accounts. Storyboards in Boords can be presented in animatic form before being animated, thanks to flexible frame sizes and tons of free templates.
Despite the affordable monthly price, this product works on every major operating system. It is rare to find a program that offers this much functionality at such an affordable price. Boords is an excellent solution for collaborative work. You can try it for a while until you decide if it’s right for you, but there is no commitment involved.
7. makeStoryboard
Price: Free; $12/month (Professional); $36/month (Team)
Platforms: Windows, and Mac.

MakeStoryboard provides a simple, straightforward interface for uploading camera shots, drawing stick figures with its built-in tool, and incorporating text for scene details if you are not interested in the fancier options in the list. In addition, any drawing tablet can be used with marker, pencil, and pen tools.
Additional details unique to your team and use case can also be entered in custom text fields. Then, using a PDF format, you can export your storyboard when you’re ready to pitch. Finally, stakeholders can review it using a private link without requiring an account in an alternative method. The best part is that it has a free subscription plan, making it an excellent option for teams on a small budget.
8. Canva
Price: Free
Platforms: Works on all major Operating Systems

It doesn’t have to be stressful to create a storyboard, and Canva makes it easy with a large library of templates, millions of stock photos (or the ability to upload your own), and color frames. The font type, colors, headers, and subheaders can be customized.
If you’re working on a script or design with someone else, you can grant access to collaborate, and when you’re done you can share the design through email or as a PDF. On the other hand, if your team needs an easy and simple tool to manage simpler projects or get started with storyboarding, this may be your best choice.
9. PanelForge
Price: Free (Public Beta); $7.31/month (Pro); $1,411/year (Studio)
Platforms: Works on all Major Operating Systems
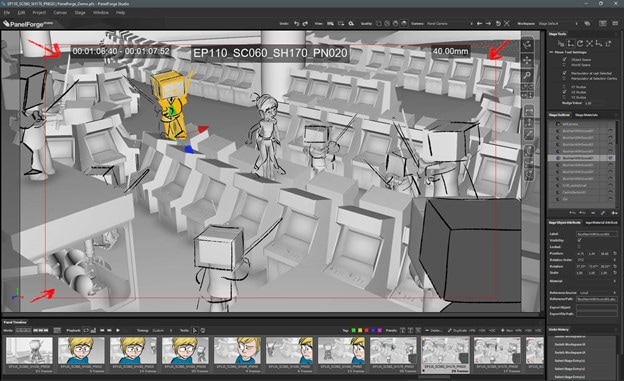
PanelForge delivers a feature-rich, drag-and-drop storyboarding solution with flexible frames and drag-and-drop tools. Storyboarding is free to try and offers a suite of paid plans for anyone working on animatics and more complex projects.
Drawings and 3D designs can both be created with PanelForge. Aside from creating animatics, you can also import and export files from Adobe Premiere and Final Cut Pro. The PanelForge tool is ideal for experienced marketers and storyboarders familiar with visualization tools.
10. Adobe Photoshop
Price: $9.99/mo
Platforms: Mac and Windows.
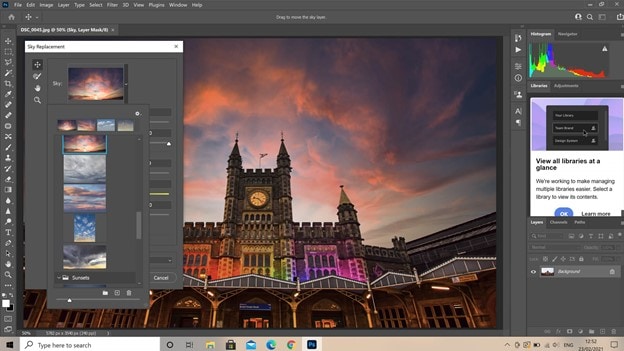
I think it will stay around for a long time. It’s been around for 20+ years. Yet, doesn’t it seem funny how Photoshop can be used for so much more than photo editing? In addition to storyboarding, we see it used for digital painting, pixel art, etc. The digital drawing capability of PS is the same as that of other programs. There are now more brushes available for the PS environment, so there’s even more support.
Additionally, you can download free storyboard templates in PSD format for Photoshop. This program doesn’t need too much explanation because every artist is already aware of it. However, Linux users are most likely to be disappointed by the lack of support.
Conclusion
So, these are some of the best free and paid to storyboard software that you can find in 2021. Each piece of software has its own characteristics and way of being used. In the end, it all depends upon your usage and preferences to decide which software you will use to achieve your goals. If you have enough budget then you can work with paid tools as they offer more features. If you have limited or no budget, you can try to free tools as they offer pretty good features.


Liza Brown
Liza Brown is a writer and a lover of all things video.
Follow @Liza Brown
Liza Brown
Mar 27, 2024• Proven solutions
Several different creative sectors rely on storyboarding for their creative process, including filmmakers and animators and UX designers, game designers, and creative directors. However, the process of hand-drawing each frame or shot can take a great deal of time if you have to do it by hand. Our goal is to make storyboarding easier and more efficient by bringing you this list of free and paid tools, storyboarding software, and apps.
You can add text, sound, and script to your original sketches with these tools (or make use of assets from a library if you do not have time to sketch your own). Alternatively, you can share your storyboarding progress within the project, either by a link or a PDF - or get immediate feedback. Finally, you can continue working from anywhere with apps that work across multiple devices - desktop, mobile, and tablet.
No matter what kind of tool you prefer, from a simple 2D sketch tool like Make Storyboard to a 3D drawing tool like Storyboard Pro, you’ll find the best options on this page.
You might be interested in:
1. Storyboarder by Wonder Unit
Price: Free
Platforms: Windows, Mac, and Linux.
If you’re on a smaller budget, Storyboarder is an excellent option. It’s free and open-source. In the program’s clean interface, you have all the tools you need, so drawing shapes and characters is a breeze. In addition to writing dialogue, you can also enter timing information and the type of shot.
The Storyboarder and Photoshop apps integrate seamlessly, which means you can refine your board in Photoshop and have it updated in Storyboarder. In addition, you can export videos to Premiere, Final Cut, Avid, PDF, or Animated GIF from this software.
2. Toon Boom Storyboard Pro
Price: $60/mo or $999 one-time fee
Platforms: Mac, Windows
Toon Boom Storyboard Pro is the complete opposite of free. A standout among storyboarding programs, it’s also one of the most expensive. However, in most studios, boarding and animating is done using Toon Boom, so you may want to learn about this if you’d like to break into the industry. As a result, the monthly fee is a lot lower than the initial cost, allowing most people to take advantage of the service.
You can use Toon Boom for a month and test the waters before committing yourself to a huge license fee. How can you benefit from this program? Sketching and animation go hand-in-hand in this process. Drawing your boards and seeing how they would animate is a great way to test your script while making sure you’re on target with your scenes.
The program is primarily designed for animators. It can be used for ad agencies and for making small skits. Nevertheless, the Story Flow tool makes switching between board and script for writers incredibly easy. In addition to creating dynamic camera movements, you can also use some 3D effects that work well for 3D animators. Create layered panels in Photoshop quickly and easily by importing Final Draft scripts. There is plenty of support available for all the common programs in the art industry.
3. Plot
Price: $10/month (14 days Free Trial Available)
Platforms: Windows, Linux, and Mac
Storytelling is super easy with the plot. There are no limits to the number of boards, projects, and users you can have. With some nice features targeted toward animators, it is a web-based storyboarding app for beginners.
A drawing pane is available on whichever operating system you run this program on. Drawing your frames this way also lets you add dialogues and stage directions directly to your project. In addition, it is easy to move through different scenes in the app because it is visual. You can click and drag pieces around to change the scene. It couldn’t be easier.
In addition to the collaboration features, we consider it to be exceptional and above the norm for products in this price range. As long as you have a desktop program to work on your drawings, you’ll have more control. When you import the drawings into Plot, you can then arrange them accordingly. Hence, you’ve still got collaborative features with online management of very detailed drawings.
4. FrameForge Storyboard Studio
Price: $498.95 one-time fee or $12.99/month (Core Edition); $799 one-time fee or $24.99/month (Professional Edition)
Platforms: Windows, Mac, and Android.
Even without animation, drawing, or highly technical computer skills, your team can benefit from FrameForge, with HBO, Netflix, and BBC as users.
There are two versions of FrameForge’s product: Core and Professional. Professional offers planning capabilities (down to the inch) for dollies and cranes. Scripts from any program can be imported into the software. In addition to movement arrows, framing notes, angle of view, focal length, and more, the storyboards ensure that your video team understands all aspects of production, from preparation to post-production.
Mobile users can use it on any mobile device, and PowerPoint presentations can be downloaded as a final product. Team members who want to produce more elaborate and lengthy videos for entertainment purposes might find FrameForge useful.
5. Studiobinder
Price: $29/month (Indie); $49/month (Professional); $99/month (Studio) Free Trial is also available.
Platform: Windows, Linux, and Mac.
Visualizations can be personalized at every level in Studiobinder. Filters can be used to sort columns, order scenes, add images, adjust aspect ratios, color code images, and add notes to locations. In addition, project management features such as task assignment and commenting help Studiobinder make collaboration easy.
Also, the platform includes a handy presentation mode so you can show your team your projects. The company boasts impressive clients such as BuzzFeed, ESPN, and CBS Interactive. Team members who need to collaborate on various stages of the video production process and who prefer customizable tools should take advantage of this option.
6. Boords
Price: $12-$24/month
Platforms: Windows, Linux, and Mac
In the software industry, online SaaS products have quickly become the norm. While desktop programs are not going away, we see more and more web-based options such as Boards that provide unique solutions.
The Boards software is a native storyboard platform that provides tons of free templates and collaboration tools. In addition, clients can log into their projects and add comments directly from their computers.
For teams working together on a project, you may also set up multiple user accounts. Storyboards in Boords can be presented in animatic form before being animated, thanks to flexible frame sizes and tons of free templates.
Despite the affordable monthly price, this product works on every major operating system. It is rare to find a program that offers this much functionality at such an affordable price. Boords is an excellent solution for collaborative work. You can try it for a while until you decide if it’s right for you, but there is no commitment involved.
7. makeStoryboard
Price: Free; $12/month (Professional); $36/month (Team)
Platforms: Windows, and Mac.
MakeStoryboard provides a simple, straightforward interface for uploading camera shots, drawing stick figures with its built-in tool, and incorporating text for scene details if you are not interested in the fancier options in the list. In addition, any drawing tablet can be used with marker, pencil, and pen tools.
Additional details unique to your team and use case can also be entered in custom text fields. Then, using a PDF format, you can export your storyboard when you’re ready to pitch. Finally, stakeholders can review it using a private link without requiring an account in an alternative method. The best part is that it has a free subscription plan, making it an excellent option for teams on a small budget.
8. Canva
Price: Free
Platforms: Works on all major Operating Systems
It doesn’t have to be stressful to create a storyboard, and Canva makes it easy with a large library of templates, millions of stock photos (or the ability to upload your own), and color frames. The font type, colors, headers, and subheaders can be customized.
If you’re working on a script or design with someone else, you can grant access to collaborate, and when you’re done you can share the design through email or as a PDF. On the other hand, if your team needs an easy and simple tool to manage simpler projects or get started with storyboarding, this may be your best choice.
9. PanelForge
Price: Free (Public Beta); $7.31/month (Pro); $1,411/year (Studio)
Platforms: Works on all Major Operating Systems
PanelForge delivers a feature-rich, drag-and-drop storyboarding solution with flexible frames and drag-and-drop tools. Storyboarding is free to try and offers a suite of paid plans for anyone working on animatics and more complex projects.
Drawings and 3D designs can both be created with PanelForge. Aside from creating animatics, you can also import and export files from Adobe Premiere and Final Cut Pro. The PanelForge tool is ideal for experienced marketers and storyboarders familiar with visualization tools.
10. Adobe Photoshop
Price: $9.99/mo
Platforms: Mac and Windows.
I think it will stay around for a long time. It’s been around for 20+ years. Yet, doesn’t it seem funny how Photoshop can be used for so much more than photo editing? In addition to storyboarding, we see it used for digital painting, pixel art, etc. The digital drawing capability of PS is the same as that of other programs. There are now more brushes available for the PS environment, so there’s even more support.
Additionally, you can download free storyboard templates in PSD format for Photoshop. This program doesn’t need too much explanation because every artist is already aware of it. However, Linux users are most likely to be disappointed by the lack of support.
Conclusion
So, these are some of the best free and paid to storyboard software that you can find in 2021. Each piece of software has its own characteristics and way of being used. In the end, it all depends upon your usage and preferences to decide which software you will use to achieve your goals. If you have enough budget then you can work with paid tools as they offer more features. If you have limited or no budget, you can try to free tools as they offer pretty good features.
Liza Brown
Liza Brown is a writer and a lover of all things video.
Follow @Liza Brown
How to Make a Funny Meme on MacBook
How to Make a Funny Meme on MacBook
Liza Brown
Dec 14, 2023• Proven solutions
Everyone these days is living and breathing over the internet. One of the most popular things over the internet is a meme. No matter where you look on social media, you are going to come across memes. Funny memes or memes provoking sadness, there is a lot. You might love memes, but you might not have the idea that there are different kinds of memes.
There are different types of memes, such as image memes, video memes, and GIF memes. The table below is going to show you the difference between the three.
| Image Meme | Video Meme | GIF Meme |
|---|---|---|
| Static Images | Videos | Moving Static Images |
| Contains Text | Contain Text | Contains Text |
| Contains No Music | Contain Music | Contains No Music |
| Isn’t Animated | Isn’t Animated | Animated |
How to Make a GIF or a Video Meme on Mac?
If you want to create a video or GIF meme on your Mac device, here are the steps that you need to follow.
- Find Your Video or Image
When you are looking to make a meme, you will have to collect the video. However, if you are planning to create a GIF meme, you have to find the right picture. You can use the videos and images that you have in the Mac image gallery.
In case you are using a video editor, you can access their official site for some images to create your meme.
- Find Caption
Now, you have to think of a captioning for the meme. This can be serious or funny when you make meme.
- Add the Caption
The first thing that you need to do is open the image or video that you have saved on the laptop. As soon as you click on the ‘Markup icon’ you will find a display bar pop-up. Look for icon ‘T’ to click and then insert the text you want.
When you click on the ‘T’ icon, a text box is going to appear over the picture. Click on the box labeled ‘Text’ for bringing inserting the caption.
If you want, you can change the alignment, color, italics, bolding, font, and underline, too.
- Save the Meme
Now that you have created your desired meme, save it on your Mac device. Then share the final product on the social media platform.
Steps of Creating Video or GIF Meme Using FilmoraX
You can also use a video editor to create your Video or make meme in GIF. With FilmoraX, it is easy to do so. In case you want to make meme, but are new to this process, then FilmoraX is just the perfect tool for you. With the help of this meme maker, you can easily create a video, GIF, and image memes.
FilmoraX can process memes much faster than its counterparts. It comes with an advanced encoder or decoder that ensures fast action. The video editor lets you upload videos with the help of a URL. Its output format is highly flexible and will convert your video to GIF in no time. With its help, you can edit fonts, add text, and move them as you want. What’s more, the video editor doesn’t include a watermark in the video.
Here is a guide that will help you to create the funny video meme using FilmoraX on your Mac device.
- Download and Install FilmoraX
The first thing that you have to do is download and install FilmoraX on Mac in case you do not have it already.
- Drag and Drop the Video
Now that you have the meme maker, drag and drop on the video that you want. This will import the video to the meme maker.
- Edit the Video with Funny Text or stickers
Go to the meme editor page when you are done choosing the video, image, or GIF. Now, from the left panel, you have to customize the video meme. You can also use the FilmoraX video trimmer to cut the video as per your requirements. Add texts, alter fonts, and preview the changes that you have made.
- Export
When you are done making the change, you have to click on the ‘Export’ button to apply the changes to the video meme. After you have shared the meme on your social media pages, download it.

Ingredients to Make an Effective Meme
Memes keep gaining far-reaching traction. Businesses can join in on creating memes that will be suitable for their brand. However, while creating a meme, a business or an individual needs to keep a few things in mind.
- Be Witty
The point of a meme is basically to be fun and silly. However, in the depth of it, you will find a witty connotation. This ties it to something more grave and important. So, the subject matter of the meme doesn’t have to be serious, but if you relate it to a far-reaching topic adding a witty comment will make the meme popular.
- Creating Memes off Existing and Successful Trends
You should play off the existing trend. This is a popular method that is used by many across the web. By adapting a video in trend, you can add your own spin to it. This method is particularly known as memejacking.
- Use Good Quality Video and Images
You might think that for a meme you do not quality video or image. However, that is not true. Even the picture frame that you are adding is important. Keep in mind that everything inside the meme is communicating something. The absence of something is also communicating certain things. Hence, unless you really mean to post a bad quality video or photo, make sure you do your best to get top-quality content.
- Consider If It Works for the Audience
There is an audience for everything over the social media channels. However, meme-makers often tend to forget how personal it is. So, when you are making a joke, you have to make sure others are getting it. Simply because something is in trend, you shouldn’t go for it. You should only post it if it works for the brand of your profile.
Conclusion
Memes can be of different types but what matters the most is they make the viewers laugh. If you keep the above tips in mind, you will be able to make a meme successfully. By using a meme maker like FilmoraX , the job becomes even easier.
Learn More: 10 Best Meme Maker App or Website You Need to Know>>>
Liza Brown
Liza Brown is a writer and a lover of all things video.
Follow @Liza Brown
Liza Brown
Dec 14, 2023• Proven solutions
Everyone these days is living and breathing over the internet. One of the most popular things over the internet is a meme. No matter where you look on social media, you are going to come across memes. Funny memes or memes provoking sadness, there is a lot. You might love memes, but you might not have the idea that there are different kinds of memes.
There are different types of memes, such as image memes, video memes, and GIF memes. The table below is going to show you the difference between the three.
| Image Meme | Video Meme | GIF Meme |
|---|---|---|
| Static Images | Videos | Moving Static Images |
| Contains Text | Contain Text | Contains Text |
| Contains No Music | Contain Music | Contains No Music |
| Isn’t Animated | Isn’t Animated | Animated |
How to Make a GIF or a Video Meme on Mac?
If you want to create a video or GIF meme on your Mac device, here are the steps that you need to follow.
- Find Your Video or Image
When you are looking to make a meme, you will have to collect the video. However, if you are planning to create a GIF meme, you have to find the right picture. You can use the videos and images that you have in the Mac image gallery.
In case you are using a video editor, you can access their official site for some images to create your meme.
- Find Caption
Now, you have to think of a captioning for the meme. This can be serious or funny when you make meme.
- Add the Caption
The first thing that you need to do is open the image or video that you have saved on the laptop. As soon as you click on the ‘Markup icon’ you will find a display bar pop-up. Look for icon ‘T’ to click and then insert the text you want.
When you click on the ‘T’ icon, a text box is going to appear over the picture. Click on the box labeled ‘Text’ for bringing inserting the caption.
If you want, you can change the alignment, color, italics, bolding, font, and underline, too.
- Save the Meme
Now that you have created your desired meme, save it on your Mac device. Then share the final product on the social media platform.
Steps of Creating Video or GIF Meme Using FilmoraX
You can also use a video editor to create your Video or make meme in GIF. With FilmoraX, it is easy to do so. In case you want to make meme, but are new to this process, then FilmoraX is just the perfect tool for you. With the help of this meme maker, you can easily create a video, GIF, and image memes.
FilmoraX can process memes much faster than its counterparts. It comes with an advanced encoder or decoder that ensures fast action. The video editor lets you upload videos with the help of a URL. Its output format is highly flexible and will convert your video to GIF in no time. With its help, you can edit fonts, add text, and move them as you want. What’s more, the video editor doesn’t include a watermark in the video.
Here is a guide that will help you to create the funny video meme using FilmoraX on your Mac device.
- Download and Install FilmoraX
The first thing that you have to do is download and install FilmoraX on Mac in case you do not have it already.
- Drag and Drop the Video
Now that you have the meme maker, drag and drop on the video that you want. This will import the video to the meme maker.
- Edit the Video with Funny Text or stickers
Go to the meme editor page when you are done choosing the video, image, or GIF. Now, from the left panel, you have to customize the video meme. You can also use the FilmoraX video trimmer to cut the video as per your requirements. Add texts, alter fonts, and preview the changes that you have made.
- Export
When you are done making the change, you have to click on the ‘Export’ button to apply the changes to the video meme. After you have shared the meme on your social media pages, download it.
Ingredients to Make an Effective Meme
Memes keep gaining far-reaching traction. Businesses can join in on creating memes that will be suitable for their brand. However, while creating a meme, a business or an individual needs to keep a few things in mind.
- Be Witty
The point of a meme is basically to be fun and silly. However, in the depth of it, you will find a witty connotation. This ties it to something more grave and important. So, the subject matter of the meme doesn’t have to be serious, but if you relate it to a far-reaching topic adding a witty comment will make the meme popular.
- Creating Memes off Existing and Successful Trends
You should play off the existing trend. This is a popular method that is used by many across the web. By adapting a video in trend, you can add your own spin to it. This method is particularly known as memejacking.
- Use Good Quality Video and Images
You might think that for a meme you do not quality video or image. However, that is not true. Even the picture frame that you are adding is important. Keep in mind that everything inside the meme is communicating something. The absence of something is also communicating certain things. Hence, unless you really mean to post a bad quality video or photo, make sure you do your best to get top-quality content.
- Consider If It Works for the Audience
There is an audience for everything over the social media channels. However, meme-makers often tend to forget how personal it is. So, when you are making a joke, you have to make sure others are getting it. Simply because something is in trend, you shouldn’t go for it. You should only post it if it works for the brand of your profile.
Conclusion
Memes can be of different types but what matters the most is they make the viewers laugh. If you keep the above tips in mind, you will be able to make a meme successfully. By using a meme maker like FilmoraX , the job becomes even easier.
Learn More: 10 Best Meme Maker App or Website You Need to Know>>>
Liza Brown
Liza Brown is a writer and a lover of all things video.
Follow @Liza Brown
How to Add Stickers to WhatsApp-The Ultimate Guide
How to Add Stickers to WhatsApp-The Ultimate Guide

Shanoon Cox
Mar 27, 2024• Proven solutions
Whatsapp has recently added the stickers feature, and people are going crazy about adding stickers to WhatsApp. But the question is how to add stickers to Whatsapp? To help with that, we will walk you through a detailed guide on how to add stickers to Whatsapp and bring a dash of fun to boring texts.
Now, if you don’t know how to add stickers to WhatsApp and use stickers on Whatsapp, we have you covered.
- Part 1: How to Create Stickers for WhatsApp
- Part 2: How to Add Stickers to WhatsApp
- Part 3: How to Send Stickers on WhatsApp
- Part 4: Bonus Tip—Add Sticker to Your Video with Wondershare Filmora
Part 1: How to Create Stickers for WhatsApp
Whatsapp stickers are now a significant part of our daily conversations. Because let’s face it, life would be boring without them. Perhaps it’s time to up your game by learning how to add stickers to Whatsapp
Even though Whatsapp has a vast library of stickers available, creating a unique sticker is more fun. And the latest apps have made it incredibly easy to create customized stickers. So all you need to do now is learn how to use stickers in Whatsapp
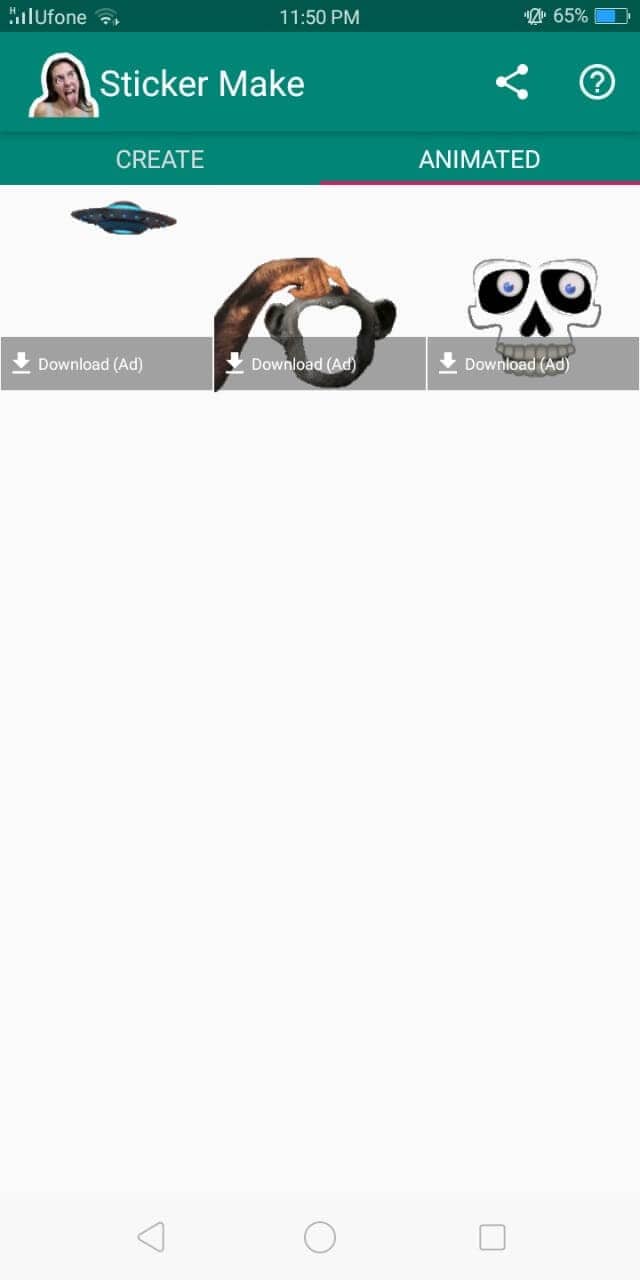
Sticker Make for Whatsapp is one such app. It is free and requires no registrations. Download the app from Google Store and start creating hilarious stickers to surprise your friends.
1. Download Sticker Make and launch it. On the homepage, you will be presented with two options. Click Create to make a sticker from scratch using your own image or click on Animated to insert your picture in a sticker template.
2. Choose any image from your gallery. Crop it to the size and shape you wish to include. Use the Freehand tool or click Automatically to let the app crop a face itself.
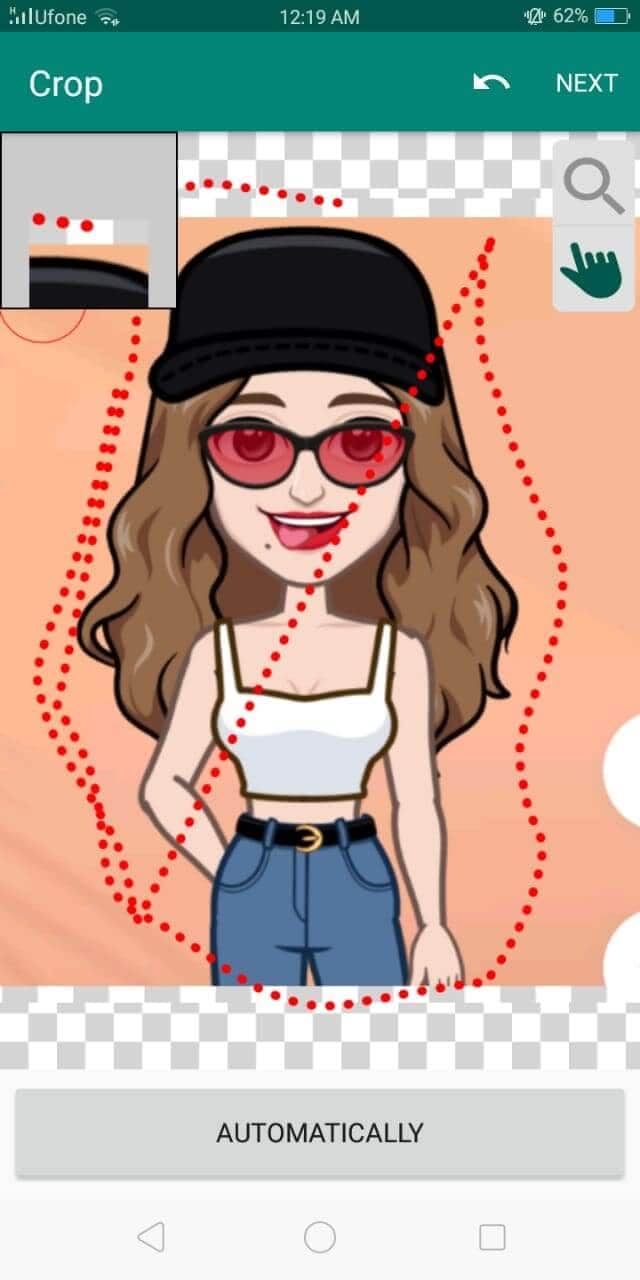
3. Click Next and now erase the background or make careful cropping.
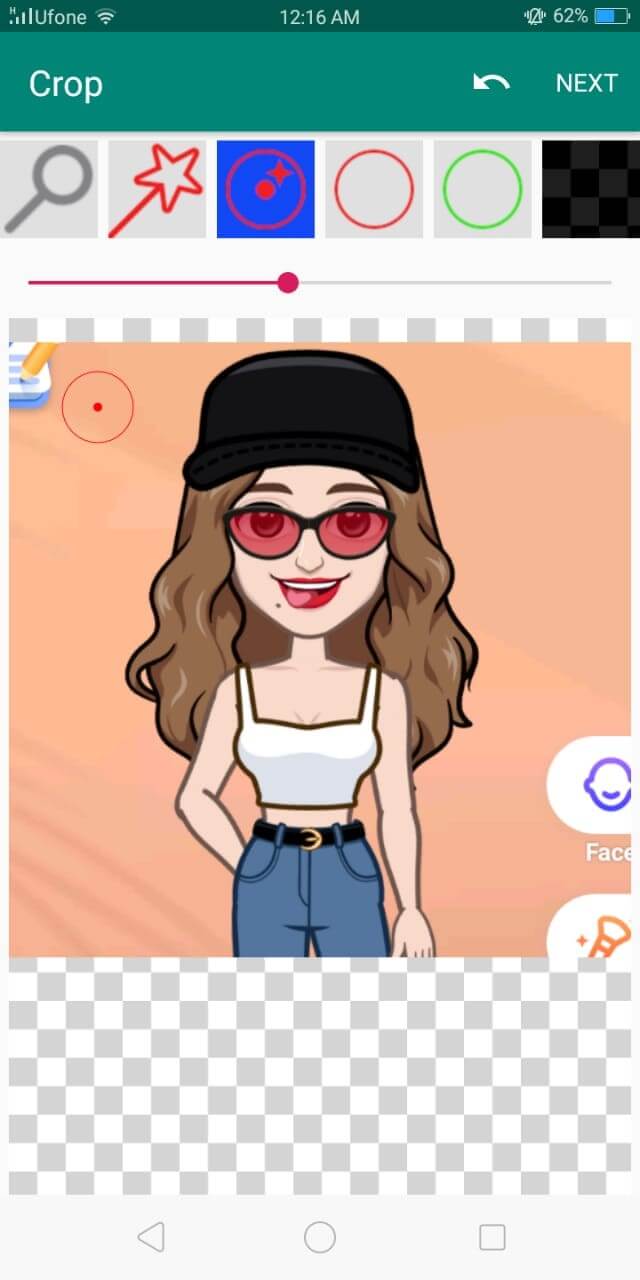
4. You can even outline your sticker and adjust its width and color.
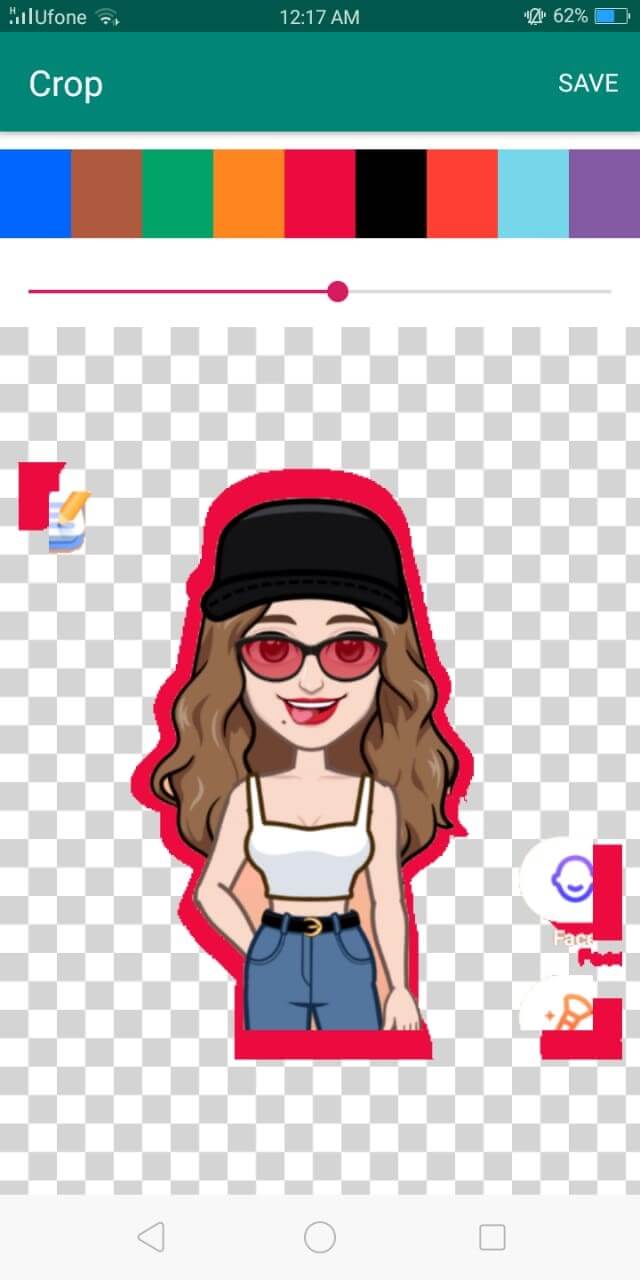
5. You can even add texts and change fonts.

6. Click on the square in the bottom panel to choose from a list of cool backgrounds for your sticker.
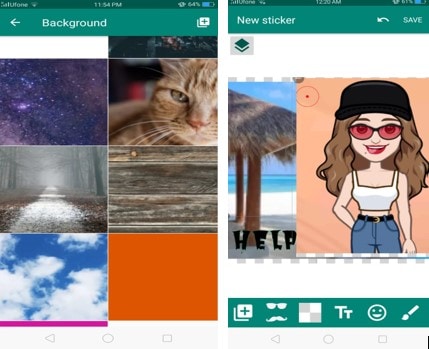
7. Choose to add themed emojis or decorate using a variety of images in the library of Sticker Make. Once you are done, click Save, enter pack name, and click Ok.
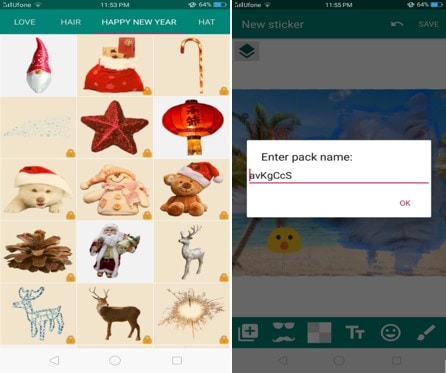
(P.S Make sure that the stickers are precisely 512x512 pixels and no more than 100kb)
Part 2: How to Add Stickers to WhatsApp
Now, you must be wondering how to add stickers to Whatsapp. Let me ease your worry. In this part, I will walk you through a step-by-step guide on how to use stickers in Whatsapp and a few additional features too.
You can save the stickers you receive from other people-
- Click on the sticker you receive
- Tap Add to favorites

If you wish you get more exciting stickers to better express yourself-
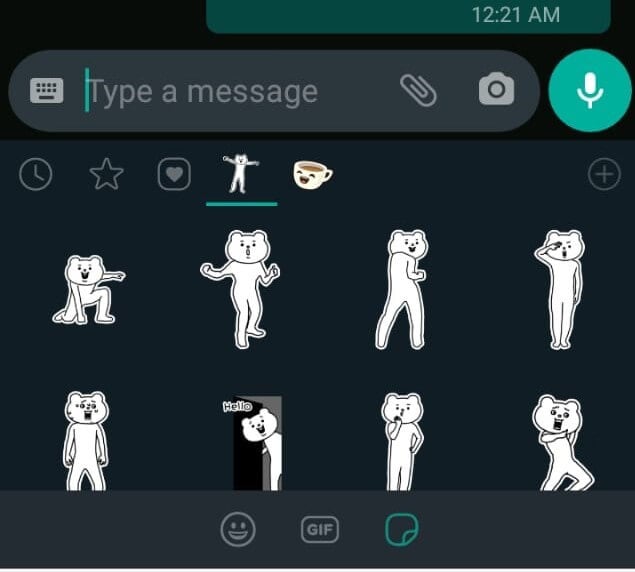
- Open Whatsapp chat, either individual or group chat.
- Click on the emoji and then click the sticker beside GIF (the square shape)
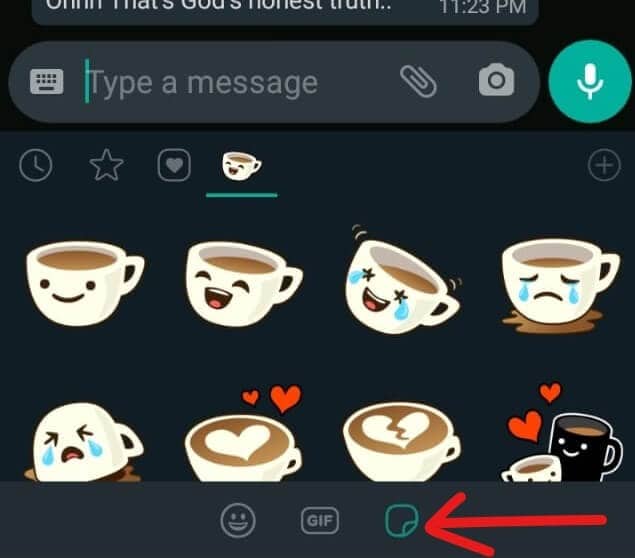
- Tap on the + sign on the upper right corner of your keyboard.
- Here you choose to download any number of sticker packs or click Get More Stickers from Google Play.
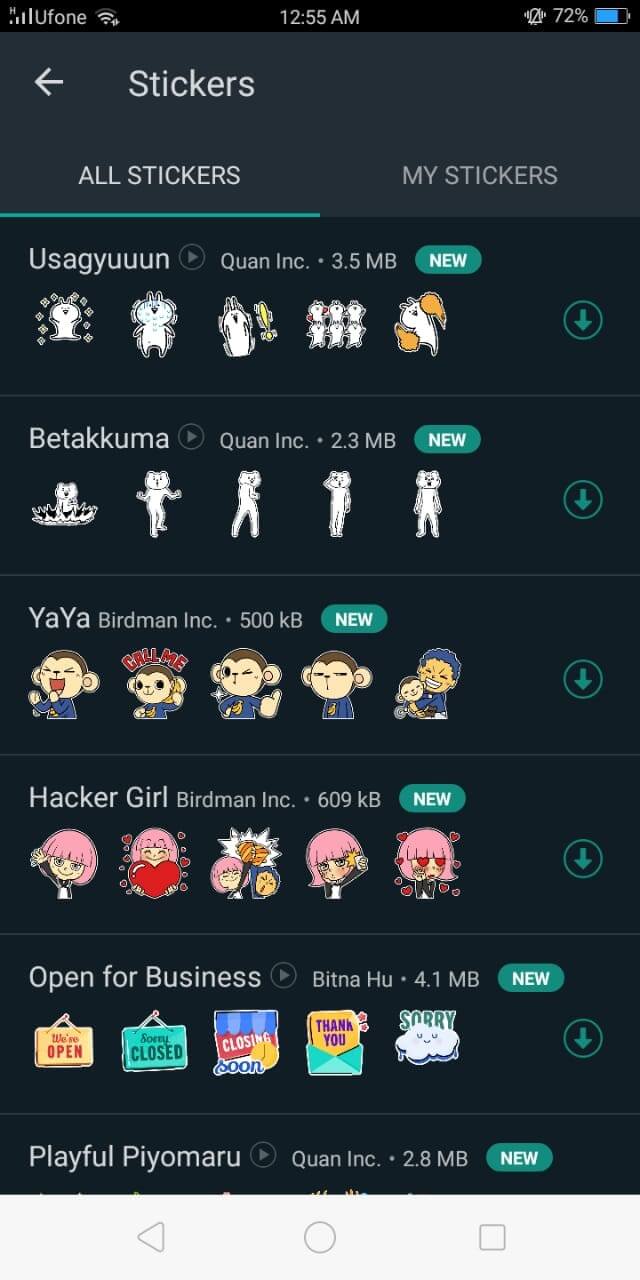
- Tap the download sign beside the sticker pack to start downloading.
- Once the download is complete, it will be displayed among the other stickers in your list.
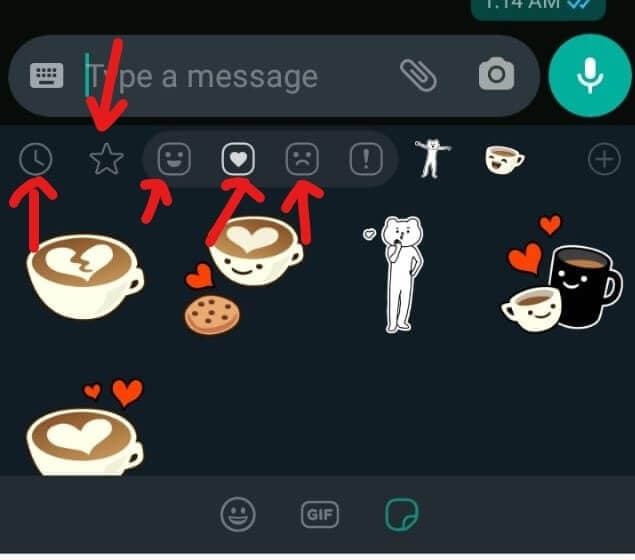
Other features:
- Clock sign- This sign has all the stickers you recently used
- Star sign- It contains your favorite stickers
- Heart- In this, there are several categories. Whatsapp automatically arranges all your stickers in these categories as happy, sad, romantic, etc.
Part 3: How to Send Stickers on WhatsApp
So far, you have learned to create a custom sticker and then how to use Whatsapp stickers. All credit goes to the apps that made this task cakewalk (and some credit goes to your creativity too). Now that the worst is over, you have come to the final and best part of our article.
In 3 quick steps, you will be able to learn how to add stickers to Whatsapp and surprise your friends with hilarious stickers.
1.Open individual or group chat.
2.Click on the emoji and then tap the stickers on the bottom panel.
3.Choose the sticker that best fits your mood and intention from the various categories. Click it and voila! Sent!
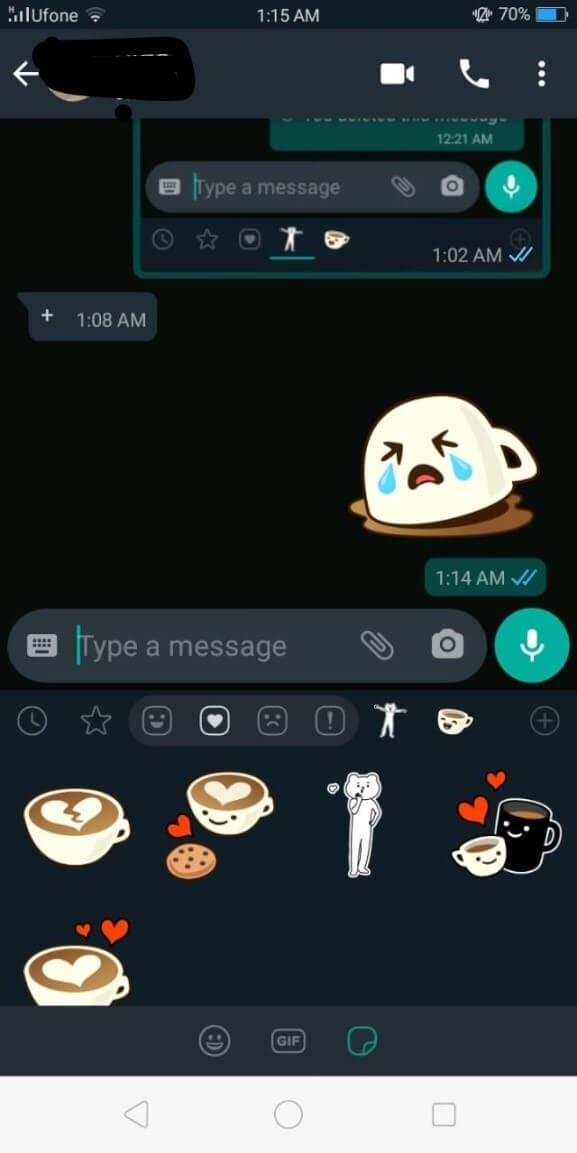
Easy peasy, right?
Bonus Tip—Add Sticker to Your Video with Wondershare Filmora
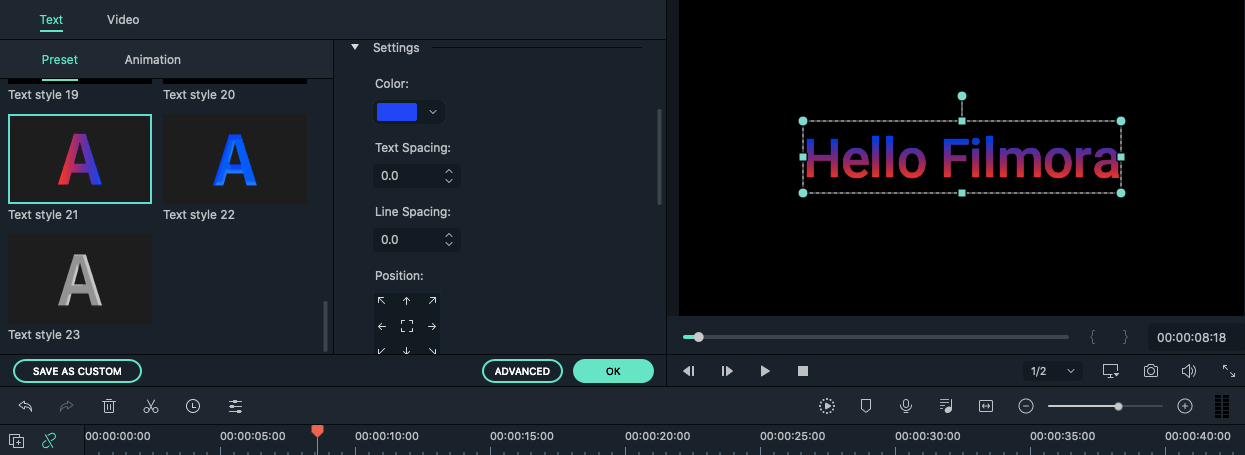
Although videos themselves are gripping enough, the addition of a customized sticker exclusive to you will be a cherry on top. Wondershare Filmora, with its user-friendly interface, is here just for that. You can now not only add your customized stickers to your video, but multiple effects can also be applied to enhance the video. Filmora is specially designed to offer professional editing tools to beginners. It has an in-built library of special effects and filters to help you create a stunningly cinematic video. Apply motion tracking, keyframe animations, or color match your videos. Add catchy captions or aesthetic filters to create a cool cinematic video
Let’s get right to it:
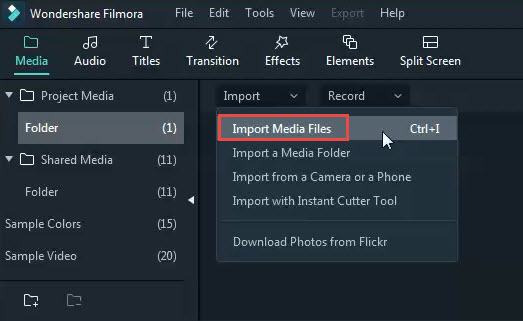
1.Download and install Filmora. Launch it. And click on Import-Import Media Files.
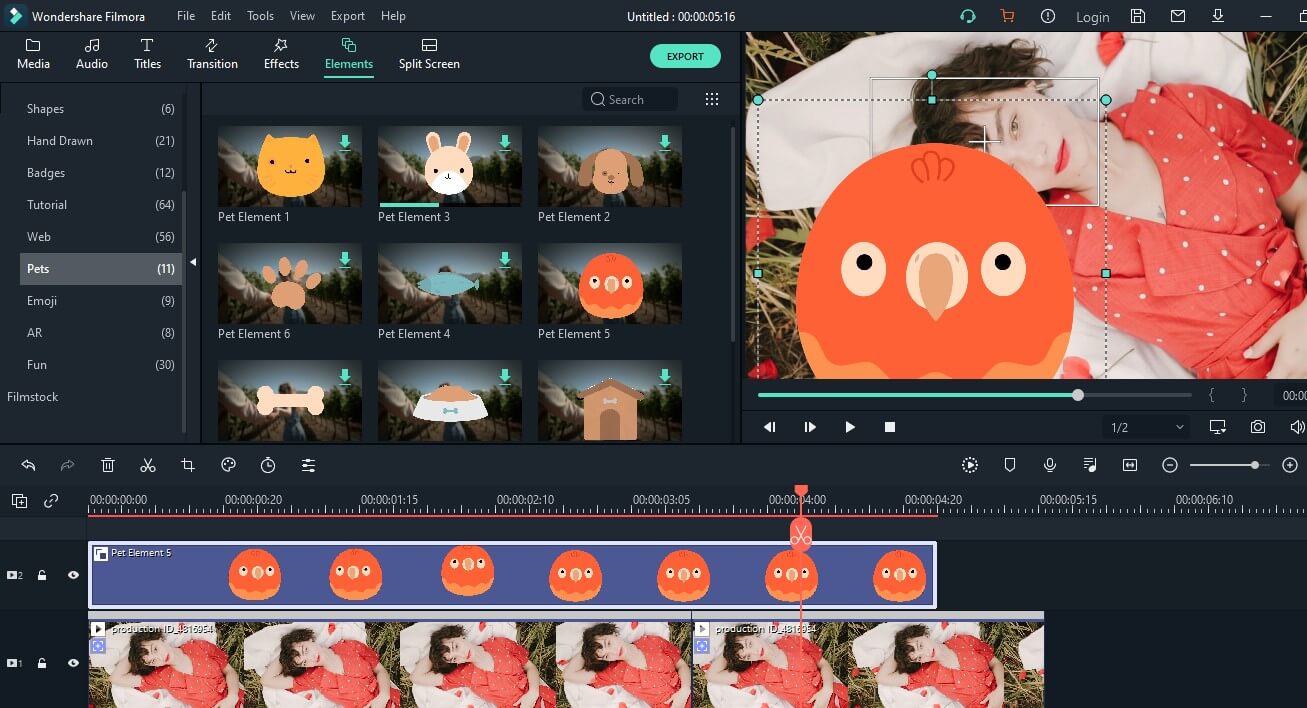
2. Then import your sticker into Filmora and drag and drop it to the video track or choose a sticker from the Elements (Note that both must be added to the video track).
3. Double-click on the sticker in the timeline to adjust the additional parameters. In Video, you can adjust the size or rotation of the sticker. Tap Color to adjust the tint, temperature, or saturation of the sticker. You can also add 3D motion to the sticker in the Motion.
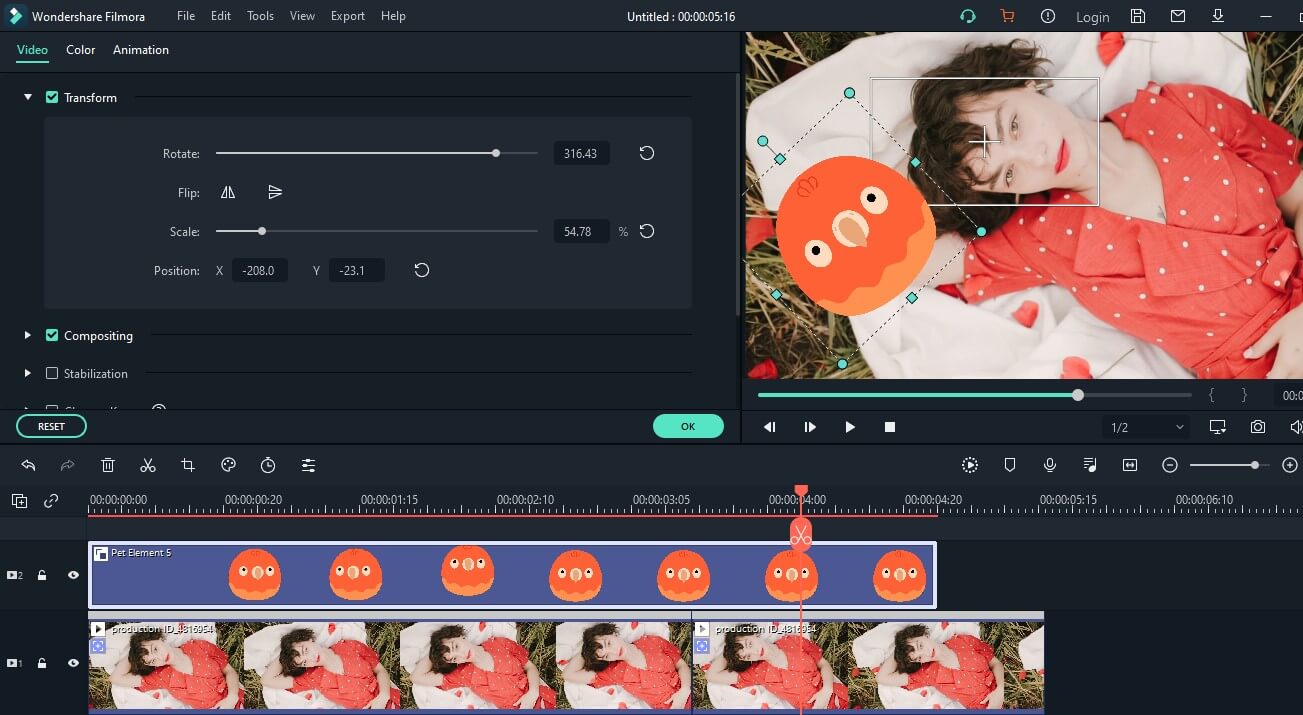
4. And in the viewer panel, click on the sticker and drag it to adjust the size or change the location.
5. Click Export and save it to your computer in the desired resolution.

Ready to Create and Add Stickers?
Stickers have been around long enough to become boringly ordinary. So, to keep the fun side of texting alive, you can now master how to use stickers on Whatsapp after creating your own personalized stickers.
You can start being creative with Sticker Make for Whatsapp. And if you didn’t know how to add stickers in Whatsapp, by now, you must have mastered it (hopefully).
Last but not least, to stand out in a crowd, you need to bring to light something others can’t. Inserting custom-made stickers in your videos might do the trick. Decorate your videos with Wondershare Filmora and create impressive masterpieces. Take note from this ultimate guide on how to add stickers to Whatsapp and transform your texting experience.
Let the fun begin!
Shanoon Cox
Shanoon Cox is a writer and a lover of all things video.
Follow @Shanoon Cox
Shanoon Cox
Mar 27, 2024• Proven solutions
Whatsapp has recently added the stickers feature, and people are going crazy about adding stickers to WhatsApp. But the question is how to add stickers to Whatsapp? To help with that, we will walk you through a detailed guide on how to add stickers to Whatsapp and bring a dash of fun to boring texts.
Now, if you don’t know how to add stickers to WhatsApp and use stickers on Whatsapp, we have you covered.
- Part 1: How to Create Stickers for WhatsApp
- Part 2: How to Add Stickers to WhatsApp
- Part 3: How to Send Stickers on WhatsApp
- Part 4: Bonus Tip—Add Sticker to Your Video with Wondershare Filmora
Part 1: How to Create Stickers for WhatsApp
Whatsapp stickers are now a significant part of our daily conversations. Because let’s face it, life would be boring without them. Perhaps it’s time to up your game by learning how to add stickers to Whatsapp
Even though Whatsapp has a vast library of stickers available, creating a unique sticker is more fun. And the latest apps have made it incredibly easy to create customized stickers. So all you need to do now is learn how to use stickers in Whatsapp
Sticker Make for Whatsapp is one such app. It is free and requires no registrations. Download the app from Google Store and start creating hilarious stickers to surprise your friends.
1. Download Sticker Make and launch it. On the homepage, you will be presented with two options. Click Create to make a sticker from scratch using your own image or click on Animated to insert your picture in a sticker template.
2. Choose any image from your gallery. Crop it to the size and shape you wish to include. Use the Freehand tool or click Automatically to let the app crop a face itself.
3. Click Next and now erase the background or make careful cropping.
4. You can even outline your sticker and adjust its width and color.
5. You can even add texts and change fonts.
6. Click on the square in the bottom panel to choose from a list of cool backgrounds for your sticker.
7. Choose to add themed emojis or decorate using a variety of images in the library of Sticker Make. Once you are done, click Save, enter pack name, and click Ok.
(P.S Make sure that the stickers are precisely 512x512 pixels and no more than 100kb)
Part 2: How to Add Stickers to WhatsApp
Now, you must be wondering how to add stickers to Whatsapp. Let me ease your worry. In this part, I will walk you through a step-by-step guide on how to use stickers in Whatsapp and a few additional features too.
You can save the stickers you receive from other people-
- Click on the sticker you receive
- Tap Add to favorites
If you wish you get more exciting stickers to better express yourself-
- Open Whatsapp chat, either individual or group chat.
- Click on the emoji and then click the sticker beside GIF (the square shape)
- Tap on the + sign on the upper right corner of your keyboard.
- Here you choose to download any number of sticker packs or click Get More Stickers from Google Play.
- Tap the download sign beside the sticker pack to start downloading.
- Once the download is complete, it will be displayed among the other stickers in your list.
Other features:
- Clock sign- This sign has all the stickers you recently used
- Star sign- It contains your favorite stickers
- Heart- In this, there are several categories. Whatsapp automatically arranges all your stickers in these categories as happy, sad, romantic, etc.
Part 3: How to Send Stickers on WhatsApp
So far, you have learned to create a custom sticker and then how to use Whatsapp stickers. All credit goes to the apps that made this task cakewalk (and some credit goes to your creativity too). Now that the worst is over, you have come to the final and best part of our article.
In 3 quick steps, you will be able to learn how to add stickers to Whatsapp and surprise your friends with hilarious stickers.
1.Open individual or group chat.
2.Click on the emoji and then tap the stickers on the bottom panel.
3.Choose the sticker that best fits your mood and intention from the various categories. Click it and voila! Sent!
Easy peasy, right?
Bonus Tip—Add Sticker to Your Video with Wondershare Filmora
Although videos themselves are gripping enough, the addition of a customized sticker exclusive to you will be a cherry on top. Wondershare Filmora, with its user-friendly interface, is here just for that. You can now not only add your customized stickers to your video, but multiple effects can also be applied to enhance the video. Filmora is specially designed to offer professional editing tools to beginners. It has an in-built library of special effects and filters to help you create a stunningly cinematic video. Apply motion tracking, keyframe animations, or color match your videos. Add catchy captions or aesthetic filters to create a cool cinematic video
Let’s get right to it:
1.Download and install Filmora. Launch it. And click on Import-Import Media Files.
2. Then import your sticker into Filmora and drag and drop it to the video track or choose a sticker from the Elements (Note that both must be added to the video track).
3. Double-click on the sticker in the timeline to adjust the additional parameters. In Video, you can adjust the size or rotation of the sticker. Tap Color to adjust the tint, temperature, or saturation of the sticker. You can also add 3D motion to the sticker in the Motion.
4. And in the viewer panel, click on the sticker and drag it to adjust the size or change the location.
5. Click Export and save it to your computer in the desired resolution.
Ready to Create and Add Stickers?
Stickers have been around long enough to become boringly ordinary. So, to keep the fun side of texting alive, you can now master how to use stickers on Whatsapp after creating your own personalized stickers.
You can start being creative with Sticker Make for Whatsapp. And if you didn’t know how to add stickers in Whatsapp, by now, you must have mastered it (hopefully).
Last but not least, to stand out in a crowd, you need to bring to light something others can’t. Inserting custom-made stickers in your videos might do the trick. Decorate your videos with Wondershare Filmora and create impressive masterpieces. Take note from this ultimate guide on how to add stickers to Whatsapp and transform your texting experience.
Let the fun begin!
Shanoon Cox
Shanoon Cox is a writer and a lover of all things video.
Follow @Shanoon Cox
What Is Emoji?
What Is Emoji?
Shanoon Cox
Mar 27, 2024• Proven solutions
If you ever wondered what is emoji, and how the term relates (or unrelates) to its elder sibling emoticon, you are at the right place. In the following sections, you will learn some quite interesting facts about the two, what different types of emojis are available, and what do they mean.
Because understanding the meaning of emojis is more important as compared to knowing what is an emoji itself, here you will get all the related details, relevant answers, and some best practice tips.
Part 1: What Is an Emoji?
In a nutshell, an emoji is a graphical image that reflects a certain facial expression. Emojis are created using a drawing tool, and are incorporated into a unique 16-bit Unicode in order to make them compatible with operating systems of the most common devices and platforms like iOS, Android, macOS, and Windows.
In addition to being merely a picture, emojis are also animated to exaggerate the message senders’ emotions. You can find a couple of decent examples of such animations while using Skype messenger.
The reason behind emojis being more popular than the emoticons used earlier is the close resemblance of the former to the real-like expressions that they reflect when sent to a recipient. Therefore, it would be safe to say that a single emoji could be worth several sentences while texting if used correctly.
Part 2: What are the Differences Between Emojis and Emoticons?
As explained earlier, the emojis are graphical and sometimes animated Unicode illustrations that can be included in the text messages as objects.
On the other hand, the emoticons are formed using the ASCII characters, and no specific coding is required at the users’ side to create them. Simply put, an emoticon can be easily added to a text message or even to an email merely by using a combination of letters on the keyboard.
For instance, to create an emoticon of a smiley face, all you need to do is, type a colon sign along with a closing brace. (E.g. Typing a : and ) without space will become a smiling face, a : and ( will form a sad face, and so on).
To be clearer, emojis can be considered an advanced, better, and evolved version of emoticons. While the latter can be formed using simple characters like letters and symbols, the former is inserted as an object in the text messages.
Part 3: Where to Find the Meaning of Emojis?
Once you have understood what emoji is, it is now time to learn what the emojis mean. This part is imperative to ensure you don’t send a wrong emotional expression to your friends or family members, and get into some awkward situation after that.
Below is a list of some useful online websites and dictionaries that can help you find correct emojis along with their meanings to make your text conversation more meaningful and interesting:
1. Emojipedia
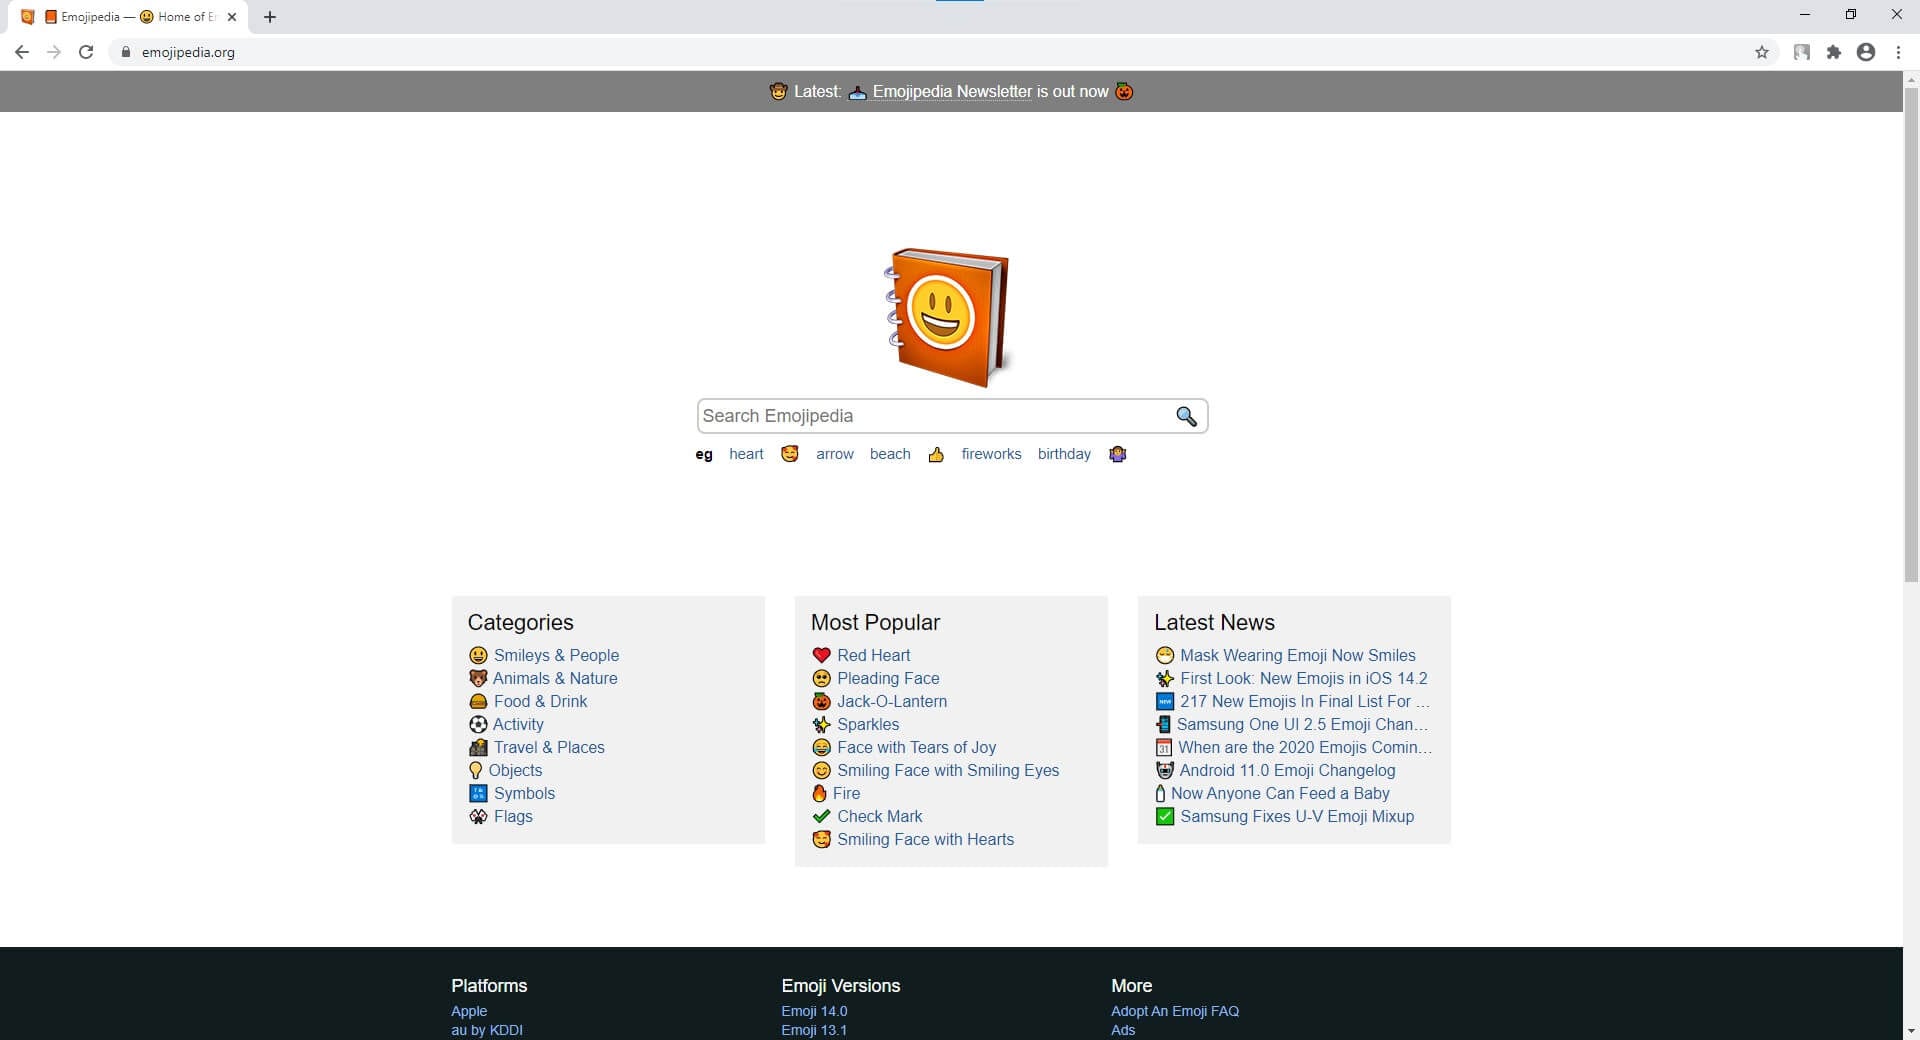
Emojipedia is an online library that holds several emojis. All the emojis that the portal has are placed in their corresponding categories.
Another section on the landing page of the website contains some of the most popular emojis, i.e. those that are mostly used by the texters during their conversions. Furthermore, the name of the emoji is present right next to it, and the entire part is hyperlinked which when clicked, takes you to a new page that has all the details about the object including its meaning, alternate names, and a button to copy the emoji to the clip board. The copied element can then be pasted in the text input field of a compatible messenger such as Facebook.
2. EMOJI DICTIONARY
https://www.dictionary.com/e/emoji/
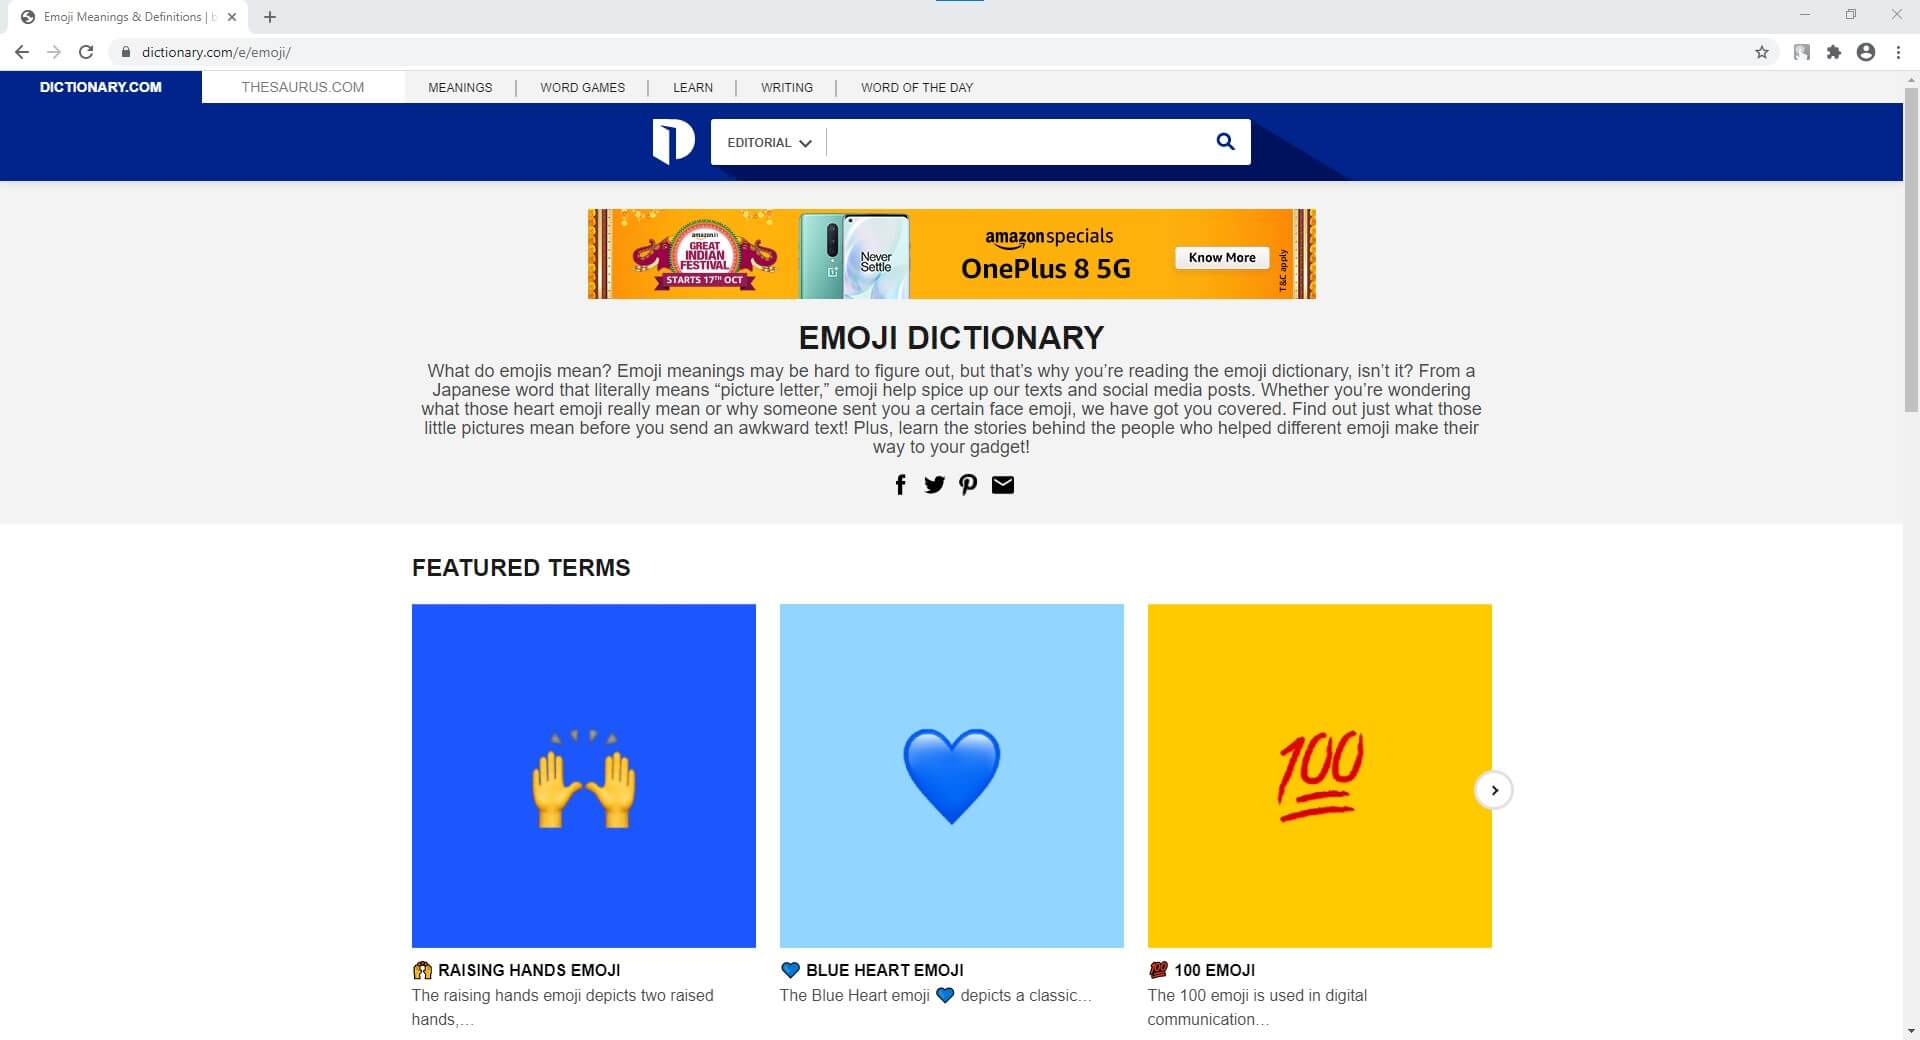
EMOJI DICTIONARY is another online portal that contains almost all the commonly used emojis. The upper section of the page is dedicated to ‘Featured Terms’ with a slider that has all the featured emojis. The next segment lists all the categories other than emojis.
The bottom area of the landing page has all the emojis along with their names and/or the supported devices. All the names in the section are hyperlinked that open a new page when clicked, and show all the details such as examples, usage, and origin related to that particular emoji.
3. Emoji Dictionary
https://emojidictionary.emojifoundation.com/
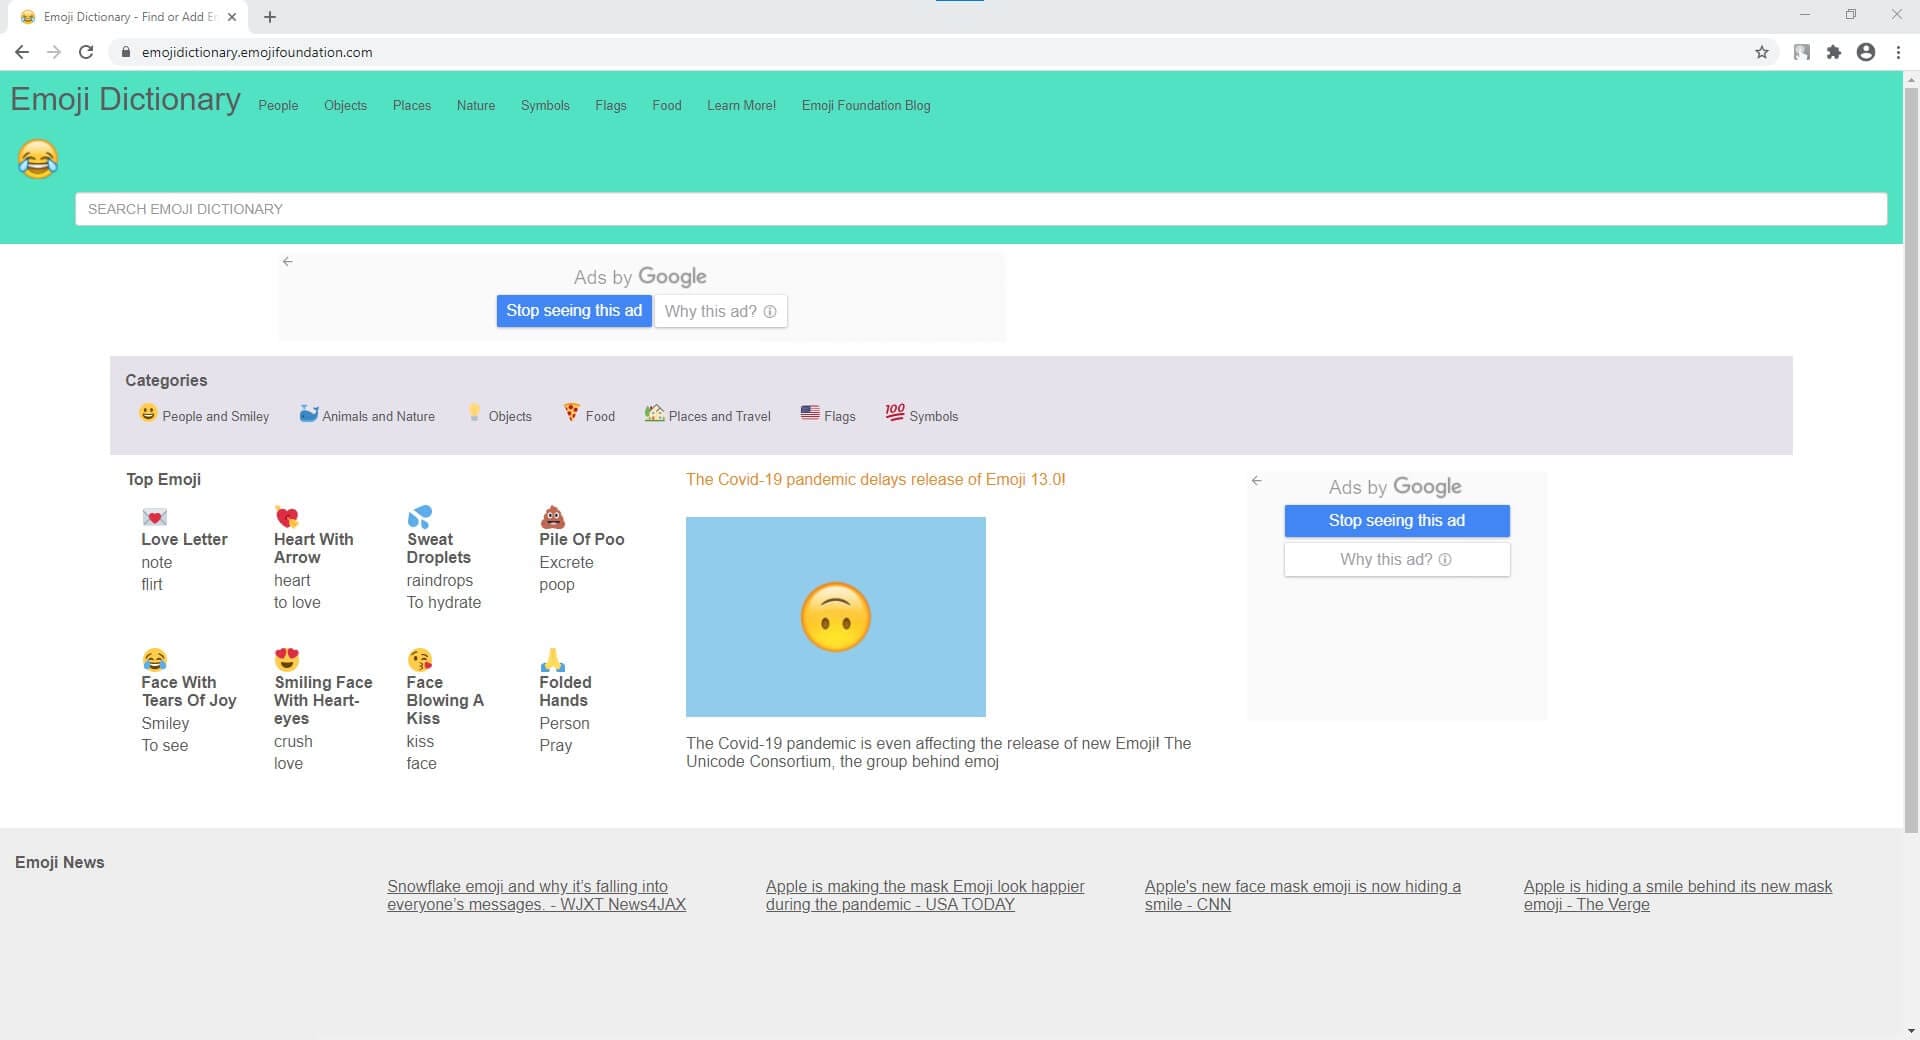
This one is unique in its own way as in along with listing the most popular emojis and their names and definitions, it also allows you to include your own information in case you know something other than what is already present.
In addition to displaying the top emojis right on the landing page, the portal also has a category list where each segment holds its corresponding objects. This helps in locating your favorite elements easily and quickly. Furthermore, when you click an emoji, a new page opens up with all its definition from different aspects such as nouns, verbs, etc., along with a ‘Copy’ button that lets you copy the image to the clipboard, and use it on a compatible messaging app.
4. EmojiMeanings
https://www.emojimeanings.net/
The landing page of EmojiMeanings is populated with all the categories where each holds several relevant emojis, thus making it easier for the users to find and learn their meaning. The home page also has complete information about what emojis are, how they are different from emoticons, and what does the term ‘smiley’ actually mean.
When you click a category, a new page opens up with three major columns titled as ‘Emoji’, ‘Meaning’, and ‘Unicode’ that show an emoji itself, explain what it means, and what Unicode is used to form it respectively. All the emojis on EmojiMeanings are usually compatible with WhatsApp and Facebook.
5. HotEmoji
https://hotemoji.com/emoji-meanings.html
HotEmoji is yet another online portal that lists almost all the emojis along with their meanings. Each entry is hyperlinked which when clicked opens a new web page dedicated to that particular emoji where all the details about it are mentioned.
The new page also has a ‘Copy’ button that can be used to copy the object to the clipboard, and then the element can be pasted onto any compatible messenger during a text conversation.
Part 4: How to Find Emoji on Any Device?
While locating and inserting emojis on any messaging app on your smartphone is fairly simple as the messenger already has an icon that opens the entire emoji library when tapped, things are a bit tricky while using a Mac or Windows PC. Therefore, the following points explain how to find and use emojis on the computer running any of these operating systems:
How to Find Emojis on Windows 8 and Windows 10
On Windows 8 or Windows 10 computers, click the ‘Keyboard’ icon that is present in the ‘Notification area’ at the bottom-right corner of the screen, i.e. right side of the taskbar. When the list of emojis appears, you can click your favorite one and use it in the messenger.
How to Find Emojis on macOS
While using a Mac computer, you can open the app you want to add an emoji to, and then press the ctrl + cmd + spacebar keys on the keyboard.
Part 5: Most Common Emoji Categories
Some of the most commonly used categories that you must know after understanding what is an emoji include:
- Smileys & People – Holds the images of faces reflecting facial expressions and the vector images/animations of some popular people
- Animals & Nature – Contains the images/animations of animals and other natural elements such as trees, rocks, mountains, etc.
- Food & Drink – This category has vector images of beautifully decorated and well-aligned wine glasses, soft drink cans, pizza slices, etc.
- Activity – Has the emojis that reflect certain actions such as dance stances, walking, running, etc.
- Travel & Places – Is equipped with vectors of transportation mediums and locations such as trains, buses, buildings, banks, etc.
- Objects – Is populated with miscellaneous objects like a pair of shoes, suits, clocks, socks, etc.
- Symbols – This one consists of different types of symbols such as an equal to sign, stop sign, delta symbol, and many more
- Flags – This category contains flags of almost all the countries of the world. These emojis are mostly used to illustrate your current or destination location for reference
Part 6: Tips of Using Emojis
It is always a good idea to use emojis every now and then. However, using too many of them in your conversation might make the entire text look overly populated, and your communication partner may lose interest in you. Therefore, understanding when and how to use emojis is as important as it is to know what the emoji means.
Add Emojis to Video with Filmora
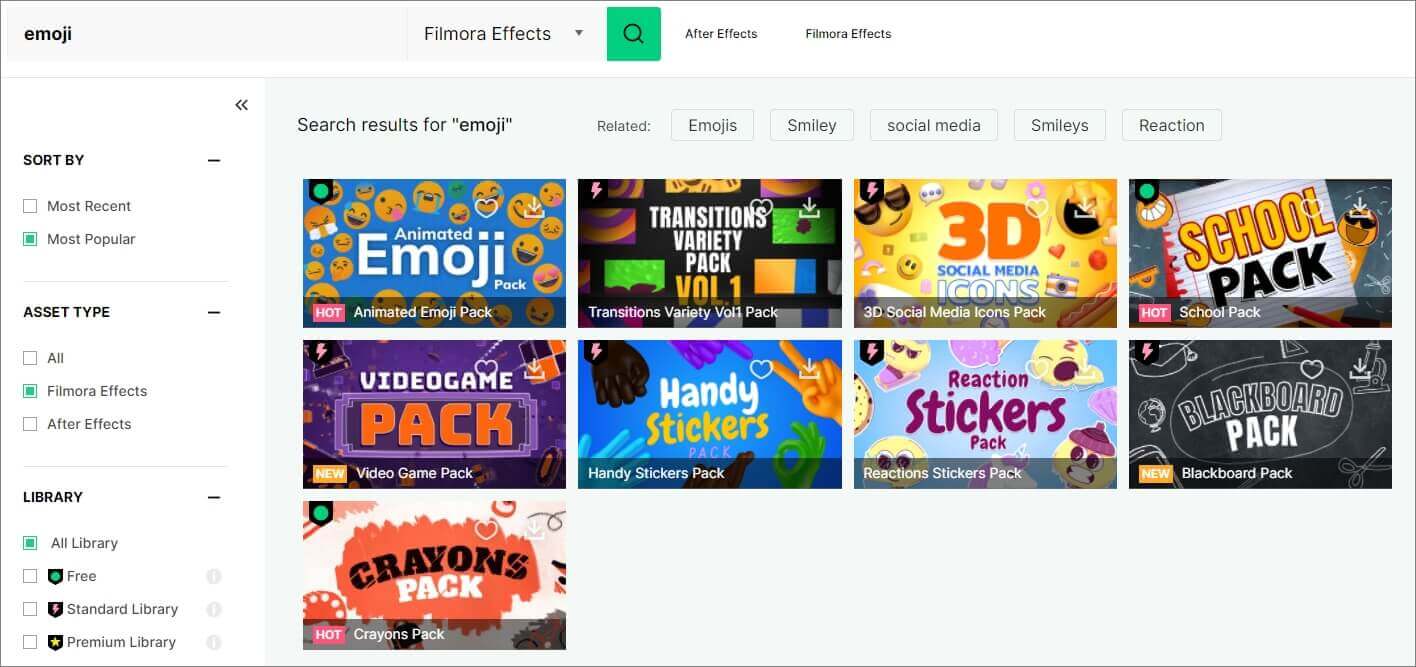
If you want to add animated emojis to video and share on social media, then Filmora is a good choice. Besides the built-in free animated emojis under Effects tab, you will also find some free or paid animated emojis or stickers on the effects store Filmstock. Download the free trial version of Filmora and create videos with fun.
Shanoon Cox
Shanoon Cox is a writer and a lover of all things video.
Follow @Shanoon Cox
Shanoon Cox
Mar 27, 2024• Proven solutions
If you ever wondered what is emoji, and how the term relates (or unrelates) to its elder sibling emoticon, you are at the right place. In the following sections, you will learn some quite interesting facts about the two, what different types of emojis are available, and what do they mean.
Because understanding the meaning of emojis is more important as compared to knowing what is an emoji itself, here you will get all the related details, relevant answers, and some best practice tips.
Part 1: What Is an Emoji?
In a nutshell, an emoji is a graphical image that reflects a certain facial expression. Emojis are created using a drawing tool, and are incorporated into a unique 16-bit Unicode in order to make them compatible with operating systems of the most common devices and platforms like iOS, Android, macOS, and Windows.
In addition to being merely a picture, emojis are also animated to exaggerate the message senders’ emotions. You can find a couple of decent examples of such animations while using Skype messenger.
The reason behind emojis being more popular than the emoticons used earlier is the close resemblance of the former to the real-like expressions that they reflect when sent to a recipient. Therefore, it would be safe to say that a single emoji could be worth several sentences while texting if used correctly.
Part 2: What are the Differences Between Emojis and Emoticons?
As explained earlier, the emojis are graphical and sometimes animated Unicode illustrations that can be included in the text messages as objects.
On the other hand, the emoticons are formed using the ASCII characters, and no specific coding is required at the users’ side to create them. Simply put, an emoticon can be easily added to a text message or even to an email merely by using a combination of letters on the keyboard.
For instance, to create an emoticon of a smiley face, all you need to do is, type a colon sign along with a closing brace. (E.g. Typing a : and ) without space will become a smiling face, a : and ( will form a sad face, and so on).
To be clearer, emojis can be considered an advanced, better, and evolved version of emoticons. While the latter can be formed using simple characters like letters and symbols, the former is inserted as an object in the text messages.
Part 3: Where to Find the Meaning of Emojis?
Once you have understood what emoji is, it is now time to learn what the emojis mean. This part is imperative to ensure you don’t send a wrong emotional expression to your friends or family members, and get into some awkward situation after that.
Below is a list of some useful online websites and dictionaries that can help you find correct emojis along with their meanings to make your text conversation more meaningful and interesting:
1. Emojipedia
Emojipedia is an online library that holds several emojis. All the emojis that the portal has are placed in their corresponding categories.
Another section on the landing page of the website contains some of the most popular emojis, i.e. those that are mostly used by the texters during their conversions. Furthermore, the name of the emoji is present right next to it, and the entire part is hyperlinked which when clicked, takes you to a new page that has all the details about the object including its meaning, alternate names, and a button to copy the emoji to the clip board. The copied element can then be pasted in the text input field of a compatible messenger such as Facebook.
2. EMOJI DICTIONARY
https://www.dictionary.com/e/emoji/
EMOJI DICTIONARY is another online portal that contains almost all the commonly used emojis. The upper section of the page is dedicated to ‘Featured Terms’ with a slider that has all the featured emojis. The next segment lists all the categories other than emojis.
The bottom area of the landing page has all the emojis along with their names and/or the supported devices. All the names in the section are hyperlinked that open a new page when clicked, and show all the details such as examples, usage, and origin related to that particular emoji.
3. Emoji Dictionary
https://emojidictionary.emojifoundation.com/
This one is unique in its own way as in along with listing the most popular emojis and their names and definitions, it also allows you to include your own information in case you know something other than what is already present.
In addition to displaying the top emojis right on the landing page, the portal also has a category list where each segment holds its corresponding objects. This helps in locating your favorite elements easily and quickly. Furthermore, when you click an emoji, a new page opens up with all its definition from different aspects such as nouns, verbs, etc., along with a ‘Copy’ button that lets you copy the image to the clipboard, and use it on a compatible messaging app.
4. EmojiMeanings
https://www.emojimeanings.net/
The landing page of EmojiMeanings is populated with all the categories where each holds several relevant emojis, thus making it easier for the users to find and learn their meaning. The home page also has complete information about what emojis are, how they are different from emoticons, and what does the term ‘smiley’ actually mean.
When you click a category, a new page opens up with three major columns titled as ‘Emoji’, ‘Meaning’, and ‘Unicode’ that show an emoji itself, explain what it means, and what Unicode is used to form it respectively. All the emojis on EmojiMeanings are usually compatible with WhatsApp and Facebook.
5. HotEmoji
https://hotemoji.com/emoji-meanings.html
HotEmoji is yet another online portal that lists almost all the emojis along with their meanings. Each entry is hyperlinked which when clicked opens a new web page dedicated to that particular emoji where all the details about it are mentioned.
The new page also has a ‘Copy’ button that can be used to copy the object to the clipboard, and then the element can be pasted onto any compatible messenger during a text conversation.
Part 4: How to Find Emoji on Any Device?
While locating and inserting emojis on any messaging app on your smartphone is fairly simple as the messenger already has an icon that opens the entire emoji library when tapped, things are a bit tricky while using a Mac or Windows PC. Therefore, the following points explain how to find and use emojis on the computer running any of these operating systems:
How to Find Emojis on Windows 8 and Windows 10
On Windows 8 or Windows 10 computers, click the ‘Keyboard’ icon that is present in the ‘Notification area’ at the bottom-right corner of the screen, i.e. right side of the taskbar. When the list of emojis appears, you can click your favorite one and use it in the messenger.
How to Find Emojis on macOS
While using a Mac computer, you can open the app you want to add an emoji to, and then press the ctrl + cmd + spacebar keys on the keyboard.
Part 5: Most Common Emoji Categories
Some of the most commonly used categories that you must know after understanding what is an emoji include:
- Smileys & People – Holds the images of faces reflecting facial expressions and the vector images/animations of some popular people
- Animals & Nature – Contains the images/animations of animals and other natural elements such as trees, rocks, mountains, etc.
- Food & Drink – This category has vector images of beautifully decorated and well-aligned wine glasses, soft drink cans, pizza slices, etc.
- Activity – Has the emojis that reflect certain actions such as dance stances, walking, running, etc.
- Travel & Places – Is equipped with vectors of transportation mediums and locations such as trains, buses, buildings, banks, etc.
- Objects – Is populated with miscellaneous objects like a pair of shoes, suits, clocks, socks, etc.
- Symbols – This one consists of different types of symbols such as an equal to sign, stop sign, delta symbol, and many more
- Flags – This category contains flags of almost all the countries of the world. These emojis are mostly used to illustrate your current or destination location for reference
Part 6: Tips of Using Emojis
It is always a good idea to use emojis every now and then. However, using too many of them in your conversation might make the entire text look overly populated, and your communication partner may lose interest in you. Therefore, understanding when and how to use emojis is as important as it is to know what the emoji means.
Add Emojis to Video with Filmora
If you want to add animated emojis to video and share on social media, then Filmora is a good choice. Besides the built-in free animated emojis under Effects tab, you will also find some free or paid animated emojis or stickers on the effects store Filmstock. Download the free trial version of Filmora and create videos with fun.
Shanoon Cox
Shanoon Cox is a writer and a lover of all things video.
Follow @Shanoon Cox
How to Make Memes with White Background Step by Step
How to Make Memes with White Background Step by Step

Ollie Mattison
Mar 27, 2024• Proven solutions
World seems fun and humorous, as we wake up to a variety of memes every day. Especially memes having captions are so cool and funny over the social media . A white background with your meme enhances the significance of captions over the video or image in the meme. So, if you too desire to know how to make memes with white background, you have hit the right spot.
In this article, we are going to explain you the detailed process of creating memes with white background. Stay tuned to explore!
- Part1: Create memes with white background by Filmora meme maker
- Part2: How to make memes with white background on phone
Part 1: Create memes with white background by Filmora meme maker
If you are curious enough to know how to make memes with white background online, then Filmora Meme Maker is the right choice for you. You don’t have to install or download any app or software. Just browse and edit the photo or video to create a white background meme and you are good to go. This meme maker can create photo, GIF and video memes alike for you. Moreover, you can add texts, alter fonts, font size and color as well as move the text anywhere in the meme.
This is a fast tool that runs straight on your browser and comes with a decoder and encoder. You can even directly add videos from URL by including the online link to this meme maker program. You can convert a video to a GIF meme with Filmora Meme Maker.
Here comes the detailed process for how to make memes with white background –
Step 1: First and foremost, browse for the official website of Filmora Online Meme Maker page. Drag and drop the desired image over here.

Step 2: On the meme editor page customize the background to white and then select tools from the left side panel to customize the meme further. Add texts, change color, font size and move the text around the background to position it appropriately and match your meme.

Step 3: When everything is as per your wish, click on the ‘CREATE’ button. It will ensure that the changes that you have made will be saved properly. If you are satisfied with the changes and want to go ahead with it, hit the ‘DOWNLOAD’ button.
Step 4: When the ‘DOWNLOAD’ button is pressed, the meme with black and white background is saved on your computer. You can now share it on Reddit, Instagram, Facebook, Twitter or any other social media platform of your choice.

Part 2: How to make memes with white background on phone
Among the various apps available in the market, we have considered PhotoGrid to make memes with white background. Both Play Store and iTunes can offer a good number of these apps to create memes having white background. Here, we are considering an Android phone for that matter.
Step by step guide for creating memes with white background –
Step 1: From the Play Store, download the app on your Android phone. Run the app on your mobile device and click on the ‘Grid’ for selecting the image that you wish to add to your meme.
Step 2: When the picture is loaded on Photo Grid, you need to click on the ‘Background’ tab from the menu at the bottom. Pick white color from the menu over here, though usually it is selected by default.
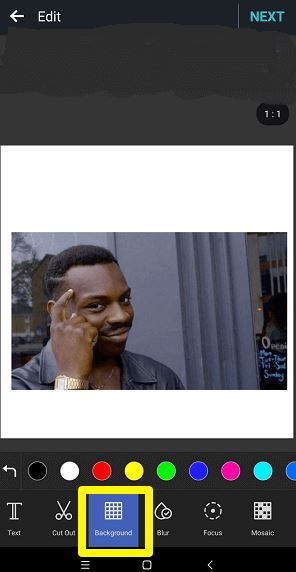
Step 3: Adjust the position and size of the image as you desire by pinching and zooming with your fingers. Once the position and dimensions are fixed as per your requirements, hit the ‘Text’ option. Enter the text you want to include in the meme and then click the ‘tick’ box.
Step 4: Your text is movable across the image area and is resizable as well using your fingers. You can alter the alignment, font, border, color etc. for every text you enter here.
Step 5: When everything else is sorted, press the ‘NEXT’ button on the top corner and hit ‘Save’. This is how to make memes with white background.
Using Photo Grid, you can also create video memes following the same guide as that of the photo memes. As everything is created in a square size, you can seamlessly use it on any social media platform including Reddit, Instagram, etc.
Conclusion
From this article, Filmora Meme Maker is one of the top meme makers in the market. Not only picture or GIF but video memes can also be done using this tool. As there is no need of downloading the software on your system or mobile, you save lot of time and space on your hard drive. We are hopeful that you are comfortable with how to make memes with white background using Filmora Meme Maker online.
Ollie Mattison
Ollie Mattison is a writer and a lover of all things video.
Follow @Ollie Mattison
Ollie Mattison
Mar 27, 2024• Proven solutions
World seems fun and humorous, as we wake up to a variety of memes every day. Especially memes having captions are so cool and funny over the social media . A white background with your meme enhances the significance of captions over the video or image in the meme. So, if you too desire to know how to make memes with white background, you have hit the right spot.
In this article, we are going to explain you the detailed process of creating memes with white background. Stay tuned to explore!
- Part1: Create memes with white background by Filmora meme maker
- Part2: How to make memes with white background on phone
Part 1: Create memes with white background by Filmora meme maker
If you are curious enough to know how to make memes with white background online, then Filmora Meme Maker is the right choice for you. You don’t have to install or download any app or software. Just browse and edit the photo or video to create a white background meme and you are good to go. This meme maker can create photo, GIF and video memes alike for you. Moreover, you can add texts, alter fonts, font size and color as well as move the text anywhere in the meme.
This is a fast tool that runs straight on your browser and comes with a decoder and encoder. You can even directly add videos from URL by including the online link to this meme maker program. You can convert a video to a GIF meme with Filmora Meme Maker.
Here comes the detailed process for how to make memes with white background –
Step 1: First and foremost, browse for the official website of Filmora Online Meme Maker page. Drag and drop the desired image over here.
Step 2: On the meme editor page customize the background to white and then select tools from the left side panel to customize the meme further. Add texts, change color, font size and move the text around the background to position it appropriately and match your meme.
Step 3: When everything is as per your wish, click on the ‘CREATE’ button. It will ensure that the changes that you have made will be saved properly. If you are satisfied with the changes and want to go ahead with it, hit the ‘DOWNLOAD’ button.
Step 4: When the ‘DOWNLOAD’ button is pressed, the meme with black and white background is saved on your computer. You can now share it on Reddit, Instagram, Facebook, Twitter or any other social media platform of your choice.
Part 2: How to make memes with white background on phone
Among the various apps available in the market, we have considered PhotoGrid to make memes with white background. Both Play Store and iTunes can offer a good number of these apps to create memes having white background. Here, we are considering an Android phone for that matter.
Step by step guide for creating memes with white background –
Step 1: From the Play Store, download the app on your Android phone. Run the app on your mobile device and click on the ‘Grid’ for selecting the image that you wish to add to your meme.
Step 2: When the picture is loaded on Photo Grid, you need to click on the ‘Background’ tab from the menu at the bottom. Pick white color from the menu over here, though usually it is selected by default.
Step 3: Adjust the position and size of the image as you desire by pinching and zooming with your fingers. Once the position and dimensions are fixed as per your requirements, hit the ‘Text’ option. Enter the text you want to include in the meme and then click the ‘tick’ box.
Step 4: Your text is movable across the image area and is resizable as well using your fingers. You can alter the alignment, font, border, color etc. for every text you enter here.
Step 5: When everything else is sorted, press the ‘NEXT’ button on the top corner and hit ‘Save’. This is how to make memes with white background.
Using Photo Grid, you can also create video memes following the same guide as that of the photo memes. As everything is created in a square size, you can seamlessly use it on any social media platform including Reddit, Instagram, etc.
Conclusion
From this article, Filmora Meme Maker is one of the top meme makers in the market. Not only picture or GIF but video memes can also be done using this tool. As there is no need of downloading the software on your system or mobile, you save lot of time and space on your hard drive. We are hopeful that you are comfortable with how to make memes with white background using Filmora Meme Maker online.
Ollie Mattison
Ollie Mattison is a writer and a lover of all things video.
Follow @Ollie Mattison
How to Make a Photo Collage on Mac/iPhone Using iPhoto?
How to Make a Photo Collage on Mac/iPhone Using iPhoto?
Shanoon Cox
Mar 27, 2024• Proven solutions
iPhoto is a photo library familiar to iOS users. It can help you easily organize, store and sort images, and even make a slide show to help you enjoy photos. This is why, even though Apple no longer develops iPhoto, some people use it.
Update: On April 8, 2015, Apple has launched a new Photos app on OS X Yosemite, which means Apple has stopped developing iPhoto. However, if you like iPhoto, you can still use it.
The following will introduce how to use the iPhoto collage maker on Mac or iPhone. At the end of this article, iPhoto alternative software will serve as your reference.
Part 1: How to Make a Photo Collage in iPhoto?
Here are the quick steps to create a photo collage with iPhoto.
Step 1: Launch iPhoto and click “Events” in the side menu.
Step 2: Hold “Shift” and click each photo you want to include in your photo collage.
Step 3: Click the “+” button in the lower-left corner and select Card in the pop-up window.
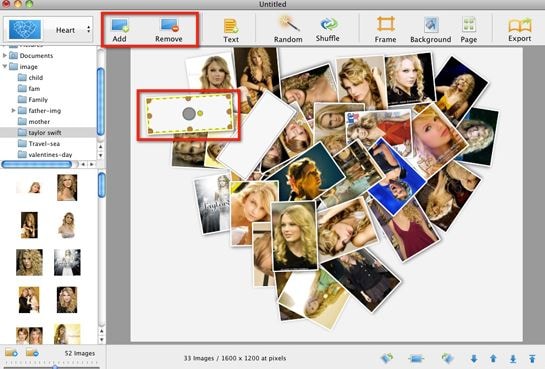
Step 4: Choose “Picture Collage”, which should be under the Any Occasion section if you are using the iPhoto 11.
Step 5: You’ll notice that all the templates are sorted based on the occasion.
Step 6: Drag photos to the template and pick a background, orientation and design.
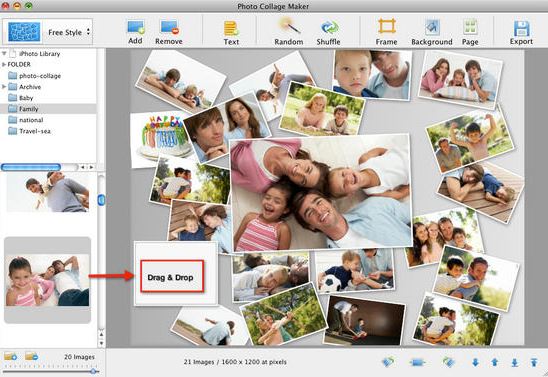
Step 7: Click the Buy button on the lower right-hand corner of the collage editor, or go to the Share menu and email it to yourself or family members.
But before you make a photo collage using iPhoto, here are some important things for you to know:
- Technically, iPhoto can’t make fancy photo collages like other Photo collages makers on Mac. So don’t expect too much of it. iPhoto only creates greeting cards with a simple collage layout.
- The templates iPhoto offers are quite limited and ordinary that you might feel a little disappointed.
- iPhoto offers no share options to save photo collages to desktop or to post on Facebook, which is a basic feature of picture collage editor.
Part 2: What Replaces iPhoto on Mac/iPhone?
Since iPhoto’s functions are not sufficient, we will introduce some alternative collage makers that you may be interested in.
Alternative to Make a Short Video, Slideshow, or Photo Collage: Wondershare Filmora
If there are too many photos to save or share with friends and family, you can use these images to make short videos to better collage and share. Filmora can do this for you, through which you can easily crop, add effects, split the screen, and merge photos. In order to make the “photo video” lively and exciting, you can also add music, audio, animation, title, music, etc. to it.
Alternative to Organize, Store, and Sort Images: iCloud
Migrating your photos to iCloud is a wise choice. iCloud is the best photo storage for iOS or Mac users. You don’t need to download other apps or software. Just allow iCloud to back up the photo’s library in the settings.
The best thing is that you can view iCloud photos anytime and anywhere after logging in to your iCloud account. You can also automatically share photos with others by opening “Shared Album”. However, if there are too many photos, a paid subscription may be required to upgrade the storage space.
Conclusion
Above are the steps to make a photo collage using iPhoto on Mac/iPhone. We also list alternative methods to meet the different needs of the Photo library. So, if this isn’t quite what you’re looking for, you can also use some online photo collage service instead. If you want to have more fun editing photo stories, welcome to download Filmora and make more memorable and interesting videos.
Shanoon Cox
Shanoon Cox is a writer and a lover of all things video.
Follow @Shanoon Cox
Shanoon Cox
Mar 27, 2024• Proven solutions
iPhoto is a photo library familiar to iOS users. It can help you easily organize, store and sort images, and even make a slide show to help you enjoy photos. This is why, even though Apple no longer develops iPhoto, some people use it.
Update: On April 8, 2015, Apple has launched a new Photos app on OS X Yosemite, which means Apple has stopped developing iPhoto. However, if you like iPhoto, you can still use it.
The following will introduce how to use the iPhoto collage maker on Mac or iPhone. At the end of this article, iPhoto alternative software will serve as your reference.
Part 1: How to Make a Photo Collage in iPhoto?
Here are the quick steps to create a photo collage with iPhoto.
Step 1: Launch iPhoto and click “Events” in the side menu.
Step 2: Hold “Shift” and click each photo you want to include in your photo collage.
Step 3: Click the “+” button in the lower-left corner and select Card in the pop-up window.
Step 4: Choose “Picture Collage”, which should be under the Any Occasion section if you are using the iPhoto 11.
Step 5: You’ll notice that all the templates are sorted based on the occasion.
Step 6: Drag photos to the template and pick a background, orientation and design.
Step 7: Click the Buy button on the lower right-hand corner of the collage editor, or go to the Share menu and email it to yourself or family members.
But before you make a photo collage using iPhoto, here are some important things for you to know:
- Technically, iPhoto can’t make fancy photo collages like other Photo collages makers on Mac. So don’t expect too much of it. iPhoto only creates greeting cards with a simple collage layout.
- The templates iPhoto offers are quite limited and ordinary that you might feel a little disappointed.
- iPhoto offers no share options to save photo collages to desktop or to post on Facebook, which is a basic feature of picture collage editor.
Part 2: What Replaces iPhoto on Mac/iPhone?
Since iPhoto’s functions are not sufficient, we will introduce some alternative collage makers that you may be interested in.
Alternative to Make a Short Video, Slideshow, or Photo Collage: Wondershare Filmora
If there are too many photos to save or share with friends and family, you can use these images to make short videos to better collage and share. Filmora can do this for you, through which you can easily crop, add effects, split the screen, and merge photos. In order to make the “photo video” lively and exciting, you can also add music, audio, animation, title, music, etc. to it.
Alternative to Organize, Store, and Sort Images: iCloud
Migrating your photos to iCloud is a wise choice. iCloud is the best photo storage for iOS or Mac users. You don’t need to download other apps or software. Just allow iCloud to back up the photo’s library in the settings.
The best thing is that you can view iCloud photos anytime and anywhere after logging in to your iCloud account. You can also automatically share photos with others by opening “Shared Album”. However, if there are too many photos, a paid subscription may be required to upgrade the storage space.
Conclusion
Above are the steps to make a photo collage using iPhoto on Mac/iPhone. We also list alternative methods to meet the different needs of the Photo library. So, if this isn’t quite what you’re looking for, you can also use some online photo collage service instead. If you want to have more fun editing photo stories, welcome to download Filmora and make more memorable and interesting videos.
Shanoon Cox
Shanoon Cox is a writer and a lover of all things video.
Follow @Shanoon Cox
How to Record and Edit an Animoji or Memoji Karaoke Music Video?
How to Record and Edit an Animoji or Memoji Karaoke Music Video?
Liza Brown
Mar 27, 2024• Proven solutions
Becoming a superstar whose music is adored in every corner of the Earth is not something that can be achieved overnight. The rest of us, who only dream of worldwide fame can just enjoy our favorite songs and from time to time create animoji karaoke music videos for entertainment purposes. Read on if you are not sure what animojis are and how you can use them to create music videos from your iPhone or iPad, because in this article we are going to take you through each step of the process of making an animoji karaoke video.
First, let’s check some popular Memoji Karaoke video from YouTube. The Video below is from YouTuber Memoji Karaoke, enjoy.
What Exactly is The Difference Between Animojis and Memojis?
Animojis and Memojis have taken the world by storm since the first iPhone X model was released back in 2017. Both animojis and memojis utilize facial recognition technologies to track your movements and facial expressions and imitate them in a virtual environment. However, an animoji is a 3D emoji like a monkey, koala, tiger or a unicorn, while memojis are fully customizable avatars that let you create a character from scratch.
Memojis enable you to choose the character’s skin color, head, nose, ear shape or hairstyle, meaning that you can create as many new characters as you want effortlessly. Furthermore, you can add stickers or apply up to five different filters to animojis and memojis you share with your friends.

See best Memoji makers here: Top 8 Memoji Makers to Make a Memoji on PC, Android, and iPhone.
How to Set Up and Create Memojis?
Owners of iPhone X, iPhone XS, iPhone XS Max, and iPadPro can easily make new memojis from their devices. All you have to do in order to start creating a new memoji is open the messaging app, locate the iMessage AppStore icon, tap on it and then tap on the Animoji icon. By doing so you will gain access to all animojis that are available on iOS 12 or other versions of the iOS that support memojis and animojis. After tapping on the New Memoji icon you will be able to see the default character you can customize as you see fit.
You can now get creative and pick one of the countless skin tones, choose how old your character is going to be or select any of the available head, nose and ear shapes. Moreover, you can customize the eye color for each character you create, add eyewear, or decide whether or not your character is going to have facial hair. Once you’re finished customizing a new memoji, simply tap on the Done button and the character you’ve created is going to be saved in your animoji collection. You can edit, duplicate or delete the memojis by tapping on the three dot icon or you can use them as camera overlays and share them with your friends.
How to Make a Memoji or Animoji Karaoke Music Video?
Once you’ve created a memoji you will have to record thirty-second videos in order to be able to send them as messages. After the recording session is completed, you can review the material you’ve produced, and decide if you are happy with the result or if you want to do another take. The only downside is that you can’t play music from your iPhone or your iPad while you’re recording, which means that you have to play the song you want to cover from another device such as a computer or the stereo system.
Read this article to learn more about Animoji: The Ultimate Guide of How to Use Animoji on iPhone X.
It is worth noting that knowing the lyrics of the song is going to improve the quality of the karaoke music video you’re producing significantly, so rehearsing a song few times before you hit the record button may be a good idea if you don’t know its lyrics by heart.
When you’re ready, launch the iMessage app and choose an animoji or memoji character you’re going to be in the video. Don’t record karaoke videos in the full-screen mode because the record button is going to cover a significant portion of the screen, which can complicate the video editing process. Optionally, you download and install the Animoji Studio app if you want to record videos that are longer than thirty seconds, but you might need some time to get used to making karaoke videos with this app.
Proceed to record your 30-second video or activate the Screen Recording option from the Control Center if you want to capture a karaoke video that exceeds that limit. If you like the results you can simply send the video you’ve created as a message, but you can also transfer the file to your computer and edit from a video editing software like Filmora.
Import the memoji video file you’ve transferred to your computer into Filmora after you’ve created a new project. You can do this from the software’s Media panel by clicking on the Import drop-down menu and choosing the Import Media Files option. Place the video file on the timeline and then cut or trim all parts of the clip you don’t want to include in the final cut of your memoji karaoke video. Filmora offers a vast number of different opening titles, end credits, audio and visual effects and transitions that can all help you create a visually attractive karaoke video.
Moreover, you can duplicate an animoji or memoji and create a duet in just a few simple clicks. The editor’s powerful audio editing tools enable you to add a high-quality audio file to your project or sound effects that can make your video more entertaining. Click on the Export button to choose the output destination, format, resolution and aspect ratio for the karaoke video you’ve just created. Filmora lets you export videos directly to your YouTube or Vimeo channel, which can be quite handy if you want to share your memoji videos online immediately after you’ve completed the video editing process.
List of iPhones and iPads that Support Animojis and Memojis
| Face ID | Animoji | Memoji |
|---|---|---|
| iPhone X | iPhone X | iPhone X (iOS 12 or later required) |
| iPhone XR | iPhone XR | iPhone XR |
| iPhone XS | iPhone XS | iPhone XS |
| iPhone XS Max | iPhone XS Max | iPhone XS Max |
| iPad Pro 12.9-inch (3rd generation) | iPad Pro 12.9-inch (3rd generation) | iPad Pro 12.9-inch (3rd generation) |
| iPad Pro 11-inch or above | iPad Pro 11-inch | iPad Pro 11-inch |
Unfortunately, Face ID feature, as well as animojis and memojis, are relatively novel additions on iOS-based devices, and you won’t be able to create memoji or animoji karaoke videos from the iMessages app unless you have one of the following iPhone or iPad models.
The list of iPhone and iPad models that offer the Face ID, Animoji and Memoji Features
Older models of iPhones, iPods, and iPads that have the latest version of iOS installed can only receive animoji and memoji messages, but it is not possible to create these messages with them. In case you are using an older model of an iPhone or an iPad but you still want to create animoji and memoji karaoke videos you can find a simple solution to your problem below.
Supermoji – The Emoji App
A powerful and intuitive app like Supermoji enables you to create karaoke music videos that feature your favorite animoji and memoji characters with ease. Creating animated 3D models won’t take too much of your time if you choose to download and install this app on your device, but after a three-day trial period, you’ll have to opt for one of the available subscription models. A weekly subscription costs $9.99, while you must pay $29.99 for a monthly subscription, which makes the Supermoji app a bit pricy. Alternatively, you can try Facemoji or Emoji Face Recorder apps, but the results you’ll get can be a bit underwhelming when compared to the animojis and memojis created from the iMessages app.
Conclusion
Creating funny animoji and memoji karaoke music videos is a new trend that can only grow in popularity in the future. However, this feature is only available on recent iPhone and iPad models, but there are a number of third-party apps that enable you to create this type of video even if you are using an older iPhone or iPad model. Do you like using memoji and animoji animations to create karaoke videos you share with your friends on social media? Leave a comment below and share your opinions with us.
Liza Brown
Liza Brown is a writer and a lover of all things video.
Follow @Liza Brown
Liza Brown
Mar 27, 2024• Proven solutions
Becoming a superstar whose music is adored in every corner of the Earth is not something that can be achieved overnight. The rest of us, who only dream of worldwide fame can just enjoy our favorite songs and from time to time create animoji karaoke music videos for entertainment purposes. Read on if you are not sure what animojis are and how you can use them to create music videos from your iPhone or iPad, because in this article we are going to take you through each step of the process of making an animoji karaoke video.
First, let’s check some popular Memoji Karaoke video from YouTube. The Video below is from YouTuber Memoji Karaoke, enjoy.
What Exactly is The Difference Between Animojis and Memojis?
Animojis and Memojis have taken the world by storm since the first iPhone X model was released back in 2017. Both animojis and memojis utilize facial recognition technologies to track your movements and facial expressions and imitate them in a virtual environment. However, an animoji is a 3D emoji like a monkey, koala, tiger or a unicorn, while memojis are fully customizable avatars that let you create a character from scratch.
Memojis enable you to choose the character’s skin color, head, nose, ear shape or hairstyle, meaning that you can create as many new characters as you want effortlessly. Furthermore, you can add stickers or apply up to five different filters to animojis and memojis you share with your friends.
See best Memoji makers here: Top 8 Memoji Makers to Make a Memoji on PC, Android, and iPhone.
How to Set Up and Create Memojis?
Owners of iPhone X, iPhone XS, iPhone XS Max, and iPadPro can easily make new memojis from their devices. All you have to do in order to start creating a new memoji is open the messaging app, locate the iMessage AppStore icon, tap on it and then tap on the Animoji icon. By doing so you will gain access to all animojis that are available on iOS 12 or other versions of the iOS that support memojis and animojis. After tapping on the New Memoji icon you will be able to see the default character you can customize as you see fit.
You can now get creative and pick one of the countless skin tones, choose how old your character is going to be or select any of the available head, nose and ear shapes. Moreover, you can customize the eye color for each character you create, add eyewear, or decide whether or not your character is going to have facial hair. Once you’re finished customizing a new memoji, simply tap on the Done button and the character you’ve created is going to be saved in your animoji collection. You can edit, duplicate or delete the memojis by tapping on the three dot icon or you can use them as camera overlays and share them with your friends.
How to Make a Memoji or Animoji Karaoke Music Video?
Once you’ve created a memoji you will have to record thirty-second videos in order to be able to send them as messages. After the recording session is completed, you can review the material you’ve produced, and decide if you are happy with the result or if you want to do another take. The only downside is that you can’t play music from your iPhone or your iPad while you’re recording, which means that you have to play the song you want to cover from another device such as a computer or the stereo system.
Read this article to learn more about Animoji: The Ultimate Guide of How to Use Animoji on iPhone X.
It is worth noting that knowing the lyrics of the song is going to improve the quality of the karaoke music video you’re producing significantly, so rehearsing a song few times before you hit the record button may be a good idea if you don’t know its lyrics by heart.
When you’re ready, launch the iMessage app and choose an animoji or memoji character you’re going to be in the video. Don’t record karaoke videos in the full-screen mode because the record button is going to cover a significant portion of the screen, which can complicate the video editing process. Optionally, you download and install the Animoji Studio app if you want to record videos that are longer than thirty seconds, but you might need some time to get used to making karaoke videos with this app.
Proceed to record your 30-second video or activate the Screen Recording option from the Control Center if you want to capture a karaoke video that exceeds that limit. If you like the results you can simply send the video you’ve created as a message, but you can also transfer the file to your computer and edit from a video editing software like Filmora.
Import the memoji video file you’ve transferred to your computer into Filmora after you’ve created a new project. You can do this from the software’s Media panel by clicking on the Import drop-down menu and choosing the Import Media Files option. Place the video file on the timeline and then cut or trim all parts of the clip you don’t want to include in the final cut of your memoji karaoke video. Filmora offers a vast number of different opening titles, end credits, audio and visual effects and transitions that can all help you create a visually attractive karaoke video.
Moreover, you can duplicate an animoji or memoji and create a duet in just a few simple clicks. The editor’s powerful audio editing tools enable you to add a high-quality audio file to your project or sound effects that can make your video more entertaining. Click on the Export button to choose the output destination, format, resolution and aspect ratio for the karaoke video you’ve just created. Filmora lets you export videos directly to your YouTube or Vimeo channel, which can be quite handy if you want to share your memoji videos online immediately after you’ve completed the video editing process.
List of iPhones and iPads that Support Animojis and Memojis
| Face ID | Animoji | Memoji |
|---|---|---|
| iPhone X | iPhone X | iPhone X (iOS 12 or later required) |
| iPhone XR | iPhone XR | iPhone XR |
| iPhone XS | iPhone XS | iPhone XS |
| iPhone XS Max | iPhone XS Max | iPhone XS Max |
| iPad Pro 12.9-inch (3rd generation) | iPad Pro 12.9-inch (3rd generation) | iPad Pro 12.9-inch (3rd generation) |
| iPad Pro 11-inch or above | iPad Pro 11-inch | iPad Pro 11-inch |
Unfortunately, Face ID feature, as well as animojis and memojis, are relatively novel additions on iOS-based devices, and you won’t be able to create memoji or animoji karaoke videos from the iMessages app unless you have one of the following iPhone or iPad models.
The list of iPhone and iPad models that offer the Face ID, Animoji and Memoji Features
Older models of iPhones, iPods, and iPads that have the latest version of iOS installed can only receive animoji and memoji messages, but it is not possible to create these messages with them. In case you are using an older model of an iPhone or an iPad but you still want to create animoji and memoji karaoke videos you can find a simple solution to your problem below.
Supermoji – The Emoji App
A powerful and intuitive app like Supermoji enables you to create karaoke music videos that feature your favorite animoji and memoji characters with ease. Creating animated 3D models won’t take too much of your time if you choose to download and install this app on your device, but after a three-day trial period, you’ll have to opt for one of the available subscription models. A weekly subscription costs $9.99, while you must pay $29.99 for a monthly subscription, which makes the Supermoji app a bit pricy. Alternatively, you can try Facemoji or Emoji Face Recorder apps, but the results you’ll get can be a bit underwhelming when compared to the animojis and memojis created from the iMessages app.
Conclusion
Creating funny animoji and memoji karaoke music videos is a new trend that can only grow in popularity in the future. However, this feature is only available on recent iPhone and iPad models, but there are a number of third-party apps that enable you to create this type of video even if you are using an older iPhone or iPad model. Do you like using memoji and animoji animations to create karaoke videos you share with your friends on social media? Leave a comment below and share your opinions with us.
Liza Brown
Liza Brown is a writer and a lover of all things video.
Follow @Liza Brown
Also read:
- [Updated] 2024 Approved Crafting Quality Content for YouTube Success
- [Updated] 2024 Approved Crafting Timeless Videos with Historical Flair
- [Updated] 2024 Approved Mastering Audio Capture From Skype for MP3
- [Updated] In 2024, Commencing a Community Benefit Contest Online
- Amplify Your Business Through Effective Use of Top 15 FB Analyzers
- Bandicam Revolutionizing Screen Capture for Modern Media for 2024
- Crafting a Champion: Critical Settings to Customize in FPS Games
- In 2024, 6 Popular Animated Emoji Video Effects
- Is This a Pigeon Meme Generator for 2024
- New 2024 Approved 10 Best Work Memes to Have Fun in Work Days
- New How to Make a Memorable Honeymoon Video for 2024
- New In 2024, Best Emoji Removers to Remove Emojis From Pictures
- Ultimate Tutorial for Using Windows Movie Maker on Windows 10 and 11 Systems
- Updated FREE 10 Websites to Watch Cartoon Online in HD
- Updated How to Make Memoji Talk-Make Memoji Video On Your Own for 2024
- Updated In 2024, Burn Photos to DVD | How to Burn Photos to DVD with Transitions and Music
- Your Ultimate Checklist for Channel Buying Success
- Title: New In 2024, Top 10 Storyboarding Software
- Author: Jan
- Created at : 2025-02-16 17:45:09
- Updated at : 2025-02-19 17:42:24
- Link: https://meme-emoji.techidaily.com/new-in-2024-top-10-storyboarding-software/
- License: This work is licensed under CC BY-NC-SA 4.0.