
New In 2024, How to Make a Video Meme with 4 Best Meme Video Makers
How to Make a Video Meme with 4 Best Meme Video Makers
How to Make a Video Meme with 4 Best Meme Video Makers

Ollie Mattison
Mar 27, 2024• Proven solutions
Being a new trend in the market, memes are ruling the Internet like never before. If you want to make your own video meme and facing issues in that, then you have reached the right place. You don’t need to be a pro at graphics or video editing . All that you need is a preferred video and the content you want to use along with as text and the rest is a smooth walk.
In this article, we are going to explain you, how to create memes using videos in different ways. Stay tuned for more!
- Part1: How to create a video meme with Filmora meme maker
- Part2: How to create a video meme with Filmora online meme maker
- Part3: How to create a video meme with Kapwing
- Part4: How to create a video meme with Blurbiz
Part 1: How to create a video meme with Filmora meme maker
You can also create a more vivid video meme with Filmora meme maker . It is such a handy video editing tool which enables you to create your own meme in just three steps. You can download the software first and follow the steps below:
Read more: Easy Steps to Create a Meme [Photo & Video Memes]
Part 2: How to create a video meme with Filmora online meme maker
If you are unsure about how to make video memes without download software, then rush to Filmora online meme maker . It would certainly help you to the great extent. This online meme maker can create image, GIF, and video memes with interesting fonts.
It processes videos memes faster than the counterparts. It comes with advanced decoder and encoder for fast action. You can directly upload videos using URL. The output formats are flexible and you can convert video to GIF. You can add text, edit fonts and move them freely as you desire. More importantly, no watermark in the outputted video.
Here is the guide for creating best video meme using Filmora online meme maker –
Step 1: Browse the official website to access Filmora online meme maker. Drag and drop or click to import video. Filmora meme maker can decode the video from the uploaded link itself.

Step 2: Navigate to the meme editor page once you have selected the video (GIF/image as well). From the left panel, customize your video meme. You can use Filmora video trimmer for cutting the video to fit your needs. Add text, alter fonts and preview the changes.

Step 3: Once you are done with your editing, click on the ‘CREATE’ button and let the change get applied on your video meme. Hit ‘DOWNLOAD’ after that and share your video meme on Facebook, Instagram, or Reddit.

Part 3: How to create a video meme with Blurbiz
When you want to make your own video meme, Blurbiz can also come in handy. However, it requires you to sign up first to use. The process needs you to first signup using your company name, name, email ID and password. Then the confirmation link is sent to your email. Once you tap the link then only your account gets activated. The free trial is available only for a week. You can create a video, image or GIF meme. It allows you to add content, drag and drop text, adjust it before saving it.
Here is a quick guide –
Step 1: Browse Blurbiz first and then enter name, email, password, and company name and press ‘Sign Up’.
Step 2: Once the confirmation mail is sent to your email, click the link to activate your user ID. You will be guided to the main page of the program. Click ‘Create Project’ and hit ‘Create’ after selecting a name.
Step 3: Click ‘+ Add Media Files’ and select a video. Tap ‘Open’ to upload video and then hit ‘EDIT’. Press the ‘Text’ tab and then edit and add various texts. Click ‘Complete’ and then ‘Download’ once the video is processed.
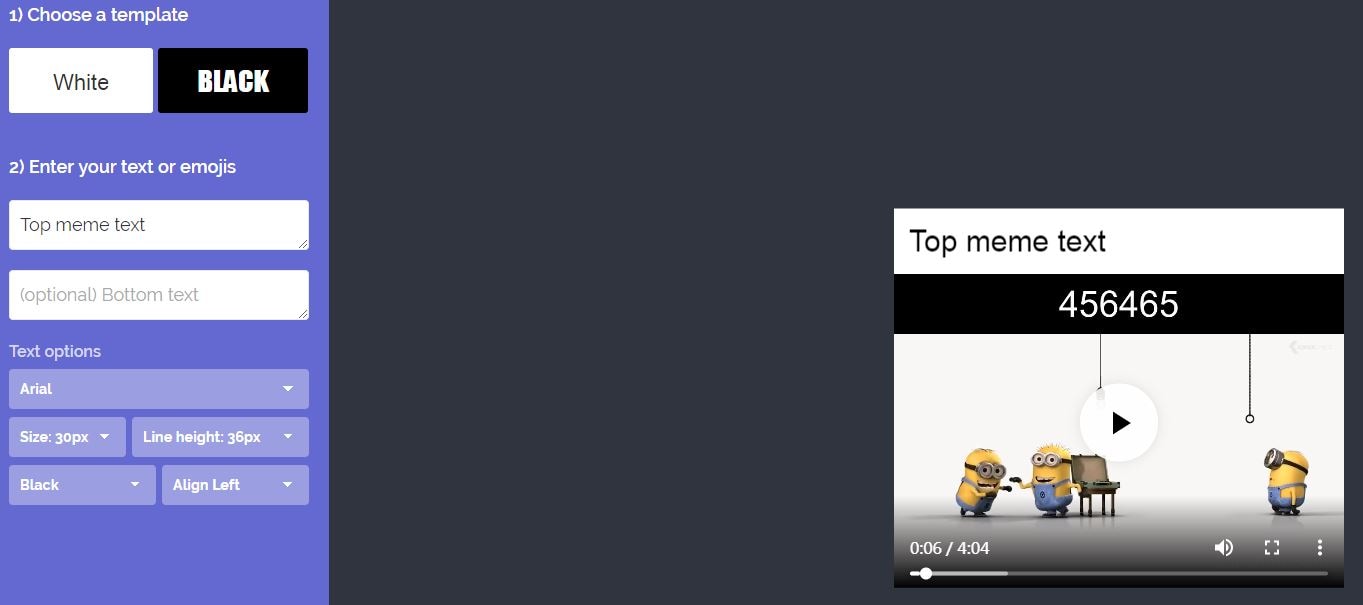
Part 4: How to create a video meme with Kapwing
Kapwing is one of the online meme video makers. It can also create memes with images. Though, it is a free meme maker, it will have a watermark. If you want to have the watermark removed, you need to sign up for a subscription. Though, the regular version needs no login to edit or create memes. It takes lot of time to process and create a meme out of your video.
Here is the quick guide for Kapwing –
Step 1: Browse for Kapwing and then upload a video.
Step 2: Now, select a template ‘Black’ or ‘White’, enter header and footer text and emojis. Edit the text and define the font style, size and height.
Step 3: Hit the ‘CREATE’ button and wait till the output is generated. You need to wait and then tap ‘Download image’ to save the video meme on your PC.
Final Comments
Now that you are well aware of the process involving how to create a video meme, why don’t you start it with Filmora meme maker ?
As you know that, this is one of the most effective meme maker available in the market. It doesn’t require you to sign up and has a very intuitive interface too. All that you need to do is upload the video, add text, edit fonts and then you are all set with a rib tickling meme without watermark. You don’t need to download the software.
Ollie Mattison
Ollie Mattison is a writer and a lover of all things video.
Follow @Ollie Mattison
Ollie Mattison
Mar 27, 2024• Proven solutions
Being a new trend in the market, memes are ruling the Internet like never before. If you want to make your own video meme and facing issues in that, then you have reached the right place. You don’t need to be a pro at graphics or video editing . All that you need is a preferred video and the content you want to use along with as text and the rest is a smooth walk.
In this article, we are going to explain you, how to create memes using videos in different ways. Stay tuned for more!
- Part1: How to create a video meme with Filmora meme maker
- Part2: How to create a video meme with Filmora online meme maker
- Part3: How to create a video meme with Kapwing
- Part4: How to create a video meme with Blurbiz
Part 1: How to create a video meme with Filmora meme maker
You can also create a more vivid video meme with Filmora meme maker . It is such a handy video editing tool which enables you to create your own meme in just three steps. You can download the software first and follow the steps below:
Read more: Easy Steps to Create a Meme [Photo & Video Memes]
Part 2: How to create a video meme with Filmora online meme maker
If you are unsure about how to make video memes without download software, then rush to Filmora online meme maker . It would certainly help you to the great extent. This online meme maker can create image, GIF, and video memes with interesting fonts.
It processes videos memes faster than the counterparts. It comes with advanced decoder and encoder for fast action. You can directly upload videos using URL. The output formats are flexible and you can convert video to GIF. You can add text, edit fonts and move them freely as you desire. More importantly, no watermark in the outputted video.
Here is the guide for creating best video meme using Filmora online meme maker –
Step 1: Browse the official website to access Filmora online meme maker. Drag and drop or click to import video. Filmora meme maker can decode the video from the uploaded link itself.
Step 2: Navigate to the meme editor page once you have selected the video (GIF/image as well). From the left panel, customize your video meme. You can use Filmora video trimmer for cutting the video to fit your needs. Add text, alter fonts and preview the changes.
Step 3: Once you are done with your editing, click on the ‘CREATE’ button and let the change get applied on your video meme. Hit ‘DOWNLOAD’ after that and share your video meme on Facebook, Instagram, or Reddit.
Part 3: How to create a video meme with Blurbiz
When you want to make your own video meme, Blurbiz can also come in handy. However, it requires you to sign up first to use. The process needs you to first signup using your company name, name, email ID and password. Then the confirmation link is sent to your email. Once you tap the link then only your account gets activated. The free trial is available only for a week. You can create a video, image or GIF meme. It allows you to add content, drag and drop text, adjust it before saving it.
Here is a quick guide –
Step 1: Browse Blurbiz first and then enter name, email, password, and company name and press ‘Sign Up’.
Step 2: Once the confirmation mail is sent to your email, click the link to activate your user ID. You will be guided to the main page of the program. Click ‘Create Project’ and hit ‘Create’ after selecting a name.
Step 3: Click ‘+ Add Media Files’ and select a video. Tap ‘Open’ to upload video and then hit ‘EDIT’. Press the ‘Text’ tab and then edit and add various texts. Click ‘Complete’ and then ‘Download’ once the video is processed.
Part 4: How to create a video meme with Kapwing
Kapwing is one of the online meme video makers. It can also create memes with images. Though, it is a free meme maker, it will have a watermark. If you want to have the watermark removed, you need to sign up for a subscription. Though, the regular version needs no login to edit or create memes. It takes lot of time to process and create a meme out of your video.
Here is the quick guide for Kapwing –
Step 1: Browse for Kapwing and then upload a video.
Step 2: Now, select a template ‘Black’ or ‘White’, enter header and footer text and emojis. Edit the text and define the font style, size and height.
Step 3: Hit the ‘CREATE’ button and wait till the output is generated. You need to wait and then tap ‘Download image’ to save the video meme on your PC.
Final Comments
Now that you are well aware of the process involving how to create a video meme, why don’t you start it with Filmora meme maker ?
As you know that, this is one of the most effective meme maker available in the market. It doesn’t require you to sign up and has a very intuitive interface too. All that you need to do is upload the video, add text, edit fonts and then you are all set with a rib tickling meme without watermark. You don’t need to download the software.
Ollie Mattison
Ollie Mattison is a writer and a lover of all things video.
Follow @Ollie Mattison
How to Make a Slideshow with Music
How to Make a Slideshow with Music

Shanoon Cox
Mar 27, 2024• Proven solutions
Nowadays, we tend to store our experiences of important occasions in photos and videos since cameras and camcorders are popular. To better preserve these sweet memories, make a slideshow with music, photos and videos is a good idea. It’s not as difficult as you think since all you need are: a good slideshow maker, photos and videos you want to show, music to go along with your slideshow. Here is a tutorial about how to make a slideshow with music with Wondershare Filmora video editor and Wondershare DVD Slideshow Builder .
Read more: 20 Best Slideshow Songs for Different Occasions [Royalty-Free]
How to create slideshow with music in Filmora?


Note: The video tutorial about how to make slideshow in minutes is created with the previous version of Filmora video editor. Most of the steps are similar and creating a music slideshow with the latest Filmora is very easy. As we said before, all you need is your photos and music tracks, then follow the steps below to start.
Step 1. Download Filmora and Run it
Click the Free Download button above to download and install Wondershare Filmora on your computer and then launch it.
In case you want to change the default aspect ratio setting in the splash screen, you can choose 9:16 for portrait mode, 1:1 for Instagram slideshow and more. And then click New Project to create a project to continue.
Step 2. Import Photos and Music
After that, you need to import all your photo and music media to the Media Library and then drag and drop them to the timeline directly. Filmora allows you to change the order the photos in the timeline, and the photo duration as well.
You can also rotate photos and crop them manually to fit your project.
Note: If you find some black bar on your photos in preview, it is recommended to change Photo Placement to Crop and Zoom under Preference before drag-n-drop to timeline.
Step 3. Add Transitions

There are hundreds of transitions available in Filmora which you should totally have a try. You can apply a specific transition between each selected photo, or apply random transitions to selected photos.
Filmora features more than 30 transitions especially for Slideshow, such as cross merge, cross split, swap and sweep clockwise. Of course, you can also use some 3D transition, ripple and dissolve, or speed blur transitions.
You can also adjust the transition duration accordingly.
To make your photos slideshow looks better, it is highly recommended to apply filters and overlays effects.
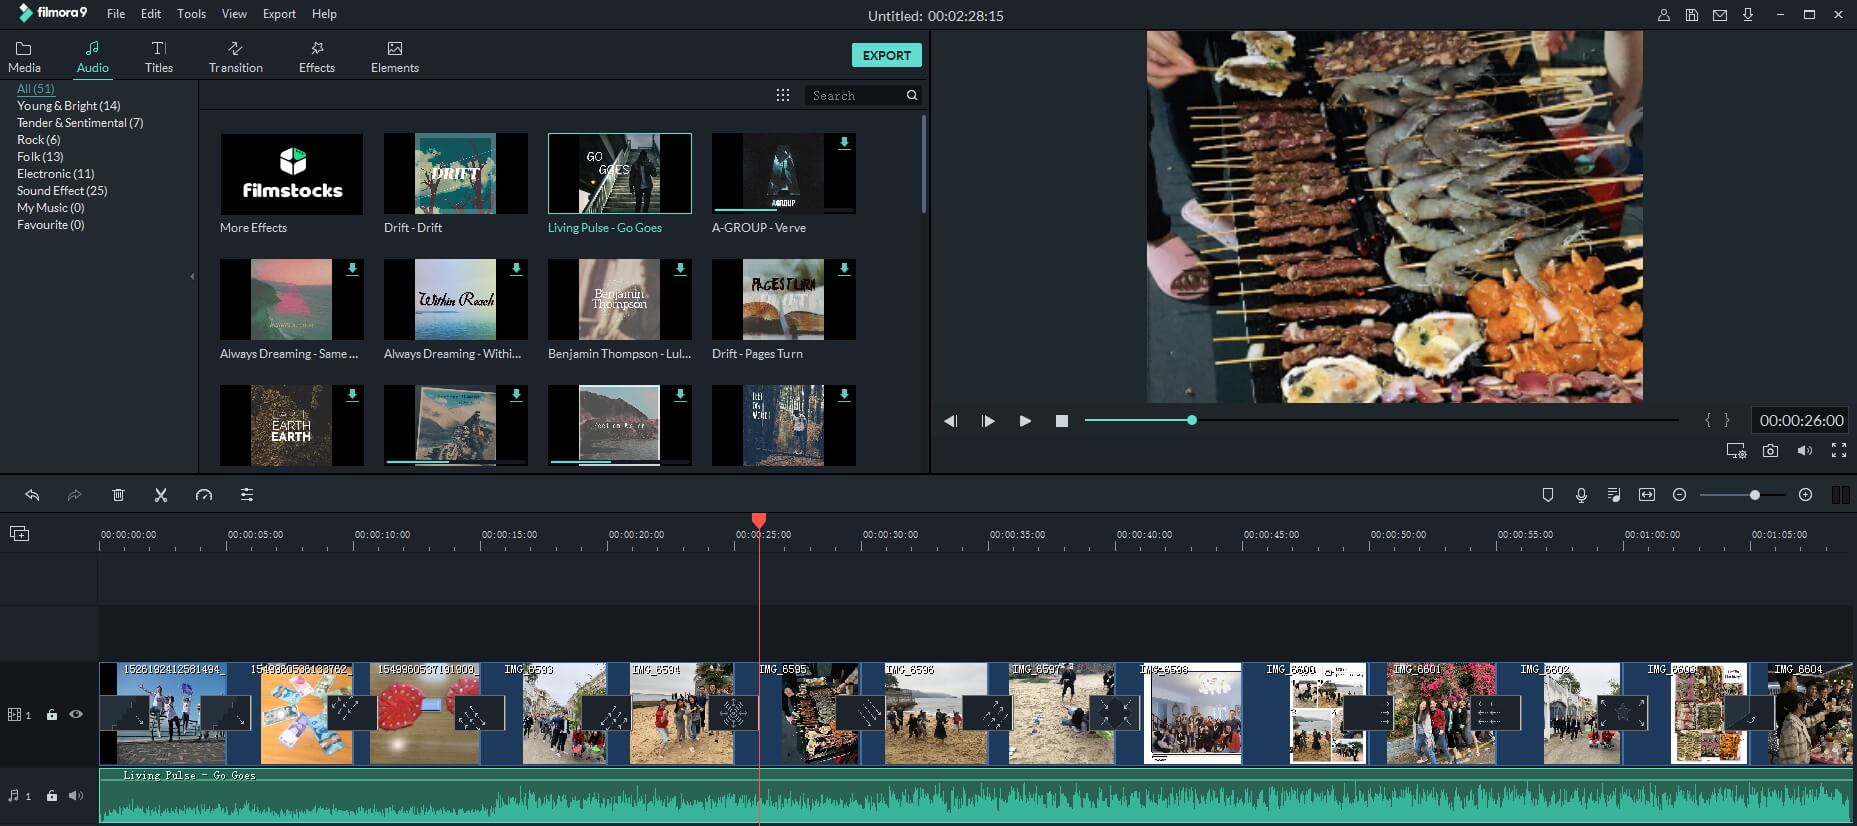
Step 4. Add background music
You can choose background music or sound effect from the inbuilt audio library in Filmora or drag and drop the music track file from computer to the timeline directly. Filmora features the voiceover recording tool which helps you to record your own voice easily.
Step 5. Export and Save
Finally, it’s time to save and export the music slideshow as you see fit. You have several options, you can save it on the computer in different formats, or you can share it to YouTube or Vimeo directly, or you can burn it to DVD.
Why choose Filmora to create music slideshow?
- Filmora supports most of popular image formats such as .jpg, .png, .bmp, .gif, .tif, and .tiff.
- Filmora allows you to crop, pan & zoom the slideshow manually or automatically by applying Pan & Zoom Photo Placement.
- Filmora has inbuilt music track and sound effect library, and stunning transitions, effects and elements presets.
- Filmora allows you to record your own voiceover and apply fade in and fade out effects.
- Besides creating photo slideshow, you can use it to create videos for both your YouTube marketing, daily sharing and business.
How to make a slideshow with DVD Slideshow Builder

Tips for Make a Slideshow with Music
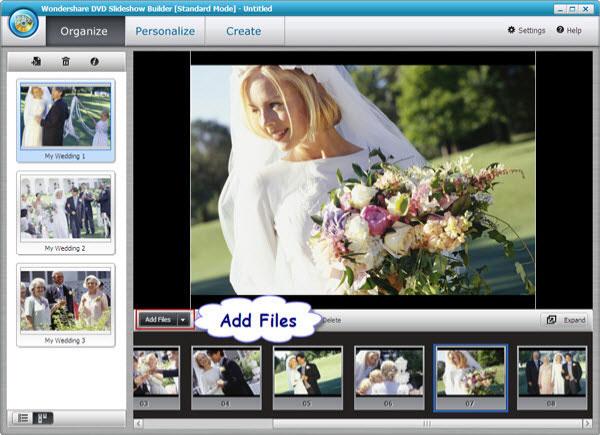
1. Install slideshow software and import photos and videos
Install the software and import your digital photos to the storyboard by clicking ‘“Add Files” (there is no quantity limitation of photos). You can also add videos from computer or camera.
2. Add music to your photo slideshow
Go to the “Personalize” tab. Click “Music” toolbar to add background music or just drag the music to the background track. In the timeline, you can drag the slider to make the music best suit the photos and videos. If you need to edit the music, double click the clip and in the pop up window, trim music and adjust music volume as you like.
Tip: If you want to synchronize background music with the slideshow, click “Settings” (it’s on the right upper corner) and choose “Slideshow” tab, then tick the checkbox under the “Synchronize“. At last, click “OK” button.
3 .Select movie styles and add decorations
There are also 480+ free styles and transition effects that can be used for your picture slideshow with music in this tab. Choose your favorite styles and drag it on the photos. You can also add decoration text, clipart and effects on your digital photos. To make add more fun, you can also add intro movie and credit movie to your picture slideshow with music by clicking the “Intro/Credit” build-in button.

4 . Preview and save your slideshow with music
Go to “Publish” tab, you can preview the photo video by click the preview button first. Then publish it to the format you want. If you want to watch your photo slideshow with music to iPod or iPhone, you’d better publish it to MP4 format. This slideshow software also enables you to share your slideshow directly to YouTube by filling in the necessary information. Besides, you can burn DVD slideshow with music by clicking the “Burn to DVD” button and putting a DVD disc in your computer.
We shared two ways of making slideshow with music, whether you are using Filmora or DVD slideshow maker, leave a comment below and let me know your choice.
Shanoon Cox
Shanoon Cox is a writer and a lover of all things video.
Follow @Shanoon Cox
Shanoon Cox
Mar 27, 2024• Proven solutions
Nowadays, we tend to store our experiences of important occasions in photos and videos since cameras and camcorders are popular. To better preserve these sweet memories, make a slideshow with music, photos and videos is a good idea. It’s not as difficult as you think since all you need are: a good slideshow maker, photos and videos you want to show, music to go along with your slideshow. Here is a tutorial about how to make a slideshow with music with Wondershare Filmora video editor and Wondershare DVD Slideshow Builder .
Read more: 20 Best Slideshow Songs for Different Occasions [Royalty-Free]
How to create slideshow with music in Filmora?
Note: The video tutorial about how to make slideshow in minutes is created with the previous version of Filmora video editor. Most of the steps are similar and creating a music slideshow with the latest Filmora is very easy. As we said before, all you need is your photos and music tracks, then follow the steps below to start.
Step 1. Download Filmora and Run it
Click the Free Download button above to download and install Wondershare Filmora on your computer and then launch it.
In case you want to change the default aspect ratio setting in the splash screen, you can choose 9:16 for portrait mode, 1:1 for Instagram slideshow and more. And then click New Project to create a project to continue.
Step 2. Import Photos and Music
After that, you need to import all your photo and music media to the Media Library and then drag and drop them to the timeline directly. Filmora allows you to change the order the photos in the timeline, and the photo duration as well.
You can also rotate photos and crop them manually to fit your project.
Note: If you find some black bar on your photos in preview, it is recommended to change Photo Placement to Crop and Zoom under Preference before drag-n-drop to timeline.
Step 3. Add Transitions
There are hundreds of transitions available in Filmora which you should totally have a try. You can apply a specific transition between each selected photo, or apply random transitions to selected photos.
Filmora features more than 30 transitions especially for Slideshow, such as cross merge, cross split, swap and sweep clockwise. Of course, you can also use some 3D transition, ripple and dissolve, or speed blur transitions.
You can also adjust the transition duration accordingly.
To make your photos slideshow looks better, it is highly recommended to apply filters and overlays effects.
Step 4. Add background music
You can choose background music or sound effect from the inbuilt audio library in Filmora or drag and drop the music track file from computer to the timeline directly. Filmora features the voiceover recording tool which helps you to record your own voice easily.
Step 5. Export and Save
Finally, it’s time to save and export the music slideshow as you see fit. You have several options, you can save it on the computer in different formats, or you can share it to YouTube or Vimeo directly, or you can burn it to DVD.
Why choose Filmora to create music slideshow?
- Filmora supports most of popular image formats such as .jpg, .png, .bmp, .gif, .tif, and .tiff.
- Filmora allows you to crop, pan & zoom the slideshow manually or automatically by applying Pan & Zoom Photo Placement.
- Filmora has inbuilt music track and sound effect library, and stunning transitions, effects and elements presets.
- Filmora allows you to record your own voiceover and apply fade in and fade out effects.
- Besides creating photo slideshow, you can use it to create videos for both your YouTube marketing, daily sharing and business.
How to make a slideshow with DVD Slideshow Builder
Tips for Make a Slideshow with Music
1. Install slideshow software and import photos and videos
Install the software and import your digital photos to the storyboard by clicking ‘“Add Files” (there is no quantity limitation of photos). You can also add videos from computer or camera.
2. Add music to your photo slideshow
Go to the “Personalize” tab. Click “Music” toolbar to add background music or just drag the music to the background track. In the timeline, you can drag the slider to make the music best suit the photos and videos. If you need to edit the music, double click the clip and in the pop up window, trim music and adjust music volume as you like.
Tip: If you want to synchronize background music with the slideshow, click “Settings” (it’s on the right upper corner) and choose “Slideshow” tab, then tick the checkbox under the “Synchronize“. At last, click “OK” button.
3 .Select movie styles and add decorations
There are also 480+ free styles and transition effects that can be used for your picture slideshow with music in this tab. Choose your favorite styles and drag it on the photos. You can also add decoration text, clipart and effects on your digital photos. To make add more fun, you can also add intro movie and credit movie to your picture slideshow with music by clicking the “Intro/Credit” build-in button.
4 . Preview and save your slideshow with music
Go to “Publish” tab, you can preview the photo video by click the preview button first. Then publish it to the format you want. If you want to watch your photo slideshow with music to iPod or iPhone, you’d better publish it to MP4 format. This slideshow software also enables you to share your slideshow directly to YouTube by filling in the necessary information. Besides, you can burn DVD slideshow with music by clicking the “Burn to DVD” button and putting a DVD disc in your computer.
We shared two ways of making slideshow with music, whether you are using Filmora or DVD slideshow maker, leave a comment below and let me know your choice.
Shanoon Cox
Shanoon Cox is a writer and a lover of all things video.
Follow @Shanoon Cox
10 Most Popular Minion Memes that Moms Are Crazy About
10 Most Popular Minion Memes that Moms are Crazy About

Liza Brown
Mar 27, 2024• Proven solutions
Minions have successfully occupied global pop culture. In 2015, Universal Pictures made a record by spending $600 million on Minions marketing, partnering with Tic Tac, Converse, Amazon, and McDonald’s. In addition, minions were an inspiration for numerous products, creating a kind of signifier for their film and signifying a sense that they were “freaking everywhere.”
They’ve also infiltrated the Internet. The Minions’ abstractness let them known as ripe for meme-ing, which you can combine with any joke, idiom, or feeling.
A Minion meme is rarely crude, and generally, they are helpful for self-deprecating jabs or fart-jokes at one’s cooking.
Leading with the fact, we’ll discuss all the minion memes, how to make them, and their different types.
- Part 1: Who Invented Minion Memes?
- Part 2: Top 10 Minion Memes of 2021
- Part 3: Create Memes with a Free Minion Meme Generator
Part 1: Who Invented Minion Memes?
Who is to blame for pushing things down my throat day after day? It would be simple enough to blame Obama, Universal Studios, or even the guy who invented Minions, Pierre Coffin. But none of them is actually at fault. They were only providing humankind with the weapon, and humanity chose to use that evil weapon.
There have been loads of discussions about how Minions have dishonored the excellent name of the meme, rendering humor and creativity obsolete. But we are still entirely astonished as to why Minions shine from the big screen and leaked all over smartphones.
Part 2: Top 10 Minion Memes of 2021
The delayed-release “Minions: The Rise of Gru” is no laughing concern, but there’ll be miles into smiles with or top collection of minion memes that include all funny minion memes, Facebook minion memes, and more.
So, let’s dive into them without further ado!
1.Magnetos
We are all familiar with the “X-Men” installations/movies and the sometimes the supervillain and evil-doer Magneto, who is smart enough to control iron?
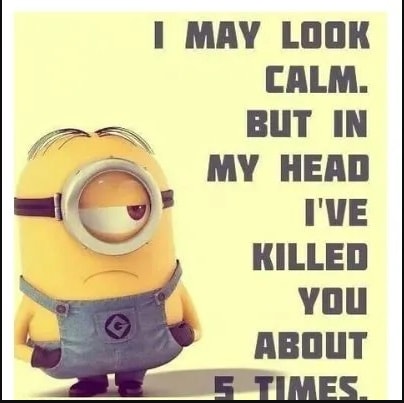
Source: sidomexentertainment.com
2.Cereal Killer
Cereal Killer is one of the most hilarious and well-thought-out Minion memes on the list.

Source: sidomexentertainment.com
3.Fall in Love
You will fall in love with this funny Facebook Minion meme. It begins slow; you can’t tell where it is heading to but grow; you are on the rolling floor.

4.A Minion poem
What’s the best way to include this cute, crazy evil minion poem? Enjoy!

5.Your Minions Would Like to Say Happy Birthday!!! - Happy Birthday Minion Meme

Source: 2happybirthday.com
6.Happy Birthday!! You are on in a Minion - Happy Birthday Minion Meme

7.Chasing my dream
You know, when people act some fantastic stuff but mean something else, like when they say “would die” if they don’t eat that Chicken kebab! Even though it uses the literal word, it does not mean they die over a chicken wing piece; they exaggerate.

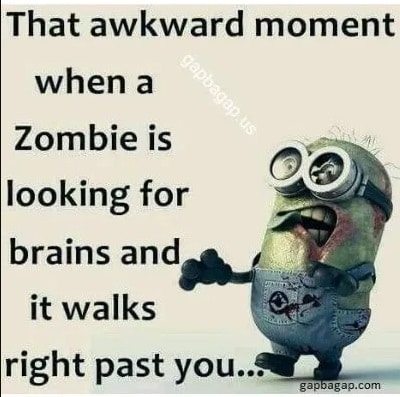
8.A Vegan Zombie
Ever met a zombie that hates meat? The one who likes to eat earthworms, grass, and grubs? Have you encountered a zombie? Well, we haven’t.
9.Best Cook
Nothing like a finger-licking dish for a healthy “roasted dinner.”

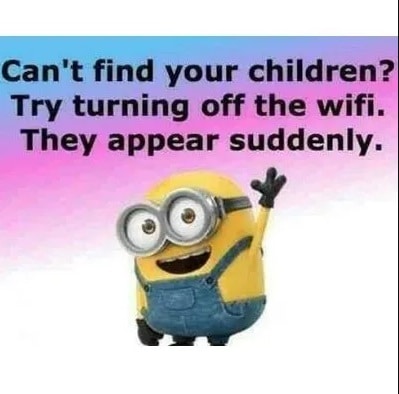
10.Mum Hack
So what’s the fastest way to get down the children? Well, that can be the mobile hotspot. Turn that beautiful technology on and look for the children to rush you for the password… True?
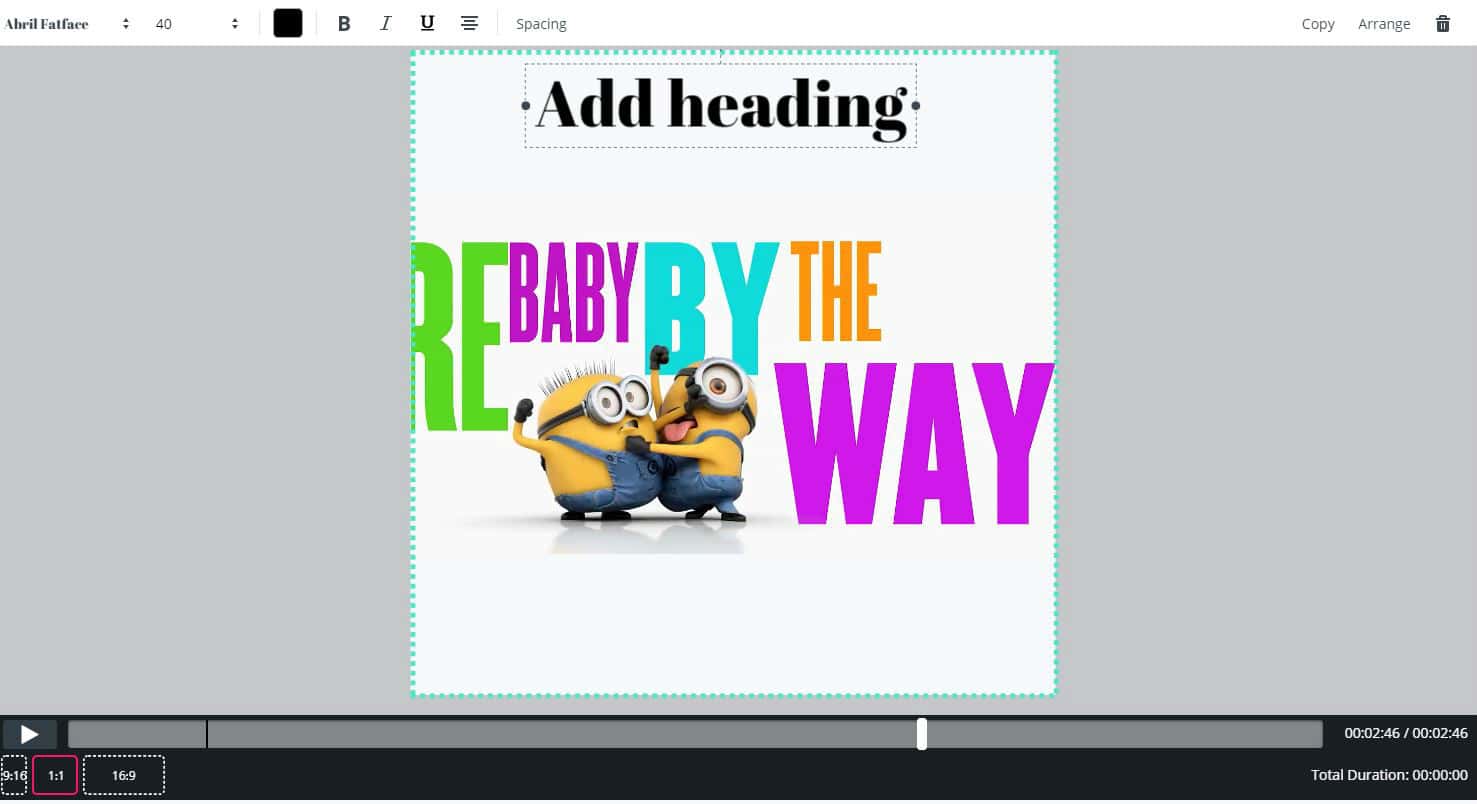
Part 3: Create Memes with a Free Minion Meme Generator
With memes taking over entirely famous culture, you may be looking for a minion meme generator for yourself. By considering the use o meme maker, you can do just that!
Filmora meme maker is a free minion meme generator without a watermark.
Also, there’s no need to log in or sign up first to use it. It supports importing an image, video, and GIF in one place. Just drag them to import, so simple to use. Essentially, if you want to choose a black or white background to input a caption, the Filmora minion meme generator can help you quickly.
You can change the text color, size, and position of your meme.
After editing is over, it allows you to export your work within a few seconds. In addition, you can also freely upload to some social media platforms, like IG, FB, and others.
- Enter text anywhere (inside and outside of image)
- Support exporting to popular video and photo formats, such as jpg, png, gif, mp4
- It is entirely free to use, without any subscription cost.
Conclusion
Finally, we all agree that Minions, undoubtedly, are adorable short-sized, yellow, and clumsy but cute creatures, which, if used properly for minion memes, can motivate, cheer and improve a person’s mood. They always try to shove in distinct words that generally make it a blow-off. And that can be awkward and odd as well.
However, as a bonus tip, we’ve mentioned all kinds of minion memes, including a free minion meme generator. So, try out these special memes through meme generators and let us know if you find our content helpful and valuable.
Liza Brown
Liza Brown is a writer and a lover of all things video.
Follow @Liza Brown
Liza Brown
Mar 27, 2024• Proven solutions
Minions have successfully occupied global pop culture. In 2015, Universal Pictures made a record by spending $600 million on Minions marketing, partnering with Tic Tac, Converse, Amazon, and McDonald’s. In addition, minions were an inspiration for numerous products, creating a kind of signifier for their film and signifying a sense that they were “freaking everywhere.”
They’ve also infiltrated the Internet. The Minions’ abstractness let them known as ripe for meme-ing, which you can combine with any joke, idiom, or feeling.
A Minion meme is rarely crude, and generally, they are helpful for self-deprecating jabs or fart-jokes at one’s cooking.
Leading with the fact, we’ll discuss all the minion memes, how to make them, and their different types.
- Part 1: Who Invented Minion Memes?
- Part 2: Top 10 Minion Memes of 2021
- Part 3: Create Memes with a Free Minion Meme Generator
Part 1: Who Invented Minion Memes?
Who is to blame for pushing things down my throat day after day? It would be simple enough to blame Obama, Universal Studios, or even the guy who invented Minions, Pierre Coffin. But none of them is actually at fault. They were only providing humankind with the weapon, and humanity chose to use that evil weapon.
There have been loads of discussions about how Minions have dishonored the excellent name of the meme, rendering humor and creativity obsolete. But we are still entirely astonished as to why Minions shine from the big screen and leaked all over smartphones.
Part 2: Top 10 Minion Memes of 2021
The delayed-release “Minions: The Rise of Gru” is no laughing concern, but there’ll be miles into smiles with or top collection of minion memes that include all funny minion memes, Facebook minion memes, and more.
So, let’s dive into them without further ado!
1.Magnetos
We are all familiar with the “X-Men” installations/movies and the sometimes the supervillain and evil-doer Magneto, who is smart enough to control iron?
Source: sidomexentertainment.com
2.Cereal Killer
Cereal Killer is one of the most hilarious and well-thought-out Minion memes on the list.
Source: sidomexentertainment.com
3.Fall in Love
You will fall in love with this funny Facebook Minion meme. It begins slow; you can’t tell where it is heading to but grow; you are on the rolling floor.
4.A Minion poem
What’s the best way to include this cute, crazy evil minion poem? Enjoy!
5.Your Minions Would Like to Say Happy Birthday!!! - Happy Birthday Minion Meme
Source: 2happybirthday.com
6.Happy Birthday!! You are on in a Minion - Happy Birthday Minion Meme
7.Chasing my dream
You know, when people act some fantastic stuff but mean something else, like when they say “would die” if they don’t eat that Chicken kebab! Even though it uses the literal word, it does not mean they die over a chicken wing piece; they exaggerate.
8.A Vegan Zombie
Ever met a zombie that hates meat? The one who likes to eat earthworms, grass, and grubs? Have you encountered a zombie? Well, we haven’t.
9.Best Cook
Nothing like a finger-licking dish for a healthy “roasted dinner.”
10.Mum Hack
So what’s the fastest way to get down the children? Well, that can be the mobile hotspot. Turn that beautiful technology on and look for the children to rush you for the password… True?
Part 3: Create Memes with a Free Minion Meme Generator
With memes taking over entirely famous culture, you may be looking for a minion meme generator for yourself. By considering the use o meme maker, you can do just that!
Filmora meme maker is a free minion meme generator without a watermark.
Also, there’s no need to log in or sign up first to use it. It supports importing an image, video, and GIF in one place. Just drag them to import, so simple to use. Essentially, if you want to choose a black or white background to input a caption, the Filmora minion meme generator can help you quickly.
You can change the text color, size, and position of your meme.
After editing is over, it allows you to export your work within a few seconds. In addition, you can also freely upload to some social media platforms, like IG, FB, and others.
- Enter text anywhere (inside and outside of image)
- Support exporting to popular video and photo formats, such as jpg, png, gif, mp4
- It is entirely free to use, without any subscription cost.
Conclusion
Finally, we all agree that Minions, undoubtedly, are adorable short-sized, yellow, and clumsy but cute creatures, which, if used properly for minion memes, can motivate, cheer and improve a person’s mood. They always try to shove in distinct words that generally make it a blow-off. And that can be awkward and odd as well.
However, as a bonus tip, we’ve mentioned all kinds of minion memes, including a free minion meme generator. So, try out these special memes through meme generators and let us know if you find our content helpful and valuable.
Liza Brown
Liza Brown is a writer and a lover of all things video.
Follow @Liza Brown
Top 10 Storyboarding Software [Free&Paid]
Top 10 Storyboarding Software in 2024
Liza Brown
Mar 27, 2024• Proven solutions
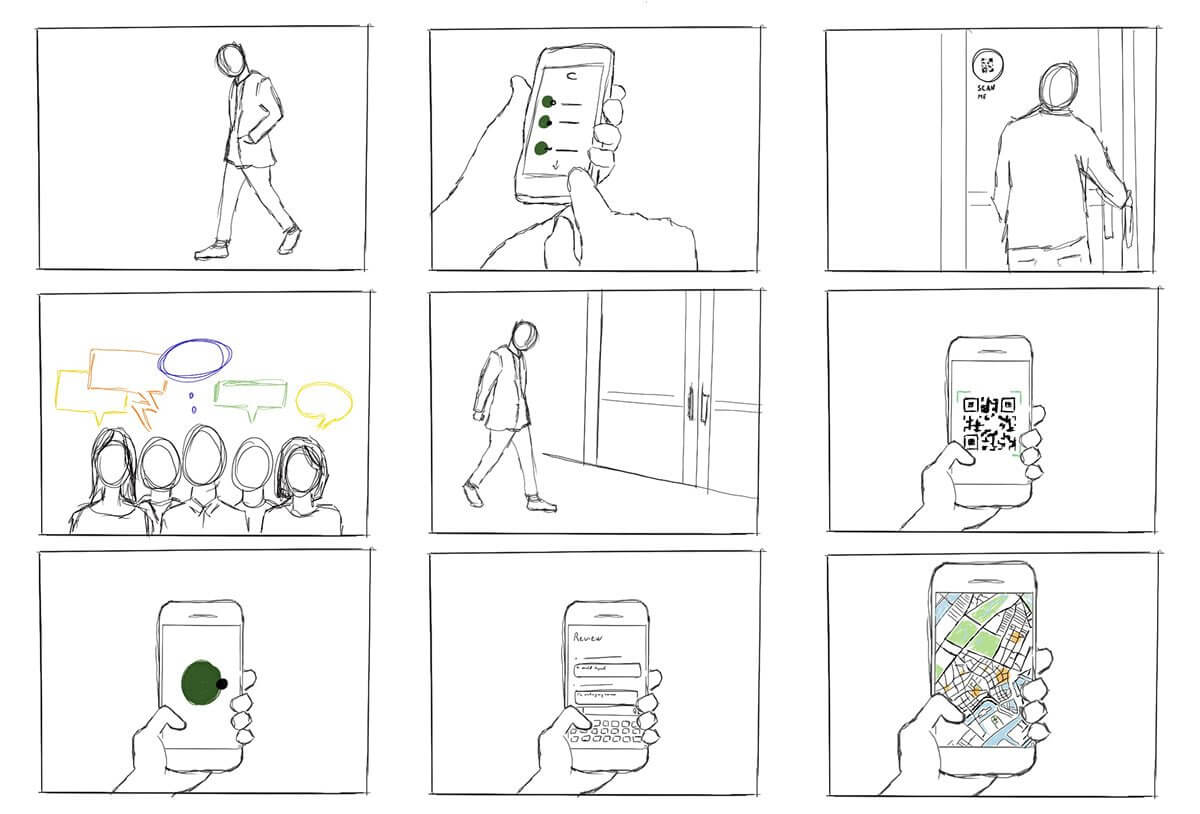
Several different creative sectors rely on storyboarding for their creative process, including filmmakers and animators and UX designers, game designers, and creative directors. However, the process of hand-drawing each frame or shot can take a great deal of time if you have to do it by hand. Our goal is to make storyboarding easier and more efficient by bringing you this list of free and paid tools, storyboarding software, and apps.
You can add text, sound, and script to your original sketches with these tools (or make use of assets from a library if you do not have time to sketch your own). Alternatively, you can share your storyboarding progress within the project, either by a link or a PDF - or get immediate feedback. Finally, you can continue working from anywhere with apps that work across multiple devices - desktop, mobile, and tablet.
No matter what kind of tool you prefer, from a simple 2D sketch tool like Make Storyboard to a 3D drawing tool like Storyboard Pro, you’ll find the best options on this page.
You might be interested in:
1. Storyboarder by Wonder Unit
Price: Free
Platforms: Windows, Mac, and Linux.
If you’re on a smaller budget, Storyboarder is an excellent option. It’s free and open-source. In the program’s clean interface, you have all the tools you need, so drawing shapes and characters is a breeze. In addition to writing dialogue, you can also enter timing information and the type of shot.
The Storyboarder and Photoshop apps integrate seamlessly, which means you can refine your board in Photoshop and have it updated in Storyboarder. In addition, you can export videos to Premiere, Final Cut, Avid, PDF, or Animated GIF from this software.
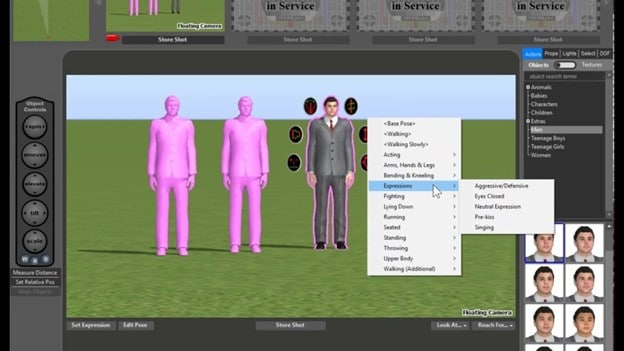
2. Toon Boom Storyboard Pro
Price: $60/mo or $999 one-time fee
Platforms: Mac, Windows
Toon Boom Storyboard Pro is the complete opposite of free. A standout among storyboarding programs, it’s also one of the most expensive. However, in most studios, boarding and animating is done using Toon Boom, so you may want to learn about this if you’d like to break into the industry. As a result, the monthly fee is a lot lower than the initial cost, allowing most people to take advantage of the service.
You can use Toon Boom for a month and test the waters before committing yourself to a huge license fee. How can you benefit from this program? Sketching and animation go hand-in-hand in this process. Drawing your boards and seeing how they would animate is a great way to test your script while making sure you’re on target with your scenes.
The program is primarily designed for animators. It can be used for ad agencies and for making small skits. Nevertheless, the Story Flow tool makes switching between board and script for writers incredibly easy. In addition to creating dynamic camera movements, you can also use some 3D effects that work well for 3D animators. Create layered panels in Photoshop quickly and easily by importing Final Draft scripts. There is plenty of support available for all the common programs in the art industry.
3. Plot
Price: $10/month (14 days Free Trial Available)
Platforms: Windows, Linux, and Mac

Storytelling is super easy with the plot. There are no limits to the number of boards, projects, and users you can have. With some nice features targeted toward animators, it is a web-based storyboarding app for beginners.
A drawing pane is available on whichever operating system you run this program on. Drawing your frames this way also lets you add dialogues and stage directions directly to your project. In addition, it is easy to move through different scenes in the app because it is visual. You can click and drag pieces around to change the scene. It couldn’t be easier.
In addition to the collaboration features, we consider it to be exceptional and above the norm for products in this price range. As long as you have a desktop program to work on your drawings, you’ll have more control. When you import the drawings into Plot, you can then arrange them accordingly. Hence, you’ve still got collaborative features with online management of very detailed drawings.
4. FrameForge Storyboard Studio
Price: $498.95 one-time fee or $12.99/month (Core Edition); $799 one-time fee or $24.99/month (Professional Edition)
Platforms: Windows, Mac, and Android.
Even without animation, drawing, or highly technical computer skills, your team can benefit from FrameForge, with HBO, Netflix, and BBC as users.
There are two versions of FrameForge’s product: Core and Professional. Professional offers planning capabilities (down to the inch) for dollies and cranes. Scripts from any program can be imported into the software. In addition to movement arrows, framing notes, angle of view, focal length, and more, the storyboards ensure that your video team understands all aspects of production, from preparation to post-production.
Mobile users can use it on any mobile device, and PowerPoint presentations can be downloaded as a final product. Team members who want to produce more elaborate and lengthy videos for entertainment purposes might find FrameForge useful.
5. Studiobinder
Price: $29/month (Indie); $49/month (Professional); $99/month (Studio) Free Trial is also available.
Platform: Windows, Linux, and Mac.
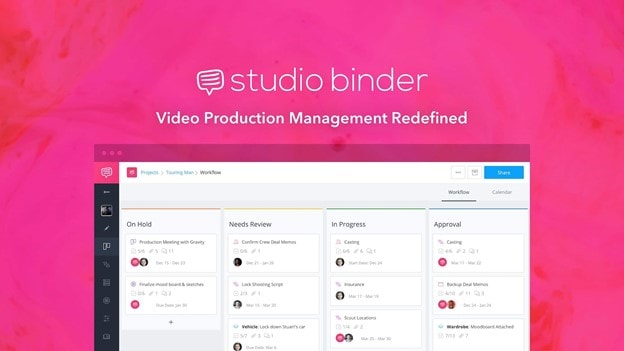
Visualizations can be personalized at every level in Studiobinder. Filters can be used to sort columns, order scenes, add images, adjust aspect ratios, color code images, and add notes to locations. In addition, project management features such as task assignment and commenting help Studiobinder make collaboration easy.
Also, the platform includes a handy presentation mode so you can show your team your projects. The company boasts impressive clients such as BuzzFeed, ESPN, and CBS Interactive. Team members who need to collaborate on various stages of the video production process and who prefer customizable tools should take advantage of this option.
6. Boords
Price: $12-$24/month
Platforms: Windows, Linux, and Mac

In the software industry, online SaaS products have quickly become the norm. While desktop programs are not going away, we see more and more web-based options such as Boards that provide unique solutions.
The Boards software is a native storyboard platform that provides tons of free templates and collaboration tools. In addition, clients can log into their projects and add comments directly from their computers.
For teams working together on a project, you may also set up multiple user accounts. Storyboards in Boords can be presented in animatic form before being animated, thanks to flexible frame sizes and tons of free templates.
Despite the affordable monthly price, this product works on every major operating system. It is rare to find a program that offers this much functionality at such an affordable price. Boords is an excellent solution for collaborative work. You can try it for a while until you decide if it’s right for you, but there is no commitment involved.
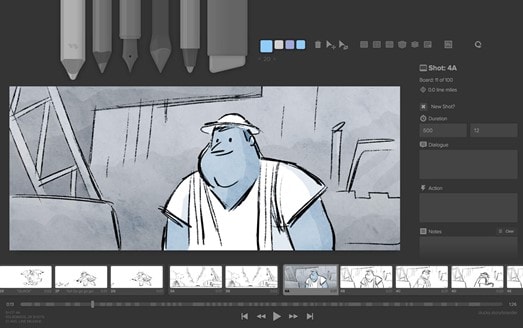
7. makeStoryboard
Price: Free; $12/month (Professional); $36/month (Team)
Platforms: Windows, and Mac.

MakeStoryboard provides a simple, straightforward interface for uploading camera shots, drawing stick figures with its built-in tool, and incorporating text for scene details if you are not interested in the fancier options in the list. In addition, any drawing tablet can be used with marker, pencil, and pen tools.
Additional details unique to your team and use case can also be entered in custom text fields. Then, using a PDF format, you can export your storyboard when you’re ready to pitch. Finally, stakeholders can review it using a private link without requiring an account in an alternative method. The best part is that it has a free subscription plan, making it an excellent option for teams on a small budget.
8. Canva
Price: Free
Platforms: Works on all major Operating Systems

It doesn’t have to be stressful to create a storyboard, and Canva makes it easy with a large library of templates, millions of stock photos (or the ability to upload your own), and color frames. The font type, colors, headers, and subheaders can be customized.
If you’re working on a script or design with someone else, you can grant access to collaborate, and when you’re done you can share the design through email or as a PDF. On the other hand, if your team needs an easy and simple tool to manage simpler projects or get started with storyboarding, this may be your best choice.
9. PanelForge
Price: Free (Public Beta); $7.31/month (Pro); $1,411/year (Studio)
Platforms: Works on all Major Operating Systems
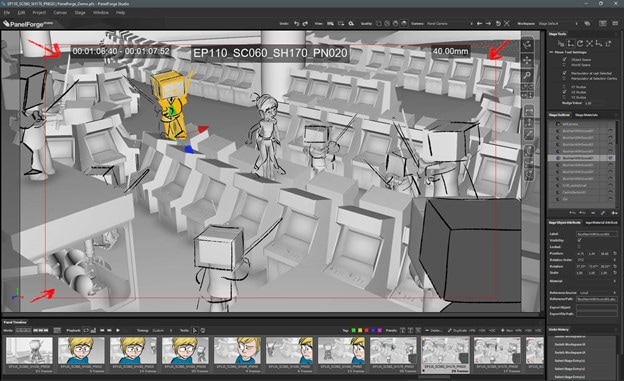
PanelForge delivers a feature-rich, drag-and-drop storyboarding solution with flexible frames and drag-and-drop tools. Storyboarding is free to try and offers a suite of paid plans for anyone working on animatics and more complex projects.
Drawings and 3D designs can both be created with PanelForge. Aside from creating animatics, you can also import and export files from Adobe Premiere and Final Cut Pro. The PanelForge tool is ideal for experienced marketers and storyboarders familiar with visualization tools.
10. Adobe Photoshop
Price: $9.99/mo
Platforms: Mac and Windows.
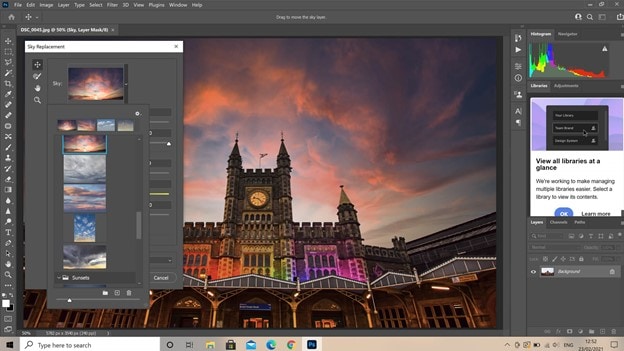
I think it will stay around for a long time. It’s been around for 20+ years. Yet, doesn’t it seem funny how Photoshop can be used for so much more than photo editing? In addition to storyboarding, we see it used for digital painting, pixel art, etc. The digital drawing capability of PS is the same as that of other programs. There are now more brushes available for the PS environment, so there’s even more support.
Additionally, you can download free storyboard templates in PSD format for Photoshop. This program doesn’t need too much explanation because every artist is already aware of it. However, Linux users are most likely to be disappointed by the lack of support.
Conclusion
So, these are some of the best free and paid to storyboard software that you can find in 2021. Each piece of software has its own characteristics and way of being used. In the end, it all depends upon your usage and preferences to decide which software you will use to achieve your goals. If you have enough budget then you can work with paid tools as they offer more features. If you have limited or no budget, you can try to free tools as they offer pretty good features.
Liza Brown
Liza Brown is a writer and a lover of all things video.
Follow @Liza Brown
Liza Brown
Mar 27, 2024• Proven solutions
Several different creative sectors rely on storyboarding for their creative process, including filmmakers and animators and UX designers, game designers, and creative directors. However, the process of hand-drawing each frame or shot can take a great deal of time if you have to do it by hand. Our goal is to make storyboarding easier and more efficient by bringing you this list of free and paid tools, storyboarding software, and apps.
You can add text, sound, and script to your original sketches with these tools (or make use of assets from a library if you do not have time to sketch your own). Alternatively, you can share your storyboarding progress within the project, either by a link or a PDF - or get immediate feedback. Finally, you can continue working from anywhere with apps that work across multiple devices - desktop, mobile, and tablet.
No matter what kind of tool you prefer, from a simple 2D sketch tool like Make Storyboard to a 3D drawing tool like Storyboard Pro, you’ll find the best options on this page.
You might be interested in:
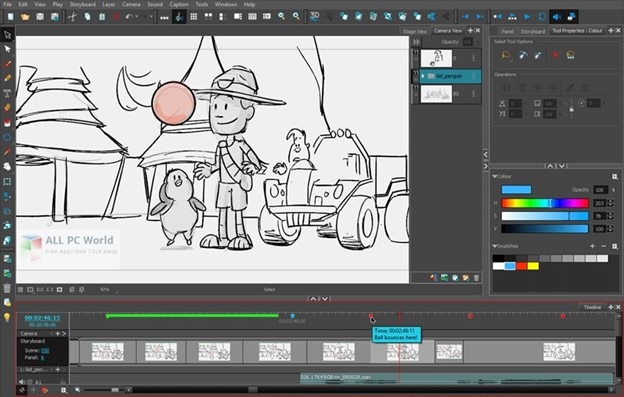
1. Storyboarder by Wonder Unit
Price: Free
Platforms: Windows, Mac, and Linux.
If you’re on a smaller budget, Storyboarder is an excellent option. It’s free and open-source. In the program’s clean interface, you have all the tools you need, so drawing shapes and characters is a breeze. In addition to writing dialogue, you can also enter timing information and the type of shot.
The Storyboarder and Photoshop apps integrate seamlessly, which means you can refine your board in Photoshop and have it updated in Storyboarder. In addition, you can export videos to Premiere, Final Cut, Avid, PDF, or Animated GIF from this software.
2. Toon Boom Storyboard Pro
Price: $60/mo or $999 one-time fee
Platforms: Mac, Windows
Toon Boom Storyboard Pro is the complete opposite of free. A standout among storyboarding programs, it’s also one of the most expensive. However, in most studios, boarding and animating is done using Toon Boom, so you may want to learn about this if you’d like to break into the industry. As a result, the monthly fee is a lot lower than the initial cost, allowing most people to take advantage of the service.
You can use Toon Boom for a month and test the waters before committing yourself to a huge license fee. How can you benefit from this program? Sketching and animation go hand-in-hand in this process. Drawing your boards and seeing how they would animate is a great way to test your script while making sure you’re on target with your scenes.
The program is primarily designed for animators. It can be used for ad agencies and for making small skits. Nevertheless, the Story Flow tool makes switching between board and script for writers incredibly easy. In addition to creating dynamic camera movements, you can also use some 3D effects that work well for 3D animators. Create layered panels in Photoshop quickly and easily by importing Final Draft scripts. There is plenty of support available for all the common programs in the art industry.
3. Plot
Price: $10/month (14 days Free Trial Available)
Platforms: Windows, Linux, and Mac
Storytelling is super easy with the plot. There are no limits to the number of boards, projects, and users you can have. With some nice features targeted toward animators, it is a web-based storyboarding app for beginners.
A drawing pane is available on whichever operating system you run this program on. Drawing your frames this way also lets you add dialogues and stage directions directly to your project. In addition, it is easy to move through different scenes in the app because it is visual. You can click and drag pieces around to change the scene. It couldn’t be easier.
In addition to the collaboration features, we consider it to be exceptional and above the norm for products in this price range. As long as you have a desktop program to work on your drawings, you’ll have more control. When you import the drawings into Plot, you can then arrange them accordingly. Hence, you’ve still got collaborative features with online management of very detailed drawings.
4. FrameForge Storyboard Studio
Price: $498.95 one-time fee or $12.99/month (Core Edition); $799 one-time fee or $24.99/month (Professional Edition)
Platforms: Windows, Mac, and Android.
Even without animation, drawing, or highly technical computer skills, your team can benefit from FrameForge, with HBO, Netflix, and BBC as users.
There are two versions of FrameForge’s product: Core and Professional. Professional offers planning capabilities (down to the inch) for dollies and cranes. Scripts from any program can be imported into the software. In addition to movement arrows, framing notes, angle of view, focal length, and more, the storyboards ensure that your video team understands all aspects of production, from preparation to post-production.
Mobile users can use it on any mobile device, and PowerPoint presentations can be downloaded as a final product. Team members who want to produce more elaborate and lengthy videos for entertainment purposes might find FrameForge useful.
5. Studiobinder
Price: $29/month (Indie); $49/month (Professional); $99/month (Studio) Free Trial is also available.
Platform: Windows, Linux, and Mac.
Visualizations can be personalized at every level in Studiobinder. Filters can be used to sort columns, order scenes, add images, adjust aspect ratios, color code images, and add notes to locations. In addition, project management features such as task assignment and commenting help Studiobinder make collaboration easy.
Also, the platform includes a handy presentation mode so you can show your team your projects. The company boasts impressive clients such as BuzzFeed, ESPN, and CBS Interactive. Team members who need to collaborate on various stages of the video production process and who prefer customizable tools should take advantage of this option.
6. Boords
Price: $12-$24/month
Platforms: Windows, Linux, and Mac
In the software industry, online SaaS products have quickly become the norm. While desktop programs are not going away, we see more and more web-based options such as Boards that provide unique solutions.
The Boards software is a native storyboard platform that provides tons of free templates and collaboration tools. In addition, clients can log into their projects and add comments directly from their computers.
For teams working together on a project, you may also set up multiple user accounts. Storyboards in Boords can be presented in animatic form before being animated, thanks to flexible frame sizes and tons of free templates.
Despite the affordable monthly price, this product works on every major operating system. It is rare to find a program that offers this much functionality at such an affordable price. Boords is an excellent solution for collaborative work. You can try it for a while until you decide if it’s right for you, but there is no commitment involved.
7. makeStoryboard
Price: Free; $12/month (Professional); $36/month (Team)
Platforms: Windows, and Mac.
MakeStoryboard provides a simple, straightforward interface for uploading camera shots, drawing stick figures with its built-in tool, and incorporating text for scene details if you are not interested in the fancier options in the list. In addition, any drawing tablet can be used with marker, pencil, and pen tools.
Additional details unique to your team and use case can also be entered in custom text fields. Then, using a PDF format, you can export your storyboard when you’re ready to pitch. Finally, stakeholders can review it using a private link without requiring an account in an alternative method. The best part is that it has a free subscription plan, making it an excellent option for teams on a small budget.
8. Canva
Price: Free
Platforms: Works on all major Operating Systems
It doesn’t have to be stressful to create a storyboard, and Canva makes it easy with a large library of templates, millions of stock photos (or the ability to upload your own), and color frames. The font type, colors, headers, and subheaders can be customized.
If you’re working on a script or design with someone else, you can grant access to collaborate, and when you’re done you can share the design through email or as a PDF. On the other hand, if your team needs an easy and simple tool to manage simpler projects or get started with storyboarding, this may be your best choice.
9. PanelForge
Price: Free (Public Beta); $7.31/month (Pro); $1,411/year (Studio)
Platforms: Works on all Major Operating Systems
PanelForge delivers a feature-rich, drag-and-drop storyboarding solution with flexible frames and drag-and-drop tools. Storyboarding is free to try and offers a suite of paid plans for anyone working on animatics and more complex projects.
Drawings and 3D designs can both be created with PanelForge. Aside from creating animatics, you can also import and export files from Adobe Premiere and Final Cut Pro. The PanelForge tool is ideal for experienced marketers and storyboarders familiar with visualization tools.
10. Adobe Photoshop
Price: $9.99/mo
Platforms: Mac and Windows.
I think it will stay around for a long time. It’s been around for 20+ years. Yet, doesn’t it seem funny how Photoshop can be used for so much more than photo editing? In addition to storyboarding, we see it used for digital painting, pixel art, etc. The digital drawing capability of PS is the same as that of other programs. There are now more brushes available for the PS environment, so there’s even more support.
Additionally, you can download free storyboard templates in PSD format for Photoshop. This program doesn’t need too much explanation because every artist is already aware of it. However, Linux users are most likely to be disappointed by the lack of support.
Conclusion
So, these are some of the best free and paid to storyboard software that you can find in 2021. Each piece of software has its own characteristics and way of being used. In the end, it all depends upon your usage and preferences to decide which software you will use to achieve your goals. If you have enough budget then you can work with paid tools as they offer more features. If you have limited or no budget, you can try to free tools as they offer pretty good features.
Liza Brown
Liza Brown is a writer and a lover of all things video.
Follow @Liza Brown
Liza Brown
Mar 27, 2024• Proven solutions
Several different creative sectors rely on storyboarding for their creative process, including filmmakers and animators and UX designers, game designers, and creative directors. However, the process of hand-drawing each frame or shot can take a great deal of time if you have to do it by hand. Our goal is to make storyboarding easier and more efficient by bringing you this list of free and paid tools, storyboarding software, and apps.
You can add text, sound, and script to your original sketches with these tools (or make use of assets from a library if you do not have time to sketch your own). Alternatively, you can share your storyboarding progress within the project, either by a link or a PDF - or get immediate feedback. Finally, you can continue working from anywhere with apps that work across multiple devices - desktop, mobile, and tablet.
No matter what kind of tool you prefer, from a simple 2D sketch tool like Make Storyboard to a 3D drawing tool like Storyboard Pro, you’ll find the best options on this page.
You might be interested in:
1. Storyboarder by Wonder Unit
Price: Free
Platforms: Windows, Mac, and Linux.
If you’re on a smaller budget, Storyboarder is an excellent option. It’s free and open-source. In the program’s clean interface, you have all the tools you need, so drawing shapes and characters is a breeze. In addition to writing dialogue, you can also enter timing information and the type of shot.
The Storyboarder and Photoshop apps integrate seamlessly, which means you can refine your board in Photoshop and have it updated in Storyboarder. In addition, you can export videos to Premiere, Final Cut, Avid, PDF, or Animated GIF from this software.
2. Toon Boom Storyboard Pro
Price: $60/mo or $999 one-time fee
Platforms: Mac, Windows
Toon Boom Storyboard Pro is the complete opposite of free. A standout among storyboarding programs, it’s also one of the most expensive. However, in most studios, boarding and animating is done using Toon Boom, so you may want to learn about this if you’d like to break into the industry. As a result, the monthly fee is a lot lower than the initial cost, allowing most people to take advantage of the service.
You can use Toon Boom for a month and test the waters before committing yourself to a huge license fee. How can you benefit from this program? Sketching and animation go hand-in-hand in this process. Drawing your boards and seeing how they would animate is a great way to test your script while making sure you’re on target with your scenes.
The program is primarily designed for animators. It can be used for ad agencies and for making small skits. Nevertheless, the Story Flow tool makes switching between board and script for writers incredibly easy. In addition to creating dynamic camera movements, you can also use some 3D effects that work well for 3D animators. Create layered panels in Photoshop quickly and easily by importing Final Draft scripts. There is plenty of support available for all the common programs in the art industry.
3. Plot
Price: $10/month (14 days Free Trial Available)
Platforms: Windows, Linux, and Mac
Storytelling is super easy with the plot. There are no limits to the number of boards, projects, and users you can have. With some nice features targeted toward animators, it is a web-based storyboarding app for beginners.
A drawing pane is available on whichever operating system you run this program on. Drawing your frames this way also lets you add dialogues and stage directions directly to your project. In addition, it is easy to move through different scenes in the app because it is visual. You can click and drag pieces around to change the scene. It couldn’t be easier.
In addition to the collaboration features, we consider it to be exceptional and above the norm for products in this price range. As long as you have a desktop program to work on your drawings, you’ll have more control. When you import the drawings into Plot, you can then arrange them accordingly. Hence, you’ve still got collaborative features with online management of very detailed drawings.
4. FrameForge Storyboard Studio
Price: $498.95 one-time fee or $12.99/month (Core Edition); $799 one-time fee or $24.99/month (Professional Edition)
Platforms: Windows, Mac, and Android.
Even without animation, drawing, or highly technical computer skills, your team can benefit from FrameForge, with HBO, Netflix, and BBC as users.
There are two versions of FrameForge’s product: Core and Professional. Professional offers planning capabilities (down to the inch) for dollies and cranes. Scripts from any program can be imported into the software. In addition to movement arrows, framing notes, angle of view, focal length, and more, the storyboards ensure that your video team understands all aspects of production, from preparation to post-production.
Mobile users can use it on any mobile device, and PowerPoint presentations can be downloaded as a final product. Team members who want to produce more elaborate and lengthy videos for entertainment purposes might find FrameForge useful.
5. Studiobinder
Price: $29/month (Indie); $49/month (Professional); $99/month (Studio) Free Trial is also available.
Platform: Windows, Linux, and Mac.
Visualizations can be personalized at every level in Studiobinder. Filters can be used to sort columns, order scenes, add images, adjust aspect ratios, color code images, and add notes to locations. In addition, project management features such as task assignment and commenting help Studiobinder make collaboration easy.
Also, the platform includes a handy presentation mode so you can show your team your projects. The company boasts impressive clients such as BuzzFeed, ESPN, and CBS Interactive. Team members who need to collaborate on various stages of the video production process and who prefer customizable tools should take advantage of this option.
6. Boords
Price: $12-$24/month
Platforms: Windows, Linux, and Mac
In the software industry, online SaaS products have quickly become the norm. While desktop programs are not going away, we see more and more web-based options such as Boards that provide unique solutions.
The Boards software is a native storyboard platform that provides tons of free templates and collaboration tools. In addition, clients can log into their projects and add comments directly from their computers.
For teams working together on a project, you may also set up multiple user accounts. Storyboards in Boords can be presented in animatic form before being animated, thanks to flexible frame sizes and tons of free templates.
Despite the affordable monthly price, this product works on every major operating system. It is rare to find a program that offers this much functionality at such an affordable price. Boords is an excellent solution for collaborative work. You can try it for a while until you decide if it’s right for you, but there is no commitment involved.
7. makeStoryboard
Price: Free; $12/month (Professional); $36/month (Team)
Platforms: Windows, and Mac.
MakeStoryboard provides a simple, straightforward interface for uploading camera shots, drawing stick figures with its built-in tool, and incorporating text for scene details if you are not interested in the fancier options in the list. In addition, any drawing tablet can be used with marker, pencil, and pen tools.
Additional details unique to your team and use case can also be entered in custom text fields. Then, using a PDF format, you can export your storyboard when you’re ready to pitch. Finally, stakeholders can review it using a private link without requiring an account in an alternative method. The best part is that it has a free subscription plan, making it an excellent option for teams on a small budget.
8. Canva
Price: Free
Platforms: Works on all major Operating Systems
It doesn’t have to be stressful to create a storyboard, and Canva makes it easy with a large library of templates, millions of stock photos (or the ability to upload your own), and color frames. The font type, colors, headers, and subheaders can be customized.
If you’re working on a script or design with someone else, you can grant access to collaborate, and when you’re done you can share the design through email or as a PDF. On the other hand, if your team needs an easy and simple tool to manage simpler projects or get started with storyboarding, this may be your best choice.
9. PanelForge
Price: Free (Public Beta); $7.31/month (Pro); $1,411/year (Studio)
Platforms: Works on all Major Operating Systems
PanelForge delivers a feature-rich, drag-and-drop storyboarding solution with flexible frames and drag-and-drop tools. Storyboarding is free to try and offers a suite of paid plans for anyone working on animatics and more complex projects.
Drawings and 3D designs can both be created with PanelForge. Aside from creating animatics, you can also import and export files from Adobe Premiere and Final Cut Pro. The PanelForge tool is ideal for experienced marketers and storyboarders familiar with visualization tools.
10. Adobe Photoshop
Price: $9.99/mo
Platforms: Mac and Windows.
I think it will stay around for a long time. It’s been around for 20+ years. Yet, doesn’t it seem funny how Photoshop can be used for so much more than photo editing? In addition to storyboarding, we see it used for digital painting, pixel art, etc. The digital drawing capability of PS is the same as that of other programs. There are now more brushes available for the PS environment, so there’s even more support.
Additionally, you can download free storyboard templates in PSD format for Photoshop. This program doesn’t need too much explanation because every artist is already aware of it. However, Linux users are most likely to be disappointed by the lack of support.
Conclusion
So, these are some of the best free and paid to storyboard software that you can find in 2021. Each piece of software has its own characteristics and way of being used. In the end, it all depends upon your usage and preferences to decide which software you will use to achieve your goals. If you have enough budget then you can work with paid tools as they offer more features. If you have limited or no budget, you can try to free tools as they offer pretty good features.
Liza Brown
Liza Brown is a writer and a lover of all things video.
Follow @Liza Brown
How to Make a Photo Collage on Mac/iPhone Using iPhoto?
How to Make a Photo Collage on Mac/iPhone Using iPhoto?
Shanoon Cox
Mar 27, 2024• Proven solutions
iPhoto is a photo library familiar to iOS users. It can help you easily organize, store and sort images, and even make a slide show to help you enjoy photos. This is why, even though Apple no longer develops iPhoto, some people use it.
Update: On April 8, 2015, Apple has launched a new Photos app on OS X Yosemite, which means Apple has stopped developing iPhoto. However, if you like iPhoto, you can still use it.
The following will introduce how to use the iPhoto collage maker on Mac or iPhone. At the end of this article, iPhoto alternative software will serve as your reference.
Part 1: How to Make a Photo Collage in iPhoto?
Here are the quick steps to create a photo collage with iPhoto.
Step 1: Launch iPhoto and click “Events” in the side menu.
Step 2: Hold “Shift” and click each photo you want to include in your photo collage.
Step 3: Click the “+” button in the lower-left corner and select Card in the pop-up window.
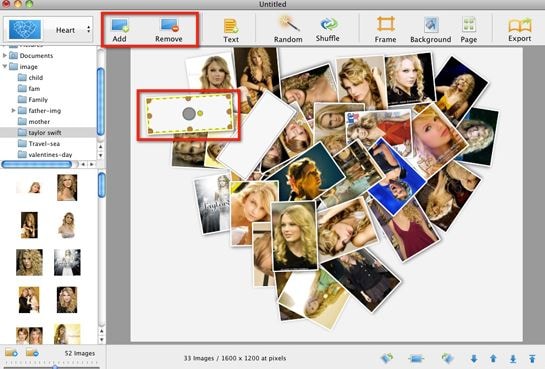
Step 4: Choose “Picture Collage”, which should be under the Any Occasion section if you are using the iPhoto 11.
Step 5: You’ll notice that all the templates are sorted based on the occasion.
Step 6: Drag photos to the template and pick a background, orientation and design.
Step 7: Click the Buy button on the lower right-hand corner of the collage editor, or go to the Share menu and email it to yourself or family members.
But before you make a photo collage using iPhoto, here are some important things for you to know:
- Technically, iPhoto can’t make fancy photo collages like other Photo collages makers on Mac. So don’t expect too much of it. iPhoto only creates greeting cards with a simple collage layout.
- The templates iPhoto offers are quite limited and ordinary that you might feel a little disappointed.
- iPhoto offers no share options to save photo collages to desktop or to post on Facebook, which is a basic feature of picture collage editor.
Part 2: What Replaces iPhoto on Mac/iPhone?
Since iPhoto’s functions are not sufficient, we will introduce some alternative collage makers that you may be interested in.
Alternative to Make a Short Video, Slideshow, or Photo Collage: Wondershare Filmora
If there are too many photos to save or share with friends and family, you can use these images to make short videos to better collage and share. Filmora can do this for you, through which you can easily crop, add effects, split the screen, and merge photos. In order to make the “photo video” lively and exciting, you can also add music, audio, animation, title, music, etc. to it.
Alternative to Organize, Store, and Sort Images: iCloud
Migrating your photos to iCloud is a wise choice. iCloud is the best photo storage for iOS or Mac users. You don’t need to download other apps or software. Just allow iCloud to back up the photo’s library in the settings.
The best thing is that you can view iCloud photos anytime and anywhere after logging in to your iCloud account. You can also automatically share photos with others by opening “Shared Album”. However, if there are too many photos, a paid subscription may be required to upgrade the storage space.
Conclusion
Above are the steps to make a photo collage using iPhoto on Mac/iPhone. We also list alternative methods to meet the different needs of the Photo library. So, if this isn’t quite what you’re looking for, you can also use some online photo collage service instead. If you want to have more fun editing photo stories, welcome to download Filmora and make more memorable and interesting videos.
Shanoon Cox
Shanoon Cox is a writer and a lover of all things video.
Follow @Shanoon Cox
Shanoon Cox
Mar 27, 2024• Proven solutions
iPhoto is a photo library familiar to iOS users. It can help you easily organize, store and sort images, and even make a slide show to help you enjoy photos. This is why, even though Apple no longer develops iPhoto, some people use it.
Update: On April 8, 2015, Apple has launched a new Photos app on OS X Yosemite, which means Apple has stopped developing iPhoto. However, if you like iPhoto, you can still use it.
The following will introduce how to use the iPhoto collage maker on Mac or iPhone. At the end of this article, iPhoto alternative software will serve as your reference.
Part 1: How to Make a Photo Collage in iPhoto?
Here are the quick steps to create a photo collage with iPhoto.
Step 1: Launch iPhoto and click “Events” in the side menu.
Step 2: Hold “Shift” and click each photo you want to include in your photo collage.
Step 3: Click the “+” button in the lower-left corner and select Card in the pop-up window.
Step 4: Choose “Picture Collage”, which should be under the Any Occasion section if you are using the iPhoto 11.
Step 5: You’ll notice that all the templates are sorted based on the occasion.
Step 6: Drag photos to the template and pick a background, orientation and design.
Step 7: Click the Buy button on the lower right-hand corner of the collage editor, or go to the Share menu and email it to yourself or family members.
But before you make a photo collage using iPhoto, here are some important things for you to know:
- Technically, iPhoto can’t make fancy photo collages like other Photo collages makers on Mac. So don’t expect too much of it. iPhoto only creates greeting cards with a simple collage layout.
- The templates iPhoto offers are quite limited and ordinary that you might feel a little disappointed.
- iPhoto offers no share options to save photo collages to desktop or to post on Facebook, which is a basic feature of picture collage editor.
Part 2: What Replaces iPhoto on Mac/iPhone?
Since iPhoto’s functions are not sufficient, we will introduce some alternative collage makers that you may be interested in.
Alternative to Make a Short Video, Slideshow, or Photo Collage: Wondershare Filmora
If there are too many photos to save or share with friends and family, you can use these images to make short videos to better collage and share. Filmora can do this for you, through which you can easily crop, add effects, split the screen, and merge photos. In order to make the “photo video” lively and exciting, you can also add music, audio, animation, title, music, etc. to it.
Alternative to Organize, Store, and Sort Images: iCloud
Migrating your photos to iCloud is a wise choice. iCloud is the best photo storage for iOS or Mac users. You don’t need to download other apps or software. Just allow iCloud to back up the photo’s library in the settings.
The best thing is that you can view iCloud photos anytime and anywhere after logging in to your iCloud account. You can also automatically share photos with others by opening “Shared Album”. However, if there are too many photos, a paid subscription may be required to upgrade the storage space.
Conclusion
Above are the steps to make a photo collage using iPhoto on Mac/iPhone. We also list alternative methods to meet the different needs of the Photo library. So, if this isn’t quite what you’re looking for, you can also use some online photo collage service instead. If you want to have more fun editing photo stories, welcome to download Filmora and make more memorable and interesting videos.
Shanoon Cox
Shanoon Cox is a writer and a lover of all things video.
Follow @Shanoon Cox
Best Emoji Removers to Remove Emojis From Pictures
Thanks to technology, editing photos have become easy. You can crop and rotate a photo, add filters, and even add emojis. While removing emojis is easy while you are editing an image and have not saved your work, but what if you have and want to get rid of the emojis you added to the picture? How to go about that?
So, if you want to remove an emoji from a picture and the picture is already saved, don’t worry; this post will help you learn about the top ways to remove it. Keep reading!
Related: How to Remove Unwanted Objects from Photo
In this article
01 Best Emoji Removers Online to Remove Emojis from Pictures
02 Best Emoji Removers on Windows/Mac Computer
03 Best Emoji Remover Apps on iPhone and Android
Part 1: Best Emoji Removers Online to Remove Emojis from Pictures
1. Inpaint
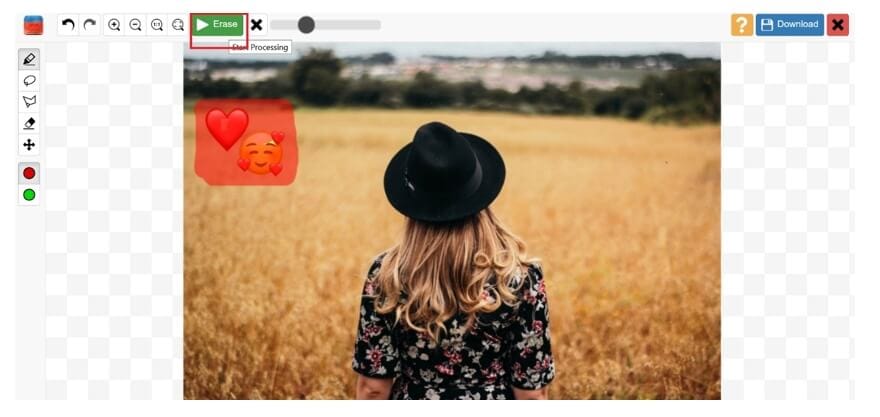
So, the first online emoji remover that you can try is Inpaint. This is a simple to use tool and will remove unwanted objects, such as emojis, from a picture by intelligently filling it with textures that match the surrounding image data.
The image formats Inpaint accepts are JPG, WebP, and PNG. Just remember to use only the recommended image formats, and you can start using them right away. You don’t need to log in or sign up to start using it.
Features
- An online tool that removes unwanted objects quickly.
- You don’t need to sign up or log in.
- It accepts JPG, PNG, and WebP formats.
- 4.2MP is the maximum image resolution.
Website: https://theinpaint.com/
2. Pixlr
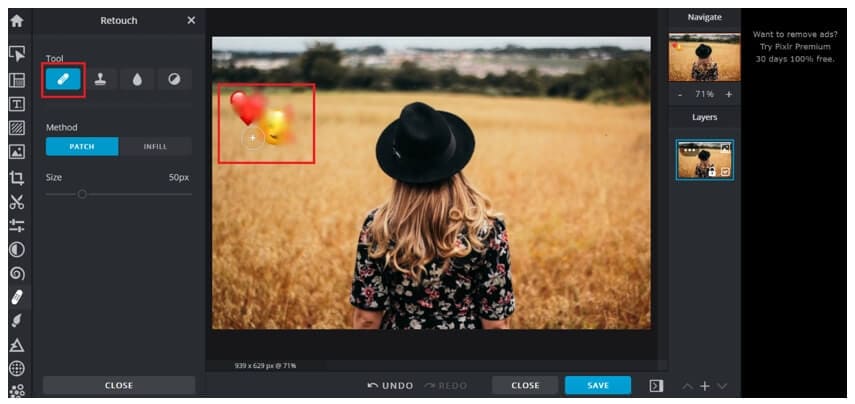
The next popular online tool is Pixlr. Pixlr is a popular photo editing tool that allows you to fix your pictures as well. You can use the tool online either using your computer web browser or mobile.
Whatever works for you. It doesn’t only let you remove emojis but erase background as well. But since you want to remove emojis, you will have to add the image and click on the retouch button from the toolbar. Then, you need to click on the image multiple times so that its surroundings overlap the emojis.
Features
- Pixlr can be used on both mobile and web browsers.
- Multiple photo editing tools are available.
- Removes emojis by blending them with the surroundings.
- Using Pixlr is easy and convenient.
Website: https://pixlr.com/
3. Fotor

Fotor is a professional photo editing tool, which lets you clone an emoji with a part of the image. The online tool asks you to sign up using your Google account to save your work. So, if you want to know how to remove emoji from a photo, you can use the clone feature.
Once you upload an image with emojis, move your cursor to the tool section in the left menu bar. Scroll down, and you will see the Clone option. Touch one part of the image that you want to use instead of the emoji. The first dot will be the area you want to clone and place the second dot on the emoji. And all done.
Website: https://www.fotor.com/
Features
- You can clone the emoji to remove it.
- A professional tool with lots of editing features.
- One needs to sign up or log in before using Fotor.
- The tool retains the original picture quality.
Related: Best Online Photo Editors
Part 2: Best Emoji Removers on Windows/Mac Computer
1. Adobe Photoshop
Adobe Photoshop is arguably one of the best photo editing tools that only allows you to enhance a photo but fix issues, such as removing emojis, unwanted objects, and so on. Adobe Photoshop is a professional tool and might not be the best for those new to it, but if you have used Adobe Photoshop earlier, you can use the Lasso Tool or the Marqueel Tool, which you will find on the left toolbar to remove emojis and unwanted items. Once done, save the image, and yes, the original picture quality will be retained.
Key Features
- A professional photo editing tool.
- It has multiple photo editing features and lets you remove emojis.
- You can draw on the emoji with a pen or pencil.
- It autosaves your work.
2. Wondershare Fotophire
Wondershare Fotophire is a fantastic photo editing tool that works magically on all kinds of images. Whether your photo is loaded with multiple emojis, you can remove them easily using Fotophire. If you are thinking about how to remove emojis from pictures using Fotophire, it’s pretty easy.
You need to clone any part of the image, and the tool will automatically use its algorithm to fill the emoji with its surroundings so that the filled area looks natural and blends well with the rest of the photo. Fotophire is a good option for both beginners and pros.
Key Features
- It removes all kinds of unwanted objects from an image, including emojis.
- Using Fotophire is easy and convenient.
- A good tool for both pros and beginners.
- Background doesn’t get impacted, and the original image quality remains intact.
3. GIMP
GIMP is a free and open-source photo editor, which allows you to remove emojis from a photo. It is available for Windows, macOS, GNU/Linux, and other operating systems. GIMP has been designed for everyone who would want their picture to look better.
If you wish to manipulate a high-quality image, you don’t have to worry about that because it accepts bigger-size photos as well. GIMP lets you clone an area and use that part on the emoji. You can also adjust the opacity of the cloned item depending on your requirements.
Key Features
- It lets you clone the surrounding area to hide an emoji.
- Accepts all the top image formats.
- It doesn’t pixelate the image after editing it.
- A free tool to use with lots of photo editing features.
4. Jihosoft Photo Eraser
Jihosoft Photo Eraser is a good photo editor tool that removes emojis or unwanted objects from an image by analyzing the surroundings. Once done, it will fill the selected emojis with the intelligently-generated textures. If you no longer want the emojis to be there is an image, Jihosoft Photo Eraser will be an ideal tool to use. The tool’s primary purpose is to remove unwanted items from an image, which is why it is an excellent software to go for.
Key Features
- It removes unwanted objects, such as emojis, from a photo.
- It allows the cloning of things to replace emojis.
- Using Jihosoft Photo Eraser is easy.
- The photo quality remains intact.
Part 3: Best Emoji Remover Apps on iPhone and Android
1. Snapseed
Snapseed is a photo editing app that is available for both iPhone and Android users. It has a masking feature, which lets you mask any object in a photo, including an emoji. Snapseed is a good tool to get rid of unwanted items from any image.
It has around 29 photo editing tools, which will help a user to enhance the photo quality. Using it is very easy because all the tools are readily available on the main screen. You just need to select the right tool and get started with the work.
Key Features
- It helps in removing emojis and unwanted objects from a photo.
- It works on both RAW and JPG files.
- It has multiple photo editing tools.
- Using Snapseed is easy.
2. AirBrush
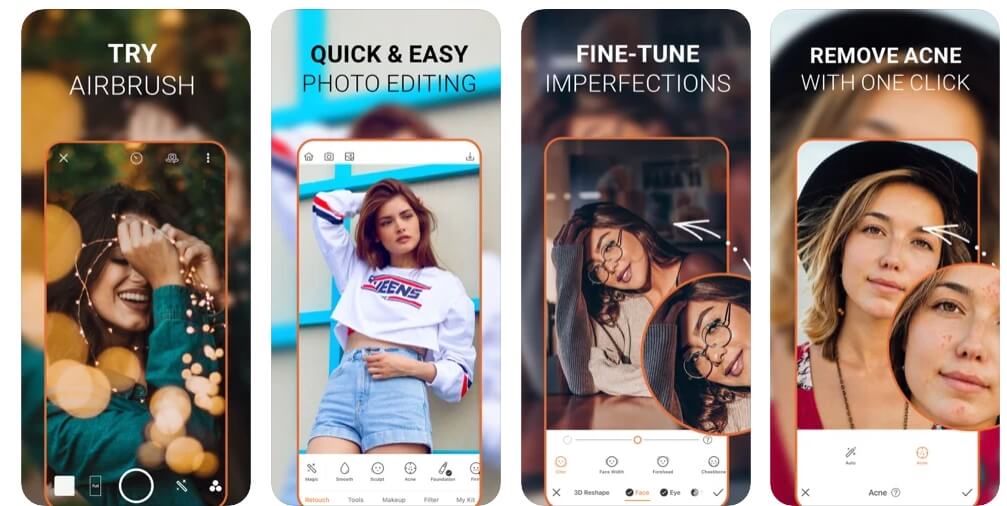
AirBrush is a leading photo editing tool for iPhone users and has a high rating of 4.9. The tool makes editing an image effortlessly. If you don’t want the emojis to ruin your photo, use AirBrush to deal with it quickly. Moreover, it lets you edit your photos further, for example, remove blemishes, make the image look smooth and glowing, add filters to give it a magical touch, and so much more! The tool has quite a lot of features that you will like.
Key Features
- It removes emojis and unwanted objects from an image.
- Using AirBrush is easy.
- It removes emojis quickly.
- It has many photo editing tools.
3. TouchRetouch
If you are looking for a professional photo editing tool that will let you do much more than just remove emojis, you should try TouchRetouch. You can use it to remove unwanted items, such as emojis, lines, blemishes, imperfections, and more.
It has a rating of 4.8, which is great looking at the kind of photo editing features TouchRetouch offers. No matter what objects you want to get rid of in your photo, TouchRetouch can let you do that easily.
Key Features
- It removes all kinds of unwanted objects quickly.
- It provides you with a single-flick line removal function.
- TouchRetouch is easy to use.
- It offers easy to understand tutorials.
FAQ About Removing Emojis from Pictures
How Do I Remove an Emoji from a Hidden Face?
It depends on the kind of tool you have picked. Typically, the tool will let you select the emoji and mask it with its surroundings to blend in well. So, let’s say you are on a dating site and you can’t see how the person looks like because they have hidden their face with an emoji.
In such a case, even if you use an emoji remover tool, it won’t show the actual face, instead replace it with the surrounding. Emoji removal tools are for personal use only.
Conclusion
So, now you know about the easy ways to remove emojis from pictures. Try any of the tools and remove unwanted objects and emojis from any photo you want. The tools that we have listed here are trusted by many and are easy to use.
02 Best Emoji Removers on Windows/Mac Computer
03 Best Emoji Remover Apps on iPhone and Android
Part 1: Best Emoji Removers Online to Remove Emojis from Pictures
1. Inpaint
So, the first online emoji remover that you can try is Inpaint. This is a simple to use tool and will remove unwanted objects, such as emojis, from a picture by intelligently filling it with textures that match the surrounding image data.
The image formats Inpaint accepts are JPG, WebP, and PNG. Just remember to use only the recommended image formats, and you can start using them right away. You don’t need to log in or sign up to start using it.
Features
- An online tool that removes unwanted objects quickly.
- You don’t need to sign up or log in.
- It accepts JPG, PNG, and WebP formats.
- 4.2MP is the maximum image resolution.
Website: https://theinpaint.com/
2. Pixlr
The next popular online tool is Pixlr. Pixlr is a popular photo editing tool that allows you to fix your pictures as well. You can use the tool online either using your computer web browser or mobile.
Whatever works for you. It doesn’t only let you remove emojis but erase background as well. But since you want to remove emojis, you will have to add the image and click on the retouch button from the toolbar. Then, you need to click on the image multiple times so that its surroundings overlap the emojis.
Features
- Pixlr can be used on both mobile and web browsers.
- Multiple photo editing tools are available.
- Removes emojis by blending them with the surroundings.
- Using Pixlr is easy and convenient.
Website: https://pixlr.com/
3. Fotor
Fotor is a professional photo editing tool, which lets you clone an emoji with a part of the image. The online tool asks you to sign up using your Google account to save your work. So, if you want to know how to remove emoji from a photo, you can use the clone feature.
Once you upload an image with emojis, move your cursor to the tool section in the left menu bar. Scroll down, and you will see the Clone option. Touch one part of the image that you want to use instead of the emoji. The first dot will be the area you want to clone and place the second dot on the emoji. And all done.
Website: https://www.fotor.com/
Features
- You can clone the emoji to remove it.
- A professional tool with lots of editing features.
- One needs to sign up or log in before using Fotor.
- The tool retains the original picture quality.
Related: Best Online Photo Editors
Part 2: Best Emoji Removers on Windows/Mac Computer
1. Adobe Photoshop
Adobe Photoshop is arguably one of the best photo editing tools that only allows you to enhance a photo but fix issues, such as removing emojis, unwanted objects, and so on. Adobe Photoshop is a professional tool and might not be the best for those new to it, but if you have used Adobe Photoshop earlier, you can use the Lasso Tool or the Marqueel Tool, which you will find on the left toolbar to remove emojis and unwanted items. Once done, save the image, and yes, the original picture quality will be retained.
Key Features
- A professional photo editing tool.
- It has multiple photo editing features and lets you remove emojis.
- You can draw on the emoji with a pen or pencil.
- It autosaves your work.
2. Wondershare Fotophire
Wondershare Fotophire is a fantastic photo editing tool that works magically on all kinds of images. Whether your photo is loaded with multiple emojis, you can remove them easily using Fotophire. If you are thinking about how to remove emojis from pictures using Fotophire, it’s pretty easy.
You need to clone any part of the image, and the tool will automatically use its algorithm to fill the emoji with its surroundings so that the filled area looks natural and blends well with the rest of the photo. Fotophire is a good option for both beginners and pros.
Key Features
- It removes all kinds of unwanted objects from an image, including emojis.
- Using Fotophire is easy and convenient.
- A good tool for both pros and beginners.
- Background doesn’t get impacted, and the original image quality remains intact.
3. GIMP
GIMP is a free and open-source photo editor, which allows you to remove emojis from a photo. It is available for Windows, macOS, GNU/Linux, and other operating systems. GIMP has been designed for everyone who would want their picture to look better.
If you wish to manipulate a high-quality image, you don’t have to worry about that because it accepts bigger-size photos as well. GIMP lets you clone an area and use that part on the emoji. You can also adjust the opacity of the cloned item depending on your requirements.
Key Features
- It lets you clone the surrounding area to hide an emoji.
- Accepts all the top image formats.
- It doesn’t pixelate the image after editing it.
- A free tool to use with lots of photo editing features.
4. Jihosoft Photo Eraser
Jihosoft Photo Eraser is a good photo editor tool that removes emojis or unwanted objects from an image by analyzing the surroundings. Once done, it will fill the selected emojis with the intelligently-generated textures. If you no longer want the emojis to be there is an image, Jihosoft Photo Eraser will be an ideal tool to use. The tool’s primary purpose is to remove unwanted items from an image, which is why it is an excellent software to go for.
Key Features
- It removes unwanted objects, such as emojis, from a photo.
- It allows the cloning of things to replace emojis.
- Using Jihosoft Photo Eraser is easy.
- The photo quality remains intact.
Part 3: Best Emoji Remover Apps on iPhone and Android
1. Snapseed
Snapseed is a photo editing app that is available for both iPhone and Android users. It has a masking feature, which lets you mask any object in a photo, including an emoji. Snapseed is a good tool to get rid of unwanted items from any image.
It has around 29 photo editing tools, which will help a user to enhance the photo quality. Using it is very easy because all the tools are readily available on the main screen. You just need to select the right tool and get started with the work.
Key Features
- It helps in removing emojis and unwanted objects from a photo.
- It works on both RAW and JPG files.
- It has multiple photo editing tools.
- Using Snapseed is easy.
2. AirBrush
AirBrush is a leading photo editing tool for iPhone users and has a high rating of 4.9. The tool makes editing an image effortlessly. If you don’t want the emojis to ruin your photo, use AirBrush to deal with it quickly. Moreover, it lets you edit your photos further, for example, remove blemishes, make the image look smooth and glowing, add filters to give it a magical touch, and so much more! The tool has quite a lot of features that you will like.
Key Features
- It removes emojis and unwanted objects from an image.
- Using AirBrush is easy.
- It removes emojis quickly.
- It has many photo editing tools.
3. TouchRetouch
If you are looking for a professional photo editing tool that will let you do much more than just remove emojis, you should try TouchRetouch. You can use it to remove unwanted items, such as emojis, lines, blemishes, imperfections, and more.
It has a rating of 4.8, which is great looking at the kind of photo editing features TouchRetouch offers. No matter what objects you want to get rid of in your photo, TouchRetouch can let you do that easily.
Key Features
- It removes all kinds of unwanted objects quickly.
- It provides you with a single-flick line removal function.
- TouchRetouch is easy to use.
- It offers easy to understand tutorials.
FAQ About Removing Emojis from Pictures
How Do I Remove an Emoji from a Hidden Face?
It depends on the kind of tool you have picked. Typically, the tool will let you select the emoji and mask it with its surroundings to blend in well. So, let’s say you are on a dating site and you can’t see how the person looks like because they have hidden their face with an emoji.
In such a case, even if you use an emoji remover tool, it won’t show the actual face, instead replace it with the surrounding. Emoji removal tools are for personal use only.
Conclusion
So, now you know about the easy ways to remove emojis from pictures. Try any of the tools and remove unwanted objects and emojis from any photo you want. The tools that we have listed here are trusted by many and are easy to use.
How to Add Bitmoji to Keyboard? [Complete Guide]
Emojis have made it so much better for people to express themselves. Let’s say someone compliments you on a chat app; you can use a smiley emoji to tell that you are happy. At the same time, an angry emoji lets you express that you are angry.
Apart from the generic emojis that you can find in your chat applications, Bitmoji enables you to customize your character and share it with people you chat with. Bitmoji is fun, but do you know how to add it to a keyboard? If you don’t, don’t worry, this post will help you understand how to do that.
In this article
02 How to Add and Use Bitmoji to iPhone Keyboard?
03 How to Get the Bitmoji Keyboard on Android?
04 How to Install and Use Bitmoji on Windows and Mac?
Part 1: What is Bitmoji?
If you are new to Bitmoji, you may wonder what it is? Bitmoji is essentially your own personal emoji. You can create a cartoon version of yourself and share it with people to make the conversation fun. So, what one does is create an avatar of themselves and give it all kinds of expressions.
Then, you can create comics using your Bitmoji, use it to express yourself while having a chat, and even use it as a reaction. Anyone who is done using the same old emojis has started using Bitmoji because it’s a lot more fun.
Now, let’s learn how to create your very own Bitmoji.
Step 1: First, go to the App Store or Play store and download the Bitmoji application.
Step 2: Once downloaded, launch the app and start making an avatar or your Bitmoji.
Step 3: Pick a skin color, hair color, chin, nose, hairstyle, jawline, and more.

Once your Bitmoji is created, you are all set to use the Bitmoji as stickers. Moreover, the app lets you dress your Bitmoji as you want as well. Let it have different expressions and postures because that’s how it’s going to be fun! After your Bitmoji is added, the next thing to do is enable Bitmoji on the keyboard of the device you are using.
Part 2: How to Add and Use Bitmoji to iPhone Keyboard?
Since you have learned how to create a Bimoji, it’s time to learn the steps to use it on your iPhone keyboard. Unfortunately, just by downloading the app, it won’t reflect on the keyboard directly. Instead, you will have to follow a few steps to add Bitmoji to the keyboard. Here’s what you need to do.
Step 1: Launch your iPhone and click on the Settings option.
Step 2: Now, go to the General option and click on the Keyboard option.

Step 3: When the Keyboard page opens, click on the option that says Keyboards and then click on Add New Keyboard.
Step 4: You will see the Third Party Keyboards option. There, you need to click on Bitmoji.
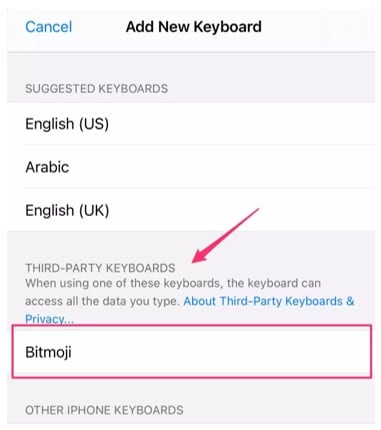
Step 5: Now, toggle the option that says Allow Full Access. Once you do that, you will see a small pop-up. Click on the Allow option.
And that’s it. Bitmoji will be added to the iPhone keyboard. Open any messaging app and click on the globe and hold it for a few seconds. When you see Bitmoji, click on that, and you will be able to use Bitmoji stickers.
Part 3: How to Get the Bitmoji Keyboard on Android?
Bitmoji is available for Android users as well. Before you begin to use it, go through the first part again and download the app. Then create your Bitmoji, as explained earlier. You can send Bitmojis directly from the app itself, but if you plan to use Bitmoji regularly, getting the Bitmoji keyboard makes sense. So, once you are done, follow the following steps to get the Bitmoji keyboard on Android.
Step 1: Launch the Bitmoji app. Click on the Keyboard option that you see at the bottom of the Bitmoji app screen.
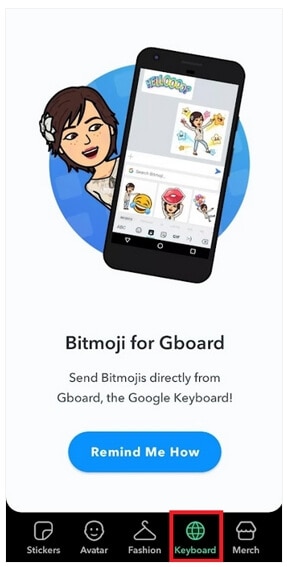
Step 2: Install Bitmoji keyboard and give permission to your phone to use Bitmoji keyboard. Bitmoji will notify you when the Bitmoji keyboard gets activated.
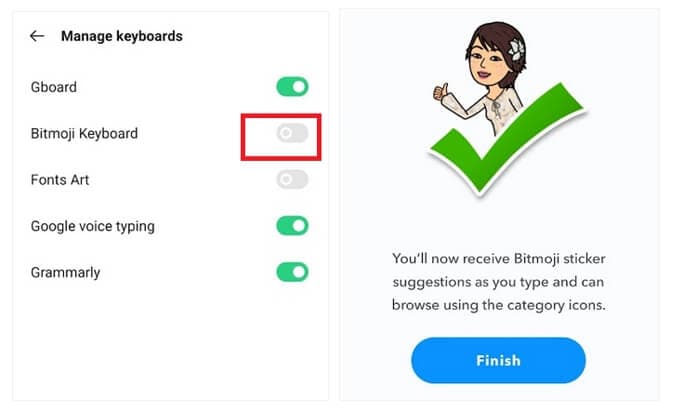
You are all done. Now, use the Bitmoji keyboard to chat with your family members and friends and make everything fun and exciting.
Part 4: How to Install and Use Bitmoji on Windows and Mac?
If you want to use Bitmoji on Windows and Mac, you will have to use the Google Chrome browser. If you already have the Google Chrome browser, carry on with the steps explained below; otherwise, get the browser before starting.
Step 1: Go to Chrome Extension and install Bitmoji for Chrome Extension.
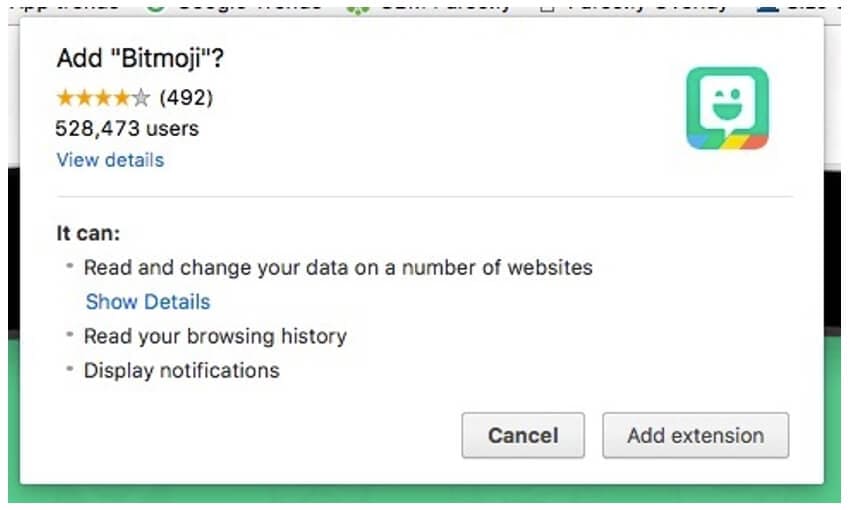
Step 2: You will have to sign in to Bitmoji. If you want to add Bitmoji to Gmail, click on add Bitmoji to Gmail.
After you are done following the three easy steps, you will see Bitmoji is installed. To start using it, move the cursor to the upper corner of the browser and click on the Bitmoji icon. Next, you will see the Bitmojis. Choose any Bitmoji, copy it, and paste it on Gmail or instant messaging applications.
Part 5: Where can You Use Bitmoji?
Bitmojis can be used on different platforms. All you need to do is enable Bitmoji keyboard on your iPhone or Android phone or Windows and Mac computers and use it on various social media platforms. For example, use Snapchat to send Bitmojis for different types of occasions.
If you are an iPhone user, you can share fun Bitmojis through iMessage. On a computer, you can use these Bitmojis on Facebook or other instant messaging platforms. You can drag and drop the Bitmoji sticker or copy it to share it with your friends.
If you are a working professional and want to lighten the mood of your Slack workspace, use Bitmojis to make your coworkers feel relaxed. Plus, this can be a great way to make someone feel pumped up. Like that, there are many other platforms to use Bitmojis!
Related: Best Free Apps to Get Emojis on iPhone and Android
Conclusion
So, there you go. We have finally reached the end of this guide. We hope you have found this post interesting and will face no hassle using the Bitmoji keyboard on different devices. Get the Bitmoji app if you haven’t downloaded it yet and make your conversations fun and enjoyable!
02 How to Add and Use Bitmoji to iPhone Keyboard?
03 How to Get the Bitmoji Keyboard on Android?
04 How to Install and Use Bitmoji on Windows and Mac?
Part 1: What is Bitmoji?
If you are new to Bitmoji, you may wonder what it is? Bitmoji is essentially your own personal emoji. You can create a cartoon version of yourself and share it with people to make the conversation fun. So, what one does is create an avatar of themselves and give it all kinds of expressions.
Then, you can create comics using your Bitmoji, use it to express yourself while having a chat, and even use it as a reaction. Anyone who is done using the same old emojis has started using Bitmoji because it’s a lot more fun.
Now, let’s learn how to create your very own Bitmoji.
Step 1: First, go to the App Store or Play store and download the Bitmoji application.
Step 2: Once downloaded, launch the app and start making an avatar or your Bitmoji.
Step 3: Pick a skin color, hair color, chin, nose, hairstyle, jawline, and more.
Once your Bitmoji is created, you are all set to use the Bitmoji as stickers. Moreover, the app lets you dress your Bitmoji as you want as well. Let it have different expressions and postures because that’s how it’s going to be fun! After your Bitmoji is added, the next thing to do is enable Bitmoji on the keyboard of the device you are using.
Part 2: How to Add and Use Bitmoji to iPhone Keyboard?
Since you have learned how to create a Bimoji, it’s time to learn the steps to use it on your iPhone keyboard. Unfortunately, just by downloading the app, it won’t reflect on the keyboard directly. Instead, you will have to follow a few steps to add Bitmoji to the keyboard. Here’s what you need to do.
Step 1: Launch your iPhone and click on the Settings option.
Step 2: Now, go to the General option and click on the Keyboard option.
Step 3: When the Keyboard page opens, click on the option that says Keyboards and then click on Add New Keyboard.
Step 4: You will see the Third Party Keyboards option. There, you need to click on Bitmoji.
Step 5: Now, toggle the option that says Allow Full Access. Once you do that, you will see a small pop-up. Click on the Allow option.
And that’s it. Bitmoji will be added to the iPhone keyboard. Open any messaging app and click on the globe and hold it for a few seconds. When you see Bitmoji, click on that, and you will be able to use Bitmoji stickers.
Part 3: How to Get the Bitmoji Keyboard on Android?
Bitmoji is available for Android users as well. Before you begin to use it, go through the first part again and download the app. Then create your Bitmoji, as explained earlier. You can send Bitmojis directly from the app itself, but if you plan to use Bitmoji regularly, getting the Bitmoji keyboard makes sense. So, once you are done, follow the following steps to get the Bitmoji keyboard on Android.
Step 1: Launch the Bitmoji app. Click on the Keyboard option that you see at the bottom of the Bitmoji app screen.
Step 2: Install Bitmoji keyboard and give permission to your phone to use Bitmoji keyboard. Bitmoji will notify you when the Bitmoji keyboard gets activated.
You are all done. Now, use the Bitmoji keyboard to chat with your family members and friends and make everything fun and exciting.
Part 4: How to Install and Use Bitmoji on Windows and Mac?
If you want to use Bitmoji on Windows and Mac, you will have to use the Google Chrome browser. If you already have the Google Chrome browser, carry on with the steps explained below; otherwise, get the browser before starting.
Step 1: Go to Chrome Extension and install Bitmoji for Chrome Extension.
Step 2: You will have to sign in to Bitmoji. If you want to add Bitmoji to Gmail, click on add Bitmoji to Gmail.
After you are done following the three easy steps, you will see Bitmoji is installed. To start using it, move the cursor to the upper corner of the browser and click on the Bitmoji icon. Next, you will see the Bitmojis. Choose any Bitmoji, copy it, and paste it on Gmail or instant messaging applications.
Part 5: Where can You Use Bitmoji?
Bitmojis can be used on different platforms. All you need to do is enable Bitmoji keyboard on your iPhone or Android phone or Windows and Mac computers and use it on various social media platforms. For example, use Snapchat to send Bitmojis for different types of occasions.
If you are an iPhone user, you can share fun Bitmojis through iMessage. On a computer, you can use these Bitmojis on Facebook or other instant messaging platforms. You can drag and drop the Bitmoji sticker or copy it to share it with your friends.
If you are a working professional and want to lighten the mood of your Slack workspace, use Bitmojis to make your coworkers feel relaxed. Plus, this can be a great way to make someone feel pumped up. Like that, there are many other platforms to use Bitmojis!
Related: Best Free Apps to Get Emojis on iPhone and Android
Conclusion
So, there you go. We have finally reached the end of this guide. We hope you have found this post interesting and will face no hassle using the Bitmoji keyboard on different devices. Get the Bitmoji app if you haven’t downloaded it yet and make your conversations fun and enjoyable!
Also read:
- [Updated] 2024 Approved The Development and Application of VR Shopping
- [Updated] In 2024, Explore Advanced Video Control in YouTube’s Playback Features
- Add Emojis to Videos on YouTube/Facebook/Snapchat 2023 Guide for 2024
- Call of Duty Warzone Stability Fixes and Optimization for PC Users, April 2024 Edition
- Guida Completa: Conversione Gratuita Da MTS a MP4 Con I Tre Modi Ottimali
- How to Make a Video Meme with 4 Best Meme Video Makers for 2024
- In 2024, Is This a Pigeon Meme Generator
- In 2024, MemeMakerPro Visual Laughter Factory
- Install Your ASUS PCE-AC68 Driver Instantly with Our Easy Download Guide
- New 7 Free Apps to Get Emojis on Android and iPhone
- New How to Make a Memorable Honeymoon Video
- New How to Make a Photo Collage on Mac/iPhone Using iPhoto?
- New How to Make a Video for Your Babys First Year for 2024
- Record and Edit an Animoji or Memoji Karaoke Music Video for 2024
- Resolving the 0X80240034 Troubleshooting Guide: Fixing Windows 10 Updates
- Step-by-Step Guide to Full-Sphere Video via iPhone
- Ultimate Fixes to Bring Back Colour: Addressing the B&W Display Problem on Windows 10
- Title: New In 2024, How to Make a Video Meme with 4 Best Meme Video Makers
- Author: Jan
- Created at : 2025-02-13 18:19:35
- Updated at : 2025-02-19 17:19:13
- Link: https://meme-emoji.techidaily.com/new-in-2024-how-to-make-a-video-meme-with-4-best-meme-video-makers/
- License: This work is licensed under CC BY-NC-SA 4.0.