
New How to Make a Triggered Meme, In 2024
How to Make a Triggered Meme?
How to Make a Triggered Meme?

Ollie Mattison
Mar 27, 2024• Proven solutions
It is no secret that we all lose our cool from time. It’s only natural, after all, the world can be a frustrating place. We’re all enraged by different things, some of us can’t stand pineapple on pizza while others explode when being pranked. What we often don’t realize is that being triggered in front of a camera makes us perfect meme material. Even though the majority of memes are still images, some of the most memorable memes ever created were GIFs or short videos.
Making the triggered meme is easy when you know how, so in this article, we are going to show you how to make your next potentially viral meme, in just a few easy steps.
Filmora offers an easy to use video editor named Filmora Video Editor to make video and gif memes, and an online free meme maker named Filmora FREE Online Meme Maker which allows you to create images, videos and gifs memes for free. The video tutorial below will show you how to make a triggered video meme with Filmora. Download it and try it by yourself now.


The Things You Need to Make a Triggered Meme
Preparation is key to almost every important thing in life, including making a triggered meme featuring your bestie. Before you can capitalize on that amazing footage of triggered people you first have to make sure you have everything you need to generate a meme. Okay, let’s get started with the essentials to making a fun and effective meme.
1. A Triggered Template
You have virtually unlimited resources at your disposal, as this meme template can be easily found through a quick Google search. There is even an Android app called Triggered Meme Maker , that lets you do what its name suggests, make triggered memes. Making your own template in Microsoft Paint (we will show you how to make it in this article later) or any other photo editing software is also an option if you want to select the color of the background, rather than work with what you can find online.
2. A Video Editing Software
Memes are short videos that rarely last longer than 30 seconds, which is why you don’t need a powerful video editing suite like Final Cut Pro or Adobe Premiere Pro to make a good meme. A software like Wondershare Filmora that is easy to use and yet packed with cool visual effects and useful tools is a better choice if you just want to have a little fun with a video you recorded.
3. The Sound for the Triggered Meme
This ingredient of a good meme is easy to forget, but music or any other type of sound can make your meme funnier. In most cases, you’ll want to keep at least a portion of the original audio, but adding sound effects at different points of the meme can have a comical effect. The Filmora’s Music Library can serve as your endless source of royalty free music and sounds .
Making a Triggered Meme Template in Microsoft Paint
Creating a meme template is an easy task that can be handled from the Microsoft Paint in a couple of minutes. When you launch the software, click on the Fill with color icon located in the Tools section of the Paint’s ribbon. Activating this option enables you to change the color of the background with a single click. Proceed to select the color of the background from the color palette located on the far right side of the ribbon. We recommend choosing shades of green because the background is going to be used for the Chroma Key effect. You can click on the Edit Colors icon if you want to find a perfect color tone for the background. Right-click anywhere on the canvas to change its color.
Now you just need to add the text to your template. Select the Text option in the Tools menu and then proceed to select the font or the size of your text in the Font menu. Make sure that the Opaque feature is enabled in the Background menu in order to change the color of the textbox background. Adjusting the Color 1 option in the Color Menu will enable you to choose the text color, while the Color 2 option lets you pick the color of the background. Type triggered in the textbox, and center the text by clicking on the TAB button on your keyboard a few times. Now you have everything you need to start creating your own triggered meme.
How to Make a Triggered Meme?
Once you’ve successfully created a triggered template you can move on to the next step of the meme making process.
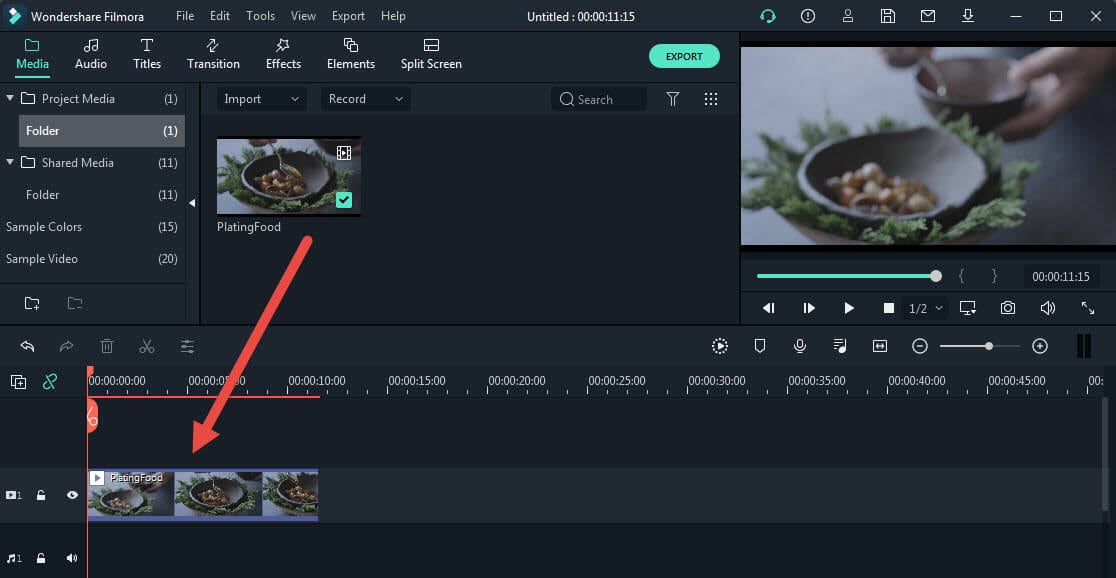
1. Adding Media to a Project
Open Filmora in the Full Feature Mode and import all the files you’re going to need during the process of making a meme. The files you import to your project will be stored in the Media Panel. Add the video to the timeline by dropping it over the video track. You can then remove the unwanted parts of the clip or add a still frame to the end of the video to prolong the triggered effect of the meme. Still frames in Filmora can be created by clicking on the Snapshot icon, that is located below the Preview Panel.
2. Using the Green Screen Effect
Place the triggered template to the Picture-in-Picture track and try to position it at the exact place in the video where the person gets triggered. Click on the Green Screen icon located in the toolbar to gain access to the PIP Edit window. The Chroma Key (Green Screen) option will be selected by default, so you just have to check the ‘Make parts of the clip transparent’ box. The green background of the template will become transparent and you’ll be able to see parts of your video, with the triggered text displayed below it.
3. Enhancing Colors and Applying Effects
In order to highlight just how much a person in the video got triggered, you can change the vibrance and saturation in a portion of a video clip by clicking on the Edit icon in the toolbar. In addition, other software’s color correction tools like brightness, tint or contrast can also be used to highlight the triggered moment.
After you adjust the color values, you can click on the Effects icon if you want to add motion blur or camera shake effects. Click on the Shake option in the Effects panel to start browsing through different effects and click on the plus icon to add the effect to the clip you selected. The Distortion category in the Effects panel features a number of blur effects you can use to make the video more entertaining. You can adjust the properties of all the effects you add to your meme and control how much of the effect is applied to the video.
4. Adding Music and Text Overlays to Your Meme
Increasing the number of visual elements in the video can help you create a funnier meme. A single word can change the meaning of a meme so if you want to add additional comment besides noting that the person got triggered you can click on the Text icon and select the text overlay you like. Click on the plus icon that is displayed over the effect to add it to a video clip. A textbox will appear over the video in the Preview window and you can drag it around the screen to reposition it or rotate it. Enable the No Animation option if you want the text to just appear and disappear from the screen.
Sounds can add to the comical effect of a meme. Carefully select what type of music or sound you want to use for a meme since it can improve the quality of your meme. Simply drag the audio file you imported into Filmora and place it on the audio track and adjust its duration to match the duration of the video. If you don’t have your own music you can try some of the tracks featured in the software’s music library.
4. Exporting the Triggered Meme from Filmora
When your meme is ready to hit the social media, you can click on the Export button. In the Export window, you can choose any of the available file formats, but the formats best suited for memes are either MP4 or GIF. Click on the Settings icon in the Output Description menu to change the frame rate, resolution or the quality of the video. Wondershare Filmora lets you export videos directly to your YouTube channel or your Facebook account, so you don’t have to waste time on posting the meme after the export process is completed.
The software also offers the option to save a meme you created to your hard drive if you don’t want to post a meme on social media right away. You just have to click on the Export button after adjusting the output settings and wait for the file to be exported.
Conclusion
The precious memories of your friends being enraged by the silliest things can be turned into hilarious memes effortlessly. A video editing software like Wondershare Filmora gives you all the tools you’ll need to quickly generate a triggered meme, so you can focus on having fun with your friends. What’s your favorite method of making memes?
Ollie Mattison
Ollie Mattison is a writer and a lover of all things video.
Follow @Ollie Mattison
Ollie Mattison
Mar 27, 2024• Proven solutions
It is no secret that we all lose our cool from time. It’s only natural, after all, the world can be a frustrating place. We’re all enraged by different things, some of us can’t stand pineapple on pizza while others explode when being pranked. What we often don’t realize is that being triggered in front of a camera makes us perfect meme material. Even though the majority of memes are still images, some of the most memorable memes ever created were GIFs or short videos.
Making the triggered meme is easy when you know how, so in this article, we are going to show you how to make your next potentially viral meme, in just a few easy steps.
Filmora offers an easy to use video editor named Filmora Video Editor to make video and gif memes, and an online free meme maker named Filmora FREE Online Meme Maker which allows you to create images, videos and gifs memes for free. The video tutorial below will show you how to make a triggered video meme with Filmora. Download it and try it by yourself now.
The Things You Need to Make a Triggered Meme
Preparation is key to almost every important thing in life, including making a triggered meme featuring your bestie. Before you can capitalize on that amazing footage of triggered people you first have to make sure you have everything you need to generate a meme. Okay, let’s get started with the essentials to making a fun and effective meme.
1. A Triggered Template
You have virtually unlimited resources at your disposal, as this meme template can be easily found through a quick Google search. There is even an Android app called Triggered Meme Maker , that lets you do what its name suggests, make triggered memes. Making your own template in Microsoft Paint (we will show you how to make it in this article later) or any other photo editing software is also an option if you want to select the color of the background, rather than work with what you can find online.
2. A Video Editing Software
Memes are short videos that rarely last longer than 30 seconds, which is why you don’t need a powerful video editing suite like Final Cut Pro or Adobe Premiere Pro to make a good meme. A software like Wondershare Filmora that is easy to use and yet packed with cool visual effects and useful tools is a better choice if you just want to have a little fun with a video you recorded.
3. The Sound for the Triggered Meme
This ingredient of a good meme is easy to forget, but music or any other type of sound can make your meme funnier. In most cases, you’ll want to keep at least a portion of the original audio, but adding sound effects at different points of the meme can have a comical effect. The Filmora’s Music Library can serve as your endless source of royalty free music and sounds .
Making a Triggered Meme Template in Microsoft Paint
Creating a meme template is an easy task that can be handled from the Microsoft Paint in a couple of minutes. When you launch the software, click on the Fill with color icon located in the Tools section of the Paint’s ribbon. Activating this option enables you to change the color of the background with a single click. Proceed to select the color of the background from the color palette located on the far right side of the ribbon. We recommend choosing shades of green because the background is going to be used for the Chroma Key effect. You can click on the Edit Colors icon if you want to find a perfect color tone for the background. Right-click anywhere on the canvas to change its color.
Now you just need to add the text to your template. Select the Text option in the Tools menu and then proceed to select the font or the size of your text in the Font menu. Make sure that the Opaque feature is enabled in the Background menu in order to change the color of the textbox background. Adjusting the Color 1 option in the Color Menu will enable you to choose the text color, while the Color 2 option lets you pick the color of the background. Type triggered in the textbox, and center the text by clicking on the TAB button on your keyboard a few times. Now you have everything you need to start creating your own triggered meme.
How to Make a Triggered Meme?
Once you’ve successfully created a triggered template you can move on to the next step of the meme making process.
1. Adding Media to a Project
Open Filmora in the Full Feature Mode and import all the files you’re going to need during the process of making a meme. The files you import to your project will be stored in the Media Panel. Add the video to the timeline by dropping it over the video track. You can then remove the unwanted parts of the clip or add a still frame to the end of the video to prolong the triggered effect of the meme. Still frames in Filmora can be created by clicking on the Snapshot icon, that is located below the Preview Panel.
2. Using the Green Screen Effect
Place the triggered template to the Picture-in-Picture track and try to position it at the exact place in the video where the person gets triggered. Click on the Green Screen icon located in the toolbar to gain access to the PIP Edit window. The Chroma Key (Green Screen) option will be selected by default, so you just have to check the ‘Make parts of the clip transparent’ box. The green background of the template will become transparent and you’ll be able to see parts of your video, with the triggered text displayed below it.
3. Enhancing Colors and Applying Effects
In order to highlight just how much a person in the video got triggered, you can change the vibrance and saturation in a portion of a video clip by clicking on the Edit icon in the toolbar. In addition, other software’s color correction tools like brightness, tint or contrast can also be used to highlight the triggered moment.
After you adjust the color values, you can click on the Effects icon if you want to add motion blur or camera shake effects. Click on the Shake option in the Effects panel to start browsing through different effects and click on the plus icon to add the effect to the clip you selected. The Distortion category in the Effects panel features a number of blur effects you can use to make the video more entertaining. You can adjust the properties of all the effects you add to your meme and control how much of the effect is applied to the video.
4. Adding Music and Text Overlays to Your Meme
Increasing the number of visual elements in the video can help you create a funnier meme. A single word can change the meaning of a meme so if you want to add additional comment besides noting that the person got triggered you can click on the Text icon and select the text overlay you like. Click on the plus icon that is displayed over the effect to add it to a video clip. A textbox will appear over the video in the Preview window and you can drag it around the screen to reposition it or rotate it. Enable the No Animation option if you want the text to just appear and disappear from the screen.
Sounds can add to the comical effect of a meme. Carefully select what type of music or sound you want to use for a meme since it can improve the quality of your meme. Simply drag the audio file you imported into Filmora and place it on the audio track and adjust its duration to match the duration of the video. If you don’t have your own music you can try some of the tracks featured in the software’s music library.
4. Exporting the Triggered Meme from Filmora
When your meme is ready to hit the social media, you can click on the Export button. In the Export window, you can choose any of the available file formats, but the formats best suited for memes are either MP4 or GIF. Click on the Settings icon in the Output Description menu to change the frame rate, resolution or the quality of the video. Wondershare Filmora lets you export videos directly to your YouTube channel or your Facebook account, so you don’t have to waste time on posting the meme after the export process is completed.
The software also offers the option to save a meme you created to your hard drive if you don’t want to post a meme on social media right away. You just have to click on the Export button after adjusting the output settings and wait for the file to be exported.
Conclusion
The precious memories of your friends being enraged by the silliest things can be turned into hilarious memes effortlessly. A video editing software like Wondershare Filmora gives you all the tools you’ll need to quickly generate a triggered meme, so you can focus on having fun with your friends. What’s your favorite method of making memes?
Ollie Mattison
Ollie Mattison is a writer and a lover of all things video.
Follow @Ollie Mattison
Best 10 Emoji Makers to Create Your Own Emojis [PC/Online/Android/iPhone]
Best 10 Emoji Makers to Create Your Own Emojis [PC/Online/Android/iPhone]

Shanoon Cox
Mar 27, 2024• Proven solutions
In this generation of online chatting and social media, emoji plays a big role in making our conversation easier and interesting. It helps people to express feelings or convey something in a better way than words or sentences ever could. Adding an emoji to chat, video or photo brings more fun to the content and the type of emojis different individuals prefer to use will be different.
Want to create your own emoji? So there is a need for emoji makers that can help to create customized emojis depending on everyone’s likes.
There are a lot of emoji makers in the online market that offers a bundle of pre-packed emoji as well as help you to create emoji of your choice. These tools help you to create your own emoji on whichever theme you wish providing a lot of customizing options.
- Part 1: Best 10 Emoji Makers to Create Your Own Emojis
- Part 2: Add Emojis to Your Video with Wondershare Filmora
Part 1: Best 10 Emoji Makers to Create Your Own Emojis
Most people around the world use emoji in their conversations, whether it be chats, comments on social media, writing blogs, etc. But the type of emojis preferred by different people may vary and sometimes the default emojis available might not be enough to express what they wish to. Hence there is a need for creating more emoji, depending on each individual’s taste.
This is where the emoji makers come in. Here we will discuss the top 10 emoji makers that can be used to create attractive emojis for sharing on social media platforms.
- [1. Emoji-maker.com(Online)](#emoji maker1)
- [2. piZap Emoji Maker(Online)](#emoji maker2)
- [3. Flat Icons Emoji Maker(Online)](#emoji maker3)
- [4. Labeley.com(Online)](#emoji maker4)
- [5. Disney Emoji Maker (Online)](#emoji maker5)
- [6. Animated Emoji Maker (Android app)](#emoji maker6)
- [7. Elite Emoji (Android app)](#emoji maker7)
- [8. Boomoji (Android app)](#emoji maker8)
- [9. Zmoji (iPhone app)](#emoji maker9)
- [10. Emojily (iPhone app)](#emoji maker10)
1. Emoji-maker.com(Online)
Emoji maker.com is an online told that provides a lot of beautiful and unique emoji editing options to the users.
Price:
- Free
Features:
- Offers a wide variety of emoji shapes
- Allows to customize emojis in a match to the user’s face
- Has an Emoji text function, that allows adding text to any emoji
- Provides a lot of emoji background options
- Provides multiple saving options for the emojis you have created
2. piZap Emoji Maker(Online)
piZap Emoji Maker is an online editor that has extensive emoji features that can help you to create awesome emojis. However, before you can do something, a mandatory signing in is required by this editor.
Price:
- Free
- Extra Features - piZap PRO for $5.99 per month or $35.88 per year
Features:
- All in one tool that can be used to create emoji, edit photos, create memes, etc.
- 6 million stock images
- Vibrant, colorful filters exclusive to this tool
- About 367 font options
3. Flat Icons Emoji Maker(Online)
Flat Icons Emoji is one of the simplest tools that are available to you for creating customized emojis of your choice.
![]()
Price:
- Free
- Premium bundle offers for $79 or $3710 (depends on the packs you choose)
Features:
- Offers a lot of shape options
- Provides a good collection of icon bundles for free
- Options to download both in PNG and SVG formats
- Easy editing and saving options
4. Labeley.com(Online)
Labeley.com is an online tool that allows you to design the emoji that you desire as well as provide you with printed copies of your design for an amount.
Price:
- Free
Features:
- Cool designing features and options for emoji
- Allows to save edits and make changes to it afterward
- Provides a set of beautiful artwork collections
- Provides “ print and delivery” option if you need physical copies of the emoji you designed (chargeable)
5. Disney Emoji Maker (Online)
As the name indicates, Disney Emoji Maker allows you to customize emoji based on some Disney characters. This emoji maker itself is very fun to use.
Price:
- Free
Features:
- An amazing user interface
- A variety of emoji features to add
- Apt for kids as well as grownups
- Easy export of the created emoji
6. Animated Emoji Maker (Android app)
Animated Emoji Maker is a tool that allows you to create wonderful emojis on any android devices without much effort.

Price:
- Free
Features:
- Allows to create normal as well as animated emoji
- Different characters like a cat, fox, dog, pig, panda chicken, monkey are available to create emoji
- Allows to customize emoji according to the user’s appearance
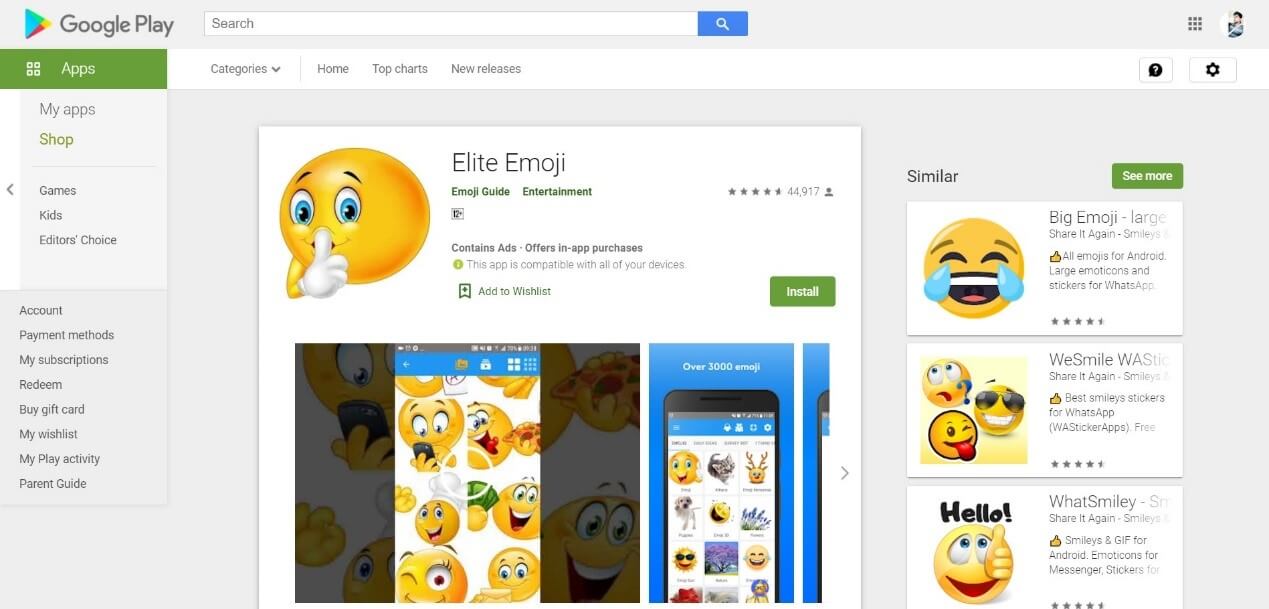
7. Elite Emoji (Android app)
Elite Emoji is an android tool that will allow you to create high-quality emoji that can be used to express ideas and emotions in your conversations.
Price:
- Free
Features
- 2000+ emoji options to choose from
- Single touch sharing in social media platforms like WhatsApp, Messenger, Instagram, etc.
- Ober 5000+ default messages to add to emojis
- Emoji suggestions, taking into account the personality traits of each user
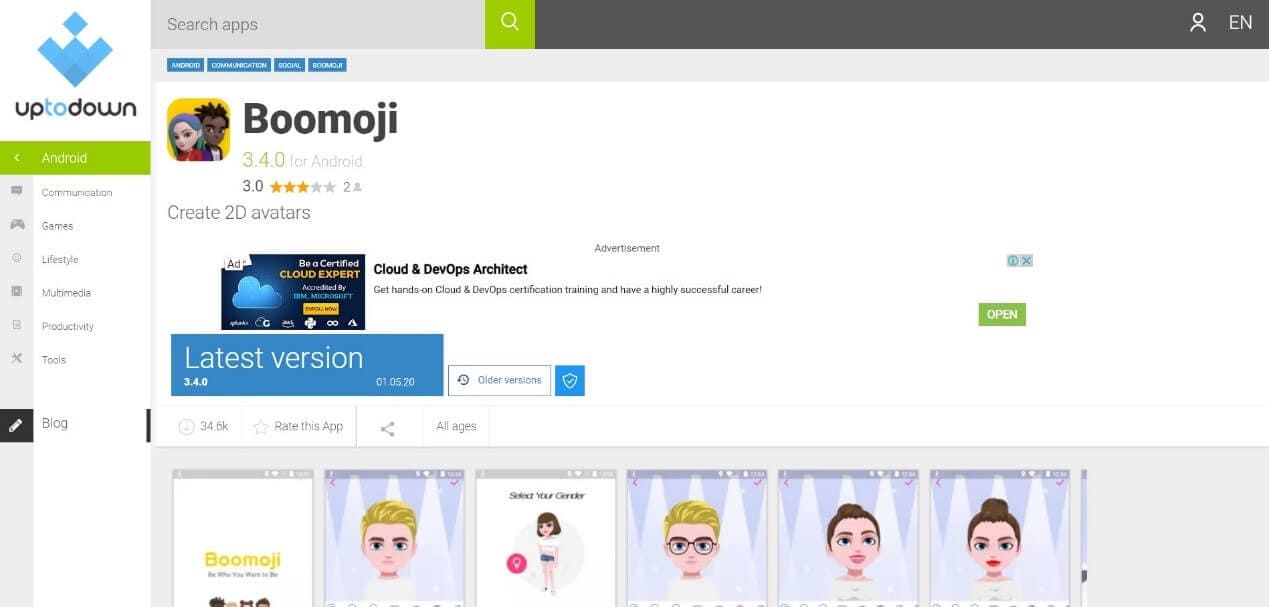
8. Boomoji (Android app)
Boomoji is a free Android application that will allow you to create fun avatar type emoji of your choice.
Price:
- Free
Features:
- A ton of characteristics to edit
- Allows to create exact animate clones of the users
- Direct sharing into social media networks
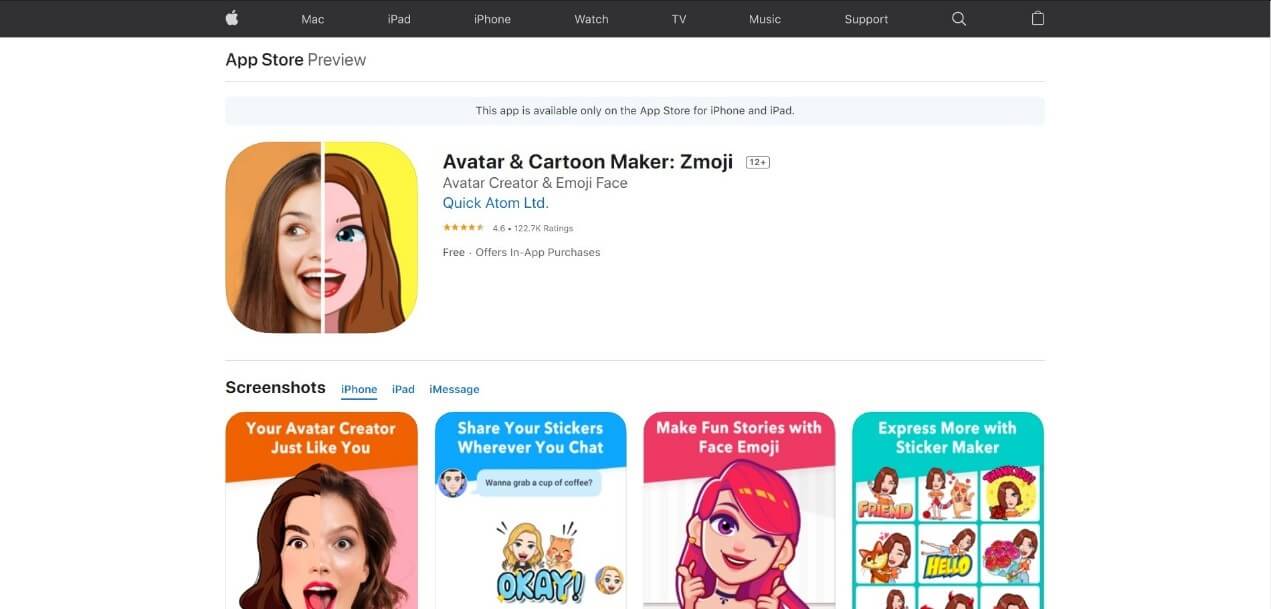
9. Zmoji (iPhone app)
Zmoji is an iPhone tool that allows you to create and customize emojis that you need for any social interactions.
Price:
- Free
- Zmoji Premium for $99.9 per year
Features:
- Quick and easy creation of expressive avatars and emoji
- Create an animated avatar resembling the user appearance
- A number of fashionable options and facial features are available
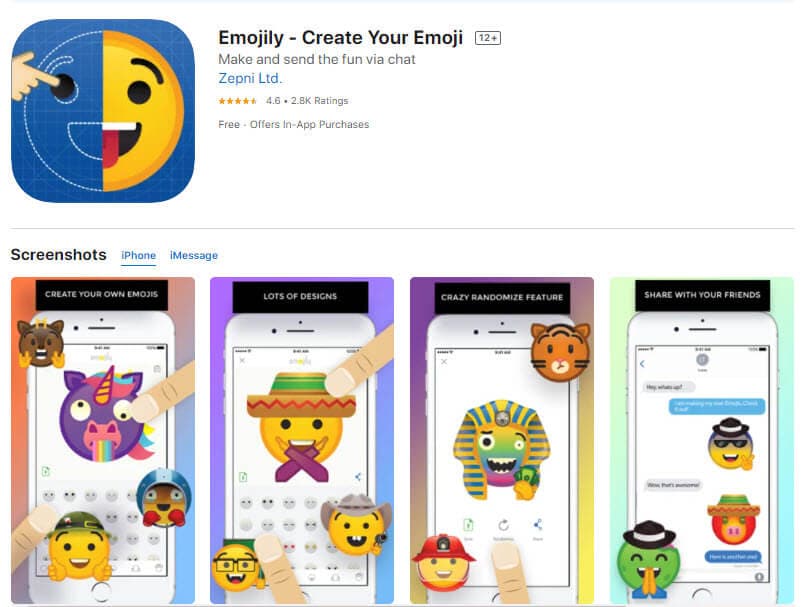
10. Emojily (iPhone app)
Emojily is a fun tool that provides a large number of crazy emoji features. It is a free iPhone application that allows the sharing of the edited emoji on any platform.
Price:
- Free
- $0.99 for unlocking single emoji packs
- $3.99 for unlocking all packs
Features:
- A ton of items to choose from to create unique emoji
- An application provided keyboard to use the emoji
- A variety of design options
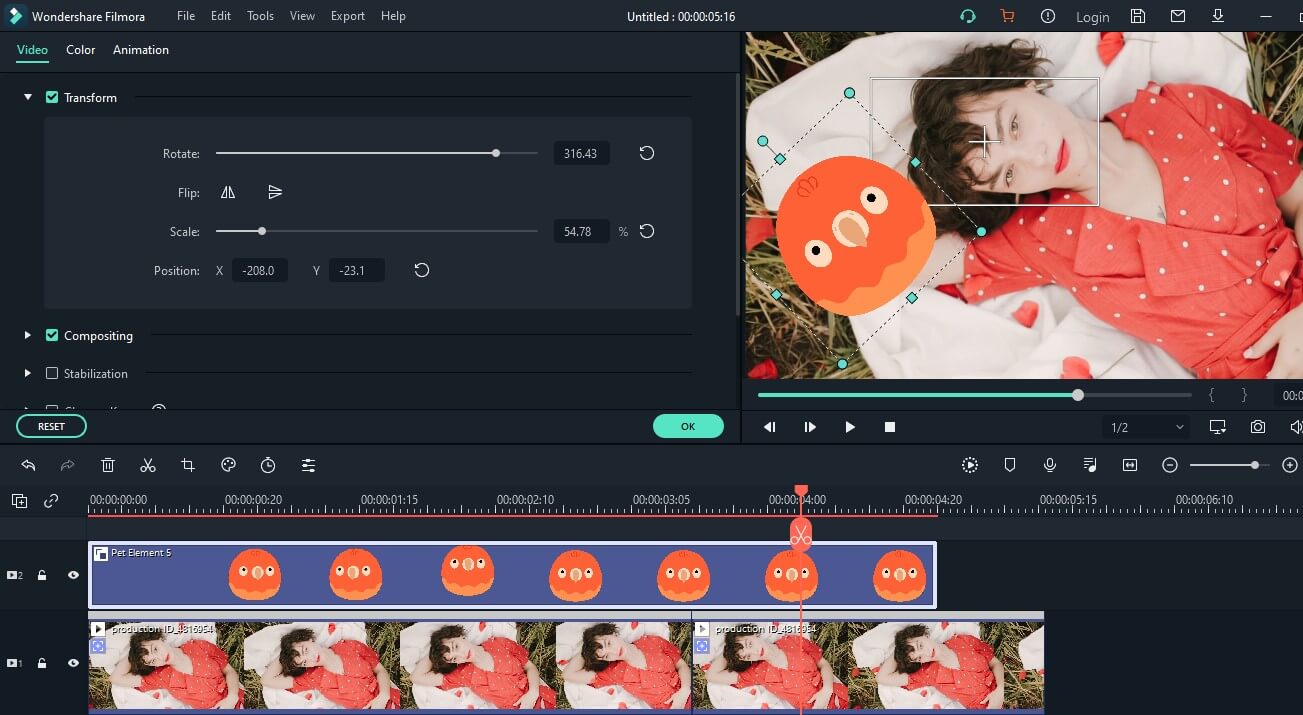
Part 2: Add Emojis to Your Video with Wondershare Filmora
Wondershare Filmora is an all in one video editing application that offers a ton of video editing options and features, with the addition of interesting emojis that can be used to create wonderful videos. Some of the best features of Filmora include a number of animated titles, motion tracking, animation keyframing, vide effects, enhanced video stabilization, noise removal, noise effects, and much more.
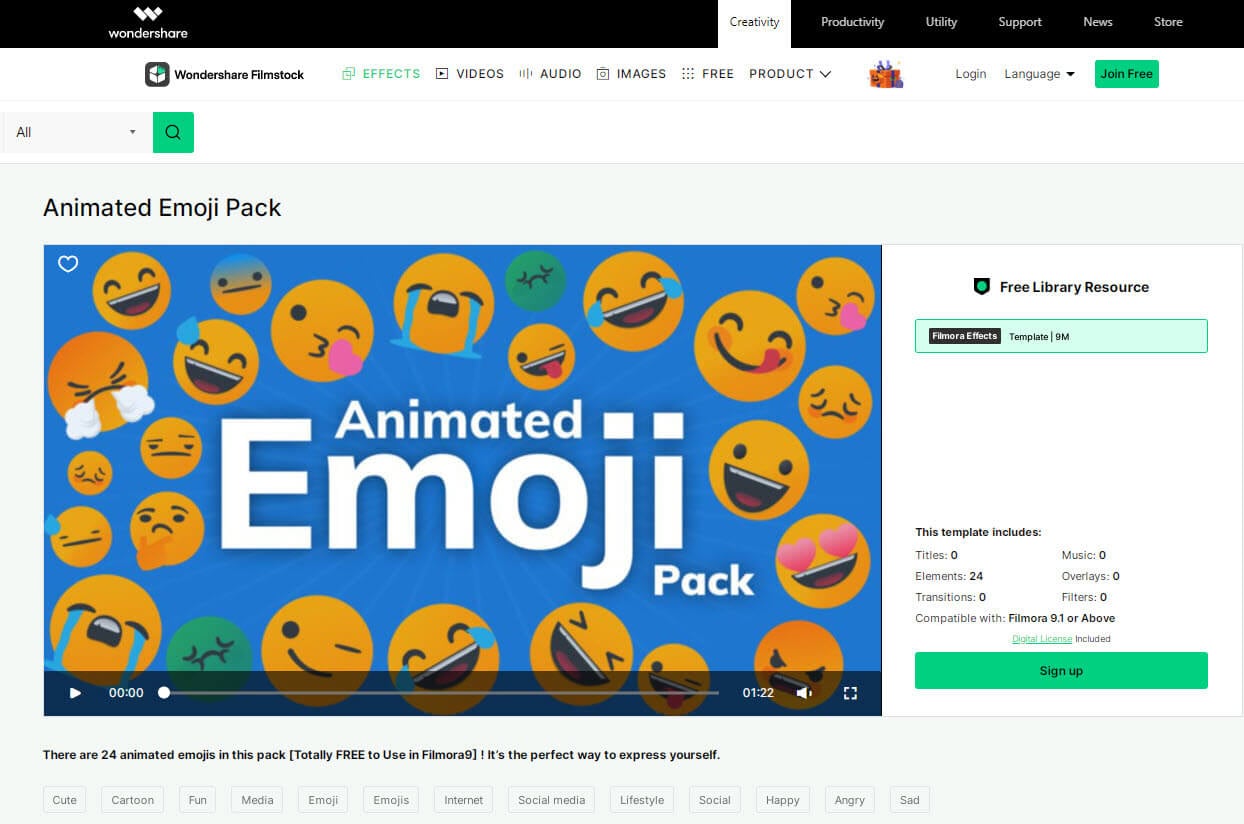
The Filmora application offers 9 inbuilt emojis within the tool and more emojis of different genres can be accessed by downloading the Animated Emoji Pack from the Filmstock effects store.
Adding emoji to videos has been a trend for some time. It is fun as well as allows the creator to express his ideas or feelings without the use of long texts and not offending the viewers in any way. So, let’s see how Filmora can be used to add emoji to any videos.
Steps to Follow:
1. Download and install Wondershare Filmora on your PC.

2. Create a New Project and add the video that needs to be edited to the Filmora timeline.
3. Tap on the Elements tab at the top and tap on the Emoji category on the side. A list of emoji elements will be displayed to you.

4. Or you can go to Wondershare Filmstock (Filmora’s effects store), find the free Animated Emoji Pack and download more emojis.
5. Select the emoji you like and drag and drop it just above the video on your timeline.
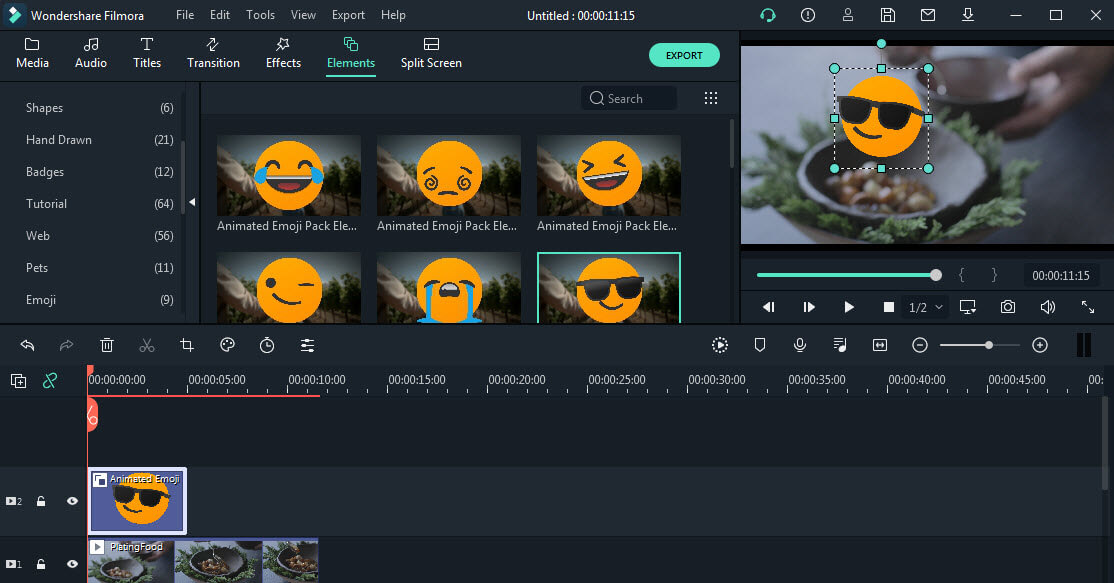
6. Adjust the position, duration, or size of the emoji if needed. Then preview the results and make changes if necessary.

7. After that, tap on the Export tab and save the video to any location of your choice.

Conclusion
Emoji is a wonderful way of expressing one’s ideas or feelings towards something on social media platforms like WhatsApp, YouTube, Facebook, etc. Most often the emoji provided by these applications may not be enough to express ourselves and hence there will be a need for creating or downloading more emoji. A list of the best 10 emoji creator apps has been listed above for you.
The use of emoji is not limited to just chats and comments, they are also used on images and videos. Filmora is an application that can be used to add emoji to video to make it more attractive and appealing.
We hope this article has been helpful to you. Please let us know what you think about our suggestion in the comment box below.
Shanoon Cox
Shanoon Cox is a writer and a lover of all things video.
Follow @Shanoon Cox
Shanoon Cox
Mar 27, 2024• Proven solutions
In this generation of online chatting and social media, emoji plays a big role in making our conversation easier and interesting. It helps people to express feelings or convey something in a better way than words or sentences ever could. Adding an emoji to chat, video or photo brings more fun to the content and the type of emojis different individuals prefer to use will be different.
Want to create your own emoji? So there is a need for emoji makers that can help to create customized emojis depending on everyone’s likes.
There are a lot of emoji makers in the online market that offers a bundle of pre-packed emoji as well as help you to create emoji of your choice. These tools help you to create your own emoji on whichever theme you wish providing a lot of customizing options.
- Part 1: Best 10 Emoji Makers to Create Your Own Emojis
- Part 2: Add Emojis to Your Video with Wondershare Filmora
Part 1: Best 10 Emoji Makers to Create Your Own Emojis
Most people around the world use emoji in their conversations, whether it be chats, comments on social media, writing blogs, etc. But the type of emojis preferred by different people may vary and sometimes the default emojis available might not be enough to express what they wish to. Hence there is a need for creating more emoji, depending on each individual’s taste.
This is where the emoji makers come in. Here we will discuss the top 10 emoji makers that can be used to create attractive emojis for sharing on social media platforms.
- [1. Emoji-maker.com(Online)](#emoji maker1)
- [2. piZap Emoji Maker(Online)](#emoji maker2)
- [3. Flat Icons Emoji Maker(Online)](#emoji maker3)
- [4. Labeley.com(Online)](#emoji maker4)
- [5. Disney Emoji Maker (Online)](#emoji maker5)
- [6. Animated Emoji Maker (Android app)](#emoji maker6)
- [7. Elite Emoji (Android app)](#emoji maker7)
- [8. Boomoji (Android app)](#emoji maker8)
- [9. Zmoji (iPhone app)](#emoji maker9)
- [10. Emojily (iPhone app)](#emoji maker10)
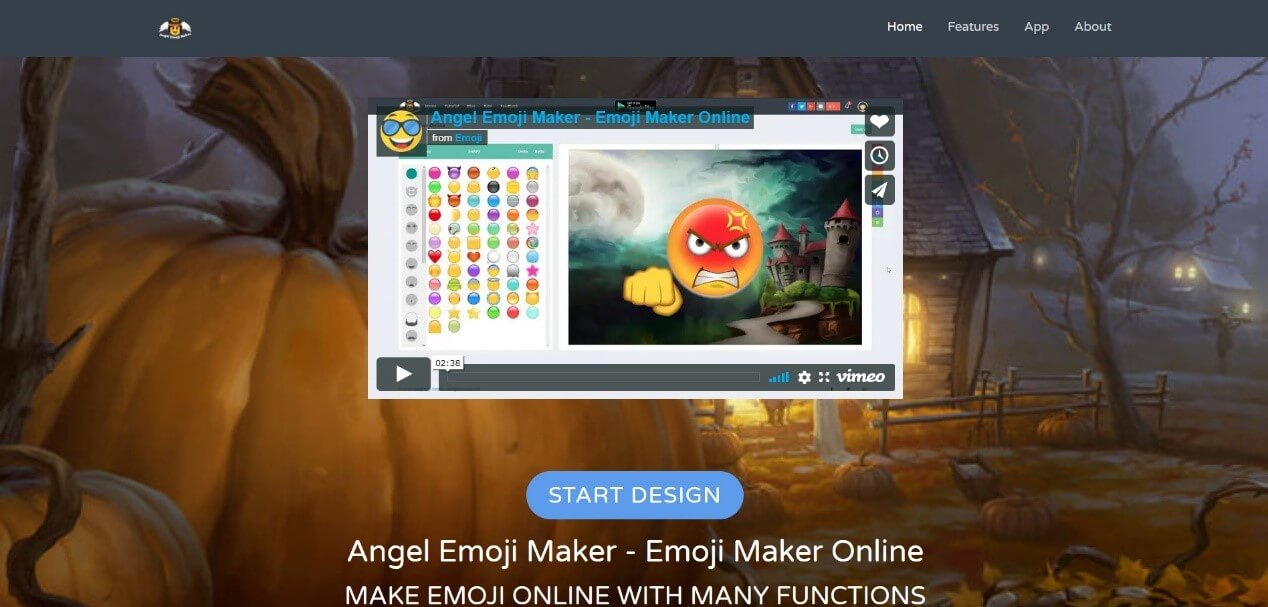
1. Emoji-maker.com(Online)
Emoji maker.com is an online told that provides a lot of beautiful and unique emoji editing options to the users.
Price:
- Free
Features:
- Offers a wide variety of emoji shapes
- Allows to customize emojis in a match to the user’s face
- Has an Emoji text function, that allows adding text to any emoji
- Provides a lot of emoji background options
- Provides multiple saving options for the emojis you have created
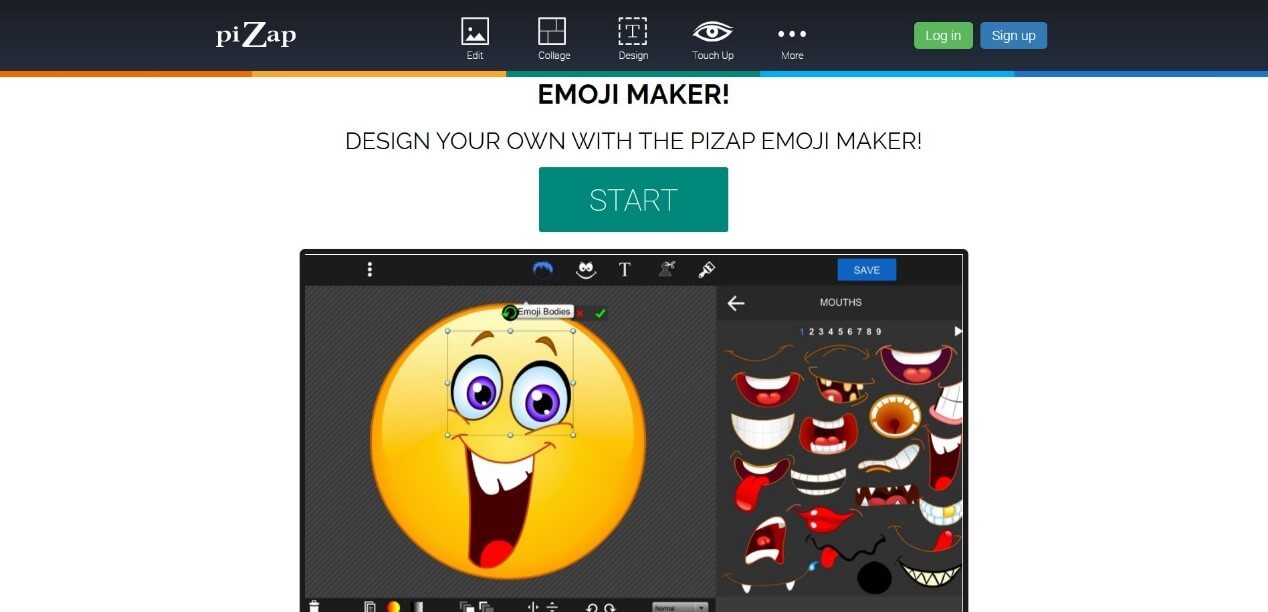
2. piZap Emoji Maker(Online)
piZap Emoji Maker is an online editor that has extensive emoji features that can help you to create awesome emojis. However, before you can do something, a mandatory signing in is required by this editor.
Price:
- Free
- Extra Features - piZap PRO for $5.99 per month or $35.88 per year
Features:
- All in one tool that can be used to create emoji, edit photos, create memes, etc.
- 6 million stock images
- Vibrant, colorful filters exclusive to this tool
- About 367 font options
3. Flat Icons Emoji Maker(Online)
Flat Icons Emoji is one of the simplest tools that are available to you for creating customized emojis of your choice.
![]()
Price:
- Free
- Premium bundle offers for $79 or $3710 (depends on the packs you choose)
Features:
- Offers a lot of shape options
- Provides a good collection of icon bundles for free
- Options to download both in PNG and SVG formats
- Easy editing and saving options
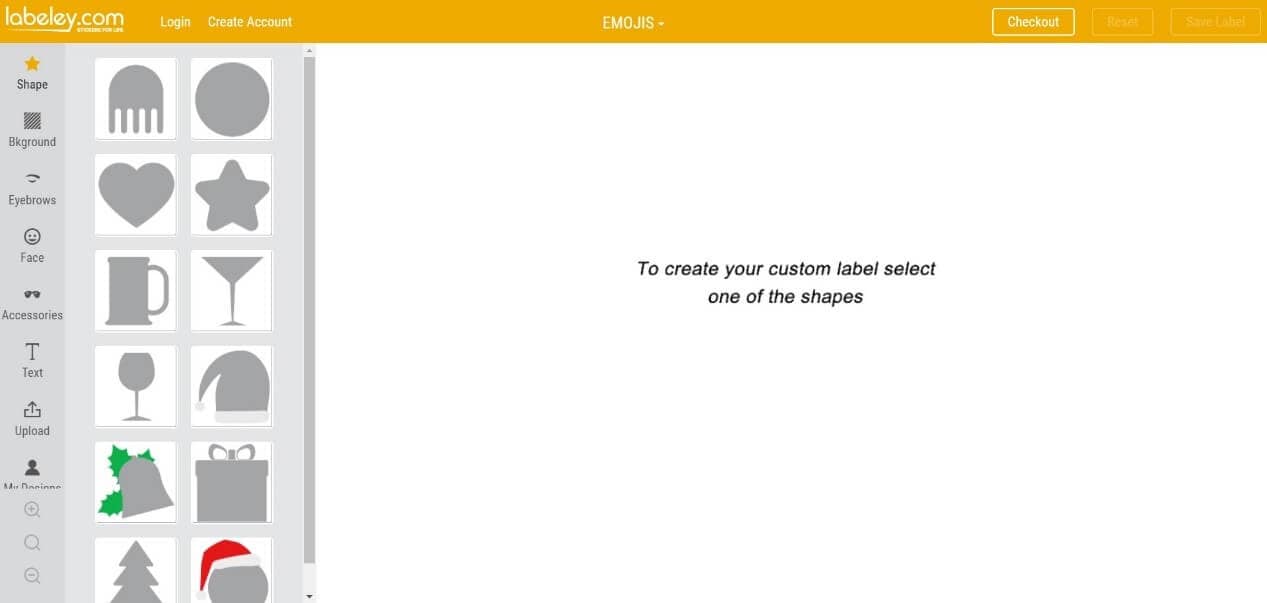
4. Labeley.com(Online)
Labeley.com is an online tool that allows you to design the emoji that you desire as well as provide you with printed copies of your design for an amount.
Price:
- Free
Features:
- Cool designing features and options for emoji
- Allows to save edits and make changes to it afterward
- Provides a set of beautiful artwork collections
- Provides “ print and delivery” option if you need physical copies of the emoji you designed (chargeable)
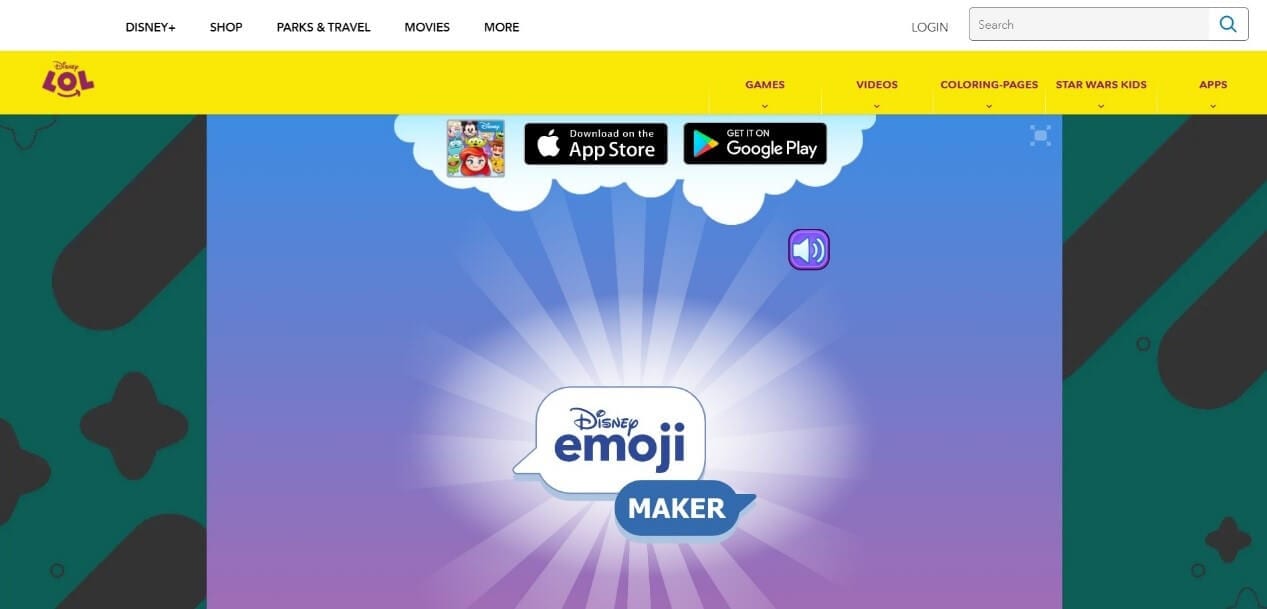
5. Disney Emoji Maker (Online)
As the name indicates, Disney Emoji Maker allows you to customize emoji based on some Disney characters. This emoji maker itself is very fun to use.
Price:
- Free
Features:
- An amazing user interface
- A variety of emoji features to add
- Apt for kids as well as grownups
- Easy export of the created emoji
6. Animated Emoji Maker (Android app)
Animated Emoji Maker is a tool that allows you to create wonderful emojis on any android devices without much effort.
Price:
- Free
Features:
- Allows to create normal as well as animated emoji
- Different characters like a cat, fox, dog, pig, panda chicken, monkey are available to create emoji
- Allows to customize emoji according to the user’s appearance
7. Elite Emoji (Android app)
Elite Emoji is an android tool that will allow you to create high-quality emoji that can be used to express ideas and emotions in your conversations.
Price:
- Free
Features
- 2000+ emoji options to choose from
- Single touch sharing in social media platforms like WhatsApp, Messenger, Instagram, etc.
- Ober 5000+ default messages to add to emojis
- Emoji suggestions, taking into account the personality traits of each user
8. Boomoji (Android app)
Boomoji is a free Android application that will allow you to create fun avatar type emoji of your choice.
Price:
- Free
Features:
- A ton of characteristics to edit
- Allows to create exact animate clones of the users
- Direct sharing into social media networks
9. Zmoji (iPhone app)
Zmoji is an iPhone tool that allows you to create and customize emojis that you need for any social interactions.
Price:
- Free
- Zmoji Premium for $99.9 per year
Features:
- Quick and easy creation of expressive avatars and emoji
- Create an animated avatar resembling the user appearance
- A number of fashionable options and facial features are available
10. Emojily (iPhone app)
Emojily is a fun tool that provides a large number of crazy emoji features. It is a free iPhone application that allows the sharing of the edited emoji on any platform.
Price:
- Free
- $0.99 for unlocking single emoji packs
- $3.99 for unlocking all packs
Features:
- A ton of items to choose from to create unique emoji
- An application provided keyboard to use the emoji
- A variety of design options
Part 2: Add Emojis to Your Video with Wondershare Filmora
Wondershare Filmora is an all in one video editing application that offers a ton of video editing options and features, with the addition of interesting emojis that can be used to create wonderful videos. Some of the best features of Filmora include a number of animated titles, motion tracking, animation keyframing, vide effects, enhanced video stabilization, noise removal, noise effects, and much more.
The Filmora application offers 9 inbuilt emojis within the tool and more emojis of different genres can be accessed by downloading the Animated Emoji Pack from the Filmstock effects store.
Adding emoji to videos has been a trend for some time. It is fun as well as allows the creator to express his ideas or feelings without the use of long texts and not offending the viewers in any way. So, let’s see how Filmora can be used to add emoji to any videos.
Steps to Follow:
1. Download and install Wondershare Filmora on your PC.
2. Create a New Project and add the video that needs to be edited to the Filmora timeline.
3. Tap on the Elements tab at the top and tap on the Emoji category on the side. A list of emoji elements will be displayed to you.
4. Or you can go to Wondershare Filmstock (Filmora’s effects store), find the free Animated Emoji Pack and download more emojis.
5. Select the emoji you like and drag and drop it just above the video on your timeline.
6. Adjust the position, duration, or size of the emoji if needed. Then preview the results and make changes if necessary.
7. After that, tap on the Export tab and save the video to any location of your choice.
Conclusion
Emoji is a wonderful way of expressing one’s ideas or feelings towards something on social media platforms like WhatsApp, YouTube, Facebook, etc. Most often the emoji provided by these applications may not be enough to express ourselves and hence there will be a need for creating or downloading more emoji. A list of the best 10 emoji creator apps has been listed above for you.
The use of emoji is not limited to just chats and comments, they are also used on images and videos. Filmora is an application that can be used to add emoji to video to make it more attractive and appealing.
We hope this article has been helpful to you. Please let us know what you think about our suggestion in the comment box below.
Shanoon Cox
Shanoon Cox is a writer and a lover of all things video.
Follow @Shanoon Cox
Shanoon Cox
Mar 27, 2024• Proven solutions
In this generation of online chatting and social media, emoji plays a big role in making our conversation easier and interesting. It helps people to express feelings or convey something in a better way than words or sentences ever could. Adding an emoji to chat, video or photo brings more fun to the content and the type of emojis different individuals prefer to use will be different.
Want to create your own emoji? So there is a need for emoji makers that can help to create customized emojis depending on everyone’s likes.
There are a lot of emoji makers in the online market that offers a bundle of pre-packed emoji as well as help you to create emoji of your choice. These tools help you to create your own emoji on whichever theme you wish providing a lot of customizing options.
- Part 1: Best 10 Emoji Makers to Create Your Own Emojis
- Part 2: Add Emojis to Your Video with Wondershare Filmora
Part 1: Best 10 Emoji Makers to Create Your Own Emojis
Most people around the world use emoji in their conversations, whether it be chats, comments on social media, writing blogs, etc. But the type of emojis preferred by different people may vary and sometimes the default emojis available might not be enough to express what they wish to. Hence there is a need for creating more emoji, depending on each individual’s taste.
This is where the emoji makers come in. Here we will discuss the top 10 emoji makers that can be used to create attractive emojis for sharing on social media platforms.
- [1. Emoji-maker.com(Online)](#emoji maker1)
- [2. piZap Emoji Maker(Online)](#emoji maker2)
- [3. Flat Icons Emoji Maker(Online)](#emoji maker3)
- [4. Labeley.com(Online)](#emoji maker4)
- [5. Disney Emoji Maker (Online)](#emoji maker5)
- [6. Animated Emoji Maker (Android app)](#emoji maker6)
- [7. Elite Emoji (Android app)](#emoji maker7)
- [8. Boomoji (Android app)](#emoji maker8)
- [9. Zmoji (iPhone app)](#emoji maker9)
- [10. Emojily (iPhone app)](#emoji maker10)
1. Emoji-maker.com(Online)
Emoji maker.com is an online told that provides a lot of beautiful and unique emoji editing options to the users.
Price:
- Free
Features:
- Offers a wide variety of emoji shapes
- Allows to customize emojis in a match to the user’s face
- Has an Emoji text function, that allows adding text to any emoji
- Provides a lot of emoji background options
- Provides multiple saving options for the emojis you have created
2. piZap Emoji Maker(Online)
piZap Emoji Maker is an online editor that has extensive emoji features that can help you to create awesome emojis. However, before you can do something, a mandatory signing in is required by this editor.
Price:
- Free
- Extra Features - piZap PRO for $5.99 per month or $35.88 per year
Features:
- All in one tool that can be used to create emoji, edit photos, create memes, etc.
- 6 million stock images
- Vibrant, colorful filters exclusive to this tool
- About 367 font options
3. Flat Icons Emoji Maker(Online)
Flat Icons Emoji is one of the simplest tools that are available to you for creating customized emojis of your choice.
![]()
Price:
- Free
- Premium bundle offers for $79 or $3710 (depends on the packs you choose)
Features:
- Offers a lot of shape options
- Provides a good collection of icon bundles for free
- Options to download both in PNG and SVG formats
- Easy editing and saving options
4. Labeley.com(Online)
Labeley.com is an online tool that allows you to design the emoji that you desire as well as provide you with printed copies of your design for an amount.
Price:
- Free
Features:
- Cool designing features and options for emoji
- Allows to save edits and make changes to it afterward
- Provides a set of beautiful artwork collections
- Provides “ print and delivery” option if you need physical copies of the emoji you designed (chargeable)
5. Disney Emoji Maker (Online)
As the name indicates, Disney Emoji Maker allows you to customize emoji based on some Disney characters. This emoji maker itself is very fun to use.
Price:
- Free
Features:
- An amazing user interface
- A variety of emoji features to add
- Apt for kids as well as grownups
- Easy export of the created emoji
6. Animated Emoji Maker (Android app)
Animated Emoji Maker is a tool that allows you to create wonderful emojis on any android devices without much effort.
Price:
- Free
Features:
- Allows to create normal as well as animated emoji
- Different characters like a cat, fox, dog, pig, panda chicken, monkey are available to create emoji
- Allows to customize emoji according to the user’s appearance
7. Elite Emoji (Android app)
Elite Emoji is an android tool that will allow you to create high-quality emoji that can be used to express ideas and emotions in your conversations.
Price:
- Free
Features
- 2000+ emoji options to choose from
- Single touch sharing in social media platforms like WhatsApp, Messenger, Instagram, etc.
- Ober 5000+ default messages to add to emojis
- Emoji suggestions, taking into account the personality traits of each user
8. Boomoji (Android app)
Boomoji is a free Android application that will allow you to create fun avatar type emoji of your choice.
Price:
- Free
Features:
- A ton of characteristics to edit
- Allows to create exact animate clones of the users
- Direct sharing into social media networks
9. Zmoji (iPhone app)
Zmoji is an iPhone tool that allows you to create and customize emojis that you need for any social interactions.
Price:
- Free
- Zmoji Premium for $99.9 per year
Features:
- Quick and easy creation of expressive avatars and emoji
- Create an animated avatar resembling the user appearance
- A number of fashionable options and facial features are available
10. Emojily (iPhone app)
Emojily is a fun tool that provides a large number of crazy emoji features. It is a free iPhone application that allows the sharing of the edited emoji on any platform.
Price:
- Free
- $0.99 for unlocking single emoji packs
- $3.99 for unlocking all packs
Features:
- A ton of items to choose from to create unique emoji
- An application provided keyboard to use the emoji
- A variety of design options
Part 2: Add Emojis to Your Video with Wondershare Filmora
Wondershare Filmora is an all in one video editing application that offers a ton of video editing options and features, with the addition of interesting emojis that can be used to create wonderful videos. Some of the best features of Filmora include a number of animated titles, motion tracking, animation keyframing, vide effects, enhanced video stabilization, noise removal, noise effects, and much more.
The Filmora application offers 9 inbuilt emojis within the tool and more emojis of different genres can be accessed by downloading the Animated Emoji Pack from the Filmstock effects store.
Adding emoji to videos has been a trend for some time. It is fun as well as allows the creator to express his ideas or feelings without the use of long texts and not offending the viewers in any way. So, let’s see how Filmora can be used to add emoji to any videos.
Steps to Follow:
1. Download and install Wondershare Filmora on your PC.
2. Create a New Project and add the video that needs to be edited to the Filmora timeline.
3. Tap on the Elements tab at the top and tap on the Emoji category on the side. A list of emoji elements will be displayed to you.
4. Or you can go to Wondershare Filmstock (Filmora’s effects store), find the free Animated Emoji Pack and download more emojis.
5. Select the emoji you like and drag and drop it just above the video on your timeline.
6. Adjust the position, duration, or size of the emoji if needed. Then preview the results and make changes if necessary.
7. After that, tap on the Export tab and save the video to any location of your choice.
Conclusion
Emoji is a wonderful way of expressing one’s ideas or feelings towards something on social media platforms like WhatsApp, YouTube, Facebook, etc. Most often the emoji provided by these applications may not be enough to express ourselves and hence there will be a need for creating or downloading more emoji. A list of the best 10 emoji creator apps has been listed above for you.
The use of emoji is not limited to just chats and comments, they are also used on images and videos. Filmora is an application that can be used to add emoji to video to make it more attractive and appealing.
We hope this article has been helpful to you. Please let us know what you think about our suggestion in the comment box below.
Shanoon Cox
Shanoon Cox is a writer and a lover of all things video.
Follow @Shanoon Cox
How to Add Stickers to WhatsApp-The Ultimate Guide
How to Add Stickers to WhatsApp-The Ultimate Guide
Shanoon Cox
Mar 27, 2024• Proven solutions
Whatsapp has recently added the stickers feature, and people are going crazy about adding stickers to WhatsApp. But the question is how to add stickers to Whatsapp? To help with that, we will walk you through a detailed guide on how to add stickers to Whatsapp and bring a dash of fun to boring texts.
Now, if you don’t know how to add stickers to WhatsApp and use stickers on Whatsapp, we have you covered.
- Part 1: How to Create Stickers for WhatsApp
- Part 2: How to Add Stickers to WhatsApp
- Part 3: How to Send Stickers on WhatsApp
- Part 4: Bonus Tip—Add Sticker to Your Video with Wondershare Filmora
Part 1: How to Create Stickers for WhatsApp
Whatsapp stickers are now a significant part of our daily conversations. Because let’s face it, life would be boring without them. Perhaps it’s time to up your game by learning how to add stickers to Whatsapp
Even though Whatsapp has a vast library of stickers available, creating a unique sticker is more fun. And the latest apps have made it incredibly easy to create customized stickers. So all you need to do now is learn how to use stickers in Whatsapp
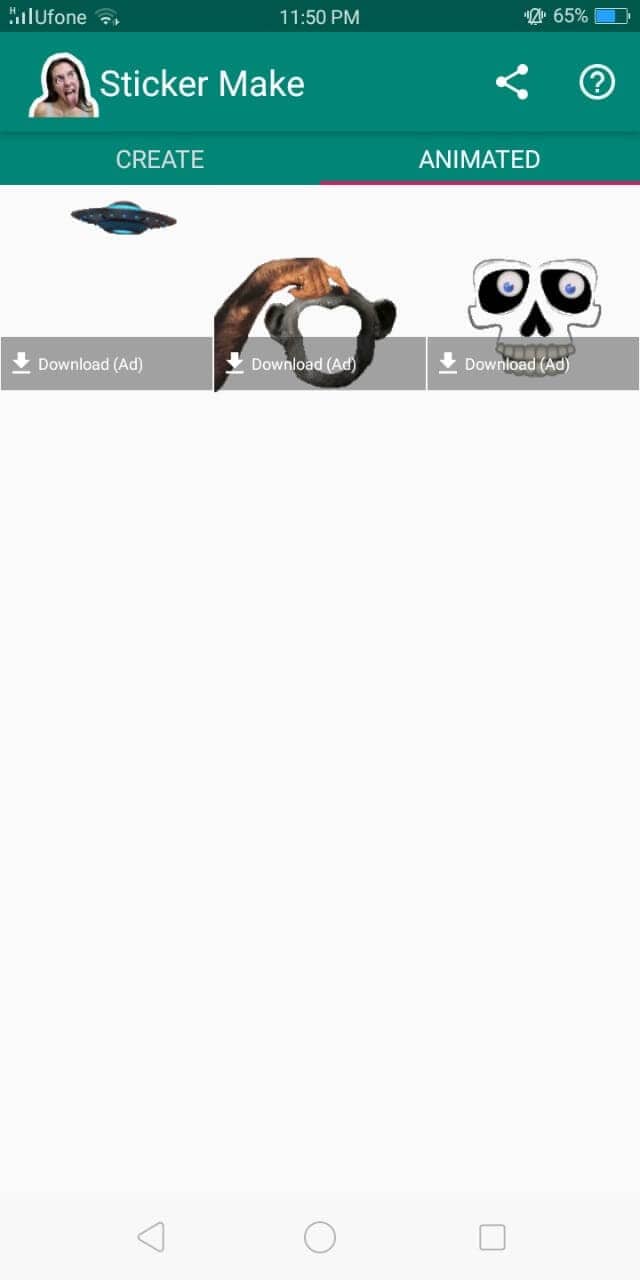
Sticker Make for Whatsapp is one such app. It is free and requires no registrations. Download the app from Google Store and start creating hilarious stickers to surprise your friends.
1. Download Sticker Make and launch it. On the homepage, you will be presented with two options. Click Create to make a sticker from scratch using your own image or click on Animated to insert your picture in a sticker template.
2. Choose any image from your gallery. Crop it to the size and shape you wish to include. Use the Freehand tool or click Automatically to let the app crop a face itself.
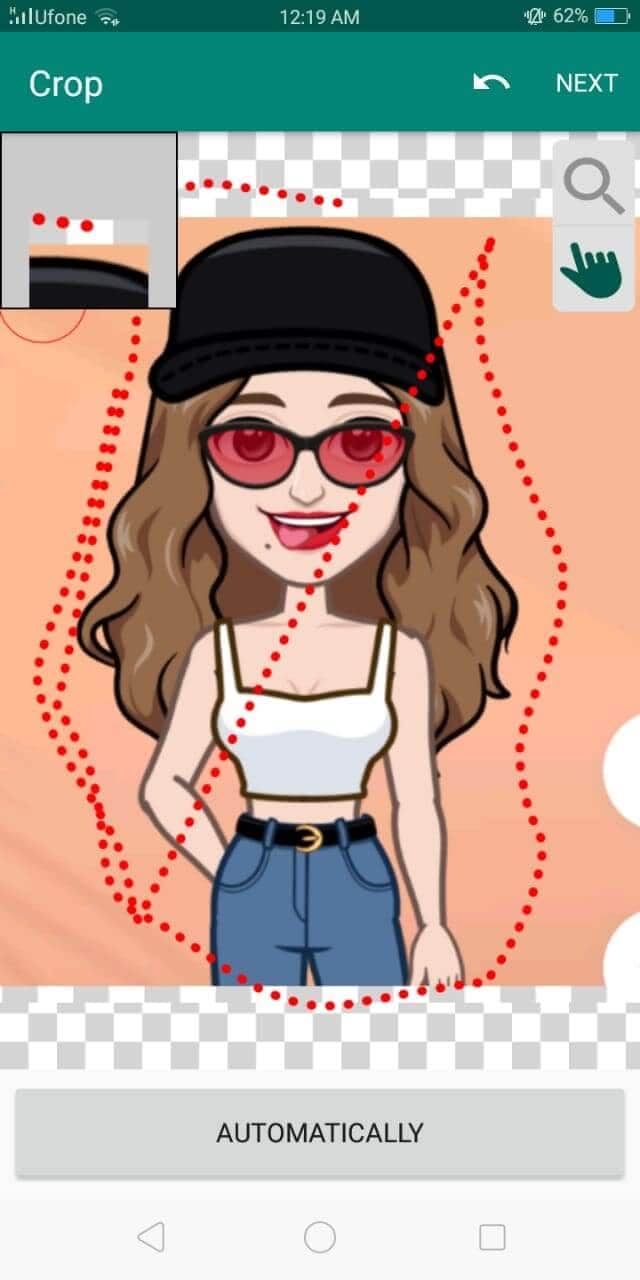
3. Click Next and now erase the background or make careful cropping.
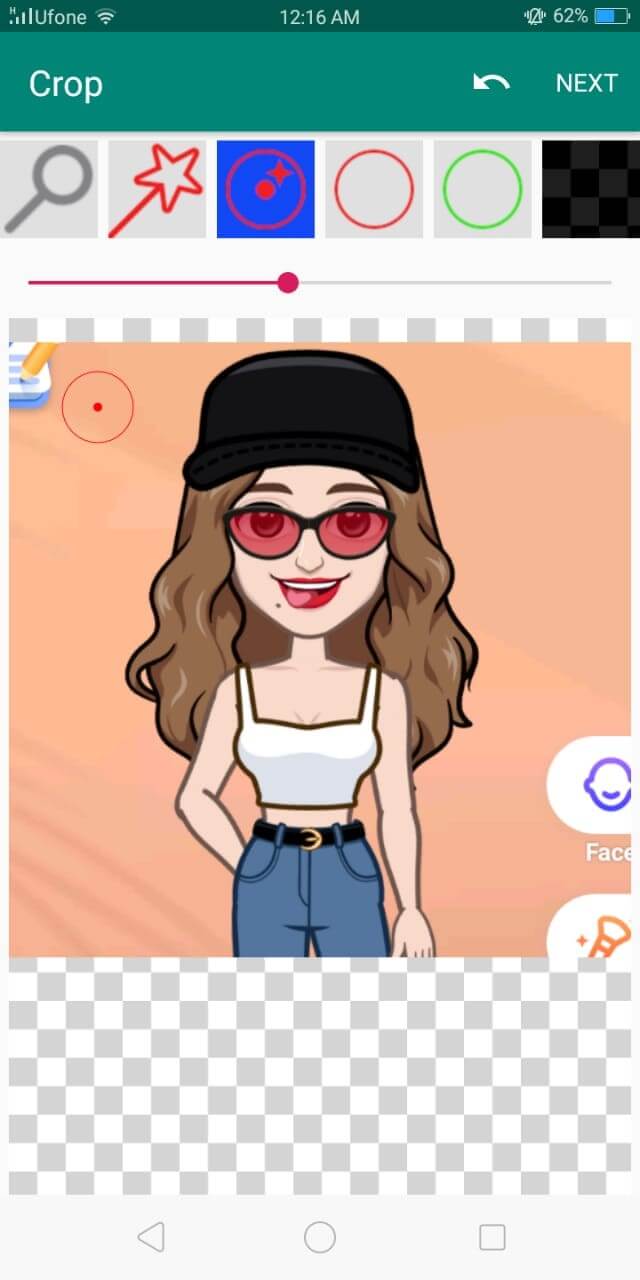
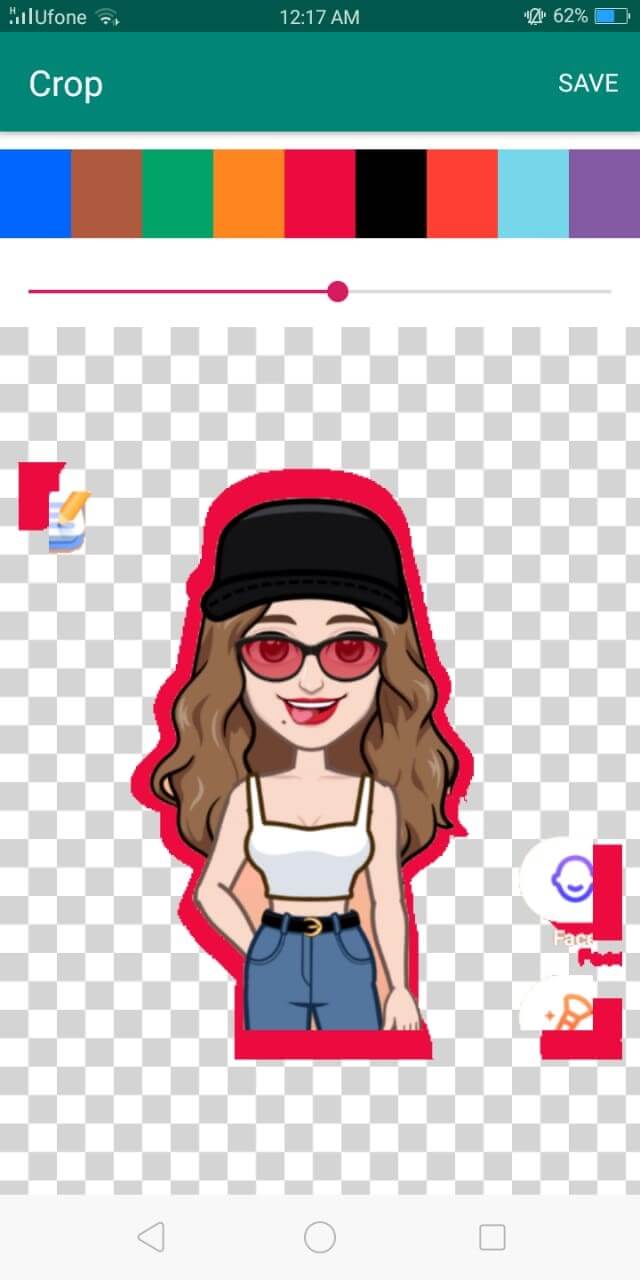
4. You can even outline your sticker and adjust its width and color.
5. You can even add texts and change fonts.

6. Click on the square in the bottom panel to choose from a list of cool backgrounds for your sticker.
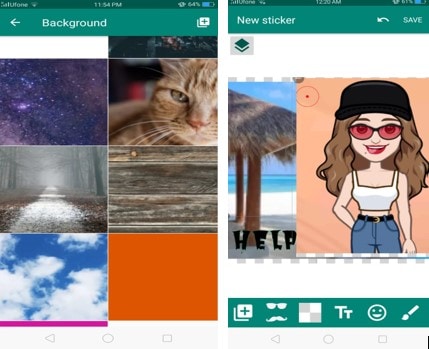
7. Choose to add themed emojis or decorate using a variety of images in the library of Sticker Make. Once you are done, click Save, enter pack name, and click Ok.
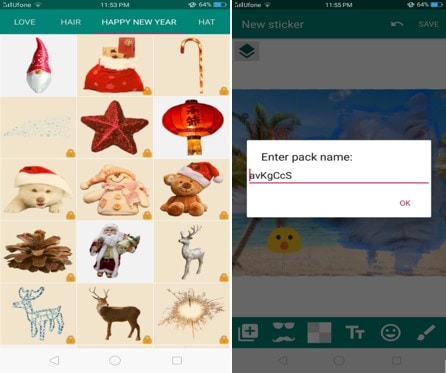
(P.S Make sure that the stickers are precisely 512x512 pixels and no more than 100kb)
Part 2: How to Add Stickers to WhatsApp
Now, you must be wondering how to add stickers to Whatsapp. Let me ease your worry. In this part, I will walk you through a step-by-step guide on how to use stickers in Whatsapp and a few additional features too.
You can save the stickers you receive from other people-
- Click on the sticker you receive
- Tap Add to favorites

If you wish you get more exciting stickers to better express yourself-
- Open Whatsapp chat, either individual or group chat.
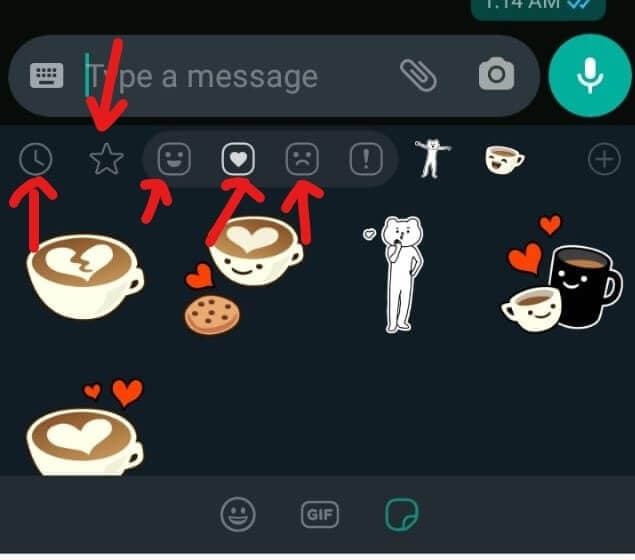
- Click on the emoji and then click the sticker beside GIF (the square shape)
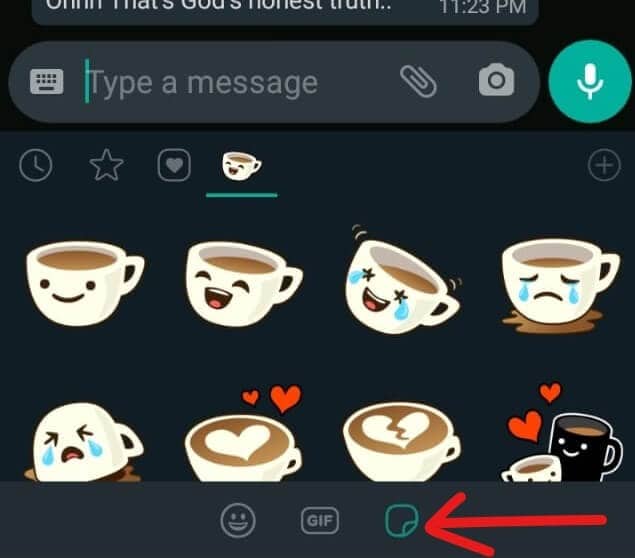
- Tap on the + sign on the upper right corner of your keyboard.
- Here you choose to download any number of sticker packs or click Get More Stickers from Google Play.
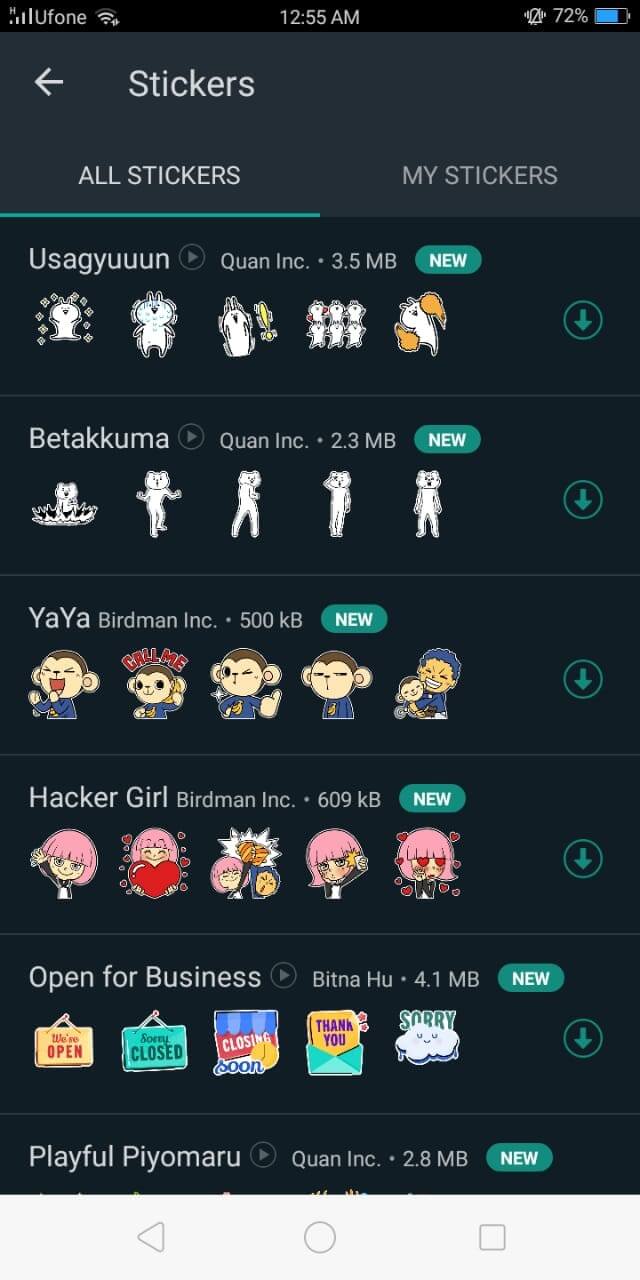
- Tap the download sign beside the sticker pack to start downloading.
- Once the download is complete, it will be displayed among the other stickers in your list.
Other features:
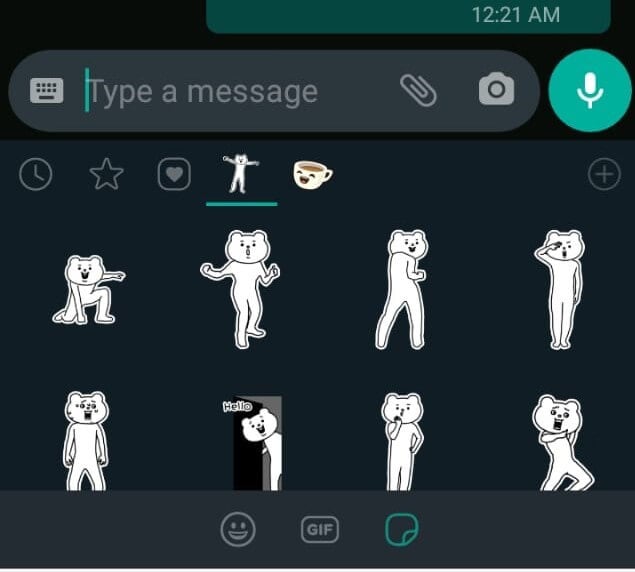
- Clock sign- This sign has all the stickers you recently used
- Star sign- It contains your favorite stickers
- Heart- In this, there are several categories. Whatsapp automatically arranges all your stickers in these categories as happy, sad, romantic, etc.
Part 3: How to Send Stickers on WhatsApp
So far, you have learned to create a custom sticker and then how to use Whatsapp stickers. All credit goes to the apps that made this task cakewalk (and some credit goes to your creativity too). Now that the worst is over, you have come to the final and best part of our article.
In 3 quick steps, you will be able to learn how to add stickers to Whatsapp and surprise your friends with hilarious stickers.
1.Open individual or group chat.
2.Click on the emoji and then tap the stickers on the bottom panel.
3.Choose the sticker that best fits your mood and intention from the various categories. Click it and voila! Sent!
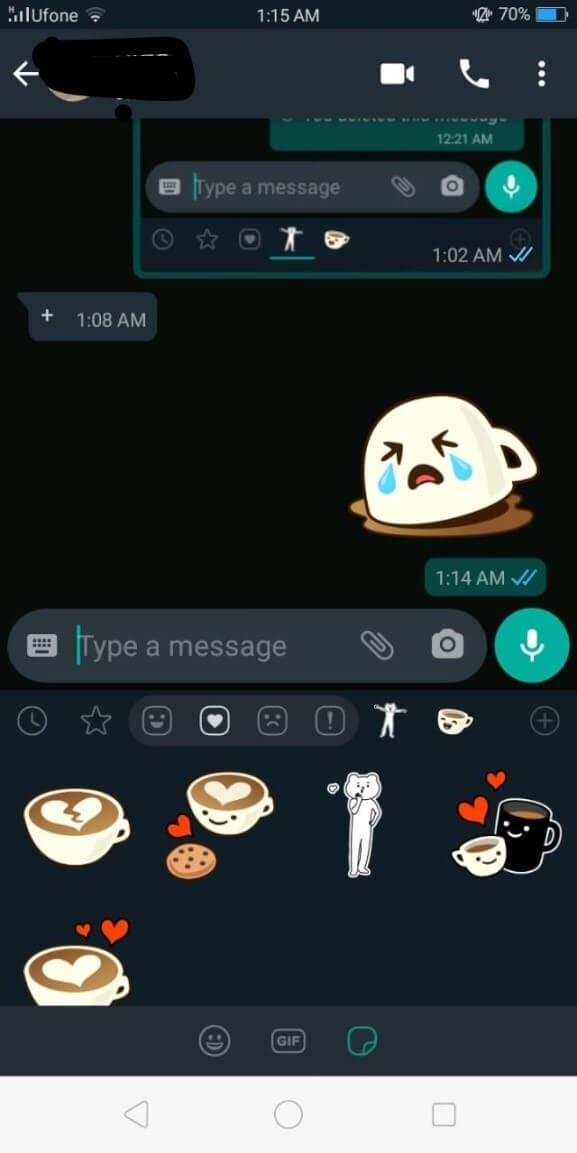
Easy peasy, right?
Bonus Tip—Add Sticker to Your Video with Wondershare Filmora
Although videos themselves are gripping enough, the addition of a customized sticker exclusive to you will be a cherry on top. Wondershare Filmora, with its user-friendly interface, is here just for that. You can now not only add your customized stickers to your video, but multiple effects can also be applied to enhance the video. Filmora is specially designed to offer professional editing tools to beginners. It has an in-built library of special effects and filters to help you create a stunningly cinematic video. Apply motion tracking, keyframe animations, or color match your videos. Add catchy captions or aesthetic filters to create a cool cinematic video
Let’s get right to it:
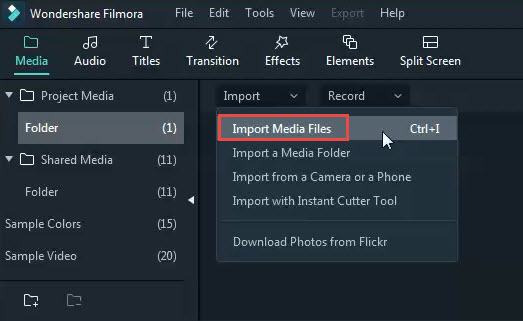
1.Download and install Filmora. Launch it. And click on Import-Import Media Files.
2. Then import your sticker into Filmora and drag and drop it to the video track or choose a sticker from the Elements (Note that both must be added to the video track).
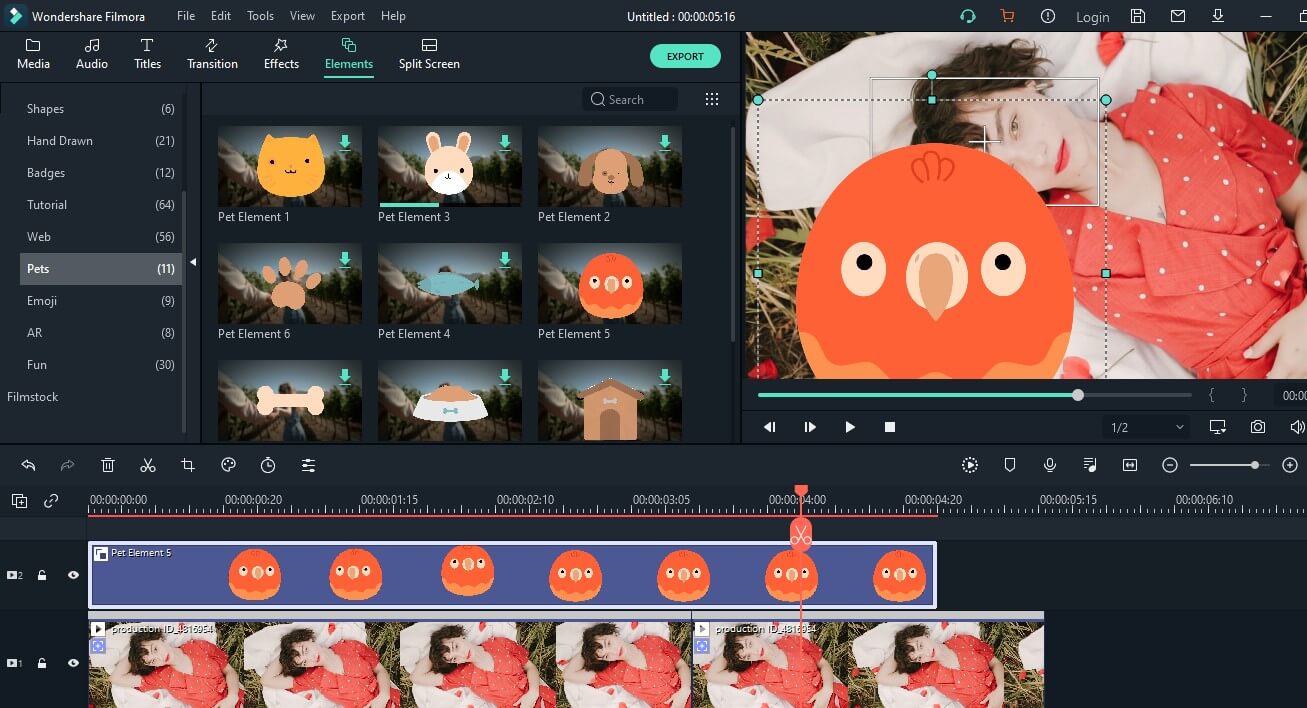
3. Double-click on the sticker in the timeline to adjust the additional parameters. In Video, you can adjust the size or rotation of the sticker. Tap Color to adjust the tint, temperature, or saturation of the sticker. You can also add 3D motion to the sticker in the Motion.
4. And in the viewer panel, click on the sticker and drag it to adjust the size or change the location.
5. Click Export and save it to your computer in the desired resolution.
Ready to Create and Add Stickers?
Stickers have been around long enough to become boringly ordinary. So, to keep the fun side of texting alive, you can now master how to use stickers on Whatsapp after creating your own personalized stickers.
You can start being creative with Sticker Make for Whatsapp. And if you didn’t know how to add stickers in Whatsapp, by now, you must have mastered it (hopefully).
Last but not least, to stand out in a crowd, you need to bring to light something others can’t. Inserting custom-made stickers in your videos might do the trick. Decorate your videos with Wondershare Filmora and create impressive masterpieces. Take note from this ultimate guide on how to add stickers to Whatsapp and transform your texting experience.
Let the fun begin!
Shanoon Cox
Shanoon Cox is a writer and a lover of all things video.
Follow @Shanoon Cox
Shanoon Cox
Mar 27, 2024• Proven solutions
Whatsapp has recently added the stickers feature, and people are going crazy about adding stickers to WhatsApp. But the question is how to add stickers to Whatsapp? To help with that, we will walk you through a detailed guide on how to add stickers to Whatsapp and bring a dash of fun to boring texts.
Now, if you don’t know how to add stickers to WhatsApp and use stickers on Whatsapp, we have you covered.
- Part 1: How to Create Stickers for WhatsApp
- Part 2: How to Add Stickers to WhatsApp
- Part 3: How to Send Stickers on WhatsApp
- Part 4: Bonus Tip—Add Sticker to Your Video with Wondershare Filmora
Part 1: How to Create Stickers for WhatsApp
Whatsapp stickers are now a significant part of our daily conversations. Because let’s face it, life would be boring without them. Perhaps it’s time to up your game by learning how to add stickers to Whatsapp
Even though Whatsapp has a vast library of stickers available, creating a unique sticker is more fun. And the latest apps have made it incredibly easy to create customized stickers. So all you need to do now is learn how to use stickers in Whatsapp
Sticker Make for Whatsapp is one such app. It is free and requires no registrations. Download the app from Google Store and start creating hilarious stickers to surprise your friends.
1. Download Sticker Make and launch it. On the homepage, you will be presented with two options. Click Create to make a sticker from scratch using your own image or click on Animated to insert your picture in a sticker template.
2. Choose any image from your gallery. Crop it to the size and shape you wish to include. Use the Freehand tool or click Automatically to let the app crop a face itself.
3. Click Next and now erase the background or make careful cropping.
4. You can even outline your sticker and adjust its width and color.
5. You can even add texts and change fonts.
6. Click on the square in the bottom panel to choose from a list of cool backgrounds for your sticker.
7. Choose to add themed emojis or decorate using a variety of images in the library of Sticker Make. Once you are done, click Save, enter pack name, and click Ok.
(P.S Make sure that the stickers are precisely 512x512 pixels and no more than 100kb)
Part 2: How to Add Stickers to WhatsApp
Now, you must be wondering how to add stickers to Whatsapp. Let me ease your worry. In this part, I will walk you through a step-by-step guide on how to use stickers in Whatsapp and a few additional features too.
You can save the stickers you receive from other people-
- Click on the sticker you receive
- Tap Add to favorites
If you wish you get more exciting stickers to better express yourself-
- Open Whatsapp chat, either individual or group chat.
- Click on the emoji and then click the sticker beside GIF (the square shape)
- Tap on the + sign on the upper right corner of your keyboard.
- Here you choose to download any number of sticker packs or click Get More Stickers from Google Play.
- Tap the download sign beside the sticker pack to start downloading.
- Once the download is complete, it will be displayed among the other stickers in your list.
Other features:
- Clock sign- This sign has all the stickers you recently used
- Star sign- It contains your favorite stickers
- Heart- In this, there are several categories. Whatsapp automatically arranges all your stickers in these categories as happy, sad, romantic, etc.
Part 3: How to Send Stickers on WhatsApp
So far, you have learned to create a custom sticker and then how to use Whatsapp stickers. All credit goes to the apps that made this task cakewalk (and some credit goes to your creativity too). Now that the worst is over, you have come to the final and best part of our article.
In 3 quick steps, you will be able to learn how to add stickers to Whatsapp and surprise your friends with hilarious stickers.
1.Open individual or group chat.
2.Click on the emoji and then tap the stickers on the bottom panel.
3.Choose the sticker that best fits your mood and intention from the various categories. Click it and voila! Sent!
Easy peasy, right?
Bonus Tip—Add Sticker to Your Video with Wondershare Filmora
Although videos themselves are gripping enough, the addition of a customized sticker exclusive to you will be a cherry on top. Wondershare Filmora, with its user-friendly interface, is here just for that. You can now not only add your customized stickers to your video, but multiple effects can also be applied to enhance the video. Filmora is specially designed to offer professional editing tools to beginners. It has an in-built library of special effects and filters to help you create a stunningly cinematic video. Apply motion tracking, keyframe animations, or color match your videos. Add catchy captions or aesthetic filters to create a cool cinematic video
Let’s get right to it:
1.Download and install Filmora. Launch it. And click on Import-Import Media Files.
2. Then import your sticker into Filmora and drag and drop it to the video track or choose a sticker from the Elements (Note that both must be added to the video track).
3. Double-click on the sticker in the timeline to adjust the additional parameters. In Video, you can adjust the size or rotation of the sticker. Tap Color to adjust the tint, temperature, or saturation of the sticker. You can also add 3D motion to the sticker in the Motion.
4. And in the viewer panel, click on the sticker and drag it to adjust the size or change the location.
5. Click Export and save it to your computer in the desired resolution.
Ready to Create and Add Stickers?
Stickers have been around long enough to become boringly ordinary. So, to keep the fun side of texting alive, you can now master how to use stickers on Whatsapp after creating your own personalized stickers.
You can start being creative with Sticker Make for Whatsapp. And if you didn’t know how to add stickers in Whatsapp, by now, you must have mastered it (hopefully).
Last but not least, to stand out in a crowd, you need to bring to light something others can’t. Inserting custom-made stickers in your videos might do the trick. Decorate your videos with Wondershare Filmora and create impressive masterpieces. Take note from this ultimate guide on how to add stickers to Whatsapp and transform your texting experience.
Let the fun begin!
Shanoon Cox
Shanoon Cox is a writer and a lover of all things video.
Follow @Shanoon Cox
How to Make a Slideshow with Music
How to Make a Slideshow with Music
Shanoon Cox
Mar 27, 2024• Proven solutions
Nowadays, we tend to store our experiences of important occasions in photos and videos since cameras and camcorders are popular. To better preserve these sweet memories, make a slideshow with music, photos and videos is a good idea. It’s not as difficult as you think since all you need are: a good slideshow maker, photos and videos you want to show, music to go along with your slideshow. Here is a tutorial about how to make a slideshow with music with Wondershare Filmora video editor and Wondershare DVD Slideshow Builder .
Read more: 20 Best Slideshow Songs for Different Occasions [Royalty-Free]
How to create slideshow with music in Filmora?
Note: The video tutorial about how to make slideshow in minutes is created with the previous version of Filmora video editor. Most of the steps are similar and creating a music slideshow with the latest Filmora is very easy. As we said before, all you need is your photos and music tracks, then follow the steps below to start.
Step 1. Download Filmora and Run it
Click the Free Download button above to download and install Wondershare Filmora on your computer and then launch it.
In case you want to change the default aspect ratio setting in the splash screen, you can choose 9:16 for portrait mode, 1:1 for Instagram slideshow and more. And then click New Project to create a project to continue.
Step 2. Import Photos and Music
After that, you need to import all your photo and music media to the Media Library and then drag and drop them to the timeline directly. Filmora allows you to change the order the photos in the timeline, and the photo duration as well.
You can also rotate photos and crop them manually to fit your project.
Note: If you find some black bar on your photos in preview, it is recommended to change Photo Placement to Crop and Zoom under Preference before drag-n-drop to timeline.
Step 3. Add Transitions

There are hundreds of transitions available in Filmora which you should totally have a try. You can apply a specific transition between each selected photo, or apply random transitions to selected photos.
Filmora features more than 30 transitions especially for Slideshow, such as cross merge, cross split, swap and sweep clockwise. Of course, you can also use some 3D transition, ripple and dissolve, or speed blur transitions.
You can also adjust the transition duration accordingly.
To make your photos slideshow looks better, it is highly recommended to apply filters and overlays effects.
Step 4. Add background music
You can choose background music or sound effect from the inbuilt audio library in Filmora or drag and drop the music track file from computer to the timeline directly. Filmora features the voiceover recording tool which helps you to record your own voice easily.
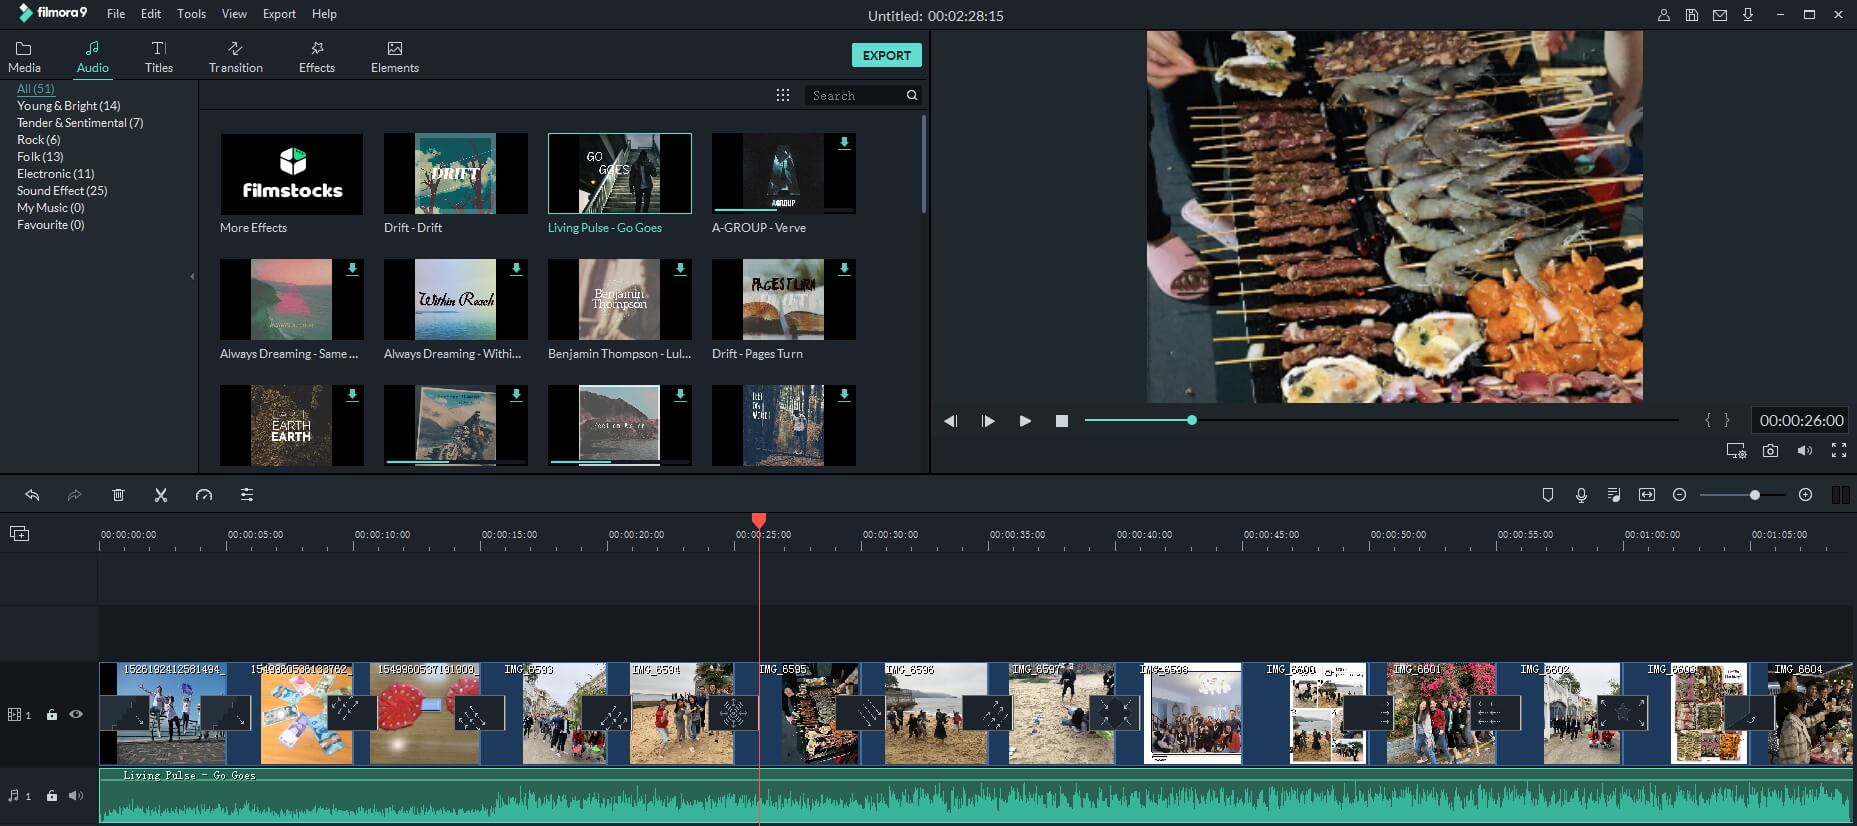
Step 5. Export and Save
Finally, it’s time to save and export the music slideshow as you see fit. You have several options, you can save it on the computer in different formats, or you can share it to YouTube or Vimeo directly, or you can burn it to DVD.
Why choose Filmora to create music slideshow?
- Filmora supports most of popular image formats such as .jpg, .png, .bmp, .gif, .tif, and .tiff.
- Filmora allows you to crop, pan & zoom the slideshow manually or automatically by applying Pan & Zoom Photo Placement.
- Filmora has inbuilt music track and sound effect library, and stunning transitions, effects and elements presets.
- Filmora allows you to record your own voiceover and apply fade in and fade out effects.
- Besides creating photo slideshow, you can use it to create videos for both your YouTube marketing, daily sharing and business.
How to make a slideshow with DVD Slideshow Builder

Tips for Make a Slideshow with Music
1. Install slideshow software and import photos and videos
Install the software and import your digital photos to the storyboard by clicking ‘“Add Files” (there is no quantity limitation of photos). You can also add videos from computer or camera.
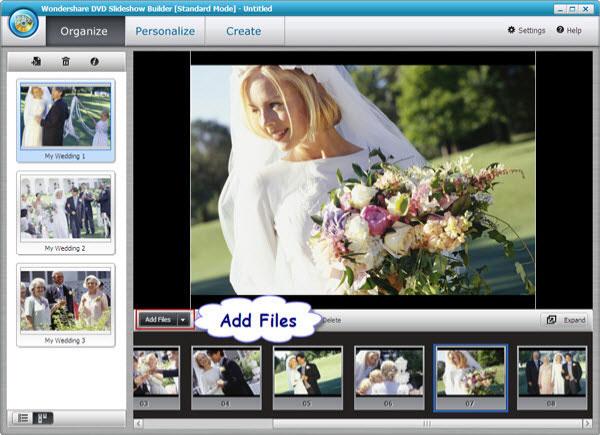
2. Add music to your photo slideshow
Go to the “Personalize” tab. Click “Music” toolbar to add background music or just drag the music to the background track. In the timeline, you can drag the slider to make the music best suit the photos and videos. If you need to edit the music, double click the clip and in the pop up window, trim music and adjust music volume as you like.
Tip: If you want to synchronize background music with the slideshow, click “Settings” (it’s on the right upper corner) and choose “Slideshow” tab, then tick the checkbox under the “Synchronize“. At last, click “OK” button.
3 .Select movie styles and add decorations
There are also 480+ free styles and transition effects that can be used for your picture slideshow with music in this tab. Choose your favorite styles and drag it on the photos. You can also add decoration text, clipart and effects on your digital photos. To make add more fun, you can also add intro movie and credit movie to your picture slideshow with music by clicking the “Intro/Credit” build-in button.

4 . Preview and save your slideshow with music
Go to “Publish” tab, you can preview the photo video by click the preview button first. Then publish it to the format you want. If you want to watch your photo slideshow with music to iPod or iPhone, you’d better publish it to MP4 format. This slideshow software also enables you to share your slideshow directly to YouTube by filling in the necessary information. Besides, you can burn DVD slideshow with music by clicking the “Burn to DVD” button and putting a DVD disc in your computer.
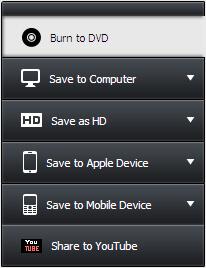
We shared two ways of making slideshow with music, whether you are using Filmora or DVD slideshow maker, leave a comment below and let me know your choice.
Shanoon Cox
Shanoon Cox is a writer and a lover of all things video.
Follow @Shanoon Cox
Shanoon Cox
Mar 27, 2024• Proven solutions
Nowadays, we tend to store our experiences of important occasions in photos and videos since cameras and camcorders are popular. To better preserve these sweet memories, make a slideshow with music, photos and videos is a good idea. It’s not as difficult as you think since all you need are: a good slideshow maker, photos and videos you want to show, music to go along with your slideshow. Here is a tutorial about how to make a slideshow with music with Wondershare Filmora video editor and Wondershare DVD Slideshow Builder .
Read more: 20 Best Slideshow Songs for Different Occasions [Royalty-Free]
How to create slideshow with music in Filmora?
Note: The video tutorial about how to make slideshow in minutes is created with the previous version of Filmora video editor. Most of the steps are similar and creating a music slideshow with the latest Filmora is very easy. As we said before, all you need is your photos and music tracks, then follow the steps below to start.
Step 1. Download Filmora and Run it
Click the Free Download button above to download and install Wondershare Filmora on your computer and then launch it.
In case you want to change the default aspect ratio setting in the splash screen, you can choose 9:16 for portrait mode, 1:1 for Instagram slideshow and more. And then click New Project to create a project to continue.
Step 2. Import Photos and Music
After that, you need to import all your photo and music media to the Media Library and then drag and drop them to the timeline directly. Filmora allows you to change the order the photos in the timeline, and the photo duration as well.
You can also rotate photos and crop them manually to fit your project.
Note: If you find some black bar on your photos in preview, it is recommended to change Photo Placement to Crop and Zoom under Preference before drag-n-drop to timeline.
Step 3. Add Transitions
There are hundreds of transitions available in Filmora which you should totally have a try. You can apply a specific transition between each selected photo, or apply random transitions to selected photos.
Filmora features more than 30 transitions especially for Slideshow, such as cross merge, cross split, swap and sweep clockwise. Of course, you can also use some 3D transition, ripple and dissolve, or speed blur transitions.
You can also adjust the transition duration accordingly.
To make your photos slideshow looks better, it is highly recommended to apply filters and overlays effects.
Step 4. Add background music
You can choose background music or sound effect from the inbuilt audio library in Filmora or drag and drop the music track file from computer to the timeline directly. Filmora features the voiceover recording tool which helps you to record your own voice easily.
Step 5. Export and Save
Finally, it’s time to save and export the music slideshow as you see fit. You have several options, you can save it on the computer in different formats, or you can share it to YouTube or Vimeo directly, or you can burn it to DVD.
Why choose Filmora to create music slideshow?
- Filmora supports most of popular image formats such as .jpg, .png, .bmp, .gif, .tif, and .tiff.
- Filmora allows you to crop, pan & zoom the slideshow manually or automatically by applying Pan & Zoom Photo Placement.
- Filmora has inbuilt music track and sound effect library, and stunning transitions, effects and elements presets.
- Filmora allows you to record your own voiceover and apply fade in and fade out effects.
- Besides creating photo slideshow, you can use it to create videos for both your YouTube marketing, daily sharing and business.
How to make a slideshow with DVD Slideshow Builder
Tips for Make a Slideshow with Music
1. Install slideshow software and import photos and videos
Install the software and import your digital photos to the storyboard by clicking ‘“Add Files” (there is no quantity limitation of photos). You can also add videos from computer or camera.
2. Add music to your photo slideshow
Go to the “Personalize” tab. Click “Music” toolbar to add background music or just drag the music to the background track. In the timeline, you can drag the slider to make the music best suit the photos and videos. If you need to edit the music, double click the clip and in the pop up window, trim music and adjust music volume as you like.
Tip: If you want to synchronize background music with the slideshow, click “Settings” (it’s on the right upper corner) and choose “Slideshow” tab, then tick the checkbox under the “Synchronize“. At last, click “OK” button.
3 .Select movie styles and add decorations
There are also 480+ free styles and transition effects that can be used for your picture slideshow with music in this tab. Choose your favorite styles and drag it on the photos. You can also add decoration text, clipart and effects on your digital photos. To make add more fun, you can also add intro movie and credit movie to your picture slideshow with music by clicking the “Intro/Credit” build-in button.
4 . Preview and save your slideshow with music
Go to “Publish” tab, you can preview the photo video by click the preview button first. Then publish it to the format you want. If you want to watch your photo slideshow with music to iPod or iPhone, you’d better publish it to MP4 format. This slideshow software also enables you to share your slideshow directly to YouTube by filling in the necessary information. Besides, you can burn DVD slideshow with music by clicking the “Burn to DVD” button and putting a DVD disc in your computer.
We shared two ways of making slideshow with music, whether you are using Filmora or DVD slideshow maker, leave a comment below and let me know your choice.
Shanoon Cox
Shanoon Cox is a writer and a lover of all things video.
Follow @Shanoon Cox
How to Make a Memorable Honeymoon Video
How to Make a Memorable Honeymoon Video
Ollie Mattison
Mar 27, 2024• Proven solutions
The honeymoon is maybe one of the most important times in our life. It’s unique, refined and filled with emotion which is why you should always try to consider exploring all the opportunities that this has to offer. But if you go on a honeymoon, you do want to have a video that you can cherish forever, don’t you? If you do, here are example of fancy honey moon video and some of the best ideas that you can use to create the best, most immersive and memorable honeymoon video.
Tips on creating a memorable honeymoon video
Choosing the right camera
There are many affordable 1080p or 4k cameras that you can use and all of them come with various features and prices. Obviously, you should try and focus on finding the right one that suits your needs. Take your time and study the prices and features then select the one you want based on your budget and expertise.
Get lots of photos
Another great tip is that you need to get as many photos as you can. No matter where you choose to go, there are tons of scenes, people, monuments and landmarks that you can choose to photograph. Take your time and try to capture as many of them as you possibly can. Granted, it will take a little bit of time but it will offer you the insight and fun you need in order to have a great slideshow in the end.
Organize a story from your photos
Once you have the photos, you should try to organize a story from the images. The best honeymoon movies are the ones that include a story so think about that and you will have quite a bit of fun as you immerse yourself into this experience, that’s for sure.
Add songs and overlays
You should try and consider adding songs and overlays because this will make the movie more fun and immersive. Once you complete it, you will need to share it with friends and family!
Edit your honeymoon video with Wondershare Filmora
Why choose Wondershare Filmora
If you are not good at video editing, or if you are a beginner and bothered by the complex steps of some professional video editor, Wondershare Filmora is here to save you. This is the best movie creation tool that helps you create you honeymoon movies from images all while delivering the entire set of tools you need to get a one of a kind and fun experience. If you always wanted an incredible and unique, refined movie creation experience then this is the app to use.
=“” style=”width: 100%; height: 278.438px;”;
Download Mac Version ](https://tools.techidaily.com/wondershare/filmora/download/ )
Wondershare Filmora is very easy to use but it also manages to offer a lot of power. This is great for people that want to access basic editing features such as splitting, reverse, rotate and crop but which might also want some advanced features as well. You are bound to enjoy the entire experience for sure and the outcome will be very well worth it.
Aside from that, Wondershare Filmora also allows you to access a fresh interface that makes editing such a video a breeze. You can even add a variety of overlays and filters which do add up to offer you a very refined, exciting and refreshing experience at all times. It’s all about having the right focus and attention to detail but rest assured that the outcome will be well worth it. Once you have the movie, you can share it on Vimeo, YouTube and Facebook with a single click. The app also allows you to burn it to DVD if you so desire.
How to edit the honeymoon video with Wondershare Filmora
All you have to do is to go through the next steps:
Step 1: Import your honeymoon photos and videos
Gather all the videos and images that you have from your honeymoon then paste them inside the app.

Step 2: Tone your videos with editing tools
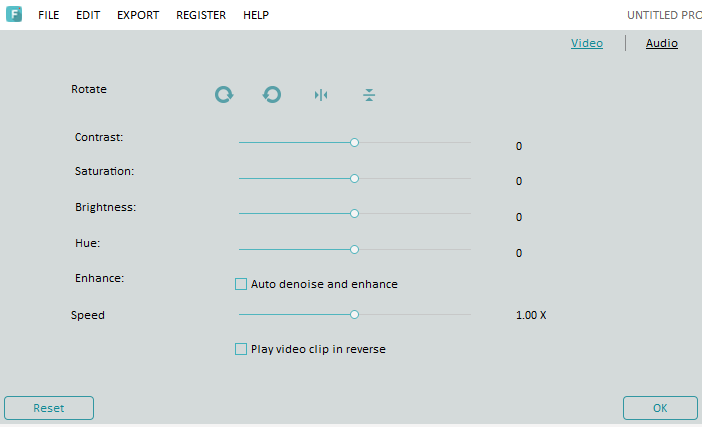
Add in video tones with features like reverse, trim, rotate, overlays, transitions, text and so on. This will help you refine the movie and offer it the unique experience you always wanted.
Step 3: Add music from Filmora library
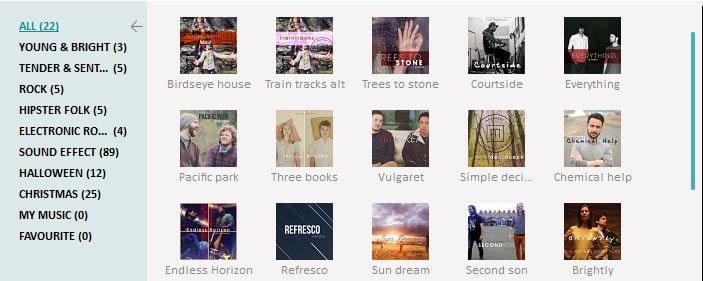
Once you have that, add the music from the integrated royalty free library to ignite your love story.
Step 4: Save and share you video

Complete the video by saving it and then you can feel free to share it with friends.
Wondershare Filmora is the best solution for those that want a refined and fun honeymoon video. All you have to do is to try it out and rest assured that you are bound to love the results!
Download Mac Version ](https://tools.techidaily.com/wondershare/filmora/download/ )
Ollie Mattison
Ollie Mattison is a writer and a lover of all things video.
Follow @Ollie Mattison
Ollie Mattison
Mar 27, 2024• Proven solutions
The honeymoon is maybe one of the most important times in our life. It’s unique, refined and filled with emotion which is why you should always try to consider exploring all the opportunities that this has to offer. But if you go on a honeymoon, you do want to have a video that you can cherish forever, don’t you? If you do, here are example of fancy honey moon video and some of the best ideas that you can use to create the best, most immersive and memorable honeymoon video.
Tips on creating a memorable honeymoon video
Choosing the right camera
There are many affordable 1080p or 4k cameras that you can use and all of them come with various features and prices. Obviously, you should try and focus on finding the right one that suits your needs. Take your time and study the prices and features then select the one you want based on your budget and expertise.
Get lots of photos
Another great tip is that you need to get as many photos as you can. No matter where you choose to go, there are tons of scenes, people, monuments and landmarks that you can choose to photograph. Take your time and try to capture as many of them as you possibly can. Granted, it will take a little bit of time but it will offer you the insight and fun you need in order to have a great slideshow in the end.
Organize a story from your photos
Once you have the photos, you should try to organize a story from the images. The best honeymoon movies are the ones that include a story so think about that and you will have quite a bit of fun as you immerse yourself into this experience, that’s for sure.
Add songs and overlays
You should try and consider adding songs and overlays because this will make the movie more fun and immersive. Once you complete it, you will need to share it with friends and family!
Edit your honeymoon video with Wondershare Filmora
Why choose Wondershare Filmora
If you are not good at video editing, or if you are a beginner and bothered by the complex steps of some professional video editor, Wondershare Filmora is here to save you. This is the best movie creation tool that helps you create you honeymoon movies from images all while delivering the entire set of tools you need to get a one of a kind and fun experience. If you always wanted an incredible and unique, refined movie creation experience then this is the app to use.
=“” style=”width: 100%; height: 278.438px;”;
Download Mac Version ](https://tools.techidaily.com/wondershare/filmora/download/ )
Wondershare Filmora is very easy to use but it also manages to offer a lot of power. This is great for people that want to access basic editing features such as splitting, reverse, rotate and crop but which might also want some advanced features as well. You are bound to enjoy the entire experience for sure and the outcome will be very well worth it.
Aside from that, Wondershare Filmora also allows you to access a fresh interface that makes editing such a video a breeze. You can even add a variety of overlays and filters which do add up to offer you a very refined, exciting and refreshing experience at all times. It’s all about having the right focus and attention to detail but rest assured that the outcome will be well worth it. Once you have the movie, you can share it on Vimeo, YouTube and Facebook with a single click. The app also allows you to burn it to DVD if you so desire.
How to edit the honeymoon video with Wondershare Filmora
All you have to do is to go through the next steps:
Step 1: Import your honeymoon photos and videos
Gather all the videos and images that you have from your honeymoon then paste them inside the app.
Step 2: Tone your videos with editing tools
Add in video tones with features like reverse, trim, rotate, overlays, transitions, text and so on. This will help you refine the movie and offer it the unique experience you always wanted.
Step 3: Add music from Filmora library
Once you have that, add the music from the integrated royalty free library to ignite your love story.
Step 4: Save and share you video
Complete the video by saving it and then you can feel free to share it with friends.
Wondershare Filmora is the best solution for those that want a refined and fun honeymoon video. All you have to do is to try it out and rest assured that you are bound to love the results!
Download Mac Version ](https://tools.techidaily.com/wondershare/filmora/download/ )
Ollie Mattison
Ollie Mattison is a writer and a lover of all things video.
Follow @Ollie Mattison
How to Add Bitmoji to Keyboard? [Complete Guide]
Emojis have made it so much better for people to express themselves. Let’s say someone compliments you on a chat app; you can use a smiley emoji to tell that you are happy. At the same time, an angry emoji lets you express that you are angry.
Apart from the generic emojis that you can find in your chat applications, Bitmoji enables you to customize your character and share it with people you chat with. Bitmoji is fun, but do you know how to add it to a keyboard? If you don’t, don’t worry, this post will help you understand how to do that.
In this article
02 How to Add and Use Bitmoji to iPhone Keyboard?
03 How to Get the Bitmoji Keyboard on Android?
04 How to Install and Use Bitmoji on Windows and Mac?
Part 1: What is Bitmoji?
If you are new to Bitmoji, you may wonder what it is? Bitmoji is essentially your own personal emoji. You can create a cartoon version of yourself and share it with people to make the conversation fun. So, what one does is create an avatar of themselves and give it all kinds of expressions.
Then, you can create comics using your Bitmoji, use it to express yourself while having a chat, and even use it as a reaction. Anyone who is done using the same old emojis has started using Bitmoji because it’s a lot more fun.
Now, let’s learn how to create your very own Bitmoji.
Step 1: First, go to the App Store or Play store and download the Bitmoji application.
Step 2: Once downloaded, launch the app and start making an avatar or your Bitmoji.
Step 3: Pick a skin color, hair color, chin, nose, hairstyle, jawline, and more.

Once your Bitmoji is created, you are all set to use the Bitmoji as stickers. Moreover, the app lets you dress your Bitmoji as you want as well. Let it have different expressions and postures because that’s how it’s going to be fun! After your Bitmoji is added, the next thing to do is enable Bitmoji on the keyboard of the device you are using.
Part 2: How to Add and Use Bitmoji to iPhone Keyboard?
Since you have learned how to create a Bimoji, it’s time to learn the steps to use it on your iPhone keyboard. Unfortunately, just by downloading the app, it won’t reflect on the keyboard directly. Instead, you will have to follow a few steps to add Bitmoji to the keyboard. Here’s what you need to do.
Step 1: Launch your iPhone and click on the Settings option.
Step 2: Now, go to the General option and click on the Keyboard option.

Step 3: When the Keyboard page opens, click on the option that says Keyboards and then click on Add New Keyboard.
Step 4: You will see the Third Party Keyboards option. There, you need to click on Bitmoji.
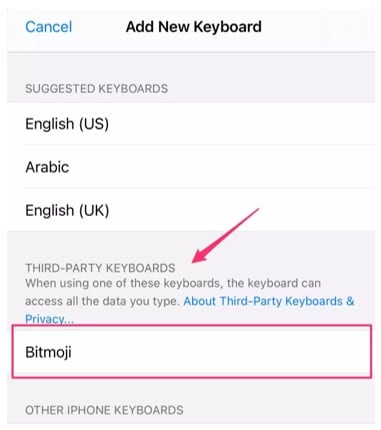
Step 5: Now, toggle the option that says Allow Full Access. Once you do that, you will see a small pop-up. Click on the Allow option.
And that’s it. Bitmoji will be added to the iPhone keyboard. Open any messaging app and click on the globe and hold it for a few seconds. When you see Bitmoji, click on that, and you will be able to use Bitmoji stickers.
Part 3: How to Get the Bitmoji Keyboard on Android?
Bitmoji is available for Android users as well. Before you begin to use it, go through the first part again and download the app. Then create your Bitmoji, as explained earlier. You can send Bitmojis directly from the app itself, but if you plan to use Bitmoji regularly, getting the Bitmoji keyboard makes sense. So, once you are done, follow the following steps to get the Bitmoji keyboard on Android.
Step 1: Launch the Bitmoji app. Click on the Keyboard option that you see at the bottom of the Bitmoji app screen.
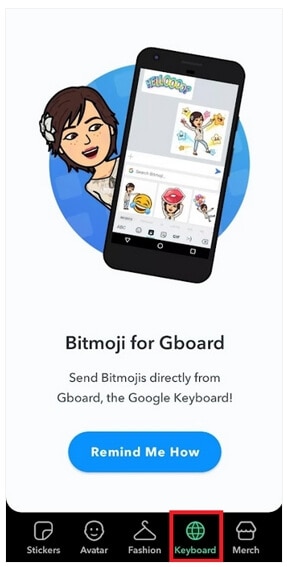
Step 2: Install Bitmoji keyboard and give permission to your phone to use Bitmoji keyboard. Bitmoji will notify you when the Bitmoji keyboard gets activated.
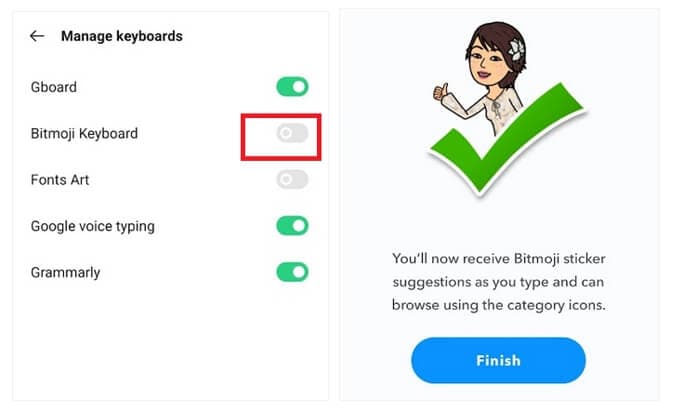
You are all done. Now, use the Bitmoji keyboard to chat with your family members and friends and make everything fun and exciting.
Part 4: How to Install and Use Bitmoji on Windows and Mac?
If you want to use Bitmoji on Windows and Mac, you will have to use the Google Chrome browser. If you already have the Google Chrome browser, carry on with the steps explained below; otherwise, get the browser before starting.
Step 1: Go to Chrome Extension and install Bitmoji for Chrome Extension.
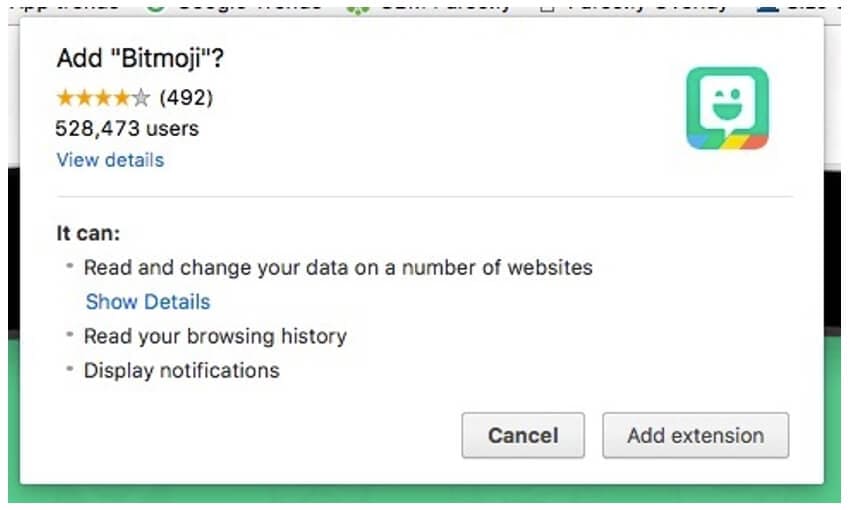
Step 2: You will have to sign in to Bitmoji. If you want to add Bitmoji to Gmail, click on add Bitmoji to Gmail.
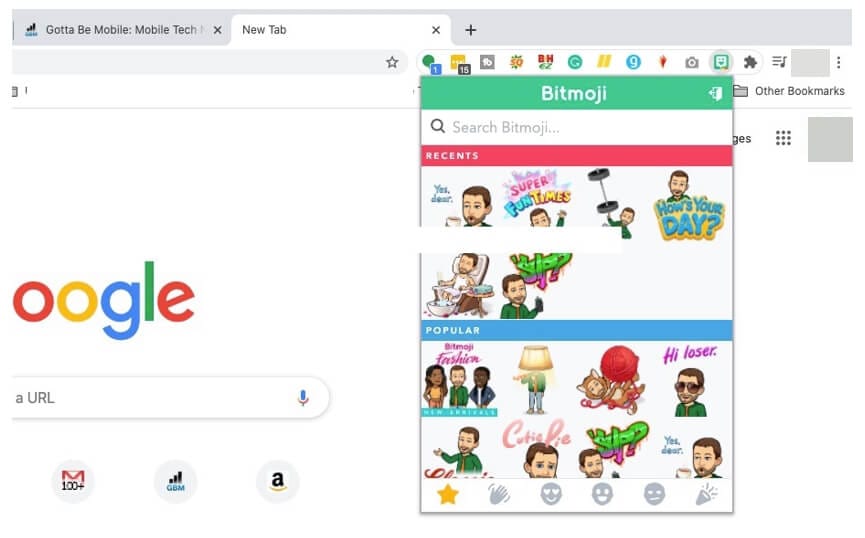
After you are done following the three easy steps, you will see Bitmoji is installed. To start using it, move the cursor to the upper corner of the browser and click on the Bitmoji icon. Next, you will see the Bitmojis. Choose any Bitmoji, copy it, and paste it on Gmail or instant messaging applications.
Part 5: Where can You Use Bitmoji?
Bitmojis can be used on different platforms. All you need to do is enable Bitmoji keyboard on your iPhone or Android phone or Windows and Mac computers and use it on various social media platforms. For example, use Snapchat to send Bitmojis for different types of occasions.
If you are an iPhone user, you can share fun Bitmojis through iMessage. On a computer, you can use these Bitmojis on Facebook or other instant messaging platforms. You can drag and drop the Bitmoji sticker or copy it to share it with your friends.
If you are a working professional and want to lighten the mood of your Slack workspace, use Bitmojis to make your coworkers feel relaxed. Plus, this can be a great way to make someone feel pumped up. Like that, there are many other platforms to use Bitmojis!
Related: Best Free Apps to Get Emojis on iPhone and Android
Conclusion
So, there you go. We have finally reached the end of this guide. We hope you have found this post interesting and will face no hassle using the Bitmoji keyboard on different devices. Get the Bitmoji app if you haven’t downloaded it yet and make your conversations fun and enjoyable!
02 How to Add and Use Bitmoji to iPhone Keyboard?
03 How to Get the Bitmoji Keyboard on Android?
04 How to Install and Use Bitmoji on Windows and Mac?
Part 1: What is Bitmoji?
If you are new to Bitmoji, you may wonder what it is? Bitmoji is essentially your own personal emoji. You can create a cartoon version of yourself and share it with people to make the conversation fun. So, what one does is create an avatar of themselves and give it all kinds of expressions.
Then, you can create comics using your Bitmoji, use it to express yourself while having a chat, and even use it as a reaction. Anyone who is done using the same old emojis has started using Bitmoji because it’s a lot more fun.
Now, let’s learn how to create your very own Bitmoji.
Step 1: First, go to the App Store or Play store and download the Bitmoji application.
Step 2: Once downloaded, launch the app and start making an avatar or your Bitmoji.
Step 3: Pick a skin color, hair color, chin, nose, hairstyle, jawline, and more.
Once your Bitmoji is created, you are all set to use the Bitmoji as stickers. Moreover, the app lets you dress your Bitmoji as you want as well. Let it have different expressions and postures because that’s how it’s going to be fun! After your Bitmoji is added, the next thing to do is enable Bitmoji on the keyboard of the device you are using.
Part 2: How to Add and Use Bitmoji to iPhone Keyboard?
Since you have learned how to create a Bimoji, it’s time to learn the steps to use it on your iPhone keyboard. Unfortunately, just by downloading the app, it won’t reflect on the keyboard directly. Instead, you will have to follow a few steps to add Bitmoji to the keyboard. Here’s what you need to do.
Step 1: Launch your iPhone and click on the Settings option.
Step 2: Now, go to the General option and click on the Keyboard option.
Step 3: When the Keyboard page opens, click on the option that says Keyboards and then click on Add New Keyboard.
Step 4: You will see the Third Party Keyboards option. There, you need to click on Bitmoji.
Step 5: Now, toggle the option that says Allow Full Access. Once you do that, you will see a small pop-up. Click on the Allow option.
And that’s it. Bitmoji will be added to the iPhone keyboard. Open any messaging app and click on the globe and hold it for a few seconds. When you see Bitmoji, click on that, and you will be able to use Bitmoji stickers.
Part 3: How to Get the Bitmoji Keyboard on Android?
Bitmoji is available for Android users as well. Before you begin to use it, go through the first part again and download the app. Then create your Bitmoji, as explained earlier. You can send Bitmojis directly from the app itself, but if you plan to use Bitmoji regularly, getting the Bitmoji keyboard makes sense. So, once you are done, follow the following steps to get the Bitmoji keyboard on Android.
Step 1: Launch the Bitmoji app. Click on the Keyboard option that you see at the bottom of the Bitmoji app screen.
Step 2: Install Bitmoji keyboard and give permission to your phone to use Bitmoji keyboard. Bitmoji will notify you when the Bitmoji keyboard gets activated.
You are all done. Now, use the Bitmoji keyboard to chat with your family members and friends and make everything fun and exciting.
Part 4: How to Install and Use Bitmoji on Windows and Mac?
If you want to use Bitmoji on Windows and Mac, you will have to use the Google Chrome browser. If you already have the Google Chrome browser, carry on with the steps explained below; otherwise, get the browser before starting.
Step 1: Go to Chrome Extension and install Bitmoji for Chrome Extension.
Step 2: You will have to sign in to Bitmoji. If you want to add Bitmoji to Gmail, click on add Bitmoji to Gmail.
After you are done following the three easy steps, you will see Bitmoji is installed. To start using it, move the cursor to the upper corner of the browser and click on the Bitmoji icon. Next, you will see the Bitmojis. Choose any Bitmoji, copy it, and paste it on Gmail or instant messaging applications.
Part 5: Where can You Use Bitmoji?
Bitmojis can be used on different platforms. All you need to do is enable Bitmoji keyboard on your iPhone or Android phone or Windows and Mac computers and use it on various social media platforms. For example, use Snapchat to send Bitmojis for different types of occasions.
If you are an iPhone user, you can share fun Bitmojis through iMessage. On a computer, you can use these Bitmojis on Facebook or other instant messaging platforms. You can drag and drop the Bitmoji sticker or copy it to share it with your friends.
If you are a working professional and want to lighten the mood of your Slack workspace, use Bitmojis to make your coworkers feel relaxed. Plus, this can be a great way to make someone feel pumped up. Like that, there are many other platforms to use Bitmojis!
Related: Best Free Apps to Get Emojis on iPhone and Android
Conclusion
So, there you go. We have finally reached the end of this guide. We hope you have found this post interesting and will face no hassle using the Bitmoji keyboard on different devices. Get the Bitmoji app if you haven’t downloaded it yet and make your conversations fun and enjoyable!
What Is Emoji?
What Is Emoji?
Shanoon Cox
Mar 27, 2024• Proven solutions
If you ever wondered what is emoji, and how the term relates (or unrelates) to its elder sibling emoticon, you are at the right place. In the following sections, you will learn some quite interesting facts about the two, what different types of emojis are available, and what do they mean.
Because understanding the meaning of emojis is more important as compared to knowing what is an emoji itself, here you will get all the related details, relevant answers, and some best practice tips.
Part 1: What Is an Emoji?
In a nutshell, an emoji is a graphical image that reflects a certain facial expression. Emojis are created using a drawing tool, and are incorporated into a unique 16-bit Unicode in order to make them compatible with operating systems of the most common devices and platforms like iOS, Android, macOS, and Windows.
In addition to being merely a picture, emojis are also animated to exaggerate the message senders’ emotions. You can find a couple of decent examples of such animations while using Skype messenger.
The reason behind emojis being more popular than the emoticons used earlier is the close resemblance of the former to the real-like expressions that they reflect when sent to a recipient. Therefore, it would be safe to say that a single emoji could be worth several sentences while texting if used correctly.
Part 2: What are the Differences Between Emojis and Emoticons?
As explained earlier, the emojis are graphical and sometimes animated Unicode illustrations that can be included in the text messages as objects.
On the other hand, the emoticons are formed using the ASCII characters, and no specific coding is required at the users’ side to create them. Simply put, an emoticon can be easily added to a text message or even to an email merely by using a combination of letters on the keyboard.
For instance, to create an emoticon of a smiley face, all you need to do is, type a colon sign along with a closing brace. (E.g. Typing a : and ) without space will become a smiling face, a : and ( will form a sad face, and so on).
To be clearer, emojis can be considered an advanced, better, and evolved version of emoticons. While the latter can be formed using simple characters like letters and symbols, the former is inserted as an object in the text messages.
Part 3: Where to Find the Meaning of Emojis?
Once you have understood what emoji is, it is now time to learn what the emojis mean. This part is imperative to ensure you don’t send a wrong emotional expression to your friends or family members, and get into some awkward situation after that.
Below is a list of some useful online websites and dictionaries that can help you find correct emojis along with their meanings to make your text conversation more meaningful and interesting:
1. Emojipedia
Emojipedia is an online library that holds several emojis. All the emojis that the portal has are placed in their corresponding categories.
Another section on the landing page of the website contains some of the most popular emojis, i.e. those that are mostly used by the texters during their conversions. Furthermore, the name of the emoji is present right next to it, and the entire part is hyperlinked which when clicked, takes you to a new page that has all the details about the object including its meaning, alternate names, and a button to copy the emoji to the clip board. The copied element can then be pasted in the text input field of a compatible messenger such as Facebook.
2. EMOJI DICTIONARY
https://www.dictionary.com/e/emoji/
EMOJI DICTIONARY is another online portal that contains almost all the commonly used emojis. The upper section of the page is dedicated to ‘Featured Terms’ with a slider that has all the featured emojis. The next segment lists all the categories other than emojis.
The bottom area of the landing page has all the emojis along with their names and/or the supported devices. All the names in the section are hyperlinked that open a new page when clicked, and show all the details such as examples, usage, and origin related to that particular emoji.
3. Emoji Dictionary
https://emojidictionary.emojifoundation.com/
This one is unique in its own way as in along with listing the most popular emojis and their names and definitions, it also allows you to include your own information in case you know something other than what is already present.
In addition to displaying the top emojis right on the landing page, the portal also has a category list where each segment holds its corresponding objects. This helps in locating your favorite elements easily and quickly. Furthermore, when you click an emoji, a new page opens up with all its definition from different aspects such as nouns, verbs, etc., along with a ‘Copy’ button that lets you copy the image to the clipboard, and use it on a compatible messaging app.
4. EmojiMeanings
https://www.emojimeanings.net/
The landing page of EmojiMeanings is populated with all the categories where each holds several relevant emojis, thus making it easier for the users to find and learn their meaning. The home page also has complete information about what emojis are, how they are different from emoticons, and what does the term ‘smiley’ actually mean.
When you click a category, a new page opens up with three major columns titled as ‘Emoji’, ‘Meaning’, and ‘Unicode’ that show an emoji itself, explain what it means, and what Unicode is used to form it respectively. All the emojis on EmojiMeanings are usually compatible with WhatsApp and Facebook.
5. HotEmoji
https://hotemoji.com/emoji-meanings.html
HotEmoji is yet another online portal that lists almost all the emojis along with their meanings. Each entry is hyperlinked which when clicked opens a new web page dedicated to that particular emoji where all the details about it are mentioned.
The new page also has a ‘Copy’ button that can be used to copy the object to the clipboard, and then the element can be pasted onto any compatible messenger during a text conversation.
Part 4: How to Find Emoji on Any Device?
While locating and inserting emojis on any messaging app on your smartphone is fairly simple as the messenger already has an icon that opens the entire emoji library when tapped, things are a bit tricky while using a Mac or Windows PC. Therefore, the following points explain how to find and use emojis on the computer running any of these operating systems:
How to Find Emojis on Windows 8 and Windows 10
On Windows 8 or Windows 10 computers, click the ‘Keyboard’ icon that is present in the ‘Notification area’ at the bottom-right corner of the screen, i.e. right side of the taskbar. When the list of emojis appears, you can click your favorite one and use it in the messenger.
How to Find Emojis on macOS
While using a Mac computer, you can open the app you want to add an emoji to, and then press the ctrl + cmd + spacebar keys on the keyboard.
Part 5: Most Common Emoji Categories
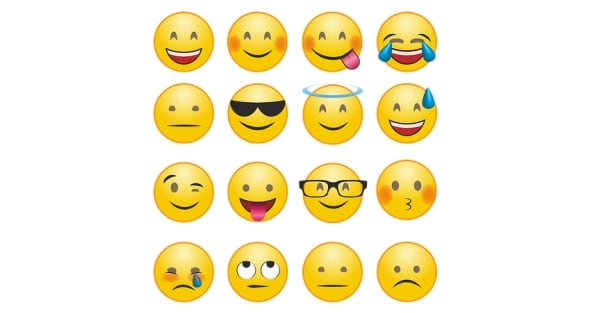
Some of the most commonly used categories that you must know after understanding what is an emoji include:
- Smileys & People – Holds the images of faces reflecting facial expressions and the vector images/animations of some popular people
- Animals & Nature – Contains the images/animations of animals and other natural elements such as trees, rocks, mountains, etc.
- Food & Drink – This category has vector images of beautifully decorated and well-aligned wine glasses, soft drink cans, pizza slices, etc.
- Activity – Has the emojis that reflect certain actions such as dance stances, walking, running, etc.
- Travel & Places – Is equipped with vectors of transportation mediums and locations such as trains, buses, buildings, banks, etc.
- Objects – Is populated with miscellaneous objects like a pair of shoes, suits, clocks, socks, etc.
- Symbols – This one consists of different types of symbols such as an equal to sign, stop sign, delta symbol, and many more
- Flags – This category contains flags of almost all the countries of the world. These emojis are mostly used to illustrate your current or destination location for reference
Part 6: Tips of Using Emojis
It is always a good idea to use emojis every now and then. However, using too many of them in your conversation might make the entire text look overly populated, and your communication partner may lose interest in you. Therefore, understanding when and how to use emojis is as important as it is to know what the emoji means.
Add Emojis to Video with Filmora
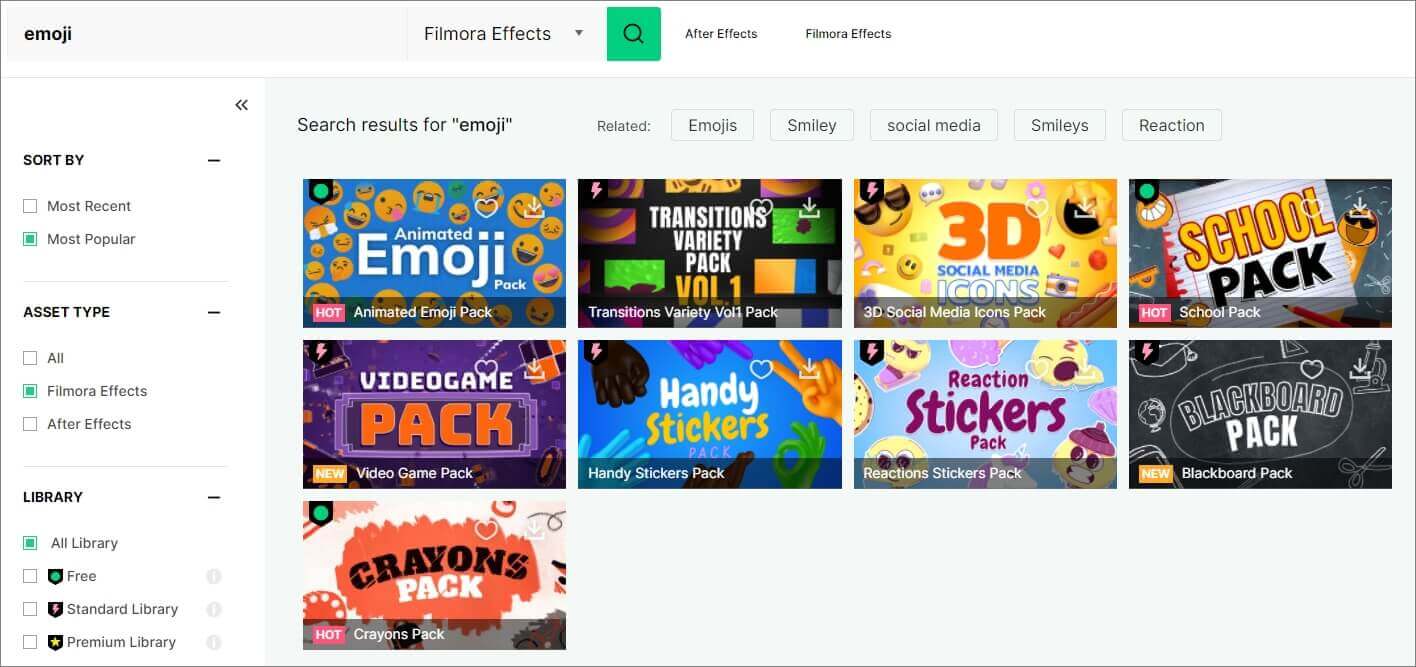
If you want to add animated emojis to video and share on social media, then Filmora is a good choice. Besides the built-in free animated emojis under Effects tab, you will also find some free or paid animated emojis or stickers on the effects store Filmstock. Download the free trial version of Filmora and create videos with fun.
Shanoon Cox
Shanoon Cox is a writer and a lover of all things video.
Follow @Shanoon Cox
Shanoon Cox
Mar 27, 2024• Proven solutions
If you ever wondered what is emoji, and how the term relates (or unrelates) to its elder sibling emoticon, you are at the right place. In the following sections, you will learn some quite interesting facts about the two, what different types of emojis are available, and what do they mean.
Because understanding the meaning of emojis is more important as compared to knowing what is an emoji itself, here you will get all the related details, relevant answers, and some best practice tips.
Part 1: What Is an Emoji?
In a nutshell, an emoji is a graphical image that reflects a certain facial expression. Emojis are created using a drawing tool, and are incorporated into a unique 16-bit Unicode in order to make them compatible with operating systems of the most common devices and platforms like iOS, Android, macOS, and Windows.
In addition to being merely a picture, emojis are also animated to exaggerate the message senders’ emotions. You can find a couple of decent examples of such animations while using Skype messenger.
The reason behind emojis being more popular than the emoticons used earlier is the close resemblance of the former to the real-like expressions that they reflect when sent to a recipient. Therefore, it would be safe to say that a single emoji could be worth several sentences while texting if used correctly.
Part 2: What are the Differences Between Emojis and Emoticons?
As explained earlier, the emojis are graphical and sometimes animated Unicode illustrations that can be included in the text messages as objects.
On the other hand, the emoticons are formed using the ASCII characters, and no specific coding is required at the users’ side to create them. Simply put, an emoticon can be easily added to a text message or even to an email merely by using a combination of letters on the keyboard.
For instance, to create an emoticon of a smiley face, all you need to do is, type a colon sign along with a closing brace. (E.g. Typing a : and ) without space will become a smiling face, a : and ( will form a sad face, and so on).
To be clearer, emojis can be considered an advanced, better, and evolved version of emoticons. While the latter can be formed using simple characters like letters and symbols, the former is inserted as an object in the text messages.
Part 3: Where to Find the Meaning of Emojis?
Once you have understood what emoji is, it is now time to learn what the emojis mean. This part is imperative to ensure you don’t send a wrong emotional expression to your friends or family members, and get into some awkward situation after that.
Below is a list of some useful online websites and dictionaries that can help you find correct emojis along with their meanings to make your text conversation more meaningful and interesting:
1. Emojipedia
Emojipedia is an online library that holds several emojis. All the emojis that the portal has are placed in their corresponding categories.
Another section on the landing page of the website contains some of the most popular emojis, i.e. those that are mostly used by the texters during their conversions. Furthermore, the name of the emoji is present right next to it, and the entire part is hyperlinked which when clicked, takes you to a new page that has all the details about the object including its meaning, alternate names, and a button to copy the emoji to the clip board. The copied element can then be pasted in the text input field of a compatible messenger such as Facebook.
2. EMOJI DICTIONARY
https://www.dictionary.com/e/emoji/
EMOJI DICTIONARY is another online portal that contains almost all the commonly used emojis. The upper section of the page is dedicated to ‘Featured Terms’ with a slider that has all the featured emojis. The next segment lists all the categories other than emojis.
The bottom area of the landing page has all the emojis along with their names and/or the supported devices. All the names in the section are hyperlinked that open a new page when clicked, and show all the details such as examples, usage, and origin related to that particular emoji.
3. Emoji Dictionary
https://emojidictionary.emojifoundation.com/
This one is unique in its own way as in along with listing the most popular emojis and their names and definitions, it also allows you to include your own information in case you know something other than what is already present.
In addition to displaying the top emojis right on the landing page, the portal also has a category list where each segment holds its corresponding objects. This helps in locating your favorite elements easily and quickly. Furthermore, when you click an emoji, a new page opens up with all its definition from different aspects such as nouns, verbs, etc., along with a ‘Copy’ button that lets you copy the image to the clipboard, and use it on a compatible messaging app.
4. EmojiMeanings
https://www.emojimeanings.net/
The landing page of EmojiMeanings is populated with all the categories where each holds several relevant emojis, thus making it easier for the users to find and learn their meaning. The home page also has complete information about what emojis are, how they are different from emoticons, and what does the term ‘smiley’ actually mean.
When you click a category, a new page opens up with three major columns titled as ‘Emoji’, ‘Meaning’, and ‘Unicode’ that show an emoji itself, explain what it means, and what Unicode is used to form it respectively. All the emojis on EmojiMeanings are usually compatible with WhatsApp and Facebook.
5. HotEmoji
https://hotemoji.com/emoji-meanings.html
HotEmoji is yet another online portal that lists almost all the emojis along with their meanings. Each entry is hyperlinked which when clicked opens a new web page dedicated to that particular emoji where all the details about it are mentioned.
The new page also has a ‘Copy’ button that can be used to copy the object to the clipboard, and then the element can be pasted onto any compatible messenger during a text conversation.
Part 4: How to Find Emoji on Any Device?
While locating and inserting emojis on any messaging app on your smartphone is fairly simple as the messenger already has an icon that opens the entire emoji library when tapped, things are a bit tricky while using a Mac or Windows PC. Therefore, the following points explain how to find and use emojis on the computer running any of these operating systems:
How to Find Emojis on Windows 8 and Windows 10
On Windows 8 or Windows 10 computers, click the ‘Keyboard’ icon that is present in the ‘Notification area’ at the bottom-right corner of the screen, i.e. right side of the taskbar. When the list of emojis appears, you can click your favorite one and use it in the messenger.
How to Find Emojis on macOS
While using a Mac computer, you can open the app you want to add an emoji to, and then press the ctrl + cmd + spacebar keys on the keyboard.
Part 5: Most Common Emoji Categories
Some of the most commonly used categories that you must know after understanding what is an emoji include:
- Smileys & People – Holds the images of faces reflecting facial expressions and the vector images/animations of some popular people
- Animals & Nature – Contains the images/animations of animals and other natural elements such as trees, rocks, mountains, etc.
- Food & Drink – This category has vector images of beautifully decorated and well-aligned wine glasses, soft drink cans, pizza slices, etc.
- Activity – Has the emojis that reflect certain actions such as dance stances, walking, running, etc.
- Travel & Places – Is equipped with vectors of transportation mediums and locations such as trains, buses, buildings, banks, etc.
- Objects – Is populated with miscellaneous objects like a pair of shoes, suits, clocks, socks, etc.
- Symbols – This one consists of different types of symbols such as an equal to sign, stop sign, delta symbol, and many more
- Flags – This category contains flags of almost all the countries of the world. These emojis are mostly used to illustrate your current or destination location for reference
Part 6: Tips of Using Emojis
It is always a good idea to use emojis every now and then. However, using too many of them in your conversation might make the entire text look overly populated, and your communication partner may lose interest in you. Therefore, understanding when and how to use emojis is as important as it is to know what the emoji means.
Add Emojis to Video with Filmora
If you want to add animated emojis to video and share on social media, then Filmora is a good choice. Besides the built-in free animated emojis under Effects tab, you will also find some free or paid animated emojis or stickers on the effects store Filmstock. Download the free trial version of Filmora and create videos with fun.
Shanoon Cox
Shanoon Cox is a writer and a lover of all things video.
Follow @Shanoon Cox
Also read:
- [Updated] A Step-by-Step Guide to Gain More Likes on TikTok Unboxings for 2024
- [Updated] Dissecting TSeries Profits From YouTube Platforms
- Complete Step-by-Step Setup of Your Epson WF-3540 Printer Driver for Windows Devices
- H.265 To H. 264 Transformation Tricks - No Bound on File Size
- In 2024, How to Transfer Contacts from Vivo S18 to Outlook | Dr.fone
- In 2024, The Ultimate Technique for Harmonizing Volume in DaVinci Resolve
- New 2024 Approved 25 Cute Memes to Make You Feel Better
- New How to Make a Photo Collage on Mac/iPhone Using iPhoto, In 2024
- Resolving Unsupported Video Playbacks
- Updated How to Add Emojis To Discord on Desktop Computer and Mobile for 2024
- Updated How to Make a Wonderful Video Slideshow with Your Travel Photos for 2024
- Title: New How to Make a Triggered Meme, In 2024
- Author: Jan
- Created at : 2025-02-14 19:07:54
- Updated at : 2025-02-19 17:53:42
- Link: https://meme-emoji.techidaily.com/new-how-to-make-a-triggered-meme-in-2024/
- License: This work is licensed under CC BY-NC-SA 4.0.