
New How to Make a Memorable Honeymoon Video for 2024
How to Record Your Memorable Honeymoon Video
How to Make a Memorable Honeymoon Video

Ollie Mattison
Mar 27, 2024• Proven solutions
The honeymoon is maybe one of the most important times in our life. It’s unique, refined and filled with emotion which is why you should always try to consider exploring all the opportunities that this has to offer. But if you go on a honeymoon, you do want to have a video that you can cherish forever, don’t you? If you do, here are example of fancy honey moon video and some of the best ideas that you can use to create the best, most immersive and memorable honeymoon video.
Tips on creating a memorable honeymoon video
Choosing the right camera
There are many affordable 1080p or 4k cameras that you can use and all of them come with various features and prices. Obviously, you should try and focus on finding the right one that suits your needs. Take your time and study the prices and features then select the one you want based on your budget and expertise.
Get lots of photos
Another great tip is that you need to get as many photos as you can. No matter where you choose to go, there are tons of scenes, people, monuments and landmarks that you can choose to photograph. Take your time and try to capture as many of them as you possibly can. Granted, it will take a little bit of time but it will offer you the insight and fun you need in order to have a great slideshow in the end.
Organize a story from your photos
Once you have the photos, you should try to organize a story from the images. The best honeymoon movies are the ones that include a story so think about that and you will have quite a bit of fun as you immerse yourself into this experience, that’s for sure.
Add songs and overlays
You should try and consider adding songs and overlays because this will make the movie more fun and immersive. Once you complete it, you will need to share it with friends and family!
Edit your honeymoon video with Wondershare Filmora
Why choose Wondershare Filmora
If you are not good at video editing, or if you are a beginner and bothered by the complex steps of some professional video editor, Wondershare Filmora is here to save you. This is the best movie creation tool that helps you create you honeymoon movies from images all while delivering the entire set of tools you need to get a one of a kind and fun experience. If you always wanted an incredible and unique, refined movie creation experience then this is the app to use.
=“” style=”width: 100%; height: 278.438px;”;
 Download Mac Version ](https://tools.techidaily.com/wondershare/filmora/download/ )
Wondershare Filmora is very easy to use but it also manages to offer a lot of power. This is great for people that want to access basic editing features such as splitting, reverse, rotate and crop but which might also want some advanced features as well. You are bound to enjoy the entire experience for sure and the outcome will be very well worth it.
Aside from that, Wondershare Filmora also allows you to access a fresh interface that makes editing such a video a breeze. You can even add a variety of overlays and filters which do add up to offer you a very refined, exciting and refreshing experience at all times. It’s all about having the right focus and attention to detail but rest assured that the outcome will be well worth it. Once you have the movie, you can share it on Vimeo, YouTube and Facebook with a single click. The app also allows you to burn it to DVD if you so desire.
How to edit the honeymoon video with Wondershare Filmora
All you have to do is to go through the next steps:
Step 1: Import your honeymoon photos and videos
Gather all the videos and images that you have from your honeymoon then paste them inside the app.

Step 2: Tone your videos with editing tools
Add in video tones with features like reverse, trim, rotate, overlays, transitions, text and so on. This will help you refine the movie and offer it the unique experience you always wanted.
Step 3: Add music from Filmora library
Once you have that, add the music from the integrated royalty free library to ignite your love story.
Step 4: Save and share you video

Complete the video by saving it and then you can feel free to share it with friends.
Wondershare Filmora is the best solution for those that want a refined and fun honeymoon video. All you have to do is to try it out and rest assured that you are bound to love the results!
Download Mac Version ](https://tools.techidaily.com/wondershare/filmora/download/ )
Ollie Mattison
Ollie Mattison is a writer and a lover of all things video.
Follow @Ollie Mattison
Ollie Mattison
Mar 27, 2024• Proven solutions
The honeymoon is maybe one of the most important times in our life. It’s unique, refined and filled with emotion which is why you should always try to consider exploring all the opportunities that this has to offer. But if you go on a honeymoon, you do want to have a video that you can cherish forever, don’t you? If you do, here are example of fancy honey moon video and some of the best ideas that you can use to create the best, most immersive and memorable honeymoon video.
Tips on creating a memorable honeymoon video
Choosing the right camera
There are many affordable 1080p or 4k cameras that you can use and all of them come with various features and prices. Obviously, you should try and focus on finding the right one that suits your needs. Take your time and study the prices and features then select the one you want based on your budget and expertise.
Get lots of photos
Another great tip is that you need to get as many photos as you can. No matter where you choose to go, there are tons of scenes, people, monuments and landmarks that you can choose to photograph. Take your time and try to capture as many of them as you possibly can. Granted, it will take a little bit of time but it will offer you the insight and fun you need in order to have a great slideshow in the end.
Organize a story from your photos
Once you have the photos, you should try to organize a story from the images. The best honeymoon movies are the ones that include a story so think about that and you will have quite a bit of fun as you immerse yourself into this experience, that’s for sure.
Add songs and overlays
You should try and consider adding songs and overlays because this will make the movie more fun and immersive. Once you complete it, you will need to share it with friends and family!
Edit your honeymoon video with Wondershare Filmora
Why choose Wondershare Filmora
If you are not good at video editing, or if you are a beginner and bothered by the complex steps of some professional video editor, Wondershare Filmora is here to save you. This is the best movie creation tool that helps you create you honeymoon movies from images all while delivering the entire set of tools you need to get a one of a kind and fun experience. If you always wanted an incredible and unique, refined movie creation experience then this is the app to use.
=“” style=”width: 100%; height: 278.438px;”;
Download Mac Version ](https://tools.techidaily.com/wondershare/filmora/download/ )
Wondershare Filmora is very easy to use but it also manages to offer a lot of power. This is great for people that want to access basic editing features such as splitting, reverse, rotate and crop but which might also want some advanced features as well. You are bound to enjoy the entire experience for sure and the outcome will be very well worth it.
Aside from that, Wondershare Filmora also allows you to access a fresh interface that makes editing such a video a breeze. You can even add a variety of overlays and filters which do add up to offer you a very refined, exciting and refreshing experience at all times. It’s all about having the right focus and attention to detail but rest assured that the outcome will be well worth it. Once you have the movie, you can share it on Vimeo, YouTube and Facebook with a single click. The app also allows you to burn it to DVD if you so desire.
How to edit the honeymoon video with Wondershare Filmora
All you have to do is to go through the next steps:
Step 1: Import your honeymoon photos and videos
Gather all the videos and images that you have from your honeymoon then paste them inside the app.
Step 2: Tone your videos with editing tools
Add in video tones with features like reverse, trim, rotate, overlays, transitions, text and so on. This will help you refine the movie and offer it the unique experience you always wanted.
Step 3: Add music from Filmora library
Once you have that, add the music from the integrated royalty free library to ignite your love story.
Step 4: Save and share you video
Complete the video by saving it and then you can feel free to share it with friends.
Wondershare Filmora is the best solution for those that want a refined and fun honeymoon video. All you have to do is to try it out and rest assured that you are bound to love the results!
Download Mac Version ](https://tools.techidaily.com/wondershare/filmora/download/ )
Ollie Mattison
Ollie Mattison is a writer and a lover of all things video.
Follow @Ollie Mattison
How to Add Bitmoji to Keyboard?
Emojis have made it so much better for people to express themselves. Let’s say someone compliments you on a chat app; you can use a smiley emoji to tell that you are happy. At the same time, an angry emoji lets you express that you are angry.
Apart from the generic emojis that you can find in your chat applications, Bitmoji enables you to customize your character and share it with people you chat with. Bitmoji is fun, but do you know how to add it to a keyboard? If you don’t, don’t worry, this post will help you understand how to do that.
In this article
02 How to Add and Use Bitmoji to iPhone Keyboard?
03 How to Get the Bitmoji Keyboard on Android?
04 How to Install and Use Bitmoji on Windows and Mac?
Part 1: What is Bitmoji?
If you are new to Bitmoji, you may wonder what it is? Bitmoji is essentially your own personal emoji. You can create a cartoon version of yourself and share it with people to make the conversation fun. So, what one does is create an avatar of themselves and give it all kinds of expressions.
Then, you can create comics using your Bitmoji, use it to express yourself while having a chat, and even use it as a reaction. Anyone who is done using the same old emojis has started using Bitmoji because it’s a lot more fun.
Now, let’s learn how to create your very own Bitmoji.
Step 1: First, go to the App Store or Play store and download the Bitmoji application.
Step 2: Once downloaded, launch the app and start making an avatar or your Bitmoji.
Step 3: Pick a skin color, hair color, chin, nose, hairstyle, jawline, and more.

Once your Bitmoji is created, you are all set to use the Bitmoji as stickers. Moreover, the app lets you dress your Bitmoji as you want as well. Let it have different expressions and postures because that’s how it’s going to be fun! After your Bitmoji is added, the next thing to do is enable Bitmoji on the keyboard of the device you are using.
Part 2: How to Add and Use Bitmoji to iPhone Keyboard?
Since you have learned how to create a Bimoji, it’s time to learn the steps to use it on your iPhone keyboard. Unfortunately, just by downloading the app, it won’t reflect on the keyboard directly. Instead, you will have to follow a few steps to add Bitmoji to the keyboard. Here’s what you need to do.
Step 1: Launch your iPhone and click on the Settings option.
Step 2: Now, go to the General option and click on the Keyboard option.

Step 3: When the Keyboard page opens, click on the option that says Keyboards and then click on Add New Keyboard.
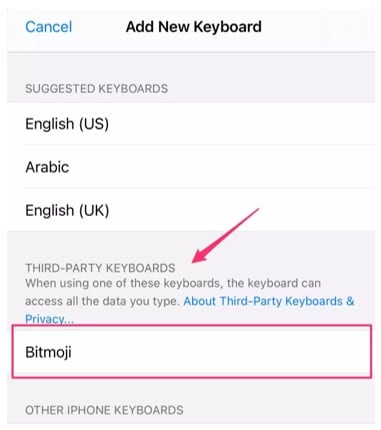
Step 4: You will see the Third Party Keyboards option. There, you need to click on Bitmoji.
Step 5: Now, toggle the option that says Allow Full Access. Once you do that, you will see a small pop-up. Click on the Allow option.
And that’s it. Bitmoji will be added to the iPhone keyboard. Open any messaging app and click on the globe and hold it for a few seconds. When you see Bitmoji, click on that, and you will be able to use Bitmoji stickers.
Part 3: How to Get the Bitmoji Keyboard on Android?
Bitmoji is available for Android users as well. Before you begin to use it, go through the first part again and download the app. Then create your Bitmoji, as explained earlier. You can send Bitmojis directly from the app itself, but if you plan to use Bitmoji regularly, getting the Bitmoji keyboard makes sense. So, once you are done, follow the following steps to get the Bitmoji keyboard on Android.
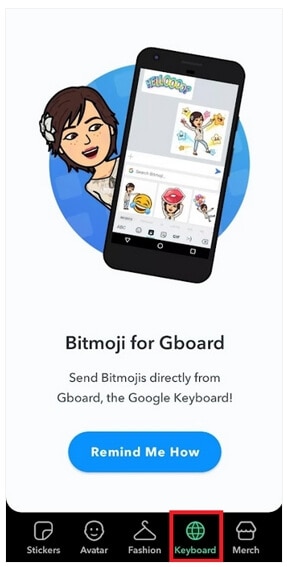
Step 1: Launch the Bitmoji app. Click on the Keyboard option that you see at the bottom of the Bitmoji app screen.
Step 2: Install Bitmoji keyboard and give permission to your phone to use Bitmoji keyboard. Bitmoji will notify you when the Bitmoji keyboard gets activated.
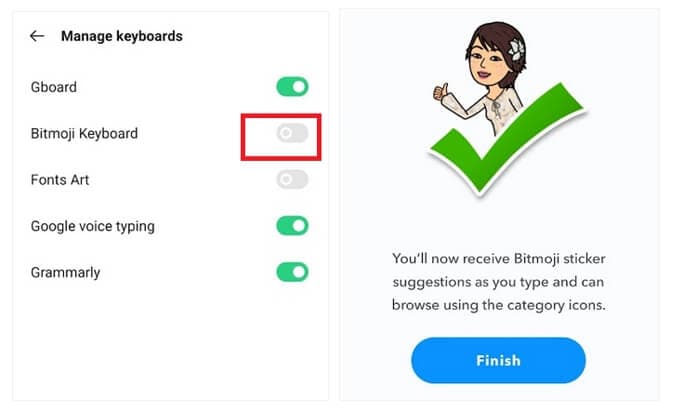
You are all done. Now, use the Bitmoji keyboard to chat with your family members and friends and make everything fun and exciting.
Part 4: How to Install and Use Bitmoji on Windows and Mac?
If you want to use Bitmoji on Windows and Mac, you will have to use the Google Chrome browser. If you already have the Google Chrome browser, carry on with the steps explained below; otherwise, get the browser before starting.
Step 1: Go to Chrome Extension and install Bitmoji for Chrome Extension.
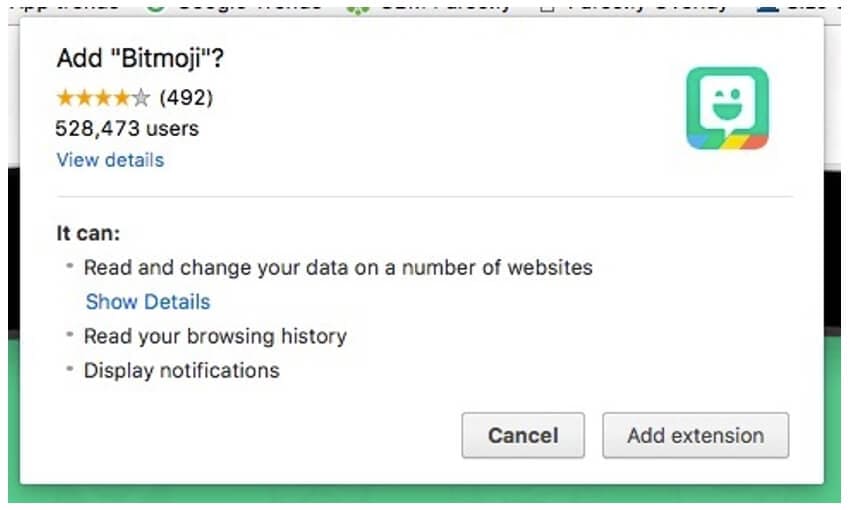
Step 2: You will have to sign in to Bitmoji. If you want to add Bitmoji to Gmail, click on add Bitmoji to Gmail.
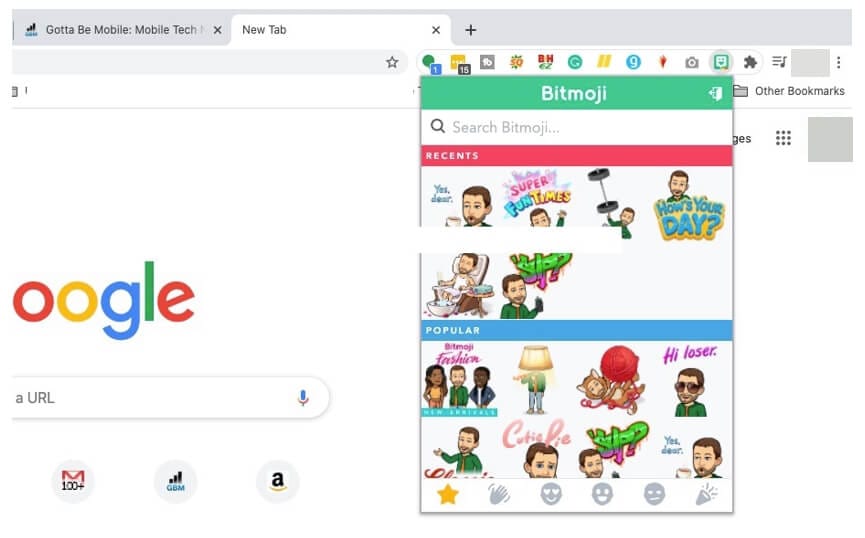
After you are done following the three easy steps, you will see Bitmoji is installed. To start using it, move the cursor to the upper corner of the browser and click on the Bitmoji icon. Next, you will see the Bitmojis. Choose any Bitmoji, copy it, and paste it on Gmail or instant messaging applications.
Part 5: Where can You Use Bitmoji?
Bitmojis can be used on different platforms. All you need to do is enable Bitmoji keyboard on your iPhone or Android phone or Windows and Mac computers and use it on various social media platforms. For example, use Snapchat to send Bitmojis for different types of occasions.
If you are an iPhone user, you can share fun Bitmojis through iMessage. On a computer, you can use these Bitmojis on Facebook or other instant messaging platforms. You can drag and drop the Bitmoji sticker or copy it to share it with your friends.
If you are a working professional and want to lighten the mood of your Slack workspace, use Bitmojis to make your coworkers feel relaxed. Plus, this can be a great way to make someone feel pumped up. Like that, there are many other platforms to use Bitmojis!
Related: Best Free Apps to Get Emojis on iPhone and Android
Conclusion
So, there you go. We have finally reached the end of this guide. We hope you have found this post interesting and will face no hassle using the Bitmoji keyboard on different devices. Get the Bitmoji app if you haven’t downloaded it yet and make your conversations fun and enjoyable!
02 How to Add and Use Bitmoji to iPhone Keyboard?
03 How to Get the Bitmoji Keyboard on Android?
04 How to Install and Use Bitmoji on Windows and Mac?
Part 1: What is Bitmoji?
If you are new to Bitmoji, you may wonder what it is? Bitmoji is essentially your own personal emoji. You can create a cartoon version of yourself and share it with people to make the conversation fun. So, what one does is create an avatar of themselves and give it all kinds of expressions.
Then, you can create comics using your Bitmoji, use it to express yourself while having a chat, and even use it as a reaction. Anyone who is done using the same old emojis has started using Bitmoji because it’s a lot more fun.
Now, let’s learn how to create your very own Bitmoji.
Step 1: First, go to the App Store or Play store and download the Bitmoji application.
Step 2: Once downloaded, launch the app and start making an avatar or your Bitmoji.
Step 3: Pick a skin color, hair color, chin, nose, hairstyle, jawline, and more.
Once your Bitmoji is created, you are all set to use the Bitmoji as stickers. Moreover, the app lets you dress your Bitmoji as you want as well. Let it have different expressions and postures because that’s how it’s going to be fun! After your Bitmoji is added, the next thing to do is enable Bitmoji on the keyboard of the device you are using.
Part 2: How to Add and Use Bitmoji to iPhone Keyboard?
Since you have learned how to create a Bimoji, it’s time to learn the steps to use it on your iPhone keyboard. Unfortunately, just by downloading the app, it won’t reflect on the keyboard directly. Instead, you will have to follow a few steps to add Bitmoji to the keyboard. Here’s what you need to do.
Step 1: Launch your iPhone and click on the Settings option.
Step 2: Now, go to the General option and click on the Keyboard option.
Step 3: When the Keyboard page opens, click on the option that says Keyboards and then click on Add New Keyboard.
Step 4: You will see the Third Party Keyboards option. There, you need to click on Bitmoji.
Step 5: Now, toggle the option that says Allow Full Access. Once you do that, you will see a small pop-up. Click on the Allow option.
And that’s it. Bitmoji will be added to the iPhone keyboard. Open any messaging app and click on the globe and hold it for a few seconds. When you see Bitmoji, click on that, and you will be able to use Bitmoji stickers.
Part 3: How to Get the Bitmoji Keyboard on Android?
Bitmoji is available for Android users as well. Before you begin to use it, go through the first part again and download the app. Then create your Bitmoji, as explained earlier. You can send Bitmojis directly from the app itself, but if you plan to use Bitmoji regularly, getting the Bitmoji keyboard makes sense. So, once you are done, follow the following steps to get the Bitmoji keyboard on Android.
Step 1: Launch the Bitmoji app. Click on the Keyboard option that you see at the bottom of the Bitmoji app screen.
Step 2: Install Bitmoji keyboard and give permission to your phone to use Bitmoji keyboard. Bitmoji will notify you when the Bitmoji keyboard gets activated.
You are all done. Now, use the Bitmoji keyboard to chat with your family members and friends and make everything fun and exciting.
Part 4: How to Install and Use Bitmoji on Windows and Mac?
If you want to use Bitmoji on Windows and Mac, you will have to use the Google Chrome browser. If you already have the Google Chrome browser, carry on with the steps explained below; otherwise, get the browser before starting.
Step 1: Go to Chrome Extension and install Bitmoji for Chrome Extension.
Step 2: You will have to sign in to Bitmoji. If you want to add Bitmoji to Gmail, click on add Bitmoji to Gmail.
After you are done following the three easy steps, you will see Bitmoji is installed. To start using it, move the cursor to the upper corner of the browser and click on the Bitmoji icon. Next, you will see the Bitmojis. Choose any Bitmoji, copy it, and paste it on Gmail or instant messaging applications.
Part 5: Where can You Use Bitmoji?
Bitmojis can be used on different platforms. All you need to do is enable Bitmoji keyboard on your iPhone or Android phone or Windows and Mac computers and use it on various social media platforms. For example, use Snapchat to send Bitmojis for different types of occasions.
If you are an iPhone user, you can share fun Bitmojis through iMessage. On a computer, you can use these Bitmojis on Facebook or other instant messaging platforms. You can drag and drop the Bitmoji sticker or copy it to share it with your friends.
If you are a working professional and want to lighten the mood of your Slack workspace, use Bitmojis to make your coworkers feel relaxed. Plus, this can be a great way to make someone feel pumped up. Like that, there are many other platforms to use Bitmojis!
Related: Best Free Apps to Get Emojis on iPhone and Android
Conclusion
So, there you go. We have finally reached the end of this guide. We hope you have found this post interesting and will face no hassle using the Bitmoji keyboard on different devices. Get the Bitmoji app if you haven’t downloaded it yet and make your conversations fun and enjoyable!
10 Funniest Subreddits to Find Hilarious Memes (Picked)
10 Funniest Subreddits to Find Hilarious Memes (Picked)
Ollie Mattison
Mar 27, 2024• Proven solutions
Are you a memes lover? Reddit is the best hub for funny memes. However, all of the hilarious memes are deep under several subreddits. As these subreddits cover various topics, it can be difficult to find the most hysterical memes out of all.
So, in this article, we have come up with 10 funniest subreddits to make you laugh. You need not worry further that you are unable to find the memes.
10 Funniest Subreddits to Find Memes
1. /r/AdviceAnimals
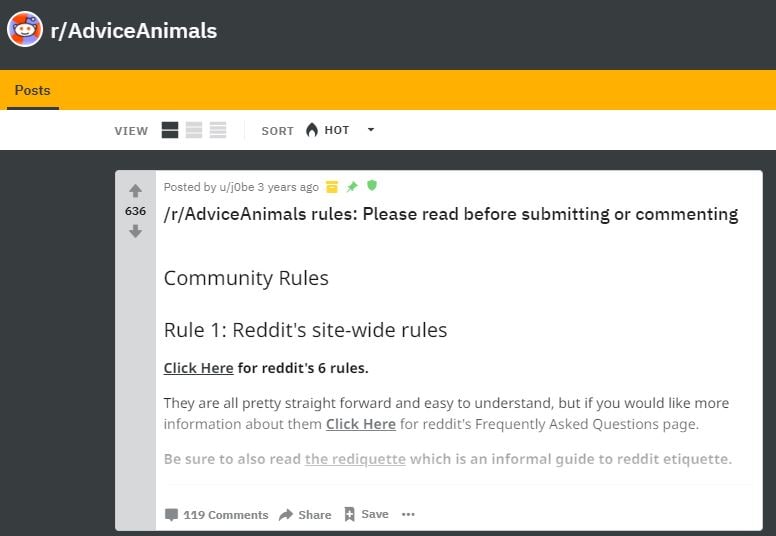
On 7th December 2010, the /r/AdviceAnimals subreddit was created. It is simple and straight to understand. Advice Animals was firstly a memes category that showed memes like a business cat wearing a coat and tie or socially awkward penguin lacking confidence with some message or awful advice placed over the image.
The funniest subreddits on /r/AdviceAnimals showed a Penguin with head and half body with the red background looking left, but the other half of the body and the feet turn right with a blue background. The memes read “Started going to the gym - Only at midnight, so there’s nobody else there.”/r/AdviceAnimals subreddit showed it as “there’s someone else in the gym, so I left and made memes instead.”
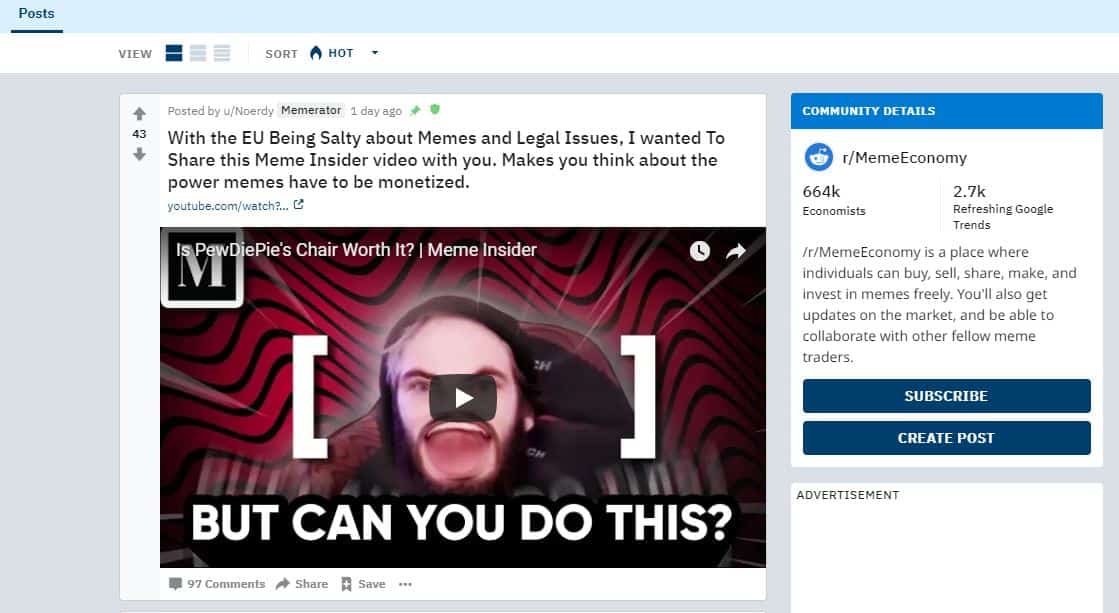
2. /r/MemeEconomy
r/MemeEconomy is a quirky and funniest subreddit where real-world commodities are discussed through memes. There’s no real money involved, but when a meme starts becoming popular, people opt to buy, and when emaciated, you sell.
For instance, the frustration of a father is making him invest. The memes show a man sitting on the wall looking down and making his face, thinking when your son starts Fortnite dancing in public. You should have made sandwiches instead of making him.
3. /r/ComedyCemetery
/r/ComedyCemetery is one of the funniest subreddit where the memes are shared by people and mocked them to try out their humor. To start with, users usually share internet culture pieces.
You won’t find any macro images or animal advice memes, ironical jokes allowed, poor titles and reposts, no harassment, or meta-posts. So, the simple yet funniest memes show a poem with various minion expressions, “Roses are red, violets are blue. The face like yours belongs to the zoo. Don’t be said. I’ll be there too. Not in the cage but laughing at you.” Dedicating this song to a friend can create a laugh riot.

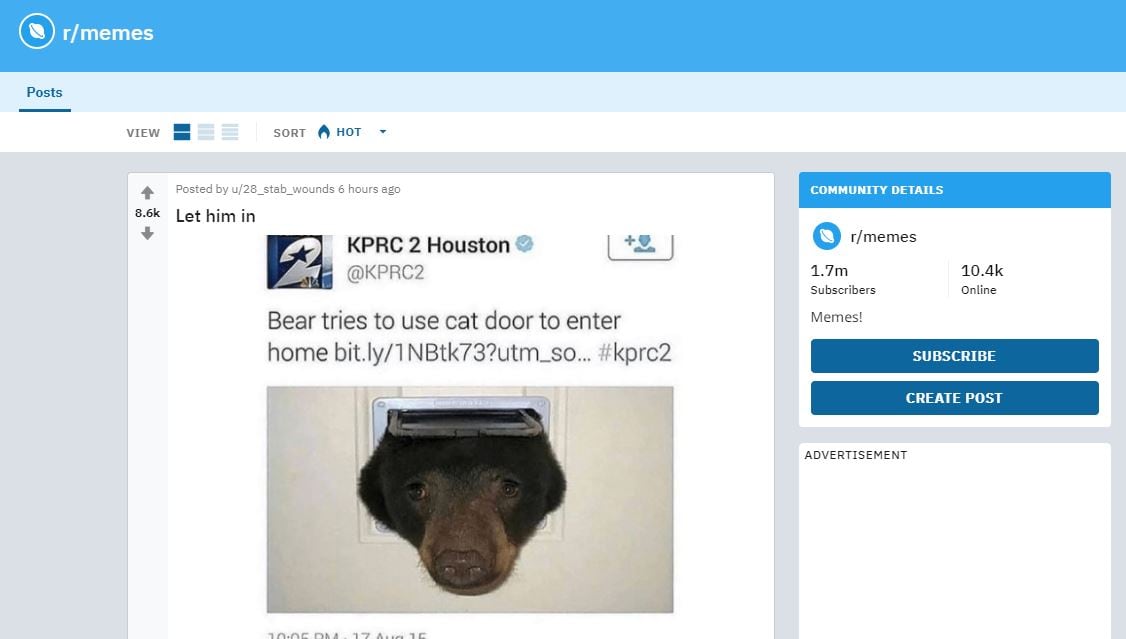
4. /r/memes
The /r/memes/ is the funniest subreddits that use phrases to show the user’s emotion, physical and mental state through the linked video or image. It has 1.7million subscribers. The statements used are often ironical on the image or videos. For instance, a meme shows Keanu Reeves running with a camera and a man trying to catch him. The caption says he stole the camera from the paparazzi and ran away.
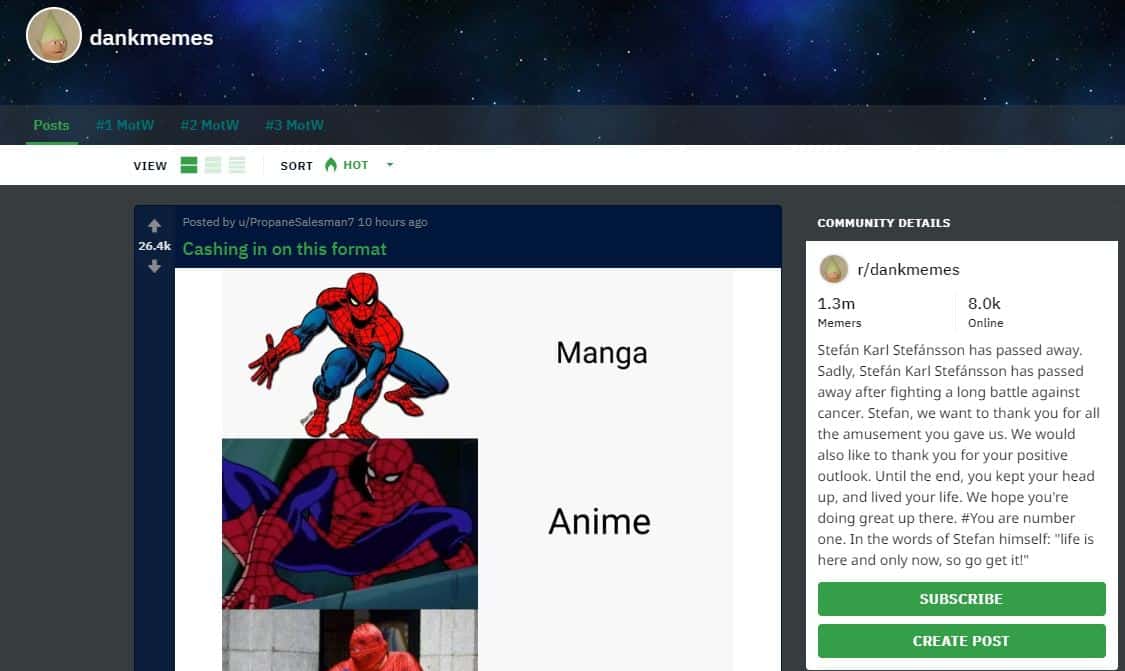
5. /r/dankmemes
The funniest subreddits /r/dankmemes/ are the sarcastic expressions describing the viral media jokes that have lost their comedic value or the intentionally inexplicable cliché. For example, a 7 year old boy asks, “what’s virgin?” and a 9yrs old boy reverts, “allow us to introduce ourselves.”
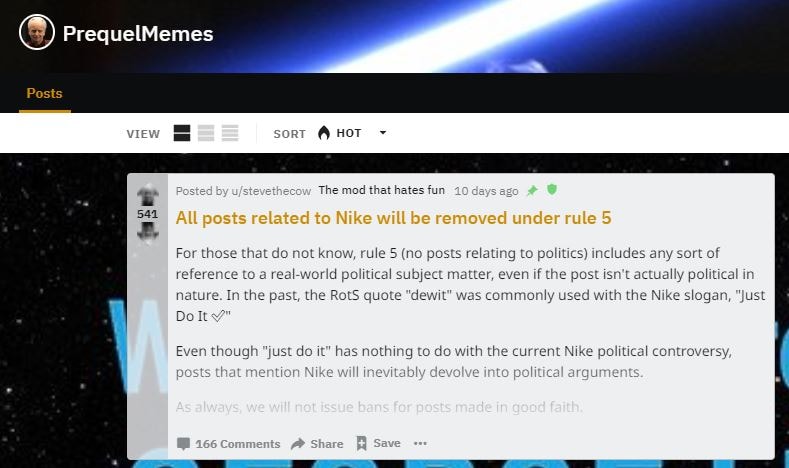
6. /r/PrequelMemes
With 715k subscribers, /r/PrequelMemes deals usually with the star war memes. The photoshop memes or image macros series related to Star War films content is all about r/PrequelMemes. It helps to change the audience’s opinion about the movie.
For instance, when the star war movie is about to start at 7.45 and at 7.40 you reach and your dad is still left to carry your baby brother from his car seat. You see a character from the movie asking you to leave him or else you cannot make it in time for the movie.
7. /r/terriblefacebookmemes
/r/terriblefacebookmemes is one of the funniest subreddits as it is a mixture of terribly shitty memes with various suggestions of granny-types. With around 216k subscribers, /r/terriblefacebookmemes is funny yet, relates to some old-fashioned ideas. For instance, a man thinking if the sun is said to be in space, why space doesn’t have light and the earth instead has it?
8. /r/PewdiepieSubmissions
/r/PewdiepieSubmissions let the users submit votes related to the competitions and submissions in pewdiepie. There are content policy violation rules where you must not post porn content or hate speech.
For instance, a long-haired dead man was found standing behind a man working on the computer and his camera captured the image. It is thought to be a cursed image and if not liked and shared, it can bring ill-fate to you, or the dead person will be in your room at night.
9. /r/funny
It is the largest humor stock collection with about a 20.8million subscribers. For example, a badge with the Apple logo says, “Does more. Cost less. It’s that simple. Apple.” According to the meme, Apple has changed direction as APPLE product costs a bomb in recent times.

10. /r/teenagers/
With 767k subscribers, /r/teenagers/ is a teenager’s community created only by teenagers. It is the funniest subreddit for discussing memes that teenagers enjoy thoroughly.
Although there’s no particular age specification to join, the target users are teenagers between 13-19. One of the funniest subreddit memes shows how the teens are singing and playing instruments when they ask for $5 from Mom and get $10 in return. The joy is something out of the world.
Ollie Mattison
Ollie Mattison is a writer and a lover of all things video.
Follow @Ollie Mattison
Ollie Mattison
Mar 27, 2024• Proven solutions
Are you a memes lover? Reddit is the best hub for funny memes. However, all of the hilarious memes are deep under several subreddits. As these subreddits cover various topics, it can be difficult to find the most hysterical memes out of all.
So, in this article, we have come up with 10 funniest subreddits to make you laugh. You need not worry further that you are unable to find the memes.
10 Funniest Subreddits to Find Memes
1. /r/AdviceAnimals
On 7th December 2010, the /r/AdviceAnimals subreddit was created. It is simple and straight to understand. Advice Animals was firstly a memes category that showed memes like a business cat wearing a coat and tie or socially awkward penguin lacking confidence with some message or awful advice placed over the image.
The funniest subreddits on /r/AdviceAnimals showed a Penguin with head and half body with the red background looking left, but the other half of the body and the feet turn right with a blue background. The memes read “Started going to the gym - Only at midnight, so there’s nobody else there.”/r/AdviceAnimals subreddit showed it as “there’s someone else in the gym, so I left and made memes instead.”
2. /r/MemeEconomy
r/MemeEconomy is a quirky and funniest subreddit where real-world commodities are discussed through memes. There’s no real money involved, but when a meme starts becoming popular, people opt to buy, and when emaciated, you sell.
For instance, the frustration of a father is making him invest. The memes show a man sitting on the wall looking down and making his face, thinking when your son starts Fortnite dancing in public. You should have made sandwiches instead of making him.
3. /r/ComedyCemetery
/r/ComedyCemetery is one of the funniest subreddit where the memes are shared by people and mocked them to try out their humor. To start with, users usually share internet culture pieces.
You won’t find any macro images or animal advice memes, ironical jokes allowed, poor titles and reposts, no harassment, or meta-posts. So, the simple yet funniest memes show a poem with various minion expressions, “Roses are red, violets are blue. The face like yours belongs to the zoo. Don’t be said. I’ll be there too. Not in the cage but laughing at you.” Dedicating this song to a friend can create a laugh riot.
4. /r/memes
The /r/memes/ is the funniest subreddits that use phrases to show the user’s emotion, physical and mental state through the linked video or image. It has 1.7million subscribers. The statements used are often ironical on the image or videos. For instance, a meme shows Keanu Reeves running with a camera and a man trying to catch him. The caption says he stole the camera from the paparazzi and ran away.
5. /r/dankmemes
The funniest subreddits /r/dankmemes/ are the sarcastic expressions describing the viral media jokes that have lost their comedic value or the intentionally inexplicable cliché. For example, a 7 year old boy asks, “what’s virgin?” and a 9yrs old boy reverts, “allow us to introduce ourselves.”
6. /r/PrequelMemes
With 715k subscribers, /r/PrequelMemes deals usually with the star war memes. The photoshop memes or image macros series related to Star War films content is all about r/PrequelMemes. It helps to change the audience’s opinion about the movie.
For instance, when the star war movie is about to start at 7.45 and at 7.40 you reach and your dad is still left to carry your baby brother from his car seat. You see a character from the movie asking you to leave him or else you cannot make it in time for the movie.
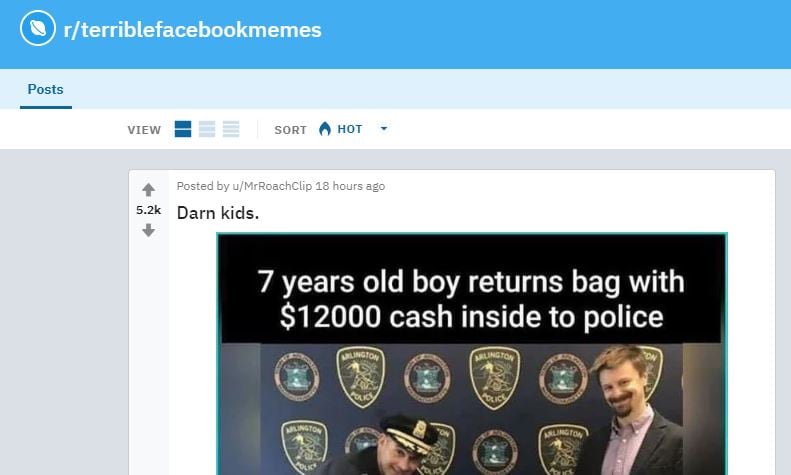
7. /r/terriblefacebookmemes
/r/terriblefacebookmemes is one of the funniest subreddits as it is a mixture of terribly shitty memes with various suggestions of granny-types. With around 216k subscribers, /r/terriblefacebookmemes is funny yet, relates to some old-fashioned ideas. For instance, a man thinking if the sun is said to be in space, why space doesn’t have light and the earth instead has it?
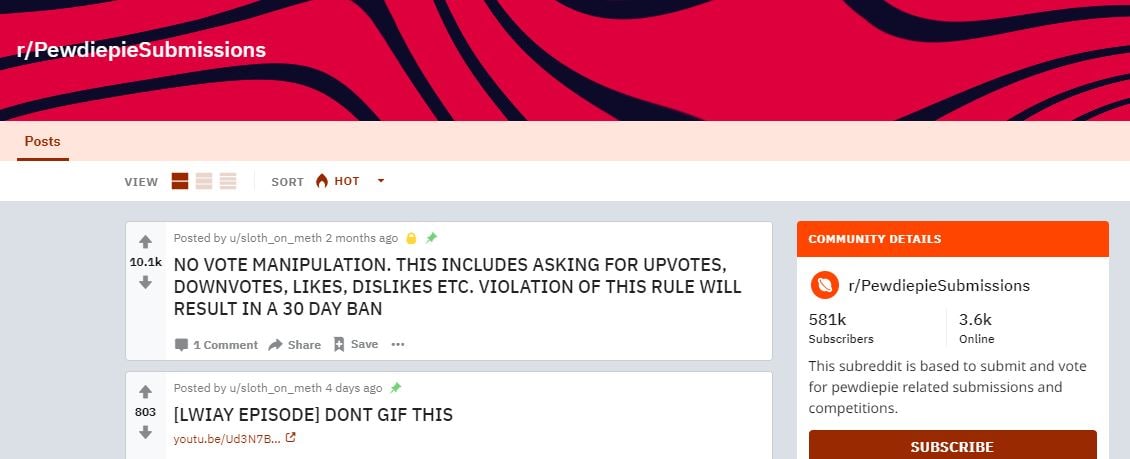
8. /r/PewdiepieSubmissions
/r/PewdiepieSubmissions let the users submit votes related to the competitions and submissions in pewdiepie. There are content policy violation rules where you must not post porn content or hate speech.
For instance, a long-haired dead man was found standing behind a man working on the computer and his camera captured the image. It is thought to be a cursed image and if not liked and shared, it can bring ill-fate to you, or the dead person will be in your room at night.
9. /r/funny
It is the largest humor stock collection with about a 20.8million subscribers. For example, a badge with the Apple logo says, “Does more. Cost less. It’s that simple. Apple.” According to the meme, Apple has changed direction as APPLE product costs a bomb in recent times.
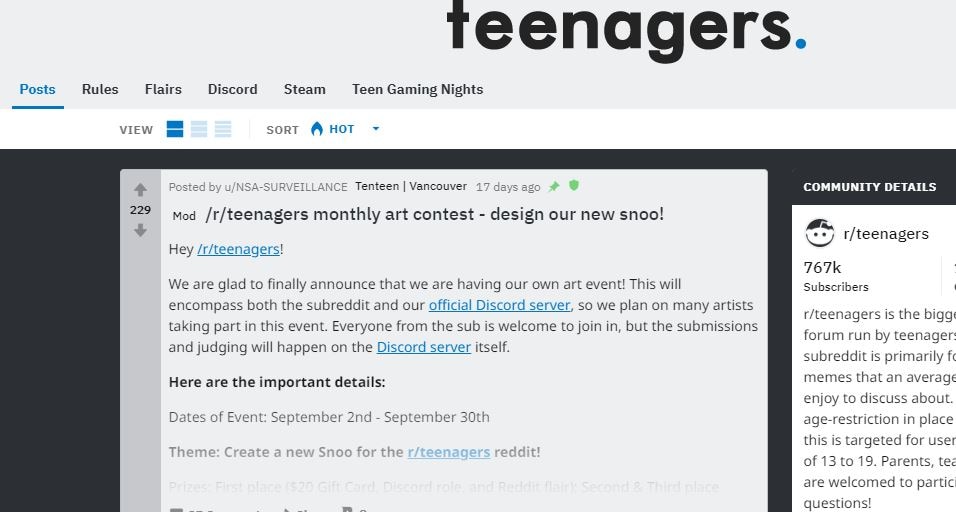
10. /r/teenagers/
With 767k subscribers, /r/teenagers/ is a teenager’s community created only by teenagers. It is the funniest subreddit for discussing memes that teenagers enjoy thoroughly.
Although there’s no particular age specification to join, the target users are teenagers between 13-19. One of the funniest subreddit memes shows how the teens are singing and playing instruments when they ask for $5 from Mom and get $10 in return. The joy is something out of the world.
Ollie Mattison
Ollie Mattison is a writer and a lover of all things video.
Follow @Ollie Mattison
Ollie Mattison
Mar 27, 2024• Proven solutions
Are you a memes lover? Reddit is the best hub for funny memes. However, all of the hilarious memes are deep under several subreddits. As these subreddits cover various topics, it can be difficult to find the most hysterical memes out of all.
So, in this article, we have come up with 10 funniest subreddits to make you laugh. You need not worry further that you are unable to find the memes.
10 Funniest Subreddits to Find Memes
1. /r/AdviceAnimals
On 7th December 2010, the /r/AdviceAnimals subreddit was created. It is simple and straight to understand. Advice Animals was firstly a memes category that showed memes like a business cat wearing a coat and tie or socially awkward penguin lacking confidence with some message or awful advice placed over the image.
The funniest subreddits on /r/AdviceAnimals showed a Penguin with head and half body with the red background looking left, but the other half of the body and the feet turn right with a blue background. The memes read “Started going to the gym - Only at midnight, so there’s nobody else there.”/r/AdviceAnimals subreddit showed it as “there’s someone else in the gym, so I left and made memes instead.”
2. /r/MemeEconomy
r/MemeEconomy is a quirky and funniest subreddit where real-world commodities are discussed through memes. There’s no real money involved, but when a meme starts becoming popular, people opt to buy, and when emaciated, you sell.
For instance, the frustration of a father is making him invest. The memes show a man sitting on the wall looking down and making his face, thinking when your son starts Fortnite dancing in public. You should have made sandwiches instead of making him.
3. /r/ComedyCemetery
/r/ComedyCemetery is one of the funniest subreddit where the memes are shared by people and mocked them to try out their humor. To start with, users usually share internet culture pieces.
You won’t find any macro images or animal advice memes, ironical jokes allowed, poor titles and reposts, no harassment, or meta-posts. So, the simple yet funniest memes show a poem with various minion expressions, “Roses are red, violets are blue. The face like yours belongs to the zoo. Don’t be said. I’ll be there too. Not in the cage but laughing at you.” Dedicating this song to a friend can create a laugh riot.
4. /r/memes
The /r/memes/ is the funniest subreddits that use phrases to show the user’s emotion, physical and mental state through the linked video or image. It has 1.7million subscribers. The statements used are often ironical on the image or videos. For instance, a meme shows Keanu Reeves running with a camera and a man trying to catch him. The caption says he stole the camera from the paparazzi and ran away.
5. /r/dankmemes
The funniest subreddits /r/dankmemes/ are the sarcastic expressions describing the viral media jokes that have lost their comedic value or the intentionally inexplicable cliché. For example, a 7 year old boy asks, “what’s virgin?” and a 9yrs old boy reverts, “allow us to introduce ourselves.”
6. /r/PrequelMemes
With 715k subscribers, /r/PrequelMemes deals usually with the star war memes. The photoshop memes or image macros series related to Star War films content is all about r/PrequelMemes. It helps to change the audience’s opinion about the movie.
For instance, when the star war movie is about to start at 7.45 and at 7.40 you reach and your dad is still left to carry your baby brother from his car seat. You see a character from the movie asking you to leave him or else you cannot make it in time for the movie.
7. /r/terriblefacebookmemes
/r/terriblefacebookmemes is one of the funniest subreddits as it is a mixture of terribly shitty memes with various suggestions of granny-types. With around 216k subscribers, /r/terriblefacebookmemes is funny yet, relates to some old-fashioned ideas. For instance, a man thinking if the sun is said to be in space, why space doesn’t have light and the earth instead has it?
8. /r/PewdiepieSubmissions
/r/PewdiepieSubmissions let the users submit votes related to the competitions and submissions in pewdiepie. There are content policy violation rules where you must not post porn content or hate speech.
For instance, a long-haired dead man was found standing behind a man working on the computer and his camera captured the image. It is thought to be a cursed image and if not liked and shared, it can bring ill-fate to you, or the dead person will be in your room at night.
9. /r/funny
It is the largest humor stock collection with about a 20.8million subscribers. For example, a badge with the Apple logo says, “Does more. Cost less. It’s that simple. Apple.” According to the meme, Apple has changed direction as APPLE product costs a bomb in recent times.
10. /r/teenagers/
With 767k subscribers, /r/teenagers/ is a teenager’s community created only by teenagers. It is the funniest subreddit for discussing memes that teenagers enjoy thoroughly.
Although there’s no particular age specification to join, the target users are teenagers between 13-19. One of the funniest subreddit memes shows how the teens are singing and playing instruments when they ask for $5 from Mom and get $10 in return. The joy is something out of the world.
Ollie Mattison
Ollie Mattison is a writer and a lover of all things video.
Follow @Ollie Mattison
How to Make a Triggered Meme?
How to Make a Triggered Meme?
Ollie Mattison
Mar 27, 2024• Proven solutions
It is no secret that we all lose our cool from time. It’s only natural, after all, the world can be a frustrating place. We’re all enraged by different things, some of us can’t stand pineapple on pizza while others explode when being pranked. What we often don’t realize is that being triggered in front of a camera makes us perfect meme material. Even though the majority of memes are still images, some of the most memorable memes ever created were GIFs or short videos.
Making the triggered meme is easy when you know how, so in this article, we are going to show you how to make your next potentially viral meme, in just a few easy steps.
Filmora offers an easy to use video editor named Filmora Video Editor to make video and gif memes, and an online free meme maker named Filmora FREE Online Meme Maker which allows you to create images, videos and gifs memes for free. The video tutorial below will show you how to make a triggered video meme with Filmora. Download it and try it by yourself now.

The Things You Need to Make a Triggered Meme
Preparation is key to almost every important thing in life, including making a triggered meme featuring your bestie. Before you can capitalize on that amazing footage of triggered people you first have to make sure you have everything you need to generate a meme. Okay, let’s get started with the essentials to making a fun and effective meme.
1. A Triggered Template
You have virtually unlimited resources at your disposal, as this meme template can be easily found through a quick Google search. There is even an Android app called Triggered Meme Maker , that lets you do what its name suggests, make triggered memes. Making your own template in Microsoft Paint (we will show you how to make it in this article later) or any other photo editing software is also an option if you want to select the color of the background, rather than work with what you can find online.
2. A Video Editing Software
Memes are short videos that rarely last longer than 30 seconds, which is why you don’t need a powerful video editing suite like Final Cut Pro or Adobe Premiere Pro to make a good meme. A software like Wondershare Filmora that is easy to use and yet packed with cool visual effects and useful tools is a better choice if you just want to have a little fun with a video you recorded.
3. The Sound for the Triggered Meme
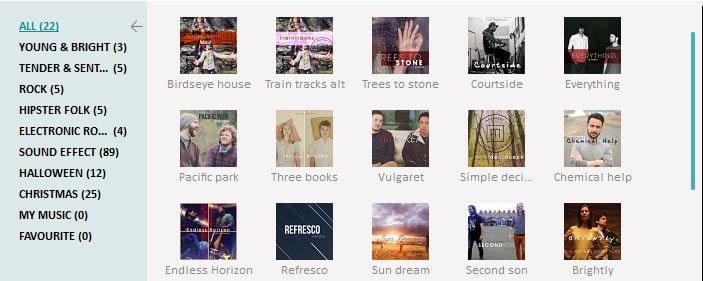
This ingredient of a good meme is easy to forget, but music or any other type of sound can make your meme funnier. In most cases, you’ll want to keep at least a portion of the original audio, but adding sound effects at different points of the meme can have a comical effect. The Filmora’s Music Library can serve as your endless source of royalty free music and sounds .
Making a Triggered Meme Template in Microsoft Paint
Creating a meme template is an easy task that can be handled from the Microsoft Paint in a couple of minutes. When you launch the software, click on the Fill with color icon located in the Tools section of the Paint’s ribbon. Activating this option enables you to change the color of the background with a single click. Proceed to select the color of the background from the color palette located on the far right side of the ribbon. We recommend choosing shades of green because the background is going to be used for the Chroma Key effect. You can click on the Edit Colors icon if you want to find a perfect color tone for the background. Right-click anywhere on the canvas to change its color.
Now you just need to add the text to your template. Select the Text option in the Tools menu and then proceed to select the font or the size of your text in the Font menu. Make sure that the Opaque feature is enabled in the Background menu in order to change the color of the textbox background. Adjusting the Color 1 option in the Color Menu will enable you to choose the text color, while the Color 2 option lets you pick the color of the background. Type triggered in the textbox, and center the text by clicking on the TAB button on your keyboard a few times. Now you have everything you need to start creating your own triggered meme.
How to Make a Triggered Meme?
Once you’ve successfully created a triggered template you can move on to the next step of the meme making process.
1. Adding Media to a Project
Open Filmora in the Full Feature Mode and import all the files you’re going to need during the process of making a meme. The files you import to your project will be stored in the Media Panel. Add the video to the timeline by dropping it over the video track. You can then remove the unwanted parts of the clip or add a still frame to the end of the video to prolong the triggered effect of the meme. Still frames in Filmora can be created by clicking on the Snapshot icon, that is located below the Preview Panel.
2. Using the Green Screen Effect
Place the triggered template to the Picture-in-Picture track and try to position it at the exact place in the video where the person gets triggered. Click on the Green Screen icon located in the toolbar to gain access to the PIP Edit window. The Chroma Key (Green Screen) option will be selected by default, so you just have to check the ‘Make parts of the clip transparent’ box. The green background of the template will become transparent and you’ll be able to see parts of your video, with the triggered text displayed below it.
3. Enhancing Colors and Applying Effects
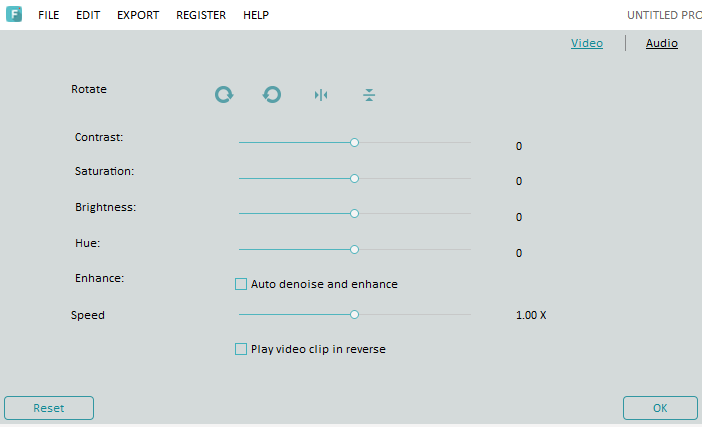
In order to highlight just how much a person in the video got triggered, you can change the vibrance and saturation in a portion of a video clip by clicking on the Edit icon in the toolbar. In addition, other software’s color correction tools like brightness, tint or contrast can also be used to highlight the triggered moment.
After you adjust the color values, you can click on the Effects icon if you want to add motion blur or camera shake effects. Click on the Shake option in the Effects panel to start browsing through different effects and click on the plus icon to add the effect to the clip you selected. The Distortion category in the Effects panel features a number of blur effects you can use to make the video more entertaining. You can adjust the properties of all the effects you add to your meme and control how much of the effect is applied to the video.
4. Adding Music and Text Overlays to Your Meme
Increasing the number of visual elements in the video can help you create a funnier meme. A single word can change the meaning of a meme so if you want to add additional comment besides noting that the person got triggered you can click on the Text icon and select the text overlay you like. Click on the plus icon that is displayed over the effect to add it to a video clip. A textbox will appear over the video in the Preview window and you can drag it around the screen to reposition it or rotate it. Enable the No Animation option if you want the text to just appear and disappear from the screen.
Sounds can add to the comical effect of a meme. Carefully select what type of music or sound you want to use for a meme since it can improve the quality of your meme. Simply drag the audio file you imported into Filmora and place it on the audio track and adjust its duration to match the duration of the video. If you don’t have your own music you can try some of the tracks featured in the software’s music library.
4. Exporting the Triggered Meme from Filmora
When your meme is ready to hit the social media, you can click on the Export button. In the Export window, you can choose any of the available file formats, but the formats best suited for memes are either MP4 or GIF. Click on the Settings icon in the Output Description menu to change the frame rate, resolution or the quality of the video. Wondershare Filmora lets you export videos directly to your YouTube channel or your Facebook account, so you don’t have to waste time on posting the meme after the export process is completed.
The software also offers the option to save a meme you created to your hard drive if you don’t want to post a meme on social media right away. You just have to click on the Export button after adjusting the output settings and wait for the file to be exported.
Conclusion
The precious memories of your friends being enraged by the silliest things can be turned into hilarious memes effortlessly. A video editing software like Wondershare Filmora gives you all the tools you’ll need to quickly generate a triggered meme, so you can focus on having fun with your friends. What’s your favorite method of making memes?
Ollie Mattison
Ollie Mattison is a writer and a lover of all things video.
Follow @Ollie Mattison
Ollie Mattison
Mar 27, 2024• Proven solutions
It is no secret that we all lose our cool from time. It’s only natural, after all, the world can be a frustrating place. We’re all enraged by different things, some of us can’t stand pineapple on pizza while others explode when being pranked. What we often don’t realize is that being triggered in front of a camera makes us perfect meme material. Even though the majority of memes are still images, some of the most memorable memes ever created were GIFs or short videos.
Making the triggered meme is easy when you know how, so in this article, we are going to show you how to make your next potentially viral meme, in just a few easy steps.
Filmora offers an easy to use video editor named Filmora Video Editor to make video and gif memes, and an online free meme maker named Filmora FREE Online Meme Maker which allows you to create images, videos and gifs memes for free. The video tutorial below will show you how to make a triggered video meme with Filmora. Download it and try it by yourself now.
The Things You Need to Make a Triggered Meme
Preparation is key to almost every important thing in life, including making a triggered meme featuring your bestie. Before you can capitalize on that amazing footage of triggered people you first have to make sure you have everything you need to generate a meme. Okay, let’s get started with the essentials to making a fun and effective meme.
1. A Triggered Template
You have virtually unlimited resources at your disposal, as this meme template can be easily found through a quick Google search. There is even an Android app called Triggered Meme Maker , that lets you do what its name suggests, make triggered memes. Making your own template in Microsoft Paint (we will show you how to make it in this article later) or any other photo editing software is also an option if you want to select the color of the background, rather than work with what you can find online.
2. A Video Editing Software
Memes are short videos that rarely last longer than 30 seconds, which is why you don’t need a powerful video editing suite like Final Cut Pro or Adobe Premiere Pro to make a good meme. A software like Wondershare Filmora that is easy to use and yet packed with cool visual effects and useful tools is a better choice if you just want to have a little fun with a video you recorded.
3. The Sound for the Triggered Meme
This ingredient of a good meme is easy to forget, but music or any other type of sound can make your meme funnier. In most cases, you’ll want to keep at least a portion of the original audio, but adding sound effects at different points of the meme can have a comical effect. The Filmora’s Music Library can serve as your endless source of royalty free music and sounds .
Making a Triggered Meme Template in Microsoft Paint
Creating a meme template is an easy task that can be handled from the Microsoft Paint in a couple of minutes. When you launch the software, click on the Fill with color icon located in the Tools section of the Paint’s ribbon. Activating this option enables you to change the color of the background with a single click. Proceed to select the color of the background from the color palette located on the far right side of the ribbon. We recommend choosing shades of green because the background is going to be used for the Chroma Key effect. You can click on the Edit Colors icon if you want to find a perfect color tone for the background. Right-click anywhere on the canvas to change its color.
Now you just need to add the text to your template. Select the Text option in the Tools menu and then proceed to select the font or the size of your text in the Font menu. Make sure that the Opaque feature is enabled in the Background menu in order to change the color of the textbox background. Adjusting the Color 1 option in the Color Menu will enable you to choose the text color, while the Color 2 option lets you pick the color of the background. Type triggered in the textbox, and center the text by clicking on the TAB button on your keyboard a few times. Now you have everything you need to start creating your own triggered meme.
How to Make a Triggered Meme?
Once you’ve successfully created a triggered template you can move on to the next step of the meme making process.
1. Adding Media to a Project
Open Filmora in the Full Feature Mode and import all the files you’re going to need during the process of making a meme. The files you import to your project will be stored in the Media Panel. Add the video to the timeline by dropping it over the video track. You can then remove the unwanted parts of the clip or add a still frame to the end of the video to prolong the triggered effect of the meme. Still frames in Filmora can be created by clicking on the Snapshot icon, that is located below the Preview Panel.
2. Using the Green Screen Effect
Place the triggered template to the Picture-in-Picture track and try to position it at the exact place in the video where the person gets triggered. Click on the Green Screen icon located in the toolbar to gain access to the PIP Edit window. The Chroma Key (Green Screen) option will be selected by default, so you just have to check the ‘Make parts of the clip transparent’ box. The green background of the template will become transparent and you’ll be able to see parts of your video, with the triggered text displayed below it.
3. Enhancing Colors and Applying Effects
In order to highlight just how much a person in the video got triggered, you can change the vibrance and saturation in a portion of a video clip by clicking on the Edit icon in the toolbar. In addition, other software’s color correction tools like brightness, tint or contrast can also be used to highlight the triggered moment.
After you adjust the color values, you can click on the Effects icon if you want to add motion blur or camera shake effects. Click on the Shake option in the Effects panel to start browsing through different effects and click on the plus icon to add the effect to the clip you selected. The Distortion category in the Effects panel features a number of blur effects you can use to make the video more entertaining. You can adjust the properties of all the effects you add to your meme and control how much of the effect is applied to the video.
4. Adding Music and Text Overlays to Your Meme
Increasing the number of visual elements in the video can help you create a funnier meme. A single word can change the meaning of a meme so if you want to add additional comment besides noting that the person got triggered you can click on the Text icon and select the text overlay you like. Click on the plus icon that is displayed over the effect to add it to a video clip. A textbox will appear over the video in the Preview window and you can drag it around the screen to reposition it or rotate it. Enable the No Animation option if you want the text to just appear and disappear from the screen.
Sounds can add to the comical effect of a meme. Carefully select what type of music or sound you want to use for a meme since it can improve the quality of your meme. Simply drag the audio file you imported into Filmora and place it on the audio track and adjust its duration to match the duration of the video. If you don’t have your own music you can try some of the tracks featured in the software’s music library.
4. Exporting the Triggered Meme from Filmora
When your meme is ready to hit the social media, you can click on the Export button. In the Export window, you can choose any of the available file formats, but the formats best suited for memes are either MP4 or GIF. Click on the Settings icon in the Output Description menu to change the frame rate, resolution or the quality of the video. Wondershare Filmora lets you export videos directly to your YouTube channel or your Facebook account, so you don’t have to waste time on posting the meme after the export process is completed.
The software also offers the option to save a meme you created to your hard drive if you don’t want to post a meme on social media right away. You just have to click on the Export button after adjusting the output settings and wait for the file to be exported.
Conclusion
The precious memories of your friends being enraged by the silliest things can be turned into hilarious memes effortlessly. A video editing software like Wondershare Filmora gives you all the tools you’ll need to quickly generate a triggered meme, so you can focus on having fun with your friends. What’s your favorite method of making memes?
Ollie Mattison
Ollie Mattison is a writer and a lover of all things video.
Follow @Ollie Mattison
Best 10 Emoji Apps to Emoji Yourself-Make an Emoji of Yourself
Best 10 Emoji Apps to Emoji Yourself-Make an Emoji of Yourself

Shanoon Cox
Mar 27, 2024• Proven solutions
Sharing emoji is the latest trend in communication on almost all online social media platforms. Emoji makes a conversation funny, engaging and conveys the message you intend perfectly. There are a lot of emoji apps available in the play store that can be downloaded on any device to get more emojis. These emoji apps provide hundreds of emoji suitable for all situations and occasions, needed while interacting online.
Some emoji apps help to emoji yourself, which means you will be able to make an emoji avatar that looks like yourself. These emoji apps absorb your appearance and create funny emojis, with your looks, which is more fun than using regular emojis.
- Best 8 Emoji Apps to Make an Emoji of Yourself
- Bonus Tip - Add Emoji to Your Video with Wondershare Filmora
Best 8 Emoji Apps to Make an Emoji of Yourself
Since sharing emojis has been a trend for some time, there a lot of apps that help to emoji yourself in the online market. These emoji apps provide a lot of editing features and captions to make your emoji more appealing and message conveying.
Let’s have a look at some of the best apps that helps to make an emoji of yourself.
- 1.Bitmoji (iPhone and Android)
- 2.Zmoji(iPhone and Android)
- 3.Avatoon(iPhone and Android)
- 4.Emoji My Face (iPhone)
- 5.Mirror(iPhone and Android)
- 6.MojiPop (iPhone and Android)
- 7.Face Cam (Android)
- 8.Facemoji (iPhone)
1.Bitmoji (iPhone and Android)
Bitmoji is one of the widely used applications that can help you to emoji yourself. This emoji app offers a variety of customizable options, a wide range of accessories and costumes to make your avatar look cooler than ordinary emojis.
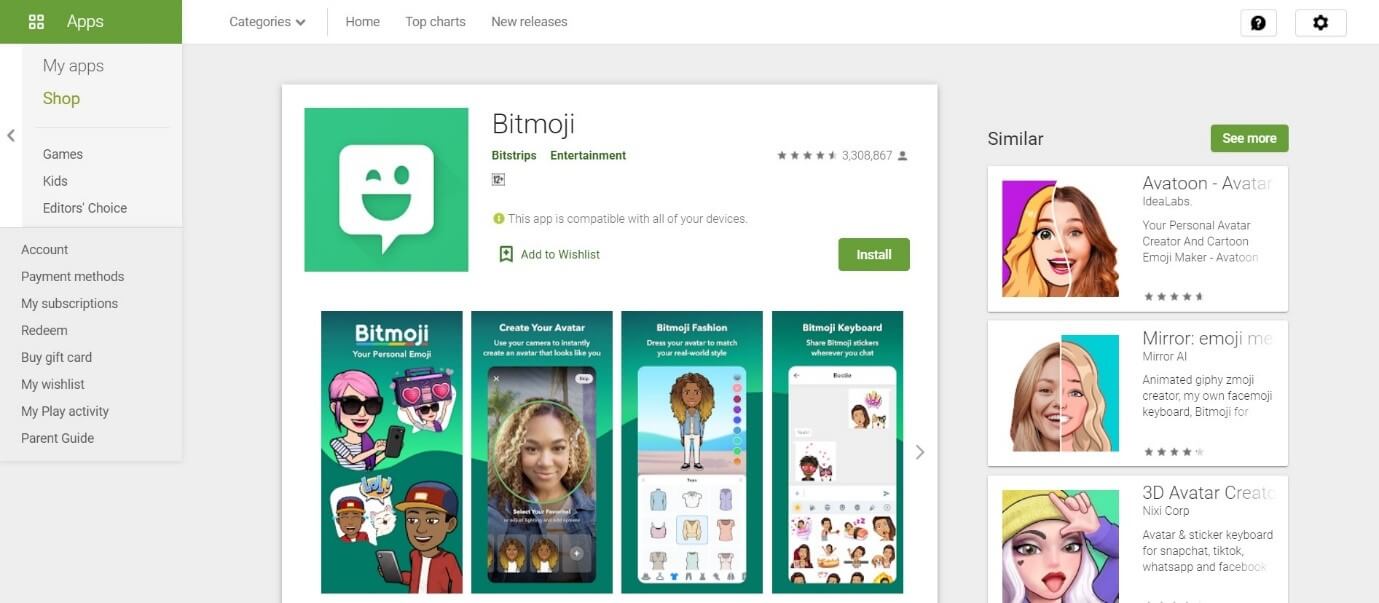
Price:
- Free
- Include in-app purchases
Features:
- Can create an expressive avatar of yourself
- A huge library of stickers to choose from
- Option to create 2 person emoji to share on Snapchat
- Access to emoji from the chatting platform. For ios users, direct access from keyboards
2. Zmoji(iPhone and Android)
Zmoji is a customizable emoji app that helps to emoji yourself easily. It allows you to make an avatar that looks exactly like you but in a cartoonish style. You can also edit your avatar’s clothes, accessories, and other details.
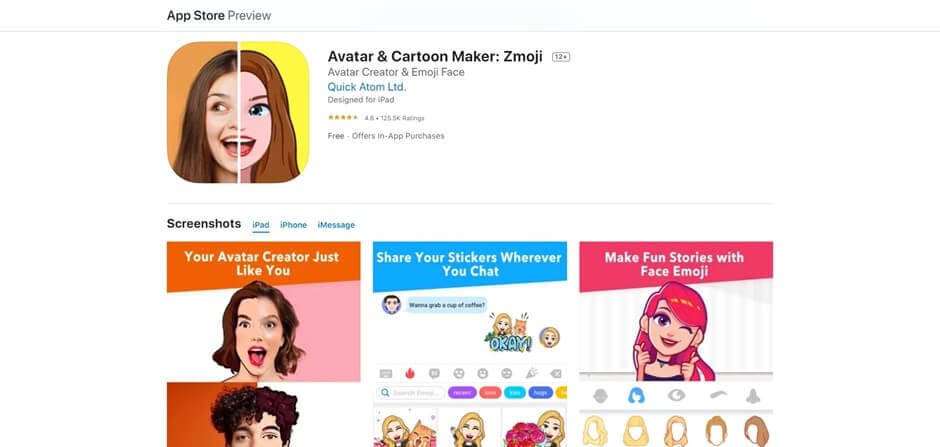
Price:
- Free
- Zmoji Premium with extra features = $99.99 per year
- Include in-app purchases
Features:
- Easy and quick creation of an avatar
- Emoji, GIFs, and avatars that you can use directly from your phone keyboard
- A variety of facial features and a big library
3. Avatoon(iPhone and Android)
Avatoon is a powerful emoji application that helps to make an emoji of yourself, with the same facial appearance. These emojis allow you to expresses all your excitement and moods in a way words can’t. This emoji app also allows the customization of the emoji background.
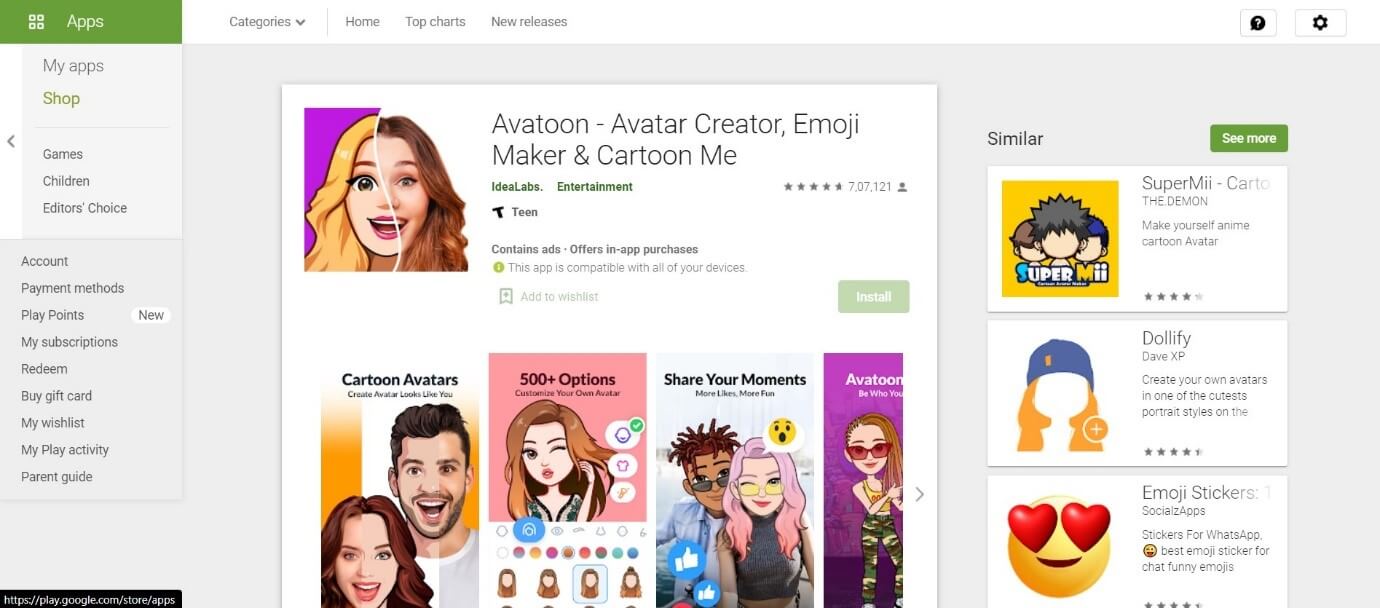
Price:
- Free
- Avatoon Premium with extra features = $49.99 per year
- Include in-app purchases
Features:
- Awesome facial recognition feature
- Easily customize clothes to nose and hair to eyes
- Eye-catching clothes and costumes to try on
- Effortlessly share the created emojis while interacting on any social media platform
4. Emoji My Face (iPhone)
Emoji My Face is an iPhone exclusive emoji app that helps to create wonderful emoji of yourself or your friends from any photos in your storage. It is one of the best apps have to have fun on social media platforms or to prank your friends by sending crazy emojis.

Price:
- Free
- Include in-app purchases
Features:
- Well designed, beautiful emoji icon of yourself
- Cool emoji expressions that can make anyone laugh
- Compactable to share on all most all social platforms like WhatsApp, Facebook, Line, Twitter, messenger, mail WeChat, etc.
5. Mirror(iPhone and Android)
Mirror is an emoji app that helps you to emoji yourself in all the funny and entertaining ways possible. You can either take a snap or yourself or upload a photo to recreate your appearance for the emoji.

Price:
- Free
- Include in-app purchases
- Subscription: $9.99 per month
Features:
- Personalized emoji and more than 150 stickers are available
- A mirror keyboard is available, to give emoji suggestions as you text
- Cool emoji icons with attractive accessories and addition of emojis to the library every week
6. MojiPop (iPhone and Android)
MojiPop is an instant emoji app that allows you to customize every single detail of the emoji you are creating. It allows you to click pictures of yourself or friends and create humorous emoji icons that can surprise anybody.
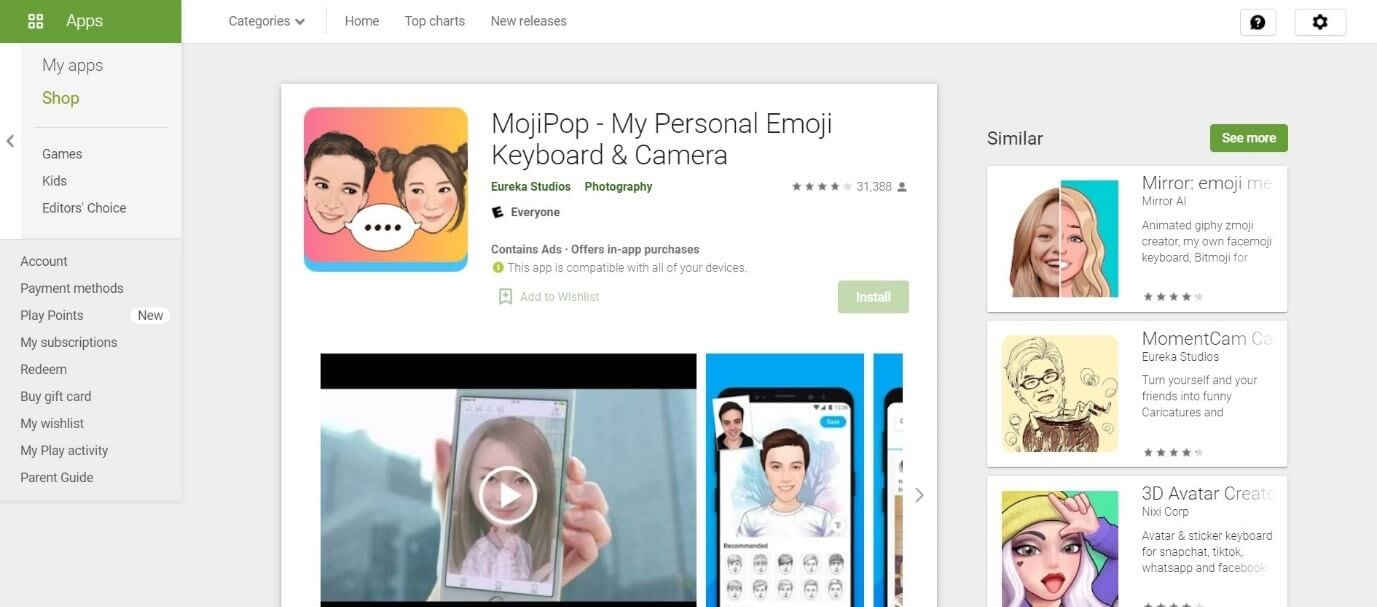
Price:
- Free
- Include in-app purchases
- Premium:$5.99 for 1 month, $29.99 per year
Features:
- Advanced facial recognition that allows you to create live looking emojis
- Thousands of emoji stickers available in the library
- Editing features like adding funny accessories, changing the theme, adding a caption, etc.
7. Face Cam (Android)
Face Cam is an android exclusive emoji app that helps you to make an emoji of yourself very easily. It helps to create live looking 3D emoji of yourself which can add extra fun to all your social media interactions.

Price:
- Free
- Include in-app purchases
Features:
- A variety of expressions that fit your personality and style
- Allows to choose from skin tones, hair colors, hairstyles, eye colors, accessories, and more
- Create a group emoji of 2 people to add more fun
- Easy sharing on social media platforms
8. Facemoji (iPhone)
Facemoji is an emoji app that helps you to be yourself while interacting with your friends and family on social media apps. This emoji app helps to emoji yourself to a cooler, funnier, and friendly cartoon version of yourself for better communication.
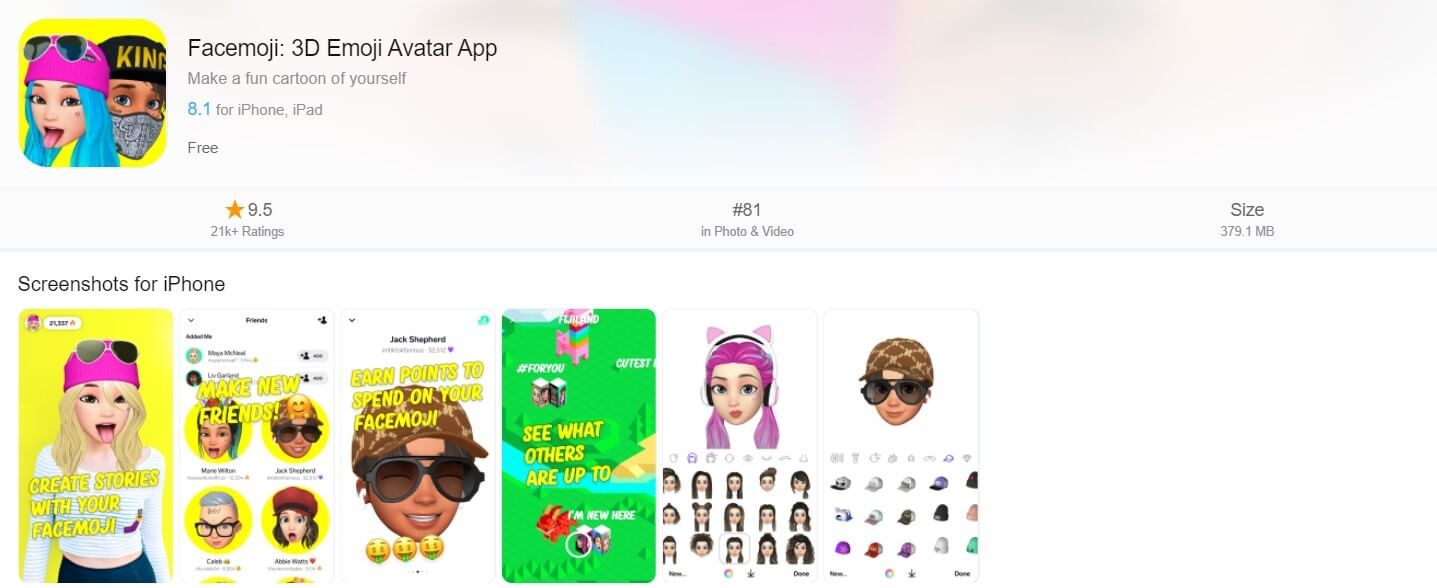
Price:
- Free
Features:
- A number of emoji styles and expressions
- A lot of customizable options suitable for any situation or occasion
- A lot of accessories and background options to make the emoji more appealing
Bonus Tip - Add Emoji to Your Video with Wondershare Filmora
Wondershare Filmora is an amazing application that is preferred for video editing both by professional videographers and immatures alike. This application has extensive video editing features that can help to boost the clarity, make it more creative and appealing to any audience.
Wondershar Filmora can also help you to add cool emojis of yourself to any video. These emojis help you to convey expressions and messages words can’t and also makes the video more appealing.
Let’s see how this can be done
Step 1: Open the Wondershare Filmora app, and select New Project.
Step 2: Import the video clip and drag & drop it to the Filmora timeline.
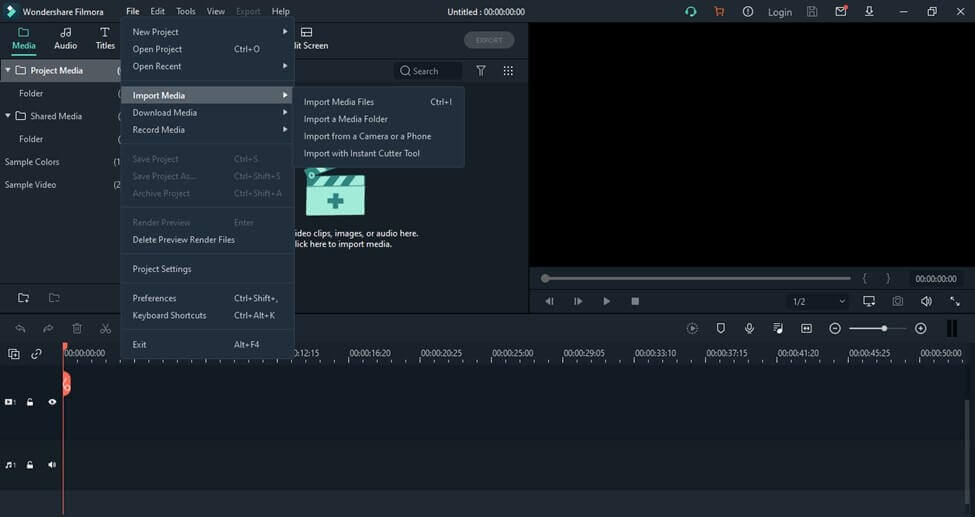
Step 3: Open the editing menu by double-clicking on the video clip on your timeline and mark the box beside Motion Tracking.
![]()
Step 4: A tracker box will appear. Move the box on top of the moving object in the video and tap on Start Tracking.
![]()
Step 5: From the Elements bar, drag and drop the memoji you wish to track above the video. After dropping u can adjust the size, orientation, or position if necessary.
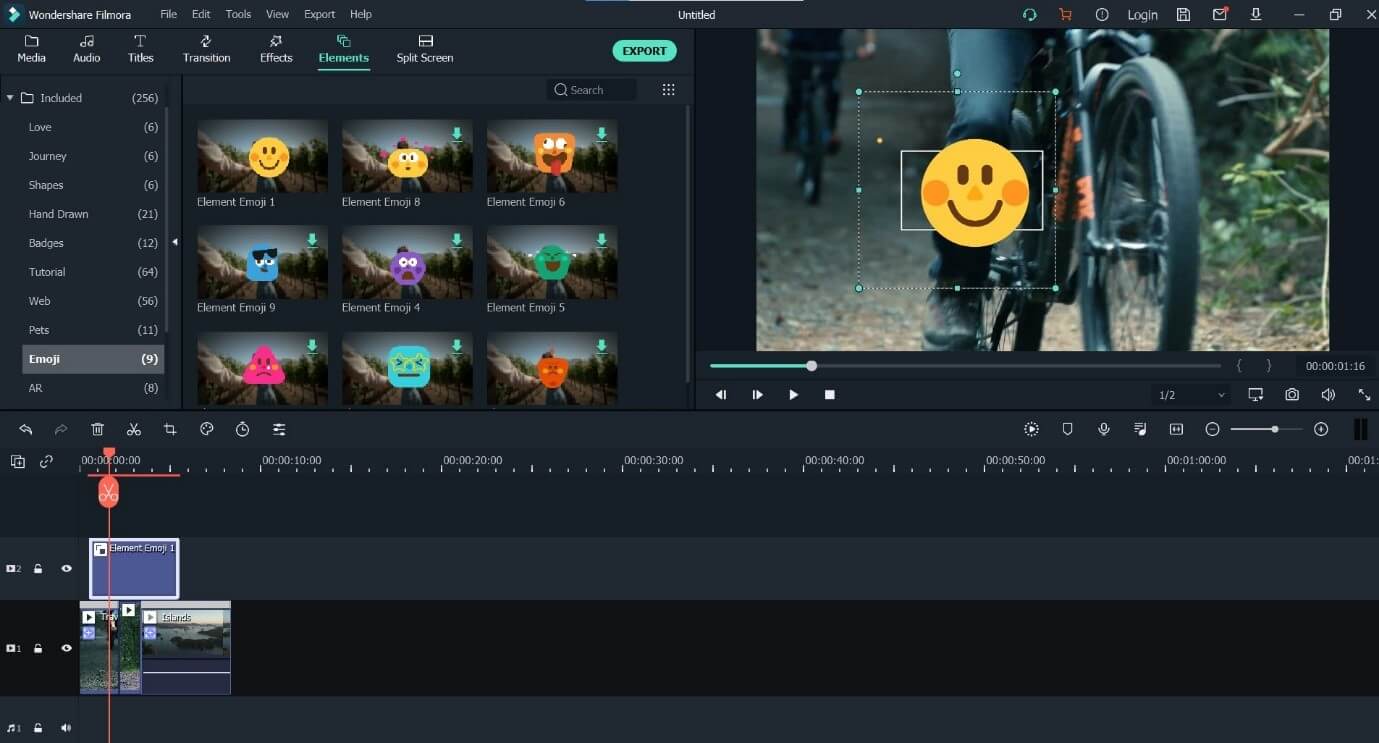
Step 6: Double click the video clip on which you have enabled motion tracking on the timeline, and from the Motion Tracking dropdown menu, select the object to follow the movement.
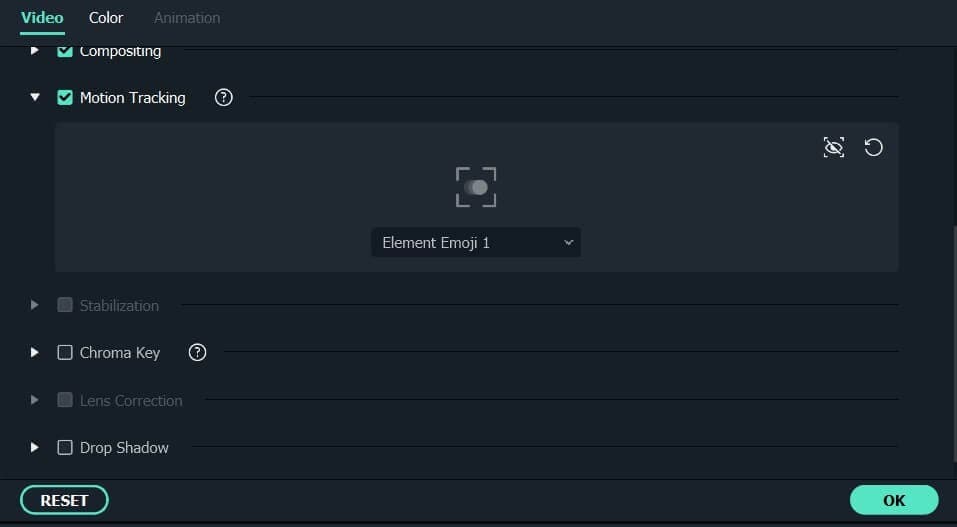
Step 7: Check the tracking result by playing back the video. And finally click Export to export the video to your local device, or to YouTube directly.
Conclusion
Emoji is one of the creative ways of communication of your generation. They help to convey messages and expressions that words sometimes can’t. The above listed are the best emoji apps that can be used to make an emoji of yourself. These emoji apps offer a lot of exciting and attractive features to emoji yourself in the best way possible.
Emojis can also be added to videos using video editing apps like Wondershare Filmora. Filmora allows you to add memojis to any videos and further customize it as you wish. Try out the emoji apps we have suggested and give us feedback about our suggestions. Thank you.
Shanoon Cox
Shanoon Cox is a writer and a lover of all things video.
Follow @Shanoon Cox
Shanoon Cox
Mar 27, 2024• Proven solutions
Sharing emoji is the latest trend in communication on almost all online social media platforms. Emoji makes a conversation funny, engaging and conveys the message you intend perfectly. There are a lot of emoji apps available in the play store that can be downloaded on any device to get more emojis. These emoji apps provide hundreds of emoji suitable for all situations and occasions, needed while interacting online.
Some emoji apps help to emoji yourself, which means you will be able to make an emoji avatar that looks like yourself. These emoji apps absorb your appearance and create funny emojis, with your looks, which is more fun than using regular emojis.
- Best 8 Emoji Apps to Make an Emoji of Yourself
- Bonus Tip - Add Emoji to Your Video with Wondershare Filmora
Best 8 Emoji Apps to Make an Emoji of Yourself
Since sharing emojis has been a trend for some time, there a lot of apps that help to emoji yourself in the online market. These emoji apps provide a lot of editing features and captions to make your emoji more appealing and message conveying.
Let’s have a look at some of the best apps that helps to make an emoji of yourself.
- 1.Bitmoji (iPhone and Android)
- 2.Zmoji(iPhone and Android)
- 3.Avatoon(iPhone and Android)
- 4.Emoji My Face (iPhone)
- 5.Mirror(iPhone and Android)
- 6.MojiPop (iPhone and Android)
- 7.Face Cam (Android)
- 8.Facemoji (iPhone)
1.Bitmoji (iPhone and Android)
Bitmoji is one of the widely used applications that can help you to emoji yourself. This emoji app offers a variety of customizable options, a wide range of accessories and costumes to make your avatar look cooler than ordinary emojis.
Price:
- Free
- Include in-app purchases
Features:
- Can create an expressive avatar of yourself
- A huge library of stickers to choose from
- Option to create 2 person emoji to share on Snapchat
- Access to emoji from the chatting platform. For ios users, direct access from keyboards
2. Zmoji(iPhone and Android)
Zmoji is a customizable emoji app that helps to emoji yourself easily. It allows you to make an avatar that looks exactly like you but in a cartoonish style. You can also edit your avatar’s clothes, accessories, and other details.
Price:
- Free
- Zmoji Premium with extra features = $99.99 per year
- Include in-app purchases
Features:
- Easy and quick creation of an avatar
- Emoji, GIFs, and avatars that you can use directly from your phone keyboard
- A variety of facial features and a big library
3. Avatoon(iPhone and Android)
Avatoon is a powerful emoji application that helps to make an emoji of yourself, with the same facial appearance. These emojis allow you to expresses all your excitement and moods in a way words can’t. This emoji app also allows the customization of the emoji background.
Price:
- Free
- Avatoon Premium with extra features = $49.99 per year
- Include in-app purchases
Features:
- Awesome facial recognition feature
- Easily customize clothes to nose and hair to eyes
- Eye-catching clothes and costumes to try on
- Effortlessly share the created emojis while interacting on any social media platform
4. Emoji My Face (iPhone)
Emoji My Face is an iPhone exclusive emoji app that helps to create wonderful emoji of yourself or your friends from any photos in your storage. It is one of the best apps have to have fun on social media platforms or to prank your friends by sending crazy emojis.
Price:
- Free
- Include in-app purchases
Features:
- Well designed, beautiful emoji icon of yourself
- Cool emoji expressions that can make anyone laugh
- Compactable to share on all most all social platforms like WhatsApp, Facebook, Line, Twitter, messenger, mail WeChat, etc.
5. Mirror(iPhone and Android)
Mirror is an emoji app that helps you to emoji yourself in all the funny and entertaining ways possible. You can either take a snap or yourself or upload a photo to recreate your appearance for the emoji.
Price:
- Free
- Include in-app purchases
- Subscription: $9.99 per month
Features:
- Personalized emoji and more than 150 stickers are available
- A mirror keyboard is available, to give emoji suggestions as you text
- Cool emoji icons with attractive accessories and addition of emojis to the library every week
6. MojiPop (iPhone and Android)
MojiPop is an instant emoji app that allows you to customize every single detail of the emoji you are creating. It allows you to click pictures of yourself or friends and create humorous emoji icons that can surprise anybody.
Price:
- Free
- Include in-app purchases
- Premium:$5.99 for 1 month, $29.99 per year
Features:
- Advanced facial recognition that allows you to create live looking emojis
- Thousands of emoji stickers available in the library
- Editing features like adding funny accessories, changing the theme, adding a caption, etc.
7. Face Cam (Android)
Face Cam is an android exclusive emoji app that helps you to make an emoji of yourself very easily. It helps to create live looking 3D emoji of yourself which can add extra fun to all your social media interactions.
Price:
- Free
- Include in-app purchases
Features:
- A variety of expressions that fit your personality and style
- Allows to choose from skin tones, hair colors, hairstyles, eye colors, accessories, and more
- Create a group emoji of 2 people to add more fun
- Easy sharing on social media platforms
8. Facemoji (iPhone)
Facemoji is an emoji app that helps you to be yourself while interacting with your friends and family on social media apps. This emoji app helps to emoji yourself to a cooler, funnier, and friendly cartoon version of yourself for better communication.
Price:
- Free
Features:
- A number of emoji styles and expressions
- A lot of customizable options suitable for any situation or occasion
- A lot of accessories and background options to make the emoji more appealing
Bonus Tip - Add Emoji to Your Video with Wondershare Filmora
Wondershare Filmora is an amazing application that is preferred for video editing both by professional videographers and immatures alike. This application has extensive video editing features that can help to boost the clarity, make it more creative and appealing to any audience.
Wondershar Filmora can also help you to add cool emojis of yourself to any video. These emojis help you to convey expressions and messages words can’t and also makes the video more appealing.
Let’s see how this can be done
Step 1: Open the Wondershare Filmora app, and select New Project.
Step 2: Import the video clip and drag & drop it to the Filmora timeline.
Step 3: Open the editing menu by double-clicking on the video clip on your timeline and mark the box beside Motion Tracking.
![]()
Step 4: A tracker box will appear. Move the box on top of the moving object in the video and tap on Start Tracking.
![]()
Step 5: From the Elements bar, drag and drop the memoji you wish to track above the video. After dropping u can adjust the size, orientation, or position if necessary.
Step 6: Double click the video clip on which you have enabled motion tracking on the timeline, and from the Motion Tracking dropdown menu, select the object to follow the movement.
Step 7: Check the tracking result by playing back the video. And finally click Export to export the video to your local device, or to YouTube directly.
Conclusion
Emoji is one of the creative ways of communication of your generation. They help to convey messages and expressions that words sometimes can’t. The above listed are the best emoji apps that can be used to make an emoji of yourself. These emoji apps offer a lot of exciting and attractive features to emoji yourself in the best way possible.
Emojis can also be added to videos using video editing apps like Wondershare Filmora. Filmora allows you to add memojis to any videos and further customize it as you wish. Try out the emoji apps we have suggested and give us feedback about our suggestions. Thank you.
Shanoon Cox
Shanoon Cox is a writer and a lover of all things video.
Follow @Shanoon Cox
How to Make Your Own Emoji in 2 Ways [Step-By Step Guide]
How to Make Your Own Emoji in 2 Ways [Step-by Step Guide]
Shanoon Cox
Mar 27, 2024• Proven solutions
The small yellow faces that we have come to call emojis are now rapidly being used on all platforms. Whether you’re sending an email or texting a friend, emoji is ever-present to spice up the conversation and give it an emotional touch. But these cliché emojis are now becoming dull, and the creative side in us is craving for something more personal and fun.
To satisfy that craving of being unique, you can now create your own emoji. Tease your friends with an emoji of their faces or custom-create an emoji that best expresses your facial expressions. The customized emoji can be an object or an emotion, while the only limitation is your imagination.
Let me show you how to make emoji that relates to your feelings and will help you transform your texting experience.
- Method 1: Make Your Own Emoji Using Online Emoji Maker
- Method 2: Make Your Own Emoji Using an Emoji Maker App
- Bonus Tip-Add Your Emoji to a Video Using Wondershare Filmora
Method 1: Make Your Own Emoji Using Online Emoji Maker
Emoji Maker is an online tool to quench your thirst for creativity. It is free and incredibly easy to use. You would think that it takes expertise to make your own emoji, but, fortunately, all it takes is imagination and a few clicks, of course.
You can create an emoji from the face shapes available or customize a funny emoji using your own or a friend’s face. You can finally take revenge by pasting the funniest mustache on your ex’s face or making them bald. (Savage, right?)
Better yet, you can make a superhero emoji of yourself and even change the background as if you’re in the sky. The functions of this Emoji Maker are countless and of a professional level. These customized emojis are bound to make you stand out in those group chats
Now, as promised, I will show you exactly how it’s done.
1. First of all, open Emoji Maker on your browser.
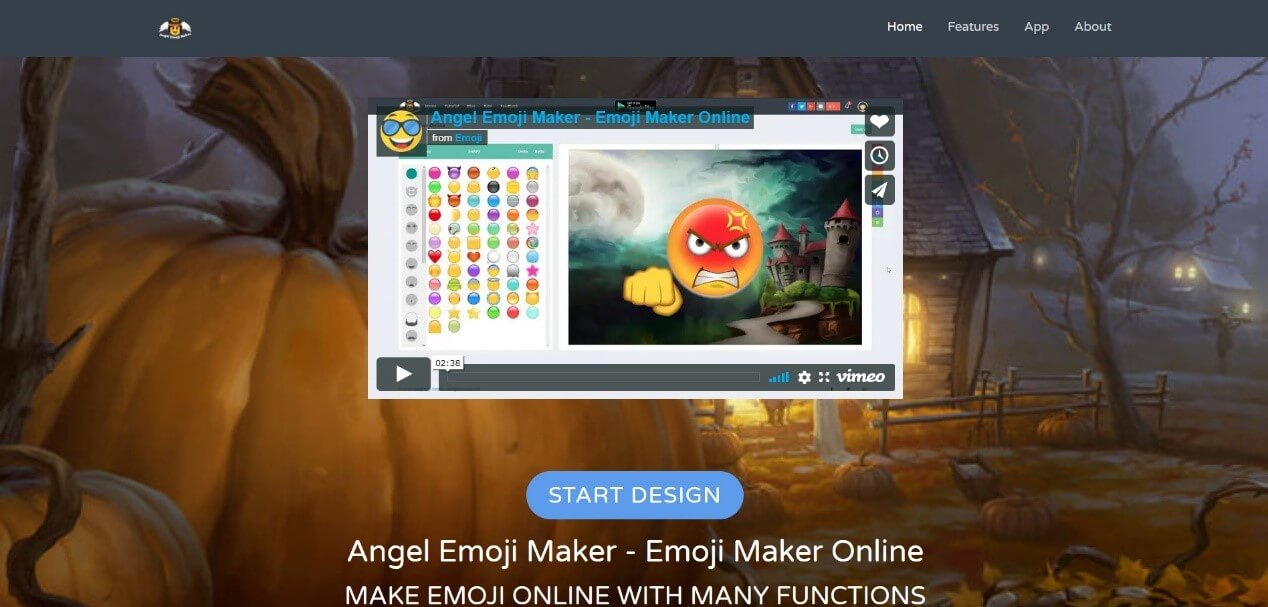
2. Select a sample shape and face. You can even upload your own selfie to use as a face.
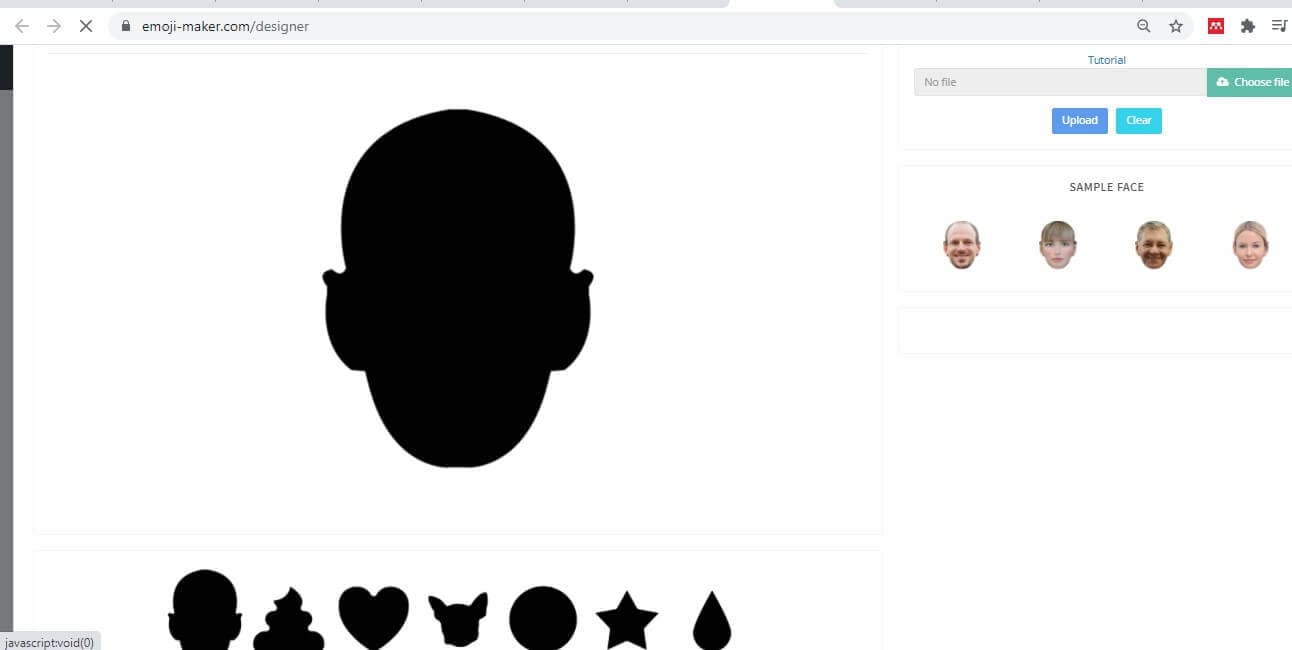
3. Now change the various features on the face such as eyes, hair, mustache, glasses, nose, etc
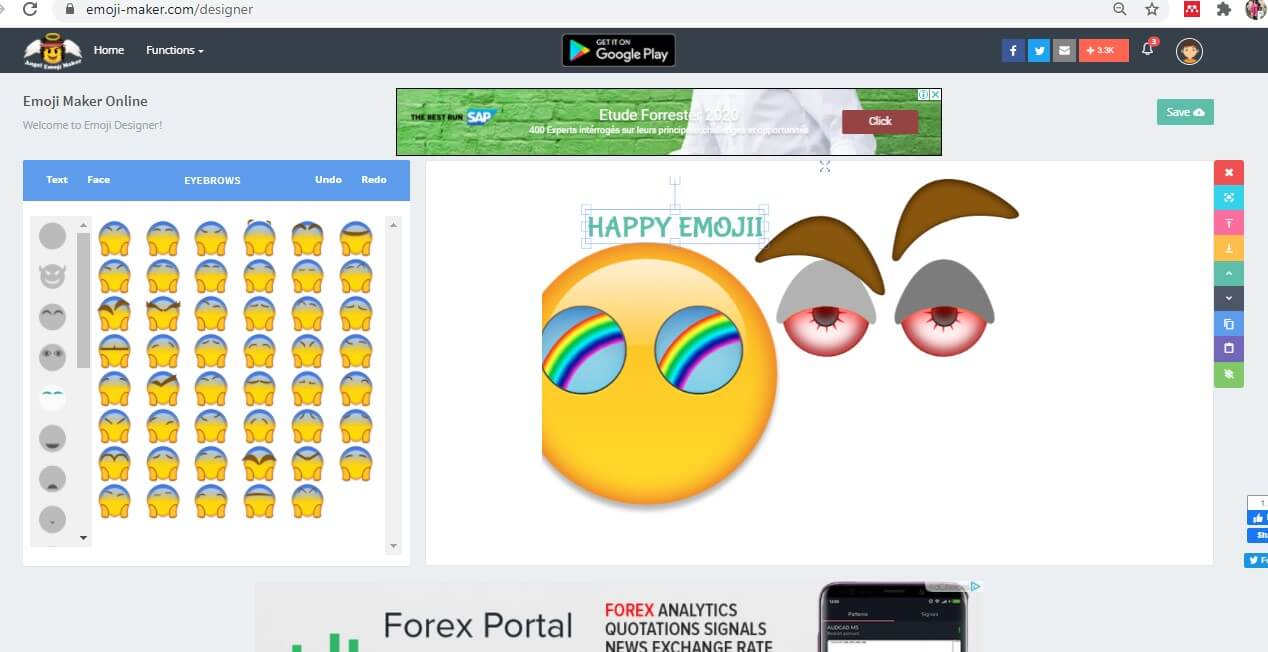
4. The undo and redo buttons are available for quick creations. The size of the emoji can be adjusted by clicking on the features and dragging it.
5. A panel on the right lets you copy, paste, or move the selected feature up, down, to the front or behind.
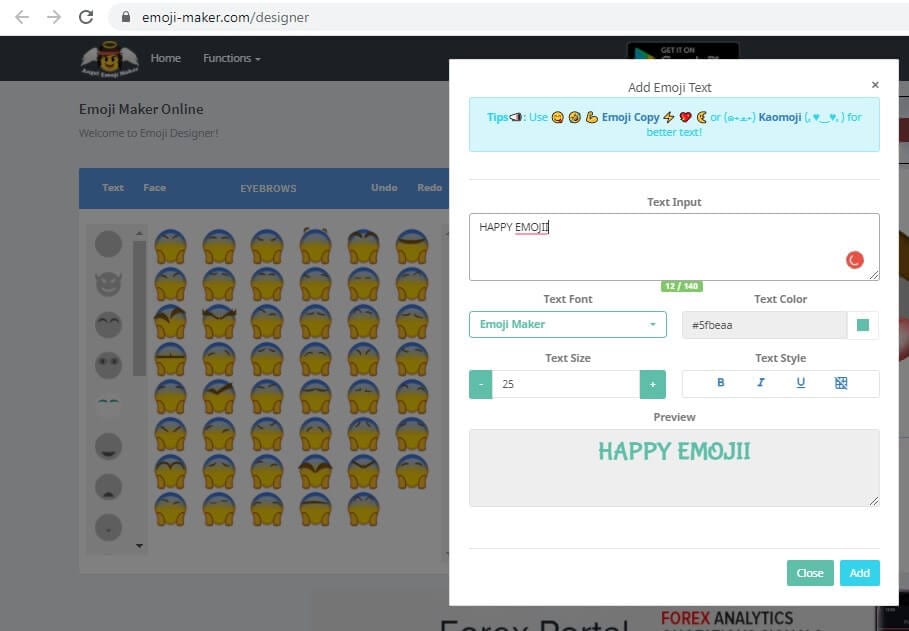
6. You can also click on the Text tab to insert a message with customized size, color, or font
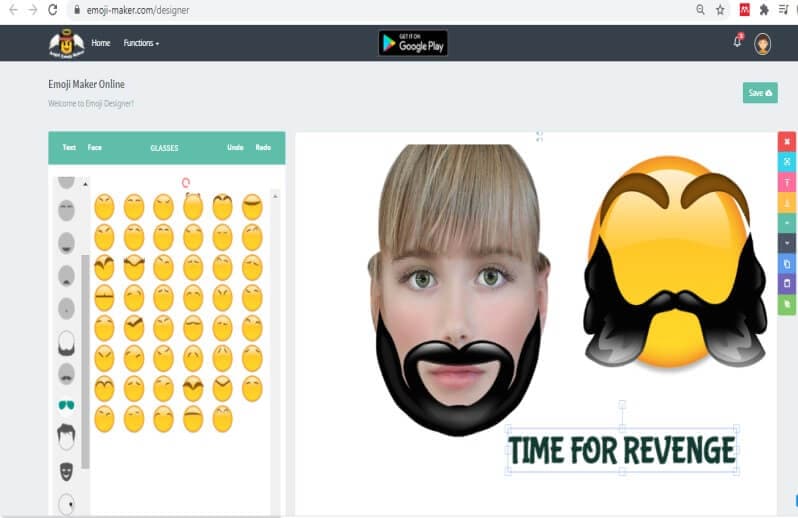
7. After customization, press Save in the top right corner. You can either directly save the emoji to your pc or crop to size and then save.
Method 2: Make Your Own Emoji Using an Emoji Maker App
Zmoji is an app that lets you create a whole range of personalized avatars of yourself. Imagine a collection of stickers of different emotions but all featuring you.
You can create your avatar manually or by using the facial recognition feature. Moreover, you can dress up the avatar to look just like you. There is a wide range of stylish clothes you can choose from. Be funky or silly, or be you. Who cares? It’s time for some fun.
Let there be a mini-you in a funny or silly position. Or a dancing avatar of you to express your delight or crying a pool of tears after a piece of bad news, next-level texting, right?
1. Download Zmoji or either your Android or Apple device. Launch it.
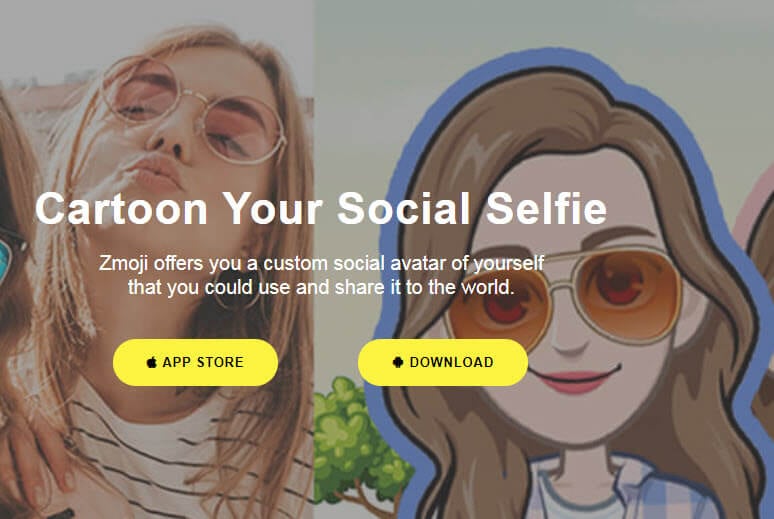
2. Choose your gender. Click on Facial Recognition and take a selfie to proceed. Or tap Manual Creation to create a face yourself.
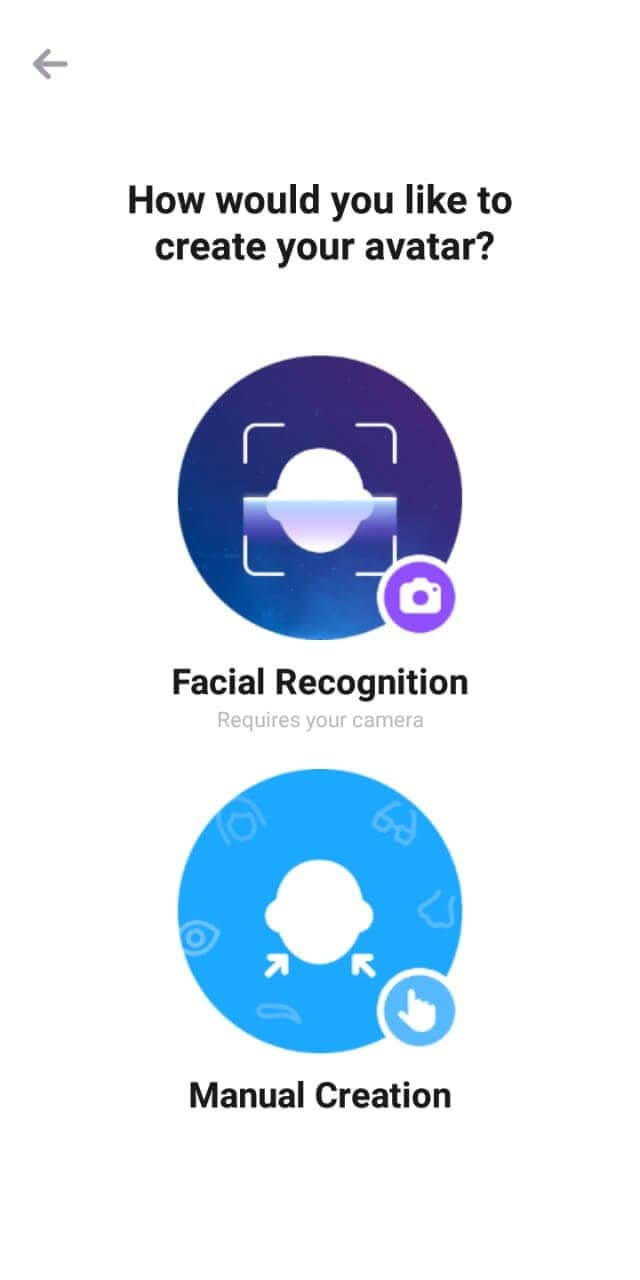
3. Choose from the variety of features to make the emoji look precisely like you. Click Save. You will also earn coins on creating an emoji that you can use to buy special features.
4. Now you can dress it up to match the real you and choose a pose that best fits your mood.
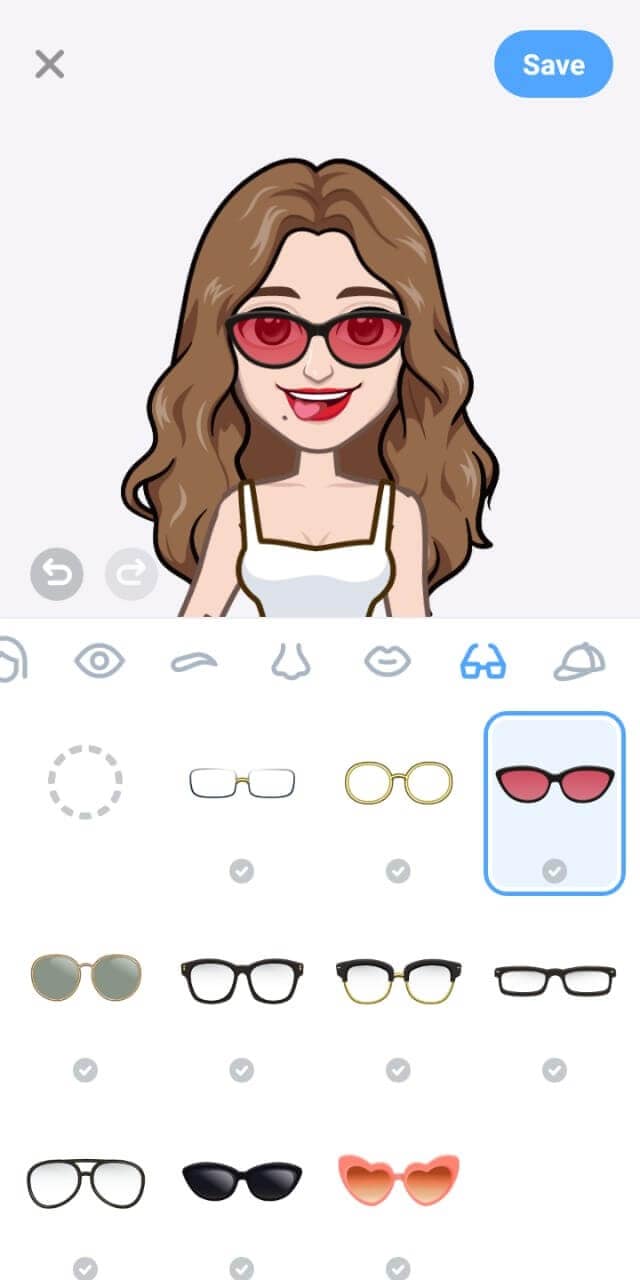
5. Click on Photobooth and choose a template to create a sticker of you just like that.
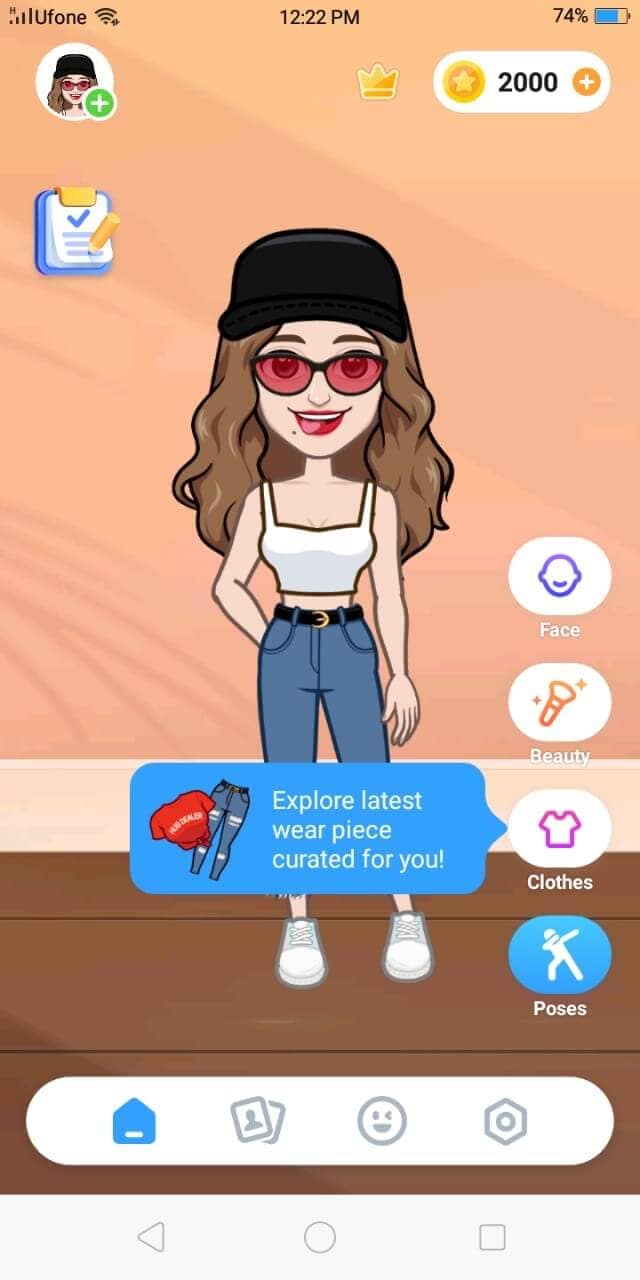
6. Once you are all dolled up, press Save or share the avatar directly on Facebook, Whatsapp, and Instagram, etc.
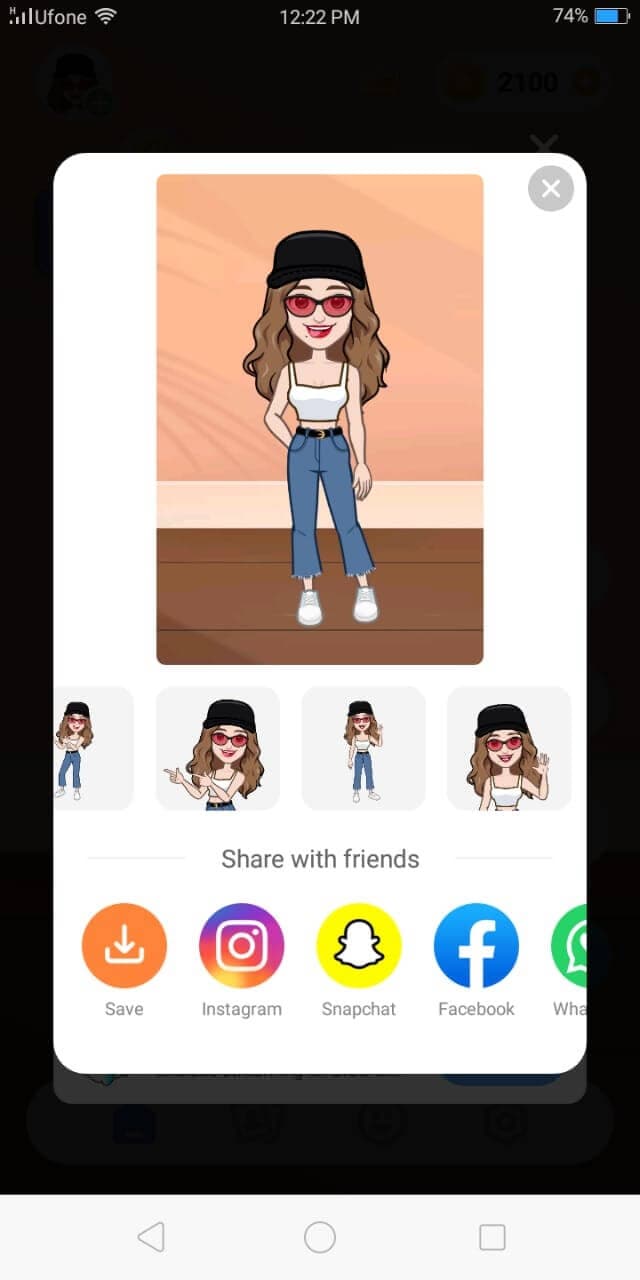
Bonus Tip-Add Your Emoji to a Video Using Wondershare Filmora
Wondershare Filmora, famous for its simple interface and professional video-making and editing tools, is here to save the day again. With the wide range of editing tools and effects that Filmora offers, I will show you how to create your own emoji and then enhance it further.
You can add the customized emoji or add other emojis from Filmora’s library. Motion effects and other special effects will give your video a refined and dramatic look, and the customized emoji will be a cherry on top.
Let’s surprise our friends with our unique creation!
1. Download and install Filmora. Launch it.
2. Click on File>Import Media to select the emoji you created as well as the video.
3. Drag and drop both onto the timeline.
4. In the viewer panel, adjust the size and location of the emoji.
5. Click on the emoji image in the timeline to change the values in Image, Color, and Motion. You can rotate the emoji or alter its color. You can even choose the motion of how the emoji comes in the video. This animated introduction of the emoji will give your video a dramatic look.
Finally, click Export, choose the destination folder, and the output format.
Conclusion
From creating unique emojis to creative avatars, you know it all now. We have walked you through how to make emoji in 2 easy ways. Now it’s up to you. You can use these customized emojis to add a spark to your conversations or attract followers to your brands. Based on your ease, choose any method and let the creativity in you take over.
Wondershare Filmora will help you create the kind of unique video you need to stand out. Just don’t forget to decorate your videos with your custom made emojis. You might get famous, who knows?
Shanoon Cox
Shanoon Cox is a writer and a lover of all things video.
Follow @Shanoon Cox
Shanoon Cox
Mar 27, 2024• Proven solutions
The small yellow faces that we have come to call emojis are now rapidly being used on all platforms. Whether you’re sending an email or texting a friend, emoji is ever-present to spice up the conversation and give it an emotional touch. But these cliché emojis are now becoming dull, and the creative side in us is craving for something more personal and fun.
To satisfy that craving of being unique, you can now create your own emoji. Tease your friends with an emoji of their faces or custom-create an emoji that best expresses your facial expressions. The customized emoji can be an object or an emotion, while the only limitation is your imagination.
Let me show you how to make emoji that relates to your feelings and will help you transform your texting experience.
- Method 1: Make Your Own Emoji Using Online Emoji Maker
- Method 2: Make Your Own Emoji Using an Emoji Maker App
- Bonus Tip-Add Your Emoji to a Video Using Wondershare Filmora
Method 1: Make Your Own Emoji Using Online Emoji Maker
Emoji Maker is an online tool to quench your thirst for creativity. It is free and incredibly easy to use. You would think that it takes expertise to make your own emoji, but, fortunately, all it takes is imagination and a few clicks, of course.
You can create an emoji from the face shapes available or customize a funny emoji using your own or a friend’s face. You can finally take revenge by pasting the funniest mustache on your ex’s face or making them bald. (Savage, right?)
Better yet, you can make a superhero emoji of yourself and even change the background as if you’re in the sky. The functions of this Emoji Maker are countless and of a professional level. These customized emojis are bound to make you stand out in those group chats
Now, as promised, I will show you exactly how it’s done.
1. First of all, open Emoji Maker on your browser.
2. Select a sample shape and face. You can even upload your own selfie to use as a face.
3. Now change the various features on the face such as eyes, hair, mustache, glasses, nose, etc
4. The undo and redo buttons are available for quick creations. The size of the emoji can be adjusted by clicking on the features and dragging it.
5. A panel on the right lets you copy, paste, or move the selected feature up, down, to the front or behind.
6. You can also click on the Text tab to insert a message with customized size, color, or font
7. After customization, press Save in the top right corner. You can either directly save the emoji to your pc or crop to size and then save.
Method 2: Make Your Own Emoji Using an Emoji Maker App
Zmoji is an app that lets you create a whole range of personalized avatars of yourself. Imagine a collection of stickers of different emotions but all featuring you.
You can create your avatar manually or by using the facial recognition feature. Moreover, you can dress up the avatar to look just like you. There is a wide range of stylish clothes you can choose from. Be funky or silly, or be you. Who cares? It’s time for some fun.
Let there be a mini-you in a funny or silly position. Or a dancing avatar of you to express your delight or crying a pool of tears after a piece of bad news, next-level texting, right?
1. Download Zmoji or either your Android or Apple device. Launch it.
2. Choose your gender. Click on Facial Recognition and take a selfie to proceed. Or tap Manual Creation to create a face yourself.
3. Choose from the variety of features to make the emoji look precisely like you. Click Save. You will also earn coins on creating an emoji that you can use to buy special features.
4. Now you can dress it up to match the real you and choose a pose that best fits your mood.
5. Click on Photobooth and choose a template to create a sticker of you just like that.
6. Once you are all dolled up, press Save or share the avatar directly on Facebook, Whatsapp, and Instagram, etc.
Bonus Tip-Add Your Emoji to a Video Using Wondershare Filmora
Wondershare Filmora, famous for its simple interface and professional video-making and editing tools, is here to save the day again. With the wide range of editing tools and effects that Filmora offers, I will show you how to create your own emoji and then enhance it further.
You can add the customized emoji or add other emojis from Filmora’s library. Motion effects and other special effects will give your video a refined and dramatic look, and the customized emoji will be a cherry on top.
Let’s surprise our friends with our unique creation!
1. Download and install Filmora. Launch it.
2. Click on File>Import Media to select the emoji you created as well as the video.
3. Drag and drop both onto the timeline.
4. In the viewer panel, adjust the size and location of the emoji.
5. Click on the emoji image in the timeline to change the values in Image, Color, and Motion. You can rotate the emoji or alter its color. You can even choose the motion of how the emoji comes in the video. This animated introduction of the emoji will give your video a dramatic look.
Finally, click Export, choose the destination folder, and the output format.
Conclusion
From creating unique emojis to creative avatars, you know it all now. We have walked you through how to make emoji in 2 easy ways. Now it’s up to you. You can use these customized emojis to add a spark to your conversations or attract followers to your brands. Based on your ease, choose any method and let the creativity in you take over.
Wondershare Filmora will help you create the kind of unique video you need to stand out. Just don’t forget to decorate your videos with your custom made emojis. You might get famous, who knows?
Shanoon Cox
Shanoon Cox is a writer and a lover of all things video.
Follow @Shanoon Cox
How to Use Emojis on Windows
If you ever wondered how to use emojis on Windows, or since when the emojis are around and what is their significance, you will find all your answers here. Because Windows 10 offers a great range of emojis that help you express your feelings and reactions in fewer words, they have recently gained a decent level of popularity, mostly amongst youngsters and millennials.
With that said, in the following sections, you will learn how to use emojis on Windows 10 using both keyboard shortcuts and touch keyboard, how to get emojis on Windows 10 to make your text or conversation look more versatile, and what new has been added to the latest operating system released by Microsoft, i.e., Windows 11.
In this article
01 Part 1: The History of Emojis in Windows
02 Part 2: How to Use Emojis with Keyboard Shortcuts
03 Part 3: How to Use Emojis on Windows PC with Touch Keyboard
04 Part 4: What’s New in Emojis in Windows 11
05 Part 5: How to Get More Emojis in Windows 11
Part 1: The History of Emojis in Windows
Although emojis are present in some form or the other since the mid-‘90s, they were not quite popular back then. With the evolution of smartphones, these iconic characters got attention from the then-teenagers. Seeing this, in 2012, Microsoft introduced the first-ever set of black-and-white emojis with the release of Windows 8, and after some time, the company also added the same to Windows 7 that was rolled out along with the updates for the OS.
With the release of Windows 10 in 2015, a wide range of full-fledged colored emojis was introduced and received a large number of positive reactions from the users. As of today, emojis have become an integral part of everyone’s day-to-day text conversation, be it on Skype, WhatsApp, Facebook, or any other such platform.
Part 2: How to Use Emojis with Keyboard Shortcuts
A keyboard shortcut is a combination of two or more keys that are pressed simultaneously to trigger a pre-assigned event or action. A good example of a keyboard shortcut is ‘Ctrl + S’ which, when pressed, saves the document you’re working on.
While learning the process of how to use emoji in Windows 10, it is equally imperative to memorize the shortcut keys to insert those icons without taking your hands off the keyboard. This not only saves your time, but it also prevents you from going through the lengthy process of opening the emojis keyboard, navigating through all the available icons to choose the one you’re looking for, and then clicking it to insert in the document or conversation.
Nevertheless, it would be a good idea to learn how to launch the emojis keyboard, and the process is simple. All you need to do is:
- Make sure that your keyboard cursor is in an app that can accept text inputs. A text editor like MS Word or WordPad could be a good example
- Press the Windows + ; (semicolon) or Windows + . (period) keys together to open the emojis keyboard

Once the keyboard is open, you can click any of the available emojis to insert it in your conversion or text content.
As for the shortcuts, depending on the type of expression you want to convey, there could be thousands of them. Some of the commonly used emojis and their universal shortcut keys for both Windows 10 and Windows 11 include:
: (colon) + ) (right brace) will create a smiley face
: (colon) + ( (left brace) will create a sad face
: (colon) + ; (semicolon) will create a wink face
…and so on. You can conduct a quick online search to get the entire list of keyboard shortcuts and the emojis that they will create. For your convenience, a link from the Microsoft official website is given below:
Part 3: How to Use Emojis on Windows PC with Touch Keyboard
If you have Microsoft Surface or any other device that has Windows 10 or Windows 11 installed on it, and can accept inputs via touch keyboard, you can enable the feature in the operating system, and then use the touch keyboard to add emojis to your conversion or content. You can follow the instructions given below to enable touch keyboard, and then learn how to use emojis on Windows 11 or Windows 10 via touch:
- Right-click anywhere on the taskbar (Windows 11 is used here for demonstration), and then click Taskbar settings

- From the right area of the Settings window that opens next, scroll down to the Taskbar corner icons section, and then turn on the Touch keyboard switch

- Launch an app that can accept text inputs, e.g., a text editor, chatting app, etc. Click or tap the Touch keyboard icon from the notification area that is present at the bottom-right corner of the screen.

- Click or tap the Emojis icon from the upper-left corner of the touch keyboard that opens up, and then touch your preferred emoji to add it to your text or conversation.

Part 4: What’s New in Emojis in Windows 11
In addition to learning how to use emojis on Windows 10, it is also important to know what’s new with them or the emojis panel in Windows 11, the latest operating system released by Microsoft this year, i.e., 2021.
In Windows 11, although you can launch the emojis keyboard using the same shortcuts, i.e., ‘Windows + .’ or ‘Windows + ;’ keys as mentioned earlier, the emojis keyboard itself has four sections, namely:
- Emojis – Contains various emojis and smileys
- GIF – Gives you access to various animated GIFs from Tenor
- Kamojis – Lets you add the ASCII characters for emojis, e.g., :-) or :-(
- Symbols – To add important symbols to your text, e.g., ©, ®, etc.
In addition to this, the 2D Clippy emoji has also been introduced with Windows 11, and can be located by launching the emojis keyboard, and typing ‘Clippy’.
Part 5: How to Get More Emojis in Windows 11
If the built-in emoji library doesn’t contain your favorite expressions, you can always get several more by following the instructions given below:
- Launch your favorite web browser on Windows 11, and then go to http://www.iemoji.com/
- Click an emoji from the available options or copy one from your favorite portal, and paste it in the Paste Emoji here field

- Review the emoji in the MESSAGE PREVIEW field, and click Create from the Options section to generate the emoji that can be sent as a message or image

- Alternatively, click Copy from the Options section itself, and then go to the text editor or any other portal you want to use the emoji in, and press Ctrl + V to paste and insert the emoji in your conversation or text without any hassle.

Conclusion
While the emojis were introduced to Windows as late as 2012, Windows 11 has a wide range of these virtual objects or faces for various occasions and to convey different expressions respectively. Furthermore, Windows 11 also gives you access to Tenor’s GIFs, and ASCII characters with particular combinations to represent the emojis, as it was done back in the days of button-operated cellphones.
Also, if the built-in emoji keyboard doesn’t have your favorite expressions and smileys, you can always generate your custom ones by going to http://www.iemoji.com/ , and using the options that the website offers. All in all, it’s easy to learn how to use emojis on Windows as long as you have access to the correct tutorial that explains the process in an easy manner.
02 Part 2: How to Use Emojis with Keyboard Shortcuts
03 Part 3: How to Use Emojis on Windows PC with Touch Keyboard
04 Part 4: What’s New in Emojis in Windows 11
05 Part 5: How to Get More Emojis in Windows 11
Part 1: The History of Emojis in Windows
Although emojis are present in some form or the other since the mid-‘90s, they were not quite popular back then. With the evolution of smartphones, these iconic characters got attention from the then-teenagers. Seeing this, in 2012, Microsoft introduced the first-ever set of black-and-white emojis with the release of Windows 8, and after some time, the company also added the same to Windows 7 that was rolled out along with the updates for the OS.
With the release of Windows 10 in 2015, a wide range of full-fledged colored emojis was introduced and received a large number of positive reactions from the users. As of today, emojis have become an integral part of everyone’s day-to-day text conversation, be it on Skype, WhatsApp, Facebook, or any other such platform.
Part 2: How to Use Emojis with Keyboard Shortcuts
A keyboard shortcut is a combination of two or more keys that are pressed simultaneously to trigger a pre-assigned event or action. A good example of a keyboard shortcut is ‘Ctrl + S’ which, when pressed, saves the document you’re working on.
While learning the process of how to use emoji in Windows 10, it is equally imperative to memorize the shortcut keys to insert those icons without taking your hands off the keyboard. This not only saves your time, but it also prevents you from going through the lengthy process of opening the emojis keyboard, navigating through all the available icons to choose the one you’re looking for, and then clicking it to insert in the document or conversation.
Nevertheless, it would be a good idea to learn how to launch the emojis keyboard, and the process is simple. All you need to do is:
- Make sure that your keyboard cursor is in an app that can accept text inputs. A text editor like MS Word or WordPad could be a good example
- Press the Windows + ; (semicolon) or Windows + . (period) keys together to open the emojis keyboard
Once the keyboard is open, you can click any of the available emojis to insert it in your conversion or text content.
As for the shortcuts, depending on the type of expression you want to convey, there could be thousands of them. Some of the commonly used emojis and their universal shortcut keys for both Windows 10 and Windows 11 include:
: (colon) + ) (right brace) will create a smiley face
: (colon) + ( (left brace) will create a sad face
: (colon) + ; (semicolon) will create a wink face
…and so on. You can conduct a quick online search to get the entire list of keyboard shortcuts and the emojis that they will create. For your convenience, a link from the Microsoft official website is given below:
Part 3: How to Use Emojis on Windows PC with Touch Keyboard
If you have Microsoft Surface or any other device that has Windows 10 or Windows 11 installed on it, and can accept inputs via touch keyboard, you can enable the feature in the operating system, and then use the touch keyboard to add emojis to your conversion or content. You can follow the instructions given below to enable touch keyboard, and then learn how to use emojis on Windows 11 or Windows 10 via touch:
- Right-click anywhere on the taskbar (Windows 11 is used here for demonstration), and then click Taskbar settings
- From the right area of the Settings window that opens next, scroll down to the Taskbar corner icons section, and then turn on the Touch keyboard switch
- Launch an app that can accept text inputs, e.g., a text editor, chatting app, etc. Click or tap the Touch keyboard icon from the notification area that is present at the bottom-right corner of the screen.
- Click or tap the Emojis icon from the upper-left corner of the touch keyboard that opens up, and then touch your preferred emoji to add it to your text or conversation.
Part 4: What’s New in Emojis in Windows 11
In addition to learning how to use emojis on Windows 10, it is also important to know what’s new with them or the emojis panel in Windows 11, the latest operating system released by Microsoft this year, i.e., 2021.
In Windows 11, although you can launch the emojis keyboard using the same shortcuts, i.e., ‘Windows + .’ or ‘Windows + ;’ keys as mentioned earlier, the emojis keyboard itself has four sections, namely:
- Emojis – Contains various emojis and smileys
- GIF – Gives you access to various animated GIFs from Tenor
- Kamojis – Lets you add the ASCII characters for emojis, e.g., :-) or :-(
- Symbols – To add important symbols to your text, e.g., ©, ®, etc.
In addition to this, the 2D Clippy emoji has also been introduced with Windows 11, and can be located by launching the emojis keyboard, and typing ‘Clippy’.
Part 5: How to Get More Emojis in Windows 11
If the built-in emoji library doesn’t contain your favorite expressions, you can always get several more by following the instructions given below:
- Launch your favorite web browser on Windows 11, and then go to http://www.iemoji.com/
- Click an emoji from the available options or copy one from your favorite portal, and paste it in the Paste Emoji here field
- Review the emoji in the MESSAGE PREVIEW field, and click Create from the Options section to generate the emoji that can be sent as a message or image
- Alternatively, click Copy from the Options section itself, and then go to the text editor or any other portal you want to use the emoji in, and press Ctrl + V to paste and insert the emoji in your conversation or text without any hassle.
Conclusion
While the emojis were introduced to Windows as late as 2012, Windows 11 has a wide range of these virtual objects or faces for various occasions and to convey different expressions respectively. Furthermore, Windows 11 also gives you access to Tenor’s GIFs, and ASCII characters with particular combinations to represent the emojis, as it was done back in the days of button-operated cellphones.
Also, if the built-in emoji keyboard doesn’t have your favorite expressions and smileys, you can always generate your custom ones by going to http://www.iemoji.com/ , and using the options that the website offers. All in all, it’s easy to learn how to use emojis on Windows as long as you have access to the correct tutorial that explains the process in an easy manner.
Also read:
- [New] 2024 Approved How to Identify Premium, Hassle-Free Free SRT Translator Services
- [New] Simple Guide YouTube to MP3 on Mac
- [New] The Financial Scale One Million YouTube Viewers' Pay
- [Updated] 2024 Approved Enhance Video Reach Strategic Insights Into YouTube's Tag System
- [Updated] JestMastery Create, Share & Sign Up with Ease for 2024
- 2024 Approved Best 10 Emoji Makers to Create Your Own Emojis PC/Online/Android/iPhone
- Free Logitech Brio Webcam Software Compatible with Windows 10, 8 & 7
- How to Make an Adorable Video for Your Babys First Year
- In 2024, Top 9 Complimentary Christmas Films on YouTube
- In 2024, Visual Branding in YouTubes Design Tips
- Network Locked SIM Card Inserted On Your Infinix Smart 8 Phone? Unlock It Now
- New 10 Best Meme Makers Online (Free to Use) for 2024
- New 2024 Approved Generating the Roll Safe-Think About It Meme
- Top 10 Storyboarding Software Free&Paid
- Updated 2024 Approved What Is Emoji and What Does It Mean?
- Updated In 2024, Best iOS and Android Apps You Can Use to Create Animoji and Memoji Videos
- Updated In 2024, Mocking Sponge Bob Meme Generator
- Title: New How to Make a Memorable Honeymoon Video for 2024
- Author: Jan
- Created at : 2025-02-18 18:48:32
- Updated at : 2025-02-19 19:14:11
- Link: https://meme-emoji.techidaily.com/new-how-to-make-a-memorable-honeymoon-video-for-2024/
- License: This work is licensed under CC BY-NC-SA 4.0.