
New 2024 Approved How to Make a Photo Collage on Mac/iPhone Using iPhoto?
How to Make a Photo Collage Using iPhoto?
How to Make a Photo Collage on Mac/iPhone Using iPhoto?

Shanoon Cox
Mar 27, 2024• Proven solutions
iPhoto is a photo library familiar to iOS users. It can help you easily organize, store and sort images, and even make a slide show to help you enjoy photos. This is why, even though Apple no longer develops iPhoto, some people use it.
Update: On April 8, 2015, Apple has launched a new Photos app on OS X Yosemite, which means Apple has stopped developing iPhoto. However, if you like iPhoto, you can still use it.
The following will introduce how to use the iPhoto collage maker on Mac or iPhone. At the end of this article, iPhoto alternative software will serve as your reference.
Part 1: How to Make a Photo Collage in iPhoto?
Here are the quick steps to create a photo collage with iPhoto.
Step 1: Launch iPhoto and click “Events” in the side menu.
Step 2: Hold “Shift” and click each photo you want to include in your photo collage.
Step 3: Click the “+” button in the lower-left corner and select Card in the pop-up window.
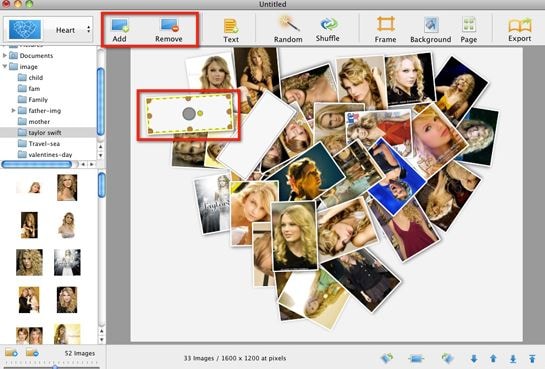
Step 4: Choose “Picture Collage”, which should be under the Any Occasion section if you are using the iPhoto 11.
Step 5: You’ll notice that all the templates are sorted based on the occasion.
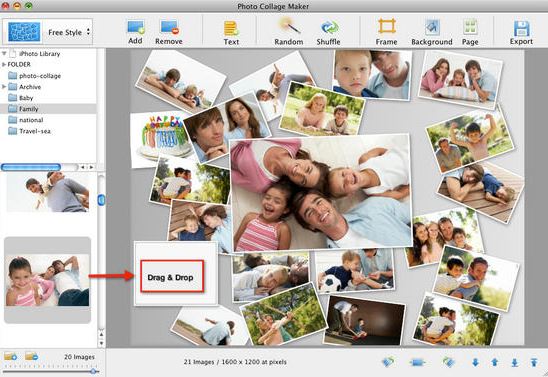
Step 6: Drag photos to the template and pick a background, orientation and design.
Step 7: Click the Buy button on the lower right-hand corner of the collage editor, or go to the Share menu and email it to yourself or family members.
But before you make a photo collage using iPhoto, here are some important things for you to know:
- Technically, iPhoto can’t make fancy photo collages like other Photo collages makers on Mac. So don’t expect too much of it. iPhoto only creates greeting cards with a simple collage layout.
- The templates iPhoto offers are quite limited and ordinary that you might feel a little disappointed.
- iPhoto offers no share options to save photo collages to desktop or to post on Facebook, which is a basic feature of picture collage editor.
Part 2: What Replaces iPhoto on Mac/iPhone?
Since iPhoto’s functions are not sufficient, we will introduce some alternative collage makers that you may be interested in.
Alternative to Make a Short Video, Slideshow, or Photo Collage: Wondershare Filmora
If there are too many photos to save or share with friends and family, you can use these images to make short videos to better collage and share. Filmora can do this for you, through which you can easily crop, add effects, split the screen, and merge photos. In order to make the “photo video” lively and exciting, you can also add music, audio, animation, title, music, etc. to it.


Alternative to Organize, Store, and Sort Images: iCloud
Migrating your photos to iCloud is a wise choice. iCloud is the best photo storage for iOS or Mac users. You don’t need to download other apps or software. Just allow iCloud to back up the photo’s library in the settings.
The best thing is that you can view iCloud photos anytime and anywhere after logging in to your iCloud account. You can also automatically share photos with others by opening “Shared Album”. However, if there are too many photos, a paid subscription may be required to upgrade the storage space.
Conclusion
Above are the steps to make a photo collage using iPhoto on Mac/iPhone. We also list alternative methods to meet the different needs of the Photo library. So, if this isn’t quite what you’re looking for, you can also use some online photo collage service instead. If you want to have more fun editing photo stories, welcome to download Filmora and make more memorable and interesting videos.
Shanoon Cox
Shanoon Cox is a writer and a lover of all things video.
Follow @Shanoon Cox
Shanoon Cox
Mar 27, 2024• Proven solutions
iPhoto is a photo library familiar to iOS users. It can help you easily organize, store and sort images, and even make a slide show to help you enjoy photos. This is why, even though Apple no longer develops iPhoto, some people use it.
Update: On April 8, 2015, Apple has launched a new Photos app on OS X Yosemite, which means Apple has stopped developing iPhoto. However, if you like iPhoto, you can still use it.
The following will introduce how to use the iPhoto collage maker on Mac or iPhone. At the end of this article, iPhoto alternative software will serve as your reference.
Part 1: How to Make a Photo Collage in iPhoto?
Here are the quick steps to create a photo collage with iPhoto.
Step 1: Launch iPhoto and click “Events” in the side menu.
Step 2: Hold “Shift” and click each photo you want to include in your photo collage.
Step 3: Click the “+” button in the lower-left corner and select Card in the pop-up window.
Step 4: Choose “Picture Collage”, which should be under the Any Occasion section if you are using the iPhoto 11.
Step 5: You’ll notice that all the templates are sorted based on the occasion.
Step 6: Drag photos to the template and pick a background, orientation and design.
Step 7: Click the Buy button on the lower right-hand corner of the collage editor, or go to the Share menu and email it to yourself or family members.
But before you make a photo collage using iPhoto, here are some important things for you to know:
- Technically, iPhoto can’t make fancy photo collages like other Photo collages makers on Mac. So don’t expect too much of it. iPhoto only creates greeting cards with a simple collage layout.
- The templates iPhoto offers are quite limited and ordinary that you might feel a little disappointed.
- iPhoto offers no share options to save photo collages to desktop or to post on Facebook, which is a basic feature of picture collage editor.
Part 2: What Replaces iPhoto on Mac/iPhone?
Since iPhoto’s functions are not sufficient, we will introduce some alternative collage makers that you may be interested in.
Alternative to Make a Short Video, Slideshow, or Photo Collage: Wondershare Filmora
If there are too many photos to save or share with friends and family, you can use these images to make short videos to better collage and share. Filmora can do this for you, through which you can easily crop, add effects, split the screen, and merge photos. In order to make the “photo video” lively and exciting, you can also add music, audio, animation, title, music, etc. to it.
Alternative to Organize, Store, and Sort Images: iCloud
Migrating your photos to iCloud is a wise choice. iCloud is the best photo storage for iOS or Mac users. You don’t need to download other apps or software. Just allow iCloud to back up the photo’s library in the settings.
The best thing is that you can view iCloud photos anytime and anywhere after logging in to your iCloud account. You can also automatically share photos with others by opening “Shared Album”. However, if there are too many photos, a paid subscription may be required to upgrade the storage space.
Conclusion
Above are the steps to make a photo collage using iPhoto on Mac/iPhone. We also list alternative methods to meet the different needs of the Photo library. So, if this isn’t quite what you’re looking for, you can also use some online photo collage service instead. If you want to have more fun editing photo stories, welcome to download Filmora and make more memorable and interesting videos.
Shanoon Cox
Shanoon Cox is a writer and a lover of all things video.
Follow @Shanoon Cox
How to Use Emojis on Windows
If you ever wondered how to use emojis on Windows, or since when the emojis are around and what is their significance, you will find all your answers here. Because Windows 10 offers a great range of emojis that help you express your feelings and reactions in fewer words, they have recently gained a decent level of popularity, mostly amongst youngsters and millennials.
With that said, in the following sections, you will learn how to use emojis on Windows 10 using both keyboard shortcuts and touch keyboard, how to get emojis on Windows 10 to make your text or conversation look more versatile, and what new has been added to the latest operating system released by Microsoft, i.e., Windows 11.
In this article
01 Part 1: The History of Emojis in Windows
02 Part 2: How to Use Emojis with Keyboard Shortcuts
03 Part 3: How to Use Emojis on Windows PC with Touch Keyboard
04 Part 4: What’s New in Emojis in Windows 11
05 Part 5: How to Get More Emojis in Windows 11
Part 1: The History of Emojis in Windows
Although emojis are present in some form or the other since the mid-‘90s, they were not quite popular back then. With the evolution of smartphones, these iconic characters got attention from the then-teenagers. Seeing this, in 2012, Microsoft introduced the first-ever set of black-and-white emojis with the release of Windows 8, and after some time, the company also added the same to Windows 7 that was rolled out along with the updates for the OS.
With the release of Windows 10 in 2015, a wide range of full-fledged colored emojis was introduced and received a large number of positive reactions from the users. As of today, emojis have become an integral part of everyone’s day-to-day text conversation, be it on Skype, WhatsApp, Facebook, or any other such platform.
Part 2: How to Use Emojis with Keyboard Shortcuts
A keyboard shortcut is a combination of two or more keys that are pressed simultaneously to trigger a pre-assigned event or action. A good example of a keyboard shortcut is ‘Ctrl + S’ which, when pressed, saves the document you’re working on.
While learning the process of how to use emoji in Windows 10, it is equally imperative to memorize the shortcut keys to insert those icons without taking your hands off the keyboard. This not only saves your time, but it also prevents you from going through the lengthy process of opening the emojis keyboard, navigating through all the available icons to choose the one you’re looking for, and then clicking it to insert in the document or conversation.
Nevertheless, it would be a good idea to learn how to launch the emojis keyboard, and the process is simple. All you need to do is:
- Make sure that your keyboard cursor is in an app that can accept text inputs. A text editor like MS Word or WordPad could be a good example
- Press the Windows + ; (semicolon) or Windows + . (period) keys together to open the emojis keyboard

Once the keyboard is open, you can click any of the available emojis to insert it in your conversion or text content.
As for the shortcuts, depending on the type of expression you want to convey, there could be thousands of them. Some of the commonly used emojis and their universal shortcut keys for both Windows 10 and Windows 11 include:
: (colon) + ) (right brace) will create a smiley face
: (colon) + ( (left brace) will create a sad face
: (colon) + ; (semicolon) will create a wink face
…and so on. You can conduct a quick online search to get the entire list of keyboard shortcuts and the emojis that they will create. For your convenience, a link from the Microsoft official website is given below:
Part 3: How to Use Emojis on Windows PC with Touch Keyboard
If you have Microsoft Surface or any other device that has Windows 10 or Windows 11 installed on it, and can accept inputs via touch keyboard, you can enable the feature in the operating system, and then use the touch keyboard to add emojis to your conversion or content. You can follow the instructions given below to enable touch keyboard, and then learn how to use emojis on Windows 11 or Windows 10 via touch:
- Right-click anywhere on the taskbar (Windows 11 is used here for demonstration), and then click Taskbar settings

- From the right area of the Settings window that opens next, scroll down to the Taskbar corner icons section, and then turn on the Touch keyboard switch

- Launch an app that can accept text inputs, e.g., a text editor, chatting app, etc. Click or tap the Touch keyboard icon from the notification area that is present at the bottom-right corner of the screen.

- Click or tap the Emojis icon from the upper-left corner of the touch keyboard that opens up, and then touch your preferred emoji to add it to your text or conversation.

Part 4: What’s New in Emojis in Windows 11
In addition to learning how to use emojis on Windows 10, it is also important to know what’s new with them or the emojis panel in Windows 11, the latest operating system released by Microsoft this year, i.e., 2021.
In Windows 11, although you can launch the emojis keyboard using the same shortcuts, i.e., ‘Windows + .’ or ‘Windows + ;’ keys as mentioned earlier, the emojis keyboard itself has four sections, namely:
- Emojis – Contains various emojis and smileys
- GIF – Gives you access to various animated GIFs from Tenor
- Kamojis – Lets you add the ASCII characters for emojis, e.g., :-) or :-(
- Symbols – To add important symbols to your text, e.g., ©, ®, etc.
In addition to this, the 2D Clippy emoji has also been introduced with Windows 11, and can be located by launching the emojis keyboard, and typing ‘Clippy’.
Part 5: How to Get More Emojis in Windows 11
If the built-in emoji library doesn’t contain your favorite expressions, you can always get several more by following the instructions given below:
- Launch your favorite web browser on Windows 11, and then go to http://www.iemoji.com/
- Click an emoji from the available options or copy one from your favorite portal, and paste it in the Paste Emoji here field

- Review the emoji in the MESSAGE PREVIEW field, and click Create from the Options section to generate the emoji that can be sent as a message or image

- Alternatively, click Copy from the Options section itself, and then go to the text editor or any other portal you want to use the emoji in, and press Ctrl + V to paste and insert the emoji in your conversation or text without any hassle.

Conclusion
While the emojis were introduced to Windows as late as 2012, Windows 11 has a wide range of these virtual objects or faces for various occasions and to convey different expressions respectively. Furthermore, Windows 11 also gives you access to Tenor’s GIFs, and ASCII characters with particular combinations to represent the emojis, as it was done back in the days of button-operated cellphones.
Also, if the built-in emoji keyboard doesn’t have your favorite expressions and smileys, you can always generate your custom ones by going to http://www.iemoji.com/ , and using the options that the website offers. All in all, it’s easy to learn how to use emojis on Windows as long as you have access to the correct tutorial that explains the process in an easy manner.
02 Part 2: How to Use Emojis with Keyboard Shortcuts
03 Part 3: How to Use Emojis on Windows PC with Touch Keyboard
04 Part 4: What’s New in Emojis in Windows 11
05 Part 5: How to Get More Emojis in Windows 11
Part 1: The History of Emojis in Windows
Although emojis are present in some form or the other since the mid-‘90s, they were not quite popular back then. With the evolution of smartphones, these iconic characters got attention from the then-teenagers. Seeing this, in 2012, Microsoft introduced the first-ever set of black-and-white emojis with the release of Windows 8, and after some time, the company also added the same to Windows 7 that was rolled out along with the updates for the OS.
With the release of Windows 10 in 2015, a wide range of full-fledged colored emojis was introduced and received a large number of positive reactions from the users. As of today, emojis have become an integral part of everyone’s day-to-day text conversation, be it on Skype, WhatsApp, Facebook, or any other such platform.
Part 2: How to Use Emojis with Keyboard Shortcuts
A keyboard shortcut is a combination of two or more keys that are pressed simultaneously to trigger a pre-assigned event or action. A good example of a keyboard shortcut is ‘Ctrl + S’ which, when pressed, saves the document you’re working on.
While learning the process of how to use emoji in Windows 10, it is equally imperative to memorize the shortcut keys to insert those icons without taking your hands off the keyboard. This not only saves your time, but it also prevents you from going through the lengthy process of opening the emojis keyboard, navigating through all the available icons to choose the one you’re looking for, and then clicking it to insert in the document or conversation.
Nevertheless, it would be a good idea to learn how to launch the emojis keyboard, and the process is simple. All you need to do is:
- Make sure that your keyboard cursor is in an app that can accept text inputs. A text editor like MS Word or WordPad could be a good example
- Press the Windows + ; (semicolon) or Windows + . (period) keys together to open the emojis keyboard
Once the keyboard is open, you can click any of the available emojis to insert it in your conversion or text content.
As for the shortcuts, depending on the type of expression you want to convey, there could be thousands of them. Some of the commonly used emojis and their universal shortcut keys for both Windows 10 and Windows 11 include:
: (colon) + ) (right brace) will create a smiley face
: (colon) + ( (left brace) will create a sad face
: (colon) + ; (semicolon) will create a wink face
…and so on. You can conduct a quick online search to get the entire list of keyboard shortcuts and the emojis that they will create. For your convenience, a link from the Microsoft official website is given below:
Part 3: How to Use Emojis on Windows PC with Touch Keyboard
If you have Microsoft Surface or any other device that has Windows 10 or Windows 11 installed on it, and can accept inputs via touch keyboard, you can enable the feature in the operating system, and then use the touch keyboard to add emojis to your conversion or content. You can follow the instructions given below to enable touch keyboard, and then learn how to use emojis on Windows 11 or Windows 10 via touch:
- Right-click anywhere on the taskbar (Windows 11 is used here for demonstration), and then click Taskbar settings
- From the right area of the Settings window that opens next, scroll down to the Taskbar corner icons section, and then turn on the Touch keyboard switch
- Launch an app that can accept text inputs, e.g., a text editor, chatting app, etc. Click or tap the Touch keyboard icon from the notification area that is present at the bottom-right corner of the screen.
- Click or tap the Emojis icon from the upper-left corner of the touch keyboard that opens up, and then touch your preferred emoji to add it to your text or conversation.
Part 4: What’s New in Emojis in Windows 11
In addition to learning how to use emojis on Windows 10, it is also important to know what’s new with them or the emojis panel in Windows 11, the latest operating system released by Microsoft this year, i.e., 2021.
In Windows 11, although you can launch the emojis keyboard using the same shortcuts, i.e., ‘Windows + .’ or ‘Windows + ;’ keys as mentioned earlier, the emojis keyboard itself has four sections, namely:
- Emojis – Contains various emojis and smileys
- GIF – Gives you access to various animated GIFs from Tenor
- Kamojis – Lets you add the ASCII characters for emojis, e.g., :-) or :-(
- Symbols – To add important symbols to your text, e.g., ©, ®, etc.
In addition to this, the 2D Clippy emoji has also been introduced with Windows 11, and can be located by launching the emojis keyboard, and typing ‘Clippy’.
Part 5: How to Get More Emojis in Windows 11
If the built-in emoji library doesn’t contain your favorite expressions, you can always get several more by following the instructions given below:
- Launch your favorite web browser on Windows 11, and then go to http://www.iemoji.com/
- Click an emoji from the available options or copy one from your favorite portal, and paste it in the Paste Emoji here field
- Review the emoji in the MESSAGE PREVIEW field, and click Create from the Options section to generate the emoji that can be sent as a message or image
- Alternatively, click Copy from the Options section itself, and then go to the text editor or any other portal you want to use the emoji in, and press Ctrl + V to paste and insert the emoji in your conversation or text without any hassle.
Conclusion
While the emojis were introduced to Windows as late as 2012, Windows 11 has a wide range of these virtual objects or faces for various occasions and to convey different expressions respectively. Furthermore, Windows 11 also gives you access to Tenor’s GIFs, and ASCII characters with particular combinations to represent the emojis, as it was done back in the days of button-operated cellphones.
Also, if the built-in emoji keyboard doesn’t have your favorite expressions and smileys, you can always generate your custom ones by going to http://www.iemoji.com/ , and using the options that the website offers. All in all, it’s easy to learn how to use emojis on Windows as long as you have access to the correct tutorial that explains the process in an easy manner.
How to Add Emojis to Videos: The Ultimate Guide
How to Add Emojis to Videos: The Ultimate Guide

Liza Brown
Mar 27, 2024• Proven solutions
The way we communicate has changed so much in the first two decades of the 21st century. In the late 1990s, when emojis were first introduced to the global market nobody could have guessed just how popular they are going to become. An emoji is an ideogram that is commonly used in electronic messages, but there are countless creative ways to incorporate them in the visual content you’re sharing to your Facebook account or your YouTube channel. Read on if you would like to find out how to add an emoji to a video you’re editing on a Mac, PC, iPhone or an Android device.
- Part 1: Add Animated Emojis to Videos in Flimora [3 Ways]
- Part 2: Add Animated Emojis & Stickers to Videos in iPhone for FREE
- Part 3: Add Animated Emojis to Videos in Android
- Part 4: Add Animated Emojis & Stickers to Videos Online
How to Add Animated Emojis to Videos in Flimora? [Windows & Mac][
Gamers, YouTubers and all other Mac and PC users who’d like to add a smiley or any other emoji to a video should try processing their footage with the Filmora video editor . Performing basic video editing tasks like cutting or trimming the footage, choosing a soundtrack for a video or adding an emoji to a single shot or an entire sequence can all be completed in just a couple of clicks. Here’s how you can add an emoji to a video clip in Filmora.
1. Use the Filmora’s Built-in Animated Emoji Library
Create a new project
Launch Filmora and then select the New Project option from the app’s welcome window. Afterward, you can set the project’s aspect ratio, frame rate and resolution from the Project Settings tab that can be accessed from the File drop-down menu. When done, you should proceed to import a video clip to which you want to add an emoji.
Place the Footage onto the Timeline
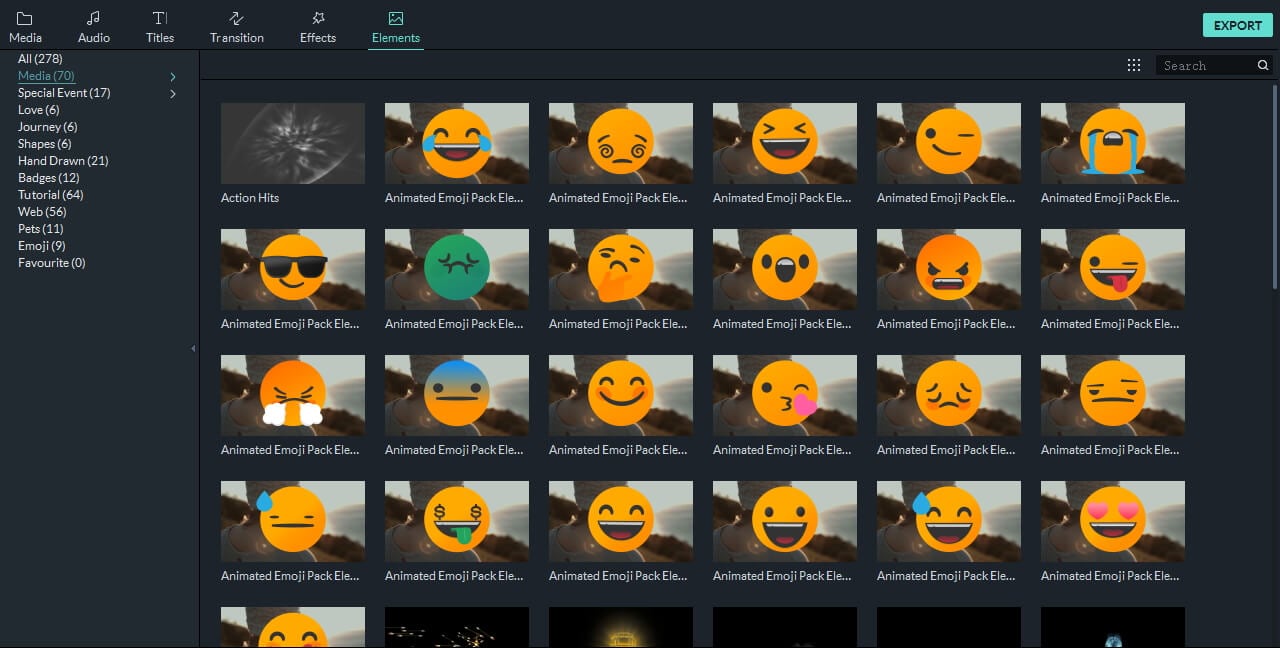
The media files you import into your projects in Filmora are located in the software’s Media Tab, and you can just drag them from the Media Tab and drop them onto a video track on the timeline. Remove all parts of the video clip you don’t want to use and head over to the Elements Tab that is located in the upper left corner of the screen.
Choose an Emoji
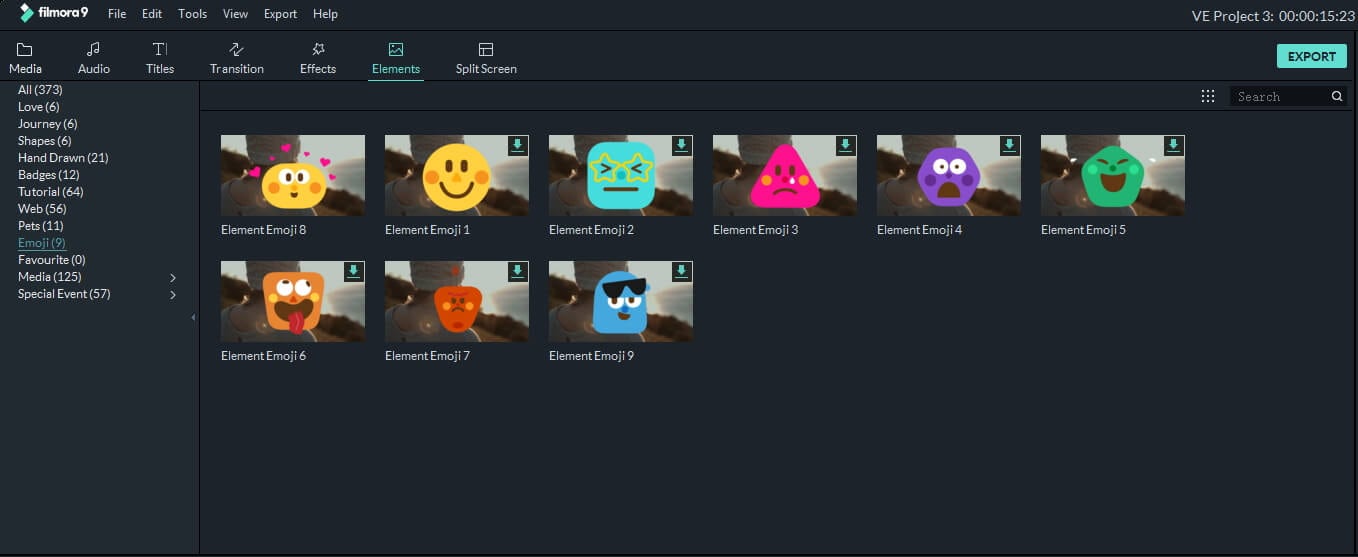
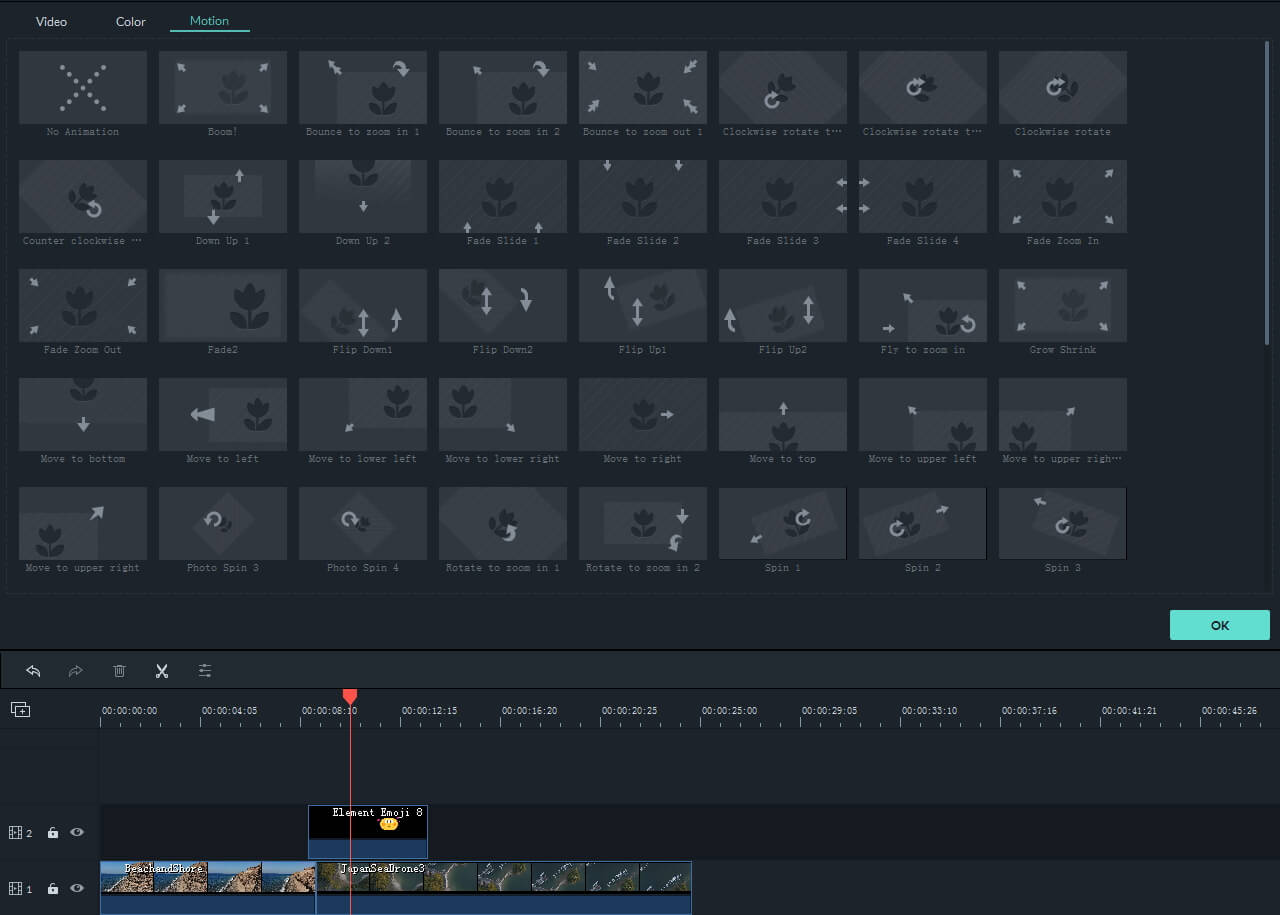
The Elements Tab contains different categories such as Shapes, Badges or Pets. Click on the Emoji category to start browsing through Filmora’s collection of emojis and simply drag and drop the emoji you like above the video clip to which you’d like to add it. You can then adjust its duration, position on the screen or size. Optionally, you can double-click on the emoji to access the Motion tab that enables you to choose between different motion effects.
Export the Project
Preview the results by hitting the space button on your keyboard or clicking on the Play button that is located below the app’s preview window. In case you don’t want to make any more edits to the footage, you should click on the Export button and choose if you want to export your project to a hard drive on your computer or to your YouTube or Vimeo channel. Select the output file format, click on the Export and wait for the rendering process to be completed.
With Filmora video editor, you can also add animated texts and titles to video, or apply various elements such as hand drawn, badges and elements for tutorial. Click to learn more details about how to edit videos in Filmora .
2. Download Additional Animated Emojis from Filmostocks for Free
There are only nine emojis available in the Filmora’s built-in Emojis category, but you can easily broaden the range of emoji genres you have the access to by downloading the Animated Emoji Pack from Filmstock effects store . You don’t have to spend any additional money on this pack that contains 24 different emojis, but you must create an account on Filmstock before you can download the Animated Emoji Pack to your computer. The process of adding the emojis from this pack to videos is the same as the process of adding one of the emojis from the built-in Emojis category. Filmstock is so much more than an endless source of emojis for your videos since it offers a variety of visual and audio stock footage and visual effects. Even if you are using Adobe After Effects, you can also download and use some visual effects templates for AE.
3. Bonus: Animate Sticker and Emojis Your Download from Internet with Filmora
Instead of adding pre-animated ideograms to your videos, you can simply download a still image of a sticker or an emoji and animate it with Filmora. However, you should search for emojis that have a transparent background in order to blend it quicker with the source footage. Once you find a smiley or any other emoji you’d like to add to a video you should save it on your hard drive and import it into a project in Filmora.
You should then place the emoji at the exact spot on the timeline where you want it to appear in the final cut of the video. Double-click on the still image file and proceed to adjust its size or position from the Transform menu or choose a motion effect from the Motion tab. When done, commence the rendering process by clicking on the Export button. You can check our step guide about How to add picture to video to get more clues about that.
How to Add Emojis and Stickers to Videos on an iPhone
Waiting to edit the high-resolution videos you recorded with your iPhone on a computer is not always an option, because in certain situations you just want to polish a video you recorded and post it on social media as fast as you can. The Apple’s Clip app that can be downloaded for free from the AppStore seems to be a perfect solution for all iPhone users who want to add emojis to their videos before sharing them on Facebook, Instagram or any other popular social media networks.
The Clip app offers a rich selection of stickers and emojis that can be accessed by tapping on the icon that looks like a star within a circle. There are more than 30 emojis available, but you can also use the iPhone’s emoji keyboard to add emojis to videos in the Clip app. All of the app’s stickers and emojis are fully customizable, which means that you can change their size, screen position or insert text effortlessly. Once the video editing process is completed you can store a video on Dropbox or share it via AirDrop.
Best App for Adding Stickers and Emojis on Android Devices
The WeVideo app for Android devices is equipped with all video editing tools you are going to need to produce a visually impressive video. In case you decide to purchase and install WeVideo on your phone, you will be able to cut, trim or arrange video clips as you see fit. The app also features a collection of emojis that can be added easily to all videos you decide to edit with it. The best part is that you can export all of your projects in 4K Ultra HD resolution and publish them to YouTube, Vimeo or Dropbox from the app so you don’t have to spend extra time on waiting for the file to be uploaded to the social media platform on which you want to share the video.
Using Kapwing Meme Maker to Add Stickers and Emojis Online
Web-based video editing platforms like Kapwing have been growing in popularity recently because they enable social media content creators to produce social media videos in a brief period of time. The Kapwing Meme Maker tool doesn’t feature any built-in stickers or emojis, so you must either upload a still image with a transparent ground to the platform or use its Text tool to add emojis to a video. Moreover, you won’t be able to animate the emojis you add to video clips with the Kapwing Meme Maker tool since the Kapwing platform doesn’t offer any animation tools. Despite this Kapwing is still one of the best online video editing platforms you can use to add emojis and stickers to videos.
A Few Tips to Help you Incorporate Emojis in Your Videos
Which emoji you are going to add to a video depends on factors that range from the topic of the video to the audience you are trying to reach. So, if you can’t find the emoji that fits perfectly to your video you should head over to emojipedia or any other website that lets you download thousands of emojis for free. You should keep in mind that emojis can have different meanings in different cultures, which is the reason why you must make sure that the emoji you’re adding to your video isn’t inappropriate or offensive in the context in which you’re using it. It is also worth noting that the emojis you download from the Internet should have a transparent background and that they should be saved in the PNG file format.
You may also like: Add Emojis to Videos on YouTube/Facebook/Snapchat [Step by Step Guide] >>
Conclusion
A single image overlay like an emoji can make your video more dynamic and more entertaining to watch, but you must discover creative and innovative ways to incorporate these visual elements into the story your video is telling. Each video editing app we presented in this article enables you to add emojis to videos in just a few easy steps, so you should choose the video editor that you feel most comfortable using. Do you add emojis to your videos often? Leave a comment below and share your favorite emojis with us.
Liza Brown
Liza Brown is a writer and a lover of all things video.
Follow @Liza Brown
Liza Brown
Mar 27, 2024• Proven solutions
The way we communicate has changed so much in the first two decades of the 21st century. In the late 1990s, when emojis were first introduced to the global market nobody could have guessed just how popular they are going to become. An emoji is an ideogram that is commonly used in electronic messages, but there are countless creative ways to incorporate them in the visual content you’re sharing to your Facebook account or your YouTube channel. Read on if you would like to find out how to add an emoji to a video you’re editing on a Mac, PC, iPhone or an Android device.
- Part 1: Add Animated Emojis to Videos in Flimora [3 Ways]
- Part 2: Add Animated Emojis & Stickers to Videos in iPhone for FREE
- Part 3: Add Animated Emojis to Videos in Android
- Part 4: Add Animated Emojis & Stickers to Videos Online
How to Add Animated Emojis to Videos in Flimora? [Windows & Mac][
Gamers, YouTubers and all other Mac and PC users who’d like to add a smiley or any other emoji to a video should try processing their footage with the Filmora video editor . Performing basic video editing tasks like cutting or trimming the footage, choosing a soundtrack for a video or adding an emoji to a single shot or an entire sequence can all be completed in just a couple of clicks. Here’s how you can add an emoji to a video clip in Filmora.
1. Use the Filmora’s Built-in Animated Emoji Library
Create a new project
Launch Filmora and then select the New Project option from the app’s welcome window. Afterward, you can set the project’s aspect ratio, frame rate and resolution from the Project Settings tab that can be accessed from the File drop-down menu. When done, you should proceed to import a video clip to which you want to add an emoji.
Place the Footage onto the Timeline
The media files you import into your projects in Filmora are located in the software’s Media Tab, and you can just drag them from the Media Tab and drop them onto a video track on the timeline. Remove all parts of the video clip you don’t want to use and head over to the Elements Tab that is located in the upper left corner of the screen.
Choose an Emoji
The Elements Tab contains different categories such as Shapes, Badges or Pets. Click on the Emoji category to start browsing through Filmora’s collection of emojis and simply drag and drop the emoji you like above the video clip to which you’d like to add it. You can then adjust its duration, position on the screen or size. Optionally, you can double-click on the emoji to access the Motion tab that enables you to choose between different motion effects.
Export the Project
Preview the results by hitting the space button on your keyboard or clicking on the Play button that is located below the app’s preview window. In case you don’t want to make any more edits to the footage, you should click on the Export button and choose if you want to export your project to a hard drive on your computer or to your YouTube or Vimeo channel. Select the output file format, click on the Export and wait for the rendering process to be completed.
With Filmora video editor, you can also add animated texts and titles to video, or apply various elements such as hand drawn, badges and elements for tutorial. Click to learn more details about how to edit videos in Filmora .
2. Download Additional Animated Emojis from Filmostocks for Free
There are only nine emojis available in the Filmora’s built-in Emojis category, but you can easily broaden the range of emoji genres you have the access to by downloading the Animated Emoji Pack from Filmstock effects store . You don’t have to spend any additional money on this pack that contains 24 different emojis, but you must create an account on Filmstock before you can download the Animated Emoji Pack to your computer. The process of adding the emojis from this pack to videos is the same as the process of adding one of the emojis from the built-in Emojis category. Filmstock is so much more than an endless source of emojis for your videos since it offers a variety of visual and audio stock footage and visual effects. Even if you are using Adobe After Effects, you can also download and use some visual effects templates for AE.
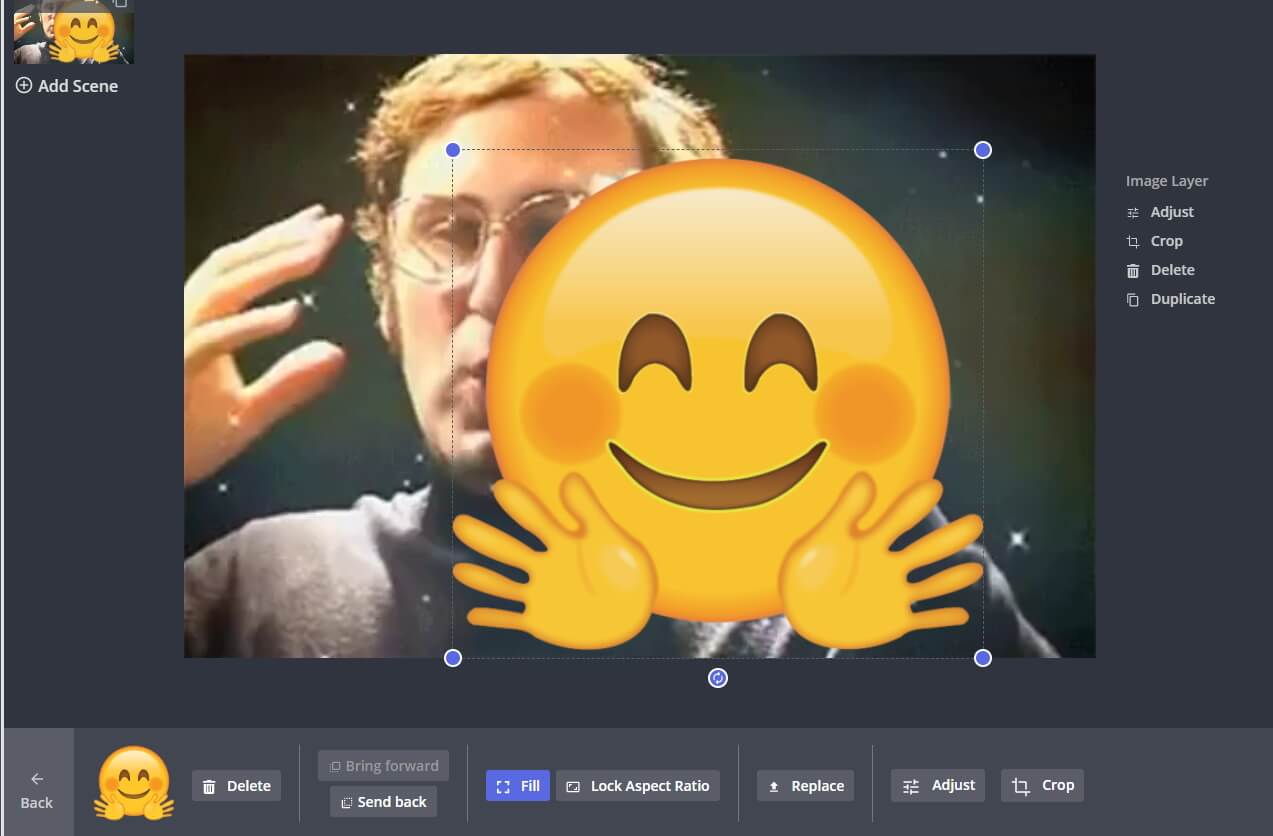
3. Bonus: Animate Sticker and Emojis Your Download from Internet with Filmora
Instead of adding pre-animated ideograms to your videos, you can simply download a still image of a sticker or an emoji and animate it with Filmora. However, you should search for emojis that have a transparent background in order to blend it quicker with the source footage. Once you find a smiley or any other emoji you’d like to add to a video you should save it on your hard drive and import it into a project in Filmora.
You should then place the emoji at the exact spot on the timeline where you want it to appear in the final cut of the video. Double-click on the still image file and proceed to adjust its size or position from the Transform menu or choose a motion effect from the Motion tab. When done, commence the rendering process by clicking on the Export button. You can check our step guide about How to add picture to video to get more clues about that.
How to Add Emojis and Stickers to Videos on an iPhone
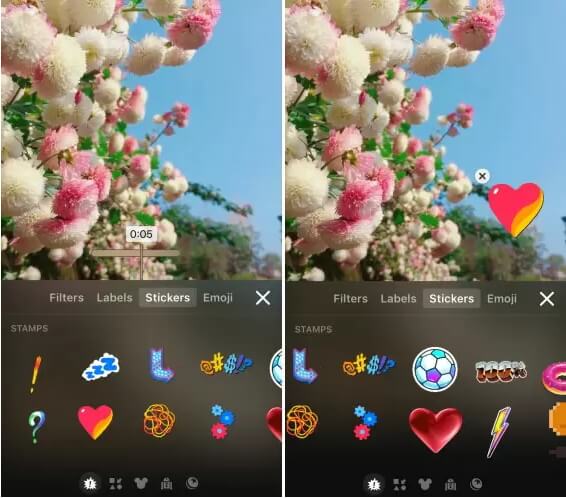
Waiting to edit the high-resolution videos you recorded with your iPhone on a computer is not always an option, because in certain situations you just want to polish a video you recorded and post it on social media as fast as you can. The Apple’s Clip app that can be downloaded for free from the AppStore seems to be a perfect solution for all iPhone users who want to add emojis to their videos before sharing them on Facebook, Instagram or any other popular social media networks.
The Clip app offers a rich selection of stickers and emojis that can be accessed by tapping on the icon that looks like a star within a circle. There are more than 30 emojis available, but you can also use the iPhone’s emoji keyboard to add emojis to videos in the Clip app. All of the app’s stickers and emojis are fully customizable, which means that you can change their size, screen position or insert text effortlessly. Once the video editing process is completed you can store a video on Dropbox or share it via AirDrop.
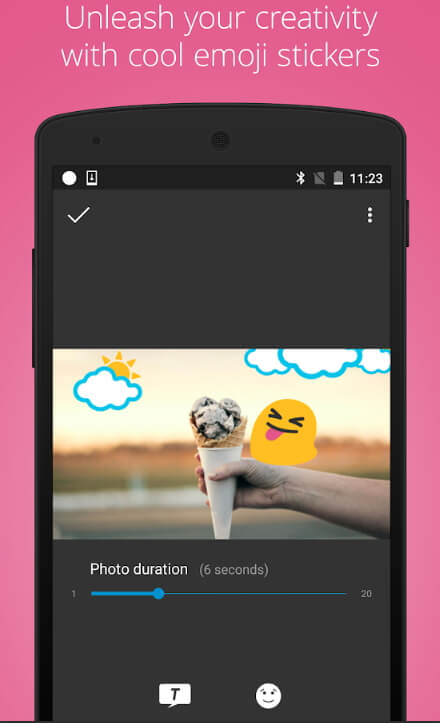
Best App for Adding Stickers and Emojis on Android Devices
The WeVideo app for Android devices is equipped with all video editing tools you are going to need to produce a visually impressive video. In case you decide to purchase and install WeVideo on your phone, you will be able to cut, trim or arrange video clips as you see fit. The app also features a collection of emojis that can be added easily to all videos you decide to edit with it. The best part is that you can export all of your projects in 4K Ultra HD resolution and publish them to YouTube, Vimeo or Dropbox from the app so you don’t have to spend extra time on waiting for the file to be uploaded to the social media platform on which you want to share the video.
Using Kapwing Meme Maker to Add Stickers and Emojis Online
Web-based video editing platforms like Kapwing have been growing in popularity recently because they enable social media content creators to produce social media videos in a brief period of time. The Kapwing Meme Maker tool doesn’t feature any built-in stickers or emojis, so you must either upload a still image with a transparent ground to the platform or use its Text tool to add emojis to a video. Moreover, you won’t be able to animate the emojis you add to video clips with the Kapwing Meme Maker tool since the Kapwing platform doesn’t offer any animation tools. Despite this Kapwing is still one of the best online video editing platforms you can use to add emojis and stickers to videos.
A Few Tips to Help you Incorporate Emojis in Your Videos
Which emoji you are going to add to a video depends on factors that range from the topic of the video to the audience you are trying to reach. So, if you can’t find the emoji that fits perfectly to your video you should head over to emojipedia or any other website that lets you download thousands of emojis for free. You should keep in mind that emojis can have different meanings in different cultures, which is the reason why you must make sure that the emoji you’re adding to your video isn’t inappropriate or offensive in the context in which you’re using it. It is also worth noting that the emojis you download from the Internet should have a transparent background and that they should be saved in the PNG file format.
You may also like: Add Emojis to Videos on YouTube/Facebook/Snapchat [Step by Step Guide] >>
Conclusion
A single image overlay like an emoji can make your video more dynamic and more entertaining to watch, but you must discover creative and innovative ways to incorporate these visual elements into the story your video is telling. Each video editing app we presented in this article enables you to add emojis to videos in just a few easy steps, so you should choose the video editor that you feel most comfortable using. Do you add emojis to your videos often? Leave a comment below and share your favorite emojis with us.
Liza Brown
Liza Brown is a writer and a lover of all things video.
Follow @Liza Brown
Liza Brown
Mar 27, 2024• Proven solutions
The way we communicate has changed so much in the first two decades of the 21st century. In the late 1990s, when emojis were first introduced to the global market nobody could have guessed just how popular they are going to become. An emoji is an ideogram that is commonly used in electronic messages, but there are countless creative ways to incorporate them in the visual content you’re sharing to your Facebook account or your YouTube channel. Read on if you would like to find out how to add an emoji to a video you’re editing on a Mac, PC, iPhone or an Android device.
- Part 1: Add Animated Emojis to Videos in Flimora [3 Ways]
- Part 2: Add Animated Emojis & Stickers to Videos in iPhone for FREE
- Part 3: Add Animated Emojis to Videos in Android
- Part 4: Add Animated Emojis & Stickers to Videos Online
How to Add Animated Emojis to Videos in Flimora? [Windows & Mac][
Gamers, YouTubers and all other Mac and PC users who’d like to add a smiley or any other emoji to a video should try processing their footage with the Filmora video editor . Performing basic video editing tasks like cutting or trimming the footage, choosing a soundtrack for a video or adding an emoji to a single shot or an entire sequence can all be completed in just a couple of clicks. Here’s how you can add an emoji to a video clip in Filmora.
1. Use the Filmora’s Built-in Animated Emoji Library
Create a new project
Launch Filmora and then select the New Project option from the app’s welcome window. Afterward, you can set the project’s aspect ratio, frame rate and resolution from the Project Settings tab that can be accessed from the File drop-down menu. When done, you should proceed to import a video clip to which you want to add an emoji.
Place the Footage onto the Timeline
The media files you import into your projects in Filmora are located in the software’s Media Tab, and you can just drag them from the Media Tab and drop them onto a video track on the timeline. Remove all parts of the video clip you don’t want to use and head over to the Elements Tab that is located in the upper left corner of the screen.
Choose an Emoji
The Elements Tab contains different categories such as Shapes, Badges or Pets. Click on the Emoji category to start browsing through Filmora’s collection of emojis and simply drag and drop the emoji you like above the video clip to which you’d like to add it. You can then adjust its duration, position on the screen or size. Optionally, you can double-click on the emoji to access the Motion tab that enables you to choose between different motion effects.
Export the Project
Preview the results by hitting the space button on your keyboard or clicking on the Play button that is located below the app’s preview window. In case you don’t want to make any more edits to the footage, you should click on the Export button and choose if you want to export your project to a hard drive on your computer or to your YouTube or Vimeo channel. Select the output file format, click on the Export and wait for the rendering process to be completed.
With Filmora video editor, you can also add animated texts and titles to video, or apply various elements such as hand drawn, badges and elements for tutorial. Click to learn more details about how to edit videos in Filmora .
2. Download Additional Animated Emojis from Filmostocks for Free
There are only nine emojis available in the Filmora’s built-in Emojis category, but you can easily broaden the range of emoji genres you have the access to by downloading the Animated Emoji Pack from Filmstock effects store . You don’t have to spend any additional money on this pack that contains 24 different emojis, but you must create an account on Filmstock before you can download the Animated Emoji Pack to your computer. The process of adding the emojis from this pack to videos is the same as the process of adding one of the emojis from the built-in Emojis category. Filmstock is so much more than an endless source of emojis for your videos since it offers a variety of visual and audio stock footage and visual effects. Even if you are using Adobe After Effects, you can also download and use some visual effects templates for AE.
3. Bonus: Animate Sticker and Emojis Your Download from Internet with Filmora
Instead of adding pre-animated ideograms to your videos, you can simply download a still image of a sticker or an emoji and animate it with Filmora. However, you should search for emojis that have a transparent background in order to blend it quicker with the source footage. Once you find a smiley or any other emoji you’d like to add to a video you should save it on your hard drive and import it into a project in Filmora.
You should then place the emoji at the exact spot on the timeline where you want it to appear in the final cut of the video. Double-click on the still image file and proceed to adjust its size or position from the Transform menu or choose a motion effect from the Motion tab. When done, commence the rendering process by clicking on the Export button. You can check our step guide about How to add picture to video to get more clues about that.
How to Add Emojis and Stickers to Videos on an iPhone
Waiting to edit the high-resolution videos you recorded with your iPhone on a computer is not always an option, because in certain situations you just want to polish a video you recorded and post it on social media as fast as you can. The Apple’s Clip app that can be downloaded for free from the AppStore seems to be a perfect solution for all iPhone users who want to add emojis to their videos before sharing them on Facebook, Instagram or any other popular social media networks.
The Clip app offers a rich selection of stickers and emojis that can be accessed by tapping on the icon that looks like a star within a circle. There are more than 30 emojis available, but you can also use the iPhone’s emoji keyboard to add emojis to videos in the Clip app. All of the app’s stickers and emojis are fully customizable, which means that you can change their size, screen position or insert text effortlessly. Once the video editing process is completed you can store a video on Dropbox or share it via AirDrop.
Best App for Adding Stickers and Emojis on Android Devices
The WeVideo app for Android devices is equipped with all video editing tools you are going to need to produce a visually impressive video. In case you decide to purchase and install WeVideo on your phone, you will be able to cut, trim or arrange video clips as you see fit. The app also features a collection of emojis that can be added easily to all videos you decide to edit with it. The best part is that you can export all of your projects in 4K Ultra HD resolution and publish them to YouTube, Vimeo or Dropbox from the app so you don’t have to spend extra time on waiting for the file to be uploaded to the social media platform on which you want to share the video.
Using Kapwing Meme Maker to Add Stickers and Emojis Online
Web-based video editing platforms like Kapwing have been growing in popularity recently because they enable social media content creators to produce social media videos in a brief period of time. The Kapwing Meme Maker tool doesn’t feature any built-in stickers or emojis, so you must either upload a still image with a transparent ground to the platform or use its Text tool to add emojis to a video. Moreover, you won’t be able to animate the emojis you add to video clips with the Kapwing Meme Maker tool since the Kapwing platform doesn’t offer any animation tools. Despite this Kapwing is still one of the best online video editing platforms you can use to add emojis and stickers to videos.
A Few Tips to Help you Incorporate Emojis in Your Videos
Which emoji you are going to add to a video depends on factors that range from the topic of the video to the audience you are trying to reach. So, if you can’t find the emoji that fits perfectly to your video you should head over to emojipedia or any other website that lets you download thousands of emojis for free. You should keep in mind that emojis can have different meanings in different cultures, which is the reason why you must make sure that the emoji you’re adding to your video isn’t inappropriate or offensive in the context in which you’re using it. It is also worth noting that the emojis you download from the Internet should have a transparent background and that they should be saved in the PNG file format.
You may also like: Add Emojis to Videos on YouTube/Facebook/Snapchat [Step by Step Guide] >>
Conclusion
A single image overlay like an emoji can make your video more dynamic and more entertaining to watch, but you must discover creative and innovative ways to incorporate these visual elements into the story your video is telling. Each video editing app we presented in this article enables you to add emojis to videos in just a few easy steps, so you should choose the video editor that you feel most comfortable using. Do you add emojis to your videos often? Leave a comment below and share your favorite emojis with us.
Liza Brown
Liza Brown is a writer and a lover of all things video.
Follow @Liza Brown
10 Free Online Sticker Makers to Make Your Own Stickers
10 Free Online Sticker Makers to Make Your Own Stickers
Shanoon Cox
Mar 27, 2024• Proven solutions
Over the years, the method of communication has changed a lot with the advancement of technological products and innovations. Be it personal forms of communication, advertisements, or public awareness, things are very different now. This is an era of digital boards, online texts, and stickers.
Making one’s own stickers have been one of the latest trends of communication on social media platforms. The use of stickers makes the conversation interesting and fun and allows people to express their opinions hilariously, without offending anyone. That is why there are a lot of online sticker makers available in the market.
Online sticker makers allow you to create your own stickers in whichever way you wish. These online sticker makers have taken the fun and involvement of socially active people to another level. So let’s dig in and find out about the best free online sticker makers available in the market.
You might be interested in:
- Part 1: 10 Free Online Stickers to Make Your Own Stickers
- Part 2: Add Sticker to Your Video with Wondershare Filmora
Part 1: 10 Free Online Stickers to Make Your Stickers
With the right applications, making your own stickers can be very easy. There are a lot of online sticker makers that allow you to create your own stickers, but the best ones among them will do the job more creatively and easily. So, let’s have a look at the top free online sticker makers we have selected for you in terms of features and easiness to use.
- 1. StickerYou
- 2. Canva
- 3. Crello
- 4. PsPrint
- 5. Jukebox
- 6. PicsArt
- 7. Uprinting
- 8. Avery
- 9. MakeStickers
- 10. Labeley
1. StickerYou
StickerYou is a wonderful online sticker maker that helps you to create clear cut stickers easily. You can upload any photo that you wish to convert into a sticker, provided those are in PNG, JPG, JPEG, or GIF formats.
Pricing
- $0.50 per Sticker
Features
- Allows to add art to the sticker
- Provides editing options like border, text, canvas, etc. within the tool itself
- Provides shipping delivery of physical copies of the stickers
- This tool can be accessed online from any computer or mobile device
2. Canva
Canva is an online tool that allows you to create your own customized stickers and labels with a professional touch. In Canva, you can either design a sticker from scratch or develop one from the hundreds of pre-installed designer templates.
Pricing:
- Free version
- Pro version with more advanced tools and features
Features:
- 100+ adjustable templates and design options
- About a million images, illustrations, colors, and texts to choose from
- Occasion based designs and custom dimensions to choose
- Easy sticker making in three steps – upload, edit, and download
3. Crello
Crello allows users to create adorable and fun stickers in whatever design they wish. It is an online sticker maker that grants a lot of editing features to make the result more outstanding, provided the users have signed into their account
Pricing:
- Starter pack – Free
- Pro pack - $7.99 per month
Features:
- Options to create photos, images, illustrations, patterns, and text badges in customizable shapes
- More than 30,000 templates to create whatever you wish
- Availability of more than 500,000 premium photos and 140M plus royalty-free pics
- Simple design and video editing features
4. PsPrint
PsPrint is an application that can help you to create versatile and fun stickers with ease with a design template that is professionally crafted. All you need is to simply pick up your desired shape, size, and color.
Pricing:
- Free kit
- Paid – depending on the stickers you choose
Features:
- A free designing tool to add personalized texts elements and graphics
- Availability of physical copy of stickers printed and cut in any dimension
- Occasion based options of design to choose from
5. Jukebox
Jukebox allows users to design and print a variety of stickers and provides quality templates to do so. This online sticker maker allows you to choose the shape size and material of the sticker first, and once designing is done, high-quality stickers will be printed up.
Pricing:
- Depends upon features like size, material, and quantity
Features:
- Can create stickers in any shape and finishing
- High-quality stickers that are easy to peel and weather resistant
- Free shipping for orders totaling more than $75
- One day turn around option available
6. PicsArt
Picsart is one of the most popular photo editing applications that also features the option of online sticker making. This application provides a large number of pre-customized online stickers and also has the best features if you are interested in creating one.
Pricing:
- Free
- Gold offer - $4.66 per month
Features:
- Easy creation and sharing of stickers
- Online sharing and printing options
- An AI technology that can remove the background of any pictures perfectly
- Amazing editing features like erase tool, brush off tool, axis rotation, etc.
7. Uprinting
Uprinting is an all-purpose online sticker making tool that can help you create appealing stickers according to your idea. It is a clean tool and you can order stickers in small as well as very large sizes. Also the sticker options available make it easy to choose.
Pricing:
- $42.29 ($0.17 for each sticker)
Features:
- Roll sticker cut to any shape and size
- Sticker available with a gloss finish as well as matt coated
- Availability of waterproof material for stickers
- Easy peel of hard sticking
8. Avery
Avery lets its users create seals and stickers personalized to their choice of interest. This online sticker making tool allows you to choose a design, make the necessary edits using the built-in options, print, and then save it on your device.

Pricing
- Pricing depends on the order of purchase
Features:
- Free printable designs that fit any occasion
- High-quality material suitable for packing
- Free shipping for all orders above $50
- Premium quality designs and products and 100 percent satisfaction guaranteed
9. MakeStickers
MakeStickers is a custom online sticker maker that offers a lot of features and sticker creating options to its users. It has a very simple user interface and anyone can create stickers easily using this online tool.
Pricing:
- Pricing depends on the quantity and dimensions of the stickers
Features:
- Availability of sticker in many cute shapes and colors
- Waterproof polypropylene material that is hard to get damaged by any liquids
- Laminated with a glossy or matte finish to ensure more durability
- Split back in the middle for easy peeling
10. Labeley
Labeley is a site that offers free online sticker creation without any hassles like a mandatory sign in or trail periods. It is a simple application that can be used to create a sticker and share them on any social platform instantly.

Pricing
- Free of cost
Features
- Allows to create customized stickers in minutes
- A lot of categories of designs to choose from
- Simple editing tools and easy to use interface
- Professional methods used for printing the stickers
Part 2: Add Sticker to Your Video with Wondershare Filmora
Wondershare Filmora is one of the most popular and widely used video editing applications around the world that offers exciting and extensive video editing features. Be it creating a simple meme or editing a professional level movie, Filmora is the application that you can choose with your eyes closed.
Stickers a way to express one’s opinion or idea in an effective way. Most of the time these stickers convey things that long sentences can’t. This is why many movie makers and editors prefer to add stickers to their videos. Also adding stickers to a video make it, more interesting, fun to watch, and appealing to the viewers. So let’s see how a custom sticker can be added to a video using Filmora.
Steps to Follow:
Step 1: Install the Filmora application on your device and open it. Then import the video you need to edit and the custom stickers you need to add to the Media Library.
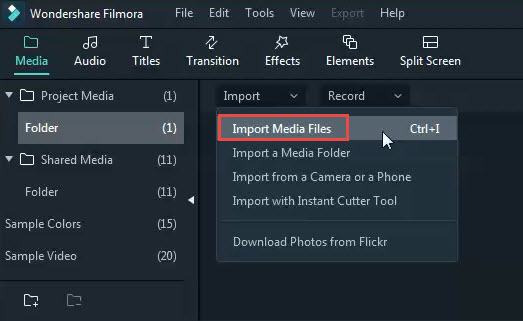
Step 2: Drag the video first to the timeline, followed by the stickers respectively. And choose the sticker options available from the Elements tab.
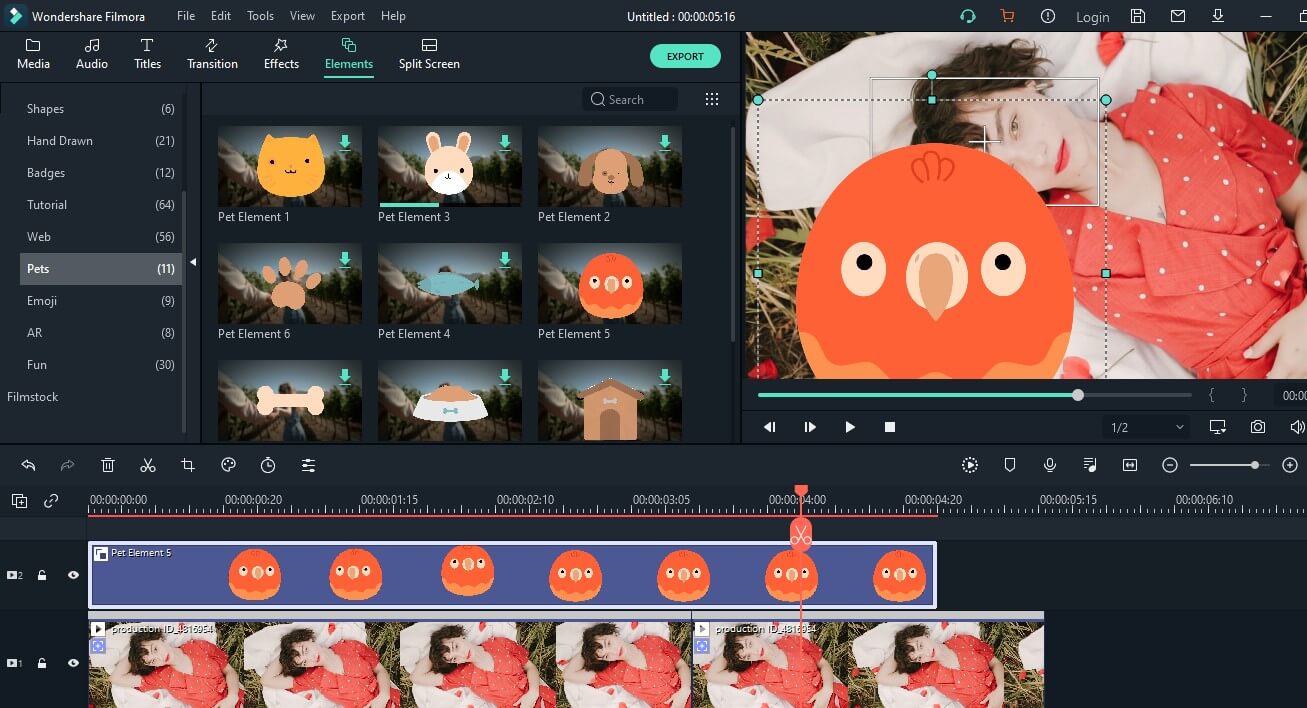
Step 3: Double click the sticker. Then you can rotate, flip, or resize it as you want. Or you can right-click the sticker on the timeline to get more advanced editing options, such as color grading, pan &zoom, and speed change, etc.
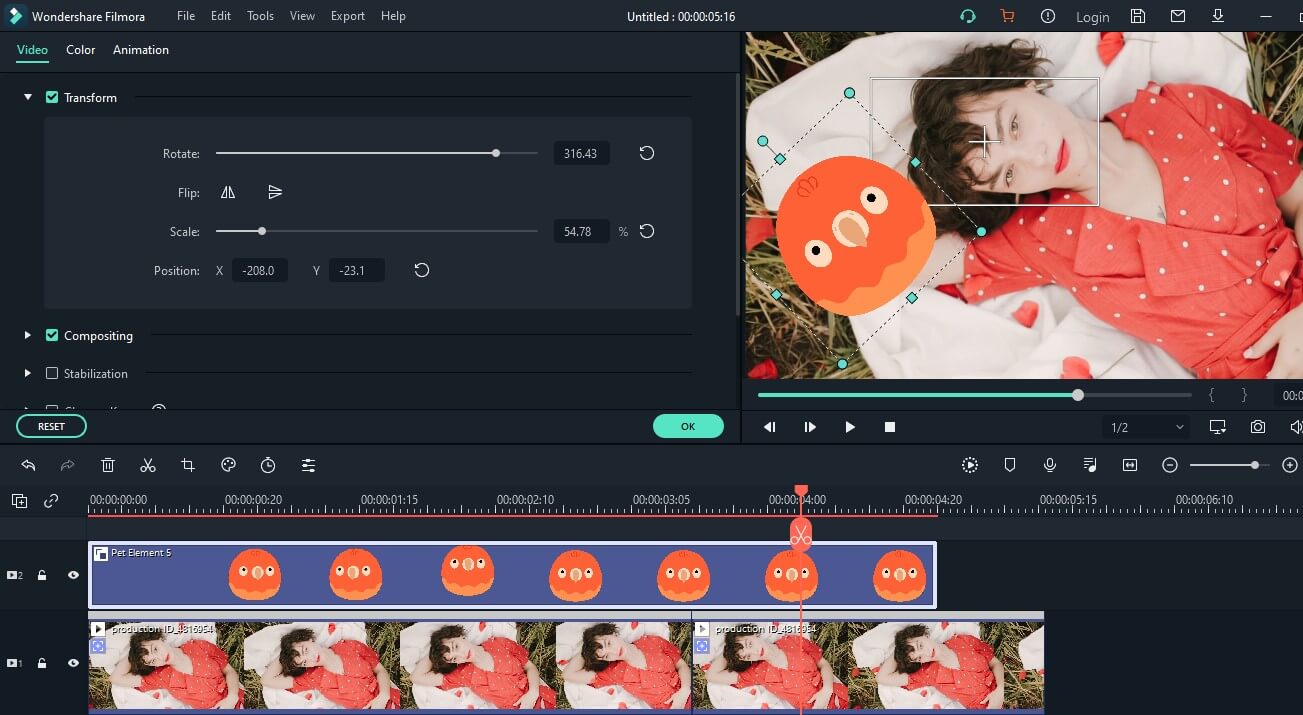
Step 4: Once the editing is completed, Export the video into the format you wish.

Conclusion
Stickers sometimes speak better than words and it is very important to know how to customize stickers as every individual wishes to speak differently. Stickers are used for many purposes, from casual chats to marketing means and home décor, which is why the quality of them is very important.
Online sticker makers allow you to customize stickers based on your ideas and depending on any occasion. We have listed the top free online sticker makers available that will allow you to create all the stickers you need. Thank you.
Shanoon Cox
Shanoon Cox is a writer and a lover of all things video.
Follow @Shanoon Cox
Shanoon Cox
Mar 27, 2024• Proven solutions
Over the years, the method of communication has changed a lot with the advancement of technological products and innovations. Be it personal forms of communication, advertisements, or public awareness, things are very different now. This is an era of digital boards, online texts, and stickers.
Making one’s own stickers have been one of the latest trends of communication on social media platforms. The use of stickers makes the conversation interesting and fun and allows people to express their opinions hilariously, without offending anyone. That is why there are a lot of online sticker makers available in the market.
Online sticker makers allow you to create your own stickers in whichever way you wish. These online sticker makers have taken the fun and involvement of socially active people to another level. So let’s dig in and find out about the best free online sticker makers available in the market.
You might be interested in:
- Part 1: 10 Free Online Stickers to Make Your Own Stickers
- Part 2: Add Sticker to Your Video with Wondershare Filmora
Part 1: 10 Free Online Stickers to Make Your Stickers
With the right applications, making your own stickers can be very easy. There are a lot of online sticker makers that allow you to create your own stickers, but the best ones among them will do the job more creatively and easily. So, let’s have a look at the top free online sticker makers we have selected for you in terms of features and easiness to use.
- 1. StickerYou
- 2. Canva
- 3. Crello
- 4. PsPrint
- 5. Jukebox
- 6. PicsArt
- 7. Uprinting
- 8. Avery
- 9. MakeStickers
- 10. Labeley
1. StickerYou
StickerYou is a wonderful online sticker maker that helps you to create clear cut stickers easily. You can upload any photo that you wish to convert into a sticker, provided those are in PNG, JPG, JPEG, or GIF formats.
Pricing
- $0.50 per Sticker
Features
- Allows to add art to the sticker
- Provides editing options like border, text, canvas, etc. within the tool itself
- Provides shipping delivery of physical copies of the stickers
- This tool can be accessed online from any computer or mobile device
2. Canva
Canva is an online tool that allows you to create your own customized stickers and labels with a professional touch. In Canva, you can either design a sticker from scratch or develop one from the hundreds of pre-installed designer templates.
Pricing:
- Free version
- Pro version with more advanced tools and features
Features:
- 100+ adjustable templates and design options
- About a million images, illustrations, colors, and texts to choose from
- Occasion based designs and custom dimensions to choose
- Easy sticker making in three steps – upload, edit, and download
3. Crello
Crello allows users to create adorable and fun stickers in whatever design they wish. It is an online sticker maker that grants a lot of editing features to make the result more outstanding, provided the users have signed into their account
Pricing:
- Starter pack – Free
- Pro pack - $7.99 per month
Features:
- Options to create photos, images, illustrations, patterns, and text badges in customizable shapes
- More than 30,000 templates to create whatever you wish
- Availability of more than 500,000 premium photos and 140M plus royalty-free pics
- Simple design and video editing features
4. PsPrint
PsPrint is an application that can help you to create versatile and fun stickers with ease with a design template that is professionally crafted. All you need is to simply pick up your desired shape, size, and color.
Pricing:
- Free kit
- Paid – depending on the stickers you choose
Features:
- A free designing tool to add personalized texts elements and graphics
- Availability of physical copy of stickers printed and cut in any dimension
- Occasion based options of design to choose from
5. Jukebox
Jukebox allows users to design and print a variety of stickers and provides quality templates to do so. This online sticker maker allows you to choose the shape size and material of the sticker first, and once designing is done, high-quality stickers will be printed up.
Pricing:
- Depends upon features like size, material, and quantity
Features:
- Can create stickers in any shape and finishing
- High-quality stickers that are easy to peel and weather resistant
- Free shipping for orders totaling more than $75
- One day turn around option available
6. PicsArt
Picsart is one of the most popular photo editing applications that also features the option of online sticker making. This application provides a large number of pre-customized online stickers and also has the best features if you are interested in creating one.
Pricing:
- Free
- Gold offer - $4.66 per month
Features:
- Easy creation and sharing of stickers
- Online sharing and printing options
- An AI technology that can remove the background of any pictures perfectly
- Amazing editing features like erase tool, brush off tool, axis rotation, etc.
7. Uprinting
Uprinting is an all-purpose online sticker making tool that can help you create appealing stickers according to your idea. It is a clean tool and you can order stickers in small as well as very large sizes. Also the sticker options available make it easy to choose.
Pricing:
- $42.29 ($0.17 for each sticker)
Features:
- Roll sticker cut to any shape and size
- Sticker available with a gloss finish as well as matt coated
- Availability of waterproof material for stickers
- Easy peel of hard sticking
8. Avery
Avery lets its users create seals and stickers personalized to their choice of interest. This online sticker making tool allows you to choose a design, make the necessary edits using the built-in options, print, and then save it on your device.
Pricing
- Pricing depends on the order of purchase
Features:
- Free printable designs that fit any occasion
- High-quality material suitable for packing
- Free shipping for all orders above $50
- Premium quality designs and products and 100 percent satisfaction guaranteed
9. MakeStickers
MakeStickers is a custom online sticker maker that offers a lot of features and sticker creating options to its users. It has a very simple user interface and anyone can create stickers easily using this online tool.
Pricing:
- Pricing depends on the quantity and dimensions of the stickers
Features:
- Availability of sticker in many cute shapes and colors
- Waterproof polypropylene material that is hard to get damaged by any liquids
- Laminated with a glossy or matte finish to ensure more durability
- Split back in the middle for easy peeling
10. Labeley
Labeley is a site that offers free online sticker creation without any hassles like a mandatory sign in or trail periods. It is a simple application that can be used to create a sticker and share them on any social platform instantly.
Pricing
- Free of cost
Features
- Allows to create customized stickers in minutes
- A lot of categories of designs to choose from
- Simple editing tools and easy to use interface
- Professional methods used for printing the stickers
Part 2: Add Sticker to Your Video with Wondershare Filmora
Wondershare Filmora is one of the most popular and widely used video editing applications around the world that offers exciting and extensive video editing features. Be it creating a simple meme or editing a professional level movie, Filmora is the application that you can choose with your eyes closed.
Stickers a way to express one’s opinion or idea in an effective way. Most of the time these stickers convey things that long sentences can’t. This is why many movie makers and editors prefer to add stickers to their videos. Also adding stickers to a video make it, more interesting, fun to watch, and appealing to the viewers. So let’s see how a custom sticker can be added to a video using Filmora.
Steps to Follow:
Step 1: Install the Filmora application on your device and open it. Then import the video you need to edit and the custom stickers you need to add to the Media Library.
Step 2: Drag the video first to the timeline, followed by the stickers respectively. And choose the sticker options available from the Elements tab.
Step 3: Double click the sticker. Then you can rotate, flip, or resize it as you want. Or you can right-click the sticker on the timeline to get more advanced editing options, such as color grading, pan &zoom, and speed change, etc.
Step 4: Once the editing is completed, Export the video into the format you wish.
Conclusion
Stickers sometimes speak better than words and it is very important to know how to customize stickers as every individual wishes to speak differently. Stickers are used for many purposes, from casual chats to marketing means and home décor, which is why the quality of them is very important.
Online sticker makers allow you to customize stickers based on your ideas and depending on any occasion. We have listed the top free online sticker makers available that will allow you to create all the stickers you need. Thank you.
Shanoon Cox
Shanoon Cox is a writer and a lover of all things video.
Follow @Shanoon Cox
How to Add and Custom Slack Emoji-Wondershare Filmora
How to Add and Custom Slack Emoji-Wondershare Filmora
Shanoon Cox
Mar 27, 2024• Proven solutions
A Slack emoji is just like the emojis you usually use on Whatsapp, Messenger, or other chatting platforms. There is a wide range of emojis you can use to express yourself better or lighten the working environment.
Plus, the option to create a custom Slack emoji makes it more interesting. You can use it to create a new and unique Slack emoji to personalize your chatting experience. Why write long texts when you can just add Slack emoji to say it all?
Let me show you the ropes on how to create a custom Slack emoji and make your chatting experience more fun.
- Part 1: How to Add Slack Emoji
- Part 2: How to Custom Slack Emoji
- Bonus Tip-Edit Emoji and Add Emoji to Your Video
Part 1: How to Add Slack Emoji
At Slack, you can find a Slack emoji for every emotion or occasion. Finding the perfect Slack emoji is as easy as browsing through the categorized sections. Better yet, the option to search for a Slack emoji makes it a cakewalk to get the exact Slack emoji to express oneself.
Also, you can add Slack emoji with a single tap. And it allows you to add unlimited Slack emoji in one message.
Let me show you how to add Slack emoji in a few quick steps:
1.Download and open Slack on your desktop or smartphone.
2.To add a Slack emoji, click on the Smiley face icon in the bottom right corner of the message box
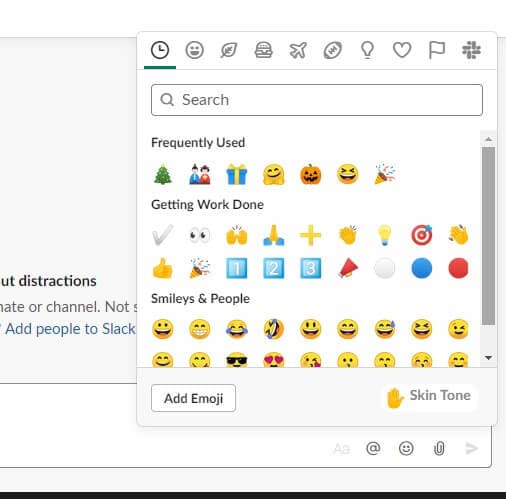
3.Browse through the categories to find the right Slack emoji for your message. In the search bar, type the kind of emoji you are looking for to find it faster.
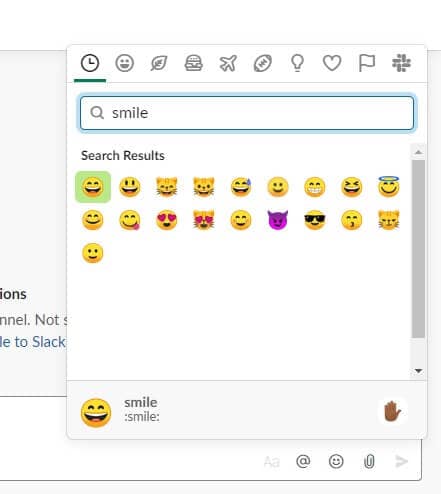
4.Click on the Hand icon in the bottom right corner to choose the default skin tone for all your emojis. Finally, to add Slack emoji to your message, just tap on it. Add as many Slack emoji as you like just by tapping on them.
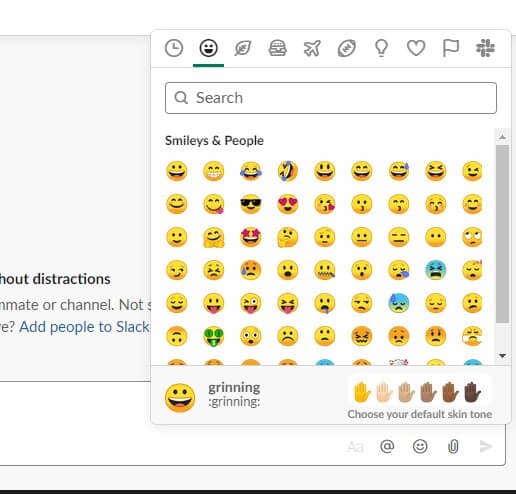
Part 2: How to Custom Slack Emoji
Using the commonly used emojis can get boring. Sometimes, even the Slack emoji collection falls short in expressing the exact feeling you wish to convey. However, the good news is that you can easily create a custom Slack emoji without any hassle.
A Slack custom emoji can range from your own picture to any other image. You can create a personalized custom Slack emoji to crack inside jokes or create your brand icon Slack emoji.
Here’s how to create an awesome custom Slack emoji-
1.On your workspace, click on your company name or icon to open the settings drop-down menu. Tap on Settings&Administration<Customize.
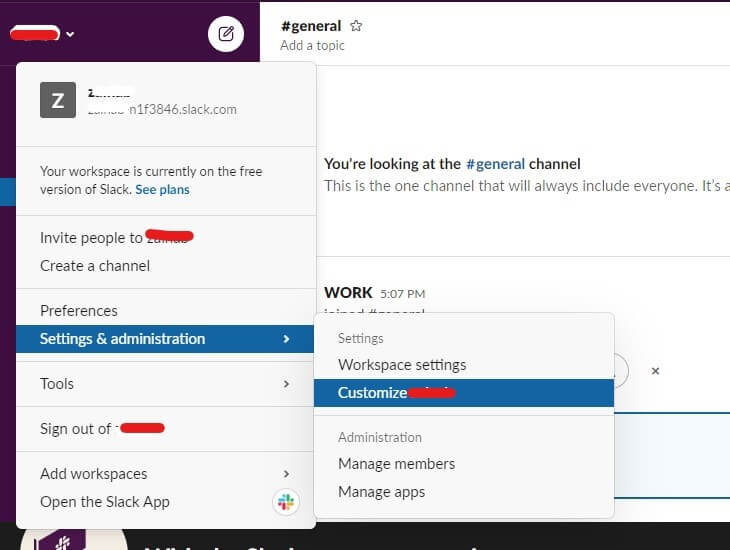
2.A new window will pop open. In the Emoji tab, click on Add Custom Emoji.
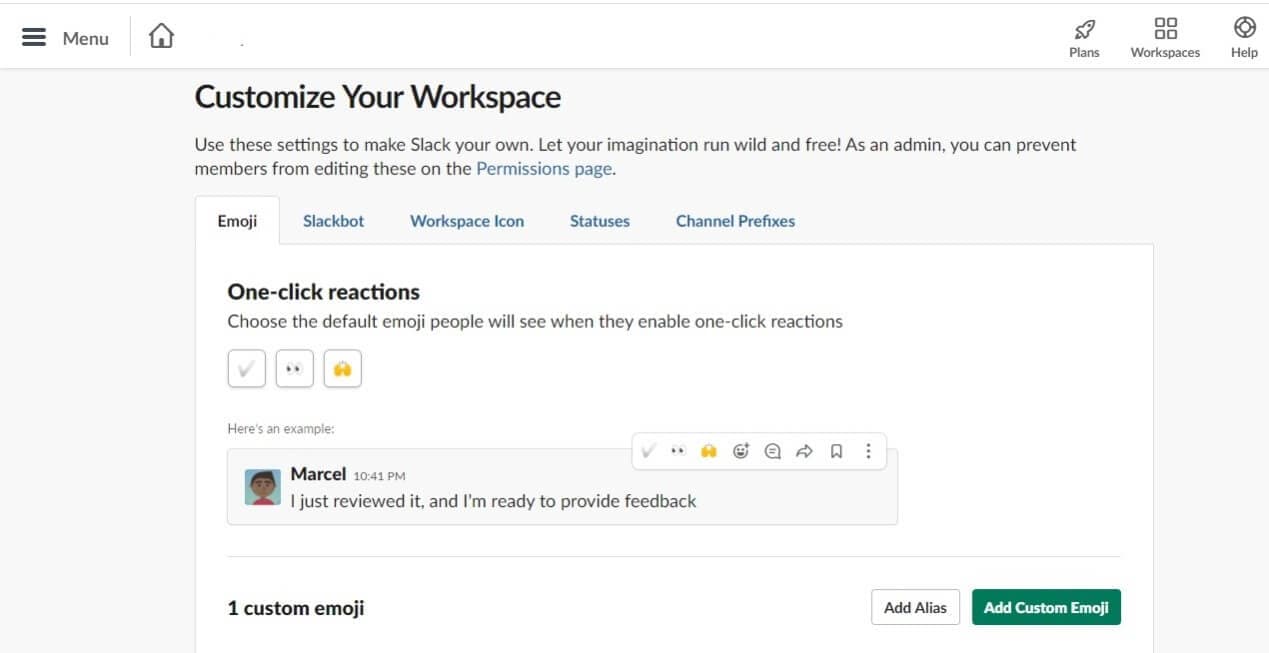
3.Here you can upload any image to make your custom Slack emoji. Click on Upload Image to select a file.
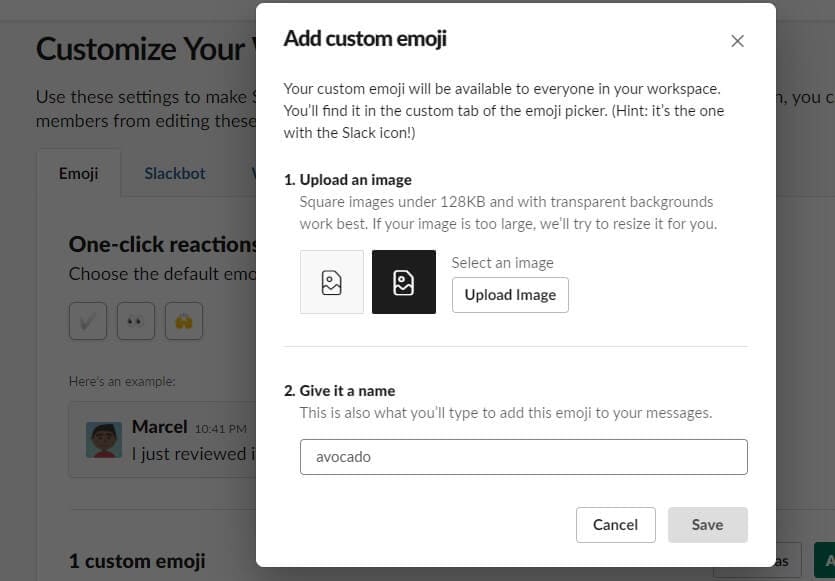
4.Then, give your emoji a name so you can easily find the custom Slack emoji while chatting. Click Save to finish.
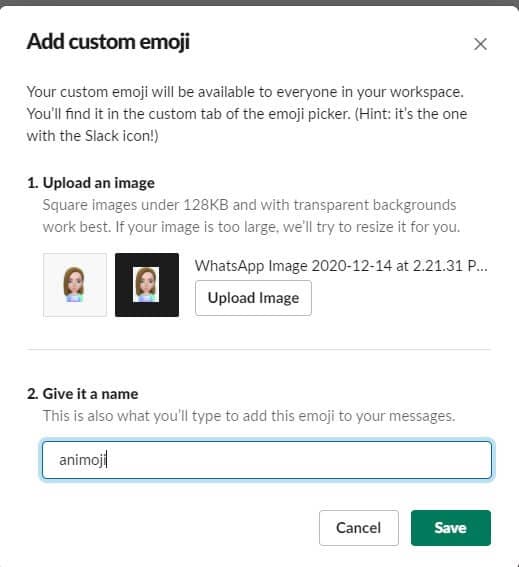
5.Now, go back to the workspace and click on the Smiley icon. Type the custom Slack emoji name to find it and click to send it.
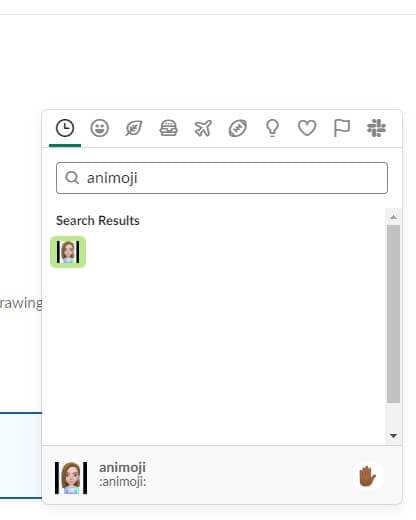
Bonus Tip-Edit Emoji and Add Emoji to Your Video
Now, let me present a top-notch video editor to help you add Slack emoji to your video without needing any editing experience.
Wondershare Filmora is a powerful video editor with a highly intuitive interface. It is loaded with high-end editing tools that are incredibly easy to use. You can add keyframe animations to make your videos more dynamic with a single click. Motion tracking allows you to track the specified object’s movements throughout the video, even allowing you to blur certain parts of the video. From the Effects tab, you can add cinematic effects to your videos, or you can easily color match all your scenes with one tap or apply noise reduction.
If you wish to edit or add custom Slack emoji to your video, you can import the image to Filmora and then drag it to the track above the video in the timeline. You can then add animations or motion tracking to adjust the custom Slack emoji. Cool transitions and color adjustments can also be made to make the video more appealing and unique. Special effects or catchy captions are just a tap away to help you create stunning videos
Conclusion
With the introduction of emojis, the need for writing long messages has diminished. Using a Slack emoji can turn your conversations around and make them more interesting. Chatting has never been easier or more fun.
Add Slack emoji or react to what others have to say. It’s time to create a custom Slack emoji to wow your friends and colleagues with tiny emojis that are exclusive to just you. If you want to spice up your work chats, just add Slack emoji and enjoy.
Try out Wondershare Filmora to add Slack emoji to your videos to make them unique.
Shanoon Cox
Shanoon Cox is a writer and a lover of all things video.
Follow @Shanoon Cox
Shanoon Cox
Mar 27, 2024• Proven solutions
A Slack emoji is just like the emojis you usually use on Whatsapp, Messenger, or other chatting platforms. There is a wide range of emojis you can use to express yourself better or lighten the working environment.
Plus, the option to create a custom Slack emoji makes it more interesting. You can use it to create a new and unique Slack emoji to personalize your chatting experience. Why write long texts when you can just add Slack emoji to say it all?
Let me show you the ropes on how to create a custom Slack emoji and make your chatting experience more fun.
- Part 1: How to Add Slack Emoji
- Part 2: How to Custom Slack Emoji
- Bonus Tip-Edit Emoji and Add Emoji to Your Video
Part 1: How to Add Slack Emoji
At Slack, you can find a Slack emoji for every emotion or occasion. Finding the perfect Slack emoji is as easy as browsing through the categorized sections. Better yet, the option to search for a Slack emoji makes it a cakewalk to get the exact Slack emoji to express oneself.
Also, you can add Slack emoji with a single tap. And it allows you to add unlimited Slack emoji in one message.
Let me show you how to add Slack emoji in a few quick steps:
1.Download and open Slack on your desktop or smartphone.
2.To add a Slack emoji, click on the Smiley face icon in the bottom right corner of the message box
3.Browse through the categories to find the right Slack emoji for your message. In the search bar, type the kind of emoji you are looking for to find it faster.
4.Click on the Hand icon in the bottom right corner to choose the default skin tone for all your emojis. Finally, to add Slack emoji to your message, just tap on it. Add as many Slack emoji as you like just by tapping on them.
Part 2: How to Custom Slack Emoji
Using the commonly used emojis can get boring. Sometimes, even the Slack emoji collection falls short in expressing the exact feeling you wish to convey. However, the good news is that you can easily create a custom Slack emoji without any hassle.
A Slack custom emoji can range from your own picture to any other image. You can create a personalized custom Slack emoji to crack inside jokes or create your brand icon Slack emoji.
Here’s how to create an awesome custom Slack emoji-
1.On your workspace, click on your company name or icon to open the settings drop-down menu. Tap on Settings&Administration<Customize.
2.A new window will pop open. In the Emoji tab, click on Add Custom Emoji.
3.Here you can upload any image to make your custom Slack emoji. Click on Upload Image to select a file.
4.Then, give your emoji a name so you can easily find the custom Slack emoji while chatting. Click Save to finish.
5.Now, go back to the workspace and click on the Smiley icon. Type the custom Slack emoji name to find it and click to send it.
Bonus Tip-Edit Emoji and Add Emoji to Your Video
Now, let me present a top-notch video editor to help you add Slack emoji to your video without needing any editing experience.
Wondershare Filmora is a powerful video editor with a highly intuitive interface. It is loaded with high-end editing tools that are incredibly easy to use. You can add keyframe animations to make your videos more dynamic with a single click. Motion tracking allows you to track the specified object’s movements throughout the video, even allowing you to blur certain parts of the video. From the Effects tab, you can add cinematic effects to your videos, or you can easily color match all your scenes with one tap or apply noise reduction.
If you wish to edit or add custom Slack emoji to your video, you can import the image to Filmora and then drag it to the track above the video in the timeline. You can then add animations or motion tracking to adjust the custom Slack emoji. Cool transitions and color adjustments can also be made to make the video more appealing and unique. Special effects or catchy captions are just a tap away to help you create stunning videos
Conclusion
With the introduction of emojis, the need for writing long messages has diminished. Using a Slack emoji can turn your conversations around and make them more interesting. Chatting has never been easier or more fun.
Add Slack emoji or react to what others have to say. It’s time to create a custom Slack emoji to wow your friends and colleagues with tiny emojis that are exclusive to just you. If you want to spice up your work chats, just add Slack emoji and enjoy.
Try out Wondershare Filmora to add Slack emoji to your videos to make them unique.
Shanoon Cox
Shanoon Cox is a writer and a lover of all things video.
Follow @Shanoon Cox
Generating the Nut Button Meme
Generating the Nut Button Meme

Ollie Mattison
Mar 27, 2024• Proven solutions
Generating the Nut Button Meme
The Nut Button meme started out as an immature joke, with a word ‘Nut’ written across a blue button, and for a number of years, this meme was used mostly for bad sex jokes. However, the meme has evolved through the years and meme makers from around the world use it to make social media, gaming and countless other types of jokes.
Commonly, the Nut Button meme suggests that a person, in many cases the creator of the meme, likes doing something in certain types of situations, like listening to crappy music when they feel down or taking revenge on their enemies when they have the opportunity. Generating this type of meme doesn’t require too much effort as it often contains one word. Some versions of this meme include the motive that prompts the hand in the meme to push the button, but using this element of the meme is optional.
A Few Good Examples of the Nut Button Meme
Taking the first concept that comes to your mind won’t necessarily make this meme as effective as you’d like it to be, so you have to think carefully which button the hand is going to hit.
Hitting the Divorce button can be a painful process in real life, but it can also be an endless source of fun if the reason why the hand hits it is so ridiculous that it could never be an actual reason for a divorce.
This meme can also be used to make fun of world leaders and their bad decisions or pop-culture figures that often do ill-advised things.

The elements of the Nut meme are always the same, although their topics can vary because the hand and the blue button are irreplaceable parts of this meme.
Generating the Nut Button Meme
We suggest using Filmora Online Meme Maker to generate your meme because this online tool lets you create memes without watermarks for free. What’s more, you don’t even have to sign up in order to make a meme from images, GIFs or videos.
Step 1 – Uploading the Meme Template
You can click the “Copy the image” link below and the image link will be copied automatically.
![]()
Copy the image
After arriving at Filmora Online Meme Maker ‘s home page, you’ll be asked to upload the image. Paste the image’s URL into the Enter a URL box. After uploading a picture from your computer, you’ll be asked if you would like to crop, flip or rotate it. Click on the OK button to confirm the changes you’ve made and proceed to the next step of the process.

Step 2 – Adding Text to the Image
When a new page loads you will get access to all tools Filmora Online Meme Maker offers. Make sure that the Text Inside option is selected, since on nearly all examples of this meme the text is positioned within the image.

Insert the text into the text boxes, and reposition it on the picture so it is placed between the blue button and hand. You can add as many text boxes as you want to the picture, but Nut Button memes commonly include just one or two lines of text.

The color of the text, size, and font can all be changed in the Text Options menu, so before hitting the Create button you can experiment with these tools in order to generate a better meme.
Step 3 – Saving the Meme
Finally, click on the download button, and when a new page loads and you’re ready to share your new Nut Button meme on social media.

The Filmora Online Meme Maker is mobile friendly, which means that you can use this platform to make memes from your Smartphone.
Conclusion
The Nut Button meme can be used in a wide array of different contexts, and it is up to you which one you’re going to use. You can mock stereotypical answers to questions, world leaders or make a joke at your own expense. Whichever topic you choose, the Filmora Online Meme Maker will help you express your creativity fully. What is your favorite Nut Button meme? Leave a comment below and let us know.
Ollie Mattison
Ollie Mattison is a writer and a lover of all things video.
Follow @Ollie Mattison
Ollie Mattison
Mar 27, 2024• Proven solutions
Generating the Nut Button Meme
The Nut Button meme started out as an immature joke, with a word ‘Nut’ written across a blue button, and for a number of years, this meme was used mostly for bad sex jokes. However, the meme has evolved through the years and meme makers from around the world use it to make social media, gaming and countless other types of jokes.
Commonly, the Nut Button meme suggests that a person, in many cases the creator of the meme, likes doing something in certain types of situations, like listening to crappy music when they feel down or taking revenge on their enemies when they have the opportunity. Generating this type of meme doesn’t require too much effort as it often contains one word. Some versions of this meme include the motive that prompts the hand in the meme to push the button, but using this element of the meme is optional.
A Few Good Examples of the Nut Button Meme
Taking the first concept that comes to your mind won’t necessarily make this meme as effective as you’d like it to be, so you have to think carefully which button the hand is going to hit.
Hitting the Divorce button can be a painful process in real life, but it can also be an endless source of fun if the reason why the hand hits it is so ridiculous that it could never be an actual reason for a divorce.
This meme can also be used to make fun of world leaders and their bad decisions or pop-culture figures that often do ill-advised things.
The elements of the Nut meme are always the same, although their topics can vary because the hand and the blue button are irreplaceable parts of this meme.
Generating the Nut Button Meme
We suggest using Filmora Online Meme Maker to generate your meme because this online tool lets you create memes without watermarks for free. What’s more, you don’t even have to sign up in order to make a meme from images, GIFs or videos.
Step 1 – Uploading the Meme Template
You can click the “Copy the image” link below and the image link will be copied automatically.
![]()
Copy the image
After arriving at Filmora Online Meme Maker ‘s home page, you’ll be asked to upload the image. Paste the image’s URL into the Enter a URL box. After uploading a picture from your computer, you’ll be asked if you would like to crop, flip or rotate it. Click on the OK button to confirm the changes you’ve made and proceed to the next step of the process.
Step 2 – Adding Text to the Image
When a new page loads you will get access to all tools Filmora Online Meme Maker offers. Make sure that the Text Inside option is selected, since on nearly all examples of this meme the text is positioned within the image.
Insert the text into the text boxes, and reposition it on the picture so it is placed between the blue button and hand. You can add as many text boxes as you want to the picture, but Nut Button memes commonly include just one or two lines of text.
The color of the text, size, and font can all be changed in the Text Options menu, so before hitting the Create button you can experiment with these tools in order to generate a better meme.
Step 3 – Saving the Meme
Finally, click on the download button, and when a new page loads and you’re ready to share your new Nut Button meme on social media.
The Filmora Online Meme Maker is mobile friendly, which means that you can use this platform to make memes from your Smartphone.
Conclusion
The Nut Button meme can be used in a wide array of different contexts, and it is up to you which one you’re going to use. You can mock stereotypical answers to questions, world leaders or make a joke at your own expense. Whichever topic you choose, the Filmora Online Meme Maker will help you express your creativity fully. What is your favorite Nut Button meme? Leave a comment below and let us know.
Ollie Mattison
Ollie Mattison is a writer and a lover of all things video.
Follow @Ollie Mattison
How to Add Emojis To Discord on Desktop Computer and Mobile
How to Add Emojis To Discord

Richard Bennett
Mar 27, 2024• Proven solutions
Who doesn’t like emoticons? They are fun, easy to use, and, best of all, highly expressive of your emotions that you cannot convey over messages otherwise.
A 2019 survey shows 70% of mobile users used emoji in texting or on social media daily. This shows the popularity of emoji in our world today.
Similarly, as a Discord user, you must have come across thousands of emoji in it. These are images uploaded on the server and called custom emojis that this gaming community can use for effective communication with friends and other players.
With the emoji and gaming industry growing, it is safe to say that discord emoji’s popularity and use will only increase.
Read ahead to see how you can add emojis on Discord if you want to have fun chats with your friends too.
- Part 1: Adding and Sending Emoji To Chat On Discord?
- Part 2: Adding Emojis To Discord Channel Name Or Nickname?
- Part 3: Adding Custom Emojis To Discord Server On Windows/Mac?
- Part 4: Adding Custom Emojis To Discord Server On iPhone And Android?
- Part 5: Managing Emojis in Discord Server
Part 1: How to Add and Send Emoji To Chat On Discord?
One of the best things about Discord’s emoji feature is that there are two ways to add them. You can either access emoji on the Discord account or upload them yourself.
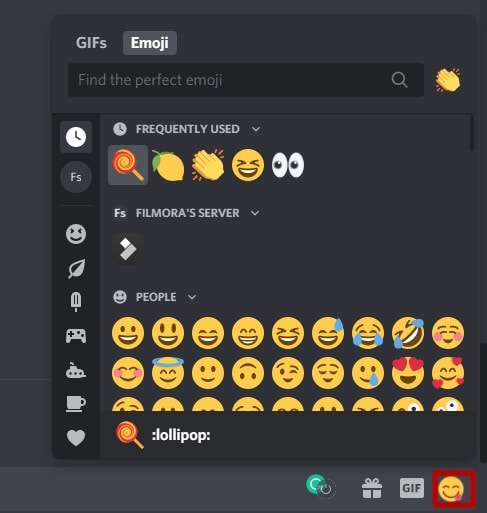
You can access the emoji menu for all Discord platforms by pressing the grey smiley face next to the message box. This will be on the right of the box for desktops, and for mobile apps, it will be on the left.
Discord-exclusive and standard emoji are present in the emoji menu, along with a part that keeps track of your most-used emoji.
On the other hand, you can also add custom emoticons to your Discord server if you have permission to do so.
Once you add and access the emoji on your device, select the one you want to send to your friends and press enter to send.
Part 2: How to Add Emojis To Discord Channel Name Or Nickname?
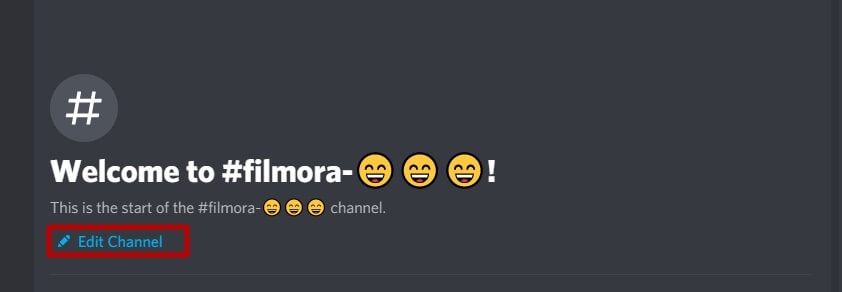
As an owner of a Discord channel, it is easy for you to add emoji to Discord. Follow the steps below to figure out how to add emojis to Discord channels:
- Use the emoji list to find the one you want to use in your channel name.
- Select the emoji “browser” column and copy it either with the mouse or “Ctrl + C” on the keyboard.
- Access your Discord server, right-click the channel where the emoji will be and use the dropdown menu to select the “Edit Channel.”
- In the “Channel Name” box, past the selected emoji using “Ctrl + V” from the keyboard.
- Select “Save Changes” to save the name with the emoji.
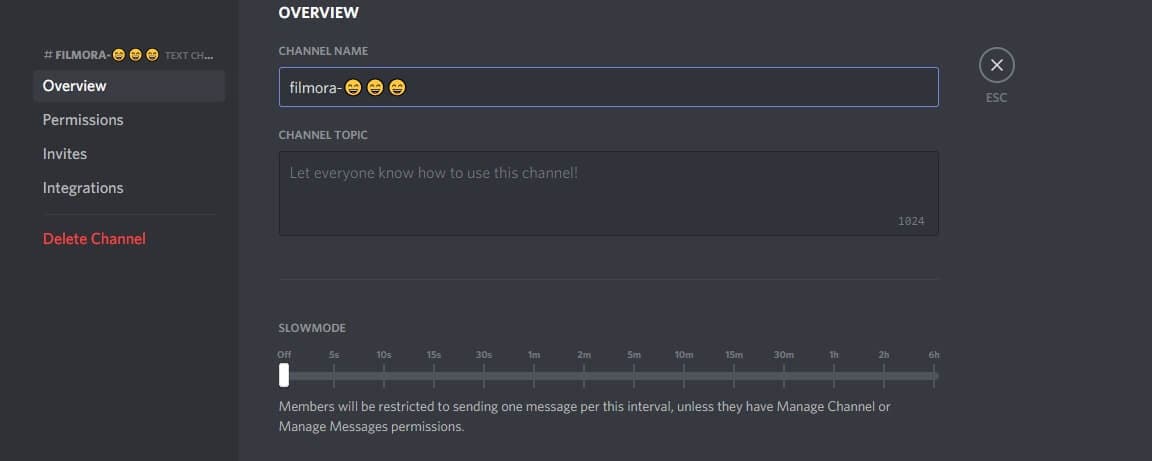
Part 3: How to Add Custom Emojis To Discord Server On Windows/Mac?
You can add custom emoji on Discord, but only if you are a server owner or administrator. Use the Discord server settings on either the desktop versions for Windows or Mac or the Discord Website.
Follow the steps below for either platform:
- Access your Discord server to begin and press the arrow pointing down in the channel list with the server name—Press “Server Settings” in the menu

- As the server’s settings open, you can add custom emojis in the “Emoji” tab. You can find a requirements list at the top that includes emoji names with a minimum of two characters and a file size limit of 256 KB. You can add fifty normal and an additional fifty animated emoji GIFs using the standard servers
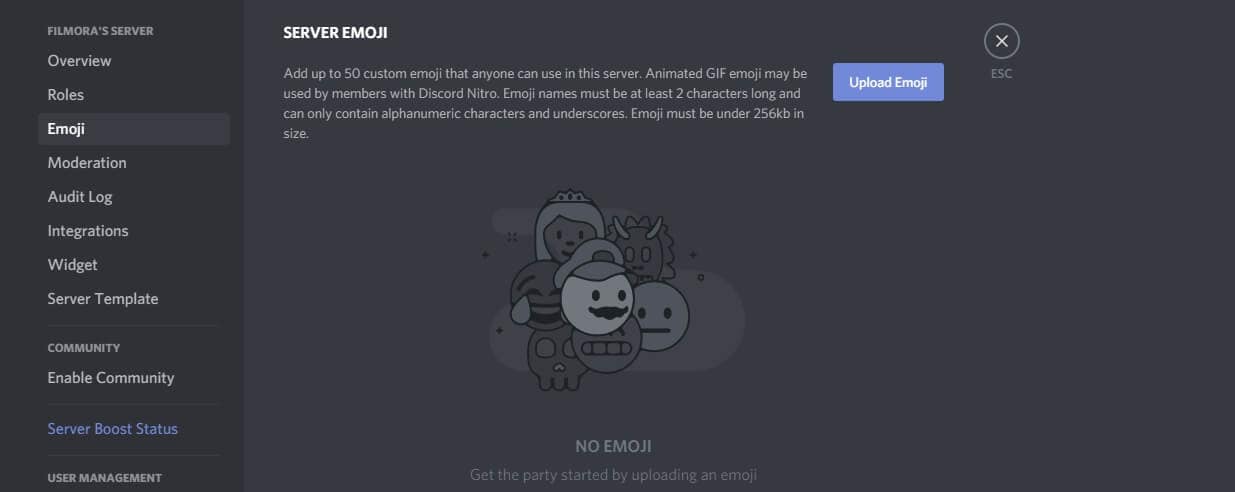
- Select “Upload Emoji” to insert a custom emoji, either standard or animated
- With the help of your device’s local storage, upload the file. However, for the emoji to be added to the lists, the file should align with Discord’s requirements.
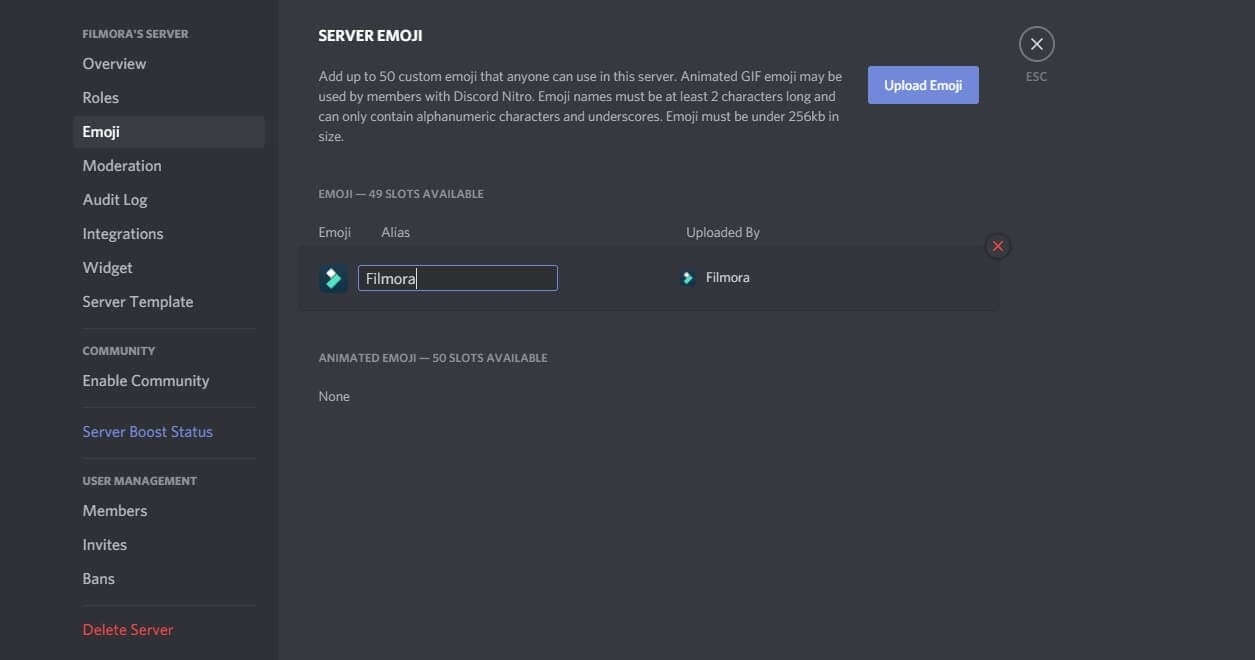
- For every emoji image that you upload, an alias tag will be created for that custom emoji using the file’s name. This tag is used to update a message with an emoji.
- A default alias name like this can be replaced by selecting the “Alias” box with the custom emoji and then creating a new name.
- Enjoy your emoji in chats as soon as you upload them to the Discord server!
Boost your server with Discord Nitro subscribers today to insert more than the standard fifty emoji!
Part 4: How to Add Custom Emojis To Discord Server On iPhone And Android?
How cool is it that you can add custom emoji to your smartphone as well? Whether you have an iPhone or an Android, you can use the same menu as Windows and Mac to upload emoji.
Discord’s interface is similar across all devices, so the following steps work on Android and Apple.
- Begin by opening the app on your device to access the server. Press the hamburger menu located at the top left in an open server and channel.
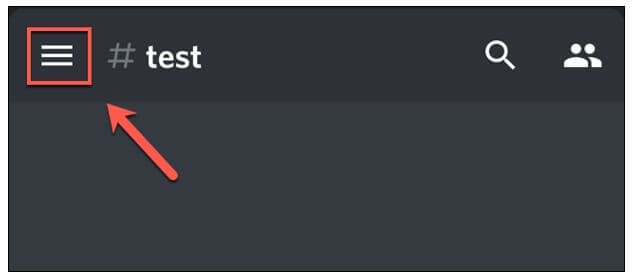
- As the channel and server list opens for Discord, you can see a three-dot menu right next to the channel list with the server name. Tap on it to proceed.
- To get to your server settings, press “Settings” in the Discord server menu that shows up.
- Under the “Server Settings” menu, select “Emoji” to access the custom emoji settings.
- As the “Emoji” menu opens, you can see an emoji requirement list
- Press “Upload Emoji” to upload any emoji that aligns with these requirements
- Press the custom emoji file, tap “Crop” if it needs cropping, and then use the “Upload” option
- After you upload the emoji file, replace the alias tag by tapping on it. This will redirect you to that specific emoji’s settings
- Type the name you want using the “Alias” box to create the tag used to insert emoji in messages
- Save this new tag with the “Save” icon placed in the bottom right
- Any changes you make to the custom emoji’s alias are applied to it instantly for your use.
Emoji bring fun to the conversations you have with friends, and it is very easy to add them to your server as well. These show up in the emoji pop-up list once you add them. The chat message bar contains the emoji icon from where you can access them.
It is essential to name your emoji with only alphanumeric characters and underscores using at least two characters.
The Discord emoji size is 32x32 pixels, so even if you upload up to 128x128 pixel size emojis, they will be resized to the default dimensions. Furthermore, emoji file sizes are at most 256kb.
If you want to use custom emojis, you can’t do so without a Nitro subscription because it is only functional on the server they are uploaded to. Even if you find a way to access the emoji from some other server, only its text code will be visible.
If you attempt to use the Emoji Picker to pick an emoji, you’ll get the following message:
Bonus: How to Manage Emoji in Discord Server?
You can’t remove or add emoji specific to a server on your own as a member. You need the server owner to toggle the permission of Manager Emoji in your domain.
On the other hand, as a server owner, you can give others this role with the following steps.
- Open Roles: Open the Server Settings and select “Roles” from the menu on the side.
- Toggle Manage Emoji: Pick the role you want to apply the permission to, and then toggle emoji’s slider to “on,” save changes, and you’re done!
FAQs About Discord Emojis
1. Why Do I See Grey Emoji In The Emoji Menu?
Greyed-out emoji in the menu means that either those emoji are animated, or you don’t have the permission to post them on other servers.
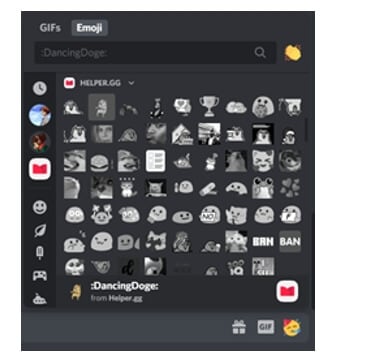
2. How Can I Get More Custom Emoji On The Server?
You can upload 50 emojis to your Discord server. But if you want more options, you need a Discord Nitro subscription to boost your server specs.
3. What Is The Discord Emoji Size?
Discord allows you to upload an emoji of up to 128x128 pixels, but it will resize it to 32x32 since that is its standard size.
Conclusion
Emojis make any chat fun, and where gaming is involved, they help you communicate better with your friends.
Discord has thousands of custom emojis that you can easily add to your server through your computer, whether it is your chat or the channel name. Follow our guide for a seamless process to add emoji to Discord and make your gaming experience better!
Richard Bennett
Richard Bennett is a writer and a lover of all things video.
Follow @Richard Bennett
Richard Bennett
Mar 27, 2024• Proven solutions
Who doesn’t like emoticons? They are fun, easy to use, and, best of all, highly expressive of your emotions that you cannot convey over messages otherwise.
A 2019 survey shows 70% of mobile users used emoji in texting or on social media daily. This shows the popularity of emoji in our world today.
Similarly, as a Discord user, you must have come across thousands of emoji in it. These are images uploaded on the server and called custom emojis that this gaming community can use for effective communication with friends and other players.
With the emoji and gaming industry growing, it is safe to say that discord emoji’s popularity and use will only increase.
Read ahead to see how you can add emojis on Discord if you want to have fun chats with your friends too.
- Part 1: Adding and Sending Emoji To Chat On Discord?
- Part 2: Adding Emojis To Discord Channel Name Or Nickname?
- Part 3: Adding Custom Emojis To Discord Server On Windows/Mac?
- Part 4: Adding Custom Emojis To Discord Server On iPhone And Android?
- Part 5: Managing Emojis in Discord Server
Part 1: How to Add and Send Emoji To Chat On Discord?
One of the best things about Discord’s emoji feature is that there are two ways to add them. You can either access emoji on the Discord account or upload them yourself.
You can access the emoji menu for all Discord platforms by pressing the grey smiley face next to the message box. This will be on the right of the box for desktops, and for mobile apps, it will be on the left.
Discord-exclusive and standard emoji are present in the emoji menu, along with a part that keeps track of your most-used emoji.
On the other hand, you can also add custom emoticons to your Discord server if you have permission to do so.
Once you add and access the emoji on your device, select the one you want to send to your friends and press enter to send.
Part 2: How to Add Emojis To Discord Channel Name Or Nickname?
As an owner of a Discord channel, it is easy for you to add emoji to Discord. Follow the steps below to figure out how to add emojis to Discord channels:
- Use the emoji list to find the one you want to use in your channel name.
- Select the emoji “browser” column and copy it either with the mouse or “Ctrl + C” on the keyboard.
- Access your Discord server, right-click the channel where the emoji will be and use the dropdown menu to select the “Edit Channel.”
- In the “Channel Name” box, past the selected emoji using “Ctrl + V” from the keyboard.
- Select “Save Changes” to save the name with the emoji.
Part 3: How to Add Custom Emojis To Discord Server On Windows/Mac?
You can add custom emoji on Discord, but only if you are a server owner or administrator. Use the Discord server settings on either the desktop versions for Windows or Mac or the Discord Website.
Follow the steps below for either platform:
- Access your Discord server to begin and press the arrow pointing down in the channel list with the server name—Press “Server Settings” in the menu
- As the server’s settings open, you can add custom emojis in the “Emoji” tab. You can find a requirements list at the top that includes emoji names with a minimum of two characters and a file size limit of 256 KB. You can add fifty normal and an additional fifty animated emoji GIFs using the standard servers
- Select “Upload Emoji” to insert a custom emoji, either standard or animated
- With the help of your device’s local storage, upload the file. However, for the emoji to be added to the lists, the file should align with Discord’s requirements.
- For every emoji image that you upload, an alias tag will be created for that custom emoji using the file’s name. This tag is used to update a message with an emoji.
- A default alias name like this can be replaced by selecting the “Alias” box with the custom emoji and then creating a new name.
- Enjoy your emoji in chats as soon as you upload them to the Discord server!
Boost your server with Discord Nitro subscribers today to insert more than the standard fifty emoji!
Part 4: How to Add Custom Emojis To Discord Server On iPhone And Android?
How cool is it that you can add custom emoji to your smartphone as well? Whether you have an iPhone or an Android, you can use the same menu as Windows and Mac to upload emoji.
Discord’s interface is similar across all devices, so the following steps work on Android and Apple.
- Begin by opening the app on your device to access the server. Press the hamburger menu located at the top left in an open server and channel.
- As the channel and server list opens for Discord, you can see a three-dot menu right next to the channel list with the server name. Tap on it to proceed.
- To get to your server settings, press “Settings” in the Discord server menu that shows up.
- Under the “Server Settings” menu, select “Emoji” to access the custom emoji settings.
- As the “Emoji” menu opens, you can see an emoji requirement list
- Press “Upload Emoji” to upload any emoji that aligns with these requirements
- Press the custom emoji file, tap “Crop” if it needs cropping, and then use the “Upload” option
- After you upload the emoji file, replace the alias tag by tapping on it. This will redirect you to that specific emoji’s settings
- Type the name you want using the “Alias” box to create the tag used to insert emoji in messages
- Save this new tag with the “Save” icon placed in the bottom right
- Any changes you make to the custom emoji’s alias are applied to it instantly for your use.
Emoji bring fun to the conversations you have with friends, and it is very easy to add them to your server as well. These show up in the emoji pop-up list once you add them. The chat message bar contains the emoji icon from where you can access them.
It is essential to name your emoji with only alphanumeric characters and underscores using at least two characters.
The Discord emoji size is 32x32 pixels, so even if you upload up to 128x128 pixel size emojis, they will be resized to the default dimensions. Furthermore, emoji file sizes are at most 256kb.
If you want to use custom emojis, you can’t do so without a Nitro subscription because it is only functional on the server they are uploaded to. Even if you find a way to access the emoji from some other server, only its text code will be visible.
If you attempt to use the Emoji Picker to pick an emoji, you’ll get the following message:
Bonus: How to Manage Emoji in Discord Server?
You can’t remove or add emoji specific to a server on your own as a member. You need the server owner to toggle the permission of Manager Emoji in your domain.
On the other hand, as a server owner, you can give others this role with the following steps.
- Open Roles: Open the Server Settings and select “Roles” from the menu on the side.
- Toggle Manage Emoji: Pick the role you want to apply the permission to, and then toggle emoji’s slider to “on,” save changes, and you’re done!
FAQs About Discord Emojis
1. Why Do I See Grey Emoji In The Emoji Menu?
Greyed-out emoji in the menu means that either those emoji are animated, or you don’t have the permission to post them on other servers.
2. How Can I Get More Custom Emoji On The Server?
You can upload 50 emojis to your Discord server. But if you want more options, you need a Discord Nitro subscription to boost your server specs.
3. What Is The Discord Emoji Size?
Discord allows you to upload an emoji of up to 128x128 pixels, but it will resize it to 32x32 since that is its standard size.
Conclusion
Emojis make any chat fun, and where gaming is involved, they help you communicate better with your friends.
Discord has thousands of custom emojis that you can easily add to your server through your computer, whether it is your chat or the channel name. Follow our guide for a seamless process to add emoji to Discord and make your gaming experience better!
Richard Bennett
Richard Bennett is a writer and a lover of all things video.
Follow @Richard Bennett
Also read:
- [Updated] 2024 Approved Unseen Sonic Scribes Best-Kept Mobile Voice Loggers List
- 2024 Approved 20 Wonderful Stop Motion Ideas for Beginners and Kids - Filmora
- 2024 Approved How to Make Video Slideshow with Your Travel Photos
- 2024 Approved Simplified Methods to Validate Your YouTube Status
- Fixes for Unopenable Windows Folders, Click-Doubled Down
- How to Reset Tecno Pova 6 Pro 5G Without the Home Button | Dr.fone
- In 2024, The Ultimate Guide How to Bypass Swipe Screen to Unlock on Huawei Nova Y71 Device
- New Top 10 Free Emoji Websites to Download Emojis Online
- Updated 2024 Approved 10 Popular Cartoon Characters That Should Top Your List 2023 Updated
- Title: New 2024 Approved How to Make a Photo Collage on Mac/iPhone Using iPhoto?
- Author: Jan
- Created at : 2025-02-16 18:06:56
- Updated at : 2025-02-19 18:38:50
- Link: https://meme-emoji.techidaily.com/new-2024-approved-how-to-make-a-photo-collage-on-maciphone-using-iphoto/
- License: This work is licensed under CC BY-NC-SA 4.0.