
New 2024 Approved How to Make a FLV Photo Slideshow with Music
How to Make a FLV Photo Slideshow with Music
How to Make a FLV Photo Slideshow

Shanoon Cox
Mar 27, 2024• Proven solutions
FLV slideshow is a suitable way to share photos and videos online due to its small size and reasonable quality. Wondershare DVD Slideshow Builder brings more convenience to instantly make a slideshow with music , photos and lets you create FLV videos, as well as other video formats. You can create a FLV slideshow in easy steps as below.
Easy Guide to Make FLV Slideshow with Music

1 Import Photos & Video and Music for FLV Slideshow
Install and launch the slideshow maker, go to Organize tab and import your photos, videos and music files. Transitions between adjacent slides will be used. But you can change them by following step 2.
2 Apply Transition and Motion Effect
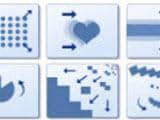
This slideshow maker includes more than 100 transition effects for slides switch. Before applying, double-click transition thumbnail to preview in player on the right. You could also randomize transitions or apply one transition to all slides in FLV slideshow.
3 Save Photo Slideshow to FLV Video
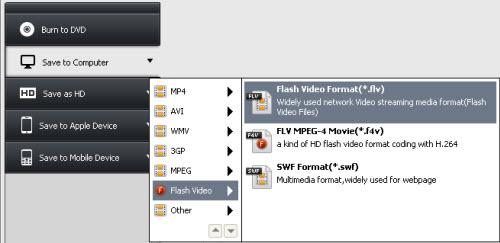
Select Flash Video format as the output and make advanced settings by clicking Settings button. Finally, click Burn and wail a while, you get your FLV video to sharing on YouTube, Facebook, MySpace, Mobile Phone. Alternatively, play FLV video on computer via stand-alone FLV player.
FLV Slideshow Tips
For more detailed settings of FLV slideshow, click Settings button and specify various options, like encoder, resolution, frame rate, bit rate and audio settings.
To play FLV slideshow on Nokia mobile phone, you should set encode type to Nokia FLV series (*.flv). Once created, upload flv to Nokia phone or online and view FLV slideshow using FLV player or web browser plugin.
You could also upload FLV slideshow to YouTube to share with more people. FLV videos are perfectly supported by YouTube.
More: Convert All Popular Formats to FLV
Wondershare DVD Slideshow Builder Deluxe supports all popular video formats. Therefore, you can import videos that need to change format, and save it in another format. It’s not only a DVD slideshow maker, but only powerful FLV converter. For detailed supported input formats, check video format references.
More: Convert FLV to MP4, AVI, MOV, MPEG or Burn FLV to DVD
You could also import FLV to DVD Slideshow Builder Deluxe and save it as MP4, AVI, MOV and 3GP, or even burn FLV video to DVD with beautiful DVD menus. For detailed supported output formats, check video format references. Here, I recommended to save FLV to MP4 for its comprehensive support on various devices, such as iPhone, iPod, Apple TV, Gphone, Nokia phone, LG phone, PSP, Palm, Zune, etc.
About FLV Video (Flash Video)
Flash Video (*.FLV) is a container file format used to deliver video over the internet using Adobe Flash Player versions 6-10 (developed by Macromedia). Flash Video content may also be embedded within SWF files. FLV videos are widely used by international companies, including YouTube, Google Video, Yahoo! Video, metacafe, Reuters.com, and many other news providers. Flash Video could be watched on most operating systems, via the Adobe Flash Player and web browser plugin, or desired third-party FLV Players.
Shanoon Cox
Shanoon Cox is a writer and a lover of all things video.
Follow @Shanoon Cox
Shanoon Cox
Mar 27, 2024• Proven solutions
FLV slideshow is a suitable way to share photos and videos online due to its small size and reasonable quality. Wondershare DVD Slideshow Builder brings more convenience to instantly make a slideshow with music , photos and lets you create FLV videos, as well as other video formats. You can create a FLV slideshow in easy steps as below.
Easy Guide to Make FLV Slideshow with Music
1 Import Photos & Video and Music for FLV Slideshow
Install and launch the slideshow maker, go to Organize tab and import your photos, videos and music files. Transitions between adjacent slides will be used. But you can change them by following step 2.
2 Apply Transition and Motion Effect
This slideshow maker includes more than 100 transition effects for slides switch. Before applying, double-click transition thumbnail to preview in player on the right. You could also randomize transitions or apply one transition to all slides in FLV slideshow.
3 Save Photo Slideshow to FLV Video
Select Flash Video format as the output and make advanced settings by clicking Settings button. Finally, click Burn and wail a while, you get your FLV video to sharing on YouTube, Facebook, MySpace, Mobile Phone. Alternatively, play FLV video on computer via stand-alone FLV player.
FLV Slideshow Tips
For more detailed settings of FLV slideshow, click Settings button and specify various options, like encoder, resolution, frame rate, bit rate and audio settings.
To play FLV slideshow on Nokia mobile phone, you should set encode type to Nokia FLV series (*.flv). Once created, upload flv to Nokia phone or online and view FLV slideshow using FLV player or web browser plugin.
You could also upload FLV slideshow to YouTube to share with more people. FLV videos are perfectly supported by YouTube.
More: Convert All Popular Formats to FLV
Wondershare DVD Slideshow Builder Deluxe supports all popular video formats. Therefore, you can import videos that need to change format, and save it in another format. It’s not only a DVD slideshow maker, but only powerful FLV converter. For detailed supported input formats, check video format references.
More: Convert FLV to MP4, AVI, MOV, MPEG or Burn FLV to DVD
You could also import FLV to DVD Slideshow Builder Deluxe and save it as MP4, AVI, MOV and 3GP, or even burn FLV video to DVD with beautiful DVD menus. For detailed supported output formats, check video format references. Here, I recommended to save FLV to MP4 for its comprehensive support on various devices, such as iPhone, iPod, Apple TV, Gphone, Nokia phone, LG phone, PSP, Palm, Zune, etc.
About FLV Video (Flash Video)
Flash Video (*.FLV) is a container file format used to deliver video over the internet using Adobe Flash Player versions 6-10 (developed by Macromedia). Flash Video content may also be embedded within SWF files. FLV videos are widely used by international companies, including YouTube, Google Video, Yahoo! Video, metacafe, Reuters.com, and many other news providers. Flash Video could be watched on most operating systems, via the Adobe Flash Player and web browser plugin, or desired third-party FLV Players.
Shanoon Cox
Shanoon Cox is a writer and a lover of all things video.
Follow @Shanoon Cox
7 Free Apps to Get Emojis on Android and iPhone
7 Free Apps to Get Emojis on Android and iPhone
Shanoon Cox
Mar 27, 2024• Proven solutions
Are you looking for apps to get emoji on your phone? An emoji is technically a symbolic representation of our feelings. You can use it to show your love or confusion for something or say that you are angry without actually having to say anything.
Emojis are a whole new language of communication. But why bother to download emojis when one can write a text? Well, because it’s faster and easier than writing. A simple ‘thumbs up’ emoji wraps up an appreciation pretty good. Using an emoji in your text or email can add a hint of color and give it extra meaning. Also, if you add emojis, it can boost engagement rates. And it is FUN!
- Part 1: Free Apps to Get Emojis on Android
- Part 2: How to Get Emojis on iPhone
- Part 3: Add Emojis to Your Video Using Wondershare Filmora
Part 1: Free Apps to Get Emojis on Android
I know you are excited to start using emojis right away. Now the question on your mind must be how to get emojis on Android?
Here are 5, top of list apps to get emojis. Could you give it a read, and then take your pick?
#KiKa Keyboard (Android)
KiKa is a trendy keyboard that lets you have all the fun. If you’re looking to spice up your android keyboards, KiKa does the trick. It is customizable, so you can make your keyboard attractive by changing the background image or change the font or size of the keyboard. Won’t it be cool to have a game of thrones themed keyboard?
Besides, Kika uses artificial intelligence to predict words as well as emojis. It works on texts, social media, and emails too. Time to up your game with this excellent emoji app.
- Access Google Play on your phone
- Download the Kika keyboard. Launch it to get the emoji.
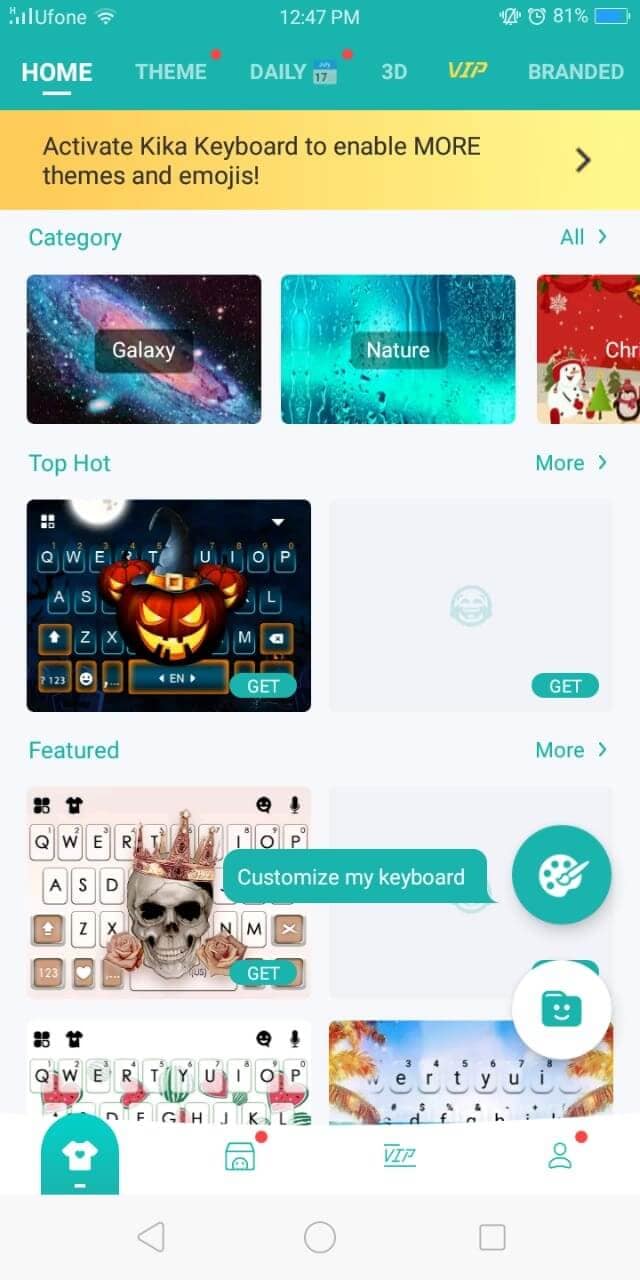
Rest assured, it is free for use. You are just one step away from having more expressive and engaging conversations.
#Emoji Keyboard(Android)
The emoji keyboard is popular because it offers more than 5000 cute emojis. Apart from that, you can choose a themed keyboard or add your picture as the background. It lets you type at lightning speed with cool fonts. Now it is easy to decorate your keyboard and customize it according to your personality. From unicorns to supervillains, take your pick and custom-design a cool keyboard. It makes chatting incredibly easy with gestures and smooth swipe typing.
- Hop on to Google Play
- Instant download Emoji keyboard to add a dash of fun to your texts.
- Launch it, and you will get the emojis.
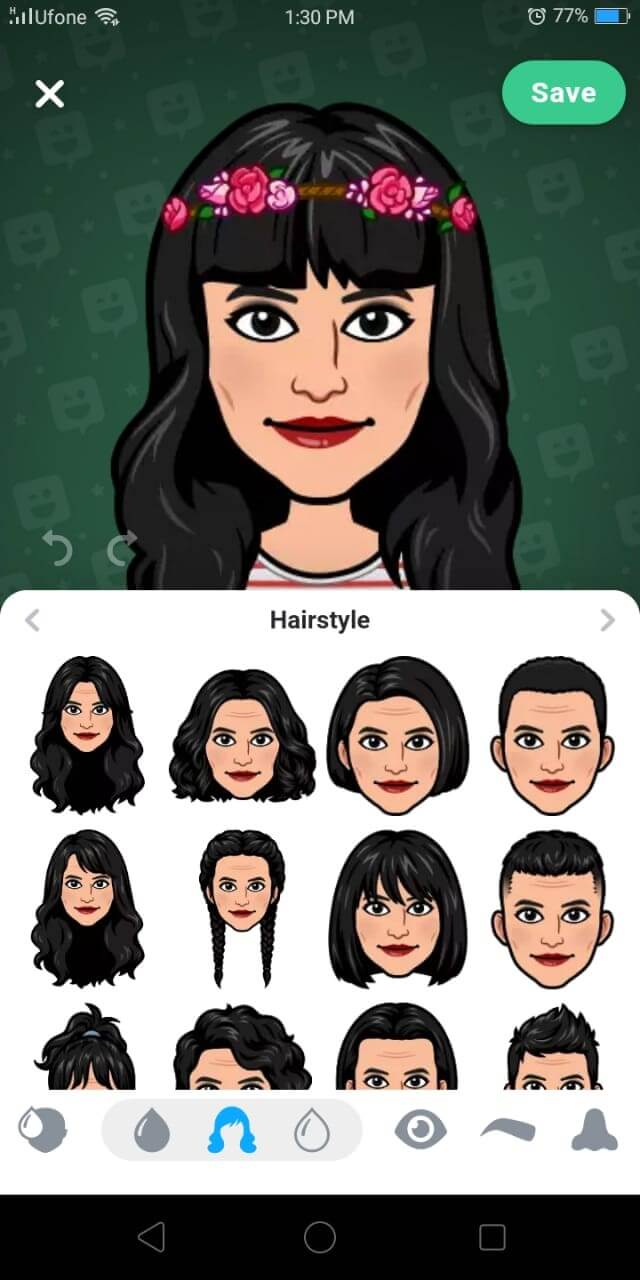
#Bitmoji(Android)
If you want to get emoji that looks just like you, Bitmoji is the app for you. Take a selfie and let the emoji look like you. Dress it up to match the real-life you. An animated version of you. A library full of your avatar stickers to compliment your texts with creativity and a personal touch. Be angry or romantic, and send over a Bitmoji to make it clear how you feel. No need to type long texts anymore. There’s a Bitmoji for every emotion.
- Install Bitmoji from Google Play and Sign in.
- Go to Settings on your phone, tap Languages and Input>On-screen keyboard
- Click Manage Keyboards and then tap Bitmoji Keyboard
#Ginger Keyboard
The ginger keyboard is built for personal as well as business communication. Along with a library of more than a thousand emojis, you get grammar, and spell check features too. Use the free pre-set themes or buy a special one from the store to decorate your keyboard. It also predicts emojis as you type. Go ahead and creatively transform your typing experience with Ginger Keyboard.
- Download Ginger Keyboard from Google Play.
- Follow the steps to sign in.
- Enable the keyboard, and all good to go.
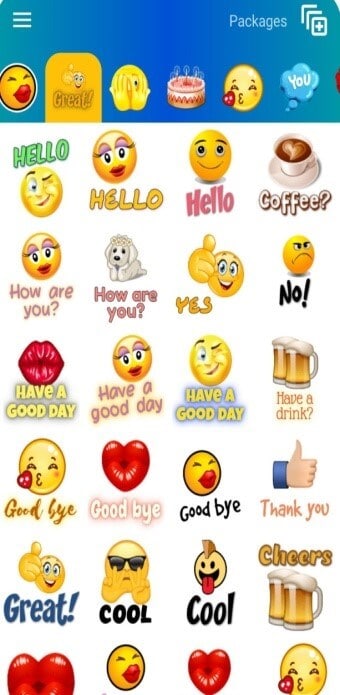
#WhatSmiley
Want to download emojis that are unique and popular? WhatSmiley offers over 2400 emojis to transform your chatting experience. You can add emojis on any social media platform, Whatsapp, or even text (MMS). Emojis are frequently updated, so the fun never stops. You can even customize the emojis and change the background color.
- Download Whatsmiley on your phone and open it.
- Select the emoji you wish to send.
- A pop up will display the apps. Choose the app through which you want to send.
Part 2: How to Get Emojis on iPhone
After emojis took the world by storm, iPhone users were also gifted with this trending communication medium. Although there are probably a dozen apps to download emojis on your iPhone, let me discuss the two easiest methods.
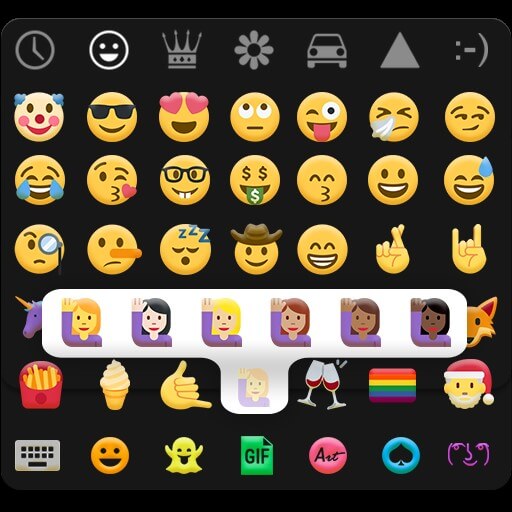
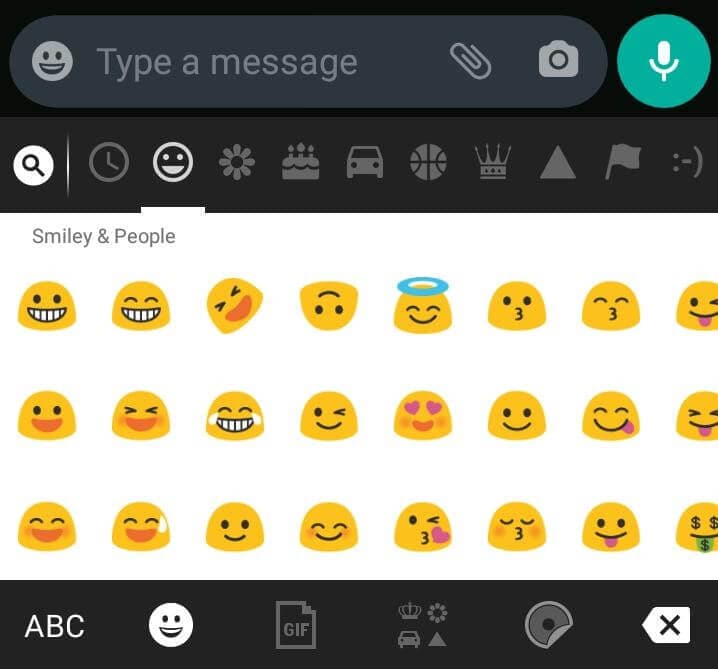
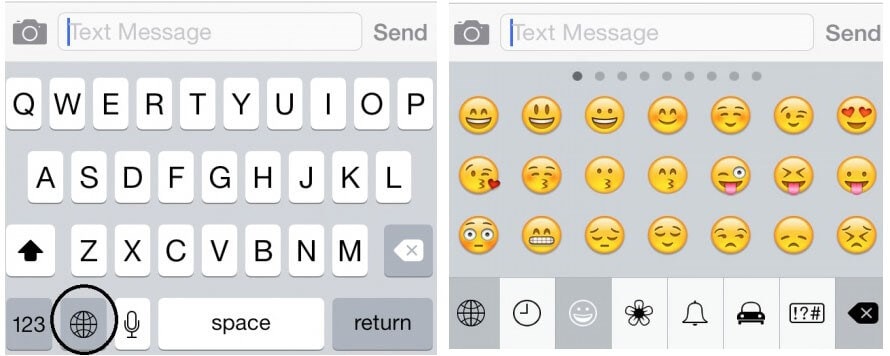
#The Built-In Keyboard on iPhone
With the increasing popularity of emojis, iPhone found a simple solution for its dedicated users by introducing a built-in emoji keyboard. All you got to do is click enable.
Here is how you can enable the built-in keyboard to get emojis.
- Launch Settings on your home screen.
- Tap General and then click on Keyboard.

- Select Add new keyboard. Swipe down and click on Emoji.
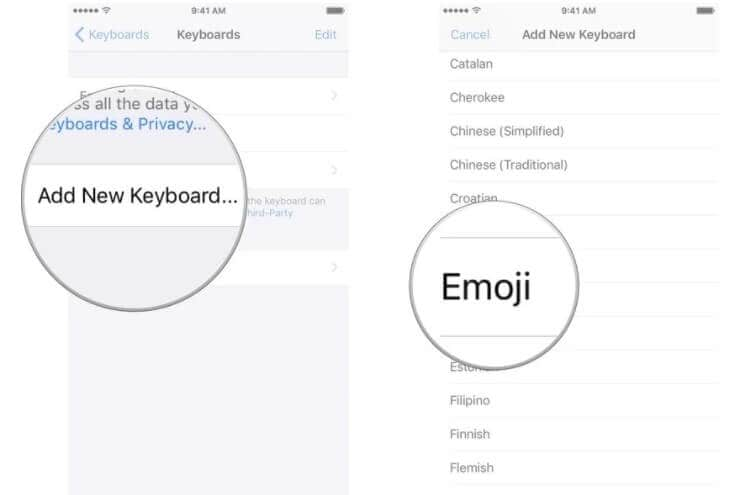
- Ta-Da! Emoji keyboard enabled! And you will be able to get the emoji.
# Emoji Keyboard App
Does the built-in emojis seem boring and wish to add that extra oomph to your texts? The Emoji keyboard app brings you the latest emojis that can be used on all iPhone apps. If you get bored again, you can even order new emojis. Cool, right?
- Open the App Store and install the Emoji Keyboard.
- Launch it, and you’re good to go. Easy peasy.
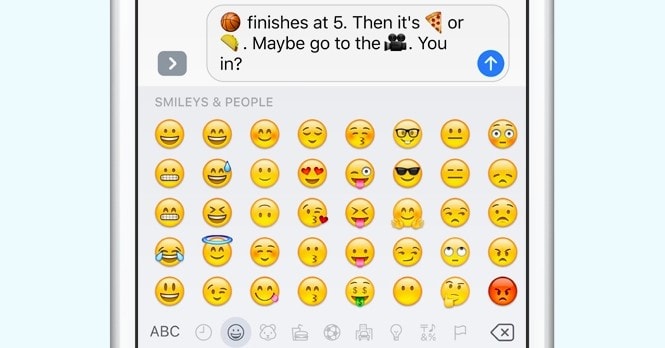
Apart from being Ad-free, it’s free and requires no registrations. Definitely a dream come true, isn’t it?
Part 3: Add Emojis to Your Video Using Wondershare Filmora
Now you know all the ways to add emojis on texts, emails, and statuses. But Wondershare Filmora wants to fan that creativity in you by allowing you to get much more artistic with emojis.
Wondershare Filmora is a video editing app with a sleek interface. You can use it to add a wide range of emojis to your videos. Imagine customizing your video with a beating heart or a laughing emoji. It offers a wide range of cute emojis arranged in categories as shapes, badges, pets, emojis, etc., making it easier to select the desired type of emoji.
Let me show you a detailed guide to add emojis through Filmora:
1. Download and install Filmora. Then launch it.


2. Click File<Import Media<Import Media Files to import your video to Filmora. Then drag and drop the video to your timeline.
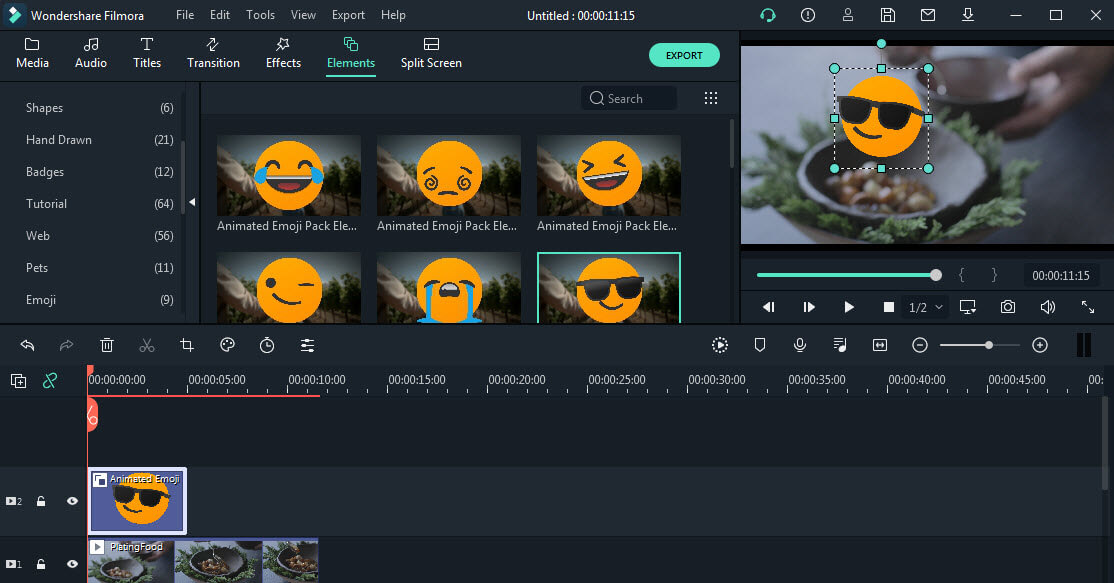
3. Now click on Elements<Emoji categories and add any emoji to the video.

Tips:
You can also access Wondershare Filmstock (Filmora’s effects store) to download the Animated Emoji Pack and get more emojis. This animated emoji pack is totally free now!
4. Then drag and drop the emoji to the video track above your video. In the viewer panel, drag to adjust the size of emoji. You can also add multiple emojis to one video.
5. Finally click the Export button to convert the video. You can upload it to YouTube, Instagram, TikTok, or any other video platforms as you like after you finish the export.

Conclusion
Emojis have revolutionized the way we communicate. There is no denying that emojis are better at portraying whatever we are trying to say and even convey our feelings much more accurately than words do.
Despite the advancements in technology, not every version of the phone has an in-built emoji collection. Since we don’t want anyone to feel left out of the fun, we compiled this easy to follow guide containing some of the best apps to download emojis.
Moreover, add emojis to your videos through Filmora to make them extra expressive. Decorate them with a blip of color and a hint of an emoji or two. Emojis are cute and fun. Use them wisely.
Shanoon Cox
Shanoon Cox is a writer and a lover of all things video.
Follow @Shanoon Cox
Shanoon Cox
Mar 27, 2024• Proven solutions
Are you looking for apps to get emoji on your phone? An emoji is technically a symbolic representation of our feelings. You can use it to show your love or confusion for something or say that you are angry without actually having to say anything.
Emojis are a whole new language of communication. But why bother to download emojis when one can write a text? Well, because it’s faster and easier than writing. A simple ‘thumbs up’ emoji wraps up an appreciation pretty good. Using an emoji in your text or email can add a hint of color and give it extra meaning. Also, if you add emojis, it can boost engagement rates. And it is FUN!
- Part 1: Free Apps to Get Emojis on Android
- Part 2: How to Get Emojis on iPhone
- Part 3: Add Emojis to Your Video Using Wondershare Filmora
Part 1: Free Apps to Get Emojis on Android
I know you are excited to start using emojis right away. Now the question on your mind must be how to get emojis on Android?
Here are 5, top of list apps to get emojis. Could you give it a read, and then take your pick?
#KiKa Keyboard (Android)
KiKa is a trendy keyboard that lets you have all the fun. If you’re looking to spice up your android keyboards, KiKa does the trick. It is customizable, so you can make your keyboard attractive by changing the background image or change the font or size of the keyboard. Won’t it be cool to have a game of thrones themed keyboard?
Besides, Kika uses artificial intelligence to predict words as well as emojis. It works on texts, social media, and emails too. Time to up your game with this excellent emoji app.
- Access Google Play on your phone
- Download the Kika keyboard. Launch it to get the emoji.
Rest assured, it is free for use. You are just one step away from having more expressive and engaging conversations.
#Emoji Keyboard(Android)
The emoji keyboard is popular because it offers more than 5000 cute emojis. Apart from that, you can choose a themed keyboard or add your picture as the background. It lets you type at lightning speed with cool fonts. Now it is easy to decorate your keyboard and customize it according to your personality. From unicorns to supervillains, take your pick and custom-design a cool keyboard. It makes chatting incredibly easy with gestures and smooth swipe typing.
- Hop on to Google Play
- Instant download Emoji keyboard to add a dash of fun to your texts.
- Launch it, and you will get the emojis.
#Bitmoji(Android)
If you want to get emoji that looks just like you, Bitmoji is the app for you. Take a selfie and let the emoji look like you. Dress it up to match the real-life you. An animated version of you. A library full of your avatar stickers to compliment your texts with creativity and a personal touch. Be angry or romantic, and send over a Bitmoji to make it clear how you feel. No need to type long texts anymore. There’s a Bitmoji for every emotion.
- Install Bitmoji from Google Play and Sign in.
- Go to Settings on your phone, tap Languages and Input>On-screen keyboard
- Click Manage Keyboards and then tap Bitmoji Keyboard
#Ginger Keyboard
The ginger keyboard is built for personal as well as business communication. Along with a library of more than a thousand emojis, you get grammar, and spell check features too. Use the free pre-set themes or buy a special one from the store to decorate your keyboard. It also predicts emojis as you type. Go ahead and creatively transform your typing experience with Ginger Keyboard.
- Download Ginger Keyboard from Google Play.
- Follow the steps to sign in.
- Enable the keyboard, and all good to go.
#WhatSmiley
Want to download emojis that are unique and popular? WhatSmiley offers over 2400 emojis to transform your chatting experience. You can add emojis on any social media platform, Whatsapp, or even text (MMS). Emojis are frequently updated, so the fun never stops. You can even customize the emojis and change the background color.
- Download Whatsmiley on your phone and open it.
- Select the emoji you wish to send.
- A pop up will display the apps. Choose the app through which you want to send.
Part 2: How to Get Emojis on iPhone
After emojis took the world by storm, iPhone users were also gifted with this trending communication medium. Although there are probably a dozen apps to download emojis on your iPhone, let me discuss the two easiest methods.
#The Built-In Keyboard on iPhone
With the increasing popularity of emojis, iPhone found a simple solution for its dedicated users by introducing a built-in emoji keyboard. All you got to do is click enable.
Here is how you can enable the built-in keyboard to get emojis.
- Launch Settings on your home screen.
- Tap General and then click on Keyboard.
- Select Add new keyboard. Swipe down and click on Emoji.
- Ta-Da! Emoji keyboard enabled! And you will be able to get the emoji.
# Emoji Keyboard App
Does the built-in emojis seem boring and wish to add that extra oomph to your texts? The Emoji keyboard app brings you the latest emojis that can be used on all iPhone apps. If you get bored again, you can even order new emojis. Cool, right?
- Open the App Store and install the Emoji Keyboard.
- Launch it, and you’re good to go. Easy peasy.
Apart from being Ad-free, it’s free and requires no registrations. Definitely a dream come true, isn’t it?
Part 3: Add Emojis to Your Video Using Wondershare Filmora
Now you know all the ways to add emojis on texts, emails, and statuses. But Wondershare Filmora wants to fan that creativity in you by allowing you to get much more artistic with emojis.
Wondershare Filmora is a video editing app with a sleek interface. You can use it to add a wide range of emojis to your videos. Imagine customizing your video with a beating heart or a laughing emoji. It offers a wide range of cute emojis arranged in categories as shapes, badges, pets, emojis, etc., making it easier to select the desired type of emoji.
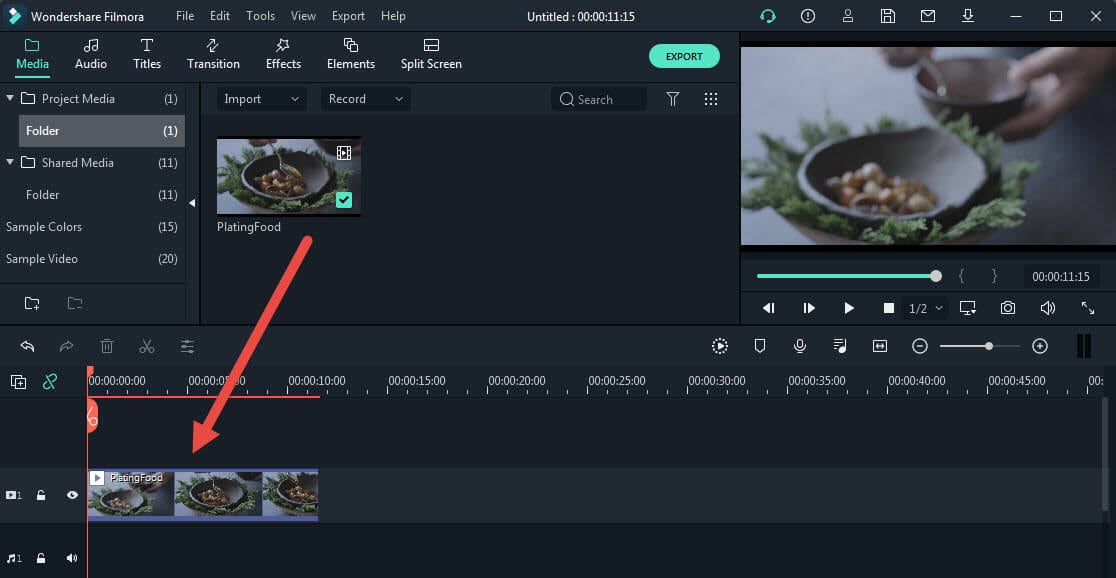
Let me show you a detailed guide to add emojis through Filmora:
1. Download and install Filmora. Then launch it.
2. Click File<Import Media<Import Media Files to import your video to Filmora. Then drag and drop the video to your timeline.
3. Now click on Elements<Emoji categories and add any emoji to the video.
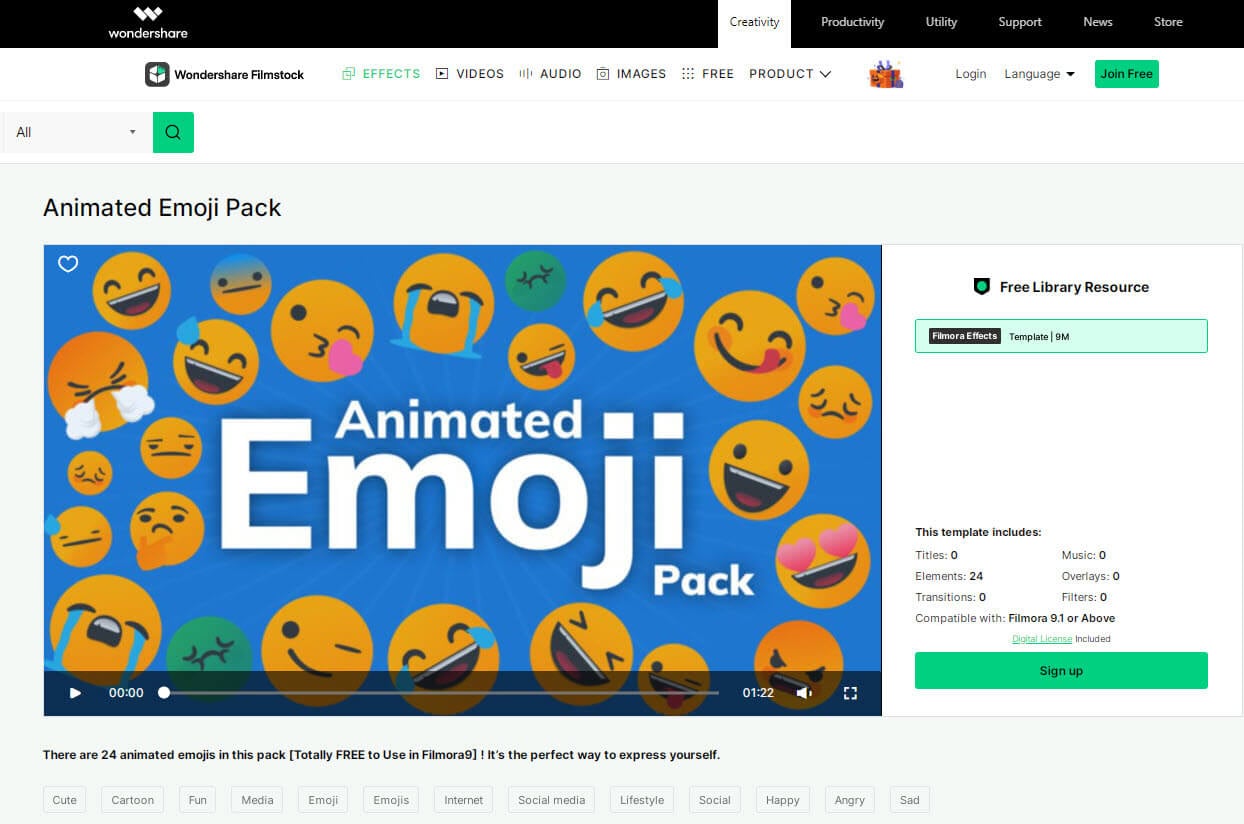
Tips:
You can also access Wondershare Filmstock (Filmora’s effects store) to download the Animated Emoji Pack and get more emojis. This animated emoji pack is totally free now!
4. Then drag and drop the emoji to the video track above your video. In the viewer panel, drag to adjust the size of emoji. You can also add multiple emojis to one video.
5. Finally click the Export button to convert the video. You can upload it to YouTube, Instagram, TikTok, or any other video platforms as you like after you finish the export.
Conclusion
Emojis have revolutionized the way we communicate. There is no denying that emojis are better at portraying whatever we are trying to say and even convey our feelings much more accurately than words do.
Despite the advancements in technology, not every version of the phone has an in-built emoji collection. Since we don’t want anyone to feel left out of the fun, we compiled this easy to follow guide containing some of the best apps to download emojis.
Moreover, add emojis to your videos through Filmora to make them extra expressive. Decorate them with a blip of color and a hint of an emoji or two. Emojis are cute and fun. Use them wisely.
Shanoon Cox
Shanoon Cox is a writer and a lover of all things video.
Follow @Shanoon Cox
Shanoon Cox
Mar 27, 2024• Proven solutions
Are you looking for apps to get emoji on your phone? An emoji is technically a symbolic representation of our feelings. You can use it to show your love or confusion for something or say that you are angry without actually having to say anything.
Emojis are a whole new language of communication. But why bother to download emojis when one can write a text? Well, because it’s faster and easier than writing. A simple ‘thumbs up’ emoji wraps up an appreciation pretty good. Using an emoji in your text or email can add a hint of color and give it extra meaning. Also, if you add emojis, it can boost engagement rates. And it is FUN!
- Part 1: Free Apps to Get Emojis on Android
- Part 2: How to Get Emojis on iPhone
- Part 3: Add Emojis to Your Video Using Wondershare Filmora
Part 1: Free Apps to Get Emojis on Android
I know you are excited to start using emojis right away. Now the question on your mind must be how to get emojis on Android?
Here are 5, top of list apps to get emojis. Could you give it a read, and then take your pick?
#KiKa Keyboard (Android)
KiKa is a trendy keyboard that lets you have all the fun. If you’re looking to spice up your android keyboards, KiKa does the trick. It is customizable, so you can make your keyboard attractive by changing the background image or change the font or size of the keyboard. Won’t it be cool to have a game of thrones themed keyboard?
Besides, Kika uses artificial intelligence to predict words as well as emojis. It works on texts, social media, and emails too. Time to up your game with this excellent emoji app.
- Access Google Play on your phone
- Download the Kika keyboard. Launch it to get the emoji.
Rest assured, it is free for use. You are just one step away from having more expressive and engaging conversations.
#Emoji Keyboard(Android)
The emoji keyboard is popular because it offers more than 5000 cute emojis. Apart from that, you can choose a themed keyboard or add your picture as the background. It lets you type at lightning speed with cool fonts. Now it is easy to decorate your keyboard and customize it according to your personality. From unicorns to supervillains, take your pick and custom-design a cool keyboard. It makes chatting incredibly easy with gestures and smooth swipe typing.
- Hop on to Google Play
- Instant download Emoji keyboard to add a dash of fun to your texts.
- Launch it, and you will get the emojis.
#Bitmoji(Android)
If you want to get emoji that looks just like you, Bitmoji is the app for you. Take a selfie and let the emoji look like you. Dress it up to match the real-life you. An animated version of you. A library full of your avatar stickers to compliment your texts with creativity and a personal touch. Be angry or romantic, and send over a Bitmoji to make it clear how you feel. No need to type long texts anymore. There’s a Bitmoji for every emotion.
- Install Bitmoji from Google Play and Sign in.
- Go to Settings on your phone, tap Languages and Input>On-screen keyboard
- Click Manage Keyboards and then tap Bitmoji Keyboard
#Ginger Keyboard
The ginger keyboard is built for personal as well as business communication. Along with a library of more than a thousand emojis, you get grammar, and spell check features too. Use the free pre-set themes or buy a special one from the store to decorate your keyboard. It also predicts emojis as you type. Go ahead and creatively transform your typing experience with Ginger Keyboard.
- Download Ginger Keyboard from Google Play.
- Follow the steps to sign in.
- Enable the keyboard, and all good to go.
#WhatSmiley
Want to download emojis that are unique and popular? WhatSmiley offers over 2400 emojis to transform your chatting experience. You can add emojis on any social media platform, Whatsapp, or even text (MMS). Emojis are frequently updated, so the fun never stops. You can even customize the emojis and change the background color.
- Download Whatsmiley on your phone and open it.
- Select the emoji you wish to send.
- A pop up will display the apps. Choose the app through which you want to send.
Part 2: How to Get Emojis on iPhone
After emojis took the world by storm, iPhone users were also gifted with this trending communication medium. Although there are probably a dozen apps to download emojis on your iPhone, let me discuss the two easiest methods.
#The Built-In Keyboard on iPhone
With the increasing popularity of emojis, iPhone found a simple solution for its dedicated users by introducing a built-in emoji keyboard. All you got to do is click enable.
Here is how you can enable the built-in keyboard to get emojis.
- Launch Settings on your home screen.
- Tap General and then click on Keyboard.
- Select Add new keyboard. Swipe down and click on Emoji.
- Ta-Da! Emoji keyboard enabled! And you will be able to get the emoji.
# Emoji Keyboard App
Does the built-in emojis seem boring and wish to add that extra oomph to your texts? The Emoji keyboard app brings you the latest emojis that can be used on all iPhone apps. If you get bored again, you can even order new emojis. Cool, right?
- Open the App Store and install the Emoji Keyboard.
- Launch it, and you’re good to go. Easy peasy.
Apart from being Ad-free, it’s free and requires no registrations. Definitely a dream come true, isn’t it?
Part 3: Add Emojis to Your Video Using Wondershare Filmora
Now you know all the ways to add emojis on texts, emails, and statuses. But Wondershare Filmora wants to fan that creativity in you by allowing you to get much more artistic with emojis.
Wondershare Filmora is a video editing app with a sleek interface. You can use it to add a wide range of emojis to your videos. Imagine customizing your video with a beating heart or a laughing emoji. It offers a wide range of cute emojis arranged in categories as shapes, badges, pets, emojis, etc., making it easier to select the desired type of emoji.
Let me show you a detailed guide to add emojis through Filmora:
1. Download and install Filmora. Then launch it.
2. Click File<Import Media<Import Media Files to import your video to Filmora. Then drag and drop the video to your timeline.
3. Now click on Elements<Emoji categories and add any emoji to the video.
Tips:
You can also access Wondershare Filmstock (Filmora’s effects store) to download the Animated Emoji Pack and get more emojis. This animated emoji pack is totally free now!
4. Then drag and drop the emoji to the video track above your video. In the viewer panel, drag to adjust the size of emoji. You can also add multiple emojis to one video.
5. Finally click the Export button to convert the video. You can upload it to YouTube, Instagram, TikTok, or any other video platforms as you like after you finish the export.
Conclusion
Emojis have revolutionized the way we communicate. There is no denying that emojis are better at portraying whatever we are trying to say and even convey our feelings much more accurately than words do.
Despite the advancements in technology, not every version of the phone has an in-built emoji collection. Since we don’t want anyone to feel left out of the fun, we compiled this easy to follow guide containing some of the best apps to download emojis.
Moreover, add emojis to your videos through Filmora to make them extra expressive. Decorate them with a blip of color and a hint of an emoji or two. Emojis are cute and fun. Use them wisely.
Shanoon Cox
Shanoon Cox is a writer and a lover of all things video.
Follow @Shanoon Cox
How to Make Video Slideshow with Your Travel Photos
How to Make Video Slideshow with Your Travel Photos

Ollie Mattison
Mar 27, 2024• Proven solutions
We all love traveling and for a good reason. It allows us to relax, it removes the pressure from our life and it just makes the entire experience a lot better. But if you are a fan of taking picture while travelling, why not try to create a video slideshow with your images? This is one of the best and most original ways you can use it in order to share your travels with others. It works magically and it manages to bring in front some of those unique moments. However, you do need to have the proper tools when you want to create such a slideshow, but that’s great as we are here to help you with that.
How can you create a travel slideshow with travel photos
Things you need to know before creating it
Before you create the travel slideshow you have to keep in mind a few things. If you don’t then the results will not be as good as you expect. You have to be committed to the idea of having the best results and as long as you do that the outcome will be very well worth it.
You need to try and consider your audience because based on that the slideshow will have a specific format. You also need to think about telling a story as that will make it a lot more interesting other than just having a bunch of images aligned together in a non-meaningful manner.
Wondershare Filmora – The best tool to create a video slideshow with your travel photos
But one has to wonder, what tool should you use to create such a travel slideshow? Wondershare Filmora is the application of choice in this regard because it does help offer a huge variety of amazing features that all add up in order to deliver great value!
- Wondershare Filmora is great for beginners as it makes editing a breeze thanks to the stellar interface
- It also integrates transitions as well as filters and effects. It provides you with a refined set of tools that help maintain a good focus on results.
- It helps you add sound effects and a variety of music types to help you with the story.
- You can burn the result to DVD or you can share it on social media and YouTube/Vimeo among others right from within the app.
How can you create video slideshows with Wondershare Filmora?
Creating a unique slideshow video with this tool is actually very easy and it does provide you with a huge amount of value should you choose to use it. Here are several things you need to consider when making a travel slideshow video. First, choose the right music for the travel slideshow; second, adjust the duration of the photos; third, transitions and effects.
Here are the steps you need to focus on when creating a travel slideshow video with Wondershare Filmora:
Filmstock Stock Media Library ](https://filmstock.wondershare.com/creative-theme-tourism?spm=rs.filmora%5Fweb&source%5Fchannel=seo%5Farticle )
Step 1: Download and install Wondershare Filmora, then open it.
Add all the travel photos into the applications. You can add in multiple folders in order to make sorting the images a lot easier.
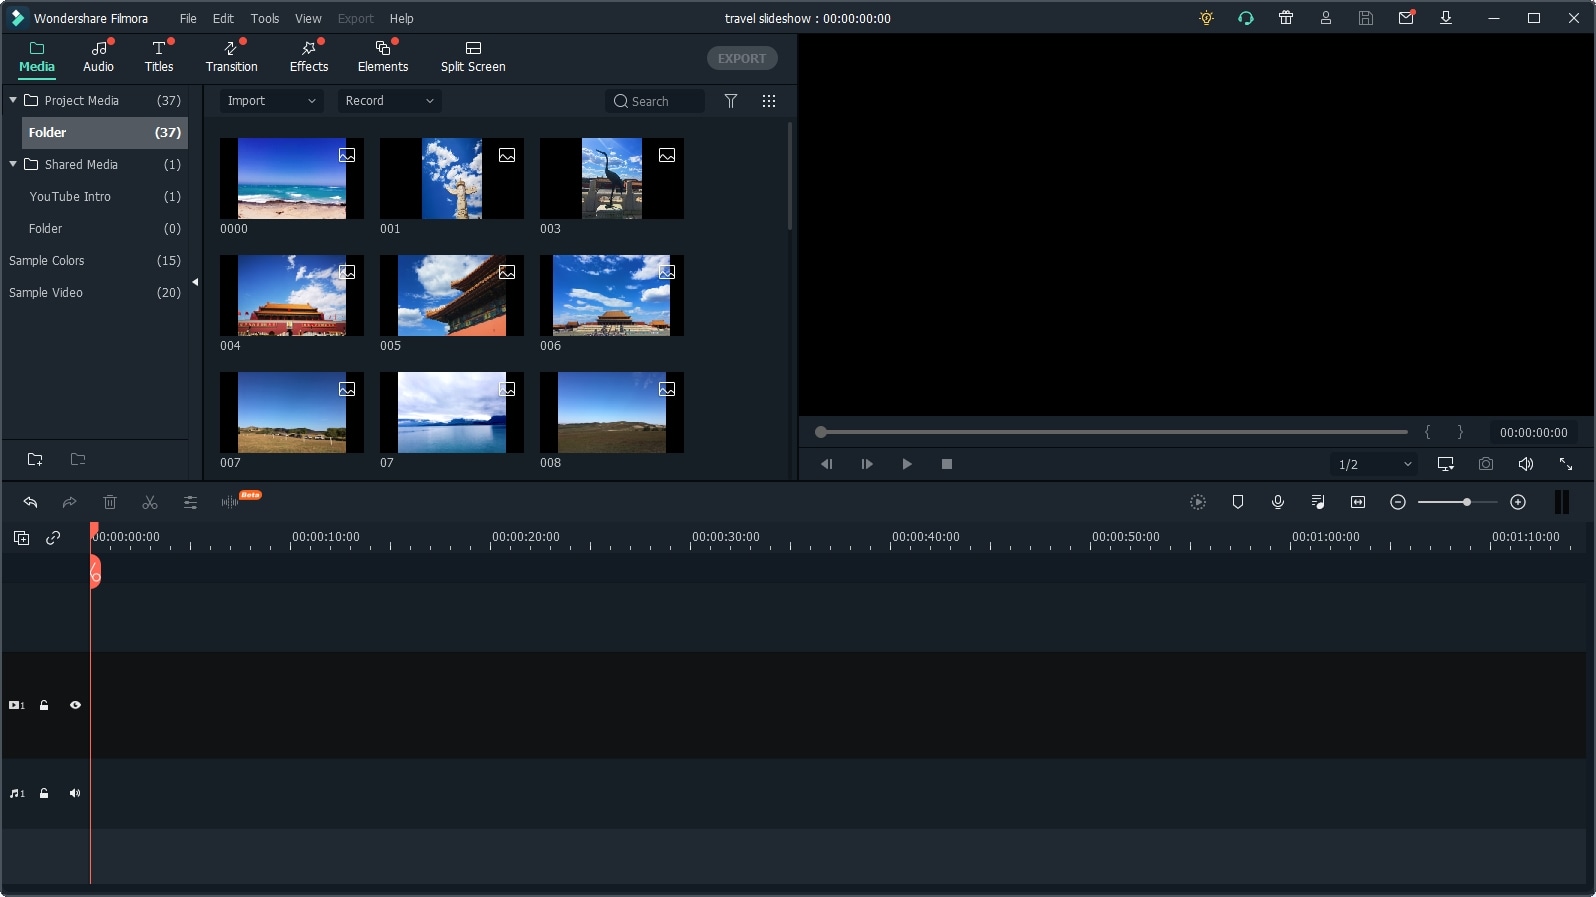
Next, set up the photo duration to the desired length, so that you don’t need to adjust the photo duration one by one.

Step 2: Now, it’s time to determine and add music in the background. Add some sounds and royalty-free music in Wondershare Filmora and then use the media library to help you give more of an impact to the entire experience.

If you want to sync the photo to the background music, you can use the Beat Detection tool in Filmora and mark the highlights accordingly.
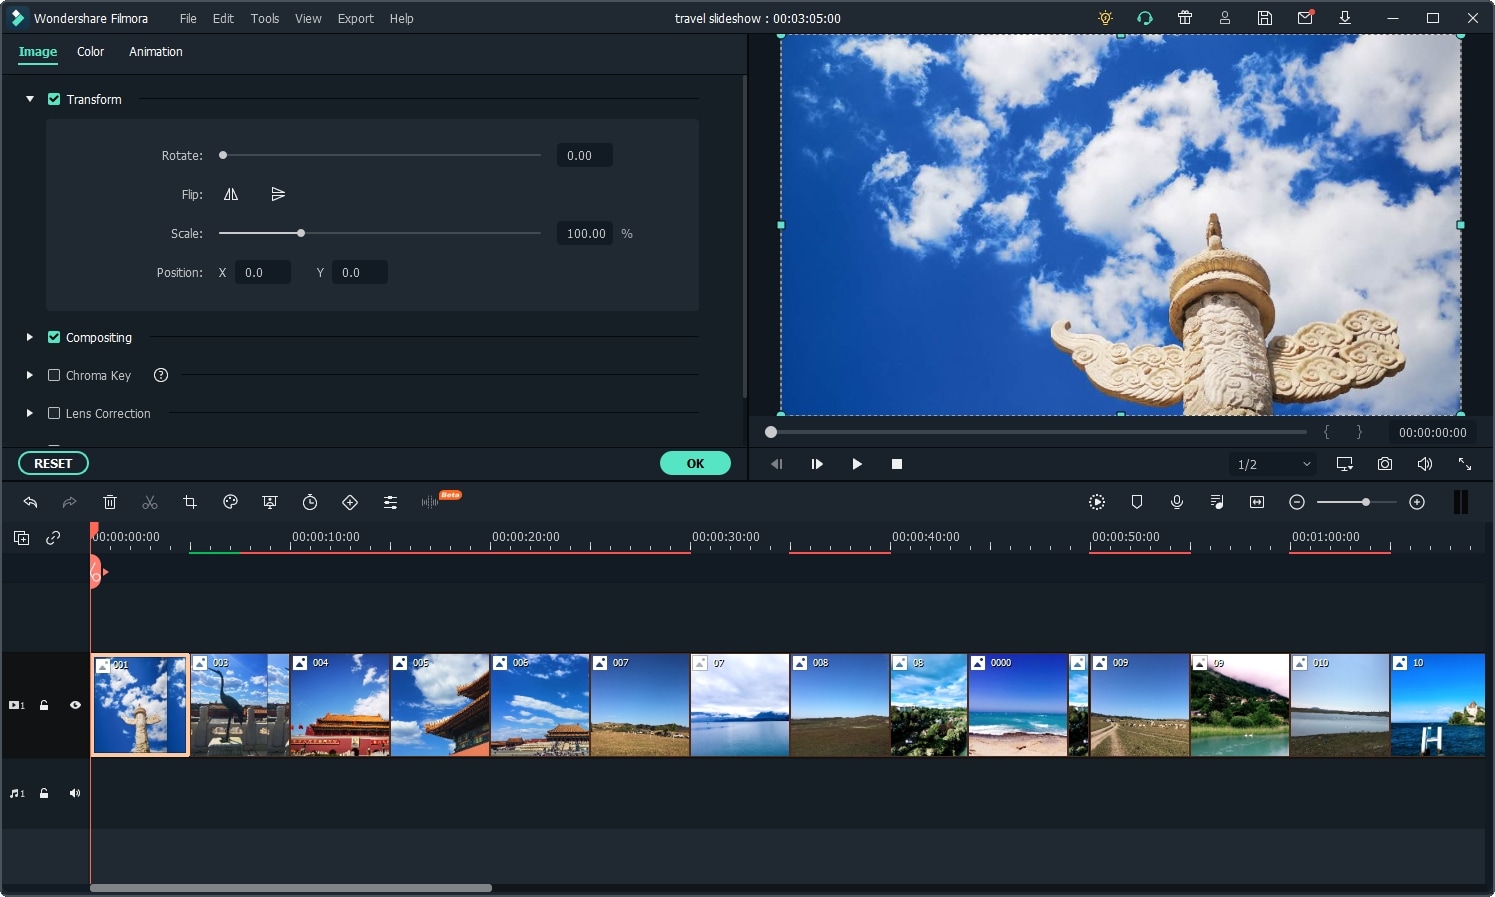
Step 3: Once you did that, you will have to drag and then drop the images directly to the timeline. Here is where you can change things like saturation, hue, brightness, contrast and other features.
You can also rotate the images and crop them if you see fit. If some of the travel photos have different aspect ratios, you can select Crop to Fit so all the photos will be in the same aspect ratio without blackbar.
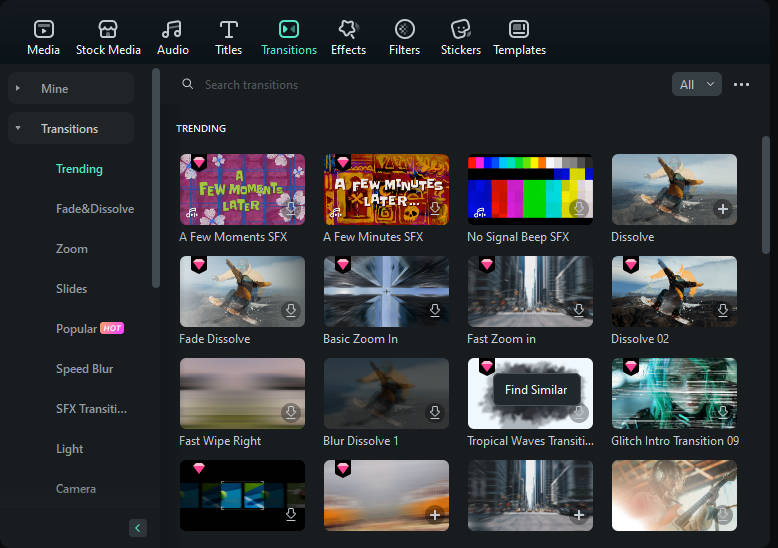
Step 4: At this point, you do need to try and add transitions between each of the images.
When you are done with that, you have to select the filters and overlays that will help you make your travel slideshow look better. This is an important step and you do want to spend a good amount of time with it.
Step 5: Lastly, you will have to export the slideshow as you see fit, but you also have the option to share it on YouTube if you so desire.

Conclusion
Wondershare Filmora is a very good application for those that want a unique, fun travel slideshow. It allows you to get all the tools and high-quality features that you need in order to take the experience to the next level. We recommend you to check it out right away as it’s well worth the investment Download Mac Version ](https://tools.techidaily.com/wondershare/filmora/download/ )
Ollie Mattison
Ollie Mattison is a writer and a lover of all things video.
Follow @Ollie Mattison
Ollie Mattison
Mar 27, 2024• Proven solutions
We all love traveling and for a good reason. It allows us to relax, it removes the pressure from our life and it just makes the entire experience a lot better. But if you are a fan of taking picture while travelling, why not try to create a video slideshow with your images? This is one of the best and most original ways you can use it in order to share your travels with others. It works magically and it manages to bring in front some of those unique moments. However, you do need to have the proper tools when you want to create such a slideshow, but that’s great as we are here to help you with that.
How can you create a travel slideshow with travel photos
Things you need to know before creating it
Before you create the travel slideshow you have to keep in mind a few things. If you don’t then the results will not be as good as you expect. You have to be committed to the idea of having the best results and as long as you do that the outcome will be very well worth it.
You need to try and consider your audience because based on that the slideshow will have a specific format. You also need to think about telling a story as that will make it a lot more interesting other than just having a bunch of images aligned together in a non-meaningful manner.
Wondershare Filmora – The best tool to create a video slideshow with your travel photos
But one has to wonder, what tool should you use to create such a travel slideshow? Wondershare Filmora is the application of choice in this regard because it does help offer a huge variety of amazing features that all add up in order to deliver great value!
- Wondershare Filmora is great for beginners as it makes editing a breeze thanks to the stellar interface
- It also integrates transitions as well as filters and effects. It provides you with a refined set of tools that help maintain a good focus on results.
- It helps you add sound effects and a variety of music types to help you with the story.
- You can burn the result to DVD or you can share it on social media and YouTube/Vimeo among others right from within the app.
How can you create video slideshows with Wondershare Filmora?
Creating a unique slideshow video with this tool is actually very easy and it does provide you with a huge amount of value should you choose to use it. Here are several things you need to consider when making a travel slideshow video. First, choose the right music for the travel slideshow; second, adjust the duration of the photos; third, transitions and effects.
Here are the steps you need to focus on when creating a travel slideshow video with Wondershare Filmora:
Filmstock Stock Media Library ](https://filmstock.wondershare.com/creative-theme-tourism?spm=rs.filmora%5Fweb&source%5Fchannel=seo%5Farticle )
Step 1: Download and install Wondershare Filmora, then open it.
Add all the travel photos into the applications. You can add in multiple folders in order to make sorting the images a lot easier.
Next, set up the photo duration to the desired length, so that you don’t need to adjust the photo duration one by one.
Step 2: Now, it’s time to determine and add music in the background. Add some sounds and royalty-free music in Wondershare Filmora and then use the media library to help you give more of an impact to the entire experience.
If you want to sync the photo to the background music, you can use the Beat Detection tool in Filmora and mark the highlights accordingly.
Step 3: Once you did that, you will have to drag and then drop the images directly to the timeline. Here is where you can change things like saturation, hue, brightness, contrast and other features.
You can also rotate the images and crop them if you see fit. If some of the travel photos have different aspect ratios, you can select Crop to Fit so all the photos will be in the same aspect ratio without blackbar.
Step 4: At this point, you do need to try and add transitions between each of the images.
When you are done with that, you have to select the filters and overlays that will help you make your travel slideshow look better. This is an important step and you do want to spend a good amount of time with it.
Step 5: Lastly, you will have to export the slideshow as you see fit, but you also have the option to share it on YouTube if you so desire.
Conclusion
Wondershare Filmora is a very good application for those that want a unique, fun travel slideshow. It allows you to get all the tools and high-quality features that you need in order to take the experience to the next level. We recommend you to check it out right away as it’s well worth the investment Download Mac Version ](https://tools.techidaily.com/wondershare/filmora/download/ )
Ollie Mattison
Ollie Mattison is a writer and a lover of all things video.
Follow @Ollie Mattison
How to Make a Triggered Meme?
How to Make a Triggered Meme?
Ollie Mattison
Mar 27, 2024• Proven solutions
It is no secret that we all lose our cool from time. It’s only natural, after all, the world can be a frustrating place. We’re all enraged by different things, some of us can’t stand pineapple on pizza while others explode when being pranked. What we often don’t realize is that being triggered in front of a camera makes us perfect meme material. Even though the majority of memes are still images, some of the most memorable memes ever created were GIFs or short videos.
Making the triggered meme is easy when you know how, so in this article, we are going to show you how to make your next potentially viral meme, in just a few easy steps.
Filmora offers an easy to use video editor named Filmora Video Editor to make video and gif memes, and an online free meme maker named Filmora FREE Online Meme Maker which allows you to create images, videos and gifs memes for free. The video tutorial below will show you how to make a triggered video meme with Filmora. Download it and try it by yourself now.
The Things You Need to Make a Triggered Meme
Preparation is key to almost every important thing in life, including making a triggered meme featuring your bestie. Before you can capitalize on that amazing footage of triggered people you first have to make sure you have everything you need to generate a meme. Okay, let’s get started with the essentials to making a fun and effective meme.
1. A Triggered Template
You have virtually unlimited resources at your disposal, as this meme template can be easily found through a quick Google search. There is even an Android app called Triggered Meme Maker , that lets you do what its name suggests, make triggered memes. Making your own template in Microsoft Paint (we will show you how to make it in this article later) or any other photo editing software is also an option if you want to select the color of the background, rather than work with what you can find online.
2. A Video Editing Software
Memes are short videos that rarely last longer than 30 seconds, which is why you don’t need a powerful video editing suite like Final Cut Pro or Adobe Premiere Pro to make a good meme. A software like Wondershare Filmora that is easy to use and yet packed with cool visual effects and useful tools is a better choice if you just want to have a little fun with a video you recorded.
3. The Sound for the Triggered Meme
This ingredient of a good meme is easy to forget, but music or any other type of sound can make your meme funnier. In most cases, you’ll want to keep at least a portion of the original audio, but adding sound effects at different points of the meme can have a comical effect. The Filmora’s Music Library can serve as your endless source of royalty free music and sounds .
Making a Triggered Meme Template in Microsoft Paint
Creating a meme template is an easy task that can be handled from the Microsoft Paint in a couple of minutes. When you launch the software, click on the Fill with color icon located in the Tools section of the Paint’s ribbon. Activating this option enables you to change the color of the background with a single click. Proceed to select the color of the background from the color palette located on the far right side of the ribbon. We recommend choosing shades of green because the background is going to be used for the Chroma Key effect. You can click on the Edit Colors icon if you want to find a perfect color tone for the background. Right-click anywhere on the canvas to change its color.
Now you just need to add the text to your template. Select the Text option in the Tools menu and then proceed to select the font or the size of your text in the Font menu. Make sure that the Opaque feature is enabled in the Background menu in order to change the color of the textbox background. Adjusting the Color 1 option in the Color Menu will enable you to choose the text color, while the Color 2 option lets you pick the color of the background. Type triggered in the textbox, and center the text by clicking on the TAB button on your keyboard a few times. Now you have everything you need to start creating your own triggered meme.
How to Make a Triggered Meme?
Once you’ve successfully created a triggered template you can move on to the next step of the meme making process.
1. Adding Media to a Project
Open Filmora in the Full Feature Mode and import all the files you’re going to need during the process of making a meme. The files you import to your project will be stored in the Media Panel. Add the video to the timeline by dropping it over the video track. You can then remove the unwanted parts of the clip or add a still frame to the end of the video to prolong the triggered effect of the meme. Still frames in Filmora can be created by clicking on the Snapshot icon, that is located below the Preview Panel.
2. Using the Green Screen Effect
Place the triggered template to the Picture-in-Picture track and try to position it at the exact place in the video where the person gets triggered. Click on the Green Screen icon located in the toolbar to gain access to the PIP Edit window. The Chroma Key (Green Screen) option will be selected by default, so you just have to check the ‘Make parts of the clip transparent’ box. The green background of the template will become transparent and you’ll be able to see parts of your video, with the triggered text displayed below it.
3. Enhancing Colors and Applying Effects
In order to highlight just how much a person in the video got triggered, you can change the vibrance and saturation in a portion of a video clip by clicking on the Edit icon in the toolbar. In addition, other software’s color correction tools like brightness, tint or contrast can also be used to highlight the triggered moment.
After you adjust the color values, you can click on the Effects icon if you want to add motion blur or camera shake effects. Click on the Shake option in the Effects panel to start browsing through different effects and click on the plus icon to add the effect to the clip you selected. The Distortion category in the Effects panel features a number of blur effects you can use to make the video more entertaining. You can adjust the properties of all the effects you add to your meme and control how much of the effect is applied to the video.
4. Adding Music and Text Overlays to Your Meme
Increasing the number of visual elements in the video can help you create a funnier meme. A single word can change the meaning of a meme so if you want to add additional comment besides noting that the person got triggered you can click on the Text icon and select the text overlay you like. Click on the plus icon that is displayed over the effect to add it to a video clip. A textbox will appear over the video in the Preview window and you can drag it around the screen to reposition it or rotate it. Enable the No Animation option if you want the text to just appear and disappear from the screen.
Sounds can add to the comical effect of a meme. Carefully select what type of music or sound you want to use for a meme since it can improve the quality of your meme. Simply drag the audio file you imported into Filmora and place it on the audio track and adjust its duration to match the duration of the video. If you don’t have your own music you can try some of the tracks featured in the software’s music library.
4. Exporting the Triggered Meme from Filmora
When your meme is ready to hit the social media, you can click on the Export button. In the Export window, you can choose any of the available file formats, but the formats best suited for memes are either MP4 or GIF. Click on the Settings icon in the Output Description menu to change the frame rate, resolution or the quality of the video. Wondershare Filmora lets you export videos directly to your YouTube channel or your Facebook account, so you don’t have to waste time on posting the meme after the export process is completed.
The software also offers the option to save a meme you created to your hard drive if you don’t want to post a meme on social media right away. You just have to click on the Export button after adjusting the output settings and wait for the file to be exported.
Conclusion
The precious memories of your friends being enraged by the silliest things can be turned into hilarious memes effortlessly. A video editing software like Wondershare Filmora gives you all the tools you’ll need to quickly generate a triggered meme, so you can focus on having fun with your friends. What’s your favorite method of making memes?
Ollie Mattison
Ollie Mattison is a writer and a lover of all things video.
Follow @Ollie Mattison
Ollie Mattison
Mar 27, 2024• Proven solutions
It is no secret that we all lose our cool from time. It’s only natural, after all, the world can be a frustrating place. We’re all enraged by different things, some of us can’t stand pineapple on pizza while others explode when being pranked. What we often don’t realize is that being triggered in front of a camera makes us perfect meme material. Even though the majority of memes are still images, some of the most memorable memes ever created were GIFs or short videos.
Making the triggered meme is easy when you know how, so in this article, we are going to show you how to make your next potentially viral meme, in just a few easy steps.
Filmora offers an easy to use video editor named Filmora Video Editor to make video and gif memes, and an online free meme maker named Filmora FREE Online Meme Maker which allows you to create images, videos and gifs memes for free. The video tutorial below will show you how to make a triggered video meme with Filmora. Download it and try it by yourself now.
The Things You Need to Make a Triggered Meme
Preparation is key to almost every important thing in life, including making a triggered meme featuring your bestie. Before you can capitalize on that amazing footage of triggered people you first have to make sure you have everything you need to generate a meme. Okay, let’s get started with the essentials to making a fun and effective meme.
1. A Triggered Template
You have virtually unlimited resources at your disposal, as this meme template can be easily found through a quick Google search. There is even an Android app called Triggered Meme Maker , that lets you do what its name suggests, make triggered memes. Making your own template in Microsoft Paint (we will show you how to make it in this article later) or any other photo editing software is also an option if you want to select the color of the background, rather than work with what you can find online.
2. A Video Editing Software
Memes are short videos that rarely last longer than 30 seconds, which is why you don’t need a powerful video editing suite like Final Cut Pro or Adobe Premiere Pro to make a good meme. A software like Wondershare Filmora that is easy to use and yet packed with cool visual effects and useful tools is a better choice if you just want to have a little fun with a video you recorded.
3. The Sound for the Triggered Meme
This ingredient of a good meme is easy to forget, but music or any other type of sound can make your meme funnier. In most cases, you’ll want to keep at least a portion of the original audio, but adding sound effects at different points of the meme can have a comical effect. The Filmora’s Music Library can serve as your endless source of royalty free music and sounds .
Making a Triggered Meme Template in Microsoft Paint
Creating a meme template is an easy task that can be handled from the Microsoft Paint in a couple of minutes. When you launch the software, click on the Fill with color icon located in the Tools section of the Paint’s ribbon. Activating this option enables you to change the color of the background with a single click. Proceed to select the color of the background from the color palette located on the far right side of the ribbon. We recommend choosing shades of green because the background is going to be used for the Chroma Key effect. You can click on the Edit Colors icon if you want to find a perfect color tone for the background. Right-click anywhere on the canvas to change its color.
Now you just need to add the text to your template. Select the Text option in the Tools menu and then proceed to select the font or the size of your text in the Font menu. Make sure that the Opaque feature is enabled in the Background menu in order to change the color of the textbox background. Adjusting the Color 1 option in the Color Menu will enable you to choose the text color, while the Color 2 option lets you pick the color of the background. Type triggered in the textbox, and center the text by clicking on the TAB button on your keyboard a few times. Now you have everything you need to start creating your own triggered meme.
How to Make a Triggered Meme?
Once you’ve successfully created a triggered template you can move on to the next step of the meme making process.
1. Adding Media to a Project
Open Filmora in the Full Feature Mode and import all the files you’re going to need during the process of making a meme. The files you import to your project will be stored in the Media Panel. Add the video to the timeline by dropping it over the video track. You can then remove the unwanted parts of the clip or add a still frame to the end of the video to prolong the triggered effect of the meme. Still frames in Filmora can be created by clicking on the Snapshot icon, that is located below the Preview Panel.
2. Using the Green Screen Effect
Place the triggered template to the Picture-in-Picture track and try to position it at the exact place in the video where the person gets triggered. Click on the Green Screen icon located in the toolbar to gain access to the PIP Edit window. The Chroma Key (Green Screen) option will be selected by default, so you just have to check the ‘Make parts of the clip transparent’ box. The green background of the template will become transparent and you’ll be able to see parts of your video, with the triggered text displayed below it.
3. Enhancing Colors and Applying Effects
In order to highlight just how much a person in the video got triggered, you can change the vibrance and saturation in a portion of a video clip by clicking on the Edit icon in the toolbar. In addition, other software’s color correction tools like brightness, tint or contrast can also be used to highlight the triggered moment.
After you adjust the color values, you can click on the Effects icon if you want to add motion blur or camera shake effects. Click on the Shake option in the Effects panel to start browsing through different effects and click on the plus icon to add the effect to the clip you selected. The Distortion category in the Effects panel features a number of blur effects you can use to make the video more entertaining. You can adjust the properties of all the effects you add to your meme and control how much of the effect is applied to the video.
4. Adding Music and Text Overlays to Your Meme
Increasing the number of visual elements in the video can help you create a funnier meme. A single word can change the meaning of a meme so if you want to add additional comment besides noting that the person got triggered you can click on the Text icon and select the text overlay you like. Click on the plus icon that is displayed over the effect to add it to a video clip. A textbox will appear over the video in the Preview window and you can drag it around the screen to reposition it or rotate it. Enable the No Animation option if you want the text to just appear and disappear from the screen.
Sounds can add to the comical effect of a meme. Carefully select what type of music or sound you want to use for a meme since it can improve the quality of your meme. Simply drag the audio file you imported into Filmora and place it on the audio track and adjust its duration to match the duration of the video. If you don’t have your own music you can try some of the tracks featured in the software’s music library.
4. Exporting the Triggered Meme from Filmora
When your meme is ready to hit the social media, you can click on the Export button. In the Export window, you can choose any of the available file formats, but the formats best suited for memes are either MP4 or GIF. Click on the Settings icon in the Output Description menu to change the frame rate, resolution or the quality of the video. Wondershare Filmora lets you export videos directly to your YouTube channel or your Facebook account, so you don’t have to waste time on posting the meme after the export process is completed.
The software also offers the option to save a meme you created to your hard drive if you don’t want to post a meme on social media right away. You just have to click on the Export button after adjusting the output settings and wait for the file to be exported.
Conclusion
The precious memories of your friends being enraged by the silliest things can be turned into hilarious memes effortlessly. A video editing software like Wondershare Filmora gives you all the tools you’ll need to quickly generate a triggered meme, so you can focus on having fun with your friends. What’s your favorite method of making memes?
Ollie Mattison
Ollie Mattison is a writer and a lover of all things video.
Follow @Ollie Mattison
10 Free Online Sticker Makers to Make Your Own Stickers
10 Free Online Sticker Makers to Make Your Own Stickers
Shanoon Cox
Mar 27, 2024• Proven solutions
Over the years, the method of communication has changed a lot with the advancement of technological products and innovations. Be it personal forms of communication, advertisements, or public awareness, things are very different now. This is an era of digital boards, online texts, and stickers.
Making one’s own stickers have been one of the latest trends of communication on social media platforms. The use of stickers makes the conversation interesting and fun and allows people to express their opinions hilariously, without offending anyone. That is why there are a lot of online sticker makers available in the market.
Online sticker makers allow you to create your own stickers in whichever way you wish. These online sticker makers have taken the fun and involvement of socially active people to another level. So let’s dig in and find out about the best free online sticker makers available in the market.
You might be interested in:
- Part 1: 10 Free Online Stickers to Make Your Own Stickers
- Part 2: Add Sticker to Your Video with Wondershare Filmora
Part 1: 10 Free Online Stickers to Make Your Stickers
With the right applications, making your own stickers can be very easy. There are a lot of online sticker makers that allow you to create your own stickers, but the best ones among them will do the job more creatively and easily. So, let’s have a look at the top free online sticker makers we have selected for you in terms of features and easiness to use.
- 1. StickerYou
- 2. Canva
- 3. Crello
- 4. PsPrint
- 5. Jukebox
- 6. PicsArt
- 7. Uprinting
- 8. Avery
- 9. MakeStickers
- 10. Labeley
1. StickerYou
StickerYou is a wonderful online sticker maker that helps you to create clear cut stickers easily. You can upload any photo that you wish to convert into a sticker, provided those are in PNG, JPG, JPEG, or GIF formats.
Pricing
- $0.50 per Sticker
Features
- Allows to add art to the sticker
- Provides editing options like border, text, canvas, etc. within the tool itself
- Provides shipping delivery of physical copies of the stickers
- This tool can be accessed online from any computer or mobile device
2. Canva
Canva is an online tool that allows you to create your own customized stickers and labels with a professional touch. In Canva, you can either design a sticker from scratch or develop one from the hundreds of pre-installed designer templates.
Pricing:
- Free version
- Pro version with more advanced tools and features
Features:
- 100+ adjustable templates and design options
- About a million images, illustrations, colors, and texts to choose from
- Occasion based designs and custom dimensions to choose
- Easy sticker making in three steps – upload, edit, and download
3. Crello
Crello allows users to create adorable and fun stickers in whatever design they wish. It is an online sticker maker that grants a lot of editing features to make the result more outstanding, provided the users have signed into their account
Pricing:
- Starter pack – Free
- Pro pack - $7.99 per month
Features:
- Options to create photos, images, illustrations, patterns, and text badges in customizable shapes
- More than 30,000 templates to create whatever you wish
- Availability of more than 500,000 premium photos and 140M plus royalty-free pics
- Simple design and video editing features
4. PsPrint
PsPrint is an application that can help you to create versatile and fun stickers with ease with a design template that is professionally crafted. All you need is to simply pick up your desired shape, size, and color.
Pricing:
- Free kit
- Paid – depending on the stickers you choose
Features:
- A free designing tool to add personalized texts elements and graphics
- Availability of physical copy of stickers printed and cut in any dimension
- Occasion based options of design to choose from
5. Jukebox
Jukebox allows users to design and print a variety of stickers and provides quality templates to do so. This online sticker maker allows you to choose the shape size and material of the sticker first, and once designing is done, high-quality stickers will be printed up.
Pricing:
- Depends upon features like size, material, and quantity
Features:
- Can create stickers in any shape and finishing
- High-quality stickers that are easy to peel and weather resistant
- Free shipping for orders totaling more than $75
- One day turn around option available
6. PicsArt
Picsart is one of the most popular photo editing applications that also features the option of online sticker making. This application provides a large number of pre-customized online stickers and also has the best features if you are interested in creating one.
Pricing:
- Free
- Gold offer - $4.66 per month
Features:
- Easy creation and sharing of stickers
- Online sharing and printing options
- An AI technology that can remove the background of any pictures perfectly
- Amazing editing features like erase tool, brush off tool, axis rotation, etc.
7. Uprinting
Uprinting is an all-purpose online sticker making tool that can help you create appealing stickers according to your idea. It is a clean tool and you can order stickers in small as well as very large sizes. Also the sticker options available make it easy to choose.
Pricing:
- $42.29 ($0.17 for each sticker)
Features:
- Roll sticker cut to any shape and size
- Sticker available with a gloss finish as well as matt coated
- Availability of waterproof material for stickers
- Easy peel of hard sticking
8. Avery
Avery lets its users create seals and stickers personalized to their choice of interest. This online sticker making tool allows you to choose a design, make the necessary edits using the built-in options, print, and then save it on your device.

Pricing
- Pricing depends on the order of purchase
Features:
- Free printable designs that fit any occasion
- High-quality material suitable for packing
- Free shipping for all orders above $50
- Premium quality designs and products and 100 percent satisfaction guaranteed
9. MakeStickers
MakeStickers is a custom online sticker maker that offers a lot of features and sticker creating options to its users. It has a very simple user interface and anyone can create stickers easily using this online tool.
Pricing:
- Pricing depends on the quantity and dimensions of the stickers
Features:
- Availability of sticker in many cute shapes and colors
- Waterproof polypropylene material that is hard to get damaged by any liquids
- Laminated with a glossy or matte finish to ensure more durability
- Split back in the middle for easy peeling
10. Labeley
Labeley is a site that offers free online sticker creation without any hassles like a mandatory sign in or trail periods. It is a simple application that can be used to create a sticker and share them on any social platform instantly.

Pricing
- Free of cost
Features
- Allows to create customized stickers in minutes
- A lot of categories of designs to choose from
- Simple editing tools and easy to use interface
- Professional methods used for printing the stickers
Part 2: Add Sticker to Your Video with Wondershare Filmora
Wondershare Filmora is one of the most popular and widely used video editing applications around the world that offers exciting and extensive video editing features. Be it creating a simple meme or editing a professional level movie, Filmora is the application that you can choose with your eyes closed.
Stickers a way to express one’s opinion or idea in an effective way. Most of the time these stickers convey things that long sentences can’t. This is why many movie makers and editors prefer to add stickers to their videos. Also adding stickers to a video make it, more interesting, fun to watch, and appealing to the viewers. So let’s see how a custom sticker can be added to a video using Filmora.
Steps to Follow:
Step 1: Install the Filmora application on your device and open it. Then import the video you need to edit and the custom stickers you need to add to the Media Library.
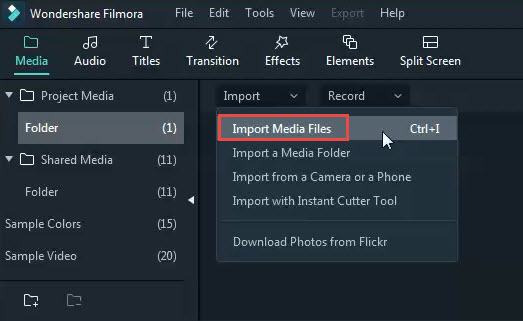
Step 2: Drag the video first to the timeline, followed by the stickers respectively. And choose the sticker options available from the Elements tab.
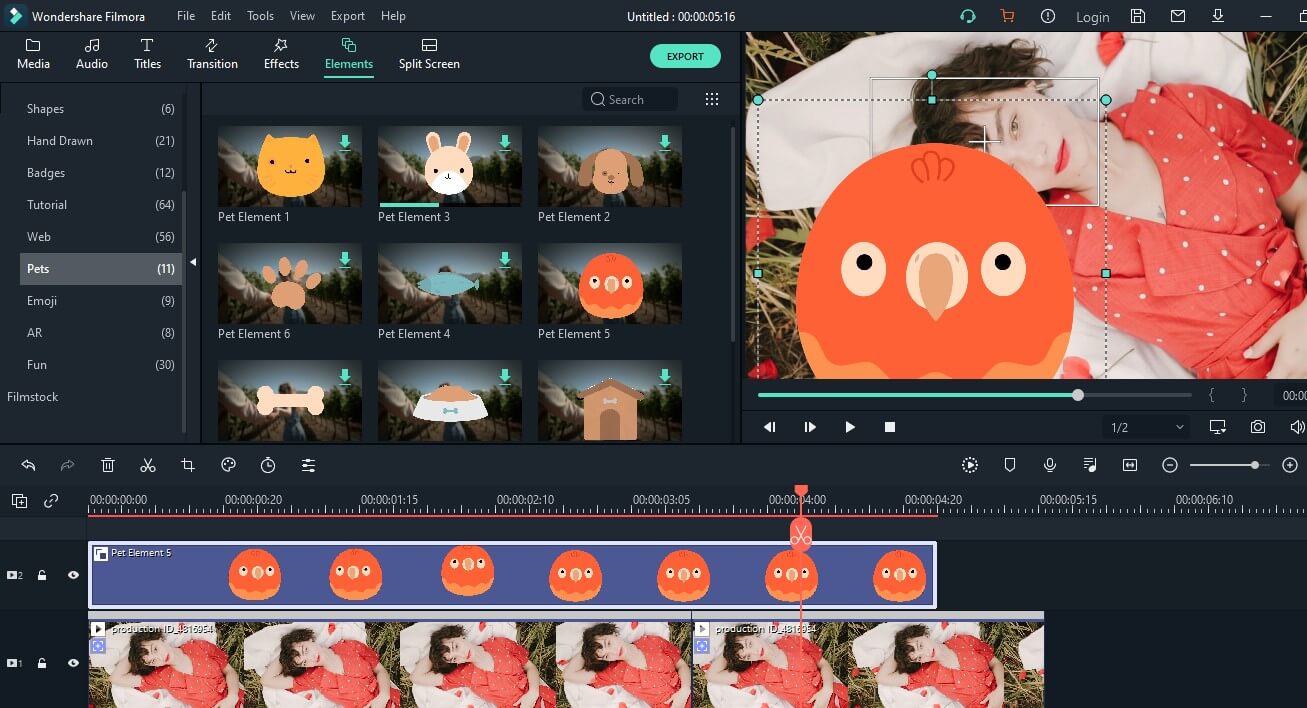
Step 3: Double click the sticker. Then you can rotate, flip, or resize it as you want. Or you can right-click the sticker on the timeline to get more advanced editing options, such as color grading, pan &zoom, and speed change, etc.
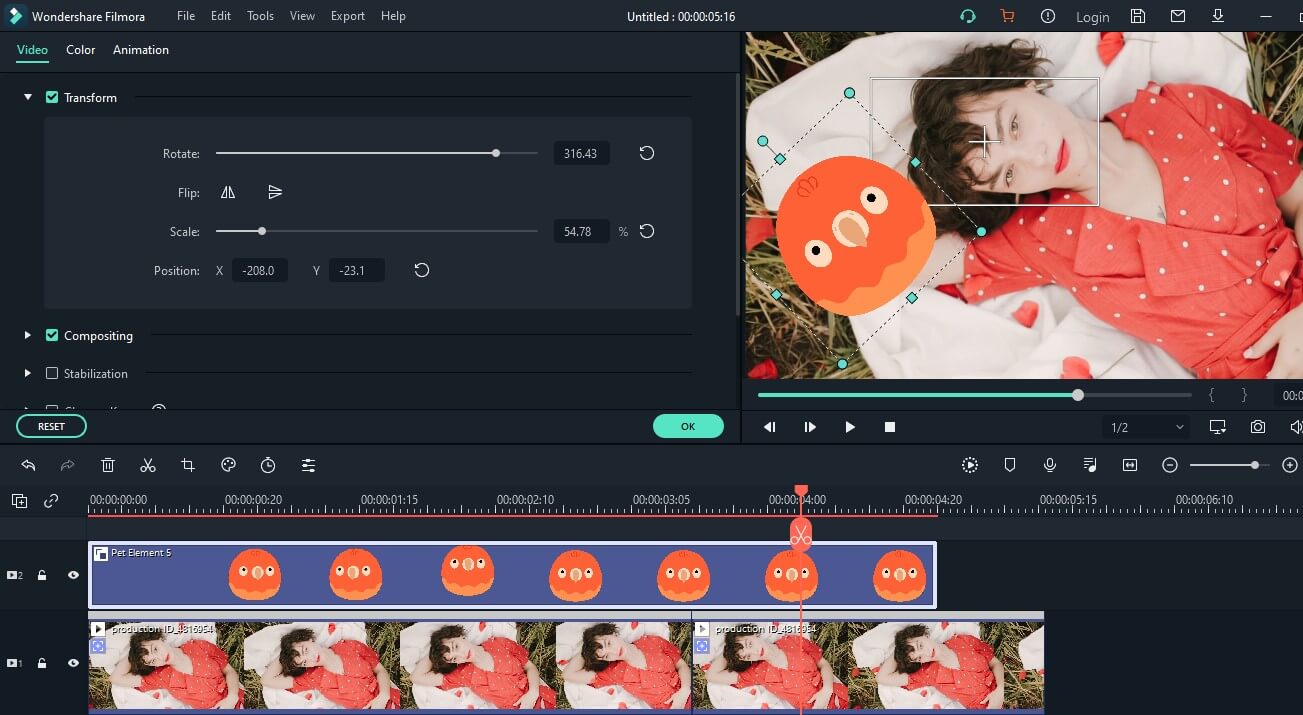
Step 4: Once the editing is completed, Export the video into the format you wish.
Conclusion
Stickers sometimes speak better than words and it is very important to know how to customize stickers as every individual wishes to speak differently. Stickers are used for many purposes, from casual chats to marketing means and home décor, which is why the quality of them is very important.
Online sticker makers allow you to customize stickers based on your ideas and depending on any occasion. We have listed the top free online sticker makers available that will allow you to create all the stickers you need. Thank you.
Shanoon Cox
Shanoon Cox is a writer and a lover of all things video.
Follow @Shanoon Cox
Shanoon Cox
Mar 27, 2024• Proven solutions
Over the years, the method of communication has changed a lot with the advancement of technological products and innovations. Be it personal forms of communication, advertisements, or public awareness, things are very different now. This is an era of digital boards, online texts, and stickers.
Making one’s own stickers have been one of the latest trends of communication on social media platforms. The use of stickers makes the conversation interesting and fun and allows people to express their opinions hilariously, without offending anyone. That is why there are a lot of online sticker makers available in the market.
Online sticker makers allow you to create your own stickers in whichever way you wish. These online sticker makers have taken the fun and involvement of socially active people to another level. So let’s dig in and find out about the best free online sticker makers available in the market.
You might be interested in:
- Part 1: 10 Free Online Stickers to Make Your Own Stickers
- Part 2: Add Sticker to Your Video with Wondershare Filmora
Part 1: 10 Free Online Stickers to Make Your Stickers
With the right applications, making your own stickers can be very easy. There are a lot of online sticker makers that allow you to create your own stickers, but the best ones among them will do the job more creatively and easily. So, let’s have a look at the top free online sticker makers we have selected for you in terms of features and easiness to use.
- 1. StickerYou
- 2. Canva
- 3. Crello
- 4. PsPrint
- 5. Jukebox
- 6. PicsArt
- 7. Uprinting
- 8. Avery
- 9. MakeStickers
- 10. Labeley
1. StickerYou
StickerYou is a wonderful online sticker maker that helps you to create clear cut stickers easily. You can upload any photo that you wish to convert into a sticker, provided those are in PNG, JPG, JPEG, or GIF formats.
Pricing
- $0.50 per Sticker
Features
- Allows to add art to the sticker
- Provides editing options like border, text, canvas, etc. within the tool itself
- Provides shipping delivery of physical copies of the stickers
- This tool can be accessed online from any computer or mobile device
2. Canva
Canva is an online tool that allows you to create your own customized stickers and labels with a professional touch. In Canva, you can either design a sticker from scratch or develop one from the hundreds of pre-installed designer templates.
Pricing:
- Free version
- Pro version with more advanced tools and features
Features:
- 100+ adjustable templates and design options
- About a million images, illustrations, colors, and texts to choose from
- Occasion based designs and custom dimensions to choose
- Easy sticker making in three steps – upload, edit, and download
3. Crello
Crello allows users to create adorable and fun stickers in whatever design they wish. It is an online sticker maker that grants a lot of editing features to make the result more outstanding, provided the users have signed into their account
Pricing:
- Starter pack – Free
- Pro pack - $7.99 per month
Features:
- Options to create photos, images, illustrations, patterns, and text badges in customizable shapes
- More than 30,000 templates to create whatever you wish
- Availability of more than 500,000 premium photos and 140M plus royalty-free pics
- Simple design and video editing features
4. PsPrint
PsPrint is an application that can help you to create versatile and fun stickers with ease with a design template that is professionally crafted. All you need is to simply pick up your desired shape, size, and color.
Pricing:
- Free kit
- Paid – depending on the stickers you choose
Features:
- A free designing tool to add personalized texts elements and graphics
- Availability of physical copy of stickers printed and cut in any dimension
- Occasion based options of design to choose from
5. Jukebox
Jukebox allows users to design and print a variety of stickers and provides quality templates to do so. This online sticker maker allows you to choose the shape size and material of the sticker first, and once designing is done, high-quality stickers will be printed up.
Pricing:
- Depends upon features like size, material, and quantity
Features:
- Can create stickers in any shape and finishing
- High-quality stickers that are easy to peel and weather resistant
- Free shipping for orders totaling more than $75
- One day turn around option available
6. PicsArt
Picsart is one of the most popular photo editing applications that also features the option of online sticker making. This application provides a large number of pre-customized online stickers and also has the best features if you are interested in creating one.
Pricing:
- Free
- Gold offer - $4.66 per month
Features:
- Easy creation and sharing of stickers
- Online sharing and printing options
- An AI technology that can remove the background of any pictures perfectly
- Amazing editing features like erase tool, brush off tool, axis rotation, etc.
7. Uprinting
Uprinting is an all-purpose online sticker making tool that can help you create appealing stickers according to your idea. It is a clean tool and you can order stickers in small as well as very large sizes. Also the sticker options available make it easy to choose.
Pricing:
- $42.29 ($0.17 for each sticker)
Features:
- Roll sticker cut to any shape and size
- Sticker available with a gloss finish as well as matt coated
- Availability of waterproof material for stickers
- Easy peel of hard sticking
8. Avery
Avery lets its users create seals and stickers personalized to their choice of interest. This online sticker making tool allows you to choose a design, make the necessary edits using the built-in options, print, and then save it on your device.
Pricing
- Pricing depends on the order of purchase
Features:
- Free printable designs that fit any occasion
- High-quality material suitable for packing
- Free shipping for all orders above $50
- Premium quality designs and products and 100 percent satisfaction guaranteed
9. MakeStickers
MakeStickers is a custom online sticker maker that offers a lot of features and sticker creating options to its users. It has a very simple user interface and anyone can create stickers easily using this online tool.
Pricing:
- Pricing depends on the quantity and dimensions of the stickers
Features:
- Availability of sticker in many cute shapes and colors
- Waterproof polypropylene material that is hard to get damaged by any liquids
- Laminated with a glossy or matte finish to ensure more durability
- Split back in the middle for easy peeling
10. Labeley
Labeley is a site that offers free online sticker creation without any hassles like a mandatory sign in or trail periods. It is a simple application that can be used to create a sticker and share them on any social platform instantly.
Pricing
- Free of cost
Features
- Allows to create customized stickers in minutes
- A lot of categories of designs to choose from
- Simple editing tools and easy to use interface
- Professional methods used for printing the stickers
Part 2: Add Sticker to Your Video with Wondershare Filmora
Wondershare Filmora is one of the most popular and widely used video editing applications around the world that offers exciting and extensive video editing features. Be it creating a simple meme or editing a professional level movie, Filmora is the application that you can choose with your eyes closed.
Stickers a way to express one’s opinion or idea in an effective way. Most of the time these stickers convey things that long sentences can’t. This is why many movie makers and editors prefer to add stickers to their videos. Also adding stickers to a video make it, more interesting, fun to watch, and appealing to the viewers. So let’s see how a custom sticker can be added to a video using Filmora.
Steps to Follow:
Step 1: Install the Filmora application on your device and open it. Then import the video you need to edit and the custom stickers you need to add to the Media Library.
Step 2: Drag the video first to the timeline, followed by the stickers respectively. And choose the sticker options available from the Elements tab.
Step 3: Double click the sticker. Then you can rotate, flip, or resize it as you want. Or you can right-click the sticker on the timeline to get more advanced editing options, such as color grading, pan &zoom, and speed change, etc.
Step 4: Once the editing is completed, Export the video into the format you wish.
Conclusion
Stickers sometimes speak better than words and it is very important to know how to customize stickers as every individual wishes to speak differently. Stickers are used for many purposes, from casual chats to marketing means and home décor, which is why the quality of them is very important.
Online sticker makers allow you to customize stickers based on your ideas and depending on any occasion. We have listed the top free online sticker makers available that will allow you to create all the stickers you need. Thank you.
Shanoon Cox
Shanoon Cox is a writer and a lover of all things video.
Follow @Shanoon Cox
How to Add Bitmoji to Keyboard?
Emojis have made it so much better for people to express themselves. Let’s say someone compliments you on a chat app; you can use a smiley emoji to tell that you are happy. At the same time, an angry emoji lets you express that you are angry.
Apart from the generic emojis that you can find in your chat applications, Bitmoji enables you to customize your character and share it with people you chat with. Bitmoji is fun, but do you know how to add it to a keyboard? If you don’t, don’t worry, this post will help you understand how to do that.
In this article
02 How to Add and Use Bitmoji to iPhone Keyboard?
03 How to Get the Bitmoji Keyboard on Android?
04 How to Install and Use Bitmoji on Windows and Mac?
Part 1: What is Bitmoji?
If you are new to Bitmoji, you may wonder what it is? Bitmoji is essentially your own personal emoji. You can create a cartoon version of yourself and share it with people to make the conversation fun. So, what one does is create an avatar of themselves and give it all kinds of expressions.
Then, you can create comics using your Bitmoji, use it to express yourself while having a chat, and even use it as a reaction. Anyone who is done using the same old emojis has started using Bitmoji because it’s a lot more fun.
Now, let’s learn how to create your very own Bitmoji.
Step 1: First, go to the App Store or Play store and download the Bitmoji application.
Step 2: Once downloaded, launch the app and start making an avatar or your Bitmoji.
Step 3: Pick a skin color, hair color, chin, nose, hairstyle, jawline, and more.

Once your Bitmoji is created, you are all set to use the Bitmoji as stickers. Moreover, the app lets you dress your Bitmoji as you want as well. Let it have different expressions and postures because that’s how it’s going to be fun! After your Bitmoji is added, the next thing to do is enable Bitmoji on the keyboard of the device you are using.
Part 2: How to Add and Use Bitmoji to iPhone Keyboard?
Since you have learned how to create a Bimoji, it’s time to learn the steps to use it on your iPhone keyboard. Unfortunately, just by downloading the app, it won’t reflect on the keyboard directly. Instead, you will have to follow a few steps to add Bitmoji to the keyboard. Here’s what you need to do.
Step 1: Launch your iPhone and click on the Settings option.
Step 2: Now, go to the General option and click on the Keyboard option.

Step 3: When the Keyboard page opens, click on the option that says Keyboards and then click on Add New Keyboard.
Step 4: You will see the Third Party Keyboards option. There, you need to click on Bitmoji.
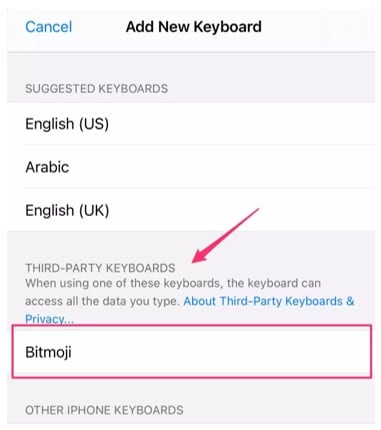
Step 5: Now, toggle the option that says Allow Full Access. Once you do that, you will see a small pop-up. Click on the Allow option.
And that’s it. Bitmoji will be added to the iPhone keyboard. Open any messaging app and click on the globe and hold it for a few seconds. When you see Bitmoji, click on that, and you will be able to use Bitmoji stickers.
Part 3: How to Get the Bitmoji Keyboard on Android?
Bitmoji is available for Android users as well. Before you begin to use it, go through the first part again and download the app. Then create your Bitmoji, as explained earlier. You can send Bitmojis directly from the app itself, but if you plan to use Bitmoji regularly, getting the Bitmoji keyboard makes sense. So, once you are done, follow the following steps to get the Bitmoji keyboard on Android.
Step 1: Launch the Bitmoji app. Click on the Keyboard option that you see at the bottom of the Bitmoji app screen.
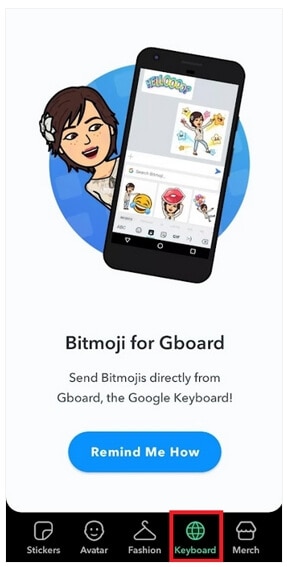
Step 2: Install Bitmoji keyboard and give permission to your phone to use Bitmoji keyboard. Bitmoji will notify you when the Bitmoji keyboard gets activated.
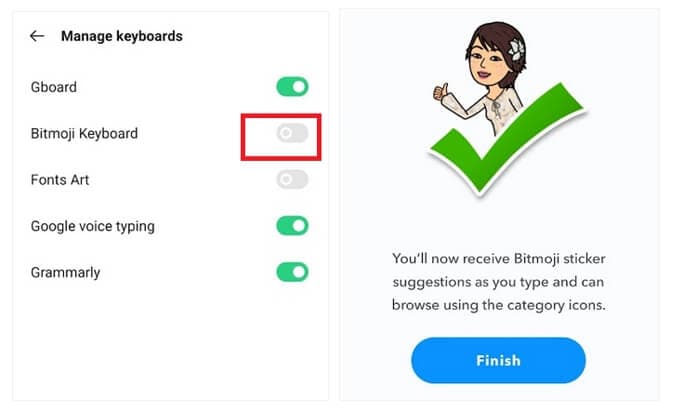
You are all done. Now, use the Bitmoji keyboard to chat with your family members and friends and make everything fun and exciting.
Part 4: How to Install and Use Bitmoji on Windows and Mac?
If you want to use Bitmoji on Windows and Mac, you will have to use the Google Chrome browser. If you already have the Google Chrome browser, carry on with the steps explained below; otherwise, get the browser before starting.
Step 1: Go to Chrome Extension and install Bitmoji for Chrome Extension.
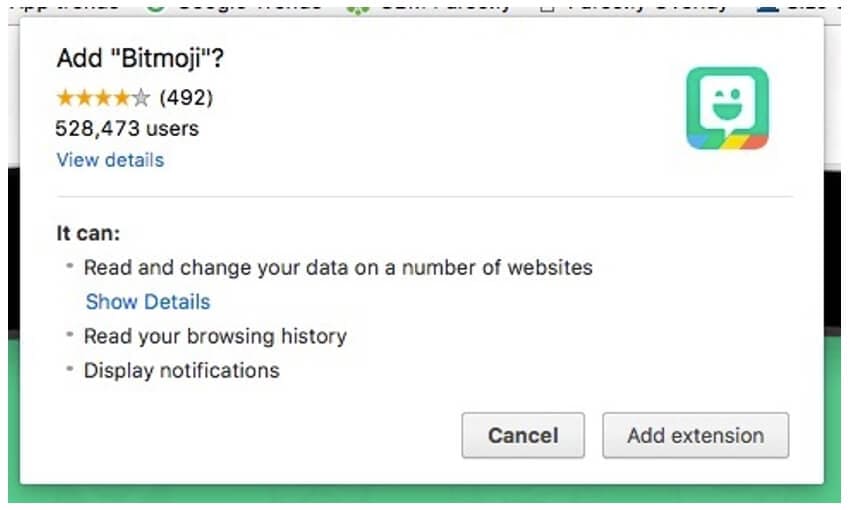
Step 2: You will have to sign in to Bitmoji. If you want to add Bitmoji to Gmail, click on add Bitmoji to Gmail.
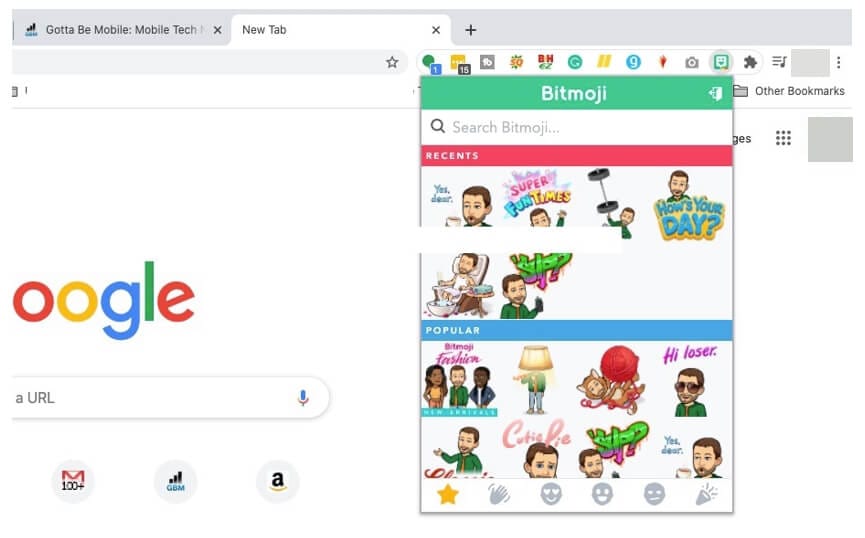
After you are done following the three easy steps, you will see Bitmoji is installed. To start using it, move the cursor to the upper corner of the browser and click on the Bitmoji icon. Next, you will see the Bitmojis. Choose any Bitmoji, copy it, and paste it on Gmail or instant messaging applications.
Part 5: Where can You Use Bitmoji?
Bitmojis can be used on different platforms. All you need to do is enable Bitmoji keyboard on your iPhone or Android phone or Windows and Mac computers and use it on various social media platforms. For example, use Snapchat to send Bitmojis for different types of occasions.
If you are an iPhone user, you can share fun Bitmojis through iMessage. On a computer, you can use these Bitmojis on Facebook or other instant messaging platforms. You can drag and drop the Bitmoji sticker or copy it to share it with your friends.
If you are a working professional and want to lighten the mood of your Slack workspace, use Bitmojis to make your coworkers feel relaxed. Plus, this can be a great way to make someone feel pumped up. Like that, there are many other platforms to use Bitmojis!
Related: Best Free Apps to Get Emojis on iPhone and Android
Conclusion
So, there you go. We have finally reached the end of this guide. We hope you have found this post interesting and will face no hassle using the Bitmoji keyboard on different devices. Get the Bitmoji app if you haven’t downloaded it yet and make your conversations fun and enjoyable!
02 How to Add and Use Bitmoji to iPhone Keyboard?
03 How to Get the Bitmoji Keyboard on Android?
04 How to Install and Use Bitmoji on Windows and Mac?
Part 1: What is Bitmoji?
If you are new to Bitmoji, you may wonder what it is? Bitmoji is essentially your own personal emoji. You can create a cartoon version of yourself and share it with people to make the conversation fun. So, what one does is create an avatar of themselves and give it all kinds of expressions.
Then, you can create comics using your Bitmoji, use it to express yourself while having a chat, and even use it as a reaction. Anyone who is done using the same old emojis has started using Bitmoji because it’s a lot more fun.
Now, let’s learn how to create your very own Bitmoji.
Step 1: First, go to the App Store or Play store and download the Bitmoji application.
Step 2: Once downloaded, launch the app and start making an avatar or your Bitmoji.
Step 3: Pick a skin color, hair color, chin, nose, hairstyle, jawline, and more.
Once your Bitmoji is created, you are all set to use the Bitmoji as stickers. Moreover, the app lets you dress your Bitmoji as you want as well. Let it have different expressions and postures because that’s how it’s going to be fun! After your Bitmoji is added, the next thing to do is enable Bitmoji on the keyboard of the device you are using.
Part 2: How to Add and Use Bitmoji to iPhone Keyboard?
Since you have learned how to create a Bimoji, it’s time to learn the steps to use it on your iPhone keyboard. Unfortunately, just by downloading the app, it won’t reflect on the keyboard directly. Instead, you will have to follow a few steps to add Bitmoji to the keyboard. Here’s what you need to do.
Step 1: Launch your iPhone and click on the Settings option.
Step 2: Now, go to the General option and click on the Keyboard option.
Step 3: When the Keyboard page opens, click on the option that says Keyboards and then click on Add New Keyboard.
Step 4: You will see the Third Party Keyboards option. There, you need to click on Bitmoji.
Step 5: Now, toggle the option that says Allow Full Access. Once you do that, you will see a small pop-up. Click on the Allow option.
And that’s it. Bitmoji will be added to the iPhone keyboard. Open any messaging app and click on the globe and hold it for a few seconds. When you see Bitmoji, click on that, and you will be able to use Bitmoji stickers.
Part 3: How to Get the Bitmoji Keyboard on Android?
Bitmoji is available for Android users as well. Before you begin to use it, go through the first part again and download the app. Then create your Bitmoji, as explained earlier. You can send Bitmojis directly from the app itself, but if you plan to use Bitmoji regularly, getting the Bitmoji keyboard makes sense. So, once you are done, follow the following steps to get the Bitmoji keyboard on Android.
Step 1: Launch the Bitmoji app. Click on the Keyboard option that you see at the bottom of the Bitmoji app screen.
Step 2: Install Bitmoji keyboard and give permission to your phone to use Bitmoji keyboard. Bitmoji will notify you when the Bitmoji keyboard gets activated.
You are all done. Now, use the Bitmoji keyboard to chat with your family members and friends and make everything fun and exciting.
Part 4: How to Install and Use Bitmoji on Windows and Mac?
If you want to use Bitmoji on Windows and Mac, you will have to use the Google Chrome browser. If you already have the Google Chrome browser, carry on with the steps explained below; otherwise, get the browser before starting.
Step 1: Go to Chrome Extension and install Bitmoji for Chrome Extension.
Step 2: You will have to sign in to Bitmoji. If you want to add Bitmoji to Gmail, click on add Bitmoji to Gmail.
After you are done following the three easy steps, you will see Bitmoji is installed. To start using it, move the cursor to the upper corner of the browser and click on the Bitmoji icon. Next, you will see the Bitmojis. Choose any Bitmoji, copy it, and paste it on Gmail or instant messaging applications.
Part 5: Where can You Use Bitmoji?
Bitmojis can be used on different platforms. All you need to do is enable Bitmoji keyboard on your iPhone or Android phone or Windows and Mac computers and use it on various social media platforms. For example, use Snapchat to send Bitmojis for different types of occasions.
If you are an iPhone user, you can share fun Bitmojis through iMessage. On a computer, you can use these Bitmojis on Facebook or other instant messaging platforms. You can drag and drop the Bitmoji sticker or copy it to share it with your friends.
If you are a working professional and want to lighten the mood of your Slack workspace, use Bitmojis to make your coworkers feel relaxed. Plus, this can be a great way to make someone feel pumped up. Like that, there are many other platforms to use Bitmojis!
Related: Best Free Apps to Get Emojis on iPhone and Android
Conclusion
So, there you go. We have finally reached the end of this guide. We hope you have found this post interesting and will face no hassle using the Bitmoji keyboard on different devices. Get the Bitmoji app if you haven’t downloaded it yet and make your conversations fun and enjoyable!
Is This a Pigeon Meme Generator
Is This a Pigeon Meme Generator
Ollie Mattison
Mar 27, 2024• Proven solutions
Have you ever been so confused that you thought that a butterfly is a pigeon? Apparently, the main protagonist of The Brave Fighter of Sun Fighbird from the Japanese anime TV series has. In an episode that was released in January 1991, Yutaro Katori seriously asked ‘is this a pigeon?’ while looking at a butterfly. At first, everyone thought that it was just a poor translation, but it turned out that the translation was correct, which turned this still frame into a meme as early as 2011.
After a while, the Is This a Pigeon meme came out of fashion, but at the beginning of 2018, it went viral again. Today the meme is used to express all sorts of confusing opinions, that range from popular culture references to philosophical questions. If you’re utterly confused in certain situations or if you simply like making Is This a Pigeon meme, you’re at the right place because in this article we’re going to show you how you can generate these memes in a couple of simple steps.
How to Make Is This a Pigeon Meme?
There are hundreds of meme makers online, but some of them watermark your memes, require you to create an account or want to charge you for the service. That’s why we recommend using Filmora Online Meme Maker that is free to use, produces watermark-free memes, and it doesn’t require you to sign in. Here’s how you can make a meme with this online meme maker:
1. Importing Images
You can copy the picture’s URL by clicking ‘Copy the image’ link below the image and import the template into the Filmora Online Meme Maker directly from the web.

Copy the image
If you choose to upload a photo from your computer or a Smartphone, you can just drag and drop the file from a folder to the webpage or you can click on the + icon and navigate to the folder on your hard drive where the template is stored. Fimora Online Meme Maker also lets you use GIFs and videos to generate memes.

2. Adding the Text to the Meme
Immediately after the image is uploaded, a new page will load, where you can add the text to the meme you’re creating. The text in the Is this a pigeon meme is usually inside the picture so you can just select the Text Inside option and proceed to insert the text into the text boxes below.
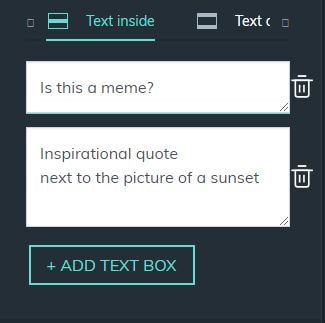
You can add as many text boxes as you want, and you can drag the text displayed across the picture and place it where ever you want. When creating the Is this a Pigeon meme, the text that refers to the source of the confusion should be next to the butterfly, while the question is most often located near the bottom of the picture. Optionally, you can reveal who is asking the question by adding me, my mom or Darth Vader next to the character in the picture.
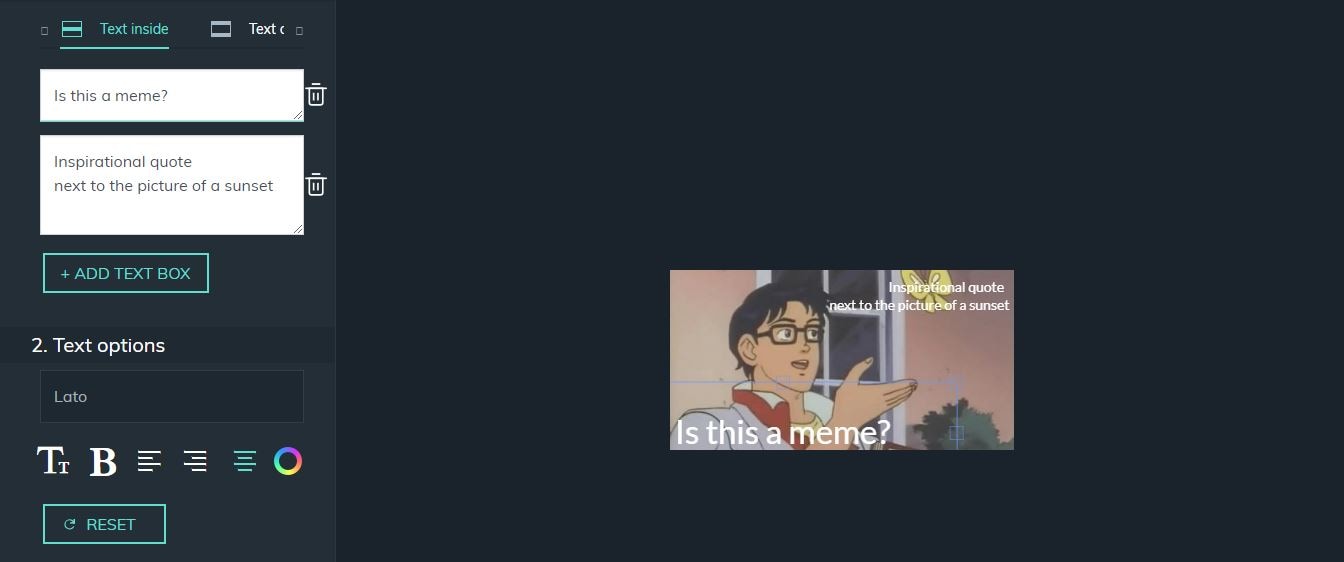
In the Text Options menu, you can adjust the size of the text in each text box individually, change its color or choose between standard text alignment options. Hit the Create button when you’re done and wait for a new page to load.
3. Downloading Memes
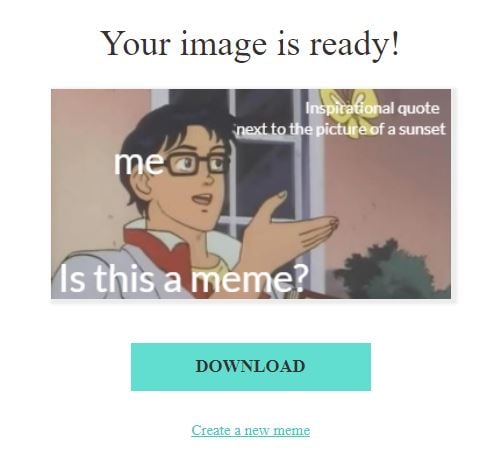
Click on the download button to add a new meme to your collection. Sharing files directly to social media from Filmora Online Meme Maker is not an option if you’re making memes from a Mac or PC computer.
Conclusion
Being confused can be hilarious, which is one of the reasons why Is this a Pigeon meme has been so popular over the course of the last year. Generating a meme is easy, so you can focus on finding an appropriate joke for this type of meme. Do you often make Is this a Pigeon memes? Leave a comment and share your favorites with us.
Ollie Mattison
Ollie Mattison is a writer and a lover of all things video.
Follow @Ollie Mattison
Ollie Mattison
Mar 27, 2024• Proven solutions
Have you ever been so confused that you thought that a butterfly is a pigeon? Apparently, the main protagonist of The Brave Fighter of Sun Fighbird from the Japanese anime TV series has. In an episode that was released in January 1991, Yutaro Katori seriously asked ‘is this a pigeon?’ while looking at a butterfly. At first, everyone thought that it was just a poor translation, but it turned out that the translation was correct, which turned this still frame into a meme as early as 2011.
After a while, the Is This a Pigeon meme came out of fashion, but at the beginning of 2018, it went viral again. Today the meme is used to express all sorts of confusing opinions, that range from popular culture references to philosophical questions. If you’re utterly confused in certain situations or if you simply like making Is This a Pigeon meme, you’re at the right place because in this article we’re going to show you how you can generate these memes in a couple of simple steps.
How to Make Is This a Pigeon Meme?
There are hundreds of meme makers online, but some of them watermark your memes, require you to create an account or want to charge you for the service. That’s why we recommend using Filmora Online Meme Maker that is free to use, produces watermark-free memes, and it doesn’t require you to sign in. Here’s how you can make a meme with this online meme maker:
1. Importing Images
You can copy the picture’s URL by clicking ‘Copy the image’ link below the image and import the template into the Filmora Online Meme Maker directly from the web.
Copy the image
If you choose to upload a photo from your computer or a Smartphone, you can just drag and drop the file from a folder to the webpage or you can click on the + icon and navigate to the folder on your hard drive where the template is stored. Fimora Online Meme Maker also lets you use GIFs and videos to generate memes.
2. Adding the Text to the Meme
Immediately after the image is uploaded, a new page will load, where you can add the text to the meme you’re creating. The text in the Is this a pigeon meme is usually inside the picture so you can just select the Text Inside option and proceed to insert the text into the text boxes below.
You can add as many text boxes as you want, and you can drag the text displayed across the picture and place it where ever you want. When creating the Is this a Pigeon meme, the text that refers to the source of the confusion should be next to the butterfly, while the question is most often located near the bottom of the picture. Optionally, you can reveal who is asking the question by adding me, my mom or Darth Vader next to the character in the picture.
In the Text Options menu, you can adjust the size of the text in each text box individually, change its color or choose between standard text alignment options. Hit the Create button when you’re done and wait for a new page to load.
3. Downloading Memes
Click on the download button to add a new meme to your collection. Sharing files directly to social media from Filmora Online Meme Maker is not an option if you’re making memes from a Mac or PC computer.
Conclusion
Being confused can be hilarious, which is one of the reasons why Is this a Pigeon meme has been so popular over the course of the last year. Generating a meme is easy, so you can focus on finding an appropriate joke for this type of meme. Do you often make Is this a Pigeon memes? Leave a comment and share your favorites with us.
Ollie Mattison
Ollie Mattison is a writer and a lover of all things video.
Follow @Ollie Mattison
Also read:
- [Updated] 2024 Approved Premier Online Streaming Options for Faith Communities
- [Updated] 2024 Approved Unbeatable Video Splitters to Match Xplit
- [Updated] In 2024, Logging Live Audio On-the-Go A User-Friendly Manual
- [Updated] Navigate to 8 Free Emoji Resources on the Web Today for 2024
- [Updated] Unlocking WINDOW 11'S Best-Kept Secrets for Maximum Productivity
- 10 Best Memes Right Now (Include Image/ GIF/Video) for 2024
- Amazon's Top Bargains for August 2Eighty-Four: Unbeatable Deals Revealed !
- How to Make a iMovie Photo Slideshow with Music? IMovie Tutorial for 2024
- In 2024, How to Cast Samsung Galaxy F14 5G Screen to PC Using WiFi | Dr.fone
- In 2024, Top-Notch Solutions for Disabled Apple ID From Apple iPhone X Making It Possible
- New 2024 Approved Best iOS and Android Apps You Can Use to Create Animoji and Memoji Videos
- New In 2024, How to Make a Video Meme with 4 Best Meme Video Makers
- New Top 5 Best Websites to Add Emojis to Photo Online
- New What Is Emoji and What Does It Mean?
- Nocturnal Notions for iPhone Photographers
- Top 9 Xiaomi Redmi 13C Monitoring Apps for Parental Controls | Dr.fone
- Updated 2024 Approved Top 5 Best Websites to Add Emojis to Photo Online
- Updated 25 Cute Memes to Make You Feel Better
- Updated How to Make a FLV Photo Slideshow
- Title: New 2024 Approved How to Make a FLV Photo Slideshow with Music
- Author: Jan
- Created at : 2025-01-22 16:28:18
- Updated at : 2025-01-27 16:32:09
- Link: https://meme-emoji.techidaily.com/new-2024-approved-how-to-make-a-flv-photo-slideshow-with-music/
- License: This work is licensed under CC BY-NC-SA 4.0.