
New 2024 Approved Generating the Roll Safe-Think About It Meme
Generating the Roll Safe-Think About It Meme
Generating the Roll Safe-Think About It Meme

Ollie Mattison
Mar 27, 2024• Proven solutions
Assumptions can lead you in a very wrong direction, and we’ve all made more foolish assumptions than we’d care to admit. As a matter of fact, seemingly brilliant life strategies are so common that they’ve become a meme. A guy named Reece Simpson made such a stupid and borderline sexist conclusion in one of the episodes of the Hood Documentary series, that it instantly became synonymous with all ideas that look good only in theory. The iconic image of him, placing the index finger to his temple with a comment: ‘You can’t be broke if you don’t check your bank account’ went viral only a six months after the documentary was initially released. In less than a week the tweet had 74.000 likes and 47.000 retweets.
Over time numerous variations of the meme emerged on social media, so in this article, we’re going to show you how you can make your own Roll Safe-Think About It memes in less than few minutes. But first, let have a look at some of the successful examples of this meme.
A Few Good Examples of the Roll Safe-Think About It Meme
Being slightly ironic while making a seemingly valid point is the true spirit of the Roll-Safe-Think About It meme, which is why using just any off the wall idea may not have the effect you’d like to achieve.

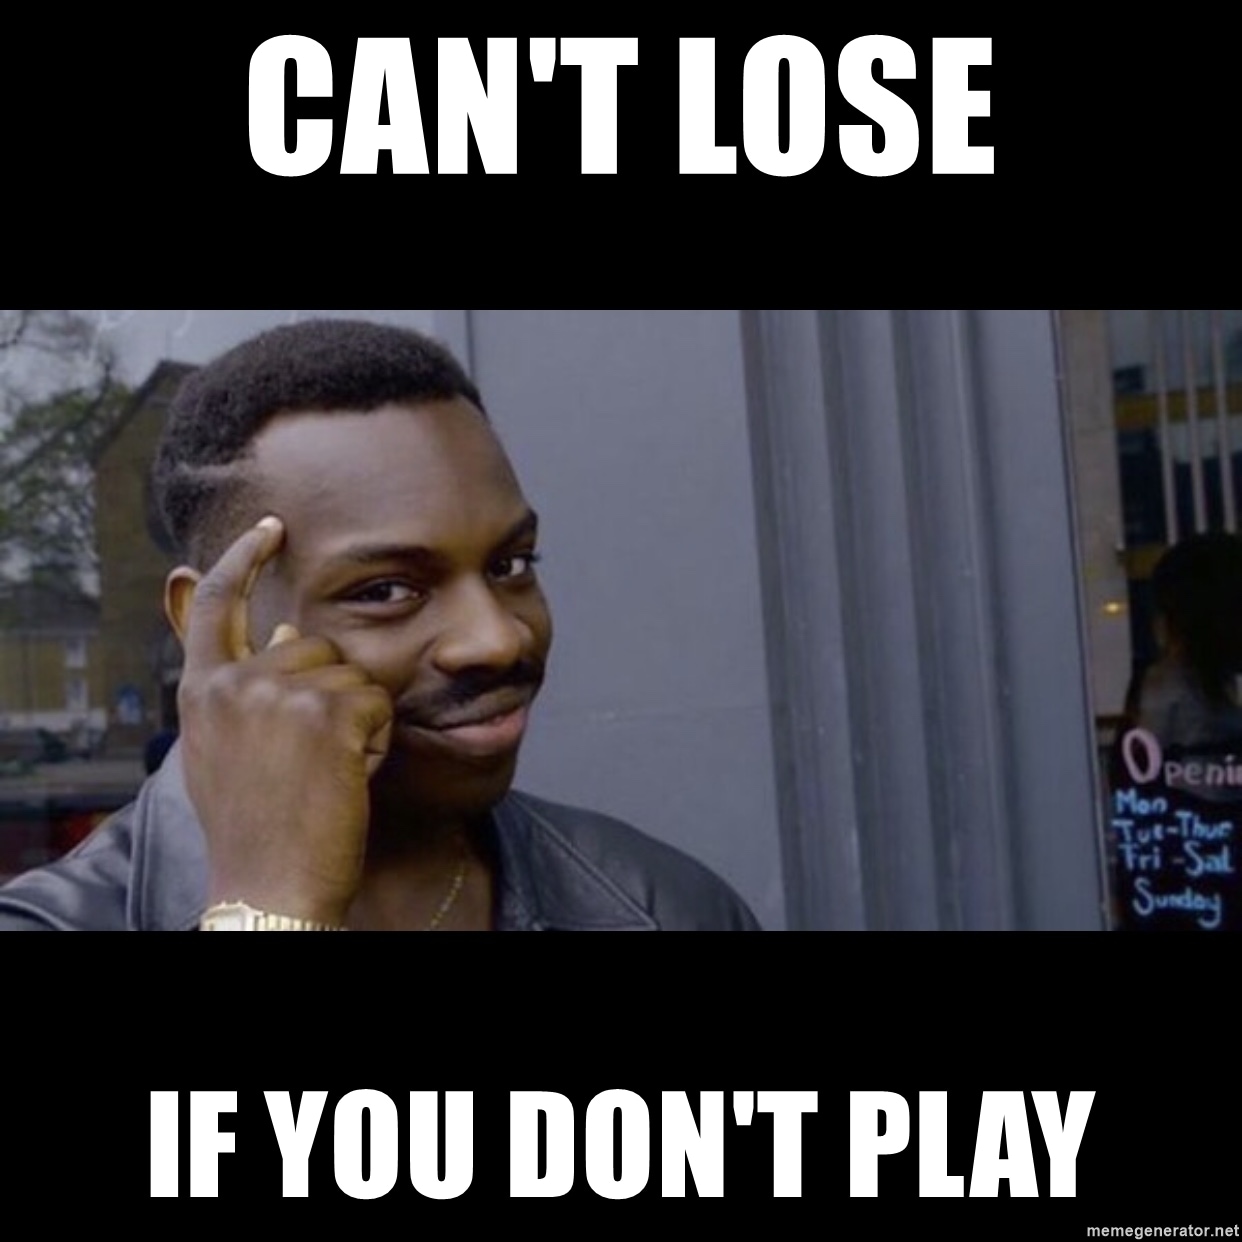
Can’t lose if you don’t play is a great illustration of what Roll Safe is all about. If you don’t try something you can’t fail at it, right? The assumption seems entirely legitimate, except it’s not, and that’s the catch.

A similar logic can be applied to romance, as there is zero chance to get cheated on if you weren’t in a relationship, to begin with. The only trouble is that if you adopt this way of thinking, you’ll never be in a relationship.
We all complain about financial troubles in one way or the other, and Roll Safe-Think About It offers a pretty funny way to do that. Once again, a seemingly valid point that only looks good in theory is the punch-line of the meme. There are so many different variations of this meme on the Internet, at the moment, but nearly all of them employ faulty logic to create the comical effect.
How to Make the Roll Safe-Think About It Meme
Generating a meme with the Filmora Online Meme Maker is free, quick and easy, and you can also use it to create memes from your Smartphone.
Attention: This post only provides the solutions to make memes for personal and non-commercial purpose. Since any redistribution without the approval of the copyright owners may violate the copyright laws, you’d better refer to the copyright laws in your country before doing so.
1. Importing the Images
On the home page of the Filmora Online Meme Maker offers you three quick ways to upload photos, videos or GIFs. You can either click on the + icon displayed in the middle of the screen and import a photo from a hard drive, drop the file from a folder on your computer to the designated section of the screen or use a URL to import meme templates.
So if you would like to create your Roll Safe-Think About It meme, you can start by copying the link the still image version or the GIF version of the meme. Click the “Copy the image” link below and the image link will be copied automatically.

Copy the image

Copy the image
Then, go to https://filmora.wondershare.com/meme-maker/ insert the image link you just copied by press Ctrl+V, click on the Upload button to start the upload process and wait until the template is uploaded.

Once the upload is complete you’ll be taken to another screen where you can choose whether you want the text to be inside the picture or outside. Which one of these options you’re going to use is up to you since there are versions where the text is placed both inside and outside of the picture.
2. Adding the Text to The Meme
Below the Text, Inside and Text Outside options you’ll be able to spot text boxes where you can add the punch-line of the meme. In the Text Options menu, you can select a new font, choose the text alignment you like the most or change the size and the color of the text. Scroll down to the bottom of the page and click on the Create button after you’ve added the text to the meme.

3. Downloading the Meme

A new page will load after the meme is generated, and you just have to click on the Download button and save it to your computer.
Those of you who use Filmora Online Meme Maker from their Smartphones can share their Roll Safe-Think About It memes directly from the platform. Sharing memes on social media is still not an option for Mac and PC users.
Conclusion
Adopting the logic behind the Roll Safe-Think About It memes in real life may not be the best of choices, but using it to cheer up your friends on social media can make your account more popular. Do you like making Roll Safe-Think About It memes? Share your experiences with us in the comments.
Ollie Mattison
Ollie Mattison is a writer and a lover of all things video.
Follow @Ollie Mattison
Ollie Mattison
Mar 27, 2024• Proven solutions
Assumptions can lead you in a very wrong direction, and we’ve all made more foolish assumptions than we’d care to admit. As a matter of fact, seemingly brilliant life strategies are so common that they’ve become a meme. A guy named Reece Simpson made such a stupid and borderline sexist conclusion in one of the episodes of the Hood Documentary series, that it instantly became synonymous with all ideas that look good only in theory. The iconic image of him, placing the index finger to his temple with a comment: ‘You can’t be broke if you don’t check your bank account’ went viral only a six months after the documentary was initially released. In less than a week the tweet had 74.000 likes and 47.000 retweets.
Over time numerous variations of the meme emerged on social media, so in this article, we’re going to show you how you can make your own Roll Safe-Think About It memes in less than few minutes. But first, let have a look at some of the successful examples of this meme.
A Few Good Examples of the Roll Safe-Think About It Meme
Being slightly ironic while making a seemingly valid point is the true spirit of the Roll-Safe-Think About It meme, which is why using just any off the wall idea may not have the effect you’d like to achieve.
Can’t lose if you don’t play is a great illustration of what Roll Safe is all about. If you don’t try something you can’t fail at it, right? The assumption seems entirely legitimate, except it’s not, and that’s the catch.
A similar logic can be applied to romance, as there is zero chance to get cheated on if you weren’t in a relationship, to begin with. The only trouble is that if you adopt this way of thinking, you’ll never be in a relationship.
We all complain about financial troubles in one way or the other, and Roll Safe-Think About It offers a pretty funny way to do that. Once again, a seemingly valid point that only looks good in theory is the punch-line of the meme. There are so many different variations of this meme on the Internet, at the moment, but nearly all of them employ faulty logic to create the comical effect.
How to Make the Roll Safe-Think About It Meme
Generating a meme with the Filmora Online Meme Maker is free, quick and easy, and you can also use it to create memes from your Smartphone.
Attention: This post only provides the solutions to make memes for personal and non-commercial purpose. Since any redistribution without the approval of the copyright owners may violate the copyright laws, you’d better refer to the copyright laws in your country before doing so.
1. Importing the Images
On the home page of the Filmora Online Meme Maker offers you three quick ways to upload photos, videos or GIFs. You can either click on the + icon displayed in the middle of the screen and import a photo from a hard drive, drop the file from a folder on your computer to the designated section of the screen or use a URL to import meme templates.
So if you would like to create your Roll Safe-Think About It meme, you can start by copying the link the still image version or the GIF version of the meme. Click the “Copy the image” link below and the image link will be copied automatically.
Copy the image
Copy the image
Then, go to https://filmora.wondershare.com/meme-maker/ insert the image link you just copied by press Ctrl+V, click on the Upload button to start the upload process and wait until the template is uploaded.
Once the upload is complete you’ll be taken to another screen where you can choose whether you want the text to be inside the picture or outside. Which one of these options you’re going to use is up to you since there are versions where the text is placed both inside and outside of the picture.
2. Adding the Text to The Meme
Below the Text, Inside and Text Outside options you’ll be able to spot text boxes where you can add the punch-line of the meme. In the Text Options menu, you can select a new font, choose the text alignment you like the most or change the size and the color of the text. Scroll down to the bottom of the page and click on the Create button after you’ve added the text to the meme.
3. Downloading the Meme
A new page will load after the meme is generated, and you just have to click on the Download button and save it to your computer.
Those of you who use Filmora Online Meme Maker from their Smartphones can share their Roll Safe-Think About It memes directly from the platform. Sharing memes on social media is still not an option for Mac and PC users.
Conclusion
Adopting the logic behind the Roll Safe-Think About It memes in real life may not be the best of choices, but using it to cheer up your friends on social media can make your account more popular. Do you like making Roll Safe-Think About It memes? Share your experiences with us in the comments.
Ollie Mattison
Ollie Mattison is a writer and a lover of all things video.
Follow @Ollie Mattison
What Is Emoji?
What Is Emoji?

Shanoon Cox
Mar 27, 2024• Proven solutions
If you ever wondered what is emoji, and how the term relates (or unrelates) to its elder sibling emoticon, you are at the right place. In the following sections, you will learn some quite interesting facts about the two, what different types of emojis are available, and what do they mean.
Because understanding the meaning of emojis is more important as compared to knowing what is an emoji itself, here you will get all the related details, relevant answers, and some best practice tips.
Part 1: What Is an Emoji?
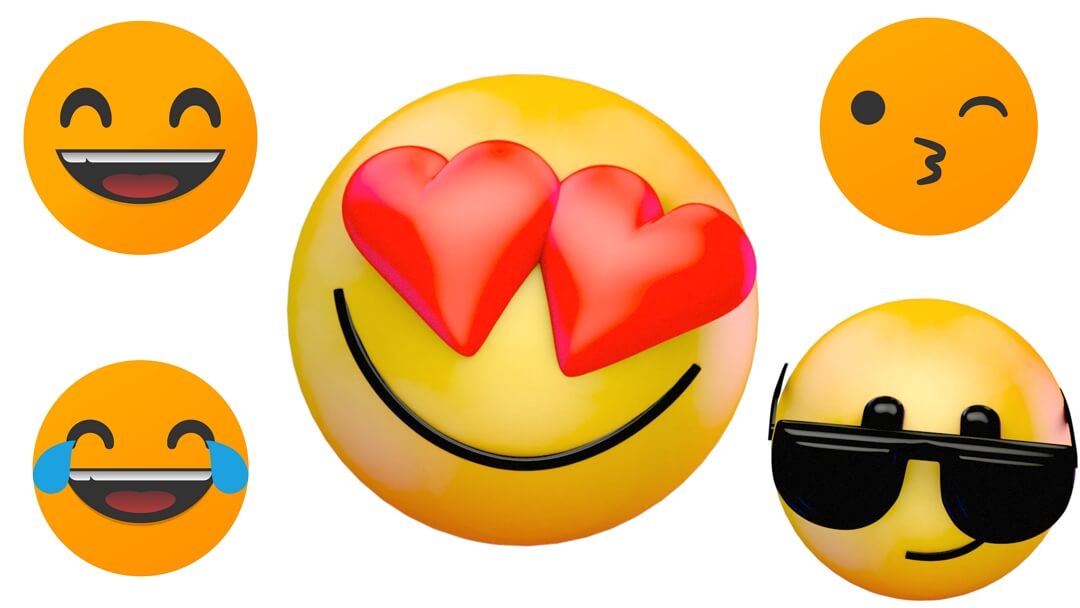
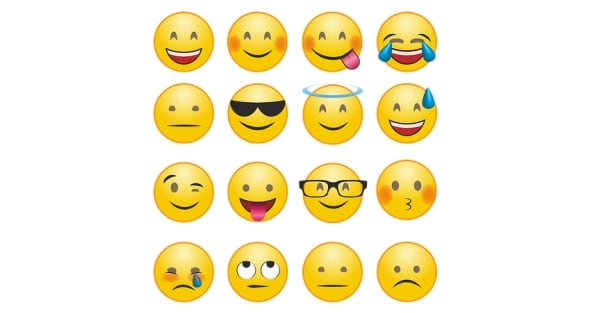
In a nutshell, an emoji is a graphical image that reflects a certain facial expression. Emojis are created using a drawing tool, and are incorporated into a unique 16-bit Unicode in order to make them compatible with operating systems of the most common devices and platforms like iOS, Android, macOS, and Windows.
In addition to being merely a picture, emojis are also animated to exaggerate the message senders’ emotions. You can find a couple of decent examples of such animations while using Skype messenger.
The reason behind emojis being more popular than the emoticons used earlier is the close resemblance of the former to the real-like expressions that they reflect when sent to a recipient. Therefore, it would be safe to say that a single emoji could be worth several sentences while texting if used correctly.
Part 2: What are the Differences Between Emojis and Emoticons?
As explained earlier, the emojis are graphical and sometimes animated Unicode illustrations that can be included in the text messages as objects.
On the other hand, the emoticons are formed using the ASCII characters, and no specific coding is required at the users’ side to create them. Simply put, an emoticon can be easily added to a text message or even to an email merely by using a combination of letters on the keyboard.
For instance, to create an emoticon of a smiley face, all you need to do is, type a colon sign along with a closing brace. (E.g. Typing a : and ) without space will become a smiling face, a : and ( will form a sad face, and so on).
To be clearer, emojis can be considered an advanced, better, and evolved version of emoticons. While the latter can be formed using simple characters like letters and symbols, the former is inserted as an object in the text messages.
Part 3: Where to Find the Meaning of Emojis?
Once you have understood what emoji is, it is now time to learn what the emojis mean. This part is imperative to ensure you don’t send a wrong emotional expression to your friends or family members, and get into some awkward situation after that.
Below is a list of some useful online websites and dictionaries that can help you find correct emojis along with their meanings to make your text conversation more meaningful and interesting:
1. Emojipedia
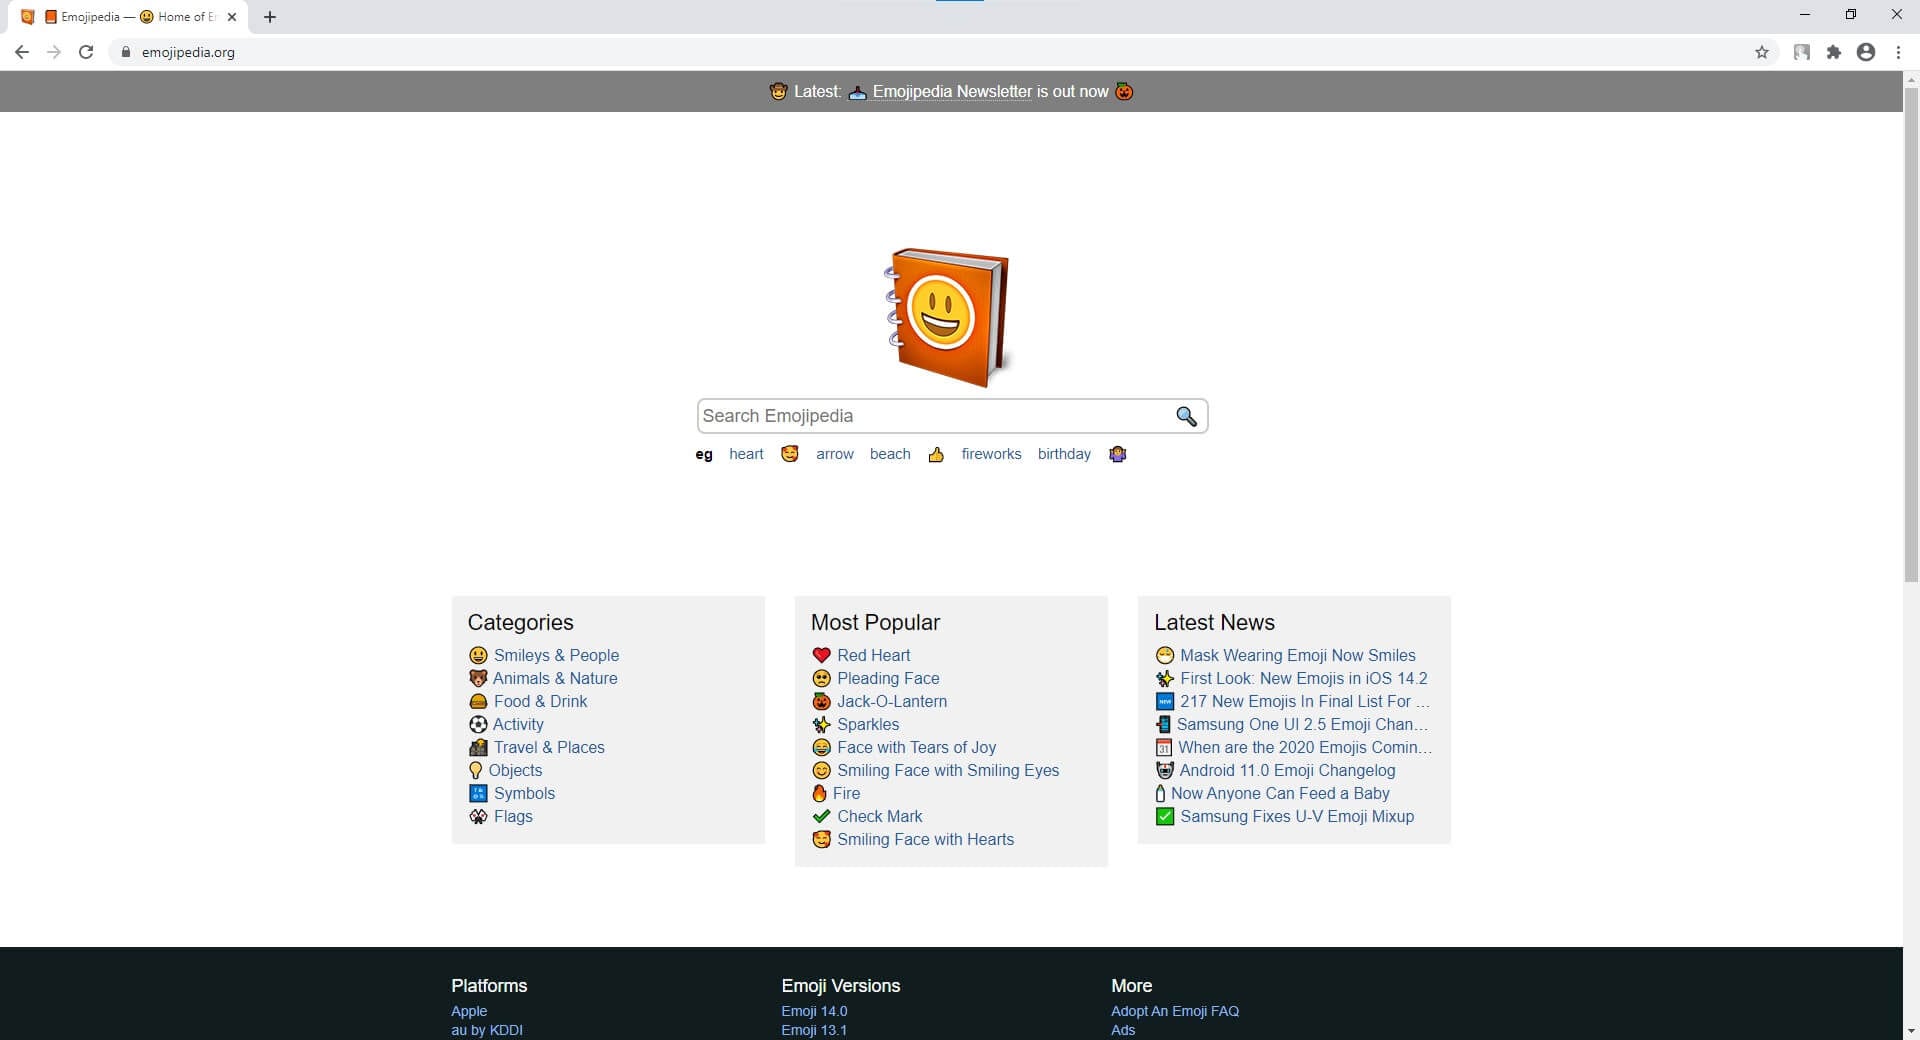
Emojipedia is an online library that holds several emojis. All the emojis that the portal has are placed in their corresponding categories.
Another section on the landing page of the website contains some of the most popular emojis, i.e. those that are mostly used by the texters during their conversions. Furthermore, the name of the emoji is present right next to it, and the entire part is hyperlinked which when clicked, takes you to a new page that has all the details about the object including its meaning, alternate names, and a button to copy the emoji to the clip board. The copied element can then be pasted in the text input field of a compatible messenger such as Facebook.
2. EMOJI DICTIONARY
https://www.dictionary.com/e/emoji/
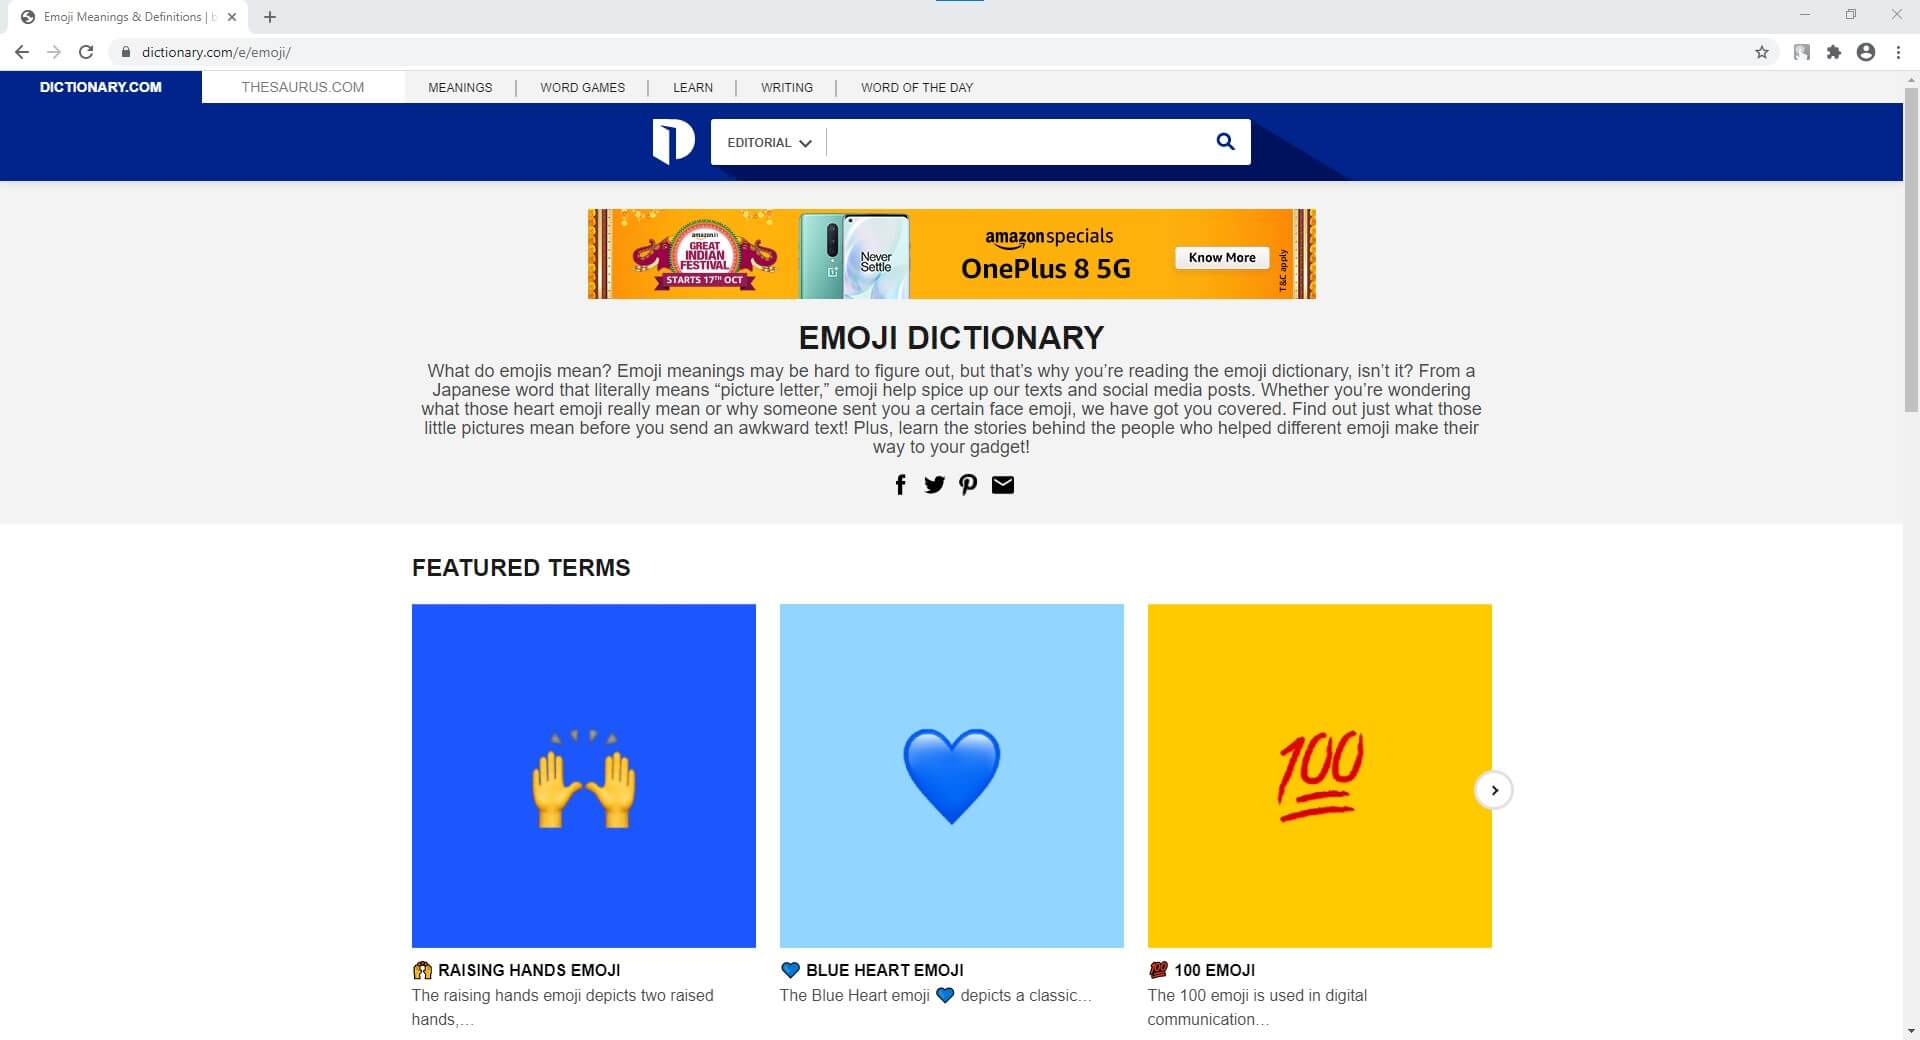
EMOJI DICTIONARY is another online portal that contains almost all the commonly used emojis. The upper section of the page is dedicated to ‘Featured Terms’ with a slider that has all the featured emojis. The next segment lists all the categories other than emojis.
The bottom area of the landing page has all the emojis along with their names and/or the supported devices. All the names in the section are hyperlinked that open a new page when clicked, and show all the details such as examples, usage, and origin related to that particular emoji.
3. Emoji Dictionary
https://emojidictionary.emojifoundation.com/
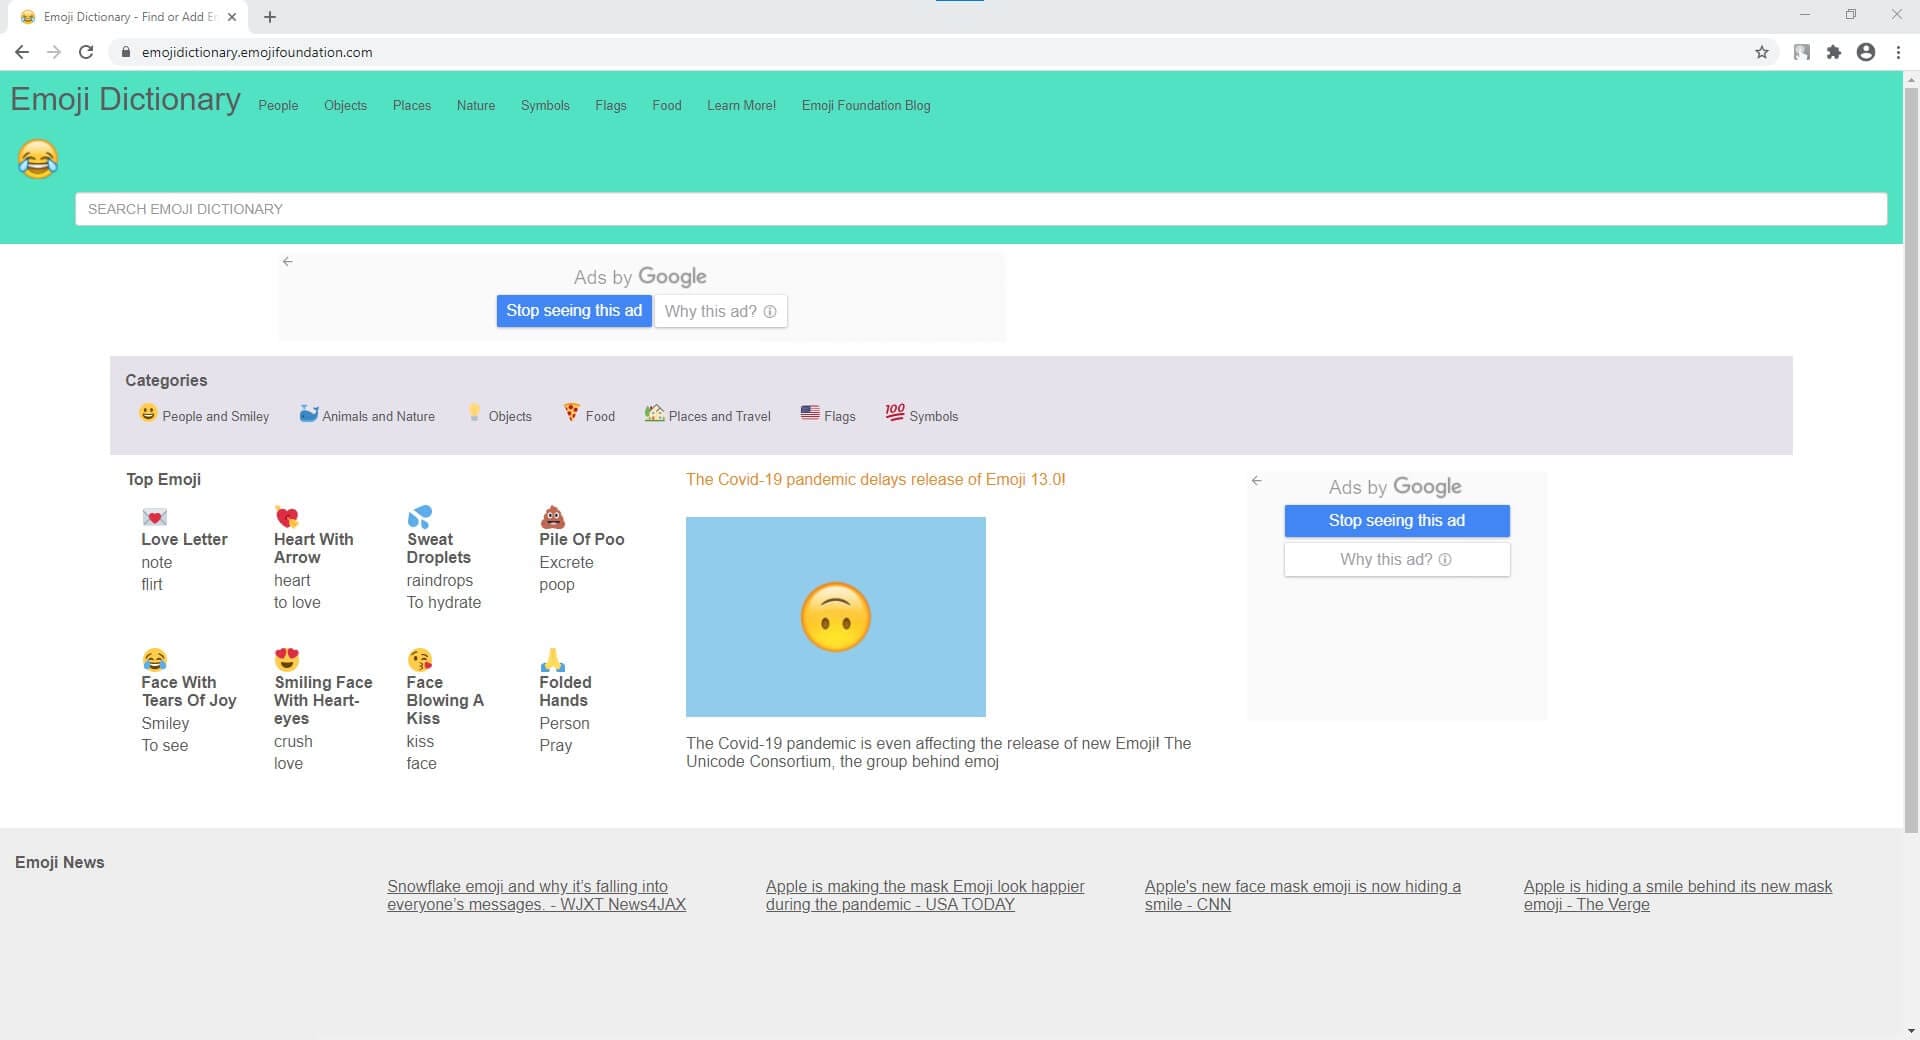
This one is unique in its own way as in along with listing the most popular emojis and their names and definitions, it also allows you to include your own information in case you know something other than what is already present.
In addition to displaying the top emojis right on the landing page, the portal also has a category list where each segment holds its corresponding objects. This helps in locating your favorite elements easily and quickly. Furthermore, when you click an emoji, a new page opens up with all its definition from different aspects such as nouns, verbs, etc., along with a ‘Copy’ button that lets you copy the image to the clipboard, and use it on a compatible messaging app.
4. EmojiMeanings
https://www.emojimeanings.net/
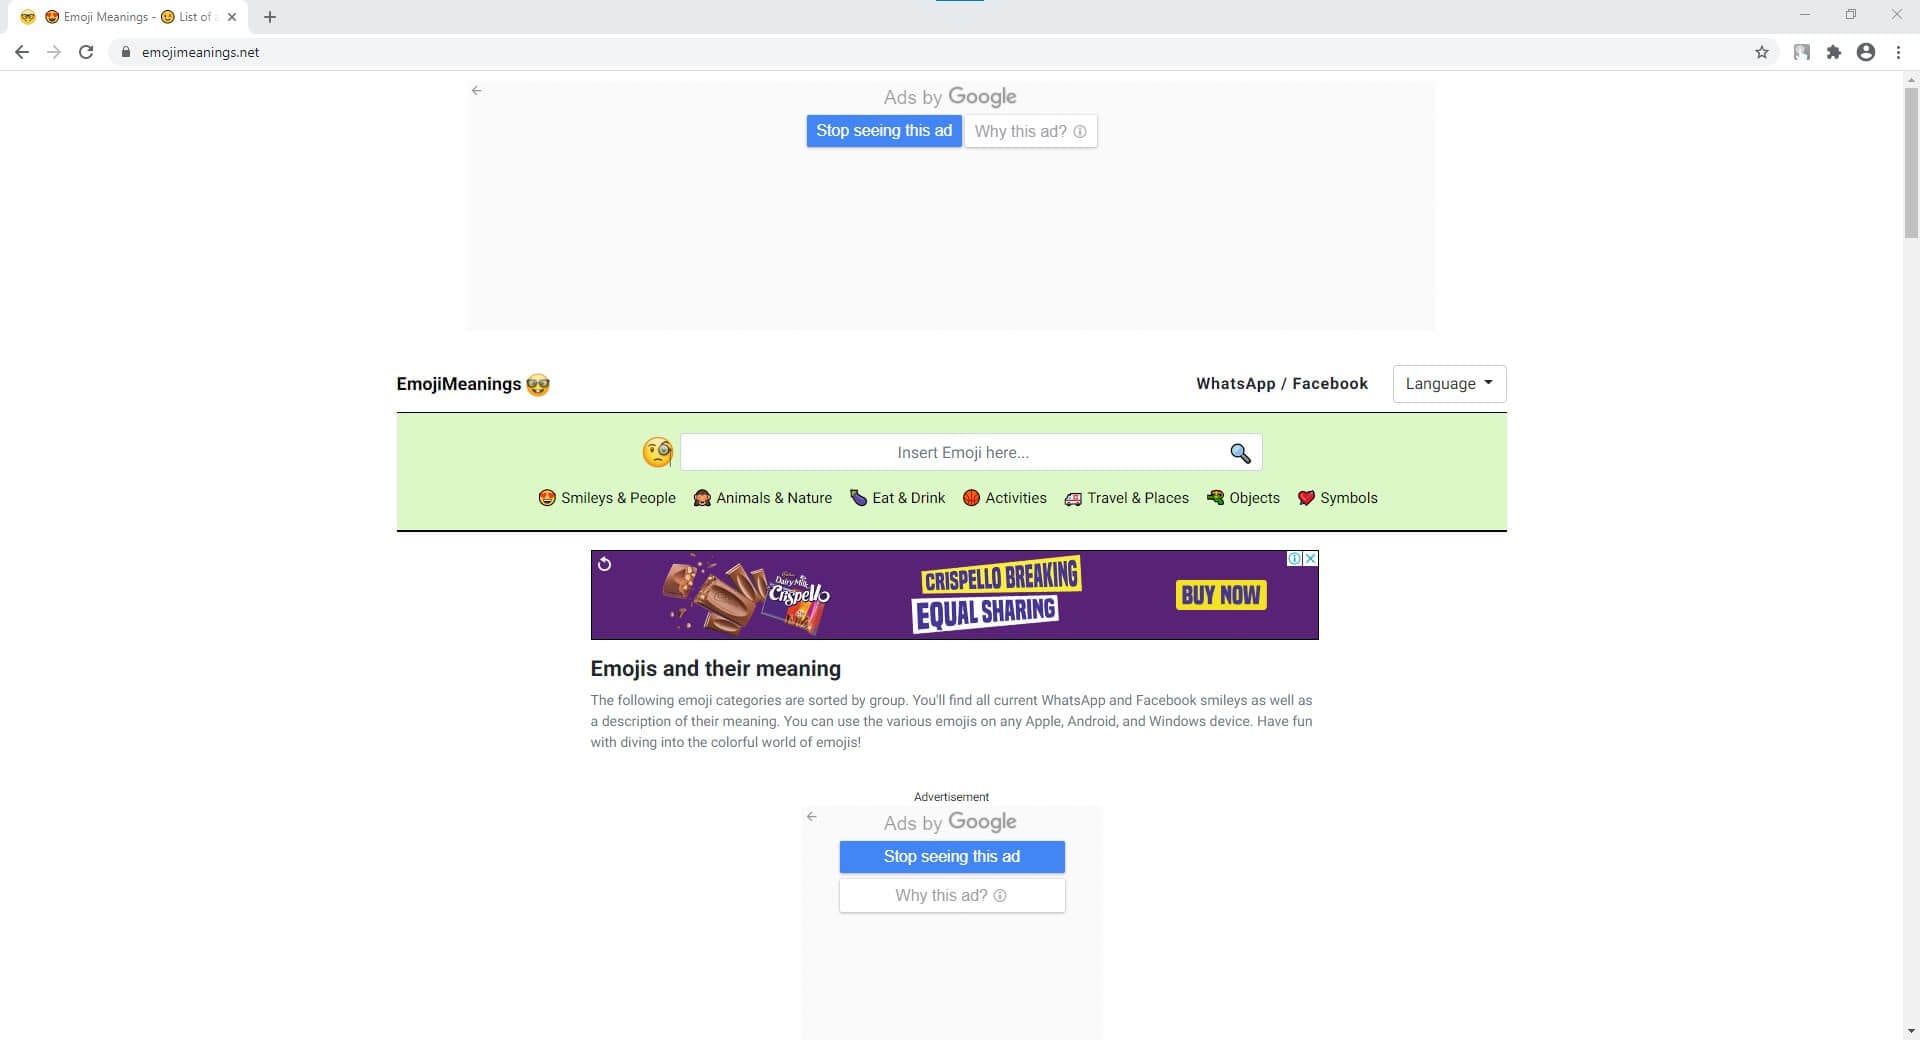
The landing page of EmojiMeanings is populated with all the categories where each holds several relevant emojis, thus making it easier for the users to find and learn their meaning. The home page also has complete information about what emojis are, how they are different from emoticons, and what does the term ‘smiley’ actually mean.
When you click a category, a new page opens up with three major columns titled as ‘Emoji’, ‘Meaning’, and ‘Unicode’ that show an emoji itself, explain what it means, and what Unicode is used to form it respectively. All the emojis on EmojiMeanings are usually compatible with WhatsApp and Facebook.
5. HotEmoji
https://hotemoji.com/emoji-meanings.html
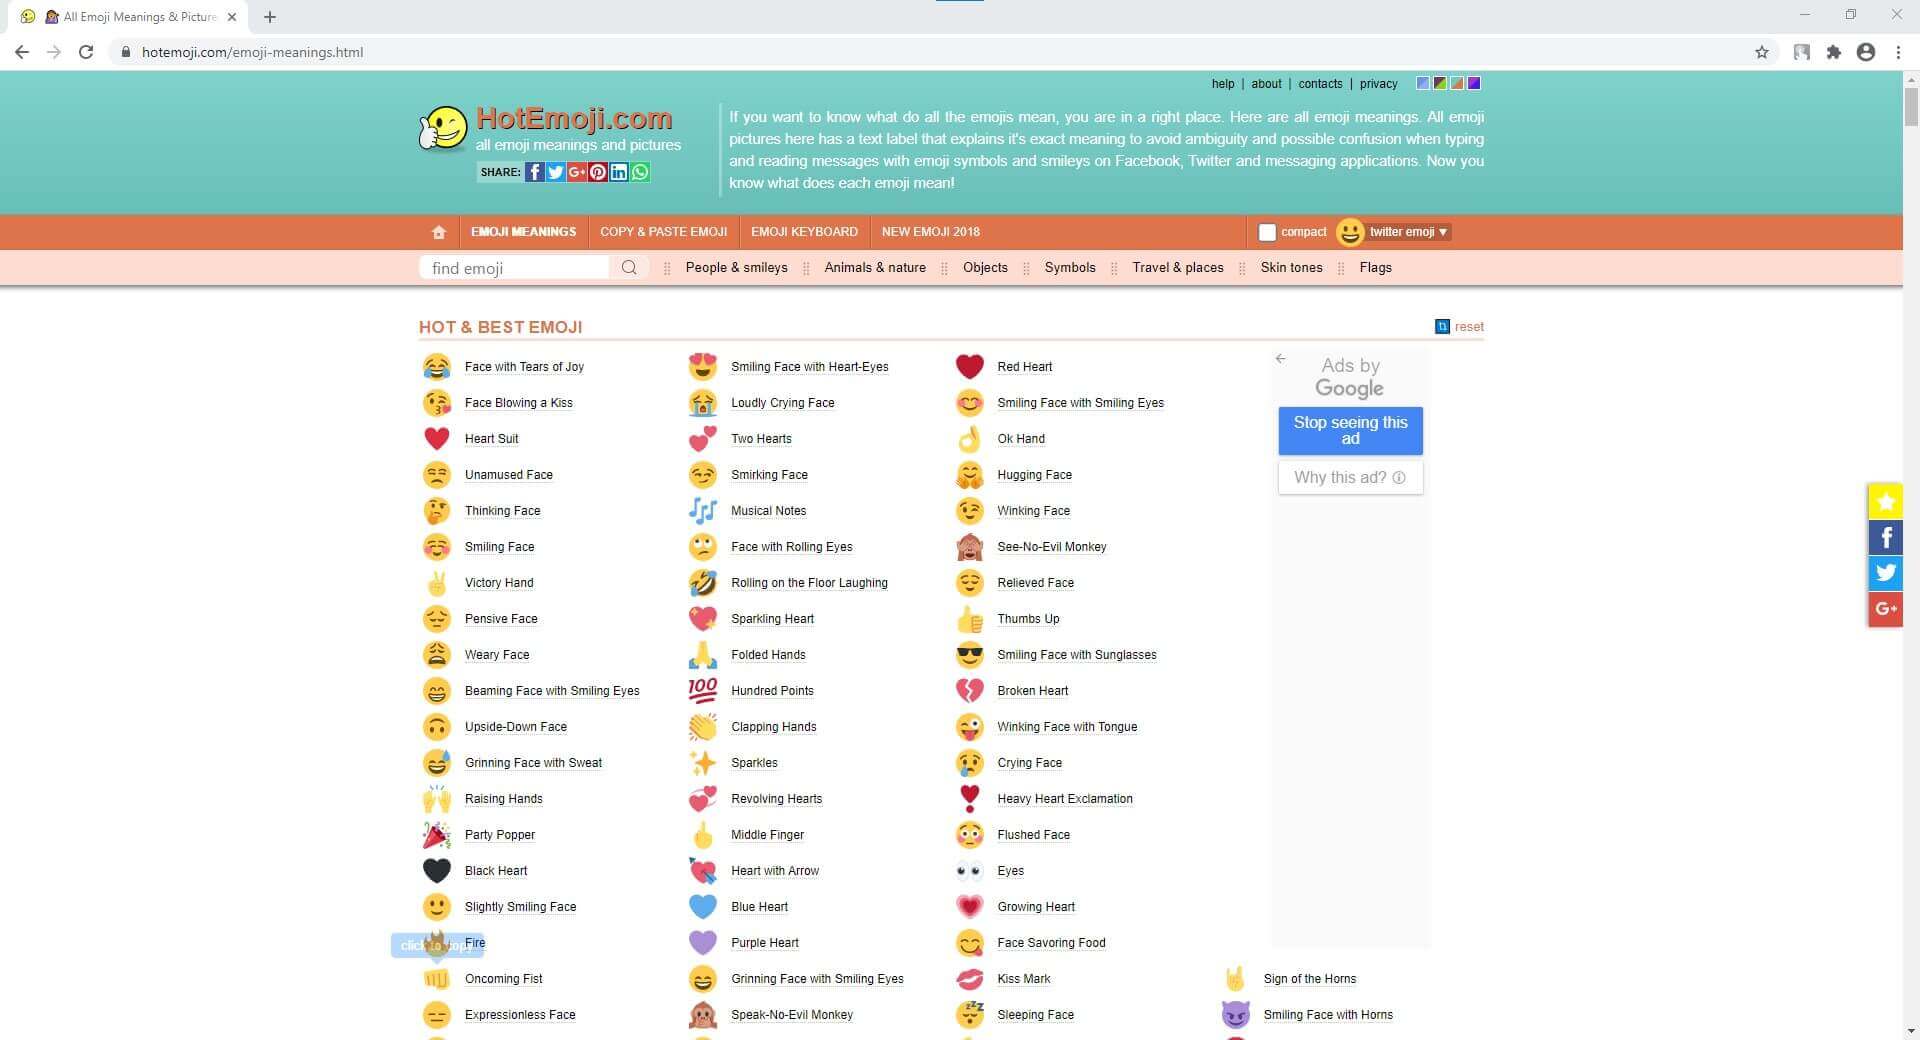
HotEmoji is yet another online portal that lists almost all the emojis along with their meanings. Each entry is hyperlinked which when clicked opens a new web page dedicated to that particular emoji where all the details about it are mentioned.
The new page also has a ‘Copy’ button that can be used to copy the object to the clipboard, and then the element can be pasted onto any compatible messenger during a text conversation.
Part 4: How to Find Emoji on Any Device?
While locating and inserting emojis on any messaging app on your smartphone is fairly simple as the messenger already has an icon that opens the entire emoji library when tapped, things are a bit tricky while using a Mac or Windows PC. Therefore, the following points explain how to find and use emojis on the computer running any of these operating systems:
How to Find Emojis on Windows 8 and Windows 10
On Windows 8 or Windows 10 computers, click the ‘Keyboard’ icon that is present in the ‘Notification area’ at the bottom-right corner of the screen, i.e. right side of the taskbar. When the list of emojis appears, you can click your favorite one and use it in the messenger.
How to Find Emojis on macOS
While using a Mac computer, you can open the app you want to add an emoji to, and then press the ctrl + cmd + spacebar keys on the keyboard.
Part 5: Most Common Emoji Categories
Some of the most commonly used categories that you must know after understanding what is an emoji include:
- Smileys & People – Holds the images of faces reflecting facial expressions and the vector images/animations of some popular people
- Animals & Nature – Contains the images/animations of animals and other natural elements such as trees, rocks, mountains, etc.
- Food & Drink – This category has vector images of beautifully decorated and well-aligned wine glasses, soft drink cans, pizza slices, etc.
- Activity – Has the emojis that reflect certain actions such as dance stances, walking, running, etc.
- Travel & Places – Is equipped with vectors of transportation mediums and locations such as trains, buses, buildings, banks, etc.
- Objects – Is populated with miscellaneous objects like a pair of shoes, suits, clocks, socks, etc.
- Symbols – This one consists of different types of symbols such as an equal to sign, stop sign, delta symbol, and many more
- Flags – This category contains flags of almost all the countries of the world. These emojis are mostly used to illustrate your current or destination location for reference
Part 6: Tips of Using Emojis
It is always a good idea to use emojis every now and then. However, using too many of them in your conversation might make the entire text look overly populated, and your communication partner may lose interest in you. Therefore, understanding when and how to use emojis is as important as it is to know what the emoji means.
Add Emojis to Video with Filmora
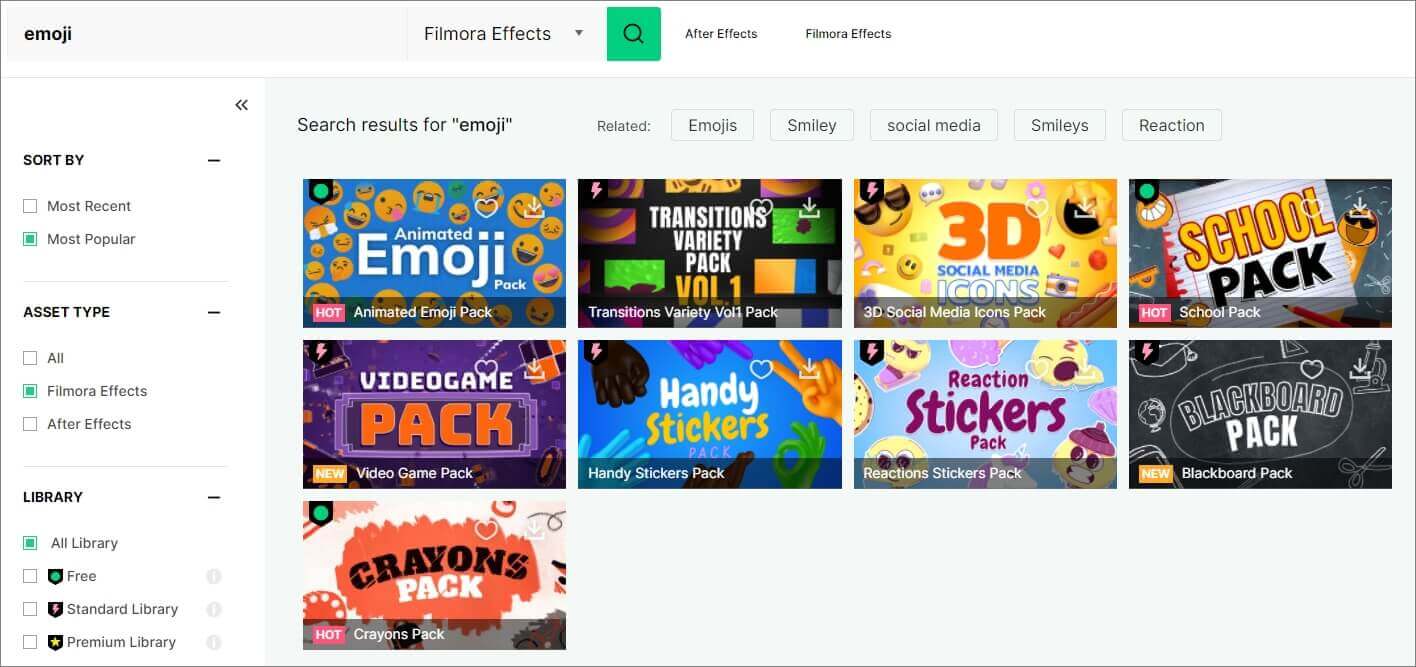
If you want to add animated emojis to video and share on social media, then Filmora is a good choice. Besides the built-in free animated emojis under Effects tab, you will also find some free or paid animated emojis or stickers on the effects store Filmstock. Download the free trial version of Filmora and create videos with fun.


Shanoon Cox
Shanoon Cox is a writer and a lover of all things video.
Follow @Shanoon Cox
Shanoon Cox
Mar 27, 2024• Proven solutions
If you ever wondered what is emoji, and how the term relates (or unrelates) to its elder sibling emoticon, you are at the right place. In the following sections, you will learn some quite interesting facts about the two, what different types of emojis are available, and what do they mean.
Because understanding the meaning of emojis is more important as compared to knowing what is an emoji itself, here you will get all the related details, relevant answers, and some best practice tips.
Part 1: What Is an Emoji?
In a nutshell, an emoji is a graphical image that reflects a certain facial expression. Emojis are created using a drawing tool, and are incorporated into a unique 16-bit Unicode in order to make them compatible with operating systems of the most common devices and platforms like iOS, Android, macOS, and Windows.
In addition to being merely a picture, emojis are also animated to exaggerate the message senders’ emotions. You can find a couple of decent examples of such animations while using Skype messenger.
The reason behind emojis being more popular than the emoticons used earlier is the close resemblance of the former to the real-like expressions that they reflect when sent to a recipient. Therefore, it would be safe to say that a single emoji could be worth several sentences while texting if used correctly.
Part 2: What are the Differences Between Emojis and Emoticons?
As explained earlier, the emojis are graphical and sometimes animated Unicode illustrations that can be included in the text messages as objects.
On the other hand, the emoticons are formed using the ASCII characters, and no specific coding is required at the users’ side to create them. Simply put, an emoticon can be easily added to a text message or even to an email merely by using a combination of letters on the keyboard.
For instance, to create an emoticon of a smiley face, all you need to do is, type a colon sign along with a closing brace. (E.g. Typing a : and ) without space will become a smiling face, a : and ( will form a sad face, and so on).
To be clearer, emojis can be considered an advanced, better, and evolved version of emoticons. While the latter can be formed using simple characters like letters and symbols, the former is inserted as an object in the text messages.
Part 3: Where to Find the Meaning of Emojis?
Once you have understood what emoji is, it is now time to learn what the emojis mean. This part is imperative to ensure you don’t send a wrong emotional expression to your friends or family members, and get into some awkward situation after that.
Below is a list of some useful online websites and dictionaries that can help you find correct emojis along with their meanings to make your text conversation more meaningful and interesting:
1. Emojipedia
Emojipedia is an online library that holds several emojis. All the emojis that the portal has are placed in their corresponding categories.
Another section on the landing page of the website contains some of the most popular emojis, i.e. those that are mostly used by the texters during their conversions. Furthermore, the name of the emoji is present right next to it, and the entire part is hyperlinked which when clicked, takes you to a new page that has all the details about the object including its meaning, alternate names, and a button to copy the emoji to the clip board. The copied element can then be pasted in the text input field of a compatible messenger such as Facebook.
2. EMOJI DICTIONARY
https://www.dictionary.com/e/emoji/
EMOJI DICTIONARY is another online portal that contains almost all the commonly used emojis. The upper section of the page is dedicated to ‘Featured Terms’ with a slider that has all the featured emojis. The next segment lists all the categories other than emojis.
The bottom area of the landing page has all the emojis along with their names and/or the supported devices. All the names in the section are hyperlinked that open a new page when clicked, and show all the details such as examples, usage, and origin related to that particular emoji.
3. Emoji Dictionary
https://emojidictionary.emojifoundation.com/
This one is unique in its own way as in along with listing the most popular emojis and their names and definitions, it also allows you to include your own information in case you know something other than what is already present.
In addition to displaying the top emojis right on the landing page, the portal also has a category list where each segment holds its corresponding objects. This helps in locating your favorite elements easily and quickly. Furthermore, when you click an emoji, a new page opens up with all its definition from different aspects such as nouns, verbs, etc., along with a ‘Copy’ button that lets you copy the image to the clipboard, and use it on a compatible messaging app.
4. EmojiMeanings
https://www.emojimeanings.net/
The landing page of EmojiMeanings is populated with all the categories where each holds several relevant emojis, thus making it easier for the users to find and learn their meaning. The home page also has complete information about what emojis are, how they are different from emoticons, and what does the term ‘smiley’ actually mean.
When you click a category, a new page opens up with three major columns titled as ‘Emoji’, ‘Meaning’, and ‘Unicode’ that show an emoji itself, explain what it means, and what Unicode is used to form it respectively. All the emojis on EmojiMeanings are usually compatible with WhatsApp and Facebook.
5. HotEmoji
https://hotemoji.com/emoji-meanings.html
HotEmoji is yet another online portal that lists almost all the emojis along with their meanings. Each entry is hyperlinked which when clicked opens a new web page dedicated to that particular emoji where all the details about it are mentioned.
The new page also has a ‘Copy’ button that can be used to copy the object to the clipboard, and then the element can be pasted onto any compatible messenger during a text conversation.
Part 4: How to Find Emoji on Any Device?
While locating and inserting emojis on any messaging app on your smartphone is fairly simple as the messenger already has an icon that opens the entire emoji library when tapped, things are a bit tricky while using a Mac or Windows PC. Therefore, the following points explain how to find and use emojis on the computer running any of these operating systems:
How to Find Emojis on Windows 8 and Windows 10
On Windows 8 or Windows 10 computers, click the ‘Keyboard’ icon that is present in the ‘Notification area’ at the bottom-right corner of the screen, i.e. right side of the taskbar. When the list of emojis appears, you can click your favorite one and use it in the messenger.
How to Find Emojis on macOS
While using a Mac computer, you can open the app you want to add an emoji to, and then press the ctrl + cmd + spacebar keys on the keyboard.
Part 5: Most Common Emoji Categories
Some of the most commonly used categories that you must know after understanding what is an emoji include:
- Smileys & People – Holds the images of faces reflecting facial expressions and the vector images/animations of some popular people
- Animals & Nature – Contains the images/animations of animals and other natural elements such as trees, rocks, mountains, etc.
- Food & Drink – This category has vector images of beautifully decorated and well-aligned wine glasses, soft drink cans, pizza slices, etc.
- Activity – Has the emojis that reflect certain actions such as dance stances, walking, running, etc.
- Travel & Places – Is equipped with vectors of transportation mediums and locations such as trains, buses, buildings, banks, etc.
- Objects – Is populated with miscellaneous objects like a pair of shoes, suits, clocks, socks, etc.
- Symbols – This one consists of different types of symbols such as an equal to sign, stop sign, delta symbol, and many more
- Flags – This category contains flags of almost all the countries of the world. These emojis are mostly used to illustrate your current or destination location for reference
Part 6: Tips of Using Emojis
It is always a good idea to use emojis every now and then. However, using too many of them in your conversation might make the entire text look overly populated, and your communication partner may lose interest in you. Therefore, understanding when and how to use emojis is as important as it is to know what the emoji means.
Add Emojis to Video with Filmora
If you want to add animated emojis to video and share on social media, then Filmora is a good choice. Besides the built-in free animated emojis under Effects tab, you will also find some free or paid animated emojis or stickers on the effects store Filmstock. Download the free trial version of Filmora and create videos with fun.
Shanoon Cox
Shanoon Cox is a writer and a lover of all things video.
Follow @Shanoon Cox
10 Free Online Sticker Makers to Make Your Own Stickers
10 Free Online Sticker Makers to Make Your Own Stickers
Shanoon Cox
Mar 27, 2024• Proven solutions
Over the years, the method of communication has changed a lot with the advancement of technological products and innovations. Be it personal forms of communication, advertisements, or public awareness, things are very different now. This is an era of digital boards, online texts, and stickers.
Making one’s own stickers have been one of the latest trends of communication on social media platforms. The use of stickers makes the conversation interesting and fun and allows people to express their opinions hilariously, without offending anyone. That is why there are a lot of online sticker makers available in the market.
Online sticker makers allow you to create your own stickers in whichever way you wish. These online sticker makers have taken the fun and involvement of socially active people to another level. So let’s dig in and find out about the best free online sticker makers available in the market.
You might be interested in:
- Part 1: 10 Free Online Stickers to Make Your Own Stickers
- Part 2: Add Sticker to Your Video with Wondershare Filmora
Part 1: 10 Free Online Stickers to Make Your Stickers
With the right applications, making your own stickers can be very easy. There are a lot of online sticker makers that allow you to create your own stickers, but the best ones among them will do the job more creatively and easily. So, let’s have a look at the top free online sticker makers we have selected for you in terms of features and easiness to use.
- 1. StickerYou
- 2. Canva
- 3. Crello
- 4. PsPrint
- 5. Jukebox
- 6. PicsArt
- 7. Uprinting
- 8. Avery
- 9. MakeStickers
- 10. Labeley
1. StickerYou
StickerYou is a wonderful online sticker maker that helps you to create clear cut stickers easily. You can upload any photo that you wish to convert into a sticker, provided those are in PNG, JPG, JPEG, or GIF formats.
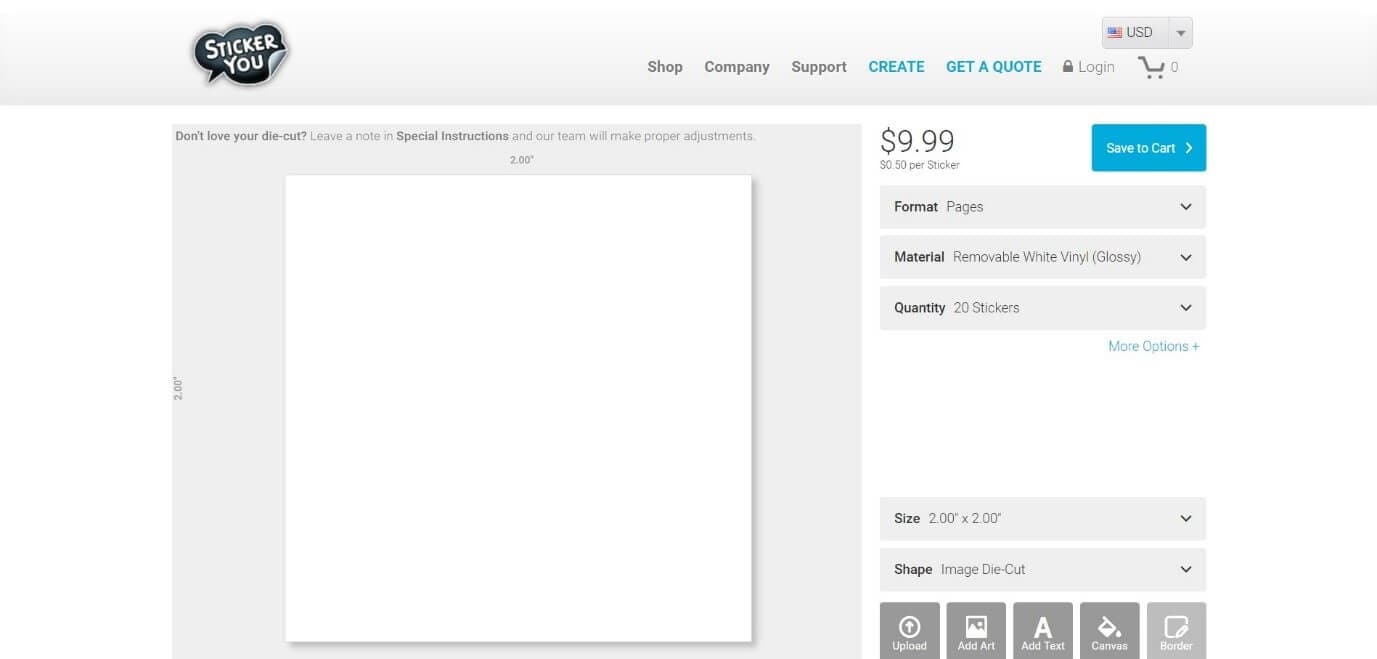
Pricing
- $0.50 per Sticker
Features
- Allows to add art to the sticker
- Provides editing options like border, text, canvas, etc. within the tool itself
- Provides shipping delivery of physical copies of the stickers
- This tool can be accessed online from any computer or mobile device
2. Canva
Canva is an online tool that allows you to create your own customized stickers and labels with a professional touch. In Canva, you can either design a sticker from scratch or develop one from the hundreds of pre-installed designer templates.
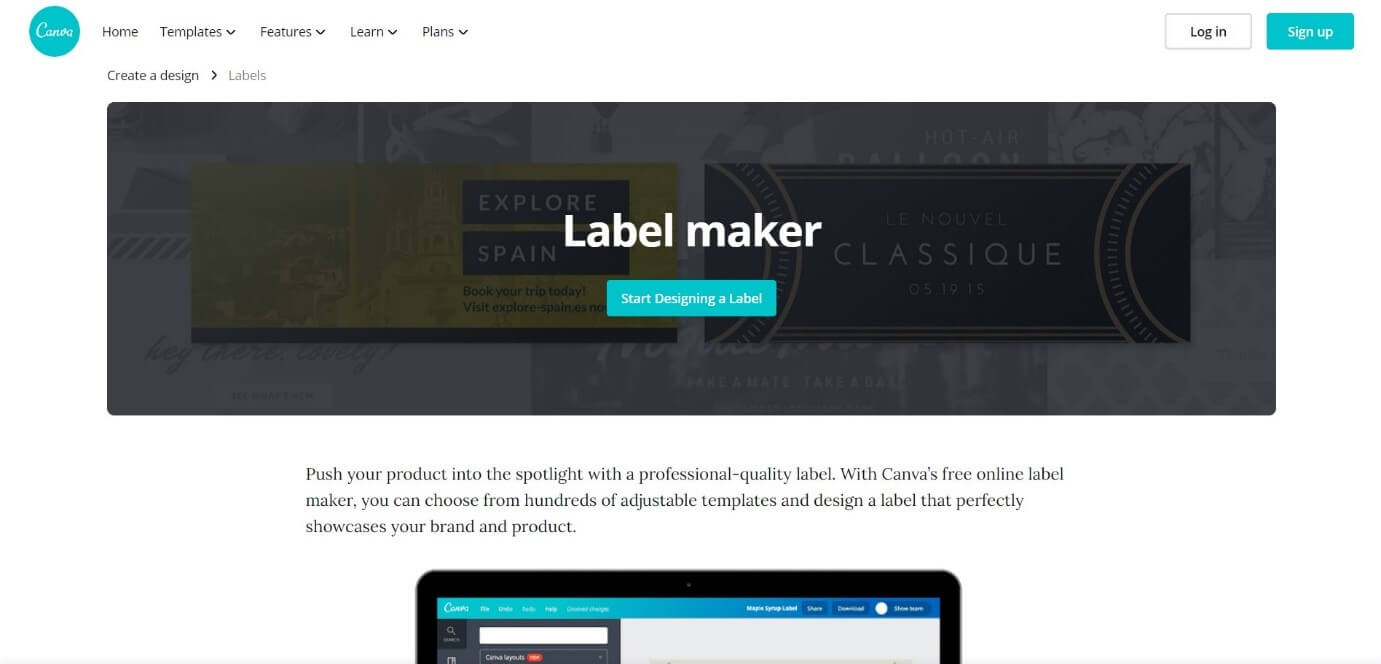
Pricing:
- Free version
- Pro version with more advanced tools and features
Features:
- 100+ adjustable templates and design options
- About a million images, illustrations, colors, and texts to choose from
- Occasion based designs and custom dimensions to choose
- Easy sticker making in three steps – upload, edit, and download
3. Crello
Crello allows users to create adorable and fun stickers in whatever design they wish. It is an online sticker maker that grants a lot of editing features to make the result more outstanding, provided the users have signed into their account
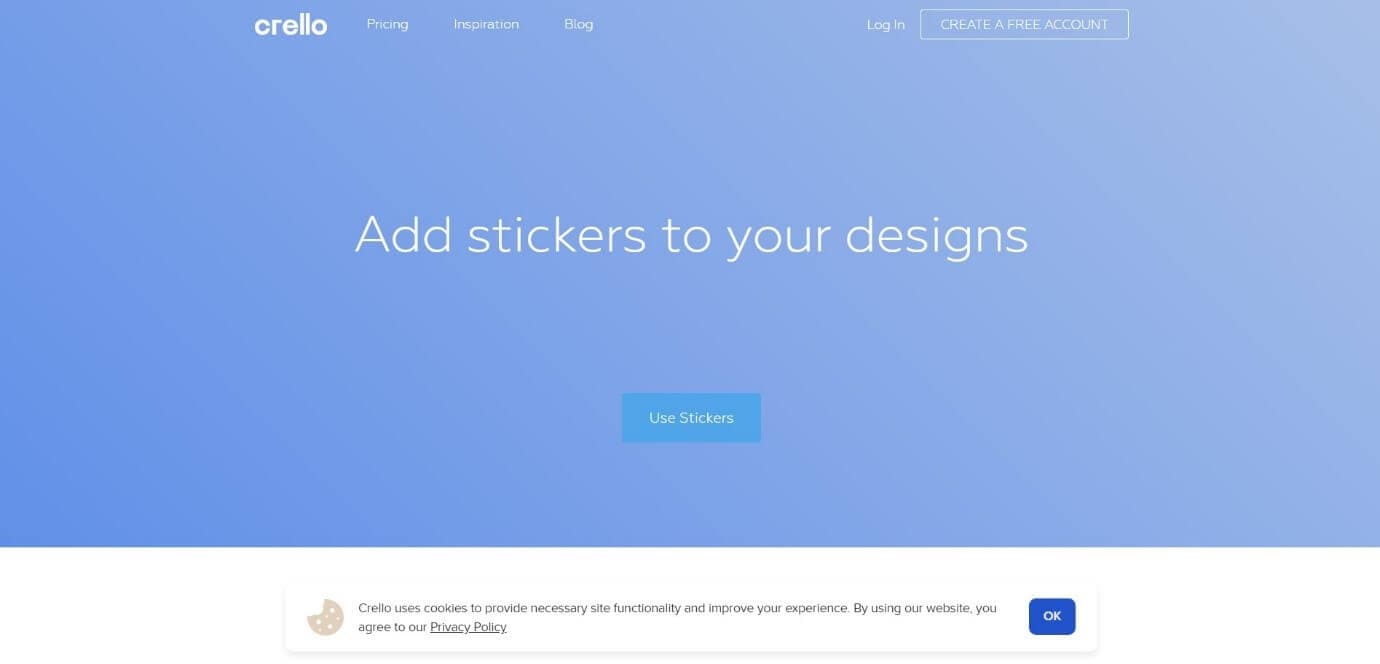
Pricing:
- Starter pack – Free
- Pro pack - $7.99 per month
Features:
- Options to create photos, images, illustrations, patterns, and text badges in customizable shapes
- More than 30,000 templates to create whatever you wish
- Availability of more than 500,000 premium photos and 140M plus royalty-free pics
- Simple design and video editing features
4. PsPrint
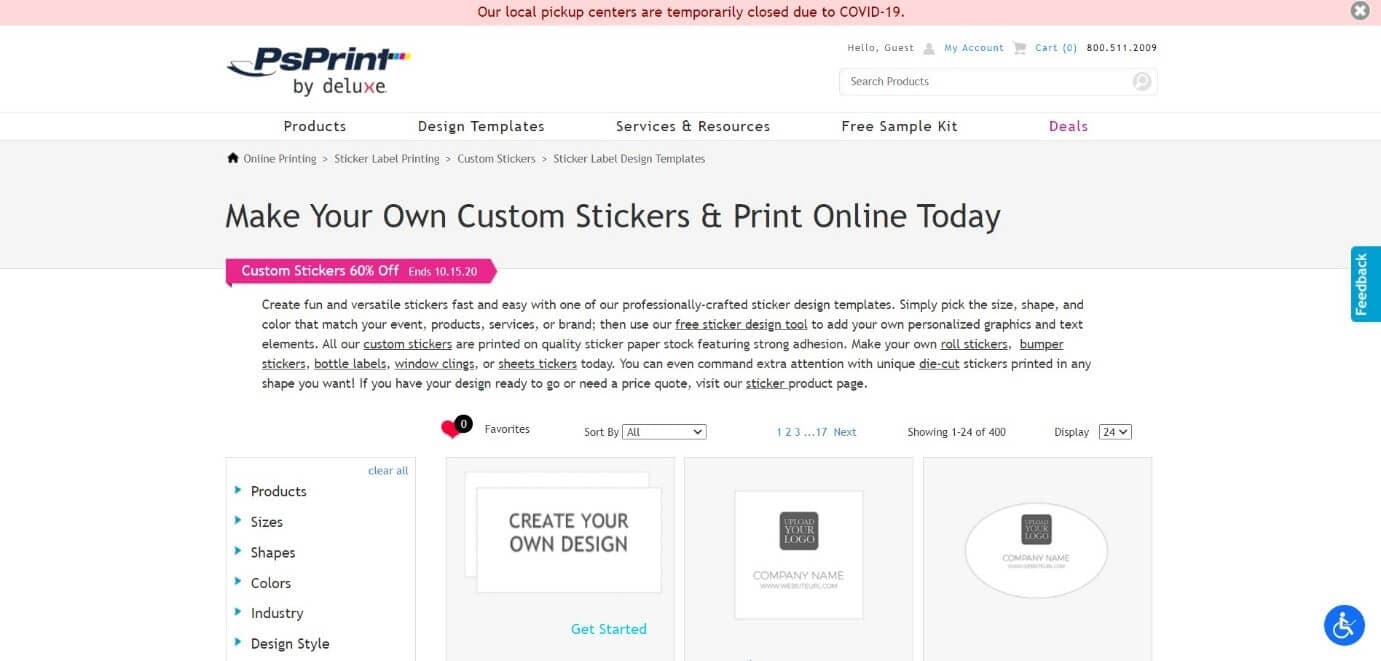
PsPrint is an application that can help you to create versatile and fun stickers with ease with a design template that is professionally crafted. All you need is to simply pick up your desired shape, size, and color.
Pricing:
- Free kit
- Paid – depending on the stickers you choose
Features:
- A free designing tool to add personalized texts elements and graphics
- Availability of physical copy of stickers printed and cut in any dimension
- Occasion based options of design to choose from
5. Jukebox
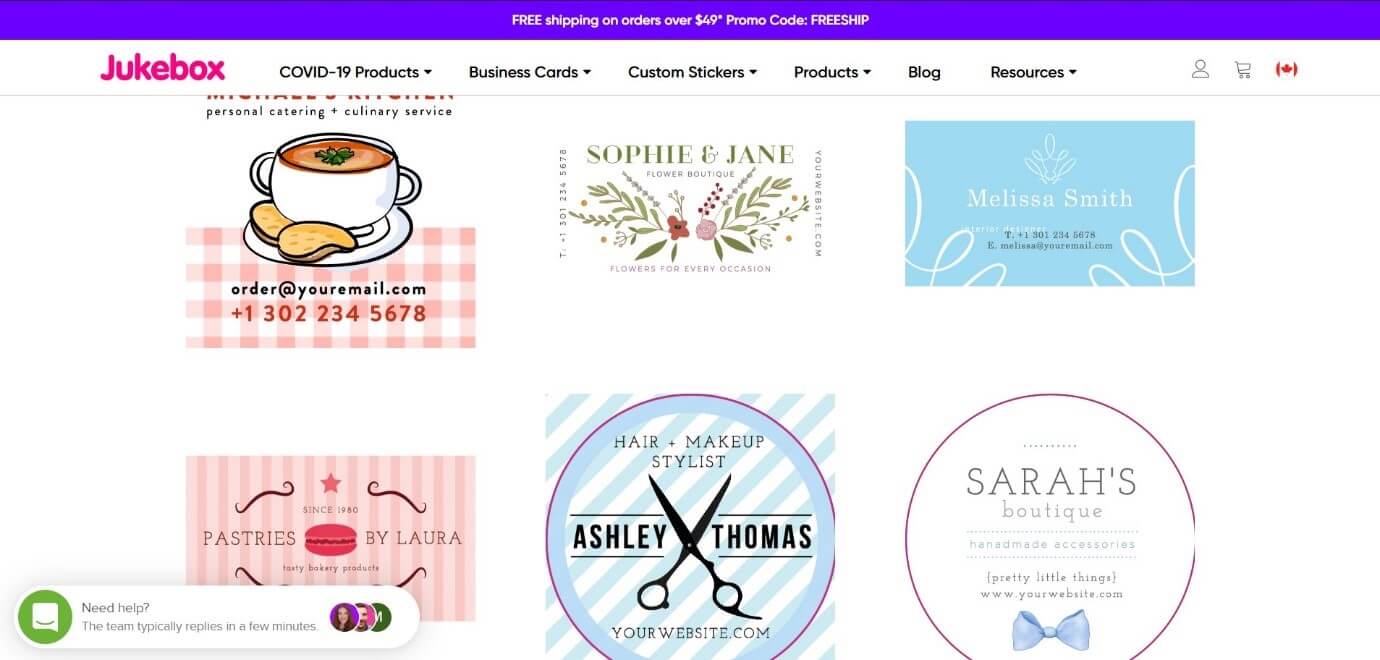
Jukebox allows users to design and print a variety of stickers and provides quality templates to do so. This online sticker maker allows you to choose the shape size and material of the sticker first, and once designing is done, high-quality stickers will be printed up.
Pricing:
- Depends upon features like size, material, and quantity
Features:
- Can create stickers in any shape and finishing
- High-quality stickers that are easy to peel and weather resistant
- Free shipping for orders totaling more than $75
- One day turn around option available
6. PicsArt
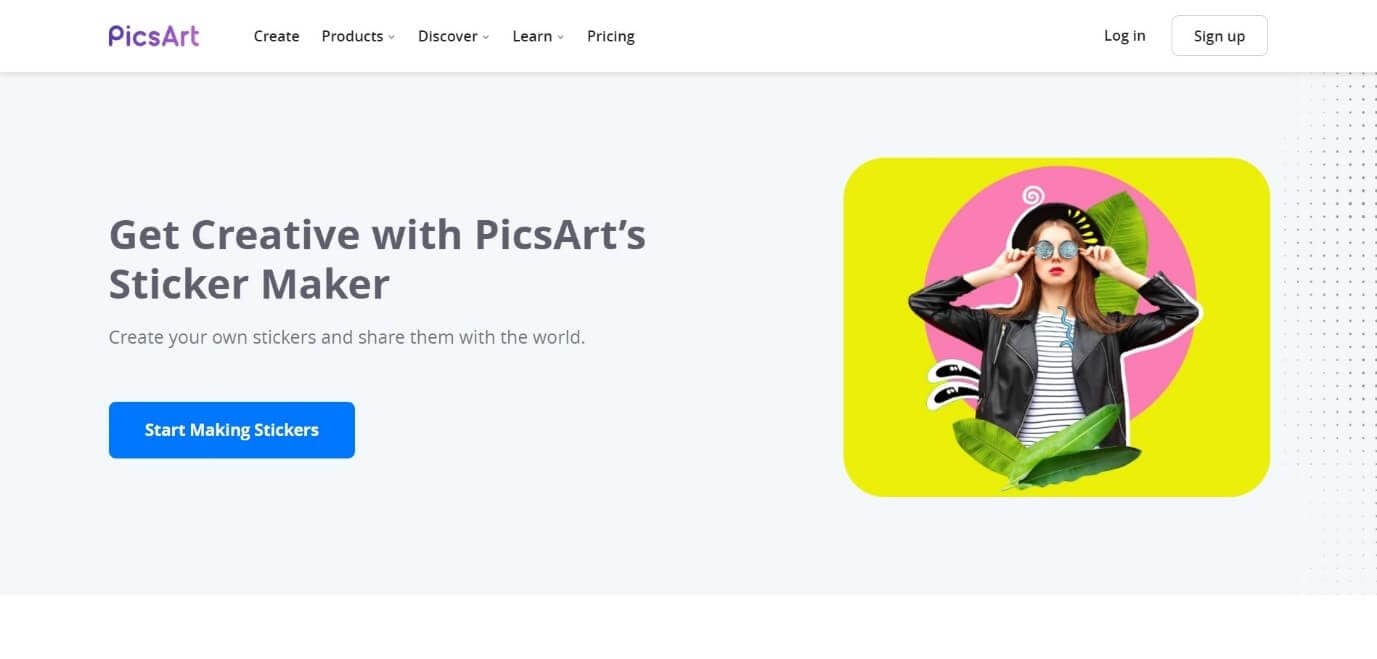
Picsart is one of the most popular photo editing applications that also features the option of online sticker making. This application provides a large number of pre-customized online stickers and also has the best features if you are interested in creating one.
Pricing:
- Free
- Gold offer - $4.66 per month
Features:
- Easy creation and sharing of stickers
- Online sharing and printing options
- An AI technology that can remove the background of any pictures perfectly
- Amazing editing features like erase tool, brush off tool, axis rotation, etc.
7. Uprinting
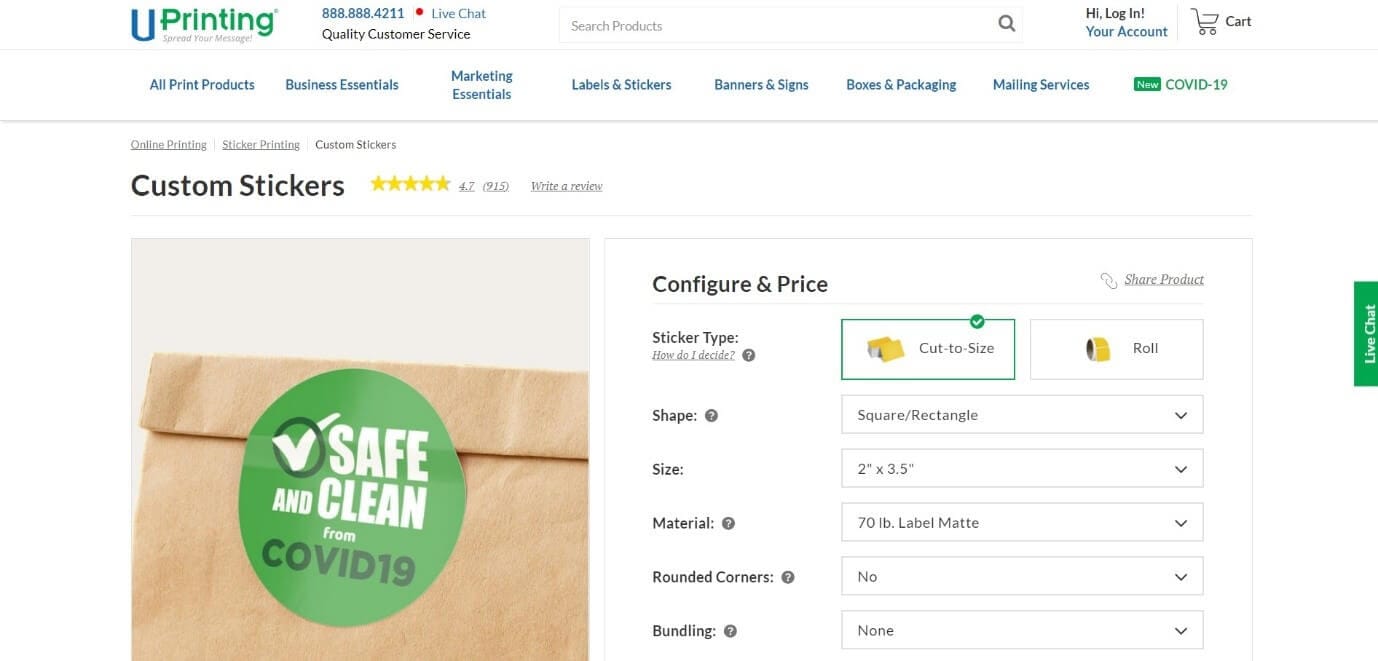
Uprinting is an all-purpose online sticker making tool that can help you create appealing stickers according to your idea. It is a clean tool and you can order stickers in small as well as very large sizes. Also the sticker options available make it easy to choose.
Pricing:
- $42.29 ($0.17 for each sticker)
Features:
- Roll sticker cut to any shape and size
- Sticker available with a gloss finish as well as matt coated
- Availability of waterproof material for stickers
- Easy peel of hard sticking
8. Avery
Avery lets its users create seals and stickers personalized to their choice of interest. This online sticker making tool allows you to choose a design, make the necessary edits using the built-in options, print, and then save it on your device.

Pricing
- Pricing depends on the order of purchase
Features:
- Free printable designs that fit any occasion
- High-quality material suitable for packing
- Free shipping for all orders above $50
- Premium quality designs and products and 100 percent satisfaction guaranteed
9. MakeStickers
MakeStickers is a custom online sticker maker that offers a lot of features and sticker creating options to its users. It has a very simple user interface and anyone can create stickers easily using this online tool.
Pricing:
- Pricing depends on the quantity and dimensions of the stickers
Features:
- Availability of sticker in many cute shapes and colors
- Waterproof polypropylene material that is hard to get damaged by any liquids
- Laminated with a glossy or matte finish to ensure more durability
- Split back in the middle for easy peeling
10. Labeley
Labeley is a site that offers free online sticker creation without any hassles like a mandatory sign in or trail periods. It is a simple application that can be used to create a sticker and share them on any social platform instantly.

Pricing
- Free of cost
Features
- Allows to create customized stickers in minutes
- A lot of categories of designs to choose from
- Simple editing tools and easy to use interface
- Professional methods used for printing the stickers
Part 2: Add Sticker to Your Video with Wondershare Filmora
Wondershare Filmora is one of the most popular and widely used video editing applications around the world that offers exciting and extensive video editing features. Be it creating a simple meme or editing a professional level movie, Filmora is the application that you can choose with your eyes closed.
Stickers a way to express one’s opinion or idea in an effective way. Most of the time these stickers convey things that long sentences can’t. This is why many movie makers and editors prefer to add stickers to their videos. Also adding stickers to a video make it, more interesting, fun to watch, and appealing to the viewers. So let’s see how a custom sticker can be added to a video using Filmora.
Steps to Follow:
Step 1: Install the Filmora application on your device and open it. Then import the video you need to edit and the custom stickers you need to add to the Media Library.
Step 2: Drag the video first to the timeline, followed by the stickers respectively. And choose the sticker options available from the Elements tab.
Step 3: Double click the sticker. Then you can rotate, flip, or resize it as you want. Or you can right-click the sticker on the timeline to get more advanced editing options, such as color grading, pan &zoom, and speed change, etc.
Step 4: Once the editing is completed, Export the video into the format you wish.

Conclusion
Stickers sometimes speak better than words and it is very important to know how to customize stickers as every individual wishes to speak differently. Stickers are used for many purposes, from casual chats to marketing means and home décor, which is why the quality of them is very important.
Online sticker makers allow you to customize stickers based on your ideas and depending on any occasion. We have listed the top free online sticker makers available that will allow you to create all the stickers you need. Thank you.
Shanoon Cox
Shanoon Cox is a writer and a lover of all things video.
Follow @Shanoon Cox
Shanoon Cox
Mar 27, 2024• Proven solutions
Over the years, the method of communication has changed a lot with the advancement of technological products and innovations. Be it personal forms of communication, advertisements, or public awareness, things are very different now. This is an era of digital boards, online texts, and stickers.
Making one’s own stickers have been one of the latest trends of communication on social media platforms. The use of stickers makes the conversation interesting and fun and allows people to express their opinions hilariously, without offending anyone. That is why there are a lot of online sticker makers available in the market.
Online sticker makers allow you to create your own stickers in whichever way you wish. These online sticker makers have taken the fun and involvement of socially active people to another level. So let’s dig in and find out about the best free online sticker makers available in the market.
You might be interested in:
- Part 1: 10 Free Online Stickers to Make Your Own Stickers
- Part 2: Add Sticker to Your Video with Wondershare Filmora
Part 1: 10 Free Online Stickers to Make Your Stickers
With the right applications, making your own stickers can be very easy. There are a lot of online sticker makers that allow you to create your own stickers, but the best ones among them will do the job more creatively and easily. So, let’s have a look at the top free online sticker makers we have selected for you in terms of features and easiness to use.
- 1. StickerYou
- 2. Canva
- 3. Crello
- 4. PsPrint
- 5. Jukebox
- 6. PicsArt
- 7. Uprinting
- 8. Avery
- 9. MakeStickers
- 10. Labeley
1. StickerYou
StickerYou is a wonderful online sticker maker that helps you to create clear cut stickers easily. You can upload any photo that you wish to convert into a sticker, provided those are in PNG, JPG, JPEG, or GIF formats.
Pricing
- $0.50 per Sticker
Features
- Allows to add art to the sticker
- Provides editing options like border, text, canvas, etc. within the tool itself
- Provides shipping delivery of physical copies of the stickers
- This tool can be accessed online from any computer or mobile device
2. Canva
Canva is an online tool that allows you to create your own customized stickers and labels with a professional touch. In Canva, you can either design a sticker from scratch or develop one from the hundreds of pre-installed designer templates.
Pricing:
- Free version
- Pro version with more advanced tools and features
Features:
- 100+ adjustable templates and design options
- About a million images, illustrations, colors, and texts to choose from
- Occasion based designs and custom dimensions to choose
- Easy sticker making in three steps – upload, edit, and download
3. Crello
Crello allows users to create adorable and fun stickers in whatever design they wish. It is an online sticker maker that grants a lot of editing features to make the result more outstanding, provided the users have signed into their account
Pricing:
- Starter pack – Free
- Pro pack - $7.99 per month
Features:
- Options to create photos, images, illustrations, patterns, and text badges in customizable shapes
- More than 30,000 templates to create whatever you wish
- Availability of more than 500,000 premium photos and 140M plus royalty-free pics
- Simple design and video editing features
4. PsPrint
PsPrint is an application that can help you to create versatile and fun stickers with ease with a design template that is professionally crafted. All you need is to simply pick up your desired shape, size, and color.
Pricing:
- Free kit
- Paid – depending on the stickers you choose
Features:
- A free designing tool to add personalized texts elements and graphics
- Availability of physical copy of stickers printed and cut in any dimension
- Occasion based options of design to choose from
5. Jukebox
Jukebox allows users to design and print a variety of stickers and provides quality templates to do so. This online sticker maker allows you to choose the shape size and material of the sticker first, and once designing is done, high-quality stickers will be printed up.
Pricing:
- Depends upon features like size, material, and quantity
Features:
- Can create stickers in any shape and finishing
- High-quality stickers that are easy to peel and weather resistant
- Free shipping for orders totaling more than $75
- One day turn around option available
6. PicsArt
Picsart is one of the most popular photo editing applications that also features the option of online sticker making. This application provides a large number of pre-customized online stickers and also has the best features if you are interested in creating one.
Pricing:
- Free
- Gold offer - $4.66 per month
Features:
- Easy creation and sharing of stickers
- Online sharing and printing options
- An AI technology that can remove the background of any pictures perfectly
- Amazing editing features like erase tool, brush off tool, axis rotation, etc.
7. Uprinting
Uprinting is an all-purpose online sticker making tool that can help you create appealing stickers according to your idea. It is a clean tool and you can order stickers in small as well as very large sizes. Also the sticker options available make it easy to choose.
Pricing:
- $42.29 ($0.17 for each sticker)
Features:
- Roll sticker cut to any shape and size
- Sticker available with a gloss finish as well as matt coated
- Availability of waterproof material for stickers
- Easy peel of hard sticking
8. Avery
Avery lets its users create seals and stickers personalized to their choice of interest. This online sticker making tool allows you to choose a design, make the necessary edits using the built-in options, print, and then save it on your device.
Pricing
- Pricing depends on the order of purchase
Features:
- Free printable designs that fit any occasion
- High-quality material suitable for packing
- Free shipping for all orders above $50
- Premium quality designs and products and 100 percent satisfaction guaranteed
9. MakeStickers
MakeStickers is a custom online sticker maker that offers a lot of features and sticker creating options to its users. It has a very simple user interface and anyone can create stickers easily using this online tool.
Pricing:
- Pricing depends on the quantity and dimensions of the stickers
Features:
- Availability of sticker in many cute shapes and colors
- Waterproof polypropylene material that is hard to get damaged by any liquids
- Laminated with a glossy or matte finish to ensure more durability
- Split back in the middle for easy peeling
10. Labeley
Labeley is a site that offers free online sticker creation without any hassles like a mandatory sign in or trail periods. It is a simple application that can be used to create a sticker and share them on any social platform instantly.
Pricing
- Free of cost
Features
- Allows to create customized stickers in minutes
- A lot of categories of designs to choose from
- Simple editing tools and easy to use interface
- Professional methods used for printing the stickers
Part 2: Add Sticker to Your Video with Wondershare Filmora
Wondershare Filmora is one of the most popular and widely used video editing applications around the world that offers exciting and extensive video editing features. Be it creating a simple meme or editing a professional level movie, Filmora is the application that you can choose with your eyes closed.
Stickers a way to express one’s opinion or idea in an effective way. Most of the time these stickers convey things that long sentences can’t. This is why many movie makers and editors prefer to add stickers to their videos. Also adding stickers to a video make it, more interesting, fun to watch, and appealing to the viewers. So let’s see how a custom sticker can be added to a video using Filmora.
Steps to Follow:
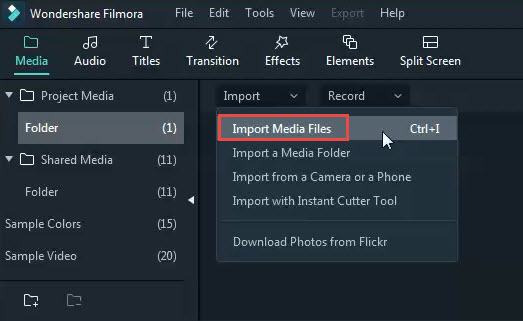
Step 1: Install the Filmora application on your device and open it. Then import the video you need to edit and the custom stickers you need to add to the Media Library.
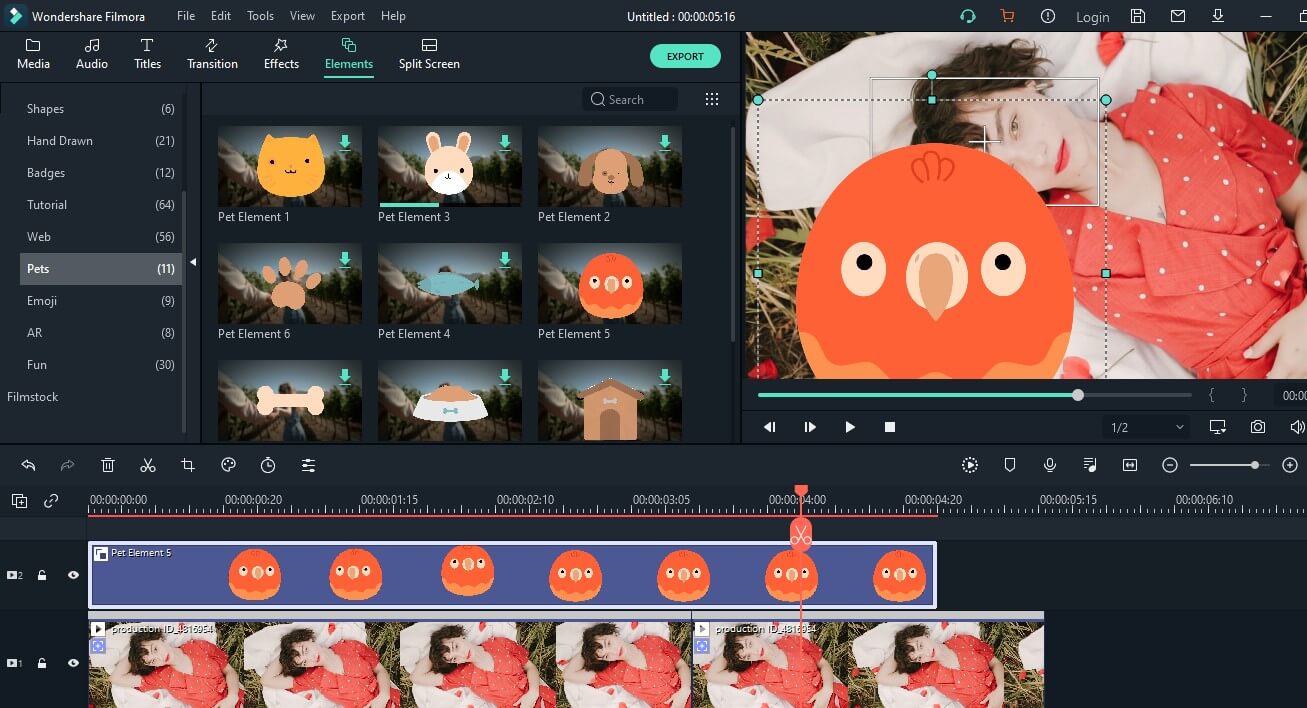
Step 2: Drag the video first to the timeline, followed by the stickers respectively. And choose the sticker options available from the Elements tab.
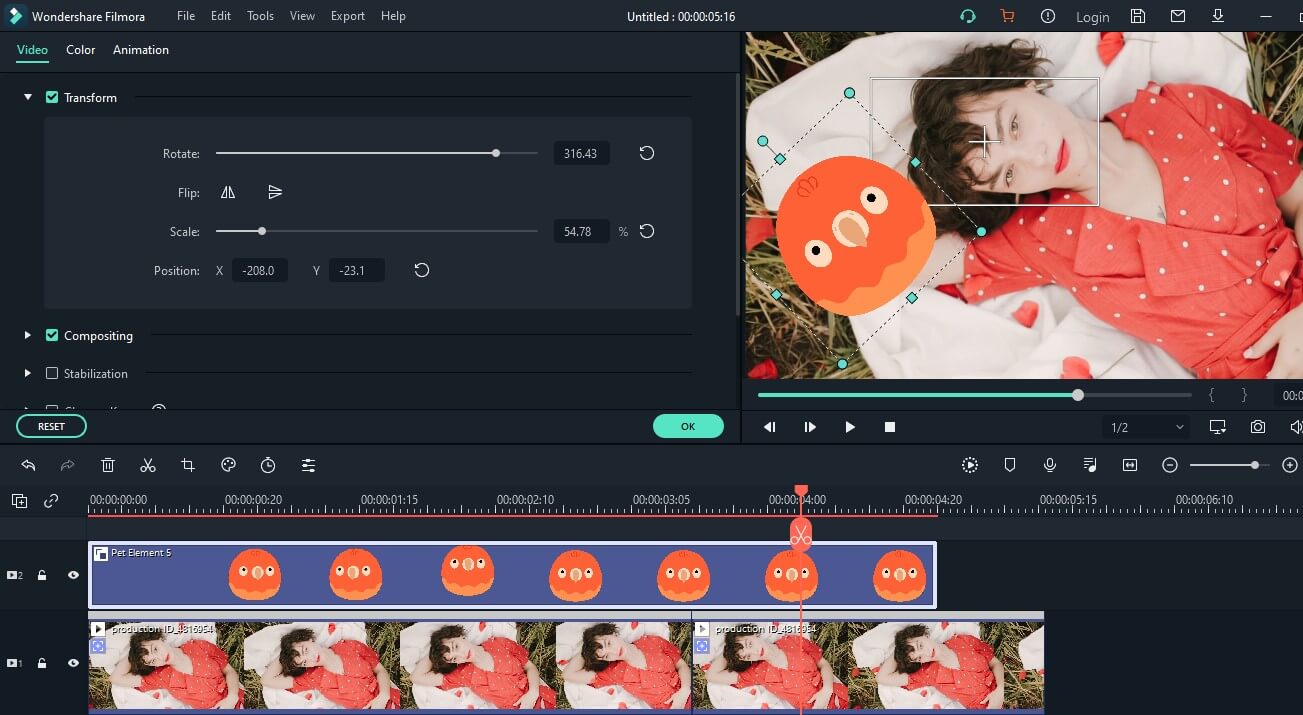
Step 3: Double click the sticker. Then you can rotate, flip, or resize it as you want. Or you can right-click the sticker on the timeline to get more advanced editing options, such as color grading, pan &zoom, and speed change, etc.
Step 4: Once the editing is completed, Export the video into the format you wish.
Conclusion
Stickers sometimes speak better than words and it is very important to know how to customize stickers as every individual wishes to speak differently. Stickers are used for many purposes, from casual chats to marketing means and home décor, which is why the quality of them is very important.
Online sticker makers allow you to customize stickers based on your ideas and depending on any occasion. We have listed the top free online sticker makers available that will allow you to create all the stickers you need. Thank you.
Shanoon Cox
Shanoon Cox is a writer and a lover of all things video.
Follow @Shanoon Cox
Shanoon Cox
Mar 27, 2024• Proven solutions
Over the years, the method of communication has changed a lot with the advancement of technological products and innovations. Be it personal forms of communication, advertisements, or public awareness, things are very different now. This is an era of digital boards, online texts, and stickers.
Making one’s own stickers have been one of the latest trends of communication on social media platforms. The use of stickers makes the conversation interesting and fun and allows people to express their opinions hilariously, without offending anyone. That is why there are a lot of online sticker makers available in the market.
Online sticker makers allow you to create your own stickers in whichever way you wish. These online sticker makers have taken the fun and involvement of socially active people to another level. So let’s dig in and find out about the best free online sticker makers available in the market.
You might be interested in:
- Part 1: 10 Free Online Stickers to Make Your Own Stickers
- Part 2: Add Sticker to Your Video with Wondershare Filmora
Part 1: 10 Free Online Stickers to Make Your Stickers
With the right applications, making your own stickers can be very easy. There are a lot of online sticker makers that allow you to create your own stickers, but the best ones among them will do the job more creatively and easily. So, let’s have a look at the top free online sticker makers we have selected for you in terms of features and easiness to use.
- 1. StickerYou
- 2. Canva
- 3. Crello
- 4. PsPrint
- 5. Jukebox
- 6. PicsArt
- 7. Uprinting
- 8. Avery
- 9. MakeStickers
- 10. Labeley
1. StickerYou
StickerYou is a wonderful online sticker maker that helps you to create clear cut stickers easily. You can upload any photo that you wish to convert into a sticker, provided those are in PNG, JPG, JPEG, or GIF formats.
Pricing
- $0.50 per Sticker
Features
- Allows to add art to the sticker
- Provides editing options like border, text, canvas, etc. within the tool itself
- Provides shipping delivery of physical copies of the stickers
- This tool can be accessed online from any computer or mobile device
2. Canva
Canva is an online tool that allows you to create your own customized stickers and labels with a professional touch. In Canva, you can either design a sticker from scratch or develop one from the hundreds of pre-installed designer templates.
Pricing:
- Free version
- Pro version with more advanced tools and features
Features:
- 100+ adjustable templates and design options
- About a million images, illustrations, colors, and texts to choose from
- Occasion based designs and custom dimensions to choose
- Easy sticker making in three steps – upload, edit, and download
3. Crello
Crello allows users to create adorable and fun stickers in whatever design they wish. It is an online sticker maker that grants a lot of editing features to make the result more outstanding, provided the users have signed into their account
Pricing:
- Starter pack – Free
- Pro pack - $7.99 per month
Features:
- Options to create photos, images, illustrations, patterns, and text badges in customizable shapes
- More than 30,000 templates to create whatever you wish
- Availability of more than 500,000 premium photos and 140M plus royalty-free pics
- Simple design and video editing features
4. PsPrint
PsPrint is an application that can help you to create versatile and fun stickers with ease with a design template that is professionally crafted. All you need is to simply pick up your desired shape, size, and color.
Pricing:
- Free kit
- Paid – depending on the stickers you choose
Features:
- A free designing tool to add personalized texts elements and graphics
- Availability of physical copy of stickers printed and cut in any dimension
- Occasion based options of design to choose from
5. Jukebox
Jukebox allows users to design and print a variety of stickers and provides quality templates to do so. This online sticker maker allows you to choose the shape size and material of the sticker first, and once designing is done, high-quality stickers will be printed up.
Pricing:
- Depends upon features like size, material, and quantity
Features:
- Can create stickers in any shape and finishing
- High-quality stickers that are easy to peel and weather resistant
- Free shipping for orders totaling more than $75
- One day turn around option available
6. PicsArt
Picsart is one of the most popular photo editing applications that also features the option of online sticker making. This application provides a large number of pre-customized online stickers and also has the best features if you are interested in creating one.
Pricing:
- Free
- Gold offer - $4.66 per month
Features:
- Easy creation and sharing of stickers
- Online sharing and printing options
- An AI technology that can remove the background of any pictures perfectly
- Amazing editing features like erase tool, brush off tool, axis rotation, etc.
7. Uprinting
Uprinting is an all-purpose online sticker making tool that can help you create appealing stickers according to your idea. It is a clean tool and you can order stickers in small as well as very large sizes. Also the sticker options available make it easy to choose.
Pricing:
- $42.29 ($0.17 for each sticker)
Features:
- Roll sticker cut to any shape and size
- Sticker available with a gloss finish as well as matt coated
- Availability of waterproof material for stickers
- Easy peel of hard sticking
8. Avery
Avery lets its users create seals and stickers personalized to their choice of interest. This online sticker making tool allows you to choose a design, make the necessary edits using the built-in options, print, and then save it on your device.
Pricing
- Pricing depends on the order of purchase
Features:
- Free printable designs that fit any occasion
- High-quality material suitable for packing
- Free shipping for all orders above $50
- Premium quality designs and products and 100 percent satisfaction guaranteed
9. MakeStickers
MakeStickers is a custom online sticker maker that offers a lot of features and sticker creating options to its users. It has a very simple user interface and anyone can create stickers easily using this online tool.
Pricing:
- Pricing depends on the quantity and dimensions of the stickers
Features:
- Availability of sticker in many cute shapes and colors
- Waterproof polypropylene material that is hard to get damaged by any liquids
- Laminated with a glossy or matte finish to ensure more durability
- Split back in the middle for easy peeling
10. Labeley
Labeley is a site that offers free online sticker creation without any hassles like a mandatory sign in or trail periods. It is a simple application that can be used to create a sticker and share them on any social platform instantly.
Pricing
- Free of cost
Features
- Allows to create customized stickers in minutes
- A lot of categories of designs to choose from
- Simple editing tools and easy to use interface
- Professional methods used for printing the stickers
Part 2: Add Sticker to Your Video with Wondershare Filmora
Wondershare Filmora is one of the most popular and widely used video editing applications around the world that offers exciting and extensive video editing features. Be it creating a simple meme or editing a professional level movie, Filmora is the application that you can choose with your eyes closed.
Stickers a way to express one’s opinion or idea in an effective way. Most of the time these stickers convey things that long sentences can’t. This is why many movie makers and editors prefer to add stickers to their videos. Also adding stickers to a video make it, more interesting, fun to watch, and appealing to the viewers. So let’s see how a custom sticker can be added to a video using Filmora.
Steps to Follow:
Step 1: Install the Filmora application on your device and open it. Then import the video you need to edit and the custom stickers you need to add to the Media Library.
Step 2: Drag the video first to the timeline, followed by the stickers respectively. And choose the sticker options available from the Elements tab.
Step 3: Double click the sticker. Then you can rotate, flip, or resize it as you want. Or you can right-click the sticker on the timeline to get more advanced editing options, such as color grading, pan &zoom, and speed change, etc.
Step 4: Once the editing is completed, Export the video into the format you wish.
Conclusion
Stickers sometimes speak better than words and it is very important to know how to customize stickers as every individual wishes to speak differently. Stickers are used for many purposes, from casual chats to marketing means and home décor, which is why the quality of them is very important.
Online sticker makers allow you to customize stickers based on your ideas and depending on any occasion. We have listed the top free online sticker makers available that will allow you to create all the stickers you need. Thank you.
Shanoon Cox
Shanoon Cox is a writer and a lover of all things video.
Follow @Shanoon Cox
Top 12 Best Meme Makers Online for FREE
Top 12 Best Meme Makers Online for FREE
Ollie Mattison
Mar 27, 2024• Proven solutions
Memes have become a central part of many online conversations. They pop up a lot on social media, especially platforms such as Twitter, Tumblr and Facebook . People even converse with each other using meme keyboards.
With memes taking over popular culture, you may want to make a meme for yourself. By using a meme maker, you can do just that! Here is a look at the top 10+ best meme maker online options that you can use for free.
10+ Best Meme Makers Online
1. Filmora Free Meme Generator
Filmora meme maker is a totally free meme generator without a watermark. Also, you don’t need to sign up or log in first to use it. It supports importing images, GIFs, and videos in one place. Just drag and drop to import, so easy to use. More importantly, if you want to select a white or black background to input the caption, Filmora meme maker can help you quickly. Changing text size, color and position is also available. After editing is done, just one click to export your work within a few seconds. You can also freely upload to social media platforms, like FB and IG.
- Place text anywhere (inside and outside of image)
- Support exporting to popular image and video formats, including jpg, png, gif, mp4
- It is totally free to use, no subscription or cost
[
3. Wondershare PixStudio
Wondershare PixStudio owns massive templates that can help you create your memes easily. You can feel free to upload your image and start to design it with text, colors and filters to the images.
Features:
- Free and easy to use.
- Ability to create memes with your images.
- Option to add filters to images for your memes.
- Option to change font and text color.
4. Quickmeme
Quickmeme is the best meme maker option for anyone who wants a simple experience, without too many frills. You can check out featured memes, which show you the most popular ones right now.
All you need to do to create a meme is go on “upload a funny” to start from scratch. If you want to select a famous picture and add your own text, you can do so using the “caption a meme” option.
Features:
- Create a meme with your own images or famous images.
- Login with Facebook to set up your account and save the memes you create.
5. MemeGenerator
One of the most popular tools for creating memes, MemeGenerator is the meme maker online that you can use when you want to add some funny captions to images. You can check out all the popular images that are being used to create memes by other people.
If you want to create a meme with one of those images, simply click on them or you can choose “create” to start making a meme with your own image or character.
Features:
- Create memes with custom images or characters.
- Add your own text to famous meme images.
- Send and share memes through the site.

6. Imgur
Imgur is mostly known as an image hosting platform. People will host images on Imgur so they can share them with friends or on social media. But there is also a meme creation tool that you can use on the site.
All you need to do is select one of the default images on the site, or use your own, and you can add the text that you want. Selecting the text to put at the top and bottom of the image is very easy with Imgur.
Features:
- Takes under a minute to create a meme with your own image or pre-selected ones.
- Imgur also offers an image hosting service.
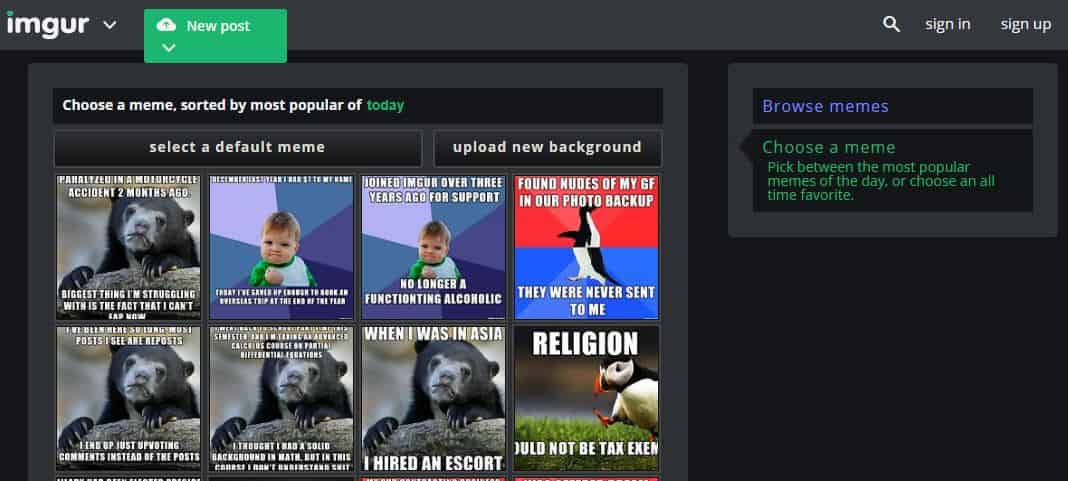
7. Make a Meme
When you go on Make a Meme, you will immediately see images of all the most famous memes from around the world. You can click on those images, where you get an interface asking for the top text, bottom text, and your custom title. Then you click on “make a meme” and your image is ready.
You can even upload your own image and then add text to it in a similar way. You have the option to preview your memes before you create them as well.
Features:
- Create memes from custom images or popular ones.
- Add top and bottom text easily.
- Create custom meme titles.
- Preview memes before making them.
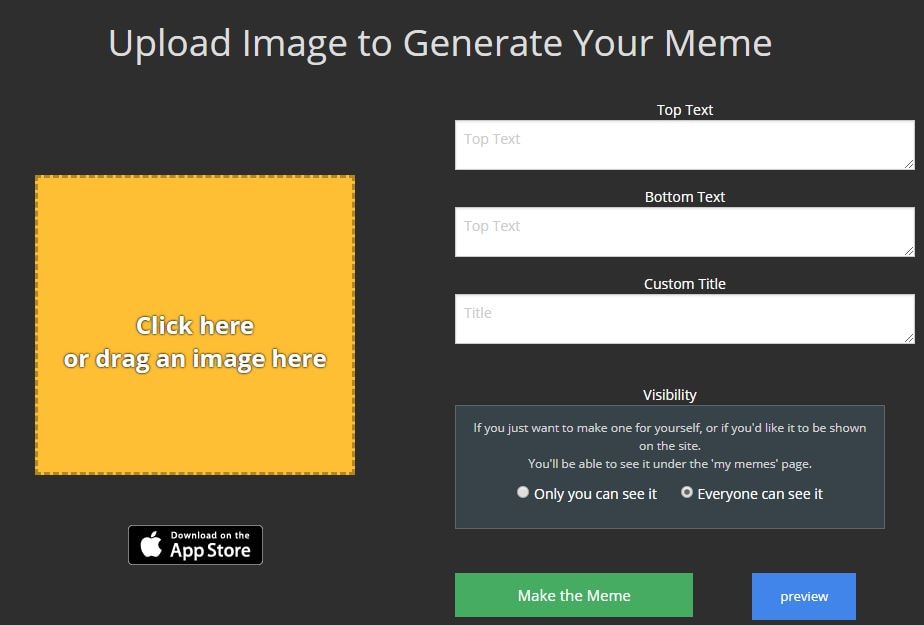
8. Livememe
Livememe is a meme generator that is very straightforward to use. When you visit the homepage, you will see a few selected images that are very popular. Click on the “create a meme” button and you will get a drop down menu that is thumbnails of all the popular memes.
You may select any of those images to create your own meme, or upload your own image and add the relevant text. You can save the image on your computer and even share it through the site.
Features:
- Includes nearly every popular meme as preselected images.
- Ability to create custom image memes.
- Easily share created memes.
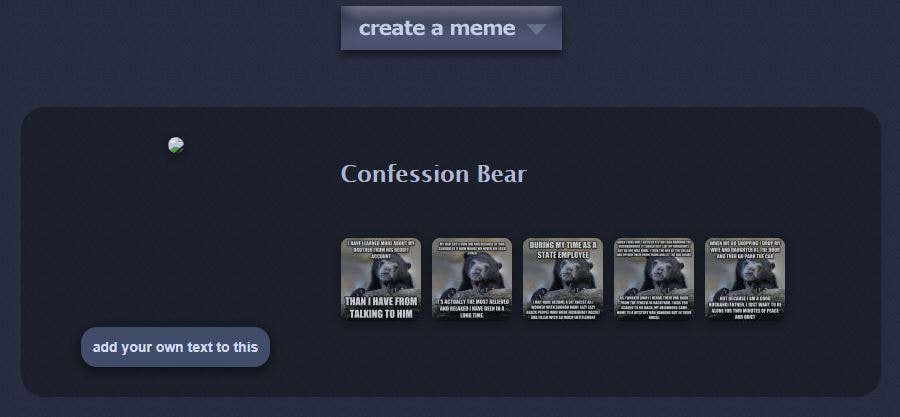
9. Canva
Unlike other sites, Canva goes a step further and gives you professionally created templates that you can use for your memes. There are over a million stock photos available to you. It is a much larger selection than other sites.
But you can also upload your own image, add relevant text and then create the meme.
Features:
- Large collection of stock images.
- Ability to create memes with your own images.
- Option to add filters to images for your memes.
- Option to change font and text color.
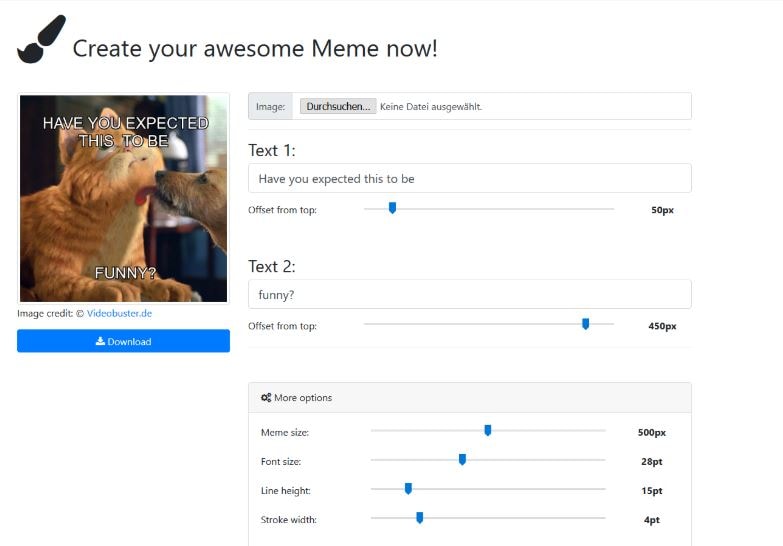
10. iLoveIMG
iLoveIMG is one of the easiest sites to use if you want to create a meme. The homepage will let you upload an image or select a meme template to get started.
Text boxes are already present, but you can edit them with your own text and see exactly how they would look. If you want to add more lines of text, you can do that as well.
It is even possible to add an image on top of one image to take your meme game to a whole new level!
Features:
- Easy meme creation with uploaded or custom images.
- Ability to add more than two lines of text.
- Option to add an image on top of the existing image.
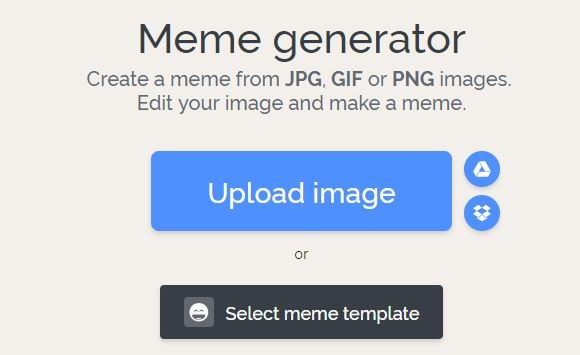
11. Meme Creator
With Meme Creator, you can recreate existing memes with the text of your choice, or upload images to make custom memes.
The site is very easy to use, which does not require you to create an account, and is completely free. It is possible to adjust the text size and color when you are using this meme generator, which is not always an option on these free tools.
Within a minute, you will have the custom meme that you can share with friends!
Features:
- Use preexisting and custom images for memes.
- Adjust the color and font size of both top and bottom text.
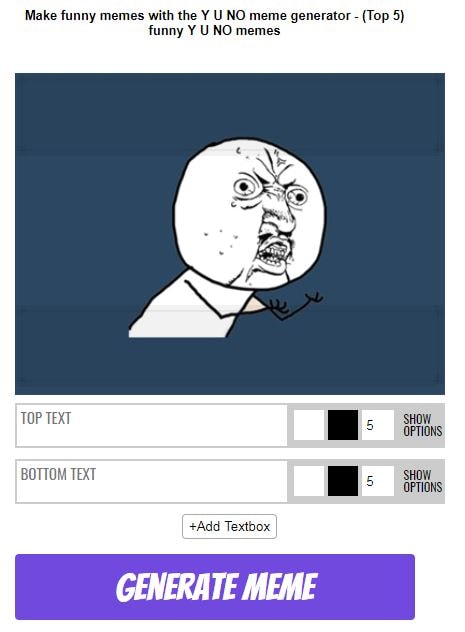
12. DIYLOL
Want to create a meme from images that already have become popular memes? Now you can do so with DIYLOL. All you need to do is pick the preexisting image that you like best, add your top and bottom text, and you are ready to go.
You can even adjust the font color and size for the top and bottom text. Then you can download the image to share with friends and family.
Features:
- Easy tool to create memes from preexisting images.
- Ability to adjust font size and color.
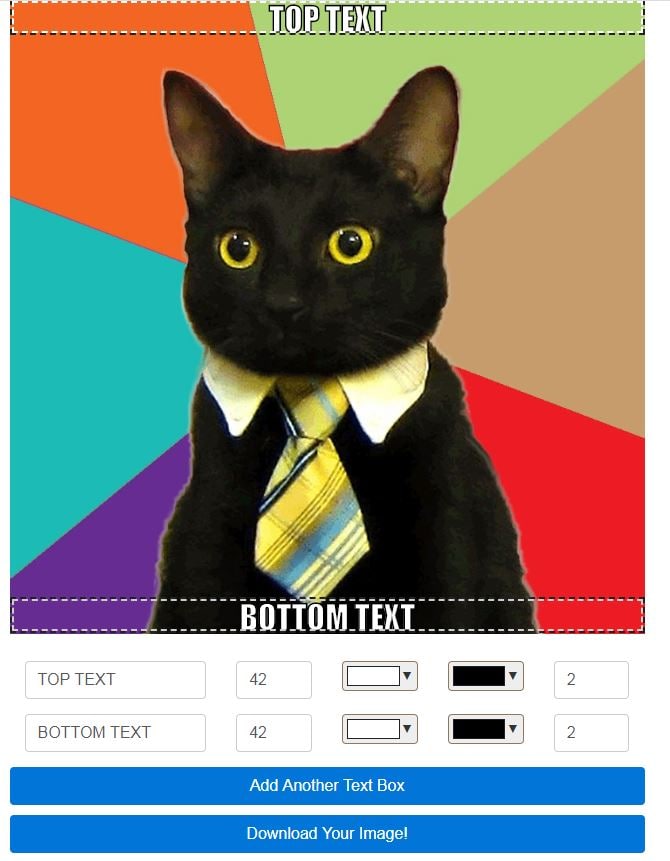
Conclusion
By using an online meme maker, you have the ability to create your own memes whenever you want. All you need is a source image and your idea for the text. Within minutes, the meme generator you are using will have your meme ready to download. Then you can share it with friends and save it on all your devices. And the best part is that you can do all of this with a meme maker online that is completely free!
[
Ollie Mattison
Ollie Mattison is a writer and a lover of all things video.
Follow @Ollie Mattison
Ollie Mattison
Mar 27, 2024• Proven solutions
Memes have become a central part of many online conversations. They pop up a lot on social media, especially platforms such as Twitter, Tumblr and Facebook . People even converse with each other using meme keyboards.
With memes taking over popular culture, you may want to make a meme for yourself. By using a meme maker, you can do just that! Here is a look at the top 10+ best meme maker online options that you can use for free.
10+ Best Meme Makers Online
1. Filmora Free Meme Generator
Filmora meme maker is a totally free meme generator without a watermark. Also, you don’t need to sign up or log in first to use it. It supports importing images, GIFs, and videos in one place. Just drag and drop to import, so easy to use. More importantly, if you want to select a white or black background to input the caption, Filmora meme maker can help you quickly. Changing text size, color and position is also available. After editing is done, just one click to export your work within a few seconds. You can also freely upload to social media platforms, like FB and IG.
- Place text anywhere (inside and outside of image)
- Support exporting to popular image and video formats, including jpg, png, gif, mp4
- It is totally free to use, no subscription or cost
[
3. Wondershare PixStudio
Wondershare PixStudio owns massive templates that can help you create your memes easily. You can feel free to upload your image and start to design it with text, colors and filters to the images.
Features:
- Free and easy to use.
- Ability to create memes with your images.
- Option to add filters to images for your memes.
- Option to change font and text color.
4. Quickmeme
Quickmeme is the best meme maker option for anyone who wants a simple experience, without too many frills. You can check out featured memes, which show you the most popular ones right now.
All you need to do to create a meme is go on “upload a funny” to start from scratch. If you want to select a famous picture and add your own text, you can do so using the “caption a meme” option.
Features:
- Create a meme with your own images or famous images.
- Login with Facebook to set up your account and save the memes you create.
5. MemeGenerator
One of the most popular tools for creating memes, MemeGenerator is the meme maker online that you can use when you want to add some funny captions to images. You can check out all the popular images that are being used to create memes by other people.
If you want to create a meme with one of those images, simply click on them or you can choose “create” to start making a meme with your own image or character.
Features:
- Create memes with custom images or characters.
- Add your own text to famous meme images.
- Send and share memes through the site.
6. Imgur
Imgur is mostly known as an image hosting platform. People will host images on Imgur so they can share them with friends or on social media. But there is also a meme creation tool that you can use on the site.
All you need to do is select one of the default images on the site, or use your own, and you can add the text that you want. Selecting the text to put at the top and bottom of the image is very easy with Imgur.
Features:
- Takes under a minute to create a meme with your own image or pre-selected ones.
- Imgur also offers an image hosting service.
7. Make a Meme
When you go on Make a Meme, you will immediately see images of all the most famous memes from around the world. You can click on those images, where you get an interface asking for the top text, bottom text, and your custom title. Then you click on “make a meme” and your image is ready.
You can even upload your own image and then add text to it in a similar way. You have the option to preview your memes before you create them as well.
Features:
- Create memes from custom images or popular ones.
- Add top and bottom text easily.
- Create custom meme titles.
- Preview memes before making them.
8. Livememe
Livememe is a meme generator that is very straightforward to use. When you visit the homepage, you will see a few selected images that are very popular. Click on the “create a meme” button and you will get a drop down menu that is thumbnails of all the popular memes.
You may select any of those images to create your own meme, or upload your own image and add the relevant text. You can save the image on your computer and even share it through the site.
Features:
- Includes nearly every popular meme as preselected images.
- Ability to create custom image memes.
- Easily share created memes.
9. Canva
Unlike other sites, Canva goes a step further and gives you professionally created templates that you can use for your memes. There are over a million stock photos available to you. It is a much larger selection than other sites.
But you can also upload your own image, add relevant text and then create the meme.
Features:
- Large collection of stock images.
- Ability to create memes with your own images.
- Option to add filters to images for your memes.
- Option to change font and text color.
10. iLoveIMG
iLoveIMG is one of the easiest sites to use if you want to create a meme. The homepage will let you upload an image or select a meme template to get started.
Text boxes are already present, but you can edit them with your own text and see exactly how they would look. If you want to add more lines of text, you can do that as well.
It is even possible to add an image on top of one image to take your meme game to a whole new level!
Features:
- Easy meme creation with uploaded or custom images.
- Ability to add more than two lines of text.
- Option to add an image on top of the existing image.
11. Meme Creator
With Meme Creator, you can recreate existing memes with the text of your choice, or upload images to make custom memes.
The site is very easy to use, which does not require you to create an account, and is completely free. It is possible to adjust the text size and color when you are using this meme generator, which is not always an option on these free tools.
Within a minute, you will have the custom meme that you can share with friends!
Features:
- Use preexisting and custom images for memes.
- Adjust the color and font size of both top and bottom text.
12. DIYLOL
Want to create a meme from images that already have become popular memes? Now you can do so with DIYLOL. All you need to do is pick the preexisting image that you like best, add your top and bottom text, and you are ready to go.
You can even adjust the font color and size for the top and bottom text. Then you can download the image to share with friends and family.
Features:
- Easy tool to create memes from preexisting images.
- Ability to adjust font size and color.
Conclusion
By using an online meme maker, you have the ability to create your own memes whenever you want. All you need is a source image and your idea for the text. Within minutes, the meme generator you are using will have your meme ready to download. Then you can share it with friends and save it on all your devices. And the best part is that you can do all of this with a meme maker online that is completely free!
[
Ollie Mattison
Ollie Mattison is a writer and a lover of all things video.
Follow @Ollie Mattison
How to Edit Memoji on Android and iPhone
How to Edit Memoji on Android and iPhone
Shanoon Cox
Mar 27, 2024• Proven solutions
A memoji is simply the cartoon avatar of you. You can easily learn how to edit memoji and make a custom memoji that is the exact mirror image of you. From eye color to freckles, you can add every feature that makes the memoji look like a mini cartoon version of you
Since a custom memoji is a more personalized way to express our emotions, it can be the perfect way to add a hint of humor to conversations. Everyone loves a unique sticker, especially if it looks like them. So, you can take help from our guide on how to change memoji and take your texting experience to the next level.
- Bonus Tip-Memoji VS Emoji
- Part 1: How to Edit Memoji on iPhone
- Part 2: How to Edit Memoji on Android
Bonus Tip—Memoji VS Emoji
Now you must be wondering what the difference between a memoji and emoji is. Well, there is the first major difference, which is that a memoji is the cartoon avatar of you, whereas an emoji is just around yellow-faced cartoon with various expressions
1.The memoji is solely based on a human face, but an emoji can be any object, place, or even a symbol. While you can mostly craft a custom emoji personalized to your style and likings, emojis are limited. Custom memoji can also be dressed and decorated to serve as the perfect mini-version of you, complete from earrings to freckles.
2.Moreover, almost everyone has the same set of emojis. But since memojis are created to look like a person, everyone has a very unique pack of memojis looking like the cartoon version of them.
Despite the differences, both memojis and emojis carry equal significance and can spice up your texting experience in hilarious ways.
Part 1: How to Edit Memoji on iPhone
Majority of you might be iPhone users and so it’s only fair to show you some easy ways on how to edit memoji on your iPhone. There are two ways to create a custom memoji and then edit it. Lets dive in!
Method 1: Edit Memoji in the Built-in Editor
The introduction of iOS13 has made it possible for the majority of iPhone users to create or edit their memojis as they like. But in order to use this built-in editor to create a custom memoji, make sure that your device is updated to iOS13.
In this Apple-exclusive editor, the steps are pretty straightforward. But to help you further, I will walk you along with the steps in detail
- Go to the iMessages and open a new message tab or a previous conversation and tap the Appstoreicon to reveal the app bar. Hit the Animoji icon represented by the three heads
![]()
- Choose the memoji you wish to edit and click the three dots in the bottom left corner. Click Editon the pop-up dialogue box. You can also tap on Duplicate to copy the same memoji.
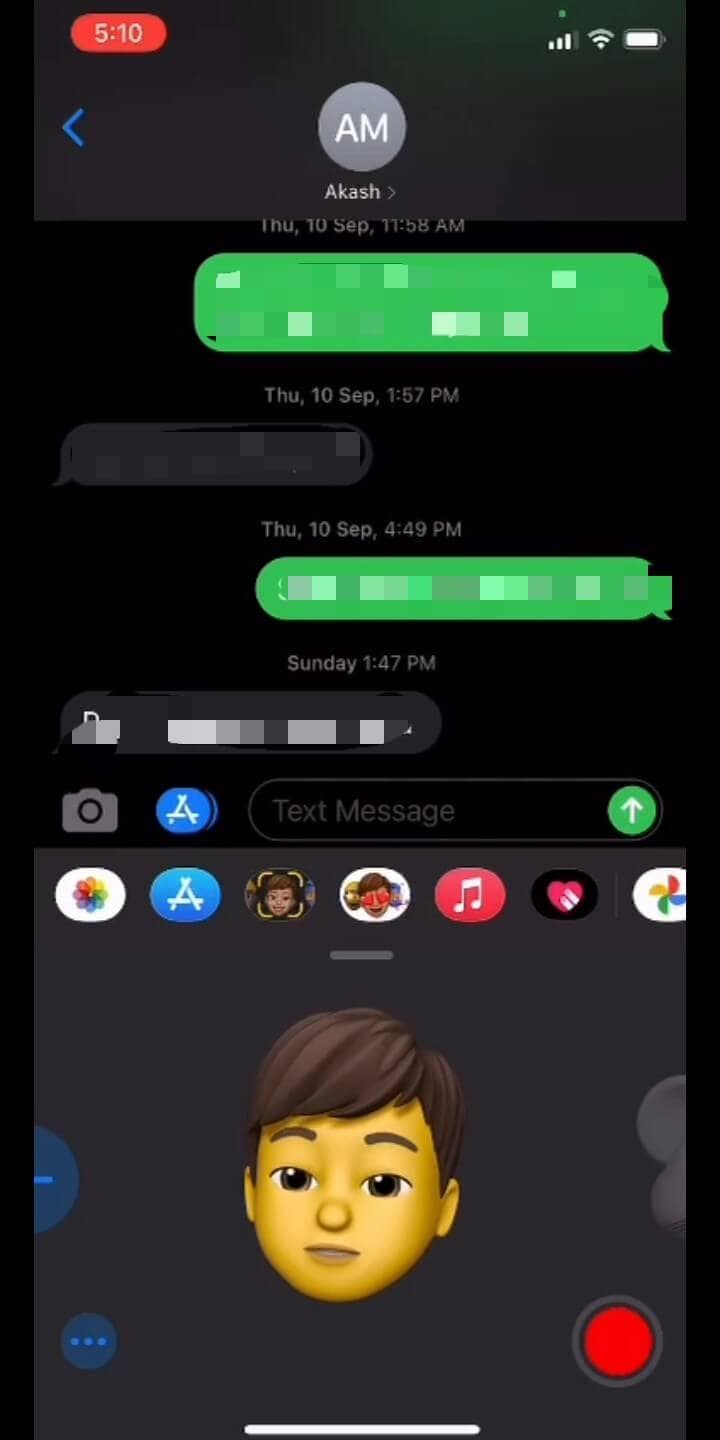
- Now you will be given various options to craft a custom memoji that looks exactly like you, right down to every detail. Click on the Skintab to change the skin color, add freckles or a beauty spot
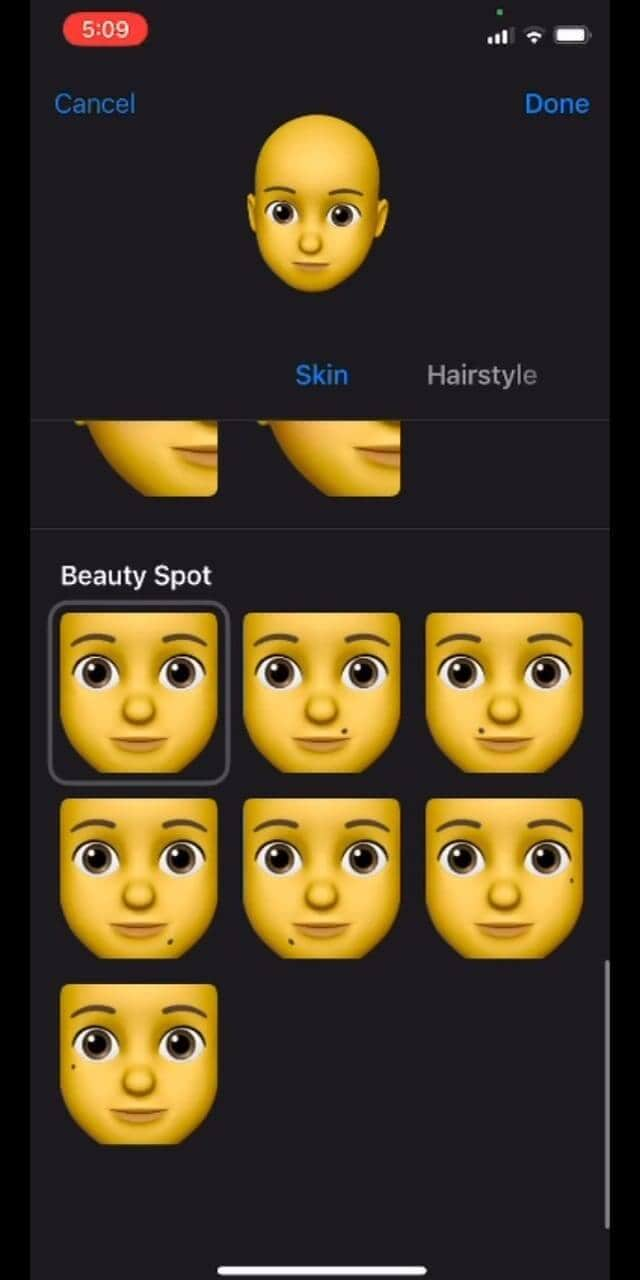
- Choose the hairstyleand hair color that suits you the best
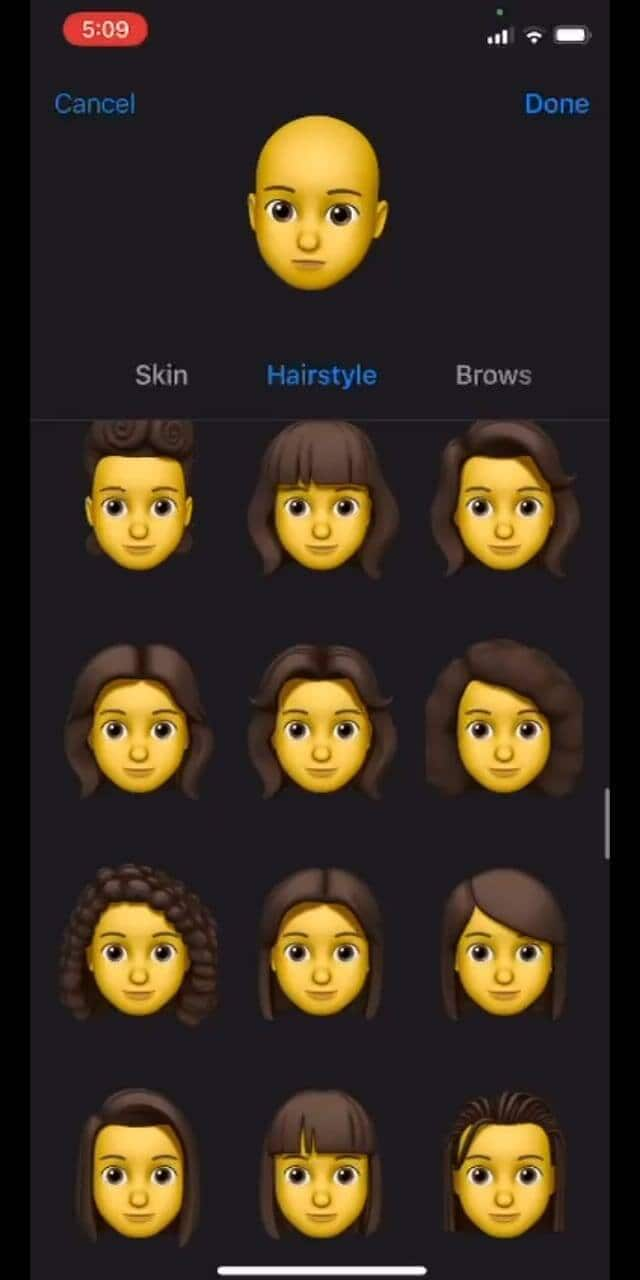
- In the Browstab, select your brow style. Go through all the tabs to choose the perfect headwear, glasses, or even AirPods to create the perfect custom memoji
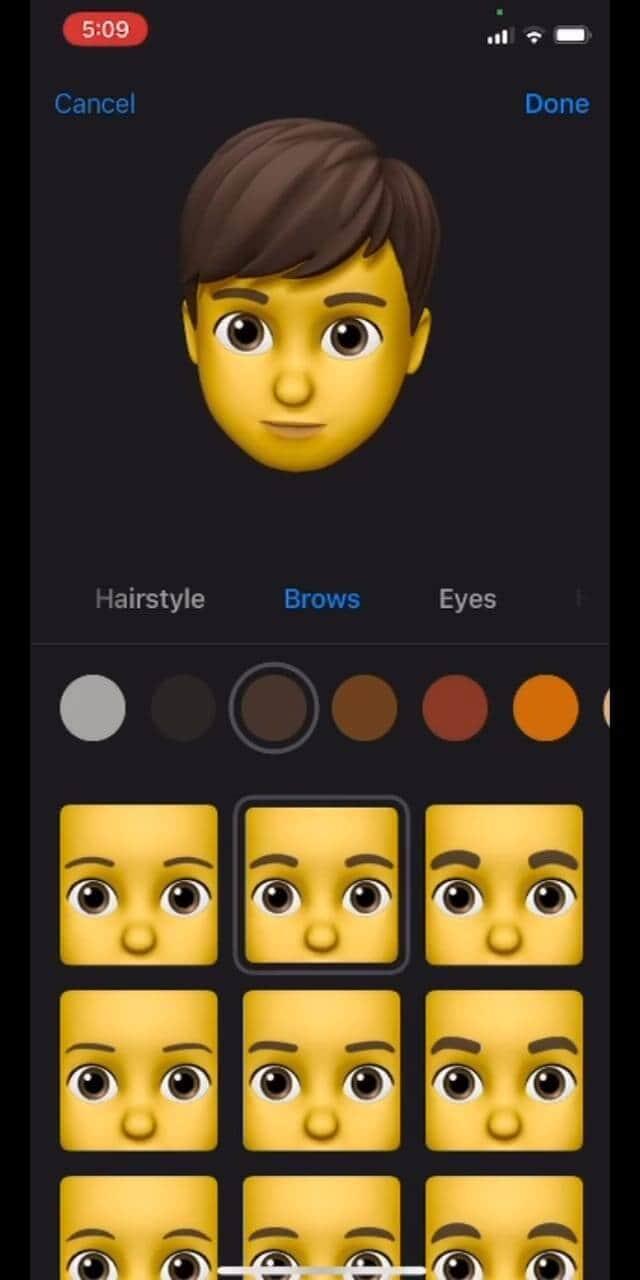
Method 2: Edit Memoji Using the Avatoon App
Avatoon is a great memoji maker app that lets you edit memoji from scratch and has an extensive collection of features you can choose from to make the cartoon look exactly like you. You can even auto-create a memoji by taking a selfie, and Avatoon will do the rest. In manual creation, you can select every detail from eyelashes, tattoos, headwear, and even jewelry.
Let me show the easy ways how to edit memoji using Avatoons powerful tools
- Firstly, download launch Avatoon.
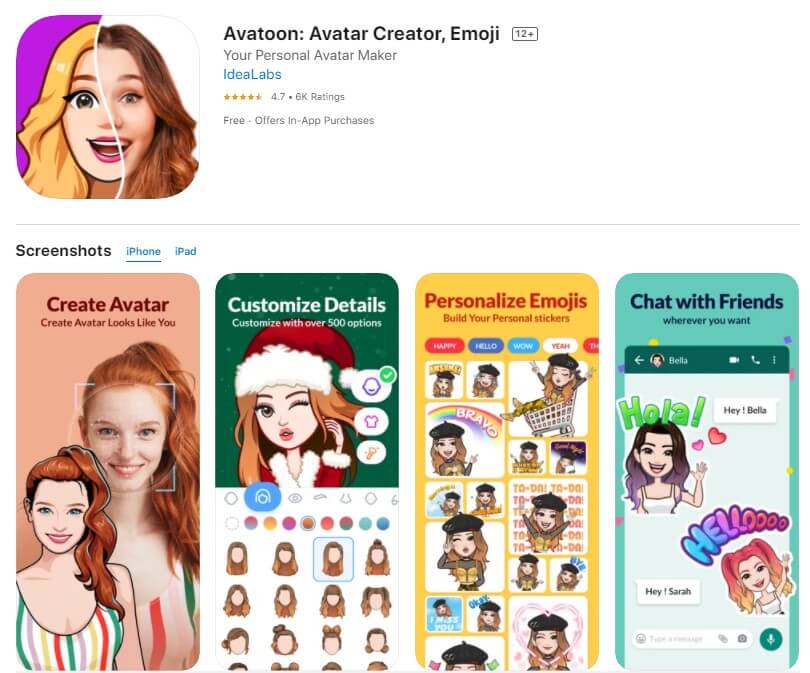
- Choose Manual Creationto create a personalized custom emoji
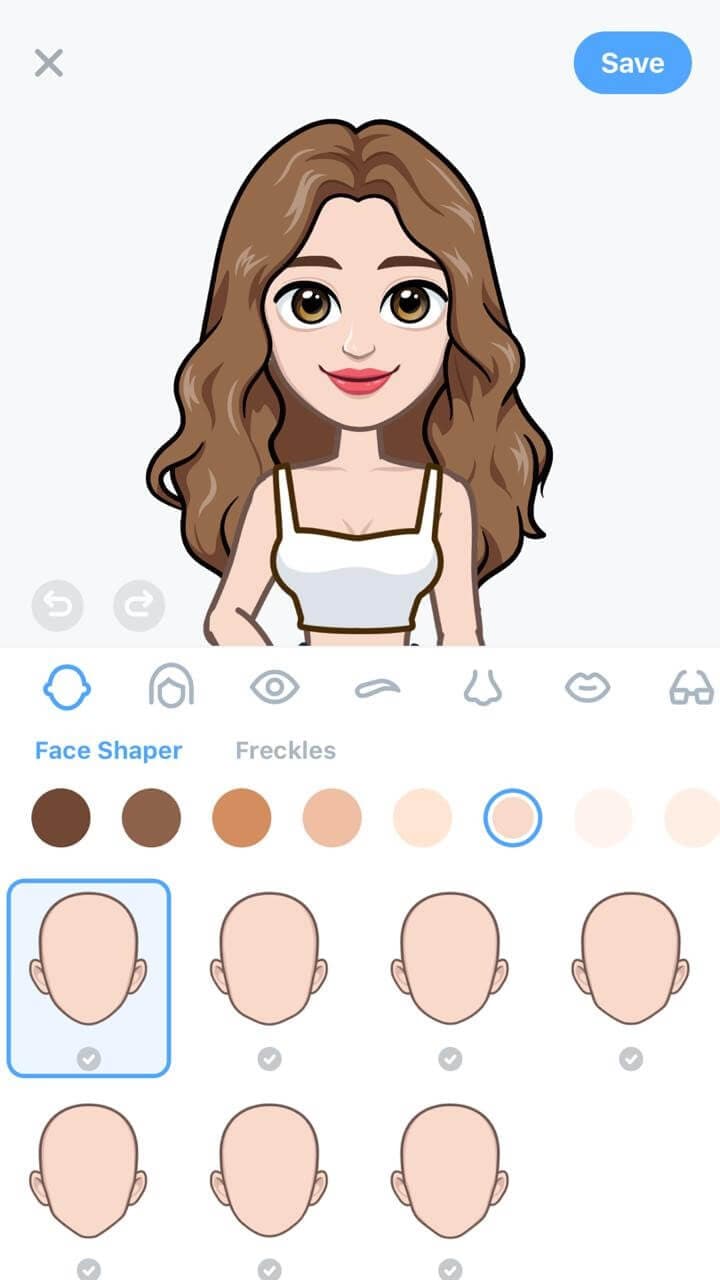
- Now you can choose your face shape, hairstyle, eyes, brows, etc. Add headwear or glasses that depict your style
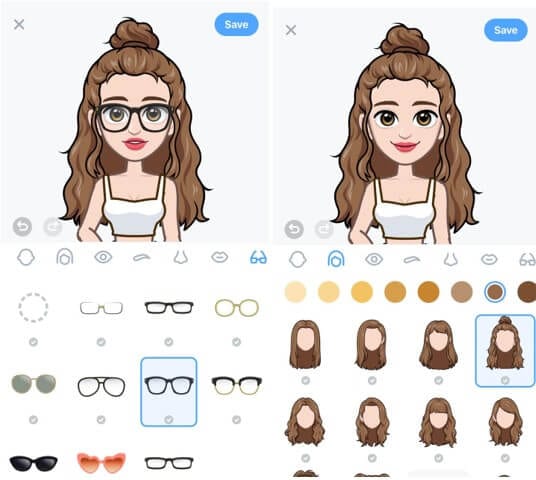
- Now that you have created a basic cartoon self, you can add much finer details by using coins.
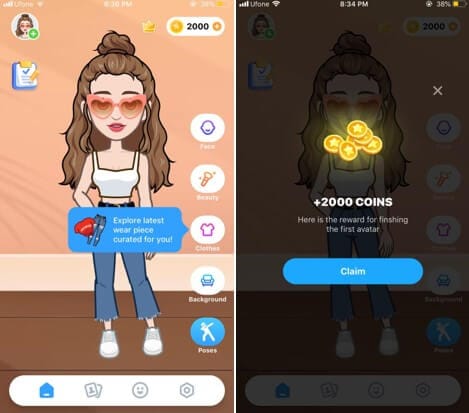
- Click on the Photobooth at the bottom to choose a cool background for your memoji.
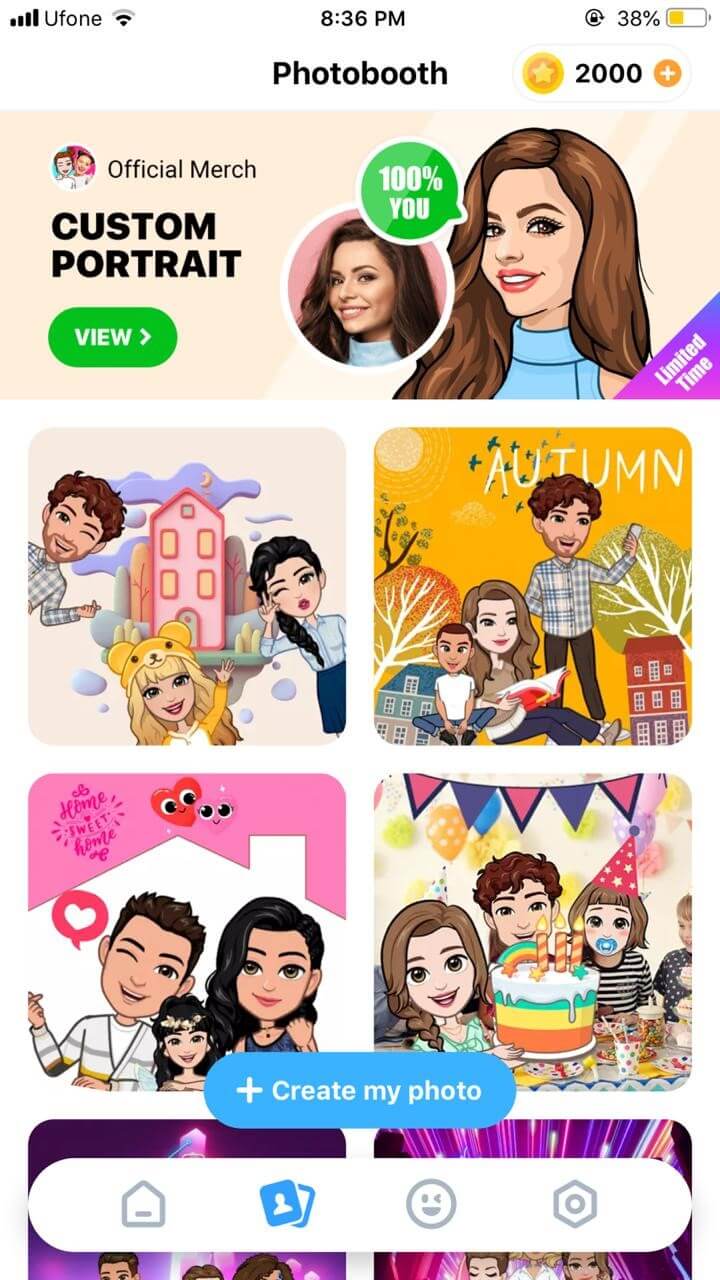
- Once you have decorated the memoji, tap on Poses, choose the mood you like and instantly share via different sharing platforms
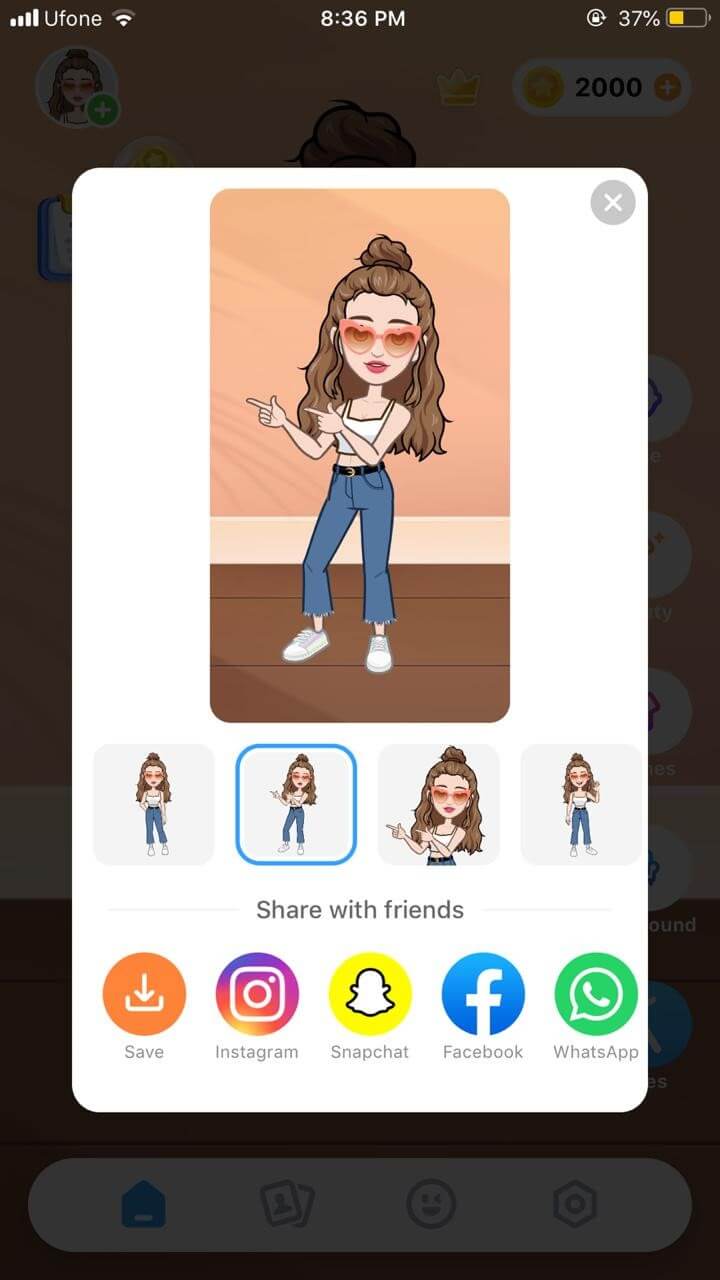
Part 2: How to Edit Memoji on Android
MojiPop is an amazing free app to make a custom emoji. It is packed with stickers and animated caricatures for every mood or emotion. Just take a selfie and start communicating using your cartoon face. You can even edit your memojis to suit your style. Then send the memoji to your friends to surprise them with a hilarious custom memoji
If you’re wondering how to edit memoji, here’s a short guide for you:
- Launch MojiPop and click on Create Avatar. Either take a selfie or choose an existing image from your gallery. Specify the age group.
![]()
- MojiPop instantly displays avatar styles, choose one that best fits you and click Next
![]()
- Select different features in tabs for hair, eyes, headwear to make the custom memoji look just like you. Click Confirmto save it.
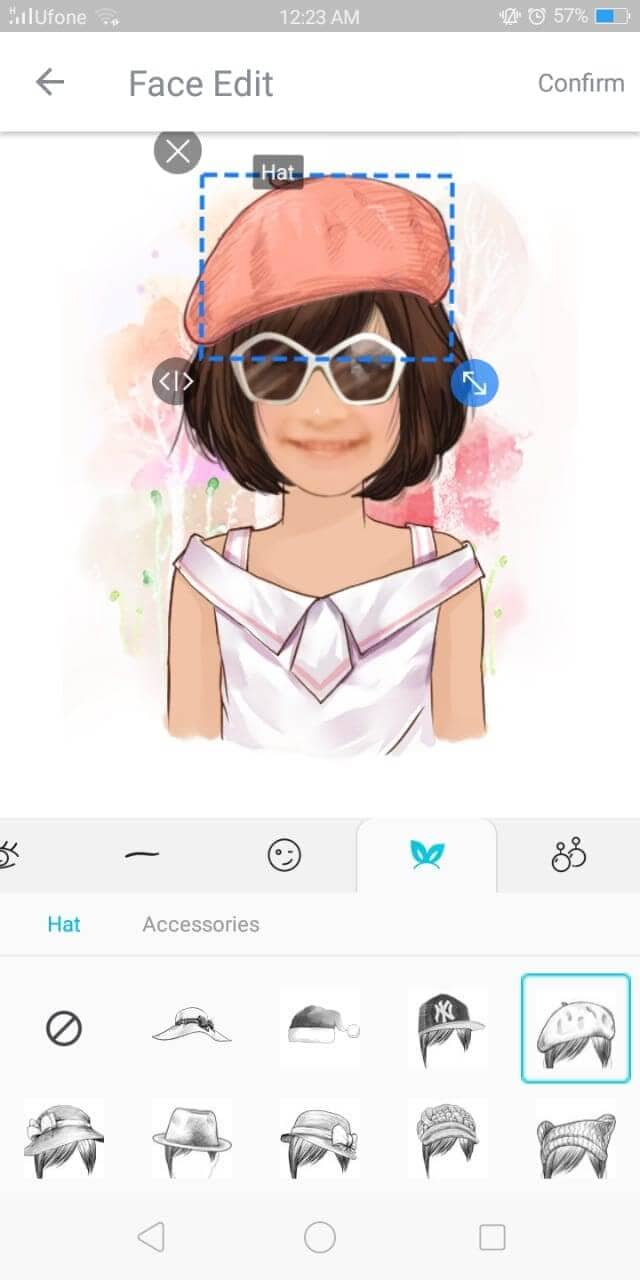
- In the Discovertab, choose a gif template to wish someone or express your feelings.
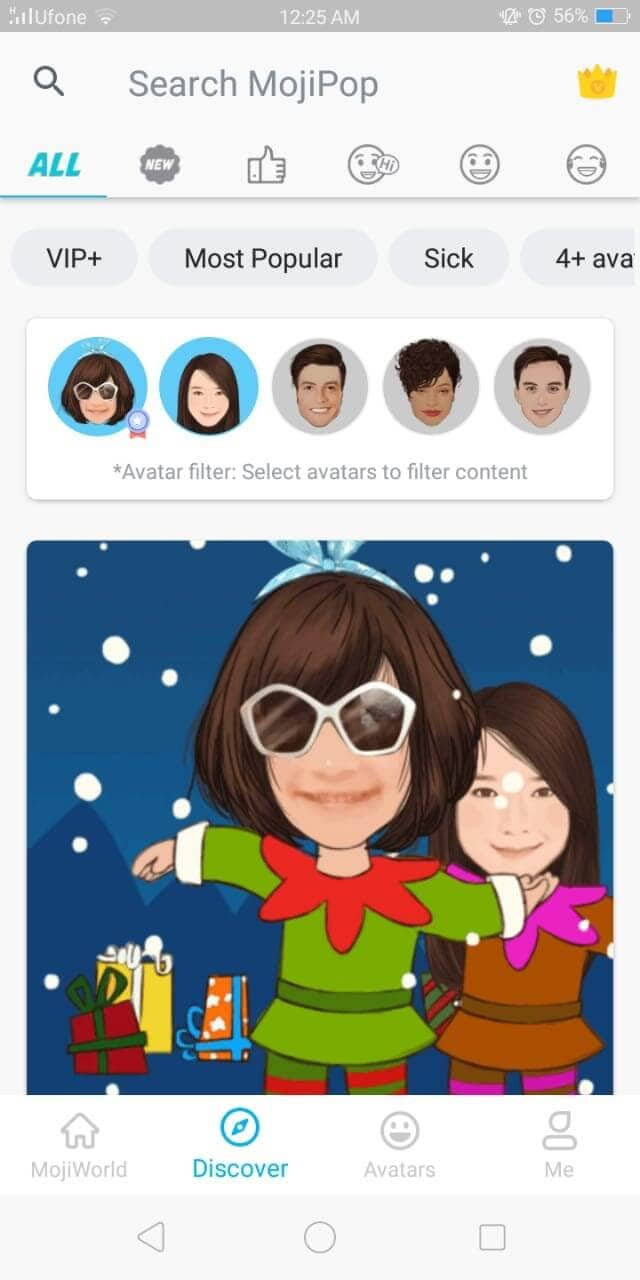
- Click on the Share icon and choose the platform for instant sharing
Ready to Edit Memoji by Yourself?
Are you ready to make your conversations more interesting and engaging using custom memojis? Because who doesn’t love a mini version of themselves displaying how happy or angry they feel? What better to communicate without saying a word?
And we hope that our short tutorial on how to edit memoji helps you create different versions of yourself to express yourself better.
Now that you know how to edit memoji to your liking, what are you waiting for? Go on to edit and create a hilarious avatar of yourself and enjoy texting
Shanoon Cox
Shanoon Cox is a writer and a lover of all things video.
Follow @Shanoon Cox
Shanoon Cox
Mar 27, 2024• Proven solutions
A memoji is simply the cartoon avatar of you. You can easily learn how to edit memoji and make a custom memoji that is the exact mirror image of you. From eye color to freckles, you can add every feature that makes the memoji look like a mini cartoon version of you
Since a custom memoji is a more personalized way to express our emotions, it can be the perfect way to add a hint of humor to conversations. Everyone loves a unique sticker, especially if it looks like them. So, you can take help from our guide on how to change memoji and take your texting experience to the next level.
- Bonus Tip-Memoji VS Emoji
- Part 1: How to Edit Memoji on iPhone
- Part 2: How to Edit Memoji on Android
Bonus Tip—Memoji VS Emoji
Now you must be wondering what the difference between a memoji and emoji is. Well, there is the first major difference, which is that a memoji is the cartoon avatar of you, whereas an emoji is just around yellow-faced cartoon with various expressions
1.The memoji is solely based on a human face, but an emoji can be any object, place, or even a symbol. While you can mostly craft a custom emoji personalized to your style and likings, emojis are limited. Custom memoji can also be dressed and decorated to serve as the perfect mini-version of you, complete from earrings to freckles.
2.Moreover, almost everyone has the same set of emojis. But since memojis are created to look like a person, everyone has a very unique pack of memojis looking like the cartoon version of them.
Despite the differences, both memojis and emojis carry equal significance and can spice up your texting experience in hilarious ways.
Part 1: How to Edit Memoji on iPhone
Majority of you might be iPhone users and so it’s only fair to show you some easy ways on how to edit memoji on your iPhone. There are two ways to create a custom memoji and then edit it. Lets dive in!
Method 1: Edit Memoji in the Built-in Editor
The introduction of iOS13 has made it possible for the majority of iPhone users to create or edit their memojis as they like. But in order to use this built-in editor to create a custom memoji, make sure that your device is updated to iOS13.
In this Apple-exclusive editor, the steps are pretty straightforward. But to help you further, I will walk you along with the steps in detail
- Go to the iMessages and open a new message tab or a previous conversation and tap the Appstoreicon to reveal the app bar. Hit the Animoji icon represented by the three heads
![]()
- Choose the memoji you wish to edit and click the three dots in the bottom left corner. Click Editon the pop-up dialogue box. You can also tap on Duplicate to copy the same memoji.
- Now you will be given various options to craft a custom memoji that looks exactly like you, right down to every detail. Click on the Skintab to change the skin color, add freckles or a beauty spot
- Choose the hairstyleand hair color that suits you the best
- In the Browstab, select your brow style. Go through all the tabs to choose the perfect headwear, glasses, or even AirPods to create the perfect custom memoji
Method 2: Edit Memoji Using the Avatoon App
Avatoon is a great memoji maker app that lets you edit memoji from scratch and has an extensive collection of features you can choose from to make the cartoon look exactly like you. You can even auto-create a memoji by taking a selfie, and Avatoon will do the rest. In manual creation, you can select every detail from eyelashes, tattoos, headwear, and even jewelry.
Let me show the easy ways how to edit memoji using Avatoons powerful tools
- Firstly, download launch Avatoon.
- Choose Manual Creationto create a personalized custom emoji
- Now you can choose your face shape, hairstyle, eyes, brows, etc. Add headwear or glasses that depict your style
- Now that you have created a basic cartoon self, you can add much finer details by using coins.
- Click on the Photobooth at the bottom to choose a cool background for your memoji.
- Once you have decorated the memoji, tap on Poses, choose the mood you like and instantly share via different sharing platforms
Part 2: How to Edit Memoji on Android
MojiPop is an amazing free app to make a custom emoji. It is packed with stickers and animated caricatures for every mood or emotion. Just take a selfie and start communicating using your cartoon face. You can even edit your memojis to suit your style. Then send the memoji to your friends to surprise them with a hilarious custom memoji
If you’re wondering how to edit memoji, here’s a short guide for you:
- Launch MojiPop and click on Create Avatar. Either take a selfie or choose an existing image from your gallery. Specify the age group.
![]()
- MojiPop instantly displays avatar styles, choose one that best fits you and click Next
![]()
- Select different features in tabs for hair, eyes, headwear to make the custom memoji look just like you. Click Confirmto save it.
- In the Discovertab, choose a gif template to wish someone or express your feelings.
- Click on the Share icon and choose the platform for instant sharing
Ready to Edit Memoji by Yourself?
Are you ready to make your conversations more interesting and engaging using custom memojis? Because who doesn’t love a mini version of themselves displaying how happy or angry they feel? What better to communicate without saying a word?
And we hope that our short tutorial on how to edit memoji helps you create different versions of yourself to express yourself better.
Now that you know how to edit memoji to your liking, what are you waiting for? Go on to edit and create a hilarious avatar of yourself and enjoy texting
Shanoon Cox
Shanoon Cox is a writer and a lover of all things video.
Follow @Shanoon Cox
How to Make a iMovie Photo Slideshow with Music?
How to Make a iMovie Photo Slideshow with Music? [iMovie Tutorial]
Shanoon Cox
Mar 27, 2024• Proven solutions
Makings a slideshow is a great way to share photos and videos with friends and families. The good news is that you can totally make a slideshow on Mac for free with iMovie. iMovie is the pre-installed program coming with every new Mac. It provides a simple yet professional way to make slideshow movies from your photos, videos, and music.
If you haven’t iMovie installed on your Mac yet, just go to iTunes and download it for free. In the following part, I’ll share with you the step-by-step tutorial on how to make a slideshow on Mac using the free video editing software iMovie.
If you are an iOS user, check our picks of best photo slideshow apps for iPhone or iPad.
Ways for iMovie Photo Slideshow with Music Making
To make a photo slideshow with music in iMovie, you can follow these steps.
1. Create a New Project
After launching iMovie, click the Project button and then click Create New. Select Movie to combine photos, videos and music to make a slideshow.

2. Import Photos, Videos, and Audio Files
Now go to the My Media tab and click the Import icon to add your photos, videos, and music to iMovie, in this way, you can import any media files from any location on your Mac. But if you have arranged all your videos, photos, and music tracks in the Photos app, you can just switch to Photos under the Libraries tab on the left to import.

3. Arrange Media in Timeline and Adjust
Now, it’s time to place all these photos and videos in the timeline in order and do some adjustments. You can use the Magic Wand tool to improve the photo quality automatically, do some color correction, or add a filter to the photo. If you preview the video clip, you will see more options that allow you to do more editing, such as changing speed.
4. Apply Transitions & Effects
Transitions and effects will help you to create a slideshow in a more professional way. Some transitions such as cross dissolve, fade and cross blur are very popular in the slideshow, but remember don’t use lots of different transitions in one slideshow since too many transitions will distract the viewer’s attention. To apply a transition in the slideshow, just drag and drop it between two photos in the timeline.

5. Add Titles and Text
Using some opener titles and credits at the beginning and ending part of your slideshow will make it cool as well. You can add some famous quotes and words to better demonstrate.
Just to the Titles tab and select one of the title templates and drop it to the timeline first and then write your own words in the preview window.

6. Add Music to Slideshow
You can download some royalty-free music and sound effects from websites such as Filmstock stock media library or iTunes or import your own audio as we said before to use it as the slideshow background music. To sync with the slideshow, you may need to trim and edit the audio accordingly. For detailed information about iMovie audio editing, you can check how to add background music to iMovie.
Filmstock Stock Media Library ](https://tools.techidaily.com/wondershare/filmora/download/ )
7. Export and Share Your Slideshow video
Play the slideshow and check the result in the preview window. If everything goes well, you can now export and share or save it. You can save the slideshow video in MP4 format, or share it to Vimeo or add the slideshow to Theater to load it on your other Apple devices so you can easily watch it on your iOS devices or Apple TV.
I hope the above tutorial about how to make a slideshow on iMovie will be helpful for your stunning slideshow creation.
If you’re running an old macOS version and having iPhoto installed on your Mac, here are the detailed steps about How to make slideshow in iMovie with iPhoto project.
Step 1. Import Photos from the iPhoto Library
iMovie works seamlessly with iPhoto. You are suggested to drag and drop photos from iPhoto to the iMovie project. If no library exists in iPhoto, create one and import photos to iPhoto first. To add videos, you could go to either “File/Import” or Event Library, and then drag and drop selected videos to the timeline.
After photos and videos are imported to the iMovie slideshow project, you can preview the raw slideshow simply by pressing Space bar on your keyboard. And then make adjustments to clips and transitions. For example, mouse over one clip or “double arrow” button and click on the settings icon, then you could access clip adjustment, video adjustment, transition adjustment, etc.

Step 2. Add Music to Your iMovie Slideshow Project
Music sets the tone of your slideshow. Adding musing to the iMovie slideshow is just as simple as adding photos and videos.
So click the audio icon in the bottom right corner, and drag and drop the desired audio file to the timeline. Multiple songs could be added to iMovie.
However, iMovie doesn’t support multiple soundtracks. If necessary, you need to combine multiple song tracks with an external audio editor before importing them to the iMovie slideshow. You can also apply audio effects and filter sound using an equalizer.

Step 3. Export Your iMovie Slideshow Video
iMovie makes sharing possibilities endless. For those who upload their videos online, iMovie allows users to directly upload to MobileMe Gallery, YouTube, Facebook, Vimeo, CNN iReport, etc.
If you select to share the iMovie slideshow using Media Browser, you will get a slideshow appeared in other Mac applications like iWeb. It’s a good idea to export the iMovie slideshow to iTunes so that you can play back slideshow quickly and easily sync with your mobile devices like iPhone, iPod, and iPad.

You may also like: How to Add Text with iMovie in Mac and iPhone >>
Recommendation: Create Slideshow on Mac with More Templates and Transitions with Filmora
If you want to make a slideshow with some templates on Mac, you can try Wondershare Filmora . Filmora can turn photos and videos into attractive slideshow videos with various inbuilt filters, transitions, elements, animations, effects, and overlays. Click the Free Download button and have a try.
Check the ultimate guide about making a slideshow with music and titles in Filmora .
If you are going to make a slideshow with music on Windows, you may need a slideshow-making tool to do it by yourself. Wondershare Filmora will also be a good choice. It helps you instantly make such an impressive slideshow from photos and videos for sharing virtually anywhere.
Shanoon Cox
Shanoon Cox is a writer and a lover of all things video.
Follow @Shanoon Cox
Shanoon Cox
Mar 27, 2024• Proven solutions
Makings a slideshow is a great way to share photos and videos with friends and families. The good news is that you can totally make a slideshow on Mac for free with iMovie. iMovie is the pre-installed program coming with every new Mac. It provides a simple yet professional way to make slideshow movies from your photos, videos, and music.
If you haven’t iMovie installed on your Mac yet, just go to iTunes and download it for free. In the following part, I’ll share with you the step-by-step tutorial on how to make a slideshow on Mac using the free video editing software iMovie.
If you are an iOS user, check our picks of best photo slideshow apps for iPhone or iPad.
Ways for iMovie Photo Slideshow with Music Making
To make a photo slideshow with music in iMovie, you can follow these steps.
1. Create a New Project
After launching iMovie, click the Project button and then click Create New. Select Movie to combine photos, videos and music to make a slideshow.
2. Import Photos, Videos, and Audio Files
Now go to the My Media tab and click the Import icon to add your photos, videos, and music to iMovie, in this way, you can import any media files from any location on your Mac. But if you have arranged all your videos, photos, and music tracks in the Photos app, you can just switch to Photos under the Libraries tab on the left to import.
3. Arrange Media in Timeline and Adjust
Now, it’s time to place all these photos and videos in the timeline in order and do some adjustments. You can use the Magic Wand tool to improve the photo quality automatically, do some color correction, or add a filter to the photo. If you preview the video clip, you will see more options that allow you to do more editing, such as changing speed.
4. Apply Transitions & Effects
Transitions and effects will help you to create a slideshow in a more professional way. Some transitions such as cross dissolve, fade and cross blur are very popular in the slideshow, but remember don’t use lots of different transitions in one slideshow since too many transitions will distract the viewer’s attention. To apply a transition in the slideshow, just drag and drop it between two photos in the timeline.
5. Add Titles and Text
Using some opener titles and credits at the beginning and ending part of your slideshow will make it cool as well. You can add some famous quotes and words to better demonstrate.
Just to the Titles tab and select one of the title templates and drop it to the timeline first and then write your own words in the preview window.
6. Add Music to Slideshow
You can download some royalty-free music and sound effects from websites such as Filmstock stock media library or iTunes or import your own audio as we said before to use it as the slideshow background music. To sync with the slideshow, you may need to trim and edit the audio accordingly. For detailed information about iMovie audio editing, you can check how to add background music to iMovie.
Filmstock Stock Media Library ](https://tools.techidaily.com/wondershare/filmora/download/ )
7. Export and Share Your Slideshow video
Play the slideshow and check the result in the preview window. If everything goes well, you can now export and share or save it. You can save the slideshow video in MP4 format, or share it to Vimeo or add the slideshow to Theater to load it on your other Apple devices so you can easily watch it on your iOS devices or Apple TV.
I hope the above tutorial about how to make a slideshow on iMovie will be helpful for your stunning slideshow creation.
If you’re running an old macOS version and having iPhoto installed on your Mac, here are the detailed steps about How to make slideshow in iMovie with iPhoto project.
Step 1. Import Photos from the iPhoto Library
iMovie works seamlessly with iPhoto. You are suggested to drag and drop photos from iPhoto to the iMovie project. If no library exists in iPhoto, create one and import photos to iPhoto first. To add videos, you could go to either “File/Import” or Event Library, and then drag and drop selected videos to the timeline.
After photos and videos are imported to the iMovie slideshow project, you can preview the raw slideshow simply by pressing Space bar on your keyboard. And then make adjustments to clips and transitions. For example, mouse over one clip or “double arrow” button and click on the settings icon, then you could access clip adjustment, video adjustment, transition adjustment, etc.
Step 2. Add Music to Your iMovie Slideshow Project
Music sets the tone of your slideshow. Adding musing to the iMovie slideshow is just as simple as adding photos and videos.
So click the audio icon in the bottom right corner, and drag and drop the desired audio file to the timeline. Multiple songs could be added to iMovie.
However, iMovie doesn’t support multiple soundtracks. If necessary, you need to combine multiple song tracks with an external audio editor before importing them to the iMovie slideshow. You can also apply audio effects and filter sound using an equalizer.
Step 3. Export Your iMovie Slideshow Video
iMovie makes sharing possibilities endless. For those who upload their videos online, iMovie allows users to directly upload to MobileMe Gallery, YouTube, Facebook, Vimeo, CNN iReport, etc.
If you select to share the iMovie slideshow using Media Browser, you will get a slideshow appeared in other Mac applications like iWeb. It’s a good idea to export the iMovie slideshow to iTunes so that you can play back slideshow quickly and easily sync with your mobile devices like iPhone, iPod, and iPad.
You may also like: How to Add Text with iMovie in Mac and iPhone >>
Recommendation: Create Slideshow on Mac with More Templates and Transitions with Filmora
If you want to make a slideshow with some templates on Mac, you can try Wondershare Filmora . Filmora can turn photos and videos into attractive slideshow videos with various inbuilt filters, transitions, elements, animations, effects, and overlays. Click the Free Download button and have a try.
Check the ultimate guide about making a slideshow with music and titles in Filmora .
If you are going to make a slideshow with music on Windows, you may need a slideshow-making tool to do it by yourself. Wondershare Filmora will also be a good choice. It helps you instantly make such an impressive slideshow from photos and videos for sharing virtually anywhere.
Shanoon Cox
Shanoon Cox is a writer and a lover of all things video.
Follow @Shanoon Cox
How to Make an Adorable Video for Your Baby’s First Year
How to Make an Adorable Video for Your Baby’s First Year
Ollie Mattison
Mar 27, 2024• Proven solutions
Your baby grows up very fast and being able to see him grow is maybe one of the most interesting and exciting moments in your life. Documenting the first year is amazing and it will surely offer you an extraordinary value so try to do that the best way you can. Imagine how touched your child would be when he/she, at the age of 18, watch something like this:
How to make the baby’s first year video
Filming tips
Shooting a good baby’s first year video can take a little bit of preparation and it will surely offer you an extraordinary experience in the long run. It will also help offer you an incredible value to begin with which is always impressive.
Stabilize the camera - The first thing you need to do is to stabilize the camera. Using a tripod can be the best option here so take your time and results will be great for sure. Of course, placing the camera on your counter will also help, so try to keep that in mind as it can indeed be a very good option to begin with.
Lighting - You will also have to play with the proper lighting setup. A good light will help you get much better results and even though it can take some time to get the best experience, it really is a truly amazing option that you do not want to miss.
Focus - Of course, focus on the baby. Yes, focus but don’t zoom in and out all the time. Find a good pattern that will help keep the baby steady and do all in your power to get the best results. Granted, it will take some time to get good results but don’t rush it otherwise the experience will not be as good as you would expect.
Audio - Moreover, audio should be your focus here as well. Take the time and do something good here, a good audio will always pay off very well so get a good audio setup if you want to obtain a stellar experience.
Props - Also, we recommend you to use props. These can really make a good video and they will even add in some much needed fun to your setup. Try to find the best possible props and add them in your video. Some good prop examples would be a stuffed animal, a toy, maybe even the family pet. All of these are great and well worth your time.
Editing tips
Once you finished capturing the movie, you will have to go to editing. This is where you have to use a good video editing tool that will help provide a good baby’s first year video in the end. With that in mind, Wondershare Filmora can be the tool of choice as it offers you all the features you need in order to create a good baby video.
=“” style=”width: 100%; height: 278.438px;”;
Download Mac Version ](https://tools.techidaily.com/wondershare/filmora/download/ )
Adjust saturation - You should try to use the app in order to adjust the saturation as this can lead to some very bad results if you’re not careful. Find the proper saturation levels and opt for them right away.
Trim, cut, or split - If needed, split, cut or even trim the video. There will be times when you will need the reversing effect as well. All of these effects are accessible via the Wondershare Filmora video app.
Advanced editing - Plus, you will also need to apply a green screen effect as this will help you place your baby in a variety of funny locations, be it a funny MV or a Hollywood movie. The app can also help you clone the baby with PIP effects and you can also use it to add filters, overlays or text.
Wondershare Filmora will offer you an extraordinary set of tools and it will bring in front a very good value right from the start. The interface of the app is user friendly and you will have no problem using it as you see fit. Also, you can create the baby’s first year video on both Mac and Windows as the app supports both platforms. It also delivers immediate support for camcorders and smartphones so you can use any device you want for video capture. With its help you can share videos to DVD or YouTube too if you so desire. Don’t hesitate and access this great tool as fast as possible to get a good outcome!
Ollie Mattison
Ollie Mattison is a writer and a lover of all things video.
Follow @Ollie Mattison
Ollie Mattison
Mar 27, 2024• Proven solutions
Your baby grows up very fast and being able to see him grow is maybe one of the most interesting and exciting moments in your life. Documenting the first year is amazing and it will surely offer you an extraordinary value so try to do that the best way you can. Imagine how touched your child would be when he/she, at the age of 18, watch something like this:
How to make the baby’s first year video
Filming tips
Shooting a good baby’s first year video can take a little bit of preparation and it will surely offer you an extraordinary experience in the long run. It will also help offer you an incredible value to begin with which is always impressive.
Stabilize the camera - The first thing you need to do is to stabilize the camera. Using a tripod can be the best option here so take your time and results will be great for sure. Of course, placing the camera on your counter will also help, so try to keep that in mind as it can indeed be a very good option to begin with.
Lighting - You will also have to play with the proper lighting setup. A good light will help you get much better results and even though it can take some time to get the best experience, it really is a truly amazing option that you do not want to miss.
Focus - Of course, focus on the baby. Yes, focus but don’t zoom in and out all the time. Find a good pattern that will help keep the baby steady and do all in your power to get the best results. Granted, it will take some time to get good results but don’t rush it otherwise the experience will not be as good as you would expect.
Audio - Moreover, audio should be your focus here as well. Take the time and do something good here, a good audio will always pay off very well so get a good audio setup if you want to obtain a stellar experience.
Props - Also, we recommend you to use props. These can really make a good video and they will even add in some much needed fun to your setup. Try to find the best possible props and add them in your video. Some good prop examples would be a stuffed animal, a toy, maybe even the family pet. All of these are great and well worth your time.
Editing tips
Once you finished capturing the movie, you will have to go to editing. This is where you have to use a good video editing tool that will help provide a good baby’s first year video in the end. With that in mind, Wondershare Filmora can be the tool of choice as it offers you all the features you need in order to create a good baby video.
=“” style=”width: 100%; height: 278.438px;”;
Download Mac Version ](https://tools.techidaily.com/wondershare/filmora/download/ )
Adjust saturation - You should try to use the app in order to adjust the saturation as this can lead to some very bad results if you’re not careful. Find the proper saturation levels and opt for them right away.
Trim, cut, or split - If needed, split, cut or even trim the video. There will be times when you will need the reversing effect as well. All of these effects are accessible via the Wondershare Filmora video app.
Advanced editing - Plus, you will also need to apply a green screen effect as this will help you place your baby in a variety of funny locations, be it a funny MV or a Hollywood movie. The app can also help you clone the baby with PIP effects and you can also use it to add filters, overlays or text.
Wondershare Filmora will offer you an extraordinary set of tools and it will bring in front a very good value right from the start. The interface of the app is user friendly and you will have no problem using it as you see fit. Also, you can create the baby’s first year video on both Mac and Windows as the app supports both platforms. It also delivers immediate support for camcorders and smartphones so you can use any device you want for video capture. With its help you can share videos to DVD or YouTube too if you so desire. Don’t hesitate and access this great tool as fast as possible to get a good outcome!
Ollie Mattison
Ollie Mattison is a writer and a lover of all things video.
Follow @Ollie Mattison
How to Make Memes on iPhone and Android
How to Make Memes on iPhone and Android
Ollie Mattison
Mar 27, 2024• Proven solutions
With growing demand on the internet, memes are spreading like wildfire. In case you want to promote your brand using various types of relatable memes that would drive more traffic for your website, then there is good news for you. It doesn’t matter, whether you own an Android or iOS device. We will help you out in learning how to make memes on iPhone/Android in this article. Keep reading!
- Part1: How to make memes on iPhone with Meme Generator
- Part2: How to make memes on Android with Memedroid
- Part3: Recommended - Making memes with Filmora meme maker online
Part 1: How to make memes on iPhone with Meme Generator
While planning to create memes on your iPhone, you might find Meme Generator as the most suitable tool. It helps you create hilarious memes and allows you to share on social media platforms like Twitter, Facebook, Messenger, Instagram, Dropbox, E-mail, Snapchat etc. you get 500 plus memes with example captions under different categories.
You can customize memes using your own photos and adding text, alter size and color of text using 10 different fonts. You can crop the image, move it, add border to it, filter/search memes, and scroll through each meme category. There are no watermark or auto upload of memes to protect your privacy. Here is the detailed guide –
Step 1: Install Meme Generator from App Store on your iPhone and launch the app.
Step 2: Tap on the 3 horizontal lines on the top-left corner to browse memes. If you know the name, then search a meme and click on it.
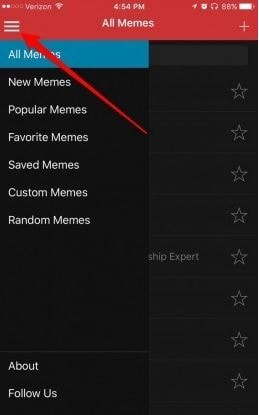
Step 3: Use the example text or hit the ‘Text’ bar to add or edit your caption. Press the icons over the top-right corner for customizing your meme photo and caption options.
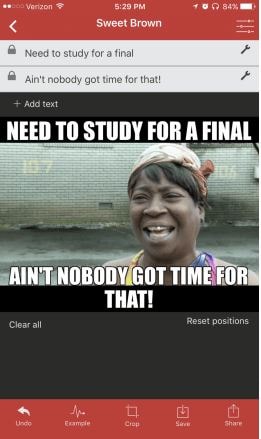
Step 4: Tap on the ‘Save’ or ‘Share’ button, once you are done editing the meme. You can find the meme on your ‘Photos’ app.
Part 2: How to make memes on Android with Memedroid
If you are wondering how to make memes on Android, then take the Memedroid app into consideration. You can create photos and GIF memes, jokes, avatars, graphics etc. with this app. There are numerous memes uploaded everyday on the app and you get the chance to let people vote for your meme too.
You get to use popular templates such as evil toddler, attached girlfriend, surprised koala with hilarious designs. The best rated memes are in the top gallery and you get the main gallery with latest funny memes too. You can design and save your memes and share them or download, it’s up to you. It supports a wide variety of languages such as English, French, Spanish, Italian, Portuguese etc.
Here are the steps for how to make memes on Android –
Step 1: Download and install the app on your mobile and launch it. Click on ‘Meme Factory’ to pick the background image and then you can swipe to explore the other features too. Alternatively, you can add your own photos if Meme factory was not of your choice. Hit ‘Upload Zone’ instead of ‘Meme Factory’ and register for a free account. On the ‘Upload’ screen, tap the ‘Select An Image’ button to pick a photo within 330MB size
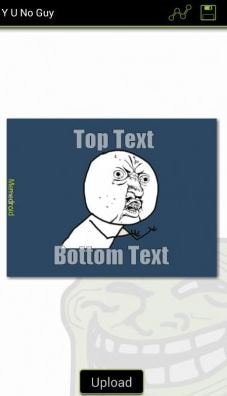
Step 2: After selecting the background image, add captions at the top and bottom of the image. The ‘SAVE’ button can be found on the top-right, tap that to save. Likewise, for sharing the meme, hit the ‘SHARE’ button located at the bottom of the screen.
Step 3: Add tags and accept the ‘Terms of Service’ followed by ‘Send’ button. Wait a while, to get you meme ready for your audience.
Part 3: Recommended - Making memes with Filmora meme maker online
In order to make memes on iPhone/Android, you need a mobile device. But, what if you have a computer on which you need to create a meme? Well, Filmora meme maker is the apt choice for you. You don’t need to download apps or software on your Pc. It is the ultimate online solution.
Brief steps to introduce making memes. You can create image, GIF, and video memes adding nice fonts. It processes video/GIF/image memes rapidly than the competitors. Adding texts, fonts and altering font colors is so easy with it.
Here is the detailed guide to make memes on Android –
Step 1: Visit the official Filmora website and look for Filmora online meme maker. Import videos by dragging and dropping to the Filmora interface. You can even add online links to videos in order to upload them.

Step 2: After selecting the video/photo/GIF move to the meme editor page and customize your video meme using tools from the left pane. Include text, change fonts and then you can preview the changes.

Step 3: Tap on the ‘CREATE’ button to apply the changes, when you are satisfied. Press the ‘DOWNLOAD’ button and then share your meme on social media sites.

Conclusion
Coming towards the end of the article, we have discovered that Filmora creates brilliant memes and that too, in no time. No lengthy or annoying processes, nor you need apps that eat up your phone memory. Life is blissfully funny with meme making on Filmora.
Ollie Mattison
Ollie Mattison is a writer and a lover of all things video.
Follow @Ollie Mattison
Ollie Mattison
Mar 27, 2024• Proven solutions
With growing demand on the internet, memes are spreading like wildfire. In case you want to promote your brand using various types of relatable memes that would drive more traffic for your website, then there is good news for you. It doesn’t matter, whether you own an Android or iOS device. We will help you out in learning how to make memes on iPhone/Android in this article. Keep reading!
- Part1: How to make memes on iPhone with Meme Generator
- Part2: How to make memes on Android with Memedroid
- Part3: Recommended - Making memes with Filmora meme maker online
Part 1: How to make memes on iPhone with Meme Generator
While planning to create memes on your iPhone, you might find Meme Generator as the most suitable tool. It helps you create hilarious memes and allows you to share on social media platforms like Twitter, Facebook, Messenger, Instagram, Dropbox, E-mail, Snapchat etc. you get 500 plus memes with example captions under different categories.
You can customize memes using your own photos and adding text, alter size and color of text using 10 different fonts. You can crop the image, move it, add border to it, filter/search memes, and scroll through each meme category. There are no watermark or auto upload of memes to protect your privacy. Here is the detailed guide –
Step 1: Install Meme Generator from App Store on your iPhone and launch the app.
Step 2: Tap on the 3 horizontal lines on the top-left corner to browse memes. If you know the name, then search a meme and click on it.
Step 3: Use the example text or hit the ‘Text’ bar to add or edit your caption. Press the icons over the top-right corner for customizing your meme photo and caption options.
Step 4: Tap on the ‘Save’ or ‘Share’ button, once you are done editing the meme. You can find the meme on your ‘Photos’ app.
Part 2: How to make memes on Android with Memedroid
If you are wondering how to make memes on Android, then take the Memedroid app into consideration. You can create photos and GIF memes, jokes, avatars, graphics etc. with this app. There are numerous memes uploaded everyday on the app and you get the chance to let people vote for your meme too.
You get to use popular templates such as evil toddler, attached girlfriend, surprised koala with hilarious designs. The best rated memes are in the top gallery and you get the main gallery with latest funny memes too. You can design and save your memes and share them or download, it’s up to you. It supports a wide variety of languages such as English, French, Spanish, Italian, Portuguese etc.
Here are the steps for how to make memes on Android –
Step 1: Download and install the app on your mobile and launch it. Click on ‘Meme Factory’ to pick the background image and then you can swipe to explore the other features too. Alternatively, you can add your own photos if Meme factory was not of your choice. Hit ‘Upload Zone’ instead of ‘Meme Factory’ and register for a free account. On the ‘Upload’ screen, tap the ‘Select An Image’ button to pick a photo within 330MB size
Step 2: After selecting the background image, add captions at the top and bottom of the image. The ‘SAVE’ button can be found on the top-right, tap that to save. Likewise, for sharing the meme, hit the ‘SHARE’ button located at the bottom of the screen.
Step 3: Add tags and accept the ‘Terms of Service’ followed by ‘Send’ button. Wait a while, to get you meme ready for your audience.
Part 3: Recommended - Making memes with Filmora meme maker online
In order to make memes on iPhone/Android, you need a mobile device. But, what if you have a computer on which you need to create a meme? Well, Filmora meme maker is the apt choice for you. You don’t need to download apps or software on your Pc. It is the ultimate online solution.
Brief steps to introduce making memes. You can create image, GIF, and video memes adding nice fonts. It processes video/GIF/image memes rapidly than the competitors. Adding texts, fonts and altering font colors is so easy with it.
Here is the detailed guide to make memes on Android –
Step 1: Visit the official Filmora website and look for Filmora online meme maker. Import videos by dragging and dropping to the Filmora interface. You can even add online links to videos in order to upload them.
Step 2: After selecting the video/photo/GIF move to the meme editor page and customize your video meme using tools from the left pane. Include text, change fonts and then you can preview the changes.
Step 3: Tap on the ‘CREATE’ button to apply the changes, when you are satisfied. Press the ‘DOWNLOAD’ button and then share your meme on social media sites.
Conclusion
Coming towards the end of the article, we have discovered that Filmora creates brilliant memes and that too, in no time. No lengthy or annoying processes, nor you need apps that eat up your phone memory. Life is blissfully funny with meme making on Filmora.
Ollie Mattison
Ollie Mattison is a writer and a lover of all things video.
Follow @Ollie Mattison
Add Emojis to Videos on YouTube/Facebook/Snapchat [Step by Step Guide]
Add Emojis to Videos on YouTube/Facebook/Snapchat [Step by Step Guide]

Liza Brown
Mar 27, 2024• Proven solutions
Emojis are a great way to express one’s emotion more vividly through a depiction rather than a plain conventional text. By the passage of time, the trend of using emoji on social media domain has drastically increased around the world. Since emoji are ubiquitous and its influence on culture is increasingly huge, using emoji has now become a trend.
A plain conventional text or video may not emphasize the meaning behind the phrase, but adding emoji to it is like adding a soul to the intentions behind the message. It helps outshine the theme and make a video more appealing at the same time.
So, with all this being known, let’s take a tour to a complete guide to how to accessorize a video on multiple social media domains and make it far more attractive and meaningful.
Best Tool to Help You Add Emojis to Videos in Few Clicks
Gamers, YouTubers and all other Mac and PC users who’d like to add a smiley or any other emoji to a video should try processing their footage with the Filmora video editor.
Performing basic video editing tasks like cutting or trimming the footage, choosing a soundtrack for a video or adding an emoji to a single shot or an entire sequence can all be completed in just a couple of clicks.
Filmora is free to download. Import your videos after you launch the software, you then can add any animated emojis into wherever you want. Have a try now! Emojis inside are so Cute!
How to Add Emojis to YouTube Videos?
You can now add emojis to any of the YouTube videos using an online free tool called Kapwing.
Below are the basic steps about how to add emojis to YouTube videos anywhere using Kapwing.
Step 1: Open free tool Meme Maker and tap on “get started”.
Step 2: Copy the link of the targeted YouTube video and paste the URL of your YouTube video.
Step 3: One of the ways to insert emoji using Kapwing is to directly upload an emoji having a transparent background. In the toolbar, click on “upload” and paste its URL there. The image will be placed onto the targeted video as an overlay by importing it. Another way to add emoji is to click “add text” where you will have options to insert emojis.
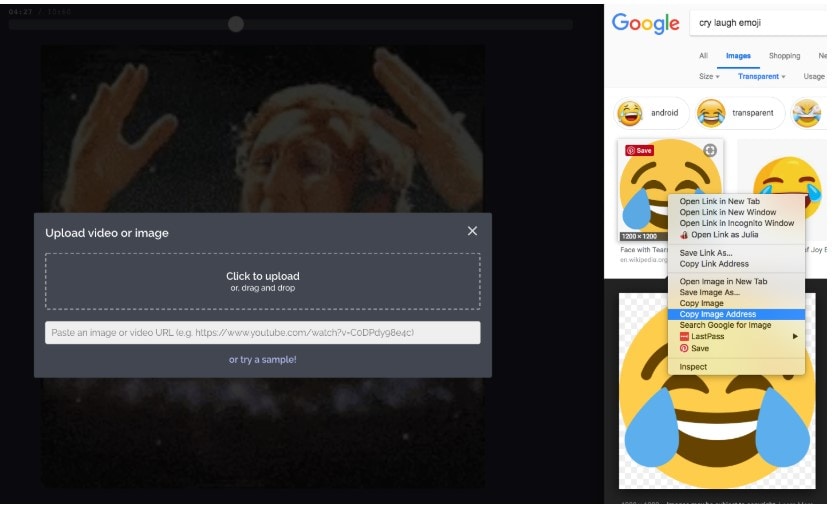
Step 4: You can now play around with editing options in Kapwing to adjust accordingly.
How to Use Emojis on YouTube?
YouTube provides you an option to insert emoji on your YouTube account description, tag and titles with great ease with the use of YouTube certified plugin, Tube Buddy.
Step 1: Install this plugin on chrome browser.
Step 2: Open “info and settings” option in your YouTube targeted video.
Step 3: Tap on description box, tags or title where an emoji icon will be shown. Tap on the emoji icon to display a list of emojis. You can also search for an emoji in the search bar.
How to Add Emojis in Snapchat Videos?
Step 1: Install Snapchat if you don’t already have it. Then run Snapchat.
Step 2: Record a video by keeping your fingers on the record button.
Step 3: Choose and tap an emoji of your choice to add in your video. Hold your fingers on emoji to place to the desired frame/clip of your recorded video.
Step 4: The emoji can be resized by dragging or pinching it in. You can add more than one emoji.
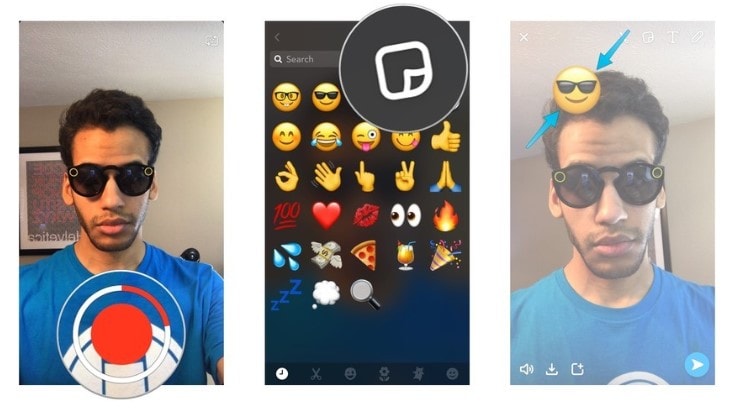
Image from iMore
How to Add Emojis to Facebook?
If you are wondering about how to add emojis to Facebook videos then, unfortunately, Facebook only offers “go live” option on Facebook where an emoji cannot be inserted. But you can insert emoji to Facebook status, comment or in your messenger conversation easily by following the step below for status:
Step 1: Click “what’s on your mind” to add new status on Facebook.
Step 2: At the bottom right side of the status box is an emoji icon. Click on it. This will open a list of emojis that you can choose as many as you want
Step 3: Click on the emoji icon back again to close the list when you are done. Click on post to share the post on your wall.
How to Add Emojis to Videos on iMovie?
Step 1: Search for the desired emoji on the internet with transparent background. Go to iMovie and select a clip of your video where you want to insert an emoji.
Step 2: Go to the “Import” option into the toolbar above, select your desired emoji from the list. This emoji will be added to the iMovie library.
Step 3: Click on that emoji. This overlays that emoji onto that video clip. You can scale the emoji up and down and drag it anywhere on the video.
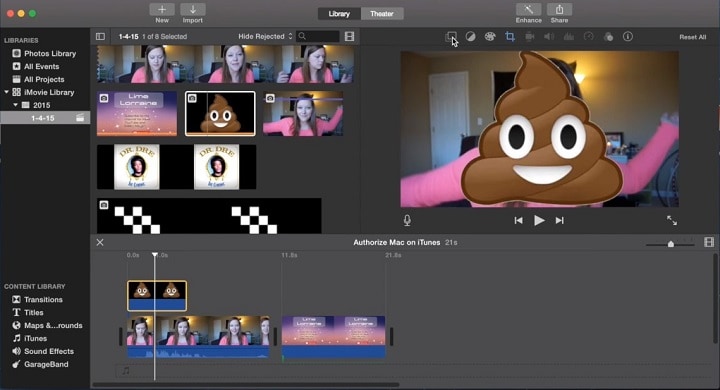
Image from YouSubtitles
How to Add Emojis to Videos Online?
Blurbiz, is an online application for editing YouTube, Instagram, Facebook and Snapchat videos. Just follow the steps below, then you can add emojis you want.
Step 1: Create and name the project in Blurbiz.
Step 2: Upload either your video, sticker or gif whichever you want an emoji to be placed in.
Step 3: Hover over the video and click on the “edit” button.
Step 4: Tap on “upload” at the top left side of the pane. Upload emoji with .png extension from your desktop.
Step 5: Drag and drop to overlay the emoji onto your video. Resize and position an emoji accordingly.
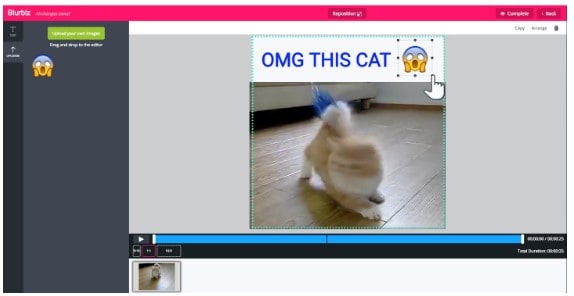
Step 6: Tap on “complete” at the top right corner when you are done. You can download an mp4 format video.
How to Add Emojis to Videos Android?
WeVideo , is an app to create and edit videos to the next level and provide one with ample special effects to add on to your videos.
Alongside using basic editing features like cutting, trimming or arranging video clips, you can amplify your editing game by adding emoji to your videos. Moreover, you can export your projects in high quality and share them on either Vimeo, YouTube or Dropbox.

Conclusion
Be it any video on any social media platform or your local device, with this thorough guide, you must be able to accessorize your video and take it to another level of emotional expression and message details in your video by using fun emojis.
Liza Brown
Liza Brown is a writer and a lover of all things video.
Follow @Liza Brown
Liza Brown
Mar 27, 2024• Proven solutions
Emojis are a great way to express one’s emotion more vividly through a depiction rather than a plain conventional text. By the passage of time, the trend of using emoji on social media domain has drastically increased around the world. Since emoji are ubiquitous and its influence on culture is increasingly huge, using emoji has now become a trend.
A plain conventional text or video may not emphasize the meaning behind the phrase, but adding emoji to it is like adding a soul to the intentions behind the message. It helps outshine the theme and make a video more appealing at the same time.
So, with all this being known, let’s take a tour to a complete guide to how to accessorize a video on multiple social media domains and make it far more attractive and meaningful.
Best Tool to Help You Add Emojis to Videos in Few Clicks
Gamers, YouTubers and all other Mac and PC users who’d like to add a smiley or any other emoji to a video should try processing their footage with the Filmora video editor.
Performing basic video editing tasks like cutting or trimming the footage, choosing a soundtrack for a video or adding an emoji to a single shot or an entire sequence can all be completed in just a couple of clicks.
Filmora is free to download. Import your videos after you launch the software, you then can add any animated emojis into wherever you want. Have a try now! Emojis inside are so Cute!
How to Add Emojis to YouTube Videos?
You can now add emojis to any of the YouTube videos using an online free tool called Kapwing.
Below are the basic steps about how to add emojis to YouTube videos anywhere using Kapwing.
Step 1: Open free tool Meme Maker and tap on “get started”.
Step 2: Copy the link of the targeted YouTube video and paste the URL of your YouTube video.
Step 3: One of the ways to insert emoji using Kapwing is to directly upload an emoji having a transparent background. In the toolbar, click on “upload” and paste its URL there. The image will be placed onto the targeted video as an overlay by importing it. Another way to add emoji is to click “add text” where you will have options to insert emojis.
Step 4: You can now play around with editing options in Kapwing to adjust accordingly.
How to Use Emojis on YouTube?
YouTube provides you an option to insert emoji on your YouTube account description, tag and titles with great ease with the use of YouTube certified plugin, Tube Buddy.
Step 1: Install this plugin on chrome browser.
Step 2: Open “info and settings” option in your YouTube targeted video.
Step 3: Tap on description box, tags or title where an emoji icon will be shown. Tap on the emoji icon to display a list of emojis. You can also search for an emoji in the search bar.
How to Add Emojis in Snapchat Videos?
Step 1: Install Snapchat if you don’t already have it. Then run Snapchat.
Step 2: Record a video by keeping your fingers on the record button.
Step 3: Choose and tap an emoji of your choice to add in your video. Hold your fingers on emoji to place to the desired frame/clip of your recorded video.
Step 4: The emoji can be resized by dragging or pinching it in. You can add more than one emoji.
Image from iMore
How to Add Emojis to Facebook?
If you are wondering about how to add emojis to Facebook videos then, unfortunately, Facebook only offers “go live” option on Facebook where an emoji cannot be inserted. But you can insert emoji to Facebook status, comment or in your messenger conversation easily by following the step below for status:
Step 1: Click “what’s on your mind” to add new status on Facebook.
Step 2: At the bottom right side of the status box is an emoji icon. Click on it. This will open a list of emojis that you can choose as many as you want
Step 3: Click on the emoji icon back again to close the list when you are done. Click on post to share the post on your wall.
How to Add Emojis to Videos on iMovie?
Step 1: Search for the desired emoji on the internet with transparent background. Go to iMovie and select a clip of your video where you want to insert an emoji.
Step 2: Go to the “Import” option into the toolbar above, select your desired emoji from the list. This emoji will be added to the iMovie library.
Step 3: Click on that emoji. This overlays that emoji onto that video clip. You can scale the emoji up and down and drag it anywhere on the video.
Image from YouSubtitles
How to Add Emojis to Videos Online?
Blurbiz, is an online application for editing YouTube, Instagram, Facebook and Snapchat videos. Just follow the steps below, then you can add emojis you want.
Step 1: Create and name the project in Blurbiz.
Step 2: Upload either your video, sticker or gif whichever you want an emoji to be placed in.
Step 3: Hover over the video and click on the “edit” button.
Step 4: Tap on “upload” at the top left side of the pane. Upload emoji with .png extension from your desktop.
Step 5: Drag and drop to overlay the emoji onto your video. Resize and position an emoji accordingly.
Step 6: Tap on “complete” at the top right corner when you are done. You can download an mp4 format video.
How to Add Emojis to Videos Android?
WeVideo , is an app to create and edit videos to the next level and provide one with ample special effects to add on to your videos.
Alongside using basic editing features like cutting, trimming or arranging video clips, you can amplify your editing game by adding emoji to your videos. Moreover, you can export your projects in high quality and share them on either Vimeo, YouTube or Dropbox.
Conclusion
Be it any video on any social media platform or your local device, with this thorough guide, you must be able to accessorize your video and take it to another level of emotional expression and message details in your video by using fun emojis.
Liza Brown
Liza Brown is a writer and a lover of all things video.
Follow @Liza Brown
Also read:
- [New] Crafting a Compelling Narrative A Key to More Viewers and Subscribers
- [Updated] Seamless Blend of Text & Video Without Payment for 2024
- 20 Wonderful Stop Motion Ideas for Beginners and Kids - Filmora for 2024
- 2024 Approved The Science of Swift Facebook Visuals
- Get the Latest: Seamless Download & Updating for Microsoft Surface Drivers
- How to Add Bitmoji to Keyboard, In 2024
- In 2024, The Essentials of Making Professional-Level Facebook Reels
- Mastering Real-Time Broadcast Periscope Essentials
- New 2024 Approved Best 10 Emoji Makers to Create Your Own EmojisPC/Online/Android/iPhone
- New 2024 Approved How to Edit Memoji on Android and iPhone
- The Visual Editor's Journey Cropping Content for Instagram Standout for 2024
- Unlock locked iPhone 15 without Passcode
- Updated 2024 Approved Making Triggered Memes with Filmora Video Editor
- Updated How to Record and Edit an Animoji or Memoji Karaoke Music Video?
- Updated How to Record Your Memorable Honeymoon Video for 2024
- Updated In 2024, How to Edit Memoji on Android and iPhone
- YouTube Vs. DailyMention Identifying Key Variations
- Title: New 2024 Approved Generating the Roll Safe-Think About It Meme
- Author: Jan
- Created at : 2025-02-12 16:41:09
- Updated at : 2025-02-19 16:24:09
- Link: https://meme-emoji.techidaily.com/new-2024-approved-generating-the-roll-safe-think-about-it-meme/
- License: This work is licensed under CC BY-NC-SA 4.0.