
Is This a Pigeon Meme Generator
Is This a Pigeon Meme Generator
Is This a Pigeon Meme Generator

Ollie Mattison
Mar 27, 2024• Proven solutions
Have you ever been so confused that you thought that a butterfly is a pigeon? Apparently, the main protagonist of The Brave Fighter of Sun Fighbird from the Japanese anime TV series has. In an episode that was released in January 1991, Yutaro Katori seriously asked ‘is this a pigeon?’ while looking at a butterfly. At first, everyone thought that it was just a poor translation, but it turned out that the translation was correct, which turned this still frame into a meme as early as 2011.
After a while, the Is This a Pigeon meme came out of fashion, but at the beginning of 2018, it went viral again. Today the meme is used to express all sorts of confusing opinions, that range from popular culture references to philosophical questions. If you’re utterly confused in certain situations or if you simply like making Is This a Pigeon meme, you’re at the right place because in this article we’re going to show you how you can generate these memes in a couple of simple steps.
How to Make Is This a Pigeon Meme?
There are hundreds of meme makers online, but some of them watermark your memes, require you to create an account or want to charge you for the service. That’s why we recommend using Filmora Online Meme Maker that is free to use, produces watermark-free memes, and it doesn’t require you to sign in. Here’s how you can make a meme with this online meme maker:
1. Importing Images
You can copy the picture’s URL by clicking ‘Copy the image’ link below the image and import the template into the Filmora Online Meme Maker directly from the web.
Copy the image
If you choose to upload a photo from your computer or a Smartphone, you can just drag and drop the file from a folder to the webpage or you can click on the + icon and navigate to the folder on your hard drive where the template is stored. Fimora Online Meme Maker also lets you use GIFs and videos to generate memes.

2. Adding the Text to the Meme
Immediately after the image is uploaded, a new page will load, where you can add the text to the meme you’re creating. The text in the Is this a pigeon meme is usually inside the picture so you can just select the Text Inside option and proceed to insert the text into the text boxes below.
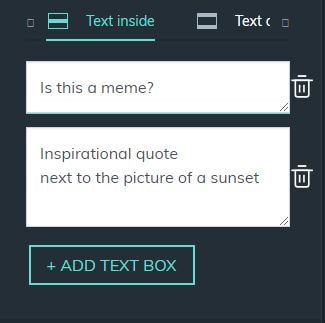
You can add as many text boxes as you want, and you can drag the text displayed across the picture and place it where ever you want. When creating the Is this a Pigeon meme, the text that refers to the source of the confusion should be next to the butterfly, while the question is most often located near the bottom of the picture. Optionally, you can reveal who is asking the question by adding me, my mom or Darth Vader next to the character in the picture.
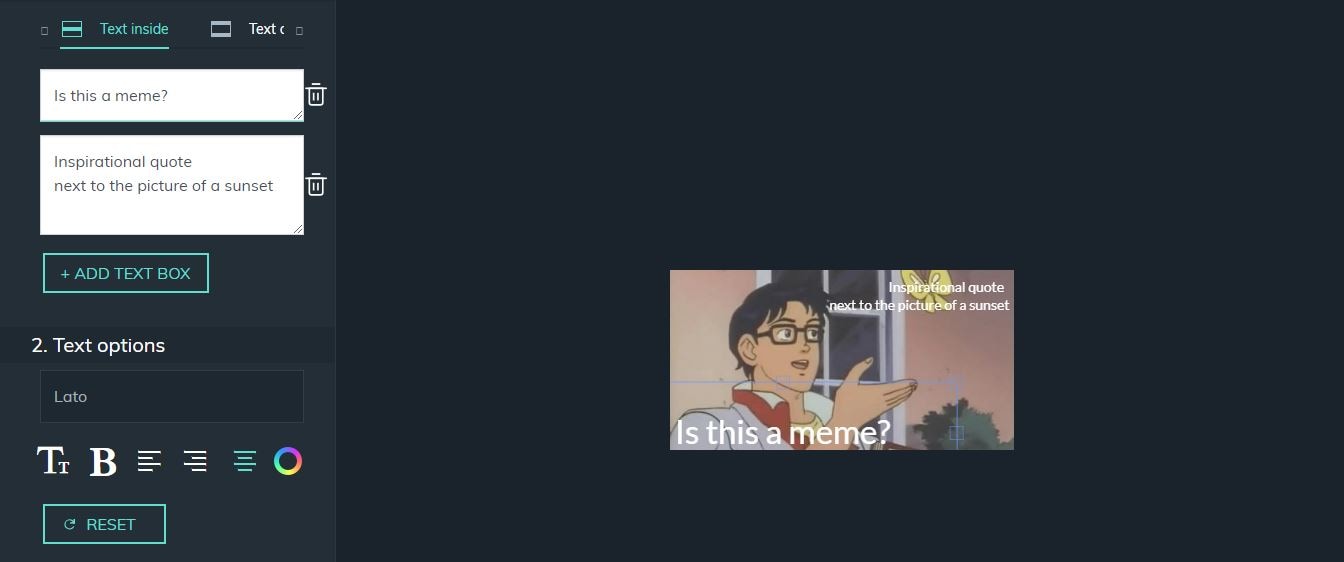
In the Text Options menu, you can adjust the size of the text in each text box individually, change its color or choose between standard text alignment options. Hit the Create button when you’re done and wait for a new page to load.
3. Downloading Memes
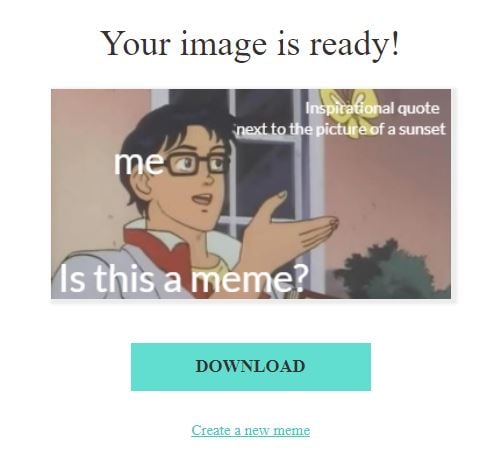
Click on the download button to add a new meme to your collection. Sharing files directly to social media from Filmora Online Meme Maker is not an option if you’re making memes from a Mac or PC computer.
Conclusion
Being confused can be hilarious, which is one of the reasons why Is this a Pigeon meme has been so popular over the course of the last year. Generating a meme is easy, so you can focus on finding an appropriate joke for this type of meme. Do you often make Is this a Pigeon memes? Leave a comment and share your favorites with us.
Ollie Mattison
Ollie Mattison is a writer and a lover of all things video.
Follow @Ollie Mattison
Ollie Mattison
Mar 27, 2024• Proven solutions
Have you ever been so confused that you thought that a butterfly is a pigeon? Apparently, the main protagonist of The Brave Fighter of Sun Fighbird from the Japanese anime TV series has. In an episode that was released in January 1991, Yutaro Katori seriously asked ‘is this a pigeon?’ while looking at a butterfly. At first, everyone thought that it was just a poor translation, but it turned out that the translation was correct, which turned this still frame into a meme as early as 2011.
After a while, the Is This a Pigeon meme came out of fashion, but at the beginning of 2018, it went viral again. Today the meme is used to express all sorts of confusing opinions, that range from popular culture references to philosophical questions. If you’re utterly confused in certain situations or if you simply like making Is This a Pigeon meme, you’re at the right place because in this article we’re going to show you how you can generate these memes in a couple of simple steps.
How to Make Is This a Pigeon Meme?
There are hundreds of meme makers online, but some of them watermark your memes, require you to create an account or want to charge you for the service. That’s why we recommend using Filmora Online Meme Maker that is free to use, produces watermark-free memes, and it doesn’t require you to sign in. Here’s how you can make a meme with this online meme maker:
1. Importing Images
You can copy the picture’s URL by clicking ‘Copy the image’ link below the image and import the template into the Filmora Online Meme Maker directly from the web.
Copy the image
If you choose to upload a photo from your computer or a Smartphone, you can just drag and drop the file from a folder to the webpage or you can click on the + icon and navigate to the folder on your hard drive where the template is stored. Fimora Online Meme Maker also lets you use GIFs and videos to generate memes.
2. Adding the Text to the Meme
Immediately after the image is uploaded, a new page will load, where you can add the text to the meme you’re creating. The text in the Is this a pigeon meme is usually inside the picture so you can just select the Text Inside option and proceed to insert the text into the text boxes below.
You can add as many text boxes as you want, and you can drag the text displayed across the picture and place it where ever you want. When creating the Is this a Pigeon meme, the text that refers to the source of the confusion should be next to the butterfly, while the question is most often located near the bottom of the picture. Optionally, you can reveal who is asking the question by adding me, my mom or Darth Vader next to the character in the picture.
In the Text Options menu, you can adjust the size of the text in each text box individually, change its color or choose between standard text alignment options. Hit the Create button when you’re done and wait for a new page to load.
3. Downloading Memes
Click on the download button to add a new meme to your collection. Sharing files directly to social media from Filmora Online Meme Maker is not an option if you’re making memes from a Mac or PC computer.
Conclusion
Being confused can be hilarious, which is one of the reasons why Is this a Pigeon meme has been so popular over the course of the last year. Generating a meme is easy, so you can focus on finding an appropriate joke for this type of meme. Do you often make Is this a Pigeon memes? Leave a comment and share your favorites with us.
Ollie Mattison
Ollie Mattison is a writer and a lover of all things video.
Follow @Ollie Mattison
Ollie Mattison
Mar 27, 2024• Proven solutions
Have you ever been so confused that you thought that a butterfly is a pigeon? Apparently, the main protagonist of The Brave Fighter of Sun Fighbird from the Japanese anime TV series has. In an episode that was released in January 1991, Yutaro Katori seriously asked ‘is this a pigeon?’ while looking at a butterfly. At first, everyone thought that it was just a poor translation, but it turned out that the translation was correct, which turned this still frame into a meme as early as 2011.
After a while, the Is This a Pigeon meme came out of fashion, but at the beginning of 2018, it went viral again. Today the meme is used to express all sorts of confusing opinions, that range from popular culture references to philosophical questions. If you’re utterly confused in certain situations or if you simply like making Is This a Pigeon meme, you’re at the right place because in this article we’re going to show you how you can generate these memes in a couple of simple steps.
How to Make Is This a Pigeon Meme?
There are hundreds of meme makers online, but some of them watermark your memes, require you to create an account or want to charge you for the service. That’s why we recommend using Filmora Online Meme Maker that is free to use, produces watermark-free memes, and it doesn’t require you to sign in. Here’s how you can make a meme with this online meme maker:
1. Importing Images
You can copy the picture’s URL by clicking ‘Copy the image’ link below the image and import the template into the Filmora Online Meme Maker directly from the web.
Copy the image
If you choose to upload a photo from your computer or a Smartphone, you can just drag and drop the file from a folder to the webpage or you can click on the + icon and navigate to the folder on your hard drive where the template is stored. Fimora Online Meme Maker also lets you use GIFs and videos to generate memes.
2. Adding the Text to the Meme
Immediately after the image is uploaded, a new page will load, where you can add the text to the meme you’re creating. The text in the Is this a pigeon meme is usually inside the picture so you can just select the Text Inside option and proceed to insert the text into the text boxes below.
You can add as many text boxes as you want, and you can drag the text displayed across the picture and place it where ever you want. When creating the Is this a Pigeon meme, the text that refers to the source of the confusion should be next to the butterfly, while the question is most often located near the bottom of the picture. Optionally, you can reveal who is asking the question by adding me, my mom or Darth Vader next to the character in the picture.

In the Text Options menu, you can adjust the size of the text in each text box individually, change its color or choose between standard text alignment options. Hit the Create button when you’re done and wait for a new page to load.
3. Downloading Memes
Click on the download button to add a new meme to your collection. Sharing files directly to social media from Filmora Online Meme Maker is not an option if you’re making memes from a Mac or PC computer.
Conclusion
Being confused can be hilarious, which is one of the reasons why Is this a Pigeon meme has been so popular over the course of the last year. Generating a meme is easy, so you can focus on finding an appropriate joke for this type of meme. Do you often make Is this a Pigeon memes? Leave a comment and share your favorites with us.
Ollie Mattison
Ollie Mattison is a writer and a lover of all things video.
Follow @Ollie Mattison
Distracted Boyfriend Meme Generator
Distracted Boyfriend Meme Generator
Ollie Mattison
Mar 27, 2024• Proven solutions
The Distracted Boyfriend meme is the embodiment of the awkward situation we find ourselves in when we want something other than what we already have. The original image was taken by Antonio Guillem and posted on iStock with a caption “Disloyal man with his girlfriend looking at another girl”. By early 2017, a few years after it was posted on iStock, the picture surfaced on social media, and it became a viral meme in a few short months. One of the first Distracted Boyfriend memes that featured a joke about staring at the sun during a solar eclipse was posted on Reddit and within 24 hours it gained 31.200 points.
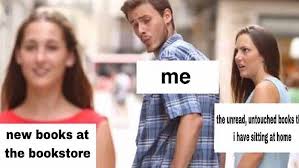
The meme has since become synonymous with being unfaithful to girlfriends, ideologies, scientific evidence, photo cameras or virtually anything else. Despite its popularity, it is still difficult to make a good Distracted Boyfriend meme, so let’s have a look at some of the best versions of the meme that emerged on social networks.
The Distracted Girlfriend meme became popular soon after the Distracted Boyfriend meme went viral. The photo belongs to the same series of images posted to iStock by Antonio Guillem.

Copy the image
The facial expression of the girl in the photo makes it perfect meme material because she looks as if she’s just about to risk it all and do what she wants. Both Boyfriend and Girlfriend versions of this meme contain text over each of the characters in the picture. If you have a similar dilemma you can make your own version effortlessly. Here’s how.
How to Make a Distracted Boyfriend Meme?
Online meme generators often watermark the content you create or require you to sign in before you can make a meme, which is why we recommend using Filmora Online Meme Maker . The platform lets you generate memes for free, and it offers all the tools you’ll need to quickly make a watermark-free Distracted Boyfriend meme.
1. Uploading the Image
You can click the “Copy the image” link below and the image link will be copied automatically.

Copy the image
Enter the URL into the box. Click on the Upload button and wait for the new page to load, so you can start making adjustments to the picture.
If you saved the photo to your computer, you can click on the +icon once you arrive at the meme maker’s homepage and navigate to its destination on your hard drive.

2. Adding Text to Memes
The textual part of the Distracted Boyfriend meme is always incorporated into the photo, so make sure that the Text Inside option is selected and proceed to insert the text into the text boxes. Click on the Add Text Box button to add a third text box to the meme, and drag the text boxes displayed on the screen to their best positions.

The Text Options menu lets you pick a font or change the color and the size of the text. It also offers the standard text alignment features, so you can easily rearrange the text.
3. Downloading the Meme
Click on the Create button once you finish customizing the text and wait for the new page to load.

Conclusion
Click on the download button to save the meme you created or use some of the file sharing options to post the meme on social media platforms if you are accessing the Online Meme Maker from a mobile device.
The Distracted Boyfriend is one of the most popular memes in the last couple of years that has made us all laugh because we all understand how it feels to be tempted by the things we don’t have. Do you like generating the Distracted Boyfriend or Distracted Girlfriend memes? Leave a comment below and share your experiences with us.
Ollie Mattison
Ollie Mattison is a writer and a lover of all things video.
Follow @Ollie Mattison
Ollie Mattison
Mar 27, 2024• Proven solutions
The Distracted Boyfriend meme is the embodiment of the awkward situation we find ourselves in when we want something other than what we already have. The original image was taken by Antonio Guillem and posted on iStock with a caption “Disloyal man with his girlfriend looking at another girl”. By early 2017, a few years after it was posted on iStock, the picture surfaced on social media, and it became a viral meme in a few short months. One of the first Distracted Boyfriend memes that featured a joke about staring at the sun during a solar eclipse was posted on Reddit and within 24 hours it gained 31.200 points.
The meme has since become synonymous with being unfaithful to girlfriends, ideologies, scientific evidence, photo cameras or virtually anything else. Despite its popularity, it is still difficult to make a good Distracted Boyfriend meme, so let’s have a look at some of the best versions of the meme that emerged on social networks.
The Distracted Girlfriend meme became popular soon after the Distracted Boyfriend meme went viral. The photo belongs to the same series of images posted to iStock by Antonio Guillem.
Copy the image
The facial expression of the girl in the photo makes it perfect meme material because she looks as if she’s just about to risk it all and do what she wants. Both Boyfriend and Girlfriend versions of this meme contain text over each of the characters in the picture. If you have a similar dilemma you can make your own version effortlessly. Here’s how.
How to Make a Distracted Boyfriend Meme?
Online meme generators often watermark the content you create or require you to sign in before you can make a meme, which is why we recommend using Filmora Online Meme Maker . The platform lets you generate memes for free, and it offers all the tools you’ll need to quickly make a watermark-free Distracted Boyfriend meme.
1. Uploading the Image
You can click the “Copy the image” link below and the image link will be copied automatically.
Copy the image
Enter the URL into the box. Click on the Upload button and wait for the new page to load, so you can start making adjustments to the picture.
If you saved the photo to your computer, you can click on the +icon once you arrive at the meme maker’s homepage and navigate to its destination on your hard drive.
2. Adding Text to Memes
The textual part of the Distracted Boyfriend meme is always incorporated into the photo, so make sure that the Text Inside option is selected and proceed to insert the text into the text boxes. Click on the Add Text Box button to add a third text box to the meme, and drag the text boxes displayed on the screen to their best positions.
The Text Options menu lets you pick a font or change the color and the size of the text. It also offers the standard text alignment features, so you can easily rearrange the text.
3. Downloading the Meme
Click on the Create button once you finish customizing the text and wait for the new page to load.
Conclusion
Click on the download button to save the meme you created or use some of the file sharing options to post the meme on social media platforms if you are accessing the Online Meme Maker from a mobile device.
The Distracted Boyfriend is one of the most popular memes in the last couple of years that has made us all laugh because we all understand how it feels to be tempted by the things we don’t have. Do you like generating the Distracted Boyfriend or Distracted Girlfriend memes? Leave a comment below and share your experiences with us.
Ollie Mattison
Ollie Mattison is a writer and a lover of all things video.
Follow @Ollie Mattison
Top 6 Animated Emoji Video Effects
6 Popular Animated Emoji Video Effects in 2024

Max Wales
Mar 27, 2024• Proven solutions
The daily grind of hard work, starting from dawn to dusk, has become overwhelming and mind-crushing. An average mind requires entertainment and recreation to work better and function properly. This brings us to the need for funny videos that make use of animated emoji to make our life more bearable.
Emojis like laughing emojis and thumbs-up emojis have a quirky way of increasing the serotonin levels in our body. Therefore, this article shall walk you through the top 6 animated emoji video effects presented by Wondershare Filmstock . In addition to this, there will be 8 peculiar ideas to make the video funny.
If you want to know the steps to edit video with animated emojis in Filmora, we have got you! So, without delaying it any longer, let us dig in!
- Part 1: Top 6 Animated Emoji Video Effects for Filmora Video Editor
- Part 2: 8 Ideas for Making Funny Videos with Animated Emoji
- Part 2: How to Edit Video with Animated Emoji in Filmora?
Part 1: Top 6 Animated Emoji Video Effects for Filmora Video Editor
The section shall revolve around the top 6animated emoji video effects that are presented by an online effects store known as Wondershare Filmstock. This website allows the user to have access to an unlimited range of effects, transitions, titles, graphics, elements, images, audio, and visual effects. One can unleash their creative ideas and download effects for every relevant situation.
Along with this, it is constantly growing and unique media with no fear of attribution. If this is not the ideal case scenario, then we don’t know what it will be! The following set of effects are the top 6 animated emoji video effects to incorporate in your YouTube introductory videos, TikTok clips, and Instagram stories or reels.
1. Animated Emoji Pack
Animated kiss emoji, animated dancing emoji, and laughing emoji, this emoji pack has covered your basics. With 24 elements, Animated Emoji Pack provides an easy way to express yourself and say it out loud using the language of emojis.
2. Emoji Stickers Pack
If you are on the verge of a nervous breakdown and require a stickers pack with 32 elements that include a crying emoji, this pack has to be your answer. In addition to this, this effect is 100% compatible with Wondershare Filmora 9.6 and above.
3. Message Bubbles Pack
With message and chat bubbles that make communication a lot faster and quick, allow me to introduce you to Message Bubbles Pack. It constitutes animated cute emoji faces and texting graphics to make your social media fun and interesting.
4. 3D Social Media Icons Pack
Incorporated with 12 titles, 60 elements, 4 overlays, and 6 transitions, 3D Social Media Icons Pack is sure to fill your shoes. One can have access to unlimited emoji animated in 3D animation and showcase themselves as the cool and classy one of the lot.
5. Cute Cartoon Emoji Pack
The Cartoon Emoji Pack is an amalgamation of a wide range of cartoon emojis to express yourself as best as you can. With the right choice of emoji, one can communicate themselves whilst using a total of 25 elements.
6. Reactions Stickers Pack
With a speech and thought bubble, Reaction Sticker Pack presents all sorts of reaction emojis and smileys. In addition to this, the template offers 11 titles, 4 overlays, 40 elements, and 2 transitions. Get ready to express your reactions in the funniest way.
Part 2: 8 Ideas for Making Funny Videos with Animated Emoji
The use of free animated emoji to make videos funny has become a thing now. Furthermore, it lets the user express themselves as a coping mechanism. Win-win situation, right? The article provides 8 fruitful ideas for making videos funny with these animated emojis. Let us have a look at them!

1. Face Swap with Animated Emoji
The first idea is sure to make the audience burst into laughter. For starters, one can swap their faces with animated emojis like an animated dancing emoji or a crying emoji. You can tell your audience what you are feeling right at the moment as you use those emojis and then show your real face.
2. Sharing a Story
One can share a funny story with their audience by using the power of animated emojis. They can explain what happened with a series of steps and incorporate emojis in the background that sync with the emotional reaction of the user as well as the audience.
3. Dream Wedding Video
The next idea is related to a wedding video. To make it funnier, the user can first create a video of the dream wedding planned for them. Combine it with the actual wedding video and then use 3D animated emojis to express how everything was messed up and, in the end, and didn’t go as planned.
4. Thoughts on Books and Netflix Series
The next idea is a workable and effective tool to make your video funnier. The content creator can make a video of a book he read or the Netflix series he watched and provide the audience with his thoughts. They can communicate the flaws of the movie or a book using animated sticker packs and gifs to make it funny and interesting.
5. Coworkers and Superiors Video
In this idea, the user can make a video showing his workplace and include all his superiors and coworkers. Afterward, he can edit the video by expressing himself what he actually feels about them and using different emojis to display the reaction of his coworkers in the video.
6. Video Techniques
The different video techniques can be used to make people laugh and be attracted to the video. For once, the user can quickly zoom in to the character when he is speaking to create a dramatic pull. In addition to this, one can also keep the camera on even after their dialogue delivery is concluded. This will capture an off-the-record reaction.
7. Capturing the Pets
The best idea yet is capturing the pets in the video. The user can record their pets doing insane and crazy things and insert emojis to bring a funny addition to the video. Along with this, one can use the thinking emoji to assume what their pet has been thinking at the moment.
8. A Random Day of your Life
One can add the element of surprise and laughter by making a video on their random day and how they want it to go. Record the video of your whole day and then combine it with a wide range of emojis such as crying emoji, laughing emoji, and kiss emoji.
Part 3: How to Edit Video with Animated Emoji in Filmora?
The last part of this article covers a brief introduction to a renowned video editing software and provides a step-by-step guideline to edit videos using animated emojis. Wondershare Filmora makes sure that the user has the right tools and mechanism to make their editing journey fun and reliable. It offers an effortless and user-friendly interface, a wide range of effects and transitions, and a motion tracking feature.


In addition to this, one can count on this software to change the backgrounds, insert split screens, discover filters and overlays, control speed, and personalize the creation. If you are all set to use this amazing video editing software, follow the procedure keenly to avoid any future inconvenience.
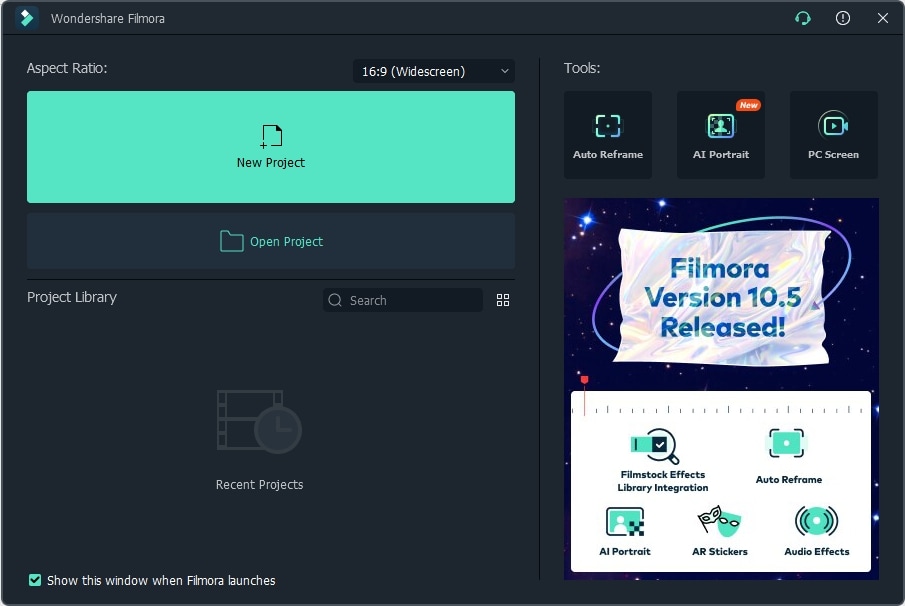
Step 1: Initiating the Project
Install Wondershare Filmora in your system and launch it as soon as the process concludes. Tap on the “New Project” tab on the welcome window of the software. Set the aspect ratio for your video. The resolution can be changed by clicking on the “File” option and then “Project Settings.”
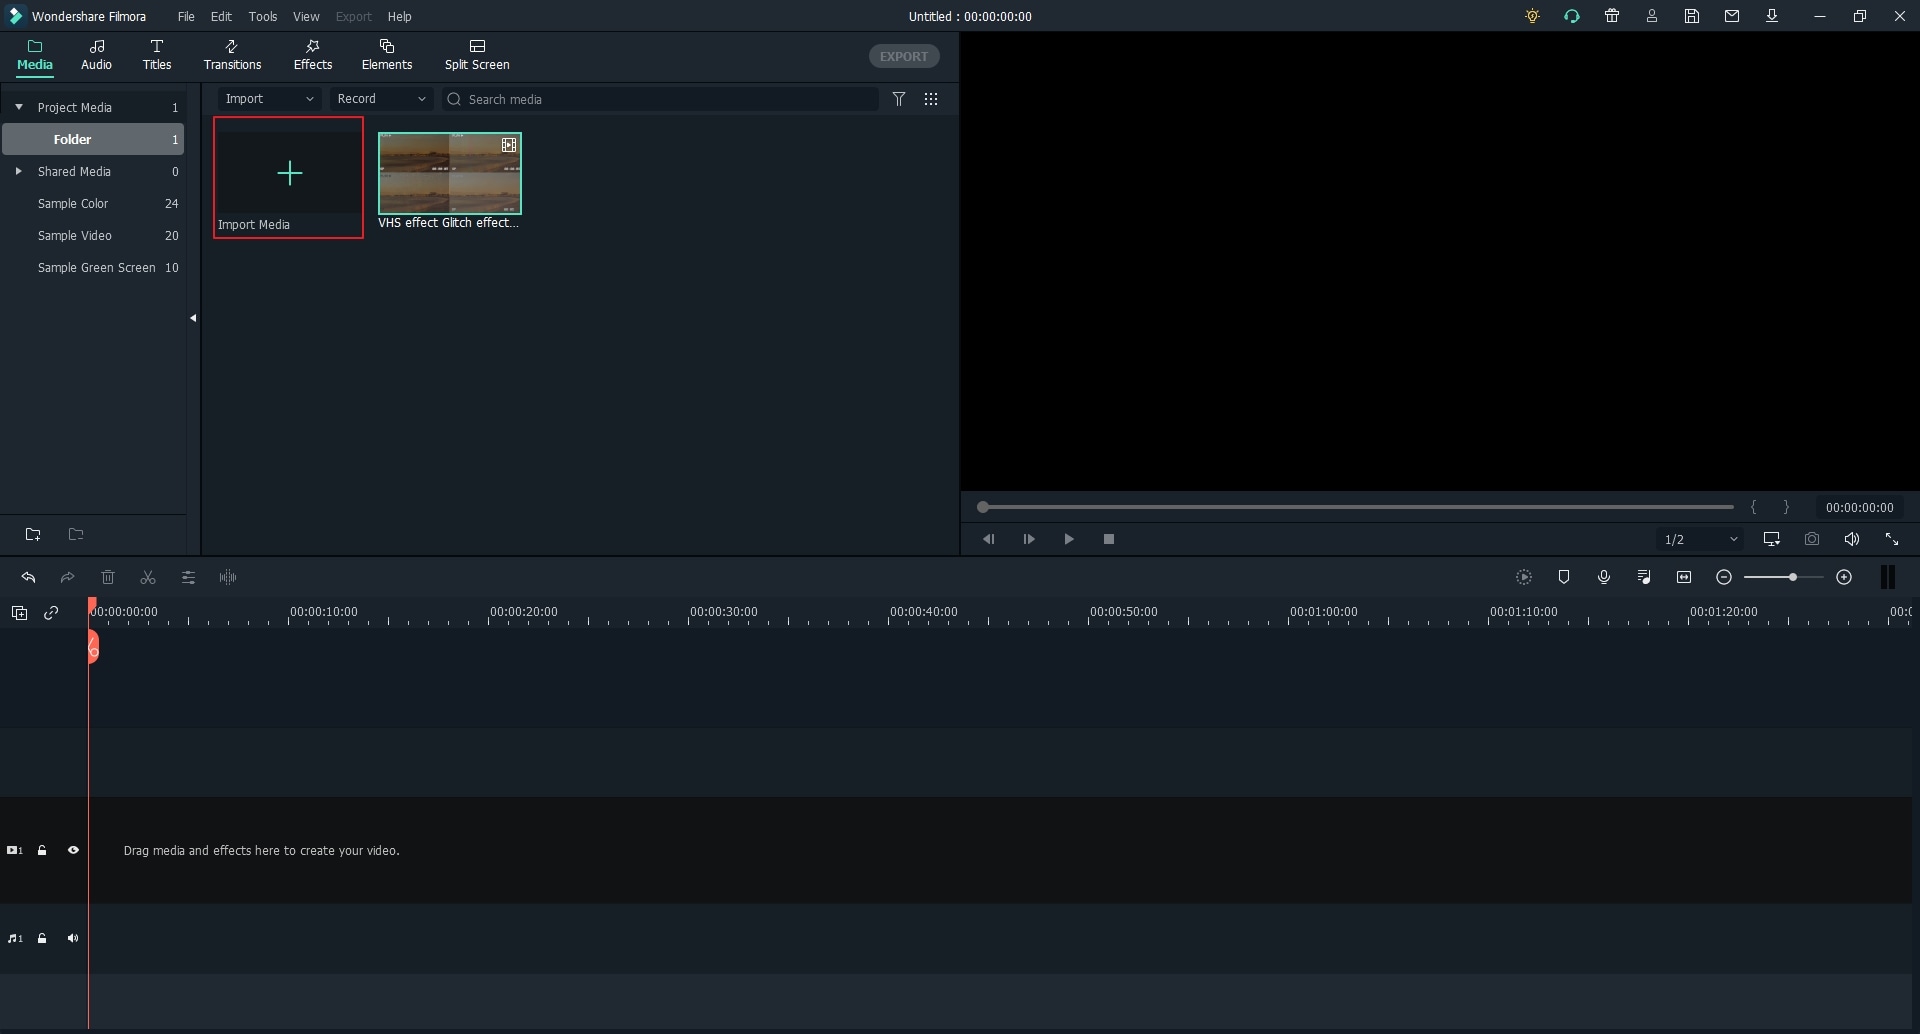
Step 2: Importing the Video
Now, tap on the “Import Media Files Here” menu option, which is located on the left side of the interface of Filmora. Tap on the targeted video to import it. Moving on, drag and drop the media file to the timeline.
Step 3: Processing the Video
Import the media files to the video track so that they can be manipulated. Now, process the video as you wish to. You can edit, trim, split, rotate, resize, crop, and combine videos.
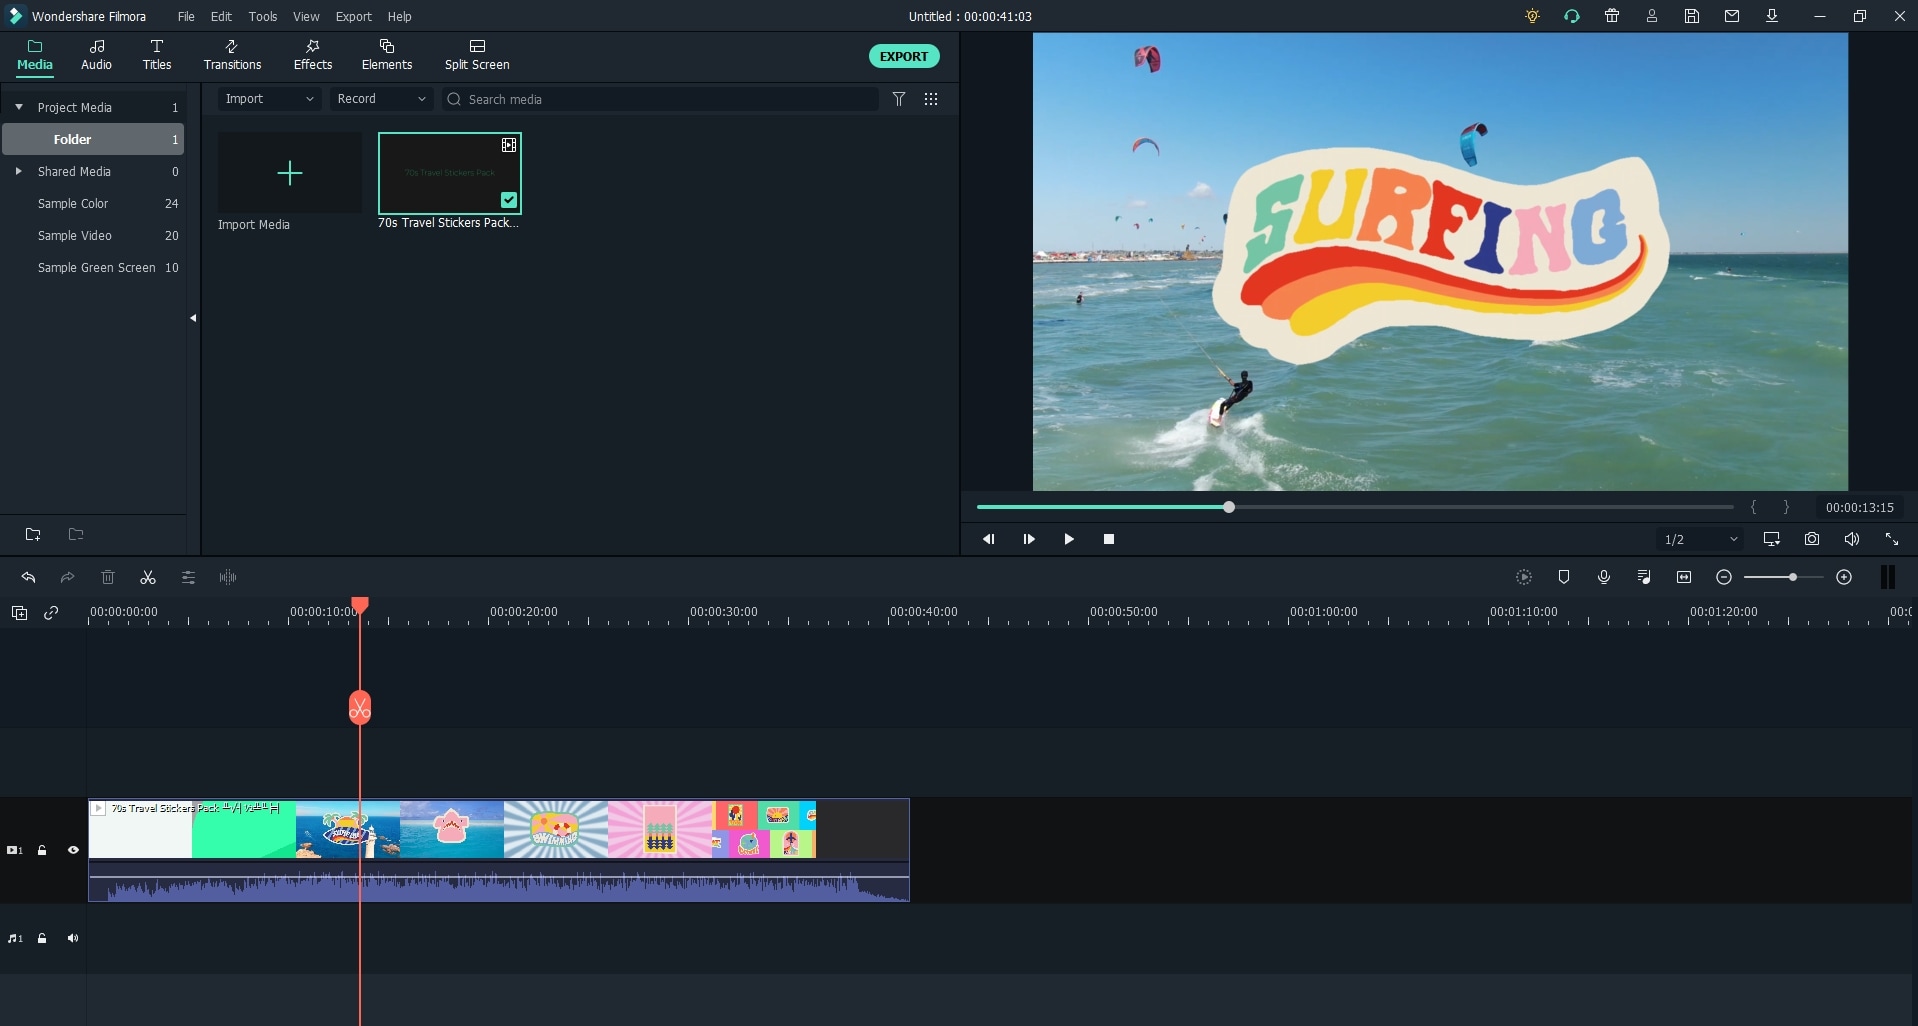
Step 4: Adding the Emoji
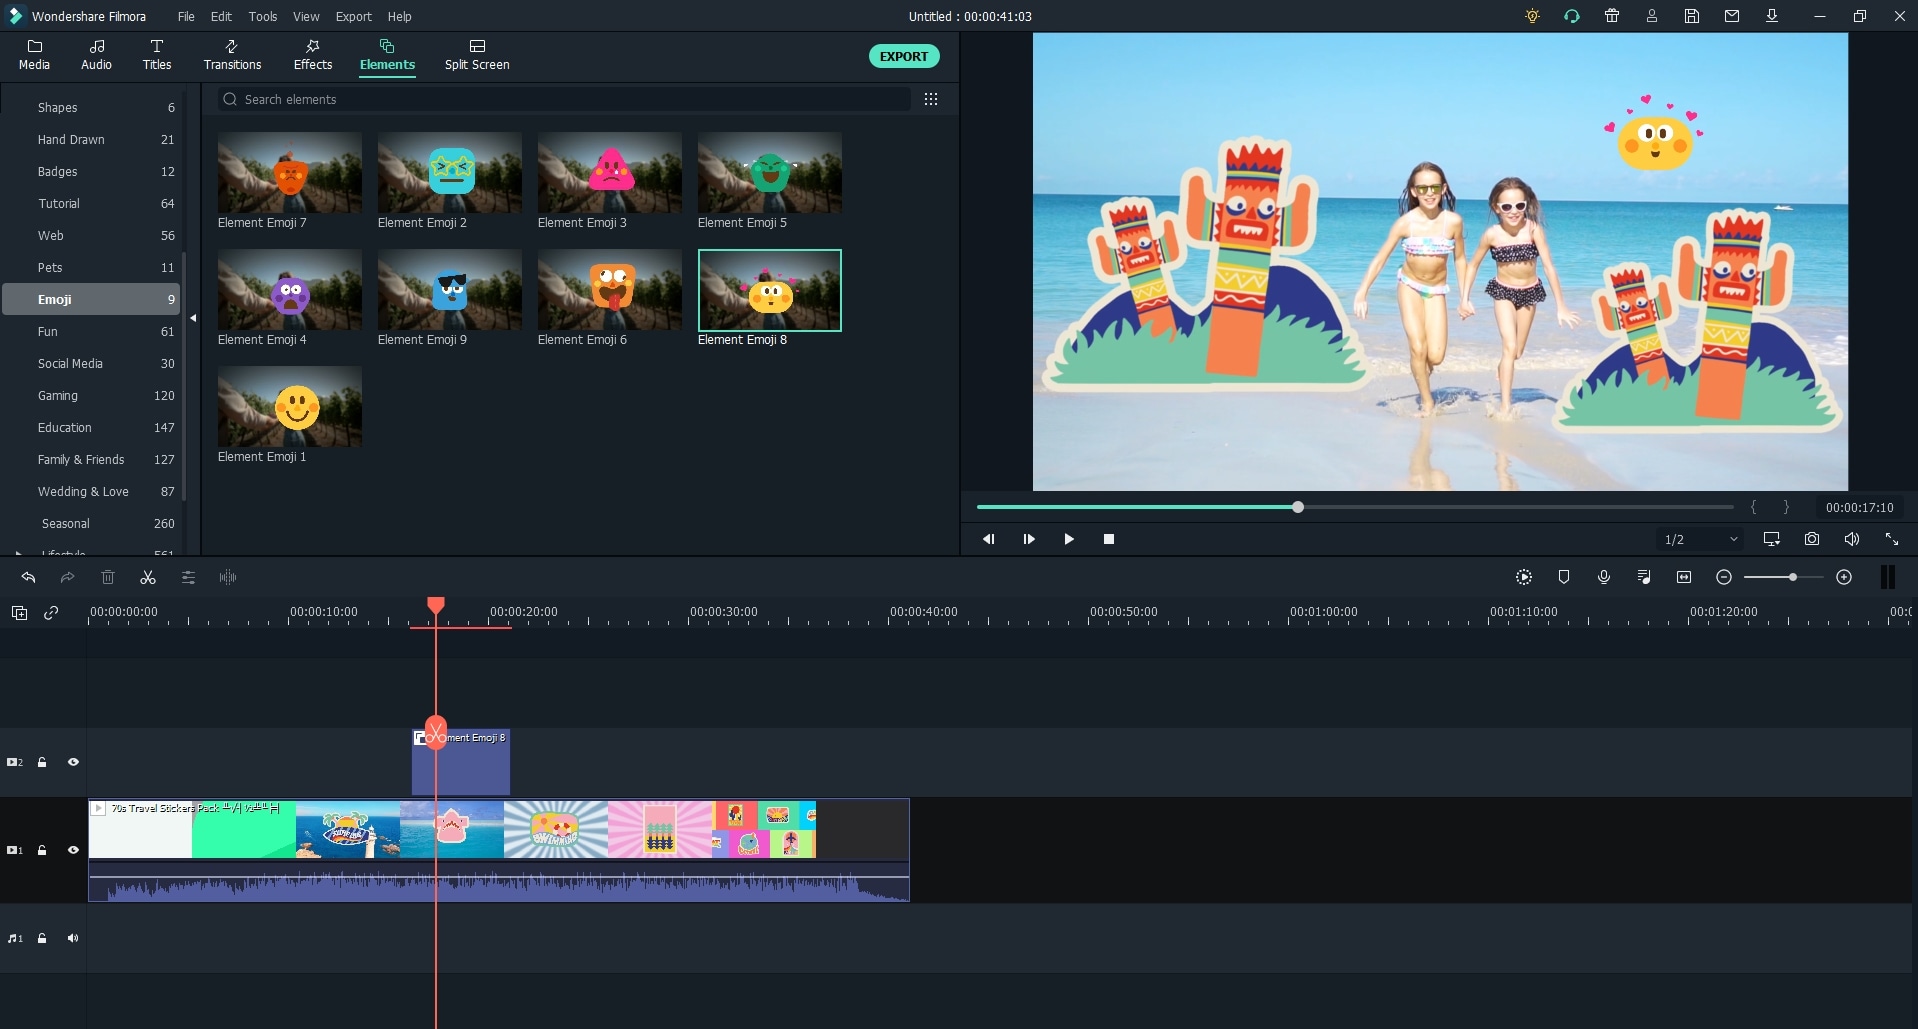
On the top left section of the window, navigate to the “Elements” tab. From there, pick out the “Emoji” category and browse a wide range of emojis. Drag and drop the emojis to your video. You can relocate and resize the emoji based on the video dimensions.
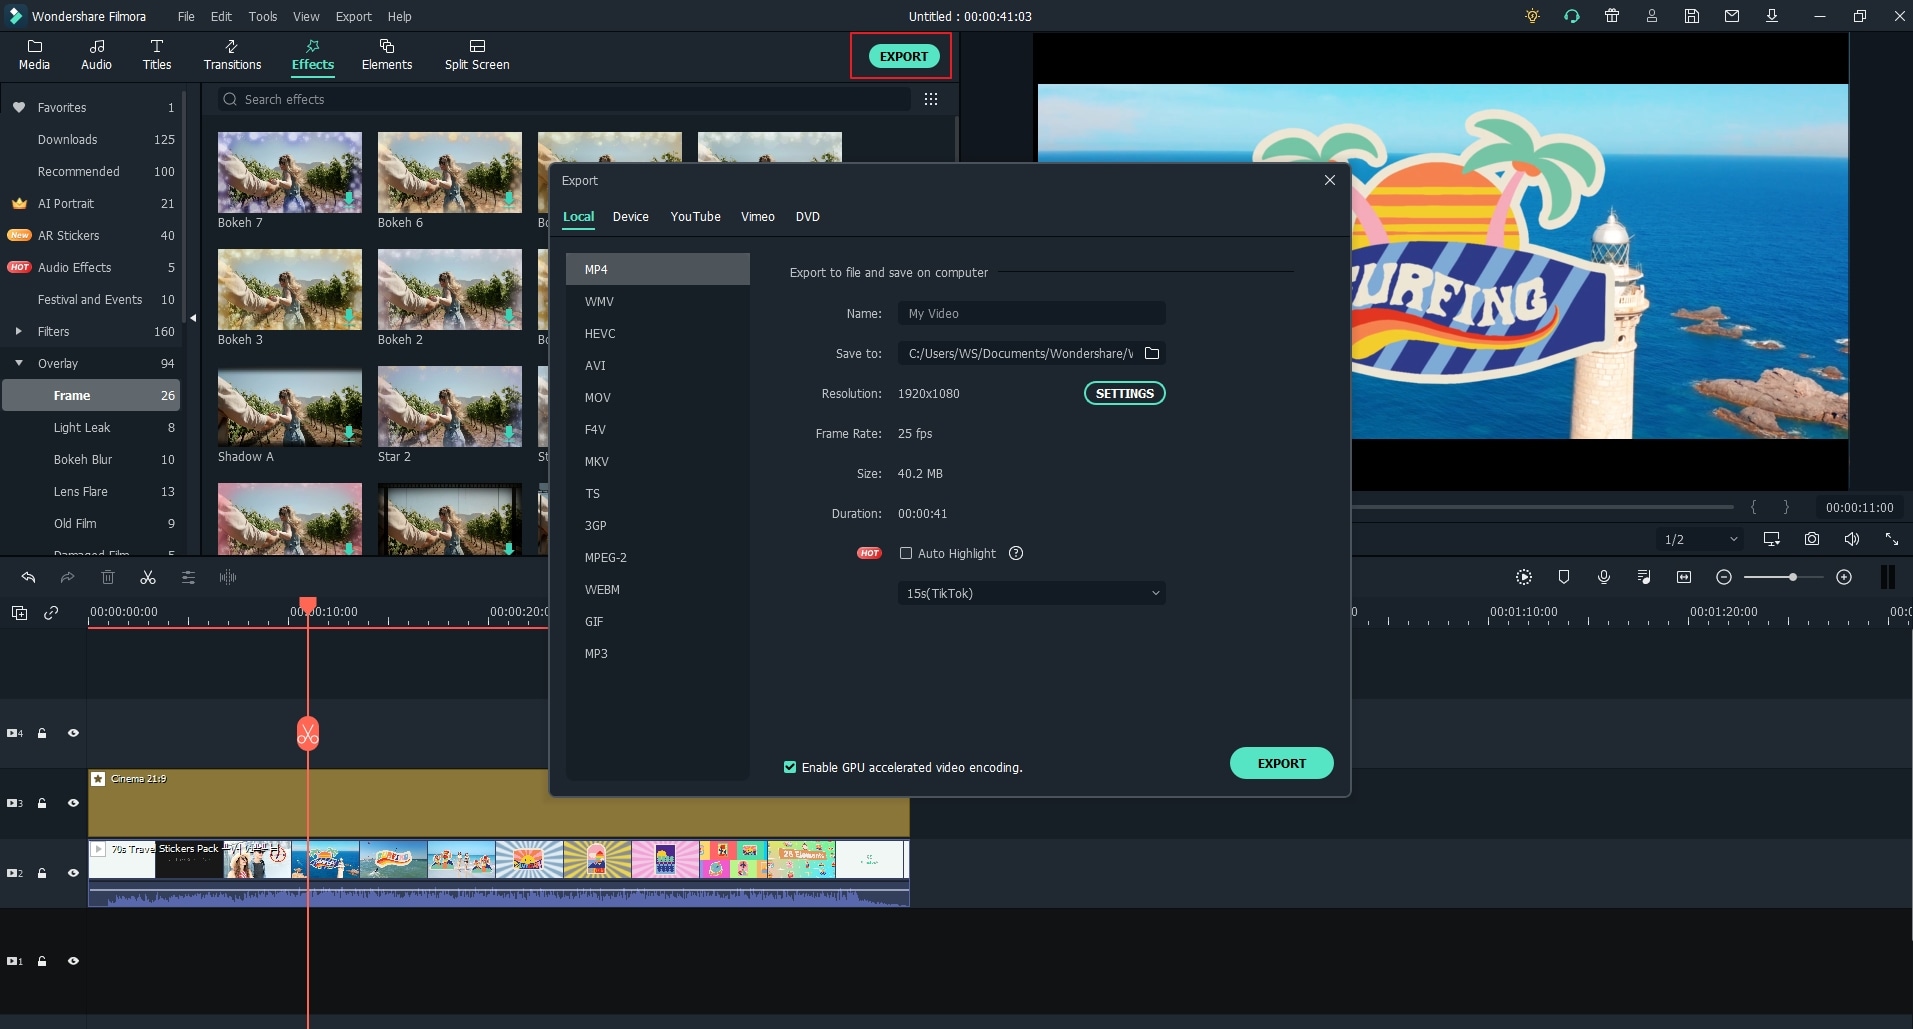
Step 5: Exporting the Video
Click on “Export,” located on the top right corner of the window. Pick out the output video format and hit “Export” to finalize the editing process.
Wrapping Up
The article put forward a detailed description of 8 viable ideas that are sure to make the video funnier. Furthermore, Wondershare Filmstock was introduced as an online effects store, and Wondershare Filmora was presented as an amazing video editing software. One can have a look at the effects offered by Filmora in section 1 to make their videos interesting, funny, and watchable.
Max Wales
Max Wales is a writer and a lover of all things video.
Follow @Max Wales
Max Wales
Mar 27, 2024• Proven solutions
The daily grind of hard work, starting from dawn to dusk, has become overwhelming and mind-crushing. An average mind requires entertainment and recreation to work better and function properly. This brings us to the need for funny videos that make use of animated emoji to make our life more bearable.
Emojis like laughing emojis and thumbs-up emojis have a quirky way of increasing the serotonin levels in our body. Therefore, this article shall walk you through the top 6 animated emoji video effects presented by Wondershare Filmstock . In addition to this, there will be 8 peculiar ideas to make the video funny.
If you want to know the steps to edit video with animated emojis in Filmora, we have got you! So, without delaying it any longer, let us dig in!
- Part 1: Top 6 Animated Emoji Video Effects for Filmora Video Editor
- Part 2: 8 Ideas for Making Funny Videos with Animated Emoji
- Part 2: How to Edit Video with Animated Emoji in Filmora?
Part 1: Top 6 Animated Emoji Video Effects for Filmora Video Editor
The section shall revolve around the top 6animated emoji video effects that are presented by an online effects store known as Wondershare Filmstock. This website allows the user to have access to an unlimited range of effects, transitions, titles, graphics, elements, images, audio, and visual effects. One can unleash their creative ideas and download effects for every relevant situation.
Along with this, it is constantly growing and unique media with no fear of attribution. If this is not the ideal case scenario, then we don’t know what it will be! The following set of effects are the top 6 animated emoji video effects to incorporate in your YouTube introductory videos, TikTok clips, and Instagram stories or reels.
1. Animated Emoji Pack
Animated kiss emoji, animated dancing emoji, and laughing emoji, this emoji pack has covered your basics. With 24 elements, Animated Emoji Pack provides an easy way to express yourself and say it out loud using the language of emojis.
2. Emoji Stickers Pack
If you are on the verge of a nervous breakdown and require a stickers pack with 32 elements that include a crying emoji, this pack has to be your answer. In addition to this, this effect is 100% compatible with Wondershare Filmora 9.6 and above.
3. Message Bubbles Pack
With message and chat bubbles that make communication a lot faster and quick, allow me to introduce you to Message Bubbles Pack. It constitutes animated cute emoji faces and texting graphics to make your social media fun and interesting.
4. 3D Social Media Icons Pack
Incorporated with 12 titles, 60 elements, 4 overlays, and 6 transitions, 3D Social Media Icons Pack is sure to fill your shoes. One can have access to unlimited emoji animated in 3D animation and showcase themselves as the cool and classy one of the lot.
5. Cute Cartoon Emoji Pack
The Cartoon Emoji Pack is an amalgamation of a wide range of cartoon emojis to express yourself as best as you can. With the right choice of emoji, one can communicate themselves whilst using a total of 25 elements.
6. Reactions Stickers Pack
With a speech and thought bubble, Reaction Sticker Pack presents all sorts of reaction emojis and smileys. In addition to this, the template offers 11 titles, 4 overlays, 40 elements, and 2 transitions. Get ready to express your reactions in the funniest way.
Part 2: 8 Ideas for Making Funny Videos with Animated Emoji
The use of free animated emoji to make videos funny has become a thing now. Furthermore, it lets the user express themselves as a coping mechanism. Win-win situation, right? The article provides 8 fruitful ideas for making videos funny with these animated emojis. Let us have a look at them!
1. Face Swap with Animated Emoji
The first idea is sure to make the audience burst into laughter. For starters, one can swap their faces with animated emojis like an animated dancing emoji or a crying emoji. You can tell your audience what you are feeling right at the moment as you use those emojis and then show your real face.
2. Sharing a Story
One can share a funny story with their audience by using the power of animated emojis. They can explain what happened with a series of steps and incorporate emojis in the background that sync with the emotional reaction of the user as well as the audience.
3. Dream Wedding Video
The next idea is related to a wedding video. To make it funnier, the user can first create a video of the dream wedding planned for them. Combine it with the actual wedding video and then use 3D animated emojis to express how everything was messed up and, in the end, and didn’t go as planned.
4. Thoughts on Books and Netflix Series
The next idea is a workable and effective tool to make your video funnier. The content creator can make a video of a book he read or the Netflix series he watched and provide the audience with his thoughts. They can communicate the flaws of the movie or a book using animated sticker packs and gifs to make it funny and interesting.
5. Coworkers and Superiors Video
In this idea, the user can make a video showing his workplace and include all his superiors and coworkers. Afterward, he can edit the video by expressing himself what he actually feels about them and using different emojis to display the reaction of his coworkers in the video.
6. Video Techniques
The different video techniques can be used to make people laugh and be attracted to the video. For once, the user can quickly zoom in to the character when he is speaking to create a dramatic pull. In addition to this, one can also keep the camera on even after their dialogue delivery is concluded. This will capture an off-the-record reaction.
7. Capturing the Pets
The best idea yet is capturing the pets in the video. The user can record their pets doing insane and crazy things and insert emojis to bring a funny addition to the video. Along with this, one can use the thinking emoji to assume what their pet has been thinking at the moment.
8. A Random Day of your Life
One can add the element of surprise and laughter by making a video on their random day and how they want it to go. Record the video of your whole day and then combine it with a wide range of emojis such as crying emoji, laughing emoji, and kiss emoji.
Part 3: How to Edit Video with Animated Emoji in Filmora?
The last part of this article covers a brief introduction to a renowned video editing software and provides a step-by-step guideline to edit videos using animated emojis. Wondershare Filmora makes sure that the user has the right tools and mechanism to make their editing journey fun and reliable. It offers an effortless and user-friendly interface, a wide range of effects and transitions, and a motion tracking feature.
In addition to this, one can count on this software to change the backgrounds, insert split screens, discover filters and overlays, control speed, and personalize the creation. If you are all set to use this amazing video editing software, follow the procedure keenly to avoid any future inconvenience.
Step 1: Initiating the Project
Install Wondershare Filmora in your system and launch it as soon as the process concludes. Tap on the “New Project” tab on the welcome window of the software. Set the aspect ratio for your video. The resolution can be changed by clicking on the “File” option and then “Project Settings.”
Step 2: Importing the Video
Now, tap on the “Import Media Files Here” menu option, which is located on the left side of the interface of Filmora. Tap on the targeted video to import it. Moving on, drag and drop the media file to the timeline.
Step 3: Processing the Video
Import the media files to the video track so that they can be manipulated. Now, process the video as you wish to. You can edit, trim, split, rotate, resize, crop, and combine videos.
Step 4: Adding the Emoji
On the top left section of the window, navigate to the “Elements” tab. From there, pick out the “Emoji” category and browse a wide range of emojis. Drag and drop the emojis to your video. You can relocate and resize the emoji based on the video dimensions.
Step 5: Exporting the Video
Click on “Export,” located on the top right corner of the window. Pick out the output video format and hit “Export” to finalize the editing process.
Wrapping Up
The article put forward a detailed description of 8 viable ideas that are sure to make the video funnier. Furthermore, Wondershare Filmstock was introduced as an online effects store, and Wondershare Filmora was presented as an amazing video editing software. One can have a look at the effects offered by Filmora in section 1 to make their videos interesting, funny, and watchable.
Max Wales
Max Wales is a writer and a lover of all things video.
Follow @Max Wales
How to Use Emojis on Windows 10 and Windows 11?
If you ever wondered how to use emojis on Windows, or since when the emojis are around and what is their significance, you will find all your answers here. Because Windows 10 offers a great range of emojis that help you express your feelings and reactions in fewer words, they have recently gained a decent level of popularity, mostly amongst youngsters and millennials.
With that said, in the following sections, you will learn how to use emojis on Windows 10 using both keyboard shortcuts and touch keyboard, how to get emojis on Windows 10 to make your text or conversation look more versatile, and what new has been added to the latest operating system released by Microsoft, i.e., Windows 11.
In this article
01 Part 1: The History of Emojis in Windows
02 Part 2: How to Use Emojis with Keyboard Shortcuts
03 Part 3: How to Use Emojis on Windows PC with Touch Keyboard
04 Part 4: What’s New in Emojis in Windows 11
05 Part 5: How to Get More Emojis in Windows 11
Part 1: The History of Emojis in Windows
Although emojis are present in some form or the other since the mid-‘90s, they were not quite popular back then. With the evolution of smartphones, these iconic characters got attention from the then-teenagers. Seeing this, in 2012, Microsoft introduced the first-ever set of black-and-white emojis with the release of Windows 8, and after some time, the company also added the same to Windows 7 that was rolled out along with the updates for the OS.
With the release of Windows 10 in 2015, a wide range of full-fledged colored emojis was introduced and received a large number of positive reactions from the users. As of today, emojis have become an integral part of everyone’s day-to-day text conversation, be it on Skype, WhatsApp, Facebook, or any other such platform.
Part 2: How to Use Emojis with Keyboard Shortcuts
A keyboard shortcut is a combination of two or more keys that are pressed simultaneously to trigger a pre-assigned event or action. A good example of a keyboard shortcut is ‘Ctrl + S’ which, when pressed, saves the document you’re working on.
While learning the process of how to use emoji in Windows 10, it is equally imperative to memorize the shortcut keys to insert those icons without taking your hands off the keyboard. This not only saves your time, but it also prevents you from going through the lengthy process of opening the emojis keyboard, navigating through all the available icons to choose the one you’re looking for, and then clicking it to insert in the document or conversation.
Nevertheless, it would be a good idea to learn how to launch the emojis keyboard, and the process is simple. All you need to do is:
- Make sure that your keyboard cursor is in an app that can accept text inputs. A text editor like MS Word or WordPad could be a good example
- Press the Windows + ; (semicolon) or Windows + . (period) keys together to open the emojis keyboard

Once the keyboard is open, you can click any of the available emojis to insert it in your conversion or text content.
As for the shortcuts, depending on the type of expression you want to convey, there could be thousands of them. Some of the commonly used emojis and their universal shortcut keys for both Windows 10 and Windows 11 include:
: (colon) + ) (right brace) will create a smiley face
: (colon) + ( (left brace) will create a sad face
: (colon) + ; (semicolon) will create a wink face
…and so on. You can conduct a quick online search to get the entire list of keyboard shortcuts and the emojis that they will create. For your convenience, a link from the Microsoft official website is given below:
Part 3: How to Use Emojis on Windows PC with Touch Keyboard
If you have Microsoft Surface or any other device that has Windows 10 or Windows 11 installed on it, and can accept inputs via touch keyboard, you can enable the feature in the operating system, and then use the touch keyboard to add emojis to your conversion or content. You can follow the instructions given below to enable touch keyboard, and then learn how to use emojis on Windows 11 or Windows 10 via touch:
- Right-click anywhere on the taskbar (Windows 11 is used here for demonstration), and then click Taskbar settings

- From the right area of the Settings window that opens next, scroll down to the Taskbar corner icons section, and then turn on the Touch keyboard switch

- Launch an app that can accept text inputs, e.g., a text editor, chatting app, etc. Click or tap the Touch keyboard icon from the notification area that is present at the bottom-right corner of the screen.

- Click or tap the Emojis icon from the upper-left corner of the touch keyboard that opens up, and then touch your preferred emoji to add it to your text or conversation.

Part 4: What’s New in Emojis in Windows 11
In addition to learning how to use emojis on Windows 10, it is also important to know what’s new with them or the emojis panel in Windows 11, the latest operating system released by Microsoft this year, i.e., 2021.
In Windows 11, although you can launch the emojis keyboard using the same shortcuts, i.e., ‘Windows + .’ or ‘Windows + ;’ keys as mentioned earlier, the emojis keyboard itself has four sections, namely:
- Emojis – Contains various emojis and smileys
- GIF – Gives you access to various animated GIFs from Tenor
- Kamojis – Lets you add the ASCII characters for emojis, e.g., :-) or :-(
- Symbols – To add important symbols to your text, e.g., ©, ®, etc.
In addition to this, the 2D Clippy emoji has also been introduced with Windows 11, and can be located by launching the emojis keyboard, and typing ‘Clippy’.
Part 5: How to Get More Emojis in Windows 11
If the built-in emoji library doesn’t contain your favorite expressions, you can always get several more by following the instructions given below:
- Launch your favorite web browser on Windows 11, and then go to http://www.iemoji.com/
- Click an emoji from the available options or copy one from your favorite portal, and paste it in the Paste Emoji here field

- Review the emoji in the MESSAGE PREVIEW field, and click Create from the Options section to generate the emoji that can be sent as a message or image

- Alternatively, click Copy from the Options section itself, and then go to the text editor or any other portal you want to use the emoji in, and press Ctrl + V to paste and insert the emoji in your conversation or text without any hassle.

Conclusion
While the emojis were introduced to Windows as late as 2012, Windows 11 has a wide range of these virtual objects or faces for various occasions and to convey different expressions respectively. Furthermore, Windows 11 also gives you access to Tenor’s GIFs, and ASCII characters with particular combinations to represent the emojis, as it was done back in the days of button-operated cellphones.
Also, if the built-in emoji keyboard doesn’t have your favorite expressions and smileys, you can always generate your custom ones by going to http://www.iemoji.com/ , and using the options that the website offers. All in all, it’s easy to learn how to use emojis on Windows as long as you have access to the correct tutorial that explains the process in an easy manner.
02 Part 2: How to Use Emojis with Keyboard Shortcuts
03 Part 3: How to Use Emojis on Windows PC with Touch Keyboard
04 Part 4: What’s New in Emojis in Windows 11
05 Part 5: How to Get More Emojis in Windows 11
Part 1: The History of Emojis in Windows
Although emojis are present in some form or the other since the mid-‘90s, they were not quite popular back then. With the evolution of smartphones, these iconic characters got attention from the then-teenagers. Seeing this, in 2012, Microsoft introduced the first-ever set of black-and-white emojis with the release of Windows 8, and after some time, the company also added the same to Windows 7 that was rolled out along with the updates for the OS.
With the release of Windows 10 in 2015, a wide range of full-fledged colored emojis was introduced and received a large number of positive reactions from the users. As of today, emojis have become an integral part of everyone’s day-to-day text conversation, be it on Skype, WhatsApp, Facebook, or any other such platform.
Part 2: How to Use Emojis with Keyboard Shortcuts
A keyboard shortcut is a combination of two or more keys that are pressed simultaneously to trigger a pre-assigned event or action. A good example of a keyboard shortcut is ‘Ctrl + S’ which, when pressed, saves the document you’re working on.
While learning the process of how to use emoji in Windows 10, it is equally imperative to memorize the shortcut keys to insert those icons without taking your hands off the keyboard. This not only saves your time, but it also prevents you from going through the lengthy process of opening the emojis keyboard, navigating through all the available icons to choose the one you’re looking for, and then clicking it to insert in the document or conversation.
Nevertheless, it would be a good idea to learn how to launch the emojis keyboard, and the process is simple. All you need to do is:
- Make sure that your keyboard cursor is in an app that can accept text inputs. A text editor like MS Word or WordPad could be a good example
- Press the Windows + ; (semicolon) or Windows + . (period) keys together to open the emojis keyboard
Once the keyboard is open, you can click any of the available emojis to insert it in your conversion or text content.
As for the shortcuts, depending on the type of expression you want to convey, there could be thousands of them. Some of the commonly used emojis and their universal shortcut keys for both Windows 10 and Windows 11 include:
: (colon) + ) (right brace) will create a smiley face
: (colon) + ( (left brace) will create a sad face
: (colon) + ; (semicolon) will create a wink face
…and so on. You can conduct a quick online search to get the entire list of keyboard shortcuts and the emojis that they will create. For your convenience, a link from the Microsoft official website is given below:
Part 3: How to Use Emojis on Windows PC with Touch Keyboard
If you have Microsoft Surface or any other device that has Windows 10 or Windows 11 installed on it, and can accept inputs via touch keyboard, you can enable the feature in the operating system, and then use the touch keyboard to add emojis to your conversion or content. You can follow the instructions given below to enable touch keyboard, and then learn how to use emojis on Windows 11 or Windows 10 via touch:
- Right-click anywhere on the taskbar (Windows 11 is used here for demonstration), and then click Taskbar settings
- From the right area of the Settings window that opens next, scroll down to the Taskbar corner icons section, and then turn on the Touch keyboard switch
- Launch an app that can accept text inputs, e.g., a text editor, chatting app, etc. Click or tap the Touch keyboard icon from the notification area that is present at the bottom-right corner of the screen.
- Click or tap the Emojis icon from the upper-left corner of the touch keyboard that opens up, and then touch your preferred emoji to add it to your text or conversation.
Part 4: What’s New in Emojis in Windows 11
In addition to learning how to use emojis on Windows 10, it is also important to know what’s new with them or the emojis panel in Windows 11, the latest operating system released by Microsoft this year, i.e., 2021.
In Windows 11, although you can launch the emojis keyboard using the same shortcuts, i.e., ‘Windows + .’ or ‘Windows + ;’ keys as mentioned earlier, the emojis keyboard itself has four sections, namely:
- Emojis – Contains various emojis and smileys
- GIF – Gives you access to various animated GIFs from Tenor
- Kamojis – Lets you add the ASCII characters for emojis, e.g., :-) or :-(
- Symbols – To add important symbols to your text, e.g., ©, ®, etc.
In addition to this, the 2D Clippy emoji has also been introduced with Windows 11, and can be located by launching the emojis keyboard, and typing ‘Clippy’.
Part 5: How to Get More Emojis in Windows 11
If the built-in emoji library doesn’t contain your favorite expressions, you can always get several more by following the instructions given below:
- Launch your favorite web browser on Windows 11, and then go to http://www.iemoji.com/
- Click an emoji from the available options or copy one from your favorite portal, and paste it in the Paste Emoji here field
- Review the emoji in the MESSAGE PREVIEW field, and click Create from the Options section to generate the emoji that can be sent as a message or image
- Alternatively, click Copy from the Options section itself, and then go to the text editor or any other portal you want to use the emoji in, and press Ctrl + V to paste and insert the emoji in your conversation or text without any hassle.
Conclusion
While the emojis were introduced to Windows as late as 2012, Windows 11 has a wide range of these virtual objects or faces for various occasions and to convey different expressions respectively. Furthermore, Windows 11 also gives you access to Tenor’s GIFs, and ASCII characters with particular combinations to represent the emojis, as it was done back in the days of button-operated cellphones.
Also, if the built-in emoji keyboard doesn’t have your favorite expressions and smileys, you can always generate your custom ones by going to http://www.iemoji.com/ , and using the options that the website offers. All in all, it’s easy to learn how to use emojis on Windows as long as you have access to the correct tutorial that explains the process in an easy manner.
How to Make Memoji Talk-Make Memoji Video On Your Own
How to Make Memoji Talk-Make Memoji Video On Your Own

Shanoon Cox
Mar 27, 2024• Proven solutions
Memojis are the 3D virtual caricatures customized to look exactly like you. Much like an animoji, memoji can mimic your facial as well as body movements. Using a memoji to convey your messages is an exciting and fun concept that is novel and unique to your personality. But, how to make memoji talk?
Well, that’s the fun part. We will walk you through the steps on how to make memoji talk in 5 simple steps. And if you’re worried about how to make memoji talk on an Android phone, don’t fret. We have the perfect solution for that too.
Read ahead to start learning how to make memoji talk.
- Part 1: How to Make Memoji Talk on iPhone
- Part 2: How to Make Memoji Talk on Android
- Bonus tip-Add Memoji to Your Video with Wondershare Filmora
Part 1: How to Make Memoji Talk on iPhone
Now you can make a talking memoji that mimics your expressions as well as your movements. Cool, right? And if you don’t know how to make memoji talk, you will be a master at it by the end of this article.
Here’s a guide on how to make memoji talk in 5 easy steps:
1.Open imessages. Go to New Message or open an existing conversation. If you don’t see the app tray above the keyboard, click on the App storeicon to reveal the hidden apps.
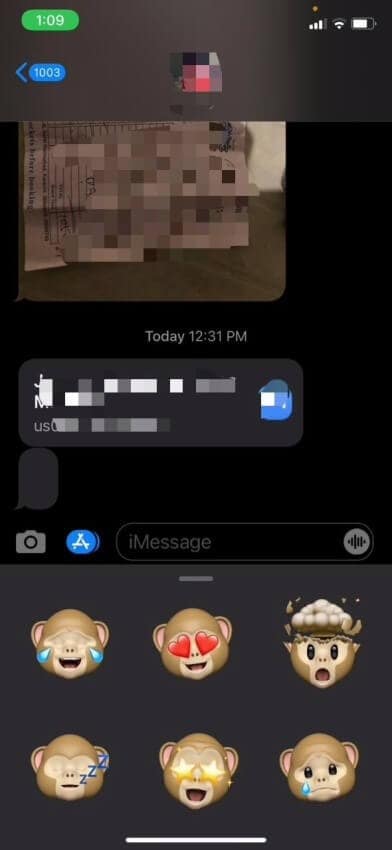
2.Now, in the app tray, click on the three-headed icon to see your memoji. If you record right there, it will just be a basic memoji head limited to a 30-second video. But, since we want more than that, click on the camera icon.
![]()
3.Now, switch to selfie mode and click on the Staricon for Effects in the bottom left corner for more options
4.Click on the Animoji icon and choose the custom memoji you like to record with. Tap to start recording. Click Doneonce you finish recording.
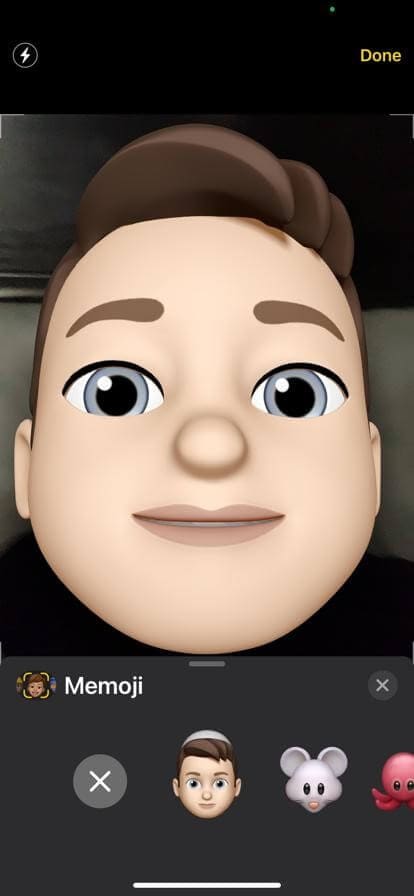
5.The recorded talking memoji will be automatically sent to the opened chat and will also be saved to your gallery for easy sharing to other contacts or other platforms.

Part 2: How to Make Memoji Talk on Android
Well, we know how to make memoji talk on an iPhone, but what about Android users?
Since Android has no in-built option to make or record a talking memoji, you will need some outside help. Face Cam is an amazing app and solution to your worries. Even if you have no idea how to make memoji video, Face Cam’s user-friendly interface lets you easily understand how to make memoji talk. Plus, you can also personalize your memoji in a fun way
Let’s see how to make memoji talk on Android phones-
1.Install and launch Face Cam on your smartphone.
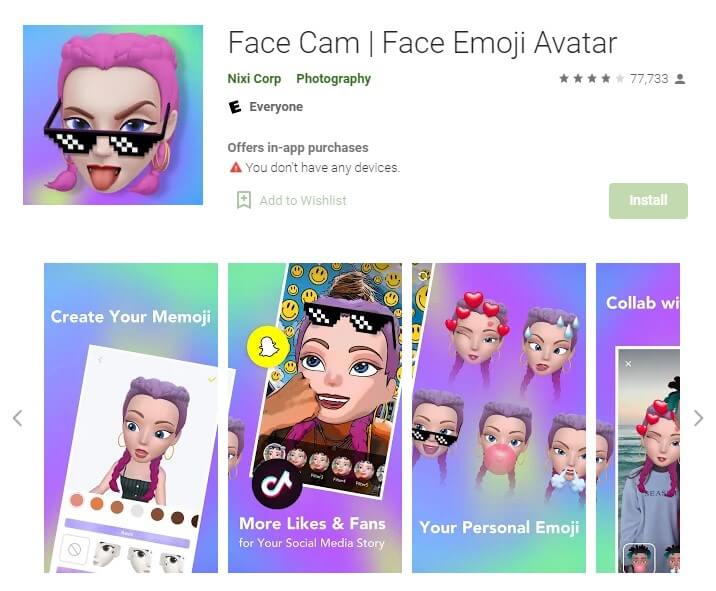
2.Now, make a custom memoji that looks like you. Select the hairstyle, face shape, eye color, accessories, etc. Tap the Tickicon to proceed.
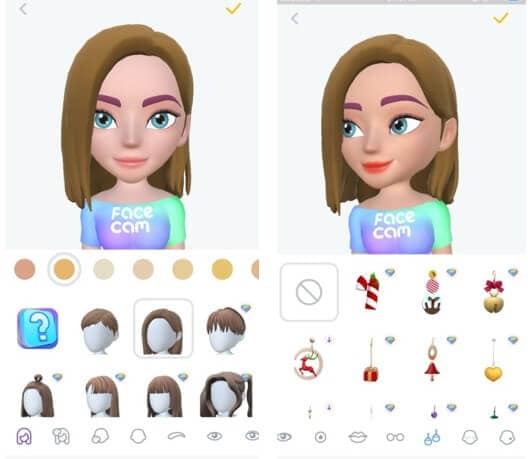
3.Click on the filter tab to reveal filters. Choose the filter you would like to apply.
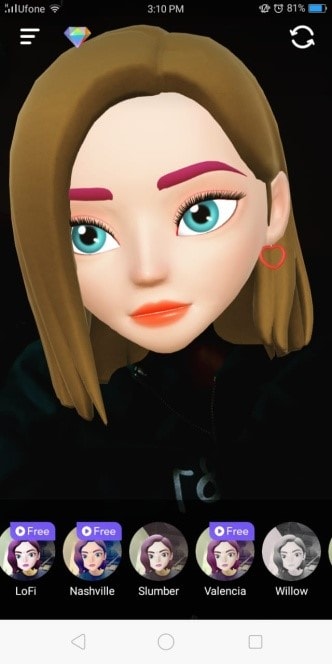
4.Tap and hold the record button to make your video.
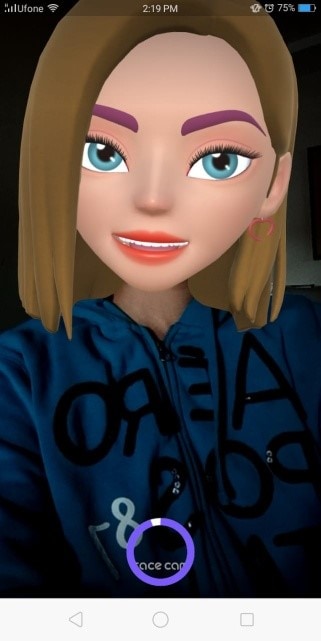
5.Finally, you can tap on the Savebutton to save the video to your gallery. You can also tap on the social media icons to share instantly.
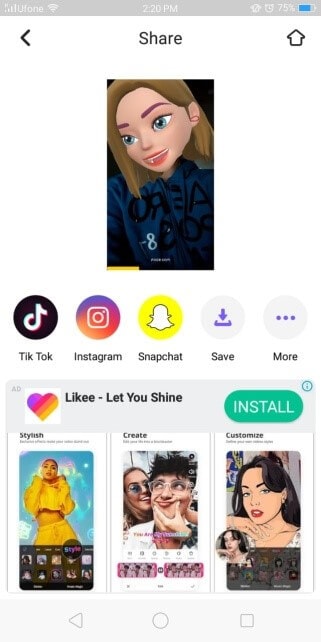
Bonus tip-Add Memoji to Your Video with Wondershare Filmora
Wanna add emoji to your video? Now here is a bonus tip for you!
Filmora is a highly professional video editor with an incredibly intuitive and easy-to-use interface. It is packed with high-end editing tools such as keyframe animations, split-screen effect, cloning, etc. There is a range of aesthetic filters and cool special effects to give your videos a cinematic touch. One key feature is motion tracking. Once you learn how to make memoji talk, you can use your memoji sticker in any video. You will be able to paste your sticker onto your face that will follow it through the clip with easy and swift motion tracking.
Follow these steps:
1.Install and launch Wondershare Filmora. Import the video and memoji sticker to Filmora.
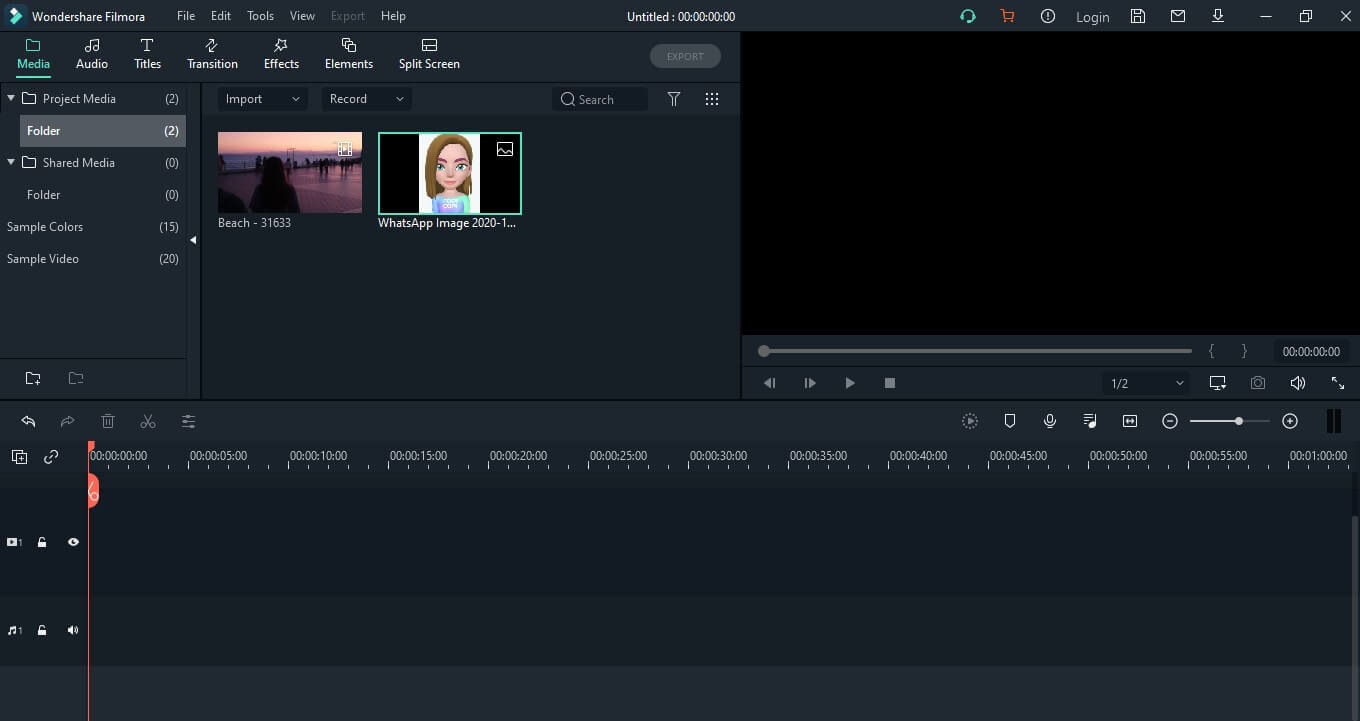
2.Drag the video to video track one and the sticker to the video track 2. And you can click on the sticker and adjust its size and position.
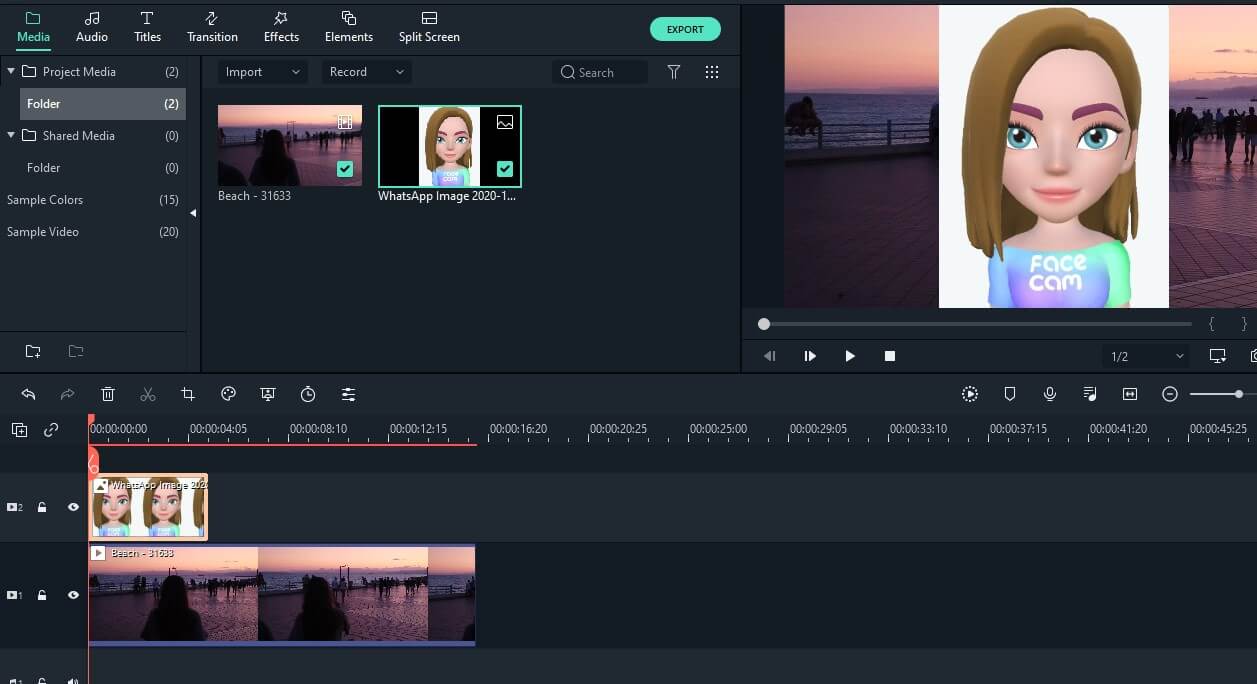
3.Double click on the video in the timeline to open settings. In the Videotab, select motion tracking, choose the area or person you want to track, and click Start Tracking.
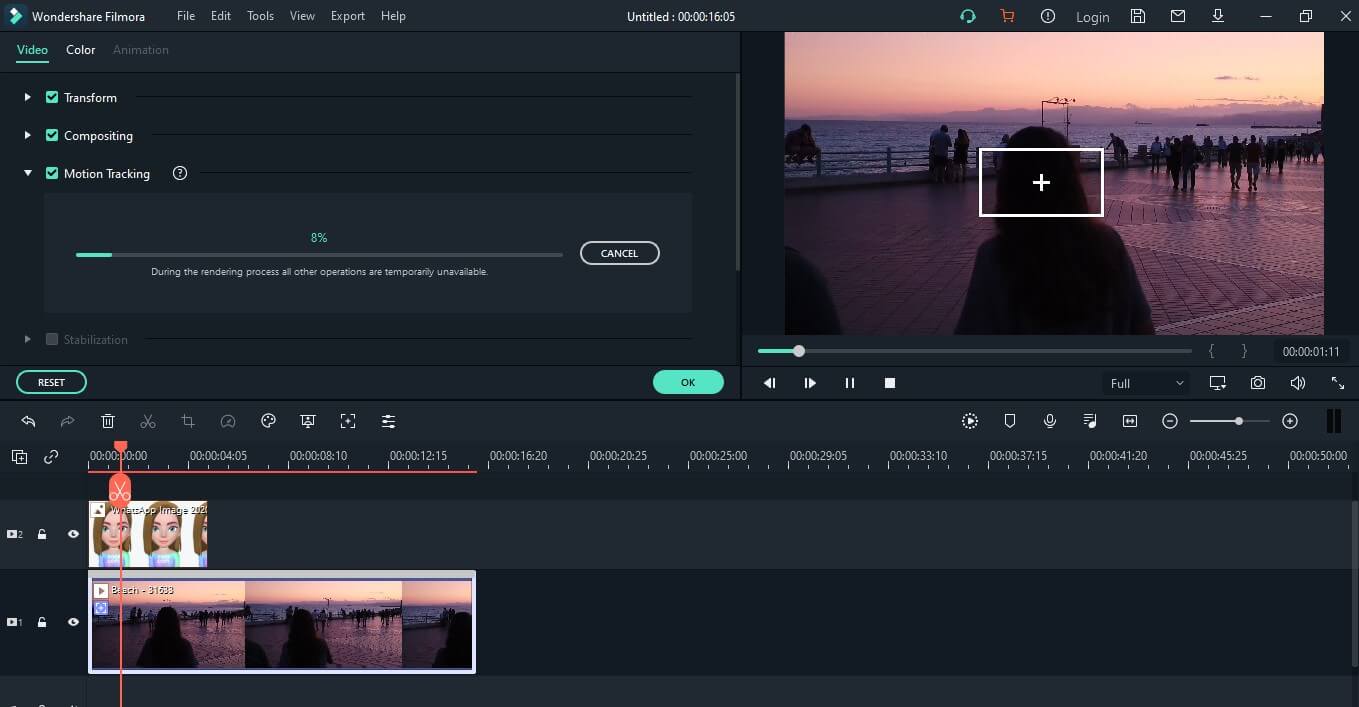
4.Now, choose the element. Open the drop-down menu and select the sticker memoji. Click Okto complete.

5.Finally, click Export. Choose the destination, format, and resolution and press Export.

Conclusion
Texting and virtual communication has now been redefined with the advent of emojis and memojis. So, you need to step up your game by learning how to make memoji talk and enter the exciting world of endless possibilities.
If you were unaware of how to make memoji talk, you must be a master at it by now. The 5 simple steps on how to make memoji video are easy to grasp and fun to try. So, don’t waste any time and start making talking memojis to share laughter. Take help from our ultimate guide on how to make memoji talk and express yourself hilariously and uniquely
Shanoon Cox
Shanoon Cox is a writer and a lover of all things video.
Follow @Shanoon Cox
Shanoon Cox
Mar 27, 2024• Proven solutions
Memojis are the 3D virtual caricatures customized to look exactly like you. Much like an animoji, memoji can mimic your facial as well as body movements. Using a memoji to convey your messages is an exciting and fun concept that is novel and unique to your personality. But, how to make memoji talk?
Well, that’s the fun part. We will walk you through the steps on how to make memoji talk in 5 simple steps. And if you’re worried about how to make memoji talk on an Android phone, don’t fret. We have the perfect solution for that too.
Read ahead to start learning how to make memoji talk.
- Part 1: How to Make Memoji Talk on iPhone
- Part 2: How to Make Memoji Talk on Android
- Bonus tip-Add Memoji to Your Video with Wondershare Filmora
Part 1: How to Make Memoji Talk on iPhone
Now you can make a talking memoji that mimics your expressions as well as your movements. Cool, right? And if you don’t know how to make memoji talk, you will be a master at it by the end of this article.
Here’s a guide on how to make memoji talk in 5 easy steps:
1.Open imessages. Go to New Message or open an existing conversation. If you don’t see the app tray above the keyboard, click on the App storeicon to reveal the hidden apps.
2.Now, in the app tray, click on the three-headed icon to see your memoji. If you record right there, it will just be a basic memoji head limited to a 30-second video. But, since we want more than that, click on the camera icon.
![]()
3.Now, switch to selfie mode and click on the Staricon for Effects in the bottom left corner for more options
4.Click on the Animoji icon and choose the custom memoji you like to record with. Tap to start recording. Click Doneonce you finish recording.
5.The recorded talking memoji will be automatically sent to the opened chat and will also be saved to your gallery for easy sharing to other contacts or other platforms.
Part 2: How to Make Memoji Talk on Android
Well, we know how to make memoji talk on an iPhone, but what about Android users?
Since Android has no in-built option to make or record a talking memoji, you will need some outside help. Face Cam is an amazing app and solution to your worries. Even if you have no idea how to make memoji video, Face Cam’s user-friendly interface lets you easily understand how to make memoji talk. Plus, you can also personalize your memoji in a fun way
Let’s see how to make memoji talk on Android phones-
1.Install and launch Face Cam on your smartphone.
2.Now, make a custom memoji that looks like you. Select the hairstyle, face shape, eye color, accessories, etc. Tap the Tickicon to proceed.
3.Click on the filter tab to reveal filters. Choose the filter you would like to apply.
4.Tap and hold the record button to make your video.
5.Finally, you can tap on the Savebutton to save the video to your gallery. You can also tap on the social media icons to share instantly.
Bonus tip-Add Memoji to Your Video with Wondershare Filmora
Wanna add emoji to your video? Now here is a bonus tip for you!
Filmora is a highly professional video editor with an incredibly intuitive and easy-to-use interface. It is packed with high-end editing tools such as keyframe animations, split-screen effect, cloning, etc. There is a range of aesthetic filters and cool special effects to give your videos a cinematic touch. One key feature is motion tracking. Once you learn how to make memoji talk, you can use your memoji sticker in any video. You will be able to paste your sticker onto your face that will follow it through the clip with easy and swift motion tracking.
Follow these steps:
1.Install and launch Wondershare Filmora. Import the video and memoji sticker to Filmora.
2.Drag the video to video track one and the sticker to the video track 2. And you can click on the sticker and adjust its size and position.
3.Double click on the video in the timeline to open settings. In the Videotab, select motion tracking, choose the area or person you want to track, and click Start Tracking.
4.Now, choose the element. Open the drop-down menu and select the sticker memoji. Click Okto complete.
5.Finally, click Export. Choose the destination, format, and resolution and press Export.
Conclusion
Texting and virtual communication has now been redefined with the advent of emojis and memojis. So, you need to step up your game by learning how to make memoji talk and enter the exciting world of endless possibilities.
If you were unaware of how to make memoji talk, you must be a master at it by now. The 5 simple steps on how to make memoji video are easy to grasp and fun to try. So, don’t waste any time and start making talking memojis to share laughter. Take help from our ultimate guide on how to make memoji talk and express yourself hilariously and uniquely
Shanoon Cox
Shanoon Cox is a writer and a lover of all things video.
Follow @Shanoon Cox
Best Photo Slideshow Maker: How to Make a Photo Slideshow
Best Photo Slideshow Maker: How to Make a Photo Slideshow
Shanoon Cox
Mar 27, 2024• Proven solutions
Have you ever taken so many photos for your family, friends and special events? One fun-filled way of sharing them is to make a photo slideshow. That helps back up the memories in your life. What’s more, it can all be done in just a few simple clicks if you use slideshow maker like DVD Slideshow Builder Deluxe . With this programs, you can easily weave photos and video into work of art to amaze anyone. Here let’s see how to easily and creatively make a photo slideshow and burn to DVD with these all-in-one slideshow tools.
Download and run DVD slideshow builder , then follow the steps below to see how to make a photo slideshow.

Ways for Photo Slidehow making
Step 1. Add photo or video files to the photo slideshow maker
After running the photo slideshow maker, you’ll start from the “Organize” tab. On the interface, there are two Add Files buttons any of which you can click to add your photos and videos. Then just drag and drop photos or videos to arrange their order on storyboard. If you want to edit the photos, click “Edit” to add effects, crop photos, repair red-eye or add caption.
Tip: To have a large viewe of all the files, click the “Expand” button on top right corner of storyboard.

Step 2. Customize the slideshow like background music and transitions
When importing your files, more than 100 transition effects will be randomly and automatically applied between every two photo or video. However, you can change them anytime in the “Personalize” tab. Just drag and drop a transition from the list to the thumbnail between two slides. You can also add effects, motion or intro/credit as you like.
Adding music can greatly enhance the vibe of your photo slideshow. To achieve this, click “Music” on the storyboard. This photo slideshow maker enables you to add several different pieces of music according to your needs. If you want to add your own voice, just click “Voice Over” to record and then add it to the slideshow.

Step 3 Create photo slideshow and burn to DVD

Go to the “Create” tab and click the “Preview” button to make sure the photo slideshow is good enough. Go back to Personalize tab to change if necessary. When you are happy with the result, choose the options on the left to export photo slideshow to DVD, PC, portable devices, etc. You can also directly upload slideshow to Youtube and send message to Facebook and Twitter friends.

Now sit back and relax, it’ll only take a while to get your photo slideshow for sharing anywhere.
Shanoon Cox
Shanoon Cox is a writer and a lover of all things video.
Follow @Shanoon Cox
Shanoon Cox
Mar 27, 2024• Proven solutions
Have you ever taken so many photos for your family, friends and special events? One fun-filled way of sharing them is to make a photo slideshow. That helps back up the memories in your life. What’s more, it can all be done in just a few simple clicks if you use slideshow maker like DVD Slideshow Builder Deluxe . With this programs, you can easily weave photos and video into work of art to amaze anyone. Here let’s see how to easily and creatively make a photo slideshow and burn to DVD with these all-in-one slideshow tools.
Download and run DVD slideshow builder , then follow the steps below to see how to make a photo slideshow.
Ways for Photo Slidehow making
Step 1. Add photo or video files to the photo slideshow maker
After running the photo slideshow maker, you’ll start from the “Organize” tab. On the interface, there are two Add Files buttons any of which you can click to add your photos and videos. Then just drag and drop photos or videos to arrange their order on storyboard. If you want to edit the photos, click “Edit” to add effects, crop photos, repair red-eye or add caption.
Tip: To have a large viewe of all the files, click the “Expand” button on top right corner of storyboard.
Step 2. Customize the slideshow like background music and transitions
When importing your files, more than 100 transition effects will be randomly and automatically applied between every two photo or video. However, you can change them anytime in the “Personalize” tab. Just drag and drop a transition from the list to the thumbnail between two slides. You can also add effects, motion or intro/credit as you like.
Adding music can greatly enhance the vibe of your photo slideshow. To achieve this, click “Music” on the storyboard. This photo slideshow maker enables you to add several different pieces of music according to your needs. If you want to add your own voice, just click “Voice Over” to record and then add it to the slideshow.
Step 3 Create photo slideshow and burn to DVD
Go to the “Create” tab and click the “Preview” button to make sure the photo slideshow is good enough. Go back to Personalize tab to change if necessary. When you are happy with the result, choose the options on the left to export photo slideshow to DVD, PC, portable devices, etc. You can also directly upload slideshow to Youtube and send message to Facebook and Twitter friends.
Now sit back and relax, it’ll only take a while to get your photo slideshow for sharing anywhere.
Shanoon Cox
Shanoon Cox is a writer and a lover of all things video.
Follow @Shanoon Cox
How to Make a Triggered Meme?
How to Make a Triggered Meme?
Ollie Mattison
Mar 27, 2024• Proven solutions
It is no secret that we all lose our cool from time. It’s only natural, after all, the world can be a frustrating place. We’re all enraged by different things, some of us can’t stand pineapple on pizza while others explode when being pranked. What we often don’t realize is that being triggered in front of a camera makes us perfect meme material. Even though the majority of memes are still images, some of the most memorable memes ever created were GIFs or short videos.
Making the triggered meme is easy when you know how, so in this article, we are going to show you how to make your next potentially viral meme, in just a few easy steps.
Filmora offers an easy to use video editor named Filmora Video Editor to make video and gif memes, and an online free meme maker named Filmora FREE Online Meme Maker which allows you to create images, videos and gifs memes for free. The video tutorial below will show you how to make a triggered video meme with Filmora. Download it and try it by yourself now.
The Things You Need to Make a Triggered Meme
Preparation is key to almost every important thing in life, including making a triggered meme featuring your bestie. Before you can capitalize on that amazing footage of triggered people you first have to make sure you have everything you need to generate a meme. Okay, let’s get started with the essentials to making a fun and effective meme.
1. A Triggered Template
You have virtually unlimited resources at your disposal, as this meme template can be easily found through a quick Google search. There is even an Android app called Triggered Meme Maker , that lets you do what its name suggests, make triggered memes. Making your own template in Microsoft Paint (we will show you how to make it in this article later) or any other photo editing software is also an option if you want to select the color of the background, rather than work with what you can find online.
2. A Video Editing Software
Memes are short videos that rarely last longer than 30 seconds, which is why you don’t need a powerful video editing suite like Final Cut Pro or Adobe Premiere Pro to make a good meme. A software like Wondershare Filmora that is easy to use and yet packed with cool visual effects and useful tools is a better choice if you just want to have a little fun with a video you recorded.
3. The Sound for the Triggered Meme
This ingredient of a good meme is easy to forget, but music or any other type of sound can make your meme funnier. In most cases, you’ll want to keep at least a portion of the original audio, but adding sound effects at different points of the meme can have a comical effect. The Filmora’s Music Library can serve as your endless source of royalty free music and sounds .
Making a Triggered Meme Template in Microsoft Paint
Creating a meme template is an easy task that can be handled from the Microsoft Paint in a couple of minutes. When you launch the software, click on the Fill with color icon located in the Tools section of the Paint’s ribbon. Activating this option enables you to change the color of the background with a single click. Proceed to select the color of the background from the color palette located on the far right side of the ribbon. We recommend choosing shades of green because the background is going to be used for the Chroma Key effect. You can click on the Edit Colors icon if you want to find a perfect color tone for the background. Right-click anywhere on the canvas to change its color.
Now you just need to add the text to your template. Select the Text option in the Tools menu and then proceed to select the font or the size of your text in the Font menu. Make sure that the Opaque feature is enabled in the Background menu in order to change the color of the textbox background. Adjusting the Color 1 option in the Color Menu will enable you to choose the text color, while the Color 2 option lets you pick the color of the background. Type triggered in the textbox, and center the text by clicking on the TAB button on your keyboard a few times. Now you have everything you need to start creating your own triggered meme.
How to Make a Triggered Meme?
Once you’ve successfully created a triggered template you can move on to the next step of the meme making process.
1. Adding Media to a Project
Open Filmora in the Full Feature Mode and import all the files you’re going to need during the process of making a meme. The files you import to your project will be stored in the Media Panel. Add the video to the timeline by dropping it over the video track. You can then remove the unwanted parts of the clip or add a still frame to the end of the video to prolong the triggered effect of the meme. Still frames in Filmora can be created by clicking on the Snapshot icon, that is located below the Preview Panel.
2. Using the Green Screen Effect
Place the triggered template to the Picture-in-Picture track and try to position it at the exact place in the video where the person gets triggered. Click on the Green Screen icon located in the toolbar to gain access to the PIP Edit window. The Chroma Key (Green Screen) option will be selected by default, so you just have to check the ‘Make parts of the clip transparent’ box. The green background of the template will become transparent and you’ll be able to see parts of your video, with the triggered text displayed below it.
3. Enhancing Colors and Applying Effects
In order to highlight just how much a person in the video got triggered, you can change the vibrance and saturation in a portion of a video clip by clicking on the Edit icon in the toolbar. In addition, other software’s color correction tools like brightness, tint or contrast can also be used to highlight the triggered moment.
After you adjust the color values, you can click on the Effects icon if you want to add motion blur or camera shake effects. Click on the Shake option in the Effects panel to start browsing through different effects and click on the plus icon to add the effect to the clip you selected. The Distortion category in the Effects panel features a number of blur effects you can use to make the video more entertaining. You can adjust the properties of all the effects you add to your meme and control how much of the effect is applied to the video.
4. Adding Music and Text Overlays to Your Meme
Increasing the number of visual elements in the video can help you create a funnier meme. A single word can change the meaning of a meme so if you want to add additional comment besides noting that the person got triggered you can click on the Text icon and select the text overlay you like. Click on the plus icon that is displayed over the effect to add it to a video clip. A textbox will appear over the video in the Preview window and you can drag it around the screen to reposition it or rotate it. Enable the No Animation option if you want the text to just appear and disappear from the screen.
Sounds can add to the comical effect of a meme. Carefully select what type of music or sound you want to use for a meme since it can improve the quality of your meme. Simply drag the audio file you imported into Filmora and place it on the audio track and adjust its duration to match the duration of the video. If you don’t have your own music you can try some of the tracks featured in the software’s music library.
4. Exporting the Triggered Meme from Filmora
When your meme is ready to hit the social media, you can click on the Export button. In the Export window, you can choose any of the available file formats, but the formats best suited for memes are either MP4 or GIF. Click on the Settings icon in the Output Description menu to change the frame rate, resolution or the quality of the video. Wondershare Filmora lets you export videos directly to your YouTube channel or your Facebook account, so you don’t have to waste time on posting the meme after the export process is completed.
The software also offers the option to save a meme you created to your hard drive if you don’t want to post a meme on social media right away. You just have to click on the Export button after adjusting the output settings and wait for the file to be exported.
Conclusion
The precious memories of your friends being enraged by the silliest things can be turned into hilarious memes effortlessly. A video editing software like Wondershare Filmora gives you all the tools you’ll need to quickly generate a triggered meme, so you can focus on having fun with your friends. What’s your favorite method of making memes?
Ollie Mattison
Ollie Mattison is a writer and a lover of all things video.
Follow @Ollie Mattison
Ollie Mattison
Mar 27, 2024• Proven solutions
It is no secret that we all lose our cool from time. It’s only natural, after all, the world can be a frustrating place. We’re all enraged by different things, some of us can’t stand pineapple on pizza while others explode when being pranked. What we often don’t realize is that being triggered in front of a camera makes us perfect meme material. Even though the majority of memes are still images, some of the most memorable memes ever created were GIFs or short videos.
Making the triggered meme is easy when you know how, so in this article, we are going to show you how to make your next potentially viral meme, in just a few easy steps.
Filmora offers an easy to use video editor named Filmora Video Editor to make video and gif memes, and an online free meme maker named Filmora FREE Online Meme Maker which allows you to create images, videos and gifs memes for free. The video tutorial below will show you how to make a triggered video meme with Filmora. Download it and try it by yourself now.
The Things You Need to Make a Triggered Meme
Preparation is key to almost every important thing in life, including making a triggered meme featuring your bestie. Before you can capitalize on that amazing footage of triggered people you first have to make sure you have everything you need to generate a meme. Okay, let’s get started with the essentials to making a fun and effective meme.
1. A Triggered Template
You have virtually unlimited resources at your disposal, as this meme template can be easily found through a quick Google search. There is even an Android app called Triggered Meme Maker , that lets you do what its name suggests, make triggered memes. Making your own template in Microsoft Paint (we will show you how to make it in this article later) or any other photo editing software is also an option if you want to select the color of the background, rather than work with what you can find online.
2. A Video Editing Software
Memes are short videos that rarely last longer than 30 seconds, which is why you don’t need a powerful video editing suite like Final Cut Pro or Adobe Premiere Pro to make a good meme. A software like Wondershare Filmora that is easy to use and yet packed with cool visual effects and useful tools is a better choice if you just want to have a little fun with a video you recorded.
3. The Sound for the Triggered Meme
This ingredient of a good meme is easy to forget, but music or any other type of sound can make your meme funnier. In most cases, you’ll want to keep at least a portion of the original audio, but adding sound effects at different points of the meme can have a comical effect. The Filmora’s Music Library can serve as your endless source of royalty free music and sounds .
Making a Triggered Meme Template in Microsoft Paint
Creating a meme template is an easy task that can be handled from the Microsoft Paint in a couple of minutes. When you launch the software, click on the Fill with color icon located in the Tools section of the Paint’s ribbon. Activating this option enables you to change the color of the background with a single click. Proceed to select the color of the background from the color palette located on the far right side of the ribbon. We recommend choosing shades of green because the background is going to be used for the Chroma Key effect. You can click on the Edit Colors icon if you want to find a perfect color tone for the background. Right-click anywhere on the canvas to change its color.
Now you just need to add the text to your template. Select the Text option in the Tools menu and then proceed to select the font or the size of your text in the Font menu. Make sure that the Opaque feature is enabled in the Background menu in order to change the color of the textbox background. Adjusting the Color 1 option in the Color Menu will enable you to choose the text color, while the Color 2 option lets you pick the color of the background. Type triggered in the textbox, and center the text by clicking on the TAB button on your keyboard a few times. Now you have everything you need to start creating your own triggered meme.
How to Make a Triggered Meme?
Once you’ve successfully created a triggered template you can move on to the next step of the meme making process.
1. Adding Media to a Project
Open Filmora in the Full Feature Mode and import all the files you’re going to need during the process of making a meme. The files you import to your project will be stored in the Media Panel. Add the video to the timeline by dropping it over the video track. You can then remove the unwanted parts of the clip or add a still frame to the end of the video to prolong the triggered effect of the meme. Still frames in Filmora can be created by clicking on the Snapshot icon, that is located below the Preview Panel.
2. Using the Green Screen Effect
Place the triggered template to the Picture-in-Picture track and try to position it at the exact place in the video where the person gets triggered. Click on the Green Screen icon located in the toolbar to gain access to the PIP Edit window. The Chroma Key (Green Screen) option will be selected by default, so you just have to check the ‘Make parts of the clip transparent’ box. The green background of the template will become transparent and you’ll be able to see parts of your video, with the triggered text displayed below it.
3. Enhancing Colors and Applying Effects
In order to highlight just how much a person in the video got triggered, you can change the vibrance and saturation in a portion of a video clip by clicking on the Edit icon in the toolbar. In addition, other software’s color correction tools like brightness, tint or contrast can also be used to highlight the triggered moment.
After you adjust the color values, you can click on the Effects icon if you want to add motion blur or camera shake effects. Click on the Shake option in the Effects panel to start browsing through different effects and click on the plus icon to add the effect to the clip you selected. The Distortion category in the Effects panel features a number of blur effects you can use to make the video more entertaining. You can adjust the properties of all the effects you add to your meme and control how much of the effect is applied to the video.
4. Adding Music and Text Overlays to Your Meme
Increasing the number of visual elements in the video can help you create a funnier meme. A single word can change the meaning of a meme so if you want to add additional comment besides noting that the person got triggered you can click on the Text icon and select the text overlay you like. Click on the plus icon that is displayed over the effect to add it to a video clip. A textbox will appear over the video in the Preview window and you can drag it around the screen to reposition it or rotate it. Enable the No Animation option if you want the text to just appear and disappear from the screen.
Sounds can add to the comical effect of a meme. Carefully select what type of music or sound you want to use for a meme since it can improve the quality of your meme. Simply drag the audio file you imported into Filmora and place it on the audio track and adjust its duration to match the duration of the video. If you don’t have your own music you can try some of the tracks featured in the software’s music library.
4. Exporting the Triggered Meme from Filmora
When your meme is ready to hit the social media, you can click on the Export button. In the Export window, you can choose any of the available file formats, but the formats best suited for memes are either MP4 or GIF. Click on the Settings icon in the Output Description menu to change the frame rate, resolution or the quality of the video. Wondershare Filmora lets you export videos directly to your YouTube channel or your Facebook account, so you don’t have to waste time on posting the meme after the export process is completed.
The software also offers the option to save a meme you created to your hard drive if you don’t want to post a meme on social media right away. You just have to click on the Export button after adjusting the output settings and wait for the file to be exported.
Conclusion
The precious memories of your friends being enraged by the silliest things can be turned into hilarious memes effortlessly. A video editing software like Wondershare Filmora gives you all the tools you’ll need to quickly generate a triggered meme, so you can focus on having fun with your friends. What’s your favorite method of making memes?
Ollie Mattison
Ollie Mattison is a writer and a lover of all things video.
Follow @Ollie Mattison
Also read:
- [New] 2024 Approved Crafting Compelling Combinations A Guide to Creating Your Own YouTube Playlists
- [New] In 2024, Fast Format Transformation YouTube for Mac Ratio
- [Updated] DIY Making Music Videos with Your iPhone
- 2024 Approved How Add Emojis/Stickers to Videos on PC/Mac/Mobile/Online
- 2024 Approved How to Record and Edit an Animoji or Memoji Karaoke Music Video?
- 9 Best Phone Monitoring Apps for Motorola Edge 2023 | Dr.fone
- Germany Loves Mondly: The Online Language Kingpin
- How to retrieve lost files from Asus ROG Phone 7 Ultimate?
- In 2024, Everything You Need to Know about Lock Screen Settings on your Tecno Pop 7 Pro
- In 2024, How to Make an Adorable Video for Your Babys First Year
- New 10 Best Work Memes to Have Fun in Work Days
- New How to Add Emojis To Discord
- New How to Make a FLV Photo Slideshow with Music for 2024
- Unlock iPhone 12 screen lock without data loss
- Updated 2024 Approved Top 10 Best Free Manga Sites to Read Online
- Title: Is This a Pigeon Meme Generator
- Author: Jan
- Created at : 2024-10-01 05:31:06
- Updated at : 2024-10-05 20:37:35
- Link: https://meme-emoji.techidaily.com/is-this-a-pigeon-meme-generator/
- License: This work is licensed under CC BY-NC-SA 4.0.