
In 2024, How to Use Emojis on Windows 10 and Windows 11?
How to Use Emojis on Windows 10 and Windows 11?
If you ever wondered how to use emojis on Windows, or since when the emojis are around and what is their significance, you will find all your answers here. Because Windows 10 offers a great range of emojis that help you express your feelings and reactions in fewer words, they have recently gained a decent level of popularity, mostly amongst youngsters and millennials.
With that said, in the following sections, you will learn how to use emojis on Windows 10 using both keyboard shortcuts and touch keyboard, how to get emojis on Windows 10 to make your text or conversation look more versatile, and what new has been added to the latest operating system released by Microsoft, i.e., Windows 11.
In this article
01 Part 1: The History of Emojis in Windows
02 Part 2: How to Use Emojis with Keyboard Shortcuts
03 Part 3: How to Use Emojis on Windows PC with Touch Keyboard
04 Part 4: What’s New in Emojis in Windows 11
05 Part 5: How to Get More Emojis in Windows 11
Part 1: The History of Emojis in Windows
Although emojis are present in some form or the other since the mid-‘90s, they were not quite popular back then. With the evolution of smartphones, these iconic characters got attention from the then-teenagers. Seeing this, in 2012, Microsoft introduced the first-ever set of black-and-white emojis with the release of Windows 8, and after some time, the company also added the same to Windows 7 that was rolled out along with the updates for the OS.
With the release of Windows 10 in 2015, a wide range of full-fledged colored emojis was introduced and received a large number of positive reactions from the users. As of today, emojis have become an integral part of everyone’s day-to-day text conversation, be it on Skype, WhatsApp, Facebook, or any other such platform.
Part 2: How to Use Emojis with Keyboard Shortcuts
A keyboard shortcut is a combination of two or more keys that are pressed simultaneously to trigger a pre-assigned event or action. A good example of a keyboard shortcut is ‘Ctrl + S’ which, when pressed, saves the document you’re working on.
While learning the process of how to use emoji in Windows 10, it is equally imperative to memorize the shortcut keys to insert those icons without taking your hands off the keyboard. This not only saves your time, but it also prevents you from going through the lengthy process of opening the emojis keyboard, navigating through all the available icons to choose the one you’re looking for, and then clicking it to insert in the document or conversation.
Nevertheless, it would be a good idea to learn how to launch the emojis keyboard, and the process is simple. All you need to do is:
- Make sure that your keyboard cursor is in an app that can accept text inputs. A text editor like MS Word or WordPad could be a good example
- Press the Windows + ; (semicolon) or Windows + . (period) keys together to open the emojis keyboard

Once the keyboard is open, you can click any of the available emojis to insert it in your conversion or text content.
As for the shortcuts, depending on the type of expression you want to convey, there could be thousands of them. Some of the commonly used emojis and their universal shortcut keys for both Windows 10 and Windows 11 include:
: (colon) + ) (right brace) will create a smiley face
: (colon) + ( (left brace) will create a sad face
: (colon) + ; (semicolon) will create a wink face
…and so on. You can conduct a quick online search to get the entire list of keyboard shortcuts and the emojis that they will create. For your convenience, a link from the Microsoft official website is given below:
Part 3: How to Use Emojis on Windows PC with Touch Keyboard
If you have Microsoft Surface or any other device that has Windows 10 or Windows 11 installed on it, and can accept inputs via touch keyboard, you can enable the feature in the operating system, and then use the touch keyboard to add emojis to your conversion or content. You can follow the instructions given below to enable touch keyboard, and then learn how to use emojis on Windows 11 or Windows 10 via touch:
- Right-click anywhere on the taskbar (Windows 11 is used here for demonstration), and then click Taskbar settings

- From the right area of the Settings window that opens next, scroll down to the Taskbar corner icons section, and then turn on the Touch keyboard switch

- Launch an app that can accept text inputs, e.g., a text editor, chatting app, etc. Click or tap the Touch keyboard icon from the notification area that is present at the bottom-right corner of the screen.

- Click or tap the Emojis icon from the upper-left corner of the touch keyboard that opens up, and then touch your preferred emoji to add it to your text or conversation.

Part 4: What’s New in Emojis in Windows 11
In addition to learning how to use emojis on Windows 10, it is also important to know what’s new with them or the emojis panel in Windows 11, the latest operating system released by Microsoft this year, i.e., 2021.
In Windows 11, although you can launch the emojis keyboard using the same shortcuts, i.e., ‘Windows + .’ or ‘Windows + ;’ keys as mentioned earlier, the emojis keyboard itself has four sections, namely:
- Emojis – Contains various emojis and smileys
- GIF – Gives you access to various animated GIFs from Tenor
- Kamojis – Lets you add the ASCII characters for emojis, e.g., :-) or :-(
- Symbols – To add important symbols to your text, e.g., ©, ®, etc.
In addition to this, the 2D Clippy emoji has also been introduced with Windows 11, and can be located by launching the emojis keyboard, and typing ‘Clippy’.
Part 5: How to Get More Emojis in Windows 11
If the built-in emoji library doesn’t contain your favorite expressions, you can always get several more by following the instructions given below:
- Launch your favorite web browser on Windows 11, and then go to http://www.iemoji.com/
- Click an emoji from the available options or copy one from your favorite portal, and paste it in the Paste Emoji here field

- Review the emoji in the MESSAGE PREVIEW field, and click Create from the Options section to generate the emoji that can be sent as a message or image

- Alternatively, click Copy from the Options section itself, and then go to the text editor or any other portal you want to use the emoji in, and press Ctrl + V to paste and insert the emoji in your conversation or text without any hassle.

Conclusion
While the emojis were introduced to Windows as late as 2012, Windows 11 has a wide range of these virtual objects or faces for various occasions and to convey different expressions respectively. Furthermore, Windows 11 also gives you access to Tenor’s GIFs, and ASCII characters with particular combinations to represent the emojis, as it was done back in the days of button-operated cellphones.
Also, if the built-in emoji keyboard doesn’t have your favorite expressions and smileys, you can always generate your custom ones by going to http://www.iemoji.com/ , and using the options that the website offers. All in all, it’s easy to learn how to use emojis on Windows as long as you have access to the correct tutorial that explains the process in an easy manner.
02 Part 2: How to Use Emojis with Keyboard Shortcuts
03 Part 3: How to Use Emojis on Windows PC with Touch Keyboard
04 Part 4: What’s New in Emojis in Windows 11
05 Part 5: How to Get More Emojis in Windows 11
Part 1: The History of Emojis in Windows
Although emojis are present in some form or the other since the mid-‘90s, they were not quite popular back then. With the evolution of smartphones, these iconic characters got attention from the then-teenagers. Seeing this, in 2012, Microsoft introduced the first-ever set of black-and-white emojis with the release of Windows 8, and after some time, the company also added the same to Windows 7 that was rolled out along with the updates for the OS.
With the release of Windows 10 in 2015, a wide range of full-fledged colored emojis was introduced and received a large number of positive reactions from the users. As of today, emojis have become an integral part of everyone’s day-to-day text conversation, be it on Skype, WhatsApp, Facebook, or any other such platform.
Part 2: How to Use Emojis with Keyboard Shortcuts
A keyboard shortcut is a combination of two or more keys that are pressed simultaneously to trigger a pre-assigned event or action. A good example of a keyboard shortcut is ‘Ctrl + S’ which, when pressed, saves the document you’re working on.
While learning the process of how to use emoji in Windows 10, it is equally imperative to memorize the shortcut keys to insert those icons without taking your hands off the keyboard. This not only saves your time, but it also prevents you from going through the lengthy process of opening the emojis keyboard, navigating through all the available icons to choose the one you’re looking for, and then clicking it to insert in the document or conversation.
Nevertheless, it would be a good idea to learn how to launch the emojis keyboard, and the process is simple. All you need to do is:
- Make sure that your keyboard cursor is in an app that can accept text inputs. A text editor like MS Word or WordPad could be a good example
- Press the Windows + ; (semicolon) or Windows + . (period) keys together to open the emojis keyboard
Once the keyboard is open, you can click any of the available emojis to insert it in your conversion or text content.
As for the shortcuts, depending on the type of expression you want to convey, there could be thousands of them. Some of the commonly used emojis and their universal shortcut keys for both Windows 10 and Windows 11 include:
: (colon) + ) (right brace) will create a smiley face
: (colon) + ( (left brace) will create a sad face
: (colon) + ; (semicolon) will create a wink face
…and so on. You can conduct a quick online search to get the entire list of keyboard shortcuts and the emojis that they will create. For your convenience, a link from the Microsoft official website is given below:
Part 3: How to Use Emojis on Windows PC with Touch Keyboard
If you have Microsoft Surface or any other device that has Windows 10 or Windows 11 installed on it, and can accept inputs via touch keyboard, you can enable the feature in the operating system, and then use the touch keyboard to add emojis to your conversion or content. You can follow the instructions given below to enable touch keyboard, and then learn how to use emojis on Windows 11 or Windows 10 via touch:
- Right-click anywhere on the taskbar (Windows 11 is used here for demonstration), and then click Taskbar settings
- From the right area of the Settings window that opens next, scroll down to the Taskbar corner icons section, and then turn on the Touch keyboard switch
- Launch an app that can accept text inputs, e.g., a text editor, chatting app, etc. Click or tap the Touch keyboard icon from the notification area that is present at the bottom-right corner of the screen.
- Click or tap the Emojis icon from the upper-left corner of the touch keyboard that opens up, and then touch your preferred emoji to add it to your text or conversation.
Part 4: What’s New in Emojis in Windows 11
In addition to learning how to use emojis on Windows 10, it is also important to know what’s new with them or the emojis panel in Windows 11, the latest operating system released by Microsoft this year, i.e., 2021.
In Windows 11, although you can launch the emojis keyboard using the same shortcuts, i.e., ‘Windows + .’ or ‘Windows + ;’ keys as mentioned earlier, the emojis keyboard itself has four sections, namely:
- Emojis – Contains various emojis and smileys
- GIF – Gives you access to various animated GIFs from Tenor
- Kamojis – Lets you add the ASCII characters for emojis, e.g., :-) or :-(
- Symbols – To add important symbols to your text, e.g., ©, ®, etc.
In addition to this, the 2D Clippy emoji has also been introduced with Windows 11, and can be located by launching the emojis keyboard, and typing ‘Clippy’.
Part 5: How to Get More Emojis in Windows 11
If the built-in emoji library doesn’t contain your favorite expressions, you can always get several more by following the instructions given below:
- Launch your favorite web browser on Windows 11, and then go to http://www.iemoji.com/
- Click an emoji from the available options or copy one from your favorite portal, and paste it in the Paste Emoji here field
- Review the emoji in the MESSAGE PREVIEW field, and click Create from the Options section to generate the emoji that can be sent as a message or image
- Alternatively, click Copy from the Options section itself, and then go to the text editor or any other portal you want to use the emoji in, and press Ctrl + V to paste and insert the emoji in your conversation or text without any hassle.
Conclusion
While the emojis were introduced to Windows as late as 2012, Windows 11 has a wide range of these virtual objects or faces for various occasions and to convey different expressions respectively. Furthermore, Windows 11 also gives you access to Tenor’s GIFs, and ASCII characters with particular combinations to represent the emojis, as it was done back in the days of button-operated cellphones.
Also, if the built-in emoji keyboard doesn’t have your favorite expressions and smileys, you can always generate your custom ones by going to http://www.iemoji.com/ , and using the options that the website offers. All in all, it’s easy to learn how to use emojis on Windows as long as you have access to the correct tutorial that explains the process in an easy manner.
02 Part 2: How to Use Emojis with Keyboard Shortcuts
03 Part 3: How to Use Emojis on Windows PC with Touch Keyboard
04 Part 4: What’s New in Emojis in Windows 11
05 Part 5: How to Get More Emojis in Windows 11
Part 1: The History of Emojis in Windows
Although emojis are present in some form or the other since the mid-‘90s, they were not quite popular back then. With the evolution of smartphones, these iconic characters got attention from the then-teenagers. Seeing this, in 2012, Microsoft introduced the first-ever set of black-and-white emojis with the release of Windows 8, and after some time, the company also added the same to Windows 7 that was rolled out along with the updates for the OS.
With the release of Windows 10 in 2015, a wide range of full-fledged colored emojis was introduced and received a large number of positive reactions from the users. As of today, emojis have become an integral part of everyone’s day-to-day text conversation, be it on Skype, WhatsApp, Facebook, or any other such platform.
Part 2: How to Use Emojis with Keyboard Shortcuts
A keyboard shortcut is a combination of two or more keys that are pressed simultaneously to trigger a pre-assigned event or action. A good example of a keyboard shortcut is ‘Ctrl + S’ which, when pressed, saves the document you’re working on.
While learning the process of how to use emoji in Windows 10, it is equally imperative to memorize the shortcut keys to insert those icons without taking your hands off the keyboard. This not only saves your time, but it also prevents you from going through the lengthy process of opening the emojis keyboard, navigating through all the available icons to choose the one you’re looking for, and then clicking it to insert in the document or conversation.
Nevertheless, it would be a good idea to learn how to launch the emojis keyboard, and the process is simple. All you need to do is:
- Make sure that your keyboard cursor is in an app that can accept text inputs. A text editor like MS Word or WordPad could be a good example
- Press the Windows + ; (semicolon) or Windows + . (period) keys together to open the emojis keyboard
Once the keyboard is open, you can click any of the available emojis to insert it in your conversion or text content.
As for the shortcuts, depending on the type of expression you want to convey, there could be thousands of them. Some of the commonly used emojis and their universal shortcut keys for both Windows 10 and Windows 11 include:
: (colon) + ) (right brace) will create a smiley face
: (colon) + ( (left brace) will create a sad face
: (colon) + ; (semicolon) will create a wink face
…and so on. You can conduct a quick online search to get the entire list of keyboard shortcuts and the emojis that they will create. For your convenience, a link from the Microsoft official website is given below:
Part 3: How to Use Emojis on Windows PC with Touch Keyboard
If you have Microsoft Surface or any other device that has Windows 10 or Windows 11 installed on it, and can accept inputs via touch keyboard, you can enable the feature in the operating system, and then use the touch keyboard to add emojis to your conversion or content. You can follow the instructions given below to enable touch keyboard, and then learn how to use emojis on Windows 11 or Windows 10 via touch:
- Right-click anywhere on the taskbar (Windows 11 is used here for demonstration), and then click Taskbar settings
- From the right area of the Settings window that opens next, scroll down to the Taskbar corner icons section, and then turn on the Touch keyboard switch
- Launch an app that can accept text inputs, e.g., a text editor, chatting app, etc. Click or tap the Touch keyboard icon from the notification area that is present at the bottom-right corner of the screen.
- Click or tap the Emojis icon from the upper-left corner of the touch keyboard that opens up, and then touch your preferred emoji to add it to your text or conversation.

Part 4: What’s New in Emojis in Windows 11
In addition to learning how to use emojis on Windows 10, it is also important to know what’s new with them or the emojis panel in Windows 11, the latest operating system released by Microsoft this year, i.e., 2021.
In Windows 11, although you can launch the emojis keyboard using the same shortcuts, i.e., ‘Windows + .’ or ‘Windows + ;’ keys as mentioned earlier, the emojis keyboard itself has four sections, namely:
- Emojis – Contains various emojis and smileys
- GIF – Gives you access to various animated GIFs from Tenor
- Kamojis – Lets you add the ASCII characters for emojis, e.g., :-) or :-(
- Symbols – To add important symbols to your text, e.g., ©, ®, etc.
In addition to this, the 2D Clippy emoji has also been introduced with Windows 11, and can be located by launching the emojis keyboard, and typing ‘Clippy’.
Part 5: How to Get More Emojis in Windows 11
If the built-in emoji library doesn’t contain your favorite expressions, you can always get several more by following the instructions given below:
- Launch your favorite web browser on Windows 11, and then go to http://www.iemoji.com/
- Click an emoji from the available options or copy one from your favorite portal, and paste it in the Paste Emoji here field
- Review the emoji in the MESSAGE PREVIEW field, and click Create from the Options section to generate the emoji that can be sent as a message or image
- Alternatively, click Copy from the Options section itself, and then go to the text editor or any other portal you want to use the emoji in, and press Ctrl + V to paste and insert the emoji in your conversation or text without any hassle.
Conclusion
While the emojis were introduced to Windows as late as 2012, Windows 11 has a wide range of these virtual objects or faces for various occasions and to convey different expressions respectively. Furthermore, Windows 11 also gives you access to Tenor’s GIFs, and ASCII characters with particular combinations to represent the emojis, as it was done back in the days of button-operated cellphones.
Also, if the built-in emoji keyboard doesn’t have your favorite expressions and smileys, you can always generate your custom ones by going to http://www.iemoji.com/ , and using the options that the website offers. All in all, it’s easy to learn how to use emojis on Windows as long as you have access to the correct tutorial that explains the process in an easy manner.
How to Record Your Memorable Honeymoon Video
How to Make a Memorable Honeymoon Video

Ollie Mattison
Mar 27, 2024• Proven solutions
The honeymoon is maybe one of the most important times in our life. It’s unique, refined and filled with emotion which is why you should always try to consider exploring all the opportunities that this has to offer. But if you go on a honeymoon, you do want to have a video that you can cherish forever, don’t you? If you do, here are example of fancy honey moon video and some of the best ideas that you can use to create the best, most immersive and memorable honeymoon video.
Tips on creating a memorable honeymoon video
Choosing the right camera
There are many affordable 1080p or 4k cameras that you can use and all of them come with various features and prices. Obviously, you should try and focus on finding the right one that suits your needs. Take your time and study the prices and features then select the one you want based on your budget and expertise.
Get lots of photos
Another great tip is that you need to get as many photos as you can. No matter where you choose to go, there are tons of scenes, people, monuments and landmarks that you can choose to photograph. Take your time and try to capture as many of them as you possibly can. Granted, it will take a little bit of time but it will offer you the insight and fun you need in order to have a great slideshow in the end.
Organize a story from your photos
Once you have the photos, you should try to organize a story from the images. The best honeymoon movies are the ones that include a story so think about that and you will have quite a bit of fun as you immerse yourself into this experience, that’s for sure.
Add songs and overlays
You should try and consider adding songs and overlays because this will make the movie more fun and immersive. Once you complete it, you will need to share it with friends and family!
Edit your honeymoon video with Wondershare Filmora
Why choose Wondershare Filmora
If you are not good at video editing, or if you are a beginner and bothered by the complex steps of some professional video editor, Wondershare Filmora is here to save you. This is the best movie creation tool that helps you create you honeymoon movies from images all while delivering the entire set of tools you need to get a one of a kind and fun experience. If you always wanted an incredible and unique, refined movie creation experience then this is the app to use.
=“” style=”width: 100%; height: 278.438px;”;
 Download Mac Version ](https://tools.techidaily.com/wondershare/filmora/download/ )
Wondershare Filmora is very easy to use but it also manages to offer a lot of power. This is great for people that want to access basic editing features such as splitting, reverse, rotate and crop but which might also want some advanced features as well. You are bound to enjoy the entire experience for sure and the outcome will be very well worth it.
Aside from that, Wondershare Filmora also allows you to access a fresh interface that makes editing such a video a breeze. You can even add a variety of overlays and filters which do add up to offer you a very refined, exciting and refreshing experience at all times. It’s all about having the right focus and attention to detail but rest assured that the outcome will be well worth it. Once you have the movie, you can share it on Vimeo, YouTube and Facebook with a single click. The app also allows you to burn it to DVD if you so desire.
How to edit the honeymoon video with Wondershare Filmora
All you have to do is to go through the next steps:
Step 1: Import your honeymoon photos and videos
Gather all the videos and images that you have from your honeymoon then paste them inside the app.

Step 2: Tone your videos with editing tools
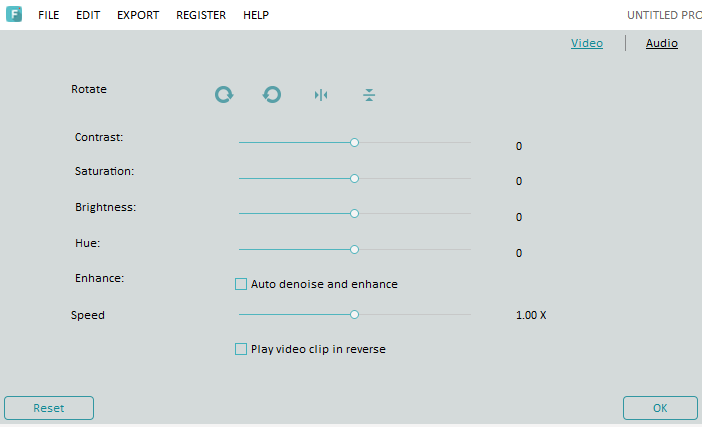
Add in video tones with features like reverse, trim, rotate, overlays, transitions, text and so on. This will help you refine the movie and offer it the unique experience you always wanted.
Step 3: Add music from Filmora library
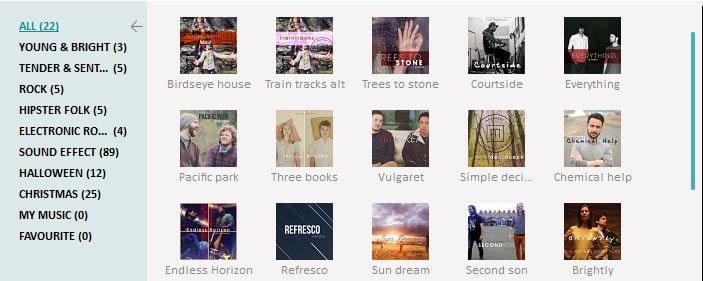
Once you have that, add the music from the integrated royalty free library to ignite your love story.
Step 4: Save and share you video

Complete the video by saving it and then you can feel free to share it with friends.
Wondershare Filmora is the best solution for those that want a refined and fun honeymoon video. All you have to do is to try it out and rest assured that you are bound to love the results Download Mac Version ](https://tools.techidaily.com/wondershare/filmora/download/ )
Ollie Mattison
Ollie Mattison is a writer and a lover of all things video.
Follow @Ollie Mattison
Ollie Mattison
Mar 27, 2024• Proven solutions
The honeymoon is maybe one of the most important times in our life. It’s unique, refined and filled with emotion which is why you should always try to consider exploring all the opportunities that this has to offer. But if you go on a honeymoon, you do want to have a video that you can cherish forever, don’t you? If you do, here are example of fancy honey moon video and some of the best ideas that you can use to create the best, most immersive and memorable honeymoon video.
Tips on creating a memorable honeymoon video
Choosing the right camera
There are many affordable 1080p or 4k cameras that you can use and all of them come with various features and prices. Obviously, you should try and focus on finding the right one that suits your needs. Take your time and study the prices and features then select the one you want based on your budget and expertise.
Get lots of photos
Another great tip is that you need to get as many photos as you can. No matter where you choose to go, there are tons of scenes, people, monuments and landmarks that you can choose to photograph. Take your time and try to capture as many of them as you possibly can. Granted, it will take a little bit of time but it will offer you the insight and fun you need in order to have a great slideshow in the end.
Organize a story from your photos
Once you have the photos, you should try to organize a story from the images. The best honeymoon movies are the ones that include a story so think about that and you will have quite a bit of fun as you immerse yourself into this experience, that’s for sure.
Add songs and overlays
You should try and consider adding songs and overlays because this will make the movie more fun and immersive. Once you complete it, you will need to share it with friends and family!
Edit your honeymoon video with Wondershare Filmora
Why choose Wondershare Filmora
If you are not good at video editing, or if you are a beginner and bothered by the complex steps of some professional video editor, Wondershare Filmora is here to save you. This is the best movie creation tool that helps you create you honeymoon movies from images all while delivering the entire set of tools you need to get a one of a kind and fun experience. If you always wanted an incredible and unique, refined movie creation experience then this is the app to use.
=“” style=”width: 100%; height: 278.438px;”;
Download Mac Version ](https://tools.techidaily.com/wondershare/filmora/download/ )
Wondershare Filmora is very easy to use but it also manages to offer a lot of power. This is great for people that want to access basic editing features such as splitting, reverse, rotate and crop but which might also want some advanced features as well. You are bound to enjoy the entire experience for sure and the outcome will be very well worth it.
Aside from that, Wondershare Filmora also allows you to access a fresh interface that makes editing such a video a breeze. You can even add a variety of overlays and filters which do add up to offer you a very refined, exciting and refreshing experience at all times. It’s all about having the right focus and attention to detail but rest assured that the outcome will be well worth it. Once you have the movie, you can share it on Vimeo, YouTube and Facebook with a single click. The app also allows you to burn it to DVD if you so desire.
How to edit the honeymoon video with Wondershare Filmora
All you have to do is to go through the next steps:
Step 1: Import your honeymoon photos and videos
Gather all the videos and images that you have from your honeymoon then paste them inside the app.
Step 2: Tone your videos with editing tools
Add in video tones with features like reverse, trim, rotate, overlays, transitions, text and so on. This will help you refine the movie and offer it the unique experience you always wanted.
Step 3: Add music from Filmora library
Once you have that, add the music from the integrated royalty free library to ignite your love story.
Step 4: Save and share you video
Complete the video by saving it and then you can feel free to share it with friends.
Wondershare Filmora is the best solution for those that want a refined and fun honeymoon video. All you have to do is to try it out and rest assured that you are bound to love the results Download Mac Version ](https://tools.techidaily.com/wondershare/filmora/download/ )
Ollie Mattison
Ollie Mattison is a writer and a lover of all things video.
Follow @Ollie Mattison
Best 10 Emoji Apps to Emoji Yourself-Make an Emoji of Yourself
Best 10 Emoji Apps to Emoji Yourself-Make an Emoji of Yourself

Shanoon Cox
Mar 27, 2024• Proven solutions
Sharing emoji is the latest trend in communication on almost all online social media platforms. Emoji makes a conversation funny, engaging and conveys the message you intend perfectly. There are a lot of emoji apps available in the play store that can be downloaded on any device to get more emojis. These emoji apps provide hundreds of emoji suitable for all situations and occasions, needed while interacting online.
Some emoji apps help to emoji yourself, which means you will be able to make an emoji avatar that looks like yourself. These emoji apps absorb your appearance and create funny emojis, with your looks, which is more fun than using regular emojis.
- Best 8 Emoji Apps to Make an Emoji of Yourself
- Bonus Tip - Add Emoji to Your Video with Wondershare Filmora
Best 8 Emoji Apps to Make an Emoji of Yourself
Since sharing emojis has been a trend for some time, there a lot of apps that help to emoji yourself in the online market. These emoji apps provide a lot of editing features and captions to make your emoji more appealing and message conveying.
Let’s have a look at some of the best apps that helps to make an emoji of yourself.
- 1.Bitmoji (iPhone and Android)
- 2.Zmoji(iPhone and Android)
- 3.Avatoon(iPhone and Android)
- 4.Emoji My Face (iPhone)
- 5.Mirror(iPhone and Android)
- 6.MojiPop (iPhone and Android)
- 7.Face Cam (Android)
- 8.Facemoji (iPhone)
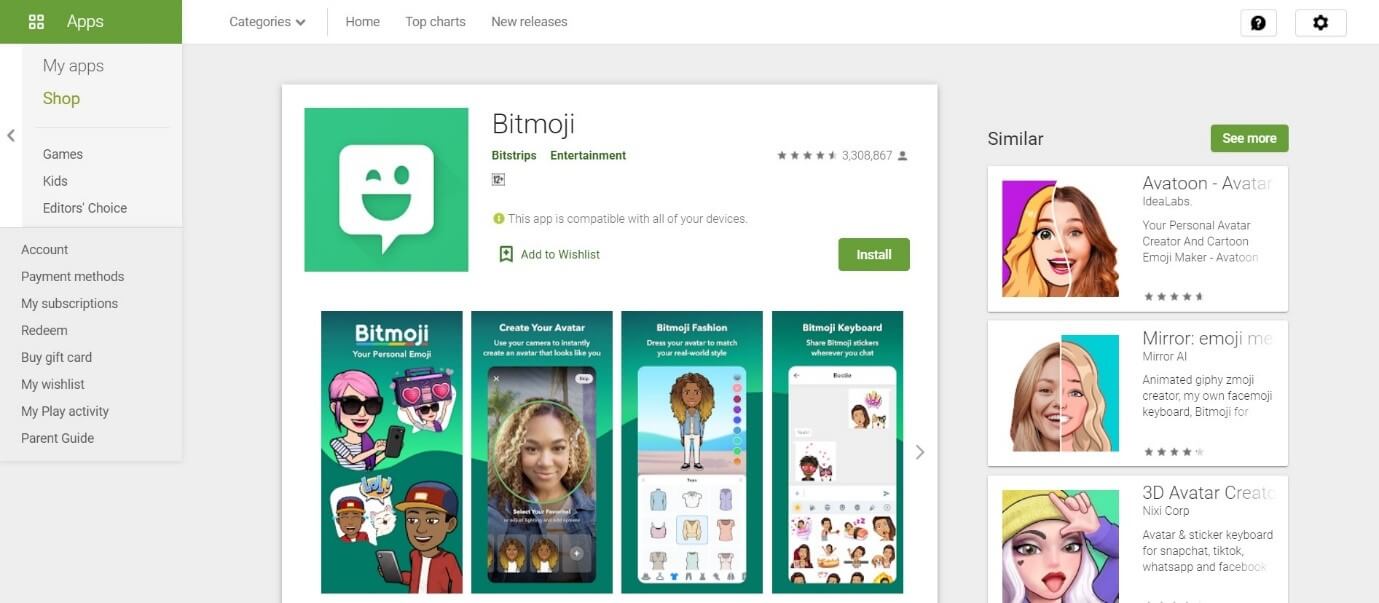
1.Bitmoji (iPhone and Android)
Bitmoji is one of the widely used applications that can help you to emoji yourself. This emoji app offers a variety of customizable options, a wide range of accessories and costumes to make your avatar look cooler than ordinary emojis.
Price:
- Free
- Include in-app purchases
Features:
- Can create an expressive avatar of yourself
- A huge library of stickers to choose from
- Option to create 2 person emoji to share on Snapchat
- Access to emoji from the chatting platform. For ios users, direct access from keyboards
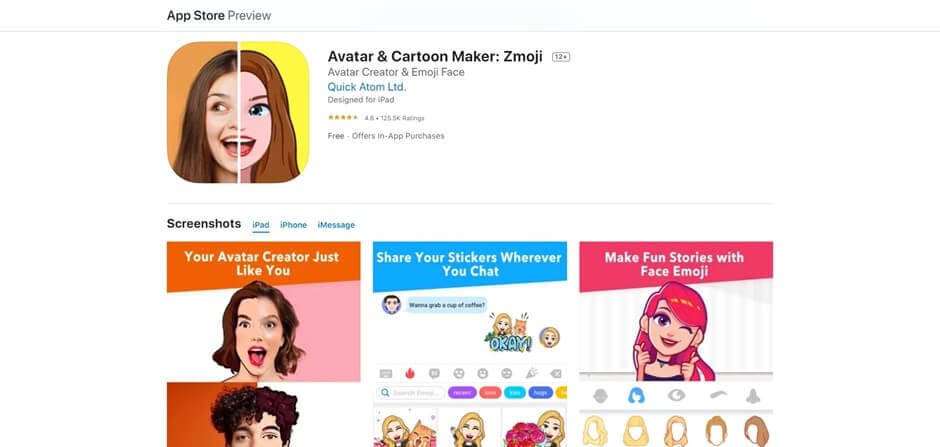
2. Zmoji(iPhone and Android)
Zmoji is a customizable emoji app that helps to emoji yourself easily. It allows you to make an avatar that looks exactly like you but in a cartoonish style. You can also edit your avatar’s clothes, accessories, and other details.
Price:
- Free
- Zmoji Premium with extra features = $99.99 per year
- Include in-app purchases
Features:
- Easy and quick creation of an avatar
- Emoji, GIFs, and avatars that you can use directly from your phone keyboard
- A variety of facial features and a big library
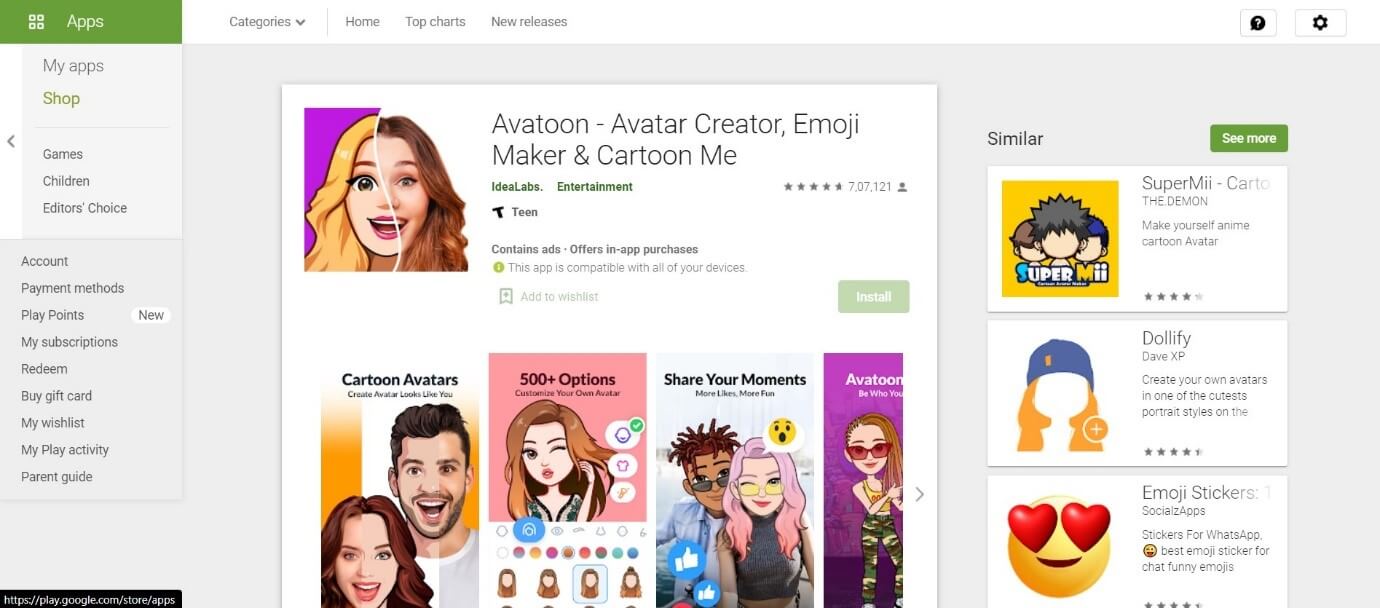
3. Avatoon(iPhone and Android)
Avatoon is a powerful emoji application that helps to make an emoji of yourself, with the same facial appearance. These emojis allow you to expresses all your excitement and moods in a way words can’t. This emoji app also allows the customization of the emoji background.
Price:
- Free
- Avatoon Premium with extra features = $49.99 per year
- Include in-app purchases
Features:
- Awesome facial recognition feature
- Easily customize clothes to nose and hair to eyes
- Eye-catching clothes and costumes to try on
- Effortlessly share the created emojis while interacting on any social media platform
4. Emoji My Face (iPhone)
Emoji My Face is an iPhone exclusive emoji app that helps to create wonderful emoji of yourself or your friends from any photos in your storage. It is one of the best apps have to have fun on social media platforms or to prank your friends by sending crazy emojis.

Price:
- Free
- Include in-app purchases
Features:
- Well designed, beautiful emoji icon of yourself
- Cool emoji expressions that can make anyone laugh
- Compactable to share on all most all social platforms like WhatsApp, Facebook, Line, Twitter, messenger, mail WeChat, etc.
5. Mirror(iPhone and Android)
Mirror is an emoji app that helps you to emoji yourself in all the funny and entertaining ways possible. You can either take a snap or yourself or upload a photo to recreate your appearance for the emoji.

Price:
- Free
- Include in-app purchases
- Subscription: $9.99 per month
Features:
- Personalized emoji and more than 150 stickers are available
- A mirror keyboard is available, to give emoji suggestions as you text
- Cool emoji icons with attractive accessories and addition of emojis to the library every week
6. MojiPop (iPhone and Android)
MojiPop is an instant emoji app that allows you to customize every single detail of the emoji you are creating. It allows you to click pictures of yourself or friends and create humorous emoji icons that can surprise anybody.
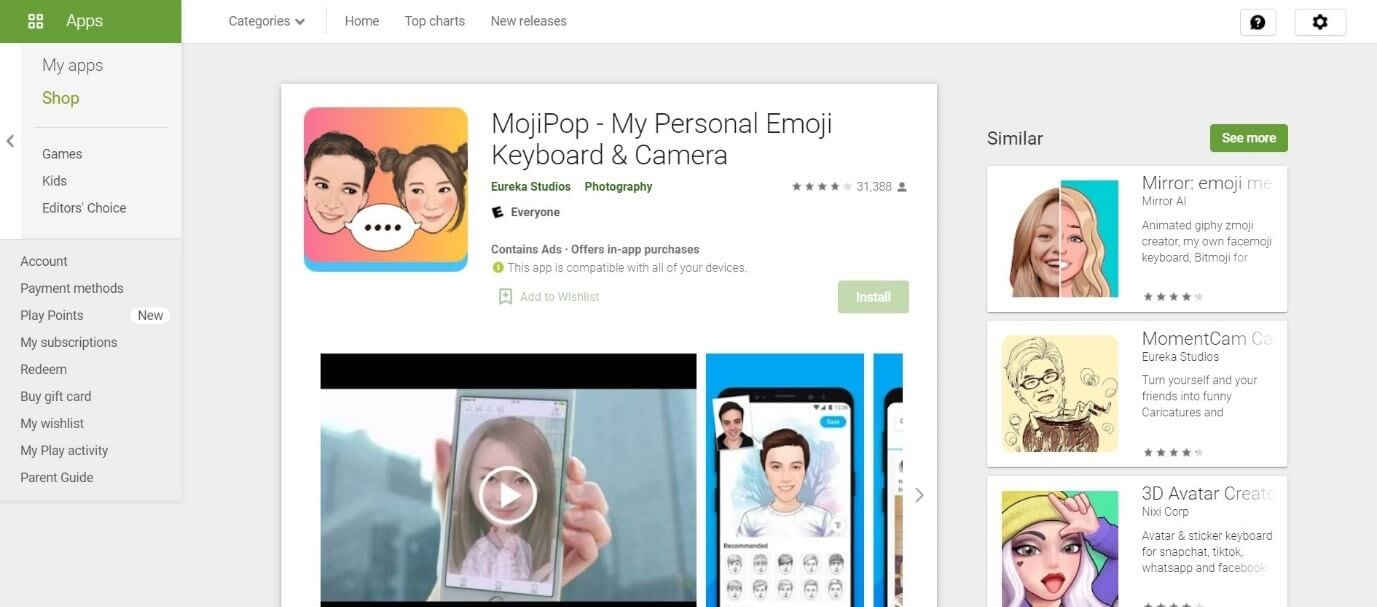
Price:
- Free
- Include in-app purchases
- Premium:$5.99 for 1 month, $29.99 per year
Features:
- Advanced facial recognition that allows you to create live looking emojis
- Thousands of emoji stickers available in the library
- Editing features like adding funny accessories, changing the theme, adding a caption, etc.
7. Face Cam (Android)
Face Cam is an android exclusive emoji app that helps you to make an emoji of yourself very easily. It helps to create live looking 3D emoji of yourself which can add extra fun to all your social media interactions.

Price:
- Free
- Include in-app purchases
Features:
- A variety of expressions that fit your personality and style
- Allows to choose from skin tones, hair colors, hairstyles, eye colors, accessories, and more
- Create a group emoji of 2 people to add more fun
- Easy sharing on social media platforms
8. Facemoji (iPhone)
Facemoji is an emoji app that helps you to be yourself while interacting with your friends and family on social media apps. This emoji app helps to emoji yourself to a cooler, funnier, and friendly cartoon version of yourself for better communication.
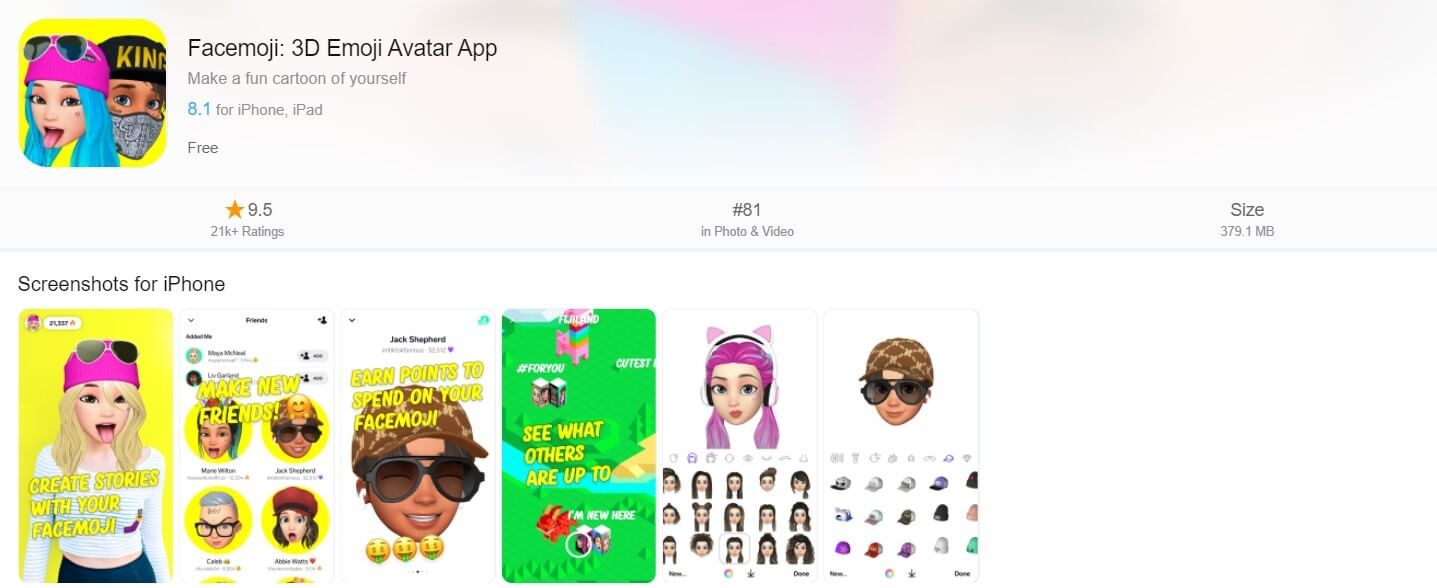
Price:
- Free
Features:
- A number of emoji styles and expressions
- A lot of customizable options suitable for any situation or occasion
- A lot of accessories and background options to make the emoji more appealing
Bonus Tip - Add Emoji to Your Video with Wondershare Filmora
Wondershare Filmora is an amazing application that is preferred for video editing both by professional videographers and immatures alike. This application has extensive video editing features that can help to boost the clarity, make it more creative and appealing to any audience.
Wondershar Filmora can also help you to add cool emojis of yourself to any video. These emojis help you to convey expressions and messages words can’t and also makes the video more appealing.
Let’s see how this can be done
Step 1: Open the Wondershare Filmora app, and select New Project.
Step 2: Import the video clip and drag & drop it to the Filmora timeline.
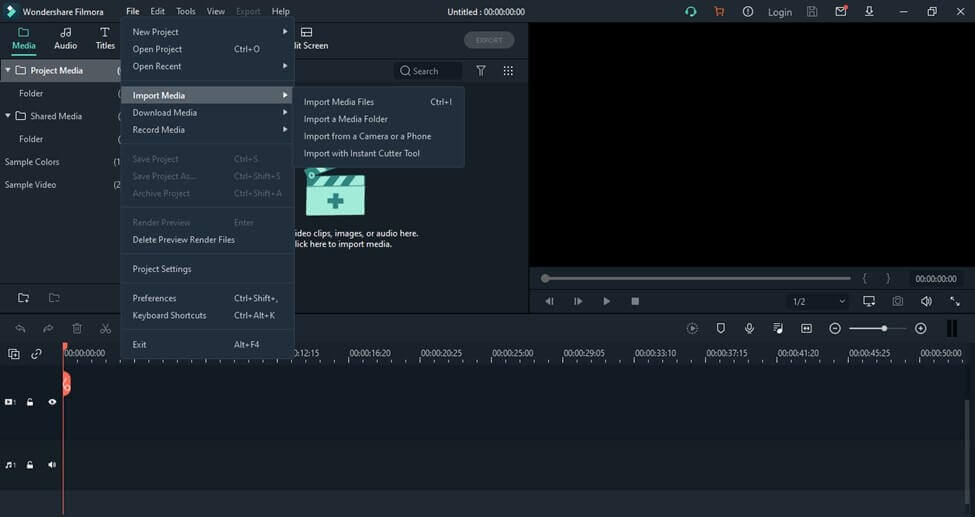
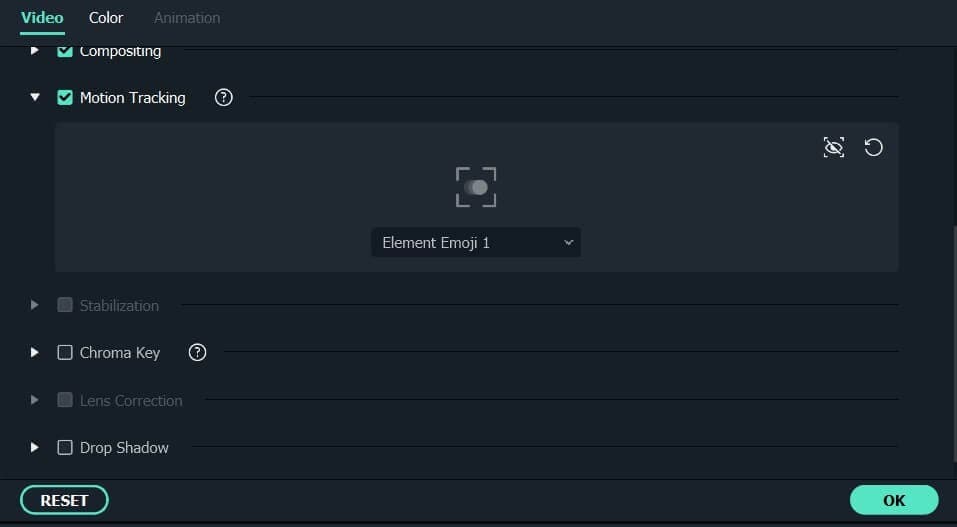
Step 3: Open the editing menu by double-clicking on the video clip on your timeline and mark the box beside Motion Tracking.
![]()
Step 4: A tracker box will appear. Move the box on top of the moving object in the video and tap on Start Tracking.
![]()
Step 5: From the Elements bar, drag and drop the memoji you wish to track above the video. After dropping u can adjust the size, orientation, or position if necessary.
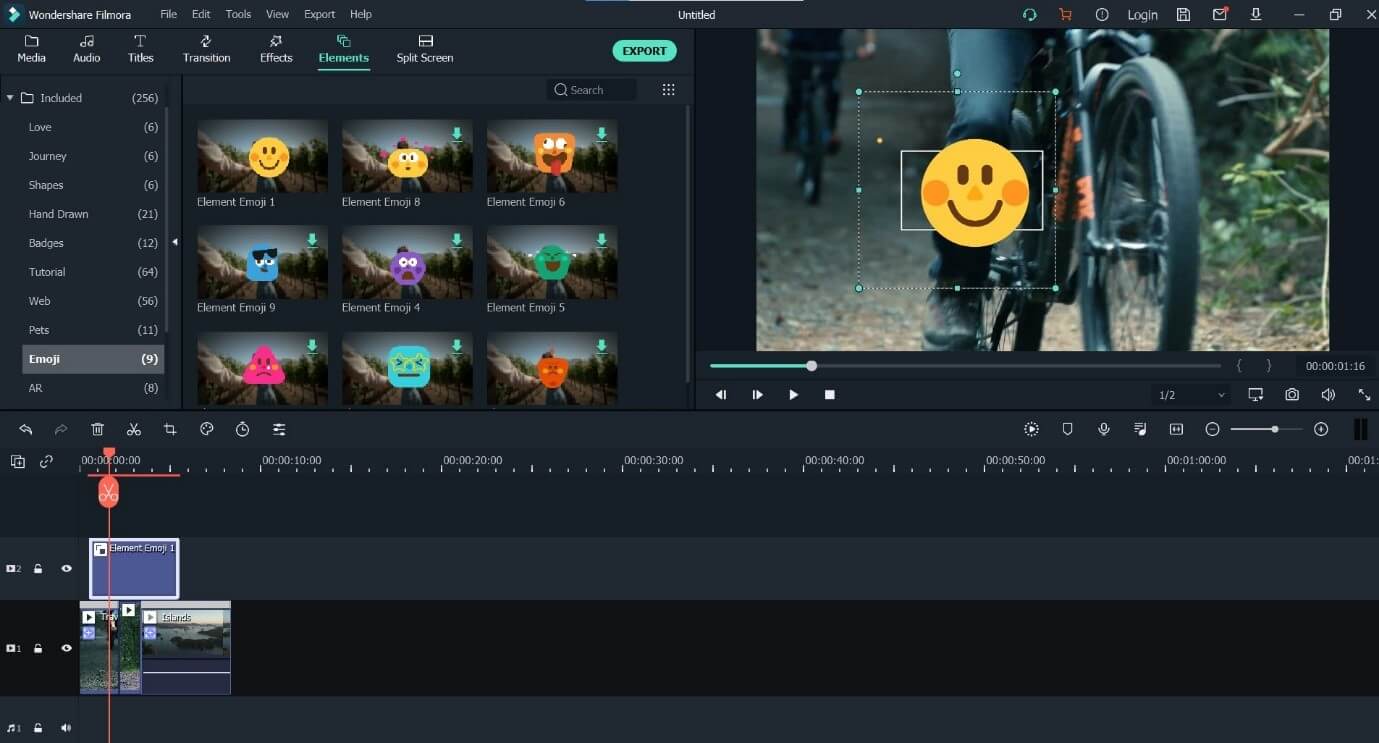
Step 6: Double click the video clip on which you have enabled motion tracking on the timeline, and from the Motion Tracking dropdown menu, select the object to follow the movement.
Step 7: Check the tracking result by playing back the video. And finally click Export to export the video to your local device, or to YouTube directly.
Conclusion
Emoji is one of the creative ways of communication of your generation. They help to convey messages and expressions that words sometimes can’t. The above listed are the best emoji apps that can be used to make an emoji of yourself. These emoji apps offer a lot of exciting and attractive features to emoji yourself in the best way possible.
Emojis can also be added to videos using video editing apps like Wondershare Filmora. Filmora allows you to add memojis to any videos and further customize it as you wish. Try out the emoji apps we have suggested and give us feedback about our suggestions. Thank you.
Shanoon Cox
Shanoon Cox is a writer and a lover of all things video.
Follow @Shanoon Cox
Shanoon Cox
Mar 27, 2024• Proven solutions
Sharing emoji is the latest trend in communication on almost all online social media platforms. Emoji makes a conversation funny, engaging and conveys the message you intend perfectly. There are a lot of emoji apps available in the play store that can be downloaded on any device to get more emojis. These emoji apps provide hundreds of emoji suitable for all situations and occasions, needed while interacting online.
Some emoji apps help to emoji yourself, which means you will be able to make an emoji avatar that looks like yourself. These emoji apps absorb your appearance and create funny emojis, with your looks, which is more fun than using regular emojis.
- Best 8 Emoji Apps to Make an Emoji of Yourself
- Bonus Tip - Add Emoji to Your Video with Wondershare Filmora
Best 8 Emoji Apps to Make an Emoji of Yourself
Since sharing emojis has been a trend for some time, there a lot of apps that help to emoji yourself in the online market. These emoji apps provide a lot of editing features and captions to make your emoji more appealing and message conveying.
Let’s have a look at some of the best apps that helps to make an emoji of yourself.
- 1.Bitmoji (iPhone and Android)
- 2.Zmoji(iPhone and Android)
- 3.Avatoon(iPhone and Android)
- 4.Emoji My Face (iPhone)
- 5.Mirror(iPhone and Android)
- 6.MojiPop (iPhone and Android)
- 7.Face Cam (Android)
- 8.Facemoji (iPhone)
1.Bitmoji (iPhone and Android)
Bitmoji is one of the widely used applications that can help you to emoji yourself. This emoji app offers a variety of customizable options, a wide range of accessories and costumes to make your avatar look cooler than ordinary emojis.
Price:
- Free
- Include in-app purchases
Features:
- Can create an expressive avatar of yourself
- A huge library of stickers to choose from
- Option to create 2 person emoji to share on Snapchat
- Access to emoji from the chatting platform. For ios users, direct access from keyboards
2. Zmoji(iPhone and Android)
Zmoji is a customizable emoji app that helps to emoji yourself easily. It allows you to make an avatar that looks exactly like you but in a cartoonish style. You can also edit your avatar’s clothes, accessories, and other details.
Price:
- Free
- Zmoji Premium with extra features = $99.99 per year
- Include in-app purchases
Features:
- Easy and quick creation of an avatar
- Emoji, GIFs, and avatars that you can use directly from your phone keyboard
- A variety of facial features and a big library
3. Avatoon(iPhone and Android)
Avatoon is a powerful emoji application that helps to make an emoji of yourself, with the same facial appearance. These emojis allow you to expresses all your excitement and moods in a way words can’t. This emoji app also allows the customization of the emoji background.
Price:
- Free
- Avatoon Premium with extra features = $49.99 per year
- Include in-app purchases
Features:
- Awesome facial recognition feature
- Easily customize clothes to nose and hair to eyes
- Eye-catching clothes and costumes to try on
- Effortlessly share the created emojis while interacting on any social media platform
4. Emoji My Face (iPhone)
Emoji My Face is an iPhone exclusive emoji app that helps to create wonderful emoji of yourself or your friends from any photos in your storage. It is one of the best apps have to have fun on social media platforms or to prank your friends by sending crazy emojis.
Price:
- Free
- Include in-app purchases
Features:
- Well designed, beautiful emoji icon of yourself
- Cool emoji expressions that can make anyone laugh
- Compactable to share on all most all social platforms like WhatsApp, Facebook, Line, Twitter, messenger, mail WeChat, etc.
5. Mirror(iPhone and Android)
Mirror is an emoji app that helps you to emoji yourself in all the funny and entertaining ways possible. You can either take a snap or yourself or upload a photo to recreate your appearance for the emoji.
Price:
- Free
- Include in-app purchases
- Subscription: $9.99 per month
Features:
- Personalized emoji and more than 150 stickers are available
- A mirror keyboard is available, to give emoji suggestions as you text
- Cool emoji icons with attractive accessories and addition of emojis to the library every week
6. MojiPop (iPhone and Android)
MojiPop is an instant emoji app that allows you to customize every single detail of the emoji you are creating. It allows you to click pictures of yourself or friends and create humorous emoji icons that can surprise anybody.
Price:
- Free
- Include in-app purchases
- Premium:$5.99 for 1 month, $29.99 per year
Features:
- Advanced facial recognition that allows you to create live looking emojis
- Thousands of emoji stickers available in the library
- Editing features like adding funny accessories, changing the theme, adding a caption, etc.
7. Face Cam (Android)
Face Cam is an android exclusive emoji app that helps you to make an emoji of yourself very easily. It helps to create live looking 3D emoji of yourself which can add extra fun to all your social media interactions.
Price:
- Free
- Include in-app purchases
Features:
- A variety of expressions that fit your personality and style
- Allows to choose from skin tones, hair colors, hairstyles, eye colors, accessories, and more
- Create a group emoji of 2 people to add more fun
- Easy sharing on social media platforms
8. Facemoji (iPhone)
Facemoji is an emoji app that helps you to be yourself while interacting with your friends and family on social media apps. This emoji app helps to emoji yourself to a cooler, funnier, and friendly cartoon version of yourself for better communication.
Price:
- Free
Features:
- A number of emoji styles and expressions
- A lot of customizable options suitable for any situation or occasion
- A lot of accessories and background options to make the emoji more appealing
Bonus Tip - Add Emoji to Your Video with Wondershare Filmora
Wondershare Filmora is an amazing application that is preferred for video editing both by professional videographers and immatures alike. This application has extensive video editing features that can help to boost the clarity, make it more creative and appealing to any audience.
Wondershar Filmora can also help you to add cool emojis of yourself to any video. These emojis help you to convey expressions and messages words can’t and also makes the video more appealing.
Let’s see how this can be done
Step 1: Open the Wondershare Filmora app, and select New Project.
Step 2: Import the video clip and drag & drop it to the Filmora timeline.
Step 3: Open the editing menu by double-clicking on the video clip on your timeline and mark the box beside Motion Tracking.
![]()
Step 4: A tracker box will appear. Move the box on top of the moving object in the video and tap on Start Tracking.
![]()
Step 5: From the Elements bar, drag and drop the memoji you wish to track above the video. After dropping u can adjust the size, orientation, or position if necessary.
Step 6: Double click the video clip on which you have enabled motion tracking on the timeline, and from the Motion Tracking dropdown menu, select the object to follow the movement.
Step 7: Check the tracking result by playing back the video. And finally click Export to export the video to your local device, or to YouTube directly.
Conclusion
Emoji is one of the creative ways of communication of your generation. They help to convey messages and expressions that words sometimes can’t. The above listed are the best emoji apps that can be used to make an emoji of yourself. These emoji apps offer a lot of exciting and attractive features to emoji yourself in the best way possible.
Emojis can also be added to videos using video editing apps like Wondershare Filmora. Filmora allows you to add memojis to any videos and further customize it as you wish. Try out the emoji apps we have suggested and give us feedback about our suggestions. Thank you.
Shanoon Cox
Shanoon Cox is a writer and a lover of all things video.
Follow @Shanoon Cox
How to Burn Photos to DVD with Transitions and Music
How to Burn Photos to DVD with Transitions and Music
Shanoon Cox
Mar 27, 2024• Proven solutions
Photos are precious memories not only for you but also for your family members. As time goes on, the photos might fade out and be unable to retrieve. To avoid this, burn photos to DVD will be a great idea to preserve family memories eternally.
This article will show you how to burn photos to DVD Slideshow with transition, titles and music quickly and easily by using Wondershare DVD Slideshow Builder Deluxe . It also provides some tips on how to burn photos to DVD.
Part 1: How to Burn Photos to DVD with Transition, Titles and Music
Wondershare DVD Slideshow Builder Deluxe can help you quickly create and burn photos to DVD. Download the free trial version this photo DVD maker first.

Step 1. Add Photo or Video Files
In Organize tab, simply click the “Add Files” button to open the browse window, find your files and import them into the program, you can drag and drop photos or videos to organize them on storyboard. Click the Expand button to get a larger viewer.

Step 2. Customize Photo Slideshow Transitions
Generally speaking, transition effects will be automatically inserted between every two photos/videos when you import the photos. But you can customize them by clicking the Personalize tab, then drag and drop a transition from the list to the thumbnail between two slides.
You are also able to add background music here: click the Music button and choose a music file from your computer.

Step 3. Choose DVD Menu
Now switch to Create tab to author a DVD menu from template and burn to DVD disc quickly:
- On the right hand side of the screen, double click on desired menu template to apply a DVD menu template.
- Click the Edit button under the preview windows to customize your DVD menu or right click on menu for more options.
- You can also make a professional DVD menu using dynamic DVD menu templates.
BTW, if you don’t want a DVD menu, just check the “Disable DVD Menu” option.

Step 4. Burn Photos to DVD Disc
Now click the Preview button beneath the preview window to make sure the photo DVD slideshow is exactly what you want. Go back to Personalize tab to change if necessary. After that, click “Burn” button to start burning your DVD slideshow to DVD.
You can also output photo slideshow to watch on Youtube, Mobile Phone, iPhone, PSP, etc. through options on the left. Below are the instructions to burn DVD for watch on TV:

- Insert a blank DVD disc, and do the following.
- Click “Burn to DVD”. Then specify the number of DVD copies. You can also choose to generate ISO Image files or DVD Folders.
- Make sure the PAL or NTSC TV Standard settings is right. If you don’t know which standard is used in your country, click the “Help” button. The wrong TV standard would cause playback incompatibility problem.
- Then click “Start” to burn DVD slideshow. If you have checked Create DVD Folder and/or Create DVD Image File options, the corresponding files will also be created to the specified folder.
Now sit back and relax, when burning complete, insert the created DVD disc into your DVD player to watch photo DVD slideshow on TV.
Learn more: User Guide of DVD Slideshow Builder Deluxe
Part 2: More Photo to DVD Tips
More about NTSC/PAL TV Standard
Nowadays, there are three video formats around the world. But each one is incompatible with others. For instance, NTSC is used in North America, Canada and Japan; while most of other regions PAL/SECAM. To apply TV Standard in DVD Slideshow Builder Deluxe , go to “Create“ -> Option tab and locate TV Standard option to select NTSC or PAL. If you are not sure which one to choose, please click “Help” button, select your country, then click “OK” , the program will choose the right TV standard for you.
Burn Photos to DVD/CD as Data Disc
If you only want to burn photo to DVD for backup and further use, you only need a burning photo to DVD software like ImgBurn (Free) or Nero (commercial). These software helps you burn all digital media files to DVD, of course you can burn photos to DVD for backup purpose. Notice that some photo DVD maker allows you burn slideshow as well as the original photos. This way, you turn photos to DVD slideshow with transition, and at the same time, backup photos to DVD for other uses.
Scan Photos to DVD - Digitize Photos
If you use traditional camera and have got loads of photos in album, you can scan photos to computer so that convert photo to digital format. Afterwards, you can get more from these digital photos, like backup photos to DVD, send to others as DVD gift, make a photo DVD show to play on TV, etc. All these could be done with your favorite photo DVD maker software. Now see how to transform your printed photos to digital first:
Select a good photo scanner -> Prepare your photos to scan -> Start photo scanning -> Adjust scanned photos
Scanning printed photos to computer is not an easy job. It needs patience and some tips and tricks. As you may know, some companies provide photo scanning service. For the Step 4, you can also adjust digital photos in your selected photo DVD maker. Anyway, you need to get your digital photos ready before you burn photos to DVD with transitions and music.
Shanoon Cox
Shanoon Cox is a writer and a lover of all things video.
Follow @Shanoon Cox
Shanoon Cox
Mar 27, 2024• Proven solutions
Photos are precious memories not only for you but also for your family members. As time goes on, the photos might fade out and be unable to retrieve. To avoid this, burn photos to DVD will be a great idea to preserve family memories eternally.
This article will show you how to burn photos to DVD Slideshow with transition, titles and music quickly and easily by using Wondershare DVD Slideshow Builder Deluxe . It also provides some tips on how to burn photos to DVD.
Part 1: How to Burn Photos to DVD with Transition, Titles and Music
Wondershare DVD Slideshow Builder Deluxe can help you quickly create and burn photos to DVD. Download the free trial version this photo DVD maker first.
Step 1. Add Photo or Video Files
In Organize tab, simply click the “Add Files” button to open the browse window, find your files and import them into the program, you can drag and drop photos or videos to organize them on storyboard. Click the Expand button to get a larger viewer.
Step 2. Customize Photo Slideshow Transitions
Generally speaking, transition effects will be automatically inserted between every two photos/videos when you import the photos. But you can customize them by clicking the Personalize tab, then drag and drop a transition from the list to the thumbnail between two slides.
You are also able to add background music here: click the Music button and choose a music file from your computer.
Step 3. Choose DVD Menu
Now switch to Create tab to author a DVD menu from template and burn to DVD disc quickly:
- On the right hand side of the screen, double click on desired menu template to apply a DVD menu template.
- Click the Edit button under the preview windows to customize your DVD menu or right click on menu for more options.
- You can also make a professional DVD menu using dynamic DVD menu templates.
BTW, if you don’t want a DVD menu, just check the “Disable DVD Menu” option.
Step 4. Burn Photos to DVD Disc
Now click the Preview button beneath the preview window to make sure the photo DVD slideshow is exactly what you want. Go back to Personalize tab to change if necessary. After that, click “Burn” button to start burning your DVD slideshow to DVD.
You can also output photo slideshow to watch on Youtube, Mobile Phone, iPhone, PSP, etc. through options on the left. Below are the instructions to burn DVD for watch on TV:
- Insert a blank DVD disc, and do the following.
- Click “Burn to DVD”. Then specify the number of DVD copies. You can also choose to generate ISO Image files or DVD Folders.
- Make sure the PAL or NTSC TV Standard settings is right. If you don’t know which standard is used in your country, click the “Help” button. The wrong TV standard would cause playback incompatibility problem.
- Then click “Start” to burn DVD slideshow. If you have checked Create DVD Folder and/or Create DVD Image File options, the corresponding files will also be created to the specified folder.
Now sit back and relax, when burning complete, insert the created DVD disc into your DVD player to watch photo DVD slideshow on TV.
Learn more: User Guide of DVD Slideshow Builder Deluxe
Part 2: More Photo to DVD Tips
More about NTSC/PAL TV Standard
Nowadays, there are three video formats around the world. But each one is incompatible with others. For instance, NTSC is used in North America, Canada and Japan; while most of other regions PAL/SECAM. To apply TV Standard in DVD Slideshow Builder Deluxe , go to “Create“ -> Option tab and locate TV Standard option to select NTSC or PAL. If you are not sure which one to choose, please click “Help” button, select your country, then click “OK” , the program will choose the right TV standard for you.
Burn Photos to DVD/CD as Data Disc
If you only want to burn photo to DVD for backup and further use, you only need a burning photo to DVD software like ImgBurn (Free) or Nero (commercial). These software helps you burn all digital media files to DVD, of course you can burn photos to DVD for backup purpose. Notice that some photo DVD maker allows you burn slideshow as well as the original photos. This way, you turn photos to DVD slideshow with transition, and at the same time, backup photos to DVD for other uses.
Scan Photos to DVD - Digitize Photos
If you use traditional camera and have got loads of photos in album, you can scan photos to computer so that convert photo to digital format. Afterwards, you can get more from these digital photos, like backup photos to DVD, send to others as DVD gift, make a photo DVD show to play on TV, etc. All these could be done with your favorite photo DVD maker software. Now see how to transform your printed photos to digital first:
Select a good photo scanner -> Prepare your photos to scan -> Start photo scanning -> Adjust scanned photos
Scanning printed photos to computer is not an easy job. It needs patience and some tips and tricks. As you may know, some companies provide photo scanning service. For the Step 4, you can also adjust digital photos in your selected photo DVD maker. Anyway, you need to get your digital photos ready before you burn photos to DVD with transitions and music.
Shanoon Cox
Shanoon Cox is a writer and a lover of all things video.
Follow @Shanoon Cox
How to Make a FLV Photo Slideshow
How to Make a FLV Photo Slideshow
Shanoon Cox
Mar 27, 2024• Proven solutions
FLV slideshow is a suitable way to share photos and videos online due to its small size and reasonable quality. Wondershare DVD Slideshow Builder brings more convenience to instantly make a slideshow with music , photos and lets you create FLV videos, as well as other video formats. You can create a FLV slideshow in easy steps as below.
Easy Guide to Make FLV Slideshow with Music
1 Import Photos & Video and Music for FLV Slideshow
Install and launch the slideshow maker, go to Organize tab and import your photos, videos and music files. Transitions between adjacent slides will be used. But you can change them by following step 2.
2 Apply Transition and Motion Effect
This slideshow maker includes more than 100 transition effects for slides switch. Before applying, double-click transition thumbnail to preview in player on the right. You could also randomize transitions or apply one transition to all slides in FLV slideshow.
3 Save Photo Slideshow to FLV Video
Select Flash Video format as the output and make advanced settings by clicking Settings button. Finally, click Burn and wail a while, you get your FLV video to sharing on YouTube, Facebook, MySpace, Mobile Phone. Alternatively, play FLV video on computer via stand-alone FLV player.
FLV Slideshow Tips
For more detailed settings of FLV slideshow, click Settings button and specify various options, like encoder, resolution, frame rate, bit rate and audio settings.
To play FLV slideshow on Nokia mobile phone, you should set encode type to Nokia FLV series (*.flv). Once created, upload flv to Nokia phone or online and view FLV slideshow using FLV player or web browser plugin.
You could also upload FLV slideshow to YouTube to share with more people. FLV videos are perfectly supported by YouTube.
More: Convert All Popular Formats to FLV
Wondershare DVD Slideshow Builder Deluxe supports all popular video formats. Therefore, you can import videos that need to change format, and save it in another format. It’s not only a DVD slideshow maker, but only powerful FLV converter. For detailed supported input formats, check video format references.
More: Convert FLV to MP4, AVI, MOV, MPEG or Burn FLV to DVD
You could also import FLV to DVD Slideshow Builder Deluxe and save it as MP4, AVI, MOV and 3GP, or even burn FLV video to DVD with beautiful DVD menus. For detailed supported output formats, check video format references. Here, I recommended to save FLV to MP4 for its comprehensive support on various devices, such as iPhone, iPod, Apple TV, Gphone, Nokia phone, LG phone, PSP, Palm, Zune, etc.
About FLV Video (Flash Video)
Flash Video (*.FLV) is a container file format used to deliver video over the internet using Adobe Flash Player versions 6-10 (developed by Macromedia). Flash Video content may also be embedded within SWF files. FLV videos are widely used by international companies, including YouTube, Google Video, Yahoo! Video, metacafe, Reuters.com, and many other news providers. Flash Video could be watched on most operating systems, via the Adobe Flash Player and web browser plugin, or desired third-party FLV Players.
Shanoon Cox
Shanoon Cox is a writer and a lover of all things video.
Follow @Shanoon Cox
Shanoon Cox
Mar 27, 2024• Proven solutions
FLV slideshow is a suitable way to share photos and videos online due to its small size and reasonable quality. Wondershare DVD Slideshow Builder brings more convenience to instantly make a slideshow with music , photos and lets you create FLV videos, as well as other video formats. You can create a FLV slideshow in easy steps as below.
Easy Guide to Make FLV Slideshow with Music
1 Import Photos & Video and Music for FLV Slideshow
Install and launch the slideshow maker, go to Organize tab and import your photos, videos and music files. Transitions between adjacent slides will be used. But you can change them by following step 2.
2 Apply Transition and Motion Effect
This slideshow maker includes more than 100 transition effects for slides switch. Before applying, double-click transition thumbnail to preview in player on the right. You could also randomize transitions or apply one transition to all slides in FLV slideshow.
3 Save Photo Slideshow to FLV Video
Select Flash Video format as the output and make advanced settings by clicking Settings button. Finally, click Burn and wail a while, you get your FLV video to sharing on YouTube, Facebook, MySpace, Mobile Phone. Alternatively, play FLV video on computer via stand-alone FLV player.
FLV Slideshow Tips
For more detailed settings of FLV slideshow, click Settings button and specify various options, like encoder, resolution, frame rate, bit rate and audio settings.
To play FLV slideshow on Nokia mobile phone, you should set encode type to Nokia FLV series (*.flv). Once created, upload flv to Nokia phone or online and view FLV slideshow using FLV player or web browser plugin.
You could also upload FLV slideshow to YouTube to share with more people. FLV videos are perfectly supported by YouTube.
More: Convert All Popular Formats to FLV
Wondershare DVD Slideshow Builder Deluxe supports all popular video formats. Therefore, you can import videos that need to change format, and save it in another format. It’s not only a DVD slideshow maker, but only powerful FLV converter. For detailed supported input formats, check video format references.
More: Convert FLV to MP4, AVI, MOV, MPEG or Burn FLV to DVD
You could also import FLV to DVD Slideshow Builder Deluxe and save it as MP4, AVI, MOV and 3GP, or even burn FLV video to DVD with beautiful DVD menus. For detailed supported output formats, check video format references. Here, I recommended to save FLV to MP4 for its comprehensive support on various devices, such as iPhone, iPod, Apple TV, Gphone, Nokia phone, LG phone, PSP, Palm, Zune, etc.
About FLV Video (Flash Video)
Flash Video (*.FLV) is a container file format used to deliver video over the internet using Adobe Flash Player versions 6-10 (developed by Macromedia). Flash Video content may also be embedded within SWF files. FLV videos are widely used by international companies, including YouTube, Google Video, Yahoo! Video, metacafe, Reuters.com, and many other news providers. Flash Video could be watched on most operating systems, via the Adobe Flash Player and web browser plugin, or desired third-party FLV Players.
Shanoon Cox
Shanoon Cox is a writer and a lover of all things video.
Follow @Shanoon Cox
How to Edit Memoji on Android and iPhone
How to Edit Memoji on Android and iPhone
Shanoon Cox
Mar 27, 2024• Proven solutions
A memoji is simply the cartoon avatar of you. You can easily learn how to edit memoji and make a custom memoji that is the exact mirror image of you. From eye color to freckles, you can add every feature that makes the memoji look like a mini cartoon version of you
Since a custom memoji is a more personalized way to express our emotions, it can be the perfect way to add a hint of humor to conversations. Everyone loves a unique sticker, especially if it looks like them. So, you can take help from our guide on how to change memoji and take your texting experience to the next level.
- Bonus Tip-Memoji VS Emoji
- Part 1: How to Edit Memoji on iPhone
- Part 2: How to Edit Memoji on Android
Bonus Tip—Memoji VS Emoji
Now you must be wondering what the difference between a memoji and emoji is. Well, there is the first major difference, which is that a memoji is the cartoon avatar of you, whereas an emoji is just around yellow-faced cartoon with various expressions
1.The memoji is solely based on a human face, but an emoji can be any object, place, or even a symbol. While you can mostly craft a custom emoji personalized to your style and likings, emojis are limited. Custom memoji can also be dressed and decorated to serve as the perfect mini-version of you, complete from earrings to freckles.
2.Moreover, almost everyone has the same set of emojis. But since memojis are created to look like a person, everyone has a very unique pack of memojis looking like the cartoon version of them.
Despite the differences, both memojis and emojis carry equal significance and can spice up your texting experience in hilarious ways.
Part 1: How to Edit Memoji on iPhone
Majority of you might be iPhone users and so it’s only fair to show you some easy ways on how to edit memoji on your iPhone. There are two ways to create a custom memoji and then edit it. Lets dive in!
Method 1: Edit Memoji in the Built-in Editor
The introduction of iOS13 has made it possible for the majority of iPhone users to create or edit their memojis as they like. But in order to use this built-in editor to create a custom memoji, make sure that your device is updated to iOS13.
In this Apple-exclusive editor, the steps are pretty straightforward. But to help you further, I will walk you along with the steps in detail
- Go to the iMessages and open a new message tab or a previous conversation and tap the Appstoreicon to reveal the app bar. Hit the Animoji icon represented by the three heads
![]()
- Choose the memoji you wish to edit and click the three dots in the bottom left corner. Click Editon the pop-up dialogue box. You can also tap on Duplicate to copy the same memoji.
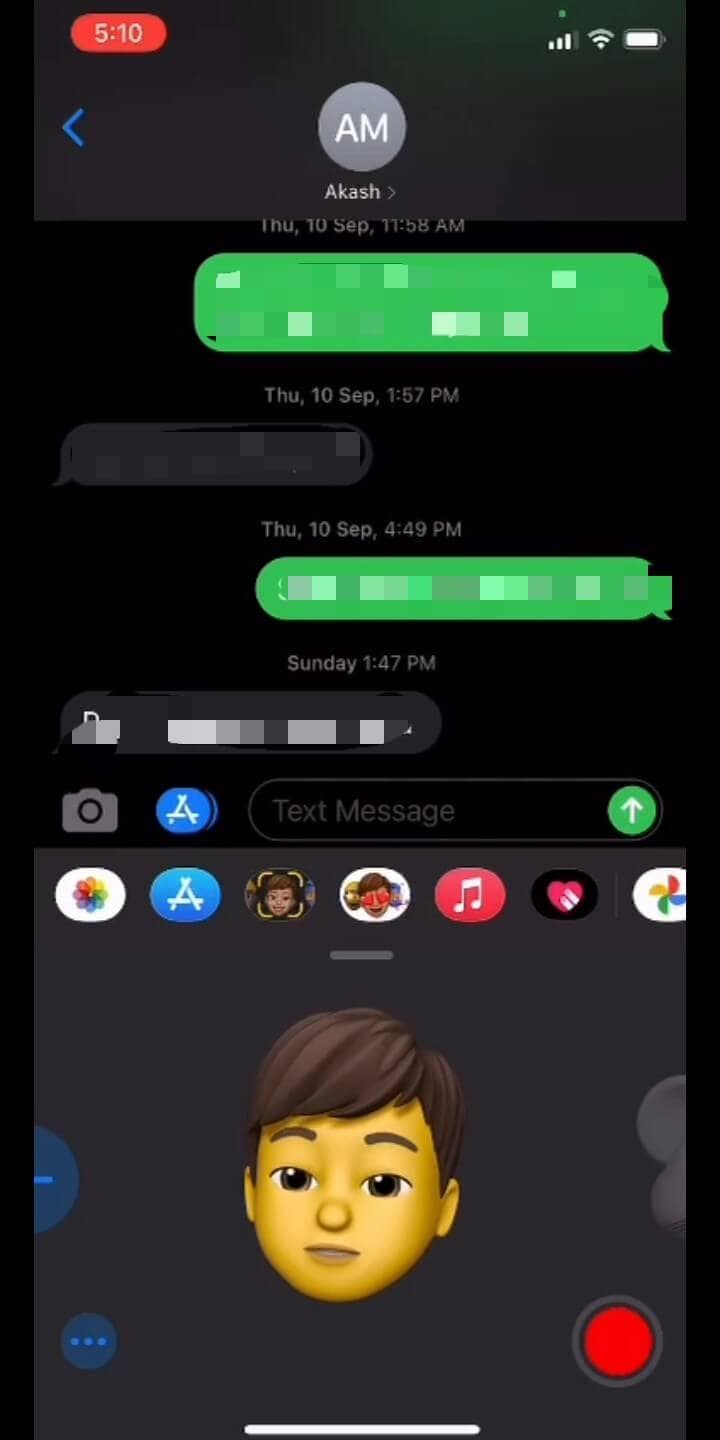
- Now you will be given various options to craft a custom memoji that looks exactly like you, right down to every detail. Click on the Skintab to change the skin color, add freckles or a beauty spot
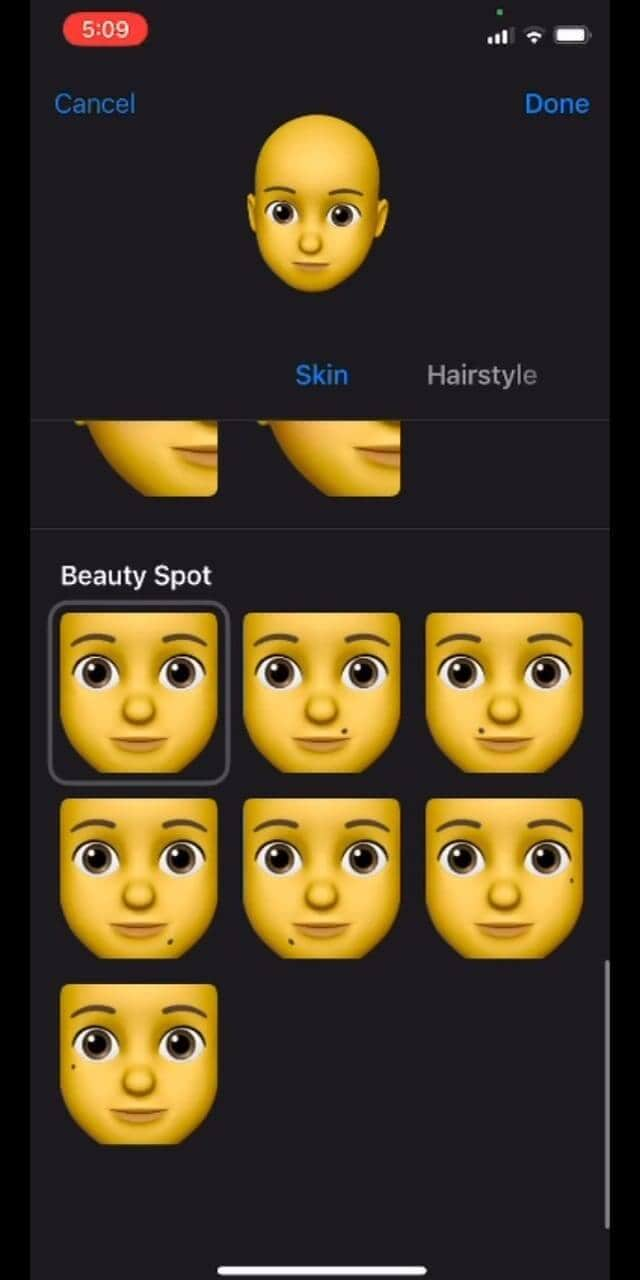
- Choose the hairstyleand hair color that suits you the best
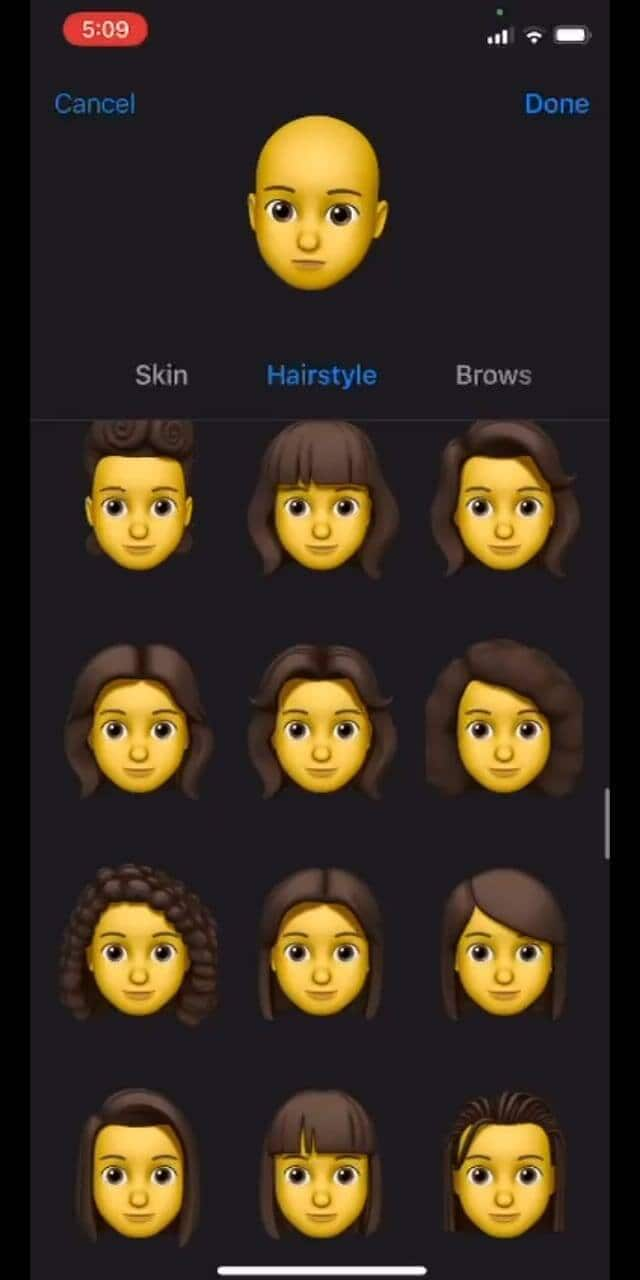
- In the Browstab, select your brow style. Go through all the tabs to choose the perfect headwear, glasses, or even AirPods to create the perfect custom memoji
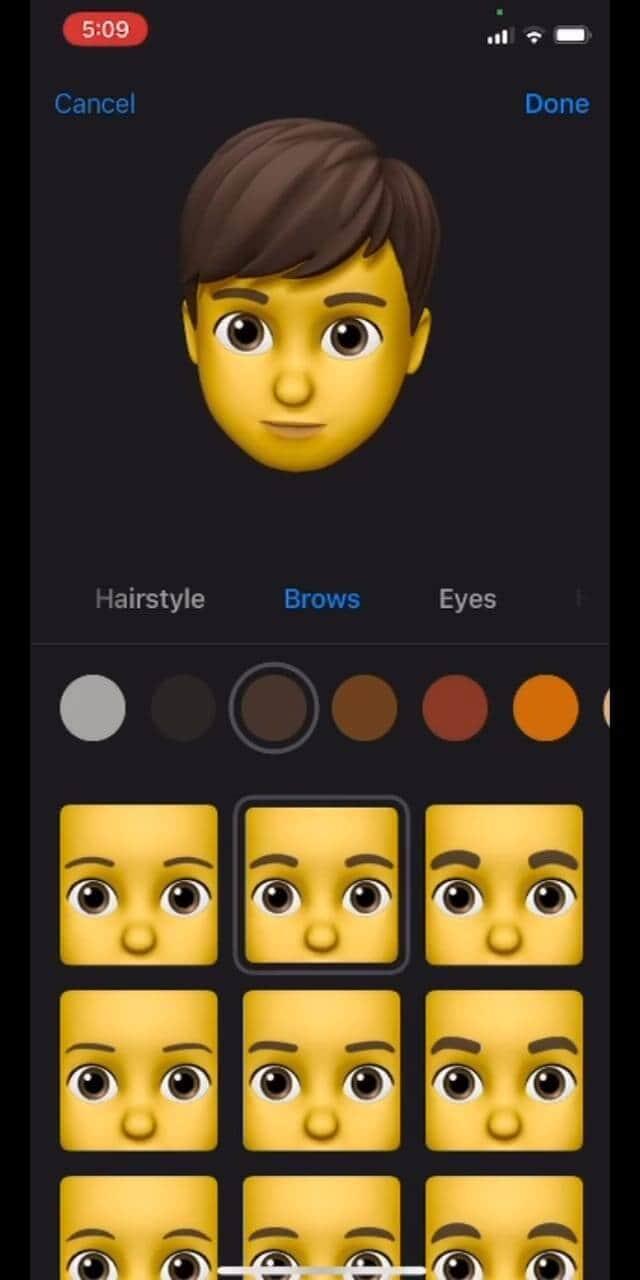
Method 2: Edit Memoji Using the Avatoon App
Avatoon is a great memoji maker app that lets you edit memoji from scratch and has an extensive collection of features you can choose from to make the cartoon look exactly like you. You can even auto-create a memoji by taking a selfie, and Avatoon will do the rest. In manual creation, you can select every detail from eyelashes, tattoos, headwear, and even jewelry.
Let me show the easy ways how to edit memoji using Avatoons powerful tools
- Firstly, download launch Avatoon.
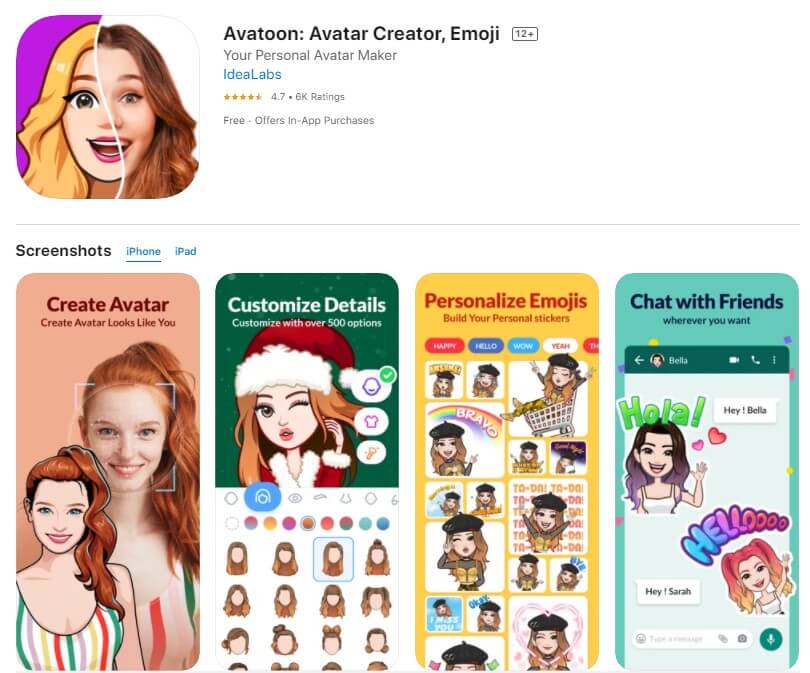
- Choose Manual Creationto create a personalized custom emoji
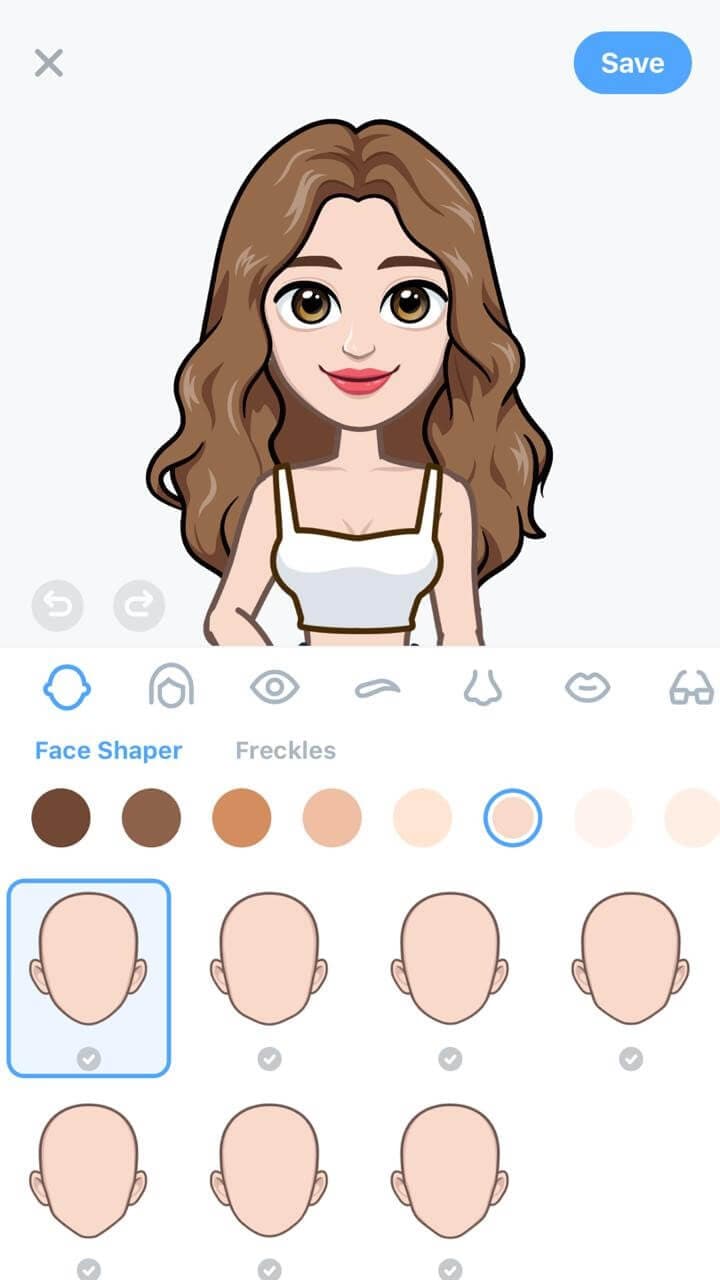
- Now you can choose your face shape, hairstyle, eyes, brows, etc. Add headwear or glasses that depict your style
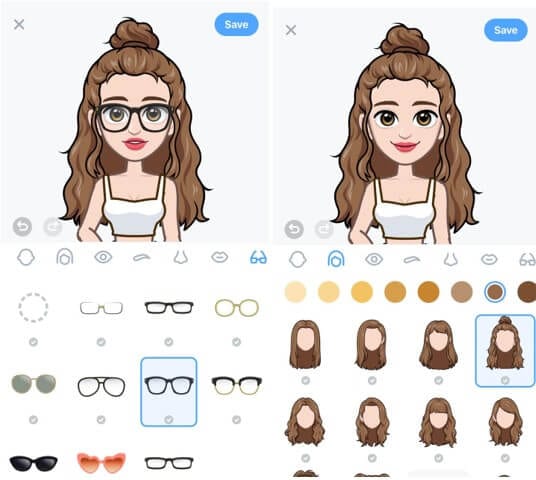
- Now that you have created a basic cartoon self, you can add much finer details by using coins.
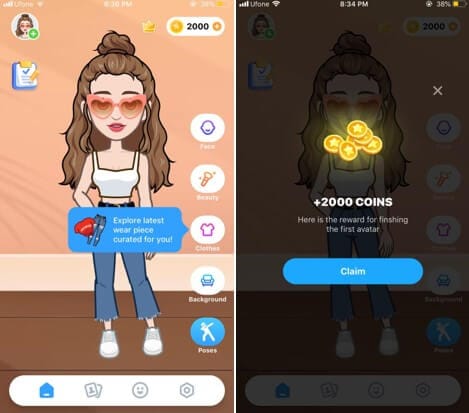
- Click on the Photobooth at the bottom to choose a cool background for your memoji.
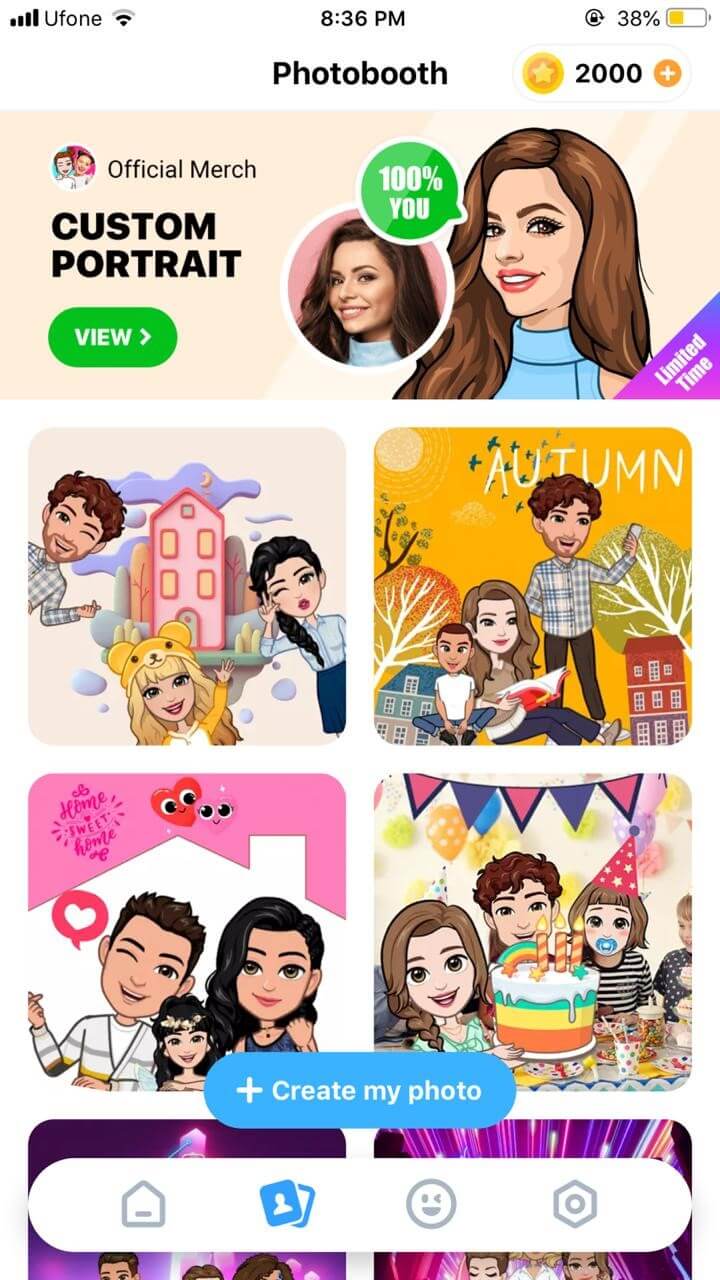
- Once you have decorated the memoji, tap on Poses, choose the mood you like and instantly share via different sharing platforms
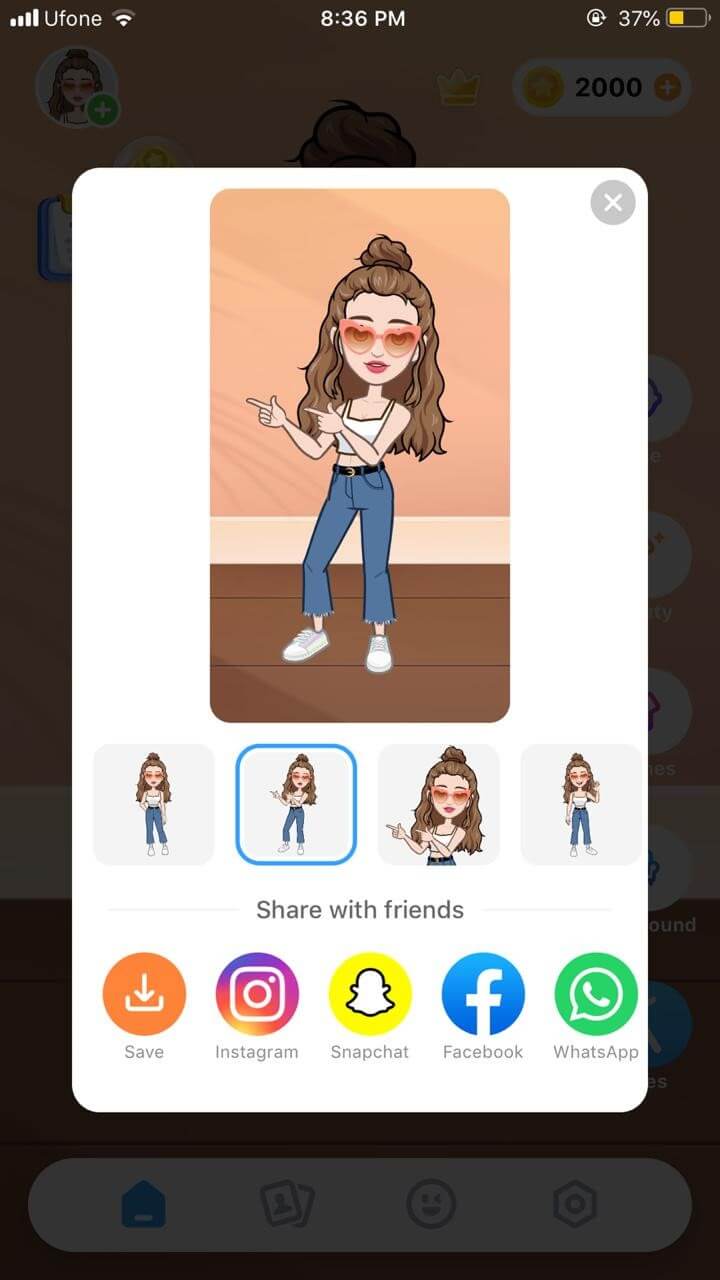
Part 2: How to Edit Memoji on Android
MojiPop is an amazing free app to make a custom emoji. It is packed with stickers and animated caricatures for every mood or emotion. Just take a selfie and start communicating using your cartoon face. You can even edit your memojis to suit your style. Then send the memoji to your friends to surprise them with a hilarious custom memoji
If you’re wondering how to edit memoji, here’s a short guide for you:
- Launch MojiPop and click on Create Avatar. Either take a selfie or choose an existing image from your gallery. Specify the age group.
![]()
- MojiPop instantly displays avatar styles, choose one that best fits you and click Next
![]()
- Select different features in tabs for hair, eyes, headwear to make the custom memoji look just like you. Click Confirmto save it.
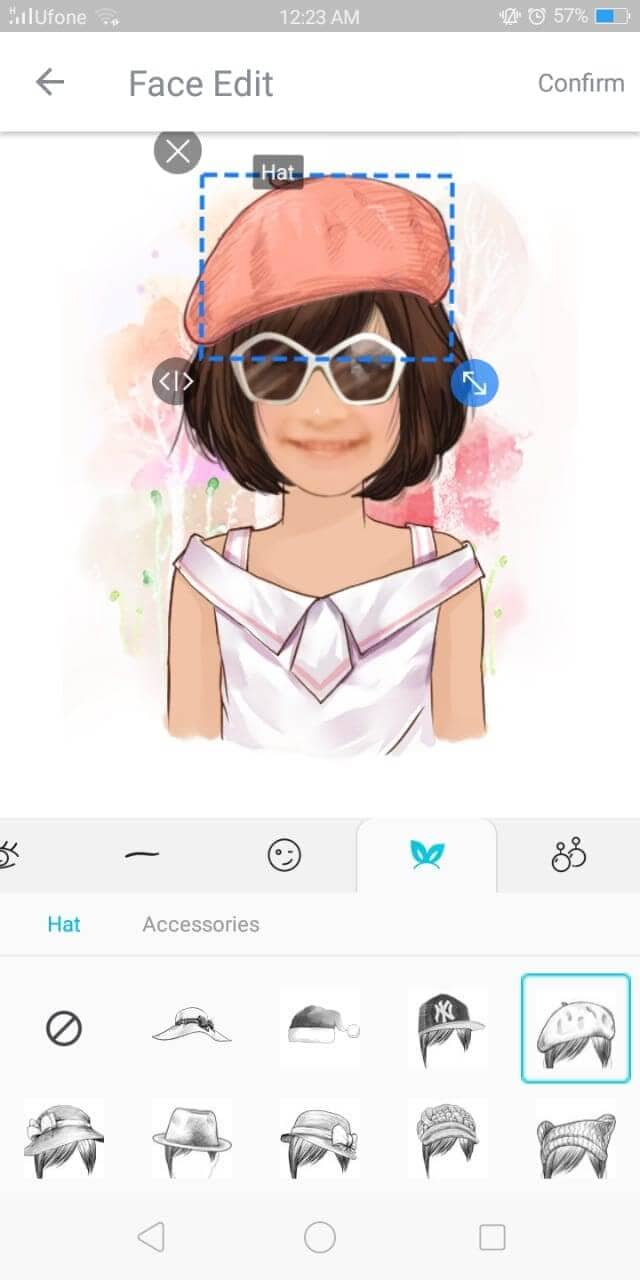
- In the Discovertab, choose a gif template to wish someone or express your feelings.
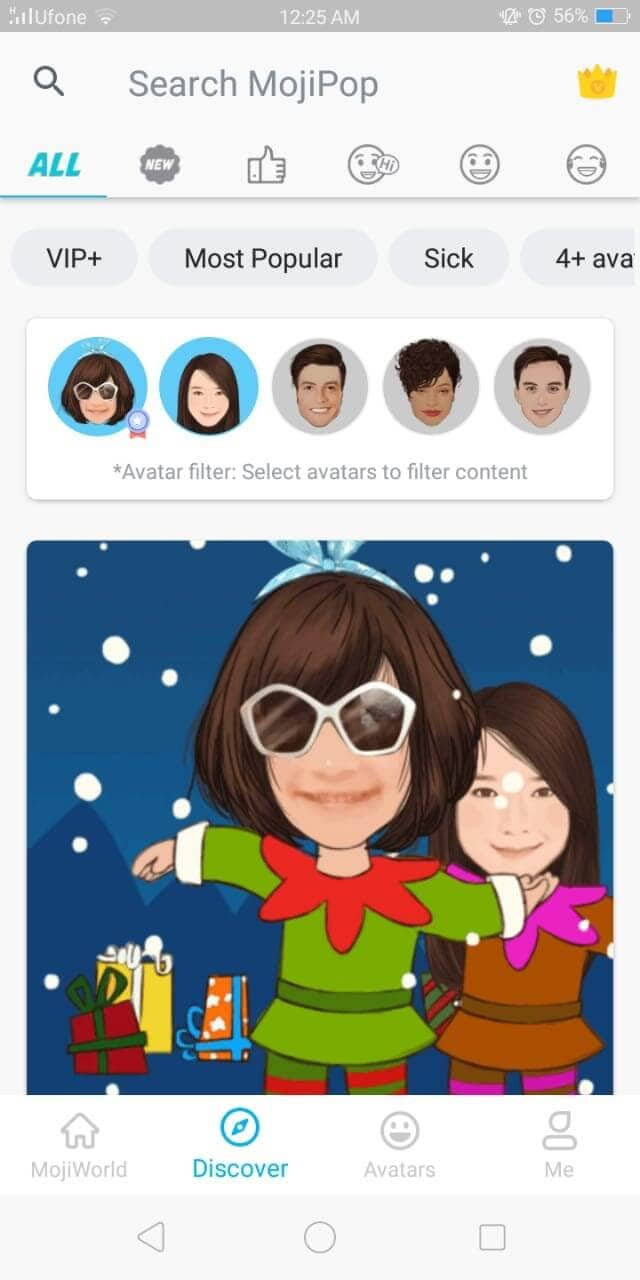
- Click on the Share icon and choose the platform for instant sharing
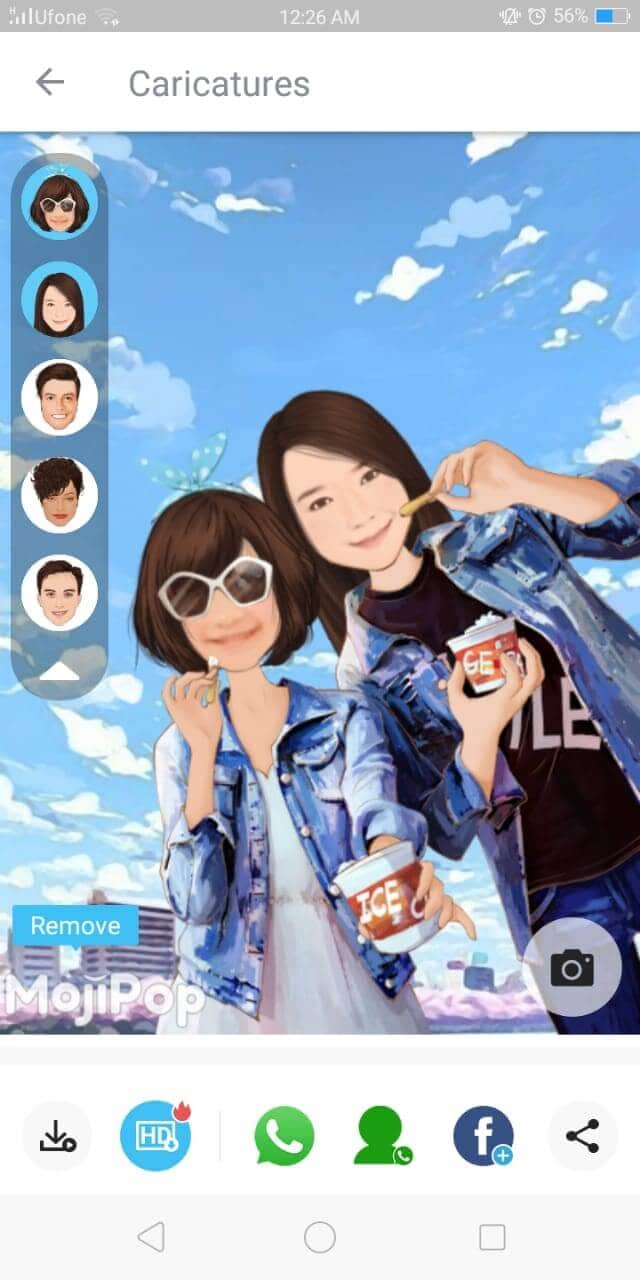
Ready to Edit Memoji by Yourself?
Are you ready to make your conversations more interesting and engaging using custom memojis? Because who doesn’t love a mini version of themselves displaying how happy or angry they feel? What better to communicate without saying a word?
And we hope that our short tutorial on how to edit memoji helps you create different versions of yourself to express yourself better.
Now that you know how to edit memoji to your liking, what are you waiting for? Go on to edit and create a hilarious avatar of yourself and enjoy texting
Shanoon Cox
Shanoon Cox is a writer and a lover of all things video.
Follow @Shanoon Cox
Shanoon Cox
Mar 27, 2024• Proven solutions
A memoji is simply the cartoon avatar of you. You can easily learn how to edit memoji and make a custom memoji that is the exact mirror image of you. From eye color to freckles, you can add every feature that makes the memoji look like a mini cartoon version of you
Since a custom memoji is a more personalized way to express our emotions, it can be the perfect way to add a hint of humor to conversations. Everyone loves a unique sticker, especially if it looks like them. So, you can take help from our guide on how to change memoji and take your texting experience to the next level.
- Bonus Tip-Memoji VS Emoji
- Part 1: How to Edit Memoji on iPhone
- Part 2: How to Edit Memoji on Android
Bonus Tip—Memoji VS Emoji
Now you must be wondering what the difference between a memoji and emoji is. Well, there is the first major difference, which is that a memoji is the cartoon avatar of you, whereas an emoji is just around yellow-faced cartoon with various expressions
1.The memoji is solely based on a human face, but an emoji can be any object, place, or even a symbol. While you can mostly craft a custom emoji personalized to your style and likings, emojis are limited. Custom memoji can also be dressed and decorated to serve as the perfect mini-version of you, complete from earrings to freckles.
2.Moreover, almost everyone has the same set of emojis. But since memojis are created to look like a person, everyone has a very unique pack of memojis looking like the cartoon version of them.
Despite the differences, both memojis and emojis carry equal significance and can spice up your texting experience in hilarious ways.
Part 1: How to Edit Memoji on iPhone
Majority of you might be iPhone users and so it’s only fair to show you some easy ways on how to edit memoji on your iPhone. There are two ways to create a custom memoji and then edit it. Lets dive in!
Method 1: Edit Memoji in the Built-in Editor
The introduction of iOS13 has made it possible for the majority of iPhone users to create or edit their memojis as they like. But in order to use this built-in editor to create a custom memoji, make sure that your device is updated to iOS13.
In this Apple-exclusive editor, the steps are pretty straightforward. But to help you further, I will walk you along with the steps in detail
- Go to the iMessages and open a new message tab or a previous conversation and tap the Appstoreicon to reveal the app bar. Hit the Animoji icon represented by the three heads
![]()
- Choose the memoji you wish to edit and click the three dots in the bottom left corner. Click Editon the pop-up dialogue box. You can also tap on Duplicate to copy the same memoji.
- Now you will be given various options to craft a custom memoji that looks exactly like you, right down to every detail. Click on the Skintab to change the skin color, add freckles or a beauty spot
- Choose the hairstyleand hair color that suits you the best
- In the Browstab, select your brow style. Go through all the tabs to choose the perfect headwear, glasses, or even AirPods to create the perfect custom memoji
Method 2: Edit Memoji Using the Avatoon App
Avatoon is a great memoji maker app that lets you edit memoji from scratch and has an extensive collection of features you can choose from to make the cartoon look exactly like you. You can even auto-create a memoji by taking a selfie, and Avatoon will do the rest. In manual creation, you can select every detail from eyelashes, tattoos, headwear, and even jewelry.
Let me show the easy ways how to edit memoji using Avatoons powerful tools
- Firstly, download launch Avatoon.
- Choose Manual Creationto create a personalized custom emoji
- Now you can choose your face shape, hairstyle, eyes, brows, etc. Add headwear or glasses that depict your style
- Now that you have created a basic cartoon self, you can add much finer details by using coins.
- Click on the Photobooth at the bottom to choose a cool background for your memoji.
- Once you have decorated the memoji, tap on Poses, choose the mood you like and instantly share via different sharing platforms
Part 2: How to Edit Memoji on Android
MojiPop is an amazing free app to make a custom emoji. It is packed with stickers and animated caricatures for every mood or emotion. Just take a selfie and start communicating using your cartoon face. You can even edit your memojis to suit your style. Then send the memoji to your friends to surprise them with a hilarious custom memoji
If you’re wondering how to edit memoji, here’s a short guide for you:
- Launch MojiPop and click on Create Avatar. Either take a selfie or choose an existing image from your gallery. Specify the age group.
![]()
- MojiPop instantly displays avatar styles, choose one that best fits you and click Next
![]()
- Select different features in tabs for hair, eyes, headwear to make the custom memoji look just like you. Click Confirmto save it.
- In the Discovertab, choose a gif template to wish someone or express your feelings.
- Click on the Share icon and choose the platform for instant sharing
Ready to Edit Memoji by Yourself?
Are you ready to make your conversations more interesting and engaging using custom memojis? Because who doesn’t love a mini version of themselves displaying how happy or angry they feel? What better to communicate without saying a word?
And we hope that our short tutorial on how to edit memoji helps you create different versions of yourself to express yourself better.
Now that you know how to edit memoji to your liking, what are you waiting for? Go on to edit and create a hilarious avatar of yourself and enjoy texting
Shanoon Cox
Shanoon Cox is a writer and a lover of all things video.
Follow @Shanoon Cox
10 Free Online Sticker Makers to Make Your Own Stickers
10 Free Online Sticker Makers to Make Your Own Stickers
Shanoon Cox
Mar 27, 2024• Proven solutions
Over the years, the method of communication has changed a lot with the advancement of technological products and innovations. Be it personal forms of communication, advertisements, or public awareness, things are very different now. This is an era of digital boards, online texts, and stickers.
Making one’s own stickers have been one of the latest trends of communication on social media platforms. The use of stickers makes the conversation interesting and fun and allows people to express their opinions hilariously, without offending anyone. That is why there are a lot of online sticker makers available in the market.
Online sticker makers allow you to create your own stickers in whichever way you wish. These online sticker makers have taken the fun and involvement of socially active people to another level. So let’s dig in and find out about the best free online sticker makers available in the market.
You might be interested in:
- Part 1: 10 Free Online Stickers to Make Your Own Stickers
- Part 2: Add Sticker to Your Video with Wondershare Filmora
Part 1: 10 Free Online Stickers to Make Your Stickers
With the right applications, making your own stickers can be very easy. There are a lot of online sticker makers that allow you to create your own stickers, but the best ones among them will do the job more creatively and easily. So, let’s have a look at the top free online sticker makers we have selected for you in terms of features and easiness to use.
- 1. StickerYou
- 2. Canva
- 3. Crello
- 4. PsPrint
- 5. Jukebox
- 6. PicsArt
- 7. Uprinting
- 8. Avery
- 9. MakeStickers
- 10. Labeley
1. StickerYou
StickerYou is a wonderful online sticker maker that helps you to create clear cut stickers easily. You can upload any photo that you wish to convert into a sticker, provided those are in PNG, JPG, JPEG, or GIF formats.
Pricing
- $0.50 per Sticker
Features
- Allows to add art to the sticker
- Provides editing options like border, text, canvas, etc. within the tool itself
- Provides shipping delivery of physical copies of the stickers
- This tool can be accessed online from any computer or mobile device
2. Canva
Canva is an online tool that allows you to create your own customized stickers and labels with a professional touch. In Canva, you can either design a sticker from scratch or develop one from the hundreds of pre-installed designer templates.
Pricing:
- Free version
- Pro version with more advanced tools and features
Features:
- 100+ adjustable templates and design options
- About a million images, illustrations, colors, and texts to choose from
- Occasion based designs and custom dimensions to choose
- Easy sticker making in three steps – upload, edit, and download
3. Crello
Crello allows users to create adorable and fun stickers in whatever design they wish. It is an online sticker maker that grants a lot of editing features to make the result more outstanding, provided the users have signed into their account
Pricing:
- Starter pack – Free
- Pro pack - $7.99 per month
Features:
- Options to create photos, images, illustrations, patterns, and text badges in customizable shapes
- More than 30,000 templates to create whatever you wish
- Availability of more than 500,000 premium photos and 140M plus royalty-free pics
- Simple design and video editing features
4. PsPrint
PsPrint is an application that can help you to create versatile and fun stickers with ease with a design template that is professionally crafted. All you need is to simply pick up your desired shape, size, and color.
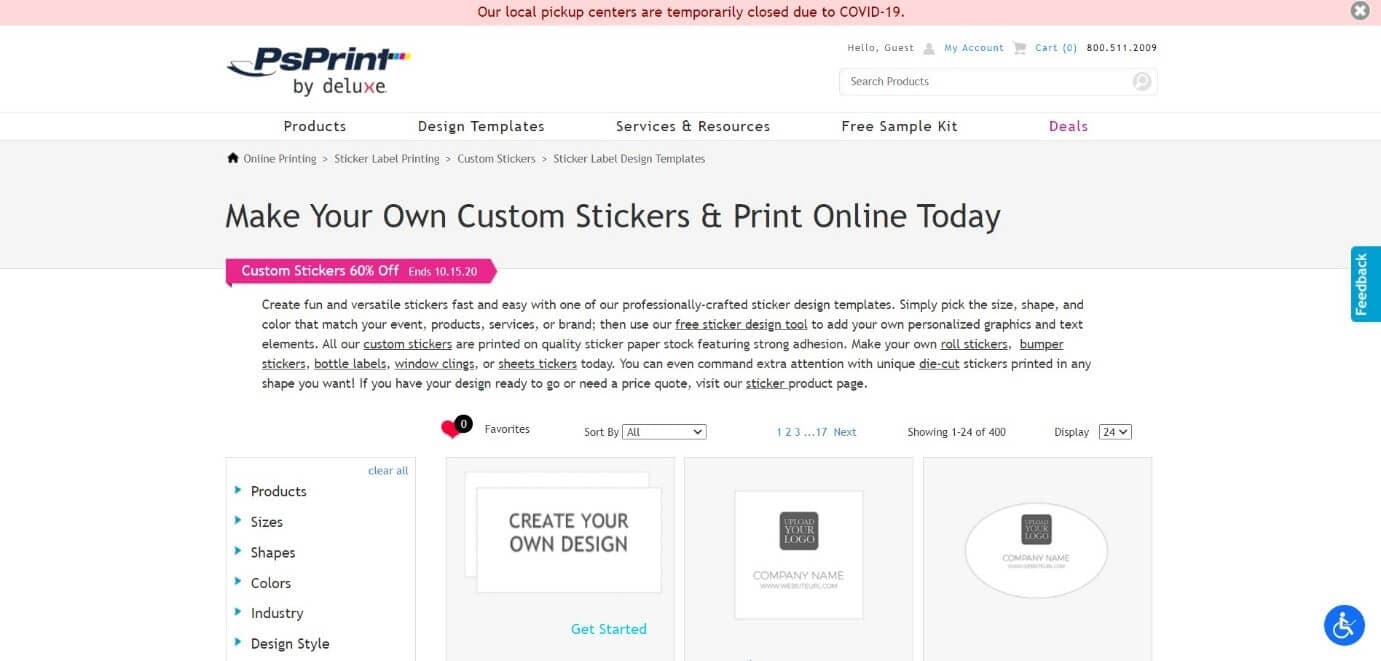
Pricing:
- Free kit
- Paid – depending on the stickers you choose
Features:
- A free designing tool to add personalized texts elements and graphics
- Availability of physical copy of stickers printed and cut in any dimension
- Occasion based options of design to choose from
5. Jukebox
Jukebox allows users to design and print a variety of stickers and provides quality templates to do so. This online sticker maker allows you to choose the shape size and material of the sticker first, and once designing is done, high-quality stickers will be printed up.
Pricing:
- Depends upon features like size, material, and quantity
Features:
- Can create stickers in any shape and finishing
- High-quality stickers that are easy to peel and weather resistant
- Free shipping for orders totaling more than $75
- One day turn around option available
6. PicsArt
Picsart is one of the most popular photo editing applications that also features the option of online sticker making. This application provides a large number of pre-customized online stickers and also has the best features if you are interested in creating one.
Pricing:
- Free
- Gold offer - $4.66 per month
Features:
- Easy creation and sharing of stickers
- Online sharing and printing options
- An AI technology that can remove the background of any pictures perfectly
- Amazing editing features like erase tool, brush off tool, axis rotation, etc.
7. Uprinting
Uprinting is an all-purpose online sticker making tool that can help you create appealing stickers according to your idea. It is a clean tool and you can order stickers in small as well as very large sizes. Also the sticker options available make it easy to choose.
Pricing:
- $42.29 ($0.17 for each sticker)
Features:
- Roll sticker cut to any shape and size
- Sticker available with a gloss finish as well as matt coated
- Availability of waterproof material for stickers
- Easy peel of hard sticking
8. Avery
Avery lets its users create seals and stickers personalized to their choice of interest. This online sticker making tool allows you to choose a design, make the necessary edits using the built-in options, print, and then save it on your device.

Pricing
- Pricing depends on the order of purchase
Features:
- Free printable designs that fit any occasion
- High-quality material suitable for packing
- Free shipping for all orders above $50
- Premium quality designs and products and 100 percent satisfaction guaranteed
9. MakeStickers
MakeStickers is a custom online sticker maker that offers a lot of features and sticker creating options to its users. It has a very simple user interface and anyone can create stickers easily using this online tool.
Pricing:
- Pricing depends on the quantity and dimensions of the stickers
Features:
- Availability of sticker in many cute shapes and colors
- Waterproof polypropylene material that is hard to get damaged by any liquids
- Laminated with a glossy or matte finish to ensure more durability
- Split back in the middle for easy peeling
10. Labeley
Labeley is a site that offers free online sticker creation without any hassles like a mandatory sign in or trail periods. It is a simple application that can be used to create a sticker and share them on any social platform instantly.

Pricing
- Free of cost
Features
- Allows to create customized stickers in minutes
- A lot of categories of designs to choose from
- Simple editing tools and easy to use interface
- Professional methods used for printing the stickers
Part 2: Add Sticker to Your Video with Wondershare Filmora
Wondershare Filmora is one of the most popular and widely used video editing applications around the world that offers exciting and extensive video editing features. Be it creating a simple meme or editing a professional level movie, Filmora is the application that you can choose with your eyes closed.
Stickers a way to express one’s opinion or idea in an effective way. Most of the time these stickers convey things that long sentences can’t. This is why many movie makers and editors prefer to add stickers to their videos. Also adding stickers to a video make it, more interesting, fun to watch, and appealing to the viewers. So let’s see how a custom sticker can be added to a video using Filmora.

Steps to Follow:
Step 1: Install the Filmora application on your device and open it. Then import the video you need to edit and the custom stickers you need to add to the Media Library.
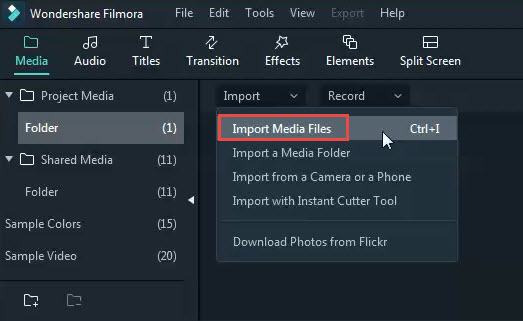
Step 2: Drag the video first to the timeline, followed by the stickers respectively. And choose the sticker options available from the Elements tab.
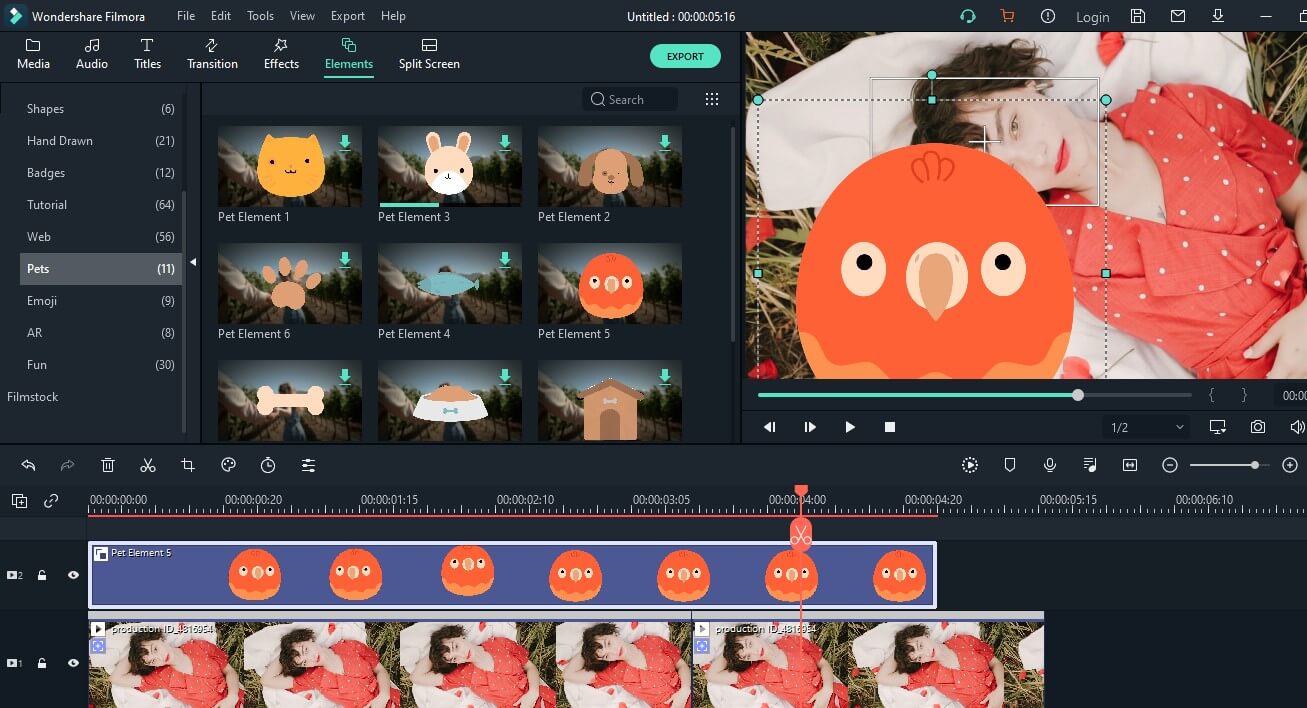
Step 3: Double click the sticker. Then you can rotate, flip, or resize it as you want. Or you can right-click the sticker on the timeline to get more advanced editing options, such as color grading, pan &zoom, and speed change, etc.
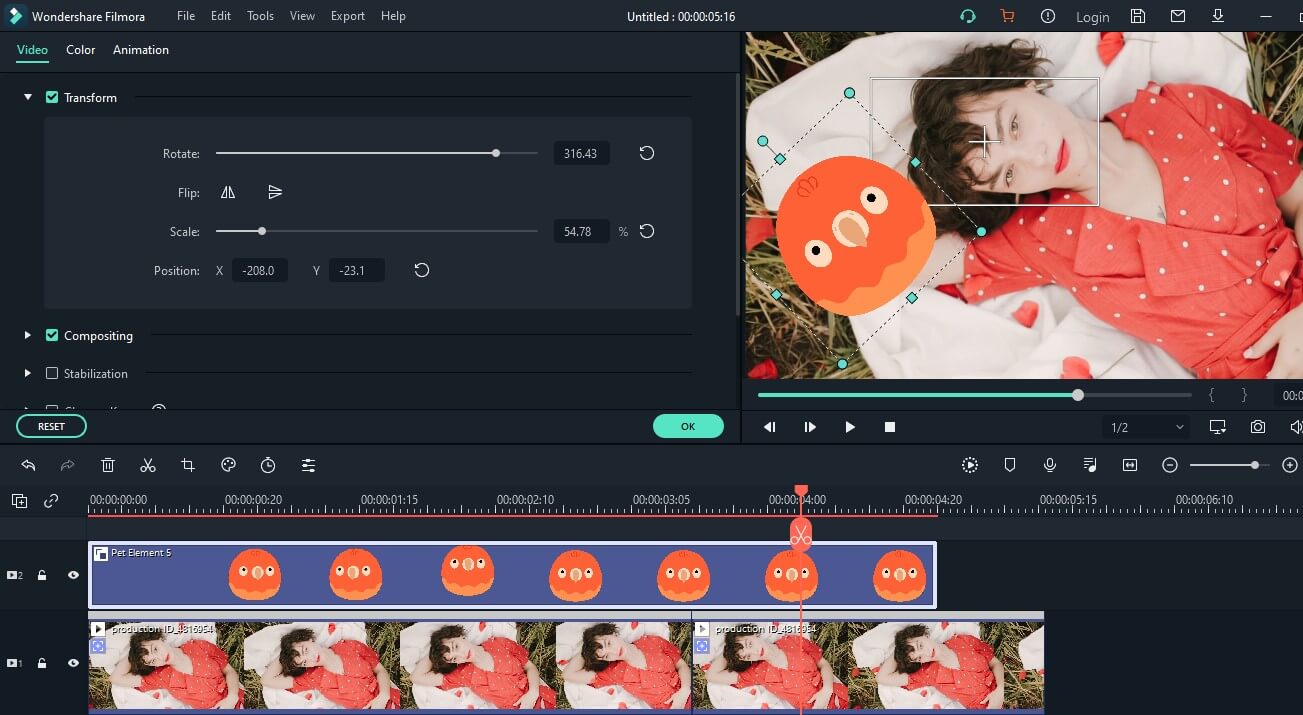
Step 4: Once the editing is completed, Export the video into the format you wish.

Conclusion
Stickers sometimes speak better than words and it is very important to know how to customize stickers as every individual wishes to speak differently. Stickers are used for many purposes, from casual chats to marketing means and home décor, which is why the quality of them is very important.
Online sticker makers allow you to customize stickers based on your ideas and depending on any occasion. We have listed the top free online sticker makers available that will allow you to create all the stickers you need. Thank you.
Shanoon Cox
Shanoon Cox is a writer and a lover of all things video.
Follow @Shanoon Cox
Shanoon Cox
Mar 27, 2024• Proven solutions
Over the years, the method of communication has changed a lot with the advancement of technological products and innovations. Be it personal forms of communication, advertisements, or public awareness, things are very different now. This is an era of digital boards, online texts, and stickers.
Making one’s own stickers have been one of the latest trends of communication on social media platforms. The use of stickers makes the conversation interesting and fun and allows people to express their opinions hilariously, without offending anyone. That is why there are a lot of online sticker makers available in the market.
Online sticker makers allow you to create your own stickers in whichever way you wish. These online sticker makers have taken the fun and involvement of socially active people to another level. So let’s dig in and find out about the best free online sticker makers available in the market.
You might be interested in:
- Part 1: 10 Free Online Stickers to Make Your Own Stickers
- Part 2: Add Sticker to Your Video with Wondershare Filmora
Part 1: 10 Free Online Stickers to Make Your Stickers
With the right applications, making your own stickers can be very easy. There are a lot of online sticker makers that allow you to create your own stickers, but the best ones among them will do the job more creatively and easily. So, let’s have a look at the top free online sticker makers we have selected for you in terms of features and easiness to use.
- 1. StickerYou
- 2. Canva
- 3. Crello
- 4. PsPrint
- 5. Jukebox
- 6. PicsArt
- 7. Uprinting
- 8. Avery
- 9. MakeStickers
- 10. Labeley
1. StickerYou
StickerYou is a wonderful online sticker maker that helps you to create clear cut stickers easily. You can upload any photo that you wish to convert into a sticker, provided those are in PNG, JPG, JPEG, or GIF formats.
Pricing
- $0.50 per Sticker
Features
- Allows to add art to the sticker
- Provides editing options like border, text, canvas, etc. within the tool itself
- Provides shipping delivery of physical copies of the stickers
- This tool can be accessed online from any computer or mobile device
2. Canva
Canva is an online tool that allows you to create your own customized stickers and labels with a professional touch. In Canva, you can either design a sticker from scratch or develop one from the hundreds of pre-installed designer templates.
Pricing:
- Free version
- Pro version with more advanced tools and features
Features:
- 100+ adjustable templates and design options
- About a million images, illustrations, colors, and texts to choose from
- Occasion based designs and custom dimensions to choose
- Easy sticker making in three steps – upload, edit, and download
3. Crello
Crello allows users to create adorable and fun stickers in whatever design they wish. It is an online sticker maker that grants a lot of editing features to make the result more outstanding, provided the users have signed into their account
Pricing:
- Starter pack – Free
- Pro pack - $7.99 per month
Features:
- Options to create photos, images, illustrations, patterns, and text badges in customizable shapes
- More than 30,000 templates to create whatever you wish
- Availability of more than 500,000 premium photos and 140M plus royalty-free pics
- Simple design and video editing features
4. PsPrint
PsPrint is an application that can help you to create versatile and fun stickers with ease with a design template that is professionally crafted. All you need is to simply pick up your desired shape, size, and color.
Pricing:
- Free kit
- Paid – depending on the stickers you choose
Features:
- A free designing tool to add personalized texts elements and graphics
- Availability of physical copy of stickers printed and cut in any dimension
- Occasion based options of design to choose from
5. Jukebox
Jukebox allows users to design and print a variety of stickers and provides quality templates to do so. This online sticker maker allows you to choose the shape size and material of the sticker first, and once designing is done, high-quality stickers will be printed up.
Pricing:
- Depends upon features like size, material, and quantity
Features:
- Can create stickers in any shape and finishing
- High-quality stickers that are easy to peel and weather resistant
- Free shipping for orders totaling more than $75
- One day turn around option available
6. PicsArt
Picsart is one of the most popular photo editing applications that also features the option of online sticker making. This application provides a large number of pre-customized online stickers and also has the best features if you are interested in creating one.
Pricing:
- Free
- Gold offer - $4.66 per month
Features:
- Easy creation and sharing of stickers
- Online sharing and printing options
- An AI technology that can remove the background of any pictures perfectly
- Amazing editing features like erase tool, brush off tool, axis rotation, etc.
7. Uprinting
Uprinting is an all-purpose online sticker making tool that can help you create appealing stickers according to your idea. It is a clean tool and you can order stickers in small as well as very large sizes. Also the sticker options available make it easy to choose.
Pricing:
- $42.29 ($0.17 for each sticker)
Features:
- Roll sticker cut to any shape and size
- Sticker available with a gloss finish as well as matt coated
- Availability of waterproof material for stickers
- Easy peel of hard sticking
8. Avery
Avery lets its users create seals and stickers personalized to their choice of interest. This online sticker making tool allows you to choose a design, make the necessary edits using the built-in options, print, and then save it on your device.
Pricing
- Pricing depends on the order of purchase
Features:
- Free printable designs that fit any occasion
- High-quality material suitable for packing
- Free shipping for all orders above $50
- Premium quality designs and products and 100 percent satisfaction guaranteed
9. MakeStickers
MakeStickers is a custom online sticker maker that offers a lot of features and sticker creating options to its users. It has a very simple user interface and anyone can create stickers easily using this online tool.
Pricing:
- Pricing depends on the quantity and dimensions of the stickers
Features:
- Availability of sticker in many cute shapes and colors
- Waterproof polypropylene material that is hard to get damaged by any liquids
- Laminated with a glossy or matte finish to ensure more durability
- Split back in the middle for easy peeling
10. Labeley
Labeley is a site that offers free online sticker creation without any hassles like a mandatory sign in or trail periods. It is a simple application that can be used to create a sticker and share them on any social platform instantly.
Pricing
- Free of cost
Features
- Allows to create customized stickers in minutes
- A lot of categories of designs to choose from
- Simple editing tools and easy to use interface
- Professional methods used for printing the stickers
Part 2: Add Sticker to Your Video with Wondershare Filmora
Wondershare Filmora is one of the most popular and widely used video editing applications around the world that offers exciting and extensive video editing features. Be it creating a simple meme or editing a professional level movie, Filmora is the application that you can choose with your eyes closed.
Stickers a way to express one’s opinion or idea in an effective way. Most of the time these stickers convey things that long sentences can’t. This is why many movie makers and editors prefer to add stickers to their videos. Also adding stickers to a video make it, more interesting, fun to watch, and appealing to the viewers. So let’s see how a custom sticker can be added to a video using Filmora.
Steps to Follow:
Step 1: Install the Filmora application on your device and open it. Then import the video you need to edit and the custom stickers you need to add to the Media Library.
Step 2: Drag the video first to the timeline, followed by the stickers respectively. And choose the sticker options available from the Elements tab.
Step 3: Double click the sticker. Then you can rotate, flip, or resize it as you want. Or you can right-click the sticker on the timeline to get more advanced editing options, such as color grading, pan &zoom, and speed change, etc.
Step 4: Once the editing is completed, Export the video into the format you wish.
Conclusion
Stickers sometimes speak better than words and it is very important to know how to customize stickers as every individual wishes to speak differently. Stickers are used for many purposes, from casual chats to marketing means and home décor, which is why the quality of them is very important.
Online sticker makers allow you to customize stickers based on your ideas and depending on any occasion. We have listed the top free online sticker makers available that will allow you to create all the stickers you need. Thank you.
Shanoon Cox
Shanoon Cox is a writer and a lover of all things video.
Follow @Shanoon Cox
Also read:
- [New] Mastering Video Uploads Past Standard Limits on Instagram
- 2024 Approved How to Make a Triggered Meme?
- 2024 Approved Top 5 Chill-Out Scenes to Add Zest to Your Snowy Videos
- 4 Solutions to Fix Unfortunately Your App Has Stopped Error on Vivo V30 | Dr.fone
- A Detailed Guide on Faking Your Location in Mozilla Firefox On Poco X6 | Dr.fone
- A Guide to Customizing Terminal Color Schemes
- French Films To Inspire You To Learn The Language Of Love
- How to Make a FLV Photo Slideshow with Music for 2024
- In 2024, 5 Ways To Teach You To Transfer Files from Poco X5 Pro to Other Android Devices Easily | Dr.fone
- In 2024, How to Make an Emoji of Yourself on Android and iPhone Emoji Yourself
- Top 26 Unmissable eBook Platforms From 2018: Your Comprehensive Guide
- Top 5 Methods for Capturing Window 11 Screen & Audio: A Comprehensive Guide
- Updated 10 Popular Cartoon Characters That Should Top Your List
- Updated 2024 Approved Best SolarMovie Alternatives-Watch Movies Online
- Title: In 2024, How to Use Emojis on Windows 10 and Windows 11?
- Author: Jan
- Created at : 2024-09-29 18:02:16
- Updated at : 2024-09-30 18:17:49
- Link: https://meme-emoji.techidaily.com/in-2024-how-to-use-emojis-on-windows-10-and-windows-11/
- License: This work is licensed under CC BY-NC-SA 4.0.