
In 2024, Best Websites to Add Emojis to Photos Online
Top 5 Best Websites to Add Emojis to Photo Online
Are you in love with those funny emojis you see in messenger apps and want to add them to your images too? Guess what? You can add emojis to photos online conveniently through a few websites. Emojis enhance how a picture looks instantly.
People can use an emoji on a friend’s image to make them look funny or hide their face with a smiley emoji. Why upload boring and the same kind of photos all the time when emojis can add the much-needed magical touch? So, if you want to add emoji to photos online, look no further and learn about the best websites that allow you do that easily.
In this article
01 Top 5 Websites to Add Emojis to Photo Online
02 How to Add Emojis to Photo on Wondershare Filmora
Part 1: Top 5 Websites to Add Emojis to Photo Online
#1: Kapwing

One of the best websites is Kapwing, which lets you add emojis to any photo you want. Kapwing is an easy-to-use online tool, which means you will not have to download any tool. But to start using it, you will have to sign up. You can do that by using your Google ID. When it comes to the number of emojis it has, it boasts more than 250 different emojis. It lets you add custom emojis; let’s say you have a pack of custom emojis with you that you want to use; you can do that effortlessly.
Key Features
- It’s an online tool and free to use.
- You need to sign up to save your work.
- It has more than 250 emojis to choose from.
- Kapwing is easy to use.
Steps to Follow to Use Kapwing
Step 1: Visit the official website of Kapwing. You will see the Start Editing option; please click on that.
Step 2: You will see the workspace with an option that says “click to upload.” Click on it.
Step 3: Now, upload a photo that you want to add the emoji too. The image will be uploaded.
Step 4: To add an emoji, look towards the left menu, and you will see the Add Media option. Click on that.
Step 5: You will see the upload, projects, and emojis options. Click on the emojis option.
Step 6: Emojis will appear. Click on one, and it will be uploaded to the main photo. You can drag, shrink, zoom, or rotate the emoji used. You can add as many emojis you want.
Related: How to make a slo-mo video on Kapwing
#2: Image Online.Co

The next good online tool that you can try is Image Online.Co. It’s a pretty basic tool that lets you upload a photo and add an emoji the right way. It has more than 100 emojis, which is not a lot. But features all the popular emojis that will suit all kinds of images. And it allows you to add your custom emojis, which is why people prefer to use Image Online.Co. Using it is very easy, and the interface of the online tool is easy to understand.
Key Features
- It is a 100% free online tool that won’t ask you to sign up or log in.
- The tool has 100+ emojis to choose from.
- The interface is easy to understand.
- The tool is easy to use.
Steps to Follow to Use Image Online.Co
Step 1: Visit https://emoji.imageonline.co/ , which is their official website.
Step 2: Click on the Select Photo option, else directly drop an image from your local folder.
Step 3: If you want, you can add a custom emoji that you already have.
Step 4: Add an emoji from the right menu and rotate or zoom in or zoom out.
#3: Canva

Canva is arguably one of the best ways to make your photos look better. This tool has tons of features, and the best part is that you can customize a picture with an emoji using one of their templates. It has 250+ emojis and lets you add your customized emoji. And to start using Canva, you will have to sign up.
Key Features
- Canva has more than 250 emojis.
- It lets you edit your photos to enhance their quality.
- One-month free trial.
- You can choose from different templates.
Steps to Follow to Use Canva
Step 1: First, visit https://www.canva.com/ and sign up using your Facebook account or Gmail.
Step 2: Choose the kind of work you would like to do, and you will be taken to the photo editing page.
Step 3: Upload an image and click on the more option.
Step 4: Click on the emoji option and choose an emoji to add to the image. To save, click on the download option.
Related: How to Animate Pictures in Canva
#4: PiZap

PiZap is a photo editing tool that lets you add emojis too. To start using, you will have to log in or sign up. You can use your Facebook, Twitter, or Google account to sign up. It provides you with various graphics, fonts, and other photo editing features to make the image look better than before. The basic tool comes for free and has 232 emojis currently.
Key Features
- The basic tool comes for free.
- There are numerous emojis to choose from.
- The image quality doesn’t lose its original quality.
- Using the tool is easy, and the interface is intuitive.
Steps to Follow to Use PiZap
Step 1: Visit www.pizap.com and click on the try for free option.
Step 2: Click on the edit photo option, and upload an image.
Step 3: From the left-side toolbar, click on the Graphics option. Scroll a bit, and you will see the emoji section.
Step 4: Click on any of the emojis you like to add to the photo. You can adjust the emojis as you want.
#5: Pixelied
![]()
The last website that we have is Pixelied. The free tool will let you edit your image and add emojis, which will be enough if you don’t want many features. Using the tool is easy, and the emojis Pixelied has are great. They are different than general emojis and look better! Plus, the tool provides 300+ fantastic emojis.
Key Features
- The tool has an excellent collection of emojis.
- Adding emojis is extremely easy.
- It is free to use and doesn’t require any photo editing experience.
- The tool also offers various photo editing features.
How to Use Pixelied?
Step 1: Visit pixelied.com and click on the Upload Your Image option.
Step 2: On the left, you will find tons of icons. Use the search bar and type emojis.
Step 3: Browse through the emojis and click on one that you like. You can use multiple emojis, too, if you want. To save, click on the download option.
Part 2: How to Add Emojis to Photo on Wondershare Filmora
Filmora video editor provides tons of emojis that you can add for free, so you can add them to photos directly. What’s more, you can also upload your own emoji and use it in Filmora. All you need to do is download the tool on your Windows or Mac computer and start using it to add an emoji. There are two ways to go about it:
Use Emojis from Elements

Step 1: Launch Wondershare Filmora and click on create a new project.
Step 2: Click on the Elements option on the top and use the search bar to search for emojis.
Step 3: Click on any of the emojis that you like and adjust them.
Step 4: To save the photo with emojis, just click the camera icon to take a screenshot .
The video below shows the animated emojis that you can try in Filmora, take a look and have fun.
For Win 7 or later (64-bit)
For macOS 10.12 or later
Upload Your Own Emoji
Step 1: Launch Wondershare Filmora and add both the emoji and photo.
Step 2: Drag both of them into the timeline.
Step 3: Use the viewer panel to adjust the size of the emoji.

For Win 7 or later (64-bit)
For macOS 10.12 or later
Besides adding emojis to photos or videos, you can also add stickers to videos in Filmora to have fun.
Conclusion
And that’s how you can add an emoji to a photo online easily. You can try all five websites to add emojis to your photos, and if you want, you can download Wondershare Filmora to further edit the image. So, try these tools and make your photo look fun and fantastic!
02 How to Add Emojis to Photo on Wondershare Filmora
Part 1: Top 5 Websites to Add Emojis to Photo Online
#1: Kapwing
One of the best websites is Kapwing, which lets you add emojis to any photo you want. Kapwing is an easy-to-use online tool, which means you will not have to download any tool. But to start using it, you will have to sign up. You can do that by using your Google ID. When it comes to the number of emojis it has, it boasts more than 250 different emojis. It lets you add custom emojis; let’s say you have a pack of custom emojis with you that you want to use; you can do that effortlessly.
Key Features
- It’s an online tool and free to use.
- You need to sign up to save your work.
- It has more than 250 emojis to choose from.
- Kapwing is easy to use.
Steps to Follow to Use Kapwing
Step 1: Visit the official website of Kapwing. You will see the Start Editing option; please click on that.
Step 2: You will see the workspace with an option that says “click to upload.” Click on it.
Step 3: Now, upload a photo that you want to add the emoji too. The image will be uploaded.
Step 4: To add an emoji, look towards the left menu, and you will see the Add Media option. Click on that.
Step 5: You will see the upload, projects, and emojis options. Click on the emojis option.
Step 6: Emojis will appear. Click on one, and it will be uploaded to the main photo. You can drag, shrink, zoom, or rotate the emoji used. You can add as many emojis you want.
Related: How to make a slo-mo video on Kapwing
#2: Image Online.Co
The next good online tool that you can try is Image Online.Co. It’s a pretty basic tool that lets you upload a photo and add an emoji the right way. It has more than 100 emojis, which is not a lot. But features all the popular emojis that will suit all kinds of images. And it allows you to add your custom emojis, which is why people prefer to use Image Online.Co. Using it is very easy, and the interface of the online tool is easy to understand.
Key Features
- It is a 100% free online tool that won’t ask you to sign up or log in.
- The tool has 100+ emojis to choose from.
- The interface is easy to understand.
- The tool is easy to use.
Steps to Follow to Use Image Online.Co
Step 1: Visit https://emoji.imageonline.co/ , which is their official website.
Step 2: Click on the Select Photo option, else directly drop an image from your local folder.
Step 3: If you want, you can add a custom emoji that you already have.
Step 4: Add an emoji from the right menu and rotate or zoom in or zoom out.
#3: Canva
Canva is arguably one of the best ways to make your photos look better. This tool has tons of features, and the best part is that you can customize a picture with an emoji using one of their templates. It has 250+ emojis and lets you add your customized emoji. And to start using Canva, you will have to sign up.
Key Features
- Canva has more than 250 emojis.
- It lets you edit your photos to enhance their quality.
- One-month free trial.
- You can choose from different templates.
Steps to Follow to Use Canva
Step 1: First, visit https://www.canva.com/ and sign up using your Facebook account or Gmail.
Step 2: Choose the kind of work you would like to do, and you will be taken to the photo editing page.
Step 3: Upload an image and click on the more option.
Step 4: Click on the emoji option and choose an emoji to add to the image. To save, click on the download option.
Related: How to Animate Pictures in Canva
#4: PiZap
PiZap is a photo editing tool that lets you add emojis too. To start using, you will have to log in or sign up. You can use your Facebook, Twitter, or Google account to sign up. It provides you with various graphics, fonts, and other photo editing features to make the image look better than before. The basic tool comes for free and has 232 emojis currently.
Key Features
- The basic tool comes for free.
- There are numerous emojis to choose from.
- The image quality doesn’t lose its original quality.
- Using the tool is easy, and the interface is intuitive.
Steps to Follow to Use PiZap
Step 1: Visit www.pizap.com and click on the try for free option.
Step 2: Click on the edit photo option, and upload an image.
Step 3: From the left-side toolbar, click on the Graphics option. Scroll a bit, and you will see the emoji section.
Step 4: Click on any of the emojis you like to add to the photo. You can adjust the emojis as you want.
#5: Pixelied
![]()
The last website that we have is Pixelied. The free tool will let you edit your image and add emojis, which will be enough if you don’t want many features. Using the tool is easy, and the emojis Pixelied has are great. They are different than general emojis and look better! Plus, the tool provides 300+ fantastic emojis.
Key Features
- The tool has an excellent collection of emojis.
- Adding emojis is extremely easy.
- It is free to use and doesn’t require any photo editing experience.
- The tool also offers various photo editing features.
How to Use Pixelied?
Step 1: Visit pixelied.com and click on the Upload Your Image option.
Step 2: On the left, you will find tons of icons. Use the search bar and type emojis.
Step 3: Browse through the emojis and click on one that you like. You can use multiple emojis, too, if you want. To save, click on the download option.
Part 2: How to Add Emojis to Photo on Wondershare Filmora
Filmora video editor provides tons of emojis that you can add for free, so you can add them to photos directly. What’s more, you can also upload your own emoji and use it in Filmora. All you need to do is download the tool on your Windows or Mac computer and start using it to add an emoji. There are two ways to go about it:
Use Emojis from Elements
Step 1: Launch Wondershare Filmora and click on create a new project.
Step 2: Click on the Elements option on the top and use the search bar to search for emojis.
Step 3: Click on any of the emojis that you like and adjust them.
Step 4: To save the photo with emojis, just click the camera icon to take a screenshot .
The video below shows the animated emojis that you can try in Filmora, take a look and have fun.
For Win 7 or later (64-bit)
For macOS 10.12 or later
Upload Your Own Emoji
Step 1: Launch Wondershare Filmora and add both the emoji and photo.
Step 2: Drag both of them into the timeline.
Step 3: Use the viewer panel to adjust the size of the emoji.
For Win 7 or later (64-bit)
For macOS 10.12 or later
Besides adding emojis to photos or videos, you can also add stickers to videos in Filmora to have fun.
Conclusion
And that’s how you can add an emoji to a photo online easily. You can try all five websites to add emojis to your photos, and if you want, you can download Wondershare Filmora to further edit the image. So, try these tools and make your photo look fun and fantastic!
How to Make a iMovie Photo Slideshow with Music? [IMovie Tutorial]
How to Make a iMovie Photo Slideshow with Music? [iMovie Tutorial]

Shanoon Cox
Mar 27, 2024• Proven solutions
Makings a slideshow is a great way to share photos and videos with friends and families. The good news is that you can totally make a slideshow on Mac for free with iMovie. iMovie is the pre-installed program coming with every new Mac. It provides a simple yet professional way to make slideshow movies from your photos, videos, and music.
If you haven’t iMovie installed on your Mac yet, just go to iTunes and download it for free. In the following part, I’ll share with you the step-by-step tutorial on how to make a slideshow on Mac using the free video editing software iMovie.
If you are an iOS user, check our picks of best photo slideshow apps for iPhone or iPad.
Ways for iMovie Photo Slideshow with Music Making
To make a photo slideshow with music in iMovie, you can follow these steps.
1. Create a New Project
After launching iMovie, click the Project button and then click Create New. Select Movie to combine photos, videos and music to make a slideshow.

2. Import Photos, Videos, and Audio Files
Now go to the My Media tab and click the Import icon to add your photos, videos, and music to iMovie, in this way, you can import any media files from any location on your Mac. But if you have arranged all your videos, photos, and music tracks in the Photos app, you can just switch to Photos under the Libraries tab on the left to import.

3. Arrange Media in Timeline and Adjust
Now, it’s time to place all these photos and videos in the timeline in order and do some adjustments. You can use the Magic Wand tool to improve the photo quality automatically, do some color correction, or add a filter to the photo. If you preview the video clip, you will see more options that allow you to do more editing, such as changing speed.
4. Apply Transitions & Effects
Transitions and effects will help you to create a slideshow in a more professional way. Some transitions such as cross dissolve, fade and cross blur are very popular in the slideshow, but remember don’t use lots of different transitions in one slideshow since too many transitions will distract the viewer’s attention. To apply a transition in the slideshow, just drag and drop it between two photos in the timeline.

5. Add Titles and Text
Using some opener titles and credits at the beginning and ending part of your slideshow will make it cool as well. You can add some famous quotes and words to better demonstrate.
Just to the Titles tab and select one of the title templates and drop it to the timeline first and then write your own words in the preview window.

6. Add Music to Slideshow
You can download some royalty-free music and sound effects from websites such as Filmstock stock media library or iTunes or import your own audio as we said before to use it as the slideshow background music. To sync with the slideshow, you may need to trim and edit the audio accordingly. For detailed information about iMovie audio editing, you can check how to add background music to iMovie.
Filmstock Stock Media Library ](https://tools.techidaily.com/wondershare/filmora/download/ )
7. Export and Share Your Slideshow video
Play the slideshow and check the result in the preview window. If everything goes well, you can now export and share or save it. You can save the slideshow video in MP4 format, or share it to Vimeo or add the slideshow to Theater to load it on your other Apple devices so you can easily watch it on your iOS devices or Apple TV.
I hope the above tutorial about how to make a slideshow on iMovie will be helpful for your stunning slideshow creation.
If you’re running an old macOS version and having iPhoto installed on your Mac, here are the detailed steps about How to make slideshow in iMovie with iPhoto project.
Step 1. Import Photos from the iPhoto Library
iMovie works seamlessly with iPhoto. You are suggested to drag and drop photos from iPhoto to the iMovie project. If no library exists in iPhoto, create one and import photos to iPhoto first. To add videos, you could go to either “File/Import” or Event Library, and then drag and drop selected videos to the timeline.
After photos and videos are imported to the iMovie slideshow project, you can preview the raw slideshow simply by pressing Space bar on your keyboard. And then make adjustments to clips and transitions. For example, mouse over one clip or “double arrow” button and click on the settings icon, then you could access clip adjustment, video adjustment, transition adjustment, etc.

Step 2. Add Music to Your iMovie Slideshow Project
Music sets the tone of your slideshow. Adding musing to the iMovie slideshow is just as simple as adding photos and videos.
So click the audio icon in the bottom right corner, and drag and drop the desired audio file to the timeline. Multiple songs could be added to iMovie.
However, iMovie doesn’t support multiple soundtracks. If necessary, you need to combine multiple song tracks with an external audio editor before importing them to the iMovie slideshow. You can also apply audio effects and filter sound using an equalizer.

Step 3. Export Your iMovie Slideshow Video
iMovie makes sharing possibilities endless. For those who upload their videos online, iMovie allows users to directly upload to MobileMe Gallery, YouTube, Facebook, Vimeo, CNN iReport, etc.
If you select to share the iMovie slideshow using Media Browser, you will get a slideshow appeared in other Mac applications like iWeb. It’s a good idea to export the iMovie slideshow to iTunes so that you can play back slideshow quickly and easily sync with your mobile devices like iPhone, iPod, and iPad.

You may also like: How to Add Text with iMovie in Mac and iPhone >>
Recommendation: Create Slideshow on Mac with More Templates and Transitions with Filmora
If you want to make a slideshow with some templates on Mac, you can try Wondershare Filmora . Filmora can turn photos and videos into attractive slideshow videos with various inbuilt filters, transitions, elements, animations, effects, and overlays. Click the Free Download button and have a try.


Check the ultimate guide about making a slideshow with music and titles in Filmora .
If you are going to make a slideshow with music on Windows, you may need a slideshow-making tool to do it by yourself. Wondershare Filmora will also be a good choice. It helps you instantly make such an impressive slideshow from photos and videos for sharing virtually anywhere.
Shanoon Cox
Shanoon Cox is a writer and a lover of all things video.
Follow @Shanoon Cox
Shanoon Cox
Mar 27, 2024• Proven solutions
Makings a slideshow is a great way to share photos and videos with friends and families. The good news is that you can totally make a slideshow on Mac for free with iMovie. iMovie is the pre-installed program coming with every new Mac. It provides a simple yet professional way to make slideshow movies from your photos, videos, and music.
If you haven’t iMovie installed on your Mac yet, just go to iTunes and download it for free. In the following part, I’ll share with you the step-by-step tutorial on how to make a slideshow on Mac using the free video editing software iMovie.
If you are an iOS user, check our picks of best photo slideshow apps for iPhone or iPad.
Ways for iMovie Photo Slideshow with Music Making
To make a photo slideshow with music in iMovie, you can follow these steps.
1. Create a New Project
After launching iMovie, click the Project button and then click Create New. Select Movie to combine photos, videos and music to make a slideshow.
2. Import Photos, Videos, and Audio Files
Now go to the My Media tab and click the Import icon to add your photos, videos, and music to iMovie, in this way, you can import any media files from any location on your Mac. But if you have arranged all your videos, photos, and music tracks in the Photos app, you can just switch to Photos under the Libraries tab on the left to import.
3. Arrange Media in Timeline and Adjust
Now, it’s time to place all these photos and videos in the timeline in order and do some adjustments. You can use the Magic Wand tool to improve the photo quality automatically, do some color correction, or add a filter to the photo. If you preview the video clip, you will see more options that allow you to do more editing, such as changing speed.
4. Apply Transitions & Effects
Transitions and effects will help you to create a slideshow in a more professional way. Some transitions such as cross dissolve, fade and cross blur are very popular in the slideshow, but remember don’t use lots of different transitions in one slideshow since too many transitions will distract the viewer’s attention. To apply a transition in the slideshow, just drag and drop it between two photos in the timeline.
5. Add Titles and Text
Using some opener titles and credits at the beginning and ending part of your slideshow will make it cool as well. You can add some famous quotes and words to better demonstrate.
Just to the Titles tab and select one of the title templates and drop it to the timeline first and then write your own words in the preview window.
6. Add Music to Slideshow
You can download some royalty-free music and sound effects from websites such as Filmstock stock media library or iTunes or import your own audio as we said before to use it as the slideshow background music. To sync with the slideshow, you may need to trim and edit the audio accordingly. For detailed information about iMovie audio editing, you can check how to add background music to iMovie.
Filmstock Stock Media Library ](https://tools.techidaily.com/wondershare/filmora/download/ )
7. Export and Share Your Slideshow video
Play the slideshow and check the result in the preview window. If everything goes well, you can now export and share or save it. You can save the slideshow video in MP4 format, or share it to Vimeo or add the slideshow to Theater to load it on your other Apple devices so you can easily watch it on your iOS devices or Apple TV.
I hope the above tutorial about how to make a slideshow on iMovie will be helpful for your stunning slideshow creation.
If you’re running an old macOS version and having iPhoto installed on your Mac, here are the detailed steps about How to make slideshow in iMovie with iPhoto project.
Step 1. Import Photos from the iPhoto Library
iMovie works seamlessly with iPhoto. You are suggested to drag and drop photos from iPhoto to the iMovie project. If no library exists in iPhoto, create one and import photos to iPhoto first. To add videos, you could go to either “File/Import” or Event Library, and then drag and drop selected videos to the timeline.
After photos and videos are imported to the iMovie slideshow project, you can preview the raw slideshow simply by pressing Space bar on your keyboard. And then make adjustments to clips and transitions. For example, mouse over one clip or “double arrow” button and click on the settings icon, then you could access clip adjustment, video adjustment, transition adjustment, etc.
Step 2. Add Music to Your iMovie Slideshow Project
Music sets the tone of your slideshow. Adding musing to the iMovie slideshow is just as simple as adding photos and videos.
So click the audio icon in the bottom right corner, and drag and drop the desired audio file to the timeline. Multiple songs could be added to iMovie.
However, iMovie doesn’t support multiple soundtracks. If necessary, you need to combine multiple song tracks with an external audio editor before importing them to the iMovie slideshow. You can also apply audio effects and filter sound using an equalizer.
Step 3. Export Your iMovie Slideshow Video
iMovie makes sharing possibilities endless. For those who upload their videos online, iMovie allows users to directly upload to MobileMe Gallery, YouTube, Facebook, Vimeo, CNN iReport, etc.
If you select to share the iMovie slideshow using Media Browser, you will get a slideshow appeared in other Mac applications like iWeb. It’s a good idea to export the iMovie slideshow to iTunes so that you can play back slideshow quickly and easily sync with your mobile devices like iPhone, iPod, and iPad.
You may also like: How to Add Text with iMovie in Mac and iPhone >>
Recommendation: Create Slideshow on Mac with More Templates and Transitions with Filmora
If you want to make a slideshow with some templates on Mac, you can try Wondershare Filmora . Filmora can turn photos and videos into attractive slideshow videos with various inbuilt filters, transitions, elements, animations, effects, and overlays. Click the Free Download button and have a try.
Check the ultimate guide about making a slideshow with music and titles in Filmora .
If you are going to make a slideshow with music on Windows, you may need a slideshow-making tool to do it by yourself. Wondershare Filmora will also be a good choice. It helps you instantly make such an impressive slideshow from photos and videos for sharing virtually anywhere.
Shanoon Cox
Shanoon Cox is a writer and a lover of all things video.
Follow @Shanoon Cox
What Is Emoji and What Does It Mean?
What Is Emoji?
Shanoon Cox
Mar 27, 2024• Proven solutions
If you ever wondered what is emoji, and how the term relates (or unrelates) to its elder sibling emoticon, you are at the right place. In the following sections, you will learn some quite interesting facts about the two, what different types of emojis are available, and what do they mean.
Because understanding the meaning of emojis is more important as compared to knowing what is an emoji itself, here you will get all the related details, relevant answers, and some best practice tips.
Part 1: What Is an Emoji?
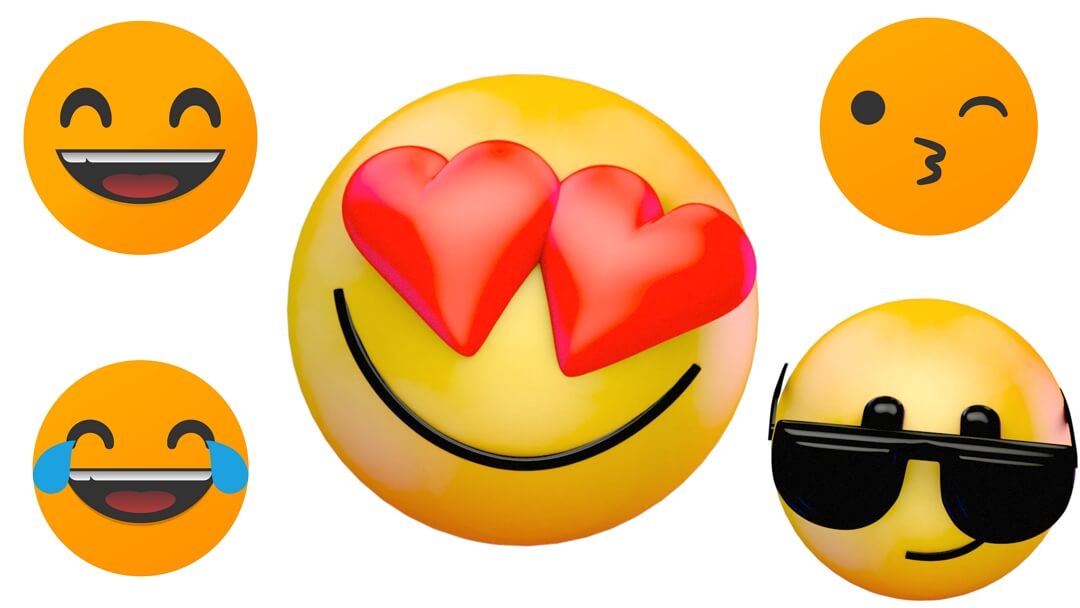
In a nutshell, an emoji is a graphical image that reflects a certain facial expression. Emojis are created using a drawing tool, and are incorporated into a unique 16-bit Unicode in order to make them compatible with operating systems of the most common devices and platforms like iOS, Android, macOS, and Windows.
In addition to being merely a picture, emojis are also animated to exaggerate the message senders’ emotions. You can find a couple of decent examples of such animations while using Skype messenger.
The reason behind emojis being more popular than the emoticons used earlier is the close resemblance of the former to the real-like expressions that they reflect when sent to a recipient. Therefore, it would be safe to say that a single emoji could be worth several sentences while texting if used correctly.
Part 2: What are the Differences Between Emojis and Emoticons?
As explained earlier, the emojis are graphical and sometimes animated Unicode illustrations that can be included in the text messages as objects.
On the other hand, the emoticons are formed using the ASCII characters, and no specific coding is required at the users’ side to create them. Simply put, an emoticon can be easily added to a text message or even to an email merely by using a combination of letters on the keyboard.
For instance, to create an emoticon of a smiley face, all you need to do is, type a colon sign along with a closing brace. (E.g. Typing a : and ) without space will become a smiling face, a : and ( will form a sad face, and so on).
To be clearer, emojis can be considered an advanced, better, and evolved version of emoticons. While the latter can be formed using simple characters like letters and symbols, the former is inserted as an object in the text messages.
Part 3: Where to Find the Meaning of Emojis?
Once you have understood what emoji is, it is now time to learn what the emojis mean. This part is imperative to ensure you don’t send a wrong emotional expression to your friends or family members, and get into some awkward situation after that.
Below is a list of some useful online websites and dictionaries that can help you find correct emojis along with their meanings to make your text conversation more meaningful and interesting:
1. Emojipedia
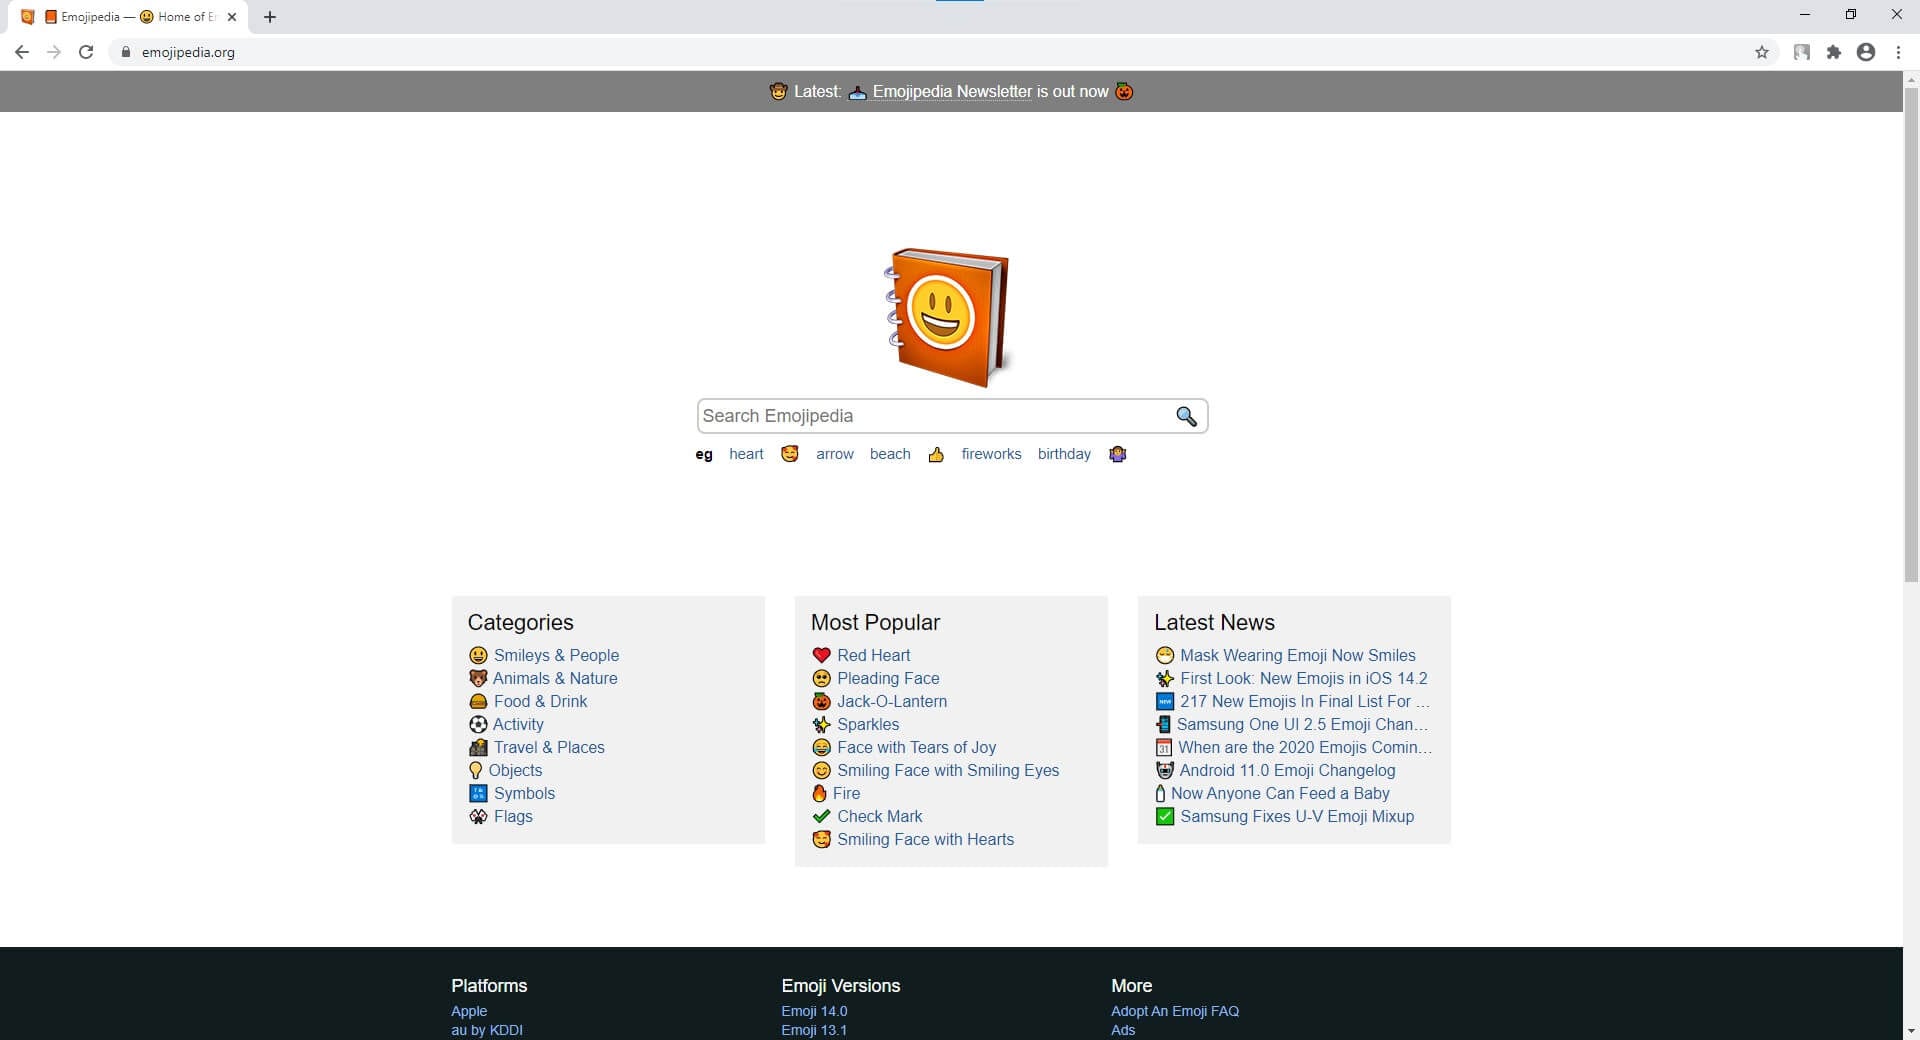
Emojipedia is an online library that holds several emojis. All the emojis that the portal has are placed in their corresponding categories.
Another section on the landing page of the website contains some of the most popular emojis, i.e. those that are mostly used by the texters during their conversions. Furthermore, the name of the emoji is present right next to it, and the entire part is hyperlinked which when clicked, takes you to a new page that has all the details about the object including its meaning, alternate names, and a button to copy the emoji to the clip board. The copied element can then be pasted in the text input field of a compatible messenger such as Facebook.
2. EMOJI DICTIONARY
https://www.dictionary.com/e/emoji/
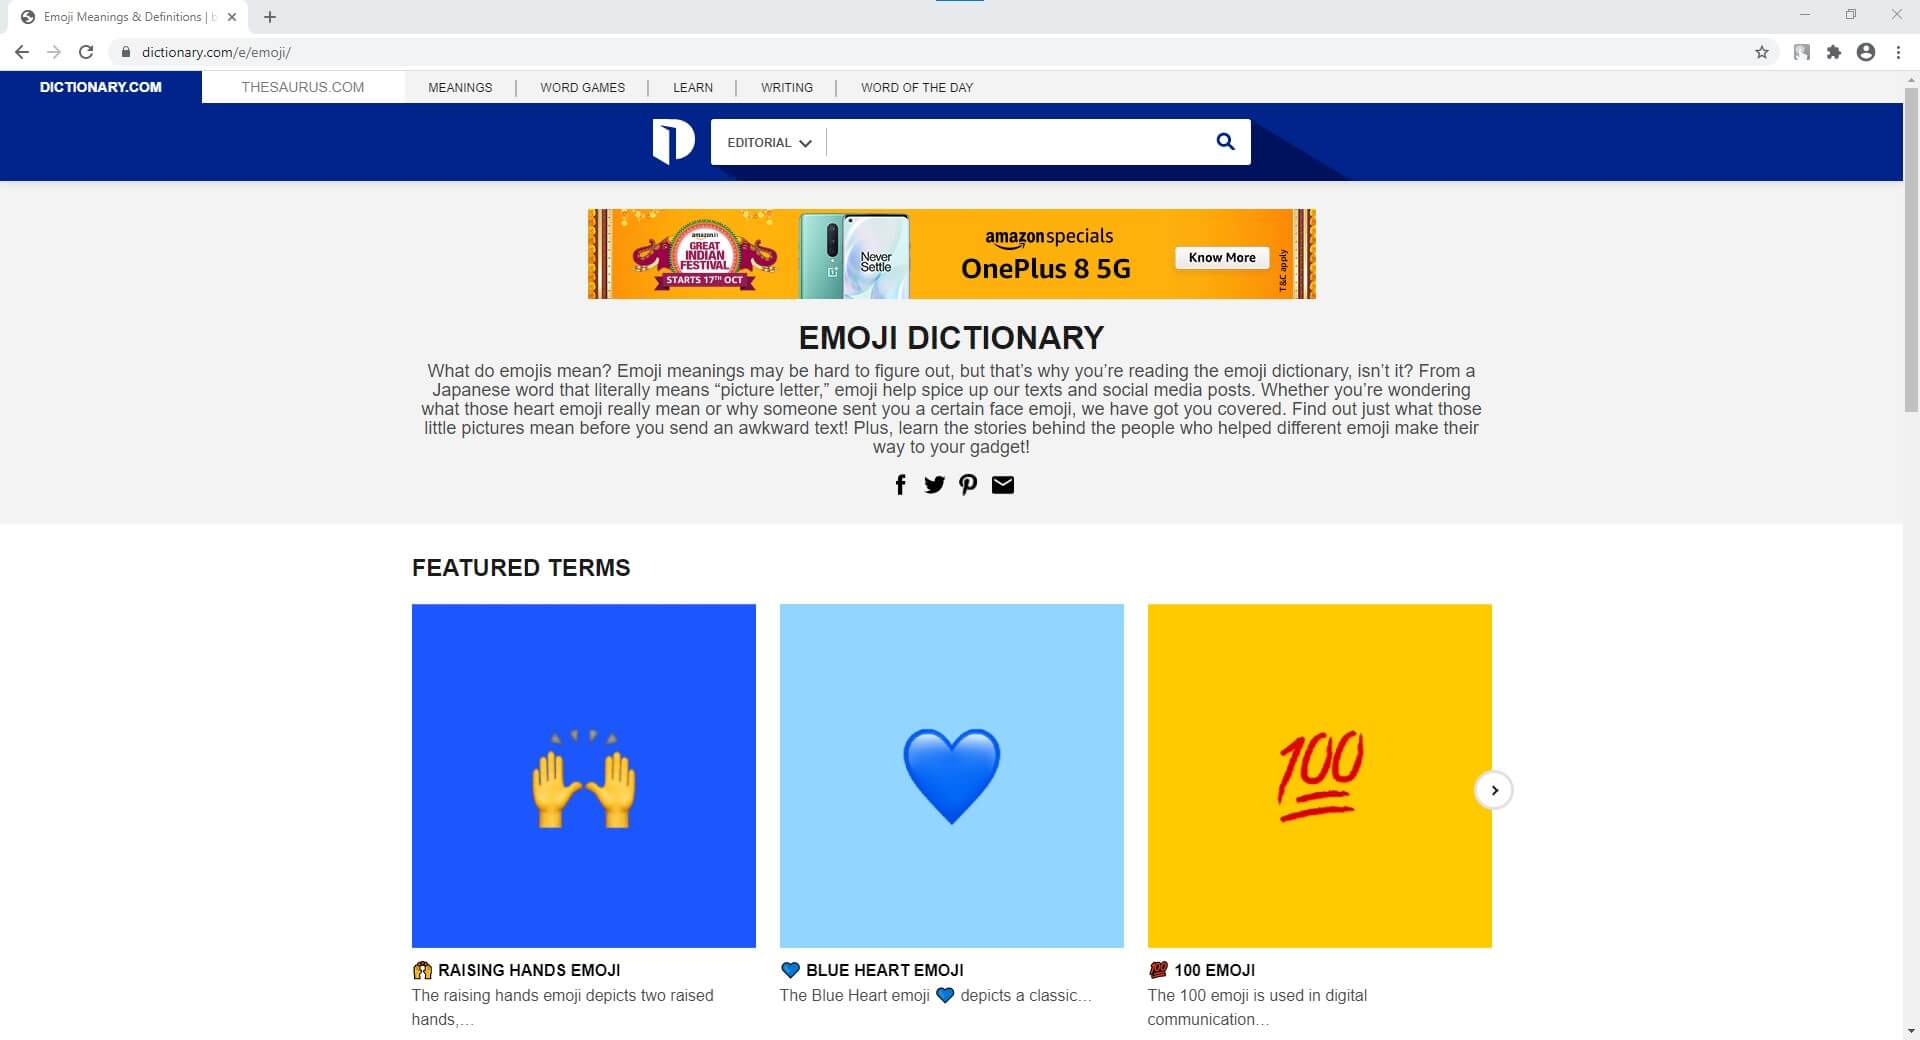
EMOJI DICTIONARY is another online portal that contains almost all the commonly used emojis. The upper section of the page is dedicated to ‘Featured Terms’ with a slider that has all the featured emojis. The next segment lists all the categories other than emojis.
The bottom area of the landing page has all the emojis along with their names and/or the supported devices. All the names in the section are hyperlinked that open a new page when clicked, and show all the details such as examples, usage, and origin related to that particular emoji.
3. Emoji Dictionary
https://emojidictionary.emojifoundation.com/
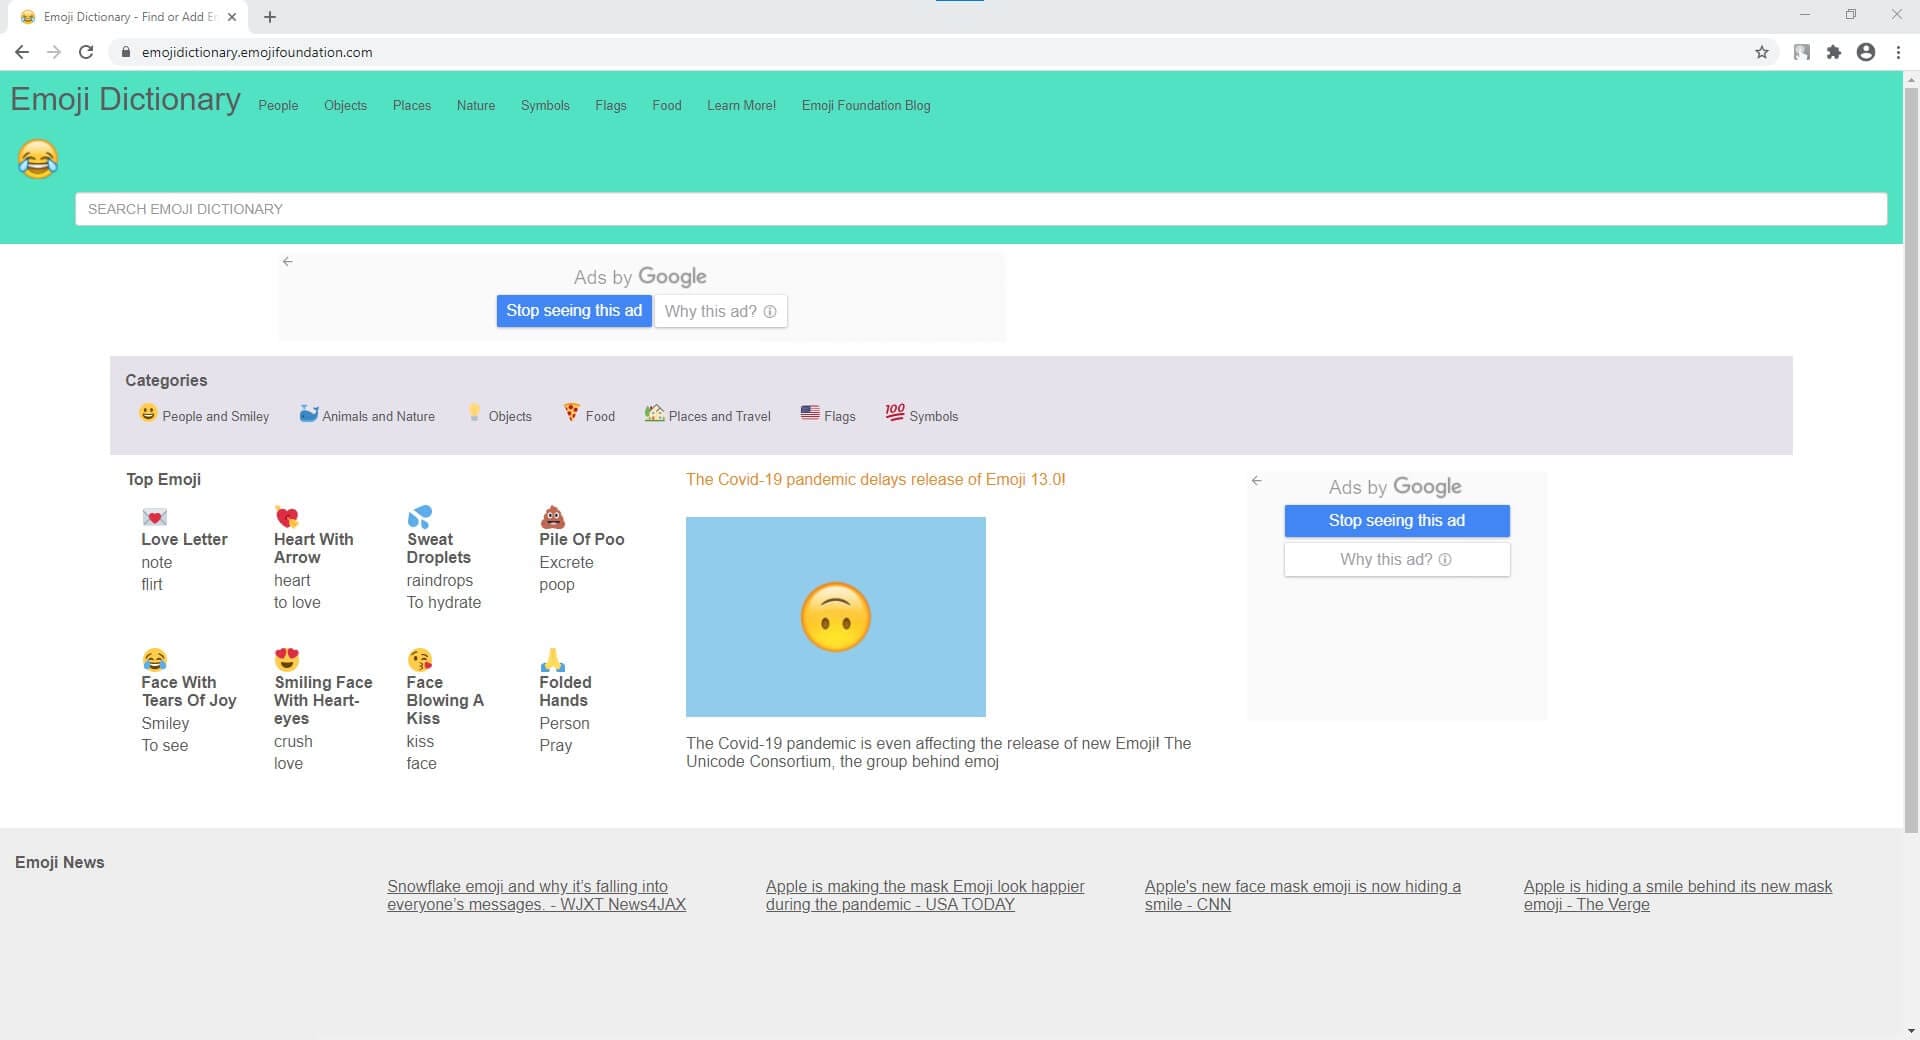
This one is unique in its own way as in along with listing the most popular emojis and their names and definitions, it also allows you to include your own information in case you know something other than what is already present.
In addition to displaying the top emojis right on the landing page, the portal also has a category list where each segment holds its corresponding objects. This helps in locating your favorite elements easily and quickly. Furthermore, when you click an emoji, a new page opens up with all its definition from different aspects such as nouns, verbs, etc., along with a ‘Copy’ button that lets you copy the image to the clipboard, and use it on a compatible messaging app.
4. EmojiMeanings
https://www.emojimeanings.net/
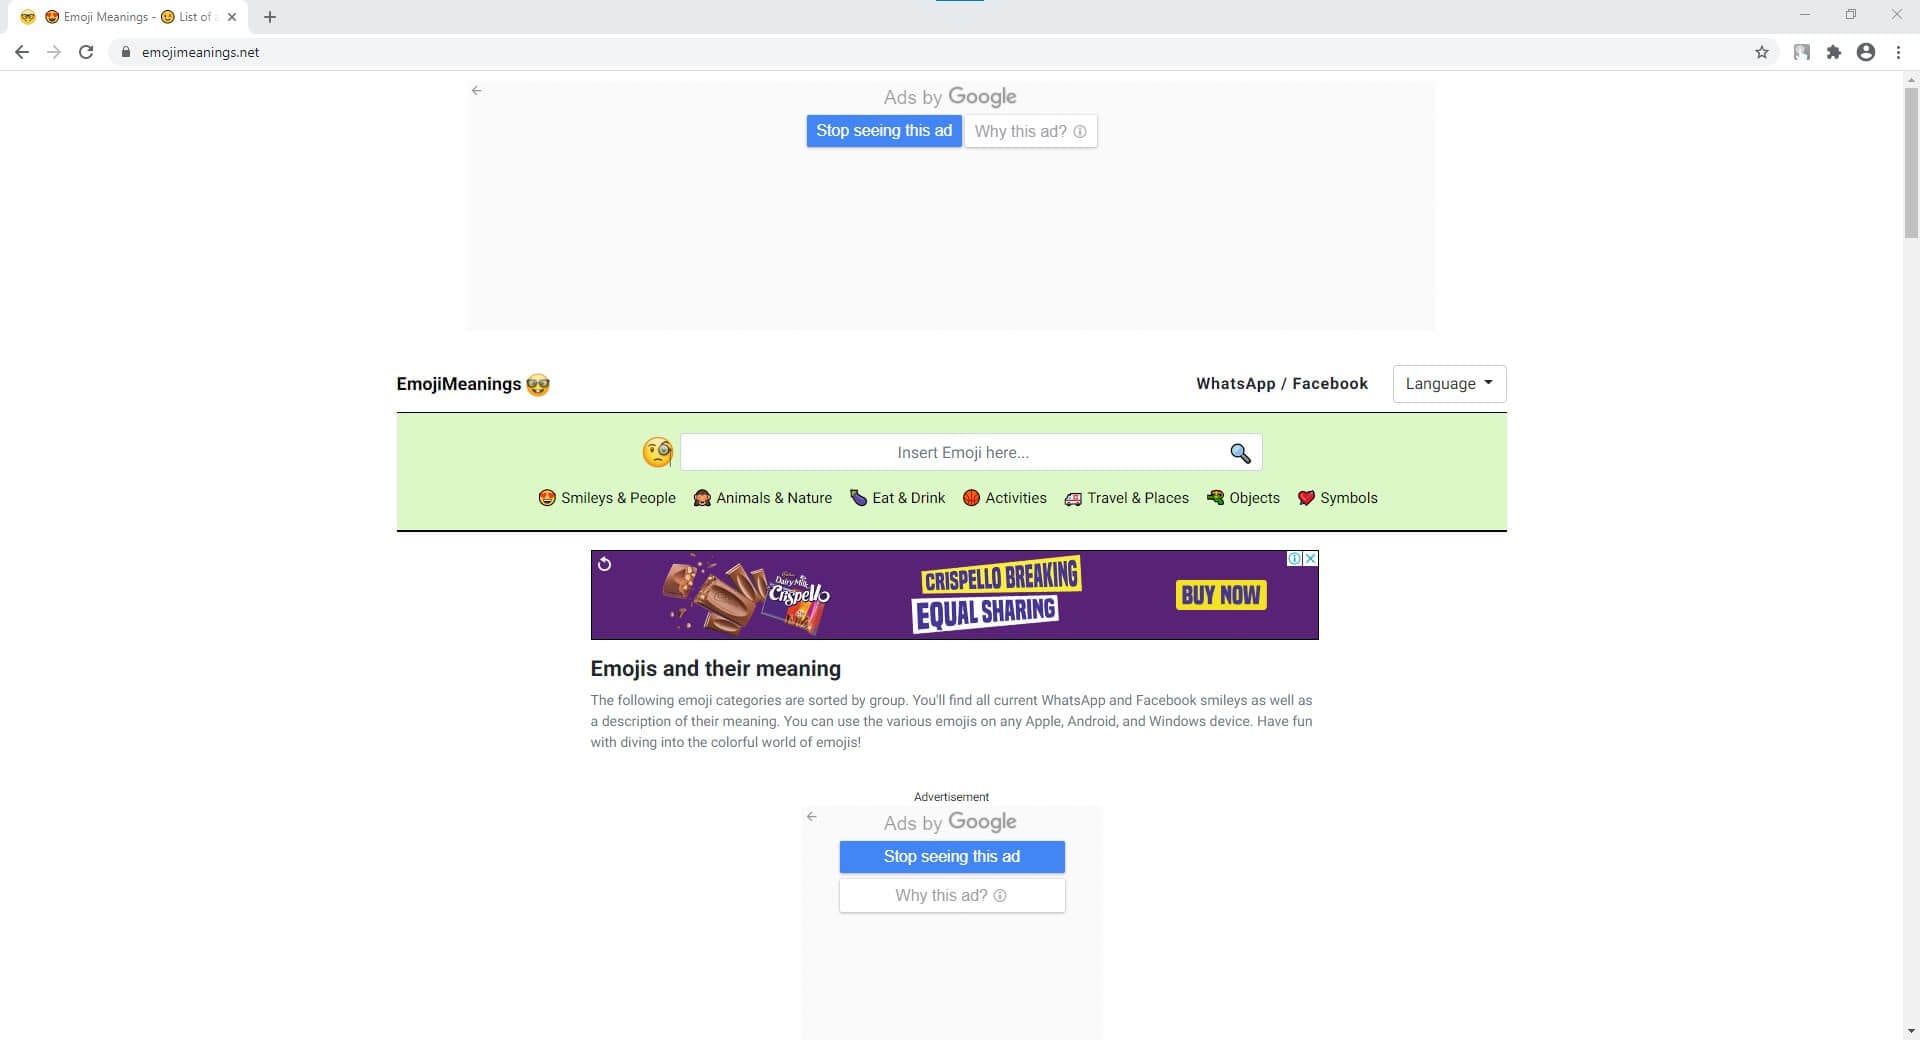
The landing page of EmojiMeanings is populated with all the categories where each holds several relevant emojis, thus making it easier for the users to find and learn their meaning. The home page also has complete information about what emojis are, how they are different from emoticons, and what does the term ‘smiley’ actually mean.
When you click a category, a new page opens up with three major columns titled as ‘Emoji’, ‘Meaning’, and ‘Unicode’ that show an emoji itself, explain what it means, and what Unicode is used to form it respectively. All the emojis on EmojiMeanings are usually compatible with WhatsApp and Facebook.
5. HotEmoji
https://hotemoji.com/emoji-meanings.html
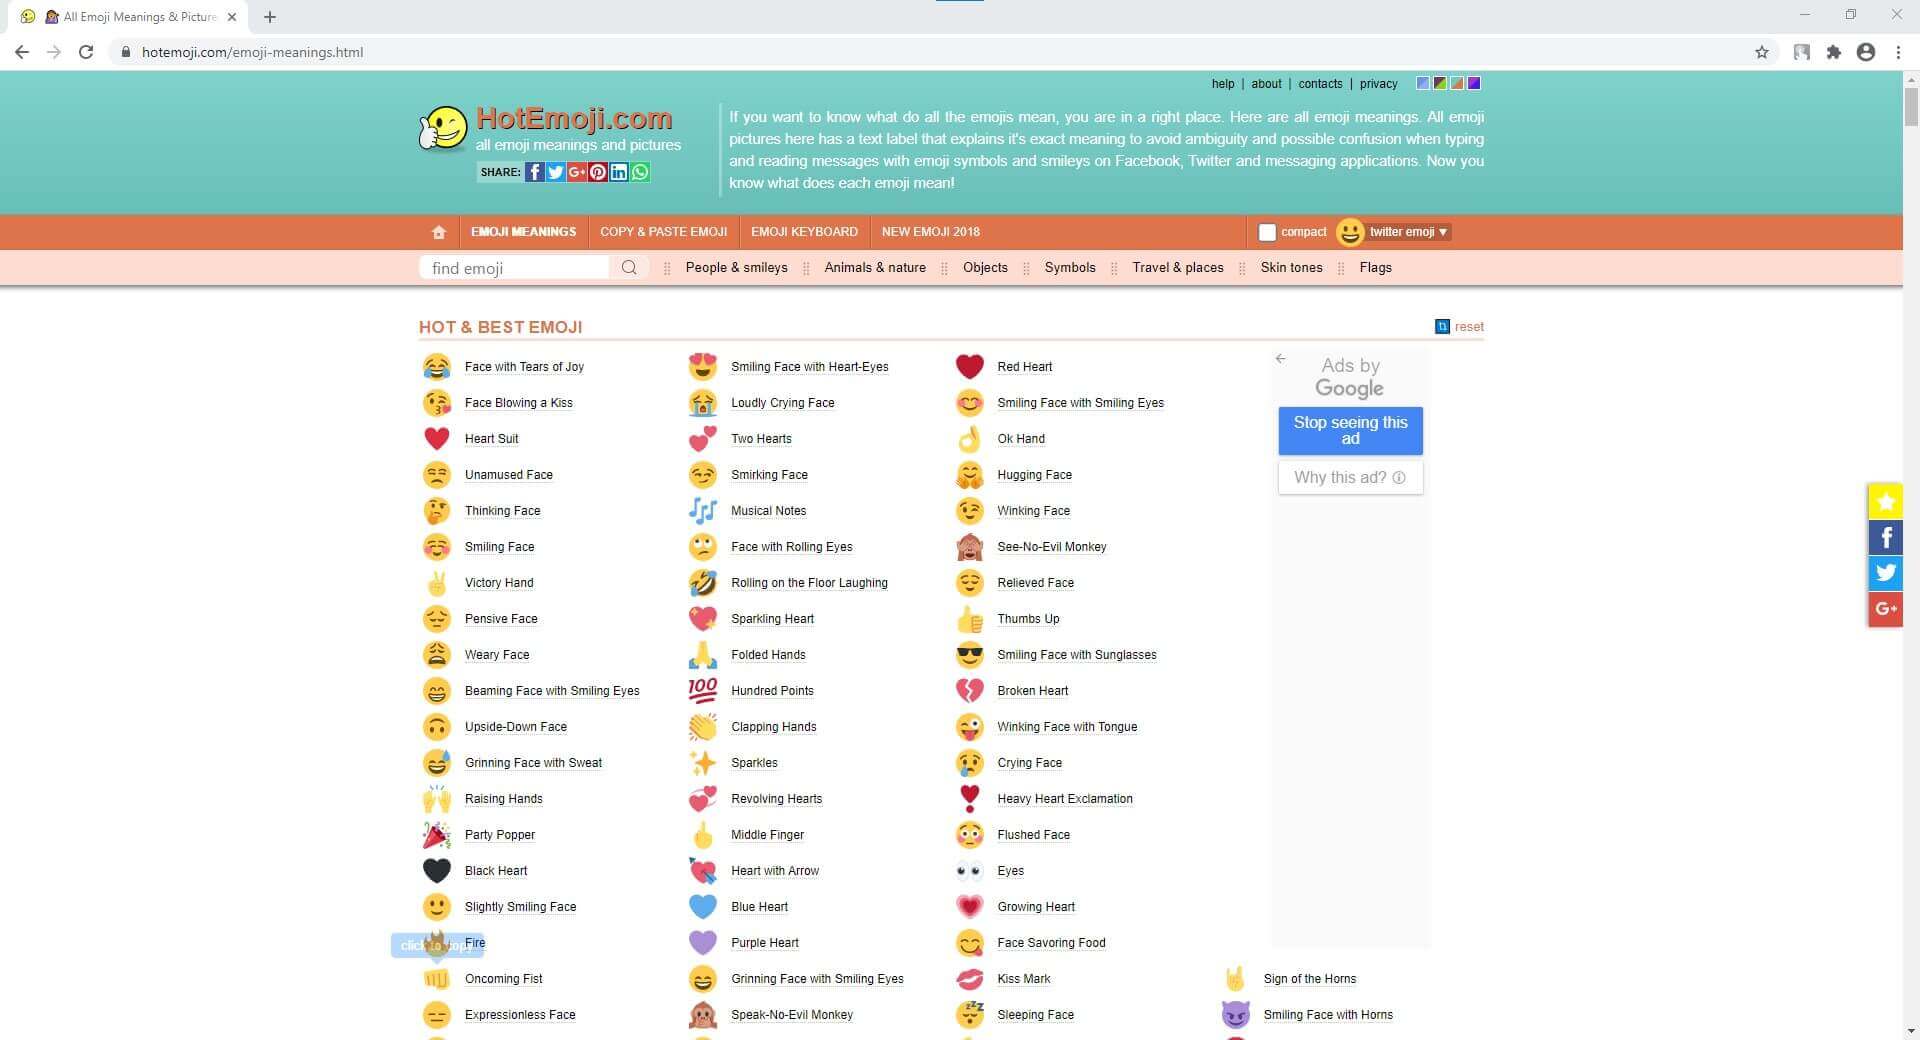
HotEmoji is yet another online portal that lists almost all the emojis along with their meanings. Each entry is hyperlinked which when clicked opens a new web page dedicated to that particular emoji where all the details about it are mentioned.
The new page also has a ‘Copy’ button that can be used to copy the object to the clipboard, and then the element can be pasted onto any compatible messenger during a text conversation.
Part 4: How to Find Emoji on Any Device?
While locating and inserting emojis on any messaging app on your smartphone is fairly simple as the messenger already has an icon that opens the entire emoji library when tapped, things are a bit tricky while using a Mac or Windows PC. Therefore, the following points explain how to find and use emojis on the computer running any of these operating systems:
How to Find Emojis on Windows 8 and Windows 10
On Windows 8 or Windows 10 computers, click the ‘Keyboard’ icon that is present in the ‘Notification area’ at the bottom-right corner of the screen, i.e. right side of the taskbar. When the list of emojis appears, you can click your favorite one and use it in the messenger.
How to Find Emojis on macOS
While using a Mac computer, you can open the app you want to add an emoji to, and then press the ctrl + cmd + spacebar keys on the keyboard.
Part 5: Most Common Emoji Categories
Some of the most commonly used categories that you must know after understanding what is an emoji include:
- Smileys & People – Holds the images of faces reflecting facial expressions and the vector images/animations of some popular people
- Animals & Nature – Contains the images/animations of animals and other natural elements such as trees, rocks, mountains, etc.
- Food & Drink – This category has vector images of beautifully decorated and well-aligned wine glasses, soft drink cans, pizza slices, etc.
- Activity – Has the emojis that reflect certain actions such as dance stances, walking, running, etc.
- Travel & Places – Is equipped with vectors of transportation mediums and locations such as trains, buses, buildings, banks, etc.
- Objects – Is populated with miscellaneous objects like a pair of shoes, suits, clocks, socks, etc.
- Symbols – This one consists of different types of symbols such as an equal to sign, stop sign, delta symbol, and many more
- Flags – This category contains flags of almost all the countries of the world. These emojis are mostly used to illustrate your current or destination location for reference
Part 6: Tips of Using Emojis
It is always a good idea to use emojis every now and then. However, using too many of them in your conversation might make the entire text look overly populated, and your communication partner may lose interest in you. Therefore, understanding when and how to use emojis is as important as it is to know what the emoji means.
Add Emojis to Video with Filmora

If you want to add animated emojis to video and share on social media, then Filmora is a good choice. Besides the built-in free animated emojis under Effects tab, you will also find some free or paid animated emojis or stickers on the effects store Filmstock. Download the free trial version of Filmora and create videos with fun.
Shanoon Cox
Shanoon Cox is a writer and a lover of all things video.
Follow @Shanoon Cox
Shanoon Cox
Mar 27, 2024• Proven solutions
If you ever wondered what is emoji, and how the term relates (or unrelates) to its elder sibling emoticon, you are at the right place. In the following sections, you will learn some quite interesting facts about the two, what different types of emojis are available, and what do they mean.
Because understanding the meaning of emojis is more important as compared to knowing what is an emoji itself, here you will get all the related details, relevant answers, and some best practice tips.
Part 1: What Is an Emoji?
In a nutshell, an emoji is a graphical image that reflects a certain facial expression. Emojis are created using a drawing tool, and are incorporated into a unique 16-bit Unicode in order to make them compatible with operating systems of the most common devices and platforms like iOS, Android, macOS, and Windows.
In addition to being merely a picture, emojis are also animated to exaggerate the message senders’ emotions. You can find a couple of decent examples of such animations while using Skype messenger.
The reason behind emojis being more popular than the emoticons used earlier is the close resemblance of the former to the real-like expressions that they reflect when sent to a recipient. Therefore, it would be safe to say that a single emoji could be worth several sentences while texting if used correctly.
Part 2: What are the Differences Between Emojis and Emoticons?
As explained earlier, the emojis are graphical and sometimes animated Unicode illustrations that can be included in the text messages as objects.
On the other hand, the emoticons are formed using the ASCII characters, and no specific coding is required at the users’ side to create them. Simply put, an emoticon can be easily added to a text message or even to an email merely by using a combination of letters on the keyboard.
For instance, to create an emoticon of a smiley face, all you need to do is, type a colon sign along with a closing brace. (E.g. Typing a : and ) without space will become a smiling face, a : and ( will form a sad face, and so on).
To be clearer, emojis can be considered an advanced, better, and evolved version of emoticons. While the latter can be formed using simple characters like letters and symbols, the former is inserted as an object in the text messages.
Part 3: Where to Find the Meaning of Emojis?
Once you have understood what emoji is, it is now time to learn what the emojis mean. This part is imperative to ensure you don’t send a wrong emotional expression to your friends or family members, and get into some awkward situation after that.
Below is a list of some useful online websites and dictionaries that can help you find correct emojis along with their meanings to make your text conversation more meaningful and interesting:
1. Emojipedia
Emojipedia is an online library that holds several emojis. All the emojis that the portal has are placed in their corresponding categories.
Another section on the landing page of the website contains some of the most popular emojis, i.e. those that are mostly used by the texters during their conversions. Furthermore, the name of the emoji is present right next to it, and the entire part is hyperlinked which when clicked, takes you to a new page that has all the details about the object including its meaning, alternate names, and a button to copy the emoji to the clip board. The copied element can then be pasted in the text input field of a compatible messenger such as Facebook.
2. EMOJI DICTIONARY
https://www.dictionary.com/e/emoji/
EMOJI DICTIONARY is another online portal that contains almost all the commonly used emojis. The upper section of the page is dedicated to ‘Featured Terms’ with a slider that has all the featured emojis. The next segment lists all the categories other than emojis.
The bottom area of the landing page has all the emojis along with their names and/or the supported devices. All the names in the section are hyperlinked that open a new page when clicked, and show all the details such as examples, usage, and origin related to that particular emoji.
3. Emoji Dictionary
https://emojidictionary.emojifoundation.com/
This one is unique in its own way as in along with listing the most popular emojis and their names and definitions, it also allows you to include your own information in case you know something other than what is already present.
In addition to displaying the top emojis right on the landing page, the portal also has a category list where each segment holds its corresponding objects. This helps in locating your favorite elements easily and quickly. Furthermore, when you click an emoji, a new page opens up with all its definition from different aspects such as nouns, verbs, etc., along with a ‘Copy’ button that lets you copy the image to the clipboard, and use it on a compatible messaging app.
4. EmojiMeanings
https://www.emojimeanings.net/
The landing page of EmojiMeanings is populated with all the categories where each holds several relevant emojis, thus making it easier for the users to find and learn their meaning. The home page also has complete information about what emojis are, how they are different from emoticons, and what does the term ‘smiley’ actually mean.
When you click a category, a new page opens up with three major columns titled as ‘Emoji’, ‘Meaning’, and ‘Unicode’ that show an emoji itself, explain what it means, and what Unicode is used to form it respectively. All the emojis on EmojiMeanings are usually compatible with WhatsApp and Facebook.
5. HotEmoji
https://hotemoji.com/emoji-meanings.html
HotEmoji is yet another online portal that lists almost all the emojis along with their meanings. Each entry is hyperlinked which when clicked opens a new web page dedicated to that particular emoji where all the details about it are mentioned.
The new page also has a ‘Copy’ button that can be used to copy the object to the clipboard, and then the element can be pasted onto any compatible messenger during a text conversation.
Part 4: How to Find Emoji on Any Device?
While locating and inserting emojis on any messaging app on your smartphone is fairly simple as the messenger already has an icon that opens the entire emoji library when tapped, things are a bit tricky while using a Mac or Windows PC. Therefore, the following points explain how to find and use emojis on the computer running any of these operating systems:
How to Find Emojis on Windows 8 and Windows 10
On Windows 8 or Windows 10 computers, click the ‘Keyboard’ icon that is present in the ‘Notification area’ at the bottom-right corner of the screen, i.e. right side of the taskbar. When the list of emojis appears, you can click your favorite one and use it in the messenger.
How to Find Emojis on macOS
While using a Mac computer, you can open the app you want to add an emoji to, and then press the ctrl + cmd + spacebar keys on the keyboard.
Part 5: Most Common Emoji Categories
Some of the most commonly used categories that you must know after understanding what is an emoji include:
- Smileys & People – Holds the images of faces reflecting facial expressions and the vector images/animations of some popular people
- Animals & Nature – Contains the images/animations of animals and other natural elements such as trees, rocks, mountains, etc.
- Food & Drink – This category has vector images of beautifully decorated and well-aligned wine glasses, soft drink cans, pizza slices, etc.
- Activity – Has the emojis that reflect certain actions such as dance stances, walking, running, etc.
- Travel & Places – Is equipped with vectors of transportation mediums and locations such as trains, buses, buildings, banks, etc.
- Objects – Is populated with miscellaneous objects like a pair of shoes, suits, clocks, socks, etc.
- Symbols – This one consists of different types of symbols such as an equal to sign, stop sign, delta symbol, and many more
- Flags – This category contains flags of almost all the countries of the world. These emojis are mostly used to illustrate your current or destination location for reference
Part 6: Tips of Using Emojis
It is always a good idea to use emojis every now and then. However, using too many of them in your conversation might make the entire text look overly populated, and your communication partner may lose interest in you. Therefore, understanding when and how to use emojis is as important as it is to know what the emoji means.
Add Emojis to Video with Filmora
If you want to add animated emojis to video and share on social media, then Filmora is a good choice. Besides the built-in free animated emojis under Effects tab, you will also find some free or paid animated emojis or stickers on the effects store Filmstock. Download the free trial version of Filmora and create videos with fun.
Shanoon Cox
Shanoon Cox is a writer and a lover of all things video.
Follow @Shanoon Cox
How to Add Stickers to WhatsApp-The Ultimate Guide
How to Add Stickers to WhatsApp-The Ultimate Guide
Shanoon Cox
Mar 27, 2024• Proven solutions
Whatsapp has recently added the stickers feature, and people are going crazy about adding stickers to WhatsApp. But the question is how to add stickers to Whatsapp? To help with that, we will walk you through a detailed guide on how to add stickers to Whatsapp and bring a dash of fun to boring texts.
Now, if you don’t know how to add stickers to WhatsApp and use stickers on Whatsapp, we have you covered.
- Part 1: How to Create Stickers for WhatsApp
- Part 2: How to Add Stickers to WhatsApp
- Part 3: How to Send Stickers on WhatsApp
- Part 4: Bonus Tip—Add Sticker to Your Video with Wondershare Filmora
Part 1: How to Create Stickers for WhatsApp
Whatsapp stickers are now a significant part of our daily conversations. Because let’s face it, life would be boring without them. Perhaps it’s time to up your game by learning how to add stickers to Whatsapp
Even though Whatsapp has a vast library of stickers available, creating a unique sticker is more fun. And the latest apps have made it incredibly easy to create customized stickers. So all you need to do now is learn how to use stickers in Whatsapp
Sticker Make for Whatsapp is one such app. It is free and requires no registrations. Download the app from Google Store and start creating hilarious stickers to surprise your friends.
1. Download Sticker Make and launch it. On the homepage, you will be presented with two options. Click Create to make a sticker from scratch using your own image or click on Animated to insert your picture in a sticker template.
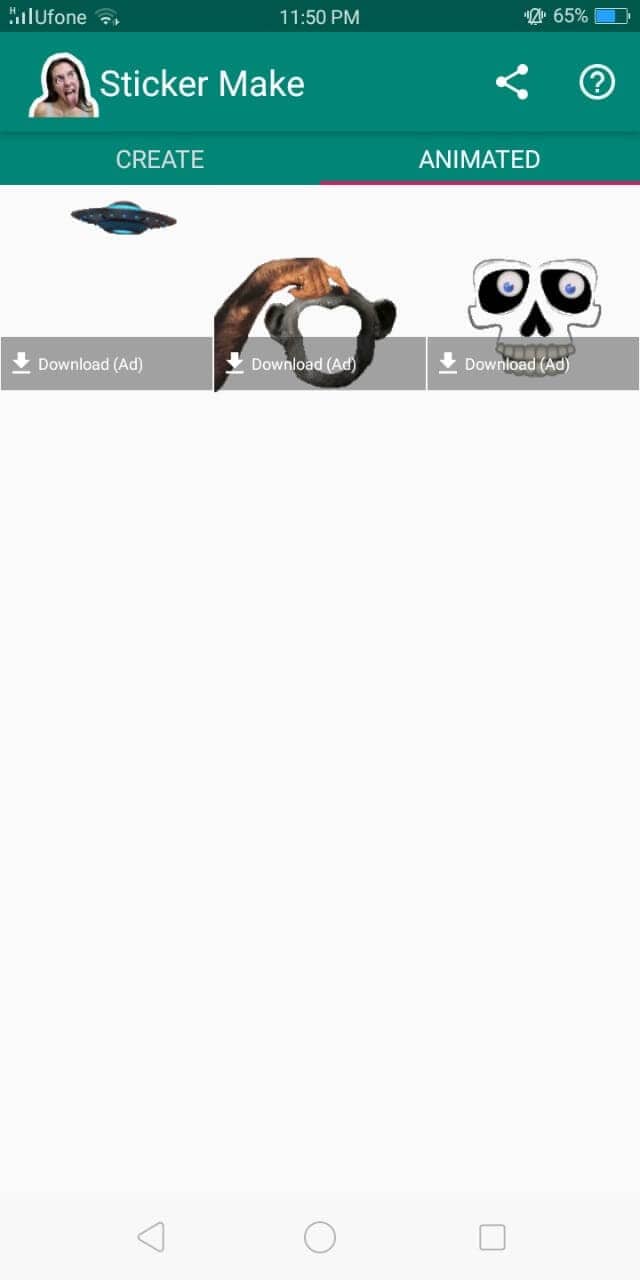
2. Choose any image from your gallery. Crop it to the size and shape you wish to include. Use the Freehand tool or click Automatically to let the app crop a face itself.
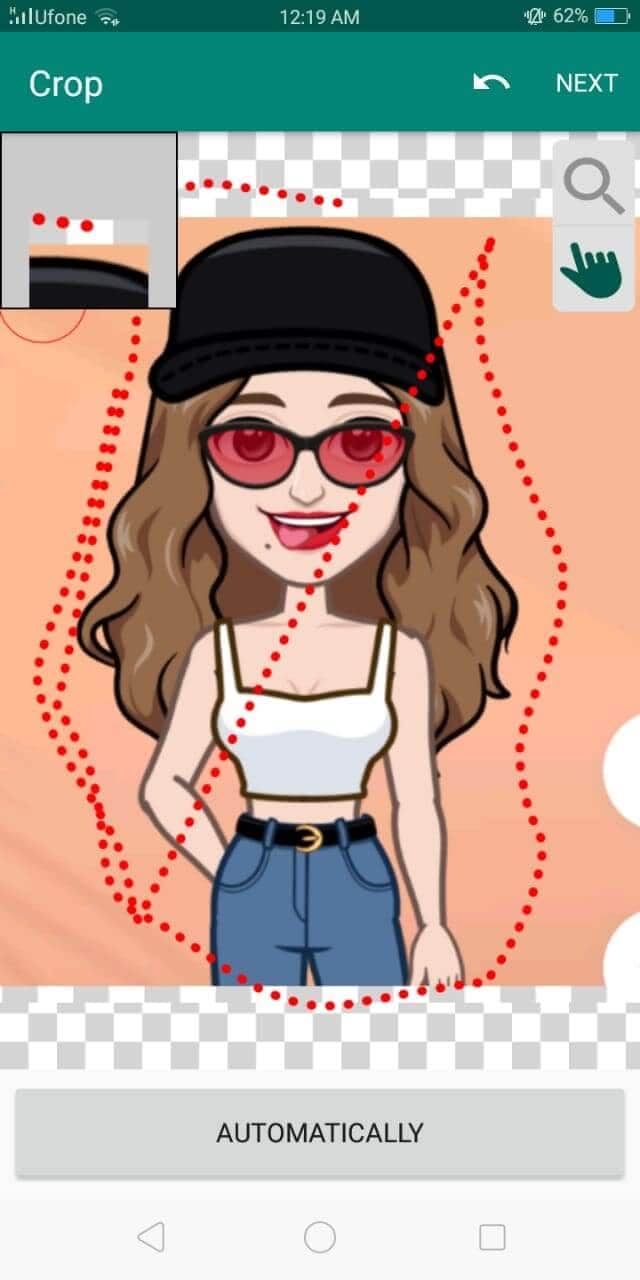
3. Click Next and now erase the background or make careful cropping.
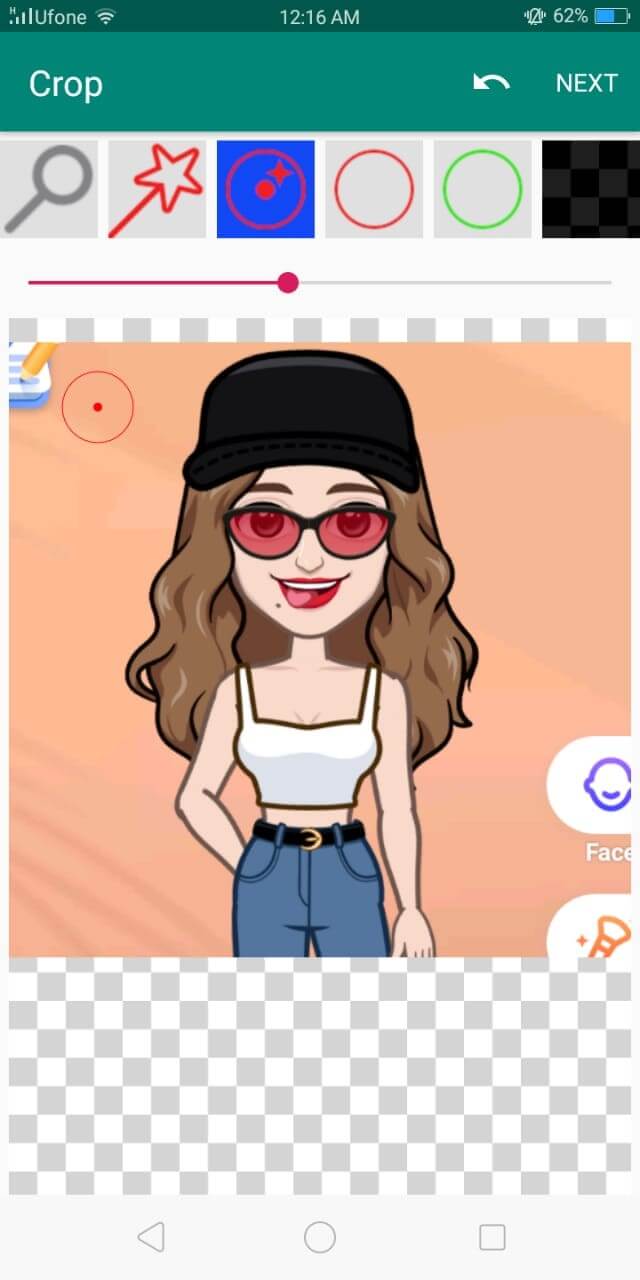
4. You can even outline your sticker and adjust its width and color.
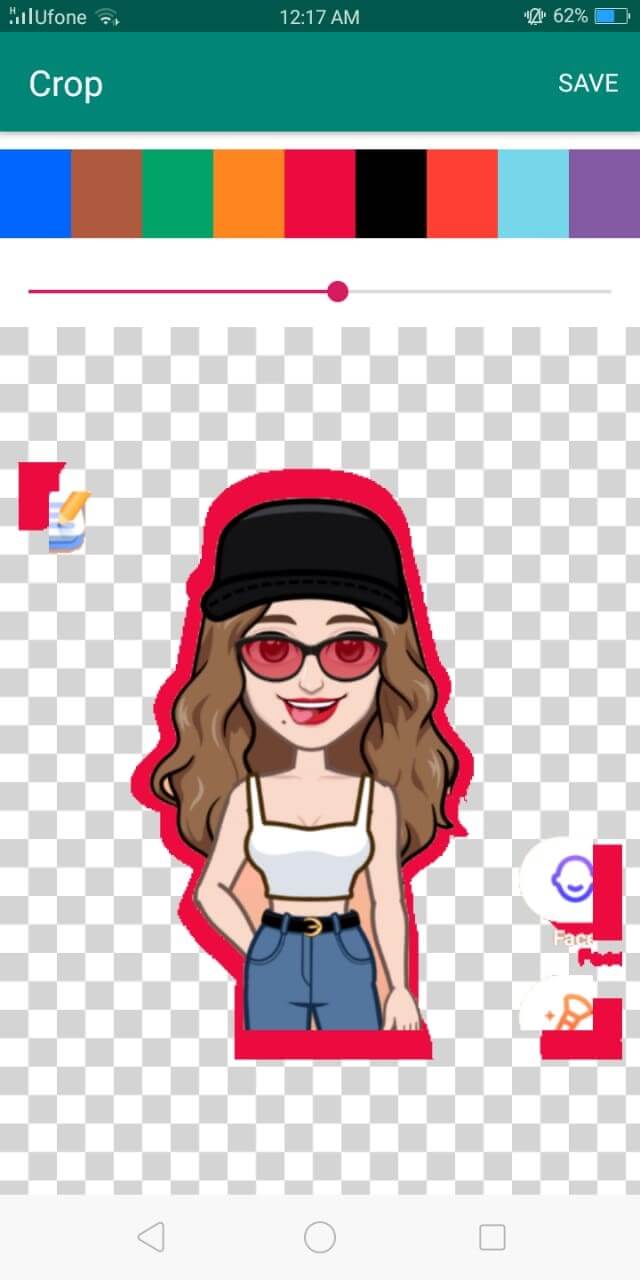
5. You can even add texts and change fonts.

6. Click on the square in the bottom panel to choose from a list of cool backgrounds for your sticker.
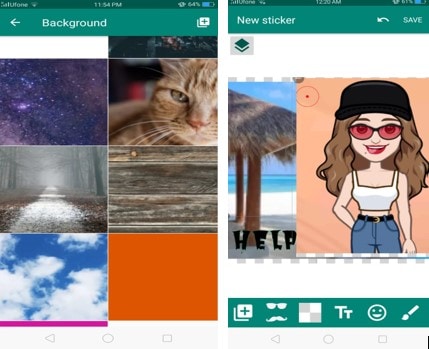
7. Choose to add themed emojis or decorate using a variety of images in the library of Sticker Make. Once you are done, click Save, enter pack name, and click Ok.
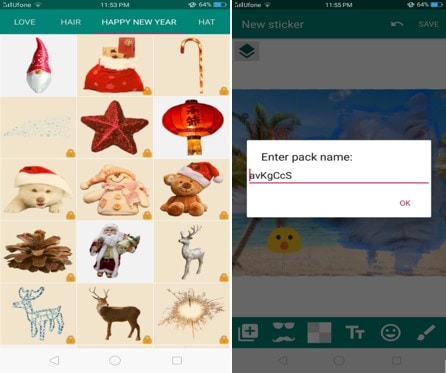
(P.S Make sure that the stickers are precisely 512x512 pixels and no more than 100kb)
Part 2: How to Add Stickers to WhatsApp
Now, you must be wondering how to add stickers to Whatsapp. Let me ease your worry. In this part, I will walk you through a step-by-step guide on how to use stickers in Whatsapp and a few additional features too.
You can save the stickers you receive from other people-
- Click on the sticker you receive
- Tap Add to favorites

If you wish you get more exciting stickers to better express yourself-
- Open Whatsapp chat, either individual or group chat.
- Click on the emoji and then click the sticker beside GIF (the square shape)
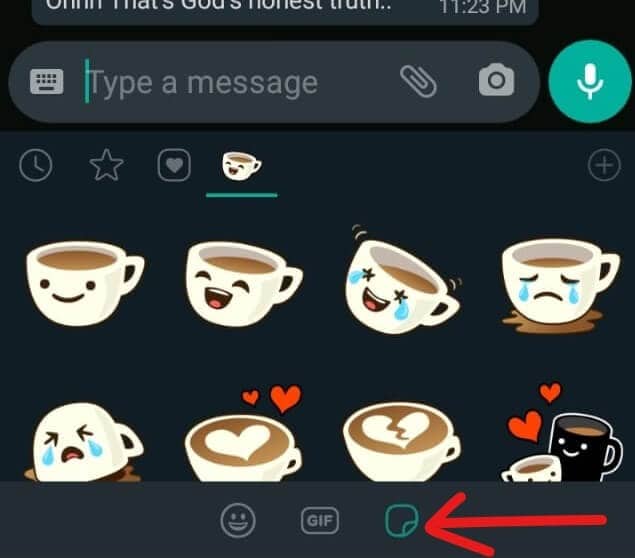
- Tap on the + sign on the upper right corner of your keyboard.
- Here you choose to download any number of sticker packs or click Get More Stickers from Google Play.
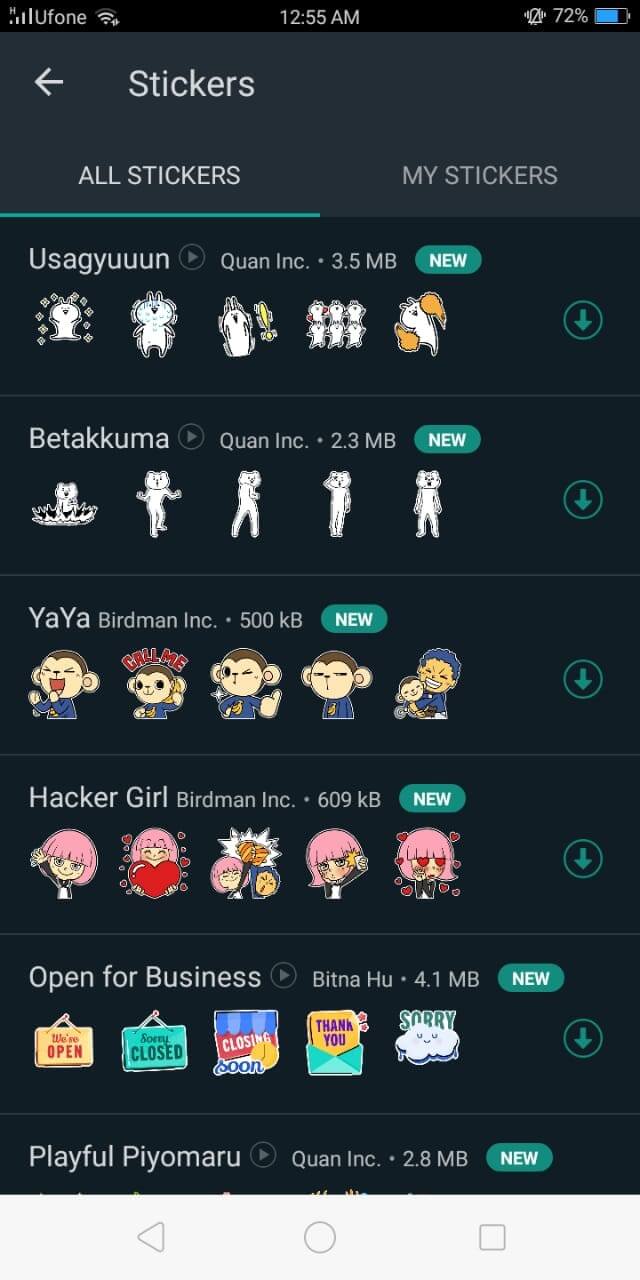
- Tap the download sign beside the sticker pack to start downloading.
- Once the download is complete, it will be displayed among the other stickers in your list.
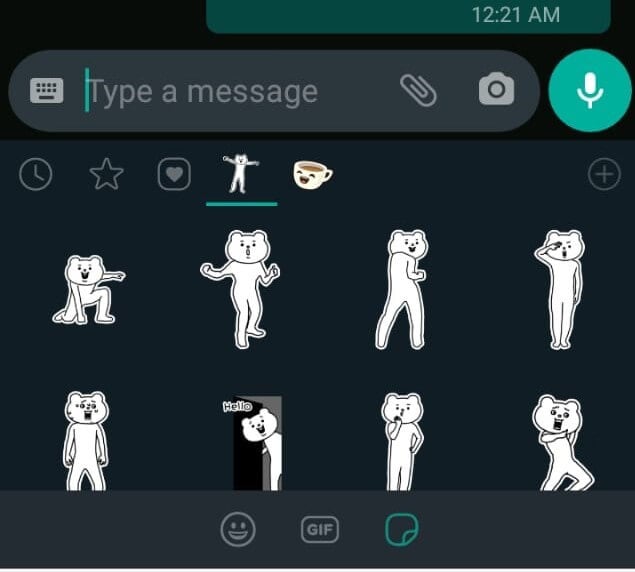
Other features:
- Clock sign- This sign has all the stickers you recently used
- Star sign- It contains your favorite stickers
- Heart- In this, there are several categories. Whatsapp automatically arranges all your stickers in these categories as happy, sad, romantic, etc.
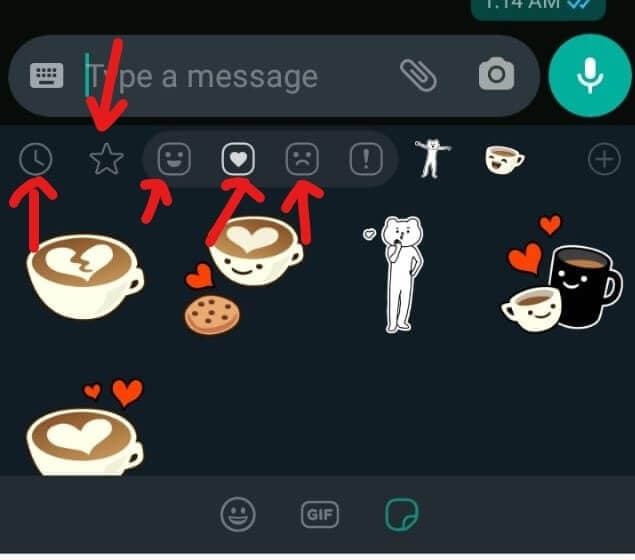
Part 3: How to Send Stickers on WhatsApp
So far, you have learned to create a custom sticker and then how to use Whatsapp stickers. All credit goes to the apps that made this task cakewalk (and some credit goes to your creativity too). Now that the worst is over, you have come to the final and best part of our article.
In 3 quick steps, you will be able to learn how to add stickers to Whatsapp and surprise your friends with hilarious stickers.
1.Open individual or group chat.
2.Click on the emoji and then tap the stickers on the bottom panel.
3.Choose the sticker that best fits your mood and intention from the various categories. Click it and voila! Sent!
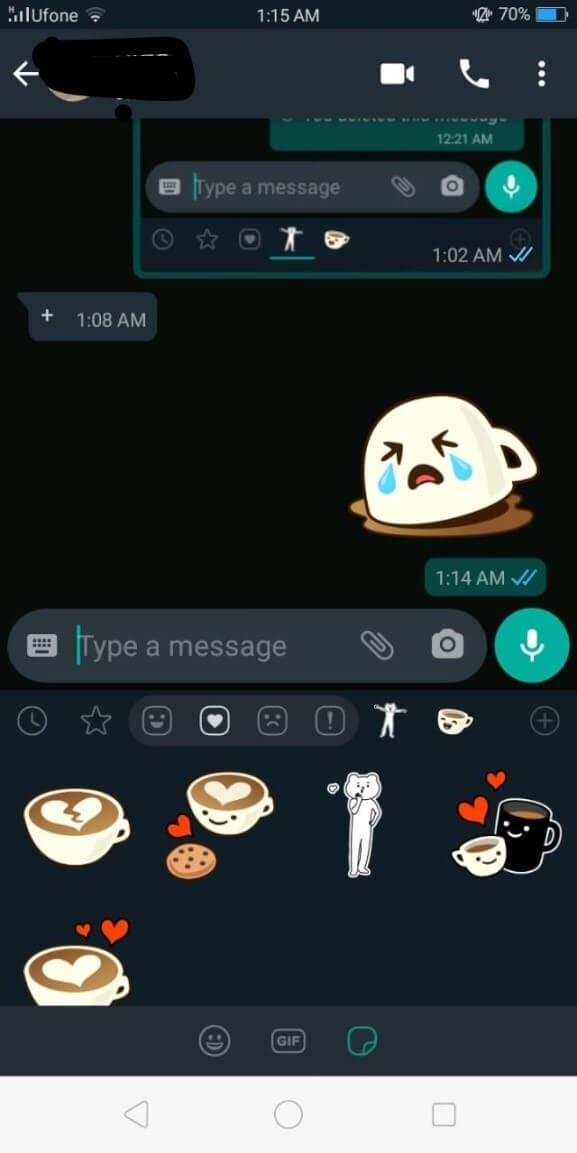
Easy peasy, right?
Bonus Tip—Add Sticker to Your Video with Wondershare Filmora
Although videos themselves are gripping enough, the addition of a customized sticker exclusive to you will be a cherry on top. Wondershare Filmora, with its user-friendly interface, is here just for that. You can now not only add your customized stickers to your video, but multiple effects can also be applied to enhance the video. Filmora is specially designed to offer professional editing tools to beginners. It has an in-built library of special effects and filters to help you create a stunningly cinematic video. Apply motion tracking, keyframe animations, or color match your videos. Add catchy captions or aesthetic filters to create a cool cinematic video
Let’s get right to it:
1.Download and install Filmora. Launch it. And click on Import-Import Media Files.
2. Then import your sticker into Filmora and drag and drop it to the video track or choose a sticker from the Elements (Note that both must be added to the video track).
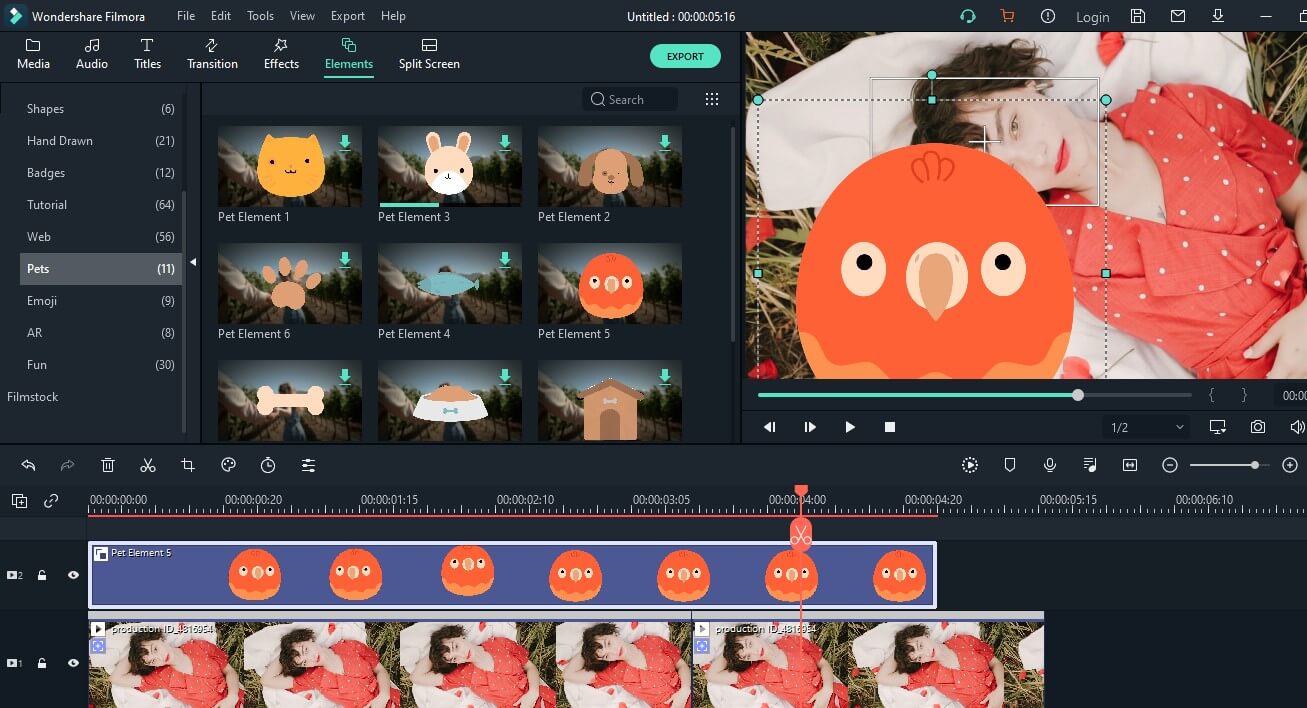
3. Double-click on the sticker in the timeline to adjust the additional parameters. In Video, you can adjust the size or rotation of the sticker. Tap Color to adjust the tint, temperature, or saturation of the sticker. You can also add 3D motion to the sticker in the Motion.
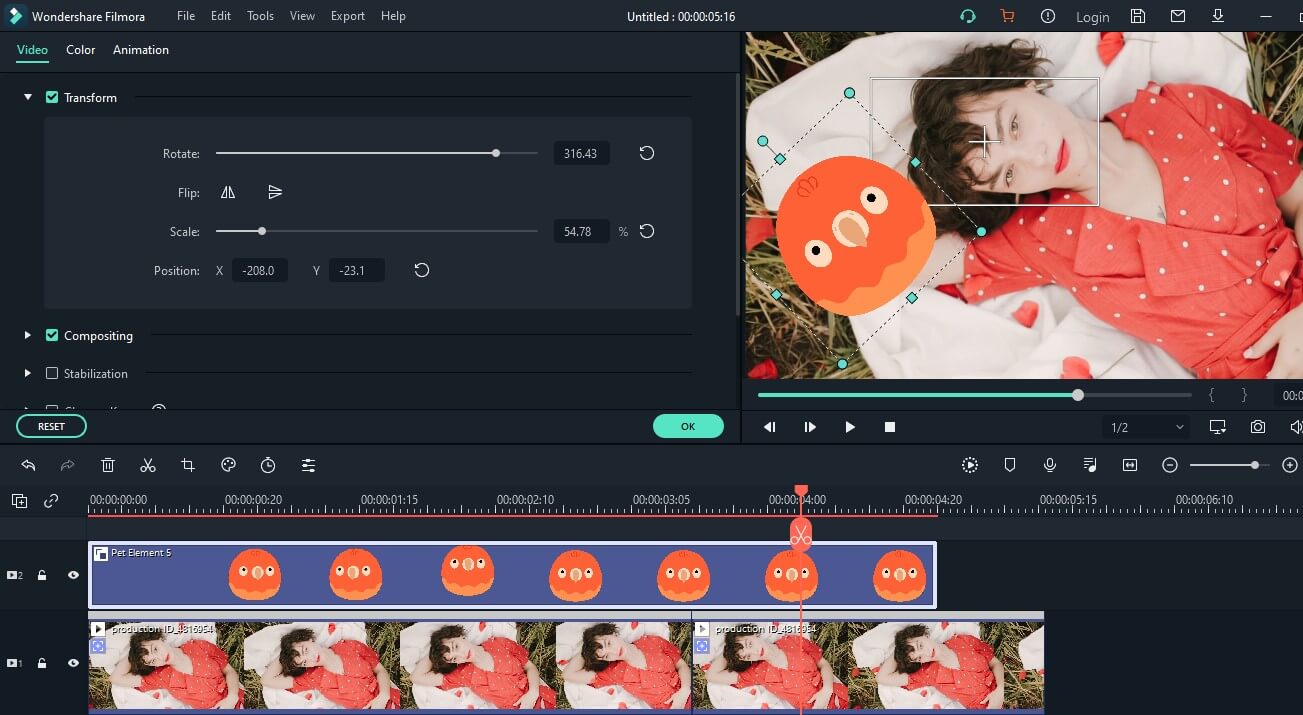
4. And in the viewer panel, click on the sticker and drag it to adjust the size or change the location.
5. Click Export and save it to your computer in the desired resolution.

Ready to Create and Add Stickers?
Stickers have been around long enough to become boringly ordinary. So, to keep the fun side of texting alive, you can now master how to use stickers on Whatsapp after creating your own personalized stickers.
You can start being creative with Sticker Make for Whatsapp. And if you didn’t know how to add stickers in Whatsapp, by now, you must have mastered it (hopefully).
Last but not least, to stand out in a crowd, you need to bring to light something others can’t. Inserting custom-made stickers in your videos might do the trick. Decorate your videos with Wondershare Filmora and create impressive masterpieces. Take note from this ultimate guide on how to add stickers to Whatsapp and transform your texting experience.
Let the fun begin!
Shanoon Cox
Shanoon Cox is a writer and a lover of all things video.
Follow @Shanoon Cox
Shanoon Cox
Mar 27, 2024• Proven solutions
Whatsapp has recently added the stickers feature, and people are going crazy about adding stickers to WhatsApp. But the question is how to add stickers to Whatsapp? To help with that, we will walk you through a detailed guide on how to add stickers to Whatsapp and bring a dash of fun to boring texts.
Now, if you don’t know how to add stickers to WhatsApp and use stickers on Whatsapp, we have you covered.
- Part 1: How to Create Stickers for WhatsApp
- Part 2: How to Add Stickers to WhatsApp
- Part 3: How to Send Stickers on WhatsApp
- Part 4: Bonus Tip—Add Sticker to Your Video with Wondershare Filmora
Part 1: How to Create Stickers for WhatsApp
Whatsapp stickers are now a significant part of our daily conversations. Because let’s face it, life would be boring without them. Perhaps it’s time to up your game by learning how to add stickers to Whatsapp
Even though Whatsapp has a vast library of stickers available, creating a unique sticker is more fun. And the latest apps have made it incredibly easy to create customized stickers. So all you need to do now is learn how to use stickers in Whatsapp
Sticker Make for Whatsapp is one such app. It is free and requires no registrations. Download the app from Google Store and start creating hilarious stickers to surprise your friends.
1. Download Sticker Make and launch it. On the homepage, you will be presented with two options. Click Create to make a sticker from scratch using your own image or click on Animated to insert your picture in a sticker template.
2. Choose any image from your gallery. Crop it to the size and shape you wish to include. Use the Freehand tool or click Automatically to let the app crop a face itself.
3. Click Next and now erase the background or make careful cropping.
4. You can even outline your sticker and adjust its width and color.
5. You can even add texts and change fonts.
6. Click on the square in the bottom panel to choose from a list of cool backgrounds for your sticker.
7. Choose to add themed emojis or decorate using a variety of images in the library of Sticker Make. Once you are done, click Save, enter pack name, and click Ok.
(P.S Make sure that the stickers are precisely 512x512 pixels and no more than 100kb)
Part 2: How to Add Stickers to WhatsApp
Now, you must be wondering how to add stickers to Whatsapp. Let me ease your worry. In this part, I will walk you through a step-by-step guide on how to use stickers in Whatsapp and a few additional features too.
You can save the stickers you receive from other people-
- Click on the sticker you receive
- Tap Add to favorites
If you wish you get more exciting stickers to better express yourself-
- Open Whatsapp chat, either individual or group chat.
- Click on the emoji and then click the sticker beside GIF (the square shape)
- Tap on the + sign on the upper right corner of your keyboard.
- Here you choose to download any number of sticker packs or click Get More Stickers from Google Play.
- Tap the download sign beside the sticker pack to start downloading.
- Once the download is complete, it will be displayed among the other stickers in your list.
Other features:
- Clock sign- This sign has all the stickers you recently used
- Star sign- It contains your favorite stickers
- Heart- In this, there are several categories. Whatsapp automatically arranges all your stickers in these categories as happy, sad, romantic, etc.
Part 3: How to Send Stickers on WhatsApp
So far, you have learned to create a custom sticker and then how to use Whatsapp stickers. All credit goes to the apps that made this task cakewalk (and some credit goes to your creativity too). Now that the worst is over, you have come to the final and best part of our article.
In 3 quick steps, you will be able to learn how to add stickers to Whatsapp and surprise your friends with hilarious stickers.
1.Open individual or group chat.
2.Click on the emoji and then tap the stickers on the bottom panel.
3.Choose the sticker that best fits your mood and intention from the various categories. Click it and voila! Sent!
Easy peasy, right?
Bonus Tip—Add Sticker to Your Video with Wondershare Filmora
Although videos themselves are gripping enough, the addition of a customized sticker exclusive to you will be a cherry on top. Wondershare Filmora, with its user-friendly interface, is here just for that. You can now not only add your customized stickers to your video, but multiple effects can also be applied to enhance the video. Filmora is specially designed to offer professional editing tools to beginners. It has an in-built library of special effects and filters to help you create a stunningly cinematic video. Apply motion tracking, keyframe animations, or color match your videos. Add catchy captions or aesthetic filters to create a cool cinematic video
Let’s get right to it:
1.Download and install Filmora. Launch it. And click on Import-Import Media Files.
2. Then import your sticker into Filmora and drag and drop it to the video track or choose a sticker from the Elements (Note that both must be added to the video track).
3. Double-click on the sticker in the timeline to adjust the additional parameters. In Video, you can adjust the size or rotation of the sticker. Tap Color to adjust the tint, temperature, or saturation of the sticker. You can also add 3D motion to the sticker in the Motion.
4. And in the viewer panel, click on the sticker and drag it to adjust the size or change the location.
5. Click Export and save it to your computer in the desired resolution.
Ready to Create and Add Stickers?
Stickers have been around long enough to become boringly ordinary. So, to keep the fun side of texting alive, you can now master how to use stickers on Whatsapp after creating your own personalized stickers.
You can start being creative with Sticker Make for Whatsapp. And if you didn’t know how to add stickers in Whatsapp, by now, you must have mastered it (hopefully).
Last but not least, to stand out in a crowd, you need to bring to light something others can’t. Inserting custom-made stickers in your videos might do the trick. Decorate your videos with Wondershare Filmora and create impressive masterpieces. Take note from this ultimate guide on how to add stickers to Whatsapp and transform your texting experience.
Let the fun begin!
Shanoon Cox
Shanoon Cox is a writer and a lover of all things video.
Follow @Shanoon Cox
10 Popular Cartoon Characters That Should Top Your List [2023 Updated]
10 Popular Cartoon Characters That Should Top Your List
Shanoon Cox
Mar 27, 2024• Proven solutions
Childhood is a book with different chapters filled with joy, fun, school, chocolates, and our favorite cartoon characters. The most fantasizing thing for a child is the popular cartoon characters which they see as a tutor who teaches them to become honest, humble and most importantly they show us how to overcome problems in our life. All the famous cartoon characters are still famous among millennials who used to watch them in their childhood. In this article, we are going to dive back into childhood again and you will be amazed to see those characters again in front of your eyes.
Get ready for something mesmerizing today!
Part 1: 10 Popular Cartoon Characters of All Time
Everyone has a role model in their life and this is is a no brainer as we always have a superhero from the cartoon world whom we follow and wanna be like them. Let’s talk about some famous cartoon characters that everyone in this world is aware of.
- 1. Bugs Bunny
- 2. Scooby-Doo
- 3. SpongeBob SquarePants
- 4. Daffy Duck
- 5. Tom Cat
- 6. Mickey Mouse
- 7. Jerry Mouse
- 8. Snoopy
- 9. Winnie-the-Pooh
- 10. Donald Duck
1. Bugs Bunny
Bugs bunny is a famous cartoon character that was created in back 1930s by Leon Schlesinger and its one of the best and popular cartoon characters of all time. Bugs bunny is associated with Looney Tunes and Merrie Melodie’s animated stories. Bugs bunny is known for his insouciant and flippant personality because bugs bunny was always happy and he was also known as Happy Rabbit. The message bugs bunny sent to the world was to be happy in all situations in life.
2. Scooby-Doo
Scooby-Doo is a famous cartoon character that was created back in 1969 and this character is associated with Hanna-Barbera, an American animation company. The character is famous for its curiosity about solving supernatural mysteries and making people laugh with his crazy styles. Scooby-Doo is a natural detective and has made people fantasize about solving mysteries more easily. Scooby is so famous today that people who are in their mid-30s still watch it with their kids because of the unique character it plays.
3. SpongeBob SquarePants
SpongeBob SquarePants was created back in 1999 by Stephen Hillenburg, a marine science educator. SpongeBob SquarePants made its debut on Nickelodeon in 1999. The show becomes a superhit and SpongeBob was the next superstar with the most successful character at that time. This cartoon character is famous for his friendship with his aquatic friends and the energetic and optimistic nature of SpongeBob made inspired everyone to be hopeful in any situation.
4. Daffy Duck
Daffy Duck is a famous cartoon character that was produced in the late 1930s by Warner Bros. The cartoon is associated with cartoon series like Merrie Melodies and Looney Tunes. The cartoon character was famous for the way he would hope around in the water and yell, Woo-hoo! Woo-hoo!. Daffy Duck has always entertained people with his quirky ways of jumping into the water and making people laugh out. The message from this character was very clear and entertaining
5. Tom Cat
Tom Cat needs no introduction as it’s the furious and popular cartoon character of all time. It was created by Joseph Barbera and William Hanna in 1940. Tom is associated with the Tom & Jerry cartoon series and it made people laugh with silly fights and chasing all over the series. Tom was very annoyed by Jerry and he wanted to make a meal of Jerry as that used to make people laugh. However, the deep message Tom has given to the viewers was that whenever Jerry was in serious trouble apart from their silly fights, Tom used to save Jerry and would ignore him sarcastically. So, the message was to spread the love even if you are irritated with a person.
6. Mickey Mouse
Walt Disney created a mouse in 1928 and that was named Mickey Mouse. The cartoon character is still famous among kids and adults as a childhood memory. Mickey is famous for his nice character and stubborn attitude. Mickey and his girlfriend Minnie Mouse with his pet dog Pluto were seen with Donald Duck and Goofy. Mickey always inspired people to stay honest and loving to friends and loved ones and people who like Mickey follow the same.
7. Jerry Mouse
Jerry Mouse is one of the most notorious and crazy characters of the Tom & Jerry cartoon series. He was very much liked by people and the way he used to irritate Tom in the cartoon series was amazing. If you want to learn different ways of annoying a friend then you better take classes from Jerry as he has the craziest ways of teasing a friend without getting caught.
8. Snoopy
Ah! Snoopy, the cute dog was created by Charles M. Schulz in 1950 for a comic strip. Snoopy was the most iconic and recognizable character and was very famous for the character. Snoopy was famous for his sleep as he used to sleep all day long and he used to find different ways to live an easier life. The message it sent to the people was very clear to become easy on life as whatever the time is today, it will ultimately pass.
9. Winnie-the-Pooh
Winnie-the-Pooh was a cartoon character featured in 1928 in A.A Milne’s House at Pooh Corner. Pooh was a yellow furred bear who loved honey and lived in a forest surrounded by hundred-acre wood. He lived there with his friends who were a donkey, pig, own, rabbit and birds. Winnie was always an adventurous character and helped his friends in every situation. People liked the way Winnie used to do things and roam around the forest with his friends.
10. Donald Duck
Donald Duck is a cartoon character created by Walt Disney in 1934 with yellow legs and feet. Donald Duck wears a typical sailor shirt and a cap to look like a gentleman in every way. Donald Duck first appeared in The Wise Little Hen in 1934 and become one of the most popular characters with its style and anger-related issues. Though Donald Duck was very strict it inspired people to be gentle and easy with being tough.
Conclusion
In this article, you learned about the popular cartoon characters that made your childhood awesome. Also, the brief given in this guide about the famous cartoon characters is amazing and you can get all the information about the cartoon characters without checking different information about them. Given that cartoons are fun to watch but we have also introduced to Filmora where you can create your cartoon video by using the features and tools on the timeline. If you find this guide helpful then don’t forget to tell us about your favorite cartoon character and why do you like them.
Shanoon Cox
Shanoon Cox is a writer and a lover of all things video.
Follow @Shanoon Cox
Shanoon Cox
Mar 27, 2024• Proven solutions
Childhood is a book with different chapters filled with joy, fun, school, chocolates, and our favorite cartoon characters. The most fantasizing thing for a child is the popular cartoon characters which they see as a tutor who teaches them to become honest, humble and most importantly they show us how to overcome problems in our life. All the famous cartoon characters are still famous among millennials who used to watch them in their childhood. In this article, we are going to dive back into childhood again and you will be amazed to see those characters again in front of your eyes.
Get ready for something mesmerizing today!
Part 1: 10 Popular Cartoon Characters of All Time
Everyone has a role model in their life and this is is a no brainer as we always have a superhero from the cartoon world whom we follow and wanna be like them. Let’s talk about some famous cartoon characters that everyone in this world is aware of.
- 1. Bugs Bunny
- 2. Scooby-Doo
- 3. SpongeBob SquarePants
- 4. Daffy Duck
- 5. Tom Cat
- 6. Mickey Mouse
- 7. Jerry Mouse
- 8. Snoopy
- 9. Winnie-the-Pooh
- 10. Donald Duck
1. Bugs Bunny
Bugs bunny is a famous cartoon character that was created in back 1930s by Leon Schlesinger and its one of the best and popular cartoon characters of all time. Bugs bunny is associated with Looney Tunes and Merrie Melodie’s animated stories. Bugs bunny is known for his insouciant and flippant personality because bugs bunny was always happy and he was also known as Happy Rabbit. The message bugs bunny sent to the world was to be happy in all situations in life.
2. Scooby-Doo
Scooby-Doo is a famous cartoon character that was created back in 1969 and this character is associated with Hanna-Barbera, an American animation company. The character is famous for its curiosity about solving supernatural mysteries and making people laugh with his crazy styles. Scooby-Doo is a natural detective and has made people fantasize about solving mysteries more easily. Scooby is so famous today that people who are in their mid-30s still watch it with their kids because of the unique character it plays.
3. SpongeBob SquarePants
SpongeBob SquarePants was created back in 1999 by Stephen Hillenburg, a marine science educator. SpongeBob SquarePants made its debut on Nickelodeon in 1999. The show becomes a superhit and SpongeBob was the next superstar with the most successful character at that time. This cartoon character is famous for his friendship with his aquatic friends and the energetic and optimistic nature of SpongeBob made inspired everyone to be hopeful in any situation.
4. Daffy Duck
Daffy Duck is a famous cartoon character that was produced in the late 1930s by Warner Bros. The cartoon is associated with cartoon series like Merrie Melodies and Looney Tunes. The cartoon character was famous for the way he would hope around in the water and yell, Woo-hoo! Woo-hoo!. Daffy Duck has always entertained people with his quirky ways of jumping into the water and making people laugh out. The message from this character was very clear and entertaining
5. Tom Cat
Tom Cat needs no introduction as it’s the furious and popular cartoon character of all time. It was created by Joseph Barbera and William Hanna in 1940. Tom is associated with the Tom & Jerry cartoon series and it made people laugh with silly fights and chasing all over the series. Tom was very annoyed by Jerry and he wanted to make a meal of Jerry as that used to make people laugh. However, the deep message Tom has given to the viewers was that whenever Jerry was in serious trouble apart from their silly fights, Tom used to save Jerry and would ignore him sarcastically. So, the message was to spread the love even if you are irritated with a person.
6. Mickey Mouse
Walt Disney created a mouse in 1928 and that was named Mickey Mouse. The cartoon character is still famous among kids and adults as a childhood memory. Mickey is famous for his nice character and stubborn attitude. Mickey and his girlfriend Minnie Mouse with his pet dog Pluto were seen with Donald Duck and Goofy. Mickey always inspired people to stay honest and loving to friends and loved ones and people who like Mickey follow the same.
7. Jerry Mouse
Jerry Mouse is one of the most notorious and crazy characters of the Tom & Jerry cartoon series. He was very much liked by people and the way he used to irritate Tom in the cartoon series was amazing. If you want to learn different ways of annoying a friend then you better take classes from Jerry as he has the craziest ways of teasing a friend without getting caught.
8. Snoopy
Ah! Snoopy, the cute dog was created by Charles M. Schulz in 1950 for a comic strip. Snoopy was the most iconic and recognizable character and was very famous for the character. Snoopy was famous for his sleep as he used to sleep all day long and he used to find different ways to live an easier life. The message it sent to the people was very clear to become easy on life as whatever the time is today, it will ultimately pass.
9. Winnie-the-Pooh
Winnie-the-Pooh was a cartoon character featured in 1928 in A.A Milne’s House at Pooh Corner. Pooh was a yellow furred bear who loved honey and lived in a forest surrounded by hundred-acre wood. He lived there with his friends who were a donkey, pig, own, rabbit and birds. Winnie was always an adventurous character and helped his friends in every situation. People liked the way Winnie used to do things and roam around the forest with his friends.
10. Donald Duck
Donald Duck is a cartoon character created by Walt Disney in 1934 with yellow legs and feet. Donald Duck wears a typical sailor shirt and a cap to look like a gentleman in every way. Donald Duck first appeared in The Wise Little Hen in 1934 and become one of the most popular characters with its style and anger-related issues. Though Donald Duck was very strict it inspired people to be gentle and easy with being tough.
Conclusion
In this article, you learned about the popular cartoon characters that made your childhood awesome. Also, the brief given in this guide about the famous cartoon characters is amazing and you can get all the information about the cartoon characters without checking different information about them. Given that cartoons are fun to watch but we have also introduced to Filmora where you can create your cartoon video by using the features and tools on the timeline. If you find this guide helpful then don’t forget to tell us about your favorite cartoon character and why do you like them.
Shanoon Cox
Shanoon Cox is a writer and a lover of all things video.
Follow @Shanoon Cox
How to Add and Custom Slack Emoji-Wondershare Filmora
How to Add and Custom Slack Emoji-Wondershare Filmora
Shanoon Cox
Mar 27, 2024• Proven solutions
A Slack emoji is just like the emojis you usually use on Whatsapp, Messenger, or other chatting platforms. There is a wide range of emojis you can use to express yourself better or lighten the working environment.
Plus, the option to create a custom Slack emoji makes it more interesting. You can use it to create a new and unique Slack emoji to personalize your chatting experience. Why write long texts when you can just add Slack emoji to say it all?
Let me show you the ropes on how to create a custom Slack emoji and make your chatting experience more fun.
- Part 1: How to Add Slack Emoji
- Part 2: How to Custom Slack Emoji
- Bonus Tip-Edit Emoji and Add Emoji to Your Video
Part 1: How to Add Slack Emoji
At Slack, you can find a Slack emoji for every emotion or occasion. Finding the perfect Slack emoji is as easy as browsing through the categorized sections. Better yet, the option to search for a Slack emoji makes it a cakewalk to get the exact Slack emoji to express oneself.
Also, you can add Slack emoji with a single tap. And it allows you to add unlimited Slack emoji in one message.
Let me show you how to add Slack emoji in a few quick steps:
1.Download and open Slack on your desktop or smartphone.
2.To add a Slack emoji, click on the Smiley face icon in the bottom right corner of the message box
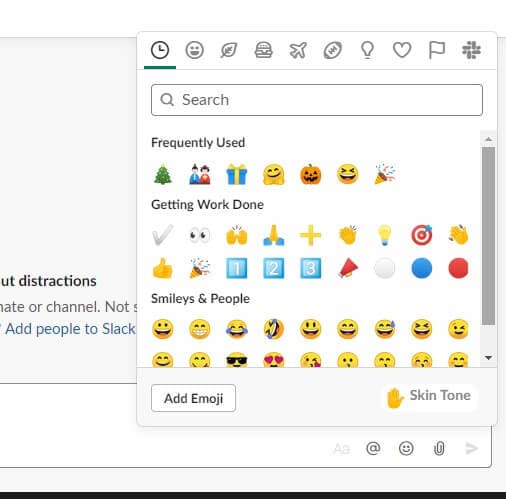
3.Browse through the categories to find the right Slack emoji for your message. In the search bar, type the kind of emoji you are looking for to find it faster.
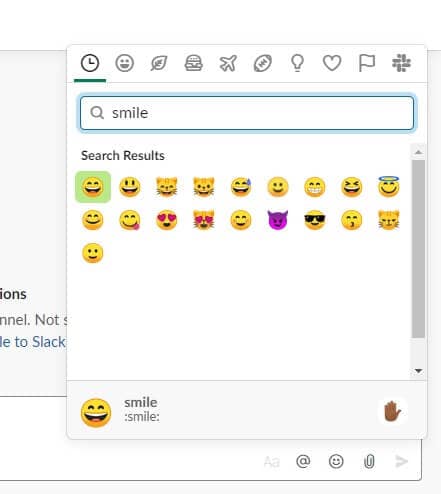
4.Click on the Hand icon in the bottom right corner to choose the default skin tone for all your emojis. Finally, to add Slack emoji to your message, just tap on it. Add as many Slack emoji as you like just by tapping on them.
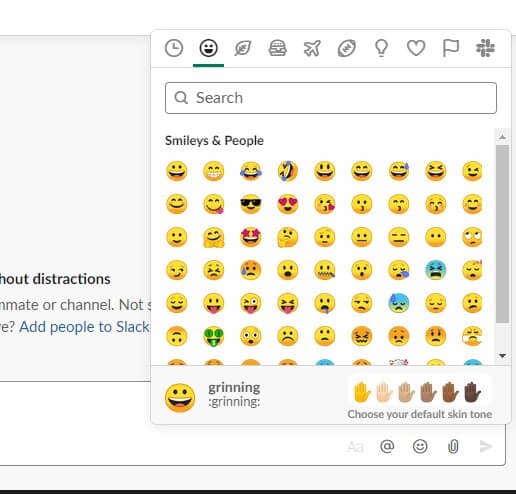
Part 2: How to Custom Slack Emoji
Using the commonly used emojis can get boring. Sometimes, even the Slack emoji collection falls short in expressing the exact feeling you wish to convey. However, the good news is that you can easily create a custom Slack emoji without any hassle.
A Slack custom emoji can range from your own picture to any other image. You can create a personalized custom Slack emoji to crack inside jokes or create your brand icon Slack emoji.
Here’s how to create an awesome custom Slack emoji-
1.On your workspace, click on your company name or icon to open the settings drop-down menu. Tap on Settings&Administration<Customize.
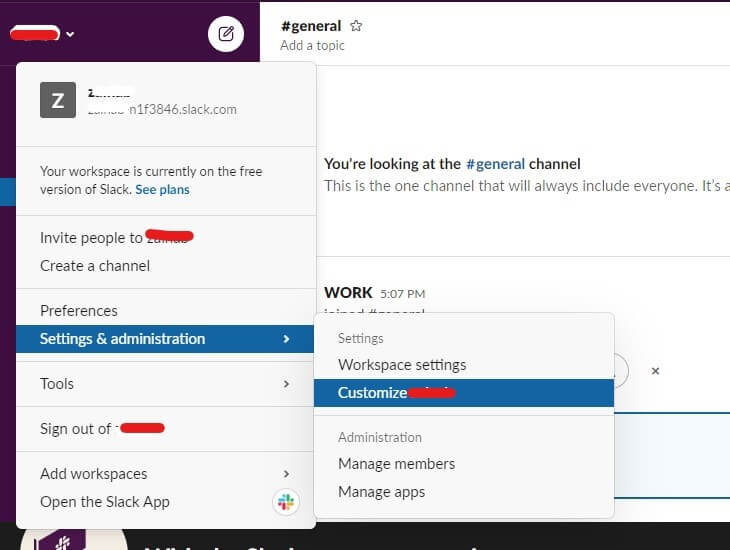
2.A new window will pop open. In the Emoji tab, click on Add Custom Emoji.
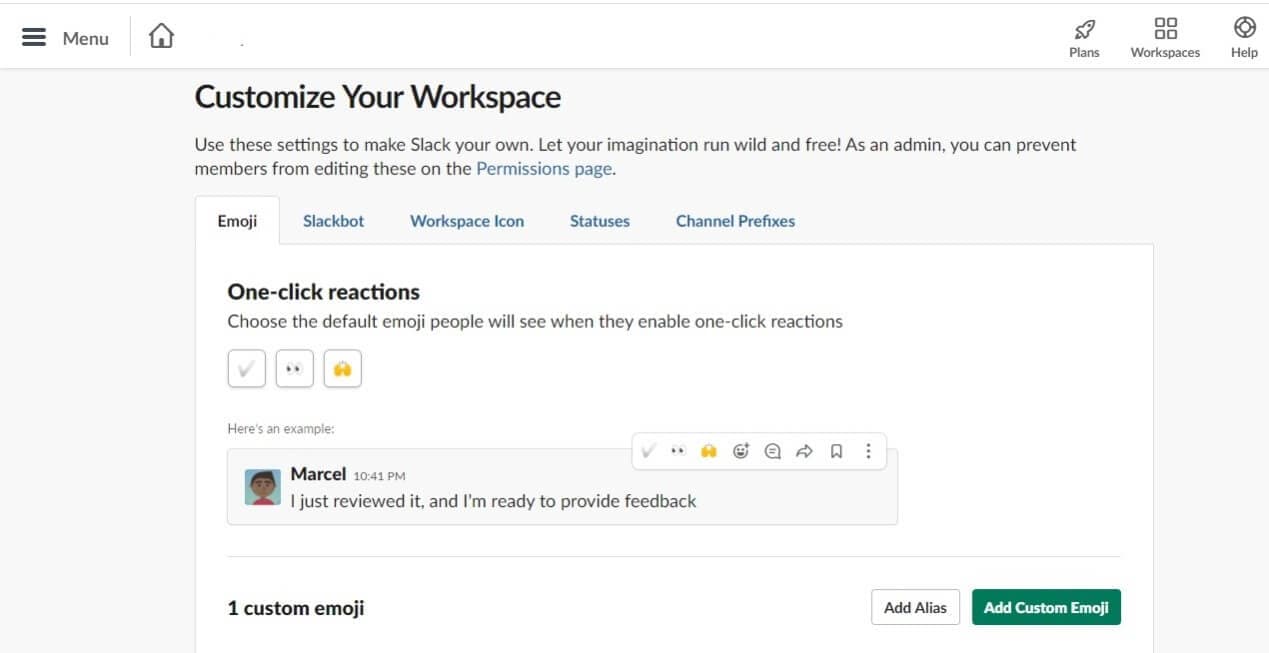
3.Here you can upload any image to make your custom Slack emoji. Click on Upload Image to select a file.
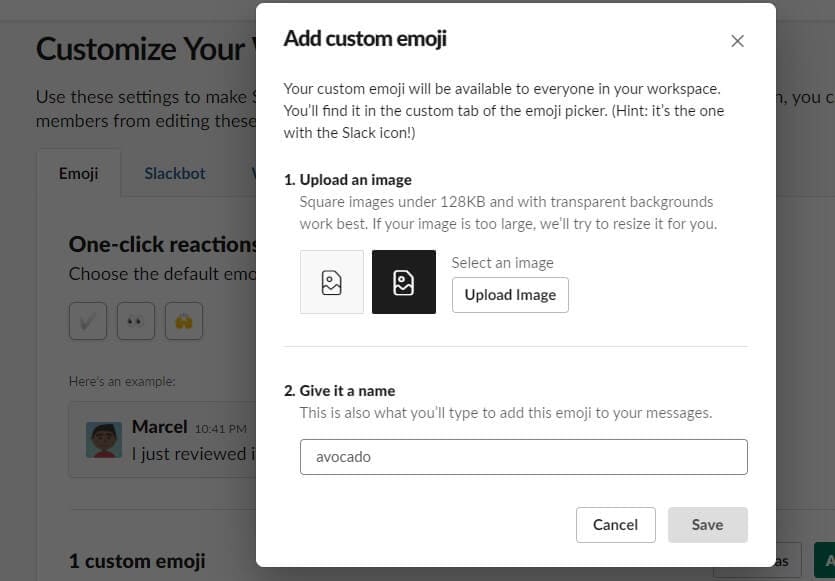
4.Then, give your emoji a name so you can easily find the custom Slack emoji while chatting. Click Save to finish.
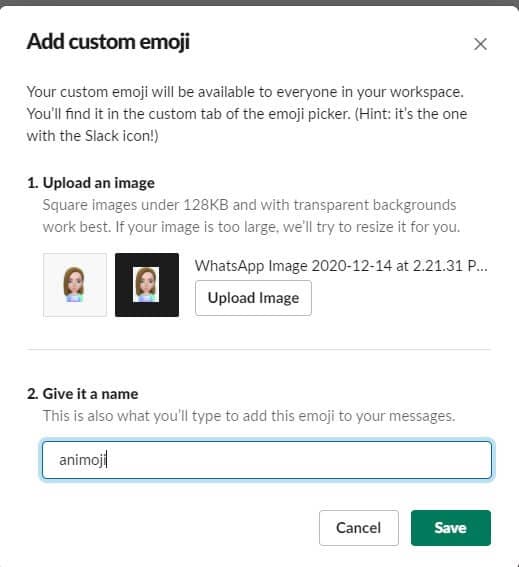
5.Now, go back to the workspace and click on the Smiley icon. Type the custom Slack emoji name to find it and click to send it.
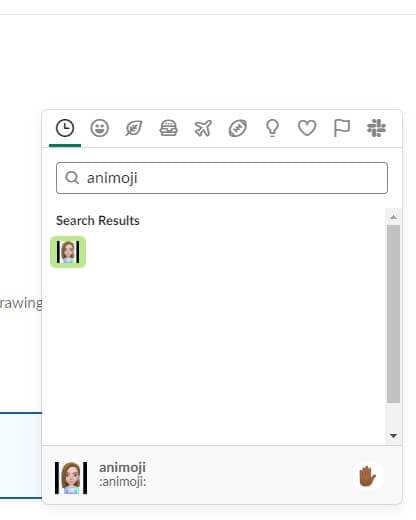
Bonus Tip-Edit Emoji and Add Emoji to Your Video
Now, let me present a top-notch video editor to help you add Slack emoji to your video without needing any editing experience.
Wondershare Filmora is a powerful video editor with a highly intuitive interface. It is loaded with high-end editing tools that are incredibly easy to use. You can add keyframe animations to make your videos more dynamic with a single click. Motion tracking allows you to track the specified object’s movements throughout the video, even allowing you to blur certain parts of the video. From the Effects tab, you can add cinematic effects to your videos, or you can easily color match all your scenes with one tap or apply noise reduction.
If you wish to edit or add custom Slack emoji to your video, you can import the image to Filmora and then drag it to the track above the video in the timeline. You can then add animations or motion tracking to adjust the custom Slack emoji. Cool transitions and color adjustments can also be made to make the video more appealing and unique. Special effects or catchy captions are just a tap away to help you create stunning videos
Conclusion
With the introduction of emojis, the need for writing long messages has diminished. Using a Slack emoji can turn your conversations around and make them more interesting. Chatting has never been easier or more fun.
Add Slack emoji or react to what others have to say. It’s time to create a custom Slack emoji to wow your friends and colleagues with tiny emojis that are exclusive to just you. If you want to spice up your work chats, just add Slack emoji and enjoy.
Try out Wondershare Filmora to add Slack emoji to your videos to make them unique.
Shanoon Cox
Shanoon Cox is a writer and a lover of all things video.
Follow @Shanoon Cox
Shanoon Cox
Mar 27, 2024• Proven solutions
A Slack emoji is just like the emojis you usually use on Whatsapp, Messenger, or other chatting platforms. There is a wide range of emojis you can use to express yourself better or lighten the working environment.
Plus, the option to create a custom Slack emoji makes it more interesting. You can use it to create a new and unique Slack emoji to personalize your chatting experience. Why write long texts when you can just add Slack emoji to say it all?
Let me show you the ropes on how to create a custom Slack emoji and make your chatting experience more fun.
- Part 1: How to Add Slack Emoji
- Part 2: How to Custom Slack Emoji
- Bonus Tip-Edit Emoji and Add Emoji to Your Video
Part 1: How to Add Slack Emoji
At Slack, you can find a Slack emoji for every emotion or occasion. Finding the perfect Slack emoji is as easy as browsing through the categorized sections. Better yet, the option to search for a Slack emoji makes it a cakewalk to get the exact Slack emoji to express oneself.
Also, you can add Slack emoji with a single tap. And it allows you to add unlimited Slack emoji in one message.
Let me show you how to add Slack emoji in a few quick steps:
1.Download and open Slack on your desktop or smartphone.
2.To add a Slack emoji, click on the Smiley face icon in the bottom right corner of the message box
3.Browse through the categories to find the right Slack emoji for your message. In the search bar, type the kind of emoji you are looking for to find it faster.
4.Click on the Hand icon in the bottom right corner to choose the default skin tone for all your emojis. Finally, to add Slack emoji to your message, just tap on it. Add as many Slack emoji as you like just by tapping on them.
Part 2: How to Custom Slack Emoji
Using the commonly used emojis can get boring. Sometimes, even the Slack emoji collection falls short in expressing the exact feeling you wish to convey. However, the good news is that you can easily create a custom Slack emoji without any hassle.
A Slack custom emoji can range from your own picture to any other image. You can create a personalized custom Slack emoji to crack inside jokes or create your brand icon Slack emoji.
Here’s how to create an awesome custom Slack emoji-
1.On your workspace, click on your company name or icon to open the settings drop-down menu. Tap on Settings&Administration<Customize.
2.A new window will pop open. In the Emoji tab, click on Add Custom Emoji.
3.Here you can upload any image to make your custom Slack emoji. Click on Upload Image to select a file.
4.Then, give your emoji a name so you can easily find the custom Slack emoji while chatting. Click Save to finish.
5.Now, go back to the workspace and click on the Smiley icon. Type the custom Slack emoji name to find it and click to send it.
Bonus Tip-Edit Emoji and Add Emoji to Your Video
Now, let me present a top-notch video editor to help you add Slack emoji to your video without needing any editing experience.
Wondershare Filmora is a powerful video editor with a highly intuitive interface. It is loaded with high-end editing tools that are incredibly easy to use. You can add keyframe animations to make your videos more dynamic with a single click. Motion tracking allows you to track the specified object’s movements throughout the video, even allowing you to blur certain parts of the video. From the Effects tab, you can add cinematic effects to your videos, or you can easily color match all your scenes with one tap or apply noise reduction.
If you wish to edit or add custom Slack emoji to your video, you can import the image to Filmora and then drag it to the track above the video in the timeline. You can then add animations or motion tracking to adjust the custom Slack emoji. Cool transitions and color adjustments can also be made to make the video more appealing and unique. Special effects or catchy captions are just a tap away to help you create stunning videos
Conclusion
With the introduction of emojis, the need for writing long messages has diminished. Using a Slack emoji can turn your conversations around and make them more interesting. Chatting has never been easier or more fun.
Add Slack emoji or react to what others have to say. It’s time to create a custom Slack emoji to wow your friends and colleagues with tiny emojis that are exclusive to just you. If you want to spice up your work chats, just add Slack emoji and enjoy.
Try out Wondershare Filmora to add Slack emoji to your videos to make them unique.
Shanoon Cox
Shanoon Cox is a writer and a lover of all things video.
Follow @Shanoon Cox
Also read:
- [New] In 2024, Essential Skills Importing Snapchat Images Into Device Gallery
- [New] Score Selection Service Enhancing Media Pieces
- 2024 Approved The 2023 Guide to Top Value Streaming Tools for All Platform Users
- Addressing Non-Functioning Windows Conditional Filters
- Are Emerging Technologies Like ChatGPT Posing Risks to Standard Search Engines' Market Share?
- Broadcast Without Breaks 2023 Guides to Overcoming Livestream Disruptions on FB
- Fixing Discord Connection Woes: Overcoming Packet Loss Challenges
- In 2024, Revolutionize Your Beat Matching – Try Free Online Detectors Now
- New 10 Best Memes Right Now (Include Image/ GIF/Video)
- New 10 Free Online Sticker Makers to Make Your Own Stickers for 2024
- New 2024 Approved How to Make Memes on iPhone and Android
- New Best SolarMovie Alternatives-Watch Movies Free Online for 2024
- New How to Make a Slideshow with Music
- New In 2024, VN Video Editor Android Review Features, Pros, and Cons
- Updated Top 10 Best Free Manga Sites to Read Online
- Title: In 2024, Best Websites to Add Emojis to Photos Online
- Author: Jan
- Created at : 2024-10-02 18:04:23
- Updated at : 2024-10-06 02:14:35
- Link: https://meme-emoji.techidaily.com/in-2024-best-websites-to-add-emojis-to-photos-online/
- License: This work is licensed under CC BY-NC-SA 4.0.