
How to Make Your Own Emoji in 2 Ways Step-By Step Guide for 2024
How to Make Your Own Emoji in 2 Ways [Step-By Step Guide]
How to Make Your Own Emoji in 2 Ways [Step-by Step Guide]

Shanoon Cox
Mar 27, 2024• Proven solutions
The small yellow faces that we have come to call emojis are now rapidly being used on all platforms. Whether you’re sending an email or texting a friend, emoji is ever-present to spice up the conversation and give it an emotional touch. But these cliché emojis are now becoming dull, and the creative side in us is craving for something more personal and fun.
To satisfy that craving of being unique, you can now create your own emoji. Tease your friends with an emoji of their faces or custom-create an emoji that best expresses your facial expressions. The customized emoji can be an object or an emotion, while the only limitation is your imagination.
Let me show you how to make emoji that relates to your feelings and will help you transform your texting experience.
- Method 1: Make Your Own Emoji Using Online Emoji Maker
- Method 2: Make Your Own Emoji Using an Emoji Maker App
- Bonus Tip-Add Your Emoji to a Video Using Wondershare Filmora
Method 1: Make Your Own Emoji Using Online Emoji Maker
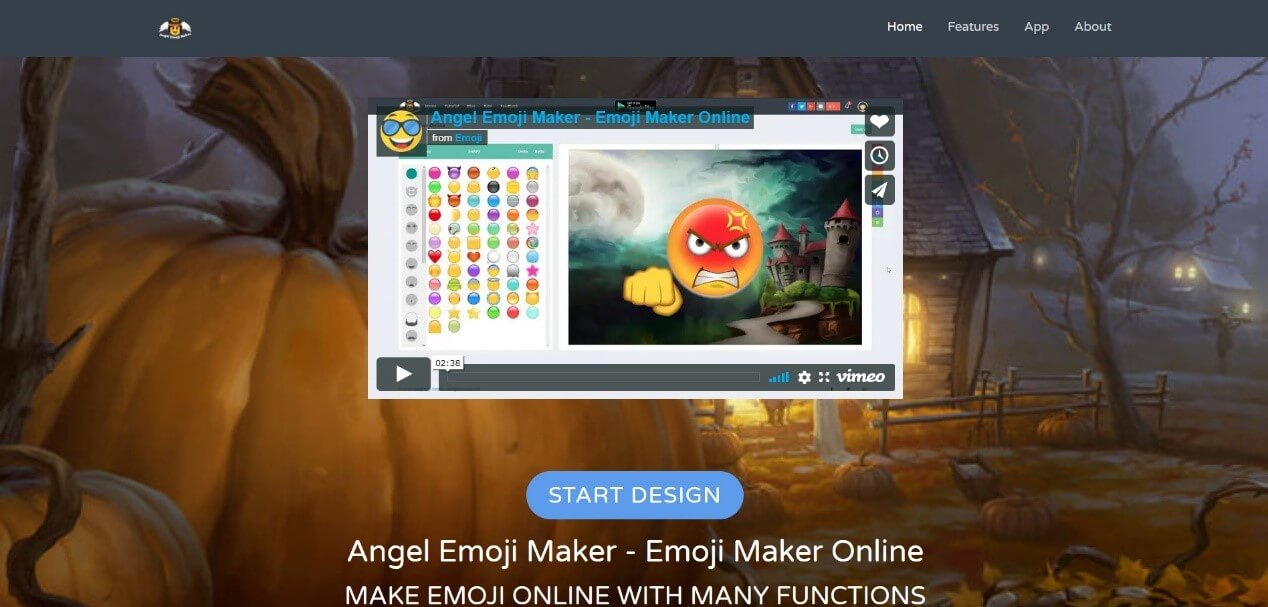
Emoji Maker is an online tool to quench your thirst for creativity. It is free and incredibly easy to use. You would think that it takes expertise to make your own emoji, but, fortunately, all it takes is imagination and a few clicks, of course.
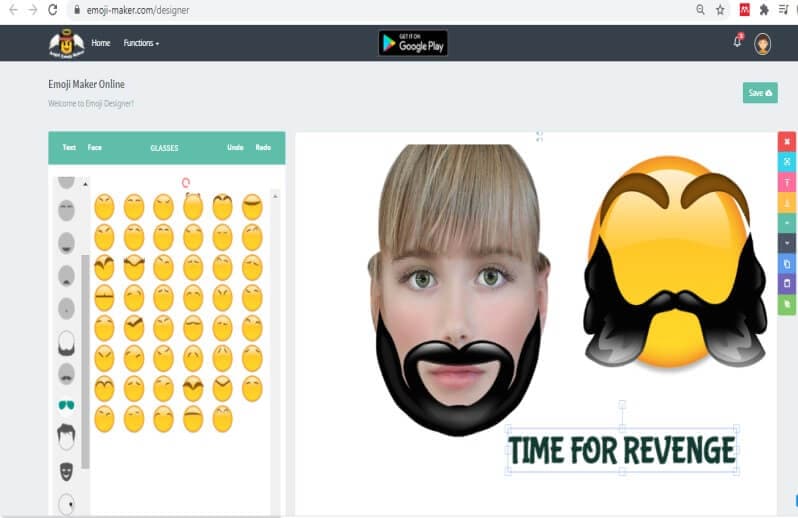
You can create an emoji from the face shapes available or customize a funny emoji using your own or a friend’s face. You can finally take revenge by pasting the funniest mustache on your ex’s face or making them bald. (Savage, right?)
Better yet, you can make a superhero emoji of yourself and even change the background as if you’re in the sky. The functions of this Emoji Maker are countless and of a professional level. These customized emojis are bound to make you stand out in those group chats
Now, as promised, I will show you exactly how it’s done.
1. First of all, open Emoji Maker on your browser.
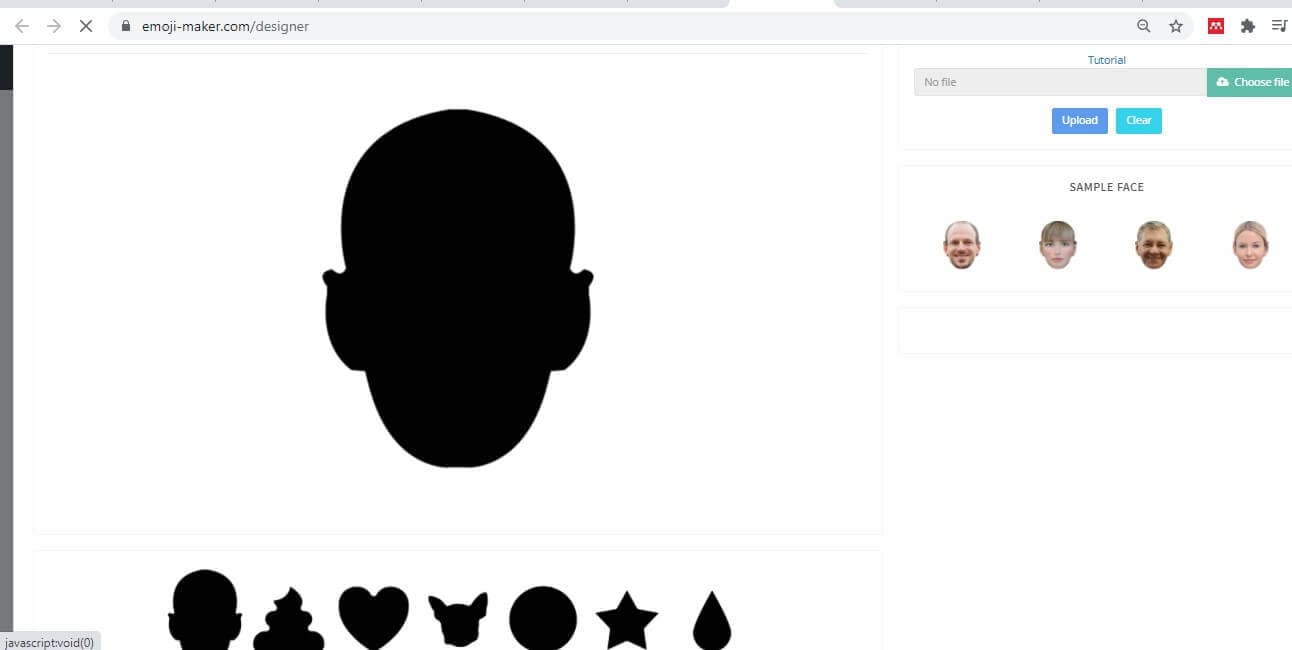
2. Select a sample shape and face. You can even upload your own selfie to use as a face.
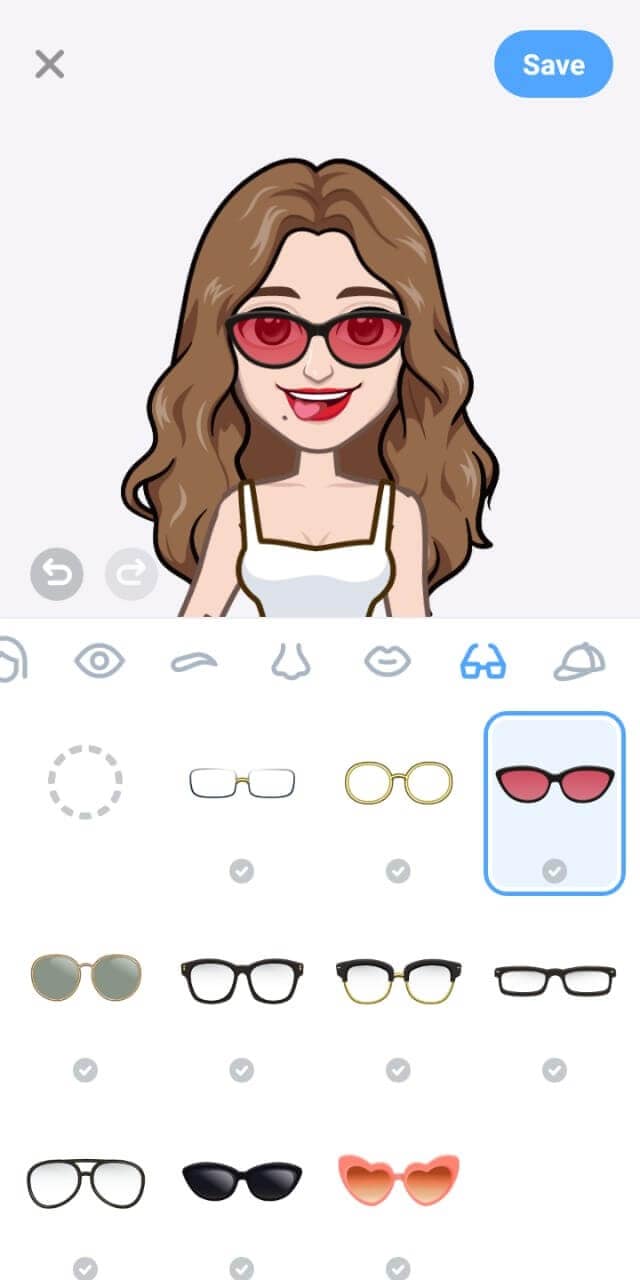
3. Now change the various features on the face such as eyes, hair, mustache, glasses, nose, etc
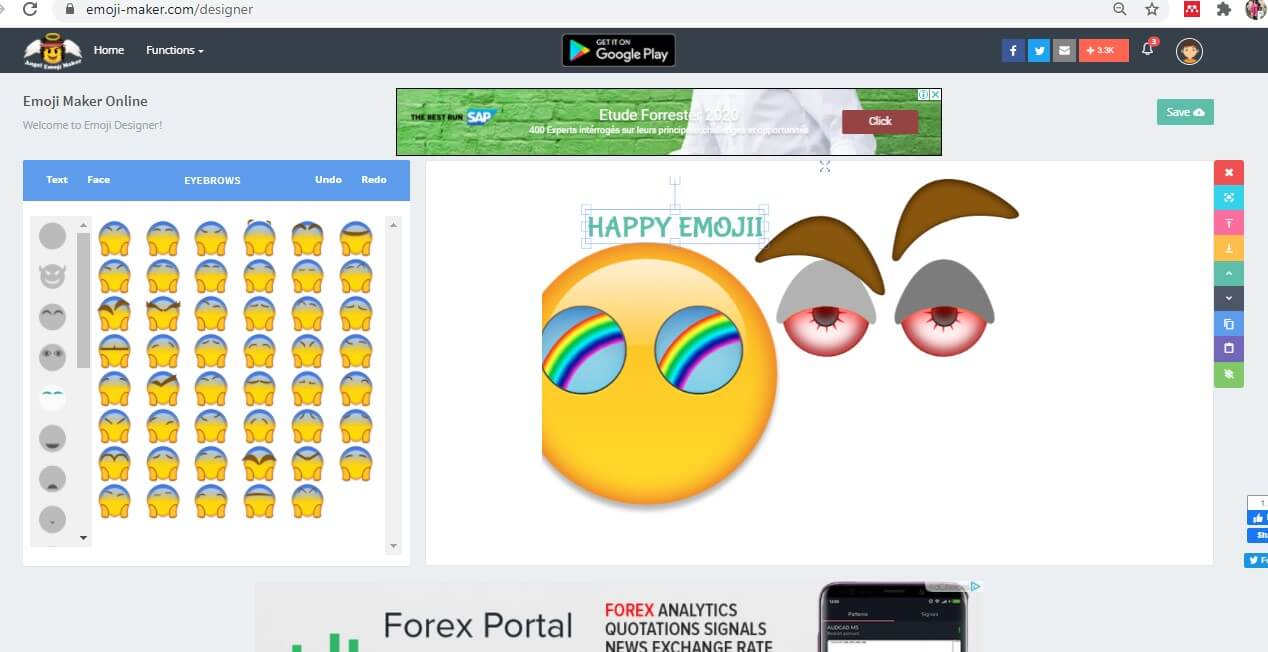
4. The undo and redo buttons are available for quick creations. The size of the emoji can be adjusted by clicking on the features and dragging it.
5. A panel on the right lets you copy, paste, or move the selected feature up, down, to the front or behind.
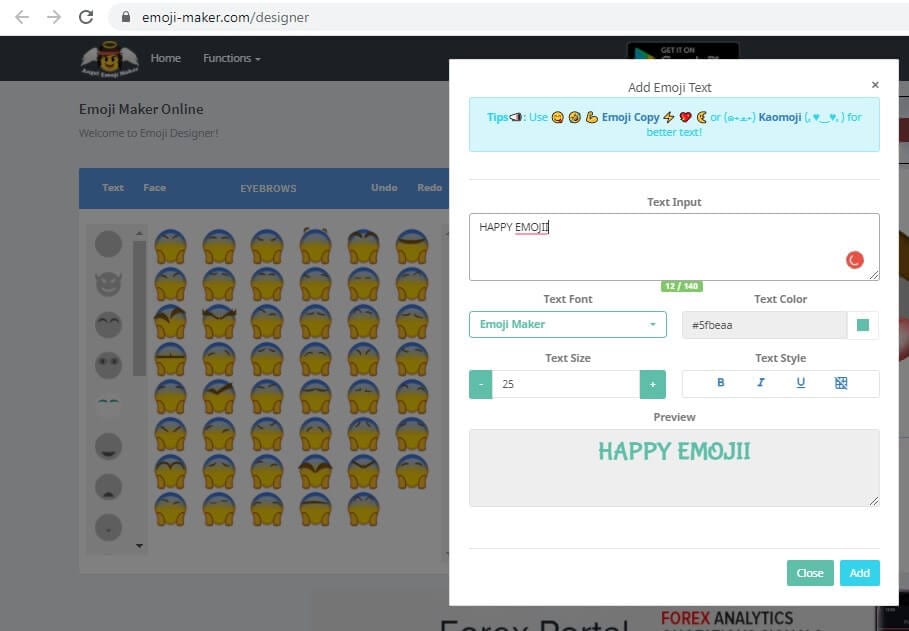
6. You can also click on the Text tab to insert a message with customized size, color, or font
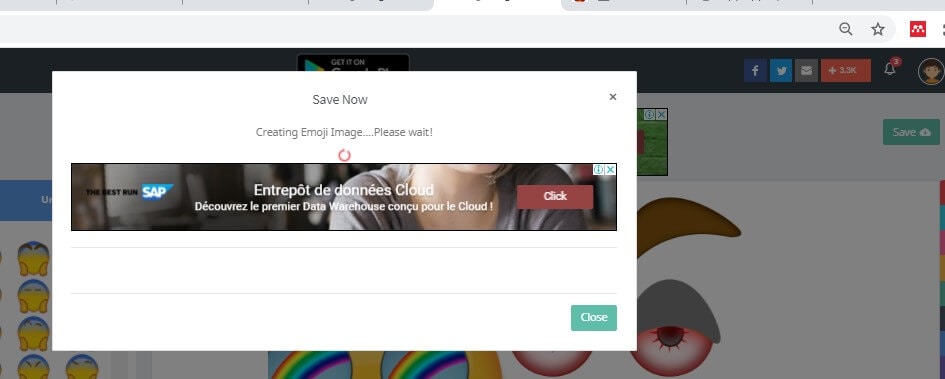
7. After customization, press Save in the top right corner. You can either directly save the emoji to your pc or crop to size and then save.
Method 2: Make Your Own Emoji Using an Emoji Maker App
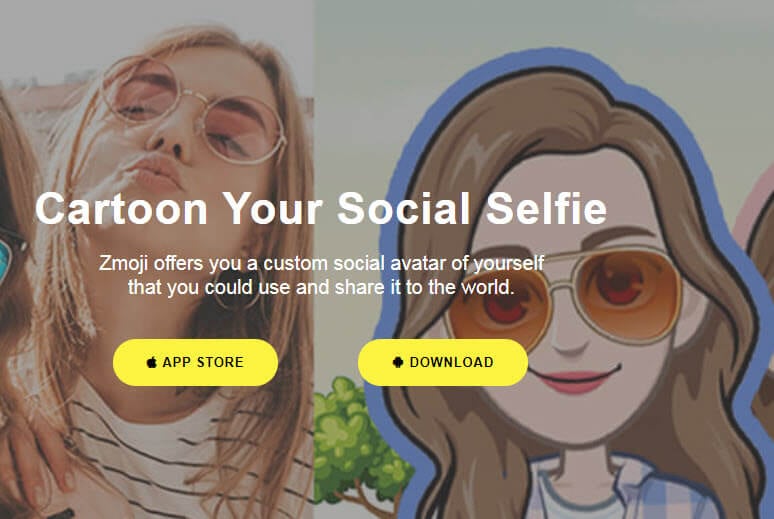
Zmoji is an app that lets you create a whole range of personalized avatars of yourself. Imagine a collection of stickers of different emotions but all featuring you.
You can create your avatar manually or by using the facial recognition feature. Moreover, you can dress up the avatar to look just like you. There is a wide range of stylish clothes you can choose from. Be funky or silly, or be you. Who cares? It’s time for some fun.
Let there be a mini-you in a funny or silly position. Or a dancing avatar of you to express your delight or crying a pool of tears after a piece of bad news, next-level texting, right?
1. Download Zmoji or either your Android or Apple device. Launch it.
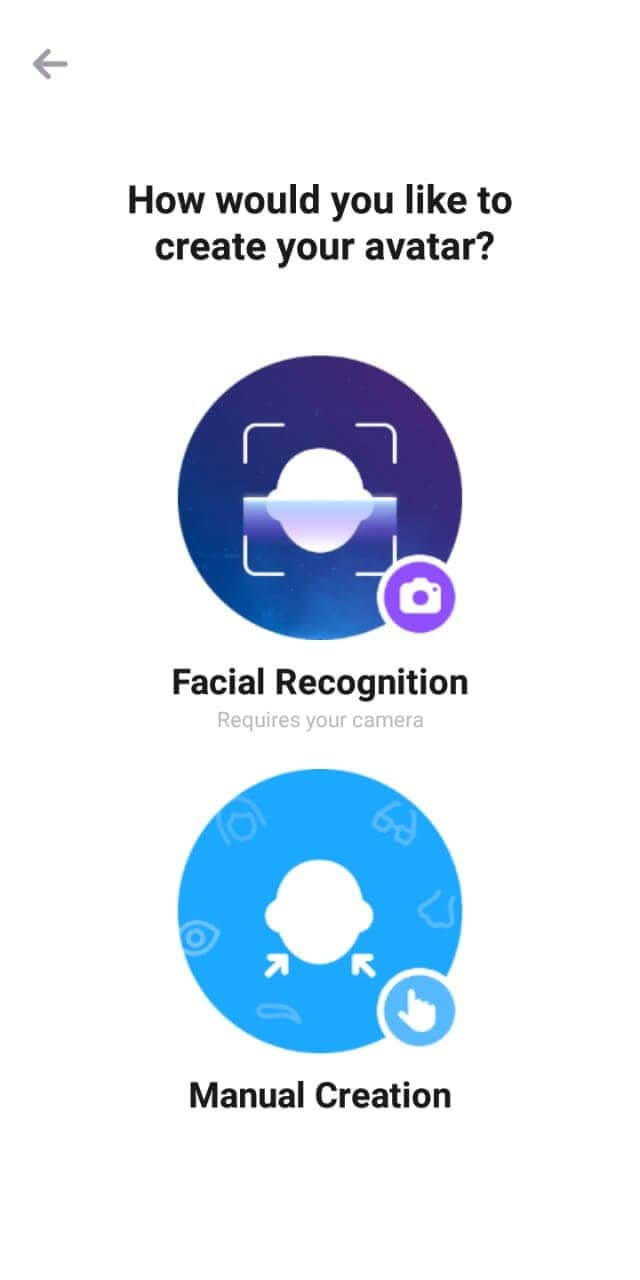
2. Choose your gender. Click on Facial Recognition and take a selfie to proceed. Or tap Manual Creation to create a face yourself.
3. Choose from the variety of features to make the emoji look precisely like you. Click Save. You will also earn coins on creating an emoji that you can use to buy special features.
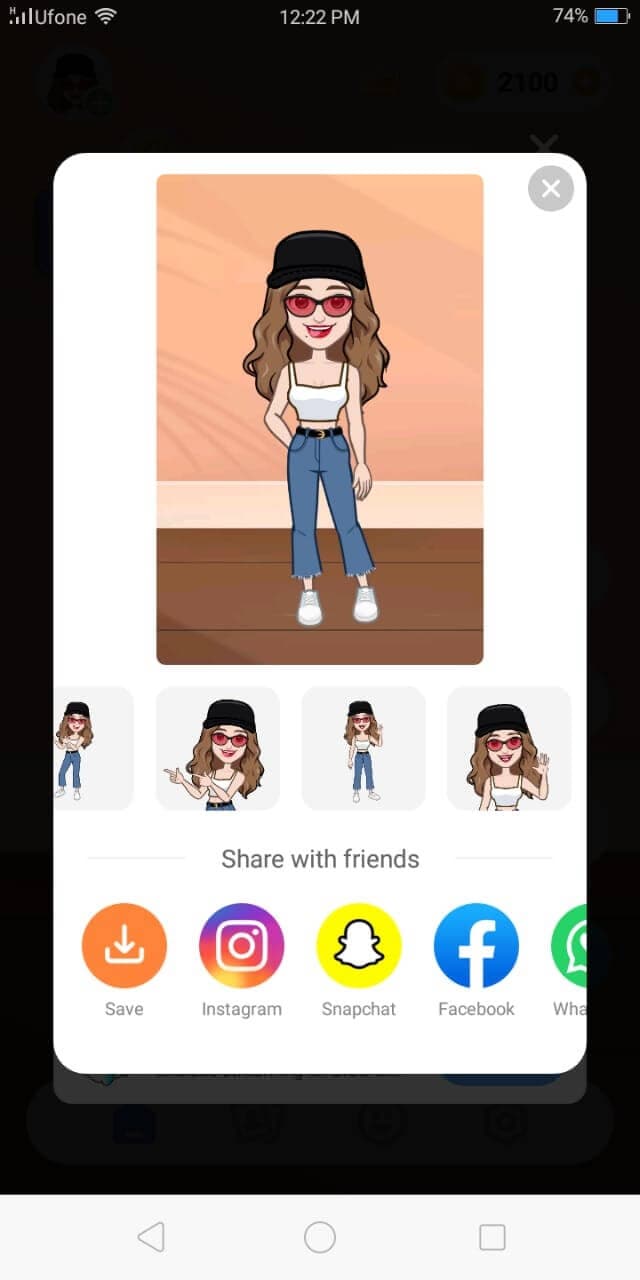
4. Now you can dress it up to match the real you and choose a pose that best fits your mood.
5. Click on Photobooth and choose a template to create a sticker of you just like that.

6. Once you are all dolled up, press Save or share the avatar directly on Facebook, Whatsapp, and Instagram, etc.
Bonus Tip-Add Your Emoji to a Video Using Wondershare Filmora
Wondershare Filmora, famous for its simple interface and professional video-making and editing tools, is here to save the day again. With the wide range of editing tools and effects that Filmora offers, I will show you how to create your own emoji and then enhance it further.
You can add the customized emoji or add other emojis from Filmora’s library. Motion effects and other special effects will give your video a refined and dramatic look, and the customized emoji will be a cherry on top.


Let’s surprise our friends with our unique creation!
1. Download and install Filmora. Launch it.
2. Click on File>Import Media to select the emoji you created as well as the video.
3. Drag and drop both onto the timeline.
4. In the viewer panel, adjust the size and location of the emoji.
5. Click on the emoji image in the timeline to change the values in Image, Color, and Motion. You can rotate the emoji or alter its color. You can even choose the motion of how the emoji comes in the video. This animated introduction of the emoji will give your video a dramatic look.
Finally, click Export, choose the destination folder, and the output format.
Conclusion
From creating unique emojis to creative avatars, you know it all now. We have walked you through how to make emoji in 2 easy ways. Now it’s up to you. You can use these customized emojis to add a spark to your conversations or attract followers to your brands. Based on your ease, choose any method and let the creativity in you take over.
Wondershare Filmora will help you create the kind of unique video you need to stand out. Just don’t forget to decorate your videos with your custom made emojis. You might get famous, who knows?
Shanoon Cox
Shanoon Cox is a writer and a lover of all things video.
Follow @Shanoon Cox
Shanoon Cox
Mar 27, 2024• Proven solutions
The small yellow faces that we have come to call emojis are now rapidly being used on all platforms. Whether you’re sending an email or texting a friend, emoji is ever-present to spice up the conversation and give it an emotional touch. But these cliché emojis are now becoming dull, and the creative side in us is craving for something more personal and fun.
To satisfy that craving of being unique, you can now create your own emoji. Tease your friends with an emoji of their faces or custom-create an emoji that best expresses your facial expressions. The customized emoji can be an object or an emotion, while the only limitation is your imagination.
Let me show you how to make emoji that relates to your feelings and will help you transform your texting experience.
- Method 1: Make Your Own Emoji Using Online Emoji Maker
- Method 2: Make Your Own Emoji Using an Emoji Maker App
- Bonus Tip-Add Your Emoji to a Video Using Wondershare Filmora
Method 1: Make Your Own Emoji Using Online Emoji Maker
Emoji Maker is an online tool to quench your thirst for creativity. It is free and incredibly easy to use. You would think that it takes expertise to make your own emoji, but, fortunately, all it takes is imagination and a few clicks, of course.
You can create an emoji from the face shapes available or customize a funny emoji using your own or a friend’s face. You can finally take revenge by pasting the funniest mustache on your ex’s face or making them bald. (Savage, right?)
Better yet, you can make a superhero emoji of yourself and even change the background as if you’re in the sky. The functions of this Emoji Maker are countless and of a professional level. These customized emojis are bound to make you stand out in those group chats
Now, as promised, I will show you exactly how it’s done.
1. First of all, open Emoji Maker on your browser.
2. Select a sample shape and face. You can even upload your own selfie to use as a face.
3. Now change the various features on the face such as eyes, hair, mustache, glasses, nose, etc
4. The undo and redo buttons are available for quick creations. The size of the emoji can be adjusted by clicking on the features and dragging it.
5. A panel on the right lets you copy, paste, or move the selected feature up, down, to the front or behind.

6. You can also click on the Text tab to insert a message with customized size, color, or font
7. After customization, press Save in the top right corner. You can either directly save the emoji to your pc or crop to size and then save.
Method 2: Make Your Own Emoji Using an Emoji Maker App
Zmoji is an app that lets you create a whole range of personalized avatars of yourself. Imagine a collection of stickers of different emotions but all featuring you.
You can create your avatar manually or by using the facial recognition feature. Moreover, you can dress up the avatar to look just like you. There is a wide range of stylish clothes you can choose from. Be funky or silly, or be you. Who cares? It’s time for some fun.
Let there be a mini-you in a funny or silly position. Or a dancing avatar of you to express your delight or crying a pool of tears after a piece of bad news, next-level texting, right?
1. Download Zmoji or either your Android or Apple device. Launch it.
2. Choose your gender. Click on Facial Recognition and take a selfie to proceed. Or tap Manual Creation to create a face yourself.
3. Choose from the variety of features to make the emoji look precisely like you. Click Save. You will also earn coins on creating an emoji that you can use to buy special features.
4. Now you can dress it up to match the real you and choose a pose that best fits your mood.
5. Click on Photobooth and choose a template to create a sticker of you just like that.
6. Once you are all dolled up, press Save or share the avatar directly on Facebook, Whatsapp, and Instagram, etc.
Bonus Tip-Add Your Emoji to a Video Using Wondershare Filmora
Wondershare Filmora, famous for its simple interface and professional video-making and editing tools, is here to save the day again. With the wide range of editing tools and effects that Filmora offers, I will show you how to create your own emoji and then enhance it further.
You can add the customized emoji or add other emojis from Filmora’s library. Motion effects and other special effects will give your video a refined and dramatic look, and the customized emoji will be a cherry on top.
Let’s surprise our friends with our unique creation!
1. Download and install Filmora. Launch it.
2. Click on File>Import Media to select the emoji you created as well as the video.
3. Drag and drop both onto the timeline.
4. In the viewer panel, adjust the size and location of the emoji.
5. Click on the emoji image in the timeline to change the values in Image, Color, and Motion. You can rotate the emoji or alter its color. You can even choose the motion of how the emoji comes in the video. This animated introduction of the emoji will give your video a dramatic look.
Finally, click Export, choose the destination folder, and the output format.
Conclusion
From creating unique emojis to creative avatars, you know it all now. We have walked you through how to make emoji in 2 easy ways. Now it’s up to you. You can use these customized emojis to add a spark to your conversations or attract followers to your brands. Based on your ease, choose any method and let the creativity in you take over.
Wondershare Filmora will help you create the kind of unique video you need to stand out. Just don’t forget to decorate your videos with your custom made emojis. You might get famous, who knows?
Shanoon Cox
Shanoon Cox is a writer and a lover of all things video.
Follow @Shanoon Cox
Shanoon Cox
Mar 27, 2024• Proven solutions
The small yellow faces that we have come to call emojis are now rapidly being used on all platforms. Whether you’re sending an email or texting a friend, emoji is ever-present to spice up the conversation and give it an emotional touch. But these cliché emojis are now becoming dull, and the creative side in us is craving for something more personal and fun.
To satisfy that craving of being unique, you can now create your own emoji. Tease your friends with an emoji of their faces or custom-create an emoji that best expresses your facial expressions. The customized emoji can be an object or an emotion, while the only limitation is your imagination.
Let me show you how to make emoji that relates to your feelings and will help you transform your texting experience.
- Method 1: Make Your Own Emoji Using Online Emoji Maker
- Method 2: Make Your Own Emoji Using an Emoji Maker App
- Bonus Tip-Add Your Emoji to a Video Using Wondershare Filmora
Method 1: Make Your Own Emoji Using Online Emoji Maker
Emoji Maker is an online tool to quench your thirst for creativity. It is free and incredibly easy to use. You would think that it takes expertise to make your own emoji, but, fortunately, all it takes is imagination and a few clicks, of course.
You can create an emoji from the face shapes available or customize a funny emoji using your own or a friend’s face. You can finally take revenge by pasting the funniest mustache on your ex’s face or making them bald. (Savage, right?)
Better yet, you can make a superhero emoji of yourself and even change the background as if you’re in the sky. The functions of this Emoji Maker are countless and of a professional level. These customized emojis are bound to make you stand out in those group chats
Now, as promised, I will show you exactly how it’s done.
1. First of all, open Emoji Maker on your browser.
2. Select a sample shape and face. You can even upload your own selfie to use as a face.
3. Now change the various features on the face such as eyes, hair, mustache, glasses, nose, etc
4. The undo and redo buttons are available for quick creations. The size of the emoji can be adjusted by clicking on the features and dragging it.
5. A panel on the right lets you copy, paste, or move the selected feature up, down, to the front or behind.
6. You can also click on the Text tab to insert a message with customized size, color, or font
7. After customization, press Save in the top right corner. You can either directly save the emoji to your pc or crop to size and then save.
Method 2: Make Your Own Emoji Using an Emoji Maker App
Zmoji is an app that lets you create a whole range of personalized avatars of yourself. Imagine a collection of stickers of different emotions but all featuring you.
You can create your avatar manually or by using the facial recognition feature. Moreover, you can dress up the avatar to look just like you. There is a wide range of stylish clothes you can choose from. Be funky or silly, or be you. Who cares? It’s time for some fun.
Let there be a mini-you in a funny or silly position. Or a dancing avatar of you to express your delight or crying a pool of tears after a piece of bad news, next-level texting, right?
1. Download Zmoji or either your Android or Apple device. Launch it.
2. Choose your gender. Click on Facial Recognition and take a selfie to proceed. Or tap Manual Creation to create a face yourself.
3. Choose from the variety of features to make the emoji look precisely like you. Click Save. You will also earn coins on creating an emoji that you can use to buy special features.
4. Now you can dress it up to match the real you and choose a pose that best fits your mood.
5. Click on Photobooth and choose a template to create a sticker of you just like that.
6. Once you are all dolled up, press Save or share the avatar directly on Facebook, Whatsapp, and Instagram, etc.
Bonus Tip-Add Your Emoji to a Video Using Wondershare Filmora
Wondershare Filmora, famous for its simple interface and professional video-making and editing tools, is here to save the day again. With the wide range of editing tools and effects that Filmora offers, I will show you how to create your own emoji and then enhance it further.
You can add the customized emoji or add other emojis from Filmora’s library. Motion effects and other special effects will give your video a refined and dramatic look, and the customized emoji will be a cherry on top.
Let’s surprise our friends with our unique creation!
1. Download and install Filmora. Launch it.
2. Click on File>Import Media to select the emoji you created as well as the video.
3. Drag and drop both onto the timeline.
4. In the viewer panel, adjust the size and location of the emoji.
5. Click on the emoji image in the timeline to change the values in Image, Color, and Motion. You can rotate the emoji or alter its color. You can even choose the motion of how the emoji comes in the video. This animated introduction of the emoji will give your video a dramatic look.
Finally, click Export, choose the destination folder, and the output format.
Conclusion
From creating unique emojis to creative avatars, you know it all now. We have walked you through how to make emoji in 2 easy ways. Now it’s up to you. You can use these customized emojis to add a spark to your conversations or attract followers to your brands. Based on your ease, choose any method and let the creativity in you take over.
Wondershare Filmora will help you create the kind of unique video you need to stand out. Just don’t forget to decorate your videos with your custom made emojis. You might get famous, who knows?
Shanoon Cox
Shanoon Cox is a writer and a lover of all things video.
Follow @Shanoon Cox
Best SolarMovie Alternatives-Watch Movies Online
Best SolarMovie Alternatives-Watch Movies Online
Shanoon Cox
Mar 27, 2024• Proven solutions
SolarMovie is an online video streaming site that offers a huge collection of movies and TV series. All these movies and shows can be streamed for free on SolarMovie. Furthermore, there is no registration required. Better yet, users can even download the movies in high quality.
However, some ISP’s have banned the SolarMovie website, and it might be inaccessible now. So, people are now on the lookout for a SolarMovie alternative that they can use to easily watch movie online.
To help with that, we have carefully curated a list of some of the top sites like SolarMovie.
- Best 10 SolarMovie Alternatives for You
- Bonus Tip- Make a Video with Wondershare Filmora Easy Movie Maker
Best 10 SolarMovie Alternatives for You
Even though there countless SolarMovie like websites on the internet, it can be pretty confusing to find the best one. Therefore, we have rounded up the top SolarMovie alternative sites for your ease.
- 1. Popcornflix
- 2. Tubi TV
- 3. Freeform
- 4. Netflix
- 5. Amazon Prime
- 6. Hulu
- 7. Yifymovies
- 8. CONtv
- 9. Aha Video
- 10. Vumoo
1. Popcornflix
One of the best SolarMovie alternative sites includes Popcornflix. It is a free HD streaming site through which users can watch movie online without having to register or subscribe. The range of movies available on this SolarMovie alternative is very extensive. Moreover, the movies are categorized as New Arrivals, Horror, Drama, Asian Action, to name a few. The categorization allows easy browsing and searching for the perfect movie. This SolarMovie alternative boasts a category of Popcornflix original movies as well that are exclusively available on this site. A search bar option further eases the task of finding a particular movie.

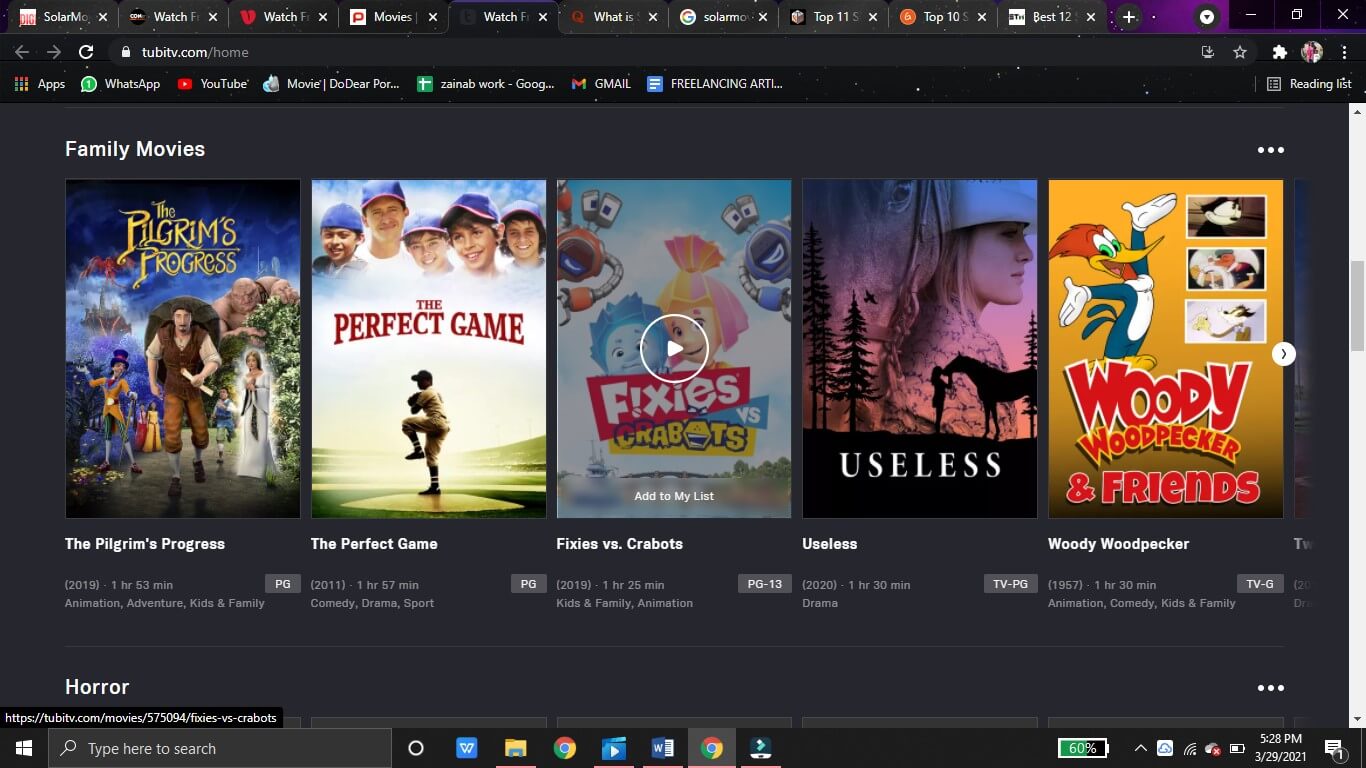
2. Tubi TV
Tubi TV is a top-notch SolarMovie alternative site. With a sleek and attractive interface, Tubi TV features a wide variety of movies available for free streaming. Also, the movies are classified into various sections based on Popularity, Genre, and many more. By selecting a title from the genre category like horror, lifestyle, or even stand-up comedy, users can easily find and watch movie online. This site might even be better than SolarMovie, as it has options to customize the resolution and the choice to display subtitles. An option of Add To My Playlist further makes this SolarMovie alternative an excellent site.
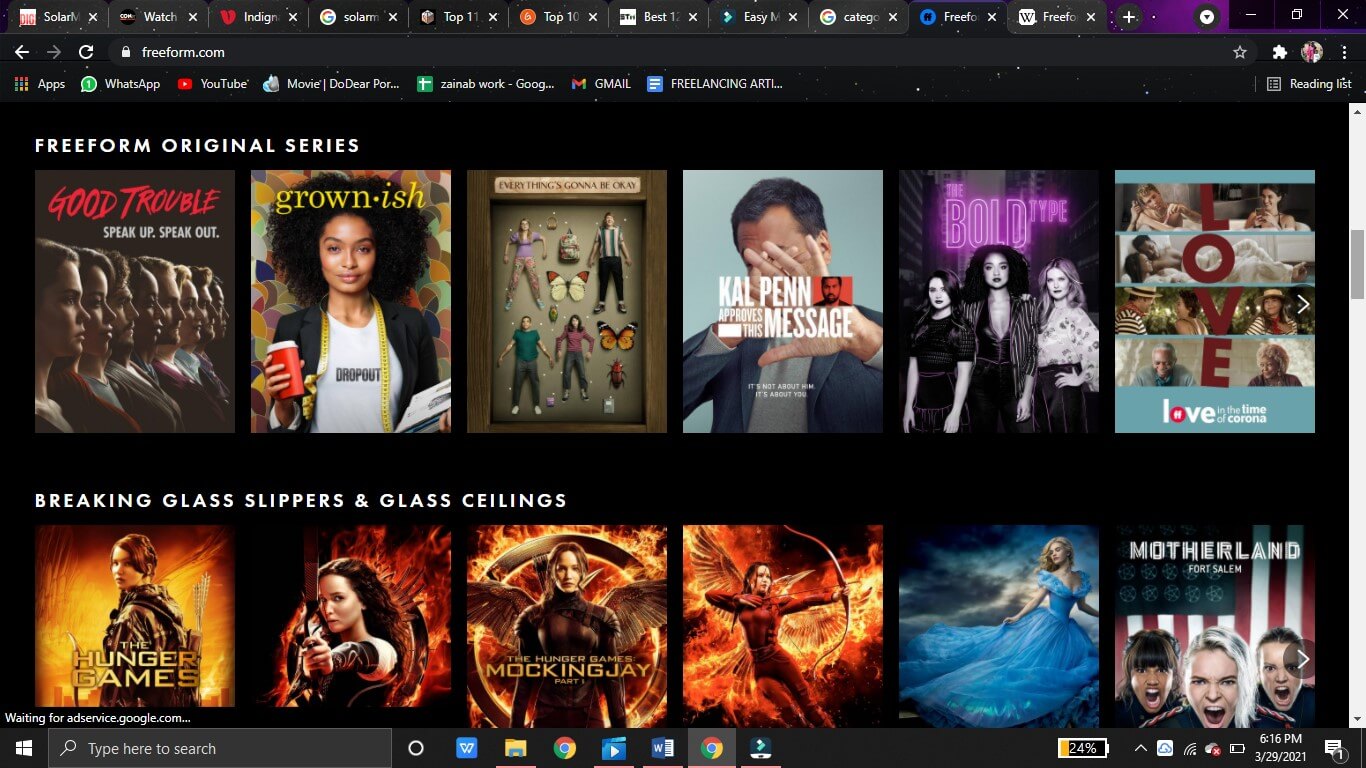
3. Freeform
Among the sites like SolarMovie, Freeform also tops the list. However, Freeform is a cable channel that requires users to access the endless movie library through their cable provider. But, this SolarMovie alternative has a huge collection of the latest as well as vintage movies. On Freeform, you can watch movie online just by clicking and selecting your cable provider. You can sign up for free to resume your movie streaming from where you left off. Freeform’s movies are creatively classified as Fierce and Funny, Familiar Faves, and Throwback.
4. Netflix
Netflix is an up-and-coming SolarMovie alternative that has dominated the online streaming sites owing to its vast movie library. Unlike SolarMovie, Netflix also produces many original movies that are available on the sites for HD streaming. Netflix, however, is not free. Users can watch movie online on Netflix by first registering for an account. After registering, users can sign in to watch movie online or download it in HD for offline streaming later. Furthermore, this SolarMovie alternative allows users to enjoy unlimited streaming on any device or platform.

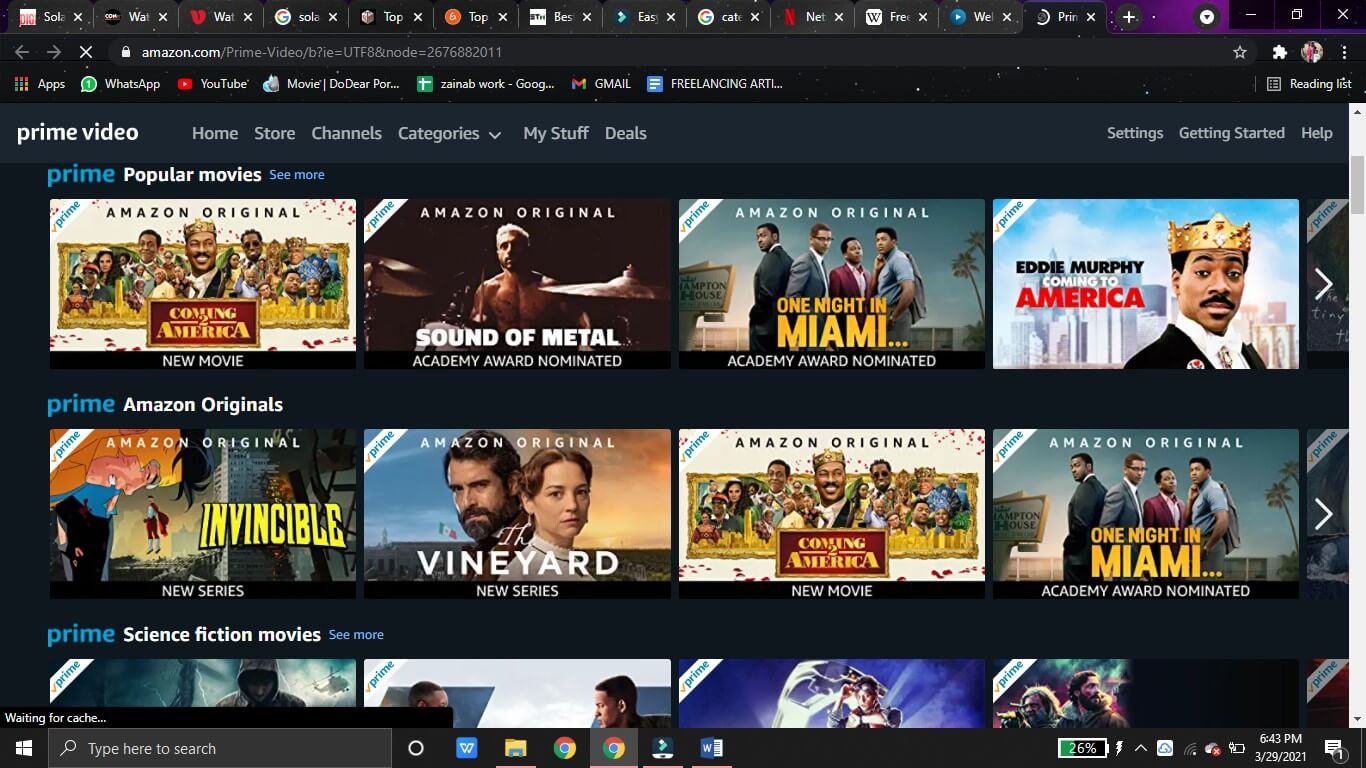
5. Amazon Prime
Amazon Prime is yet another top-notch SolarMovie alternative. On this site, users can find an exclusive Amazon original movie collection. With an intuitive interface and easy browsing categories, Amazon Prime is the go-to site to watch movie online without any ads or any kind of hassle. The categorization is based on genre, awards, or audience, to name a few. Also, the movies can be added to a Watchlist for easy organization. But, to watch movie online on Amazon Prime, users are required to create an account and sign in. And unlike SolarMovie, Amazon Prime isn’t available for free streaming.
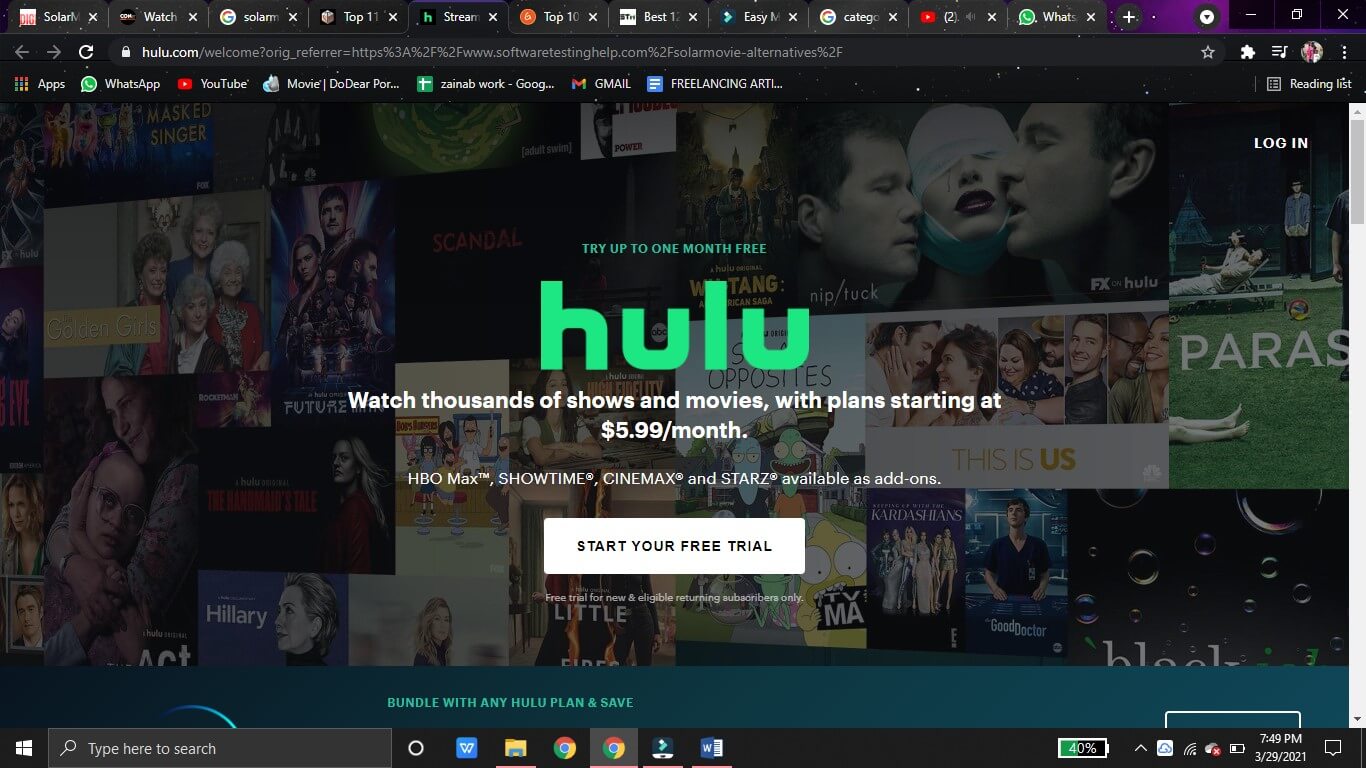
6. Hulu
Like SolarMovie, Hulu also boasts an extensive movie library. This library by Hulu is a mix of popular and classic movies. Also, it features a variety of Hulu original series and movies that you cannot find elsewhere. Whether you want to watch a thriller or a documentary, Hulu has got you covered. However, Hulu requires a paid subscription. Before subscription, you can activate a 30-day trial to weigh whether Hulu is the best SolarMovie alternative and if it is worth your time.
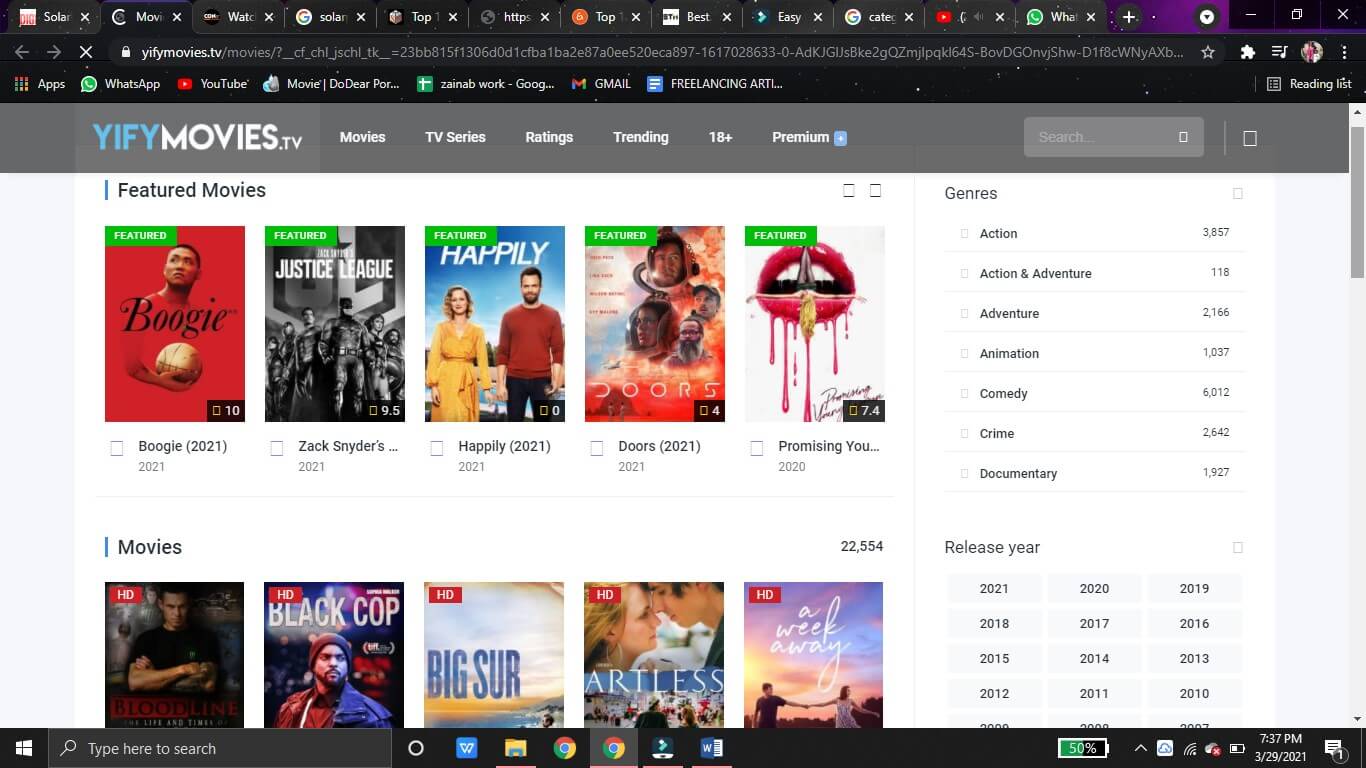
7. Yifymovies
Another amazing SolarMovie alternative is the Yifymovies site. This site rivals the SolarMovie website by featuring an up-to-date movie collection. What’s better, Yifymovies has classified its library into broad categories like adventure, animation, and documentary, etc. Users can also search by filtering out the movies on the basis of the year of release. All the movie titles contain a rating that helps the user decide whether that movie is worth their time or not. The video player in this SolarMovie alternative features the fast-forward and rewind option too. The only downside is that it has a few annoying pop-up ads.
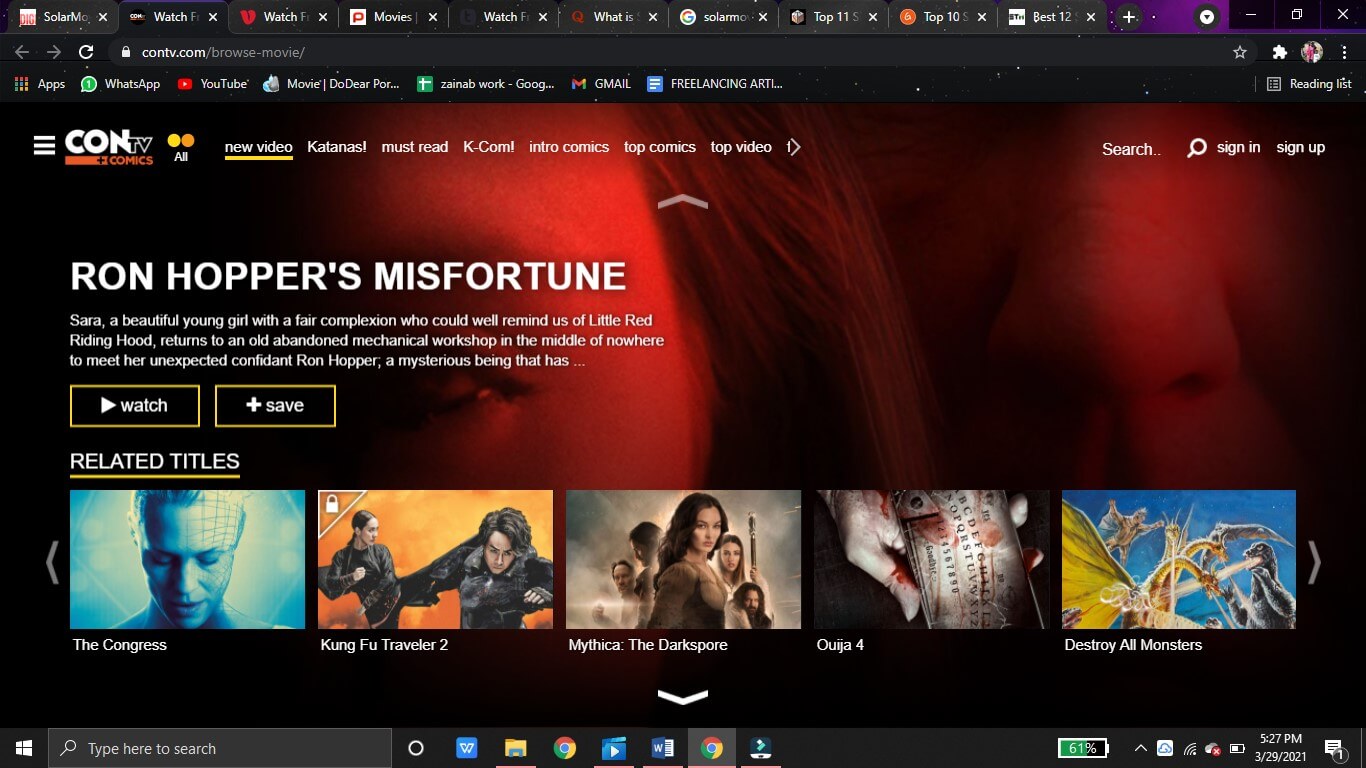
8. CONtv
One of the best sites like SolarMovie includes CONtv. Although this SolarMovie-like site requires registration in order to watch movie online, the unique and up-to-date movie collection here makes it a very popular user’s choice. By signing up, users can also save their favorite movies to the watchlist. A premium account is available if users wish to stream and watch movie online without any annoying pop-ups and commercials. On this SolarMovie alternative, users can also have access to the latest anime series as well as classic movies.
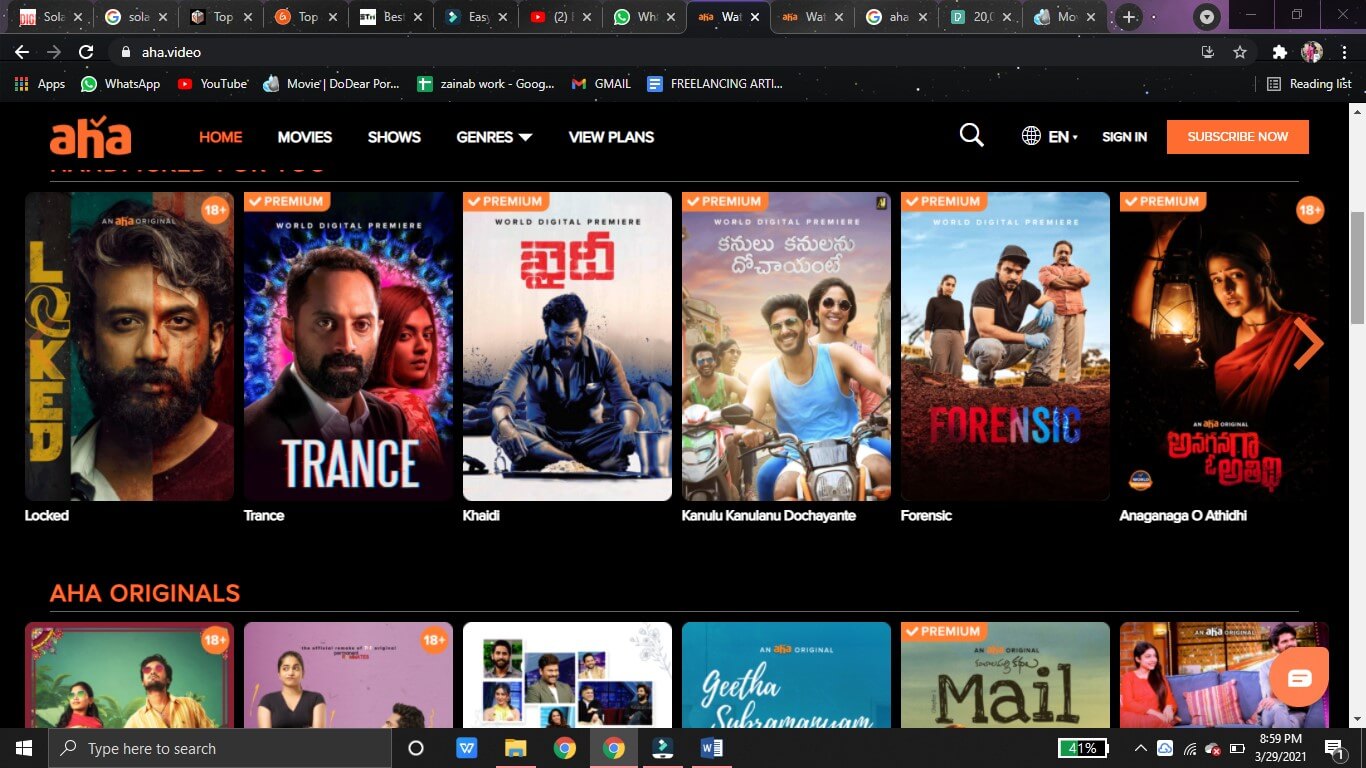
9. Aha Video
Aha is a subscription-based movie streaming SolarMovie alternative. On this site, you can watch movie online for free. But, the premium content can only be accessed after the paid subscription is activated. Aha video can easily be used as a SolarMovie alternative as it offers a great variety of movies that users can enjoy in HD quality and low buffering time. Movies for every genre like romance, comedy, and action can be found on this site. Better yet, a category is also available for kids.
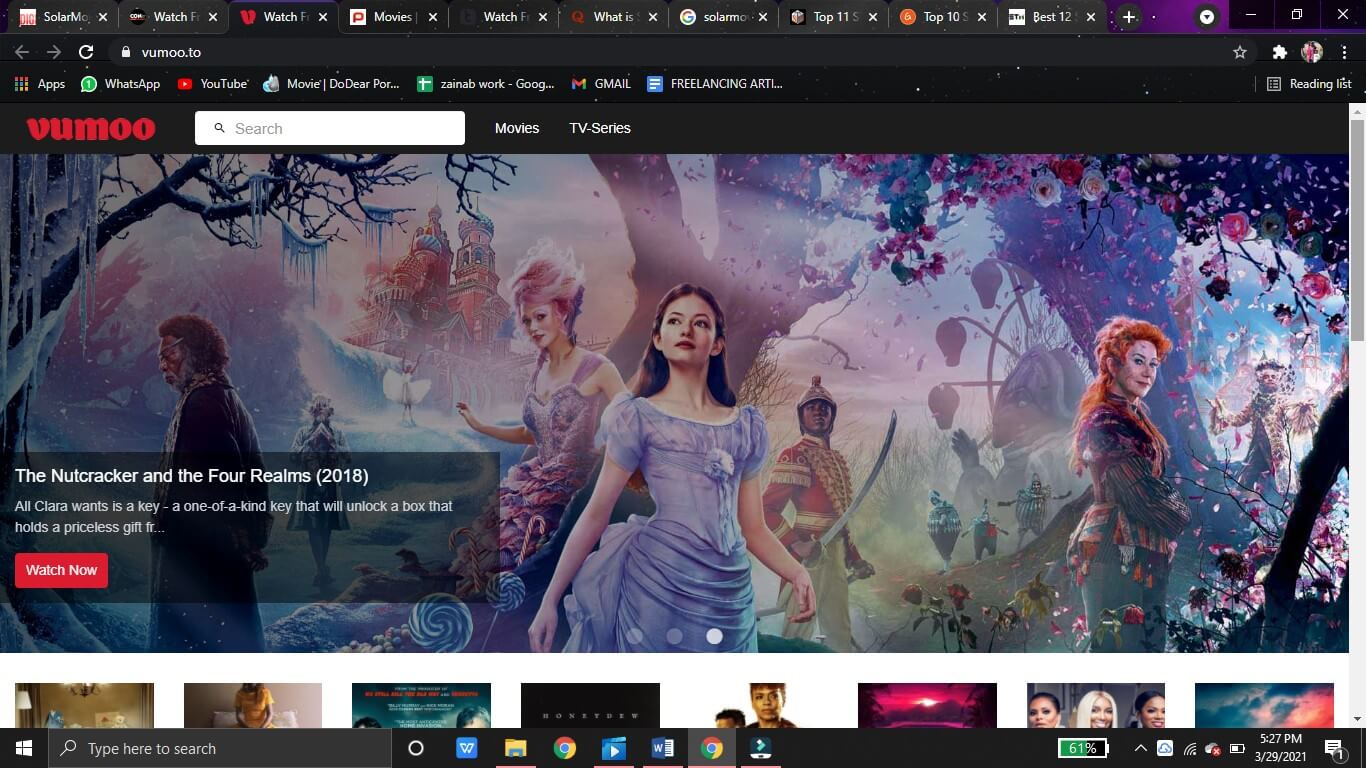
10. Vumoo
Vumoo is the last but not the least addition to our list of the best sites like SolarMovie. Vumoo features a multitude of movies ranging from horror to comedy. Users can easily find any kind of movie on this SolarMovie alternative. Users can watch movie online in HD quality through Vumoo. Furthermore, Vumoo is a free website that doesn’t require any signing up or registration. Users can just hop onto this SolarMovie like website and click to watch movie online. A major drawback is that the movies are not categorized, but that is countered by the searching option, which makes it easier to search a particular movie.
Bonus Tip- Make a Video with Wondershare Filmora Easy Movie Maker
Wondershare Filmora is a very powerful and comprehensive video editor for all kinds of edits. The user-friendly interface makes the editing process effortless. Users can easily add motion graphics, keyframe animations, and even color match with a single click.
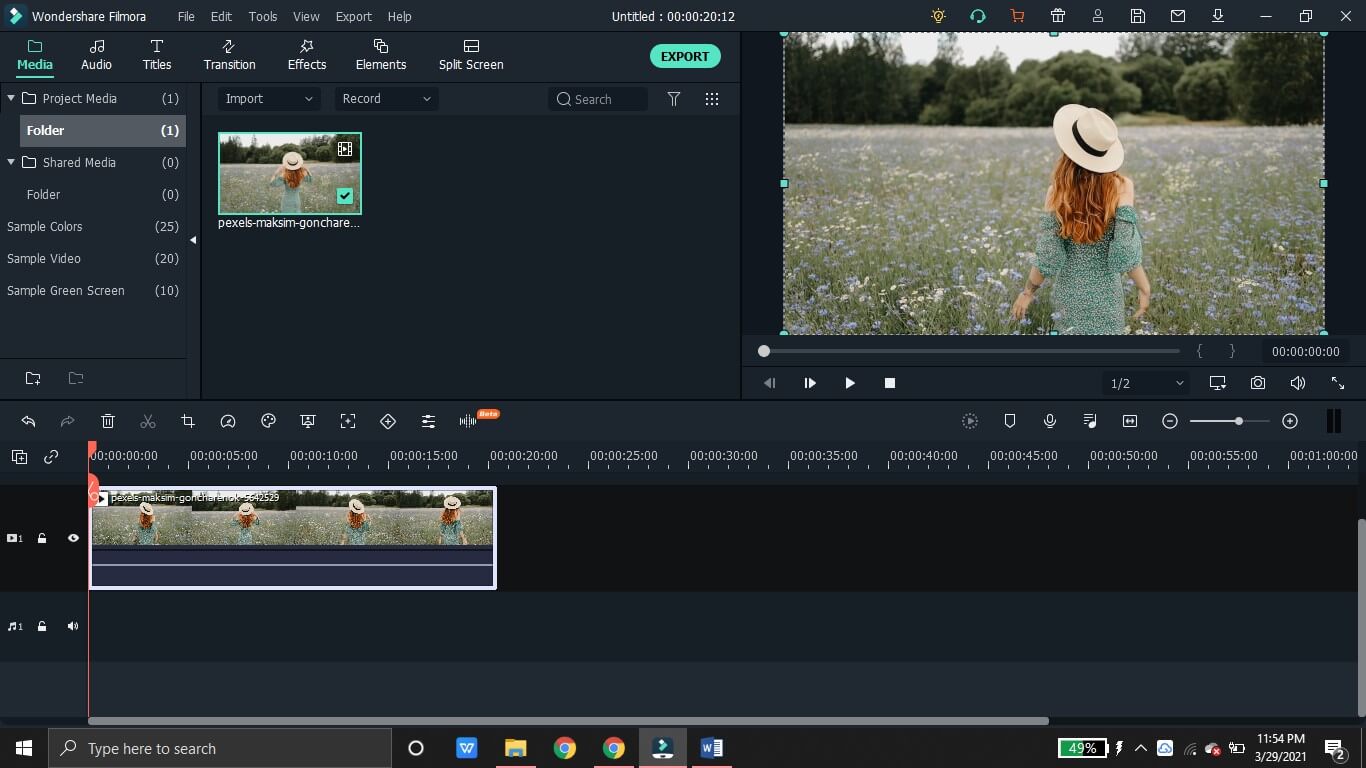
1. First, download Wondershare Filmora on your device and launch it. Then, click on File and tap on Import Media Files to import the clip you want to edit.
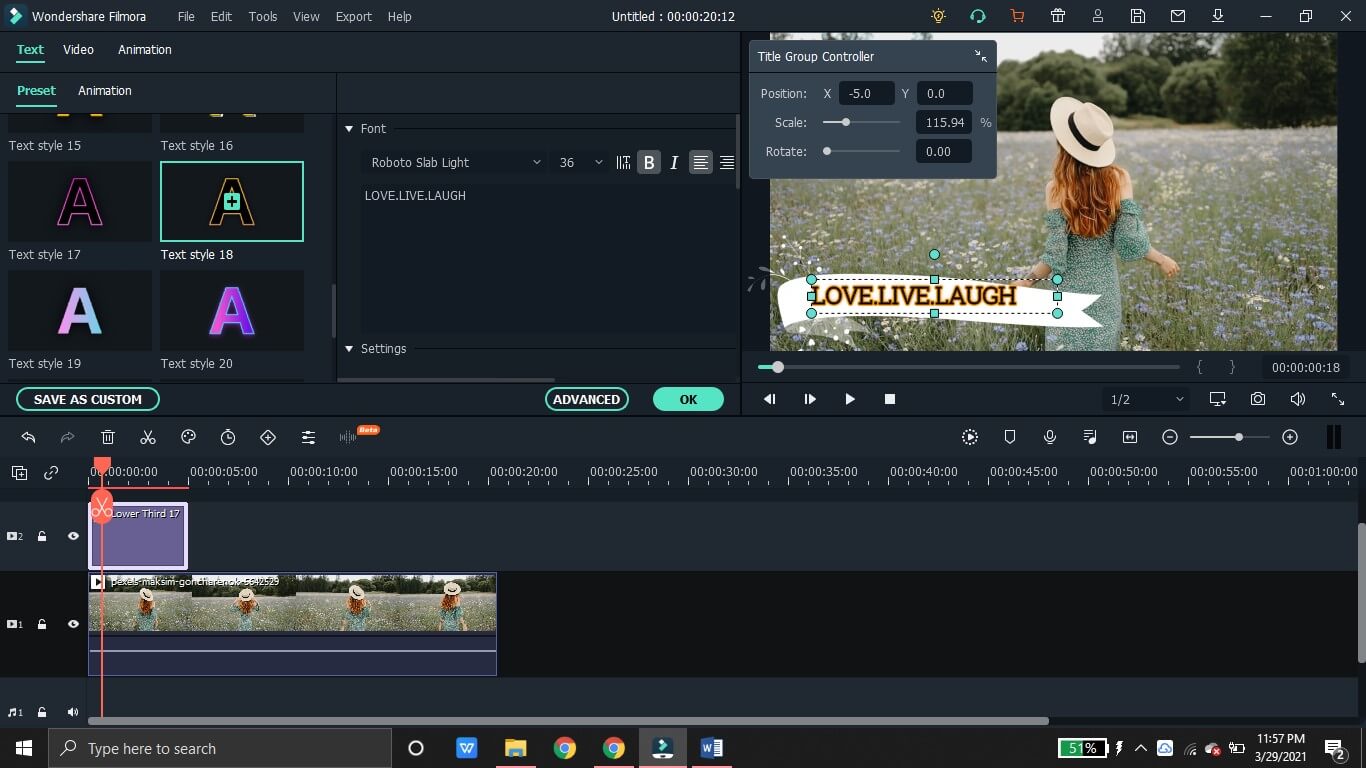
2. From the Titles section, you can choose a catchy template to compliment your video. By double-clicking on the title added to the timeline, you can access advanced settings to customize the title text, font size, color, etc. You can also animate the title to make it more dynamic.
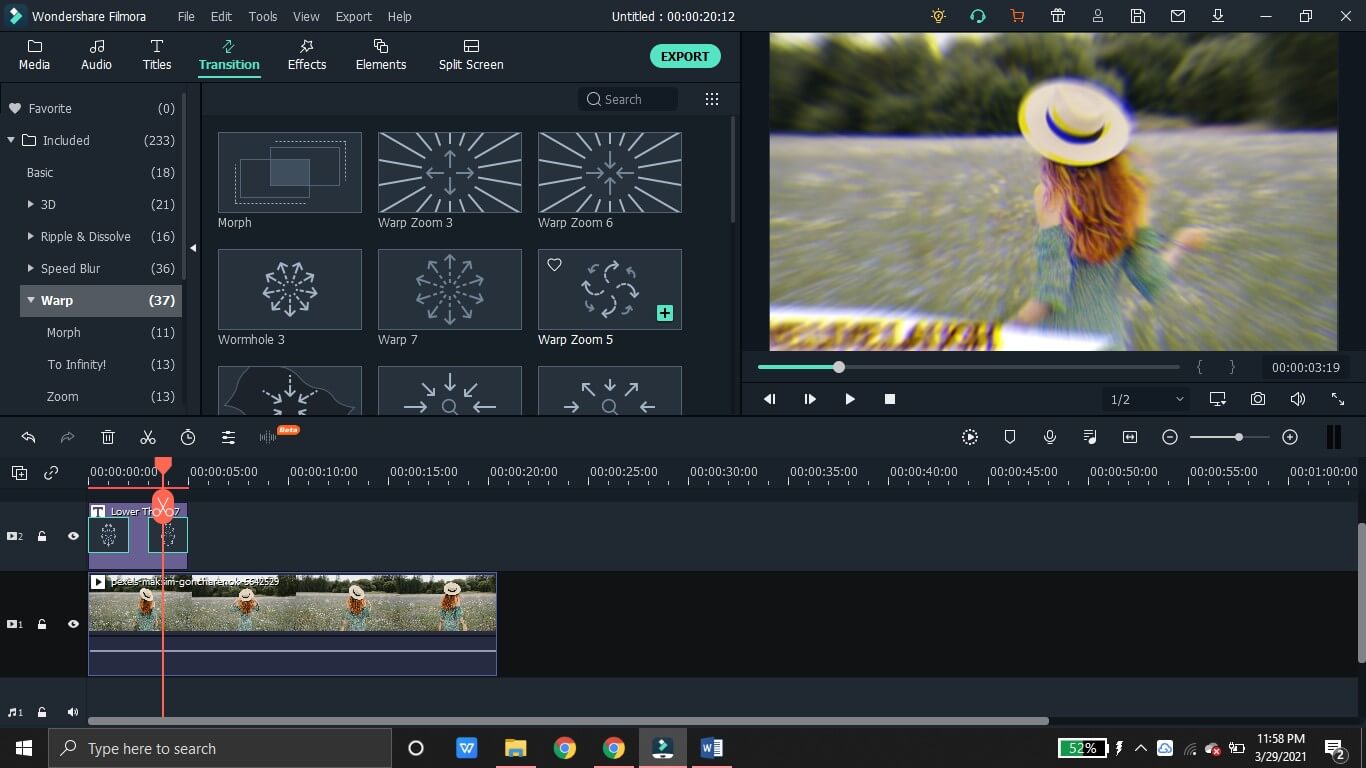
3. If you like to give your videos a cinematic touch, you can add multiple transitions ranging from 3D, ripple and dissolve, speed blur to warp effects. Just click on the plus icon on the effect to add it to the timeline. Drag and adjust the duration of the effect.
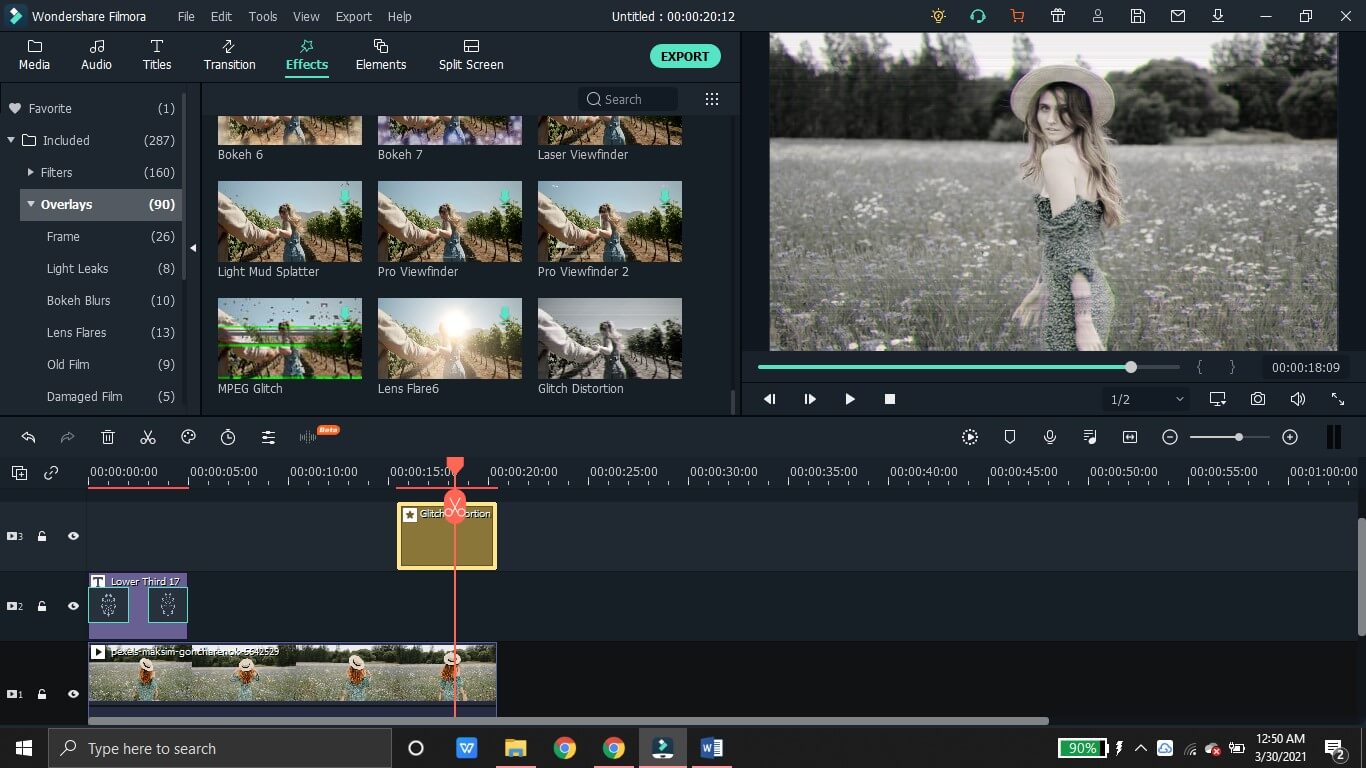
4. The Effects tab has various kinds of aesthetic filters and overlays. Choose a suitable overlay from the categories such as Frame, Bokeh Blur, Old Film etc.
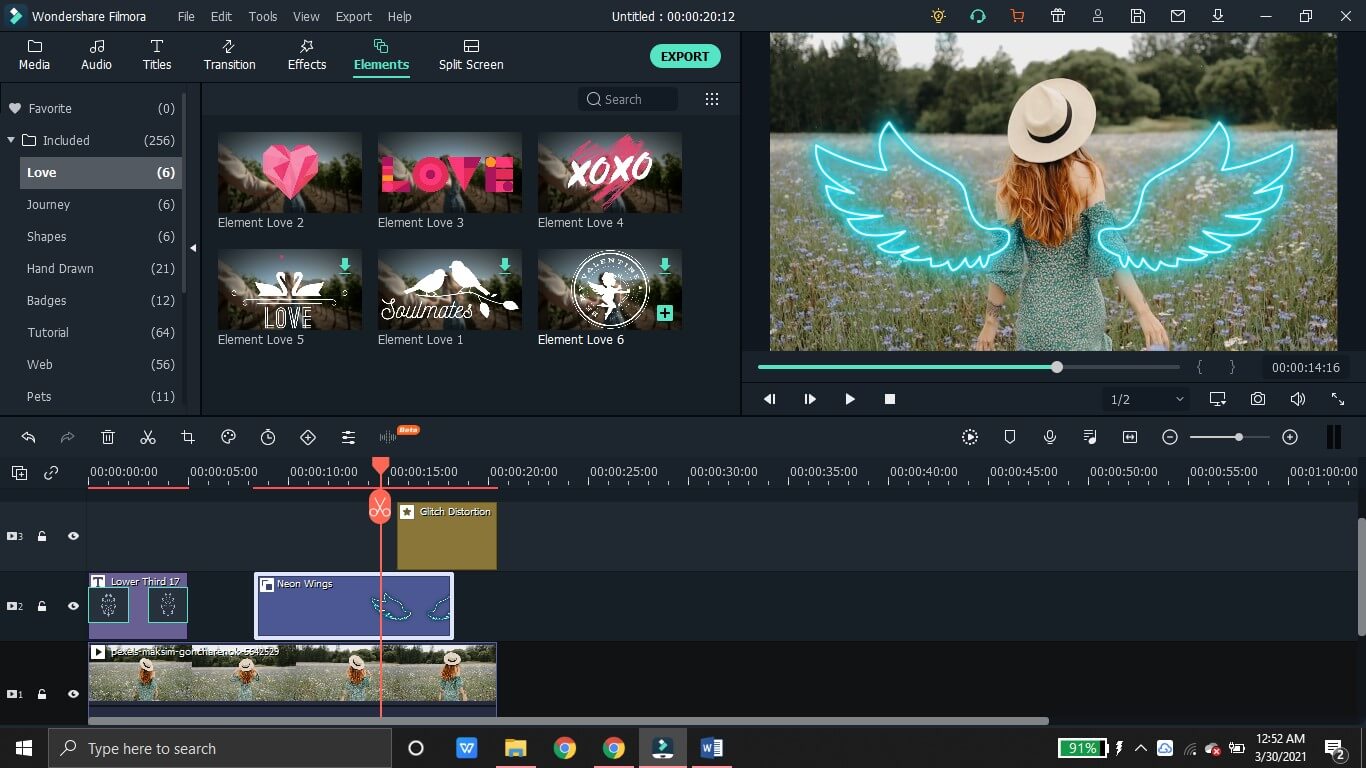
5. You can also make your videos very attractive by adding some colorful and appealing elements. From Badges to Hand Drawn icons, the Elements tab has a huge variety.
6. Finally, you can export the video and save it locally. Or, the video can be directly shared on the social media platforms like YouTube.

Summing up
Once again, you can enjoy limitless streaming of your favorite movies and shows. Thanks to the various sites like SolarMovie, you can watch movie online without any hassle. Just like SolarMovie, most of the sites we mentioned offer a huge movie library free of cost. And, there are multiple benefits associated with the SolarMovie alternative sites that range from the watchlist option to the resolution customization tool. So, you can go back to having a relaxing weekend by hopping on to the SolarMovie alternative site of your choice and watching some exciting movies. Go on and watch movie online on any device and enjoy!
Shanoon Cox
Shanoon Cox is a writer and a lover of all things video.
Follow @Shanoon Cox
Shanoon Cox
Mar 27, 2024• Proven solutions
SolarMovie is an online video streaming site that offers a huge collection of movies and TV series. All these movies and shows can be streamed for free on SolarMovie. Furthermore, there is no registration required. Better yet, users can even download the movies in high quality.
However, some ISP’s have banned the SolarMovie website, and it might be inaccessible now. So, people are now on the lookout for a SolarMovie alternative that they can use to easily watch movie online.
To help with that, we have carefully curated a list of some of the top sites like SolarMovie.
- Best 10 SolarMovie Alternatives for You
- Bonus Tip- Make a Video with Wondershare Filmora Easy Movie Maker
Best 10 SolarMovie Alternatives for You
Even though there countless SolarMovie like websites on the internet, it can be pretty confusing to find the best one. Therefore, we have rounded up the top SolarMovie alternative sites for your ease.
- 1. Popcornflix
- 2. Tubi TV
- 3. Freeform
- 4. Netflix
- 5. Amazon Prime
- 6. Hulu
- 7. Yifymovies
- 8. CONtv
- 9. Aha Video
- 10. Vumoo
1. Popcornflix
One of the best SolarMovie alternative sites includes Popcornflix. It is a free HD streaming site through which users can watch movie online without having to register or subscribe. The range of movies available on this SolarMovie alternative is very extensive. Moreover, the movies are categorized as New Arrivals, Horror, Drama, Asian Action, to name a few. The categorization allows easy browsing and searching for the perfect movie. This SolarMovie alternative boasts a category of Popcornflix original movies as well that are exclusively available on this site. A search bar option further eases the task of finding a particular movie.
2. Tubi TV
Tubi TV is a top-notch SolarMovie alternative site. With a sleek and attractive interface, Tubi TV features a wide variety of movies available for free streaming. Also, the movies are classified into various sections based on Popularity, Genre, and many more. By selecting a title from the genre category like horror, lifestyle, or even stand-up comedy, users can easily find and watch movie online. This site might even be better than SolarMovie, as it has options to customize the resolution and the choice to display subtitles. An option of Add To My Playlist further makes this SolarMovie alternative an excellent site.
3. Freeform
Among the sites like SolarMovie, Freeform also tops the list. However, Freeform is a cable channel that requires users to access the endless movie library through their cable provider. But, this SolarMovie alternative has a huge collection of the latest as well as vintage movies. On Freeform, you can watch movie online just by clicking and selecting your cable provider. You can sign up for free to resume your movie streaming from where you left off. Freeform’s movies are creatively classified as Fierce and Funny, Familiar Faves, and Throwback.
4. Netflix
Netflix is an up-and-coming SolarMovie alternative that has dominated the online streaming sites owing to its vast movie library. Unlike SolarMovie, Netflix also produces many original movies that are available on the sites for HD streaming. Netflix, however, is not free. Users can watch movie online on Netflix by first registering for an account. After registering, users can sign in to watch movie online or download it in HD for offline streaming later. Furthermore, this SolarMovie alternative allows users to enjoy unlimited streaming on any device or platform.
5. Amazon Prime
Amazon Prime is yet another top-notch SolarMovie alternative. On this site, users can find an exclusive Amazon original movie collection. With an intuitive interface and easy browsing categories, Amazon Prime is the go-to site to watch movie online without any ads or any kind of hassle. The categorization is based on genre, awards, or audience, to name a few. Also, the movies can be added to a Watchlist for easy organization. But, to watch movie online on Amazon Prime, users are required to create an account and sign in. And unlike SolarMovie, Amazon Prime isn’t available for free streaming.
6. Hulu
Like SolarMovie, Hulu also boasts an extensive movie library. This library by Hulu is a mix of popular and classic movies. Also, it features a variety of Hulu original series and movies that you cannot find elsewhere. Whether you want to watch a thriller or a documentary, Hulu has got you covered. However, Hulu requires a paid subscription. Before subscription, you can activate a 30-day trial to weigh whether Hulu is the best SolarMovie alternative and if it is worth your time.
7. Yifymovies
Another amazing SolarMovie alternative is the Yifymovies site. This site rivals the SolarMovie website by featuring an up-to-date movie collection. What’s better, Yifymovies has classified its library into broad categories like adventure, animation, and documentary, etc. Users can also search by filtering out the movies on the basis of the year of release. All the movie titles contain a rating that helps the user decide whether that movie is worth their time or not. The video player in this SolarMovie alternative features the fast-forward and rewind option too. The only downside is that it has a few annoying pop-up ads.
8. CONtv
One of the best sites like SolarMovie includes CONtv. Although this SolarMovie-like site requires registration in order to watch movie online, the unique and up-to-date movie collection here makes it a very popular user’s choice. By signing up, users can also save their favorite movies to the watchlist. A premium account is available if users wish to stream and watch movie online without any annoying pop-ups and commercials. On this SolarMovie alternative, users can also have access to the latest anime series as well as classic movies.
9. Aha Video
Aha is a subscription-based movie streaming SolarMovie alternative. On this site, you can watch movie online for free. But, the premium content can only be accessed after the paid subscription is activated. Aha video can easily be used as a SolarMovie alternative as it offers a great variety of movies that users can enjoy in HD quality and low buffering time. Movies for every genre like romance, comedy, and action can be found on this site. Better yet, a category is also available for kids.
10. Vumoo
Vumoo is the last but not the least addition to our list of the best sites like SolarMovie. Vumoo features a multitude of movies ranging from horror to comedy. Users can easily find any kind of movie on this SolarMovie alternative. Users can watch movie online in HD quality through Vumoo. Furthermore, Vumoo is a free website that doesn’t require any signing up or registration. Users can just hop onto this SolarMovie like website and click to watch movie online. A major drawback is that the movies are not categorized, but that is countered by the searching option, which makes it easier to search a particular movie.
Bonus Tip- Make a Video with Wondershare Filmora Easy Movie Maker
Wondershare Filmora is a very powerful and comprehensive video editor for all kinds of edits. The user-friendly interface makes the editing process effortless. Users can easily add motion graphics, keyframe animations, and even color match with a single click.
1. First, download Wondershare Filmora on your device and launch it. Then, click on File and tap on Import Media Files to import the clip you want to edit.
2. From the Titles section, you can choose a catchy template to compliment your video. By double-clicking on the title added to the timeline, you can access advanced settings to customize the title text, font size, color, etc. You can also animate the title to make it more dynamic.
3. If you like to give your videos a cinematic touch, you can add multiple transitions ranging from 3D, ripple and dissolve, speed blur to warp effects. Just click on the plus icon on the effect to add it to the timeline. Drag and adjust the duration of the effect.
4. The Effects tab has various kinds of aesthetic filters and overlays. Choose a suitable overlay from the categories such as Frame, Bokeh Blur, Old Film etc.
5. You can also make your videos very attractive by adding some colorful and appealing elements. From Badges to Hand Drawn icons, the Elements tab has a huge variety.
6. Finally, you can export the video and save it locally. Or, the video can be directly shared on the social media platforms like YouTube.
Summing up
Once again, you can enjoy limitless streaming of your favorite movies and shows. Thanks to the various sites like SolarMovie, you can watch movie online without any hassle. Just like SolarMovie, most of the sites we mentioned offer a huge movie library free of cost. And, there are multiple benefits associated with the SolarMovie alternative sites that range from the watchlist option to the resolution customization tool. So, you can go back to having a relaxing weekend by hopping on to the SolarMovie alternative site of your choice and watching some exciting movies. Go on and watch movie online on any device and enjoy!
Shanoon Cox
Shanoon Cox is a writer and a lover of all things video.
Follow @Shanoon Cox
How to Make Memes on iPhone and Android
How to Make Memes on iPhone and Android

Ollie Mattison
Mar 27, 2024• Proven solutions
With growing demand on the internet, memes are spreading like wildfire. In case you want to promote your brand using various types of relatable memes that would drive more traffic for your website, then there is good news for you. It doesn’t matter, whether you own an Android or iOS device. We will help you out in learning how to make memes on iPhone/Android in this article. Keep reading!
- Part1: How to make memes on iPhone with Meme Generator
- Part2: How to make memes on Android with Memedroid
- Part3: Recommended - Making memes with Filmora meme maker online
Part 1: How to make memes on iPhone with Meme Generator
While planning to create memes on your iPhone, you might find Meme Generator as the most suitable tool. It helps you create hilarious memes and allows you to share on social media platforms like Twitter, Facebook, Messenger, Instagram, Dropbox, E-mail, Snapchat etc. you get 500 plus memes with example captions under different categories.
You can customize memes using your own photos and adding text, alter size and color of text using 10 different fonts. You can crop the image, move it, add border to it, filter/search memes, and scroll through each meme category. There are no watermark or auto upload of memes to protect your privacy. Here is the detailed guide –
Step 1: Install Meme Generator from App Store on your iPhone and launch the app.
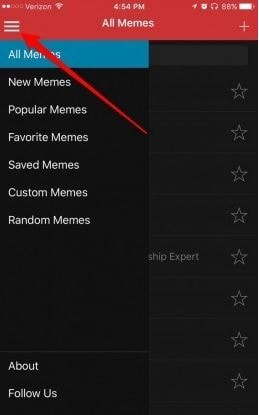
Step 2: Tap on the 3 horizontal lines on the top-left corner to browse memes. If you know the name, then search a meme and click on it.
Step 3: Use the example text or hit the ‘Text’ bar to add or edit your caption. Press the icons over the top-right corner for customizing your meme photo and caption options.

Step 4: Tap on the ‘Save’ or ‘Share’ button, once you are done editing the meme. You can find the meme on your ‘Photos’ app.
Part 2: How to make memes on Android with Memedroid
If you are wondering how to make memes on Android, then take the Memedroid app into consideration. You can create photos and GIF memes, jokes, avatars, graphics etc. with this app. There are numerous memes uploaded everyday on the app and you get the chance to let people vote for your meme too.
You get to use popular templates such as evil toddler, attached girlfriend, surprised koala with hilarious designs. The best rated memes are in the top gallery and you get the main gallery with latest funny memes too. You can design and save your memes and share them or download, it’s up to you. It supports a wide variety of languages such as English, French, Spanish, Italian, Portuguese etc.
Here are the steps for how to make memes on Android –
Step 1: Download and install the app on your mobile and launch it. Click on ‘Meme Factory’ to pick the background image and then you can swipe to explore the other features too. Alternatively, you can add your own photos if Meme factory was not of your choice. Hit ‘Upload Zone’ instead of ‘Meme Factory’ and register for a free account. On the ‘Upload’ screen, tap the ‘Select An Image’ button to pick a photo within 330MB size

Step 2: After selecting the background image, add captions at the top and bottom of the image. The ‘SAVE’ button can be found on the top-right, tap that to save. Likewise, for sharing the meme, hit the ‘SHARE’ button located at the bottom of the screen.
Step 3: Add tags and accept the ‘Terms of Service’ followed by ‘Send’ button. Wait a while, to get you meme ready for your audience.

Part 3: Recommended - Making memes with Filmora meme maker online
In order to make memes on iPhone/Android, you need a mobile device. But, what if you have a computer on which you need to create a meme? Well, Filmora meme maker is the apt choice for you. You don’t need to download apps or software on your Pc. It is the ultimate online solution.
Brief steps to introduce making memes. You can create image, GIF, and video memes adding nice fonts. It processes video/GIF/image memes rapidly than the competitors. Adding texts, fonts and altering font colors is so easy with it.
Here is the detailed guide to make memes on Android –
Step 1: Visit the official Filmora website and look for Filmora online meme maker. Import videos by dragging and dropping to the Filmora interface. You can even add online links to videos in order to upload them.

Step 2: After selecting the video/photo/GIF move to the meme editor page and customize your video meme using tools from the left pane. Include text, change fonts and then you can preview the changes.

Step 3: Tap on the ‘CREATE’ button to apply the changes, when you are satisfied. Press the ‘DOWNLOAD’ button and then share your meme on social media sites.

Conclusion
Coming towards the end of the article, we have discovered that Filmora creates brilliant memes and that too, in no time. No lengthy or annoying processes, nor you need apps that eat up your phone memory. Life is blissfully funny with meme making on Filmora.
Ollie Mattison
Ollie Mattison is a writer and a lover of all things video.
Follow @Ollie Mattison
Ollie Mattison
Mar 27, 2024• Proven solutions
With growing demand on the internet, memes are spreading like wildfire. In case you want to promote your brand using various types of relatable memes that would drive more traffic for your website, then there is good news for you. It doesn’t matter, whether you own an Android or iOS device. We will help you out in learning how to make memes on iPhone/Android in this article. Keep reading!
- Part1: How to make memes on iPhone with Meme Generator
- Part2: How to make memes on Android with Memedroid
- Part3: Recommended - Making memes with Filmora meme maker online
Part 1: How to make memes on iPhone with Meme Generator
While planning to create memes on your iPhone, you might find Meme Generator as the most suitable tool. It helps you create hilarious memes and allows you to share on social media platforms like Twitter, Facebook, Messenger, Instagram, Dropbox, E-mail, Snapchat etc. you get 500 plus memes with example captions under different categories.
You can customize memes using your own photos and adding text, alter size and color of text using 10 different fonts. You can crop the image, move it, add border to it, filter/search memes, and scroll through each meme category. There are no watermark or auto upload of memes to protect your privacy. Here is the detailed guide –
Step 1: Install Meme Generator from App Store on your iPhone and launch the app.
Step 2: Tap on the 3 horizontal lines on the top-left corner to browse memes. If you know the name, then search a meme and click on it.
Step 3: Use the example text or hit the ‘Text’ bar to add or edit your caption. Press the icons over the top-right corner for customizing your meme photo and caption options.
Step 4: Tap on the ‘Save’ or ‘Share’ button, once you are done editing the meme. You can find the meme on your ‘Photos’ app.
Part 2: How to make memes on Android with Memedroid
If you are wondering how to make memes on Android, then take the Memedroid app into consideration. You can create photos and GIF memes, jokes, avatars, graphics etc. with this app. There are numerous memes uploaded everyday on the app and you get the chance to let people vote for your meme too.
You get to use popular templates such as evil toddler, attached girlfriend, surprised koala with hilarious designs. The best rated memes are in the top gallery and you get the main gallery with latest funny memes too. You can design and save your memes and share them or download, it’s up to you. It supports a wide variety of languages such as English, French, Spanish, Italian, Portuguese etc.
Here are the steps for how to make memes on Android –
Step 1: Download and install the app on your mobile and launch it. Click on ‘Meme Factory’ to pick the background image and then you can swipe to explore the other features too. Alternatively, you can add your own photos if Meme factory was not of your choice. Hit ‘Upload Zone’ instead of ‘Meme Factory’ and register for a free account. On the ‘Upload’ screen, tap the ‘Select An Image’ button to pick a photo within 330MB size
Step 2: After selecting the background image, add captions at the top and bottom of the image. The ‘SAVE’ button can be found on the top-right, tap that to save. Likewise, for sharing the meme, hit the ‘SHARE’ button located at the bottom of the screen.
Step 3: Add tags and accept the ‘Terms of Service’ followed by ‘Send’ button. Wait a while, to get you meme ready for your audience.
Part 3: Recommended - Making memes with Filmora meme maker online
In order to make memes on iPhone/Android, you need a mobile device. But, what if you have a computer on which you need to create a meme? Well, Filmora meme maker is the apt choice for you. You don’t need to download apps or software on your Pc. It is the ultimate online solution.
Brief steps to introduce making memes. You can create image, GIF, and video memes adding nice fonts. It processes video/GIF/image memes rapidly than the competitors. Adding texts, fonts and altering font colors is so easy with it.
Here is the detailed guide to make memes on Android –
Step 1: Visit the official Filmora website and look for Filmora online meme maker. Import videos by dragging and dropping to the Filmora interface. You can even add online links to videos in order to upload them.
Step 2: After selecting the video/photo/GIF move to the meme editor page and customize your video meme using tools from the left pane. Include text, change fonts and then you can preview the changes.
Step 3: Tap on the ‘CREATE’ button to apply the changes, when you are satisfied. Press the ‘DOWNLOAD’ button and then share your meme on social media sites.
Conclusion
Coming towards the end of the article, we have discovered that Filmora creates brilliant memes and that too, in no time. No lengthy or annoying processes, nor you need apps that eat up your phone memory. Life is blissfully funny with meme making on Filmora.
Ollie Mattison
Ollie Mattison is a writer and a lover of all things video.
Follow @Ollie Mattison
Add Emojis to Videos on YouTube/Facebook/Snapchat [Step by Step Guide]
Add Emojis to Videos on YouTube/Facebook/Snapchat [Step by Step Guide]

Liza Brown
Mar 27, 2024• Proven solutions
Emojis are a great way to express one’s emotion more vividly through a depiction rather than a plain conventional text. By the passage of time, the trend of using emoji on social media domain has drastically increased around the world. Since emoji are ubiquitous and its influence on culture is increasingly huge, using emoji has now become a trend.
A plain conventional text or video may not emphasize the meaning behind the phrase, but adding emoji to it is like adding a soul to the intentions behind the message. It helps outshine the theme and make a video more appealing at the same time.
So, with all this being known, let’s take a tour to a complete guide to how to accessorize a video on multiple social media domains and make it far more attractive and meaningful.
Best Tool to Help You Add Emojis to Videos in Few Clicks
Gamers, YouTubers and all other Mac and PC users who’d like to add a smiley or any other emoji to a video should try processing their footage with the Filmora video editor.
Performing basic video editing tasks like cutting or trimming the footage, choosing a soundtrack for a video or adding an emoji to a single shot or an entire sequence can all be completed in just a couple of clicks.
Filmora is free to download. Import your videos after you launch the software, you then can add any animated emojis into wherever you want. Have a try now! Emojis inside are so Cute!
How to Add Emojis to YouTube Videos?
You can now add emojis to any of the YouTube videos using an online free tool called Kapwing.
Below are the basic steps about how to add emojis to YouTube videos anywhere using Kapwing.
Step 1: Open free tool Meme Maker and tap on “get started”.
Step 2: Copy the link of the targeted YouTube video and paste the URL of your YouTube video.
Step 3: One of the ways to insert emoji using Kapwing is to directly upload an emoji having a transparent background. In the toolbar, click on “upload” and paste its URL there. The image will be placed onto the targeted video as an overlay by importing it. Another way to add emoji is to click “add text” where you will have options to insert emojis.
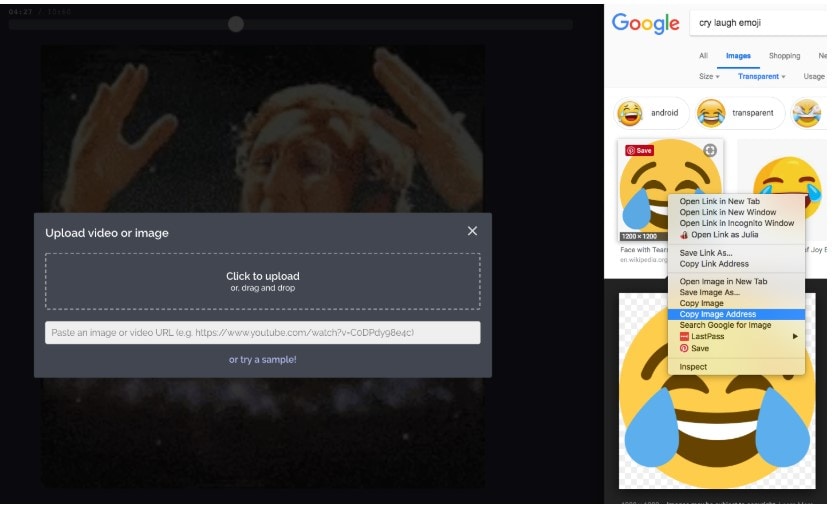
Step 4: You can now play around with editing options in Kapwing to adjust accordingly.
How to Use Emojis on YouTube?
YouTube provides you an option to insert emoji on your YouTube account description, tag and titles with great ease with the use of YouTube certified plugin, Tube Buddy.
Step 1: Install this plugin on chrome browser.
Step 2: Open “info and settings” option in your YouTube targeted video.
Step 3: Tap on description box, tags or title where an emoji icon will be shown. Tap on the emoji icon to display a list of emojis. You can also search for an emoji in the search bar.
How to Add Emojis in Snapchat Videos?
Step 1: Install Snapchat if you don’t already have it. Then run Snapchat.
Step 2: Record a video by keeping your fingers on the record button.
Step 3: Choose and tap an emoji of your choice to add in your video. Hold your fingers on emoji to place to the desired frame/clip of your recorded video.
Step 4: The emoji can be resized by dragging or pinching it in. You can add more than one emoji.
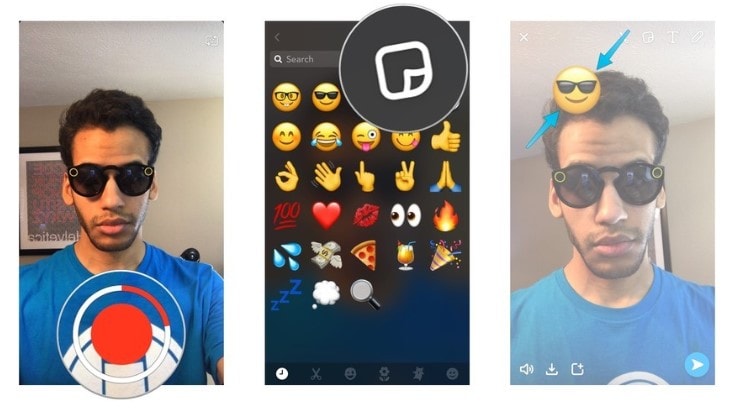
Image from iMore
How to Add Emojis to Facebook?
If you are wondering about how to add emojis to Facebook videos then, unfortunately, Facebook only offers “go live” option on Facebook where an emoji cannot be inserted. But you can insert emoji to Facebook status, comment or in your messenger conversation easily by following the step below for status:
Step 1: Click “what’s on your mind” to add new status on Facebook.
Step 2: At the bottom right side of the status box is an emoji icon. Click on it. This will open a list of emojis that you can choose as many as you want
Step 3: Click on the emoji icon back again to close the list when you are done. Click on post to share the post on your wall.
How to Add Emojis to Videos on iMovie?
Step 1: Search for the desired emoji on the internet with transparent background. Go to iMovie and select a clip of your video where you want to insert an emoji.
Step 2: Go to the “Import” option into the toolbar above, select your desired emoji from the list. This emoji will be added to the iMovie library.
Step 3: Click on that emoji. This overlays that emoji onto that video clip. You can scale the emoji up and down and drag it anywhere on the video.
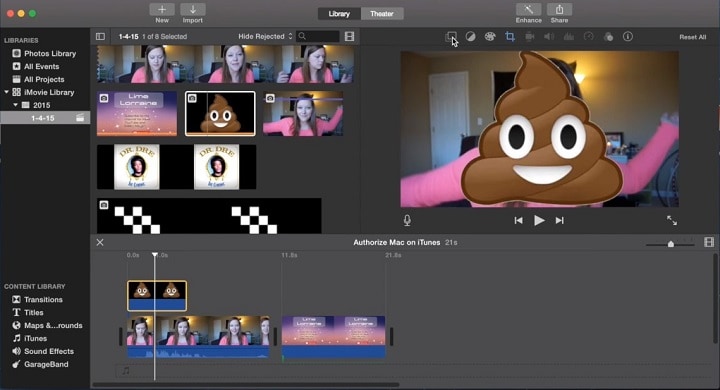
Image from YouSubtitles
How to Add Emojis to Videos Online?
Blurbiz, is an online application for editing YouTube, Instagram, Facebook and Snapchat videos. Just follow the steps below, then you can add emojis you want.
Step 1: Create and name the project in Blurbiz.
Step 2: Upload either your video, sticker or gif whichever you want an emoji to be placed in.
Step 3: Hover over the video and click on the “edit” button.
Step 4: Tap on “upload” at the top left side of the pane. Upload emoji with .png extension from your desktop.
Step 5: Drag and drop to overlay the emoji onto your video. Resize and position an emoji accordingly.
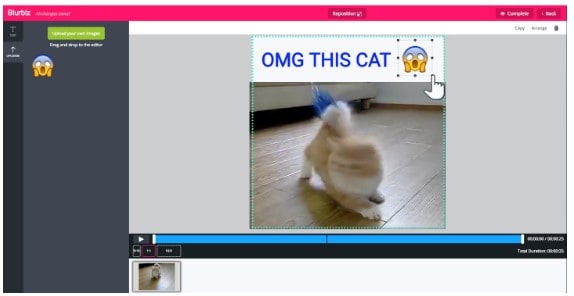
Step 6: Tap on “complete” at the top right corner when you are done. You can download an mp4 format video.
How to Add Emojis to Videos Android?
WeVideo , is an app to create and edit videos to the next level and provide one with ample special effects to add on to your videos.
Alongside using basic editing features like cutting, trimming or arranging video clips, you can amplify your editing game by adding emoji to your videos. Moreover, you can export your projects in high quality and share them on either Vimeo, YouTube or Dropbox.

Conclusion
Be it any video on any social media platform or your local device, with this thorough guide, you must be able to accessorize your video and take it to another level of emotional expression and message details in your video by using fun emojis.
Liza Brown
Liza Brown is a writer and a lover of all things video.
Follow @Liza Brown
Liza Brown
Mar 27, 2024• Proven solutions
Emojis are a great way to express one’s emotion more vividly through a depiction rather than a plain conventional text. By the passage of time, the trend of using emoji on social media domain has drastically increased around the world. Since emoji are ubiquitous and its influence on culture is increasingly huge, using emoji has now become a trend.
A plain conventional text or video may not emphasize the meaning behind the phrase, but adding emoji to it is like adding a soul to the intentions behind the message. It helps outshine the theme and make a video more appealing at the same time.
So, with all this being known, let’s take a tour to a complete guide to how to accessorize a video on multiple social media domains and make it far more attractive and meaningful.
Best Tool to Help You Add Emojis to Videos in Few Clicks
Gamers, YouTubers and all other Mac and PC users who’d like to add a smiley or any other emoji to a video should try processing their footage with the Filmora video editor.
Performing basic video editing tasks like cutting or trimming the footage, choosing a soundtrack for a video or adding an emoji to a single shot or an entire sequence can all be completed in just a couple of clicks.
Filmora is free to download. Import your videos after you launch the software, you then can add any animated emojis into wherever you want. Have a try now! Emojis inside are so Cute!
How to Add Emojis to YouTube Videos?
You can now add emojis to any of the YouTube videos using an online free tool called Kapwing.
Below are the basic steps about how to add emojis to YouTube videos anywhere using Kapwing.
Step 1: Open free tool Meme Maker and tap on “get started”.
Step 2: Copy the link of the targeted YouTube video and paste the URL of your YouTube video.
Step 3: One of the ways to insert emoji using Kapwing is to directly upload an emoji having a transparent background. In the toolbar, click on “upload” and paste its URL there. The image will be placed onto the targeted video as an overlay by importing it. Another way to add emoji is to click “add text” where you will have options to insert emojis.
Step 4: You can now play around with editing options in Kapwing to adjust accordingly.
How to Use Emojis on YouTube?
YouTube provides you an option to insert emoji on your YouTube account description, tag and titles with great ease with the use of YouTube certified plugin, Tube Buddy.
Step 1: Install this plugin on chrome browser.
Step 2: Open “info and settings” option in your YouTube targeted video.
Step 3: Tap on description box, tags or title where an emoji icon will be shown. Tap on the emoji icon to display a list of emojis. You can also search for an emoji in the search bar.
How to Add Emojis in Snapchat Videos?
Step 1: Install Snapchat if you don’t already have it. Then run Snapchat.
Step 2: Record a video by keeping your fingers on the record button.
Step 3: Choose and tap an emoji of your choice to add in your video. Hold your fingers on emoji to place to the desired frame/clip of your recorded video.
Step 4: The emoji can be resized by dragging or pinching it in. You can add more than one emoji.
Image from iMore
How to Add Emojis to Facebook?
If you are wondering about how to add emojis to Facebook videos then, unfortunately, Facebook only offers “go live” option on Facebook where an emoji cannot be inserted. But you can insert emoji to Facebook status, comment or in your messenger conversation easily by following the step below for status:
Step 1: Click “what’s on your mind” to add new status on Facebook.
Step 2: At the bottom right side of the status box is an emoji icon. Click on it. This will open a list of emojis that you can choose as many as you want
Step 3: Click on the emoji icon back again to close the list when you are done. Click on post to share the post on your wall.
How to Add Emojis to Videos on iMovie?
Step 1: Search for the desired emoji on the internet with transparent background. Go to iMovie and select a clip of your video where you want to insert an emoji.
Step 2: Go to the “Import” option into the toolbar above, select your desired emoji from the list. This emoji will be added to the iMovie library.
Step 3: Click on that emoji. This overlays that emoji onto that video clip. You can scale the emoji up and down and drag it anywhere on the video.
Image from YouSubtitles
How to Add Emojis to Videos Online?
Blurbiz, is an online application for editing YouTube, Instagram, Facebook and Snapchat videos. Just follow the steps below, then you can add emojis you want.
Step 1: Create and name the project in Blurbiz.
Step 2: Upload either your video, sticker or gif whichever you want an emoji to be placed in.
Step 3: Hover over the video and click on the “edit” button.
Step 4: Tap on “upload” at the top left side of the pane. Upload emoji with .png extension from your desktop.
Step 5: Drag and drop to overlay the emoji onto your video. Resize and position an emoji accordingly.
Step 6: Tap on “complete” at the top right corner when you are done. You can download an mp4 format video.
How to Add Emojis to Videos Android?
WeVideo , is an app to create and edit videos to the next level and provide one with ample special effects to add on to your videos.
Alongside using basic editing features like cutting, trimming or arranging video clips, you can amplify your editing game by adding emoji to your videos. Moreover, you can export your projects in high quality and share them on either Vimeo, YouTube or Dropbox.
Conclusion
Be it any video on any social media platform or your local device, with this thorough guide, you must be able to accessorize your video and take it to another level of emotional expression and message details in your video by using fun emojis.
Liza Brown
Liza Brown is a writer and a lover of all things video.
Follow @Liza Brown
How to Burn Photos to DVD with Transitions and Music
How to Burn Photos to DVD with Transitions and Music
Shanoon Cox
Mar 27, 2024• Proven solutions
Photos are precious memories not only for you but also for your family members. As time goes on, the photos might fade out and be unable to retrieve. To avoid this, burn photos to DVD will be a great idea to preserve family memories eternally.
This article will show you how to burn photos to DVD Slideshow with transition, titles and music quickly and easily by using Wondershare DVD Slideshow Builder Deluxe . It also provides some tips on how to burn photos to DVD.
Part 1: How to Burn Photos to DVD with Transition, Titles and Music
Wondershare DVD Slideshow Builder Deluxe can help you quickly create and burn photos to DVD. Download the free trial version this photo DVD maker first.

Step 1. Add Photo or Video Files
In Organize tab, simply click the “Add Files” button to open the browse window, find your files and import them into the program, you can drag and drop photos or videos to organize them on storyboard. Click the Expand button to get a larger viewer.

Step 2. Customize Photo Slideshow Transitions
Generally speaking, transition effects will be automatically inserted between every two photos/videos when you import the photos. But you can customize them by clicking the Personalize tab, then drag and drop a transition from the list to the thumbnail between two slides.
You are also able to add background music here: click the Music button and choose a music file from your computer.

Step 3. Choose DVD Menu
Now switch to Create tab to author a DVD menu from template and burn to DVD disc quickly:
- On the right hand side of the screen, double click on desired menu template to apply a DVD menu template.
- Click the Edit button under the preview windows to customize your DVD menu or right click on menu for more options.
- You can also make a professional DVD menu using dynamic DVD menu templates.
BTW, if you don’t want a DVD menu, just check the “Disable DVD Menu” option.

Step 4. Burn Photos to DVD Disc
Now click the Preview button beneath the preview window to make sure the photo DVD slideshow is exactly what you want. Go back to Personalize tab to change if necessary. After that, click “Burn” button to start burning your DVD slideshow to DVD.
You can also output photo slideshow to watch on Youtube, Mobile Phone, iPhone, PSP, etc. through options on the left. Below are the instructions to burn DVD for watch on TV:

- Insert a blank DVD disc, and do the following.
- Click “Burn to DVD”. Then specify the number of DVD copies. You can also choose to generate ISO Image files or DVD Folders.
- Make sure the PAL or NTSC TV Standard settings is right. If you don’t know which standard is used in your country, click the “Help” button. The wrong TV standard would cause playback incompatibility problem.
- Then click “Start” to burn DVD slideshow. If you have checked Create DVD Folder and/or Create DVD Image File options, the corresponding files will also be created to the specified folder.
Now sit back and relax, when burning complete, insert the created DVD disc into your DVD player to watch photo DVD slideshow on TV.
Learn more: User Guide of DVD Slideshow Builder Deluxe
Part 2: More Photo to DVD Tips
More about NTSC/PAL TV Standard
Nowadays, there are three video formats around the world. But each one is incompatible with others. For instance, NTSC is used in North America, Canada and Japan; while most of other regions PAL/SECAM. To apply TV Standard in DVD Slideshow Builder Deluxe , go to “Create“ -> Option tab and locate TV Standard option to select NTSC or PAL. If you are not sure which one to choose, please click “Help” button, select your country, then click “OK” , the program will choose the right TV standard for you.
Burn Photos to DVD/CD as Data Disc
If you only want to burn photo to DVD for backup and further use, you only need a burning photo to DVD software like ImgBurn (Free) or Nero (commercial). These software helps you burn all digital media files to DVD, of course you can burn photos to DVD for backup purpose. Notice that some photo DVD maker allows you burn slideshow as well as the original photos. This way, you turn photos to DVD slideshow with transition, and at the same time, backup photos to DVD for other uses.
Scan Photos to DVD - Digitize Photos
If you use traditional camera and have got loads of photos in album, you can scan photos to computer so that convert photo to digital format. Afterwards, you can get more from these digital photos, like backup photos to DVD, send to others as DVD gift, make a photo DVD show to play on TV, etc. All these could be done with your favorite photo DVD maker software. Now see how to transform your printed photos to digital first:
Select a good photo scanner -> Prepare your photos to scan -> Start photo scanning -> Adjust scanned photos
Scanning printed photos to computer is not an easy job. It needs patience and some tips and tricks. As you may know, some companies provide photo scanning service. For the Step 4, you can also adjust digital photos in your selected photo DVD maker. Anyway, you need to get your digital photos ready before you burn photos to DVD with transitions and music.
Shanoon Cox
Shanoon Cox is a writer and a lover of all things video.
Follow @Shanoon Cox
Shanoon Cox
Mar 27, 2024• Proven solutions
Photos are precious memories not only for you but also for your family members. As time goes on, the photos might fade out and be unable to retrieve. To avoid this, burn photos to DVD will be a great idea to preserve family memories eternally.
This article will show you how to burn photos to DVD Slideshow with transition, titles and music quickly and easily by using Wondershare DVD Slideshow Builder Deluxe . It also provides some tips on how to burn photos to DVD.
Part 1: How to Burn Photos to DVD with Transition, Titles and Music
Wondershare DVD Slideshow Builder Deluxe can help you quickly create and burn photos to DVD. Download the free trial version this photo DVD maker first.
Step 1. Add Photo or Video Files
In Organize tab, simply click the “Add Files” button to open the browse window, find your files and import them into the program, you can drag and drop photos or videos to organize them on storyboard. Click the Expand button to get a larger viewer.
Step 2. Customize Photo Slideshow Transitions
Generally speaking, transition effects will be automatically inserted between every two photos/videos when you import the photos. But you can customize them by clicking the Personalize tab, then drag and drop a transition from the list to the thumbnail between two slides.
You are also able to add background music here: click the Music button and choose a music file from your computer.
Step 3. Choose DVD Menu
Now switch to Create tab to author a DVD menu from template and burn to DVD disc quickly:
- On the right hand side of the screen, double click on desired menu template to apply a DVD menu template.
- Click the Edit button under the preview windows to customize your DVD menu or right click on menu for more options.
- You can also make a professional DVD menu using dynamic DVD menu templates.
BTW, if you don’t want a DVD menu, just check the “Disable DVD Menu” option.
Step 4. Burn Photos to DVD Disc
Now click the Preview button beneath the preview window to make sure the photo DVD slideshow is exactly what you want. Go back to Personalize tab to change if necessary. After that, click “Burn” button to start burning your DVD slideshow to DVD.
You can also output photo slideshow to watch on Youtube, Mobile Phone, iPhone, PSP, etc. through options on the left. Below are the instructions to burn DVD for watch on TV:
- Insert a blank DVD disc, and do the following.
- Click “Burn to DVD”. Then specify the number of DVD copies. You can also choose to generate ISO Image files or DVD Folders.
- Make sure the PAL or NTSC TV Standard settings is right. If you don’t know which standard is used in your country, click the “Help” button. The wrong TV standard would cause playback incompatibility problem.
- Then click “Start” to burn DVD slideshow. If you have checked Create DVD Folder and/or Create DVD Image File options, the corresponding files will also be created to the specified folder.
Now sit back and relax, when burning complete, insert the created DVD disc into your DVD player to watch photo DVD slideshow on TV.
Learn more: User Guide of DVD Slideshow Builder Deluxe
Part 2: More Photo to DVD Tips
More about NTSC/PAL TV Standard
Nowadays, there are three video formats around the world. But each one is incompatible with others. For instance, NTSC is used in North America, Canada and Japan; while most of other regions PAL/SECAM. To apply TV Standard in DVD Slideshow Builder Deluxe , go to “Create“ -> Option tab and locate TV Standard option to select NTSC or PAL. If you are not sure which one to choose, please click “Help” button, select your country, then click “OK” , the program will choose the right TV standard for you.
Burn Photos to DVD/CD as Data Disc
If you only want to burn photo to DVD for backup and further use, you only need a burning photo to DVD software like ImgBurn (Free) or Nero (commercial). These software helps you burn all digital media files to DVD, of course you can burn photos to DVD for backup purpose. Notice that some photo DVD maker allows you burn slideshow as well as the original photos. This way, you turn photos to DVD slideshow with transition, and at the same time, backup photos to DVD for other uses.
Scan Photos to DVD - Digitize Photos
If you use traditional camera and have got loads of photos in album, you can scan photos to computer so that convert photo to digital format. Afterwards, you can get more from these digital photos, like backup photos to DVD, send to others as DVD gift, make a photo DVD show to play on TV, etc. All these could be done with your favorite photo DVD maker software. Now see how to transform your printed photos to digital first:
Select a good photo scanner -> Prepare your photos to scan -> Start photo scanning -> Adjust scanned photos
Scanning printed photos to computer is not an easy job. It needs patience and some tips and tricks. As you may know, some companies provide photo scanning service. For the Step 4, you can also adjust digital photos in your selected photo DVD maker. Anyway, you need to get your digital photos ready before you burn photos to DVD with transitions and music.
Shanoon Cox
Shanoon Cox is a writer and a lover of all things video.
Follow @Shanoon Cox
7 Free Apps to Get Emojis on Android and iPhone
7 Free Apps to Get Emojis on Android and iPhone
Shanoon Cox
Mar 27, 2024• Proven solutions
Are you looking for apps to get emoji on your phone? An emoji is technically a symbolic representation of our feelings. You can use it to show your love or confusion for something or say that you are angry without actually having to say anything.
Emojis are a whole new language of communication. But why bother to download emojis when one can write a text? Well, because it’s faster and easier than writing. A simple ‘thumbs up’ emoji wraps up an appreciation pretty good. Using an emoji in your text or email can add a hint of color and give it extra meaning. Also, if you add emojis, it can boost engagement rates. And it is FUN!
- Part 1: Free Apps to Get Emojis on Android
- Part 2: How to Get Emojis on iPhone
- Part 3: Add Emojis to Your Video Using Wondershare Filmora
Part 1: Free Apps to Get Emojis on Android
I know you are excited to start using emojis right away. Now the question on your mind must be how to get emojis on Android?
Here are 5, top of list apps to get emojis. Could you give it a read, and then take your pick?
#KiKa Keyboard (Android)
KiKa is a trendy keyboard that lets you have all the fun. If you’re looking to spice up your android keyboards, KiKa does the trick. It is customizable, so you can make your keyboard attractive by changing the background image or change the font or size of the keyboard. Won’t it be cool to have a game of thrones themed keyboard?
Besides, Kika uses artificial intelligence to predict words as well as emojis. It works on texts, social media, and emails too. Time to up your game with this excellent emoji app.
- Access Google Play on your phone
- Download the Kika keyboard. Launch it to get the emoji.
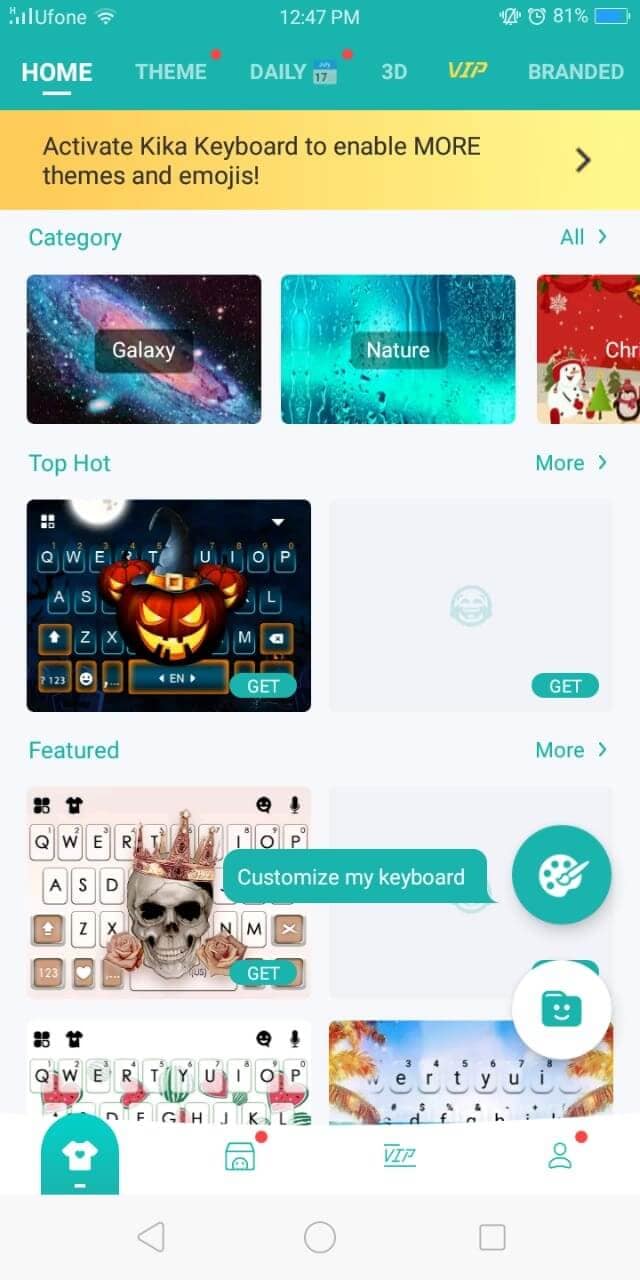
Rest assured, it is free for use. You are just one step away from having more expressive and engaging conversations.
#Emoji Keyboard(Android)
The emoji keyboard is popular because it offers more than 5000 cute emojis. Apart from that, you can choose a themed keyboard or add your picture as the background. It lets you type at lightning speed with cool fonts. Now it is easy to decorate your keyboard and customize it according to your personality. From unicorns to supervillains, take your pick and custom-design a cool keyboard. It makes chatting incredibly easy with gestures and smooth swipe typing.
- Hop on to Google Play
- Instant download Emoji keyboard to add a dash of fun to your texts.
- Launch it, and you will get the emojis.
#Bitmoji(Android)
If you want to get emoji that looks just like you, Bitmoji is the app for you. Take a selfie and let the emoji look like you. Dress it up to match the real-life you. An animated version of you. A library full of your avatar stickers to compliment your texts with creativity and a personal touch. Be angry or romantic, and send over a Bitmoji to make it clear how you feel. No need to type long texts anymore. There’s a Bitmoji for every emotion.
- Install Bitmoji from Google Play and Sign in.
- Go to Settings on your phone, tap Languages and Input>On-screen keyboard
- Click Manage Keyboards and then tap Bitmoji Keyboard

#Ginger Keyboard
The ginger keyboard is built for personal as well as business communication. Along with a library of more than a thousand emojis, you get grammar, and spell check features too. Use the free pre-set themes or buy a special one from the store to decorate your keyboard. It also predicts emojis as you type. Go ahead and creatively transform your typing experience with Ginger Keyboard.
- Download Ginger Keyboard from Google Play.
- Follow the steps to sign in.
- Enable the keyboard, and all good to go.
#WhatSmiley
Want to download emojis that are unique and popular? WhatSmiley offers over 2400 emojis to transform your chatting experience. You can add emojis on any social media platform, Whatsapp, or even text (MMS). Emojis are frequently updated, so the fun never stops. You can even customize the emojis and change the background color.
- Download Whatsmiley on your phone and open it.
- Select the emoji you wish to send.
- A pop up will display the apps. Choose the app through which you want to send.
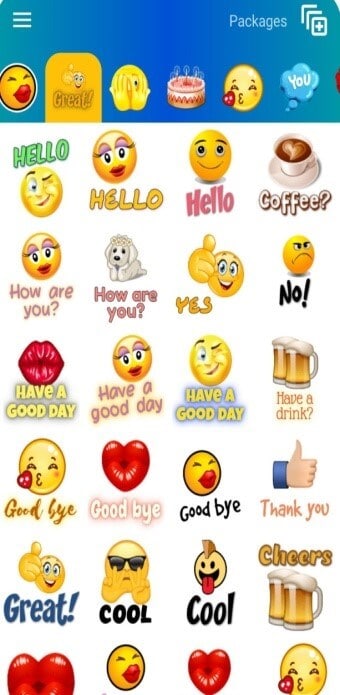
Part 2: How to Get Emojis on iPhone
After emojis took the world by storm, iPhone users were also gifted with this trending communication medium. Although there are probably a dozen apps to download emojis on your iPhone, let me discuss the two easiest methods.
#The Built-In Keyboard on iPhone
With the increasing popularity of emojis, iPhone found a simple solution for its dedicated users by introducing a built-in emoji keyboard. All you got to do is click enable.
Here is how you can enable the built-in keyboard to get emojis.
- Launch Settings on your home screen.
- Tap General and then click on Keyboard.

- Select Add new keyboard. Swipe down and click on Emoji.
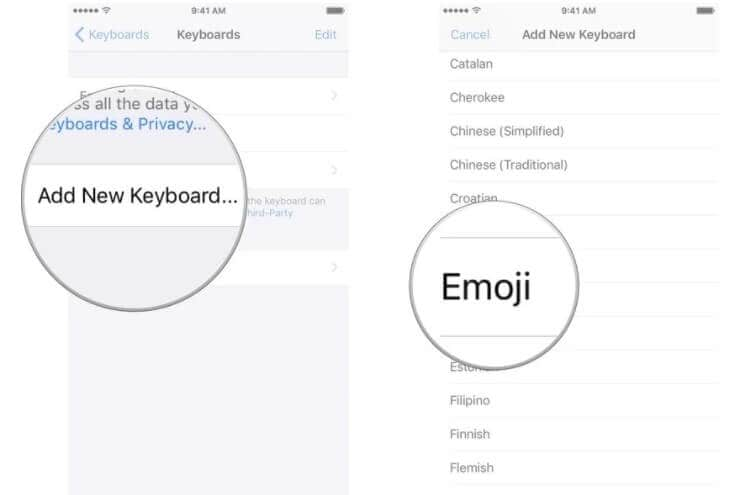
- Ta-Da! Emoji keyboard enabled! And you will be able to get the emoji.
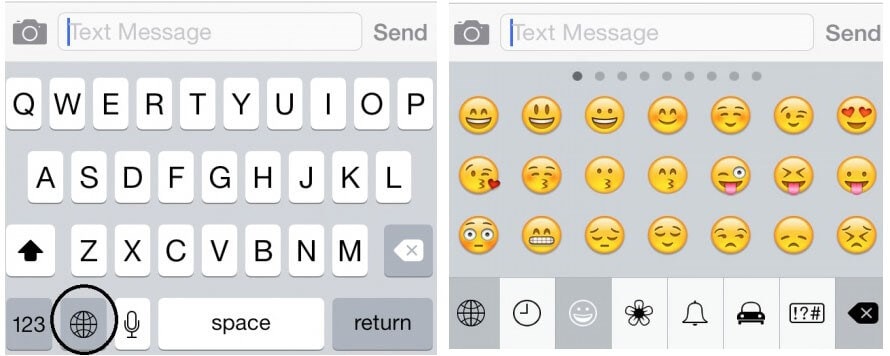
# Emoji Keyboard App
Does the built-in emojis seem boring and wish to add that extra oomph to your texts? The Emoji keyboard app brings you the latest emojis that can be used on all iPhone apps. If you get bored again, you can even order new emojis. Cool, right?
- Open the App Store and install the Emoji Keyboard.
- Launch it, and you’re good to go. Easy peasy.
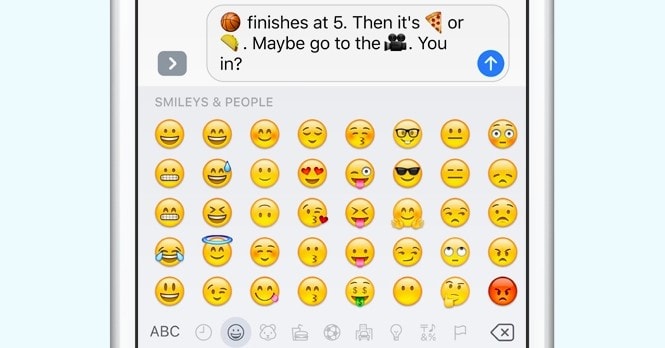
Apart from being Ad-free, it’s free and requires no registrations. Definitely a dream come true, isn’t it?
Part 3: Add Emojis to Your Video Using Wondershare Filmora
Now you know all the ways to add emojis on texts, emails, and statuses. But Wondershare Filmora wants to fan that creativity in you by allowing you to get much more artistic with emojis.
Wondershare Filmora is a video editing app with a sleek interface. You can use it to add a wide range of emojis to your videos. Imagine customizing your video with a beating heart or a laughing emoji. It offers a wide range of cute emojis arranged in categories as shapes, badges, pets, emojis, etc., making it easier to select the desired type of emoji.
Let me show you a detailed guide to add emojis through Filmora:
1. Download and install Filmora. Then launch it.
2. Click File<Import Media<Import Media Files to import your video to Filmora. Then drag and drop the video to your timeline.
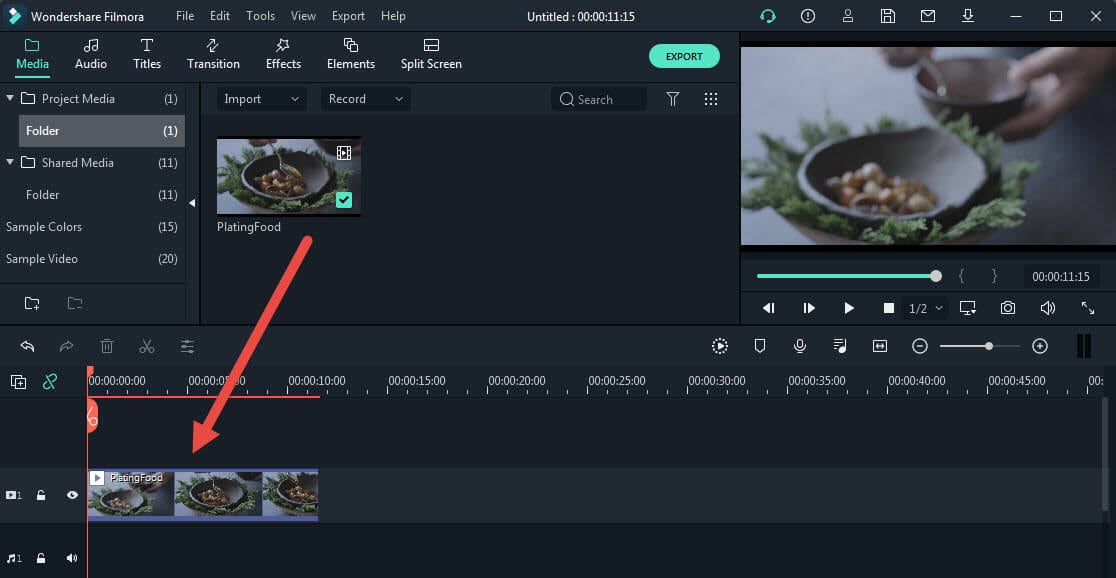
3. Now click on Elements<Emoji categories and add any emoji to the video.

Tips:
You can also access Wondershare Filmstock (Filmora’s effects store) to download the Animated Emoji Pack and get more emojis. This animated emoji pack is totally free now!
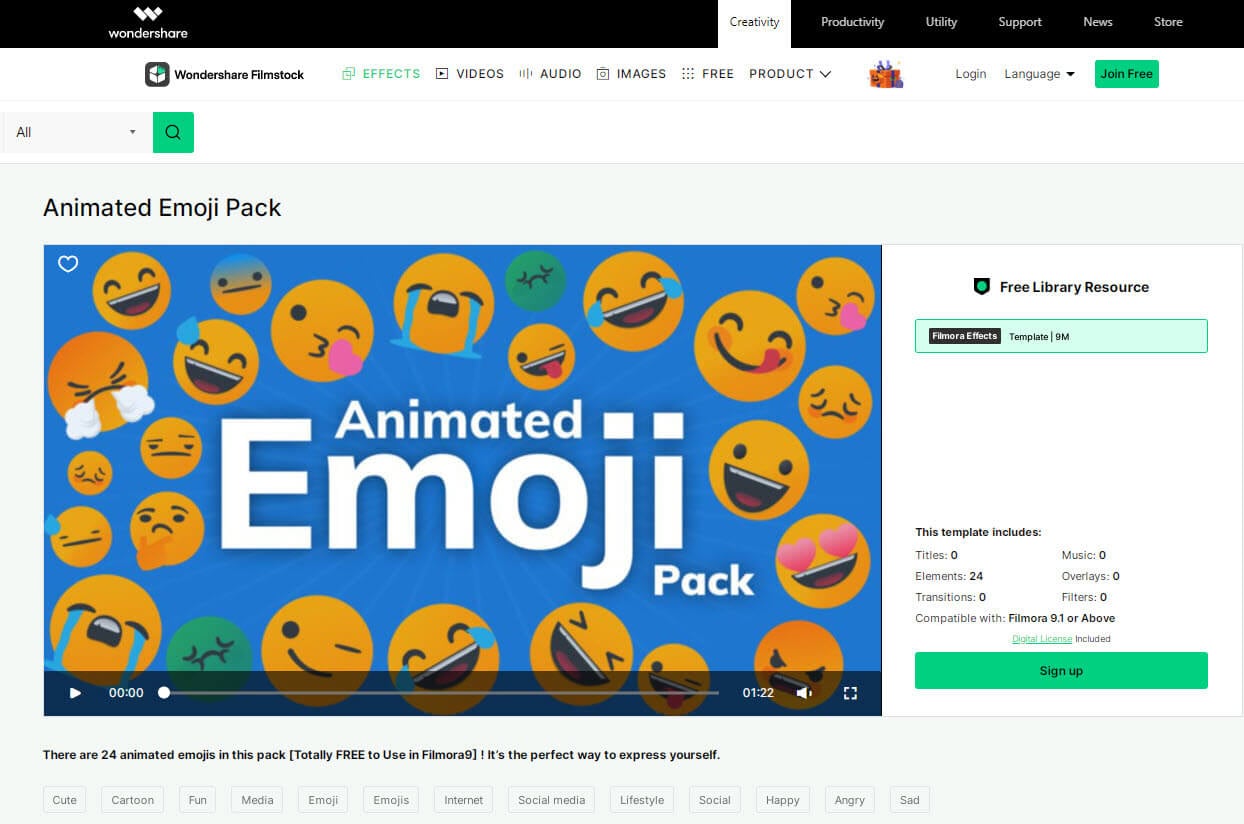
4. Then drag and drop the emoji to the video track above your video. In the viewer panel, drag to adjust the size of emoji. You can also add multiple emojis to one video.
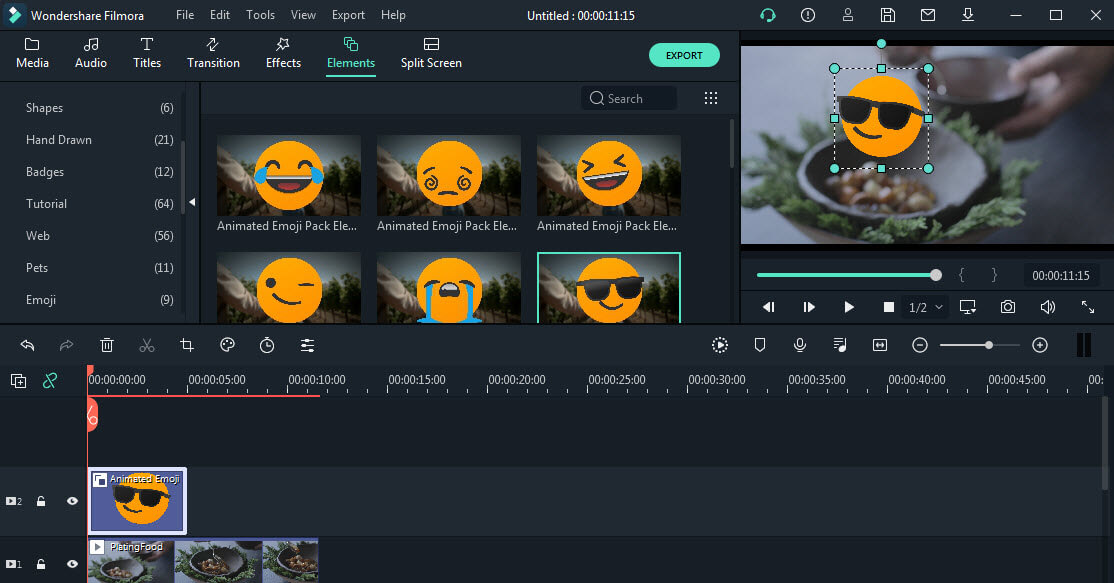
5. Finally click the Export button to convert the video. You can upload it to YouTube, Instagram, TikTok, or any other video platforms as you like after you finish the export.

Conclusion
Emojis have revolutionized the way we communicate. There is no denying that emojis are better at portraying whatever we are trying to say and even convey our feelings much more accurately than words do.
Despite the advancements in technology, not every version of the phone has an in-built emoji collection. Since we don’t want anyone to feel left out of the fun, we compiled this easy to follow guide containing some of the best apps to download emojis.
Moreover, add emojis to your videos through Filmora to make them extra expressive. Decorate them with a blip of color and a hint of an emoji or two. Emojis are cute and fun. Use them wisely.
Shanoon Cox
Shanoon Cox is a writer and a lover of all things video.
Follow @Shanoon Cox
Shanoon Cox
Mar 27, 2024• Proven solutions
Are you looking for apps to get emoji on your phone? An emoji is technically a symbolic representation of our feelings. You can use it to show your love or confusion for something or say that you are angry without actually having to say anything.
Emojis are a whole new language of communication. But why bother to download emojis when one can write a text? Well, because it’s faster and easier than writing. A simple ‘thumbs up’ emoji wraps up an appreciation pretty good. Using an emoji in your text or email can add a hint of color and give it extra meaning. Also, if you add emojis, it can boost engagement rates. And it is FUN!
- Part 1: Free Apps to Get Emojis on Android
- Part 2: How to Get Emojis on iPhone
- Part 3: Add Emojis to Your Video Using Wondershare Filmora
Part 1: Free Apps to Get Emojis on Android
I know you are excited to start using emojis right away. Now the question on your mind must be how to get emojis on Android?
Here are 5, top of list apps to get emojis. Could you give it a read, and then take your pick?
#KiKa Keyboard (Android)
KiKa is a trendy keyboard that lets you have all the fun. If you’re looking to spice up your android keyboards, KiKa does the trick. It is customizable, so you can make your keyboard attractive by changing the background image or change the font or size of the keyboard. Won’t it be cool to have a game of thrones themed keyboard?
Besides, Kika uses artificial intelligence to predict words as well as emojis. It works on texts, social media, and emails too. Time to up your game with this excellent emoji app.
- Access Google Play on your phone
- Download the Kika keyboard. Launch it to get the emoji.
Rest assured, it is free for use. You are just one step away from having more expressive and engaging conversations.
#Emoji Keyboard(Android)
The emoji keyboard is popular because it offers more than 5000 cute emojis. Apart from that, you can choose a themed keyboard or add your picture as the background. It lets you type at lightning speed with cool fonts. Now it is easy to decorate your keyboard and customize it according to your personality. From unicorns to supervillains, take your pick and custom-design a cool keyboard. It makes chatting incredibly easy with gestures and smooth swipe typing.
- Hop on to Google Play
- Instant download Emoji keyboard to add a dash of fun to your texts.
- Launch it, and you will get the emojis.
#Bitmoji(Android)
If you want to get emoji that looks just like you, Bitmoji is the app for you. Take a selfie and let the emoji look like you. Dress it up to match the real-life you. An animated version of you. A library full of your avatar stickers to compliment your texts with creativity and a personal touch. Be angry or romantic, and send over a Bitmoji to make it clear how you feel. No need to type long texts anymore. There’s a Bitmoji for every emotion.
- Install Bitmoji from Google Play and Sign in.
- Go to Settings on your phone, tap Languages and Input>On-screen keyboard
- Click Manage Keyboards and then tap Bitmoji Keyboard
#Ginger Keyboard
The ginger keyboard is built for personal as well as business communication. Along with a library of more than a thousand emojis, you get grammar, and spell check features too. Use the free pre-set themes or buy a special one from the store to decorate your keyboard. It also predicts emojis as you type. Go ahead and creatively transform your typing experience with Ginger Keyboard.
- Download Ginger Keyboard from Google Play.
- Follow the steps to sign in.
- Enable the keyboard, and all good to go.
#WhatSmiley
Want to download emojis that are unique and popular? WhatSmiley offers over 2400 emojis to transform your chatting experience. You can add emojis on any social media platform, Whatsapp, or even text (MMS). Emojis are frequently updated, so the fun never stops. You can even customize the emojis and change the background color.
- Download Whatsmiley on your phone and open it.
- Select the emoji you wish to send.
- A pop up will display the apps. Choose the app through which you want to send.
Part 2: How to Get Emojis on iPhone
After emojis took the world by storm, iPhone users were also gifted with this trending communication medium. Although there are probably a dozen apps to download emojis on your iPhone, let me discuss the two easiest methods.
#The Built-In Keyboard on iPhone
With the increasing popularity of emojis, iPhone found a simple solution for its dedicated users by introducing a built-in emoji keyboard. All you got to do is click enable.
Here is how you can enable the built-in keyboard to get emojis.
- Launch Settings on your home screen.
- Tap General and then click on Keyboard.
- Select Add new keyboard. Swipe down and click on Emoji.
- Ta-Da! Emoji keyboard enabled! And you will be able to get the emoji.
# Emoji Keyboard App
Does the built-in emojis seem boring and wish to add that extra oomph to your texts? The Emoji keyboard app brings you the latest emojis that can be used on all iPhone apps. If you get bored again, you can even order new emojis. Cool, right?
- Open the App Store and install the Emoji Keyboard.
- Launch it, and you’re good to go. Easy peasy.
Apart from being Ad-free, it’s free and requires no registrations. Definitely a dream come true, isn’t it?
Part 3: Add Emojis to Your Video Using Wondershare Filmora
Now you know all the ways to add emojis on texts, emails, and statuses. But Wondershare Filmora wants to fan that creativity in you by allowing you to get much more artistic with emojis.
Wondershare Filmora is a video editing app with a sleek interface. You can use it to add a wide range of emojis to your videos. Imagine customizing your video with a beating heart or a laughing emoji. It offers a wide range of cute emojis arranged in categories as shapes, badges, pets, emojis, etc., making it easier to select the desired type of emoji.
Let me show you a detailed guide to add emojis through Filmora:
1. Download and install Filmora. Then launch it.
2. Click File<Import Media<Import Media Files to import your video to Filmora. Then drag and drop the video to your timeline.
3. Now click on Elements<Emoji categories and add any emoji to the video.
Tips:
You can also access Wondershare Filmstock (Filmora’s effects store) to download the Animated Emoji Pack and get more emojis. This animated emoji pack is totally free now!
4. Then drag and drop the emoji to the video track above your video. In the viewer panel, drag to adjust the size of emoji. You can also add multiple emojis to one video.
5. Finally click the Export button to convert the video. You can upload it to YouTube, Instagram, TikTok, or any other video platforms as you like after you finish the export.
Conclusion
Emojis have revolutionized the way we communicate. There is no denying that emojis are better at portraying whatever we are trying to say and even convey our feelings much more accurately than words do.
Despite the advancements in technology, not every version of the phone has an in-built emoji collection. Since we don’t want anyone to feel left out of the fun, we compiled this easy to follow guide containing some of the best apps to download emojis.
Moreover, add emojis to your videos through Filmora to make them extra expressive. Decorate them with a blip of color and a hint of an emoji or two. Emojis are cute and fun. Use them wisely.
Shanoon Cox
Shanoon Cox is a writer and a lover of all things video.
Follow @Shanoon Cox
How to Make a Photo Collage Using iPhoto?
How to Make a Photo Collage on Mac/iPhone Using iPhoto?
Shanoon Cox
Mar 27, 2024• Proven solutions
iPhoto is a photo library familiar to iOS users. It can help you easily organize, store and sort images, and even make a slide show to help you enjoy photos. This is why, even though Apple no longer develops iPhoto, some people use it.
Update: On April 8, 2015, Apple has launched a new Photos app on OS X Yosemite, which means Apple has stopped developing iPhoto. However, if you like iPhoto, you can still use it.
The following will introduce how to use the iPhoto collage maker on Mac or iPhone. At the end of this article, iPhoto alternative software will serve as your reference.
Part 1: How to Make a Photo Collage in iPhoto?
Here are the quick steps to create a photo collage with iPhoto.
Step 1: Launch iPhoto and click “Events” in the side menu.
Step 2: Hold “Shift” and click each photo you want to include in your photo collage.
Step 3: Click the “+” button in the lower-left corner and select Card in the pop-up window.
Step 4: Choose “Picture Collage”, which should be under the Any Occasion section if you are using the iPhoto 11.
Step 5: You’ll notice that all the templates are sorted based on the occasion.
Step 6: Drag photos to the template and pick a background, orientation and design.
Step 7: Click the Buy button on the lower right-hand corner of the collage editor, or go to the Share menu and email it to yourself or family members.
But before you make a photo collage using iPhoto, here are some important things for you to know:
- Technically, iPhoto can’t make fancy photo collages like other Photo collages makers on Mac. So don’t expect too much of it. iPhoto only creates greeting cards with a simple collage layout.
- The templates iPhoto offers are quite limited and ordinary that you might feel a little disappointed.
- iPhoto offers no share options to save photo collages to desktop or to post on Facebook, which is a basic feature of picture collage editor.
Part 2: What Replaces iPhoto on Mac/iPhone?
Since iPhoto’s functions are not sufficient, we will introduce some alternative collage makers that you may be interested in.
Alternative to Make a Short Video, Slideshow, or Photo Collage: Wondershare Filmora
If there are too many photos to save or share with friends and family, you can use these images to make short videos to better collage and share. Filmora can do this for you, through which you can easily crop, add effects, split the screen, and merge photos. In order to make the “photo video” lively and exciting, you can also add music, audio, animation, title, music, etc. to it.
Alternative to Organize, Store, and Sort Images: iCloud
Migrating your photos to iCloud is a wise choice. iCloud is the best photo storage for iOS or Mac users. You don’t need to download other apps or software. Just allow iCloud to back up the photo’s library in the settings.
The best thing is that you can view iCloud photos anytime and anywhere after logging in to your iCloud account. You can also automatically share photos with others by opening “Shared Album”. However, if there are too many photos, a paid subscription may be required to upgrade the storage space.
Conclusion
Above are the steps to make a photo collage using iPhoto on Mac/iPhone. We also list alternative methods to meet the different needs of the Photo library. So, if this isn’t quite what you’re looking for, you can also use some online photo collage service instead. If you want to have more fun editing photo stories, welcome to download Filmora and make more memorable and interesting videos.
Shanoon Cox
Shanoon Cox is a writer and a lover of all things video.
Follow @Shanoon Cox
Shanoon Cox
Mar 27, 2024• Proven solutions
iPhoto is a photo library familiar to iOS users. It can help you easily organize, store and sort images, and even make a slide show to help you enjoy photos. This is why, even though Apple no longer develops iPhoto, some people use it.
Update: On April 8, 2015, Apple has launched a new Photos app on OS X Yosemite, which means Apple has stopped developing iPhoto. However, if you like iPhoto, you can still use it.
The following will introduce how to use the iPhoto collage maker on Mac or iPhone. At the end of this article, iPhoto alternative software will serve as your reference.
Part 1: How to Make a Photo Collage in iPhoto?
Here are the quick steps to create a photo collage with iPhoto.
Step 1: Launch iPhoto and click “Events” in the side menu.
Step 2: Hold “Shift” and click each photo you want to include in your photo collage.
Step 3: Click the “+” button in the lower-left corner and select Card in the pop-up window.
Step 4: Choose “Picture Collage”, which should be under the Any Occasion section if you are using the iPhoto 11.
Step 5: You’ll notice that all the templates are sorted based on the occasion.
Step 6: Drag photos to the template and pick a background, orientation and design.
Step 7: Click the Buy button on the lower right-hand corner of the collage editor, or go to the Share menu and email it to yourself or family members.
But before you make a photo collage using iPhoto, here are some important things for you to know:
- Technically, iPhoto can’t make fancy photo collages like other Photo collages makers on Mac. So don’t expect too much of it. iPhoto only creates greeting cards with a simple collage layout.
- The templates iPhoto offers are quite limited and ordinary that you might feel a little disappointed.
- iPhoto offers no share options to save photo collages to desktop or to post on Facebook, which is a basic feature of picture collage editor.
Part 2: What Replaces iPhoto on Mac/iPhone?
Since iPhoto’s functions are not sufficient, we will introduce some alternative collage makers that you may be interested in.
Alternative to Make a Short Video, Slideshow, or Photo Collage: Wondershare Filmora
If there are too many photos to save or share with friends and family, you can use these images to make short videos to better collage and share. Filmora can do this for you, through which you can easily crop, add effects, split the screen, and merge photos. In order to make the “photo video” lively and exciting, you can also add music, audio, animation, title, music, etc. to it.
Alternative to Organize, Store, and Sort Images: iCloud
Migrating your photos to iCloud is a wise choice. iCloud is the best photo storage for iOS or Mac users. You don’t need to download other apps or software. Just allow iCloud to back up the photo’s library in the settings.
The best thing is that you can view iCloud photos anytime and anywhere after logging in to your iCloud account. You can also automatically share photos with others by opening “Shared Album”. However, if there are too many photos, a paid subscription may be required to upgrade the storage space.
Conclusion
Above are the steps to make a photo collage using iPhoto on Mac/iPhone. We also list alternative methods to meet the different needs of the Photo library. So, if this isn’t quite what you’re looking for, you can also use some online photo collage service instead. If you want to have more fun editing photo stories, welcome to download Filmora and make more memorable and interesting videos.
Shanoon Cox
Shanoon Cox is a writer and a lover of all things video.
Follow @Shanoon Cox
Also read:
- [New] Celebrating Beauty Innovators YouTube's Elite List for 2024
- [New] In 2024, The Complete Guide to Twitter's Paid Reach and Impressions
- [New] The Comprehensive Guide to Enhancing Your Video Gaming Channels
- [Updated] Rock Your Facebook Profile Add, Pin, Play, & Manage Music (iPhone & Android)
- [Updated] The Artisan’ Writes Crafting HDR Magic with iPhone
- 8 Best Meme Maker App to Create Memes with Your Own Picture
- Fix Vivo Y200e 5G Android System Webview Crash 2024 Issue | Dr.fone
- In 2024, 5 Techniques to Transfer Data from Vivo V27e to iPhone 15/14/13/12 | Dr.fone
- In 2024, Looking For A Location Changer On Xiaomi Redmi 13C 5G? Look No Further | Dr.fone
- Key Platforms Ranking the Best 6 Sites for Business Interaction
- New How to Record and Edit an Animoji or Memoji Karaoke Music Video for 2024
- New In 2024, Best 10 Emoji Makers to Create Your Own EmojisPC/Online/Android/iPhone
- New In 2024, Best 10 Free Manga Sites to Read Online
- Updated In 2024, How to Add Bitmoji to Keyboard? Complete Guide
- Updated In 2024, How to Make Video Slideshow with Your Travel Photos
- Updated Mocking Sponge Bob Meme Generator for 2024
- Title: How to Make Your Own Emoji in 2 Ways Step-By Step Guide for 2024
- Author: Jan
- Created at : 2024-09-28 16:47:30
- Updated at : 2024-09-30 18:59:38
- Link: https://meme-emoji.techidaily.com/how-to-make-your-own-emoji-in-2-ways-step-by-step-guide-for-2024/
- License: This work is licensed under CC BY-NC-SA 4.0.