
How to Make Memes with White Background Step by Step
How to Make Memes with White Background Step by Step
How to Make Memes with White Background Step by Step

Ollie Mattison
Mar 27, 2024• Proven solutions
World seems fun and humorous, as we wake up to a variety of memes every day. Especially memes having captions are so cool and funny over the social media . A white background with your meme enhances the significance of captions over the video or image in the meme. So, if you too desire to know how to make memes with white background, you have hit the right spot.
In this article, we are going to explain you the detailed process of creating memes with white background. Stay tuned to explore!
- Part1: Create memes with white background by Filmora meme maker
- Part2: How to make memes with white background on phone
Part 1: Create memes with white background by Filmora meme maker
If you are curious enough to know how to make memes with white background online, then Filmora Meme Maker is the right choice for you. You don’t have to install or download any app or software. Just browse and edit the photo or video to create a white background meme and you are good to go. This meme maker can create photo, GIF and video memes alike for you. Moreover, you can add texts, alter fonts, font size and color as well as move the text anywhere in the meme.
This is a fast tool that runs straight on your browser and comes with a decoder and encoder. You can even directly add videos from URL by including the online link to this meme maker program. You can convert a video to a GIF meme with Filmora Meme Maker.
Here comes the detailed process for how to make memes with white background –
Step 1: First and foremost, browse for the official website of Filmora Online Meme Maker page. Drag and drop the desired image over here.

Step 2: On the meme editor page customize the background to white and then select tools from the left side panel to customize the meme further. Add texts, change color, font size and move the text around the background to position it appropriately and match your meme.

Step 3: When everything is as per your wish, click on the ‘CREATE’ button. It will ensure that the changes that you have made will be saved properly. If you are satisfied with the changes and want to go ahead with it, hit the ‘DOWNLOAD’ button.
Step 4: When the ‘DOWNLOAD’ button is pressed, the meme with black and white background is saved on your computer. You can now share it on Reddit, Instagram, Facebook, Twitter or any other social media platform of your choice.

Part 2: How to make memes with white background on phone
Among the various apps available in the market, we have considered PhotoGrid to make memes with white background. Both Play Store and iTunes can offer a good number of these apps to create memes having white background. Here, we are considering an Android phone for that matter.
Step by step guide for creating memes with white background –
Step 1: From the Play Store, download the app on your Android phone. Run the app on your mobile device and click on the ‘Grid’ for selecting the image that you wish to add to your meme.
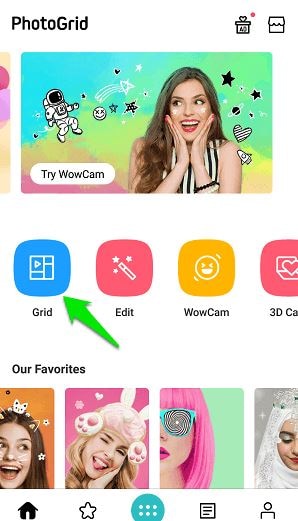
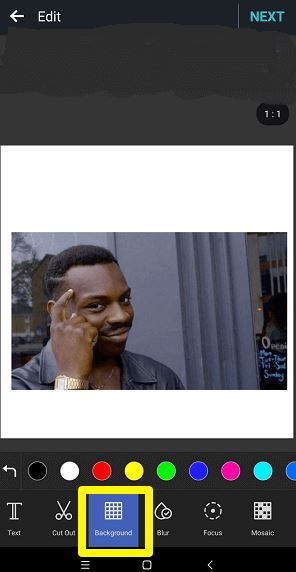
Step 2: When the picture is loaded on Photo Grid, you need to click on the ‘Background’ tab from the menu at the bottom. Pick white color from the menu over here, though usually it is selected by default.
Step 3: Adjust the position and size of the image as you desire by pinching and zooming with your fingers. Once the position and dimensions are fixed as per your requirements, hit the ‘Text’ option. Enter the text you want to include in the meme and then click the ‘tick’ box.
Step 4: Your text is movable across the image area and is resizable as well using your fingers. You can alter the alignment, font, border, color etc. for every text you enter here.
Step 5: When everything else is sorted, press the ‘NEXT’ button on the top corner and hit ‘Save’. This is how to make memes with white background.
Using Photo Grid, you can also create video memes following the same guide as that of the photo memes. As everything is created in a square size, you can seamlessly use it on any social media platform including Reddit, Instagram, etc.
Conclusion
From this article, Filmora Meme Maker is one of the top meme makers in the market. Not only picture or GIF but video memes can also be done using this tool. As there is no need of downloading the software on your system or mobile, you save lot of time and space on your hard drive. We are hopeful that you are comfortable with how to make memes with white background using Filmora Meme Maker online.
Ollie Mattison
Ollie Mattison is a writer and a lover of all things video.
Follow @Ollie Mattison
Ollie Mattison
Mar 27, 2024• Proven solutions
World seems fun and humorous, as we wake up to a variety of memes every day. Especially memes having captions are so cool and funny over the social media . A white background with your meme enhances the significance of captions over the video or image in the meme. So, if you too desire to know how to make memes with white background, you have hit the right spot.
In this article, we are going to explain you the detailed process of creating memes with white background. Stay tuned to explore!
- Part1: Create memes with white background by Filmora meme maker
- Part2: How to make memes with white background on phone
Part 1: Create memes with white background by Filmora meme maker
If you are curious enough to know how to make memes with white background online, then Filmora Meme Maker is the right choice for you. You don’t have to install or download any app or software. Just browse and edit the photo or video to create a white background meme and you are good to go. This meme maker can create photo, GIF and video memes alike for you. Moreover, you can add texts, alter fonts, font size and color as well as move the text anywhere in the meme.
This is a fast tool that runs straight on your browser and comes with a decoder and encoder. You can even directly add videos from URL by including the online link to this meme maker program. You can convert a video to a GIF meme with Filmora Meme Maker.
Here comes the detailed process for how to make memes with white background –
Step 1: First and foremost, browse for the official website of Filmora Online Meme Maker page. Drag and drop the desired image over here.
Step 2: On the meme editor page customize the background to white and then select tools from the left side panel to customize the meme further. Add texts, change color, font size and move the text around the background to position it appropriately and match your meme.
Step 3: When everything is as per your wish, click on the ‘CREATE’ button. It will ensure that the changes that you have made will be saved properly. If you are satisfied with the changes and want to go ahead with it, hit the ‘DOWNLOAD’ button.
Step 4: When the ‘DOWNLOAD’ button is pressed, the meme with black and white background is saved on your computer. You can now share it on Reddit, Instagram, Facebook, Twitter or any other social media platform of your choice.
Part 2: How to make memes with white background on phone
Among the various apps available in the market, we have considered PhotoGrid to make memes with white background. Both Play Store and iTunes can offer a good number of these apps to create memes having white background. Here, we are considering an Android phone for that matter.
Step by step guide for creating memes with white background –
Step 1: From the Play Store, download the app on your Android phone. Run the app on your mobile device and click on the ‘Grid’ for selecting the image that you wish to add to your meme.
Step 2: When the picture is loaded on Photo Grid, you need to click on the ‘Background’ tab from the menu at the bottom. Pick white color from the menu over here, though usually it is selected by default.
Step 3: Adjust the position and size of the image as you desire by pinching and zooming with your fingers. Once the position and dimensions are fixed as per your requirements, hit the ‘Text’ option. Enter the text you want to include in the meme and then click the ‘tick’ box.
Step 4: Your text is movable across the image area and is resizable as well using your fingers. You can alter the alignment, font, border, color etc. for every text you enter here.
Step 5: When everything else is sorted, press the ‘NEXT’ button on the top corner and hit ‘Save’. This is how to make memes with white background.
Using Photo Grid, you can also create video memes following the same guide as that of the photo memes. As everything is created in a square size, you can seamlessly use it on any social media platform including Reddit, Instagram, etc.
Conclusion
From this article, Filmora Meme Maker is one of the top meme makers in the market. Not only picture or GIF but video memes can also be done using this tool. As there is no need of downloading the software on your system or mobile, you save lot of time and space on your hard drive. We are hopeful that you are comfortable with how to make memes with white background using Filmora Meme Maker online.
Ollie Mattison
Ollie Mattison is a writer and a lover of all things video.
Follow @Ollie Mattison
Best Emoji Removers to Remove Emojis From Pictures [Online/PC/Mobile]
Thanks to technology, editing photos have become easy. You can crop and rotate a photo, add filters, and even add emojis. While removing emojis is easy while you are editing an image and have not saved your work, but what if you have and want to get rid of the emojis you added to the picture? How to go about that?
So, if you want to remove an emoji from a picture and the picture is already saved, don’t worry; this post will help you learn about the top ways to remove it. Keep reading!
Related: How to Remove Unwanted Objects from Photo
In this article
01 Best Emoji Removers Online to Remove Emojis from Pictures
02 Best Emoji Removers on Windows/Mac Computer
03 Best Emoji Remover Apps on iPhone and Android

Part 1: Best Emoji Removers Online to Remove Emojis from Pictures
1. Inpaint
So, the first online emoji remover that you can try is Inpaint. This is a simple to use tool and will remove unwanted objects, such as emojis, from a picture by intelligently filling it with textures that match the surrounding image data.
The image formats Inpaint accepts are JPG, WebP, and PNG. Just remember to use only the recommended image formats, and you can start using them right away. You don’t need to log in or sign up to start using it.
Features
- An online tool that removes unwanted objects quickly.
- You don’t need to sign up or log in.
- It accepts JPG, PNG, and WebP formats.
- 4.2MP is the maximum image resolution.
Website: https://theinpaint.com/
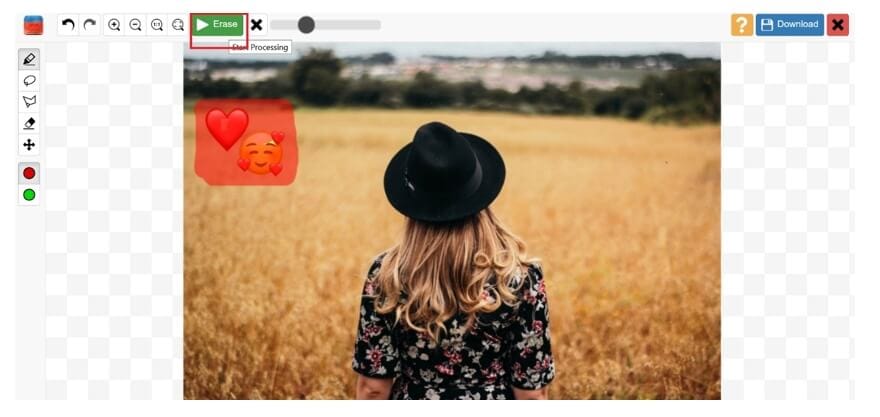
2. Pixlr
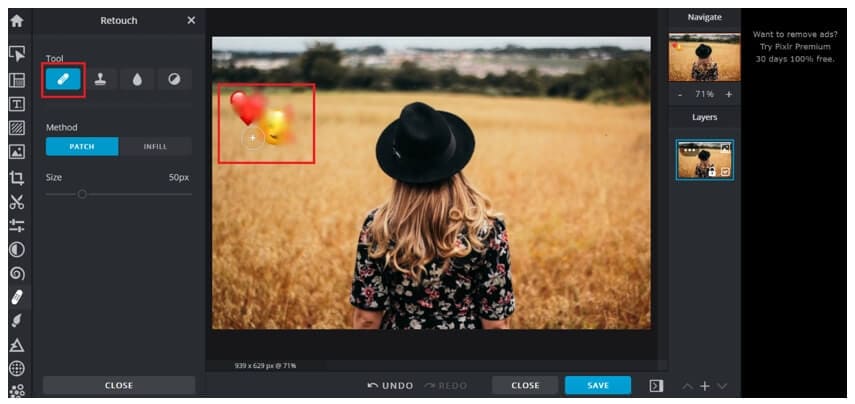
The next popular online tool is Pixlr. Pixlr is a popular photo editing tool that allows you to fix your pictures as well. You can use the tool online either using your computer web browser or mobile.
Whatever works for you. It doesn’t only let you remove emojis but erase background as well. But since you want to remove emojis, you will have to add the image and click on the retouch button from the toolbar. Then, you need to click on the image multiple times so that its surroundings overlap the emojis.
Features
- Pixlr can be used on both mobile and web browsers.
- Multiple photo editing tools are available.
- Removes emojis by blending them with the surroundings.
- Using Pixlr is easy and convenient.
Website: https://pixlr.com/
3. Fotor

Fotor is a professional photo editing tool, which lets you clone an emoji with a part of the image. The online tool asks you to sign up using your Google account to save your work. So, if you want to know how to remove emoji from a photo, you can use the clone feature.
Once you upload an image with emojis, move your cursor to the tool section in the left menu bar. Scroll down, and you will see the Clone option. Touch one part of the image that you want to use instead of the emoji. The first dot will be the area you want to clone and place the second dot on the emoji. And all done.
Website: https://www.fotor.com/
Features
- You can clone the emoji to remove it.
- A professional tool with lots of editing features.
- One needs to sign up or log in before using Fotor.
- The tool retains the original picture quality.
Related: Best Online Photo Editors
Part 2: Best Emoji Removers on Windows/Mac Computer
1. Adobe Photoshop
Adobe Photoshop is arguably one of the best photo editing tools that only allows you to enhance a photo but fix issues, such as removing emojis, unwanted objects, and so on. Adobe Photoshop is a professional tool and might not be the best for those new to it, but if you have used Adobe Photoshop earlier, you can use the Lasso Tool or the Marqueel Tool, which you will find on the left toolbar to remove emojis and unwanted items. Once done, save the image, and yes, the original picture quality will be retained.
Key Features
- A professional photo editing tool.
- It has multiple photo editing features and lets you remove emojis.
- You can draw on the emoji with a pen or pencil.
- It autosaves your work.
2. Wondershare Fotophire
Wondershare Fotophire is a fantastic photo editing tool that works magically on all kinds of images. Whether your photo is loaded with multiple emojis, you can remove them easily using Fotophire. If you are thinking about how to remove emojis from pictures using Fotophire, it’s pretty easy.
You need to clone any part of the image, and the tool will automatically use its algorithm to fill the emoji with its surroundings so that the filled area looks natural and blends well with the rest of the photo. Fotophire is a good option for both beginners and pros.
Key Features
- It removes all kinds of unwanted objects from an image, including emojis.
- Using Fotophire is easy and convenient.
- A good tool for both pros and beginners.
- Background doesn’t get impacted, and the original image quality remains intact.
3. GIMP
GIMP is a free and open-source photo editor, which allows you to remove emojis from a photo. It is available for Windows, macOS, GNU/Linux, and other operating systems. GIMP has been designed for everyone who would want their picture to look better.
If you wish to manipulate a high-quality image, you don’t have to worry about that because it accepts bigger-size photos as well. GIMP lets you clone an area and use that part on the emoji. You can also adjust the opacity of the cloned item depending on your requirements.
Key Features
- It lets you clone the surrounding area to hide an emoji.
- Accepts all the top image formats.
- It doesn’t pixelate the image after editing it.
- A free tool to use with lots of photo editing features.
4. Jihosoft Photo Eraser
Jihosoft Photo Eraser is a good photo editor tool that removes emojis or unwanted objects from an image by analyzing the surroundings. Once done, it will fill the selected emojis with the intelligently-generated textures. If you no longer want the emojis to be there is an image, Jihosoft Photo Eraser will be an ideal tool to use. The tool’s primary purpose is to remove unwanted items from an image, which is why it is an excellent software to go for.
Key Features
- It removes unwanted objects, such as emojis, from a photo.
- It allows the cloning of things to replace emojis.
- Using Jihosoft Photo Eraser is easy.
- The photo quality remains intact.
Part 3: Best Emoji Remover Apps on iPhone and Android
1. Snapseed
Snapseed is a photo editing app that is available for both iPhone and Android users. It has a masking feature, which lets you mask any object in a photo, including an emoji. Snapseed is a good tool to get rid of unwanted items from any image.
It has around 29 photo editing tools, which will help a user to enhance the photo quality. Using it is very easy because all the tools are readily available on the main screen. You just need to select the right tool and get started with the work.
Key Features
- It helps in removing emojis and unwanted objects from a photo.
- It works on both RAW and JPG files.
- It has multiple photo editing tools.
- Using Snapseed is easy.
2. AirBrush
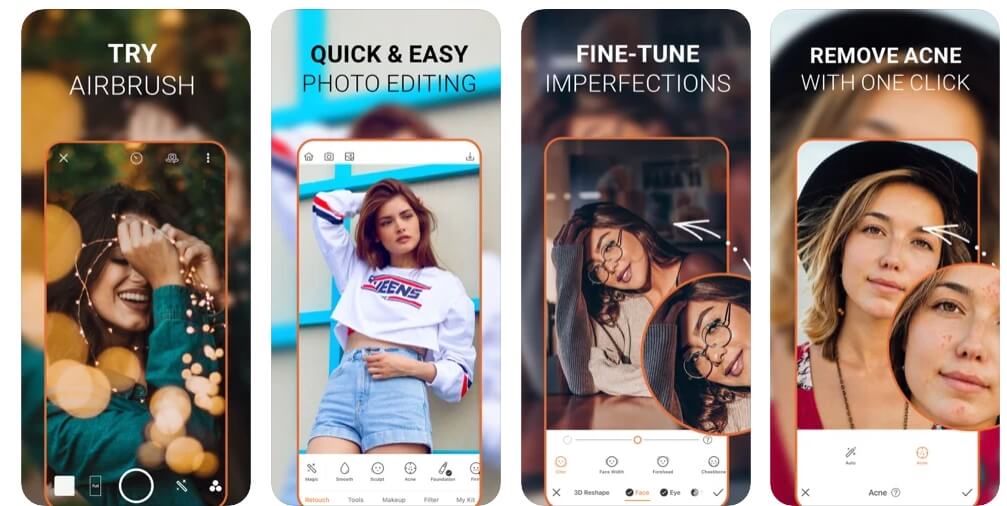
AirBrush is a leading photo editing tool for iPhone users and has a high rating of 4.9. The tool makes editing an image effortlessly. If you don’t want the emojis to ruin your photo, use AirBrush to deal with it quickly. Moreover, it lets you edit your photos further, for example, remove blemishes, make the image look smooth and glowing, add filters to give it a magical touch, and so much more! The tool has quite a lot of features that you will like.
Key Features
- It removes emojis and unwanted objects from an image.
- Using AirBrush is easy.
- It removes emojis quickly.
- It has many photo editing tools.
3. TouchRetouch
If you are looking for a professional photo editing tool that will let you do much more than just remove emojis, you should try TouchRetouch. You can use it to remove unwanted items, such as emojis, lines, blemishes, imperfections, and more.
It has a rating of 4.8, which is great looking at the kind of photo editing features TouchRetouch offers. No matter what objects you want to get rid of in your photo, TouchRetouch can let you do that easily.
Key Features
- It removes all kinds of unwanted objects quickly.
- It provides you with a single-flick line removal function.
- TouchRetouch is easy to use.
- It offers easy to understand tutorials.
FAQ About Removing Emojis from Pictures
How Do I Remove an Emoji from a Hidden Face?
It depends on the kind of tool you have picked. Typically, the tool will let you select the emoji and mask it with its surroundings to blend in well. So, let’s say you are on a dating site and you can’t see how the person looks like because they have hidden their face with an emoji.
In such a case, even if you use an emoji remover tool, it won’t show the actual face, instead replace it with the surrounding. Emoji removal tools are for personal use only.
Conclusion
So, now you know about the easy ways to remove emojis from pictures. Try any of the tools and remove unwanted objects and emojis from any photo you want. The tools that we have listed here are trusted by many and are easy to use.
02 Best Emoji Removers on Windows/Mac Computer
03 Best Emoji Remover Apps on iPhone and Android
Part 1: Best Emoji Removers Online to Remove Emojis from Pictures
1. Inpaint
So, the first online emoji remover that you can try is Inpaint. This is a simple to use tool and will remove unwanted objects, such as emojis, from a picture by intelligently filling it with textures that match the surrounding image data.
The image formats Inpaint accepts are JPG, WebP, and PNG. Just remember to use only the recommended image formats, and you can start using them right away. You don’t need to log in or sign up to start using it.
Features
- An online tool that removes unwanted objects quickly.
- You don’t need to sign up or log in.
- It accepts JPG, PNG, and WebP formats.
- 4.2MP is the maximum image resolution.
Website: https://theinpaint.com/
2. Pixlr
The next popular online tool is Pixlr. Pixlr is a popular photo editing tool that allows you to fix your pictures as well. You can use the tool online either using your computer web browser or mobile.
Whatever works for you. It doesn’t only let you remove emojis but erase background as well. But since you want to remove emojis, you will have to add the image and click on the retouch button from the toolbar. Then, you need to click on the image multiple times so that its surroundings overlap the emojis.
Features
- Pixlr can be used on both mobile and web browsers.
- Multiple photo editing tools are available.
- Removes emojis by blending them with the surroundings.
- Using Pixlr is easy and convenient.
Website: https://pixlr.com/
3. Fotor
Fotor is a professional photo editing tool, which lets you clone an emoji with a part of the image. The online tool asks you to sign up using your Google account to save your work. So, if you want to know how to remove emoji from a photo, you can use the clone feature.
Once you upload an image with emojis, move your cursor to the tool section in the left menu bar. Scroll down, and you will see the Clone option. Touch one part of the image that you want to use instead of the emoji. The first dot will be the area you want to clone and place the second dot on the emoji. And all done.
Website: https://www.fotor.com/
Features
- You can clone the emoji to remove it.
- A professional tool with lots of editing features.
- One needs to sign up or log in before using Fotor.
- The tool retains the original picture quality.
Related: Best Online Photo Editors
Part 2: Best Emoji Removers on Windows/Mac Computer
1. Adobe Photoshop
Adobe Photoshop is arguably one of the best photo editing tools that only allows you to enhance a photo but fix issues, such as removing emojis, unwanted objects, and so on. Adobe Photoshop is a professional tool and might not be the best for those new to it, but if you have used Adobe Photoshop earlier, you can use the Lasso Tool or the Marqueel Tool, which you will find on the left toolbar to remove emojis and unwanted items. Once done, save the image, and yes, the original picture quality will be retained.
Key Features
- A professional photo editing tool.
- It has multiple photo editing features and lets you remove emojis.
- You can draw on the emoji with a pen or pencil.
- It autosaves your work.
2. Wondershare Fotophire
Wondershare Fotophire is a fantastic photo editing tool that works magically on all kinds of images. Whether your photo is loaded with multiple emojis, you can remove them easily using Fotophire. If you are thinking about how to remove emojis from pictures using Fotophire, it’s pretty easy.
You need to clone any part of the image, and the tool will automatically use its algorithm to fill the emoji with its surroundings so that the filled area looks natural and blends well with the rest of the photo. Fotophire is a good option for both beginners and pros.
Key Features
- It removes all kinds of unwanted objects from an image, including emojis.
- Using Fotophire is easy and convenient.
- A good tool for both pros and beginners.
- Background doesn’t get impacted, and the original image quality remains intact.
3. GIMP
GIMP is a free and open-source photo editor, which allows you to remove emojis from a photo. It is available for Windows, macOS, GNU/Linux, and other operating systems. GIMP has been designed for everyone who would want their picture to look better.
If you wish to manipulate a high-quality image, you don’t have to worry about that because it accepts bigger-size photos as well. GIMP lets you clone an area and use that part on the emoji. You can also adjust the opacity of the cloned item depending on your requirements.
Key Features
- It lets you clone the surrounding area to hide an emoji.
- Accepts all the top image formats.
- It doesn’t pixelate the image after editing it.
- A free tool to use with lots of photo editing features.
4. Jihosoft Photo Eraser
Jihosoft Photo Eraser is a good photo editor tool that removes emojis or unwanted objects from an image by analyzing the surroundings. Once done, it will fill the selected emojis with the intelligently-generated textures. If you no longer want the emojis to be there is an image, Jihosoft Photo Eraser will be an ideal tool to use. The tool’s primary purpose is to remove unwanted items from an image, which is why it is an excellent software to go for.
Key Features
- It removes unwanted objects, such as emojis, from a photo.
- It allows the cloning of things to replace emojis.
- Using Jihosoft Photo Eraser is easy.
- The photo quality remains intact.
Part 3: Best Emoji Remover Apps on iPhone and Android
1. Snapseed
Snapseed is a photo editing app that is available for both iPhone and Android users. It has a masking feature, which lets you mask any object in a photo, including an emoji. Snapseed is a good tool to get rid of unwanted items from any image.
It has around 29 photo editing tools, which will help a user to enhance the photo quality. Using it is very easy because all the tools are readily available on the main screen. You just need to select the right tool and get started with the work.
Key Features
- It helps in removing emojis and unwanted objects from a photo.
- It works on both RAW and JPG files.
- It has multiple photo editing tools.
- Using Snapseed is easy.
2. AirBrush
AirBrush is a leading photo editing tool for iPhone users and has a high rating of 4.9. The tool makes editing an image effortlessly. If you don’t want the emojis to ruin your photo, use AirBrush to deal with it quickly. Moreover, it lets you edit your photos further, for example, remove blemishes, make the image look smooth and glowing, add filters to give it a magical touch, and so much more! The tool has quite a lot of features that you will like.
Key Features
- It removes emojis and unwanted objects from an image.
- Using AirBrush is easy.
- It removes emojis quickly.
- It has many photo editing tools.
3. TouchRetouch
If you are looking for a professional photo editing tool that will let you do much more than just remove emojis, you should try TouchRetouch. You can use it to remove unwanted items, such as emojis, lines, blemishes, imperfections, and more.
It has a rating of 4.8, which is great looking at the kind of photo editing features TouchRetouch offers. No matter what objects you want to get rid of in your photo, TouchRetouch can let you do that easily.
Key Features
- It removes all kinds of unwanted objects quickly.
- It provides you with a single-flick line removal function.
- TouchRetouch is easy to use.
- It offers easy to understand tutorials.
FAQ About Removing Emojis from Pictures
How Do I Remove an Emoji from a Hidden Face?
It depends on the kind of tool you have picked. Typically, the tool will let you select the emoji and mask it with its surroundings to blend in well. So, let’s say you are on a dating site and you can’t see how the person looks like because they have hidden their face with an emoji.
In such a case, even if you use an emoji remover tool, it won’t show the actual face, instead replace it with the surrounding. Emoji removal tools are for personal use only.
Conclusion
So, now you know about the easy ways to remove emojis from pictures. Try any of the tools and remove unwanted objects and emojis from any photo you want. The tools that we have listed here are trusted by many and are easy to use.
Is This a Pigeon Meme Generator
Is This a Pigeon Meme Generator
Ollie Mattison
Mar 27, 2024• Proven solutions
Have you ever been so confused that you thought that a butterfly is a pigeon? Apparently, the main protagonist of The Brave Fighter of Sun Fighbird from the Japanese anime TV series has. In an episode that was released in January 1991, Yutaro Katori seriously asked ‘is this a pigeon?’ while looking at a butterfly. At first, everyone thought that it was just a poor translation, but it turned out that the translation was correct, which turned this still frame into a meme as early as 2011.
After a while, the Is This a Pigeon meme came out of fashion, but at the beginning of 2018, it went viral again. Today the meme is used to express all sorts of confusing opinions, that range from popular culture references to philosophical questions. If you’re utterly confused in certain situations or if you simply like making Is This a Pigeon meme, you’re at the right place because in this article we’re going to show you how you can generate these memes in a couple of simple steps.
How to Make Is This a Pigeon Meme?
There are hundreds of meme makers online, but some of them watermark your memes, require you to create an account or want to charge you for the service. That’s why we recommend using Filmora Online Meme Maker that is free to use, produces watermark-free memes, and it doesn’t require you to sign in. Here’s how you can make a meme with this online meme maker:
1. Importing Images
You can copy the picture’s URL by clicking ‘Copy the image’ link below the image and import the template into the Filmora Online Meme Maker directly from the web.

Copy the image
If you choose to upload a photo from your computer or a Smartphone, you can just drag and drop the file from a folder to the webpage or you can click on the + icon and navigate to the folder on your hard drive where the template is stored. Fimora Online Meme Maker also lets you use GIFs and videos to generate memes.

2. Adding the Text to the Meme
Immediately after the image is uploaded, a new page will load, where you can add the text to the meme you’re creating. The text in the Is this a pigeon meme is usually inside the picture so you can just select the Text Inside option and proceed to insert the text into the text boxes below.
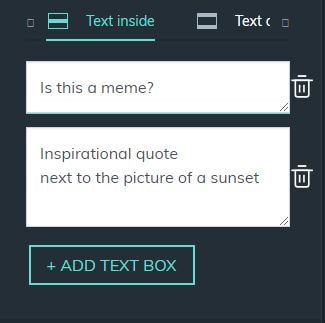
You can add as many text boxes as you want, and you can drag the text displayed across the picture and place it where ever you want. When creating the Is this a Pigeon meme, the text that refers to the source of the confusion should be next to the butterfly, while the question is most often located near the bottom of the picture. Optionally, you can reveal who is asking the question by adding me, my mom or Darth Vader next to the character in the picture.
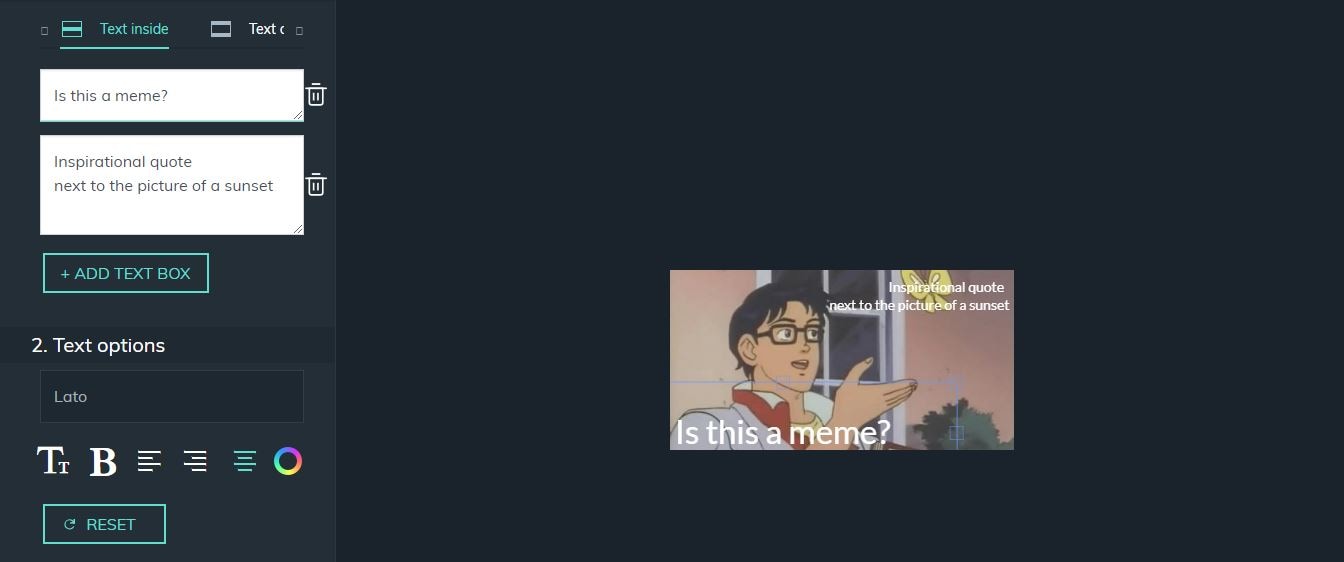
In the Text Options menu, you can adjust the size of the text in each text box individually, change its color or choose between standard text alignment options. Hit the Create button when you’re done and wait for a new page to load.
3. Downloading Memes
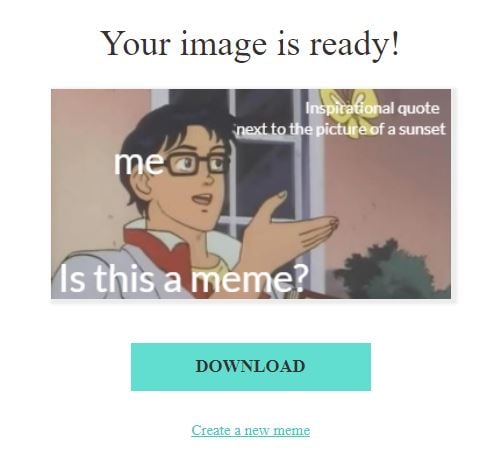
Click on the download button to add a new meme to your collection. Sharing files directly to social media from Filmora Online Meme Maker is not an option if you’re making memes from a Mac or PC computer.
Conclusion
Being confused can be hilarious, which is one of the reasons why Is this a Pigeon meme has been so popular over the course of the last year. Generating a meme is easy, so you can focus on finding an appropriate joke for this type of meme. Do you often make Is this a Pigeon memes? Leave a comment and share your favorites with us.
Ollie Mattison
Ollie Mattison is a writer and a lover of all things video.
Follow @Ollie Mattison
Ollie Mattison
Mar 27, 2024• Proven solutions
Have you ever been so confused that you thought that a butterfly is a pigeon? Apparently, the main protagonist of The Brave Fighter of Sun Fighbird from the Japanese anime TV series has. In an episode that was released in January 1991, Yutaro Katori seriously asked ‘is this a pigeon?’ while looking at a butterfly. At first, everyone thought that it was just a poor translation, but it turned out that the translation was correct, which turned this still frame into a meme as early as 2011.
After a while, the Is This a Pigeon meme came out of fashion, but at the beginning of 2018, it went viral again. Today the meme is used to express all sorts of confusing opinions, that range from popular culture references to philosophical questions. If you’re utterly confused in certain situations or if you simply like making Is This a Pigeon meme, you’re at the right place because in this article we’re going to show you how you can generate these memes in a couple of simple steps.
How to Make Is This a Pigeon Meme?
There are hundreds of meme makers online, but some of them watermark your memes, require you to create an account or want to charge you for the service. That’s why we recommend using Filmora Online Meme Maker that is free to use, produces watermark-free memes, and it doesn’t require you to sign in. Here’s how you can make a meme with this online meme maker:
1. Importing Images
You can copy the picture’s URL by clicking ‘Copy the image’ link below the image and import the template into the Filmora Online Meme Maker directly from the web.
Copy the image
If you choose to upload a photo from your computer or a Smartphone, you can just drag and drop the file from a folder to the webpage or you can click on the + icon and navigate to the folder on your hard drive where the template is stored. Fimora Online Meme Maker also lets you use GIFs and videos to generate memes.
2. Adding the Text to the Meme
Immediately after the image is uploaded, a new page will load, where you can add the text to the meme you’re creating. The text in the Is this a pigeon meme is usually inside the picture so you can just select the Text Inside option and proceed to insert the text into the text boxes below.
You can add as many text boxes as you want, and you can drag the text displayed across the picture and place it where ever you want. When creating the Is this a Pigeon meme, the text that refers to the source of the confusion should be next to the butterfly, while the question is most often located near the bottom of the picture. Optionally, you can reveal who is asking the question by adding me, my mom or Darth Vader next to the character in the picture.
In the Text Options menu, you can adjust the size of the text in each text box individually, change its color or choose between standard text alignment options. Hit the Create button when you’re done and wait for a new page to load.
3. Downloading Memes
Click on the download button to add a new meme to your collection. Sharing files directly to social media from Filmora Online Meme Maker is not an option if you’re making memes from a Mac or PC computer.
Conclusion
Being confused can be hilarious, which is one of the reasons why Is this a Pigeon meme has been so popular over the course of the last year. Generating a meme is easy, so you can focus on finding an appropriate joke for this type of meme. Do you often make Is this a Pigeon memes? Leave a comment and share your favorites with us.
Ollie Mattison
Ollie Mattison is a writer and a lover of all things video.
Follow @Ollie Mattison
Top 10 Best Free Manga Sites to Read Online
Top 10 Best Free Manga Sites to Read Online
Ollie Mattison
Mar 27, 2024• Proven solutions


a
Comic books, also known as manga in Japanese, have been an important part of the country’s culture for a long time. Manga is one of the most popular forms of entertainment throughout the world. You won’t find anything like Japanese manga anywhere else in the world in terms of its unique graphics and stories. Manga is popular both in Japan and all over the world due to the very same reasons.
If you are a manga fan and would like to read manga online, you can find many websites that offer the latest manga editions and are free to access. However, there are few places in the world where you can buy these comic book series. To read their favorite manga series at any time, people often search online for free manga sites to read free of charge.
In this article, we will share a list of the 12 best free manga sites where you can easily read your favorite comic books.
1. MangaFox
MangaFox is among the best and most popular manga sites. The website was launched in 2008. Manga fans will find a vast collection of old and new series on this site. You can use MangaFox for free. It is very easy to use and has a very simple user interface. Additionally, when reading manga, users won’t see advertisements.

Features:
- It is not necessary to sign up or register in order to access the comics. All you have to do is browse the site and start reading.
- The site has millions of users and is one of the most popular sites for comics.
- Reading on the go is possible. Mobile users can browse the website from their smartphones and continue reading on the go.
2. MangaReader
Mangaareader is another best and most popular manga website. There are no charges for using the platform. There are a good number of manga collections on Mangaareader. Among other genres, it allows users to read manga without worrying about adventure, action, or fantasy. Using this platform may, however, result in sponsored advertisements.
It is very nice to see the website in such a light green color. Simple, user-friendly, and intuitive user interface. Popular manga updates and the latest manga updates can be found on the homepage. On the right side, you can also find old manga series.
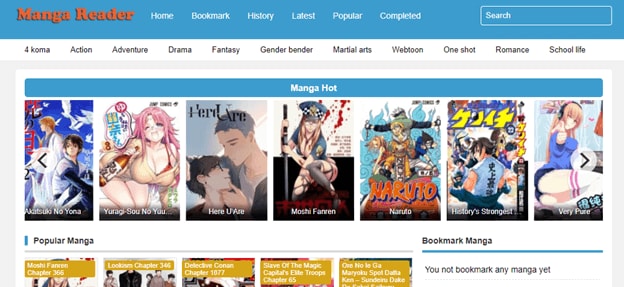
Features:
- As of now, it is the best website to read free manga online. You will also find the newest editions and comics.
- Getting your favorite comics is easy because there’s no need to register.
- All comics are free to download. Thus, it enjoys international popularity as well.
3. MangaHere
MangaHere is another excellent manga site on the Internet. With a wide range of manga in different genres like romantic comedies, girls, drama, school life, teens, action, fantasy, and staining, it has it all. In addition to manga news, MangaHere provides leaked manga. New manga episodes or series are regularly added to this website by the administrators.
As with other manga websites, the interface of MangaHere looks quite similar. A section featuring manga news, hot manga releases, and the latest updates can be found on the homepage.
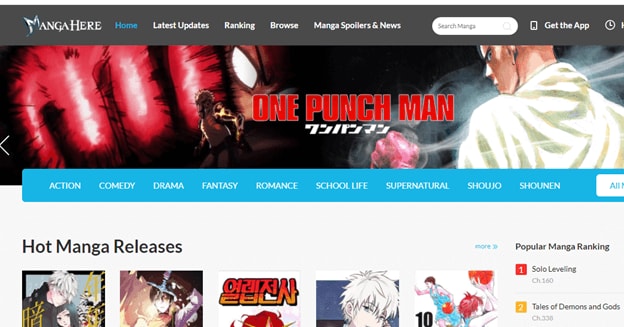
Features:
- This site provides the latest spoilers and news on manga.
- Manga stories for adults are available in a massive collection. Those seeking this type of content will find it here.
- This website is accessible from a smartphone. The website supports all types of OS.
4. MangaPark
There’s no shortage of free comic books online at Manga Park. This website also offers almost all types of comics. Comics include action, school life, romance, horror, thrillers, comedy, drama, and more types of comics. Each comic is categorized properly, including letters, number of views, ratings, and the latest comic.
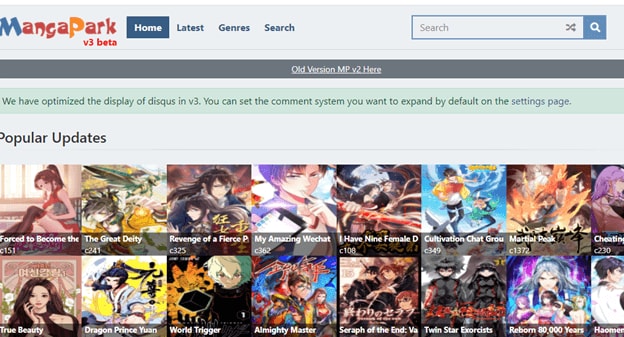
Features:
- In a clear grid pattern, MangaPark presents all popular comic books and the most recent comic releases.
- Your favorite comics and themes can be marked as favorites with a free account.
- You can view all the previous comics chapters by clicking on the history button.
- Find out which is the best website for reading manga.
- There is no need to register or sign up.
5. BATO.TO
A bit more fancy and appealing than Manga Reader, BATO features a different interface. Manga Comics can be found here, including romance, action, sports, sci-fi, and other genres. The website Bato.to is popular, and it is not subject to sudden downtime like many other manga sites. You can upload manga to this open-source website and help improve the collection.
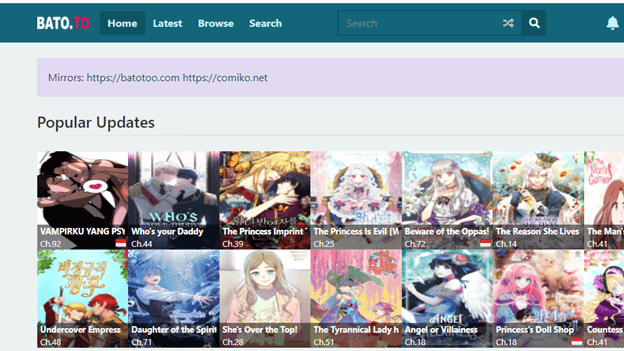
Features:
- There’s much Manga on Bato.to, and there’s a great community for you to interact with.
- Despite its unorganized nature, the website still accomplishes its objective.
- This website offers a variety of free manga for you to read.
- Additionally, there is a section for recent releases and updates.
- It lets you narrow your search using advanced filters.
- There are four types of filters: style, demographics, status, and genre.
6. Manga Kakalot
There is a website called MangaKakalot that offers a clearer and more sophisticated user experience. To access the most entertaining manga comic collection online, visitors must first create a free account on the website. With high-quality images and an updated collection that is constantly updated, you’ll always find the most recent issues. Visitors will find it very easy to search the series on this website because it is well laid out.
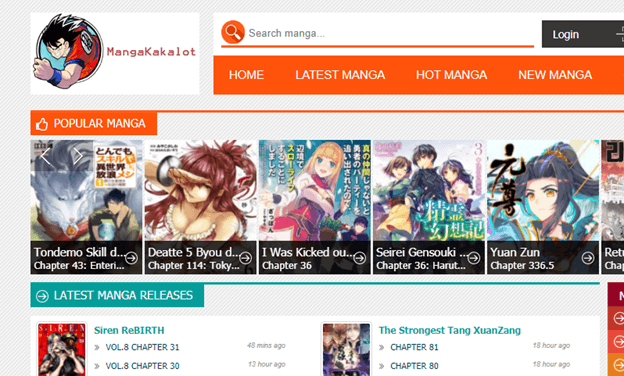
Features:
- Manga’s homepage has links to its latest version.
- There are all types of manga available, from action comics to mystery, mystery and romance manga.
- Also, the manga series are listed alphabetically, along with their completion status.
- It is possible to read manga on Mangakalot.
- All Comics on the homepage are displayed in a grid pattern, and the site has a simple and minimalistic look.
- Reading manga online is best at this site.
7. Otakusmash.com
Because of the easy navigation interface and the extensive collection of Manga collections on this site, we have included it in our list of best manga sites. You can browse Top 100 Action Adventure Manga, Top 50 Sports Manga, Top 50 Romantic Manga, and more on this website.
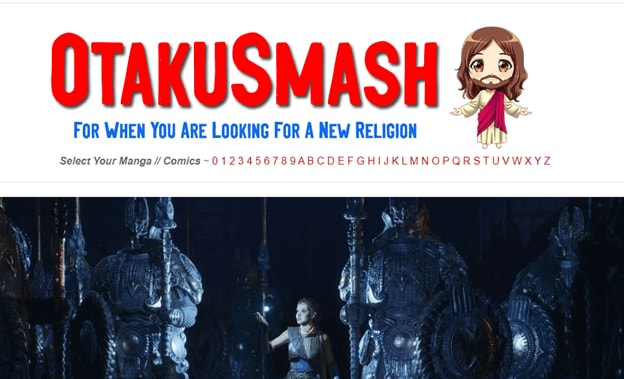
Features:
- The site is quite easy to navigate.
- You can also find online comics and download anime besides reading manga on the website.
- You can also download anime wallpapers from this website.
- You can find anime news, new mangas, and wishlist on the right section of the website.
8. Mngdoom.com
A site that can certainly be considered one of the best manga sites is Manga Doom. With new comics and chapters added every hour, it has a huge database and keeps growing in popularity. This website does not charge for the back-end work or for sharing premium content. While it does contain advertisements, they are not intrusive or creepy as those on other sites.

Features:
- The Manga Doom interface is simple, and it has a search bar at the top, which allows you to find manga without any hassles easily.
- Using this platform will allow you to meet people with similar interests all over the world.
- Overall you can find plenty of good mangas on this website.
- The library of mangas keeps growing every day so you won’t get bored.
9. Manga Freak
A good number of audiences find it useful and enjoy it, despite the advertisements. There is a huge database of comics on Manga Freak. Manga Freak is unique in that it is updated far more frequently than other dead websites. New content is consistently posted on this manga website. The content on this site can be read and accessed for free
Features:
- The website has a dark theme that gives it a very calm look.
- Although you see some annoying ads still it is worth reading.
- There is a huge library of mangas available on this website.
- You can also search for your desired mangas using the search bar on the top left side.
10. Comixology.com
Our next platform is Comixology. Amazon assists Comixology in its operations. Marvel Comics, DCU, Manga, and other digital comics are available here. Coximology, therefore, has a diverse comic book collection. The other great feature of this website is that they host every graphic novel in their library in English. The prices for comics and manga on Comixology are incredibly reasonable. You can also find many free comics on websites for which you don’t need to pay anything. Sadly, they do not have any options for renting. The website is also incredibly easy to navigate and looks very premium. We rate this manga site among the top on our list today.
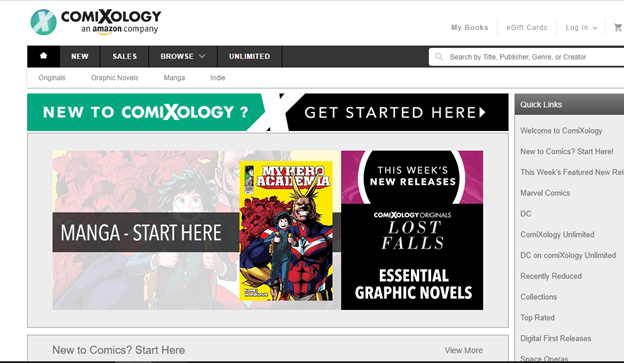
Features:
- Supported by Amazon.
- Offers a diverse range of comics and mangas.
- Clean website layout.
- Easy to access and use.
Final Verdict
So, in this article, we shared a detailed list of the best free manga sites where you can read mangas online. All these websites are very popular among manga fans, and if you are a manga lover, you will have an amazing experience on these websites.
Ollie Mattison
Ollie Mattison is a writer and a lover of all things video.
Follow @Ollie Mattison
Ollie Mattison
Mar 27, 2024• Proven solutions
a
Comic books, also known as manga in Japanese, have been an important part of the country’s culture for a long time. Manga is one of the most popular forms of entertainment throughout the world. You won’t find anything like Japanese manga anywhere else in the world in terms of its unique graphics and stories. Manga is popular both in Japan and all over the world due to the very same reasons.
If you are a manga fan and would like to read manga online, you can find many websites that offer the latest manga editions and are free to access. However, there are few places in the world where you can buy these comic book series. To read their favorite manga series at any time, people often search online for free manga sites to read free of charge.
In this article, we will share a list of the 12 best free manga sites where you can easily read your favorite comic books.
1. MangaFox
MangaFox is among the best and most popular manga sites. The website was launched in 2008. Manga fans will find a vast collection of old and new series on this site. You can use MangaFox for free. It is very easy to use and has a very simple user interface. Additionally, when reading manga, users won’t see advertisements.
Features:
- It is not necessary to sign up or register in order to access the comics. All you have to do is browse the site and start reading.
- The site has millions of users and is one of the most popular sites for comics.
- Reading on the go is possible. Mobile users can browse the website from their smartphones and continue reading on the go.
2. MangaReader
Mangaareader is another best and most popular manga website. There are no charges for using the platform. There are a good number of manga collections on Mangaareader. Among other genres, it allows users to read manga without worrying about adventure, action, or fantasy. Using this platform may, however, result in sponsored advertisements.
It is very nice to see the website in such a light green color. Simple, user-friendly, and intuitive user interface. Popular manga updates and the latest manga updates can be found on the homepage. On the right side, you can also find old manga series.
Features:
- As of now, it is the best website to read free manga online. You will also find the newest editions and comics.
- Getting your favorite comics is easy because there’s no need to register.
- All comics are free to download. Thus, it enjoys international popularity as well.
3. MangaHere
MangaHere is another excellent manga site on the Internet. With a wide range of manga in different genres like romantic comedies, girls, drama, school life, teens, action, fantasy, and staining, it has it all. In addition to manga news, MangaHere provides leaked manga. New manga episodes or series are regularly added to this website by the administrators.
As with other manga websites, the interface of MangaHere looks quite similar. A section featuring manga news, hot manga releases, and the latest updates can be found on the homepage.
Features:
- This site provides the latest spoilers and news on manga.
- Manga stories for adults are available in a massive collection. Those seeking this type of content will find it here.
- This website is accessible from a smartphone. The website supports all types of OS.
4. MangaPark
There’s no shortage of free comic books online at Manga Park. This website also offers almost all types of comics. Comics include action, school life, romance, horror, thrillers, comedy, drama, and more types of comics. Each comic is categorized properly, including letters, number of views, ratings, and the latest comic.
Features:
- In a clear grid pattern, MangaPark presents all popular comic books and the most recent comic releases.
- Your favorite comics and themes can be marked as favorites with a free account.
- You can view all the previous comics chapters by clicking on the history button.
- Find out which is the best website for reading manga.
- There is no need to register or sign up.
5. BATO.TO
A bit more fancy and appealing than Manga Reader, BATO features a different interface. Manga Comics can be found here, including romance, action, sports, sci-fi, and other genres. The website Bato.to is popular, and it is not subject to sudden downtime like many other manga sites. You can upload manga to this open-source website and help improve the collection.
Features:
- There’s much Manga on Bato.to, and there’s a great community for you to interact with.
- Despite its unorganized nature, the website still accomplishes its objective.
- This website offers a variety of free manga for you to read.
- Additionally, there is a section for recent releases and updates.
- It lets you narrow your search using advanced filters.
- There are four types of filters: style, demographics, status, and genre.
6. Manga Kakalot
There is a website called MangaKakalot that offers a clearer and more sophisticated user experience. To access the most entertaining manga comic collection online, visitors must first create a free account on the website. With high-quality images and an updated collection that is constantly updated, you’ll always find the most recent issues. Visitors will find it very easy to search the series on this website because it is well laid out.
Features:
- Manga’s homepage has links to its latest version.
- There are all types of manga available, from action comics to mystery, mystery and romance manga.
- Also, the manga series are listed alphabetically, along with their completion status.
- It is possible to read manga on Mangakalot.
- All Comics on the homepage are displayed in a grid pattern, and the site has a simple and minimalistic look.
- Reading manga online is best at this site.
7. Otakusmash.com
Because of the easy navigation interface and the extensive collection of Manga collections on this site, we have included it in our list of best manga sites. You can browse Top 100 Action Adventure Manga, Top 50 Sports Manga, Top 50 Romantic Manga, and more on this website.
Features:
- The site is quite easy to navigate.
- You can also find online comics and download anime besides reading manga on the website.
- You can also download anime wallpapers from this website.
- You can find anime news, new mangas, and wishlist on the right section of the website.
8. Mngdoom.com
A site that can certainly be considered one of the best manga sites is Manga Doom. With new comics and chapters added every hour, it has a huge database and keeps growing in popularity. This website does not charge for the back-end work or for sharing premium content. While it does contain advertisements, they are not intrusive or creepy as those on other sites.
Features:
- The Manga Doom interface is simple, and it has a search bar at the top, which allows you to find manga without any hassles easily.
- Using this platform will allow you to meet people with similar interests all over the world.
- Overall you can find plenty of good mangas on this website.
- The library of mangas keeps growing every day so you won’t get bored.
9. Manga Freak
A good number of audiences find it useful and enjoy it, despite the advertisements. There is a huge database of comics on Manga Freak. Manga Freak is unique in that it is updated far more frequently than other dead websites. New content is consistently posted on this manga website. The content on this site can be read and accessed for free
Features:
- The website has a dark theme that gives it a very calm look.
- Although you see some annoying ads still it is worth reading.
- There is a huge library of mangas available on this website.
- You can also search for your desired mangas using the search bar on the top left side.
10. Comixology.com
Our next platform is Comixology. Amazon assists Comixology in its operations. Marvel Comics, DCU, Manga, and other digital comics are available here. Coximology, therefore, has a diverse comic book collection. The other great feature of this website is that they host every graphic novel in their library in English. The prices for comics and manga on Comixology are incredibly reasonable. You can also find many free comics on websites for which you don’t need to pay anything. Sadly, they do not have any options for renting. The website is also incredibly easy to navigate and looks very premium. We rate this manga site among the top on our list today.
Features:
- Supported by Amazon.
- Offers a diverse range of comics and mangas.
- Clean website layout.
- Easy to access and use.
Final Verdict
So, in this article, we shared a detailed list of the best free manga sites where you can read mangas online. All these websites are very popular among manga fans, and if you are a manga lover, you will have an amazing experience on these websites.
Ollie Mattison
Ollie Mattison is a writer and a lover of all things video.
Follow @Ollie Mattison
How to Make a Slideshow with Music
How to Make a Slideshow with Music

Shanoon Cox
Mar 27, 2024• Proven solutions
Nowadays, we tend to store our experiences of important occasions in photos and videos since cameras and camcorders are popular. To better preserve these sweet memories, make a slideshow with music, photos and videos is a good idea. It’s not as difficult as you think since all you need are: a good slideshow maker, photos and videos you want to show, music to go along with your slideshow. Here is a tutorial about how to make a slideshow with music with Wondershare Filmora video editor and Wondershare DVD Slideshow Builder .
Read more: 20 Best Slideshow Songs for Different Occasions [Royalty-Free]
How to create slideshow with music in Filmora?
Note: The video tutorial about how to make slideshow in minutes is created with the previous version of Filmora video editor. Most of the steps are similar and creating a music slideshow with the latest Filmora is very easy. As we said before, all you need is your photos and music tracks, then follow the steps below to start.
Step 1. Download Filmora and Run it
Click the Free Download button above to download and install Wondershare Filmora on your computer and then launch it.
In case you want to change the default aspect ratio setting in the splash screen, you can choose 9:16 for portrait mode, 1:1 for Instagram slideshow and more. And then click New Project to create a project to continue.
Step 2. Import Photos and Music
After that, you need to import all your photo and music media to the Media Library and then drag and drop them to the timeline directly. Filmora allows you to change the order the photos in the timeline, and the photo duration as well.
You can also rotate photos and crop them manually to fit your project.
Note: If you find some black bar on your photos in preview, it is recommended to change Photo Placement to Crop and Zoom under Preference before drag-n-drop to timeline.
Step 3. Add Transitions

There are hundreds of transitions available in Filmora which you should totally have a try. You can apply a specific transition between each selected photo, or apply random transitions to selected photos.
Filmora features more than 30 transitions especially for Slideshow, such as cross merge, cross split, swap and sweep clockwise. Of course, you can also use some 3D transition, ripple and dissolve, or speed blur transitions.
You can also adjust the transition duration accordingly.
To make your photos slideshow looks better, it is highly recommended to apply filters and overlays effects.
Step 4. Add background music
You can choose background music or sound effect from the inbuilt audio library in Filmora or drag and drop the music track file from computer to the timeline directly. Filmora features the voiceover recording tool which helps you to record your own voice easily.
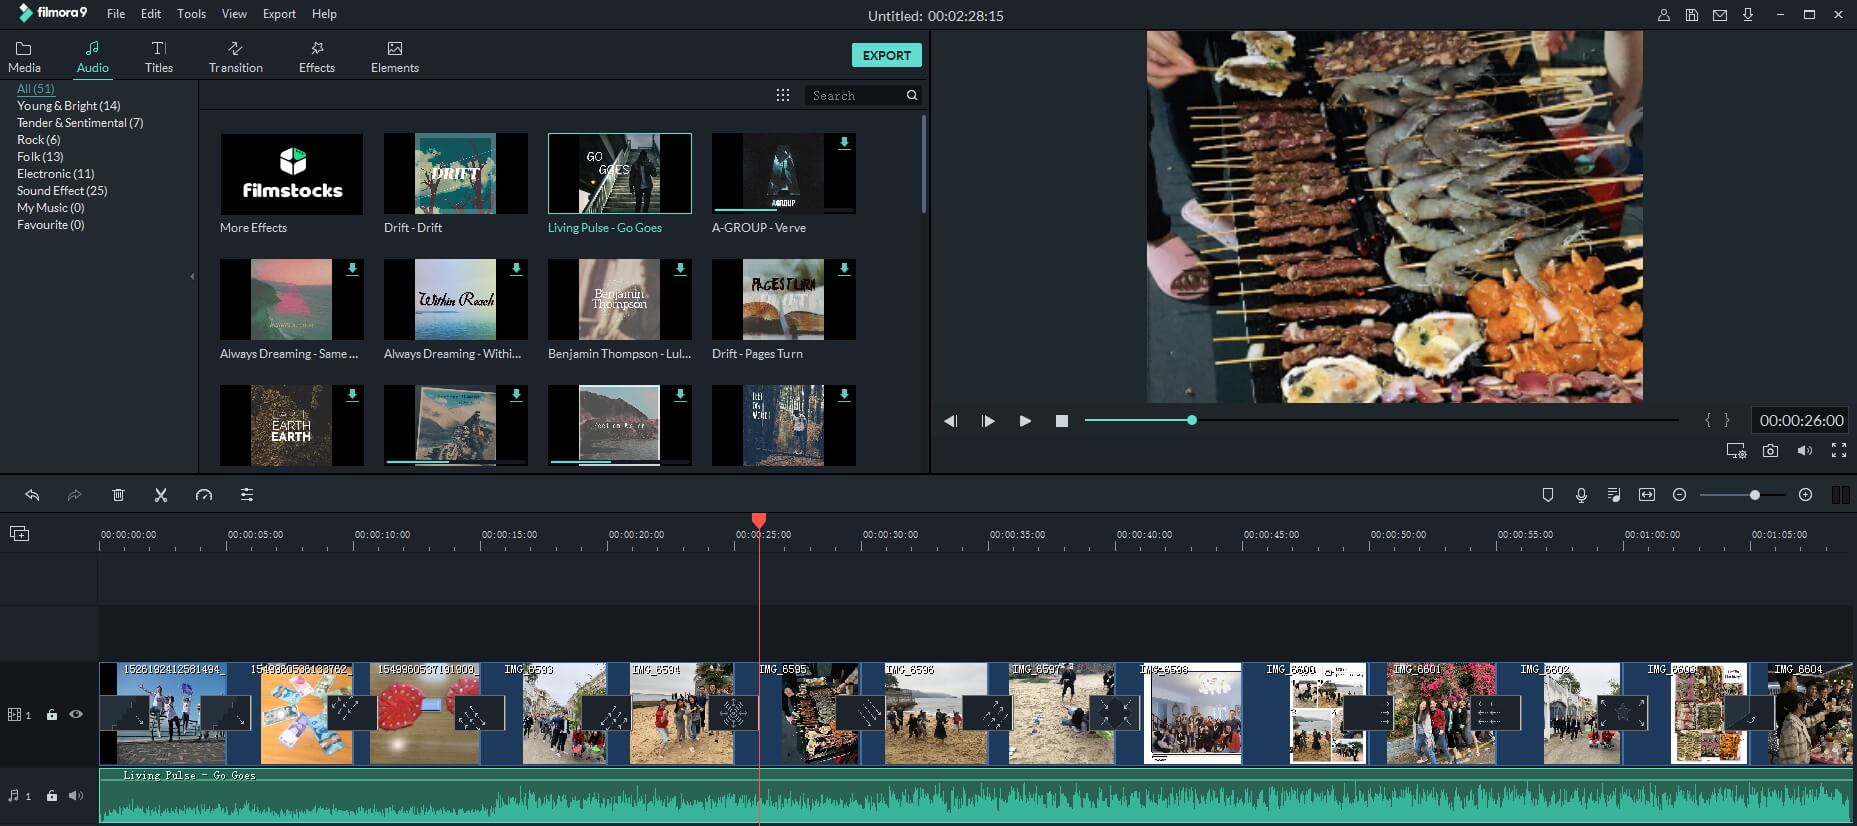
Step 5. Export and Save
Finally, it’s time to save and export the music slideshow as you see fit. You have several options, you can save it on the computer in different formats, or you can share it to YouTube or Vimeo directly, or you can burn it to DVD.
Why choose Filmora to create music slideshow?
- Filmora supports most of popular image formats such as .jpg, .png, .bmp, .gif, .tif, and .tiff.
- Filmora allows you to crop, pan & zoom the slideshow manually or automatically by applying Pan & Zoom Photo Placement.
- Filmora has inbuilt music track and sound effect library, and stunning transitions, effects and elements presets.
- Filmora allows you to record your own voiceover and apply fade in and fade out effects.
- Besides creating photo slideshow, you can use it to create videos for both your YouTube marketing, daily sharing and business.
How to make a slideshow with DVD Slideshow Builder

Tips for Make a Slideshow with Music
1. Install slideshow software and import photos and videos
Install the software and import your digital photos to the storyboard by clicking ‘“Add Files” (there is no quantity limitation of photos). You can also add videos from computer or camera.
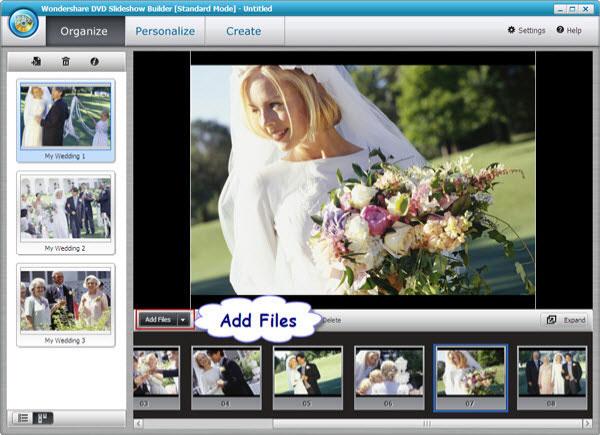
2. Add music to your photo slideshow
Go to the “Personalize” tab. Click “Music” toolbar to add background music or just drag the music to the background track. In the timeline, you can drag the slider to make the music best suit the photos and videos. If you need to edit the music, double click the clip and in the pop up window, trim music and adjust music volume as you like.
Tip: If you want to synchronize background music with the slideshow, click “Settings” (it’s on the right upper corner) and choose “Slideshow” tab, then tick the checkbox under the “Synchronize“. At last, click “OK” button.
3 .Select movie styles and add decorations
There are also 480+ free styles and transition effects that can be used for your picture slideshow with music in this tab. Choose your favorite styles and drag it on the photos. You can also add decoration text, clipart and effects on your digital photos. To make add more fun, you can also add intro movie and credit movie to your picture slideshow with music by clicking the “Intro/Credit” build-in button.

4 . Preview and save your slideshow with music
Go to “Publish” tab, you can preview the photo video by click the preview button first. Then publish it to the format you want. If you want to watch your photo slideshow with music to iPod or iPhone, you’d better publish it to MP4 format. This slideshow software also enables you to share your slideshow directly to YouTube by filling in the necessary information. Besides, you can burn DVD slideshow with music by clicking the “Burn to DVD” button and putting a DVD disc in your computer.
We shared two ways of making slideshow with music, whether you are using Filmora or DVD slideshow maker, leave a comment below and let me know your choice.
Shanoon Cox
Shanoon Cox is a writer and a lover of all things video.
Follow @Shanoon Cox
Shanoon Cox
Mar 27, 2024• Proven solutions
Nowadays, we tend to store our experiences of important occasions in photos and videos since cameras and camcorders are popular. To better preserve these sweet memories, make a slideshow with music, photos and videos is a good idea. It’s not as difficult as you think since all you need are: a good slideshow maker, photos and videos you want to show, music to go along with your slideshow. Here is a tutorial about how to make a slideshow with music with Wondershare Filmora video editor and Wondershare DVD Slideshow Builder .
Read more: 20 Best Slideshow Songs for Different Occasions [Royalty-Free]
How to create slideshow with music in Filmora?
Note: The video tutorial about how to make slideshow in minutes is created with the previous version of Filmora video editor. Most of the steps are similar and creating a music slideshow with the latest Filmora is very easy. As we said before, all you need is your photos and music tracks, then follow the steps below to start.
Step 1. Download Filmora and Run it
Click the Free Download button above to download and install Wondershare Filmora on your computer and then launch it.
In case you want to change the default aspect ratio setting in the splash screen, you can choose 9:16 for portrait mode, 1:1 for Instagram slideshow and more. And then click New Project to create a project to continue.
Step 2. Import Photos and Music
After that, you need to import all your photo and music media to the Media Library and then drag and drop them to the timeline directly. Filmora allows you to change the order the photos in the timeline, and the photo duration as well.
You can also rotate photos and crop them manually to fit your project.
Note: If you find some black bar on your photos in preview, it is recommended to change Photo Placement to Crop and Zoom under Preference before drag-n-drop to timeline.
Step 3. Add Transitions
There are hundreds of transitions available in Filmora which you should totally have a try. You can apply a specific transition between each selected photo, or apply random transitions to selected photos.
Filmora features more than 30 transitions especially for Slideshow, such as cross merge, cross split, swap and sweep clockwise. Of course, you can also use some 3D transition, ripple and dissolve, or speed blur transitions.
You can also adjust the transition duration accordingly.
To make your photos slideshow looks better, it is highly recommended to apply filters and overlays effects.
Step 4. Add background music
You can choose background music or sound effect from the inbuilt audio library in Filmora or drag and drop the music track file from computer to the timeline directly. Filmora features the voiceover recording tool which helps you to record your own voice easily.
Step 5. Export and Save
Finally, it’s time to save and export the music slideshow as you see fit. You have several options, you can save it on the computer in different formats, or you can share it to YouTube or Vimeo directly, or you can burn it to DVD.
Why choose Filmora to create music slideshow?
- Filmora supports most of popular image formats such as .jpg, .png, .bmp, .gif, .tif, and .tiff.
- Filmora allows you to crop, pan & zoom the slideshow manually or automatically by applying Pan & Zoom Photo Placement.
- Filmora has inbuilt music track and sound effect library, and stunning transitions, effects and elements presets.
- Filmora allows you to record your own voiceover and apply fade in and fade out effects.
- Besides creating photo slideshow, you can use it to create videos for both your YouTube marketing, daily sharing and business.
How to make a slideshow with DVD Slideshow Builder
Tips for Make a Slideshow with Music
1. Install slideshow software and import photos and videos
Install the software and import your digital photos to the storyboard by clicking ‘“Add Files” (there is no quantity limitation of photos). You can also add videos from computer or camera.
2. Add music to your photo slideshow
Go to the “Personalize” tab. Click “Music” toolbar to add background music or just drag the music to the background track. In the timeline, you can drag the slider to make the music best suit the photos and videos. If you need to edit the music, double click the clip and in the pop up window, trim music and adjust music volume as you like.
Tip: If you want to synchronize background music with the slideshow, click “Settings” (it’s on the right upper corner) and choose “Slideshow” tab, then tick the checkbox under the “Synchronize“. At last, click “OK” button.
3 .Select movie styles and add decorations
There are also 480+ free styles and transition effects that can be used for your picture slideshow with music in this tab. Choose your favorite styles and drag it on the photos. You can also add decoration text, clipart and effects on your digital photos. To make add more fun, you can also add intro movie and credit movie to your picture slideshow with music by clicking the “Intro/Credit” build-in button.
4 . Preview and save your slideshow with music
Go to “Publish” tab, you can preview the photo video by click the preview button first. Then publish it to the format you want. If you want to watch your photo slideshow with music to iPod or iPhone, you’d better publish it to MP4 format. This slideshow software also enables you to share your slideshow directly to YouTube by filling in the necessary information. Besides, you can burn DVD slideshow with music by clicking the “Burn to DVD” button and putting a DVD disc in your computer.
We shared two ways of making slideshow with music, whether you are using Filmora or DVD slideshow maker, leave a comment below and let me know your choice.
Shanoon Cox
Shanoon Cox is a writer and a lover of all things video.
Follow @Shanoon Cox
How to Use Emojis on Windows 10 and Windows 11?
If you ever wondered how to use emojis on Windows, or since when the emojis are around and what is their significance, you will find all your answers here. Because Windows 10 offers a great range of emojis that help you express your feelings and reactions in fewer words, they have recently gained a decent level of popularity, mostly amongst youngsters and millennials.
With that said, in the following sections, you will learn how to use emojis on Windows 10 using both keyboard shortcuts and touch keyboard, how to get emojis on Windows 10 to make your text or conversation look more versatile, and what new has been added to the latest operating system released by Microsoft, i.e., Windows 11.
In this article
01 Part 1: The History of Emojis in Windows
02 Part 2: How to Use Emojis with Keyboard Shortcuts
03 Part 3: How to Use Emojis on Windows PC with Touch Keyboard
04 Part 4: What’s New in Emojis in Windows 11
05 Part 5: How to Get More Emojis in Windows 11
Part 1: The History of Emojis in Windows
Although emojis are present in some form or the other since the mid-‘90s, they were not quite popular back then. With the evolution of smartphones, these iconic characters got attention from the then-teenagers. Seeing this, in 2012, Microsoft introduced the first-ever set of black-and-white emojis with the release of Windows 8, and after some time, the company also added the same to Windows 7 that was rolled out along with the updates for the OS.
With the release of Windows 10 in 2015, a wide range of full-fledged colored emojis was introduced and received a large number of positive reactions from the users. As of today, emojis have become an integral part of everyone’s day-to-day text conversation, be it on Skype, WhatsApp, Facebook, or any other such platform.
Part 2: How to Use Emojis with Keyboard Shortcuts
A keyboard shortcut is a combination of two or more keys that are pressed simultaneously to trigger a pre-assigned event or action. A good example of a keyboard shortcut is ‘Ctrl + S’ which, when pressed, saves the document you’re working on.
While learning the process of how to use emoji in Windows 10, it is equally imperative to memorize the shortcut keys to insert those icons without taking your hands off the keyboard. This not only saves your time, but it also prevents you from going through the lengthy process of opening the emojis keyboard, navigating through all the available icons to choose the one you’re looking for, and then clicking it to insert in the document or conversation.
Nevertheless, it would be a good idea to learn how to launch the emojis keyboard, and the process is simple. All you need to do is:
- Make sure that your keyboard cursor is in an app that can accept text inputs. A text editor like MS Word or WordPad could be a good example
- Press the Windows + ; (semicolon) or Windows + . (period) keys together to open the emojis keyboard

Once the keyboard is open, you can click any of the available emojis to insert it in your conversion or text content.
As for the shortcuts, depending on the type of expression you want to convey, there could be thousands of them. Some of the commonly used emojis and their universal shortcut keys for both Windows 10 and Windows 11 include:
: (colon) + ) (right brace) will create a smiley face
: (colon) + ( (left brace) will create a sad face
: (colon) + ; (semicolon) will create a wink face
…and so on. You can conduct a quick online search to get the entire list of keyboard shortcuts and the emojis that they will create. For your convenience, a link from the Microsoft official website is given below:
Part 3: How to Use Emojis on Windows PC with Touch Keyboard
If you have Microsoft Surface or any other device that has Windows 10 or Windows 11 installed on it, and can accept inputs via touch keyboard, you can enable the feature in the operating system, and then use the touch keyboard to add emojis to your conversion or content. You can follow the instructions given below to enable touch keyboard, and then learn how to use emojis on Windows 11 or Windows 10 via touch:
- Right-click anywhere on the taskbar (Windows 11 is used here for demonstration), and then click Taskbar settings

- From the right area of the Settings window that opens next, scroll down to the Taskbar corner icons section, and then turn on the Touch keyboard switch

- Launch an app that can accept text inputs, e.g., a text editor, chatting app, etc. Click or tap the Touch keyboard icon from the notification area that is present at the bottom-right corner of the screen.

- Click or tap the Emojis icon from the upper-left corner of the touch keyboard that opens up, and then touch your preferred emoji to add it to your text or conversation.

Part 4: What’s New in Emojis in Windows 11
In addition to learning how to use emojis on Windows 10, it is also important to know what’s new with them or the emojis panel in Windows 11, the latest operating system released by Microsoft this year, i.e., 2021.
In Windows 11, although you can launch the emojis keyboard using the same shortcuts, i.e., ‘Windows + .’ or ‘Windows + ;’ keys as mentioned earlier, the emojis keyboard itself has four sections, namely:
- Emojis – Contains various emojis and smileys
- GIF – Gives you access to various animated GIFs from Tenor
- Kamojis – Lets you add the ASCII characters for emojis, e.g., :-) or :-(
- Symbols – To add important symbols to your text, e.g., ©, ®, etc.
In addition to this, the 2D Clippy emoji has also been introduced with Windows 11, and can be located by launching the emojis keyboard, and typing ‘Clippy’.
Part 5: How to Get More Emojis in Windows 11
If the built-in emoji library doesn’t contain your favorite expressions, you can always get several more by following the instructions given below:
- Launch your favorite web browser on Windows 11, and then go to http://www.iemoji.com/
- Click an emoji from the available options or copy one from your favorite portal, and paste it in the Paste Emoji here field

- Review the emoji in the MESSAGE PREVIEW field, and click Create from the Options section to generate the emoji that can be sent as a message or image

- Alternatively, click Copy from the Options section itself, and then go to the text editor or any other portal you want to use the emoji in, and press Ctrl + V to paste and insert the emoji in your conversation or text without any hassle.

Conclusion
While the emojis were introduced to Windows as late as 2012, Windows 11 has a wide range of these virtual objects or faces for various occasions and to convey different expressions respectively. Furthermore, Windows 11 also gives you access to Tenor’s GIFs, and ASCII characters with particular combinations to represent the emojis, as it was done back in the days of button-operated cellphones.
Also, if the built-in emoji keyboard doesn’t have your favorite expressions and smileys, you can always generate your custom ones by going to http://www.iemoji.com/ , and using the options that the website offers. All in all, it’s easy to learn how to use emojis on Windows as long as you have access to the correct tutorial that explains the process in an easy manner.
02 Part 2: How to Use Emojis with Keyboard Shortcuts
03 Part 3: How to Use Emojis on Windows PC with Touch Keyboard
04 Part 4: What’s New in Emojis in Windows 11
05 Part 5: How to Get More Emojis in Windows 11
Part 1: The History of Emojis in Windows
Although emojis are present in some form or the other since the mid-‘90s, they were not quite popular back then. With the evolution of smartphones, these iconic characters got attention from the then-teenagers. Seeing this, in 2012, Microsoft introduced the first-ever set of black-and-white emojis with the release of Windows 8, and after some time, the company also added the same to Windows 7 that was rolled out along with the updates for the OS.
With the release of Windows 10 in 2015, a wide range of full-fledged colored emojis was introduced and received a large number of positive reactions from the users. As of today, emojis have become an integral part of everyone’s day-to-day text conversation, be it on Skype, WhatsApp, Facebook, or any other such platform.
Part 2: How to Use Emojis with Keyboard Shortcuts
A keyboard shortcut is a combination of two or more keys that are pressed simultaneously to trigger a pre-assigned event or action. A good example of a keyboard shortcut is ‘Ctrl + S’ which, when pressed, saves the document you’re working on.
While learning the process of how to use emoji in Windows 10, it is equally imperative to memorize the shortcut keys to insert those icons without taking your hands off the keyboard. This not only saves your time, but it also prevents you from going through the lengthy process of opening the emojis keyboard, navigating through all the available icons to choose the one you’re looking for, and then clicking it to insert in the document or conversation.
Nevertheless, it would be a good idea to learn how to launch the emojis keyboard, and the process is simple. All you need to do is:
- Make sure that your keyboard cursor is in an app that can accept text inputs. A text editor like MS Word or WordPad could be a good example
- Press the Windows + ; (semicolon) or Windows + . (period) keys together to open the emojis keyboard
Once the keyboard is open, you can click any of the available emojis to insert it in your conversion or text content.
As for the shortcuts, depending on the type of expression you want to convey, there could be thousands of them. Some of the commonly used emojis and their universal shortcut keys for both Windows 10 and Windows 11 include:
: (colon) + ) (right brace) will create a smiley face
: (colon) + ( (left brace) will create a sad face
: (colon) + ; (semicolon) will create a wink face
…and so on. You can conduct a quick online search to get the entire list of keyboard shortcuts and the emojis that they will create. For your convenience, a link from the Microsoft official website is given below:
Part 3: How to Use Emojis on Windows PC with Touch Keyboard
If you have Microsoft Surface or any other device that has Windows 10 or Windows 11 installed on it, and can accept inputs via touch keyboard, you can enable the feature in the operating system, and then use the touch keyboard to add emojis to your conversion or content. You can follow the instructions given below to enable touch keyboard, and then learn how to use emojis on Windows 11 or Windows 10 via touch:
- Right-click anywhere on the taskbar (Windows 11 is used here for demonstration), and then click Taskbar settings
- From the right area of the Settings window that opens next, scroll down to the Taskbar corner icons section, and then turn on the Touch keyboard switch
- Launch an app that can accept text inputs, e.g., a text editor, chatting app, etc. Click or tap the Touch keyboard icon from the notification area that is present at the bottom-right corner of the screen.
- Click or tap the Emojis icon from the upper-left corner of the touch keyboard that opens up, and then touch your preferred emoji to add it to your text or conversation.
Part 4: What’s New in Emojis in Windows 11
In addition to learning how to use emojis on Windows 10, it is also important to know what’s new with them or the emojis panel in Windows 11, the latest operating system released by Microsoft this year, i.e., 2021.
In Windows 11, although you can launch the emojis keyboard using the same shortcuts, i.e., ‘Windows + .’ or ‘Windows + ;’ keys as mentioned earlier, the emojis keyboard itself has four sections, namely:
- Emojis – Contains various emojis and smileys
- GIF – Gives you access to various animated GIFs from Tenor
- Kamojis – Lets you add the ASCII characters for emojis, e.g., :-) or :-(
- Symbols – To add important symbols to your text, e.g., ©, ®, etc.
In addition to this, the 2D Clippy emoji has also been introduced with Windows 11, and can be located by launching the emojis keyboard, and typing ‘Clippy’.
Part 5: How to Get More Emojis in Windows 11
If the built-in emoji library doesn’t contain your favorite expressions, you can always get several more by following the instructions given below:
- Launch your favorite web browser on Windows 11, and then go to http://www.iemoji.com/
- Click an emoji from the available options or copy one from your favorite portal, and paste it in the Paste Emoji here field
- Review the emoji in the MESSAGE PREVIEW field, and click Create from the Options section to generate the emoji that can be sent as a message or image
- Alternatively, click Copy from the Options section itself, and then go to the text editor or any other portal you want to use the emoji in, and press Ctrl + V to paste and insert the emoji in your conversation or text without any hassle.
Conclusion
While the emojis were introduced to Windows as late as 2012, Windows 11 has a wide range of these virtual objects or faces for various occasions and to convey different expressions respectively. Furthermore, Windows 11 also gives you access to Tenor’s GIFs, and ASCII characters with particular combinations to represent the emojis, as it was done back in the days of button-operated cellphones.
Also, if the built-in emoji keyboard doesn’t have your favorite expressions and smileys, you can always generate your custom ones by going to http://www.iemoji.com/ , and using the options that the website offers. All in all, it’s easy to learn how to use emojis on Windows as long as you have access to the correct tutorial that explains the process in an easy manner.
How to Add Emojis To Discord
How to Add Emojis To Discord

Richard Bennett
Mar 27, 2024• Proven solutions
Who doesn’t like emoticons? They are fun, easy to use, and, best of all, highly expressive of your emotions that you cannot convey over messages otherwise.
A 2019 survey shows 70% of mobile users used emoji in texting or on social media daily. This shows the popularity of emoji in our world today.
Similarly, as a Discord user, you must have come across thousands of emoji in it. These are images uploaded on the server and called custom emojis that this gaming community can use for effective communication with friends and other players.
With the emoji and gaming industry growing, it is safe to say that discord emoji’s popularity and use will only increase.
Read ahead to see how you can add emojis on Discord if you want to have fun chats with your friends too.
- Part 1: Adding and Sending Emoji To Chat On Discord?
- Part 2: Adding Emojis To Discord Channel Name Or Nickname?
- Part 3: Adding Custom Emojis To Discord Server On Windows/Mac?
- Part 4: Adding Custom Emojis To Discord Server On iPhone And Android?
- Part 5: Managing Emojis in Discord Server
Part 1: How to Add and Send Emoji To Chat On Discord?
One of the best things about Discord’s emoji feature is that there are two ways to add them. You can either access emoji on the Discord account or upload them yourself.
You can access the emoji menu for all Discord platforms by pressing the grey smiley face next to the message box. This will be on the right of the box for desktops, and for mobile apps, it will be on the left.
Discord-exclusive and standard emoji are present in the emoji menu, along with a part that keeps track of your most-used emoji.
On the other hand, you can also add custom emoticons to your Discord server if you have permission to do so.
Once you add and access the emoji on your device, select the one you want to send to your friends and press enter to send.
Part 2: How to Add Emojis To Discord Channel Name Or Nickname?
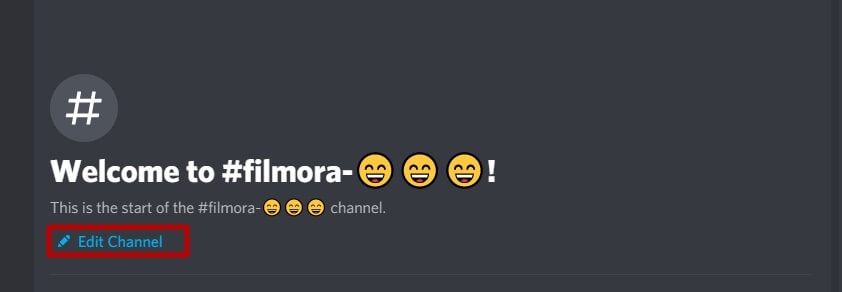
As an owner of a Discord channel, it is easy for you to add emoji to Discord. Follow the steps below to figure out how to add emojis to Discord channels:
- Use the emoji list to find the one you want to use in your channel name.
- Select the emoji “browser” column and copy it either with the mouse or “Ctrl + C” on the keyboard.
- Access your Discord server, right-click the channel where the emoji will be and use the dropdown menu to select the “Edit Channel.”
- In the “Channel Name” box, past the selected emoji using “Ctrl + V” from the keyboard.
- Select “Save Changes” to save the name with the emoji.
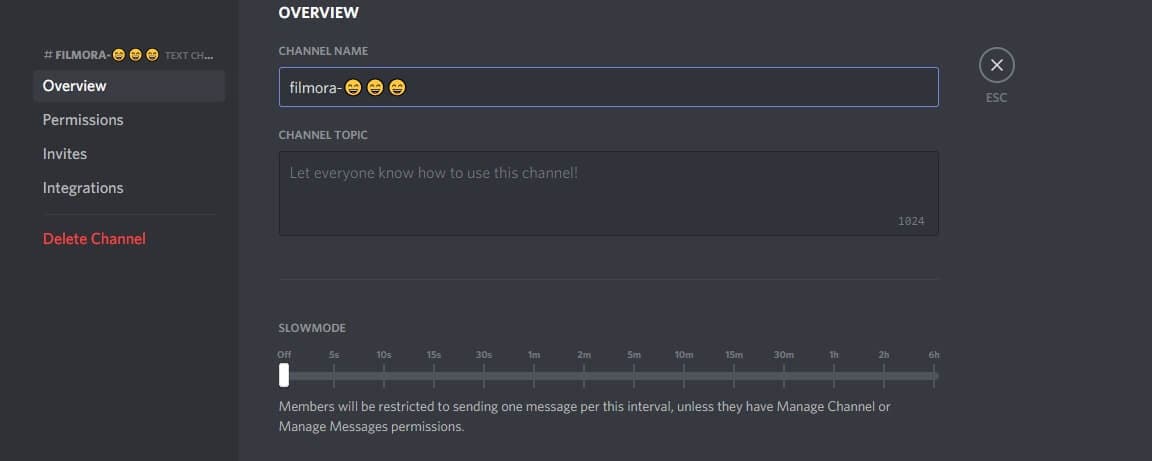
Part 3: How to Add Custom Emojis To Discord Server On Windows/Mac?
You can add custom emoji on Discord, but only if you are a server owner or administrator. Use the Discord server settings on either the desktop versions for Windows or Mac or the Discord Website.
Follow the steps below for either platform:
- Access your Discord server to begin and press the arrow pointing down in the channel list with the server name—Press “Server Settings” in the menu

- As the server’s settings open, you can add custom emojis in the “Emoji” tab. You can find a requirements list at the top that includes emoji names with a minimum of two characters and a file size limit of 256 KB. You can add fifty normal and an additional fifty animated emoji GIFs using the standard servers
- Select “Upload Emoji” to insert a custom emoji, either standard or animated
- With the help of your device’s local storage, upload the file. However, for the emoji to be added to the lists, the file should align with Discord’s requirements.
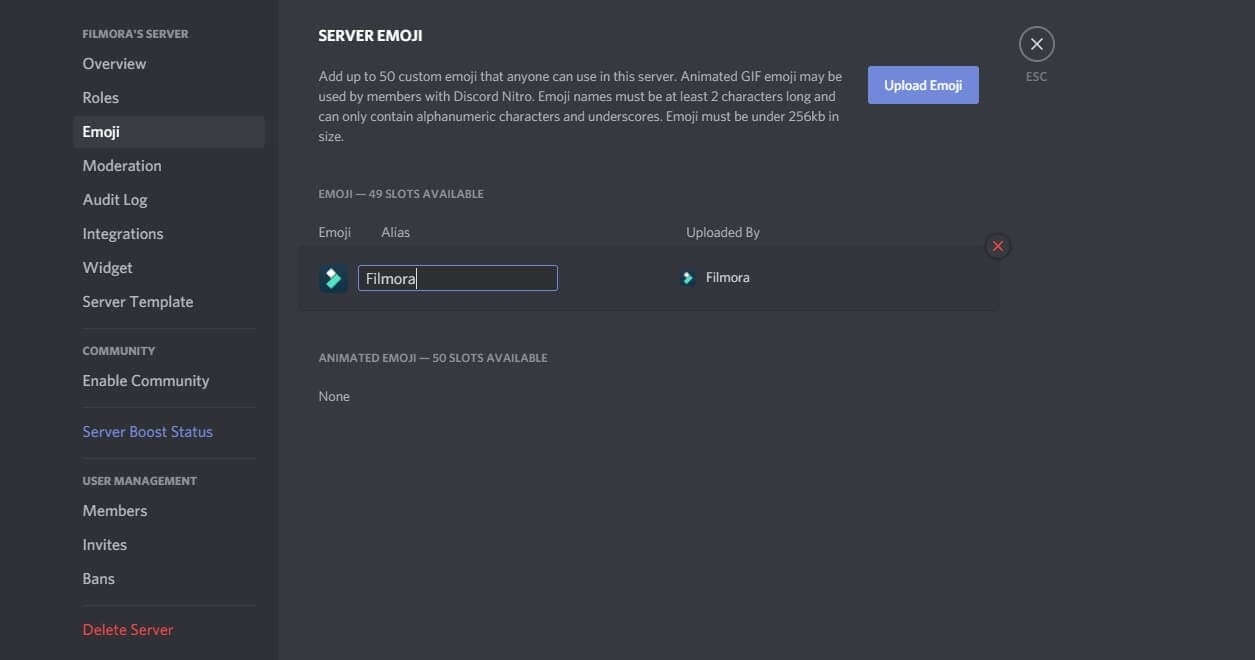
- For every emoji image that you upload, an alias tag will be created for that custom emoji using the file’s name. This tag is used to update a message with an emoji.
- A default alias name like this can be replaced by selecting the “Alias” box with the custom emoji and then creating a new name.
- Enjoy your emoji in chats as soon as you upload them to the Discord server!
Boost your server with Discord Nitro subscribers today to insert more than the standard fifty emoji!
Part 4: How to Add Custom Emojis To Discord Server On iPhone And Android?
How cool is it that you can add custom emoji to your smartphone as well? Whether you have an iPhone or an Android, you can use the same menu as Windows and Mac to upload emoji.
Discord’s interface is similar across all devices, so the following steps work on Android and Apple.
- Begin by opening the app on your device to access the server. Press the hamburger menu located at the top left in an open server and channel.
- As the channel and server list opens for Discord, you can see a three-dot menu right next to the channel list with the server name. Tap on it to proceed.
- To get to your server settings, press “Settings” in the Discord server menu that shows up.
- Under the “Server Settings” menu, select “Emoji” to access the custom emoji settings.
- As the “Emoji” menu opens, you can see an emoji requirement list
- Press “Upload Emoji” to upload any emoji that aligns with these requirements
- Press the custom emoji file, tap “Crop” if it needs cropping, and then use the “Upload” option
- After you upload the emoji file, replace the alias tag by tapping on it. This will redirect you to that specific emoji’s settings
- Type the name you want using the “Alias” box to create the tag used to insert emoji in messages
- Save this new tag with the “Save” icon placed in the bottom right
- Any changes you make to the custom emoji’s alias are applied to it instantly for your use.
Emoji bring fun to the conversations you have with friends, and it is very easy to add them to your server as well. These show up in the emoji pop-up list once you add them. The chat message bar contains the emoji icon from where you can access them.
It is essential to name your emoji with only alphanumeric characters and underscores using at least two characters.
The Discord emoji size is 32x32 pixels, so even if you upload up to 128x128 pixel size emojis, they will be resized to the default dimensions. Furthermore, emoji file sizes are at most 256kb.
If you want to use custom emojis, you can’t do so without a Nitro subscription because it is only functional on the server they are uploaded to. Even if you find a way to access the emoji from some other server, only its text code will be visible.
If you attempt to use the Emoji Picker to pick an emoji, you’ll get the following message:
Bonus: How to Manage Emoji in Discord Server?
You can’t remove or add emoji specific to a server on your own as a member. You need the server owner to toggle the permission of Manager Emoji in your domain.
On the other hand, as a server owner, you can give others this role with the following steps.
- Open Roles: Open the Server Settings and select “Roles” from the menu on the side.
- Toggle Manage Emoji: Pick the role you want to apply the permission to, and then toggle emoji’s slider to “on,” save changes, and you’re done!
FAQs About Discord Emojis
1. Why Do I See Grey Emoji In The Emoji Menu?
Greyed-out emoji in the menu means that either those emoji are animated, or you don’t have the permission to post them on other servers.
2. How Can I Get More Custom Emoji On The Server?
You can upload 50 emojis to your Discord server. But if you want more options, you need a Discord Nitro subscription to boost your server specs.
3. What Is The Discord Emoji Size?
Discord allows you to upload an emoji of up to 128x128 pixels, but it will resize it to 32x32 since that is its standard size.
Conclusion
Emojis make any chat fun, and where gaming is involved, they help you communicate better with your friends.
Discord has thousands of custom emojis that you can easily add to your server through your computer, whether it is your chat or the channel name. Follow our guide for a seamless process to add emoji to Discord and make your gaming experience better!
Richard Bennett
Richard Bennett is a writer and a lover of all things video.
Follow @Richard Bennett
Richard Bennett
Mar 27, 2024• Proven solutions
Who doesn’t like emoticons? They are fun, easy to use, and, best of all, highly expressive of your emotions that you cannot convey over messages otherwise.
A 2019 survey shows 70% of mobile users used emoji in texting or on social media daily. This shows the popularity of emoji in our world today.
Similarly, as a Discord user, you must have come across thousands of emoji in it. These are images uploaded on the server and called custom emojis that this gaming community can use for effective communication with friends and other players.
With the emoji and gaming industry growing, it is safe to say that discord emoji’s popularity and use will only increase.
Read ahead to see how you can add emojis on Discord if you want to have fun chats with your friends too.
- Part 1: Adding and Sending Emoji To Chat On Discord?
- Part 2: Adding Emojis To Discord Channel Name Or Nickname?
- Part 3: Adding Custom Emojis To Discord Server On Windows/Mac?
- Part 4: Adding Custom Emojis To Discord Server On iPhone And Android?
- Part 5: Managing Emojis in Discord Server
Part 1: How to Add and Send Emoji To Chat On Discord?
One of the best things about Discord’s emoji feature is that there are two ways to add them. You can either access emoji on the Discord account or upload them yourself.
You can access the emoji menu for all Discord platforms by pressing the grey smiley face next to the message box. This will be on the right of the box for desktops, and for mobile apps, it will be on the left.
Discord-exclusive and standard emoji are present in the emoji menu, along with a part that keeps track of your most-used emoji.
On the other hand, you can also add custom emoticons to your Discord server if you have permission to do so.
Once you add and access the emoji on your device, select the one you want to send to your friends and press enter to send.
Part 2: How to Add Emojis To Discord Channel Name Or Nickname?
As an owner of a Discord channel, it is easy for you to add emoji to Discord. Follow the steps below to figure out how to add emojis to Discord channels:
- Use the emoji list to find the one you want to use in your channel name.
- Select the emoji “browser” column and copy it either with the mouse or “Ctrl + C” on the keyboard.
- Access your Discord server, right-click the channel where the emoji will be and use the dropdown menu to select the “Edit Channel.”
- In the “Channel Name” box, past the selected emoji using “Ctrl + V” from the keyboard.
- Select “Save Changes” to save the name with the emoji.
Part 3: How to Add Custom Emojis To Discord Server On Windows/Mac?
You can add custom emoji on Discord, but only if you are a server owner or administrator. Use the Discord server settings on either the desktop versions for Windows or Mac or the Discord Website.
Follow the steps below for either platform:
- Access your Discord server to begin and press the arrow pointing down in the channel list with the server name—Press “Server Settings” in the menu
- As the server’s settings open, you can add custom emojis in the “Emoji” tab. You can find a requirements list at the top that includes emoji names with a minimum of two characters and a file size limit of 256 KB. You can add fifty normal and an additional fifty animated emoji GIFs using the standard servers
- Select “Upload Emoji” to insert a custom emoji, either standard or animated
- With the help of your device’s local storage, upload the file. However, for the emoji to be added to the lists, the file should align with Discord’s requirements.
- For every emoji image that you upload, an alias tag will be created for that custom emoji using the file’s name. This tag is used to update a message with an emoji.
- A default alias name like this can be replaced by selecting the “Alias” box with the custom emoji and then creating a new name.
- Enjoy your emoji in chats as soon as you upload them to the Discord server!
Boost your server with Discord Nitro subscribers today to insert more than the standard fifty emoji!
Part 4: How to Add Custom Emojis To Discord Server On iPhone And Android?
How cool is it that you can add custom emoji to your smartphone as well? Whether you have an iPhone or an Android, you can use the same menu as Windows and Mac to upload emoji.
Discord’s interface is similar across all devices, so the following steps work on Android and Apple.
- Begin by opening the app on your device to access the server. Press the hamburger menu located at the top left in an open server and channel.
- As the channel and server list opens for Discord, you can see a three-dot menu right next to the channel list with the server name. Tap on it to proceed.
- To get to your server settings, press “Settings” in the Discord server menu that shows up.
- Under the “Server Settings” menu, select “Emoji” to access the custom emoji settings.
- As the “Emoji” menu opens, you can see an emoji requirement list
- Press “Upload Emoji” to upload any emoji that aligns with these requirements
- Press the custom emoji file, tap “Crop” if it needs cropping, and then use the “Upload” option
- After you upload the emoji file, replace the alias tag by tapping on it. This will redirect you to that specific emoji’s settings
- Type the name you want using the “Alias” box to create the tag used to insert emoji in messages
- Save this new tag with the “Save” icon placed in the bottom right
- Any changes you make to the custom emoji’s alias are applied to it instantly for your use.
Emoji bring fun to the conversations you have with friends, and it is very easy to add them to your server as well. These show up in the emoji pop-up list once you add them. The chat message bar contains the emoji icon from where you can access them.
It is essential to name your emoji with only alphanumeric characters and underscores using at least two characters.
The Discord emoji size is 32x32 pixels, so even if you upload up to 128x128 pixel size emojis, they will be resized to the default dimensions. Furthermore, emoji file sizes are at most 256kb.
If you want to use custom emojis, you can’t do so without a Nitro subscription because it is only functional on the server they are uploaded to. Even if you find a way to access the emoji from some other server, only its text code will be visible.
If you attempt to use the Emoji Picker to pick an emoji, you’ll get the following message:
Bonus: How to Manage Emoji in Discord Server?
You can’t remove or add emoji specific to a server on your own as a member. You need the server owner to toggle the permission of Manager Emoji in your domain.
On the other hand, as a server owner, you can give others this role with the following steps.
- Open Roles: Open the Server Settings and select “Roles” from the menu on the side.
- Toggle Manage Emoji: Pick the role you want to apply the permission to, and then toggle emoji’s slider to “on,” save changes, and you’re done!
FAQs About Discord Emojis
1. Why Do I See Grey Emoji In The Emoji Menu?
Greyed-out emoji in the menu means that either those emoji are animated, or you don’t have the permission to post them on other servers.
2. How Can I Get More Custom Emoji On The Server?
You can upload 50 emojis to your Discord server. But if you want more options, you need a Discord Nitro subscription to boost your server specs.
3. What Is The Discord Emoji Size?
Discord allows you to upload an emoji of up to 128x128 pixels, but it will resize it to 32x32 since that is its standard size.
Conclusion
Emojis make any chat fun, and where gaming is involved, they help you communicate better with your friends.
Discord has thousands of custom emojis that you can easily add to your server through your computer, whether it is your chat or the channel name. Follow our guide for a seamless process to add emoji to Discord and make your gaming experience better!
Richard Bennett
Richard Bennett is a writer and a lover of all things video.
Follow @Richard Bennett
Also read:
- [New] 2024 Approved The Must-Know About YouTube Shorts Explained
- [New] OBS for a Clearer, Better Live Stream to YouTube
- [Updated] 2024 Approved The Ultimate Guide to Free Converting YouTube Videos to WAV
- 2024 Approved Top 10 Best Free Manga Sites to Read Online
- Best Photo Slideshow Maker How to Make a Photo Slideshow 2023 Update
- ChatGPT vs Google Translate - Which Tool Delivers More Accurate Translations?
- Exploring the World of Telegram: Insights Into Its Features and Capabilities
- How to Make a Memorable Honeymoon Video
- In 2024, Complete Examination ScreenFlow Full Features for Mac
- In 2024, How to Make a Photo Collage Using iPhoto?
- In 2024, Top 5 from Infinix Smart 8 Plus to iPhone Contacts Transfer Apps and Software | Dr.fone
- New 2024 Approved 20 Wonderful Stop Motion Ideas for Beginners and Kids - Filmora
- The Photographer’s Guide to PC Gaming Scenes
- Unleash Potential Mastering Minecraft Recordings with macOS Technology for 2024
- Updated 2024 Approved Best iOS and Android Apps You Can Use to Create Animoji and Memoji Videos
- Title: How to Make Memes with White Background Step by Step
- Author: Jan
- Created at : 2024-10-03 00:07:21
- Updated at : 2024-10-05 18:06:10
- Link: https://meme-emoji.techidaily.com/how-to-make-memes-with-white-background-step-by-step/
- License: This work is licensed under CC BY-NC-SA 4.0.