
How to Make a Triggered Meme for 2024
How to Make a Triggered Meme?
How to Make a Triggered Meme?

Ollie Mattison
Mar 27, 2024• Proven solutions
It is no secret that we all lose our cool from time. It’s only natural, after all, the world can be a frustrating place. We’re all enraged by different things, some of us can’t stand pineapple on pizza while others explode when being pranked. What we often don’t realize is that being triggered in front of a camera makes us perfect meme material. Even though the majority of memes are still images, some of the most memorable memes ever created were GIFs or short videos.
Making the triggered meme is easy when you know how, so in this article, we are going to show you how to make your next potentially viral meme, in just a few easy steps.
Filmora offers an easy to use video editor named Filmora Video Editor to make video and gif memes, and an online free meme maker named Filmora FREE Online Meme Maker which allows you to create images, videos and gifs memes for free. The video tutorial below will show you how to make a triggered video meme with Filmora. Download it and try it by yourself now.


The Things You Need to Make a Triggered Meme
Preparation is key to almost every important thing in life, including making a triggered meme featuring your bestie. Before you can capitalize on that amazing footage of triggered people you first have to make sure you have everything you need to generate a meme. Okay, let’s get started with the essentials to making a fun and effective meme.
1. A Triggered Template
You have virtually unlimited resources at your disposal, as this meme template can be easily found through a quick Google search. There is even an Android app called Triggered Meme Maker , that lets you do what its name suggests, make triggered memes. Making your own template in Microsoft Paint (we will show you how to make it in this article later) or any other photo editing software is also an option if you want to select the color of the background, rather than work with what you can find online.
2. A Video Editing Software
Memes are short videos that rarely last longer than 30 seconds, which is why you don’t need a powerful video editing suite like Final Cut Pro or Adobe Premiere Pro to make a good meme. A software like Wondershare Filmora that is easy to use and yet packed with cool visual effects and useful tools is a better choice if you just want to have a little fun with a video you recorded.
3. The Sound for the Triggered Meme
This ingredient of a good meme is easy to forget, but music or any other type of sound can make your meme funnier. In most cases, you’ll want to keep at least a portion of the original audio, but adding sound effects at different points of the meme can have a comical effect. The Filmora’s Music Library can serve as your endless source of royalty free music and sounds .
Making a Triggered Meme Template in Microsoft Paint
Creating a meme template is an easy task that can be handled from the Microsoft Paint in a couple of minutes. When you launch the software, click on the Fill with color icon located in the Tools section of the Paint’s ribbon. Activating this option enables you to change the color of the background with a single click. Proceed to select the color of the background from the color palette located on the far right side of the ribbon. We recommend choosing shades of green because the background is going to be used for the Chroma Key effect. You can click on the Edit Colors icon if you want to find a perfect color tone for the background. Right-click anywhere on the canvas to change its color.
Now you just need to add the text to your template. Select the Text option in the Tools menu and then proceed to select the font or the size of your text in the Font menu. Make sure that the Opaque feature is enabled in the Background menu in order to change the color of the textbox background. Adjusting the Color 1 option in the Color Menu will enable you to choose the text color, while the Color 2 option lets you pick the color of the background. Type triggered in the textbox, and center the text by clicking on the TAB button on your keyboard a few times. Now you have everything you need to start creating your own triggered meme.
How to Make a Triggered Meme?
Once you’ve successfully created a triggered template you can move on to the next step of the meme making process.
1. Adding Media to a Project
Open Filmora in the Full Feature Mode and import all the files you’re going to need during the process of making a meme. The files you import to your project will be stored in the Media Panel. Add the video to the timeline by dropping it over the video track. You can then remove the unwanted parts of the clip or add a still frame to the end of the video to prolong the triggered effect of the meme. Still frames in Filmora can be created by clicking on the Snapshot icon, that is located below the Preview Panel.
2. Using the Green Screen Effect
Place the triggered template to the Picture-in-Picture track and try to position it at the exact place in the video where the person gets triggered. Click on the Green Screen icon located in the toolbar to gain access to the PIP Edit window. The Chroma Key (Green Screen) option will be selected by default, so you just have to check the ‘Make parts of the clip transparent’ box. The green background of the template will become transparent and you’ll be able to see parts of your video, with the triggered text displayed below it.
3. Enhancing Colors and Applying Effects
In order to highlight just how much a person in the video got triggered, you can change the vibrance and saturation in a portion of a video clip by clicking on the Edit icon in the toolbar. In addition, other software’s color correction tools like brightness, tint or contrast can also be used to highlight the triggered moment.
After you adjust the color values, you can click on the Effects icon if you want to add motion blur or camera shake effects. Click on the Shake option in the Effects panel to start browsing through different effects and click on the plus icon to add the effect to the clip you selected. The Distortion category in the Effects panel features a number of blur effects you can use to make the video more entertaining. You can adjust the properties of all the effects you add to your meme and control how much of the effect is applied to the video.
4. Adding Music and Text Overlays to Your Meme
Increasing the number of visual elements in the video can help you create a funnier meme. A single word can change the meaning of a meme so if you want to add additional comment besides noting that the person got triggered you can click on the Text icon and select the text overlay you like. Click on the plus icon that is displayed over the effect to add it to a video clip. A textbox will appear over the video in the Preview window and you can drag it around the screen to reposition it or rotate it. Enable the No Animation option if you want the text to just appear and disappear from the screen.
Sounds can add to the comical effect of a meme. Carefully select what type of music or sound you want to use for a meme since it can improve the quality of your meme. Simply drag the audio file you imported into Filmora and place it on the audio track and adjust its duration to match the duration of the video. If you don’t have your own music you can try some of the tracks featured in the software’s music library.
4. Exporting the Triggered Meme from Filmora
When your meme is ready to hit the social media, you can click on the Export button. In the Export window, you can choose any of the available file formats, but the formats best suited for memes are either MP4 or GIF. Click on the Settings icon in the Output Description menu to change the frame rate, resolution or the quality of the video. Wondershare Filmora lets you export videos directly to your YouTube channel or your Facebook account, so you don’t have to waste time on posting the meme after the export process is completed.
The software also offers the option to save a meme you created to your hard drive if you don’t want to post a meme on social media right away. You just have to click on the Export button after adjusting the output settings and wait for the file to be exported.
Conclusion
The precious memories of your friends being enraged by the silliest things can be turned into hilarious memes effortlessly. A video editing software like Wondershare Filmora gives you all the tools you’ll need to quickly generate a triggered meme, so you can focus on having fun with your friends. What’s your favorite method of making memes?
Ollie Mattison
Ollie Mattison is a writer and a lover of all things video.
Follow @Ollie Mattison
Ollie Mattison
Mar 27, 2024• Proven solutions
It is no secret that we all lose our cool from time. It’s only natural, after all, the world can be a frustrating place. We’re all enraged by different things, some of us can’t stand pineapple on pizza while others explode when being pranked. What we often don’t realize is that being triggered in front of a camera makes us perfect meme material. Even though the majority of memes are still images, some of the most memorable memes ever created were GIFs or short videos.
Making the triggered meme is easy when you know how, so in this article, we are going to show you how to make your next potentially viral meme, in just a few easy steps.
Filmora offers an easy to use video editor named Filmora Video Editor to make video and gif memes, and an online free meme maker named Filmora FREE Online Meme Maker which allows you to create images, videos and gifs memes for free. The video tutorial below will show you how to make a triggered video meme with Filmora. Download it and try it by yourself now.
The Things You Need to Make a Triggered Meme
Preparation is key to almost every important thing in life, including making a triggered meme featuring your bestie. Before you can capitalize on that amazing footage of triggered people you first have to make sure you have everything you need to generate a meme. Okay, let’s get started with the essentials to making a fun and effective meme.
1. A Triggered Template
You have virtually unlimited resources at your disposal, as this meme template can be easily found through a quick Google search. There is even an Android app called Triggered Meme Maker , that lets you do what its name suggests, make triggered memes. Making your own template in Microsoft Paint (we will show you how to make it in this article later) or any other photo editing software is also an option if you want to select the color of the background, rather than work with what you can find online.
2. A Video Editing Software
Memes are short videos that rarely last longer than 30 seconds, which is why you don’t need a powerful video editing suite like Final Cut Pro or Adobe Premiere Pro to make a good meme. A software like Wondershare Filmora that is easy to use and yet packed with cool visual effects and useful tools is a better choice if you just want to have a little fun with a video you recorded.
3. The Sound for the Triggered Meme
This ingredient of a good meme is easy to forget, but music or any other type of sound can make your meme funnier. In most cases, you’ll want to keep at least a portion of the original audio, but adding sound effects at different points of the meme can have a comical effect. The Filmora’s Music Library can serve as your endless source of royalty free music and sounds .
Making a Triggered Meme Template in Microsoft Paint
Creating a meme template is an easy task that can be handled from the Microsoft Paint in a couple of minutes. When you launch the software, click on the Fill with color icon located in the Tools section of the Paint’s ribbon. Activating this option enables you to change the color of the background with a single click. Proceed to select the color of the background from the color palette located on the far right side of the ribbon. We recommend choosing shades of green because the background is going to be used for the Chroma Key effect. You can click on the Edit Colors icon if you want to find a perfect color tone for the background. Right-click anywhere on the canvas to change its color.
Now you just need to add the text to your template. Select the Text option in the Tools menu and then proceed to select the font or the size of your text in the Font menu. Make sure that the Opaque feature is enabled in the Background menu in order to change the color of the textbox background. Adjusting the Color 1 option in the Color Menu will enable you to choose the text color, while the Color 2 option lets you pick the color of the background. Type triggered in the textbox, and center the text by clicking on the TAB button on your keyboard a few times. Now you have everything you need to start creating your own triggered meme.
How to Make a Triggered Meme?
Once you’ve successfully created a triggered template you can move on to the next step of the meme making process.
1. Adding Media to a Project
Open Filmora in the Full Feature Mode and import all the files you’re going to need during the process of making a meme. The files you import to your project will be stored in the Media Panel. Add the video to the timeline by dropping it over the video track. You can then remove the unwanted parts of the clip or add a still frame to the end of the video to prolong the triggered effect of the meme. Still frames in Filmora can be created by clicking on the Snapshot icon, that is located below the Preview Panel.
2. Using the Green Screen Effect
Place the triggered template to the Picture-in-Picture track and try to position it at the exact place in the video where the person gets triggered. Click on the Green Screen icon located in the toolbar to gain access to the PIP Edit window. The Chroma Key (Green Screen) option will be selected by default, so you just have to check the ‘Make parts of the clip transparent’ box. The green background of the template will become transparent and you’ll be able to see parts of your video, with the triggered text displayed below it.
3. Enhancing Colors and Applying Effects
In order to highlight just how much a person in the video got triggered, you can change the vibrance and saturation in a portion of a video clip by clicking on the Edit icon in the toolbar. In addition, other software’s color correction tools like brightness, tint or contrast can also be used to highlight the triggered moment.
After you adjust the color values, you can click on the Effects icon if you want to add motion blur or camera shake effects. Click on the Shake option in the Effects panel to start browsing through different effects and click on the plus icon to add the effect to the clip you selected. The Distortion category in the Effects panel features a number of blur effects you can use to make the video more entertaining. You can adjust the properties of all the effects you add to your meme and control how much of the effect is applied to the video.
4. Adding Music and Text Overlays to Your Meme
Increasing the number of visual elements in the video can help you create a funnier meme. A single word can change the meaning of a meme so if you want to add additional comment besides noting that the person got triggered you can click on the Text icon and select the text overlay you like. Click on the plus icon that is displayed over the effect to add it to a video clip. A textbox will appear over the video in the Preview window and you can drag it around the screen to reposition it or rotate it. Enable the No Animation option if you want the text to just appear and disappear from the screen.
Sounds can add to the comical effect of a meme. Carefully select what type of music or sound you want to use for a meme since it can improve the quality of your meme. Simply drag the audio file you imported into Filmora and place it on the audio track and adjust its duration to match the duration of the video. If you don’t have your own music you can try some of the tracks featured in the software’s music library.
4. Exporting the Triggered Meme from Filmora
When your meme is ready to hit the social media, you can click on the Export button. In the Export window, you can choose any of the available file formats, but the formats best suited for memes are either MP4 or GIF. Click on the Settings icon in the Output Description menu to change the frame rate, resolution or the quality of the video. Wondershare Filmora lets you export videos directly to your YouTube channel or your Facebook account, so you don’t have to waste time on posting the meme after the export process is completed.
The software also offers the option to save a meme you created to your hard drive if you don’t want to post a meme on social media right away. You just have to click on the Export button after adjusting the output settings and wait for the file to be exported.
Conclusion
The precious memories of your friends being enraged by the silliest things can be turned into hilarious memes effortlessly. A video editing software like Wondershare Filmora gives you all the tools you’ll need to quickly generate a triggered meme, so you can focus on having fun with your friends. What’s your favorite method of making memes?
Ollie Mattison
Ollie Mattison is a writer and a lover of all things video.
Follow @Ollie Mattison
How to Make a Video for Your Baby’s First Year
How to Make an Adorable Video for Your Baby’s First Year
Ollie Mattison
Mar 27, 2024• Proven solutions
Your baby grows up very fast and being able to see him grow is maybe one of the most interesting and exciting moments in your life. Documenting the first year is amazing and it will surely offer you an extraordinary value so try to do that the best way you can. Imagine how touched your child would be when he/she, at the age of 18, watch something like this:
How to make the baby’s first year video
Filming tips
Shooting a good baby’s first year video can take a little bit of preparation and it will surely offer you an extraordinary experience in the long run. It will also help offer you an incredible value to begin with which is always impressive.
Stabilize the camera - The first thing you need to do is to stabilize the camera. Using a tripod can be the best option here so take your time and results will be great for sure. Of course, placing the camera on your counter will also help, so try to keep that in mind as it can indeed be a very good option to begin with.
Lighting - You will also have to play with the proper lighting setup. A good light will help you get much better results and even though it can take some time to get the best experience, it really is a truly amazing option that you do not want to miss.
Focus - Of course, focus on the baby. Yes, focus but don’t zoom in and out all the time. Find a good pattern that will help keep the baby steady and do all in your power to get the best results. Granted, it will take some time to get good results but don’t rush it otherwise the experience will not be as good as you would expect.
Audio - Moreover, audio should be your focus here as well. Take the time and do something good here, a good audio will always pay off very well so get a good audio setup if you want to obtain a stellar experience.
Props - Also, we recommend you to use props. These can really make a good video and they will even add in some much needed fun to your setup. Try to find the best possible props and add them in your video. Some good prop examples would be a stuffed animal, a toy, maybe even the family pet. All of these are great and well worth your time.
Editing tips
Once you finished capturing the movie, you will have to go to editing. This is where you have to use a good video editing tool that will help provide a good baby’s first year video in the end. With that in mind, Wondershare Filmora can be the tool of choice as it offers you all the features you need in order to create a good baby video.
=“” style=”width: 100%; height: 278.438px;”;
Download Mac Version ](https://tools.techidaily.com/wondershare/filmora/download/ )
Adjust saturation - You should try to use the app in order to adjust the saturation as this can lead to some very bad results if you’re not careful. Find the proper saturation levels and opt for them right away.
Trim, cut, or split - If needed, split, cut or even trim the video. There will be times when you will need the reversing effect as well. All of these effects are accessible via the Wondershare Filmora video app.
Advanced editing - Plus, you will also need to apply a green screen effect as this will help you place your baby in a variety of funny locations, be it a funny MV or a Hollywood movie. The app can also help you clone the baby with PIP effects and you can also use it to add filters, overlays or text.
Wondershare Filmora will offer you an extraordinary set of tools and it will bring in front a very good value right from the start. The interface of the app is user friendly and you will have no problem using it as you see fit. Also, you can create the baby’s first year video on both Mac and Windows as the app supports both platforms. It also delivers immediate support for camcorders and smartphones so you can use any device you want for video capture. With its help you can share videos to DVD or YouTube too if you so desire. Don’t hesitate and access this great tool as fast as possible to get a good outcome!
Ollie Mattison
Ollie Mattison is a writer and a lover of all things video.
Follow @Ollie Mattison
Ollie Mattison
Mar 27, 2024• Proven solutions
Your baby grows up very fast and being able to see him grow is maybe one of the most interesting and exciting moments in your life. Documenting the first year is amazing and it will surely offer you an extraordinary value so try to do that the best way you can. Imagine how touched your child would be when he/she, at the age of 18, watch something like this:
How to make the baby’s first year video
Filming tips
Shooting a good baby’s first year video can take a little bit of preparation and it will surely offer you an extraordinary experience in the long run. It will also help offer you an incredible value to begin with which is always impressive.
Stabilize the camera - The first thing you need to do is to stabilize the camera. Using a tripod can be the best option here so take your time and results will be great for sure. Of course, placing the camera on your counter will also help, so try to keep that in mind as it can indeed be a very good option to begin with.
Lighting - You will also have to play with the proper lighting setup. A good light will help you get much better results and even though it can take some time to get the best experience, it really is a truly amazing option that you do not want to miss.
Focus - Of course, focus on the baby. Yes, focus but don’t zoom in and out all the time. Find a good pattern that will help keep the baby steady and do all in your power to get the best results. Granted, it will take some time to get good results but don’t rush it otherwise the experience will not be as good as you would expect.
Audio - Moreover, audio should be your focus here as well. Take the time and do something good here, a good audio will always pay off very well so get a good audio setup if you want to obtain a stellar experience.
Props - Also, we recommend you to use props. These can really make a good video and they will even add in some much needed fun to your setup. Try to find the best possible props and add them in your video. Some good prop examples would be a stuffed animal, a toy, maybe even the family pet. All of these are great and well worth your time.
Editing tips
Once you finished capturing the movie, you will have to go to editing. This is where you have to use a good video editing tool that will help provide a good baby’s first year video in the end. With that in mind, Wondershare Filmora can be the tool of choice as it offers you all the features you need in order to create a good baby video.
=“” style=”width: 100%; height: 278.438px;”;
Download Mac Version ](https://tools.techidaily.com/wondershare/filmora/download/ )
Adjust saturation - You should try to use the app in order to adjust the saturation as this can lead to some very bad results if you’re not careful. Find the proper saturation levels and opt for them right away.
Trim, cut, or split - If needed, split, cut or even trim the video. There will be times when you will need the reversing effect as well. All of these effects are accessible via the Wondershare Filmora video app.
Advanced editing - Plus, you will also need to apply a green screen effect as this will help you place your baby in a variety of funny locations, be it a funny MV or a Hollywood movie. The app can also help you clone the baby with PIP effects and you can also use it to add filters, overlays or text.
Wondershare Filmora will offer you an extraordinary set of tools and it will bring in front a very good value right from the start. The interface of the app is user friendly and you will have no problem using it as you see fit. Also, you can create the baby’s first year video on both Mac and Windows as the app supports both platforms. It also delivers immediate support for camcorders and smartphones so you can use any device you want for video capture. With its help you can share videos to DVD or YouTube too if you so desire. Don’t hesitate and access this great tool as fast as possible to get a good outcome!
Ollie Mattison
Ollie Mattison is a writer and a lover of all things video.
Follow @Ollie Mattison
How to Make Memoji Talk-Make Memoji Video On Your Own
How to Make Memoji Talk-Make Memoji Video On Your Own

Shanoon Cox
Mar 27, 2024• Proven solutions
Memojis are the 3D virtual caricatures customized to look exactly like you. Much like an animoji, memoji can mimic your facial as well as body movements. Using a memoji to convey your messages is an exciting and fun concept that is novel and unique to your personality. But, how to make memoji talk?
Well, that’s the fun part. We will walk you through the steps on how to make memoji talk in 5 simple steps. And if you’re worried about how to make memoji talk on an Android phone, don’t fret. We have the perfect solution for that too.
Read ahead to start learning how to make memoji talk.
- Part 1: How to Make Memoji Talk on iPhone
- Part 2: How to Make Memoji Talk on Android
- Bonus tip-Add Memoji to Your Video with Wondershare Filmora
Part 1: How to Make Memoji Talk on iPhone
Now you can make a talking memoji that mimics your expressions as well as your movements. Cool, right? And if you don’t know how to make memoji talk, you will be a master at it by the end of this article.
Here’s a guide on how to make memoji talk in 5 easy steps:
1.Open imessages. Go to New Message or open an existing conversation. If you don’t see the app tray above the keyboard, click on the App storeicon to reveal the hidden apps.
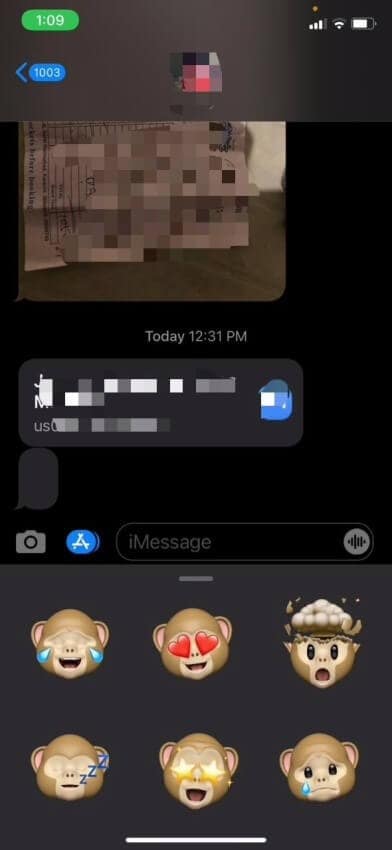
2.Now, in the app tray, click on the three-headed icon to see your memoji. If you record right there, it will just be a basic memoji head limited to a 30-second video. But, since we want more than that, click on the camera icon.
![]()
3.Now, switch to selfie mode and click on the Staricon for Effects in the bottom left corner for more options
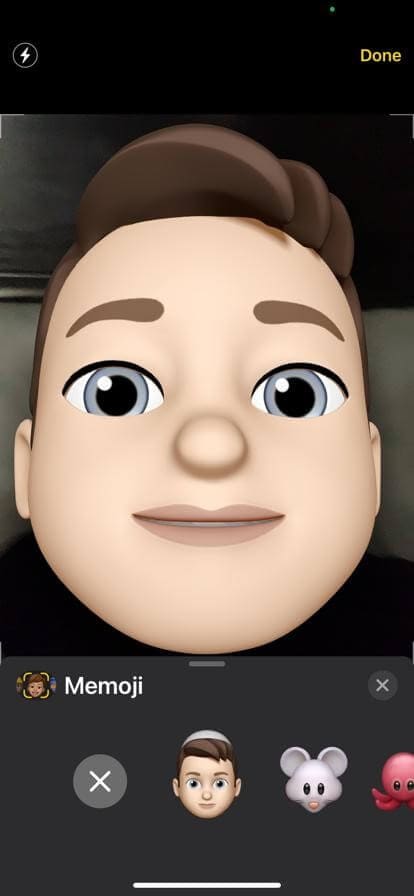
4.Click on the Animoji icon and choose the custom memoji you like to record with. Tap to start recording. Click Doneonce you finish recording.
5.The recorded talking memoji will be automatically sent to the opened chat and will also be saved to your gallery for easy sharing to other contacts or other platforms.

Part 2: How to Make Memoji Talk on Android
Well, we know how to make memoji talk on an iPhone, but what about Android users?
Since Android has no in-built option to make or record a talking memoji, you will need some outside help. Face Cam is an amazing app and solution to your worries. Even if you have no idea how to make memoji video, Face Cam’s user-friendly interface lets you easily understand how to make memoji talk. Plus, you can also personalize your memoji in a fun way
Let’s see how to make memoji talk on Android phones-
1.Install and launch Face Cam on your smartphone.
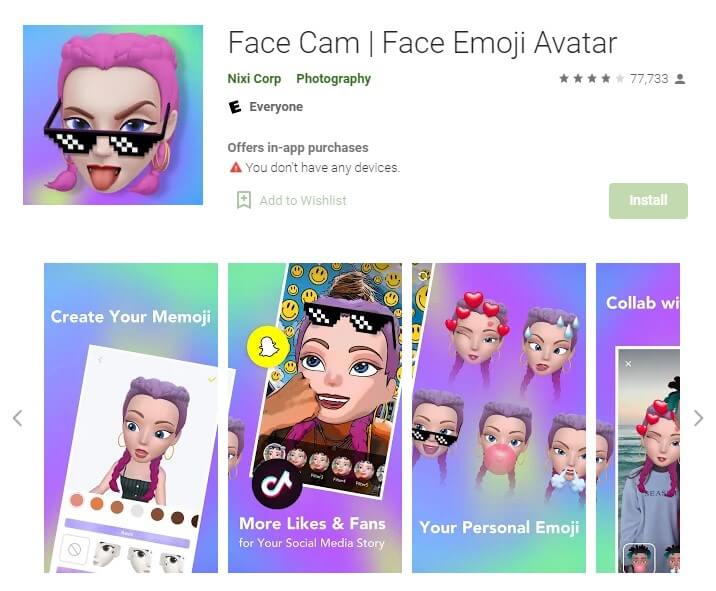
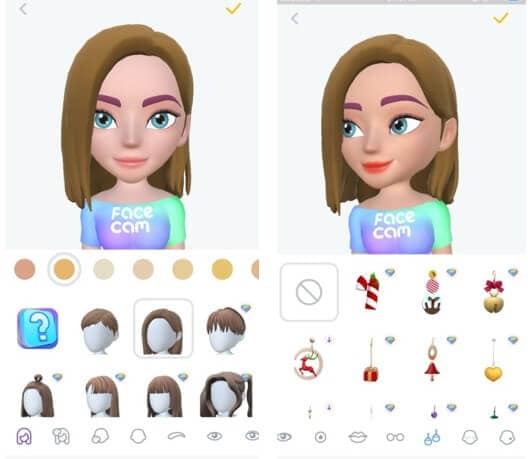
2.Now, make a custom memoji that looks like you. Select the hairstyle, face shape, eye color, accessories, etc. Tap the Tickicon to proceed.
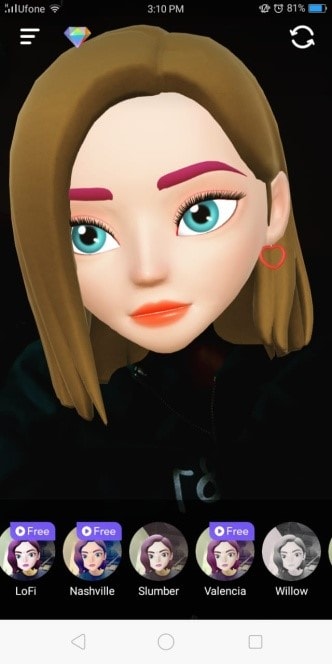
3.Click on the filter tab to reveal filters. Choose the filter you would like to apply.
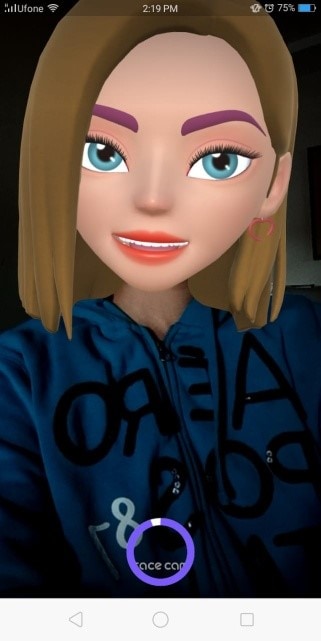
4.Tap and hold the record button to make your video.
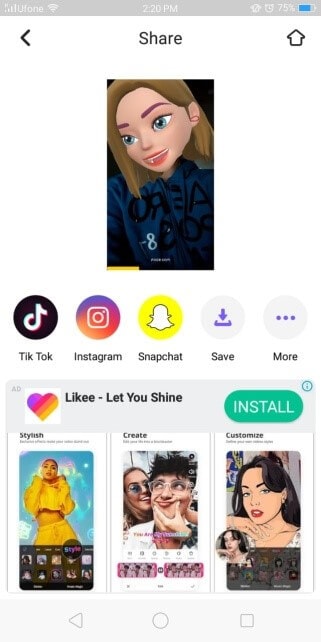
5.Finally, you can tap on the Savebutton to save the video to your gallery. You can also tap on the social media icons to share instantly.
Bonus tip-Add Memoji to Your Video with Wondershare Filmora
Wanna add emoji to your video? Now here is a bonus tip for you!
Filmora is a highly professional video editor with an incredibly intuitive and easy-to-use interface. It is packed with high-end editing tools such as keyframe animations, split-screen effect, cloning, etc. There is a range of aesthetic filters and cool special effects to give your videos a cinematic touch. One key feature is motion tracking. Once you learn how to make memoji talk, you can use your memoji sticker in any video. You will be able to paste your sticker onto your face that will follow it through the clip with easy and swift motion tracking.
Follow these steps:
1.Install and launch Wondershare Filmora. Import the video and memoji sticker to Filmora.
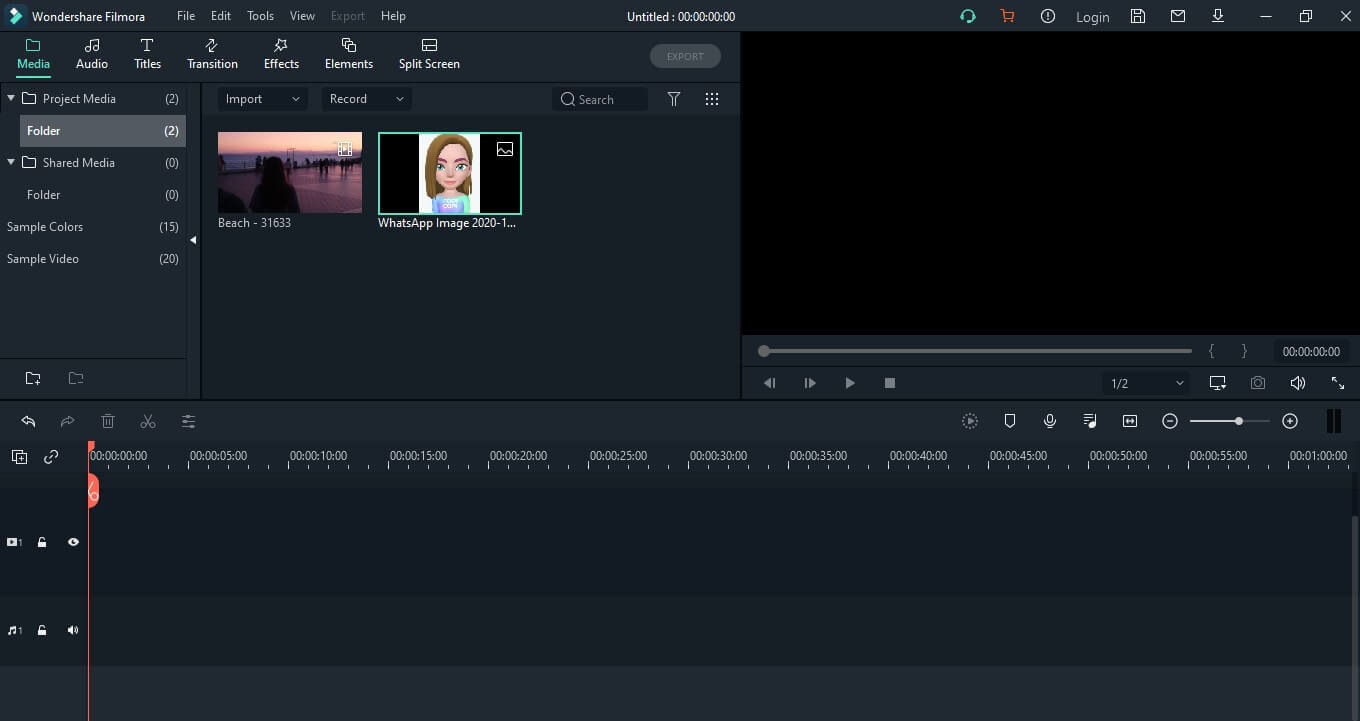

2.Drag the video to video track one and the sticker to the video track 2. And you can click on the sticker and adjust its size and position.
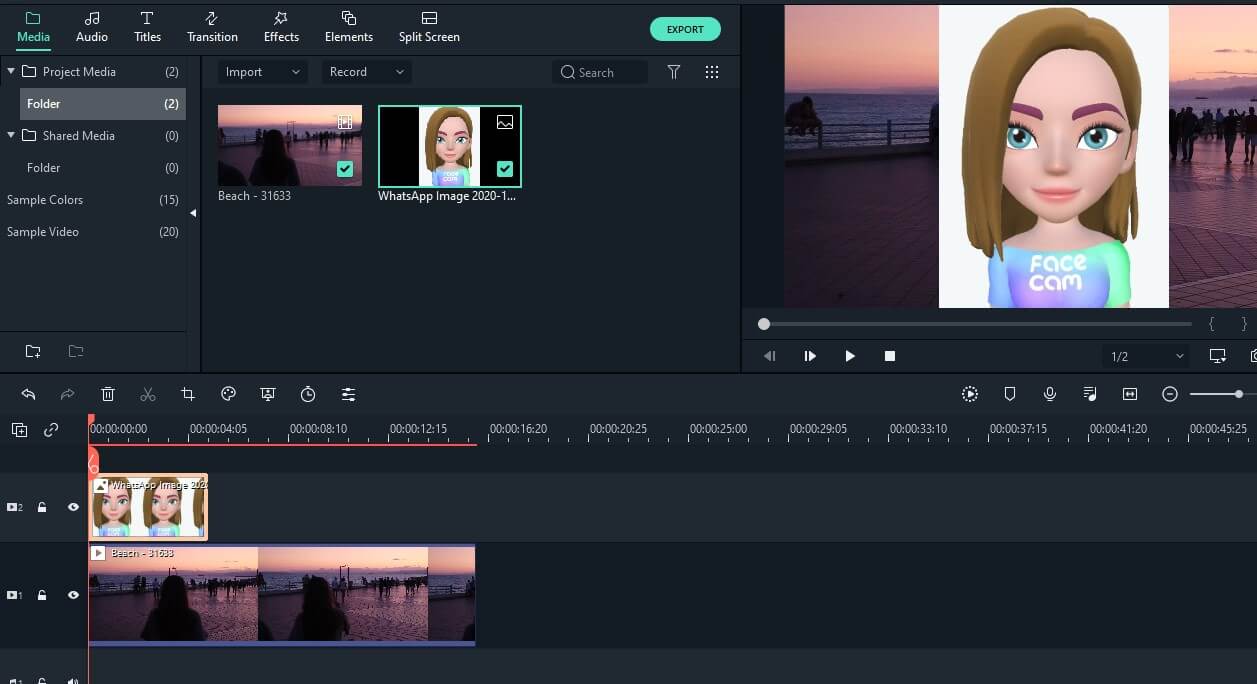
3.Double click on the video in the timeline to open settings. In the Videotab, select motion tracking, choose the area or person you want to track, and click Start Tracking.
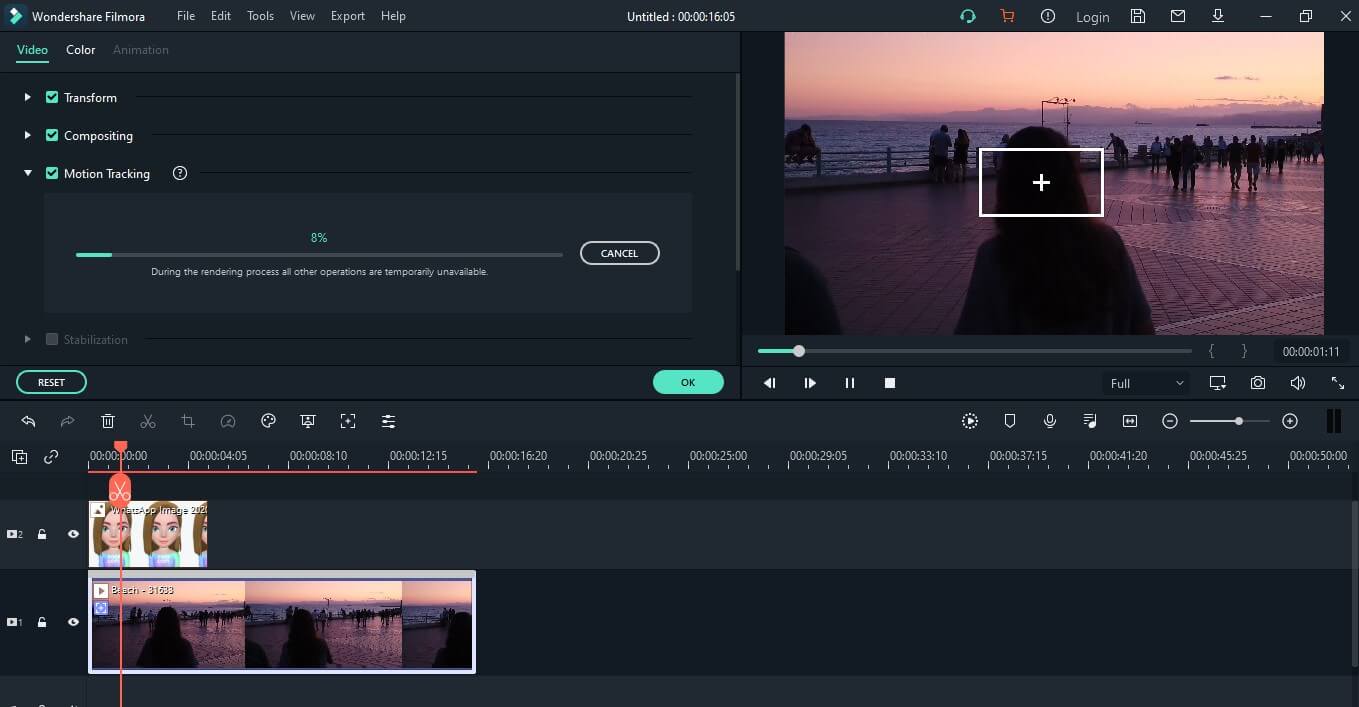
4.Now, choose the element. Open the drop-down menu and select the sticker memoji. Click Okto complete.

5.Finally, click Export. Choose the destination, format, and resolution and press Export.

Conclusion
Texting and virtual communication has now been redefined with the advent of emojis and memojis. So, you need to step up your game by learning how to make memoji talk and enter the exciting world of endless possibilities.
If you were unaware of how to make memoji talk, you must be a master at it by now. The 5 simple steps on how to make memoji video are easy to grasp and fun to try. So, don’t waste any time and start making talking memojis to share laughter. Take help from our ultimate guide on how to make memoji talk and express yourself hilariously and uniquely
Shanoon Cox
Shanoon Cox is a writer and a lover of all things video.
Follow @Shanoon Cox
Shanoon Cox
Mar 27, 2024• Proven solutions
Memojis are the 3D virtual caricatures customized to look exactly like you. Much like an animoji, memoji can mimic your facial as well as body movements. Using a memoji to convey your messages is an exciting and fun concept that is novel and unique to your personality. But, how to make memoji talk?
Well, that’s the fun part. We will walk you through the steps on how to make memoji talk in 5 simple steps. And if you’re worried about how to make memoji talk on an Android phone, don’t fret. We have the perfect solution for that too.
Read ahead to start learning how to make memoji talk.
- Part 1: How to Make Memoji Talk on iPhone
- Part 2: How to Make Memoji Talk on Android
- Bonus tip-Add Memoji to Your Video with Wondershare Filmora
Part 1: How to Make Memoji Talk on iPhone
Now you can make a talking memoji that mimics your expressions as well as your movements. Cool, right? And if you don’t know how to make memoji talk, you will be a master at it by the end of this article.
Here’s a guide on how to make memoji talk in 5 easy steps:
1.Open imessages. Go to New Message or open an existing conversation. If you don’t see the app tray above the keyboard, click on the App storeicon to reveal the hidden apps.
2.Now, in the app tray, click on the three-headed icon to see your memoji. If you record right there, it will just be a basic memoji head limited to a 30-second video. But, since we want more than that, click on the camera icon.
![]()
3.Now, switch to selfie mode and click on the Staricon for Effects in the bottom left corner for more options
4.Click on the Animoji icon and choose the custom memoji you like to record with. Tap to start recording. Click Doneonce you finish recording.
5.The recorded talking memoji will be automatically sent to the opened chat and will also be saved to your gallery for easy sharing to other contacts or other platforms.
Part 2: How to Make Memoji Talk on Android
Well, we know how to make memoji talk on an iPhone, but what about Android users?
Since Android has no in-built option to make or record a talking memoji, you will need some outside help. Face Cam is an amazing app and solution to your worries. Even if you have no idea how to make memoji video, Face Cam’s user-friendly interface lets you easily understand how to make memoji talk. Plus, you can also personalize your memoji in a fun way
Let’s see how to make memoji talk on Android phones-
1.Install and launch Face Cam on your smartphone.
2.Now, make a custom memoji that looks like you. Select the hairstyle, face shape, eye color, accessories, etc. Tap the Tickicon to proceed.
3.Click on the filter tab to reveal filters. Choose the filter you would like to apply.
4.Tap and hold the record button to make your video.
5.Finally, you can tap on the Savebutton to save the video to your gallery. You can also tap on the social media icons to share instantly.
Bonus tip-Add Memoji to Your Video with Wondershare Filmora
Wanna add emoji to your video? Now here is a bonus tip for you!
Filmora is a highly professional video editor with an incredibly intuitive and easy-to-use interface. It is packed with high-end editing tools such as keyframe animations, split-screen effect, cloning, etc. There is a range of aesthetic filters and cool special effects to give your videos a cinematic touch. One key feature is motion tracking. Once you learn how to make memoji talk, you can use your memoji sticker in any video. You will be able to paste your sticker onto your face that will follow it through the clip with easy and swift motion tracking.
Follow these steps:
1.Install and launch Wondershare Filmora. Import the video and memoji sticker to Filmora.
2.Drag the video to video track one and the sticker to the video track 2. And you can click on the sticker and adjust its size and position.
3.Double click on the video in the timeline to open settings. In the Videotab, select motion tracking, choose the area or person you want to track, and click Start Tracking.
4.Now, choose the element. Open the drop-down menu and select the sticker memoji. Click Okto complete.
5.Finally, click Export. Choose the destination, format, and resolution and press Export.
Conclusion
Texting and virtual communication has now been redefined with the advent of emojis and memojis. So, you need to step up your game by learning how to make memoji talk and enter the exciting world of endless possibilities.
If you were unaware of how to make memoji talk, you must be a master at it by now. The 5 simple steps on how to make memoji video are easy to grasp and fun to try. So, don’t waste any time and start making talking memojis to share laughter. Take help from our ultimate guide on how to make memoji talk and express yourself hilariously and uniquely
Shanoon Cox
Shanoon Cox is a writer and a lover of all things video.
Follow @Shanoon Cox
10 Popular Cartoon Characters That Should Top Your List
10 Popular Cartoon Characters That Should Top Your List
Shanoon Cox
Mar 27, 2024• Proven solutions
Childhood is a book with different chapters filled with joy, fun, school, chocolates, and our favorite cartoon characters. The most fantasizing thing for a child is the popular cartoon characters which they see as a tutor who teaches them to become honest, humble and most importantly they show us how to overcome problems in our life. All the famous cartoon characters are still famous among millennials who used to watch them in their childhood. In this article, we are going to dive back into childhood again and you will be amazed to see those characters again in front of your eyes.
Get ready for something mesmerizing today!
Part 1: 10 Popular Cartoon Characters of All Time
Everyone has a role model in their life and this is is a no brainer as we always have a superhero from the cartoon world whom we follow and wanna be like them. Let’s talk about some famous cartoon characters that everyone in this world is aware of.
- 1. Bugs Bunny
- 2. Scooby-Doo
- 3. SpongeBob SquarePants
- 4. Daffy Duck
- 5. Tom Cat
- 6. Mickey Mouse
- 7. Jerry Mouse
- 8. Snoopy
- 9. Winnie-the-Pooh
- 10. Donald Duck
1. Bugs Bunny
Bugs bunny is a famous cartoon character that was created in back 1930s by Leon Schlesinger and its one of the best and popular cartoon characters of all time. Bugs bunny is associated with Looney Tunes and Merrie Melodie’s animated stories. Bugs bunny is known for his insouciant and flippant personality because bugs bunny was always happy and he was also known as Happy Rabbit. The message bugs bunny sent to the world was to be happy in all situations in life.
2. Scooby-Doo
Scooby-Doo is a famous cartoon character that was created back in 1969 and this character is associated with Hanna-Barbera, an American animation company. The character is famous for its curiosity about solving supernatural mysteries and making people laugh with his crazy styles. Scooby-Doo is a natural detective and has made people fantasize about solving mysteries more easily. Scooby is so famous today that people who are in their mid-30s still watch it with their kids because of the unique character it plays.
3. SpongeBob SquarePants
SpongeBob SquarePants was created back in 1999 by Stephen Hillenburg, a marine science educator. SpongeBob SquarePants made its debut on Nickelodeon in 1999. The show becomes a superhit and SpongeBob was the next superstar with the most successful character at that time. This cartoon character is famous for his friendship with his aquatic friends and the energetic and optimistic nature of SpongeBob made inspired everyone to be hopeful in any situation.
4. Daffy Duck
Daffy Duck is a famous cartoon character that was produced in the late 1930s by Warner Bros. The cartoon is associated with cartoon series like Merrie Melodies and Looney Tunes. The cartoon character was famous for the way he would hope around in the water and yell, Woo-hoo! Woo-hoo!. Daffy Duck has always entertained people with his quirky ways of jumping into the water and making people laugh out. The message from this character was very clear and entertaining
5. Tom Cat
Tom Cat needs no introduction as it’s the furious and popular cartoon character of all time. It was created by Joseph Barbera and William Hanna in 1940. Tom is associated with the Tom & Jerry cartoon series and it made people laugh with silly fights and chasing all over the series. Tom was very annoyed by Jerry and he wanted to make a meal of Jerry as that used to make people laugh. However, the deep message Tom has given to the viewers was that whenever Jerry was in serious trouble apart from their silly fights, Tom used to save Jerry and would ignore him sarcastically. So, the message was to spread the love even if you are irritated with a person.
6. Mickey Mouse
Walt Disney created a mouse in 1928 and that was named Mickey Mouse. The cartoon character is still famous among kids and adults as a childhood memory. Mickey is famous for his nice character and stubborn attitude. Mickey and his girlfriend Minnie Mouse with his pet dog Pluto were seen with Donald Duck and Goofy. Mickey always inspired people to stay honest and loving to friends and loved ones and people who like Mickey follow the same.
7. Jerry Mouse
Jerry Mouse is one of the most notorious and crazy characters of the Tom & Jerry cartoon series. He was very much liked by people and the way he used to irritate Tom in the cartoon series was amazing. If you want to learn different ways of annoying a friend then you better take classes from Jerry as he has the craziest ways of teasing a friend without getting caught.
8. Snoopy
Ah! Snoopy, the cute dog was created by Charles M. Schulz in 1950 for a comic strip. Snoopy was the most iconic and recognizable character and was very famous for the character. Snoopy was famous for his sleep as he used to sleep all day long and he used to find different ways to live an easier life. The message it sent to the people was very clear to become easy on life as whatever the time is today, it will ultimately pass.
9. Winnie-the-Pooh
Winnie-the-Pooh was a cartoon character featured in 1928 in A.A Milne’s House at Pooh Corner. Pooh was a yellow furred bear who loved honey and lived in a forest surrounded by hundred-acre wood. He lived there with his friends who were a donkey, pig, own, rabbit and birds. Winnie was always an adventurous character and helped his friends in every situation. People liked the way Winnie used to do things and roam around the forest with his friends.
10. Donald Duck
Donald Duck is a cartoon character created by Walt Disney in 1934 with yellow legs and feet. Donald Duck wears a typical sailor shirt and a cap to look like a gentleman in every way. Donald Duck first appeared in The Wise Little Hen in 1934 and become one of the most popular characters with its style and anger-related issues. Though Donald Duck was very strict it inspired people to be gentle and easy with being tough.
Conclusion
In this article, you learned about the popular cartoon characters that made your childhood awesome. Also, the brief given in this guide about the famous cartoon characters is amazing and you can get all the information about the cartoon characters without checking different information about them. Given that cartoons are fun to watch but we have also introduced to Filmora where you can create your cartoon video by using the features and tools on the timeline. If you find this guide helpful then don’t forget to tell us about your favorite cartoon character and why do you like them.
Shanoon Cox
Shanoon Cox is a writer and a lover of all things video.
Follow @Shanoon Cox
Shanoon Cox
Mar 27, 2024• Proven solutions
Childhood is a book with different chapters filled with joy, fun, school, chocolates, and our favorite cartoon characters. The most fantasizing thing for a child is the popular cartoon characters which they see as a tutor who teaches them to become honest, humble and most importantly they show us how to overcome problems in our life. All the famous cartoon characters are still famous among millennials who used to watch them in their childhood. In this article, we are going to dive back into childhood again and you will be amazed to see those characters again in front of your eyes.
Get ready for something mesmerizing today!
Part 1: 10 Popular Cartoon Characters of All Time
Everyone has a role model in their life and this is is a no brainer as we always have a superhero from the cartoon world whom we follow and wanna be like them. Let’s talk about some famous cartoon characters that everyone in this world is aware of.
- 1. Bugs Bunny
- 2. Scooby-Doo
- 3. SpongeBob SquarePants
- 4. Daffy Duck
- 5. Tom Cat
- 6. Mickey Mouse
- 7. Jerry Mouse
- 8. Snoopy
- 9. Winnie-the-Pooh
- 10. Donald Duck
1. Bugs Bunny
Bugs bunny is a famous cartoon character that was created in back 1930s by Leon Schlesinger and its one of the best and popular cartoon characters of all time. Bugs bunny is associated with Looney Tunes and Merrie Melodie’s animated stories. Bugs bunny is known for his insouciant and flippant personality because bugs bunny was always happy and he was also known as Happy Rabbit. The message bugs bunny sent to the world was to be happy in all situations in life.
2. Scooby-Doo
Scooby-Doo is a famous cartoon character that was created back in 1969 and this character is associated with Hanna-Barbera, an American animation company. The character is famous for its curiosity about solving supernatural mysteries and making people laugh with his crazy styles. Scooby-Doo is a natural detective and has made people fantasize about solving mysteries more easily. Scooby is so famous today that people who are in their mid-30s still watch it with their kids because of the unique character it plays.
3. SpongeBob SquarePants
SpongeBob SquarePants was created back in 1999 by Stephen Hillenburg, a marine science educator. SpongeBob SquarePants made its debut on Nickelodeon in 1999. The show becomes a superhit and SpongeBob was the next superstar with the most successful character at that time. This cartoon character is famous for his friendship with his aquatic friends and the energetic and optimistic nature of SpongeBob made inspired everyone to be hopeful in any situation.
4. Daffy Duck
Daffy Duck is a famous cartoon character that was produced in the late 1930s by Warner Bros. The cartoon is associated with cartoon series like Merrie Melodies and Looney Tunes. The cartoon character was famous for the way he would hope around in the water and yell, Woo-hoo! Woo-hoo!. Daffy Duck has always entertained people with his quirky ways of jumping into the water and making people laugh out. The message from this character was very clear and entertaining
5. Tom Cat
Tom Cat needs no introduction as it’s the furious and popular cartoon character of all time. It was created by Joseph Barbera and William Hanna in 1940. Tom is associated with the Tom & Jerry cartoon series and it made people laugh with silly fights and chasing all over the series. Tom was very annoyed by Jerry and he wanted to make a meal of Jerry as that used to make people laugh. However, the deep message Tom has given to the viewers was that whenever Jerry was in serious trouble apart from their silly fights, Tom used to save Jerry and would ignore him sarcastically. So, the message was to spread the love even if you are irritated with a person.
6. Mickey Mouse
Walt Disney created a mouse in 1928 and that was named Mickey Mouse. The cartoon character is still famous among kids and adults as a childhood memory. Mickey is famous for his nice character and stubborn attitude. Mickey and his girlfriend Minnie Mouse with his pet dog Pluto were seen with Donald Duck and Goofy. Mickey always inspired people to stay honest and loving to friends and loved ones and people who like Mickey follow the same.
7. Jerry Mouse
Jerry Mouse is one of the most notorious and crazy characters of the Tom & Jerry cartoon series. He was very much liked by people and the way he used to irritate Tom in the cartoon series was amazing. If you want to learn different ways of annoying a friend then you better take classes from Jerry as he has the craziest ways of teasing a friend without getting caught.
8. Snoopy
Ah! Snoopy, the cute dog was created by Charles M. Schulz in 1950 for a comic strip. Snoopy was the most iconic and recognizable character and was very famous for the character. Snoopy was famous for his sleep as he used to sleep all day long and he used to find different ways to live an easier life. The message it sent to the people was very clear to become easy on life as whatever the time is today, it will ultimately pass.
9. Winnie-the-Pooh
Winnie-the-Pooh was a cartoon character featured in 1928 in A.A Milne’s House at Pooh Corner. Pooh was a yellow furred bear who loved honey and lived in a forest surrounded by hundred-acre wood. He lived there with his friends who were a donkey, pig, own, rabbit and birds. Winnie was always an adventurous character and helped his friends in every situation. People liked the way Winnie used to do things and roam around the forest with his friends.
10. Donald Duck
Donald Duck is a cartoon character created by Walt Disney in 1934 with yellow legs and feet. Donald Duck wears a typical sailor shirt and a cap to look like a gentleman in every way. Donald Duck first appeared in The Wise Little Hen in 1934 and become one of the most popular characters with its style and anger-related issues. Though Donald Duck was very strict it inspired people to be gentle and easy with being tough.
Conclusion
In this article, you learned about the popular cartoon characters that made your childhood awesome. Also, the brief given in this guide about the famous cartoon characters is amazing and you can get all the information about the cartoon characters without checking different information about them. Given that cartoons are fun to watch but we have also introduced to Filmora where you can create your cartoon video by using the features and tools on the timeline. If you find this guide helpful then don’t forget to tell us about your favorite cartoon character and why do you like them.
Shanoon Cox
Shanoon Cox is a writer and a lover of all things video.
Follow @Shanoon Cox
Best 10 Emoji Makers to Create Your Own Emojis [PC/Online/Android/iPhone]
Best 10 Emoji Makers to Create Your Own Emojis [PC/Online/Android/iPhone]
Shanoon Cox
Mar 27, 2024• Proven solutions
In this generation of online chatting and social media, emoji plays a big role in making our conversation easier and interesting. It helps people to express feelings or convey something in a better way than words or sentences ever could. Adding an emoji to chat, video or photo brings more fun to the content and the type of emojis different individuals prefer to use will be different.
Want to create your own emoji? So there is a need for emoji makers that can help to create customized emojis depending on everyone’s likes.
There are a lot of emoji makers in the online market that offers a bundle of pre-packed emoji as well as help you to create emoji of your choice. These tools help you to create your own emoji on whichever theme you wish providing a lot of customizing options.
- Part 1: Best 10 Emoji Makers to Create Your Own Emojis
- Part 2: Add Emojis to Your Video with Wondershare Filmora
Part 1: Best 10 Emoji Makers to Create Your Own Emojis
Most people around the world use emoji in their conversations, whether it be chats, comments on social media, writing blogs, etc. But the type of emojis preferred by different people may vary and sometimes the default emojis available might not be enough to express what they wish to. Hence there is a need for creating more emoji, depending on each individual’s taste.
This is where the emoji makers come in. Here we will discuss the top 10 emoji makers that can be used to create attractive emojis for sharing on social media platforms.
- [1. Emoji-maker.com(Online)](#emoji maker1)
- [2. piZap Emoji Maker(Online)](#emoji maker2)
- [3. Flat Icons Emoji Maker(Online)](#emoji maker3)
- [4. Labeley.com(Online)](#emoji maker4)
- [5. Disney Emoji Maker (Online)](#emoji maker5)
- [6. Animated Emoji Maker (Android app)](#emoji maker6)
- [7. Elite Emoji (Android app)](#emoji maker7)
- [8. Boomoji (Android app)](#emoji maker8)
- [9. Zmoji (iPhone app)](#emoji maker9)
- [10. Emojily (iPhone app)](#emoji maker10)
1. Emoji-maker.com(Online)
Emoji maker.com is an online told that provides a lot of beautiful and unique emoji editing options to the users.
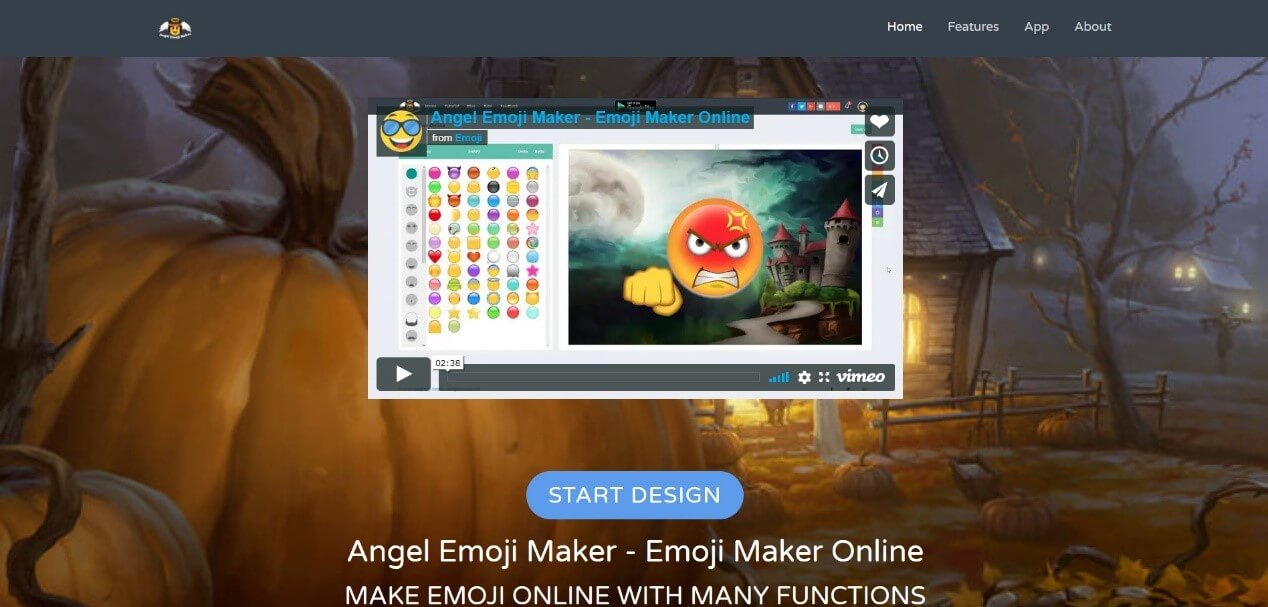
Price:
- Free
Features:
- Offers a wide variety of emoji shapes
- Allows to customize emojis in a match to the user’s face
- Has an Emoji text function, that allows adding text to any emoji
- Provides a lot of emoji background options
- Provides multiple saving options for the emojis you have created
2. piZap Emoji Maker(Online)
piZap Emoji Maker is an online editor that has extensive emoji features that can help you to create awesome emojis. However, before you can do something, a mandatory signing in is required by this editor.
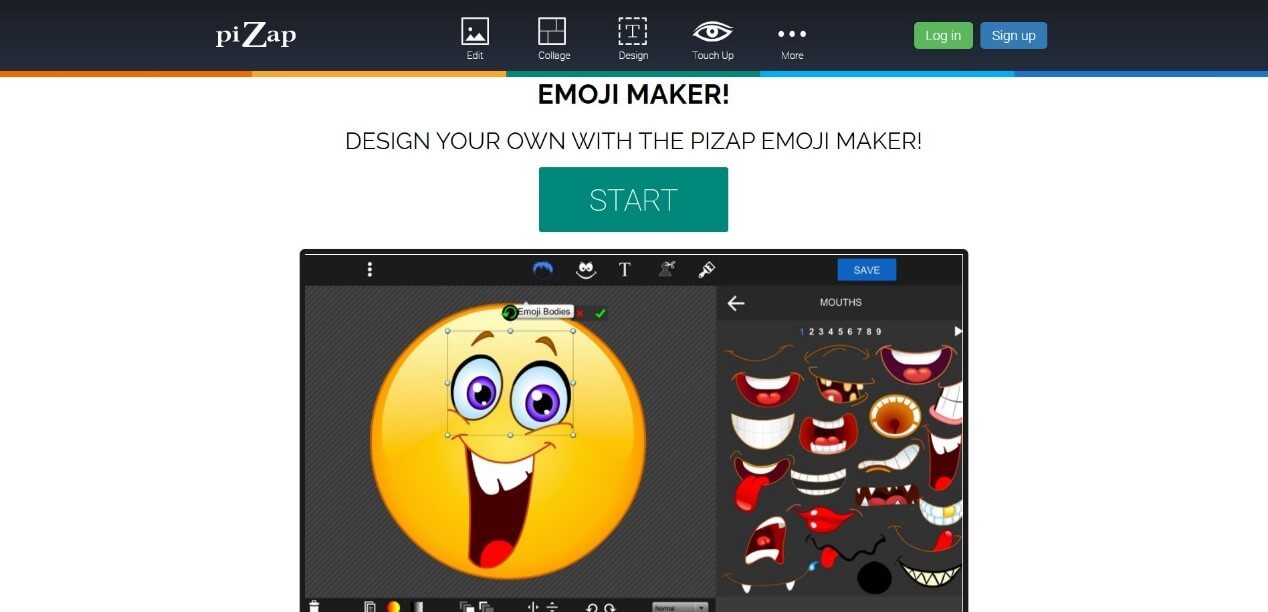
Price:
- Free
- Extra Features - piZap PRO for $5.99 per month or $35.88 per year
Features:
- All in one tool that can be used to create emoji, edit photos, create memes, etc.
- 6 million stock images
- Vibrant, colorful filters exclusive to this tool
- About 367 font options
3. Flat Icons Emoji Maker(Online)
Flat Icons Emoji is one of the simplest tools that are available to you for creating customized emojis of your choice.
![]()
Price:
- Free
- Premium bundle offers for $79 or $3710 (depends on the packs you choose)
Features:
- Offers a lot of shape options
- Provides a good collection of icon bundles for free
- Options to download both in PNG and SVG formats
- Easy editing and saving options
4. Labeley.com(Online)
Labeley.com is an online tool that allows you to design the emoji that you desire as well as provide you with printed copies of your design for an amount.
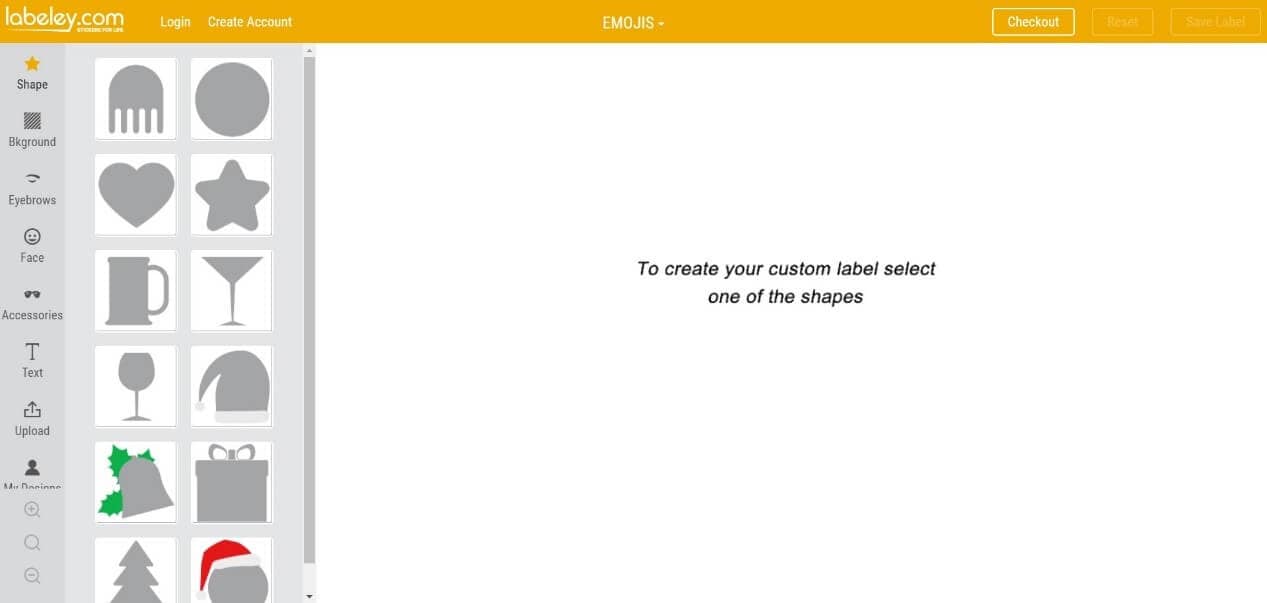
Price:
- Free
Features:
- Cool designing features and options for emoji
- Allows to save edits and make changes to it afterward
- Provides a set of beautiful artwork collections
- Provides “ print and delivery” option if you need physical copies of the emoji you designed (chargeable)
5. Disney Emoji Maker (Online)
As the name indicates, Disney Emoji Maker allows you to customize emoji based on some Disney characters. This emoji maker itself is very fun to use.
Price:
- Free
Features:
- An amazing user interface
- A variety of emoji features to add
- Apt for kids as well as grownups
- Easy export of the created emoji
6. Animated Emoji Maker (Android app)
Animated Emoji Maker is a tool that allows you to create wonderful emojis on any android devices without much effort.

Price:
- Free
Features:
- Allows to create normal as well as animated emoji
- Different characters like a cat, fox, dog, pig, panda chicken, monkey are available to create emoji
- Allows to customize emoji according to the user’s appearance
7. Elite Emoji (Android app)
Elite Emoji is an android tool that will allow you to create high-quality emoji that can be used to express ideas and emotions in your conversations.
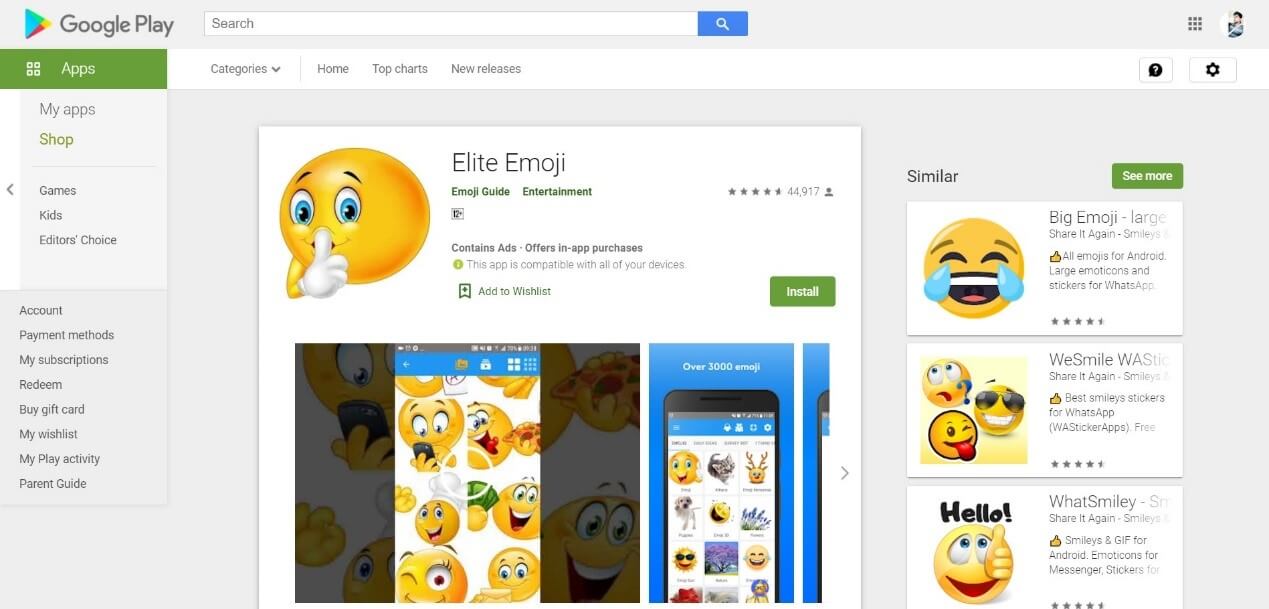
Price:
- Free
Features
- 2000+ emoji options to choose from
- Single touch sharing in social media platforms like WhatsApp, Messenger, Instagram, etc.
- Ober 5000+ default messages to add to emojis
- Emoji suggestions, taking into account the personality traits of each user
8. Boomoji (Android app)
Boomoji is a free Android application that will allow you to create fun avatar type emoji of your choice.
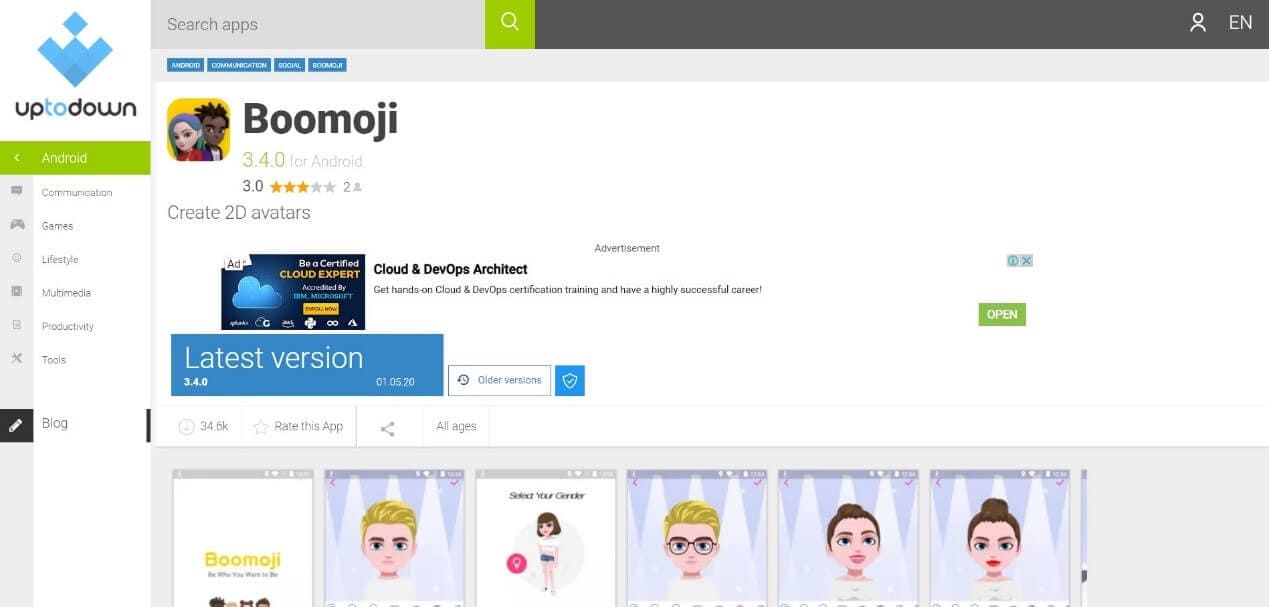
Price:
- Free
Features:
- A ton of characteristics to edit
- Allows to create exact animate clones of the users
- Direct sharing into social media networks
9. Zmoji (iPhone app)
Zmoji is an iPhone tool that allows you to create and customize emojis that you need for any social interactions.
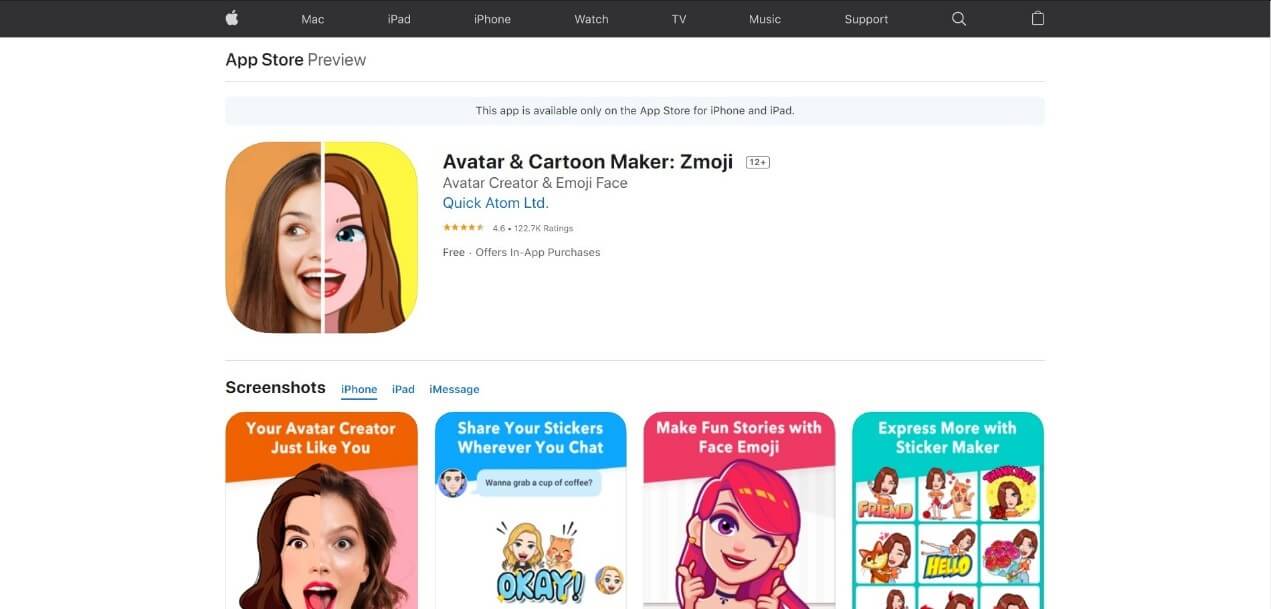
Price:
- Free
- Zmoji Premium for $99.9 per year
Features:
- Quick and easy creation of expressive avatars and emoji
- Create an animated avatar resembling the user appearance
- A number of fashionable options and facial features are available
10. Emojily (iPhone app)
Emojily is a fun tool that provides a large number of crazy emoji features. It is a free iPhone application that allows the sharing of the edited emoji on any platform.
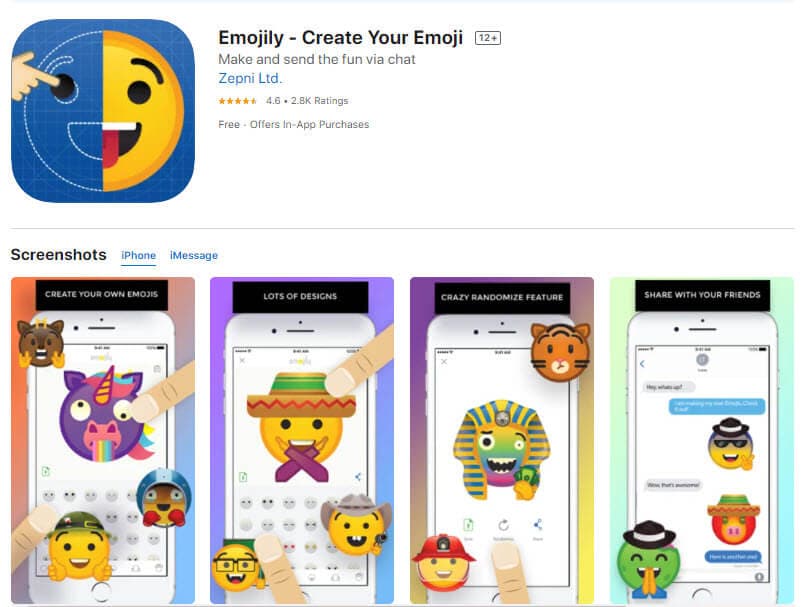
Price:
- Free
- $0.99 for unlocking single emoji packs
- $3.99 for unlocking all packs
Features:
- A ton of items to choose from to create unique emoji
- An application provided keyboard to use the emoji
- A variety of design options
Part 2: Add Emojis to Your Video with Wondershare Filmora
Wondershare Filmora is an all in one video editing application that offers a ton of video editing options and features, with the addition of interesting emojis that can be used to create wonderful videos. Some of the best features of Filmora include a number of animated titles, motion tracking, animation keyframing, vide effects, enhanced video stabilization, noise removal, noise effects, and much more.
The Filmora application offers 9 inbuilt emojis within the tool and more emojis of different genres can be accessed by downloading the Animated Emoji Pack from the Filmstock effects store.
Adding emoji to videos has been a trend for some time. It is fun as well as allows the creator to express his ideas or feelings without the use of long texts and not offending the viewers in any way. So, let’s see how Filmora can be used to add emoji to any videos.
Steps to Follow:
1. Download and install Wondershare Filmora on your PC.

2. Create a New Project and add the video that needs to be edited to the Filmora timeline.
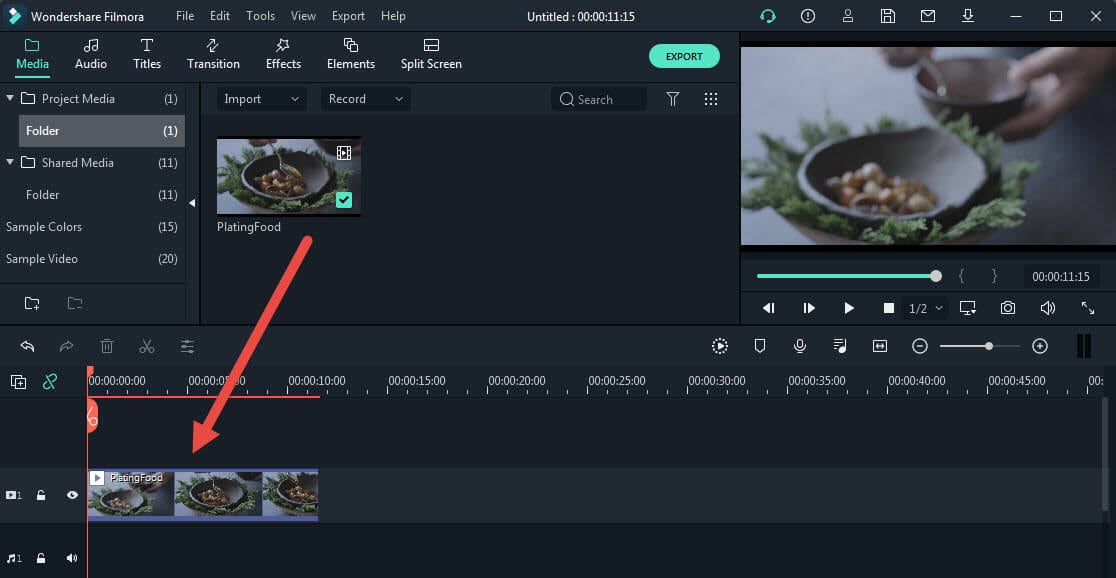
3. Tap on the Elements tab at the top and tap on the Emoji category on the side. A list of emoji elements will be displayed to you.

4. Or you can go to Wondershare Filmstock (Filmora’s effects store), find the free Animated Emoji Pack and download more emojis.
5. Select the emoji you like and drag and drop it just above the video on your timeline.
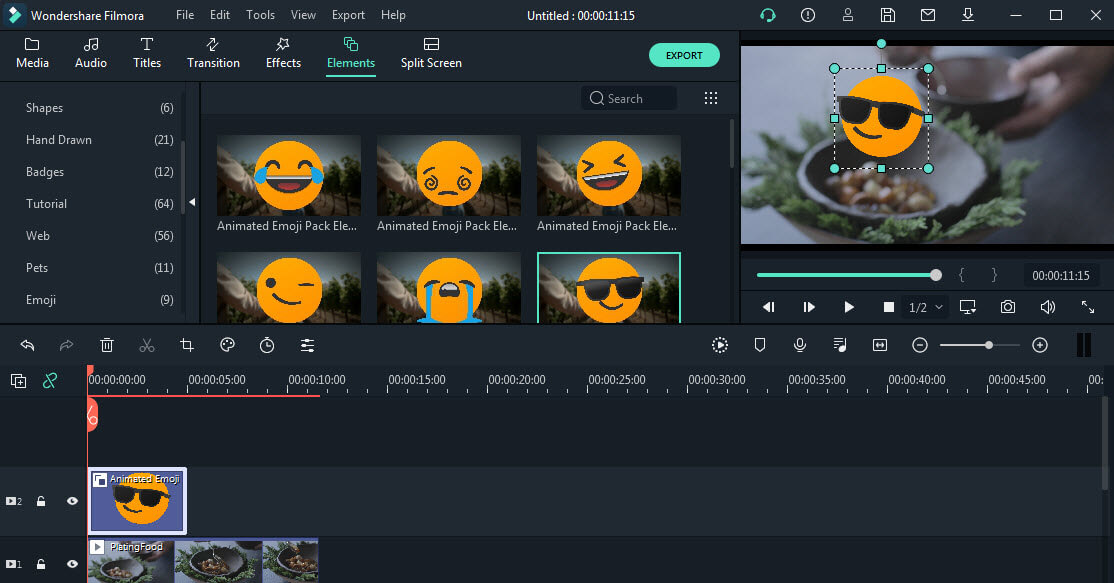
6. Adjust the position, duration, or size of the emoji if needed. Then preview the results and make changes if necessary.

7. After that, tap on the Export tab and save the video to any location of your choice.
Conclusion
Emoji is a wonderful way of expressing one’s ideas or feelings towards something on social media platforms like WhatsApp, YouTube, Facebook, etc. Most often the emoji provided by these applications may not be enough to express ourselves and hence there will be a need for creating or downloading more emoji. A list of the best 10 emoji creator apps has been listed above for you.
The use of emoji is not limited to just chats and comments, they are also used on images and videos. Filmora is an application that can be used to add emoji to video to make it more attractive and appealing.
We hope this article has been helpful to you. Please let us know what you think about our suggestion in the comment box below.
Shanoon Cox
Shanoon Cox is a writer and a lover of all things video.
Follow @Shanoon Cox
Shanoon Cox
Mar 27, 2024• Proven solutions
In this generation of online chatting and social media, emoji plays a big role in making our conversation easier and interesting. It helps people to express feelings or convey something in a better way than words or sentences ever could. Adding an emoji to chat, video or photo brings more fun to the content and the type of emojis different individuals prefer to use will be different.
Want to create your own emoji? So there is a need for emoji makers that can help to create customized emojis depending on everyone’s likes.
There are a lot of emoji makers in the online market that offers a bundle of pre-packed emoji as well as help you to create emoji of your choice. These tools help you to create your own emoji on whichever theme you wish providing a lot of customizing options.
- Part 1: Best 10 Emoji Makers to Create Your Own Emojis
- Part 2: Add Emojis to Your Video with Wondershare Filmora
Part 1: Best 10 Emoji Makers to Create Your Own Emojis
Most people around the world use emoji in their conversations, whether it be chats, comments on social media, writing blogs, etc. But the type of emojis preferred by different people may vary and sometimes the default emojis available might not be enough to express what they wish to. Hence there is a need for creating more emoji, depending on each individual’s taste.
This is where the emoji makers come in. Here we will discuss the top 10 emoji makers that can be used to create attractive emojis for sharing on social media platforms.
- [1. Emoji-maker.com(Online)](#emoji maker1)
- [2. piZap Emoji Maker(Online)](#emoji maker2)
- [3. Flat Icons Emoji Maker(Online)](#emoji maker3)
- [4. Labeley.com(Online)](#emoji maker4)
- [5. Disney Emoji Maker (Online)](#emoji maker5)
- [6. Animated Emoji Maker (Android app)](#emoji maker6)
- [7. Elite Emoji (Android app)](#emoji maker7)
- [8. Boomoji (Android app)](#emoji maker8)
- [9. Zmoji (iPhone app)](#emoji maker9)
- [10. Emojily (iPhone app)](#emoji maker10)
1. Emoji-maker.com(Online)
Emoji maker.com is an online told that provides a lot of beautiful and unique emoji editing options to the users.
Price:
- Free
Features:
- Offers a wide variety of emoji shapes
- Allows to customize emojis in a match to the user’s face
- Has an Emoji text function, that allows adding text to any emoji
- Provides a lot of emoji background options
- Provides multiple saving options for the emojis you have created
2. piZap Emoji Maker(Online)
piZap Emoji Maker is an online editor that has extensive emoji features that can help you to create awesome emojis. However, before you can do something, a mandatory signing in is required by this editor.
Price:
- Free
- Extra Features - piZap PRO for $5.99 per month or $35.88 per year
Features:
- All in one tool that can be used to create emoji, edit photos, create memes, etc.
- 6 million stock images
- Vibrant, colorful filters exclusive to this tool
- About 367 font options
3. Flat Icons Emoji Maker(Online)
Flat Icons Emoji is one of the simplest tools that are available to you for creating customized emojis of your choice.
![]()
Price:
- Free
- Premium bundle offers for $79 or $3710 (depends on the packs you choose)
Features:
- Offers a lot of shape options
- Provides a good collection of icon bundles for free
- Options to download both in PNG and SVG formats
- Easy editing and saving options
4. Labeley.com(Online)
Labeley.com is an online tool that allows you to design the emoji that you desire as well as provide you with printed copies of your design for an amount.
Price:
- Free
Features:
- Cool designing features and options for emoji
- Allows to save edits and make changes to it afterward
- Provides a set of beautiful artwork collections
- Provides “ print and delivery” option if you need physical copies of the emoji you designed (chargeable)
5. Disney Emoji Maker (Online)
As the name indicates, Disney Emoji Maker allows you to customize emoji based on some Disney characters. This emoji maker itself is very fun to use.
Price:
- Free
Features:
- An amazing user interface
- A variety of emoji features to add
- Apt for kids as well as grownups
- Easy export of the created emoji
6. Animated Emoji Maker (Android app)
Animated Emoji Maker is a tool that allows you to create wonderful emojis on any android devices without much effort.
Price:
- Free
Features:
- Allows to create normal as well as animated emoji
- Different characters like a cat, fox, dog, pig, panda chicken, monkey are available to create emoji
- Allows to customize emoji according to the user’s appearance
7. Elite Emoji (Android app)
Elite Emoji is an android tool that will allow you to create high-quality emoji that can be used to express ideas and emotions in your conversations.
Price:
- Free
Features
- 2000+ emoji options to choose from
- Single touch sharing in social media platforms like WhatsApp, Messenger, Instagram, etc.
- Ober 5000+ default messages to add to emojis
- Emoji suggestions, taking into account the personality traits of each user
8. Boomoji (Android app)
Boomoji is a free Android application that will allow you to create fun avatar type emoji of your choice.
Price:
- Free
Features:
- A ton of characteristics to edit
- Allows to create exact animate clones of the users
- Direct sharing into social media networks
9. Zmoji (iPhone app)
Zmoji is an iPhone tool that allows you to create and customize emojis that you need for any social interactions.
Price:
- Free
- Zmoji Premium for $99.9 per year
Features:
- Quick and easy creation of expressive avatars and emoji
- Create an animated avatar resembling the user appearance
- A number of fashionable options and facial features are available
10. Emojily (iPhone app)
Emojily is a fun tool that provides a large number of crazy emoji features. It is a free iPhone application that allows the sharing of the edited emoji on any platform.
Price:
- Free
- $0.99 for unlocking single emoji packs
- $3.99 for unlocking all packs
Features:
- A ton of items to choose from to create unique emoji
- An application provided keyboard to use the emoji
- A variety of design options
Part 2: Add Emojis to Your Video with Wondershare Filmora
Wondershare Filmora is an all in one video editing application that offers a ton of video editing options and features, with the addition of interesting emojis that can be used to create wonderful videos. Some of the best features of Filmora include a number of animated titles, motion tracking, animation keyframing, vide effects, enhanced video stabilization, noise removal, noise effects, and much more.
The Filmora application offers 9 inbuilt emojis within the tool and more emojis of different genres can be accessed by downloading the Animated Emoji Pack from the Filmstock effects store.
Adding emoji to videos has been a trend for some time. It is fun as well as allows the creator to express his ideas or feelings without the use of long texts and not offending the viewers in any way. So, let’s see how Filmora can be used to add emoji to any videos.
Steps to Follow:
1. Download and install Wondershare Filmora on your PC.
2. Create a New Project and add the video that needs to be edited to the Filmora timeline.
3. Tap on the Elements tab at the top and tap on the Emoji category on the side. A list of emoji elements will be displayed to you.
4. Or you can go to Wondershare Filmstock (Filmora’s effects store), find the free Animated Emoji Pack and download more emojis.
5. Select the emoji you like and drag and drop it just above the video on your timeline.
6. Adjust the position, duration, or size of the emoji if needed. Then preview the results and make changes if necessary.
7. After that, tap on the Export tab and save the video to any location of your choice.
Conclusion
Emoji is a wonderful way of expressing one’s ideas or feelings towards something on social media platforms like WhatsApp, YouTube, Facebook, etc. Most often the emoji provided by these applications may not be enough to express ourselves and hence there will be a need for creating or downloading more emoji. A list of the best 10 emoji creator apps has been listed above for you.
The use of emoji is not limited to just chats and comments, they are also used on images and videos. Filmora is an application that can be used to add emoji to video to make it more attractive and appealing.
We hope this article has been helpful to you. Please let us know what you think about our suggestion in the comment box below.
Shanoon Cox
Shanoon Cox is a writer and a lover of all things video.
Follow @Shanoon Cox
How to Use Emojis on Windows 10 and Windows 11?
If you ever wondered how to use emojis on Windows, or since when the emojis are around and what is their significance, you will find all your answers here. Because Windows 10 offers a great range of emojis that help you express your feelings and reactions in fewer words, they have recently gained a decent level of popularity, mostly amongst youngsters and millennials.
With that said, in the following sections, you will learn how to use emojis on Windows 10 using both keyboard shortcuts and touch keyboard, how to get emojis on Windows 10 to make your text or conversation look more versatile, and what new has been added to the latest operating system released by Microsoft, i.e., Windows 11.
In this article
01 Part 1: The History of Emojis in Windows
02 Part 2: How to Use Emojis with Keyboard Shortcuts
03 Part 3: How to Use Emojis on Windows PC with Touch Keyboard
04 Part 4: What’s New in Emojis in Windows 11
05 Part 5: How to Get More Emojis in Windows 11
Part 1: The History of Emojis in Windows
Although emojis are present in some form or the other since the mid-‘90s, they were not quite popular back then. With the evolution of smartphones, these iconic characters got attention from the then-teenagers. Seeing this, in 2012, Microsoft introduced the first-ever set of black-and-white emojis with the release of Windows 8, and after some time, the company also added the same to Windows 7 that was rolled out along with the updates for the OS.
With the release of Windows 10 in 2015, a wide range of full-fledged colored emojis was introduced and received a large number of positive reactions from the users. As of today, emojis have become an integral part of everyone’s day-to-day text conversation, be it on Skype, WhatsApp, Facebook, or any other such platform.
Part 2: How to Use Emojis with Keyboard Shortcuts
A keyboard shortcut is a combination of two or more keys that are pressed simultaneously to trigger a pre-assigned event or action. A good example of a keyboard shortcut is ‘Ctrl + S’ which, when pressed, saves the document you’re working on.
While learning the process of how to use emoji in Windows 10, it is equally imperative to memorize the shortcut keys to insert those icons without taking your hands off the keyboard. This not only saves your time, but it also prevents you from going through the lengthy process of opening the emojis keyboard, navigating through all the available icons to choose the one you’re looking for, and then clicking it to insert in the document or conversation.
Nevertheless, it would be a good idea to learn how to launch the emojis keyboard, and the process is simple. All you need to do is:
- Make sure that your keyboard cursor is in an app that can accept text inputs. A text editor like MS Word or WordPad could be a good example
- Press the Windows + ; (semicolon) or Windows + . (period) keys together to open the emojis keyboard

Once the keyboard is open, you can click any of the available emojis to insert it in your conversion or text content.
As for the shortcuts, depending on the type of expression you want to convey, there could be thousands of them. Some of the commonly used emojis and their universal shortcut keys for both Windows 10 and Windows 11 include:
: (colon) + ) (right brace) will create a smiley face
: (colon) + ( (left brace) will create a sad face
: (colon) + ; (semicolon) will create a wink face
…and so on. You can conduct a quick online search to get the entire list of keyboard shortcuts and the emojis that they will create. For your convenience, a link from the Microsoft official website is given below:
Part 3: How to Use Emojis on Windows PC with Touch Keyboard
If you have Microsoft Surface or any other device that has Windows 10 or Windows 11 installed on it, and can accept inputs via touch keyboard, you can enable the feature in the operating system, and then use the touch keyboard to add emojis to your conversion or content. You can follow the instructions given below to enable touch keyboard, and then learn how to use emojis on Windows 11 or Windows 10 via touch:
- Right-click anywhere on the taskbar (Windows 11 is used here for demonstration), and then click Taskbar settings

- From the right area of the Settings window that opens next, scroll down to the Taskbar corner icons section, and then turn on the Touch keyboard switch

- Launch an app that can accept text inputs, e.g., a text editor, chatting app, etc. Click or tap the Touch keyboard icon from the notification area that is present at the bottom-right corner of the screen.

- Click or tap the Emojis icon from the upper-left corner of the touch keyboard that opens up, and then touch your preferred emoji to add it to your text or conversation.

Part 4: What’s New in Emojis in Windows 11
In addition to learning how to use emojis on Windows 10, it is also important to know what’s new with them or the emojis panel in Windows 11, the latest operating system released by Microsoft this year, i.e., 2021.
In Windows 11, although you can launch the emojis keyboard using the same shortcuts, i.e., ‘Windows + .’ or ‘Windows + ;’ keys as mentioned earlier, the emojis keyboard itself has four sections, namely:
- Emojis – Contains various emojis and smileys
- GIF – Gives you access to various animated GIFs from Tenor
- Kamojis – Lets you add the ASCII characters for emojis, e.g., :-) or :-(
- Symbols – To add important symbols to your text, e.g., ©, ®, etc.
In addition to this, the 2D Clippy emoji has also been introduced with Windows 11, and can be located by launching the emojis keyboard, and typing ‘Clippy’.
Part 5: How to Get More Emojis in Windows 11
If the built-in emoji library doesn’t contain your favorite expressions, you can always get several more by following the instructions given below:
- Launch your favorite web browser on Windows 11, and then go to http://www.iemoji.com/
- Click an emoji from the available options or copy one from your favorite portal, and paste it in the Paste Emoji here field

- Review the emoji in the MESSAGE PREVIEW field, and click Create from the Options section to generate the emoji that can be sent as a message or image

- Alternatively, click Copy from the Options section itself, and then go to the text editor or any other portal you want to use the emoji in, and press Ctrl + V to paste and insert the emoji in your conversation or text without any hassle.

Conclusion
While the emojis were introduced to Windows as late as 2012, Windows 11 has a wide range of these virtual objects or faces for various occasions and to convey different expressions respectively. Furthermore, Windows 11 also gives you access to Tenor’s GIFs, and ASCII characters with particular combinations to represent the emojis, as it was done back in the days of button-operated cellphones.
Also, if the built-in emoji keyboard doesn’t have your favorite expressions and smileys, you can always generate your custom ones by going to http://www.iemoji.com/ , and using the options that the website offers. All in all, it’s easy to learn how to use emojis on Windows as long as you have access to the correct tutorial that explains the process in an easy manner.
02 Part 2: How to Use Emojis with Keyboard Shortcuts
03 Part 3: How to Use Emojis on Windows PC with Touch Keyboard
04 Part 4: What’s New in Emojis in Windows 11
05 Part 5: How to Get More Emojis in Windows 11
Part 1: The History of Emojis in Windows
Although emojis are present in some form or the other since the mid-‘90s, they were not quite popular back then. With the evolution of smartphones, these iconic characters got attention from the then-teenagers. Seeing this, in 2012, Microsoft introduced the first-ever set of black-and-white emojis with the release of Windows 8, and after some time, the company also added the same to Windows 7 that was rolled out along with the updates for the OS.
With the release of Windows 10 in 2015, a wide range of full-fledged colored emojis was introduced and received a large number of positive reactions from the users. As of today, emojis have become an integral part of everyone’s day-to-day text conversation, be it on Skype, WhatsApp, Facebook, or any other such platform.
Part 2: How to Use Emojis with Keyboard Shortcuts
A keyboard shortcut is a combination of two or more keys that are pressed simultaneously to trigger a pre-assigned event or action. A good example of a keyboard shortcut is ‘Ctrl + S’ which, when pressed, saves the document you’re working on.
While learning the process of how to use emoji in Windows 10, it is equally imperative to memorize the shortcut keys to insert those icons without taking your hands off the keyboard. This not only saves your time, but it also prevents you from going through the lengthy process of opening the emojis keyboard, navigating through all the available icons to choose the one you’re looking for, and then clicking it to insert in the document or conversation.
Nevertheless, it would be a good idea to learn how to launch the emojis keyboard, and the process is simple. All you need to do is:
- Make sure that your keyboard cursor is in an app that can accept text inputs. A text editor like MS Word or WordPad could be a good example
- Press the Windows + ; (semicolon) or Windows + . (period) keys together to open the emojis keyboard
Once the keyboard is open, you can click any of the available emojis to insert it in your conversion or text content.
As for the shortcuts, depending on the type of expression you want to convey, there could be thousands of them. Some of the commonly used emojis and their universal shortcut keys for both Windows 10 and Windows 11 include:
: (colon) + ) (right brace) will create a smiley face
: (colon) + ( (left brace) will create a sad face
: (colon) + ; (semicolon) will create a wink face
…and so on. You can conduct a quick online search to get the entire list of keyboard shortcuts and the emojis that they will create. For your convenience, a link from the Microsoft official website is given below:
Part 3: How to Use Emojis on Windows PC with Touch Keyboard
If you have Microsoft Surface or any other device that has Windows 10 or Windows 11 installed on it, and can accept inputs via touch keyboard, you can enable the feature in the operating system, and then use the touch keyboard to add emojis to your conversion or content. You can follow the instructions given below to enable touch keyboard, and then learn how to use emojis on Windows 11 or Windows 10 via touch:
- Right-click anywhere on the taskbar (Windows 11 is used here for demonstration), and then click Taskbar settings
- From the right area of the Settings window that opens next, scroll down to the Taskbar corner icons section, and then turn on the Touch keyboard switch
- Launch an app that can accept text inputs, e.g., a text editor, chatting app, etc. Click or tap the Touch keyboard icon from the notification area that is present at the bottom-right corner of the screen.
- Click or tap the Emojis icon from the upper-left corner of the touch keyboard that opens up, and then touch your preferred emoji to add it to your text or conversation.
Part 4: What’s New in Emojis in Windows 11
In addition to learning how to use emojis on Windows 10, it is also important to know what’s new with them or the emojis panel in Windows 11, the latest operating system released by Microsoft this year, i.e., 2021.
In Windows 11, although you can launch the emojis keyboard using the same shortcuts, i.e., ‘Windows + .’ or ‘Windows + ;’ keys as mentioned earlier, the emojis keyboard itself has four sections, namely:
- Emojis – Contains various emojis and smileys
- GIF – Gives you access to various animated GIFs from Tenor
- Kamojis – Lets you add the ASCII characters for emojis, e.g., :-) or :-(
- Symbols – To add important symbols to your text, e.g., ©, ®, etc.
In addition to this, the 2D Clippy emoji has also been introduced with Windows 11, and can be located by launching the emojis keyboard, and typing ‘Clippy’.
Part 5: How to Get More Emojis in Windows 11
If the built-in emoji library doesn’t contain your favorite expressions, you can always get several more by following the instructions given below:
- Launch your favorite web browser on Windows 11, and then go to http://www.iemoji.com/
- Click an emoji from the available options or copy one from your favorite portal, and paste it in the Paste Emoji here field
- Review the emoji in the MESSAGE PREVIEW field, and click Create from the Options section to generate the emoji that can be sent as a message or image
- Alternatively, click Copy from the Options section itself, and then go to the text editor or any other portal you want to use the emoji in, and press Ctrl + V to paste and insert the emoji in your conversation or text without any hassle.
Conclusion
While the emojis were introduced to Windows as late as 2012, Windows 11 has a wide range of these virtual objects or faces for various occasions and to convey different expressions respectively. Furthermore, Windows 11 also gives you access to Tenor’s GIFs, and ASCII characters with particular combinations to represent the emojis, as it was done back in the days of button-operated cellphones.
Also, if the built-in emoji keyboard doesn’t have your favorite expressions and smileys, you can always generate your custom ones by going to http://www.iemoji.com/ , and using the options that the website offers. All in all, it’s easy to learn how to use emojis on Windows as long as you have access to the correct tutorial that explains the process in an easy manner.
Also read:
- [Updated] 2024 Approved Innovative Ways to Decrease Audio Levels
- [Updated] Boost Your Channels A Guide to Best YouTube SEO Resources
- [Updated] In 2024, Leading 10 Covert Media Collection Tools
- [Updated] Push Past Limitations Showcase Videos in Social Media for 2024
- [Updated] Transform Your WebCam Footage Edit & Export Tips
- 2024 Approved How Add Emojis/Stickers to Videos on PC/Mac/Mobile/Online
- How to Make Memoji Talk-Make Memoji Video On Your Own for 2024
- In 2024, A Detailed VPNa Fake GPS Location Free Review On Tecno Spark 10 5G | Dr.fone
- In 2024, How To Change Vivo Y78+ Lock Screen Password?
- In 2024, How to Make an Adorable Video for Your Babys First Year
- New How to Add Emojis To Discord
- Professional iOS Podcast Setup Boost Your Audio Quality Game for 2024
- Updated 2024 Approved How to Edit Memoji on Android and iPhone
- Updated 2024 Approved Top 10 Best Free Manga Sites to Read Online
- Updated Best 10 Emoji Makers to Create Your Own EmojisPC/Online/Android/iPhone
- Title: How to Make a Triggered Meme for 2024
- Author: Jan
- Created at : 2024-09-27 21:46:36
- Updated at : 2024-09-30 16:25:47
- Link: https://meme-emoji.techidaily.com/how-to-make-a-triggered-meme-for-2024/
- License: This work is licensed under CC BY-NC-SA 4.0.