
How to Add Emojis To Discord
How to Add Emojis To Discord on Desktop Computer and Mobile
How to Add Emojis To Discord

Richard Bennett
Mar 27, 2024• Proven solutions
Who doesn’t like emoticons? They are fun, easy to use, and, best of all, highly expressive of your emotions that you cannot convey over messages otherwise.
A 2019 survey shows 70% of mobile users used emoji in texting or on social media daily. This shows the popularity of emoji in our world today.
Similarly, as a Discord user, you must have come across thousands of emoji in it. These are images uploaded on the server and called custom emojis that this gaming community can use for effective communication with friends and other players.
With the emoji and gaming industry growing, it is safe to say that discord emoji’s popularity and use will only increase.
Read ahead to see how you can add emojis on Discord if you want to have fun chats with your friends too.
- Part 1: Adding and Sending Emoji To Chat On Discord?
- Part 2: Adding Emojis To Discord Channel Name Or Nickname?
- Part 3: Adding Custom Emojis To Discord Server On Windows/Mac?
- Part 4: Adding Custom Emojis To Discord Server On iPhone And Android?
- Part 5: Managing Emojis in Discord Server
Part 1: How to Add and Send Emoji To Chat On Discord?
One of the best things about Discord’s emoji feature is that there are two ways to add them. You can either access emoji on the Discord account or upload them yourself.
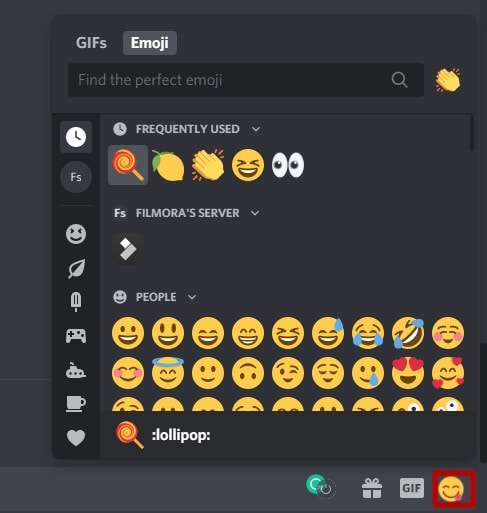
You can access the emoji menu for all Discord platforms by pressing the grey smiley face next to the message box. This will be on the right of the box for desktops, and for mobile apps, it will be on the left.
Discord-exclusive and standard emoji are present in the emoji menu, along with a part that keeps track of your most-used emoji.
On the other hand, you can also add custom emoticons to your Discord server if you have permission to do so.
Once you add and access the emoji on your device, select the one you want to send to your friends and press enter to send.
Part 2: How to Add Emojis To Discord Channel Name Or Nickname?
As an owner of a Discord channel, it is easy for you to add emoji to Discord. Follow the steps below to figure out how to add emojis to Discord channels:
- Use the emoji list to find the one you want to use in your channel name.
- Select the emoji “browser” column and copy it either with the mouse or “Ctrl + C” on the keyboard.
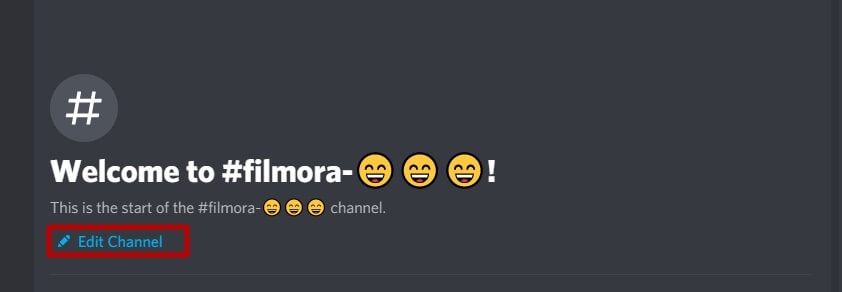
- Access your Discord server, right-click the channel where the emoji will be and use the dropdown menu to select the “Edit Channel.”
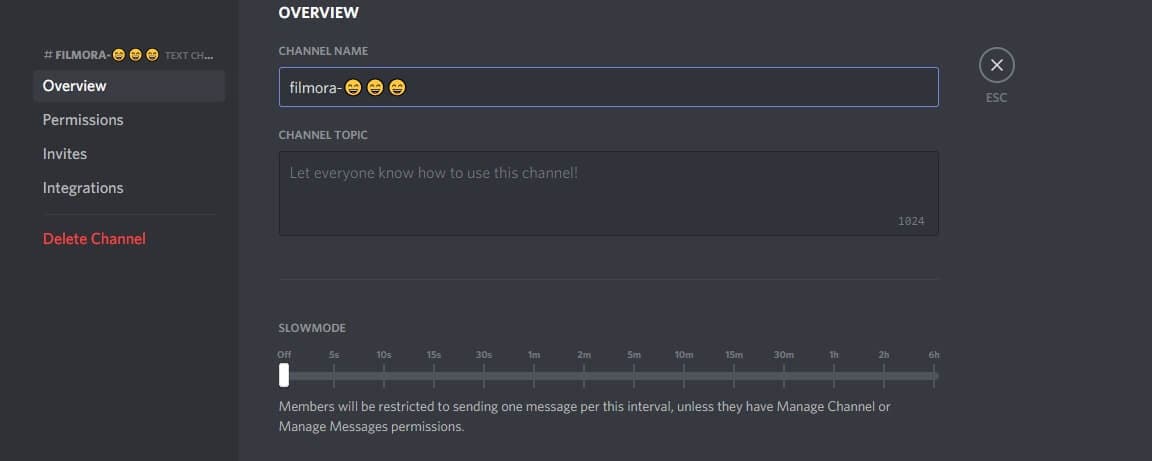
- In the “Channel Name” box, past the selected emoji using “Ctrl + V” from the keyboard.
- Select “Save Changes” to save the name with the emoji.
Part 3: How to Add Custom Emojis To Discord Server On Windows/Mac?
You can add custom emoji on Discord, but only if you are a server owner or administrator. Use the Discord server settings on either the desktop versions for Windows or Mac or the Discord Website.
Follow the steps below for either platform:
- Access your Discord server to begin and press the arrow pointing down in the channel list with the server name—Press “Server Settings” in the menu

- As the server’s settings open, you can add custom emojis in the “Emoji” tab. You can find a requirements list at the top that includes emoji names with a minimum of two characters and a file size limit of 256 KB. You can add fifty normal and an additional fifty animated emoji GIFs using the standard servers
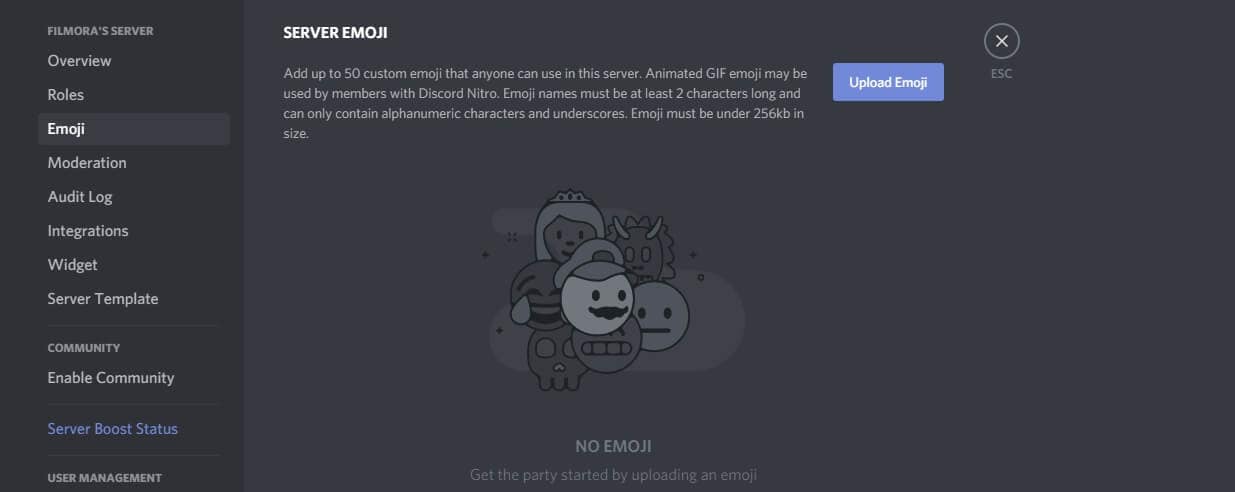
- Select “Upload Emoji” to insert a custom emoji, either standard or animated
- With the help of your device’s local storage, upload the file. However, for the emoji to be added to the lists, the file should align with Discord’s requirements.
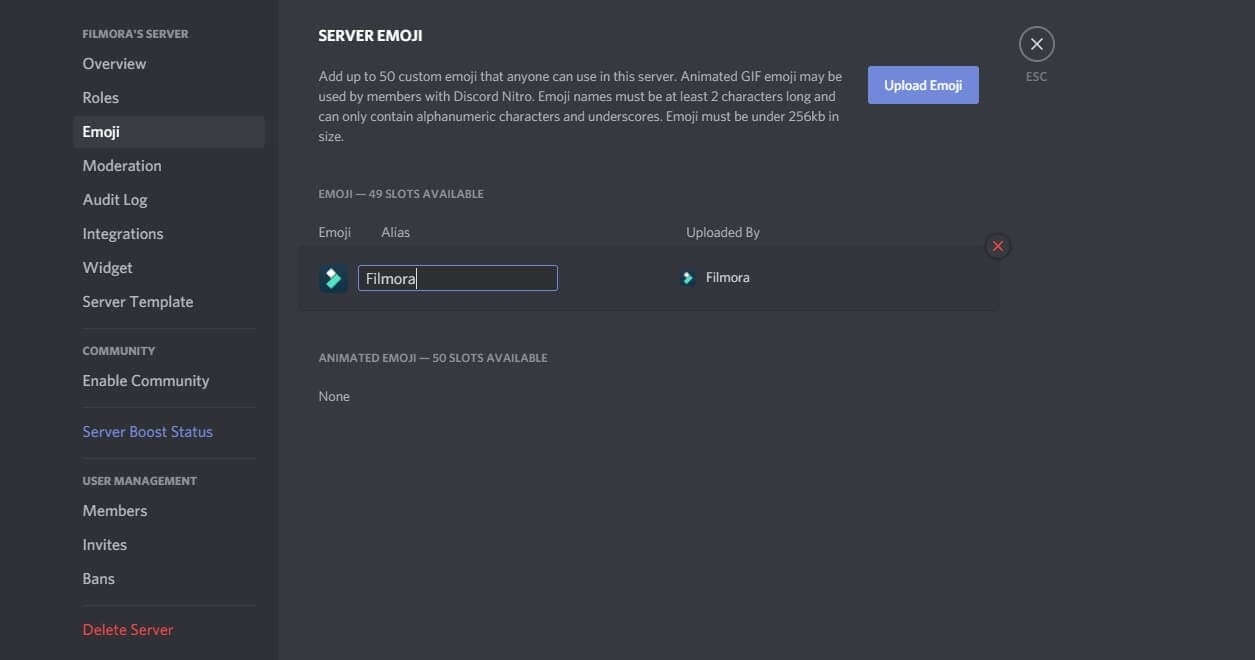
- For every emoji image that you upload, an alias tag will be created for that custom emoji using the file’s name. This tag is used to update a message with an emoji.
- A default alias name like this can be replaced by selecting the “Alias” box with the custom emoji and then creating a new name.
- Enjoy your emoji in chats as soon as you upload them to the Discord server!
Boost your server with Discord Nitro subscribers today to insert more than the standard fifty emoji!
Part 4: How to Add Custom Emojis To Discord Server On iPhone And Android?
How cool is it that you can add custom emoji to your smartphone as well? Whether you have an iPhone or an Android, you can use the same menu as Windows and Mac to upload emoji.
Discord’s interface is similar across all devices, so the following steps work on Android and Apple.
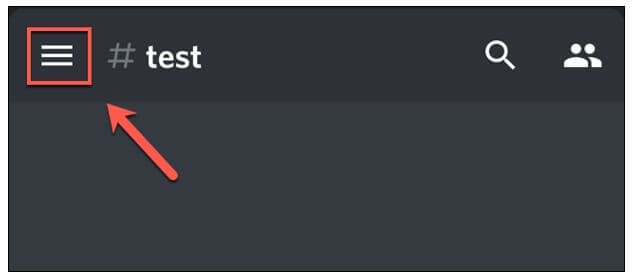
- Begin by opening the app on your device to access the server. Press the hamburger menu located at the top left in an open server and channel.
- As the channel and server list opens for Discord, you can see a three-dot menu right next to the channel list with the server name. Tap on it to proceed.
- To get to your server settings, press “Settings” in the Discord server menu that shows up.
- Under the “Server Settings” menu, select “Emoji” to access the custom emoji settings.
- As the “Emoji” menu opens, you can see an emoji requirement list
- Press “Upload Emoji” to upload any emoji that aligns with these requirements
- Press the custom emoji file, tap “Crop” if it needs cropping, and then use the “Upload” option
- After you upload the emoji file, replace the alias tag by tapping on it. This will redirect you to that specific emoji’s settings
- Type the name you want using the “Alias” box to create the tag used to insert emoji in messages
- Save this new tag with the “Save” icon placed in the bottom right
- Any changes you make to the custom emoji’s alias are applied to it instantly for your use.
Emoji bring fun to the conversations you have with friends, and it is very easy to add them to your server as well. These show up in the emoji pop-up list once you add them. The chat message bar contains the emoji icon from where you can access them.
It is essential to name your emoji with only alphanumeric characters and underscores using at least two characters.
The Discord emoji size is 32x32 pixels, so even if you upload up to 128x128 pixel size emojis, they will be resized to the default dimensions. Furthermore, emoji file sizes are at most 256kb.
If you want to use custom emojis, you can’t do so without a Nitro subscription because it is only functional on the server they are uploaded to. Even if you find a way to access the emoji from some other server, only its text code will be visible.
If you attempt to use the Emoji Picker to pick an emoji, you’ll get the following message:
Bonus: How to Manage Emoji in Discord Server?
You can’t remove or add emoji specific to a server on your own as a member. You need the server owner to toggle the permission of Manager Emoji in your domain.
On the other hand, as a server owner, you can give others this role with the following steps.
- Open Roles: Open the Server Settings and select “Roles” from the menu on the side.
- Toggle Manage Emoji: Pick the role you want to apply the permission to, and then toggle emoji’s slider to “on,” save changes, and you’re done!
FAQs About Discord Emojis
1. Why Do I See Grey Emoji In The Emoji Menu?
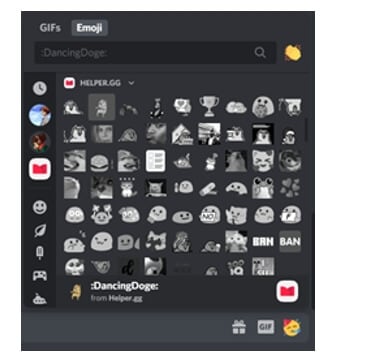
Greyed-out emoji in the menu means that either those emoji are animated, or you don’t have the permission to post them on other servers.
2. How Can I Get More Custom Emoji On The Server?
You can upload 50 emojis to your Discord server. But if you want more options, you need a Discord Nitro subscription to boost your server specs.
3. What Is The Discord Emoji Size?
Discord allows you to upload an emoji of up to 128x128 pixels, but it will resize it to 32x32 since that is its standard size.
Conclusion
Emojis make any chat fun, and where gaming is involved, they help you communicate better with your friends.
Discord has thousands of custom emojis that you can easily add to your server through your computer, whether it is your chat or the channel name. Follow our guide for a seamless process to add emoji to Discord and make your gaming experience better!
Richard Bennett
Richard Bennett is a writer and a lover of all things video.
Follow @Richard Bennett
Richard Bennett
Mar 27, 2024• Proven solutions
Who doesn’t like emoticons? They are fun, easy to use, and, best of all, highly expressive of your emotions that you cannot convey over messages otherwise.
A 2019 survey shows 70% of mobile users used emoji in texting or on social media daily. This shows the popularity of emoji in our world today.
Similarly, as a Discord user, you must have come across thousands of emoji in it. These are images uploaded on the server and called custom emojis that this gaming community can use for effective communication with friends and other players.
With the emoji and gaming industry growing, it is safe to say that discord emoji’s popularity and use will only increase.
Read ahead to see how you can add emojis on Discord if you want to have fun chats with your friends too.
- Part 1: Adding and Sending Emoji To Chat On Discord?
- Part 2: Adding Emojis To Discord Channel Name Or Nickname?
- Part 3: Adding Custom Emojis To Discord Server On Windows/Mac?
- Part 4: Adding Custom Emojis To Discord Server On iPhone And Android?
- Part 5: Managing Emojis in Discord Server
Part 1: How to Add and Send Emoji To Chat On Discord?
One of the best things about Discord’s emoji feature is that there are two ways to add them. You can either access emoji on the Discord account or upload them yourself.
You can access the emoji menu for all Discord platforms by pressing the grey smiley face next to the message box. This will be on the right of the box for desktops, and for mobile apps, it will be on the left.
Discord-exclusive and standard emoji are present in the emoji menu, along with a part that keeps track of your most-used emoji.
On the other hand, you can also add custom emoticons to your Discord server if you have permission to do so.
Once you add and access the emoji on your device, select the one you want to send to your friends and press enter to send.
Part 2: How to Add Emojis To Discord Channel Name Or Nickname?
As an owner of a Discord channel, it is easy for you to add emoji to Discord. Follow the steps below to figure out how to add emojis to Discord channels:
- Use the emoji list to find the one you want to use in your channel name.
- Select the emoji “browser” column and copy it either with the mouse or “Ctrl + C” on the keyboard.
- Access your Discord server, right-click the channel where the emoji will be and use the dropdown menu to select the “Edit Channel.”
- In the “Channel Name” box, past the selected emoji using “Ctrl + V” from the keyboard.
- Select “Save Changes” to save the name with the emoji.
Part 3: How to Add Custom Emojis To Discord Server On Windows/Mac?
You can add custom emoji on Discord, but only if you are a server owner or administrator. Use the Discord server settings on either the desktop versions for Windows or Mac or the Discord Website.
Follow the steps below for either platform:
- Access your Discord server to begin and press the arrow pointing down in the channel list with the server name—Press “Server Settings” in the menu
- As the server’s settings open, you can add custom emojis in the “Emoji” tab. You can find a requirements list at the top that includes emoji names with a minimum of two characters and a file size limit of 256 KB. You can add fifty normal and an additional fifty animated emoji GIFs using the standard servers
- Select “Upload Emoji” to insert a custom emoji, either standard or animated
- With the help of your device’s local storage, upload the file. However, for the emoji to be added to the lists, the file should align with Discord’s requirements.
- For every emoji image that you upload, an alias tag will be created for that custom emoji using the file’s name. This tag is used to update a message with an emoji.
- A default alias name like this can be replaced by selecting the “Alias” box with the custom emoji and then creating a new name.
- Enjoy your emoji in chats as soon as you upload them to the Discord server!
Boost your server with Discord Nitro subscribers today to insert more than the standard fifty emoji!
Part 4: How to Add Custom Emojis To Discord Server On iPhone And Android?
How cool is it that you can add custom emoji to your smartphone as well? Whether you have an iPhone or an Android, you can use the same menu as Windows and Mac to upload emoji.
Discord’s interface is similar across all devices, so the following steps work on Android and Apple.
- Begin by opening the app on your device to access the server. Press the hamburger menu located at the top left in an open server and channel.
- As the channel and server list opens for Discord, you can see a three-dot menu right next to the channel list with the server name. Tap on it to proceed.
- To get to your server settings, press “Settings” in the Discord server menu that shows up.
- Under the “Server Settings” menu, select “Emoji” to access the custom emoji settings.
- As the “Emoji” menu opens, you can see an emoji requirement list
- Press “Upload Emoji” to upload any emoji that aligns with these requirements
- Press the custom emoji file, tap “Crop” if it needs cropping, and then use the “Upload” option
- After you upload the emoji file, replace the alias tag by tapping on it. This will redirect you to that specific emoji’s settings
- Type the name you want using the “Alias” box to create the tag used to insert emoji in messages
- Save this new tag with the “Save” icon placed in the bottom right
- Any changes you make to the custom emoji’s alias are applied to it instantly for your use.
Emoji bring fun to the conversations you have with friends, and it is very easy to add them to your server as well. These show up in the emoji pop-up list once you add them. The chat message bar contains the emoji icon from where you can access them.
It is essential to name your emoji with only alphanumeric characters and underscores using at least two characters.
The Discord emoji size is 32x32 pixels, so even if you upload up to 128x128 pixel size emojis, they will be resized to the default dimensions. Furthermore, emoji file sizes are at most 256kb.
If you want to use custom emojis, you can’t do so without a Nitro subscription because it is only functional on the server they are uploaded to. Even if you find a way to access the emoji from some other server, only its text code will be visible.
If you attempt to use the Emoji Picker to pick an emoji, you’ll get the following message:
Bonus: How to Manage Emoji in Discord Server?
You can’t remove or add emoji specific to a server on your own as a member. You need the server owner to toggle the permission of Manager Emoji in your domain.
On the other hand, as a server owner, you can give others this role with the following steps.
- Open Roles: Open the Server Settings and select “Roles” from the menu on the side.
- Toggle Manage Emoji: Pick the role you want to apply the permission to, and then toggle emoji’s slider to “on,” save changes, and you’re done!
FAQs About Discord Emojis
1. Why Do I See Grey Emoji In The Emoji Menu?
Greyed-out emoji in the menu means that either those emoji are animated, or you don’t have the permission to post them on other servers.
2. How Can I Get More Custom Emoji On The Server?
You can upload 50 emojis to your Discord server. But if you want more options, you need a Discord Nitro subscription to boost your server specs.
3. What Is The Discord Emoji Size?
Discord allows you to upload an emoji of up to 128x128 pixels, but it will resize it to 32x32 since that is its standard size.
Conclusion
Emojis make any chat fun, and where gaming is involved, they help you communicate better with your friends.
Discord has thousands of custom emojis that you can easily add to your server through your computer, whether it is your chat or the channel name. Follow our guide for a seamless process to add emoji to Discord and make your gaming experience better!
Richard Bennett
Richard Bennett is a writer and a lover of all things video.
Follow @Richard Bennett
Richard Bennett
Mar 27, 2024• Proven solutions
Who doesn’t like emoticons? They are fun, easy to use, and, best of all, highly expressive of your emotions that you cannot convey over messages otherwise.
A 2019 survey shows 70% of mobile users used emoji in texting or on social media daily. This shows the popularity of emoji in our world today.
Similarly, as a Discord user, you must have come across thousands of emoji in it. These are images uploaded on the server and called custom emojis that this gaming community can use for effective communication with friends and other players.
With the emoji and gaming industry growing, it is safe to say that discord emoji’s popularity and use will only increase.
Read ahead to see how you can add emojis on Discord if you want to have fun chats with your friends too.
- Part 1: Adding and Sending Emoji To Chat On Discord?
- Part 2: Adding Emojis To Discord Channel Name Or Nickname?
- Part 3: Adding Custom Emojis To Discord Server On Windows/Mac?
- Part 4: Adding Custom Emojis To Discord Server On iPhone And Android?
- Part 5: Managing Emojis in Discord Server
Part 1: How to Add and Send Emoji To Chat On Discord?
One of the best things about Discord’s emoji feature is that there are two ways to add them. You can either access emoji on the Discord account or upload them yourself.
You can access the emoji menu for all Discord platforms by pressing the grey smiley face next to the message box. This will be on the right of the box for desktops, and for mobile apps, it will be on the left.
Discord-exclusive and standard emoji are present in the emoji menu, along with a part that keeps track of your most-used emoji.
On the other hand, you can also add custom emoticons to your Discord server if you have permission to do so.
Once you add and access the emoji on your device, select the one you want to send to your friends and press enter to send.
Part 2: How to Add Emojis To Discord Channel Name Or Nickname?
As an owner of a Discord channel, it is easy for you to add emoji to Discord. Follow the steps below to figure out how to add emojis to Discord channels:
- Use the emoji list to find the one you want to use in your channel name.
- Select the emoji “browser” column and copy it either with the mouse or “Ctrl + C” on the keyboard.
- Access your Discord server, right-click the channel where the emoji will be and use the dropdown menu to select the “Edit Channel.”
- In the “Channel Name” box, past the selected emoji using “Ctrl + V” from the keyboard.
- Select “Save Changes” to save the name with the emoji.
Part 3: How to Add Custom Emojis To Discord Server On Windows/Mac?
You can add custom emoji on Discord, but only if you are a server owner or administrator. Use the Discord server settings on either the desktop versions for Windows or Mac or the Discord Website.
Follow the steps below for either platform:
- Access your Discord server to begin and press the arrow pointing down in the channel list with the server name—Press “Server Settings” in the menu
- As the server’s settings open, you can add custom emojis in the “Emoji” tab. You can find a requirements list at the top that includes emoji names with a minimum of two characters and a file size limit of 256 KB. You can add fifty normal and an additional fifty animated emoji GIFs using the standard servers

- Select “Upload Emoji” to insert a custom emoji, either standard or animated
- With the help of your device’s local storage, upload the file. However, for the emoji to be added to the lists, the file should align with Discord’s requirements.
- For every emoji image that you upload, an alias tag will be created for that custom emoji using the file’s name. This tag is used to update a message with an emoji.
- A default alias name like this can be replaced by selecting the “Alias” box with the custom emoji and then creating a new name.
- Enjoy your emoji in chats as soon as you upload them to the Discord server!
Boost your server with Discord Nitro subscribers today to insert more than the standard fifty emoji!
Part 4: How to Add Custom Emojis To Discord Server On iPhone And Android?
How cool is it that you can add custom emoji to your smartphone as well? Whether you have an iPhone or an Android, you can use the same menu as Windows and Mac to upload emoji.
Discord’s interface is similar across all devices, so the following steps work on Android and Apple.
- Begin by opening the app on your device to access the server. Press the hamburger menu located at the top left in an open server and channel.
- As the channel and server list opens for Discord, you can see a three-dot menu right next to the channel list with the server name. Tap on it to proceed.
- To get to your server settings, press “Settings” in the Discord server menu that shows up.
- Under the “Server Settings” menu, select “Emoji” to access the custom emoji settings.
- As the “Emoji” menu opens, you can see an emoji requirement list
- Press “Upload Emoji” to upload any emoji that aligns with these requirements
- Press the custom emoji file, tap “Crop” if it needs cropping, and then use the “Upload” option
- After you upload the emoji file, replace the alias tag by tapping on it. This will redirect you to that specific emoji’s settings
- Type the name you want using the “Alias” box to create the tag used to insert emoji in messages
- Save this new tag with the “Save” icon placed in the bottom right
- Any changes you make to the custom emoji’s alias are applied to it instantly for your use.
Emoji bring fun to the conversations you have with friends, and it is very easy to add them to your server as well. These show up in the emoji pop-up list once you add them. The chat message bar contains the emoji icon from where you can access them.
It is essential to name your emoji with only alphanumeric characters and underscores using at least two characters.
The Discord emoji size is 32x32 pixels, so even if you upload up to 128x128 pixel size emojis, they will be resized to the default dimensions. Furthermore, emoji file sizes are at most 256kb.
If you want to use custom emojis, you can’t do so without a Nitro subscription because it is only functional on the server they are uploaded to. Even if you find a way to access the emoji from some other server, only its text code will be visible.
If you attempt to use the Emoji Picker to pick an emoji, you’ll get the following message:
Bonus: How to Manage Emoji in Discord Server?
You can’t remove or add emoji specific to a server on your own as a member. You need the server owner to toggle the permission of Manager Emoji in your domain.
On the other hand, as a server owner, you can give others this role with the following steps.
- Open Roles: Open the Server Settings and select “Roles” from the menu on the side.
- Toggle Manage Emoji: Pick the role you want to apply the permission to, and then toggle emoji’s slider to “on,” save changes, and you’re done!
FAQs About Discord Emojis
1. Why Do I See Grey Emoji In The Emoji Menu?
Greyed-out emoji in the menu means that either those emoji are animated, or you don’t have the permission to post them on other servers.
2. How Can I Get More Custom Emoji On The Server?
You can upload 50 emojis to your Discord server. But if you want more options, you need a Discord Nitro subscription to boost your server specs.
3. What Is The Discord Emoji Size?
Discord allows you to upload an emoji of up to 128x128 pixels, but it will resize it to 32x32 since that is its standard size.
Conclusion
Emojis make any chat fun, and where gaming is involved, they help you communicate better with your friends.
Discord has thousands of custom emojis that you can easily add to your server through your computer, whether it is your chat or the channel name. Follow our guide for a seamless process to add emoji to Discord and make your gaming experience better!
Richard Bennett
Richard Bennett is a writer and a lover of all things video.
Follow @Richard Bennett
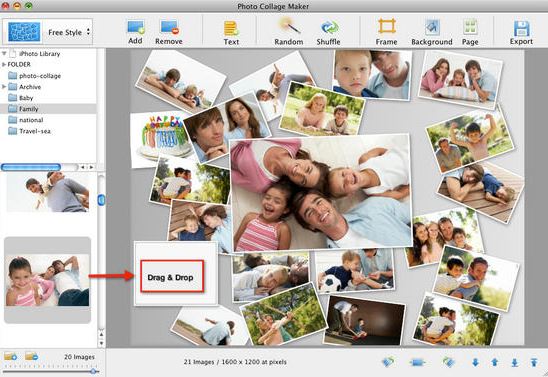
How to Make a Photo Collage Using iPhoto?
How to Make a Photo Collage on Mac/iPhone Using iPhoto?

Shanoon Cox
Mar 27, 2024• Proven solutions
iPhoto is a photo library familiar to iOS users. It can help you easily organize, store and sort images, and even make a slide show to help you enjoy photos. This is why, even though Apple no longer develops iPhoto, some people use it.
Update: On April 8, 2015, Apple has launched a new Photos app on OS X Yosemite, which means Apple has stopped developing iPhoto. However, if you like iPhoto, you can still use it.
The following will introduce how to use the iPhoto collage maker on Mac or iPhone. At the end of this article, iPhoto alternative software will serve as your reference.
Part 1: How to Make a Photo Collage in iPhoto?
Here are the quick steps to create a photo collage with iPhoto.
Step 1: Launch iPhoto and click “Events” in the side menu.
Step 2: Hold “Shift” and click each photo you want to include in your photo collage.
Step 3: Click the “+” button in the lower-left corner and select Card in the pop-up window.
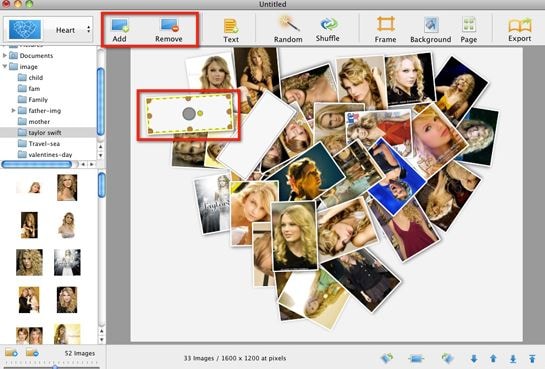
Step 4: Choose “Picture Collage”, which should be under the Any Occasion section if you are using the iPhoto 11.
Step 5: You’ll notice that all the templates are sorted based on the occasion.
Step 6: Drag photos to the template and pick a background, orientation and design.
Step 7: Click the Buy button on the lower right-hand corner of the collage editor, or go to the Share menu and email it to yourself or family members.
But before you make a photo collage using iPhoto, here are some important things for you to know:
- Technically, iPhoto can’t make fancy photo collages like other Photo collages makers on Mac. So don’t expect too much of it. iPhoto only creates greeting cards with a simple collage layout.
- The templates iPhoto offers are quite limited and ordinary that you might feel a little disappointed.
- iPhoto offers no share options to save photo collages to desktop or to post on Facebook, which is a basic feature of picture collage editor.
Part 2: What Replaces iPhoto on Mac/iPhone?
Since iPhoto’s functions are not sufficient, we will introduce some alternative collage makers that you may be interested in.
Alternative to Make a Short Video, Slideshow, or Photo Collage: Wondershare Filmora
If there are too many photos to save or share with friends and family, you can use these images to make short videos to better collage and share. Filmora can do this for you, through which you can easily crop, add effects, split the screen, and merge photos. In order to make the “photo video” lively and exciting, you can also add music, audio, animation, title, music, etc. to it.


Alternative to Organize, Store, and Sort Images: iCloud
Migrating your photos to iCloud is a wise choice. iCloud is the best photo storage for iOS or Mac users. You don’t need to download other apps or software. Just allow iCloud to back up the photo’s library in the settings.
The best thing is that you can view iCloud photos anytime and anywhere after logging in to your iCloud account. You can also automatically share photos with others by opening “Shared Album”. However, if there are too many photos, a paid subscription may be required to upgrade the storage space.
Conclusion
Above are the steps to make a photo collage using iPhoto on Mac/iPhone. We also list alternative methods to meet the different needs of the Photo library. So, if this isn’t quite what you’re looking for, you can also use some online photo collage service instead. If you want to have more fun editing photo stories, welcome to download Filmora and make more memorable and interesting videos.
Shanoon Cox
Shanoon Cox is a writer and a lover of all things video.
Follow @Shanoon Cox
Shanoon Cox
Mar 27, 2024• Proven solutions
iPhoto is a photo library familiar to iOS users. It can help you easily organize, store and sort images, and even make a slide show to help you enjoy photos. This is why, even though Apple no longer develops iPhoto, some people use it.
Update: On April 8, 2015, Apple has launched a new Photos app on OS X Yosemite, which means Apple has stopped developing iPhoto. However, if you like iPhoto, you can still use it.
The following will introduce how to use the iPhoto collage maker on Mac or iPhone. At the end of this article, iPhoto alternative software will serve as your reference.
Part 1: How to Make a Photo Collage in iPhoto?
Here are the quick steps to create a photo collage with iPhoto.
Step 1: Launch iPhoto and click “Events” in the side menu.
Step 2: Hold “Shift” and click each photo you want to include in your photo collage.
Step 3: Click the “+” button in the lower-left corner and select Card in the pop-up window.
Step 4: Choose “Picture Collage”, which should be under the Any Occasion section if you are using the iPhoto 11.
Step 5: You’ll notice that all the templates are sorted based on the occasion.
Step 6: Drag photos to the template and pick a background, orientation and design.
Step 7: Click the Buy button on the lower right-hand corner of the collage editor, or go to the Share menu and email it to yourself or family members.
But before you make a photo collage using iPhoto, here are some important things for you to know:
- Technically, iPhoto can’t make fancy photo collages like other Photo collages makers on Mac. So don’t expect too much of it. iPhoto only creates greeting cards with a simple collage layout.
- The templates iPhoto offers are quite limited and ordinary that you might feel a little disappointed.
- iPhoto offers no share options to save photo collages to desktop or to post on Facebook, which is a basic feature of picture collage editor.
Part 2: What Replaces iPhoto on Mac/iPhone?
Since iPhoto’s functions are not sufficient, we will introduce some alternative collage makers that you may be interested in.
Alternative to Make a Short Video, Slideshow, or Photo Collage: Wondershare Filmora
If there are too many photos to save or share with friends and family, you can use these images to make short videos to better collage and share. Filmora can do this for you, through which you can easily crop, add effects, split the screen, and merge photos. In order to make the “photo video” lively and exciting, you can also add music, audio, animation, title, music, etc. to it.
Alternative to Organize, Store, and Sort Images: iCloud
Migrating your photos to iCloud is a wise choice. iCloud is the best photo storage for iOS or Mac users. You don’t need to download other apps or software. Just allow iCloud to back up the photo’s library in the settings.
The best thing is that you can view iCloud photos anytime and anywhere after logging in to your iCloud account. You can also automatically share photos with others by opening “Shared Album”. However, if there are too many photos, a paid subscription may be required to upgrade the storage space.
Conclusion
Above are the steps to make a photo collage using iPhoto on Mac/iPhone. We also list alternative methods to meet the different needs of the Photo library. So, if this isn’t quite what you’re looking for, you can also use some online photo collage service instead. If you want to have more fun editing photo stories, welcome to download Filmora and make more memorable and interesting videos.
Shanoon Cox
Shanoon Cox is a writer and a lover of all things video.
Follow @Shanoon Cox
10 Most Popular Minion Memes that Moms Are Crazy About
10 Most Popular Minion Memes that Moms are Crazy About

Liza Brown
Mar 27, 2024• Proven solutions
Minions have successfully occupied global pop culture. In 2015, Universal Pictures made a record by spending $600 million on Minions marketing, partnering with Tic Tac, Converse, Amazon, and McDonald’s. In addition, minions were an inspiration for numerous products, creating a kind of signifier for their film and signifying a sense that they were “freaking everywhere.”
They’ve also infiltrated the Internet. The Minions’ abstractness let them known as ripe for meme-ing, which you can combine with any joke, idiom, or feeling.
A Minion meme is rarely crude, and generally, they are helpful for self-deprecating jabs or fart-jokes at one’s cooking.
Leading with the fact, we’ll discuss all the minion memes, how to make them, and their different types.
- Part 1: Who Invented Minion Memes?
- Part 2: Top 10 Minion Memes of 2021
- Part 3: Create Memes with a Free Minion Meme Generator
Part 1: Who Invented Minion Memes?
Who is to blame for pushing things down my throat day after day? It would be simple enough to blame Obama, Universal Studios, or even the guy who invented Minions, Pierre Coffin. But none of them is actually at fault. They were only providing humankind with the weapon, and humanity chose to use that evil weapon.
There have been loads of discussions about how Minions have dishonored the excellent name of the meme, rendering humor and creativity obsolete. But we are still entirely astonished as to why Minions shine from the big screen and leaked all over smartphones.
Part 2: Top 10 Minion Memes of 2021
The delayed-release “Minions: The Rise of Gru” is no laughing concern, but there’ll be miles into smiles with or top collection of minion memes that include all funny minion memes, Facebook minion memes, and more.
So, let’s dive into them without further ado!
1.Magnetos
We are all familiar with the “X-Men” installations/movies and the sometimes the supervillain and evil-doer Magneto, who is smart enough to control iron?
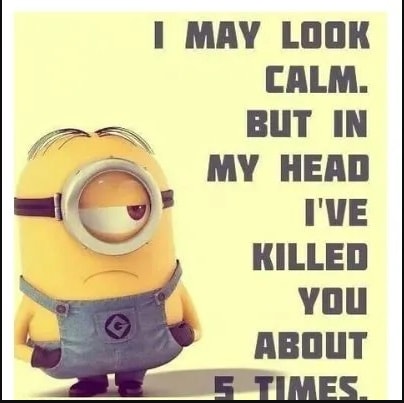
Source: sidomexentertainment.com
2.Cereal Killer
Cereal Killer is one of the most hilarious and well-thought-out Minion memes on the list.

Source: sidomexentertainment.com
3.Fall in Love
You will fall in love with this funny Facebook Minion meme. It begins slow; you can’t tell where it is heading to but grow; you are on the rolling floor.

4.A Minion poem
What’s the best way to include this cute, crazy evil minion poem? Enjoy!

5.Your Minions Would Like to Say Happy Birthday!!! - Happy Birthday Minion Meme

Source: 2happybirthday.com
6.Happy Birthday!! You are on in a Minion - Happy Birthday Minion Meme

7.Chasing my dream
You know, when people act some fantastic stuff but mean something else, like when they say “would die” if they don’t eat that Chicken kebab! Even though it uses the literal word, it does not mean they die over a chicken wing piece; they exaggerate.

8.A Vegan Zombie
Ever met a zombie that hates meat? The one who likes to eat earthworms, grass, and grubs? Have you encountered a zombie? Well, we haven’t.
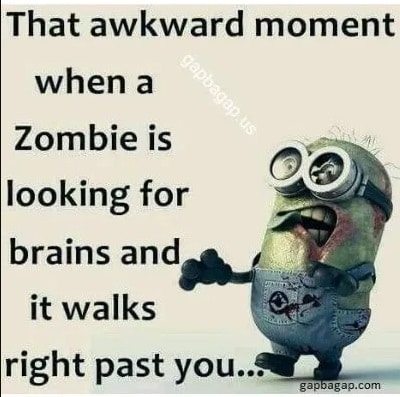
9.Best Cook
Nothing like a finger-licking dish for a healthy “roasted dinner.”

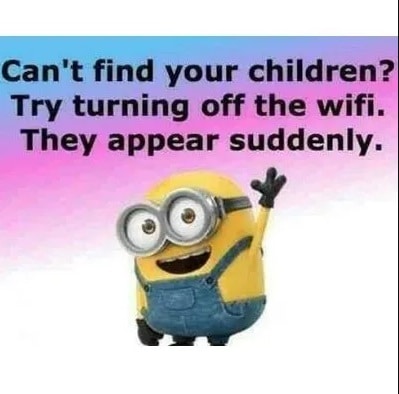
10.Mum Hack
So what’s the fastest way to get down the children? Well, that can be the mobile hotspot. Turn that beautiful technology on and look for the children to rush you for the password… True?
Part 3: Create Memes with a Free Minion Meme Generator
With memes taking over entirely famous culture, you may be looking for a minion meme generator for yourself. By considering the use o meme maker, you can do just that!
Filmora meme maker is a free minion meme generator without a watermark.
Also, there’s no need to log in or sign up first to use it. It supports importing an image, video, and GIF in one place. Just drag them to import, so simple to use. Essentially, if you want to choose a black or white background to input a caption, the Filmora minion meme generator can help you quickly.
You can change the text color, size, and position of your meme.
After editing is over, it allows you to export your work within a few seconds. In addition, you can also freely upload to some social media platforms, like IG, FB, and others.
- Enter text anywhere (inside and outside of image)
- Support exporting to popular video and photo formats, such as jpg, png, gif, mp4
- It is entirely free to use, without any subscription cost.
Conclusion
Finally, we all agree that Minions, undoubtedly, are adorable short-sized, yellow, and clumsy but cute creatures, which, if used properly for minion memes, can motivate, cheer and improve a person’s mood. They always try to shove in distinct words that generally make it a blow-off. And that can be awkward and odd as well.
However, as a bonus tip, we’ve mentioned all kinds of minion memes, including a free minion meme generator. So, try out these special memes through meme generators and let us know if you find our content helpful and valuable.
Liza Brown
Liza Brown is a writer and a lover of all things video.
Follow @Liza Brown
Liza Brown
Mar 27, 2024• Proven solutions
Minions have successfully occupied global pop culture. In 2015, Universal Pictures made a record by spending $600 million on Minions marketing, partnering with Tic Tac, Converse, Amazon, and McDonald’s. In addition, minions were an inspiration for numerous products, creating a kind of signifier for their film and signifying a sense that they were “freaking everywhere.”
They’ve also infiltrated the Internet. The Minions’ abstractness let them known as ripe for meme-ing, which you can combine with any joke, idiom, or feeling.
A Minion meme is rarely crude, and generally, they are helpful for self-deprecating jabs or fart-jokes at one’s cooking.
Leading with the fact, we’ll discuss all the minion memes, how to make them, and their different types.
- Part 1: Who Invented Minion Memes?
- Part 2: Top 10 Minion Memes of 2021
- Part 3: Create Memes with a Free Minion Meme Generator
Part 1: Who Invented Minion Memes?
Who is to blame for pushing things down my throat day after day? It would be simple enough to blame Obama, Universal Studios, or even the guy who invented Minions, Pierre Coffin. But none of them is actually at fault. They were only providing humankind with the weapon, and humanity chose to use that evil weapon.
There have been loads of discussions about how Minions have dishonored the excellent name of the meme, rendering humor and creativity obsolete. But we are still entirely astonished as to why Minions shine from the big screen and leaked all over smartphones.
Part 2: Top 10 Minion Memes of 2021
The delayed-release “Minions: The Rise of Gru” is no laughing concern, but there’ll be miles into smiles with or top collection of minion memes that include all funny minion memes, Facebook minion memes, and more.
So, let’s dive into them without further ado!
1.Magnetos
We are all familiar with the “X-Men” installations/movies and the sometimes the supervillain and evil-doer Magneto, who is smart enough to control iron?
Source: sidomexentertainment.com
2.Cereal Killer
Cereal Killer is one of the most hilarious and well-thought-out Minion memes on the list.
Source: sidomexentertainment.com
3.Fall in Love
You will fall in love with this funny Facebook Minion meme. It begins slow; you can’t tell where it is heading to but grow; you are on the rolling floor.
4.A Minion poem
What’s the best way to include this cute, crazy evil minion poem? Enjoy!
5.Your Minions Would Like to Say Happy Birthday!!! - Happy Birthday Minion Meme
Source: 2happybirthday.com
6.Happy Birthday!! You are on in a Minion - Happy Birthday Minion Meme
7.Chasing my dream
You know, when people act some fantastic stuff but mean something else, like when they say “would die” if they don’t eat that Chicken kebab! Even though it uses the literal word, it does not mean they die over a chicken wing piece; they exaggerate.
8.A Vegan Zombie
Ever met a zombie that hates meat? The one who likes to eat earthworms, grass, and grubs? Have you encountered a zombie? Well, we haven’t.
9.Best Cook
Nothing like a finger-licking dish for a healthy “roasted dinner.”
10.Mum Hack
So what’s the fastest way to get down the children? Well, that can be the mobile hotspot. Turn that beautiful technology on and look for the children to rush you for the password… True?
Part 3: Create Memes with a Free Minion Meme Generator
With memes taking over entirely famous culture, you may be looking for a minion meme generator for yourself. By considering the use o meme maker, you can do just that!
Filmora meme maker is a free minion meme generator without a watermark.
Also, there’s no need to log in or sign up first to use it. It supports importing an image, video, and GIF in one place. Just drag them to import, so simple to use. Essentially, if you want to choose a black or white background to input a caption, the Filmora minion meme generator can help you quickly.
You can change the text color, size, and position of your meme.
After editing is over, it allows you to export your work within a few seconds. In addition, you can also freely upload to some social media platforms, like IG, FB, and others.
- Enter text anywhere (inside and outside of image)
- Support exporting to popular video and photo formats, such as jpg, png, gif, mp4
- It is entirely free to use, without any subscription cost.
Conclusion
Finally, we all agree that Minions, undoubtedly, are adorable short-sized, yellow, and clumsy but cute creatures, which, if used properly for minion memes, can motivate, cheer and improve a person’s mood. They always try to shove in distinct words that generally make it a blow-off. And that can be awkward and odd as well.
However, as a bonus tip, we’ve mentioned all kinds of minion memes, including a free minion meme generator. So, try out these special memes through meme generators and let us know if you find our content helpful and valuable.
Liza Brown
Liza Brown is a writer and a lover of all things video.
Follow @Liza Brown
What Is Emoji?
What Is Emoji?
Shanoon Cox
Mar 27, 2024• Proven solutions
If you ever wondered what is emoji, and how the term relates (or unrelates) to its elder sibling emoticon, you are at the right place. In the following sections, you will learn some quite interesting facts about the two, what different types of emojis are available, and what do they mean.
Because understanding the meaning of emojis is more important as compared to knowing what is an emoji itself, here you will get all the related details, relevant answers, and some best practice tips.
Part 1: What Is an Emoji?
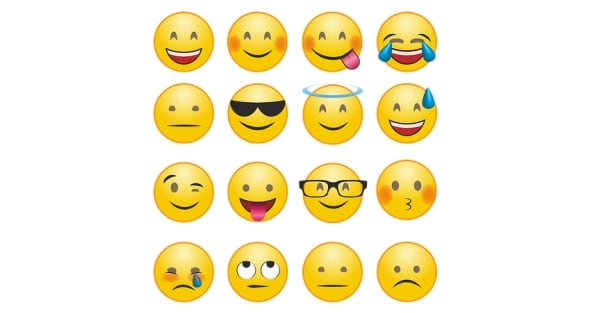
In a nutshell, an emoji is a graphical image that reflects a certain facial expression. Emojis are created using a drawing tool, and are incorporated into a unique 16-bit Unicode in order to make them compatible with operating systems of the most common devices and platforms like iOS, Android, macOS, and Windows.
In addition to being merely a picture, emojis are also animated to exaggerate the message senders’ emotions. You can find a couple of decent examples of such animations while using Skype messenger.
The reason behind emojis being more popular than the emoticons used earlier is the close resemblance of the former to the real-like expressions that they reflect when sent to a recipient. Therefore, it would be safe to say that a single emoji could be worth several sentences while texting if used correctly.
Part 2: What are the Differences Between Emojis and Emoticons?
As explained earlier, the emojis are graphical and sometimes animated Unicode illustrations that can be included in the text messages as objects.
On the other hand, the emoticons are formed using the ASCII characters, and no specific coding is required at the users’ side to create them. Simply put, an emoticon can be easily added to a text message or even to an email merely by using a combination of letters on the keyboard.
For instance, to create an emoticon of a smiley face, all you need to do is, type a colon sign along with a closing brace. (E.g. Typing a : and ) without space will become a smiling face, a : and ( will form a sad face, and so on).
To be clearer, emojis can be considered an advanced, better, and evolved version of emoticons. While the latter can be formed using simple characters like letters and symbols, the former is inserted as an object in the text messages.
Part 3: Where to Find the Meaning of Emojis?
Once you have understood what emoji is, it is now time to learn what the emojis mean. This part is imperative to ensure you don’t send a wrong emotional expression to your friends or family members, and get into some awkward situation after that.
Below is a list of some useful online websites and dictionaries that can help you find correct emojis along with their meanings to make your text conversation more meaningful and interesting:
1. Emojipedia
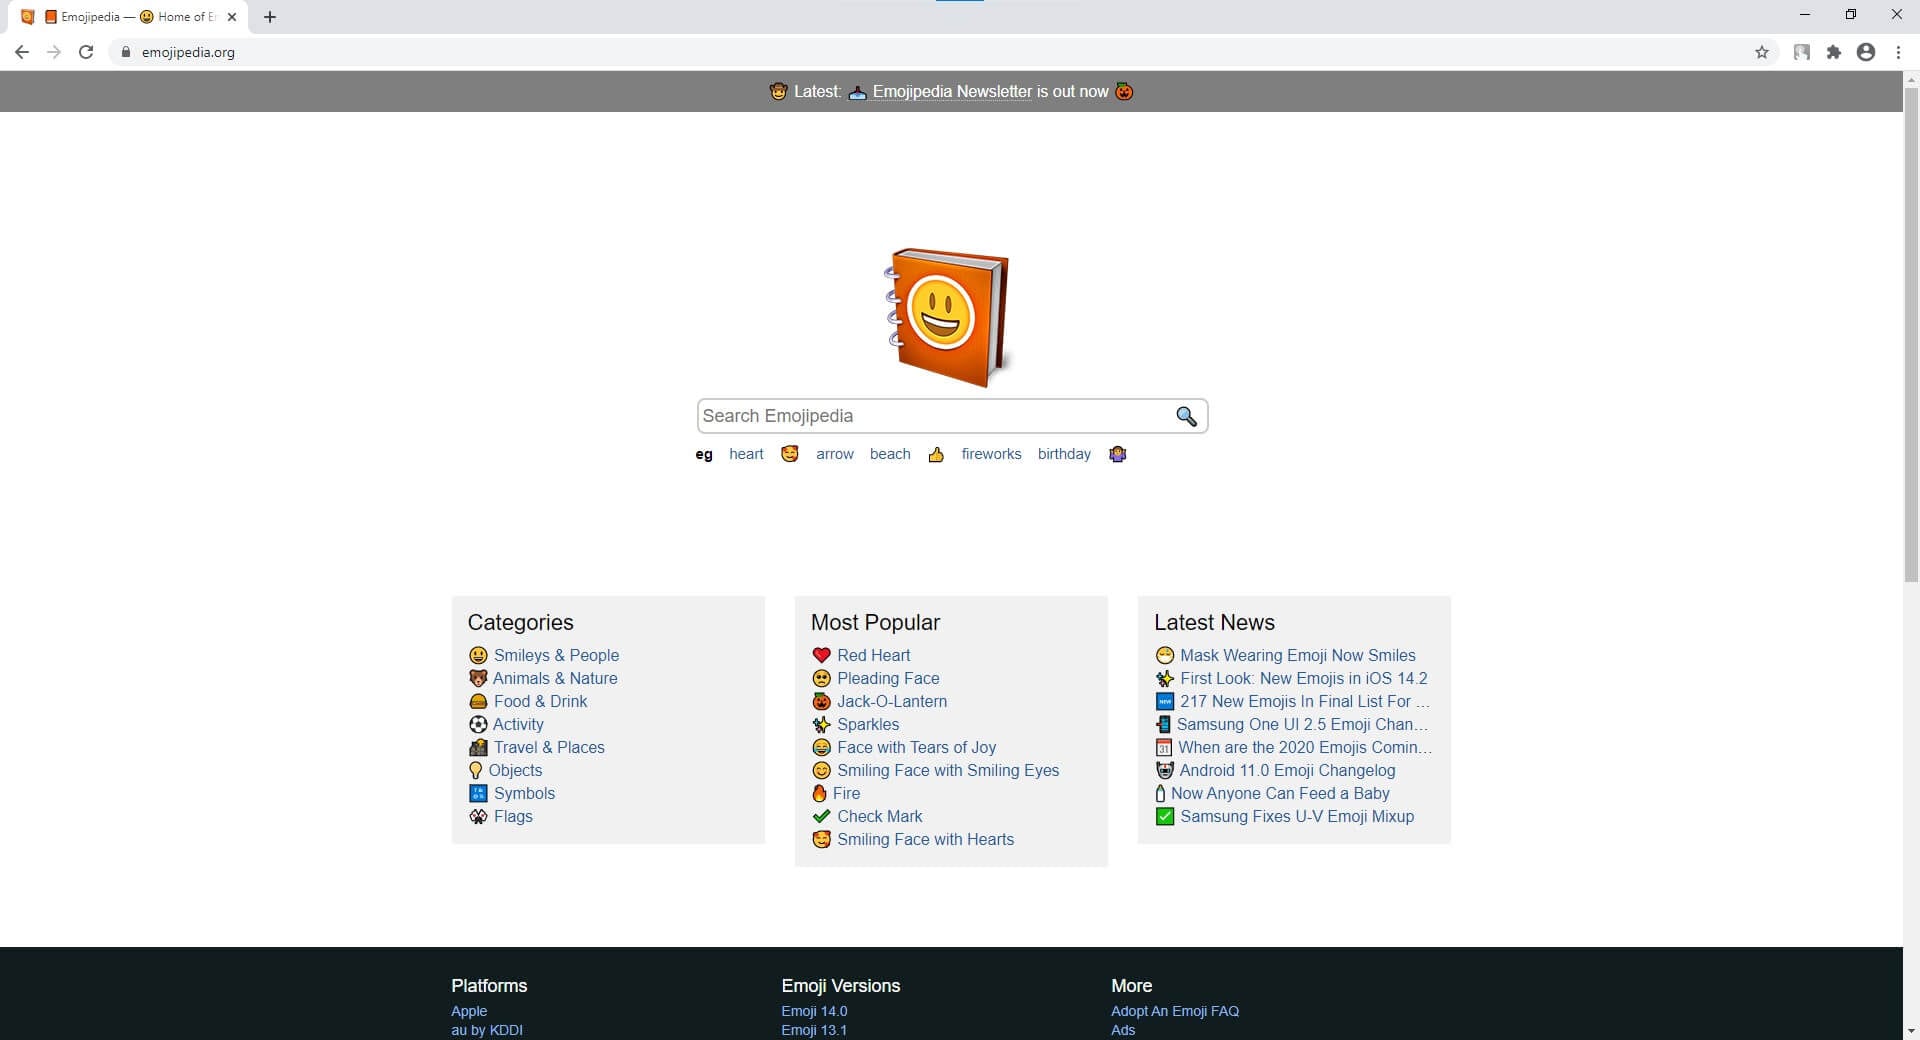
Emojipedia is an online library that holds several emojis. All the emojis that the portal has are placed in their corresponding categories.
Another section on the landing page of the website contains some of the most popular emojis, i.e. those that are mostly used by the texters during their conversions. Furthermore, the name of the emoji is present right next to it, and the entire part is hyperlinked which when clicked, takes you to a new page that has all the details about the object including its meaning, alternate names, and a button to copy the emoji to the clip board. The copied element can then be pasted in the text input field of a compatible messenger such as Facebook.
2. EMOJI DICTIONARY
https://www.dictionary.com/e/emoji/
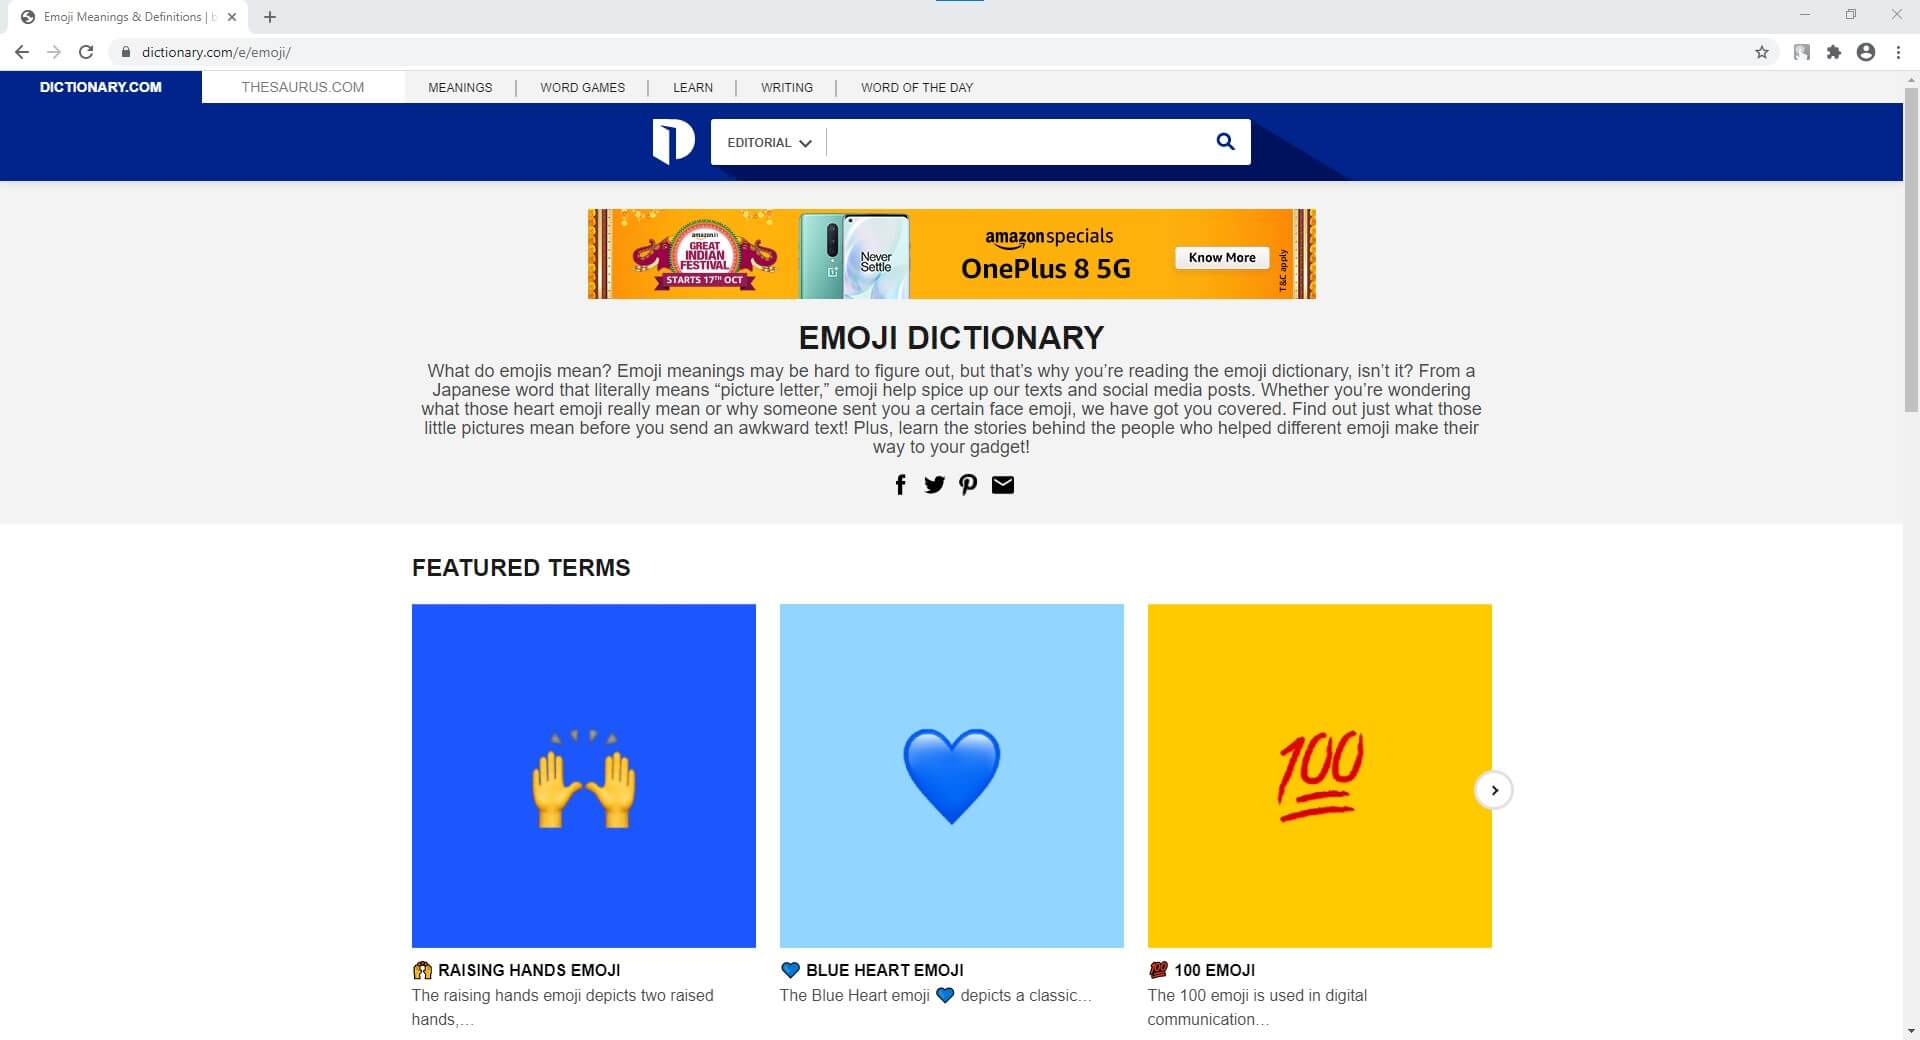
EMOJI DICTIONARY is another online portal that contains almost all the commonly used emojis. The upper section of the page is dedicated to ‘Featured Terms’ with a slider that has all the featured emojis. The next segment lists all the categories other than emojis.
The bottom area of the landing page has all the emojis along with their names and/or the supported devices. All the names in the section are hyperlinked that open a new page when clicked, and show all the details such as examples, usage, and origin related to that particular emoji.
3. Emoji Dictionary
https://emojidictionary.emojifoundation.com/
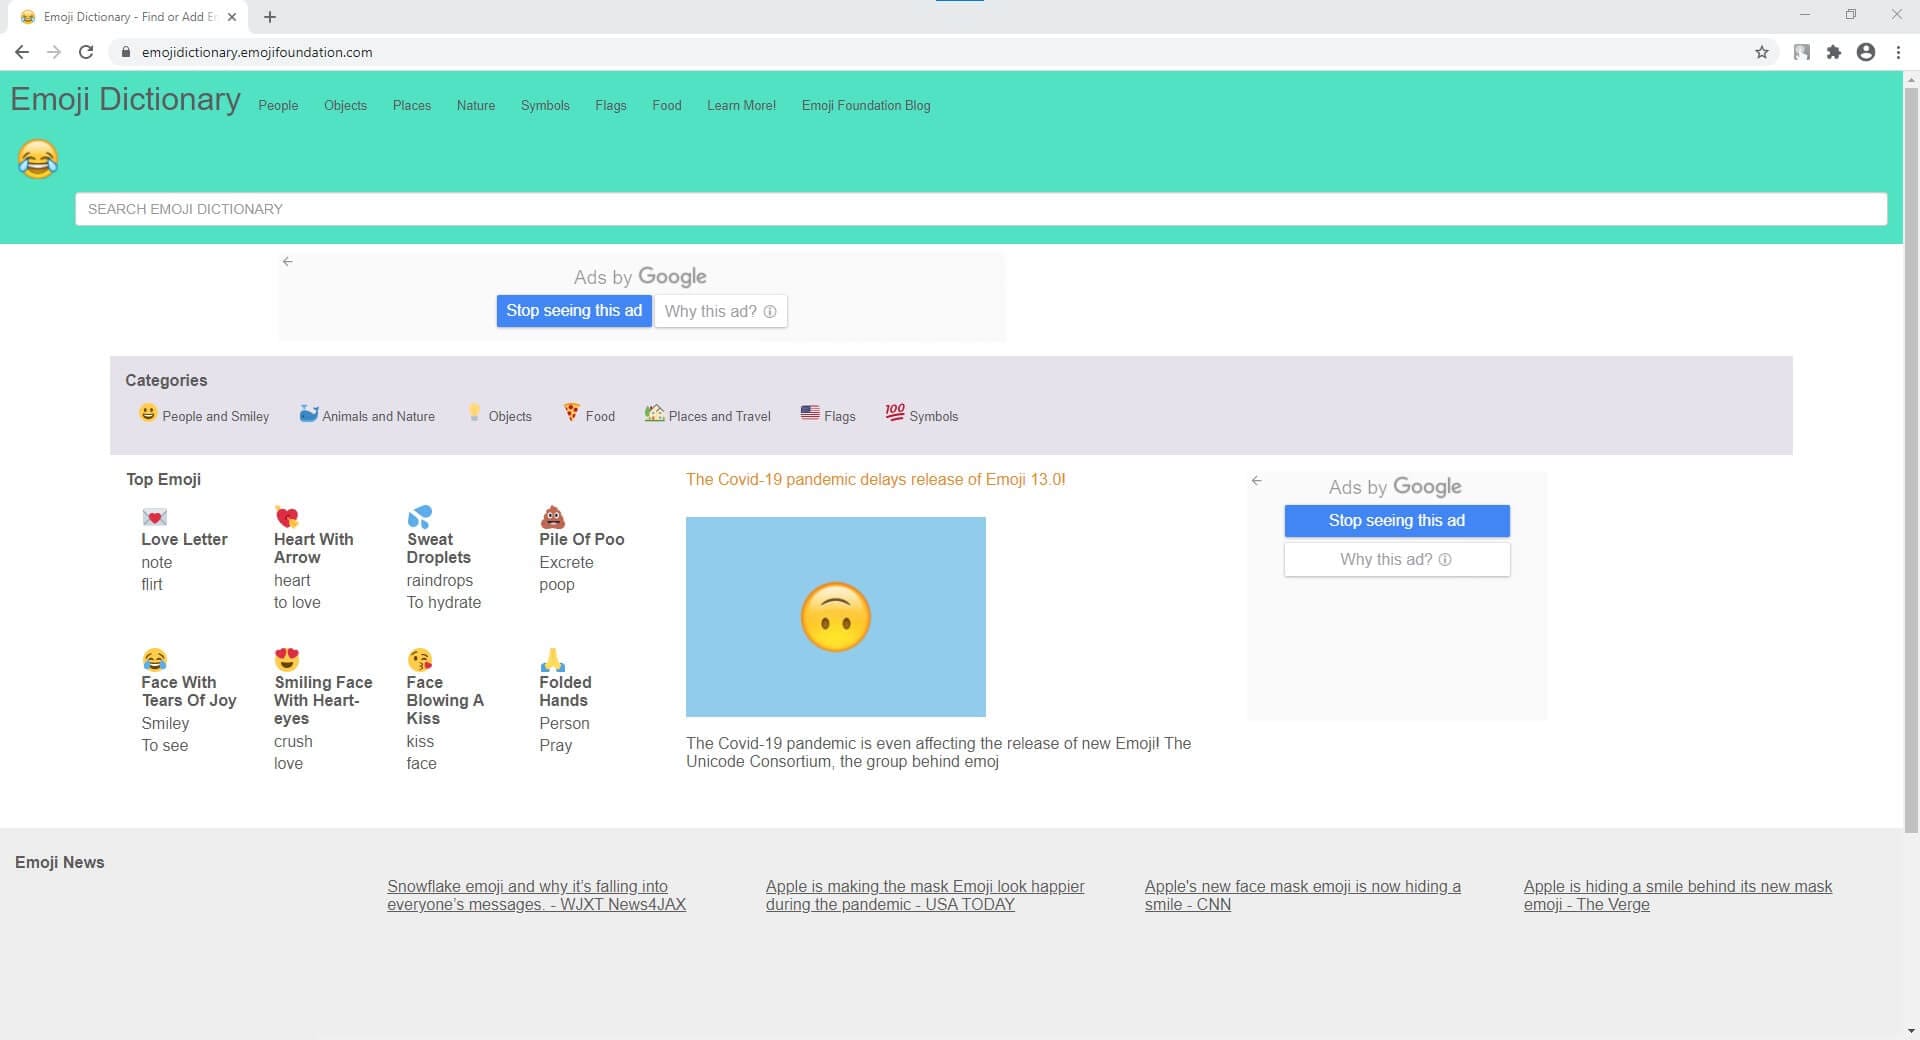
This one is unique in its own way as in along with listing the most popular emojis and their names and definitions, it also allows you to include your own information in case you know something other than what is already present.
In addition to displaying the top emojis right on the landing page, the portal also has a category list where each segment holds its corresponding objects. This helps in locating your favorite elements easily and quickly. Furthermore, when you click an emoji, a new page opens up with all its definition from different aspects such as nouns, verbs, etc., along with a ‘Copy’ button that lets you copy the image to the clipboard, and use it on a compatible messaging app.
4. EmojiMeanings
https://www.emojimeanings.net/
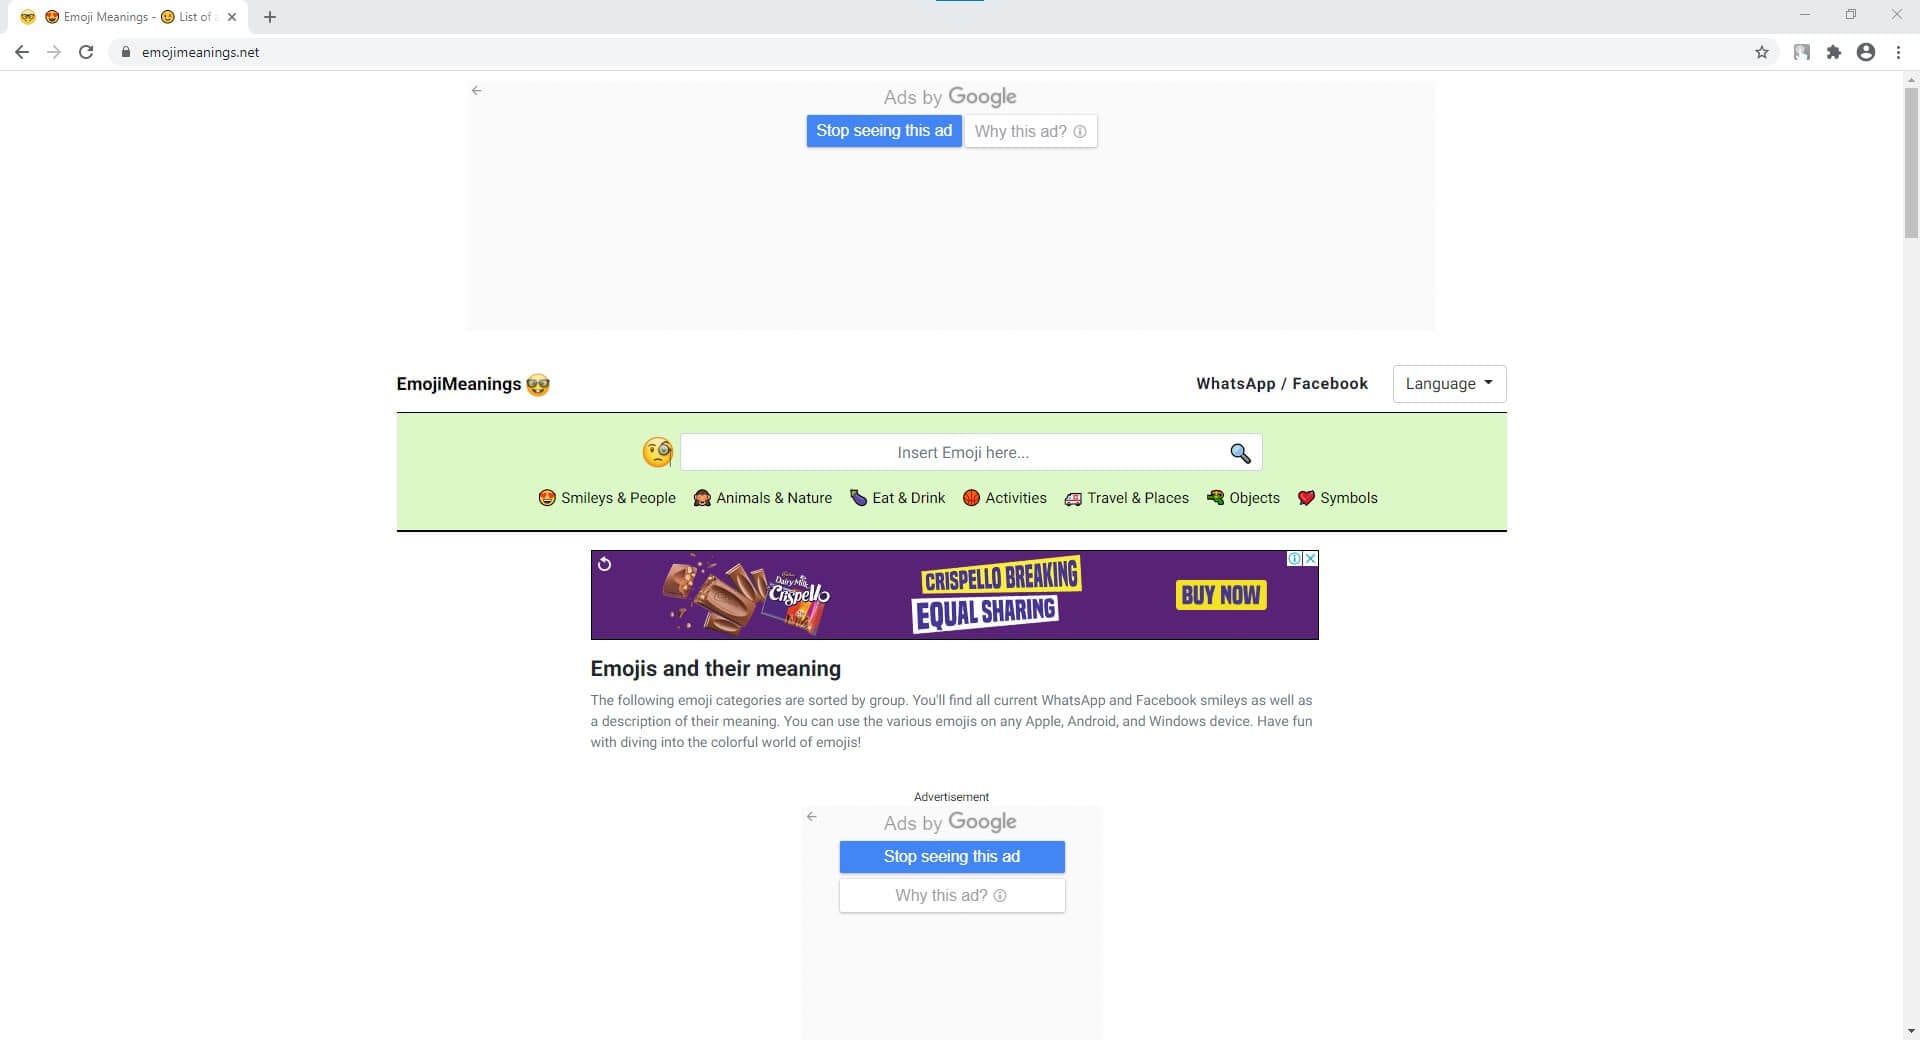
The landing page of EmojiMeanings is populated with all the categories where each holds several relevant emojis, thus making it easier for the users to find and learn their meaning. The home page also has complete information about what emojis are, how they are different from emoticons, and what does the term ‘smiley’ actually mean.
When you click a category, a new page opens up with three major columns titled as ‘Emoji’, ‘Meaning’, and ‘Unicode’ that show an emoji itself, explain what it means, and what Unicode is used to form it respectively. All the emojis on EmojiMeanings are usually compatible with WhatsApp and Facebook.
5. HotEmoji
https://hotemoji.com/emoji-meanings.html
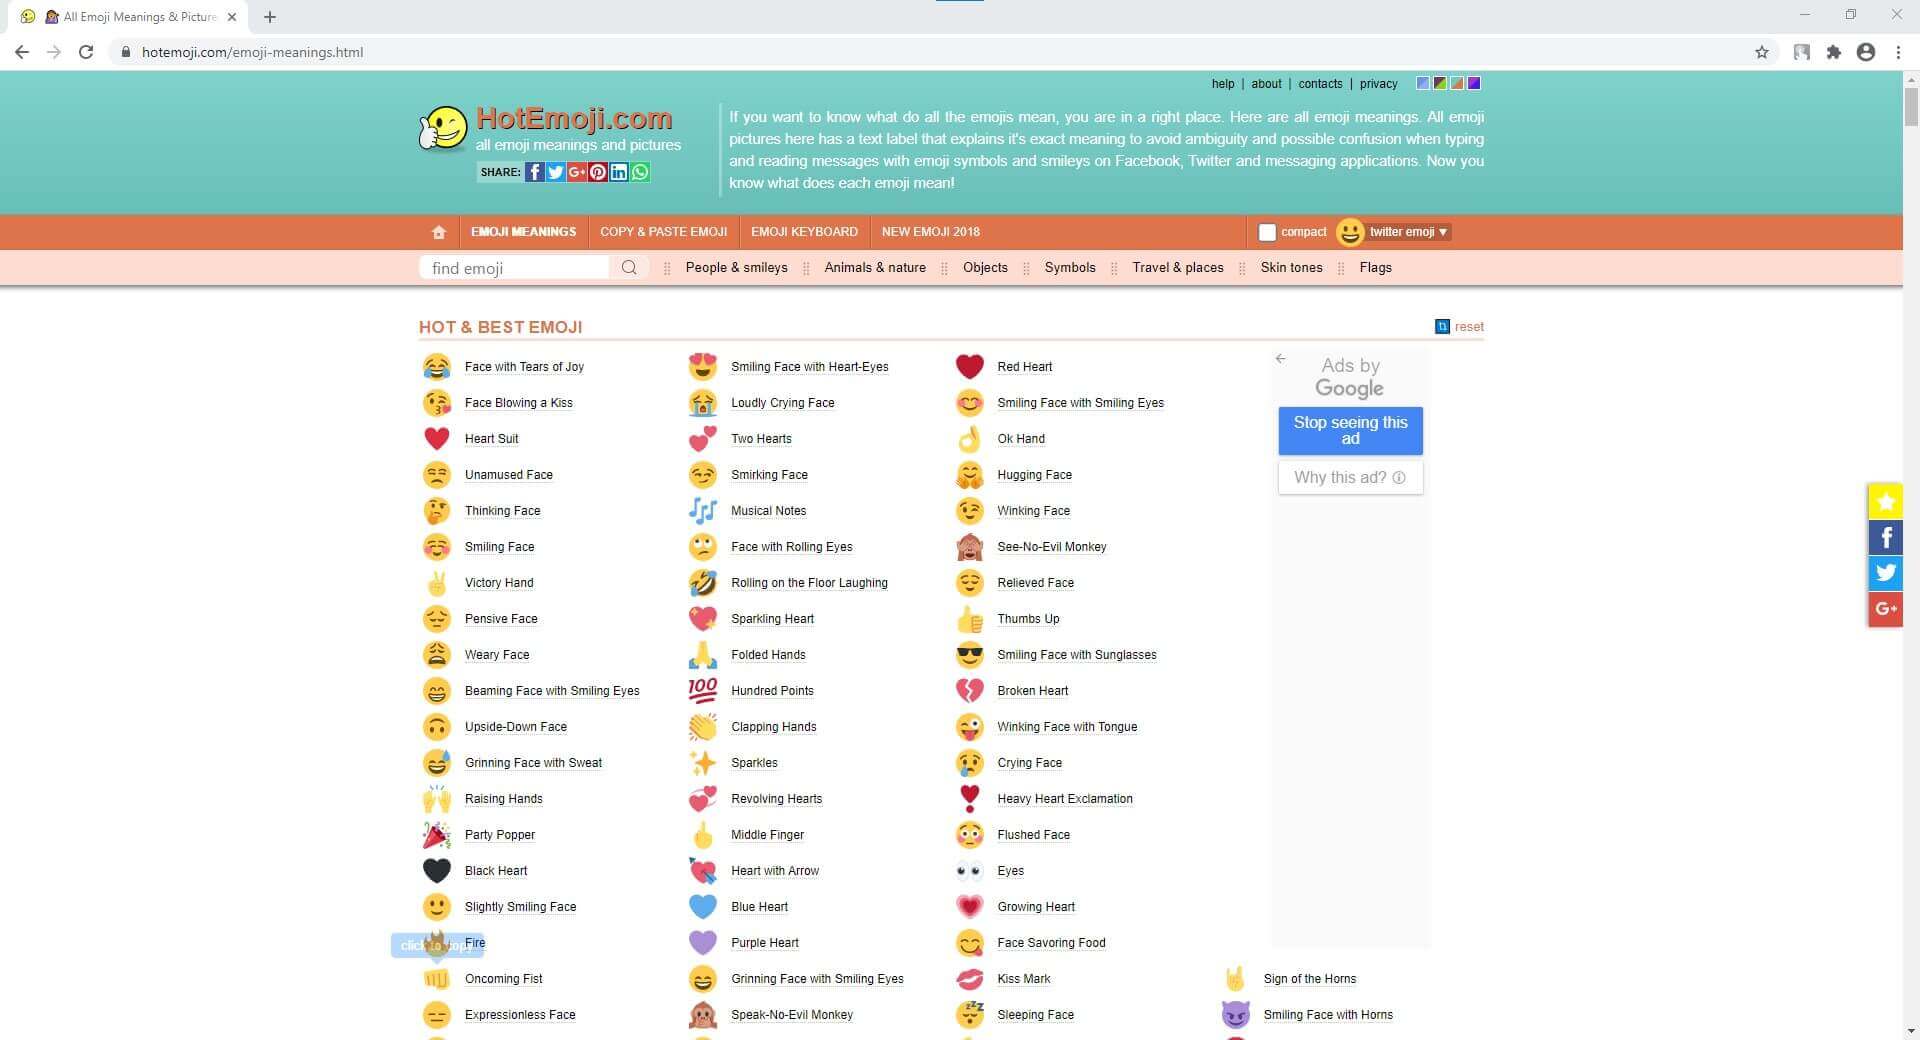
HotEmoji is yet another online portal that lists almost all the emojis along with their meanings. Each entry is hyperlinked which when clicked opens a new web page dedicated to that particular emoji where all the details about it are mentioned.
The new page also has a ‘Copy’ button that can be used to copy the object to the clipboard, and then the element can be pasted onto any compatible messenger during a text conversation.
Part 4: How to Find Emoji on Any Device?
While locating and inserting emojis on any messaging app on your smartphone is fairly simple as the messenger already has an icon that opens the entire emoji library when tapped, things are a bit tricky while using a Mac or Windows PC. Therefore, the following points explain how to find and use emojis on the computer running any of these operating systems:
How to Find Emojis on Windows 8 and Windows 10
On Windows 8 or Windows 10 computers, click the ‘Keyboard’ icon that is present in the ‘Notification area’ at the bottom-right corner of the screen, i.e. right side of the taskbar. When the list of emojis appears, you can click your favorite one and use it in the messenger.
How to Find Emojis on macOS
While using a Mac computer, you can open the app you want to add an emoji to, and then press the ctrl + cmd + spacebar keys on the keyboard.
Part 5: Most Common Emoji Categories
Some of the most commonly used categories that you must know after understanding what is an emoji include:
- Smileys & People – Holds the images of faces reflecting facial expressions and the vector images/animations of some popular people
- Animals & Nature – Contains the images/animations of animals and other natural elements such as trees, rocks, mountains, etc.
- Food & Drink – This category has vector images of beautifully decorated and well-aligned wine glasses, soft drink cans, pizza slices, etc.
- Activity – Has the emojis that reflect certain actions such as dance stances, walking, running, etc.
- Travel & Places – Is equipped with vectors of transportation mediums and locations such as trains, buses, buildings, banks, etc.
- Objects – Is populated with miscellaneous objects like a pair of shoes, suits, clocks, socks, etc.
- Symbols – This one consists of different types of symbols such as an equal to sign, stop sign, delta symbol, and many more
- Flags – This category contains flags of almost all the countries of the world. These emojis are mostly used to illustrate your current or destination location for reference
Part 6: Tips of Using Emojis
It is always a good idea to use emojis every now and then. However, using too many of them in your conversation might make the entire text look overly populated, and your communication partner may lose interest in you. Therefore, understanding when and how to use emojis is as important as it is to know what the emoji means.
Add Emojis to Video with Filmora
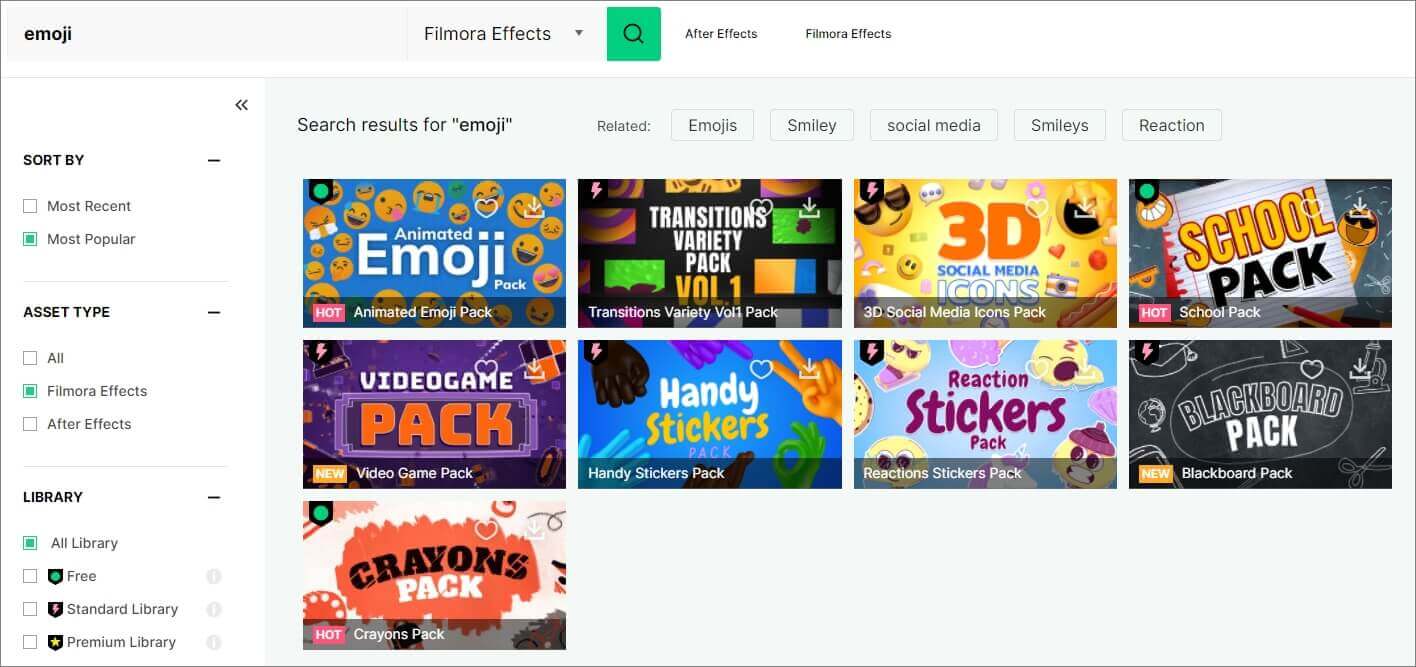
If you want to add animated emojis to video and share on social media, then Filmora is a good choice. Besides the built-in free animated emojis under Effects tab, you will also find some free or paid animated emojis or stickers on the effects store Filmstock. Download the free trial version of Filmora and create videos with fun.
Shanoon Cox
Shanoon Cox is a writer and a lover of all things video.
Follow @Shanoon Cox
Shanoon Cox
Mar 27, 2024• Proven solutions
If you ever wondered what is emoji, and how the term relates (or unrelates) to its elder sibling emoticon, you are at the right place. In the following sections, you will learn some quite interesting facts about the two, what different types of emojis are available, and what do they mean.
Because understanding the meaning of emojis is more important as compared to knowing what is an emoji itself, here you will get all the related details, relevant answers, and some best practice tips.
Part 1: What Is an Emoji?
In a nutshell, an emoji is a graphical image that reflects a certain facial expression. Emojis are created using a drawing tool, and are incorporated into a unique 16-bit Unicode in order to make them compatible with operating systems of the most common devices and platforms like iOS, Android, macOS, and Windows.
In addition to being merely a picture, emojis are also animated to exaggerate the message senders’ emotions. You can find a couple of decent examples of such animations while using Skype messenger.
The reason behind emojis being more popular than the emoticons used earlier is the close resemblance of the former to the real-like expressions that they reflect when sent to a recipient. Therefore, it would be safe to say that a single emoji could be worth several sentences while texting if used correctly.
Part 2: What are the Differences Between Emojis and Emoticons?
As explained earlier, the emojis are graphical and sometimes animated Unicode illustrations that can be included in the text messages as objects.
On the other hand, the emoticons are formed using the ASCII characters, and no specific coding is required at the users’ side to create them. Simply put, an emoticon can be easily added to a text message or even to an email merely by using a combination of letters on the keyboard.
For instance, to create an emoticon of a smiley face, all you need to do is, type a colon sign along with a closing brace. (E.g. Typing a : and ) without space will become a smiling face, a : and ( will form a sad face, and so on).
To be clearer, emojis can be considered an advanced, better, and evolved version of emoticons. While the latter can be formed using simple characters like letters and symbols, the former is inserted as an object in the text messages.
Part 3: Where to Find the Meaning of Emojis?
Once you have understood what emoji is, it is now time to learn what the emojis mean. This part is imperative to ensure you don’t send a wrong emotional expression to your friends or family members, and get into some awkward situation after that.
Below is a list of some useful online websites and dictionaries that can help you find correct emojis along with their meanings to make your text conversation more meaningful and interesting:
1. Emojipedia
Emojipedia is an online library that holds several emojis. All the emojis that the portal has are placed in their corresponding categories.
Another section on the landing page of the website contains some of the most popular emojis, i.e. those that are mostly used by the texters during their conversions. Furthermore, the name of the emoji is present right next to it, and the entire part is hyperlinked which when clicked, takes you to a new page that has all the details about the object including its meaning, alternate names, and a button to copy the emoji to the clip board. The copied element can then be pasted in the text input field of a compatible messenger such as Facebook.
2. EMOJI DICTIONARY
https://www.dictionary.com/e/emoji/
EMOJI DICTIONARY is another online portal that contains almost all the commonly used emojis. The upper section of the page is dedicated to ‘Featured Terms’ with a slider that has all the featured emojis. The next segment lists all the categories other than emojis.
The bottom area of the landing page has all the emojis along with their names and/or the supported devices. All the names in the section are hyperlinked that open a new page when clicked, and show all the details such as examples, usage, and origin related to that particular emoji.
3. Emoji Dictionary
https://emojidictionary.emojifoundation.com/
This one is unique in its own way as in along with listing the most popular emojis and their names and definitions, it also allows you to include your own information in case you know something other than what is already present.
In addition to displaying the top emojis right on the landing page, the portal also has a category list where each segment holds its corresponding objects. This helps in locating your favorite elements easily and quickly. Furthermore, when you click an emoji, a new page opens up with all its definition from different aspects such as nouns, verbs, etc., along with a ‘Copy’ button that lets you copy the image to the clipboard, and use it on a compatible messaging app.
4. EmojiMeanings
https://www.emojimeanings.net/
The landing page of EmojiMeanings is populated with all the categories where each holds several relevant emojis, thus making it easier for the users to find and learn their meaning. The home page also has complete information about what emojis are, how they are different from emoticons, and what does the term ‘smiley’ actually mean.
When you click a category, a new page opens up with three major columns titled as ‘Emoji’, ‘Meaning’, and ‘Unicode’ that show an emoji itself, explain what it means, and what Unicode is used to form it respectively. All the emojis on EmojiMeanings are usually compatible with WhatsApp and Facebook.
5. HotEmoji
https://hotemoji.com/emoji-meanings.html
HotEmoji is yet another online portal that lists almost all the emojis along with their meanings. Each entry is hyperlinked which when clicked opens a new web page dedicated to that particular emoji where all the details about it are mentioned.
The new page also has a ‘Copy’ button that can be used to copy the object to the clipboard, and then the element can be pasted onto any compatible messenger during a text conversation.
Part 4: How to Find Emoji on Any Device?
While locating and inserting emojis on any messaging app on your smartphone is fairly simple as the messenger already has an icon that opens the entire emoji library when tapped, things are a bit tricky while using a Mac or Windows PC. Therefore, the following points explain how to find and use emojis on the computer running any of these operating systems:
How to Find Emojis on Windows 8 and Windows 10
On Windows 8 or Windows 10 computers, click the ‘Keyboard’ icon that is present in the ‘Notification area’ at the bottom-right corner of the screen, i.e. right side of the taskbar. When the list of emojis appears, you can click your favorite one and use it in the messenger.
How to Find Emojis on macOS
While using a Mac computer, you can open the app you want to add an emoji to, and then press the ctrl + cmd + spacebar keys on the keyboard.
Part 5: Most Common Emoji Categories
Some of the most commonly used categories that you must know after understanding what is an emoji include:
- Smileys & People – Holds the images of faces reflecting facial expressions and the vector images/animations of some popular people
- Animals & Nature – Contains the images/animations of animals and other natural elements such as trees, rocks, mountains, etc.
- Food & Drink – This category has vector images of beautifully decorated and well-aligned wine glasses, soft drink cans, pizza slices, etc.
- Activity – Has the emojis that reflect certain actions such as dance stances, walking, running, etc.
- Travel & Places – Is equipped with vectors of transportation mediums and locations such as trains, buses, buildings, banks, etc.
- Objects – Is populated with miscellaneous objects like a pair of shoes, suits, clocks, socks, etc.
- Symbols – This one consists of different types of symbols such as an equal to sign, stop sign, delta symbol, and many more
- Flags – This category contains flags of almost all the countries of the world. These emojis are mostly used to illustrate your current or destination location for reference
Part 6: Tips of Using Emojis
It is always a good idea to use emojis every now and then. However, using too many of them in your conversation might make the entire text look overly populated, and your communication partner may lose interest in you. Therefore, understanding when and how to use emojis is as important as it is to know what the emoji means.
Add Emojis to Video with Filmora
If you want to add animated emojis to video and share on social media, then Filmora is a good choice. Besides the built-in free animated emojis under Effects tab, you will also find some free or paid animated emojis or stickers on the effects store Filmstock. Download the free trial version of Filmora and create videos with fun.
Shanoon Cox
Shanoon Cox is a writer and a lover of all things video.
Follow @Shanoon Cox
How to Make a iMovie Photo Slideshow with Music? [IMovie Tutorial]
How to Make a iMovie Photo Slideshow with Music? [iMovie Tutorial]
Shanoon Cox
Mar 27, 2024• Proven solutions
Makings a slideshow is a great way to share photos and videos with friends and families. The good news is that you can totally make a slideshow on Mac for free with iMovie. iMovie is the pre-installed program coming with every new Mac. It provides a simple yet professional way to make slideshow movies from your photos, videos, and music.
If you haven’t iMovie installed on your Mac yet, just go to iTunes and download it for free. In the following part, I’ll share with you the step-by-step tutorial on how to make a slideshow on Mac using the free video editing software iMovie.
If you are an iOS user, check our picks of best photo slideshow apps for iPhone or iPad.
Ways for iMovie Photo Slideshow with Music Making
To make a photo slideshow with music in iMovie, you can follow these steps.
1. Create a New Project
After launching iMovie, click the Project button and then click Create New. Select Movie to combine photos, videos and music to make a slideshow.

2. Import Photos, Videos, and Audio Files
Now go to the My Media tab and click the Import icon to add your photos, videos, and music to iMovie, in this way, you can import any media files from any location on your Mac. But if you have arranged all your videos, photos, and music tracks in the Photos app, you can just switch to Photos under the Libraries tab on the left to import.

3. Arrange Media in Timeline and Adjust
Now, it’s time to place all these photos and videos in the timeline in order and do some adjustments. You can use the Magic Wand tool to improve the photo quality automatically, do some color correction, or add a filter to the photo. If you preview the video clip, you will see more options that allow you to do more editing, such as changing speed.
4. Apply Transitions & Effects
Transitions and effects will help you to create a slideshow in a more professional way. Some transitions such as cross dissolve, fade and cross blur are very popular in the slideshow, but remember don’t use lots of different transitions in one slideshow since too many transitions will distract the viewer’s attention. To apply a transition in the slideshow, just drag and drop it between two photos in the timeline.

5. Add Titles and Text
Using some opener titles and credits at the beginning and ending part of your slideshow will make it cool as well. You can add some famous quotes and words to better demonstrate.
Just to the Titles tab and select one of the title templates and drop it to the timeline first and then write your own words in the preview window.

6. Add Music to Slideshow
You can download some royalty-free music and sound effects from websites such as Filmstock stock media library or iTunes or import your own audio as we said before to use it as the slideshow background music. To sync with the slideshow, you may need to trim and edit the audio accordingly. For detailed information about iMovie audio editing, you can check how to add background music to iMovie.
Filmstock Stock Media Library ](https://tools.techidaily.com/wondershare/filmora/download/ )
7. Export and Share Your Slideshow video
Play the slideshow and check the result in the preview window. If everything goes well, you can now export and share or save it. You can save the slideshow video in MP4 format, or share it to Vimeo or add the slideshow to Theater to load it on your other Apple devices so you can easily watch it on your iOS devices or Apple TV.
I hope the above tutorial about how to make a slideshow on iMovie will be helpful for your stunning slideshow creation.
If you’re running an old macOS version and having iPhoto installed on your Mac, here are the detailed steps about How to make slideshow in iMovie with iPhoto project.
Step 1. Import Photos from the iPhoto Library
iMovie works seamlessly with iPhoto. You are suggested to drag and drop photos from iPhoto to the iMovie project. If no library exists in iPhoto, create one and import photos to iPhoto first. To add videos, you could go to either “File/Import” or Event Library, and then drag and drop selected videos to the timeline.
After photos and videos are imported to the iMovie slideshow project, you can preview the raw slideshow simply by pressing Space bar on your keyboard. And then make adjustments to clips and transitions. For example, mouse over one clip or “double arrow” button and click on the settings icon, then you could access clip adjustment, video adjustment, transition adjustment, etc.

Step 2. Add Music to Your iMovie Slideshow Project
Music sets the tone of your slideshow. Adding musing to the iMovie slideshow is just as simple as adding photos and videos.
So click the audio icon in the bottom right corner, and drag and drop the desired audio file to the timeline. Multiple songs could be added to iMovie.
However, iMovie doesn’t support multiple soundtracks. If necessary, you need to combine multiple song tracks with an external audio editor before importing them to the iMovie slideshow. You can also apply audio effects and filter sound using an equalizer.

Step 3. Export Your iMovie Slideshow Video
iMovie makes sharing possibilities endless. For those who upload their videos online, iMovie allows users to directly upload to MobileMe Gallery, YouTube, Facebook, Vimeo, CNN iReport, etc.
If you select to share the iMovie slideshow using Media Browser, you will get a slideshow appeared in other Mac applications like iWeb. It’s a good idea to export the iMovie slideshow to iTunes so that you can play back slideshow quickly and easily sync with your mobile devices like iPhone, iPod, and iPad.

You may also like: How to Add Text with iMovie in Mac and iPhone >>
Recommendation: Create Slideshow on Mac with More Templates and Transitions with Filmora
If you want to make a slideshow with some templates on Mac, you can try Wondershare Filmora . Filmora can turn photos and videos into attractive slideshow videos with various inbuilt filters, transitions, elements, animations, effects, and overlays. Click the Free Download button and have a try.
Check the ultimate guide about making a slideshow with music and titles in Filmora .
If you are going to make a slideshow with music on Windows, you may need a slideshow-making tool to do it by yourself. Wondershare Filmora will also be a good choice. It helps you instantly make such an impressive slideshow from photos and videos for sharing virtually anywhere.
Shanoon Cox
Shanoon Cox is a writer and a lover of all things video.
Follow @Shanoon Cox
Shanoon Cox
Mar 27, 2024• Proven solutions
Makings a slideshow is a great way to share photos and videos with friends and families. The good news is that you can totally make a slideshow on Mac for free with iMovie. iMovie is the pre-installed program coming with every new Mac. It provides a simple yet professional way to make slideshow movies from your photos, videos, and music.
If you haven’t iMovie installed on your Mac yet, just go to iTunes and download it for free. In the following part, I’ll share with you the step-by-step tutorial on how to make a slideshow on Mac using the free video editing software iMovie.
If you are an iOS user, check our picks of best photo slideshow apps for iPhone or iPad.
Ways for iMovie Photo Slideshow with Music Making
To make a photo slideshow with music in iMovie, you can follow these steps.
1. Create a New Project
After launching iMovie, click the Project button and then click Create New. Select Movie to combine photos, videos and music to make a slideshow.
2. Import Photos, Videos, and Audio Files
Now go to the My Media tab and click the Import icon to add your photos, videos, and music to iMovie, in this way, you can import any media files from any location on your Mac. But if you have arranged all your videos, photos, and music tracks in the Photos app, you can just switch to Photos under the Libraries tab on the left to import.
3. Arrange Media in Timeline and Adjust
Now, it’s time to place all these photos and videos in the timeline in order and do some adjustments. You can use the Magic Wand tool to improve the photo quality automatically, do some color correction, or add a filter to the photo. If you preview the video clip, you will see more options that allow you to do more editing, such as changing speed.
4. Apply Transitions & Effects
Transitions and effects will help you to create a slideshow in a more professional way. Some transitions such as cross dissolve, fade and cross blur are very popular in the slideshow, but remember don’t use lots of different transitions in one slideshow since too many transitions will distract the viewer’s attention. To apply a transition in the slideshow, just drag and drop it between two photos in the timeline.
5. Add Titles and Text
Using some opener titles and credits at the beginning and ending part of your slideshow will make it cool as well. You can add some famous quotes and words to better demonstrate.
Just to the Titles tab and select one of the title templates and drop it to the timeline first and then write your own words in the preview window.
6. Add Music to Slideshow
You can download some royalty-free music and sound effects from websites such as Filmstock stock media library or iTunes or import your own audio as we said before to use it as the slideshow background music. To sync with the slideshow, you may need to trim and edit the audio accordingly. For detailed information about iMovie audio editing, you can check how to add background music to iMovie.
Filmstock Stock Media Library ](https://tools.techidaily.com/wondershare/filmora/download/ )
7. Export and Share Your Slideshow video
Play the slideshow and check the result in the preview window. If everything goes well, you can now export and share or save it. You can save the slideshow video in MP4 format, or share it to Vimeo or add the slideshow to Theater to load it on your other Apple devices so you can easily watch it on your iOS devices or Apple TV.
I hope the above tutorial about how to make a slideshow on iMovie will be helpful for your stunning slideshow creation.
If you’re running an old macOS version and having iPhoto installed on your Mac, here are the detailed steps about How to make slideshow in iMovie with iPhoto project.
Step 1. Import Photos from the iPhoto Library
iMovie works seamlessly with iPhoto. You are suggested to drag and drop photos from iPhoto to the iMovie project. If no library exists in iPhoto, create one and import photos to iPhoto first. To add videos, you could go to either “File/Import” or Event Library, and then drag and drop selected videos to the timeline.
After photos and videos are imported to the iMovie slideshow project, you can preview the raw slideshow simply by pressing Space bar on your keyboard. And then make adjustments to clips and transitions. For example, mouse over one clip or “double arrow” button and click on the settings icon, then you could access clip adjustment, video adjustment, transition adjustment, etc.
Step 2. Add Music to Your iMovie Slideshow Project
Music sets the tone of your slideshow. Adding musing to the iMovie slideshow is just as simple as adding photos and videos.
So click the audio icon in the bottom right corner, and drag and drop the desired audio file to the timeline. Multiple songs could be added to iMovie.
However, iMovie doesn’t support multiple soundtracks. If necessary, you need to combine multiple song tracks with an external audio editor before importing them to the iMovie slideshow. You can also apply audio effects and filter sound using an equalizer.
Step 3. Export Your iMovie Slideshow Video
iMovie makes sharing possibilities endless. For those who upload their videos online, iMovie allows users to directly upload to MobileMe Gallery, YouTube, Facebook, Vimeo, CNN iReport, etc.
If you select to share the iMovie slideshow using Media Browser, you will get a slideshow appeared in other Mac applications like iWeb. It’s a good idea to export the iMovie slideshow to iTunes so that you can play back slideshow quickly and easily sync with your mobile devices like iPhone, iPod, and iPad.
You may also like: How to Add Text with iMovie in Mac and iPhone >>
Recommendation: Create Slideshow on Mac with More Templates and Transitions with Filmora
If you want to make a slideshow with some templates on Mac, you can try Wondershare Filmora . Filmora can turn photos and videos into attractive slideshow videos with various inbuilt filters, transitions, elements, animations, effects, and overlays. Click the Free Download button and have a try.
Check the ultimate guide about making a slideshow with music and titles in Filmora .
If you are going to make a slideshow with music on Windows, you may need a slideshow-making tool to do it by yourself. Wondershare Filmora will also be a good choice. It helps you instantly make such an impressive slideshow from photos and videos for sharing virtually anywhere.
Shanoon Cox
Shanoon Cox is a writer and a lover of all things video.
Follow @Shanoon Cox
How to Make Your Own Emoji in 2 Ways [Step-By Step Guide]
How to Make Your Own Emoji in 2 Ways [Step-by Step Guide]
Shanoon Cox
Mar 27, 2024• Proven solutions
The small yellow faces that we have come to call emojis are now rapidly being used on all platforms. Whether you’re sending an email or texting a friend, emoji is ever-present to spice up the conversation and give it an emotional touch. But these cliché emojis are now becoming dull, and the creative side in us is craving for something more personal and fun.
To satisfy that craving of being unique, you can now create your own emoji. Tease your friends with an emoji of their faces or custom-create an emoji that best expresses your facial expressions. The customized emoji can be an object or an emotion, while the only limitation is your imagination.
Let me show you how to make emoji that relates to your feelings and will help you transform your texting experience.
- Method 1: Make Your Own Emoji Using Online Emoji Maker
- Method 2: Make Your Own Emoji Using an Emoji Maker App
- Bonus Tip-Add Your Emoji to a Video Using Wondershare Filmora
Method 1: Make Your Own Emoji Using Online Emoji Maker
Emoji Maker is an online tool to quench your thirst for creativity. It is free and incredibly easy to use. You would think that it takes expertise to make your own emoji, but, fortunately, all it takes is imagination and a few clicks, of course.
You can create an emoji from the face shapes available or customize a funny emoji using your own or a friend’s face. You can finally take revenge by pasting the funniest mustache on your ex’s face or making them bald. (Savage, right?)
Better yet, you can make a superhero emoji of yourself and even change the background as if you’re in the sky. The functions of this Emoji Maker are countless and of a professional level. These customized emojis are bound to make you stand out in those group chats
Now, as promised, I will show you exactly how it’s done.
1. First of all, open Emoji Maker on your browser.
2. Select a sample shape and face. You can even upload your own selfie to use as a face.
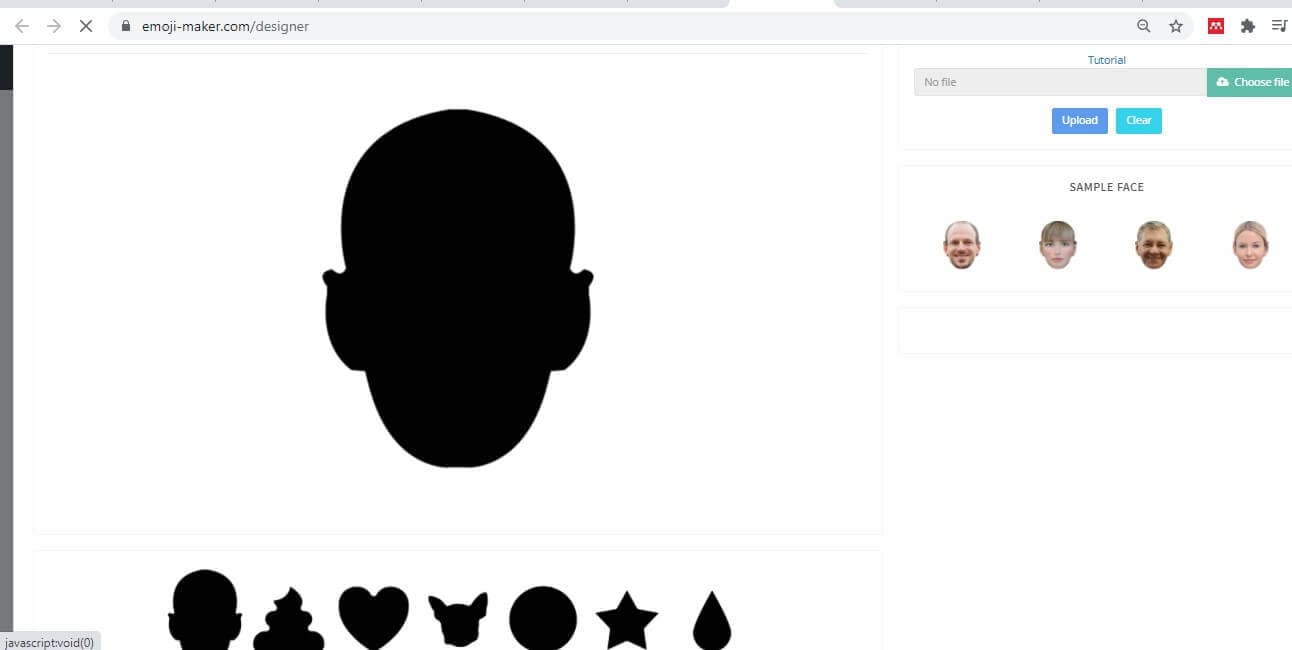
3. Now change the various features on the face such as eyes, hair, mustache, glasses, nose, etc
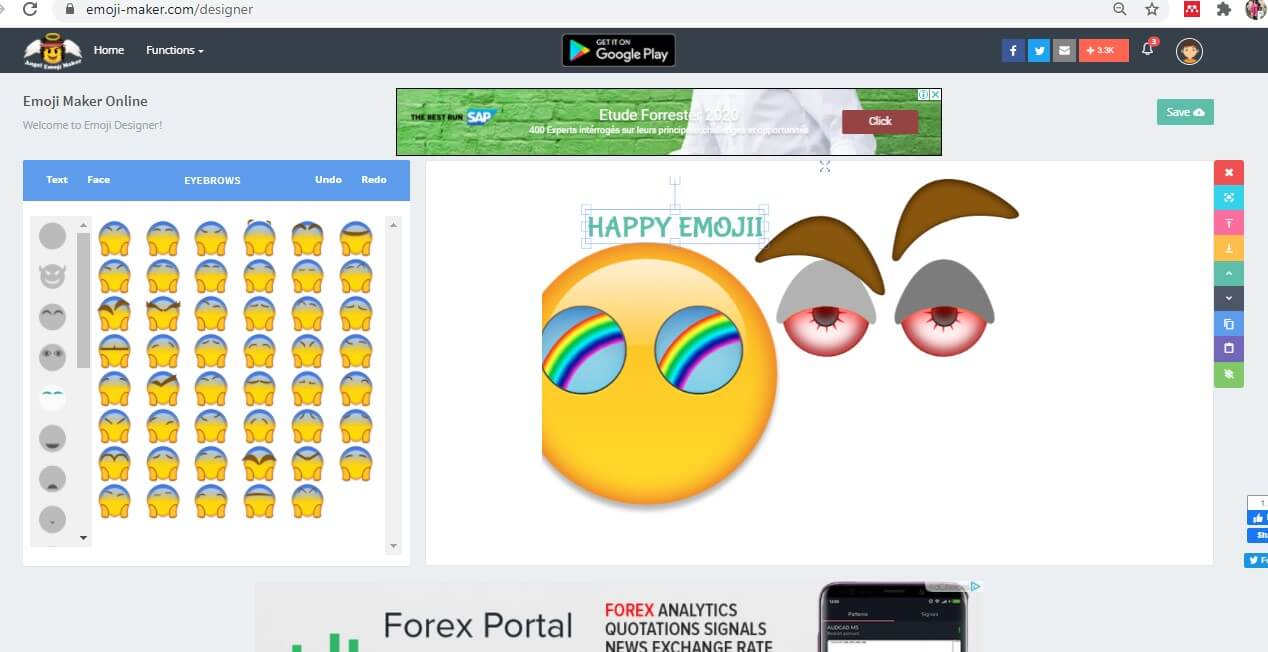
4. The undo and redo buttons are available for quick creations. The size of the emoji can be adjusted by clicking on the features and dragging it.
5. A panel on the right lets you copy, paste, or move the selected feature up, down, to the front or behind.
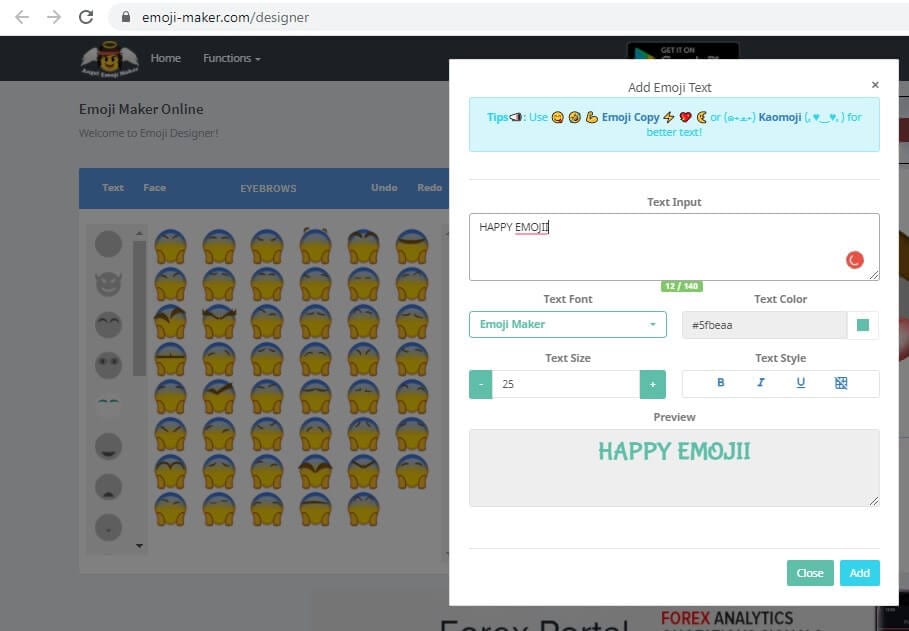
6. You can also click on the Text tab to insert a message with customized size, color, or font
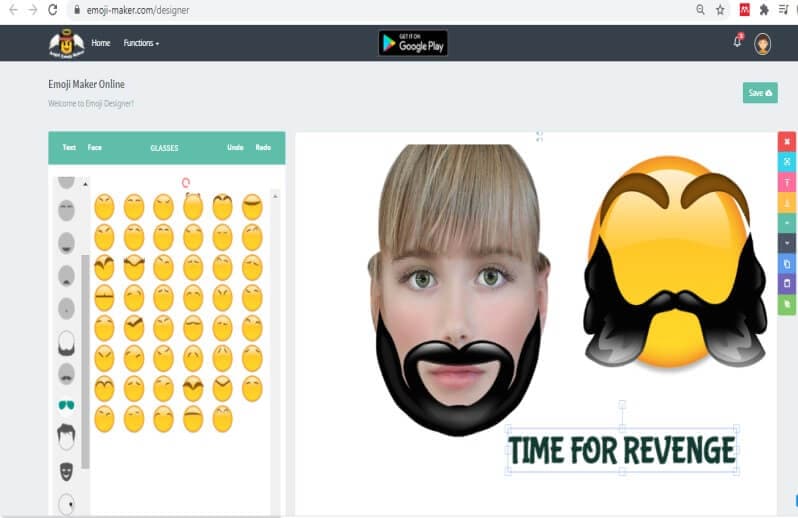
7. After customization, press Save in the top right corner. You can either directly save the emoji to your pc or crop to size and then save.
Method 2: Make Your Own Emoji Using an Emoji Maker App
Zmoji is an app that lets you create a whole range of personalized avatars of yourself. Imagine a collection of stickers of different emotions but all featuring you.
You can create your avatar manually or by using the facial recognition feature. Moreover, you can dress up the avatar to look just like you. There is a wide range of stylish clothes you can choose from. Be funky or silly, or be you. Who cares? It’s time for some fun.
Let there be a mini-you in a funny or silly position. Or a dancing avatar of you to express your delight or crying a pool of tears after a piece of bad news, next-level texting, right?
1. Download Zmoji or either your Android or Apple device. Launch it.
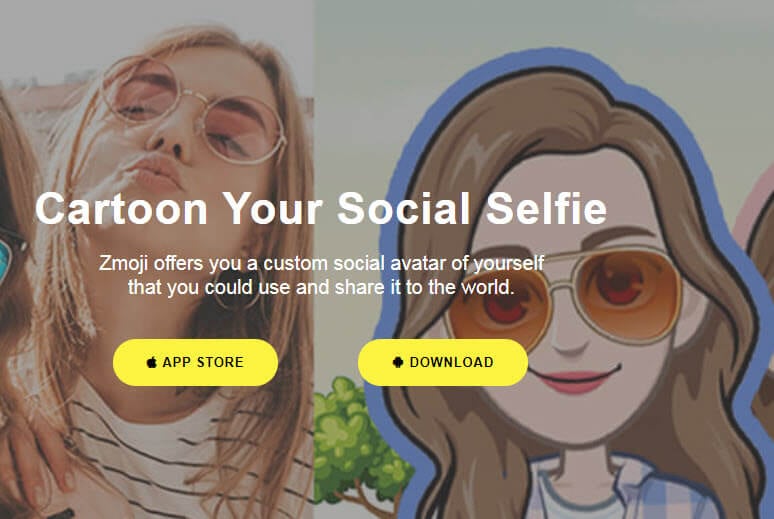
2. Choose your gender. Click on Facial Recognition and take a selfie to proceed. Or tap Manual Creation to create a face yourself.
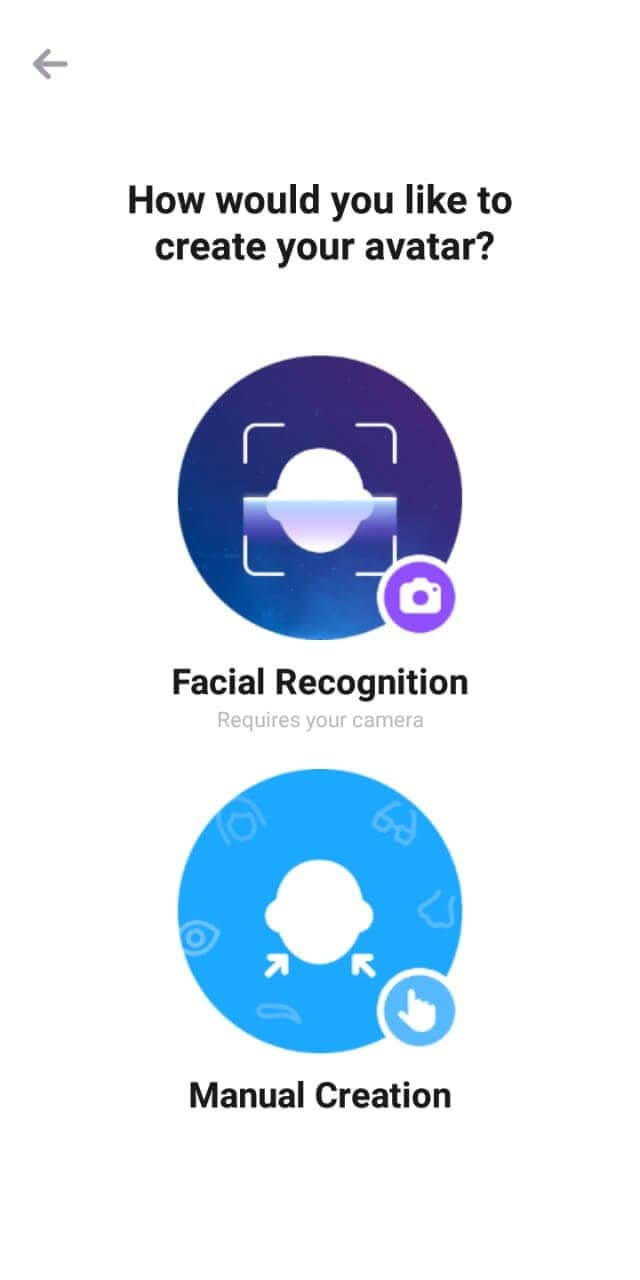
3. Choose from the variety of features to make the emoji look precisely like you. Click Save. You will also earn coins on creating an emoji that you can use to buy special features.
4. Now you can dress it up to match the real you and choose a pose that best fits your mood.
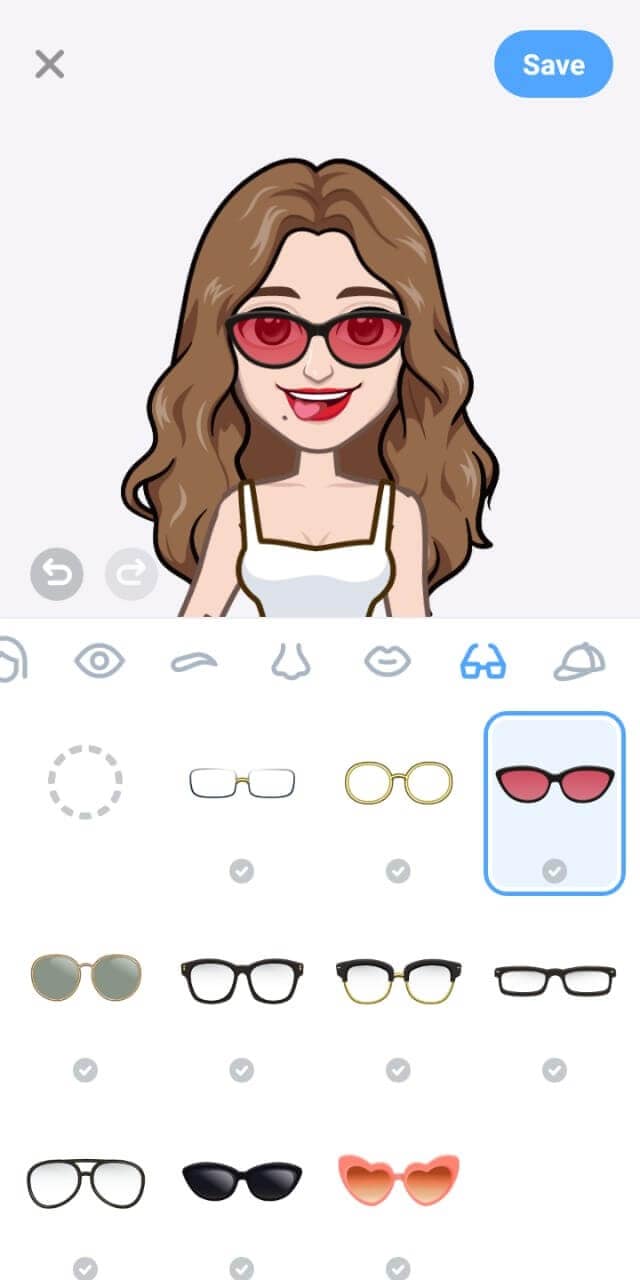
5. Click on Photobooth and choose a template to create a sticker of you just like that.
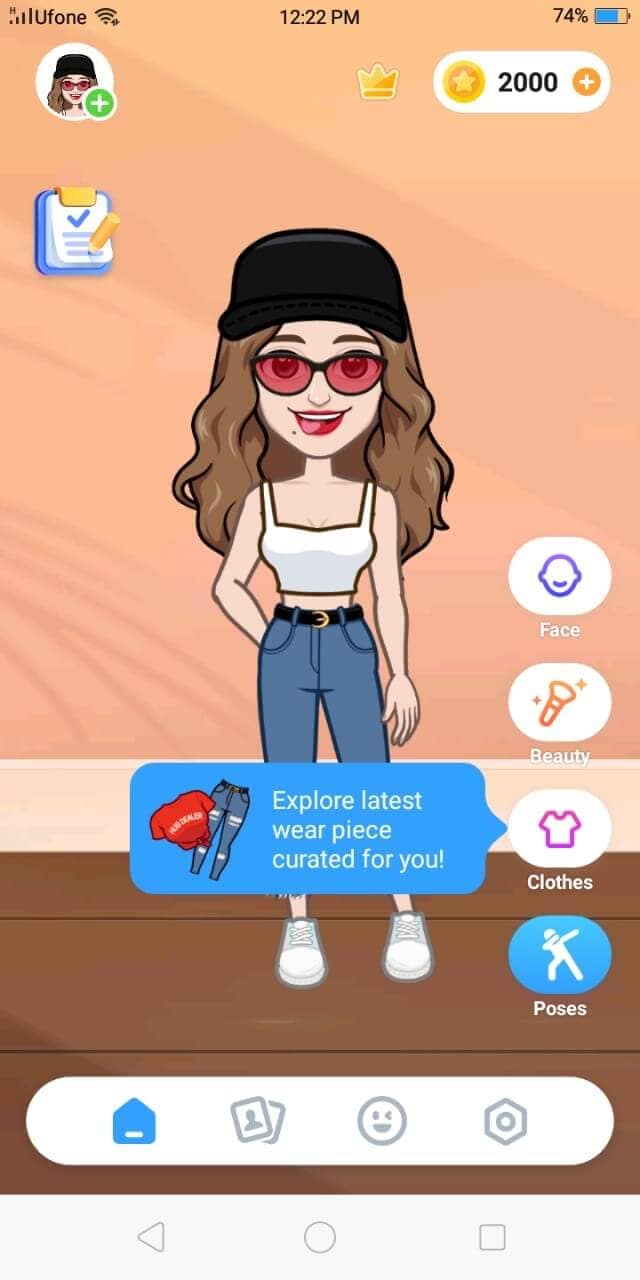
6. Once you are all dolled up, press Save or share the avatar directly on Facebook, Whatsapp, and Instagram, etc.
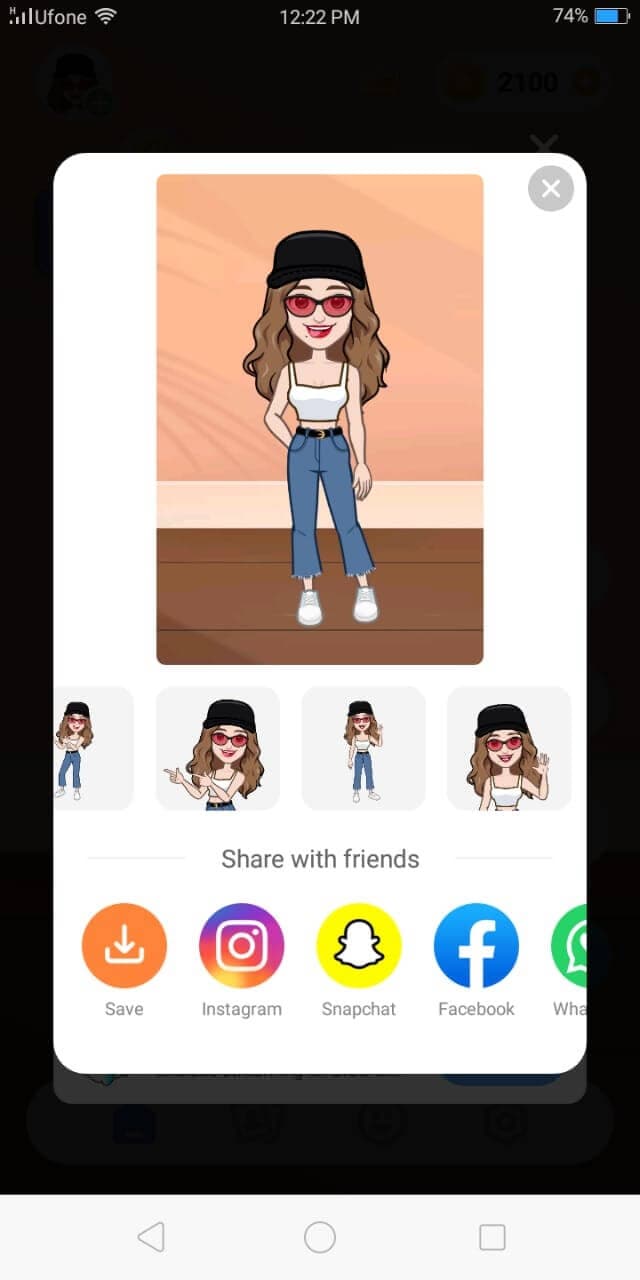
Bonus Tip-Add Your Emoji to a Video Using Wondershare Filmora
Wondershare Filmora, famous for its simple interface and professional video-making and editing tools, is here to save the day again. With the wide range of editing tools and effects that Filmora offers, I will show you how to create your own emoji and then enhance it further.
You can add the customized emoji or add other emojis from Filmora’s library. Motion effects and other special effects will give your video a refined and dramatic look, and the customized emoji will be a cherry on top.
Let’s surprise our friends with our unique creation!
1. Download and install Filmora. Launch it.
2. Click on File>Import Media to select the emoji you created as well as the video.
3. Drag and drop both onto the timeline.
4. In the viewer panel, adjust the size and location of the emoji.
5. Click on the emoji image in the timeline to change the values in Image, Color, and Motion. You can rotate the emoji or alter its color. You can even choose the motion of how the emoji comes in the video. This animated introduction of the emoji will give your video a dramatic look.
Finally, click Export, choose the destination folder, and the output format.
Conclusion
From creating unique emojis to creative avatars, you know it all now. We have walked you through how to make emoji in 2 easy ways. Now it’s up to you. You can use these customized emojis to add a spark to your conversations or attract followers to your brands. Based on your ease, choose any method and let the creativity in you take over.
Wondershare Filmora will help you create the kind of unique video you need to stand out. Just don’t forget to decorate your videos with your custom made emojis. You might get famous, who knows?
Shanoon Cox
Shanoon Cox is a writer and a lover of all things video.
Follow @Shanoon Cox
Shanoon Cox
Mar 27, 2024• Proven solutions
The small yellow faces that we have come to call emojis are now rapidly being used on all platforms. Whether you’re sending an email or texting a friend, emoji is ever-present to spice up the conversation and give it an emotional touch. But these cliché emojis are now becoming dull, and the creative side in us is craving for something more personal and fun.
To satisfy that craving of being unique, you can now create your own emoji. Tease your friends with an emoji of their faces or custom-create an emoji that best expresses your facial expressions. The customized emoji can be an object or an emotion, while the only limitation is your imagination.
Let me show you how to make emoji that relates to your feelings and will help you transform your texting experience.
- Method 1: Make Your Own Emoji Using Online Emoji Maker
- Method 2: Make Your Own Emoji Using an Emoji Maker App
- Bonus Tip-Add Your Emoji to a Video Using Wondershare Filmora
Method 1: Make Your Own Emoji Using Online Emoji Maker
Emoji Maker is an online tool to quench your thirst for creativity. It is free and incredibly easy to use. You would think that it takes expertise to make your own emoji, but, fortunately, all it takes is imagination and a few clicks, of course.
You can create an emoji from the face shapes available or customize a funny emoji using your own or a friend’s face. You can finally take revenge by pasting the funniest mustache on your ex’s face or making them bald. (Savage, right?)
Better yet, you can make a superhero emoji of yourself and even change the background as if you’re in the sky. The functions of this Emoji Maker are countless and of a professional level. These customized emojis are bound to make you stand out in those group chats
Now, as promised, I will show you exactly how it’s done.
1. First of all, open Emoji Maker on your browser.
2. Select a sample shape and face. You can even upload your own selfie to use as a face.
3. Now change the various features on the face such as eyes, hair, mustache, glasses, nose, etc
4. The undo and redo buttons are available for quick creations. The size of the emoji can be adjusted by clicking on the features and dragging it.
5. A panel on the right lets you copy, paste, or move the selected feature up, down, to the front or behind.
6. You can also click on the Text tab to insert a message with customized size, color, or font
7. After customization, press Save in the top right corner. You can either directly save the emoji to your pc or crop to size and then save.
Method 2: Make Your Own Emoji Using an Emoji Maker App
Zmoji is an app that lets you create a whole range of personalized avatars of yourself. Imagine a collection of stickers of different emotions but all featuring you.
You can create your avatar manually or by using the facial recognition feature. Moreover, you can dress up the avatar to look just like you. There is a wide range of stylish clothes you can choose from. Be funky or silly, or be you. Who cares? It’s time for some fun.
Let there be a mini-you in a funny or silly position. Or a dancing avatar of you to express your delight or crying a pool of tears after a piece of bad news, next-level texting, right?
1. Download Zmoji or either your Android or Apple device. Launch it.
2. Choose your gender. Click on Facial Recognition and take a selfie to proceed. Or tap Manual Creation to create a face yourself.
3. Choose from the variety of features to make the emoji look precisely like you. Click Save. You will also earn coins on creating an emoji that you can use to buy special features.
4. Now you can dress it up to match the real you and choose a pose that best fits your mood.
5. Click on Photobooth and choose a template to create a sticker of you just like that.
6. Once you are all dolled up, press Save or share the avatar directly on Facebook, Whatsapp, and Instagram, etc.
Bonus Tip-Add Your Emoji to a Video Using Wondershare Filmora
Wondershare Filmora, famous for its simple interface and professional video-making and editing tools, is here to save the day again. With the wide range of editing tools and effects that Filmora offers, I will show you how to create your own emoji and then enhance it further.
You can add the customized emoji or add other emojis from Filmora’s library. Motion effects and other special effects will give your video a refined and dramatic look, and the customized emoji will be a cherry on top.
Let’s surprise our friends with our unique creation!
1. Download and install Filmora. Launch it.
2. Click on File>Import Media to select the emoji you created as well as the video.
3. Drag and drop both onto the timeline.
4. In the viewer panel, adjust the size and location of the emoji.
5. Click on the emoji image in the timeline to change the values in Image, Color, and Motion. You can rotate the emoji or alter its color. You can even choose the motion of how the emoji comes in the video. This animated introduction of the emoji will give your video a dramatic look.
Finally, click Export, choose the destination folder, and the output format.
Conclusion
From creating unique emojis to creative avatars, you know it all now. We have walked you through how to make emoji in 2 easy ways. Now it’s up to you. You can use these customized emojis to add a spark to your conversations or attract followers to your brands. Based on your ease, choose any method and let the creativity in you take over.
Wondershare Filmora will help you create the kind of unique video you need to stand out. Just don’t forget to decorate your videos with your custom made emojis. You might get famous, who knows?
Shanoon Cox
Shanoon Cox is a writer and a lover of all things video.
Follow @Shanoon Cox
Generating the Roll Safe-Think About It Meme
Generating the Roll Safe-Think About It Meme

Ollie Mattison
Mar 27, 2024• Proven solutions
Assumptions can lead you in a very wrong direction, and we’ve all made more foolish assumptions than we’d care to admit. As a matter of fact, seemingly brilliant life strategies are so common that they’ve become a meme. A guy named Reece Simpson made such a stupid and borderline sexist conclusion in one of the episodes of the Hood Documentary series, that it instantly became synonymous with all ideas that look good only in theory. The iconic image of him, placing the index finger to his temple with a comment: ‘You can’t be broke if you don’t check your bank account’ went viral only a six months after the documentary was initially released. In less than a week the tweet had 74.000 likes and 47.000 retweets.
Over time numerous variations of the meme emerged on social media, so in this article, we’re going to show you how you can make your own Roll Safe-Think About It memes in less than few minutes. But first, let have a look at some of the successful examples of this meme.
A Few Good Examples of the Roll Safe-Think About It Meme
Being slightly ironic while making a seemingly valid point is the true spirit of the Roll-Safe-Think About It meme, which is why using just any off the wall idea may not have the effect you’d like to achieve.

Can’t lose if you don’t play is a great illustration of what Roll Safe is all about. If you don’t try something you can’t fail at it, right? The assumption seems entirely legitimate, except it’s not, and that’s the catch.

A similar logic can be applied to romance, as there is zero chance to get cheated on if you weren’t in a relationship, to begin with. The only trouble is that if you adopt this way of thinking, you’ll never be in a relationship.
We all complain about financial troubles in one way or the other, and Roll Safe-Think About It offers a pretty funny way to do that. Once again, a seemingly valid point that only looks good in theory is the punch-line of the meme. There are so many different variations of this meme on the Internet, at the moment, but nearly all of them employ faulty logic to create the comical effect.
How to Make the Roll Safe-Think About It Meme
Generating a meme with the Filmora Online Meme Maker is free, quick and easy, and you can also use it to create memes from your Smartphone.
Attention: This post only provides the solutions to make memes for personal and non-commercial purpose. Since any redistribution without the approval of the copyright owners may violate the copyright laws, you’d better refer to the copyright laws in your country before doing so.
1. Importing the Images
On the home page of the Filmora Online Meme Maker offers you three quick ways to upload photos, videos or GIFs. You can either click on the + icon displayed in the middle of the screen and import a photo from a hard drive, drop the file from a folder on your computer to the designated section of the screen or use a URL to import meme templates.
So if you would like to create your Roll Safe-Think About It meme, you can start by copying the link the still image version or the GIF version of the meme. Click the “Copy the image” link below and the image link will be copied automatically.

Copy the image

Copy the image
Then, go to https://filmora.wondershare.com/meme-maker/ insert the image link you just copied by press Ctrl+V, click on the Upload button to start the upload process and wait until the template is uploaded.

Once the upload is complete you’ll be taken to another screen where you can choose whether you want the text to be inside the picture or outside. Which one of these options you’re going to use is up to you since there are versions where the text is placed both inside and outside of the picture.
2. Adding the Text to The Meme
Below the Text, Inside and Text Outside options you’ll be able to spot text boxes where you can add the punch-line of the meme. In the Text Options menu, you can select a new font, choose the text alignment you like the most or change the size and the color of the text. Scroll down to the bottom of the page and click on the Create button after you’ve added the text to the meme.

3. Downloading the Meme

A new page will load after the meme is generated, and you just have to click on the Download button and save it to your computer.
Those of you who use Filmora Online Meme Maker from their Smartphones can share their Roll Safe-Think About It memes directly from the platform. Sharing memes on social media is still not an option for Mac and PC users.
Conclusion
Adopting the logic behind the Roll Safe-Think About It memes in real life may not be the best of choices, but using it to cheer up your friends on social media can make your account more popular. Do you like making Roll Safe-Think About It memes? Share your experiences with us in the comments.
Ollie Mattison
Ollie Mattison is a writer and a lover of all things video.
Follow @Ollie Mattison
Ollie Mattison
Mar 27, 2024• Proven solutions
Assumptions can lead you in a very wrong direction, and we’ve all made more foolish assumptions than we’d care to admit. As a matter of fact, seemingly brilliant life strategies are so common that they’ve become a meme. A guy named Reece Simpson made such a stupid and borderline sexist conclusion in one of the episodes of the Hood Documentary series, that it instantly became synonymous with all ideas that look good only in theory. The iconic image of him, placing the index finger to his temple with a comment: ‘You can’t be broke if you don’t check your bank account’ went viral only a six months after the documentary was initially released. In less than a week the tweet had 74.000 likes and 47.000 retweets.
Over time numerous variations of the meme emerged on social media, so in this article, we’re going to show you how you can make your own Roll Safe-Think About It memes in less than few minutes. But first, let have a look at some of the successful examples of this meme.
A Few Good Examples of the Roll Safe-Think About It Meme
Being slightly ironic while making a seemingly valid point is the true spirit of the Roll-Safe-Think About It meme, which is why using just any off the wall idea may not have the effect you’d like to achieve.
Can’t lose if you don’t play is a great illustration of what Roll Safe is all about. If you don’t try something you can’t fail at it, right? The assumption seems entirely legitimate, except it’s not, and that’s the catch.
A similar logic can be applied to romance, as there is zero chance to get cheated on if you weren’t in a relationship, to begin with. The only trouble is that if you adopt this way of thinking, you’ll never be in a relationship.
We all complain about financial troubles in one way or the other, and Roll Safe-Think About It offers a pretty funny way to do that. Once again, a seemingly valid point that only looks good in theory is the punch-line of the meme. There are so many different variations of this meme on the Internet, at the moment, but nearly all of them employ faulty logic to create the comical effect.
How to Make the Roll Safe-Think About It Meme
Generating a meme with the Filmora Online Meme Maker is free, quick and easy, and you can also use it to create memes from your Smartphone.
Attention: This post only provides the solutions to make memes for personal and non-commercial purpose. Since any redistribution without the approval of the copyright owners may violate the copyright laws, you’d better refer to the copyright laws in your country before doing so.
1. Importing the Images
On the home page of the Filmora Online Meme Maker offers you three quick ways to upload photos, videos or GIFs. You can either click on the + icon displayed in the middle of the screen and import a photo from a hard drive, drop the file from a folder on your computer to the designated section of the screen or use a URL to import meme templates.
So if you would like to create your Roll Safe-Think About It meme, you can start by copying the link the still image version or the GIF version of the meme. Click the “Copy the image” link below and the image link will be copied automatically.
Copy the image
Copy the image
Then, go to https://filmora.wondershare.com/meme-maker/ insert the image link you just copied by press Ctrl+V, click on the Upload button to start the upload process and wait until the template is uploaded.
Once the upload is complete you’ll be taken to another screen where you can choose whether you want the text to be inside the picture or outside. Which one of these options you’re going to use is up to you since there are versions where the text is placed both inside and outside of the picture.
2. Adding the Text to The Meme
Below the Text, Inside and Text Outside options you’ll be able to spot text boxes where you can add the punch-line of the meme. In the Text Options menu, you can select a new font, choose the text alignment you like the most or change the size and the color of the text. Scroll down to the bottom of the page and click on the Create button after you’ve added the text to the meme.
3. Downloading the Meme
A new page will load after the meme is generated, and you just have to click on the Download button and save it to your computer.
Those of you who use Filmora Online Meme Maker from their Smartphones can share their Roll Safe-Think About It memes directly from the platform. Sharing memes on social media is still not an option for Mac and PC users.
Conclusion
Adopting the logic behind the Roll Safe-Think About It memes in real life may not be the best of choices, but using it to cheer up your friends on social media can make your account more popular. Do you like making Roll Safe-Think About It memes? Share your experiences with us in the comments.
Ollie Mattison
Ollie Mattison is a writer and a lover of all things video.
Follow @Ollie Mattison
Also read:
- 2024 Approved 10 Trending Memes Right Now (Include Image/ GIF/Video)
- How to Make a Photo Collage Using iPhoto?
- In 2024, 10 Popular Cartoon Characters That Should Top Your List
- In 2024, 5 Ways to Track Honor Magic 6 without App | Dr.fone
- In 2024, Best Photo Slideshow Maker How to Make a Photo Slideshow 2023 Update
- In 2024, How to Reset your Samsung Galaxy XCover 6 Pro Tactical Edition Lock Screen Password
- In 2024, Ultimate Collection Highest Ranking 8 4K Players
- Key Tools Enabling Seamless Shift From Mac OS to Windows-Powered PC
- New Applications and Software Take up Your Devices Storage to Create Slow-Mo. Explore This Piece to Learn About some Slow-Motion Video Online Makers for 2024
- New How to Make a Video for Your Babys First Year
- New How to Use Emojis on Windows for 2024
- One-Stop Digital Command Center: Step-by-Step Instructions to Build Your Own Universal Remote App
- Perfectionnement D'images Sur macOS via Le Logiciel Éditeur Photo Movavi - Guide Complet Au Montage Et À La Retouche
- Top-Rated Sketch Prosthetic Devices : A Comprehensive Guide
- Updated 2024 Approved Best Photo Slideshow Maker How to Make a Photo Slideshow 2023 Update
- Updated Best iOS and Android Apps You Can Use to Create Animoji and Memoji Videos
- What Is a SIM Network Unlock PIN? Get Your Xiaomi Redmi 12 Phone Network-Ready
- Title: How to Add Emojis To Discord
- Author: Jan
- Created at : 2024-10-01 01:55:03
- Updated at : 2024-10-05 22:53:02
- Link: https://meme-emoji.techidaily.com/how-to-add-emojis-to-discord/
- License: This work is licensed under CC BY-NC-SA 4.0.