
Generating the Roll Safe-Think About It Meme for 2024
Generating the Roll Safe-Think About It Meme
Generating the Roll Safe-Think About It Meme

Ollie Mattison
Mar 27, 2024• Proven solutions
Assumptions can lead you in a very wrong direction, and we’ve all made more foolish assumptions than we’d care to admit. As a matter of fact, seemingly brilliant life strategies are so common that they’ve become a meme. A guy named Reece Simpson made such a stupid and borderline sexist conclusion in one of the episodes of the Hood Documentary series, that it instantly became synonymous with all ideas that look good only in theory. The iconic image of him, placing the index finger to his temple with a comment: ‘You can’t be broke if you don’t check your bank account’ went viral only a six months after the documentary was initially released. In less than a week the tweet had 74.000 likes and 47.000 retweets.
Over time numerous variations of the meme emerged on social media, so in this article, we’re going to show you how you can make your own Roll Safe-Think About It memes in less than few minutes. But first, let have a look at some of the successful examples of this meme.
A Few Good Examples of the Roll Safe-Think About It Meme
Being slightly ironic while making a seemingly valid point is the true spirit of the Roll-Safe-Think About It meme, which is why using just any off the wall idea may not have the effect you’d like to achieve.

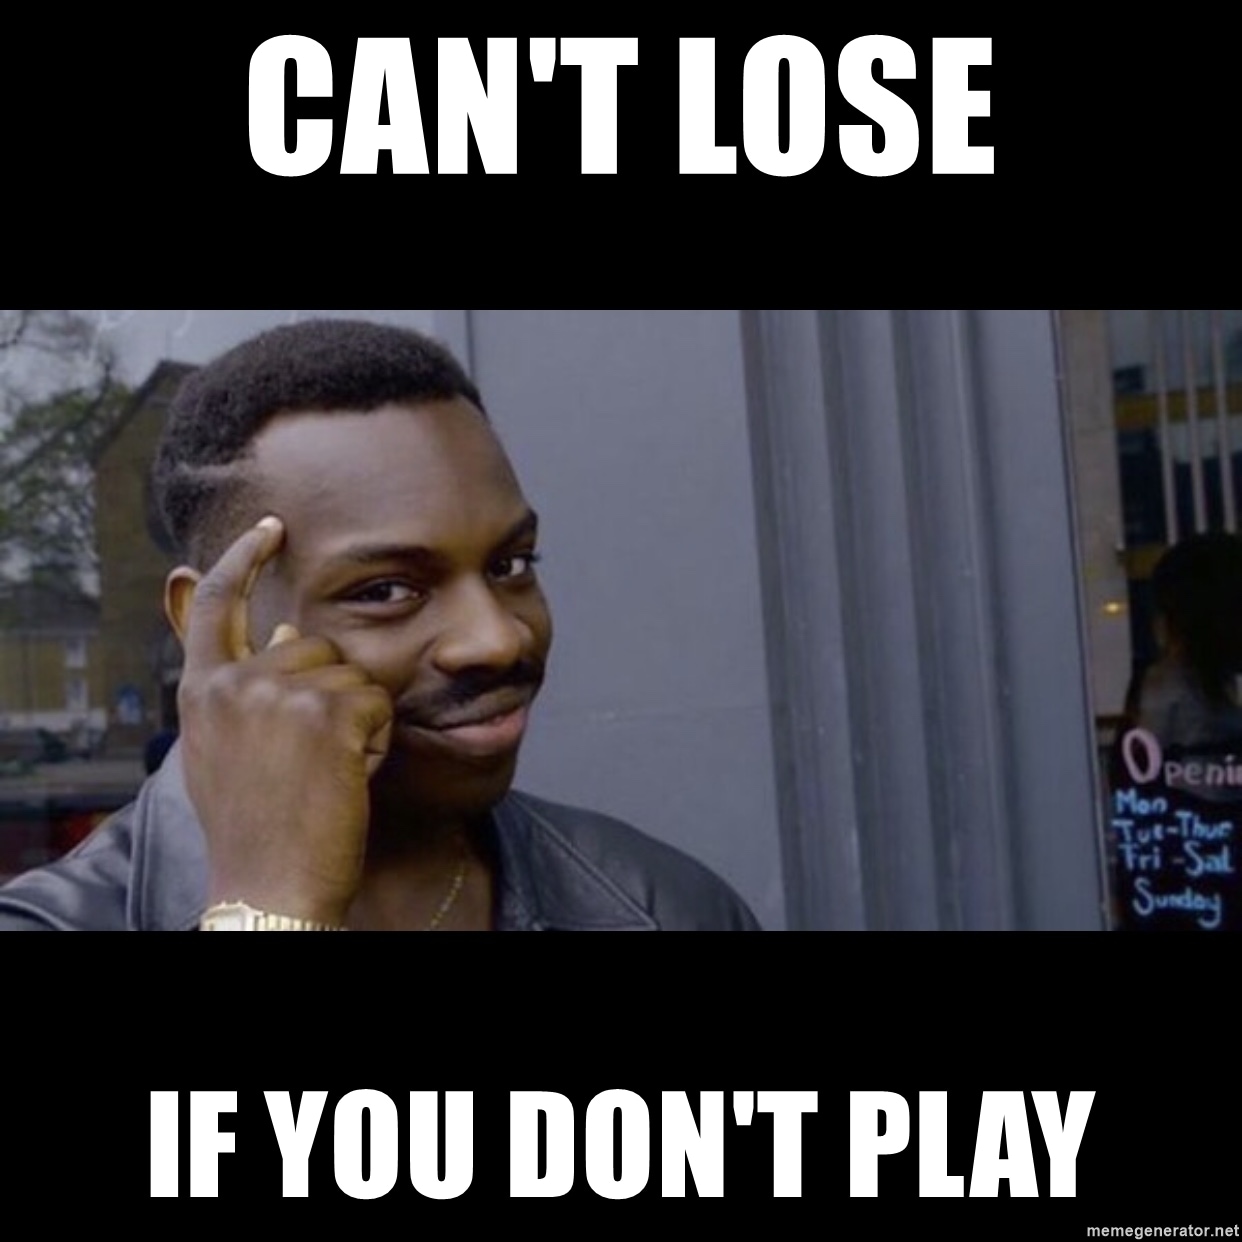
Can’t lose if you don’t play is a great illustration of what Roll Safe is all about. If you don’t try something you can’t fail at it, right? The assumption seems entirely legitimate, except it’s not, and that’s the catch.

A similar logic can be applied to romance, as there is zero chance to get cheated on if you weren’t in a relationship, to begin with. The only trouble is that if you adopt this way of thinking, you’ll never be in a relationship.
We all complain about financial troubles in one way or the other, and Roll Safe-Think About It offers a pretty funny way to do that. Once again, a seemingly valid point that only looks good in theory is the punch-line of the meme. There are so many different variations of this meme on the Internet, at the moment, but nearly all of them employ faulty logic to create the comical effect.
How to Make the Roll Safe-Think About It Meme
Generating a meme with the Filmora Online Meme Maker is free, quick and easy, and you can also use it to create memes from your Smartphone.
Attention: This post only provides the solutions to make memes for personal and non-commercial purpose. Since any redistribution without the approval of the copyright owners may violate the copyright laws, you’d better refer to the copyright laws in your country before doing so.
1. Importing the Images
On the home page of the Filmora Online Meme Maker offers you three quick ways to upload photos, videos or GIFs. You can either click on the + icon displayed in the middle of the screen and import a photo from a hard drive, drop the file from a folder on your computer to the designated section of the screen or use a URL to import meme templates.
So if you would like to create your Roll Safe-Think About It meme, you can start by copying the link the still image version or the GIF version of the meme. Click the “Copy the image” link below and the image link will be copied automatically.

Copy the image

Copy the image
Then, go to https://filmora.wondershare.com/meme-maker/ insert the image link you just copied by press Ctrl+V, click on the Upload button to start the upload process and wait until the template is uploaded.

Once the upload is complete you’ll be taken to another screen where you can choose whether you want the text to be inside the picture or outside. Which one of these options you’re going to use is up to you since there are versions where the text is placed both inside and outside of the picture.
2. Adding the Text to The Meme
Below the Text, Inside and Text Outside options you’ll be able to spot text boxes where you can add the punch-line of the meme. In the Text Options menu, you can select a new font, choose the text alignment you like the most or change the size and the color of the text. Scroll down to the bottom of the page and click on the Create button after you’ve added the text to the meme.

3. Downloading the Meme

A new page will load after the meme is generated, and you just have to click on the Download button and save it to your computer.
Those of you who use Filmora Online Meme Maker from their Smartphones can share their Roll Safe-Think About It memes directly from the platform. Sharing memes on social media is still not an option for Mac and PC users.
Conclusion
Adopting the logic behind the Roll Safe-Think About It memes in real life may not be the best of choices, but using it to cheer up your friends on social media can make your account more popular. Do you like making Roll Safe-Think About It memes? Share your experiences with us in the comments.
Ollie Mattison
Ollie Mattison is a writer and a lover of all things video.
Follow @Ollie Mattison
Ollie Mattison
Mar 27, 2024• Proven solutions
Assumptions can lead you in a very wrong direction, and we’ve all made more foolish assumptions than we’d care to admit. As a matter of fact, seemingly brilliant life strategies are so common that they’ve become a meme. A guy named Reece Simpson made such a stupid and borderline sexist conclusion in one of the episodes of the Hood Documentary series, that it instantly became synonymous with all ideas that look good only in theory. The iconic image of him, placing the index finger to his temple with a comment: ‘You can’t be broke if you don’t check your bank account’ went viral only a six months after the documentary was initially released. In less than a week the tweet had 74.000 likes and 47.000 retweets.
Over time numerous variations of the meme emerged on social media, so in this article, we’re going to show you how you can make your own Roll Safe-Think About It memes in less than few minutes. But first, let have a look at some of the successful examples of this meme.
A Few Good Examples of the Roll Safe-Think About It Meme
Being slightly ironic while making a seemingly valid point is the true spirit of the Roll-Safe-Think About It meme, which is why using just any off the wall idea may not have the effect you’d like to achieve.
Can’t lose if you don’t play is a great illustration of what Roll Safe is all about. If you don’t try something you can’t fail at it, right? The assumption seems entirely legitimate, except it’s not, and that’s the catch.
A similar logic can be applied to romance, as there is zero chance to get cheated on if you weren’t in a relationship, to begin with. The only trouble is that if you adopt this way of thinking, you’ll never be in a relationship.
We all complain about financial troubles in one way or the other, and Roll Safe-Think About It offers a pretty funny way to do that. Once again, a seemingly valid point that only looks good in theory is the punch-line of the meme. There are so many different variations of this meme on the Internet, at the moment, but nearly all of them employ faulty logic to create the comical effect.
How to Make the Roll Safe-Think About It Meme
Generating a meme with the Filmora Online Meme Maker is free, quick and easy, and you can also use it to create memes from your Smartphone.
Attention: This post only provides the solutions to make memes for personal and non-commercial purpose. Since any redistribution without the approval of the copyright owners may violate the copyright laws, you’d better refer to the copyright laws in your country before doing so.
1. Importing the Images
On the home page of the Filmora Online Meme Maker offers you three quick ways to upload photos, videos or GIFs. You can either click on the + icon displayed in the middle of the screen and import a photo from a hard drive, drop the file from a folder on your computer to the designated section of the screen or use a URL to import meme templates.
So if you would like to create your Roll Safe-Think About It meme, you can start by copying the link the still image version or the GIF version of the meme. Click the “Copy the image” link below and the image link will be copied automatically.
Copy the image
Copy the image
Then, go to https://filmora.wondershare.com/meme-maker/ insert the image link you just copied by press Ctrl+V, click on the Upload button to start the upload process and wait until the template is uploaded.
Once the upload is complete you’ll be taken to another screen where you can choose whether you want the text to be inside the picture or outside. Which one of these options you’re going to use is up to you since there are versions where the text is placed both inside and outside of the picture.
2. Adding the Text to The Meme
Below the Text, Inside and Text Outside options you’ll be able to spot text boxes where you can add the punch-line of the meme. In the Text Options menu, you can select a new font, choose the text alignment you like the most or change the size and the color of the text. Scroll down to the bottom of the page and click on the Create button after you’ve added the text to the meme.
3. Downloading the Meme
A new page will load after the meme is generated, and you just have to click on the Download button and save it to your computer.
Those of you who use Filmora Online Meme Maker from their Smartphones can share their Roll Safe-Think About It memes directly from the platform. Sharing memes on social media is still not an option for Mac and PC users.
Conclusion
Adopting the logic behind the Roll Safe-Think About It memes in real life may not be the best of choices, but using it to cheer up your friends on social media can make your account more popular. Do you like making Roll Safe-Think About It memes? Share your experiences with us in the comments.
Ollie Mattison
Ollie Mattison is a writer and a lover of all things video.
Follow @Ollie Mattison
How to Make a Slideshow with Music
How to Make a Slideshow with Music

Shanoon Cox
Mar 27, 2024• Proven solutions
Nowadays, we tend to store our experiences of important occasions in photos and videos since cameras and camcorders are popular. To better preserve these sweet memories, make a slideshow with music, photos and videos is a good idea. It’s not as difficult as you think since all you need are: a good slideshow maker, photos and videos you want to show, music to go along with your slideshow. Here is a tutorial about how to make a slideshow with music with Wondershare Filmora video editor and Wondershare DVD Slideshow Builder .
Read more: 20 Best Slideshow Songs for Different Occasions [Royalty-Free]
How to create slideshow with music in Filmora?


Note: The video tutorial about how to make slideshow in minutes is created with the previous version of Filmora video editor. Most of the steps are similar and creating a music slideshow with the latest Filmora is very easy. As we said before, all you need is your photos and music tracks, then follow the steps below to start.
Step 1. Download Filmora and Run it
Click the Free Download button above to download and install Wondershare Filmora on your computer and then launch it.
In case you want to change the default aspect ratio setting in the splash screen, you can choose 9:16 for portrait mode, 1:1 for Instagram slideshow and more. And then click New Project to create a project to continue.
Step 2. Import Photos and Music
After that, you need to import all your photo and music media to the Media Library and then drag and drop them to the timeline directly. Filmora allows you to change the order the photos in the timeline, and the photo duration as well.
You can also rotate photos and crop them manually to fit your project.
Note: If you find some black bar on your photos in preview, it is recommended to change Photo Placement to Crop and Zoom under Preference before drag-n-drop to timeline.
Step 3. Add Transitions

There are hundreds of transitions available in Filmora which you should totally have a try. You can apply a specific transition between each selected photo, or apply random transitions to selected photos.
Filmora features more than 30 transitions especially for Slideshow, such as cross merge, cross split, swap and sweep clockwise. Of course, you can also use some 3D transition, ripple and dissolve, or speed blur transitions.
You can also adjust the transition duration accordingly.
To make your photos slideshow looks better, it is highly recommended to apply filters and overlays effects.
Step 4. Add background music
You can choose background music or sound effect from the inbuilt audio library in Filmora or drag and drop the music track file from computer to the timeline directly. Filmora features the voiceover recording tool which helps you to record your own voice easily.
Step 5. Export and Save
Finally, it’s time to save and export the music slideshow as you see fit. You have several options, you can save it on the computer in different formats, or you can share it to YouTube or Vimeo directly, or you can burn it to DVD.
Why choose Filmora to create music slideshow?
- Filmora supports most of popular image formats such as .jpg, .png, .bmp, .gif, .tif, and .tiff.
- Filmora allows you to crop, pan & zoom the slideshow manually or automatically by applying Pan & Zoom Photo Placement.
- Filmora has inbuilt music track and sound effect library, and stunning transitions, effects and elements presets.
- Filmora allows you to record your own voiceover and apply fade in and fade out effects.
- Besides creating photo slideshow, you can use it to create videos for both your YouTube marketing, daily sharing and business.
How to make a slideshow with DVD Slideshow Builder

Tips for Make a Slideshow with Music
1. Install slideshow software and import photos and videos
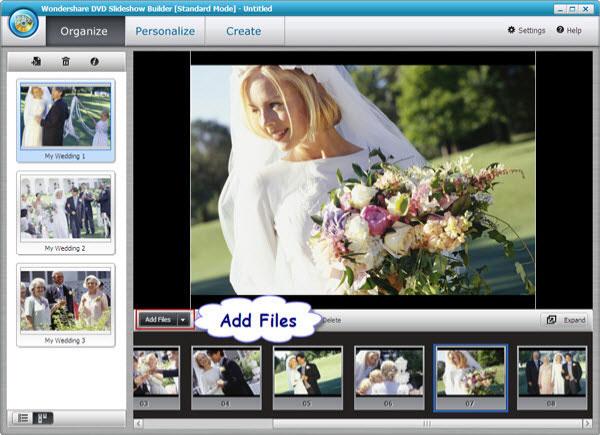
Install the software and import your digital photos to the storyboard by clicking ‘“Add Files” (there is no quantity limitation of photos). You can also add videos from computer or camera.
2. Add music to your photo slideshow
Go to the “Personalize” tab. Click “Music” toolbar to add background music or just drag the music to the background track. In the timeline, you can drag the slider to make the music best suit the photos and videos. If you need to edit the music, double click the clip and in the pop up window, trim music and adjust music volume as you like.
Tip: If you want to synchronize background music with the slideshow, click “Settings” (it’s on the right upper corner) and choose “Slideshow” tab, then tick the checkbox under the “Synchronize“. At last, click “OK” button.
3 .Select movie styles and add decorations
There are also 480+ free styles and transition effects that can be used for your picture slideshow with music in this tab. Choose your favorite styles and drag it on the photos. You can also add decoration text, clipart and effects on your digital photos. To make add more fun, you can also add intro movie and credit movie to your picture slideshow with music by clicking the “Intro/Credit” build-in button.

4 . Preview and save your slideshow with music
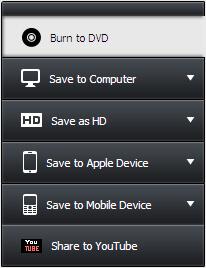
Go to “Publish” tab, you can preview the photo video by click the preview button first. Then publish it to the format you want. If you want to watch your photo slideshow with music to iPod or iPhone, you’d better publish it to MP4 format. This slideshow software also enables you to share your slideshow directly to YouTube by filling in the necessary information. Besides, you can burn DVD slideshow with music by clicking the “Burn to DVD” button and putting a DVD disc in your computer.
We shared two ways of making slideshow with music, whether you are using Filmora or DVD slideshow maker, leave a comment below and let me know your choice.
Shanoon Cox
Shanoon Cox is a writer and a lover of all things video.
Follow @Shanoon Cox
Shanoon Cox
Mar 27, 2024• Proven solutions
Nowadays, we tend to store our experiences of important occasions in photos and videos since cameras and camcorders are popular. To better preserve these sweet memories, make a slideshow with music, photos and videos is a good idea. It’s not as difficult as you think since all you need are: a good slideshow maker, photos and videos you want to show, music to go along with your slideshow. Here is a tutorial about how to make a slideshow with music with Wondershare Filmora video editor and Wondershare DVD Slideshow Builder .
Read more: 20 Best Slideshow Songs for Different Occasions [Royalty-Free]
How to create slideshow with music in Filmora?
Note: The video tutorial about how to make slideshow in minutes is created with the previous version of Filmora video editor. Most of the steps are similar and creating a music slideshow with the latest Filmora is very easy. As we said before, all you need is your photos and music tracks, then follow the steps below to start.
Step 1. Download Filmora and Run it
Click the Free Download button above to download and install Wondershare Filmora on your computer and then launch it.
In case you want to change the default aspect ratio setting in the splash screen, you can choose 9:16 for portrait mode, 1:1 for Instagram slideshow and more. And then click New Project to create a project to continue.
Step 2. Import Photos and Music
After that, you need to import all your photo and music media to the Media Library and then drag and drop them to the timeline directly. Filmora allows you to change the order the photos in the timeline, and the photo duration as well.
You can also rotate photos and crop them manually to fit your project.
Note: If you find some black bar on your photos in preview, it is recommended to change Photo Placement to Crop and Zoom under Preference before drag-n-drop to timeline.
Step 3. Add Transitions
There are hundreds of transitions available in Filmora which you should totally have a try. You can apply a specific transition between each selected photo, or apply random transitions to selected photos.
Filmora features more than 30 transitions especially for Slideshow, such as cross merge, cross split, swap and sweep clockwise. Of course, you can also use some 3D transition, ripple and dissolve, or speed blur transitions.
You can also adjust the transition duration accordingly.
To make your photos slideshow looks better, it is highly recommended to apply filters and overlays effects.
Step 4. Add background music
You can choose background music or sound effect from the inbuilt audio library in Filmora or drag and drop the music track file from computer to the timeline directly. Filmora features the voiceover recording tool which helps you to record your own voice easily.
Step 5. Export and Save
Finally, it’s time to save and export the music slideshow as you see fit. You have several options, you can save it on the computer in different formats, or you can share it to YouTube or Vimeo directly, or you can burn it to DVD.
Why choose Filmora to create music slideshow?
- Filmora supports most of popular image formats such as .jpg, .png, .bmp, .gif, .tif, and .tiff.
- Filmora allows you to crop, pan & zoom the slideshow manually or automatically by applying Pan & Zoom Photo Placement.
- Filmora has inbuilt music track and sound effect library, and stunning transitions, effects and elements presets.
- Filmora allows you to record your own voiceover and apply fade in and fade out effects.
- Besides creating photo slideshow, you can use it to create videos for both your YouTube marketing, daily sharing and business.
How to make a slideshow with DVD Slideshow Builder
Tips for Make a Slideshow with Music
1. Install slideshow software and import photos and videos
Install the software and import your digital photos to the storyboard by clicking ‘“Add Files” (there is no quantity limitation of photos). You can also add videos from computer or camera.
2. Add music to your photo slideshow
Go to the “Personalize” tab. Click “Music” toolbar to add background music or just drag the music to the background track. In the timeline, you can drag the slider to make the music best suit the photos and videos. If you need to edit the music, double click the clip and in the pop up window, trim music and adjust music volume as you like.
Tip: If you want to synchronize background music with the slideshow, click “Settings” (it’s on the right upper corner) and choose “Slideshow” tab, then tick the checkbox under the “Synchronize“. At last, click “OK” button.
3 .Select movie styles and add decorations
There are also 480+ free styles and transition effects that can be used for your picture slideshow with music in this tab. Choose your favorite styles and drag it on the photos. You can also add decoration text, clipart and effects on your digital photos. To make add more fun, you can also add intro movie and credit movie to your picture slideshow with music by clicking the “Intro/Credit” build-in button.
4 . Preview and save your slideshow with music
Go to “Publish” tab, you can preview the photo video by click the preview button first. Then publish it to the format you want. If you want to watch your photo slideshow with music to iPod or iPhone, you’d better publish it to MP4 format. This slideshow software also enables you to share your slideshow directly to YouTube by filling in the necessary information. Besides, you can burn DVD slideshow with music by clicking the “Burn to DVD” button and putting a DVD disc in your computer.
We shared two ways of making slideshow with music, whether you are using Filmora or DVD slideshow maker, leave a comment below and let me know your choice.

Shanoon Cox
Shanoon Cox is a writer and a lover of all things video.
Follow @Shanoon Cox
Shanoon Cox
Mar 27, 2024• Proven solutions
Nowadays, we tend to store our experiences of important occasions in photos and videos since cameras and camcorders are popular. To better preserve these sweet memories, make a slideshow with music, photos and videos is a good idea. It’s not as difficult as you think since all you need are: a good slideshow maker, photos and videos you want to show, music to go along with your slideshow. Here is a tutorial about how to make a slideshow with music with Wondershare Filmora video editor and Wondershare DVD Slideshow Builder .
Read more: 20 Best Slideshow Songs for Different Occasions [Royalty-Free]
How to create slideshow with music in Filmora?
Note: The video tutorial about how to make slideshow in minutes is created with the previous version of Filmora video editor. Most of the steps are similar and creating a music slideshow with the latest Filmora is very easy. As we said before, all you need is your photos and music tracks, then follow the steps below to start.
Step 1. Download Filmora and Run it
Click the Free Download button above to download and install Wondershare Filmora on your computer and then launch it.
In case you want to change the default aspect ratio setting in the splash screen, you can choose 9:16 for portrait mode, 1:1 for Instagram slideshow and more. And then click New Project to create a project to continue.
Step 2. Import Photos and Music
After that, you need to import all your photo and music media to the Media Library and then drag and drop them to the timeline directly. Filmora allows you to change the order the photos in the timeline, and the photo duration as well.
You can also rotate photos and crop them manually to fit your project.
Note: If you find some black bar on your photos in preview, it is recommended to change Photo Placement to Crop and Zoom under Preference before drag-n-drop to timeline.
Step 3. Add Transitions
There are hundreds of transitions available in Filmora which you should totally have a try. You can apply a specific transition between each selected photo, or apply random transitions to selected photos.
Filmora features more than 30 transitions especially for Slideshow, such as cross merge, cross split, swap and sweep clockwise. Of course, you can also use some 3D transition, ripple and dissolve, or speed blur transitions.
You can also adjust the transition duration accordingly.
To make your photos slideshow looks better, it is highly recommended to apply filters and overlays effects.
Step 4. Add background music
You can choose background music or sound effect from the inbuilt audio library in Filmora or drag and drop the music track file from computer to the timeline directly. Filmora features the voiceover recording tool which helps you to record your own voice easily.
Step 5. Export and Save
Finally, it’s time to save and export the music slideshow as you see fit. You have several options, you can save it on the computer in different formats, or you can share it to YouTube or Vimeo directly, or you can burn it to DVD.
Why choose Filmora to create music slideshow?
- Filmora supports most of popular image formats such as .jpg, .png, .bmp, .gif, .tif, and .tiff.
- Filmora allows you to crop, pan & zoom the slideshow manually or automatically by applying Pan & Zoom Photo Placement.
- Filmora has inbuilt music track and sound effect library, and stunning transitions, effects and elements presets.
- Filmora allows you to record your own voiceover and apply fade in and fade out effects.
- Besides creating photo slideshow, you can use it to create videos for both your YouTube marketing, daily sharing and business.
How to make a slideshow with DVD Slideshow Builder
Tips for Make a Slideshow with Music
1. Install slideshow software and import photos and videos
Install the software and import your digital photos to the storyboard by clicking ‘“Add Files” (there is no quantity limitation of photos). You can also add videos from computer or camera.
2. Add music to your photo slideshow
Go to the “Personalize” tab. Click “Music” toolbar to add background music or just drag the music to the background track. In the timeline, you can drag the slider to make the music best suit the photos and videos. If you need to edit the music, double click the clip and in the pop up window, trim music and adjust music volume as you like.
Tip: If you want to synchronize background music with the slideshow, click “Settings” (it’s on the right upper corner) and choose “Slideshow” tab, then tick the checkbox under the “Synchronize“. At last, click “OK” button.
3 .Select movie styles and add decorations
There are also 480+ free styles and transition effects that can be used for your picture slideshow with music in this tab. Choose your favorite styles and drag it on the photos. You can also add decoration text, clipart and effects on your digital photos. To make add more fun, you can also add intro movie and credit movie to your picture slideshow with music by clicking the “Intro/Credit” build-in button.
4 . Preview and save your slideshow with music
Go to “Publish” tab, you can preview the photo video by click the preview button first. Then publish it to the format you want. If you want to watch your photo slideshow with music to iPod or iPhone, you’d better publish it to MP4 format. This slideshow software also enables you to share your slideshow directly to YouTube by filling in the necessary information. Besides, you can burn DVD slideshow with music by clicking the “Burn to DVD” button and putting a DVD disc in your computer.
We shared two ways of making slideshow with music, whether you are using Filmora or DVD slideshow maker, leave a comment below and let me know your choice.
Shanoon Cox
Shanoon Cox is a writer and a lover of all things video.
Follow @Shanoon Cox
Burn Photos to DVD | How to Burn Photos to DVD with Transitions and Music
How to Burn Photos to DVD with Transitions and Music
Shanoon Cox
Mar 27, 2024• Proven solutions
Photos are precious memories not only for you but also for your family members. As time goes on, the photos might fade out and be unable to retrieve. To avoid this, burn photos to DVD will be a great idea to preserve family memories eternally.
This article will show you how to burn photos to DVD Slideshow with transition, titles and music quickly and easily by using Wondershare DVD Slideshow Builder Deluxe . It also provides some tips on how to burn photos to DVD.
Part 1: How to Burn Photos to DVD with Transition, Titles and Music
Wondershare DVD Slideshow Builder Deluxe can help you quickly create and burn photos to DVD. Download the free trial version this photo DVD maker first.
Step 1. Add Photo or Video Files
In Organize tab, simply click the “Add Files” button to open the browse window, find your files and import them into the program, you can drag and drop photos or videos to organize them on storyboard. Click the Expand button to get a larger viewer.

Step 2. Customize Photo Slideshow Transitions
Generally speaking, transition effects will be automatically inserted between every two photos/videos when you import the photos. But you can customize them by clicking the Personalize tab, then drag and drop a transition from the list to the thumbnail between two slides.
You are also able to add background music here: click the Music button and choose a music file from your computer.

Step 3. Choose DVD Menu
Now switch to Create tab to author a DVD menu from template and burn to DVD disc quickly:
- On the right hand side of the screen, double click on desired menu template to apply a DVD menu template.
- Click the Edit button under the preview windows to customize your DVD menu or right click on menu for more options.
- You can also make a professional DVD menu using dynamic DVD menu templates.
BTW, if you don’t want a DVD menu, just check the “Disable DVD Menu” option.

Step 4. Burn Photos to DVD Disc
Now click the Preview button beneath the preview window to make sure the photo DVD slideshow is exactly what you want. Go back to Personalize tab to change if necessary. After that, click “Burn” button to start burning your DVD slideshow to DVD.
You can also output photo slideshow to watch on Youtube, Mobile Phone, iPhone, PSP, etc. through options on the left. Below are the instructions to burn DVD for watch on TV:

- Insert a blank DVD disc, and do the following.
- Click “Burn to DVD”. Then specify the number of DVD copies. You can also choose to generate ISO Image files or DVD Folders.
- Make sure the PAL or NTSC TV Standard settings is right. If you don’t know which standard is used in your country, click the “Help” button. The wrong TV standard would cause playback incompatibility problem.
- Then click “Start” to burn DVD slideshow. If you have checked Create DVD Folder and/or Create DVD Image File options, the corresponding files will also be created to the specified folder.
Now sit back and relax, when burning complete, insert the created DVD disc into your DVD player to watch photo DVD slideshow on TV.
Learn more: User Guide of DVD Slideshow Builder Deluxe
Part 2: More Photo to DVD Tips
More about NTSC/PAL TV Standard
Nowadays, there are three video formats around the world. But each one is incompatible with others. For instance, NTSC is used in North America, Canada and Japan; while most of other regions PAL/SECAM. To apply TV Standard in DVD Slideshow Builder Deluxe , go to “Create“ -> Option tab and locate TV Standard option to select NTSC or PAL. If you are not sure which one to choose, please click “Help” button, select your country, then click “OK” , the program will choose the right TV standard for you.
Burn Photos to DVD/CD as Data Disc
If you only want to burn photo to DVD for backup and further use, you only need a burning photo to DVD software like ImgBurn (Free) or Nero (commercial). These software helps you burn all digital media files to DVD, of course you can burn photos to DVD for backup purpose. Notice that some photo DVD maker allows you burn slideshow as well as the original photos. This way, you turn photos to DVD slideshow with transition, and at the same time, backup photos to DVD for other uses.
Scan Photos to DVD - Digitize Photos
If you use traditional camera and have got loads of photos in album, you can scan photos to computer so that convert photo to digital format. Afterwards, you can get more from these digital photos, like backup photos to DVD, send to others as DVD gift, make a photo DVD show to play on TV, etc. All these could be done with your favorite photo DVD maker software. Now see how to transform your printed photos to digital first:
Select a good photo scanner -> Prepare your photos to scan -> Start photo scanning -> Adjust scanned photos
Scanning printed photos to computer is not an easy job. It needs patience and some tips and tricks. As you may know, some companies provide photo scanning service. For the Step 4, you can also adjust digital photos in your selected photo DVD maker. Anyway, you need to get your digital photos ready before you burn photos to DVD with transitions and music.
Shanoon Cox
Shanoon Cox is a writer and a lover of all things video.
Follow @Shanoon Cox
Shanoon Cox
Mar 27, 2024• Proven solutions
Photos are precious memories not only for you but also for your family members. As time goes on, the photos might fade out and be unable to retrieve. To avoid this, burn photos to DVD will be a great idea to preserve family memories eternally.
This article will show you how to burn photos to DVD Slideshow with transition, titles and music quickly and easily by using Wondershare DVD Slideshow Builder Deluxe . It also provides some tips on how to burn photos to DVD.
Part 1: How to Burn Photos to DVD with Transition, Titles and Music
Wondershare DVD Slideshow Builder Deluxe can help you quickly create and burn photos to DVD. Download the free trial version this photo DVD maker first.
Step 1. Add Photo or Video Files
In Organize tab, simply click the “Add Files” button to open the browse window, find your files and import them into the program, you can drag and drop photos or videos to organize them on storyboard. Click the Expand button to get a larger viewer.
Step 2. Customize Photo Slideshow Transitions
Generally speaking, transition effects will be automatically inserted between every two photos/videos when you import the photos. But you can customize them by clicking the Personalize tab, then drag and drop a transition from the list to the thumbnail between two slides.
You are also able to add background music here: click the Music button and choose a music file from your computer.
Step 3. Choose DVD Menu
Now switch to Create tab to author a DVD menu from template and burn to DVD disc quickly:
- On the right hand side of the screen, double click on desired menu template to apply a DVD menu template.
- Click the Edit button under the preview windows to customize your DVD menu or right click on menu for more options.
- You can also make a professional DVD menu using dynamic DVD menu templates.
BTW, if you don’t want a DVD menu, just check the “Disable DVD Menu” option.
Step 4. Burn Photos to DVD Disc
Now click the Preview button beneath the preview window to make sure the photo DVD slideshow is exactly what you want. Go back to Personalize tab to change if necessary. After that, click “Burn” button to start burning your DVD slideshow to DVD.
You can also output photo slideshow to watch on Youtube, Mobile Phone, iPhone, PSP, etc. through options on the left. Below are the instructions to burn DVD for watch on TV:
- Insert a blank DVD disc, and do the following.
- Click “Burn to DVD”. Then specify the number of DVD copies. You can also choose to generate ISO Image files or DVD Folders.
- Make sure the PAL or NTSC TV Standard settings is right. If you don’t know which standard is used in your country, click the “Help” button. The wrong TV standard would cause playback incompatibility problem.
- Then click “Start” to burn DVD slideshow. If you have checked Create DVD Folder and/or Create DVD Image File options, the corresponding files will also be created to the specified folder.
Now sit back and relax, when burning complete, insert the created DVD disc into your DVD player to watch photo DVD slideshow on TV.
Learn more: User Guide of DVD Slideshow Builder Deluxe
Part 2: More Photo to DVD Tips
More about NTSC/PAL TV Standard
Nowadays, there are three video formats around the world. But each one is incompatible with others. For instance, NTSC is used in North America, Canada and Japan; while most of other regions PAL/SECAM. To apply TV Standard in DVD Slideshow Builder Deluxe , go to “Create“ -> Option tab and locate TV Standard option to select NTSC or PAL. If you are not sure which one to choose, please click “Help” button, select your country, then click “OK” , the program will choose the right TV standard for you.
Burn Photos to DVD/CD as Data Disc
If you only want to burn photo to DVD for backup and further use, you only need a burning photo to DVD software like ImgBurn (Free) or Nero (commercial). These software helps you burn all digital media files to DVD, of course you can burn photos to DVD for backup purpose. Notice that some photo DVD maker allows you burn slideshow as well as the original photos. This way, you turn photos to DVD slideshow with transition, and at the same time, backup photos to DVD for other uses.
Scan Photos to DVD - Digitize Photos
If you use traditional camera and have got loads of photos in album, you can scan photos to computer so that convert photo to digital format. Afterwards, you can get more from these digital photos, like backup photos to DVD, send to others as DVD gift, make a photo DVD show to play on TV, etc. All these could be done with your favorite photo DVD maker software. Now see how to transform your printed photos to digital first:
Select a good photo scanner -> Prepare your photos to scan -> Start photo scanning -> Adjust scanned photos
Scanning printed photos to computer is not an easy job. It needs patience and some tips and tricks. As you may know, some companies provide photo scanning service. For the Step 4, you can also adjust digital photos in your selected photo DVD maker. Anyway, you need to get your digital photos ready before you burn photos to DVD with transitions and music.
Shanoon Cox
Shanoon Cox is a writer and a lover of all things video.
Follow @Shanoon Cox
10 Best Work Memes to Have Fun in Work Days
10 Best Work Memes to Have Fun in Work Days
Ollie Mattison
Mar 27, 2024• Proven solutions
Sometimes on working days, you feel drained out of ideas, or stressed to have a new idea altogether. Maybe you feel so tired to work on something, because work is not always interesting. When the monotony of the day gets into you, why not explore some work memes and refresh the mood? If you are wondering where to get such awesome, mood elevating work memes we have got you covered.
In this article, we have compiled a list of 10 work memes that will set your work mode on.
10 best work memes
Here are the 10 best work memes to help you get through the working week and cheer you up to get going.
1. When you think you been working for 4 hours
The look of surprise on the boy’s face. Lol! That is exactly how people feel, when they are stressed at work and think it’s been forever they are at work, but actually it’s only a couple of minutes.

2. Me five minutes after getting to work
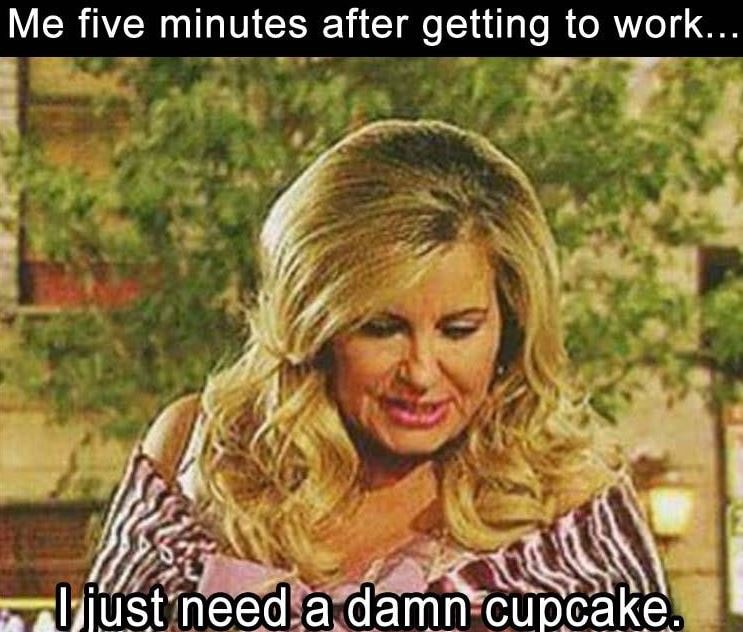
This work meme literally made us laugh. Every minute seems longer at work and it’s funny that the meme says a cupcake is badly needed to lift the work mood.
3. When you are about to leave work
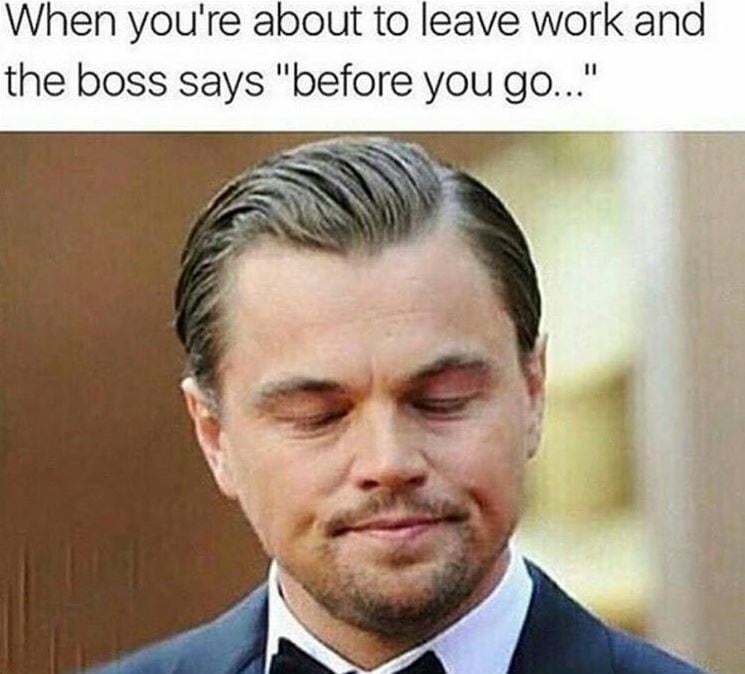
Work memes like this are so relatable. All day the boss didn’t realize something important and the moment you are about to step out, he stops you and probably assigns a work that will take ages to complete.
4. When you have been telling management
This meme describes, you giving a damn to whatever problem is happening at work. Because even after repeated reminders to fix the issue, nobody paid attention. So, now is your turn to just chillax!

5. It’s Wednesday
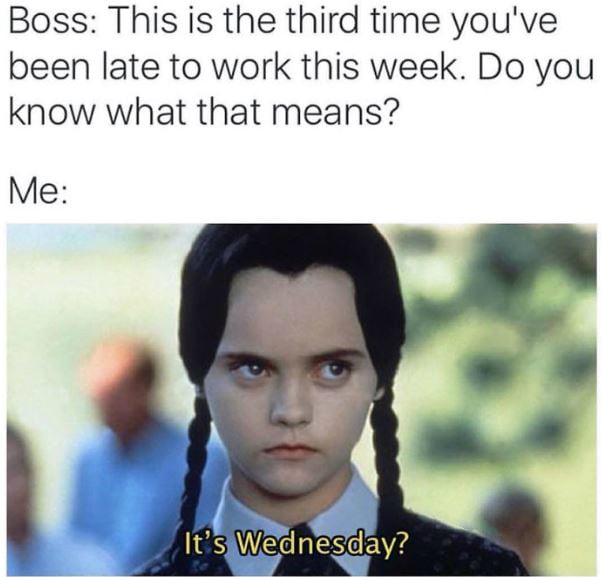
Work memes like this are sarcastic. When your boss asks that you are late for work third time in the week. Your obvious response is mentally replying is it Wednesday?
6. Dress for the job you want
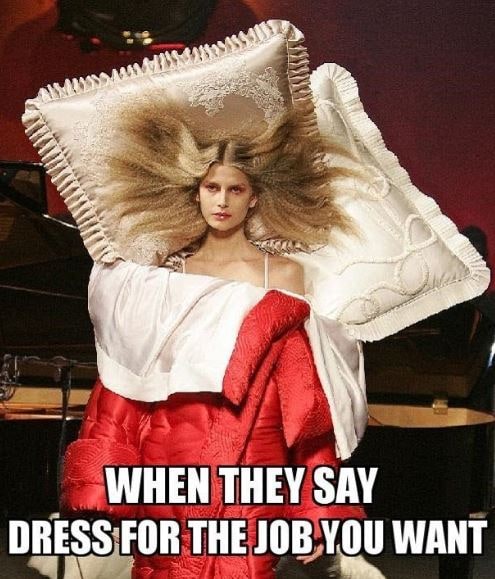
When you don’t get enough sleep, you just crave to crash on your bed. So this funny meme depicts, to get your dream job wear a dress with fixed pillows and quilt and get ready to start working, err! Sleeping.
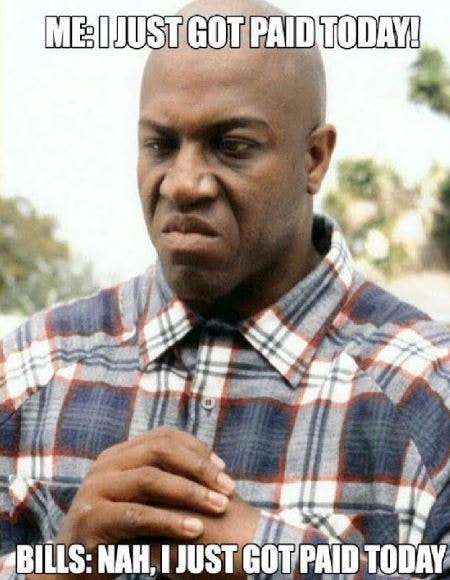
7. When you just got paid
Pay day is happiness and shock! After getting your salary has been credited text, next you receive the upcoming bills, rents etc. so, it’s not you who actually got paid, but your bills!
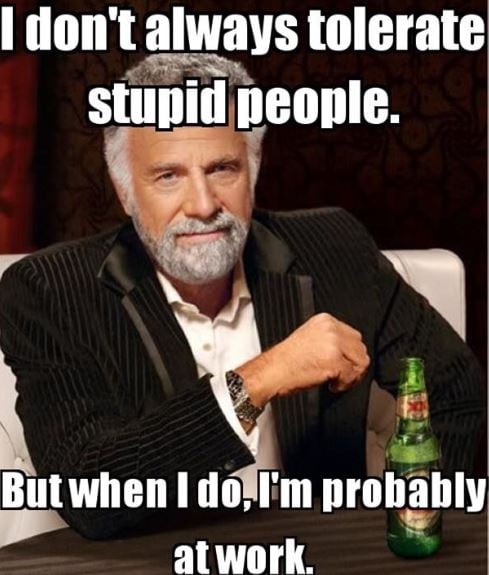
8. I don’t always tolerate stupid people
This work meme is epic. People usually get annoyed by people and revolt, but at the work place they need to tolerate the undesired behavior and bossy-ness.
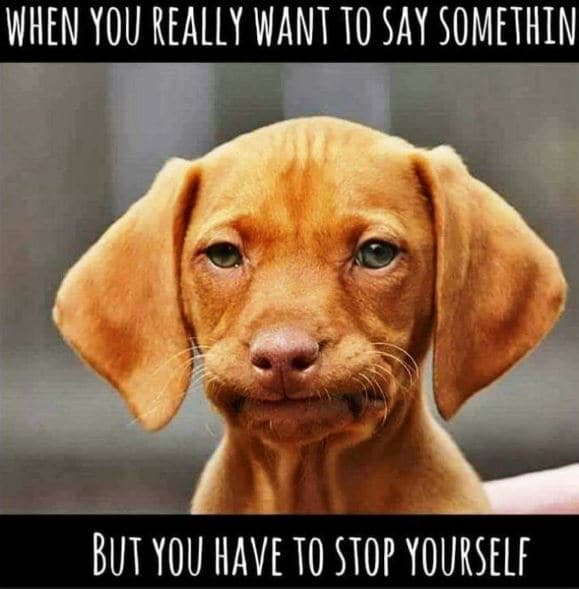
9. But you have to stop yourself
There are moments at work, you are really tempted to blurt out something, but you keep quiet, to avoid the repercussions. The dog’s expression in the picture is worth a laugh.
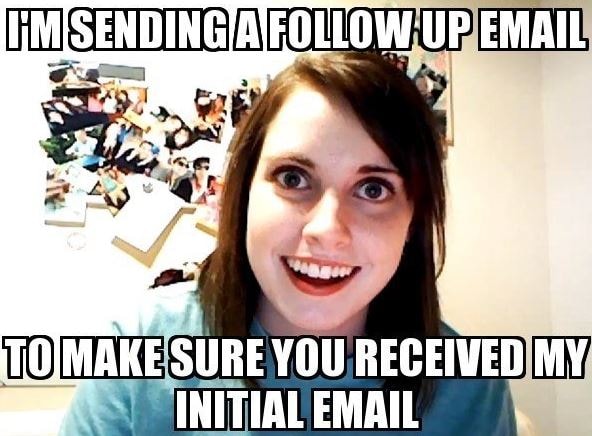
10. I am sending a follow up email
When you keep on reminding people to acknowledge your work email, but they don’t. You send follow up email to tell them, that your job is done.
Conclusion
If you want to make hilarious work memes, then don’t hesitate to adopt Filmora meme maker . It is totally free without any watermark on the meme. You can create image, GIF and video meme using this program. Moreover, you can include videos in your meme using this work meme maker. You have the customized output format feature that allows you to get a video turned into GIF. You can add text, change fonts and move the text anywhere around the meme.
Ollie Mattison
Ollie Mattison is a writer and a lover of all things video.
Follow @Ollie Mattison
Ollie Mattison
Mar 27, 2024• Proven solutions
Sometimes on working days, you feel drained out of ideas, or stressed to have a new idea altogether. Maybe you feel so tired to work on something, because work is not always interesting. When the monotony of the day gets into you, why not explore some work memes and refresh the mood? If you are wondering where to get such awesome, mood elevating work memes we have got you covered.
In this article, we have compiled a list of 10 work memes that will set your work mode on.
10 best work memes
Here are the 10 best work memes to help you get through the working week and cheer you up to get going.
1. When you think you been working for 4 hours
The look of surprise on the boy’s face. Lol! That is exactly how people feel, when they are stressed at work and think it’s been forever they are at work, but actually it’s only a couple of minutes.
2. Me five minutes after getting to work
This work meme literally made us laugh. Every minute seems longer at work and it’s funny that the meme says a cupcake is badly needed to lift the work mood.
3. When you are about to leave work
Work memes like this are so relatable. All day the boss didn’t realize something important and the moment you are about to step out, he stops you and probably assigns a work that will take ages to complete.
4. When you have been telling management
This meme describes, you giving a damn to whatever problem is happening at work. Because even after repeated reminders to fix the issue, nobody paid attention. So, now is your turn to just chillax!
5. It’s Wednesday
Work memes like this are sarcastic. When your boss asks that you are late for work third time in the week. Your obvious response is mentally replying is it Wednesday?
6. Dress for the job you want
When you don’t get enough sleep, you just crave to crash on your bed. So this funny meme depicts, to get your dream job wear a dress with fixed pillows and quilt and get ready to start working, err! Sleeping.
7. When you just got paid
Pay day is happiness and shock! After getting your salary has been credited text, next you receive the upcoming bills, rents etc. so, it’s not you who actually got paid, but your bills!
8. I don’t always tolerate stupid people
This work meme is epic. People usually get annoyed by people and revolt, but at the work place they need to tolerate the undesired behavior and bossy-ness.
9. But you have to stop yourself
There are moments at work, you are really tempted to blurt out something, but you keep quiet, to avoid the repercussions. The dog’s expression in the picture is worth a laugh.
10. I am sending a follow up email
When you keep on reminding people to acknowledge your work email, but they don’t. You send follow up email to tell them, that your job is done.
Conclusion
If you want to make hilarious work memes, then don’t hesitate to adopt Filmora meme maker . It is totally free without any watermark on the meme. You can create image, GIF and video meme using this program. Moreover, you can include videos in your meme using this work meme maker. You have the customized output format feature that allows you to get a video turned into GIF. You can add text, change fonts and move the text anywhere around the meme.
Ollie Mattison
Ollie Mattison is a writer and a lover of all things video.
Follow @Ollie Mattison
Distracted Boyfriend Meme Generator
Distracted Boyfriend Meme Generator
Ollie Mattison
Mar 27, 2024• Proven solutions
The Distracted Boyfriend meme is the embodiment of the awkward situation we find ourselves in when we want something other than what we already have. The original image was taken by Antonio Guillem and posted on iStock with a caption “Disloyal man with his girlfriend looking at another girl”. By early 2017, a few years after it was posted on iStock, the picture surfaced on social media, and it became a viral meme in a few short months. One of the first Distracted Boyfriend memes that featured a joke about staring at the sun during a solar eclipse was posted on Reddit and within 24 hours it gained 31.200 points.
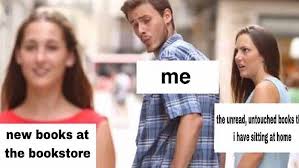
The meme has since become synonymous with being unfaithful to girlfriends, ideologies, scientific evidence, photo cameras or virtually anything else. Despite its popularity, it is still difficult to make a good Distracted Boyfriend meme, so let’s have a look at some of the best versions of the meme that emerged on social networks.
The Distracted Girlfriend meme became popular soon after the Distracted Boyfriend meme went viral. The photo belongs to the same series of images posted to iStock by Antonio Guillem.

Copy the image
The facial expression of the girl in the photo makes it perfect meme material because she looks as if she’s just about to risk it all and do what she wants. Both Boyfriend and Girlfriend versions of this meme contain text over each of the characters in the picture. If you have a similar dilemma you can make your own version effortlessly. Here’s how.
How to Make a Distracted Boyfriend Meme?
Online meme generators often watermark the content you create or require you to sign in before you can make a meme, which is why we recommend using Filmora Online Meme Maker . The platform lets you generate memes for free, and it offers all the tools you’ll need to quickly make a watermark-free Distracted Boyfriend meme.
1. Uploading the Image
You can click the “Copy the image” link below and the image link will be copied automatically.

Copy the image
Enter the URL into the box. Click on the Upload button and wait for the new page to load, so you can start making adjustments to the picture.
If you saved the photo to your computer, you can click on the +icon once you arrive at the meme maker’s homepage and navigate to its destination on your hard drive.

2. Adding Text to Memes
The textual part of the Distracted Boyfriend meme is always incorporated into the photo, so make sure that the Text Inside option is selected and proceed to insert the text into the text boxes. Click on the Add Text Box button to add a third text box to the meme, and drag the text boxes displayed on the screen to their best positions.

The Text Options menu lets you pick a font or change the color and the size of the text. It also offers the standard text alignment features, so you can easily rearrange the text.
3. Downloading the Meme
Click on the Create button once you finish customizing the text and wait for the new page to load.

Conclusion
Click on the download button to save the meme you created or use some of the file sharing options to post the meme on social media platforms if you are accessing the Online Meme Maker from a mobile device.
The Distracted Boyfriend is one of the most popular memes in the last couple of years that has made us all laugh because we all understand how it feels to be tempted by the things we don’t have. Do you like generating the Distracted Boyfriend or Distracted Girlfriend memes? Leave a comment below and share your experiences with us.
Ollie Mattison
Ollie Mattison is a writer and a lover of all things video.
Follow @Ollie Mattison
Ollie Mattison
Mar 27, 2024• Proven solutions
The Distracted Boyfriend meme is the embodiment of the awkward situation we find ourselves in when we want something other than what we already have. The original image was taken by Antonio Guillem and posted on iStock with a caption “Disloyal man with his girlfriend looking at another girl”. By early 2017, a few years after it was posted on iStock, the picture surfaced on social media, and it became a viral meme in a few short months. One of the first Distracted Boyfriend memes that featured a joke about staring at the sun during a solar eclipse was posted on Reddit and within 24 hours it gained 31.200 points.
The meme has since become synonymous with being unfaithful to girlfriends, ideologies, scientific evidence, photo cameras or virtually anything else. Despite its popularity, it is still difficult to make a good Distracted Boyfriend meme, so let’s have a look at some of the best versions of the meme that emerged on social networks.
The Distracted Girlfriend meme became popular soon after the Distracted Boyfriend meme went viral. The photo belongs to the same series of images posted to iStock by Antonio Guillem.
Copy the image
The facial expression of the girl in the photo makes it perfect meme material because she looks as if she’s just about to risk it all and do what she wants. Both Boyfriend and Girlfriend versions of this meme contain text over each of the characters in the picture. If you have a similar dilemma you can make your own version effortlessly. Here’s how.
How to Make a Distracted Boyfriend Meme?
Online meme generators often watermark the content you create or require you to sign in before you can make a meme, which is why we recommend using Filmora Online Meme Maker . The platform lets you generate memes for free, and it offers all the tools you’ll need to quickly make a watermark-free Distracted Boyfriend meme.
1. Uploading the Image
You can click the “Copy the image” link below and the image link will be copied automatically.
Copy the image
Enter the URL into the box. Click on the Upload button and wait for the new page to load, so you can start making adjustments to the picture.
If you saved the photo to your computer, you can click on the +icon once you arrive at the meme maker’s homepage and navigate to its destination on your hard drive.
2. Adding Text to Memes
The textual part of the Distracted Boyfriend meme is always incorporated into the photo, so make sure that the Text Inside option is selected and proceed to insert the text into the text boxes. Click on the Add Text Box button to add a third text box to the meme, and drag the text boxes displayed on the screen to their best positions.
The Text Options menu lets you pick a font or change the color and the size of the text. It also offers the standard text alignment features, so you can easily rearrange the text.
3. Downloading the Meme
Click on the Create button once you finish customizing the text and wait for the new page to load.
Conclusion
Click on the download button to save the meme you created or use some of the file sharing options to post the meme on social media platforms if you are accessing the Online Meme Maker from a mobile device.
The Distracted Boyfriend is one of the most popular memes in the last couple of years that has made us all laugh because we all understand how it feels to be tempted by the things we don’t have. Do you like generating the Distracted Boyfriend or Distracted Girlfriend memes? Leave a comment below and share your experiences with us.
Ollie Mattison
Ollie Mattison is a writer and a lover of all things video.
Follow @Ollie Mattison
How to Edit Memoji on Android and iPhone
How to Edit Memoji on Android and iPhone
Shanoon Cox
Mar 27, 2024• Proven solutions
A memoji is simply the cartoon avatar of you. You can easily learn how to edit memoji and make a custom memoji that is the exact mirror image of you. From eye color to freckles, you can add every feature that makes the memoji look like a mini cartoon version of you
Since a custom memoji is a more personalized way to express our emotions, it can be the perfect way to add a hint of humor to conversations. Everyone loves a unique sticker, especially if it looks like them. So, you can take help from our guide on how to change memoji and take your texting experience to the next level.
- Bonus Tip-Memoji VS Emoji
- Part 1: How to Edit Memoji on iPhone
- Part 2: How to Edit Memoji on Android
Bonus Tip—Memoji VS Emoji
Now you must be wondering what the difference between a memoji and emoji is. Well, there is the first major difference, which is that a memoji is the cartoon avatar of you, whereas an emoji is just around yellow-faced cartoon with various expressions
1.The memoji is solely based on a human face, but an emoji can be any object, place, or even a symbol. While you can mostly craft a custom emoji personalized to your style and likings, emojis are limited. Custom memoji can also be dressed and decorated to serve as the perfect mini-version of you, complete from earrings to freckles.
2.Moreover, almost everyone has the same set of emojis. But since memojis are created to look like a person, everyone has a very unique pack of memojis looking like the cartoon version of them.
Despite the differences, both memojis and emojis carry equal significance and can spice up your texting experience in hilarious ways.
Part 1: How to Edit Memoji on iPhone
Majority of you might be iPhone users and so it’s only fair to show you some easy ways on how to edit memoji on your iPhone. There are two ways to create a custom memoji and then edit it. Lets dive in!
Method 1: Edit Memoji in the Built-in Editor
The introduction of iOS13 has made it possible for the majority of iPhone users to create or edit their memojis as they like. But in order to use this built-in editor to create a custom memoji, make sure that your device is updated to iOS13.
In this Apple-exclusive editor, the steps are pretty straightforward. But to help you further, I will walk you along with the steps in detail
- Go to the iMessages and open a new message tab or a previous conversation and tap the Appstoreicon to reveal the app bar. Hit the Animoji icon represented by the three heads
![]()
- Choose the memoji you wish to edit and click the three dots in the bottom left corner. Click Editon the pop-up dialogue box. You can also tap on Duplicate to copy the same memoji.
- Now you will be given various options to craft a custom memoji that looks exactly like you, right down to every detail. Click on the Skintab to change the skin color, add freckles or a beauty spot
- Choose the hairstyleand hair color that suits you the best
- In the Browstab, select your brow style. Go through all the tabs to choose the perfect headwear, glasses, or even AirPods to create the perfect custom memoji
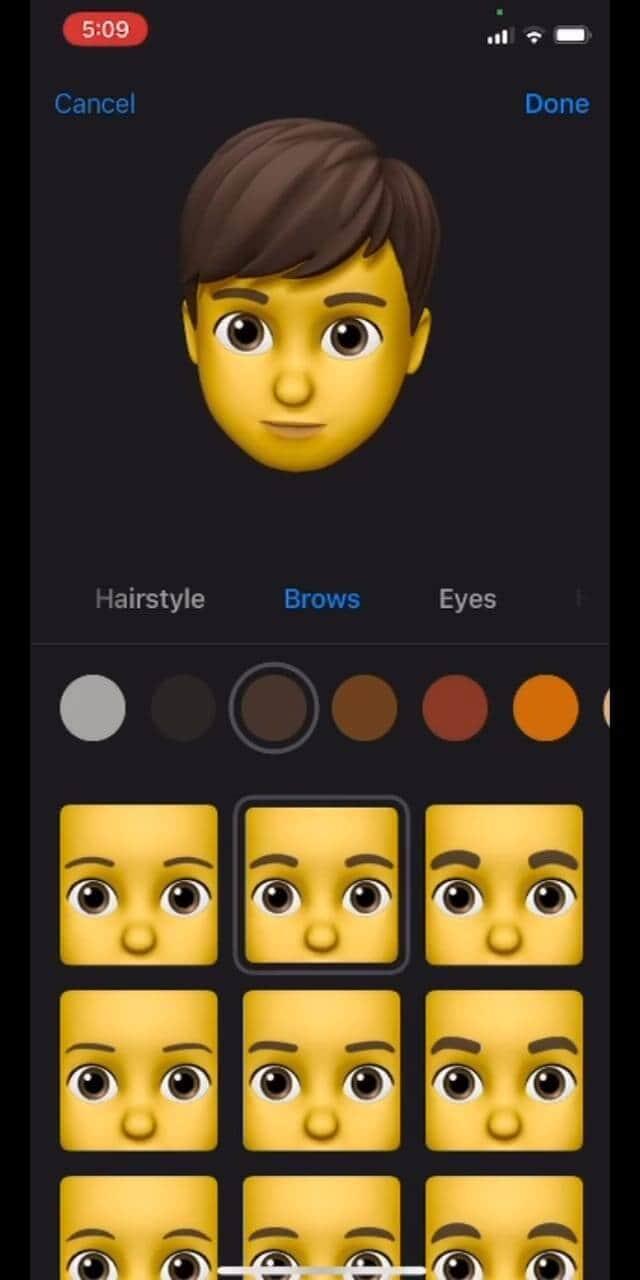
Method 2: Edit Memoji Using the Avatoon App
Avatoon is a great memoji maker app that lets you edit memoji from scratch and has an extensive collection of features you can choose from to make the cartoon look exactly like you. You can even auto-create a memoji by taking a selfie, and Avatoon will do the rest. In manual creation, you can select every detail from eyelashes, tattoos, headwear, and even jewelry.
Let me show the easy ways how to edit memoji using Avatoons powerful tools
- Firstly, download launch Avatoon.
- Choose Manual Creationto create a personalized custom emoji
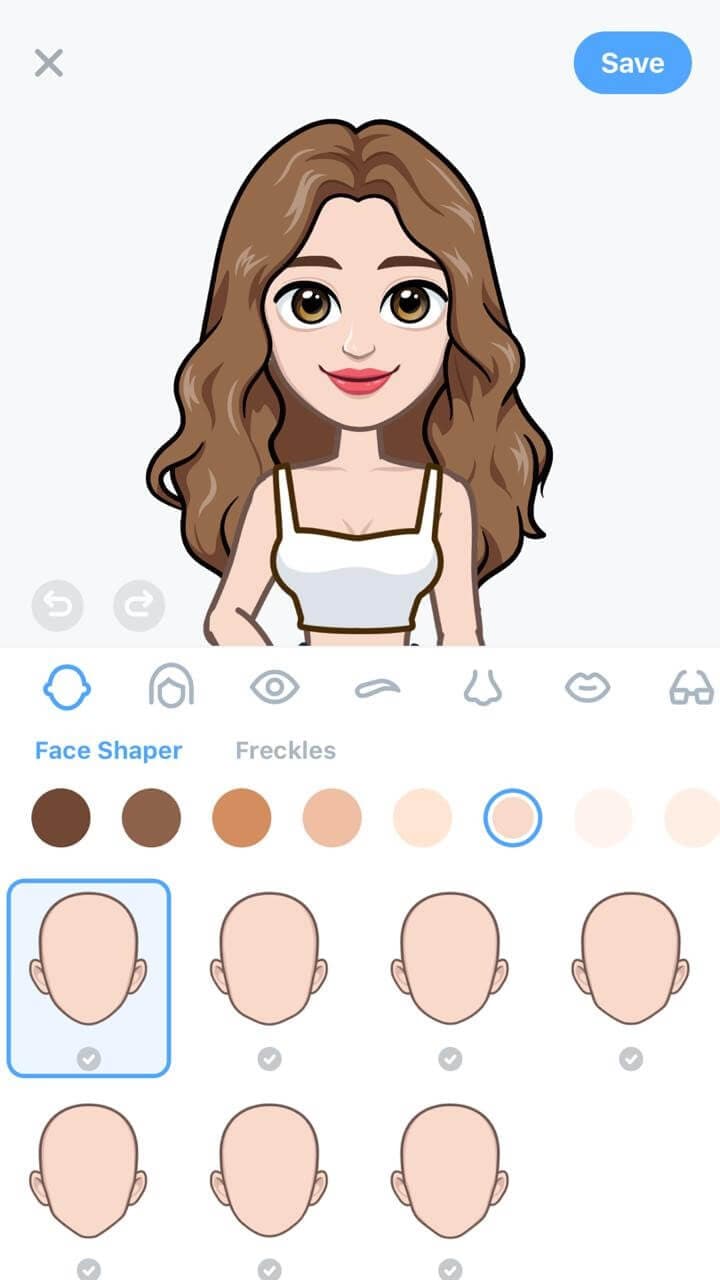
- Now you can choose your face shape, hairstyle, eyes, brows, etc. Add headwear or glasses that depict your style
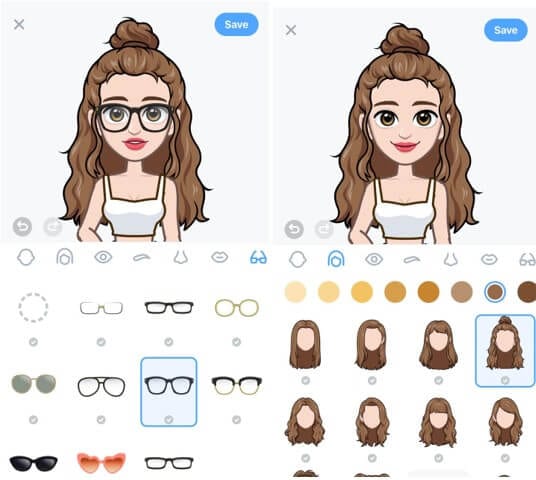
- Now that you have created a basic cartoon self, you can add much finer details by using coins.
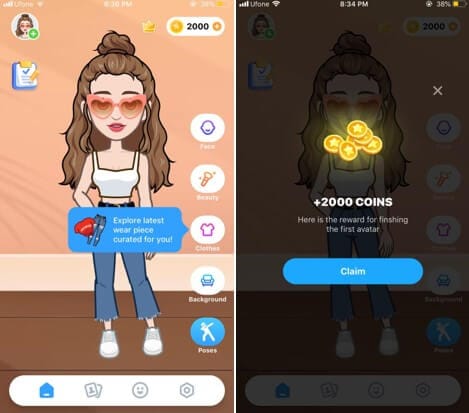
- Click on the Photobooth at the bottom to choose a cool background for your memoji.
- Once you have decorated the memoji, tap on Poses, choose the mood you like and instantly share via different sharing platforms
Part 2: How to Edit Memoji on Android
MojiPop is an amazing free app to make a custom emoji. It is packed with stickers and animated caricatures for every mood or emotion. Just take a selfie and start communicating using your cartoon face. You can even edit your memojis to suit your style. Then send the memoji to your friends to surprise them with a hilarious custom memoji
If you’re wondering how to edit memoji, here’s a short guide for you:
- Launch MojiPop and click on Create Avatar. Either take a selfie or choose an existing image from your gallery. Specify the age group.
![]()
- MojiPop instantly displays avatar styles, choose one that best fits you and click Next
![]()
- Select different features in tabs for hair, eyes, headwear to make the custom memoji look just like you. Click Confirmto save it.
- In the Discovertab, choose a gif template to wish someone or express your feelings.
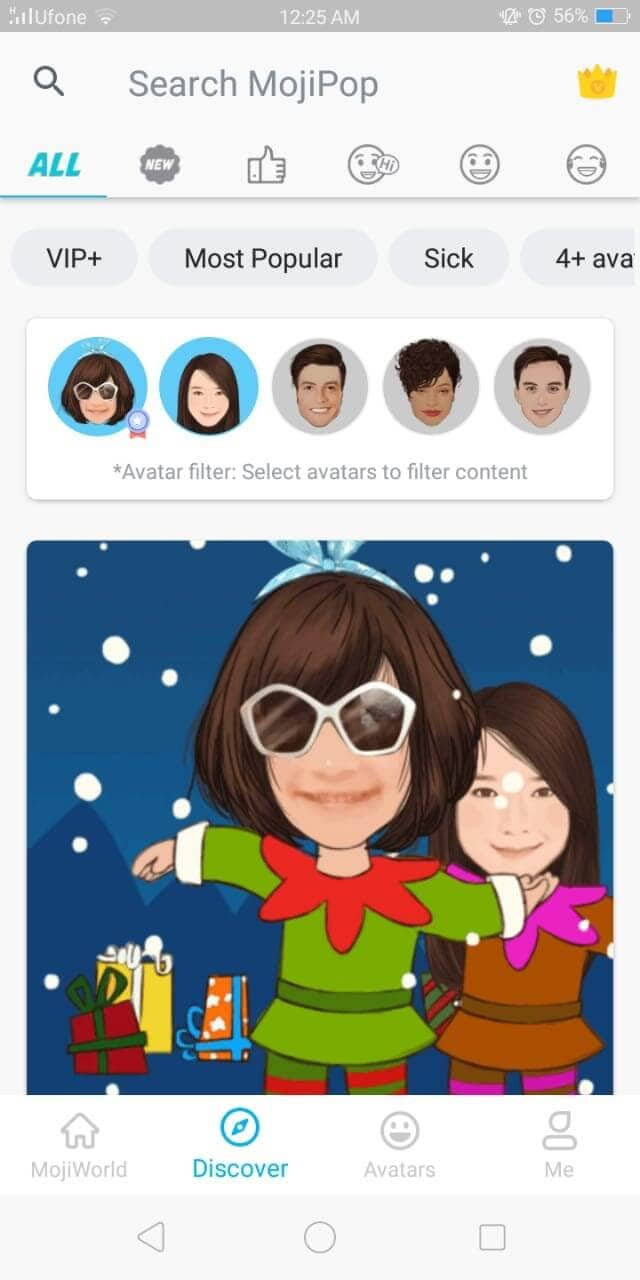
- Click on the Share icon and choose the platform for instant sharing
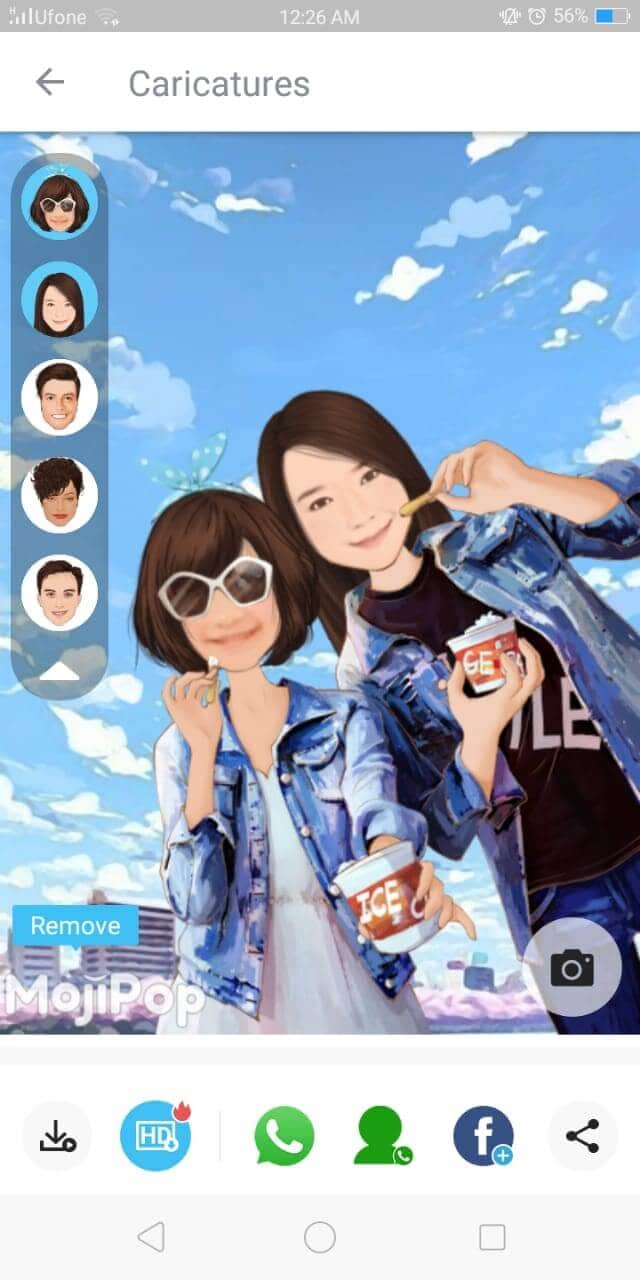
Ready to Edit Memoji by Yourself?
Are you ready to make your conversations more interesting and engaging using custom memojis? Because who doesn’t love a mini version of themselves displaying how happy or angry they feel? What better to communicate without saying a word?
And we hope that our short tutorial on how to edit memoji helps you create different versions of yourself to express yourself better.
Now that you know how to edit memoji to your liking, what are you waiting for? Go on to edit and create a hilarious avatar of yourself and enjoy texting
Shanoon Cox
Shanoon Cox is a writer and a lover of all things video.
Follow @Shanoon Cox
Shanoon Cox
Mar 27, 2024• Proven solutions
A memoji is simply the cartoon avatar of you. You can easily learn how to edit memoji and make a custom memoji that is the exact mirror image of you. From eye color to freckles, you can add every feature that makes the memoji look like a mini cartoon version of you
Since a custom memoji is a more personalized way to express our emotions, it can be the perfect way to add a hint of humor to conversations. Everyone loves a unique sticker, especially if it looks like them. So, you can take help from our guide on how to change memoji and take your texting experience to the next level.
- Bonus Tip-Memoji VS Emoji
- Part 1: How to Edit Memoji on iPhone
- Part 2: How to Edit Memoji on Android
Bonus Tip—Memoji VS Emoji
Now you must be wondering what the difference between a memoji and emoji is. Well, there is the first major difference, which is that a memoji is the cartoon avatar of you, whereas an emoji is just around yellow-faced cartoon with various expressions
1.The memoji is solely based on a human face, but an emoji can be any object, place, or even a symbol. While you can mostly craft a custom emoji personalized to your style and likings, emojis are limited. Custom memoji can also be dressed and decorated to serve as the perfect mini-version of you, complete from earrings to freckles.
2.Moreover, almost everyone has the same set of emojis. But since memojis are created to look like a person, everyone has a very unique pack of memojis looking like the cartoon version of them.
Despite the differences, both memojis and emojis carry equal significance and can spice up your texting experience in hilarious ways.
Part 1: How to Edit Memoji on iPhone
Majority of you might be iPhone users and so it’s only fair to show you some easy ways on how to edit memoji on your iPhone. There are two ways to create a custom memoji and then edit it. Lets dive in!
Method 1: Edit Memoji in the Built-in Editor
The introduction of iOS13 has made it possible for the majority of iPhone users to create or edit their memojis as they like. But in order to use this built-in editor to create a custom memoji, make sure that your device is updated to iOS13.
In this Apple-exclusive editor, the steps are pretty straightforward. But to help you further, I will walk you along with the steps in detail
- Go to the iMessages and open a new message tab or a previous conversation and tap the Appstoreicon to reveal the app bar. Hit the Animoji icon represented by the three heads
![]()
- Choose the memoji you wish to edit and click the three dots in the bottom left corner. Click Editon the pop-up dialogue box. You can also tap on Duplicate to copy the same memoji.
- Now you will be given various options to craft a custom memoji that looks exactly like you, right down to every detail. Click on the Skintab to change the skin color, add freckles or a beauty spot
- Choose the hairstyleand hair color that suits you the best
- In the Browstab, select your brow style. Go through all the tabs to choose the perfect headwear, glasses, or even AirPods to create the perfect custom memoji
Method 2: Edit Memoji Using the Avatoon App
Avatoon is a great memoji maker app that lets you edit memoji from scratch and has an extensive collection of features you can choose from to make the cartoon look exactly like you. You can even auto-create a memoji by taking a selfie, and Avatoon will do the rest. In manual creation, you can select every detail from eyelashes, tattoos, headwear, and even jewelry.
Let me show the easy ways how to edit memoji using Avatoons powerful tools
- Firstly, download launch Avatoon.
- Choose Manual Creationto create a personalized custom emoji
- Now you can choose your face shape, hairstyle, eyes, brows, etc. Add headwear or glasses that depict your style
- Now that you have created a basic cartoon self, you can add much finer details by using coins.
- Click on the Photobooth at the bottom to choose a cool background for your memoji.
- Once you have decorated the memoji, tap on Poses, choose the mood you like and instantly share via different sharing platforms
Part 2: How to Edit Memoji on Android
MojiPop is an amazing free app to make a custom emoji. It is packed with stickers and animated caricatures for every mood or emotion. Just take a selfie and start communicating using your cartoon face. You can even edit your memojis to suit your style. Then send the memoji to your friends to surprise them with a hilarious custom memoji
If you’re wondering how to edit memoji, here’s a short guide for you:
- Launch MojiPop and click on Create Avatar. Either take a selfie or choose an existing image from your gallery. Specify the age group.
![]()
- MojiPop instantly displays avatar styles, choose one that best fits you and click Next
![]()
- Select different features in tabs for hair, eyes, headwear to make the custom memoji look just like you. Click Confirmto save it.
- In the Discovertab, choose a gif template to wish someone or express your feelings.
- Click on the Share icon and choose the platform for instant sharing
Ready to Edit Memoji by Yourself?
Are you ready to make your conversations more interesting and engaging using custom memojis? Because who doesn’t love a mini version of themselves displaying how happy or angry they feel? What better to communicate without saying a word?
And we hope that our short tutorial on how to edit memoji helps you create different versions of yourself to express yourself better.
Now that you know how to edit memoji to your liking, what are you waiting for? Go on to edit and create a hilarious avatar of yourself and enjoy texting
Shanoon Cox
Shanoon Cox is a writer and a lover of all things video.
Follow @Shanoon Cox
Add Emojis to Videos on YouTube/Facebook/Snapchat [2023 Guide]
Add Emojis to Videos on YouTube/Facebook/Snapchat [Step by Step Guide]

Liza Brown
Mar 27, 2024• Proven solutions
Emojis are a great way to express one’s emotion more vividly through a depiction rather than a plain conventional text. By the passage of time, the trend of using emoji on social media domain has drastically increased around the world. Since emoji are ubiquitous and its influence on culture is increasingly huge, using emoji has now become a trend.
A plain conventional text or video may not emphasize the meaning behind the phrase, but adding emoji to it is like adding a soul to the intentions behind the message. It helps outshine the theme and make a video more appealing at the same time.
So, with all this being known, let’s take a tour to a complete guide to how to accessorize a video on multiple social media domains and make it far more attractive and meaningful.
Best Tool to Help You Add Emojis to Videos in Few Clicks
Gamers, YouTubers and all other Mac and PC users who’d like to add a smiley or any other emoji to a video should try processing their footage with the Filmora video editor.
Performing basic video editing tasks like cutting or trimming the footage, choosing a soundtrack for a video or adding an emoji to a single shot or an entire sequence can all be completed in just a couple of clicks.
Filmora is free to download. Import your videos after you launch the software, you then can add any animated emojis into wherever you want. Have a try now! Emojis inside are so Cute!
How to Add Emojis to YouTube Videos?
You can now add emojis to any of the YouTube videos using an online free tool called Kapwing.
Below are the basic steps about how to add emojis to YouTube videos anywhere using Kapwing.
Step 1: Open free tool Meme Maker and tap on “get started”.
Step 2: Copy the link of the targeted YouTube video and paste the URL of your YouTube video.
Step 3: One of the ways to insert emoji using Kapwing is to directly upload an emoji having a transparent background. In the toolbar, click on “upload” and paste its URL there. The image will be placed onto the targeted video as an overlay by importing it. Another way to add emoji is to click “add text” where you will have options to insert emojis.
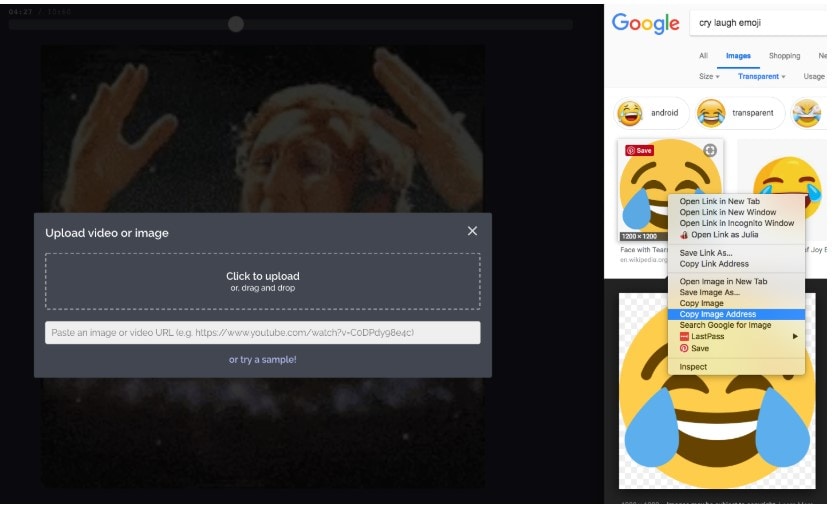
Step 4: You can now play around with editing options in Kapwing to adjust accordingly.
How to Use Emojis on YouTube?
YouTube provides you an option to insert emoji on your YouTube account description, tag and titles with great ease with the use of YouTube certified plugin, Tube Buddy.
Step 1: Install this plugin on chrome browser.
Step 2: Open “info and settings” option in your YouTube targeted video.
Step 3: Tap on description box, tags or title where an emoji icon will be shown. Tap on the emoji icon to display a list of emojis. You can also search for an emoji in the search bar.
How to Add Emojis in Snapchat Videos?
Step 1: Install Snapchat if you don’t already have it. Then run Snapchat.
Step 2: Record a video by keeping your fingers on the record button.
Step 3: Choose and tap an emoji of your choice to add in your video. Hold your fingers on emoji to place to the desired frame/clip of your recorded video.
Step 4: The emoji can be resized by dragging or pinching it in. You can add more than one emoji.
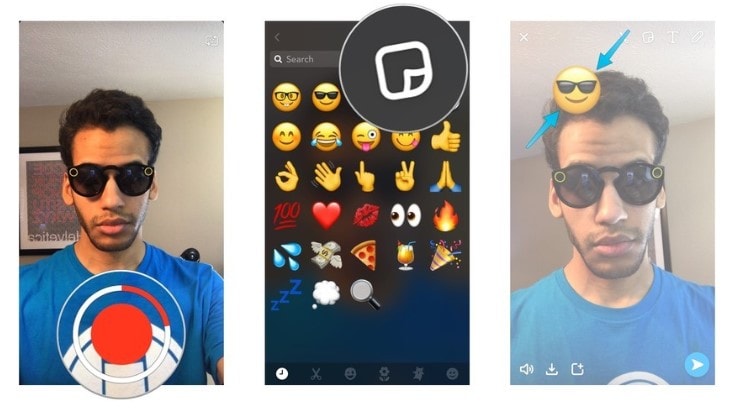
Image from iMore
How to Add Emojis to Facebook?
If you are wondering about how to add emojis to Facebook videos then, unfortunately, Facebook only offers “go live” option on Facebook where an emoji cannot be inserted. But you can insert emoji to Facebook status, comment or in your messenger conversation easily by following the step below for status:
Step 1: Click “what’s on your mind” to add new status on Facebook.
Step 2: At the bottom right side of the status box is an emoji icon. Click on it. This will open a list of emojis that you can choose as many as you want
Step 3: Click on the emoji icon back again to close the list when you are done. Click on post to share the post on your wall.
How to Add Emojis to Videos on iMovie?
Step 1: Search for the desired emoji on the internet with transparent background. Go to iMovie and select a clip of your video where you want to insert an emoji.
Step 2: Go to the “Import” option into the toolbar above, select your desired emoji from the list. This emoji will be added to the iMovie library.
Step 3: Click on that emoji. This overlays that emoji onto that video clip. You can scale the emoji up and down and drag it anywhere on the video.
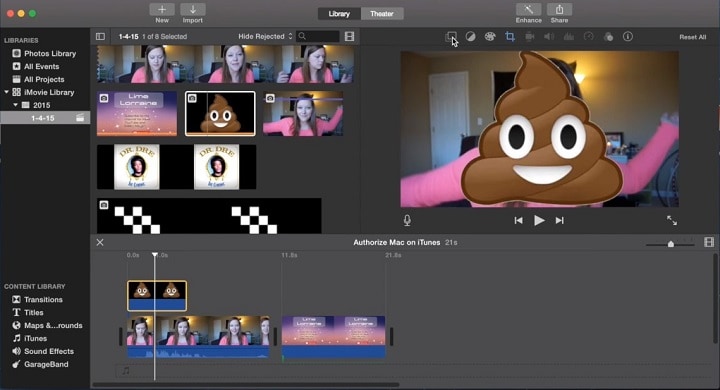
Image from YouSubtitles
How to Add Emojis to Videos Online?
Blurbiz, is an online application for editing YouTube, Instagram, Facebook and Snapchat videos. Just follow the steps below, then you can add emojis you want.
Step 1: Create and name the project in Blurbiz.
Step 2: Upload either your video, sticker or gif whichever you want an emoji to be placed in.
Step 3: Hover over the video and click on the “edit” button.
Step 4: Tap on “upload” at the top left side of the pane. Upload emoji with .png extension from your desktop.
Step 5: Drag and drop to overlay the emoji onto your video. Resize and position an emoji accordingly.
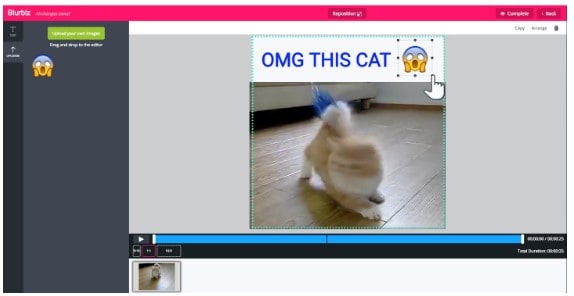
Step 6: Tap on “complete” at the top right corner when you are done. You can download an mp4 format video.
How to Add Emojis to Videos Android?
WeVideo , is an app to create and edit videos to the next level and provide one with ample special effects to add on to your videos.
Alongside using basic editing features like cutting, trimming or arranging video clips, you can amplify your editing game by adding emoji to your videos. Moreover, you can export your projects in high quality and share them on either Vimeo, YouTube or Dropbox.

Conclusion
Be it any video on any social media platform or your local device, with this thorough guide, you must be able to accessorize your video and take it to another level of emotional expression and message details in your video by using fun emojis.
Liza Brown
Liza Brown is a writer and a lover of all things video.
Follow @Liza Brown
Liza Brown
Mar 27, 2024• Proven solutions
Emojis are a great way to express one’s emotion more vividly through a depiction rather than a plain conventional text. By the passage of time, the trend of using emoji on social media domain has drastically increased around the world. Since emoji are ubiquitous and its influence on culture is increasingly huge, using emoji has now become a trend.
A plain conventional text or video may not emphasize the meaning behind the phrase, but adding emoji to it is like adding a soul to the intentions behind the message. It helps outshine the theme and make a video more appealing at the same time.
So, with all this being known, let’s take a tour to a complete guide to how to accessorize a video on multiple social media domains and make it far more attractive and meaningful.
Best Tool to Help You Add Emojis to Videos in Few Clicks
Gamers, YouTubers and all other Mac and PC users who’d like to add a smiley or any other emoji to a video should try processing their footage with the Filmora video editor.
Performing basic video editing tasks like cutting or trimming the footage, choosing a soundtrack for a video or adding an emoji to a single shot or an entire sequence can all be completed in just a couple of clicks.
Filmora is free to download. Import your videos after you launch the software, you then can add any animated emojis into wherever you want. Have a try now! Emojis inside are so Cute!
How to Add Emojis to YouTube Videos?
You can now add emojis to any of the YouTube videos using an online free tool called Kapwing.
Below are the basic steps about how to add emojis to YouTube videos anywhere using Kapwing.
Step 1: Open free tool Meme Maker and tap on “get started”.
Step 2: Copy the link of the targeted YouTube video and paste the URL of your YouTube video.
Step 3: One of the ways to insert emoji using Kapwing is to directly upload an emoji having a transparent background. In the toolbar, click on “upload” and paste its URL there. The image will be placed onto the targeted video as an overlay by importing it. Another way to add emoji is to click “add text” where you will have options to insert emojis.
Step 4: You can now play around with editing options in Kapwing to adjust accordingly.
How to Use Emojis on YouTube?
YouTube provides you an option to insert emoji on your YouTube account description, tag and titles with great ease with the use of YouTube certified plugin, Tube Buddy.
Step 1: Install this plugin on chrome browser.
Step 2: Open “info and settings” option in your YouTube targeted video.
Step 3: Tap on description box, tags or title where an emoji icon will be shown. Tap on the emoji icon to display a list of emojis. You can also search for an emoji in the search bar.
How to Add Emojis in Snapchat Videos?
Step 1: Install Snapchat if you don’t already have it. Then run Snapchat.
Step 2: Record a video by keeping your fingers on the record button.
Step 3: Choose and tap an emoji of your choice to add in your video. Hold your fingers on emoji to place to the desired frame/clip of your recorded video.
Step 4: The emoji can be resized by dragging or pinching it in. You can add more than one emoji.
Image from iMore
How to Add Emojis to Facebook?
If you are wondering about how to add emojis to Facebook videos then, unfortunately, Facebook only offers “go live” option on Facebook where an emoji cannot be inserted. But you can insert emoji to Facebook status, comment or in your messenger conversation easily by following the step below for status:
Step 1: Click “what’s on your mind” to add new status on Facebook.
Step 2: At the bottom right side of the status box is an emoji icon. Click on it. This will open a list of emojis that you can choose as many as you want
Step 3: Click on the emoji icon back again to close the list when you are done. Click on post to share the post on your wall.
How to Add Emojis to Videos on iMovie?
Step 1: Search for the desired emoji on the internet with transparent background. Go to iMovie and select a clip of your video where you want to insert an emoji.
Step 2: Go to the “Import” option into the toolbar above, select your desired emoji from the list. This emoji will be added to the iMovie library.
Step 3: Click on that emoji. This overlays that emoji onto that video clip. You can scale the emoji up and down and drag it anywhere on the video.
Image from YouSubtitles
How to Add Emojis to Videos Online?
Blurbiz, is an online application for editing YouTube, Instagram, Facebook and Snapchat videos. Just follow the steps below, then you can add emojis you want.
Step 1: Create and name the project in Blurbiz.
Step 2: Upload either your video, sticker or gif whichever you want an emoji to be placed in.
Step 3: Hover over the video and click on the “edit” button.
Step 4: Tap on “upload” at the top left side of the pane. Upload emoji with .png extension from your desktop.
Step 5: Drag and drop to overlay the emoji onto your video. Resize and position an emoji accordingly.
Step 6: Tap on “complete” at the top right corner when you are done. You can download an mp4 format video.
How to Add Emojis to Videos Android?
WeVideo , is an app to create and edit videos to the next level and provide one with ample special effects to add on to your videos.
Alongside using basic editing features like cutting, trimming or arranging video clips, you can amplify your editing game by adding emoji to your videos. Moreover, you can export your projects in high quality and share them on either Vimeo, YouTube or Dropbox.
Conclusion
Be it any video on any social media platform or your local device, with this thorough guide, you must be able to accessorize your video and take it to another level of emotional expression and message details in your video by using fun emojis.
Liza Brown
Liza Brown is a writer and a lover of all things video.
Follow @Liza Brown
Also read:
- [Updated] In 2024, Top-Ranked Costless Pixel Perfection Aid
- 安心してMovaviと一緒にMKV, M4V形式をオンラインで自由な変換 - このまま無料
- How To Change Your Apple ID on iPhone 13 With or Without Password | Dr.fone
- How to Stop Life360 from Tracking You On Samsung Galaxy M14 5G? | Dr.fone
- In 2024, 10 Best Memes Right Now (Include Image/ GIF/Video)
- In 2024, Android Unlock Code Sim Unlock Your Vivo Y36 Phone and Remove Locked Screen
- In 2024, Full Guide to Unlock Your Realme Narzo 60x 5G
- In 2024, How to Make a Slideshow with Music
- In 2024, How To Teleport Your GPS Location On Apple iPhone SE? | Dr.fone
- In 2024, Unova Stone Pokémon Go Evolution List and How Catch Them For Apple iPhone 6 Plus | Dr.fone
- Updated Effortless 3GP Video Rotation The Top Free Solutions
- Updated How to Record Your Memorable Honeymoon Video
- Updated In 2024, How to Make Memoji Talk-Make Memoji Video On Your Own
- Title: Generating the Roll Safe-Think About It Meme for 2024
- Author: Jan
- Created at : 2024-09-29 19:07:05
- Updated at : 2024-09-30 22:34:49
- Link: https://meme-emoji.techidaily.com/generating-the-roll-safe-think-about-it-meme-for-2024/
- License: This work is licensed under CC BY-NC-SA 4.0.