
7 Free Apps to Get Emojis on Android and iPhone
7 Free Apps to Get Emojis on Android and iPhone
7 Free Apps to Get Emojis on Android and iPhone

Shanoon Cox
Mar 27, 2024• Proven solutions
Are you looking for apps to get emoji on your phone? An emoji is technically a symbolic representation of our feelings. You can use it to show your love or confusion for something or say that you are angry without actually having to say anything.
Emojis are a whole new language of communication. But why bother to download emojis when one can write a text? Well, because it’s faster and easier than writing. A simple ‘thumbs up’ emoji wraps up an appreciation pretty good. Using an emoji in your text or email can add a hint of color and give it extra meaning. Also, if you add emojis, it can boost engagement rates. And it is FUN!
- Part 1: Free Apps to Get Emojis on Android
- Part 2: How to Get Emojis on iPhone
- Part 3: Add Emojis to Your Video Using Wondershare Filmora
Part 1: Free Apps to Get Emojis on Android
I know you are excited to start using emojis right away. Now the question on your mind must be how to get emojis on Android?
Here are 5, top of list apps to get emojis. Could you give it a read, and then take your pick?
#KiKa Keyboard (Android)
KiKa is a trendy keyboard that lets you have all the fun. If you’re looking to spice up your android keyboards, KiKa does the trick. It is customizable, so you can make your keyboard attractive by changing the background image or change the font or size of the keyboard. Won’t it be cool to have a game of thrones themed keyboard?
Besides, Kika uses artificial intelligence to predict words as well as emojis. It works on texts, social media, and emails too. Time to up your game with this excellent emoji app.
- Access Google Play on your phone
- Download the Kika keyboard. Launch it to get the emoji.
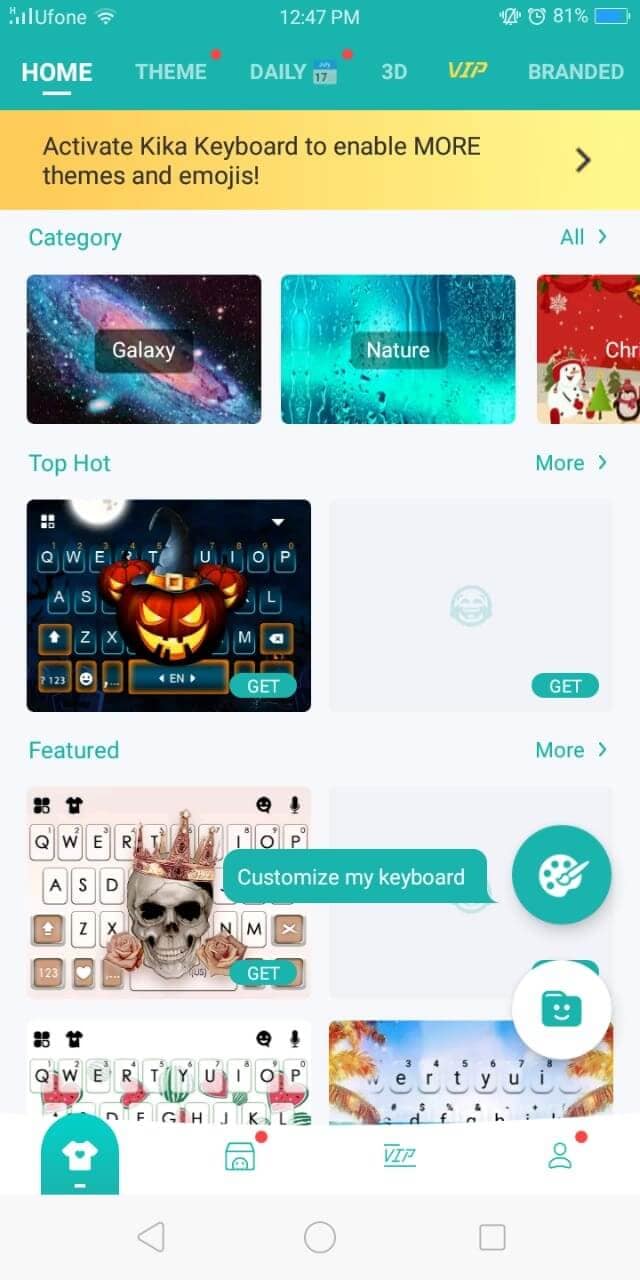
Rest assured, it is free for use. You are just one step away from having more expressive and engaging conversations.
#Emoji Keyboard(Android)
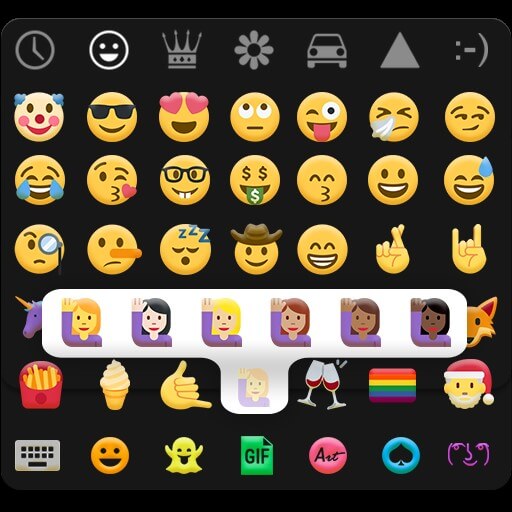
The emoji keyboard is popular because it offers more than 5000 cute emojis. Apart from that, you can choose a themed keyboard or add your picture as the background. It lets you type at lightning speed with cool fonts. Now it is easy to decorate your keyboard and customize it according to your personality. From unicorns to supervillains, take your pick and custom-design a cool keyboard. It makes chatting incredibly easy with gestures and smooth swipe typing.
- Hop on to Google Play
- Instant download Emoji keyboard to add a dash of fun to your texts.
- Launch it, and you will get the emojis.
#Bitmoji(Android)
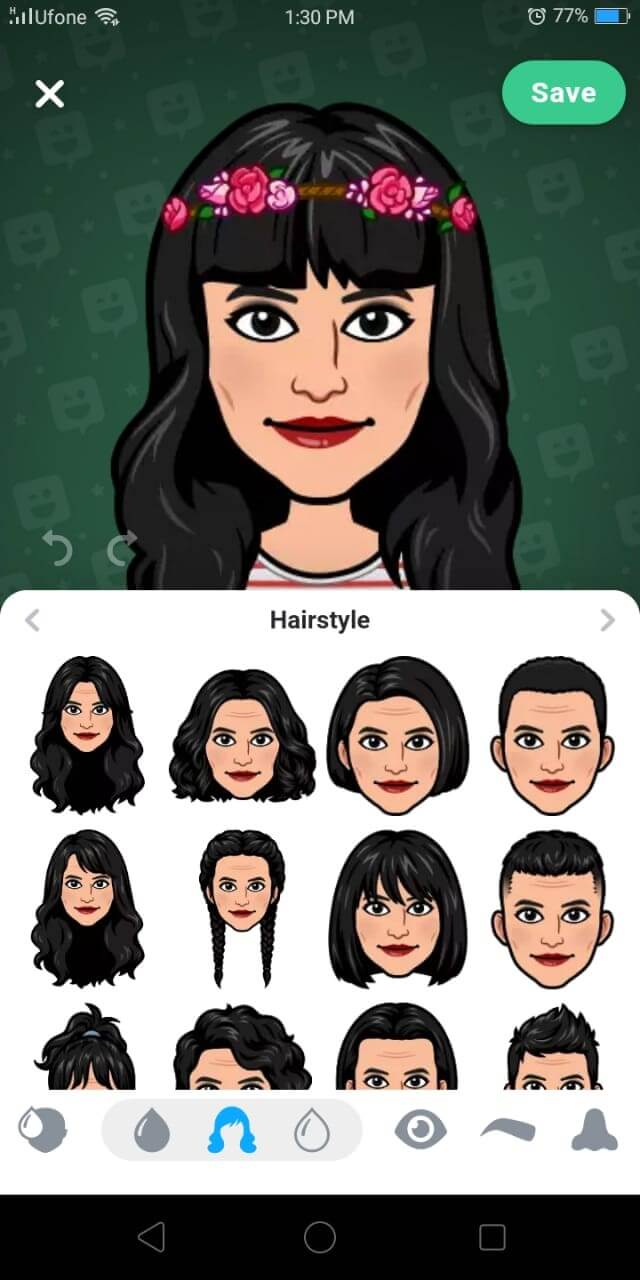
If you want to get emoji that looks just like you, Bitmoji is the app for you. Take a selfie and let the emoji look like you. Dress it up to match the real-life you. An animated version of you. A library full of your avatar stickers to compliment your texts with creativity and a personal touch. Be angry or romantic, and send over a Bitmoji to make it clear how you feel. No need to type long texts anymore. There’s a Bitmoji for every emotion.
- Install Bitmoji from Google Play and Sign in.
- Go to Settings on your phone, tap Languages and Input>On-screen keyboard
- Click Manage Keyboards and then tap Bitmoji Keyboard
#Ginger Keyboard
The ginger keyboard is built for personal as well as business communication. Along with a library of more than a thousand emojis, you get grammar, and spell check features too. Use the free pre-set themes or buy a special one from the store to decorate your keyboard. It also predicts emojis as you type. Go ahead and creatively transform your typing experience with Ginger Keyboard.
- Download Ginger Keyboard from Google Play.
- Follow the steps to sign in.
- Enable the keyboard, and all good to go.
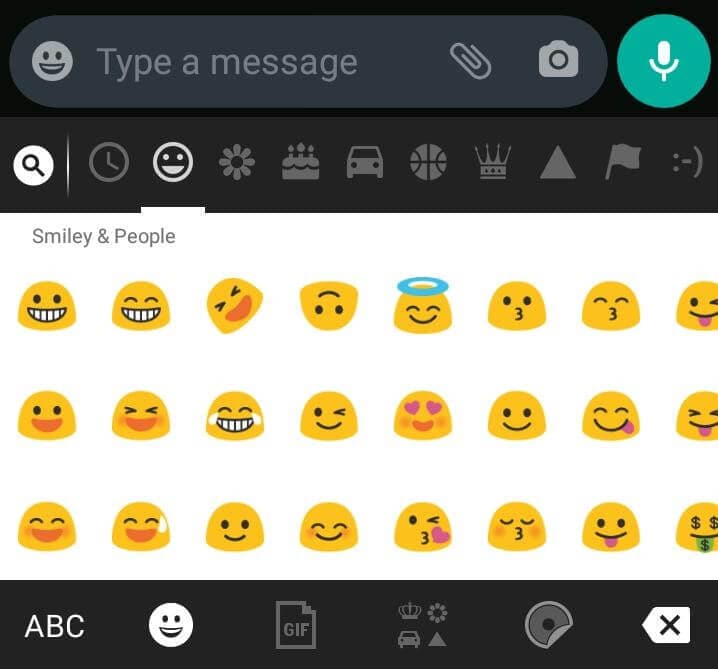
#WhatSmiley
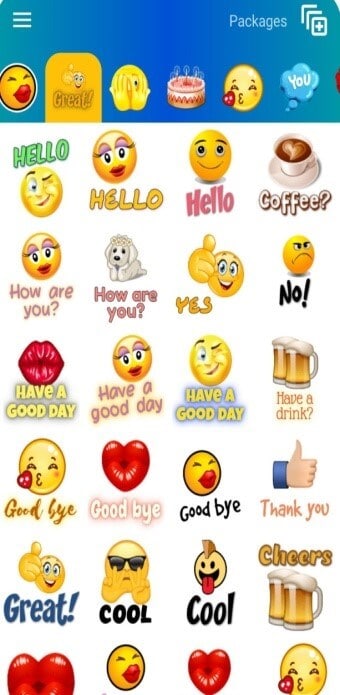
Want to download emojis that are unique and popular? WhatSmiley offers over 2400 emojis to transform your chatting experience. You can add emojis on any social media platform, Whatsapp, or even text (MMS). Emojis are frequently updated, so the fun never stops. You can even customize the emojis and change the background color.
- Download Whatsmiley on your phone and open it.
- Select the emoji you wish to send.
- A pop up will display the apps. Choose the app through which you want to send.
Part 2: How to Get Emojis on iPhone
After emojis took the world by storm, iPhone users were also gifted with this trending communication medium. Although there are probably a dozen apps to download emojis on your iPhone, let me discuss the two easiest methods.
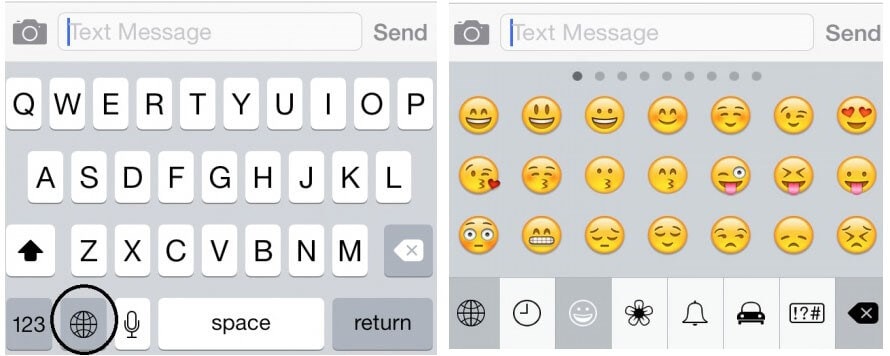
#The Built-In Keyboard on iPhone
With the increasing popularity of emojis, iPhone found a simple solution for its dedicated users by introducing a built-in emoji keyboard. All you got to do is click enable.
Here is how you can enable the built-in keyboard to get emojis.
- Launch Settings on your home screen.
- Tap General and then click on Keyboard.

- Select Add new keyboard. Swipe down and click on Emoji.
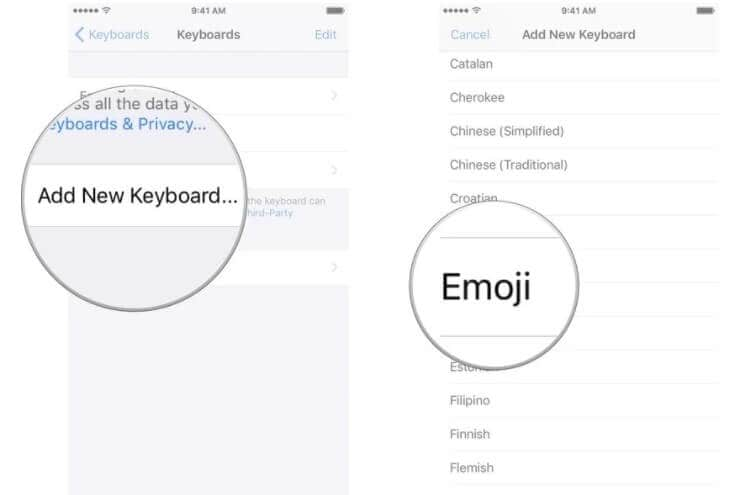
- Ta-Da! Emoji keyboard enabled! And you will be able to get the emoji.
# Emoji Keyboard App
Does the built-in emojis seem boring and wish to add that extra oomph to your texts? The Emoji keyboard app brings you the latest emojis that can be used on all iPhone apps. If you get bored again, you can even order new emojis. Cool, right?
- Open the App Store and install the Emoji Keyboard.
- Launch it, and you’re good to go. Easy peasy.
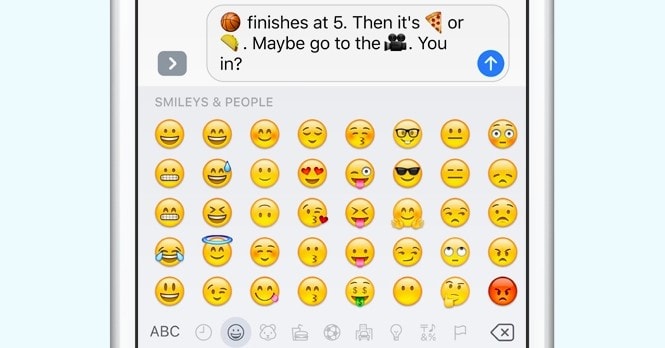
Apart from being Ad-free, it’s free and requires no registrations. Definitely a dream come true, isn’t it?
Part 3: Add Emojis to Your Video Using Wondershare Filmora
Now you know all the ways to add emojis on texts, emails, and statuses. But Wondershare Filmora wants to fan that creativity in you by allowing you to get much more artistic with emojis.
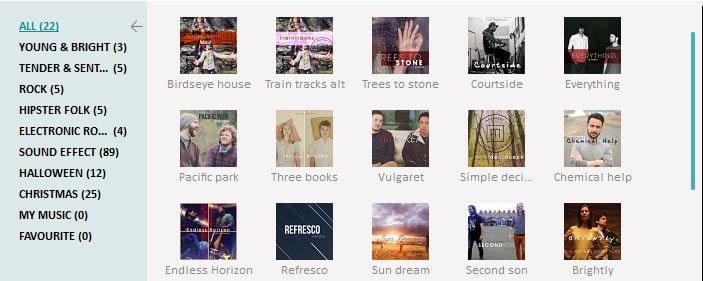
Wondershare Filmora is a video editing app with a sleek interface. You can use it to add a wide range of emojis to your videos. Imagine customizing your video with a beating heart or a laughing emoji. It offers a wide range of cute emojis arranged in categories as shapes, badges, pets, emojis, etc., making it easier to select the desired type of emoji.
Let me show you a detailed guide to add emojis through Filmora:
1. Download and install Filmora. Then launch it.


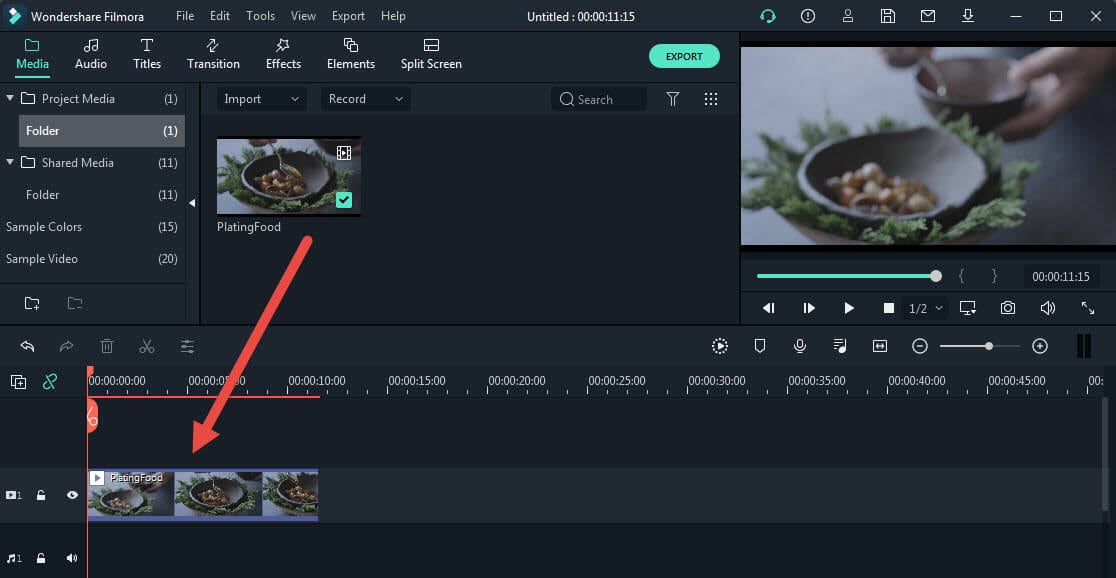
2. Click File<Import Media<Import Media Files to import your video to Filmora. Then drag and drop the video to your timeline.
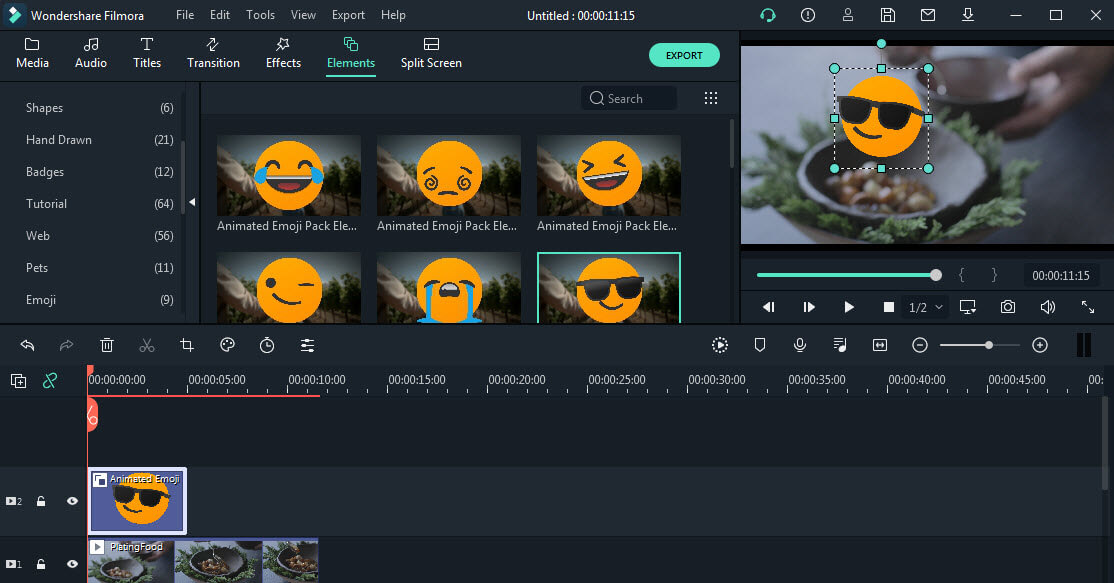
3. Now click on Elements<Emoji categories and add any emoji to the video.

Tips:
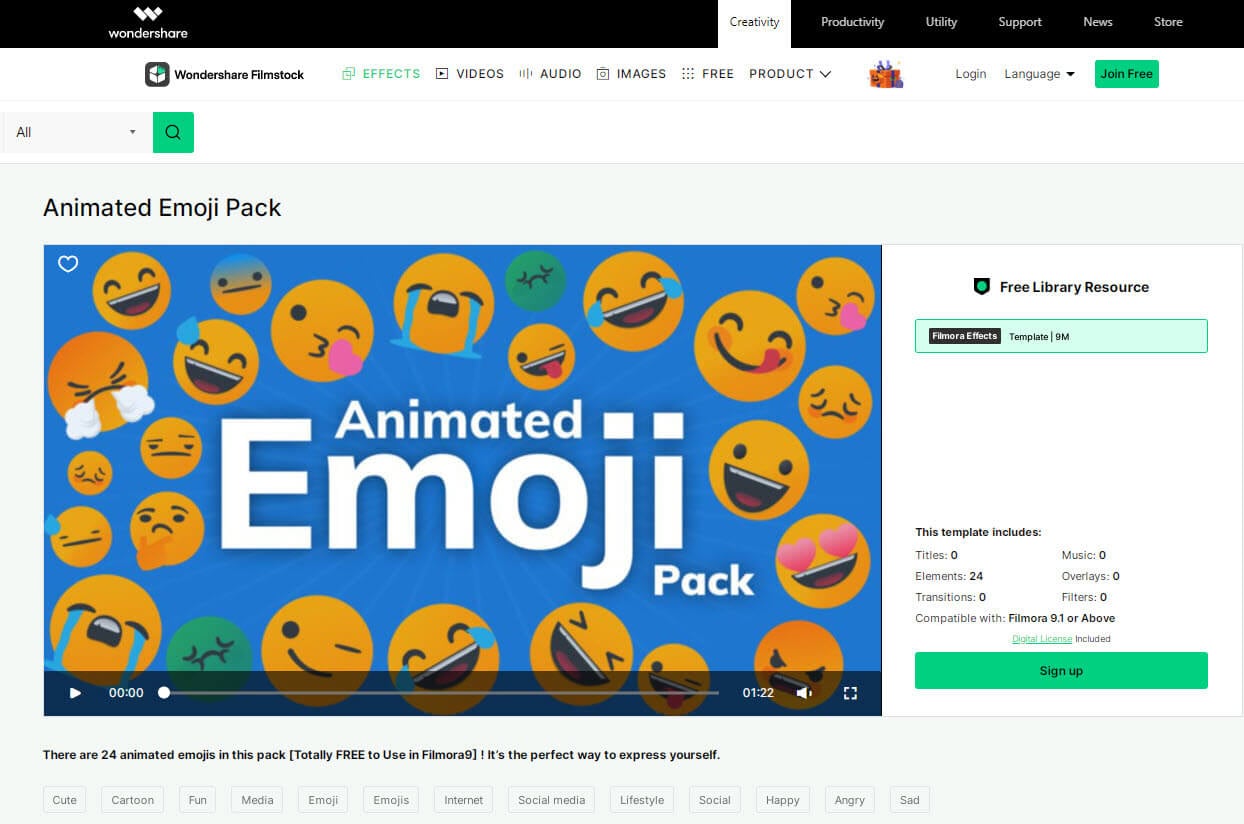
You can also access Wondershare Filmstock (Filmora’s effects store) to download the Animated Emoji Pack and get more emojis. This animated emoji pack is totally free now!
4. Then drag and drop the emoji to the video track above your video. In the viewer panel, drag to adjust the size of emoji. You can also add multiple emojis to one video.
5. Finally click the Export button to convert the video. You can upload it to YouTube, Instagram, TikTok, or any other video platforms as you like after you finish the export.

Conclusion
Emojis have revolutionized the way we communicate. There is no denying that emojis are better at portraying whatever we are trying to say and even convey our feelings much more accurately than words do.
Despite the advancements in technology, not every version of the phone has an in-built emoji collection. Since we don’t want anyone to feel left out of the fun, we compiled this easy to follow guide containing some of the best apps to download emojis.
Moreover, add emojis to your videos through Filmora to make them extra expressive. Decorate them with a blip of color and a hint of an emoji or two. Emojis are cute and fun. Use them wisely.
Shanoon Cox
Shanoon Cox is a writer and a lover of all things video.
Follow @Shanoon Cox
Shanoon Cox
Mar 27, 2024• Proven solutions
Are you looking for apps to get emoji on your phone? An emoji is technically a symbolic representation of our feelings. You can use it to show your love or confusion for something or say that you are angry without actually having to say anything.
Emojis are a whole new language of communication. But why bother to download emojis when one can write a text? Well, because it’s faster and easier than writing. A simple ‘thumbs up’ emoji wraps up an appreciation pretty good. Using an emoji in your text or email can add a hint of color and give it extra meaning. Also, if you add emojis, it can boost engagement rates. And it is FUN!
- Part 1: Free Apps to Get Emojis on Android
- Part 2: How to Get Emojis on iPhone
- Part 3: Add Emojis to Your Video Using Wondershare Filmora
Part 1: Free Apps to Get Emojis on Android
I know you are excited to start using emojis right away. Now the question on your mind must be how to get emojis on Android?
Here are 5, top of list apps to get emojis. Could you give it a read, and then take your pick?
#KiKa Keyboard (Android)
KiKa is a trendy keyboard that lets you have all the fun. If you’re looking to spice up your android keyboards, KiKa does the trick. It is customizable, so you can make your keyboard attractive by changing the background image or change the font or size of the keyboard. Won’t it be cool to have a game of thrones themed keyboard?
Besides, Kika uses artificial intelligence to predict words as well as emojis. It works on texts, social media, and emails too. Time to up your game with this excellent emoji app.
- Access Google Play on your phone
- Download the Kika keyboard. Launch it to get the emoji.
Rest assured, it is free for use. You are just one step away from having more expressive and engaging conversations.
#Emoji Keyboard(Android)
The emoji keyboard is popular because it offers more than 5000 cute emojis. Apart from that, you can choose a themed keyboard or add your picture as the background. It lets you type at lightning speed with cool fonts. Now it is easy to decorate your keyboard and customize it according to your personality. From unicorns to supervillains, take your pick and custom-design a cool keyboard. It makes chatting incredibly easy with gestures and smooth swipe typing.
- Hop on to Google Play
- Instant download Emoji keyboard to add a dash of fun to your texts.
- Launch it, and you will get the emojis.
#Bitmoji(Android)
If you want to get emoji that looks just like you, Bitmoji is the app for you. Take a selfie and let the emoji look like you. Dress it up to match the real-life you. An animated version of you. A library full of your avatar stickers to compliment your texts with creativity and a personal touch. Be angry or romantic, and send over a Bitmoji to make it clear how you feel. No need to type long texts anymore. There’s a Bitmoji for every emotion.
- Install Bitmoji from Google Play and Sign in.
- Go to Settings on your phone, tap Languages and Input>On-screen keyboard
- Click Manage Keyboards and then tap Bitmoji Keyboard
#Ginger Keyboard
The ginger keyboard is built for personal as well as business communication. Along with a library of more than a thousand emojis, you get grammar, and spell check features too. Use the free pre-set themes or buy a special one from the store to decorate your keyboard. It also predicts emojis as you type. Go ahead and creatively transform your typing experience with Ginger Keyboard.
- Download Ginger Keyboard from Google Play.
- Follow the steps to sign in.
- Enable the keyboard, and all good to go.
#WhatSmiley
Want to download emojis that are unique and popular? WhatSmiley offers over 2400 emojis to transform your chatting experience. You can add emojis on any social media platform, Whatsapp, or even text (MMS). Emojis are frequently updated, so the fun never stops. You can even customize the emojis and change the background color.
- Download Whatsmiley on your phone and open it.
- Select the emoji you wish to send.
- A pop up will display the apps. Choose the app through which you want to send.
Part 2: How to Get Emojis on iPhone
After emojis took the world by storm, iPhone users were also gifted with this trending communication medium. Although there are probably a dozen apps to download emojis on your iPhone, let me discuss the two easiest methods.
#The Built-In Keyboard on iPhone
With the increasing popularity of emojis, iPhone found a simple solution for its dedicated users by introducing a built-in emoji keyboard. All you got to do is click enable.
Here is how you can enable the built-in keyboard to get emojis.
- Launch Settings on your home screen.
- Tap General and then click on Keyboard.
- Select Add new keyboard. Swipe down and click on Emoji.
- Ta-Da! Emoji keyboard enabled! And you will be able to get the emoji.
# Emoji Keyboard App
Does the built-in emojis seem boring and wish to add that extra oomph to your texts? The Emoji keyboard app brings you the latest emojis that can be used on all iPhone apps. If you get bored again, you can even order new emojis. Cool, right?
- Open the App Store and install the Emoji Keyboard.
- Launch it, and you’re good to go. Easy peasy.
Apart from being Ad-free, it’s free and requires no registrations. Definitely a dream come true, isn’t it?
Part 3: Add Emojis to Your Video Using Wondershare Filmora
Now you know all the ways to add emojis on texts, emails, and statuses. But Wondershare Filmora wants to fan that creativity in you by allowing you to get much more artistic with emojis.
Wondershare Filmora is a video editing app with a sleek interface. You can use it to add a wide range of emojis to your videos. Imagine customizing your video with a beating heart or a laughing emoji. It offers a wide range of cute emojis arranged in categories as shapes, badges, pets, emojis, etc., making it easier to select the desired type of emoji.
Let me show you a detailed guide to add emojis through Filmora:
1. Download and install Filmora. Then launch it.
2. Click File<Import Media<Import Media Files to import your video to Filmora. Then drag and drop the video to your timeline.
3. Now click on Elements<Emoji categories and add any emoji to the video.
Tips:
You can also access Wondershare Filmstock (Filmora’s effects store) to download the Animated Emoji Pack and get more emojis. This animated emoji pack is totally free now!
4. Then drag and drop the emoji to the video track above your video. In the viewer panel, drag to adjust the size of emoji. You can also add multiple emojis to one video.
5. Finally click the Export button to convert the video. You can upload it to YouTube, Instagram, TikTok, or any other video platforms as you like after you finish the export.
Conclusion
Emojis have revolutionized the way we communicate. There is no denying that emojis are better at portraying whatever we are trying to say and even convey our feelings much more accurately than words do.
Despite the advancements in technology, not every version of the phone has an in-built emoji collection. Since we don’t want anyone to feel left out of the fun, we compiled this easy to follow guide containing some of the best apps to download emojis.
Moreover, add emojis to your videos through Filmora to make them extra expressive. Decorate them with a blip of color and a hint of an emoji or two. Emojis are cute and fun. Use them wisely.
Shanoon Cox
Shanoon Cox is a writer and a lover of all things video.
Follow @Shanoon Cox
How to Make Memes on iPhone and Android
How to Make Memes on iPhone and Android

Ollie Mattison
Mar 27, 2024• Proven solutions
With growing demand on the internet, memes are spreading like wildfire. In case you want to promote your brand using various types of relatable memes that would drive more traffic for your website, then there is good news for you. It doesn’t matter, whether you own an Android or iOS device. We will help you out in learning how to make memes on iPhone/Android in this article. Keep reading!
- Part1: How to make memes on iPhone with Meme Generator
- Part2: How to make memes on Android with Memedroid
- Part3: Recommended - Making memes with Filmora meme maker online
Part 1: How to make memes on iPhone with Meme Generator
While planning to create memes on your iPhone, you might find Meme Generator as the most suitable tool. It helps you create hilarious memes and allows you to share on social media platforms like Twitter, Facebook, Messenger, Instagram, Dropbox, E-mail, Snapchat etc. you get 500 plus memes with example captions under different categories.
You can customize memes using your own photos and adding text, alter size and color of text using 10 different fonts. You can crop the image, move it, add border to it, filter/search memes, and scroll through each meme category. There are no watermark or auto upload of memes to protect your privacy. Here is the detailed guide –
Step 1: Install Meme Generator from App Store on your iPhone and launch the app.
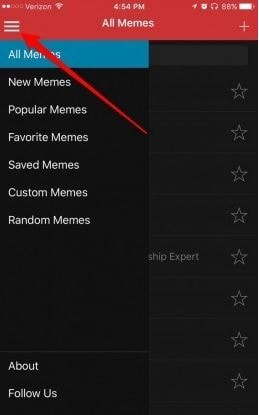
Step 2: Tap on the 3 horizontal lines on the top-left corner to browse memes. If you know the name, then search a meme and click on it.
Step 3: Use the example text or hit the ‘Text’ bar to add or edit your caption. Press the icons over the top-right corner for customizing your meme photo and caption options.

Step 4: Tap on the ‘Save’ or ‘Share’ button, once you are done editing the meme. You can find the meme on your ‘Photos’ app.
Part 2: How to make memes on Android with Memedroid
If you are wondering how to make memes on Android, then take the Memedroid app into consideration. You can create photos and GIF memes, jokes, avatars, graphics etc. with this app. There are numerous memes uploaded everyday on the app and you get the chance to let people vote for your meme too.
You get to use popular templates such as evil toddler, attached girlfriend, surprised koala with hilarious designs. The best rated memes are in the top gallery and you get the main gallery with latest funny memes too. You can design and save your memes and share them or download, it’s up to you. It supports a wide variety of languages such as English, French, Spanish, Italian, Portuguese etc.
Here are the steps for how to make memes on Android –
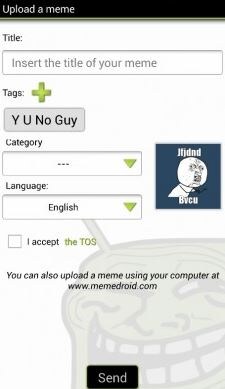
Step 1: Download and install the app on your mobile and launch it. Click on ‘Meme Factory’ to pick the background image and then you can swipe to explore the other features too. Alternatively, you can add your own photos if Meme factory was not of your choice. Hit ‘Upload Zone’ instead of ‘Meme Factory’ and register for a free account. On the ‘Upload’ screen, tap the ‘Select An Image’ button to pick a photo within 330MB size

Step 2: After selecting the background image, add captions at the top and bottom of the image. The ‘SAVE’ button can be found on the top-right, tap that to save. Likewise, for sharing the meme, hit the ‘SHARE’ button located at the bottom of the screen.
Step 3: Add tags and accept the ‘Terms of Service’ followed by ‘Send’ button. Wait a while, to get you meme ready for your audience.
Part 3: Recommended - Making memes with Filmora meme maker online
In order to make memes on iPhone/Android, you need a mobile device. But, what if you have a computer on which you need to create a meme? Well, Filmora meme maker is the apt choice for you. You don’t need to download apps or software on your Pc. It is the ultimate online solution.
Brief steps to introduce making memes. You can create image, GIF, and video memes adding nice fonts. It processes video/GIF/image memes rapidly than the competitors. Adding texts, fonts and altering font colors is so easy with it.
Here is the detailed guide to make memes on Android –
Step 1: Visit the official Filmora website and look for Filmora online meme maker. Import videos by dragging and dropping to the Filmora interface. You can even add online links to videos in order to upload them.

Step 2: After selecting the video/photo/GIF move to the meme editor page and customize your video meme using tools from the left pane. Include text, change fonts and then you can preview the changes.

Step 3: Tap on the ‘CREATE’ button to apply the changes, when you are satisfied. Press the ‘DOWNLOAD’ button and then share your meme on social media sites.

Conclusion
Coming towards the end of the article, we have discovered that Filmora creates brilliant memes and that too, in no time. No lengthy or annoying processes, nor you need apps that eat up your phone memory. Life is blissfully funny with meme making on Filmora.
Ollie Mattison
Ollie Mattison is a writer and a lover of all things video.
Follow @Ollie Mattison
Ollie Mattison
Mar 27, 2024• Proven solutions
With growing demand on the internet, memes are spreading like wildfire. In case you want to promote your brand using various types of relatable memes that would drive more traffic for your website, then there is good news for you. It doesn’t matter, whether you own an Android or iOS device. We will help you out in learning how to make memes on iPhone/Android in this article. Keep reading!
- Part1: How to make memes on iPhone with Meme Generator
- Part2: How to make memes on Android with Memedroid
- Part3: Recommended - Making memes with Filmora meme maker online
Part 1: How to make memes on iPhone with Meme Generator
While planning to create memes on your iPhone, you might find Meme Generator as the most suitable tool. It helps you create hilarious memes and allows you to share on social media platforms like Twitter, Facebook, Messenger, Instagram, Dropbox, E-mail, Snapchat etc. you get 500 plus memes with example captions under different categories.
You can customize memes using your own photos and adding text, alter size and color of text using 10 different fonts. You can crop the image, move it, add border to it, filter/search memes, and scroll through each meme category. There are no watermark or auto upload of memes to protect your privacy. Here is the detailed guide –
Step 1: Install Meme Generator from App Store on your iPhone and launch the app.
Step 2: Tap on the 3 horizontal lines on the top-left corner to browse memes. If you know the name, then search a meme and click on it.
Step 3: Use the example text or hit the ‘Text’ bar to add or edit your caption. Press the icons over the top-right corner for customizing your meme photo and caption options.
Step 4: Tap on the ‘Save’ or ‘Share’ button, once you are done editing the meme. You can find the meme on your ‘Photos’ app.
Part 2: How to make memes on Android with Memedroid
If you are wondering how to make memes on Android, then take the Memedroid app into consideration. You can create photos and GIF memes, jokes, avatars, graphics etc. with this app. There are numerous memes uploaded everyday on the app and you get the chance to let people vote for your meme too.
You get to use popular templates such as evil toddler, attached girlfriend, surprised koala with hilarious designs. The best rated memes are in the top gallery and you get the main gallery with latest funny memes too. You can design and save your memes and share them or download, it’s up to you. It supports a wide variety of languages such as English, French, Spanish, Italian, Portuguese etc.
Here are the steps for how to make memes on Android –
Step 1: Download and install the app on your mobile and launch it. Click on ‘Meme Factory’ to pick the background image and then you can swipe to explore the other features too. Alternatively, you can add your own photos if Meme factory was not of your choice. Hit ‘Upload Zone’ instead of ‘Meme Factory’ and register for a free account. On the ‘Upload’ screen, tap the ‘Select An Image’ button to pick a photo within 330MB size
Step 2: After selecting the background image, add captions at the top and bottom of the image. The ‘SAVE’ button can be found on the top-right, tap that to save. Likewise, for sharing the meme, hit the ‘SHARE’ button located at the bottom of the screen.
Step 3: Add tags and accept the ‘Terms of Service’ followed by ‘Send’ button. Wait a while, to get you meme ready for your audience.
Part 3: Recommended - Making memes with Filmora meme maker online
In order to make memes on iPhone/Android, you need a mobile device. But, what if you have a computer on which you need to create a meme? Well, Filmora meme maker is the apt choice for you. You don’t need to download apps or software on your Pc. It is the ultimate online solution.
Brief steps to introduce making memes. You can create image, GIF, and video memes adding nice fonts. It processes video/GIF/image memes rapidly than the competitors. Adding texts, fonts and altering font colors is so easy with it.
Here is the detailed guide to make memes on Android –
Step 1: Visit the official Filmora website and look for Filmora online meme maker. Import videos by dragging and dropping to the Filmora interface. You can even add online links to videos in order to upload them.
Step 2: After selecting the video/photo/GIF move to the meme editor page and customize your video meme using tools from the left pane. Include text, change fonts and then you can preview the changes.
Step 3: Tap on the ‘CREATE’ button to apply the changes, when you are satisfied. Press the ‘DOWNLOAD’ button and then share your meme on social media sites.
Conclusion
Coming towards the end of the article, we have discovered that Filmora creates brilliant memes and that too, in no time. No lengthy or annoying processes, nor you need apps that eat up your phone memory. Life is blissfully funny with meme making on Filmora.
Ollie Mattison
Ollie Mattison is a writer and a lover of all things video.
Follow @Ollie Mattison
How to Make a FLV Photo Slideshow with Music
How to Make a FLV Photo Slideshow
Shanoon Cox
Mar 27, 2024• Proven solutions
FLV slideshow is a suitable way to share photos and videos online due to its small size and reasonable quality. Wondershare DVD Slideshow Builder brings more convenience to instantly make a slideshow with music , photos and lets you create FLV videos, as well as other video formats. You can create a FLV slideshow in easy steps as below.
Easy Guide to Make FLV Slideshow with Music

1 Import Photos & Video and Music for FLV Slideshow
Install and launch the slideshow maker, go to Organize tab and import your photos, videos and music files. Transitions between adjacent slides will be used. But you can change them by following step 2.
2 Apply Transition and Motion Effect
This slideshow maker includes more than 100 transition effects for slides switch. Before applying, double-click transition thumbnail to preview in player on the right. You could also randomize transitions or apply one transition to all slides in FLV slideshow.
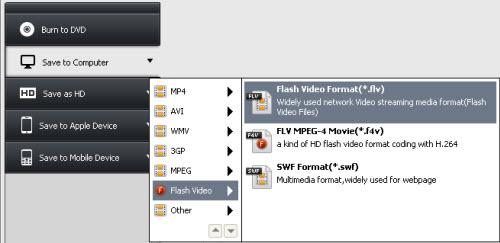
3 Save Photo Slideshow to FLV Video
Select Flash Video format as the output and make advanced settings by clicking Settings button. Finally, click Burn and wail a while, you get your FLV video to sharing on YouTube, Facebook, MySpace, Mobile Phone. Alternatively, play FLV video on computer via stand-alone FLV player.
FLV Slideshow Tips
For more detailed settings of FLV slideshow, click Settings button and specify various options, like encoder, resolution, frame rate, bit rate and audio settings.
To play FLV slideshow on Nokia mobile phone, you should set encode type to Nokia FLV series (*.flv). Once created, upload flv to Nokia phone or online and view FLV slideshow using FLV player or web browser plugin.
You could also upload FLV slideshow to YouTube to share with more people. FLV videos are perfectly supported by YouTube.
More: Convert All Popular Formats to FLV
Wondershare DVD Slideshow Builder Deluxe supports all popular video formats. Therefore, you can import videos that need to change format, and save it in another format. It’s not only a DVD slideshow maker, but only powerful FLV converter. For detailed supported input formats, check video format references.
More: Convert FLV to MP4, AVI, MOV, MPEG or Burn FLV to DVD
You could also import FLV to DVD Slideshow Builder Deluxe and save it as MP4, AVI, MOV and 3GP, or even burn FLV video to DVD with beautiful DVD menus. For detailed supported output formats, check video format references. Here, I recommended to save FLV to MP4 for its comprehensive support on various devices, such as iPhone, iPod, Apple TV, Gphone, Nokia phone, LG phone, PSP, Palm, Zune, etc.
About FLV Video (Flash Video)
Flash Video (*.FLV) is a container file format used to deliver video over the internet using Adobe Flash Player versions 6-10 (developed by Macromedia). Flash Video content may also be embedded within SWF files. FLV videos are widely used by international companies, including YouTube, Google Video, Yahoo! Video, metacafe, Reuters.com, and many other news providers. Flash Video could be watched on most operating systems, via the Adobe Flash Player and web browser plugin, or desired third-party FLV Players.
Shanoon Cox
Shanoon Cox is a writer and a lover of all things video.
Follow @Shanoon Cox
Shanoon Cox
Mar 27, 2024• Proven solutions
FLV slideshow is a suitable way to share photos and videos online due to its small size and reasonable quality. Wondershare DVD Slideshow Builder brings more convenience to instantly make a slideshow with music , photos and lets you create FLV videos, as well as other video formats. You can create a FLV slideshow in easy steps as below.
Easy Guide to Make FLV Slideshow with Music
1 Import Photos & Video and Music for FLV Slideshow
Install and launch the slideshow maker, go to Organize tab and import your photos, videos and music files. Transitions between adjacent slides will be used. But you can change them by following step 2.
2 Apply Transition and Motion Effect
This slideshow maker includes more than 100 transition effects for slides switch. Before applying, double-click transition thumbnail to preview in player on the right. You could also randomize transitions or apply one transition to all slides in FLV slideshow.
3 Save Photo Slideshow to FLV Video
Select Flash Video format as the output and make advanced settings by clicking Settings button. Finally, click Burn and wail a while, you get your FLV video to sharing on YouTube, Facebook, MySpace, Mobile Phone. Alternatively, play FLV video on computer via stand-alone FLV player.
FLV Slideshow Tips
For more detailed settings of FLV slideshow, click Settings button and specify various options, like encoder, resolution, frame rate, bit rate and audio settings.
To play FLV slideshow on Nokia mobile phone, you should set encode type to Nokia FLV series (*.flv). Once created, upload flv to Nokia phone or online and view FLV slideshow using FLV player or web browser plugin.
You could also upload FLV slideshow to YouTube to share with more people. FLV videos are perfectly supported by YouTube.
More: Convert All Popular Formats to FLV
Wondershare DVD Slideshow Builder Deluxe supports all popular video formats. Therefore, you can import videos that need to change format, and save it in another format. It’s not only a DVD slideshow maker, but only powerful FLV converter. For detailed supported input formats, check video format references.
More: Convert FLV to MP4, AVI, MOV, MPEG or Burn FLV to DVD
You could also import FLV to DVD Slideshow Builder Deluxe and save it as MP4, AVI, MOV and 3GP, or even burn FLV video to DVD with beautiful DVD menus. For detailed supported output formats, check video format references. Here, I recommended to save FLV to MP4 for its comprehensive support on various devices, such as iPhone, iPod, Apple TV, Gphone, Nokia phone, LG phone, PSP, Palm, Zune, etc.
About FLV Video (Flash Video)
Flash Video (*.FLV) is a container file format used to deliver video over the internet using Adobe Flash Player versions 6-10 (developed by Macromedia). Flash Video content may also be embedded within SWF files. FLV videos are widely used by international companies, including YouTube, Google Video, Yahoo! Video, metacafe, Reuters.com, and many other news providers. Flash Video could be watched on most operating systems, via the Adobe Flash Player and web browser plugin, or desired third-party FLV Players.
Shanoon Cox
Shanoon Cox is a writer and a lover of all things video.
Follow @Shanoon Cox
How to Record Your Memorable Honeymoon Video
How to Make a Memorable Honeymoon Video
Ollie Mattison
Mar 27, 2024• Proven solutions
The honeymoon is maybe one of the most important times in our life. It’s unique, refined and filled with emotion which is why you should always try to consider exploring all the opportunities that this has to offer. But if you go on a honeymoon, you do want to have a video that you can cherish forever, don’t you? If you do, here are example of fancy honey moon video and some of the best ideas that you can use to create the best, most immersive and memorable honeymoon video.
Tips on creating a memorable honeymoon video
Choosing the right camera
There are many affordable 1080p or 4k cameras that you can use and all of them come with various features and prices. Obviously, you should try and focus on finding the right one that suits your needs. Take your time and study the prices and features then select the one you want based on your budget and expertise.
Get lots of photos
Another great tip is that you need to get as many photos as you can. No matter where you choose to go, there are tons of scenes, people, monuments and landmarks that you can choose to photograph. Take your time and try to capture as many of them as you possibly can. Granted, it will take a little bit of time but it will offer you the insight and fun you need in order to have a great slideshow in the end.
Organize a story from your photos
Once you have the photos, you should try to organize a story from the images. The best honeymoon movies are the ones that include a story so think about that and you will have quite a bit of fun as you immerse yourself into this experience, that’s for sure.
Add songs and overlays
You should try and consider adding songs and overlays because this will make the movie more fun and immersive. Once you complete it, you will need to share it with friends and family!
Edit your honeymoon video with Wondershare Filmora
Why choose Wondershare Filmora
If you are not good at video editing, or if you are a beginner and bothered by the complex steps of some professional video editor, Wondershare Filmora is here to save you. This is the best movie creation tool that helps you create you honeymoon movies from images all while delivering the entire set of tools you need to get a one of a kind and fun experience. If you always wanted an incredible and unique, refined movie creation experience then this is the app to use.
=“” style=”width: 100%; height: 278.438px;”;
Download Mac Version ](https://tools.techidaily.com/wondershare/filmora/download/ )
Wondershare Filmora is very easy to use but it also manages to offer a lot of power. This is great for people that want to access basic editing features such as splitting, reverse, rotate and crop but which might also want some advanced features as well. You are bound to enjoy the entire experience for sure and the outcome will be very well worth it.
Aside from that, Wondershare Filmora also allows you to access a fresh interface that makes editing such a video a breeze. You can even add a variety of overlays and filters which do add up to offer you a very refined, exciting and refreshing experience at all times. It’s all about having the right focus and attention to detail but rest assured that the outcome will be well worth it. Once you have the movie, you can share it on Vimeo, YouTube and Facebook with a single click. The app also allows you to burn it to DVD if you so desire.
How to edit the honeymoon video with Wondershare Filmora
All you have to do is to go through the next steps:
Step 1: Import your honeymoon photos and videos
Gather all the videos and images that you have from your honeymoon then paste them inside the app.

Step 2: Tone your videos with editing tools
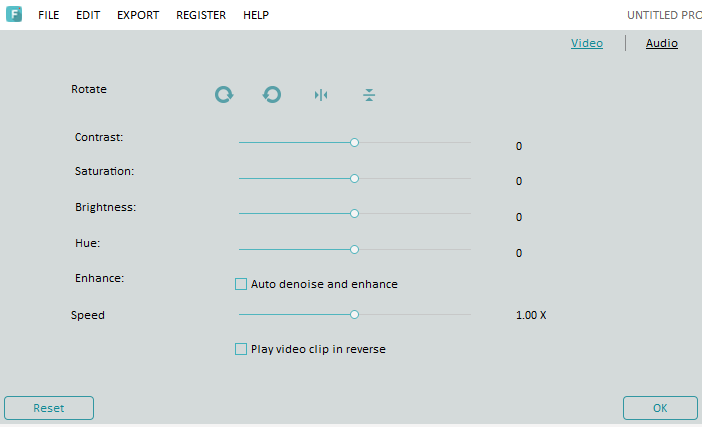
Add in video tones with features like reverse, trim, rotate, overlays, transitions, text and so on. This will help you refine the movie and offer it the unique experience you always wanted.
Step 3: Add music from Filmora library
Once you have that, add the music from the integrated royalty free library to ignite your love story.
Step 4: Save and share you video


Complete the video by saving it and then you can feel free to share it with friends.
Wondershare Filmora is the best solution for those that want a refined and fun honeymoon video. All you have to do is to try it out and rest assured that you are bound to love the results!
Download Mac Version ](https://tools.techidaily.com/wondershare/filmora/download/ )
Ollie Mattison
Ollie Mattison is a writer and a lover of all things video.
Follow @Ollie Mattison
Ollie Mattison
Mar 27, 2024• Proven solutions
The honeymoon is maybe one of the most important times in our life. It’s unique, refined and filled with emotion which is why you should always try to consider exploring all the opportunities that this has to offer. But if you go on a honeymoon, you do want to have a video that you can cherish forever, don’t you? If you do, here are example of fancy honey moon video and some of the best ideas that you can use to create the best, most immersive and memorable honeymoon video.
Tips on creating a memorable honeymoon video
Choosing the right camera
There are many affordable 1080p or 4k cameras that you can use and all of them come with various features and prices. Obviously, you should try and focus on finding the right one that suits your needs. Take your time and study the prices and features then select the one you want based on your budget and expertise.
Get lots of photos
Another great tip is that you need to get as many photos as you can. No matter where you choose to go, there are tons of scenes, people, monuments and landmarks that you can choose to photograph. Take your time and try to capture as many of them as you possibly can. Granted, it will take a little bit of time but it will offer you the insight and fun you need in order to have a great slideshow in the end.
Organize a story from your photos
Once you have the photos, you should try to organize a story from the images. The best honeymoon movies are the ones that include a story so think about that and you will have quite a bit of fun as you immerse yourself into this experience, that’s for sure.
Add songs and overlays
You should try and consider adding songs and overlays because this will make the movie more fun and immersive. Once you complete it, you will need to share it with friends and family!
Edit your honeymoon video with Wondershare Filmora
Why choose Wondershare Filmora
If you are not good at video editing, or if you are a beginner and bothered by the complex steps of some professional video editor, Wondershare Filmora is here to save you. This is the best movie creation tool that helps you create you honeymoon movies from images all while delivering the entire set of tools you need to get a one of a kind and fun experience. If you always wanted an incredible and unique, refined movie creation experience then this is the app to use.
=“” style=”width: 100%; height: 278.438px;”;
Download Mac Version ](https://tools.techidaily.com/wondershare/filmora/download/ )
Wondershare Filmora is very easy to use but it also manages to offer a lot of power. This is great for people that want to access basic editing features such as splitting, reverse, rotate and crop but which might also want some advanced features as well. You are bound to enjoy the entire experience for sure and the outcome will be very well worth it.
Aside from that, Wondershare Filmora also allows you to access a fresh interface that makes editing such a video a breeze. You can even add a variety of overlays and filters which do add up to offer you a very refined, exciting and refreshing experience at all times. It’s all about having the right focus and attention to detail but rest assured that the outcome will be well worth it. Once you have the movie, you can share it on Vimeo, YouTube and Facebook with a single click. The app also allows you to burn it to DVD if you so desire.
How to edit the honeymoon video with Wondershare Filmora
All you have to do is to go through the next steps:
Step 1: Import your honeymoon photos and videos
Gather all the videos and images that you have from your honeymoon then paste them inside the app.
Step 2: Tone your videos with editing tools
Add in video tones with features like reverse, trim, rotate, overlays, transitions, text and so on. This will help you refine the movie and offer it the unique experience you always wanted.
Step 3: Add music from Filmora library
Once you have that, add the music from the integrated royalty free library to ignite your love story.
Step 4: Save and share you video
Complete the video by saving it and then you can feel free to share it with friends.
Wondershare Filmora is the best solution for those that want a refined and fun honeymoon video. All you have to do is to try it out and rest assured that you are bound to love the results!
Download Mac Version ](https://tools.techidaily.com/wondershare/filmora/download/ )
Ollie Mattison
Ollie Mattison is a writer and a lover of all things video.
Follow @Ollie Mattison
How to Add Emojis To Discord
How to Add Emojis To Discord

Richard Bennett
Mar 27, 2024• Proven solutions
Who doesn’t like emoticons? They are fun, easy to use, and, best of all, highly expressive of your emotions that you cannot convey over messages otherwise.
A 2019 survey shows 70% of mobile users used emoji in texting or on social media daily. This shows the popularity of emoji in our world today.
Similarly, as a Discord user, you must have come across thousands of emoji in it. These are images uploaded on the server and called custom emojis that this gaming community can use for effective communication with friends and other players.
With the emoji and gaming industry growing, it is safe to say that discord emoji’s popularity and use will only increase.
Read ahead to see how you can add emojis on Discord if you want to have fun chats with your friends too.
- Part 1: Adding and Sending Emoji To Chat On Discord?
- Part 2: Adding Emojis To Discord Channel Name Or Nickname?
- Part 3: Adding Custom Emojis To Discord Server On Windows/Mac?
- Part 4: Adding Custom Emojis To Discord Server On iPhone And Android?
- Part 5: Managing Emojis in Discord Server
Part 1: How to Add and Send Emoji To Chat On Discord?
One of the best things about Discord’s emoji feature is that there are two ways to add them. You can either access emoji on the Discord account or upload them yourself.
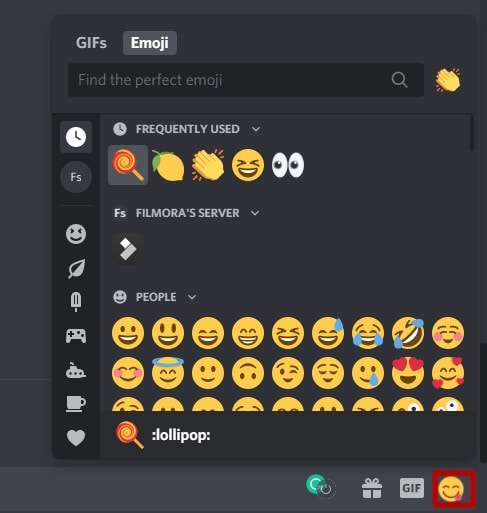
You can access the emoji menu for all Discord platforms by pressing the grey smiley face next to the message box. This will be on the right of the box for desktops, and for mobile apps, it will be on the left.
Discord-exclusive and standard emoji are present in the emoji menu, along with a part that keeps track of your most-used emoji.
On the other hand, you can also add custom emoticons to your Discord server if you have permission to do so.
Once you add and access the emoji on your device, select the one you want to send to your friends and press enter to send.
Part 2: How to Add Emojis To Discord Channel Name Or Nickname?
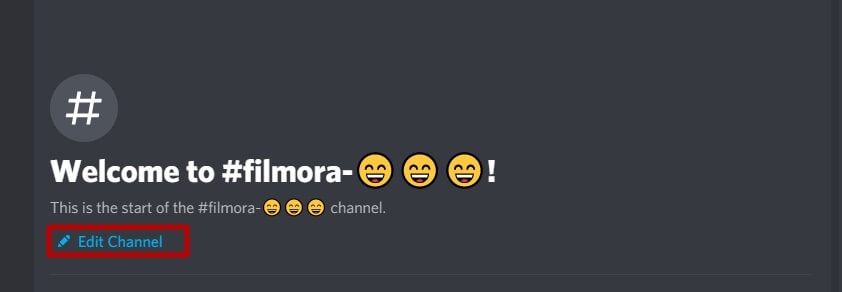
As an owner of a Discord channel, it is easy for you to add emoji to Discord. Follow the steps below to figure out how to add emojis to Discord channels:
- Use the emoji list to find the one you want to use in your channel name.
- Select the emoji “browser” column and copy it either with the mouse or “Ctrl + C” on the keyboard.
- Access your Discord server, right-click the channel where the emoji will be and use the dropdown menu to select the “Edit Channel.”
- In the “Channel Name” box, past the selected emoji using “Ctrl + V” from the keyboard.
- Select “Save Changes” to save the name with the emoji.
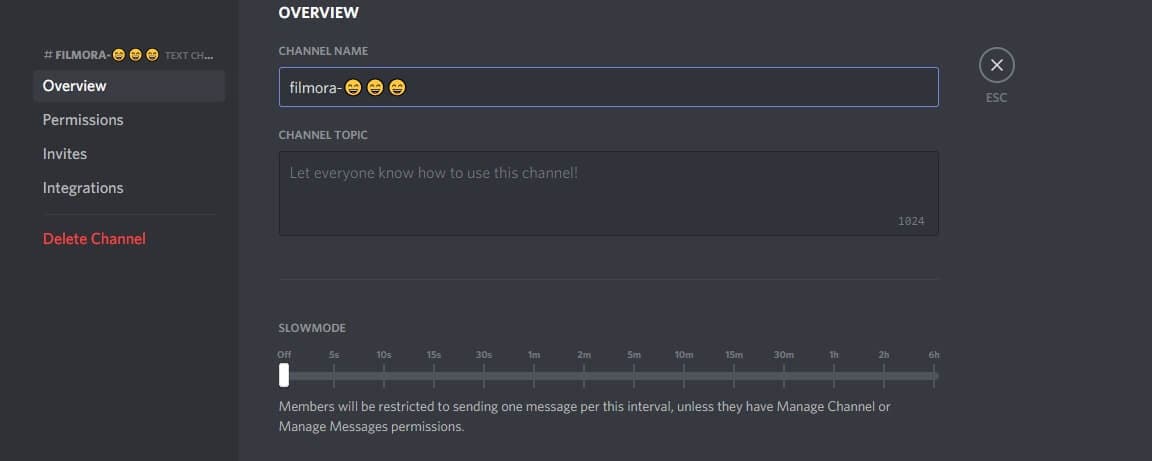
Part 3: How to Add Custom Emojis To Discord Server On Windows/Mac?
You can add custom emoji on Discord, but only if you are a server owner or administrator. Use the Discord server settings on either the desktop versions for Windows or Mac or the Discord Website.
Follow the steps below for either platform:
- Access your Discord server to begin and press the arrow pointing down in the channel list with the server name—Press “Server Settings” in the menu

- As the server’s settings open, you can add custom emojis in the “Emoji” tab. You can find a requirements list at the top that includes emoji names with a minimum of two characters and a file size limit of 256 KB. You can add fifty normal and an additional fifty animated emoji GIFs using the standard servers
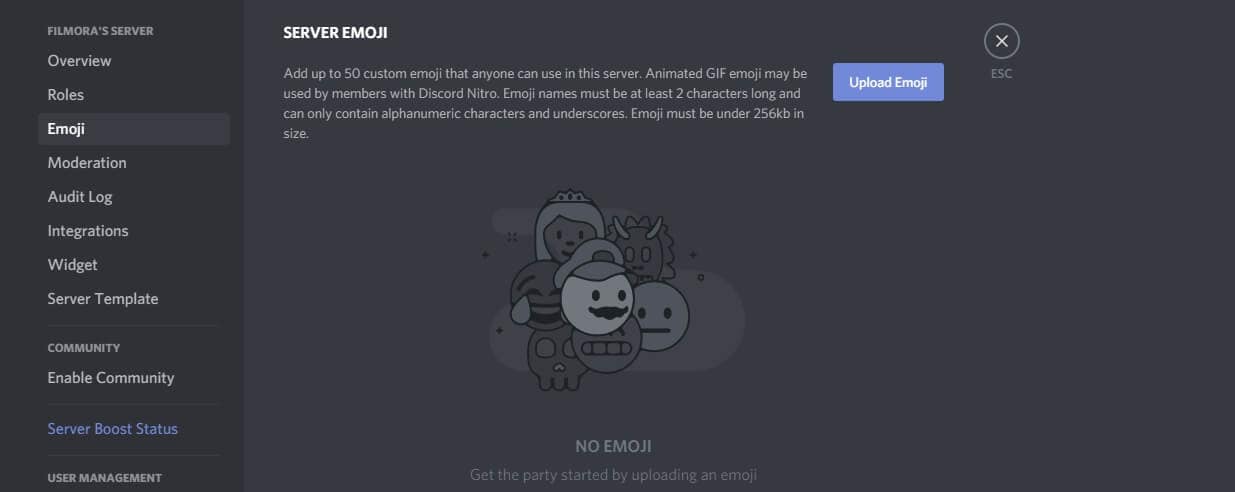
- Select “Upload Emoji” to insert a custom emoji, either standard or animated
- With the help of your device’s local storage, upload the file. However, for the emoji to be added to the lists, the file should align with Discord’s requirements.
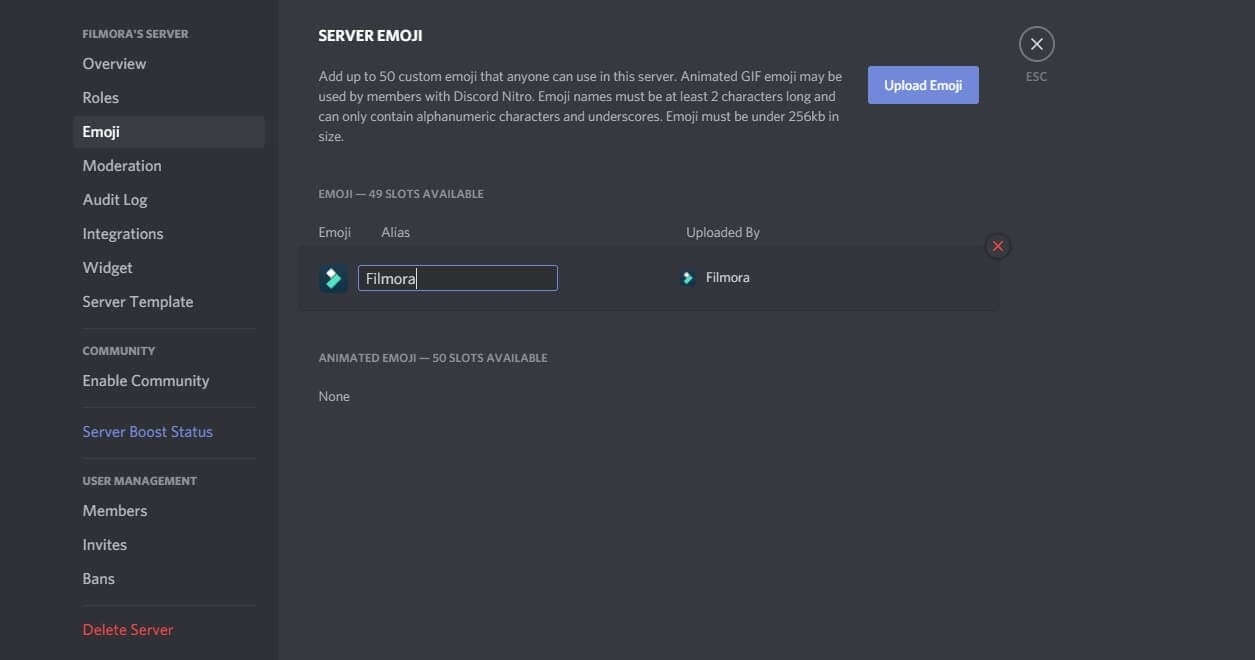
- For every emoji image that you upload, an alias tag will be created for that custom emoji using the file’s name. This tag is used to update a message with an emoji.
- A default alias name like this can be replaced by selecting the “Alias” box with the custom emoji and then creating a new name.
- Enjoy your emoji in chats as soon as you upload them to the Discord server!
Boost your server with Discord Nitro subscribers today to insert more than the standard fifty emoji!
Part 4: How to Add Custom Emojis To Discord Server On iPhone And Android?
How cool is it that you can add custom emoji to your smartphone as well? Whether you have an iPhone or an Android, you can use the same menu as Windows and Mac to upload emoji.
Discord’s interface is similar across all devices, so the following steps work on Android and Apple.
- Begin by opening the app on your device to access the server. Press the hamburger menu located at the top left in an open server and channel.
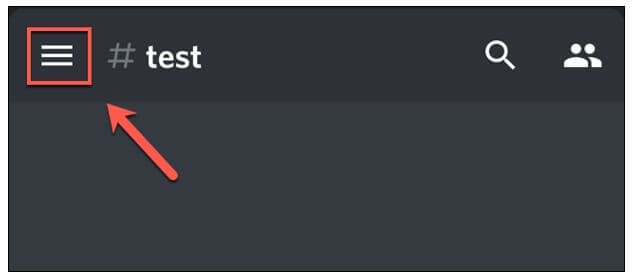
- As the channel and server list opens for Discord, you can see a three-dot menu right next to the channel list with the server name. Tap on it to proceed.
- To get to your server settings, press “Settings” in the Discord server menu that shows up.
- Under the “Server Settings” menu, select “Emoji” to access the custom emoji settings.
- As the “Emoji” menu opens, you can see an emoji requirement list
- Press “Upload Emoji” to upload any emoji that aligns with these requirements
- Press the custom emoji file, tap “Crop” if it needs cropping, and then use the “Upload” option
- After you upload the emoji file, replace the alias tag by tapping on it. This will redirect you to that specific emoji’s settings
- Type the name you want using the “Alias” box to create the tag used to insert emoji in messages
- Save this new tag with the “Save” icon placed in the bottom right
- Any changes you make to the custom emoji’s alias are applied to it instantly for your use.
Emoji bring fun to the conversations you have with friends, and it is very easy to add them to your server as well. These show up in the emoji pop-up list once you add them. The chat message bar contains the emoji icon from where you can access them.
It is essential to name your emoji with only alphanumeric characters and underscores using at least two characters.
The Discord emoji size is 32x32 pixels, so even if you upload up to 128x128 pixel size emojis, they will be resized to the default dimensions. Furthermore, emoji file sizes are at most 256kb.
If you want to use custom emojis, you can’t do so without a Nitro subscription because it is only functional on the server they are uploaded to. Even if you find a way to access the emoji from some other server, only its text code will be visible.
If you attempt to use the Emoji Picker to pick an emoji, you’ll get the following message:
Bonus: How to Manage Emoji in Discord Server?
You can’t remove or add emoji specific to a server on your own as a member. You need the server owner to toggle the permission of Manager Emoji in your domain.
On the other hand, as a server owner, you can give others this role with the following steps.
- Open Roles: Open the Server Settings and select “Roles” from the menu on the side.
- Toggle Manage Emoji: Pick the role you want to apply the permission to, and then toggle emoji’s slider to “on,” save changes, and you’re done!
FAQs About Discord Emojis
1. Why Do I See Grey Emoji In The Emoji Menu?
Greyed-out emoji in the menu means that either those emoji are animated, or you don’t have the permission to post them on other servers.
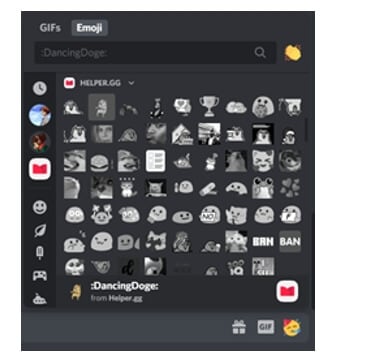
2. How Can I Get More Custom Emoji On The Server?
You can upload 50 emojis to your Discord server. But if you want more options, you need a Discord Nitro subscription to boost your server specs.
3. What Is The Discord Emoji Size?
Discord allows you to upload an emoji of up to 128x128 pixels, but it will resize it to 32x32 since that is its standard size.
Conclusion
Emojis make any chat fun, and where gaming is involved, they help you communicate better with your friends.
Discord has thousands of custom emojis that you can easily add to your server through your computer, whether it is your chat or the channel name. Follow our guide for a seamless process to add emoji to Discord and make your gaming experience better!
Richard Bennett
Richard Bennett is a writer and a lover of all things video.
Follow @Richard Bennett
Richard Bennett
Mar 27, 2024• Proven solutions
Who doesn’t like emoticons? They are fun, easy to use, and, best of all, highly expressive of your emotions that you cannot convey over messages otherwise.
A 2019 survey shows 70% of mobile users used emoji in texting or on social media daily. This shows the popularity of emoji in our world today.
Similarly, as a Discord user, you must have come across thousands of emoji in it. These are images uploaded on the server and called custom emojis that this gaming community can use for effective communication with friends and other players.
With the emoji and gaming industry growing, it is safe to say that discord emoji’s popularity and use will only increase.
Read ahead to see how you can add emojis on Discord if you want to have fun chats with your friends too.
- Part 1: Adding and Sending Emoji To Chat On Discord?
- Part 2: Adding Emojis To Discord Channel Name Or Nickname?
- Part 3: Adding Custom Emojis To Discord Server On Windows/Mac?
- Part 4: Adding Custom Emojis To Discord Server On iPhone And Android?
- Part 5: Managing Emojis in Discord Server
Part 1: How to Add and Send Emoji To Chat On Discord?
One of the best things about Discord’s emoji feature is that there are two ways to add them. You can either access emoji on the Discord account or upload them yourself.
You can access the emoji menu for all Discord platforms by pressing the grey smiley face next to the message box. This will be on the right of the box for desktops, and for mobile apps, it will be on the left.
Discord-exclusive and standard emoji are present in the emoji menu, along with a part that keeps track of your most-used emoji.
On the other hand, you can also add custom emoticons to your Discord server if you have permission to do so.
Once you add and access the emoji on your device, select the one you want to send to your friends and press enter to send.
Part 2: How to Add Emojis To Discord Channel Name Or Nickname?
As an owner of a Discord channel, it is easy for you to add emoji to Discord. Follow the steps below to figure out how to add emojis to Discord channels:
- Use the emoji list to find the one you want to use in your channel name.
- Select the emoji “browser” column and copy it either with the mouse or “Ctrl + C” on the keyboard.
- Access your Discord server, right-click the channel where the emoji will be and use the dropdown menu to select the “Edit Channel.”
- In the “Channel Name” box, past the selected emoji using “Ctrl + V” from the keyboard.
- Select “Save Changes” to save the name with the emoji.
Part 3: How to Add Custom Emojis To Discord Server On Windows/Mac?
You can add custom emoji on Discord, but only if you are a server owner or administrator. Use the Discord server settings on either the desktop versions for Windows or Mac or the Discord Website.
Follow the steps below for either platform:
- Access your Discord server to begin and press the arrow pointing down in the channel list with the server name—Press “Server Settings” in the menu
- As the server’s settings open, you can add custom emojis in the “Emoji” tab. You can find a requirements list at the top that includes emoji names with a minimum of two characters and a file size limit of 256 KB. You can add fifty normal and an additional fifty animated emoji GIFs using the standard servers
- Select “Upload Emoji” to insert a custom emoji, either standard or animated
- With the help of your device’s local storage, upload the file. However, for the emoji to be added to the lists, the file should align with Discord’s requirements.
- For every emoji image that you upload, an alias tag will be created for that custom emoji using the file’s name. This tag is used to update a message with an emoji.
- A default alias name like this can be replaced by selecting the “Alias” box with the custom emoji and then creating a new name.
- Enjoy your emoji in chats as soon as you upload them to the Discord server!
Boost your server with Discord Nitro subscribers today to insert more than the standard fifty emoji!
Part 4: How to Add Custom Emojis To Discord Server On iPhone And Android?
How cool is it that you can add custom emoji to your smartphone as well? Whether you have an iPhone or an Android, you can use the same menu as Windows and Mac to upload emoji.
Discord’s interface is similar across all devices, so the following steps work on Android and Apple.
- Begin by opening the app on your device to access the server. Press the hamburger menu located at the top left in an open server and channel.
- As the channel and server list opens for Discord, you can see a three-dot menu right next to the channel list with the server name. Tap on it to proceed.
- To get to your server settings, press “Settings” in the Discord server menu that shows up.
- Under the “Server Settings” menu, select “Emoji” to access the custom emoji settings.
- As the “Emoji” menu opens, you can see an emoji requirement list
- Press “Upload Emoji” to upload any emoji that aligns with these requirements
- Press the custom emoji file, tap “Crop” if it needs cropping, and then use the “Upload” option
- After you upload the emoji file, replace the alias tag by tapping on it. This will redirect you to that specific emoji’s settings
- Type the name you want using the “Alias” box to create the tag used to insert emoji in messages
- Save this new tag with the “Save” icon placed in the bottom right
- Any changes you make to the custom emoji’s alias are applied to it instantly for your use.
Emoji bring fun to the conversations you have with friends, and it is very easy to add them to your server as well. These show up in the emoji pop-up list once you add them. The chat message bar contains the emoji icon from where you can access them.
It is essential to name your emoji with only alphanumeric characters and underscores using at least two characters.
The Discord emoji size is 32x32 pixels, so even if you upload up to 128x128 pixel size emojis, they will be resized to the default dimensions. Furthermore, emoji file sizes are at most 256kb.
If you want to use custom emojis, you can’t do so without a Nitro subscription because it is only functional on the server they are uploaded to. Even if you find a way to access the emoji from some other server, only its text code will be visible.
If you attempt to use the Emoji Picker to pick an emoji, you’ll get the following message:
Bonus: How to Manage Emoji in Discord Server?
You can’t remove or add emoji specific to a server on your own as a member. You need the server owner to toggle the permission of Manager Emoji in your domain.
On the other hand, as a server owner, you can give others this role with the following steps.
- Open Roles: Open the Server Settings and select “Roles” from the menu on the side.
- Toggle Manage Emoji: Pick the role you want to apply the permission to, and then toggle emoji’s slider to “on,” save changes, and you’re done!
FAQs About Discord Emojis
1. Why Do I See Grey Emoji In The Emoji Menu?
Greyed-out emoji in the menu means that either those emoji are animated, or you don’t have the permission to post them on other servers.
2. How Can I Get More Custom Emoji On The Server?
You can upload 50 emojis to your Discord server. But if you want more options, you need a Discord Nitro subscription to boost your server specs.
3. What Is The Discord Emoji Size?
Discord allows you to upload an emoji of up to 128x128 pixels, but it will resize it to 32x32 since that is its standard size.
Conclusion
Emojis make any chat fun, and where gaming is involved, they help you communicate better with your friends.
Discord has thousands of custom emojis that you can easily add to your server through your computer, whether it is your chat or the channel name. Follow our guide for a seamless process to add emoji to Discord and make your gaming experience better!
Richard Bennett
Richard Bennett is a writer and a lover of all things video.
Follow @Richard Bennett
How to Use Emojis on Windows 10 and Windows 11?
If you ever wondered how to use emojis on Windows, or since when the emojis are around and what is their significance, you will find all your answers here. Because Windows 10 offers a great range of emojis that help you express your feelings and reactions in fewer words, they have recently gained a decent level of popularity, mostly amongst youngsters and millennials.
With that said, in the following sections, you will learn how to use emojis on Windows 10 using both keyboard shortcuts and touch keyboard, how to get emojis on Windows 10 to make your text or conversation look more versatile, and what new has been added to the latest operating system released by Microsoft, i.e., Windows 11.
In this article
01 Part 1: The History of Emojis in Windows
02 Part 2: How to Use Emojis with Keyboard Shortcuts
03 Part 3: How to Use Emojis on Windows PC with Touch Keyboard
04 Part 4: What’s New in Emojis in Windows 11
05 Part 5: How to Get More Emojis in Windows 11
Part 1: The History of Emojis in Windows
Although emojis are present in some form or the other since the mid-‘90s, they were not quite popular back then. With the evolution of smartphones, these iconic characters got attention from the then-teenagers. Seeing this, in 2012, Microsoft introduced the first-ever set of black-and-white emojis with the release of Windows 8, and after some time, the company also added the same to Windows 7 that was rolled out along with the updates for the OS.
With the release of Windows 10 in 2015, a wide range of full-fledged colored emojis was introduced and received a large number of positive reactions from the users. As of today, emojis have become an integral part of everyone’s day-to-day text conversation, be it on Skype, WhatsApp, Facebook, or any other such platform.
Part 2: How to Use Emojis with Keyboard Shortcuts
A keyboard shortcut is a combination of two or more keys that are pressed simultaneously to trigger a pre-assigned event or action. A good example of a keyboard shortcut is ‘Ctrl + S’ which, when pressed, saves the document you’re working on.
While learning the process of how to use emoji in Windows 10, it is equally imperative to memorize the shortcut keys to insert those icons without taking your hands off the keyboard. This not only saves your time, but it also prevents you from going through the lengthy process of opening the emojis keyboard, navigating through all the available icons to choose the one you’re looking for, and then clicking it to insert in the document or conversation.
Nevertheless, it would be a good idea to learn how to launch the emojis keyboard, and the process is simple. All you need to do is:
- Make sure that your keyboard cursor is in an app that can accept text inputs. A text editor like MS Word or WordPad could be a good example
- Press the Windows + ; (semicolon) or Windows + . (period) keys together to open the emojis keyboard

Once the keyboard is open, you can click any of the available emojis to insert it in your conversion or text content.
As for the shortcuts, depending on the type of expression you want to convey, there could be thousands of them. Some of the commonly used emojis and their universal shortcut keys for both Windows 10 and Windows 11 include:
: (colon) + ) (right brace) will create a smiley face
: (colon) + ( (left brace) will create a sad face
: (colon) + ; (semicolon) will create a wink face
…and so on. You can conduct a quick online search to get the entire list of keyboard shortcuts and the emojis that they will create. For your convenience, a link from the Microsoft official website is given below:
Part 3: How to Use Emojis on Windows PC with Touch Keyboard
If you have Microsoft Surface or any other device that has Windows 10 or Windows 11 installed on it, and can accept inputs via touch keyboard, you can enable the feature in the operating system, and then use the touch keyboard to add emojis to your conversion or content. You can follow the instructions given below to enable touch keyboard, and then learn how to use emojis on Windows 11 or Windows 10 via touch:
- Right-click anywhere on the taskbar (Windows 11 is used here for demonstration), and then click Taskbar settings

- From the right area of the Settings window that opens next, scroll down to the Taskbar corner icons section, and then turn on the Touch keyboard switch

- Launch an app that can accept text inputs, e.g., a text editor, chatting app, etc. Click or tap the Touch keyboard icon from the notification area that is present at the bottom-right corner of the screen.

- Click or tap the Emojis icon from the upper-left corner of the touch keyboard that opens up, and then touch your preferred emoji to add it to your text or conversation.

Part 4: What’s New in Emojis in Windows 11
In addition to learning how to use emojis on Windows 10, it is also important to know what’s new with them or the emojis panel in Windows 11, the latest operating system released by Microsoft this year, i.e., 2021.
In Windows 11, although you can launch the emojis keyboard using the same shortcuts, i.e., ‘Windows + .’ or ‘Windows + ;’ keys as mentioned earlier, the emojis keyboard itself has four sections, namely:
- Emojis – Contains various emojis and smileys
- GIF – Gives you access to various animated GIFs from Tenor
- Kamojis – Lets you add the ASCII characters for emojis, e.g., :-) or :-(
- Symbols – To add important symbols to your text, e.g., ©, ®, etc.
In addition to this, the 2D Clippy emoji has also been introduced with Windows 11, and can be located by launching the emojis keyboard, and typing ‘Clippy’.
Part 5: How to Get More Emojis in Windows 11
If the built-in emoji library doesn’t contain your favorite expressions, you can always get several more by following the instructions given below:
- Launch your favorite web browser on Windows 11, and then go to http://www.iemoji.com/
- Click an emoji from the available options or copy one from your favorite portal, and paste it in the Paste Emoji here field

- Review the emoji in the MESSAGE PREVIEW field, and click Create from the Options section to generate the emoji that can be sent as a message or image

- Alternatively, click Copy from the Options section itself, and then go to the text editor or any other portal you want to use the emoji in, and press Ctrl + V to paste and insert the emoji in your conversation or text without any hassle.

Conclusion
While the emojis were introduced to Windows as late as 2012, Windows 11 has a wide range of these virtual objects or faces for various occasions and to convey different expressions respectively. Furthermore, Windows 11 also gives you access to Tenor’s GIFs, and ASCII characters with particular combinations to represent the emojis, as it was done back in the days of button-operated cellphones.
Also, if the built-in emoji keyboard doesn’t have your favorite expressions and smileys, you can always generate your custom ones by going to http://www.iemoji.com/ , and using the options that the website offers. All in all, it’s easy to learn how to use emojis on Windows as long as you have access to the correct tutorial that explains the process in an easy manner.
02 Part 2: How to Use Emojis with Keyboard Shortcuts
03 Part 3: How to Use Emojis on Windows PC with Touch Keyboard
04 Part 4: What’s New in Emojis in Windows 11
05 Part 5: How to Get More Emojis in Windows 11
Part 1: The History of Emojis in Windows
Although emojis are present in some form or the other since the mid-‘90s, they were not quite popular back then. With the evolution of smartphones, these iconic characters got attention from the then-teenagers. Seeing this, in 2012, Microsoft introduced the first-ever set of black-and-white emojis with the release of Windows 8, and after some time, the company also added the same to Windows 7 that was rolled out along with the updates for the OS.
With the release of Windows 10 in 2015, a wide range of full-fledged colored emojis was introduced and received a large number of positive reactions from the users. As of today, emojis have become an integral part of everyone’s day-to-day text conversation, be it on Skype, WhatsApp, Facebook, or any other such platform.
Part 2: How to Use Emojis with Keyboard Shortcuts
A keyboard shortcut is a combination of two or more keys that are pressed simultaneously to trigger a pre-assigned event or action. A good example of a keyboard shortcut is ‘Ctrl + S’ which, when pressed, saves the document you’re working on.
While learning the process of how to use emoji in Windows 10, it is equally imperative to memorize the shortcut keys to insert those icons without taking your hands off the keyboard. This not only saves your time, but it also prevents you from going through the lengthy process of opening the emojis keyboard, navigating through all the available icons to choose the one you’re looking for, and then clicking it to insert in the document or conversation.
Nevertheless, it would be a good idea to learn how to launch the emojis keyboard, and the process is simple. All you need to do is:
- Make sure that your keyboard cursor is in an app that can accept text inputs. A text editor like MS Word or WordPad could be a good example
- Press the Windows + ; (semicolon) or Windows + . (period) keys together to open the emojis keyboard
Once the keyboard is open, you can click any of the available emojis to insert it in your conversion or text content.
As for the shortcuts, depending on the type of expression you want to convey, there could be thousands of them. Some of the commonly used emojis and their universal shortcut keys for both Windows 10 and Windows 11 include:
: (colon) + ) (right brace) will create a smiley face
: (colon) + ( (left brace) will create a sad face
: (colon) + ; (semicolon) will create a wink face
…and so on. You can conduct a quick online search to get the entire list of keyboard shortcuts and the emojis that they will create. For your convenience, a link from the Microsoft official website is given below:
Part 3: How to Use Emojis on Windows PC with Touch Keyboard
If you have Microsoft Surface or any other device that has Windows 10 or Windows 11 installed on it, and can accept inputs via touch keyboard, you can enable the feature in the operating system, and then use the touch keyboard to add emojis to your conversion or content. You can follow the instructions given below to enable touch keyboard, and then learn how to use emojis on Windows 11 or Windows 10 via touch:
- Right-click anywhere on the taskbar (Windows 11 is used here for demonstration), and then click Taskbar settings
- From the right area of the Settings window that opens next, scroll down to the Taskbar corner icons section, and then turn on the Touch keyboard switch
- Launch an app that can accept text inputs, e.g., a text editor, chatting app, etc. Click or tap the Touch keyboard icon from the notification area that is present at the bottom-right corner of the screen.
- Click or tap the Emojis icon from the upper-left corner of the touch keyboard that opens up, and then touch your preferred emoji to add it to your text or conversation.
Part 4: What’s New in Emojis in Windows 11
In addition to learning how to use emojis on Windows 10, it is also important to know what’s new with them or the emojis panel in Windows 11, the latest operating system released by Microsoft this year, i.e., 2021.
In Windows 11, although you can launch the emojis keyboard using the same shortcuts, i.e., ‘Windows + .’ or ‘Windows + ;’ keys as mentioned earlier, the emojis keyboard itself has four sections, namely:
- Emojis – Contains various emojis and smileys
- GIF – Gives you access to various animated GIFs from Tenor
- Kamojis – Lets you add the ASCII characters for emojis, e.g., :-) or :-(
- Symbols – To add important symbols to your text, e.g., ©, ®, etc.
In addition to this, the 2D Clippy emoji has also been introduced with Windows 11, and can be located by launching the emojis keyboard, and typing ‘Clippy’.
Part 5: How to Get More Emojis in Windows 11
If the built-in emoji library doesn’t contain your favorite expressions, you can always get several more by following the instructions given below:
- Launch your favorite web browser on Windows 11, and then go to http://www.iemoji.com/
- Click an emoji from the available options or copy one from your favorite portal, and paste it in the Paste Emoji here field
- Review the emoji in the MESSAGE PREVIEW field, and click Create from the Options section to generate the emoji that can be sent as a message or image
- Alternatively, click Copy from the Options section itself, and then go to the text editor or any other portal you want to use the emoji in, and press Ctrl + V to paste and insert the emoji in your conversation or text without any hassle.
Conclusion
While the emojis were introduced to Windows as late as 2012, Windows 11 has a wide range of these virtual objects or faces for various occasions and to convey different expressions respectively. Furthermore, Windows 11 also gives you access to Tenor’s GIFs, and ASCII characters with particular combinations to represent the emojis, as it was done back in the days of button-operated cellphones.
Also, if the built-in emoji keyboard doesn’t have your favorite expressions and smileys, you can always generate your custom ones by going to http://www.iemoji.com/ , and using the options that the website offers. All in all, it’s easy to learn how to use emojis on Windows as long as you have access to the correct tutorial that explains the process in an easy manner.
Top 10 Storyboarding Software [Free&Paid]
Top 10 Storyboarding Software in 2024

Liza Brown
Mar 27, 2024• Proven solutions
Several different creative sectors rely on storyboarding for their creative process, including filmmakers and animators and UX designers, game designers, and creative directors. However, the process of hand-drawing each frame or shot can take a great deal of time if you have to do it by hand. Our goal is to make storyboarding easier and more efficient by bringing you this list of free and paid tools, storyboarding software, and apps.
You can add text, sound, and script to your original sketches with these tools (or make use of assets from a library if you do not have time to sketch your own). Alternatively, you can share your storyboarding progress within the project, either by a link or a PDF - or get immediate feedback. Finally, you can continue working from anywhere with apps that work across multiple devices - desktop, mobile, and tablet.
No matter what kind of tool you prefer, from a simple 2D sketch tool like Make Storyboard to a 3D drawing tool like Storyboard Pro, you’ll find the best options on this page.
You might be interested in:
1. Storyboarder by Wonder Unit
Price: Free
Platforms: Windows, Mac, and Linux.
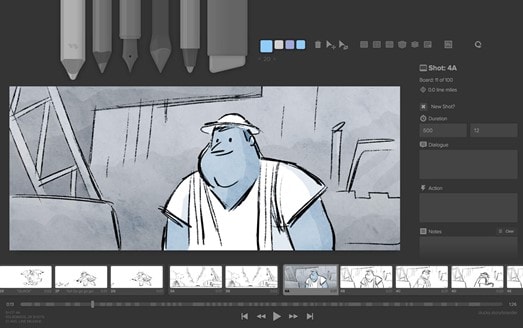
If you’re on a smaller budget, Storyboarder is an excellent option. It’s free and open-source. In the program’s clean interface, you have all the tools you need, so drawing shapes and characters is a breeze. In addition to writing dialogue, you can also enter timing information and the type of shot.
The Storyboarder and Photoshop apps integrate seamlessly, which means you can refine your board in Photoshop and have it updated in Storyboarder. In addition, you can export videos to Premiere, Final Cut, Avid, PDF, or Animated GIF from this software.
2. Toon Boom Storyboard Pro
Price: $60/mo or $999 one-time fee
Platforms: Mac, Windows
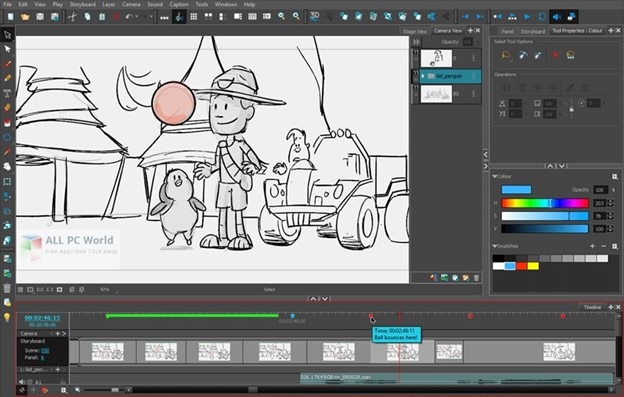
Toon Boom Storyboard Pro is the complete opposite of free. A standout among storyboarding programs, it’s also one of the most expensive. However, in most studios, boarding and animating is done using Toon Boom, so you may want to learn about this if you’d like to break into the industry. As a result, the monthly fee is a lot lower than the initial cost, allowing most people to take advantage of the service.
You can use Toon Boom for a month and test the waters before committing yourself to a huge license fee. How can you benefit from this program? Sketching and animation go hand-in-hand in this process. Drawing your boards and seeing how they would animate is a great way to test your script while making sure you’re on target with your scenes.
The program is primarily designed for animators. It can be used for ad agencies and for making small skits. Nevertheless, the Story Flow tool makes switching between board and script for writers incredibly easy. In addition to creating dynamic camera movements, you can also use some 3D effects that work well for 3D animators. Create layered panels in Photoshop quickly and easily by importing Final Draft scripts. There is plenty of support available for all the common programs in the art industry.
3. Plot
Price: $10/month (14 days Free Trial Available)
Platforms: Windows, Linux, and Mac

Storytelling is super easy with the plot. There are no limits to the number of boards, projects, and users you can have. With some nice features targeted toward animators, it is a web-based storyboarding app for beginners.
A drawing pane is available on whichever operating system you run this program on. Drawing your frames this way also lets you add dialogues and stage directions directly to your project. In addition, it is easy to move through different scenes in the app because it is visual. You can click and drag pieces around to change the scene. It couldn’t be easier.
In addition to the collaboration features, we consider it to be exceptional and above the norm for products in this price range. As long as you have a desktop program to work on your drawings, you’ll have more control. When you import the drawings into Plot, you can then arrange them accordingly. Hence, you’ve still got collaborative features with online management of very detailed drawings.
4. FrameForge Storyboard Studio
Price: $498.95 one-time fee or $12.99/month (Core Edition); $799 one-time fee or $24.99/month (Professional Edition)
Platforms: Windows, Mac, and Android.
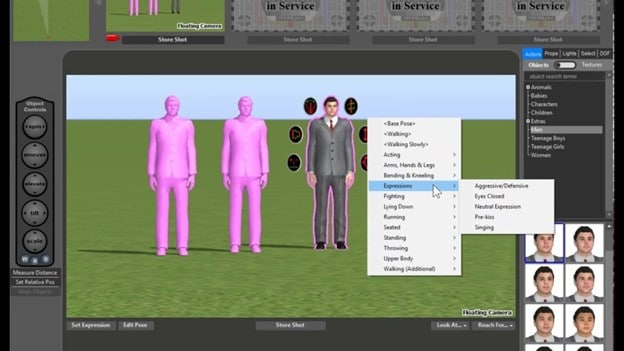
Even without animation, drawing, or highly technical computer skills, your team can benefit from FrameForge, with HBO, Netflix, and BBC as users.
There are two versions of FrameForge’s product: Core and Professional. Professional offers planning capabilities (down to the inch) for dollies and cranes. Scripts from any program can be imported into the software. In addition to movement arrows, framing notes, angle of view, focal length, and more, the storyboards ensure that your video team understands all aspects of production, from preparation to post-production.
Mobile users can use it on any mobile device, and PowerPoint presentations can be downloaded as a final product. Team members who want to produce more elaborate and lengthy videos for entertainment purposes might find FrameForge useful.
5. Studiobinder
Price: $29/month (Indie); $49/month (Professional); $99/month (Studio) Free Trial is also available.
Platform: Windows, Linux, and Mac.
Visualizations can be personalized at every level in Studiobinder. Filters can be used to sort columns, order scenes, add images, adjust aspect ratios, color code images, and add notes to locations. In addition, project management features such as task assignment and commenting help Studiobinder make collaboration easy.
Also, the platform includes a handy presentation mode so you can show your team your projects. The company boasts impressive clients such as BuzzFeed, ESPN, and CBS Interactive. Team members who need to collaborate on various stages of the video production process and who prefer customizable tools should take advantage of this option.
6. Boords
Price: $12-$24/month
Platforms: Windows, Linux, and Mac

In the software industry, online SaaS products have quickly become the norm. While desktop programs are not going away, we see more and more web-based options such as Boards that provide unique solutions.
The Boards software is a native storyboard platform that provides tons of free templates and collaboration tools. In addition, clients can log into their projects and add comments directly from their computers.
For teams working together on a project, you may also set up multiple user accounts. Storyboards in Boords can be presented in animatic form before being animated, thanks to flexible frame sizes and tons of free templates.
Despite the affordable monthly price, this product works on every major operating system. It is rare to find a program that offers this much functionality at such an affordable price. Boords is an excellent solution for collaborative work. You can try it for a while until you decide if it’s right for you, but there is no commitment involved.
7. makeStoryboard
Price: Free; $12/month (Professional); $36/month (Team)
Platforms: Windows, and Mac.

MakeStoryboard provides a simple, straightforward interface for uploading camera shots, drawing stick figures with its built-in tool, and incorporating text for scene details if you are not interested in the fancier options in the list. In addition, any drawing tablet can be used with marker, pencil, and pen tools.
Additional details unique to your team and use case can also be entered in custom text fields. Then, using a PDF format, you can export your storyboard when you’re ready to pitch. Finally, stakeholders can review it using a private link without requiring an account in an alternative method. The best part is that it has a free subscription plan, making it an excellent option for teams on a small budget.
8. Canva
Price: Free
Platforms: Works on all major Operating Systems

It doesn’t have to be stressful to create a storyboard, and Canva makes it easy with a large library of templates, millions of stock photos (or the ability to upload your own), and color frames. The font type, colors, headers, and subheaders can be customized.
If you’re working on a script or design with someone else, you can grant access to collaborate, and when you’re done you can share the design through email or as a PDF. On the other hand, if your team needs an easy and simple tool to manage simpler projects or get started with storyboarding, this may be your best choice.
9. PanelForge
Price: Free (Public Beta); $7.31/month (Pro); $1,411/year (Studio)
Platforms: Works on all Major Operating Systems
PanelForge delivers a feature-rich, drag-and-drop storyboarding solution with flexible frames and drag-and-drop tools. Storyboarding is free to try and offers a suite of paid plans for anyone working on animatics and more complex projects.
Drawings and 3D designs can both be created with PanelForge. Aside from creating animatics, you can also import and export files from Adobe Premiere and Final Cut Pro. The PanelForge tool is ideal for experienced marketers and storyboarders familiar with visualization tools.
10. Adobe Photoshop
Price: $9.99/mo
Platforms: Mac and Windows.
I think it will stay around for a long time. It’s been around for 20+ years. Yet, doesn’t it seem funny how Photoshop can be used for so much more than photo editing? In addition to storyboarding, we see it used for digital painting, pixel art, etc. The digital drawing capability of PS is the same as that of other programs. There are now more brushes available for the PS environment, so there’s even more support.
Additionally, you can download free storyboard templates in PSD format for Photoshop. This program doesn’t need too much explanation because every artist is already aware of it. However, Linux users are most likely to be disappointed by the lack of support.
Conclusion
So, these are some of the best free and paid to storyboard software that you can find in 2021. Each piece of software has its own characteristics and way of being used. In the end, it all depends upon your usage and preferences to decide which software you will use to achieve your goals. If you have enough budget then you can work with paid tools as they offer more features. If you have limited or no budget, you can try to free tools as they offer pretty good features.
Liza Brown
Liza Brown is a writer and a lover of all things video.
Follow @Liza Brown
Liza Brown
Mar 27, 2024• Proven solutions
Several different creative sectors rely on storyboarding for their creative process, including filmmakers and animators and UX designers, game designers, and creative directors. However, the process of hand-drawing each frame or shot can take a great deal of time if you have to do it by hand. Our goal is to make storyboarding easier and more efficient by bringing you this list of free and paid tools, storyboarding software, and apps.
You can add text, sound, and script to your original sketches with these tools (or make use of assets from a library if you do not have time to sketch your own). Alternatively, you can share your storyboarding progress within the project, either by a link or a PDF - or get immediate feedback. Finally, you can continue working from anywhere with apps that work across multiple devices - desktop, mobile, and tablet.
No matter what kind of tool you prefer, from a simple 2D sketch tool like Make Storyboard to a 3D drawing tool like Storyboard Pro, you’ll find the best options on this page.
You might be interested in:
1. Storyboarder by Wonder Unit
Price: Free
Platforms: Windows, Mac, and Linux.
If you’re on a smaller budget, Storyboarder is an excellent option. It’s free and open-source. In the program’s clean interface, you have all the tools you need, so drawing shapes and characters is a breeze. In addition to writing dialogue, you can also enter timing information and the type of shot.
The Storyboarder and Photoshop apps integrate seamlessly, which means you can refine your board in Photoshop and have it updated in Storyboarder. In addition, you can export videos to Premiere, Final Cut, Avid, PDF, or Animated GIF from this software.
2. Toon Boom Storyboard Pro
Price: $60/mo or $999 one-time fee
Platforms: Mac, Windows
Toon Boom Storyboard Pro is the complete opposite of free. A standout among storyboarding programs, it’s also one of the most expensive. However, in most studios, boarding and animating is done using Toon Boom, so you may want to learn about this if you’d like to break into the industry. As a result, the monthly fee is a lot lower than the initial cost, allowing most people to take advantage of the service.
You can use Toon Boom for a month and test the waters before committing yourself to a huge license fee. How can you benefit from this program? Sketching and animation go hand-in-hand in this process. Drawing your boards and seeing how they would animate is a great way to test your script while making sure you’re on target with your scenes.
The program is primarily designed for animators. It can be used for ad agencies and for making small skits. Nevertheless, the Story Flow tool makes switching between board and script for writers incredibly easy. In addition to creating dynamic camera movements, you can also use some 3D effects that work well for 3D animators. Create layered panels in Photoshop quickly and easily by importing Final Draft scripts. There is plenty of support available for all the common programs in the art industry.
3. Plot
Price: $10/month (14 days Free Trial Available)
Platforms: Windows, Linux, and Mac
Storytelling is super easy with the plot. There are no limits to the number of boards, projects, and users you can have. With some nice features targeted toward animators, it is a web-based storyboarding app for beginners.
A drawing pane is available on whichever operating system you run this program on. Drawing your frames this way also lets you add dialogues and stage directions directly to your project. In addition, it is easy to move through different scenes in the app because it is visual. You can click and drag pieces around to change the scene. It couldn’t be easier.
In addition to the collaboration features, we consider it to be exceptional and above the norm for products in this price range. As long as you have a desktop program to work on your drawings, you’ll have more control. When you import the drawings into Plot, you can then arrange them accordingly. Hence, you’ve still got collaborative features with online management of very detailed drawings.
4. FrameForge Storyboard Studio
Price: $498.95 one-time fee or $12.99/month (Core Edition); $799 one-time fee or $24.99/month (Professional Edition)
Platforms: Windows, Mac, and Android.
Even without animation, drawing, or highly technical computer skills, your team can benefit from FrameForge, with HBO, Netflix, and BBC as users.
There are two versions of FrameForge’s product: Core and Professional. Professional offers planning capabilities (down to the inch) for dollies and cranes. Scripts from any program can be imported into the software. In addition to movement arrows, framing notes, angle of view, focal length, and more, the storyboards ensure that your video team understands all aspects of production, from preparation to post-production.
Mobile users can use it on any mobile device, and PowerPoint presentations can be downloaded as a final product. Team members who want to produce more elaborate and lengthy videos for entertainment purposes might find FrameForge useful.
5. Studiobinder
Price: $29/month (Indie); $49/month (Professional); $99/month (Studio) Free Trial is also available.
Platform: Windows, Linux, and Mac.
Visualizations can be personalized at every level in Studiobinder. Filters can be used to sort columns, order scenes, add images, adjust aspect ratios, color code images, and add notes to locations. In addition, project management features such as task assignment and commenting help Studiobinder make collaboration easy.
Also, the platform includes a handy presentation mode so you can show your team your projects. The company boasts impressive clients such as BuzzFeed, ESPN, and CBS Interactive. Team members who need to collaborate on various stages of the video production process and who prefer customizable tools should take advantage of this option.
6. Boords
Price: $12-$24/month
Platforms: Windows, Linux, and Mac
In the software industry, online SaaS products have quickly become the norm. While desktop programs are not going away, we see more and more web-based options such as Boards that provide unique solutions.
The Boards software is a native storyboard platform that provides tons of free templates and collaboration tools. In addition, clients can log into their projects and add comments directly from their computers.
For teams working together on a project, you may also set up multiple user accounts. Storyboards in Boords can be presented in animatic form before being animated, thanks to flexible frame sizes and tons of free templates.
Despite the affordable monthly price, this product works on every major operating system. It is rare to find a program that offers this much functionality at such an affordable price. Boords is an excellent solution for collaborative work. You can try it for a while until you decide if it’s right for you, but there is no commitment involved.
7. makeStoryboard
Price: Free; $12/month (Professional); $36/month (Team)
Platforms: Windows, and Mac.
MakeStoryboard provides a simple, straightforward interface for uploading camera shots, drawing stick figures with its built-in tool, and incorporating text for scene details if you are not interested in the fancier options in the list. In addition, any drawing tablet can be used with marker, pencil, and pen tools.
Additional details unique to your team and use case can also be entered in custom text fields. Then, using a PDF format, you can export your storyboard when you’re ready to pitch. Finally, stakeholders can review it using a private link without requiring an account in an alternative method. The best part is that it has a free subscription plan, making it an excellent option for teams on a small budget.
8. Canva
Price: Free
Platforms: Works on all major Operating Systems
It doesn’t have to be stressful to create a storyboard, and Canva makes it easy with a large library of templates, millions of stock photos (or the ability to upload your own), and color frames. The font type, colors, headers, and subheaders can be customized.
If you’re working on a script or design with someone else, you can grant access to collaborate, and when you’re done you can share the design through email or as a PDF. On the other hand, if your team needs an easy and simple tool to manage simpler projects or get started with storyboarding, this may be your best choice.
9. PanelForge
Price: Free (Public Beta); $7.31/month (Pro); $1,411/year (Studio)
Platforms: Works on all Major Operating Systems
PanelForge delivers a feature-rich, drag-and-drop storyboarding solution with flexible frames and drag-and-drop tools. Storyboarding is free to try and offers a suite of paid plans for anyone working on animatics and more complex projects.
Drawings and 3D designs can both be created with PanelForge. Aside from creating animatics, you can also import and export files from Adobe Premiere and Final Cut Pro. The PanelForge tool is ideal for experienced marketers and storyboarders familiar with visualization tools.
10. Adobe Photoshop
Price: $9.99/mo
Platforms: Mac and Windows.
I think it will stay around for a long time. It’s been around for 20+ years. Yet, doesn’t it seem funny how Photoshop can be used for so much more than photo editing? In addition to storyboarding, we see it used for digital painting, pixel art, etc. The digital drawing capability of PS is the same as that of other programs. There are now more brushes available for the PS environment, so there’s even more support.
Additionally, you can download free storyboard templates in PSD format for Photoshop. This program doesn’t need too much explanation because every artist is already aware of it. However, Linux users are most likely to be disappointed by the lack of support.
Conclusion
So, these are some of the best free and paid to storyboard software that you can find in 2021. Each piece of software has its own characteristics and way of being used. In the end, it all depends upon your usage and preferences to decide which software you will use to achieve your goals. If you have enough budget then you can work with paid tools as they offer more features. If you have limited or no budget, you can try to free tools as they offer pretty good features.
Liza Brown
Liza Brown is a writer and a lover of all things video.
Follow @Liza Brown
Also read:
- [New] GB for a Continuous Video Watched Daily for 2024
- [Updated] 5 Tips to Get More Views with YouTube Optimization [Free Checklist] for 2024
- 2024 Approved Burn Photos to DVD | How to Burn Photos to DVD with Transitions and Music
- 2024 Approved How to Make a Memorable Honeymoon Video
- Experience the Improved, Uncrashing Century: Age of Ashes - Perfect Gaming Now Available
- Explore the Best 12 YouTube-MP4 Conversion Applications for Smooth Editing and Quality Views
- Extended Support for Windows 10 Dashed – Microsoft's Unspoken Decision Explained | Insights From ZDNet
- How to Record and Edit an Animoji or Memoji Karaoke Music Video, In 2024
- In 2024, 4 solution to get rid of pokemon fail to detect location On Tecno Camon 20 | Dr.fone
- In 2024, How To Fix OEM Unlock Missing on HTC?
- Making Triggered Memes with Filmora Video Editor for 2024
- New 10 Best Work Memes to Have Fun in Work Days for 2024
- New How to Make a Triggered Meme for 2024
- Professional Webcam Setup on MacBook
- The Newest VR Cam Face-Off Hero5 and Yi's Latest Battle for 2024
- Top 10 Free Emoji Websites to Download Emojis Online
- Ultimate Guide to MP4 Unifiers – The #1 Tools for Merging Vids Into One Masterpiece
- Updated 10 Best Meme Makers Online (Free to Use)
- Updated How to Add Stickers to WhatsApp-The Ultimate Guide
- Title: 7 Free Apps to Get Emojis on Android and iPhone
- Author: Jan
- Created at : 2024-10-04 19:16:52
- Updated at : 2024-10-06 04:35:40
- Link: https://meme-emoji.techidaily.com/7-free-apps-to-get-emojis-on-android-and-iphone/
- License: This work is licensed under CC BY-NC-SA 4.0.