2024 Approved Top 10 Storyboarding Software Free&Paid
Top 10 Storyboarding Software [Free&Paid]
Top 10 Storyboarding Software in 2024

Liza Brown
Mar 27, 2024• Proven solutions
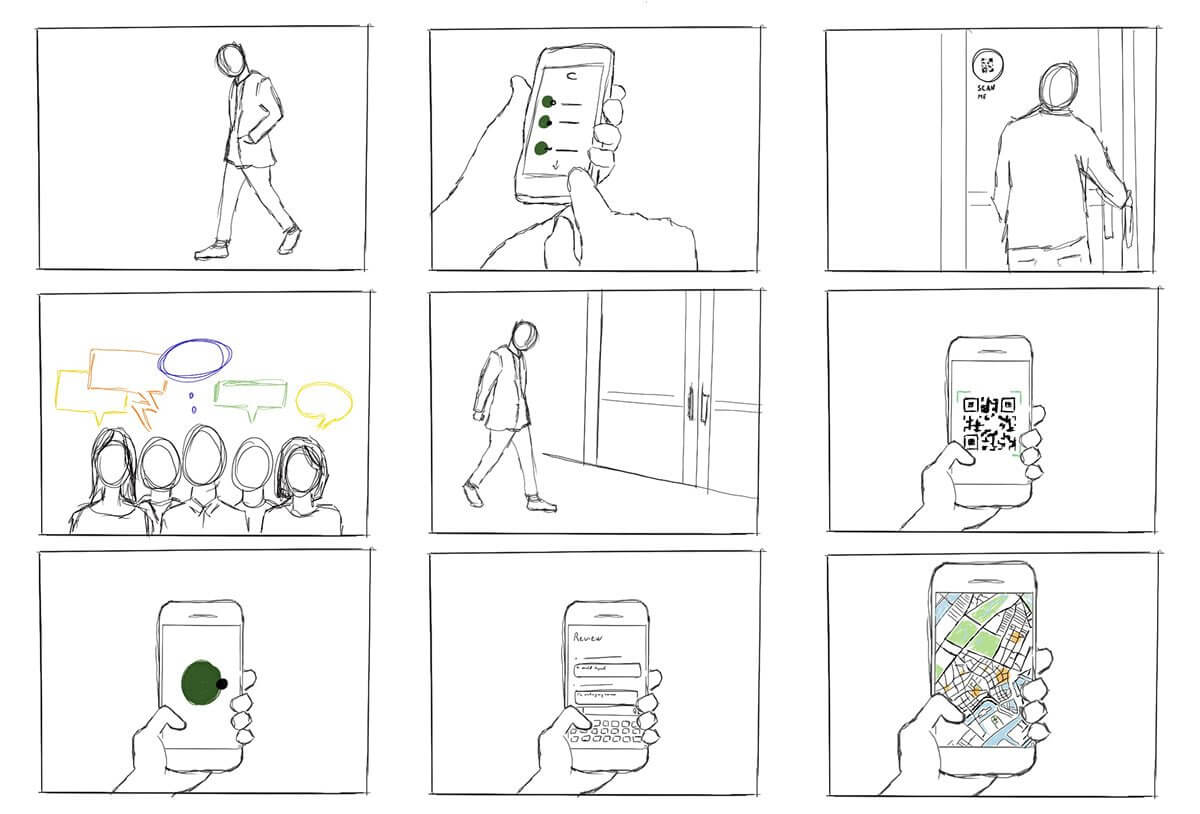
Several different creative sectors rely on storyboarding for their creative process, including filmmakers and animators and UX designers, game designers, and creative directors. However, the process of hand-drawing each frame or shot can take a great deal of time if you have to do it by hand. Our goal is to make storyboarding easier and more efficient by bringing you this list of free and paid tools, storyboarding software, and apps.
You can add text, sound, and script to your original sketches with these tools (or make use of assets from a library if you do not have time to sketch your own). Alternatively, you can share your storyboarding progress within the project, either by a link or a PDF - or get immediate feedback. Finally, you can continue working from anywhere with apps that work across multiple devices - desktop, mobile, and tablet.
No matter what kind of tool you prefer, from a simple 2D sketch tool like Make Storyboard to a 3D drawing tool like Storyboard Pro, you’ll find the best options on this page.
You might be interested in:
1. Storyboarder by Wonder Unit
Price: Free
Platforms: Windows, Mac, and Linux.
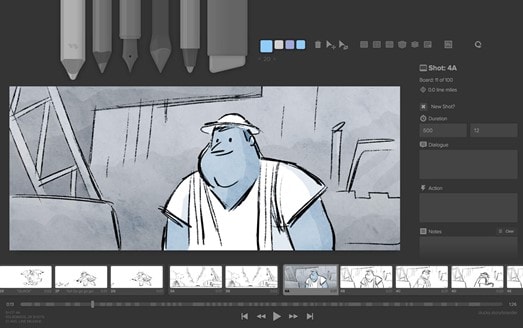
If you’re on a smaller budget, Storyboarder is an excellent option. It’s free and open-source. In the program’s clean interface, you have all the tools you need, so drawing shapes and characters is a breeze. In addition to writing dialogue, you can also enter timing information and the type of shot.
The Storyboarder and Photoshop apps integrate seamlessly, which means you can refine your board in Photoshop and have it updated in Storyboarder. In addition, you can export videos to Premiere, Final Cut, Avid, PDF, or Animated GIF from this software.
2. Toon Boom Storyboard Pro
Price: $60/mo or $999 one-time fee
Platforms: Mac, Windows
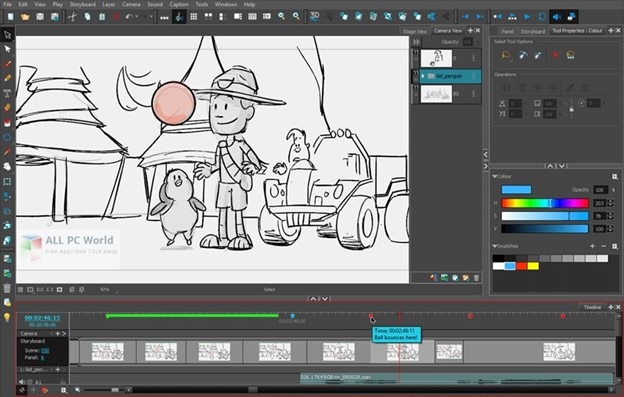
Toon Boom Storyboard Pro is the complete opposite of free. A standout among storyboarding programs, it’s also one of the most expensive. However, in most studios, boarding and animating is done using Toon Boom, so you may want to learn about this if you’d like to break into the industry. As a result, the monthly fee is a lot lower than the initial cost, allowing most people to take advantage of the service.
You can use Toon Boom for a month and test the waters before committing yourself to a huge license fee. How can you benefit from this program? Sketching and animation go hand-in-hand in this process. Drawing your boards and seeing how they would animate is a great way to test your script while making sure you’re on target with your scenes.
The program is primarily designed for animators. It can be used for ad agencies and for making small skits. Nevertheless, the Story Flow tool makes switching between board and script for writers incredibly easy. In addition to creating dynamic camera movements, you can also use some 3D effects that work well for 3D animators. Create layered panels in Photoshop quickly and easily by importing Final Draft scripts. There is plenty of support available for all the common programs in the art industry.
3. Plot
Price: $10/month (14 days Free Trial Available)
Platforms: Windows, Linux, and Mac

Storytelling is super easy with the plot. There are no limits to the number of boards, projects, and users you can have. With some nice features targeted toward animators, it is a web-based storyboarding app for beginners.
A drawing pane is available on whichever operating system you run this program on. Drawing your frames this way also lets you add dialogues and stage directions directly to your project. In addition, it is easy to move through different scenes in the app because it is visual. You can click and drag pieces around to change the scene. It couldn’t be easier.
In addition to the collaboration features, we consider it to be exceptional and above the norm for products in this price range. As long as you have a desktop program to work on your drawings, you’ll have more control. When you import the drawings into Plot, you can then arrange them accordingly. Hence, you’ve still got collaborative features with online management of very detailed drawings.
4. FrameForge Storyboard Studio
Price: $498.95 one-time fee or $12.99/month (Core Edition); $799 one-time fee or $24.99/month (Professional Edition)
Platforms: Windows, Mac, and Android.
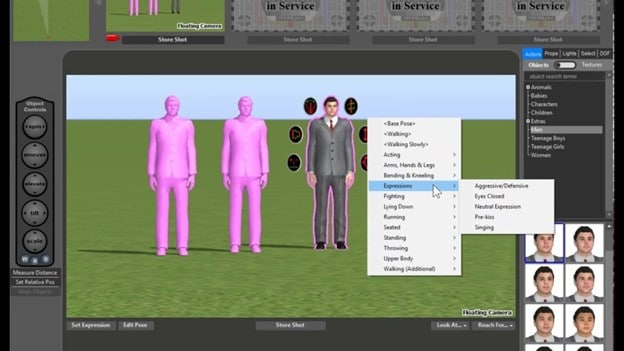
Even without animation, drawing, or highly technical computer skills, your team can benefit from FrameForge, with HBO, Netflix, and BBC as users.
There are two versions of FrameForge’s product: Core and Professional. Professional offers planning capabilities (down to the inch) for dollies and cranes. Scripts from any program can be imported into the software. In addition to movement arrows, framing notes, angle of view, focal length, and more, the storyboards ensure that your video team understands all aspects of production, from preparation to post-production.
Mobile users can use it on any mobile device, and PowerPoint presentations can be downloaded as a final product. Team members who want to produce more elaborate and lengthy videos for entertainment purposes might find FrameForge useful.
5. Studiobinder
Price: $29/month (Indie); $49/month (Professional); $99/month (Studio) Free Trial is also available.
Platform: Windows, Linux, and Mac.
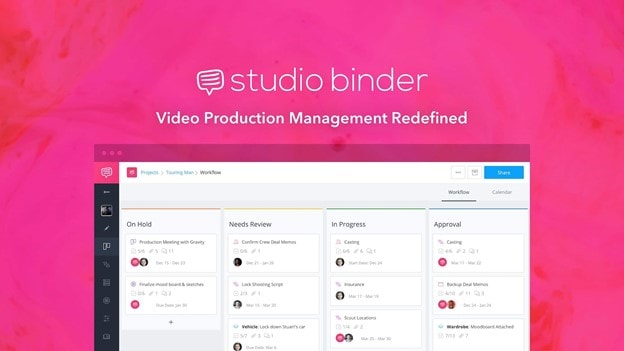
Visualizations can be personalized at every level in Studiobinder. Filters can be used to sort columns, order scenes, add images, adjust aspect ratios, color code images, and add notes to locations. In addition, project management features such as task assignment and commenting help Studiobinder make collaboration easy.
Also, the platform includes a handy presentation mode so you can show your team your projects. The company boasts impressive clients such as BuzzFeed, ESPN, and CBS Interactive. Team members who need to collaborate on various stages of the video production process and who prefer customizable tools should take advantage of this option.
6. Boords
Price: $12-$24/month
Platforms: Windows, Linux, and Mac

In the software industry, online SaaS products have quickly become the norm. While desktop programs are not going away, we see more and more web-based options such as Boards that provide unique solutions.
The Boards software is a native storyboard platform that provides tons of free templates and collaboration tools. In addition, clients can log into their projects and add comments directly from their computers.
For teams working together on a project, you may also set up multiple user accounts. Storyboards in Boords can be presented in animatic form before being animated, thanks to flexible frame sizes and tons of free templates.
Despite the affordable monthly price, this product works on every major operating system. It is rare to find a program that offers this much functionality at such an affordable price. Boords is an excellent solution for collaborative work. You can try it for a while until you decide if it’s right for you, but there is no commitment involved.
7. makeStoryboard
Price: Free; $12/month (Professional); $36/month (Team)
Platforms: Windows, and Mac.

MakeStoryboard provides a simple, straightforward interface for uploading camera shots, drawing stick figures with its built-in tool, and incorporating text for scene details if you are not interested in the fancier options in the list. In addition, any drawing tablet can be used with marker, pencil, and pen tools.
Additional details unique to your team and use case can also be entered in custom text fields. Then, using a PDF format, you can export your storyboard when you’re ready to pitch. Finally, stakeholders can review it using a private link without requiring an account in an alternative method. The best part is that it has a free subscription plan, making it an excellent option for teams on a small budget.
8. Canva
Price: Free
Platforms: Works on all major Operating Systems

It doesn’t have to be stressful to create a storyboard, and Canva makes it easy with a large library of templates, millions of stock photos (or the ability to upload your own), and color frames. The font type, colors, headers, and subheaders can be customized.
If you’re working on a script or design with someone else, you can grant access to collaborate, and when you’re done you can share the design through email or as a PDF. On the other hand, if your team needs an easy and simple tool to manage simpler projects or get started with storyboarding, this may be your best choice.
9. PanelForge
Price: Free (Public Beta); $7.31/month (Pro); $1,411/year (Studio)
Platforms: Works on all Major Operating Systems
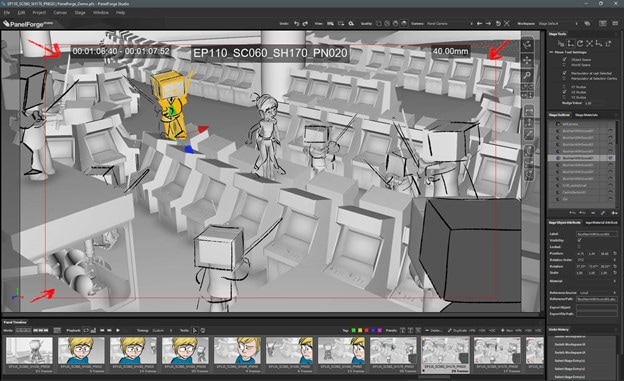
PanelForge delivers a feature-rich, drag-and-drop storyboarding solution with flexible frames and drag-and-drop tools. Storyboarding is free to try and offers a suite of paid plans for anyone working on animatics and more complex projects.
Drawings and 3D designs can both be created with PanelForge. Aside from creating animatics, you can also import and export files from Adobe Premiere and Final Cut Pro. The PanelForge tool is ideal for experienced marketers and storyboarders familiar with visualization tools.
10. Adobe Photoshop
Price: $9.99/mo
Platforms: Mac and Windows.
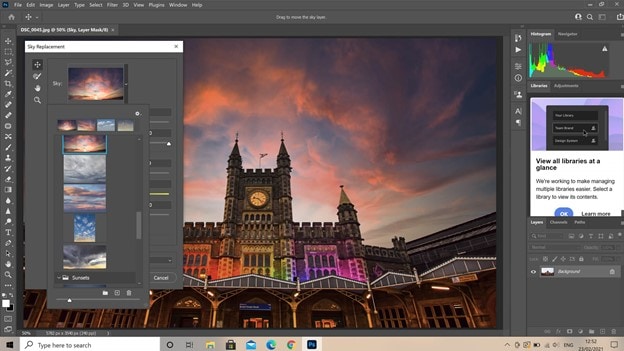
I think it will stay around for a long time. It’s been around for 20+ years. Yet, doesn’t it seem funny how Photoshop can be used for so much more than photo editing? In addition to storyboarding, we see it used for digital painting, pixel art, etc. The digital drawing capability of PS is the same as that of other programs. There are now more brushes available for the PS environment, so there’s even more support.
Additionally, you can download free storyboard templates in PSD format for Photoshop. This program doesn’t need too much explanation because every artist is already aware of it. However, Linux users are most likely to be disappointed by the lack of support.
Conclusion
So, these are some of the best free and paid to storyboard software that you can find in 2021. Each piece of software has its own characteristics and way of being used. In the end, it all depends upon your usage and preferences to decide which software you will use to achieve your goals. If you have enough budget then you can work with paid tools as they offer more features. If you have limited or no budget, you can try to free tools as they offer pretty good features.


Liza Brown
Liza Brown is a writer and a lover of all things video.
Follow @Liza Brown
Liza Brown
Mar 27, 2024• Proven solutions
Several different creative sectors rely on storyboarding for their creative process, including filmmakers and animators and UX designers, game designers, and creative directors. However, the process of hand-drawing each frame or shot can take a great deal of time if you have to do it by hand. Our goal is to make storyboarding easier and more efficient by bringing you this list of free and paid tools, storyboarding software, and apps.
You can add text, sound, and script to your original sketches with these tools (or make use of assets from a library if you do not have time to sketch your own). Alternatively, you can share your storyboarding progress within the project, either by a link or a PDF - or get immediate feedback. Finally, you can continue working from anywhere with apps that work across multiple devices - desktop, mobile, and tablet.
No matter what kind of tool you prefer, from a simple 2D sketch tool like Make Storyboard to a 3D drawing tool like Storyboard Pro, you’ll find the best options on this page.
You might be interested in:
1. Storyboarder by Wonder Unit
Price: Free
Platforms: Windows, Mac, and Linux.
If you’re on a smaller budget, Storyboarder is an excellent option. It’s free and open-source. In the program’s clean interface, you have all the tools you need, so drawing shapes and characters is a breeze. In addition to writing dialogue, you can also enter timing information and the type of shot.
The Storyboarder and Photoshop apps integrate seamlessly, which means you can refine your board in Photoshop and have it updated in Storyboarder. In addition, you can export videos to Premiere, Final Cut, Avid, PDF, or Animated GIF from this software.
2. Toon Boom Storyboard Pro
Price: $60/mo or $999 one-time fee
Platforms: Mac, Windows
Toon Boom Storyboard Pro is the complete opposite of free. A standout among storyboarding programs, it’s also one of the most expensive. However, in most studios, boarding and animating is done using Toon Boom, so you may want to learn about this if you’d like to break into the industry. As a result, the monthly fee is a lot lower than the initial cost, allowing most people to take advantage of the service.
You can use Toon Boom for a month and test the waters before committing yourself to a huge license fee. How can you benefit from this program? Sketching and animation go hand-in-hand in this process. Drawing your boards and seeing how they would animate is a great way to test your script while making sure you’re on target with your scenes.
The program is primarily designed for animators. It can be used for ad agencies and for making small skits. Nevertheless, the Story Flow tool makes switching between board and script for writers incredibly easy. In addition to creating dynamic camera movements, you can also use some 3D effects that work well for 3D animators. Create layered panels in Photoshop quickly and easily by importing Final Draft scripts. There is plenty of support available for all the common programs in the art industry.
3. Plot
Price: $10/month (14 days Free Trial Available)
Platforms: Windows, Linux, and Mac
Storytelling is super easy with the plot. There are no limits to the number of boards, projects, and users you can have. With some nice features targeted toward animators, it is a web-based storyboarding app for beginners.
A drawing pane is available on whichever operating system you run this program on. Drawing your frames this way also lets you add dialogues and stage directions directly to your project. In addition, it is easy to move through different scenes in the app because it is visual. You can click and drag pieces around to change the scene. It couldn’t be easier.
In addition to the collaboration features, we consider it to be exceptional and above the norm for products in this price range. As long as you have a desktop program to work on your drawings, you’ll have more control. When you import the drawings into Plot, you can then arrange them accordingly. Hence, you’ve still got collaborative features with online management of very detailed drawings.
4. FrameForge Storyboard Studio
Price: $498.95 one-time fee or $12.99/month (Core Edition); $799 one-time fee or $24.99/month (Professional Edition)
Platforms: Windows, Mac, and Android.
Even without animation, drawing, or highly technical computer skills, your team can benefit from FrameForge, with HBO, Netflix, and BBC as users.
There are two versions of FrameForge’s product: Core and Professional. Professional offers planning capabilities (down to the inch) for dollies and cranes. Scripts from any program can be imported into the software. In addition to movement arrows, framing notes, angle of view, focal length, and more, the storyboards ensure that your video team understands all aspects of production, from preparation to post-production.
Mobile users can use it on any mobile device, and PowerPoint presentations can be downloaded as a final product. Team members who want to produce more elaborate and lengthy videos for entertainment purposes might find FrameForge useful.
5. Studiobinder
Price: $29/month (Indie); $49/month (Professional); $99/month (Studio) Free Trial is also available.
Platform: Windows, Linux, and Mac.
Visualizations can be personalized at every level in Studiobinder. Filters can be used to sort columns, order scenes, add images, adjust aspect ratios, color code images, and add notes to locations. In addition, project management features such as task assignment and commenting help Studiobinder make collaboration easy.
Also, the platform includes a handy presentation mode so you can show your team your projects. The company boasts impressive clients such as BuzzFeed, ESPN, and CBS Interactive. Team members who need to collaborate on various stages of the video production process and who prefer customizable tools should take advantage of this option.
6. Boords
Price: $12-$24/month
Platforms: Windows, Linux, and Mac
In the software industry, online SaaS products have quickly become the norm. While desktop programs are not going away, we see more and more web-based options such as Boards that provide unique solutions.
The Boards software is a native storyboard platform that provides tons of free templates and collaboration tools. In addition, clients can log into their projects and add comments directly from their computers.
For teams working together on a project, you may also set up multiple user accounts. Storyboards in Boords can be presented in animatic form before being animated, thanks to flexible frame sizes and tons of free templates.
Despite the affordable monthly price, this product works on every major operating system. It is rare to find a program that offers this much functionality at such an affordable price. Boords is an excellent solution for collaborative work. You can try it for a while until you decide if it’s right for you, but there is no commitment involved.
7. makeStoryboard
Price: Free; $12/month (Professional); $36/month (Team)
Platforms: Windows, and Mac.
MakeStoryboard provides a simple, straightforward interface for uploading camera shots, drawing stick figures with its built-in tool, and incorporating text for scene details if you are not interested in the fancier options in the list. In addition, any drawing tablet can be used with marker, pencil, and pen tools.
Additional details unique to your team and use case can also be entered in custom text fields. Then, using a PDF format, you can export your storyboard when you’re ready to pitch. Finally, stakeholders can review it using a private link without requiring an account in an alternative method. The best part is that it has a free subscription plan, making it an excellent option for teams on a small budget.
8. Canva
Price: Free
Platforms: Works on all major Operating Systems
It doesn’t have to be stressful to create a storyboard, and Canva makes it easy with a large library of templates, millions of stock photos (or the ability to upload your own), and color frames. The font type, colors, headers, and subheaders can be customized.
If you’re working on a script or design with someone else, you can grant access to collaborate, and when you’re done you can share the design through email or as a PDF. On the other hand, if your team needs an easy and simple tool to manage simpler projects or get started with storyboarding, this may be your best choice.
9. PanelForge
Price: Free (Public Beta); $7.31/month (Pro); $1,411/year (Studio)
Platforms: Works on all Major Operating Systems
PanelForge delivers a feature-rich, drag-and-drop storyboarding solution with flexible frames and drag-and-drop tools. Storyboarding is free to try and offers a suite of paid plans for anyone working on animatics and more complex projects.
Drawings and 3D designs can both be created with PanelForge. Aside from creating animatics, you can also import and export files from Adobe Premiere and Final Cut Pro. The PanelForge tool is ideal for experienced marketers and storyboarders familiar with visualization tools.
10. Adobe Photoshop
Price: $9.99/mo
Platforms: Mac and Windows.
I think it will stay around for a long time. It’s been around for 20+ years. Yet, doesn’t it seem funny how Photoshop can be used for so much more than photo editing? In addition to storyboarding, we see it used for digital painting, pixel art, etc. The digital drawing capability of PS is the same as that of other programs. There are now more brushes available for the PS environment, so there’s even more support.
Additionally, you can download free storyboard templates in PSD format for Photoshop. This program doesn’t need too much explanation because every artist is already aware of it. However, Linux users are most likely to be disappointed by the lack of support.
Conclusion
So, these are some of the best free and paid to storyboard software that you can find in 2021. Each piece of software has its own characteristics and way of being used. In the end, it all depends upon your usage and preferences to decide which software you will use to achieve your goals. If you have enough budget then you can work with paid tools as they offer more features. If you have limited or no budget, you can try to free tools as they offer pretty good features.
Liza Brown
Liza Brown is a writer and a lover of all things video.
Follow @Liza Brown
Generating the Nut Button Meme
Generating the Nut Button Meme

Ollie Mattison
Mar 27, 2024• Proven solutions
Generating the Nut Button Meme
The Nut Button meme started out as an immature joke, with a word ‘Nut’ written across a blue button, and for a number of years, this meme was used mostly for bad sex jokes. However, the meme has evolved through the years and meme makers from around the world use it to make social media, gaming and countless other types of jokes.
Commonly, the Nut Button meme suggests that a person, in many cases the creator of the meme, likes doing something in certain types of situations, like listening to crappy music when they feel down or taking revenge on their enemies when they have the opportunity. Generating this type of meme doesn’t require too much effort as it often contains one word. Some versions of this meme include the motive that prompts the hand in the meme to push the button, but using this element of the meme is optional.
A Few Good Examples of the Nut Button Meme
Taking the first concept that comes to your mind won’t necessarily make this meme as effective as you’d like it to be, so you have to think carefully which button the hand is going to hit.
Hitting the Divorce button can be a painful process in real life, but it can also be an endless source of fun if the reason why the hand hits it is so ridiculous that it could never be an actual reason for a divorce.
This meme can also be used to make fun of world leaders and their bad decisions or pop-culture figures that often do ill-advised things.

The elements of the Nut meme are always the same, although their topics can vary because the hand and the blue button are irreplaceable parts of this meme.
Generating the Nut Button Meme
We suggest using Filmora Online Meme Maker to generate your meme because this online tool lets you create memes without watermarks for free. What’s more, you don’t even have to sign up in order to make a meme from images, GIFs or videos.
Step 1 – Uploading the Meme Template
You can click the “Copy the image” link below and the image link will be copied automatically.
![]()
Copy the image
After arriving at Filmora Online Meme Maker ‘s home page, you’ll be asked to upload the image. Paste the image’s URL into the Enter a URL box. After uploading a picture from your computer, you’ll be asked if you would like to crop, flip or rotate it. Click on the OK button to confirm the changes you’ve made and proceed to the next step of the process.

Step 2 – Adding Text to the Image
When a new page loads you will get access to all tools Filmora Online Meme Maker offers. Make sure that the Text Inside option is selected, since on nearly all examples of this meme the text is positioned within the image.

Insert the text into the text boxes, and reposition it on the picture so it is placed between the blue button and hand. You can add as many text boxes as you want to the picture, but Nut Button memes commonly include just one or two lines of text.

The color of the text, size, and font can all be changed in the Text Options menu, so before hitting the Create button you can experiment with these tools in order to generate a better meme.
Step 3 – Saving the Meme
Finally, click on the download button, and when a new page loads and you’re ready to share your new Nut Button meme on social media.

The Filmora Online Meme Maker is mobile friendly, which means that you can use this platform to make memes from your Smartphone.
Conclusion
The Nut Button meme can be used in a wide array of different contexts, and it is up to you which one you’re going to use. You can mock stereotypical answers to questions, world leaders or make a joke at your own expense. Whichever topic you choose, the Filmora Online Meme Maker will help you express your creativity fully. What is your favorite Nut Button meme? Leave a comment below and let us know.
Ollie Mattison
Ollie Mattison is a writer and a lover of all things video.
Follow @Ollie Mattison
Ollie Mattison
Mar 27, 2024• Proven solutions
Generating the Nut Button Meme
The Nut Button meme started out as an immature joke, with a word ‘Nut’ written across a blue button, and for a number of years, this meme was used mostly for bad sex jokes. However, the meme has evolved through the years and meme makers from around the world use it to make social media, gaming and countless other types of jokes.
Commonly, the Nut Button meme suggests that a person, in many cases the creator of the meme, likes doing something in certain types of situations, like listening to crappy music when they feel down or taking revenge on their enemies when they have the opportunity. Generating this type of meme doesn’t require too much effort as it often contains one word. Some versions of this meme include the motive that prompts the hand in the meme to push the button, but using this element of the meme is optional.
A Few Good Examples of the Nut Button Meme
Taking the first concept that comes to your mind won’t necessarily make this meme as effective as you’d like it to be, so you have to think carefully which button the hand is going to hit.
Hitting the Divorce button can be a painful process in real life, but it can also be an endless source of fun if the reason why the hand hits it is so ridiculous that it could never be an actual reason for a divorce.
This meme can also be used to make fun of world leaders and their bad decisions or pop-culture figures that often do ill-advised things.
The elements of the Nut meme are always the same, although their topics can vary because the hand and the blue button are irreplaceable parts of this meme.
Generating the Nut Button Meme
We suggest using Filmora Online Meme Maker to generate your meme because this online tool lets you create memes without watermarks for free. What’s more, you don’t even have to sign up in order to make a meme from images, GIFs or videos.
Step 1 – Uploading the Meme Template
You can click the “Copy the image” link below and the image link will be copied automatically.
![]()
Copy the image
After arriving at Filmora Online Meme Maker ‘s home page, you’ll be asked to upload the image. Paste the image’s URL into the Enter a URL box. After uploading a picture from your computer, you’ll be asked if you would like to crop, flip or rotate it. Click on the OK button to confirm the changes you’ve made and proceed to the next step of the process.
Step 2 – Adding Text to the Image
When a new page loads you will get access to all tools Filmora Online Meme Maker offers. Make sure that the Text Inside option is selected, since on nearly all examples of this meme the text is positioned within the image.
Insert the text into the text boxes, and reposition it on the picture so it is placed between the blue button and hand. You can add as many text boxes as you want to the picture, but Nut Button memes commonly include just one or two lines of text.
The color of the text, size, and font can all be changed in the Text Options menu, so before hitting the Create button you can experiment with these tools in order to generate a better meme.
Step 3 – Saving the Meme
Finally, click on the download button, and when a new page loads and you’re ready to share your new Nut Button meme on social media.
The Filmora Online Meme Maker is mobile friendly, which means that you can use this platform to make memes from your Smartphone.
Conclusion
The Nut Button meme can be used in a wide array of different contexts, and it is up to you which one you’re going to use. You can mock stereotypical answers to questions, world leaders or make a joke at your own expense. Whichever topic you choose, the Filmora Online Meme Maker will help you express your creativity fully. What is your favorite Nut Button meme? Leave a comment below and let us know.
Ollie Mattison
Ollie Mattison is a writer and a lover of all things video.
Follow @Ollie Mattison
How to Use Emojis on Windows 10 and Windows 11?
If you ever wondered how to use emojis on Windows, or since when the emojis are around and what is their significance, you will find all your answers here. Because Windows 10 offers a great range of emojis that help you express your feelings and reactions in fewer words, they have recently gained a decent level of popularity, mostly amongst youngsters and millennials.
With that said, in the following sections, you will learn how to use emojis on Windows 10 using both keyboard shortcuts and touch keyboard, how to get emojis on Windows 10 to make your text or conversation look more versatile, and what new has been added to the latest operating system released by Microsoft, i.e., Windows 11.
In this article
01 Part 1: The History of Emojis in Windows
02 Part 2: How to Use Emojis with Keyboard Shortcuts
03 Part 3: How to Use Emojis on Windows PC with Touch Keyboard
04 Part 4: What’s New in Emojis in Windows 11
05 Part 5: How to Get More Emojis in Windows 11
Part 1: The History of Emojis in Windows
Although emojis are present in some form or the other since the mid-‘90s, they were not quite popular back then. With the evolution of smartphones, these iconic characters got attention from the then-teenagers. Seeing this, in 2012, Microsoft introduced the first-ever set of black-and-white emojis with the release of Windows 8, and after some time, the company also added the same to Windows 7 that was rolled out along with the updates for the OS.
With the release of Windows 10 in 2015, a wide range of full-fledged colored emojis was introduced and received a large number of positive reactions from the users. As of today, emojis have become an integral part of everyone’s day-to-day text conversation, be it on Skype, WhatsApp, Facebook, or any other such platform.
Part 2: How to Use Emojis with Keyboard Shortcuts
A keyboard shortcut is a combination of two or more keys that are pressed simultaneously to trigger a pre-assigned event or action. A good example of a keyboard shortcut is ‘Ctrl + S’ which, when pressed, saves the document you’re working on.
While learning the process of how to use emoji in Windows 10, it is equally imperative to memorize the shortcut keys to insert those icons without taking your hands off the keyboard. This not only saves your time, but it also prevents you from going through the lengthy process of opening the emojis keyboard, navigating through all the available icons to choose the one you’re looking for, and then clicking it to insert in the document or conversation.
Nevertheless, it would be a good idea to learn how to launch the emojis keyboard, and the process is simple. All you need to do is:
- Make sure that your keyboard cursor is in an app that can accept text inputs. A text editor like MS Word or WordPad could be a good example
- Press the Windows + ; (semicolon) or Windows + . (period) keys together to open the emojis keyboard

Once the keyboard is open, you can click any of the available emojis to insert it in your conversion or text content.
As for the shortcuts, depending on the type of expression you want to convey, there could be thousands of them. Some of the commonly used emojis and their universal shortcut keys for both Windows 10 and Windows 11 include:
: (colon) + ) (right brace) will create a smiley face
: (colon) + ( (left brace) will create a sad face
: (colon) + ; (semicolon) will create a wink face
…and so on. You can conduct a quick online search to get the entire list of keyboard shortcuts and the emojis that they will create. For your convenience, a link from the Microsoft official website is given below:
Part 3: How to Use Emojis on Windows PC with Touch Keyboard
If you have Microsoft Surface or any other device that has Windows 10 or Windows 11 installed on it, and can accept inputs via touch keyboard, you can enable the feature in the operating system, and then use the touch keyboard to add emojis to your conversion or content. You can follow the instructions given below to enable touch keyboard, and then learn how to use emojis on Windows 11 or Windows 10 via touch:
- Right-click anywhere on the taskbar (Windows 11 is used here for demonstration), and then click Taskbar settings

- From the right area of the Settings window that opens next, scroll down to the Taskbar corner icons section, and then turn on the Touch keyboard switch

- Launch an app that can accept text inputs, e.g., a text editor, chatting app, etc. Click or tap the Touch keyboard icon from the notification area that is present at the bottom-right corner of the screen.

- Click or tap the Emojis icon from the upper-left corner of the touch keyboard that opens up, and then touch your preferred emoji to add it to your text or conversation.

Part 4: What’s New in Emojis in Windows 11
In addition to learning how to use emojis on Windows 10, it is also important to know what’s new with them or the emojis panel in Windows 11, the latest operating system released by Microsoft this year, i.e., 2021.
In Windows 11, although you can launch the emojis keyboard using the same shortcuts, i.e., ‘Windows + .’ or ‘Windows + ;’ keys as mentioned earlier, the emojis keyboard itself has four sections, namely:
- Emojis – Contains various emojis and smileys
- GIF – Gives you access to various animated GIFs from Tenor
- Kamojis – Lets you add the ASCII characters for emojis, e.g., :-) or :-(
- Symbols – To add important symbols to your text, e.g., ©, ®, etc.
In addition to this, the 2D Clippy emoji has also been introduced with Windows 11, and can be located by launching the emojis keyboard, and typing ‘Clippy’.
Part 5: How to Get More Emojis in Windows 11
If the built-in emoji library doesn’t contain your favorite expressions, you can always get several more by following the instructions given below:
- Launch your favorite web browser on Windows 11, and then go to http://www.iemoji.com/
- Click an emoji from the available options or copy one from your favorite portal, and paste it in the Paste Emoji here field

- Review the emoji in the MESSAGE PREVIEW field, and click Create from the Options section to generate the emoji that can be sent as a message or image

- Alternatively, click Copy from the Options section itself, and then go to the text editor or any other portal you want to use the emoji in, and press Ctrl + V to paste and insert the emoji in your conversation or text without any hassle.

Conclusion
While the emojis were introduced to Windows as late as 2012, Windows 11 has a wide range of these virtual objects or faces for various occasions and to convey different expressions respectively. Furthermore, Windows 11 also gives you access to Tenor’s GIFs, and ASCII characters with particular combinations to represent the emojis, as it was done back in the days of button-operated cellphones.
Also, if the built-in emoji keyboard doesn’t have your favorite expressions and smileys, you can always generate your custom ones by going to http://www.iemoji.com/ , and using the options that the website offers. All in all, it’s easy to learn how to use emojis on Windows as long as you have access to the correct tutorial that explains the process in an easy manner.
02 Part 2: How to Use Emojis with Keyboard Shortcuts
03 Part 3: How to Use Emojis on Windows PC with Touch Keyboard
04 Part 4: What’s New in Emojis in Windows 11
05 Part 5: How to Get More Emojis in Windows 11
Part 1: The History of Emojis in Windows
Although emojis are present in some form or the other since the mid-‘90s, they were not quite popular back then. With the evolution of smartphones, these iconic characters got attention from the then-teenagers. Seeing this, in 2012, Microsoft introduced the first-ever set of black-and-white emojis with the release of Windows 8, and after some time, the company also added the same to Windows 7 that was rolled out along with the updates for the OS.
With the release of Windows 10 in 2015, a wide range of full-fledged colored emojis was introduced and received a large number of positive reactions from the users. As of today, emojis have become an integral part of everyone’s day-to-day text conversation, be it on Skype, WhatsApp, Facebook, or any other such platform.
Part 2: How to Use Emojis with Keyboard Shortcuts
A keyboard shortcut is a combination of two or more keys that are pressed simultaneously to trigger a pre-assigned event or action. A good example of a keyboard shortcut is ‘Ctrl + S’ which, when pressed, saves the document you’re working on.
While learning the process of how to use emoji in Windows 10, it is equally imperative to memorize the shortcut keys to insert those icons without taking your hands off the keyboard. This not only saves your time, but it also prevents you from going through the lengthy process of opening the emojis keyboard, navigating through all the available icons to choose the one you’re looking for, and then clicking it to insert in the document or conversation.
Nevertheless, it would be a good idea to learn how to launch the emojis keyboard, and the process is simple. All you need to do is:
- Make sure that your keyboard cursor is in an app that can accept text inputs. A text editor like MS Word or WordPad could be a good example
- Press the Windows + ; (semicolon) or Windows + . (period) keys together to open the emojis keyboard
Once the keyboard is open, you can click any of the available emojis to insert it in your conversion or text content.
As for the shortcuts, depending on the type of expression you want to convey, there could be thousands of them. Some of the commonly used emojis and their universal shortcut keys for both Windows 10 and Windows 11 include:
: (colon) + ) (right brace) will create a smiley face
: (colon) + ( (left brace) will create a sad face
: (colon) + ; (semicolon) will create a wink face
…and so on. You can conduct a quick online search to get the entire list of keyboard shortcuts and the emojis that they will create. For your convenience, a link from the Microsoft official website is given below:
Part 3: How to Use Emojis on Windows PC with Touch Keyboard
If you have Microsoft Surface or any other device that has Windows 10 or Windows 11 installed on it, and can accept inputs via touch keyboard, you can enable the feature in the operating system, and then use the touch keyboard to add emojis to your conversion or content. You can follow the instructions given below to enable touch keyboard, and then learn how to use emojis on Windows 11 or Windows 10 via touch:
- Right-click anywhere on the taskbar (Windows 11 is used here for demonstration), and then click Taskbar settings
- From the right area of the Settings window that opens next, scroll down to the Taskbar corner icons section, and then turn on the Touch keyboard switch
- Launch an app that can accept text inputs, e.g., a text editor, chatting app, etc. Click or tap the Touch keyboard icon from the notification area that is present at the bottom-right corner of the screen.
- Click or tap the Emojis icon from the upper-left corner of the touch keyboard that opens up, and then touch your preferred emoji to add it to your text or conversation.
Part 4: What’s New in Emojis in Windows 11
In addition to learning how to use emojis on Windows 10, it is also important to know what’s new with them or the emojis panel in Windows 11, the latest operating system released by Microsoft this year, i.e., 2021.
In Windows 11, although you can launch the emojis keyboard using the same shortcuts, i.e., ‘Windows + .’ or ‘Windows + ;’ keys as mentioned earlier, the emojis keyboard itself has four sections, namely:
- Emojis – Contains various emojis and smileys
- GIF – Gives you access to various animated GIFs from Tenor
- Kamojis – Lets you add the ASCII characters for emojis, e.g., :-) or :-(
- Symbols – To add important symbols to your text, e.g., ©, ®, etc.
In addition to this, the 2D Clippy emoji has also been introduced with Windows 11, and can be located by launching the emojis keyboard, and typing ‘Clippy’.
Part 5: How to Get More Emojis in Windows 11
If the built-in emoji library doesn’t contain your favorite expressions, you can always get several more by following the instructions given below:
- Launch your favorite web browser on Windows 11, and then go to http://www.iemoji.com/
- Click an emoji from the available options or copy one from your favorite portal, and paste it in the Paste Emoji here field

- Review the emoji in the MESSAGE PREVIEW field, and click Create from the Options section to generate the emoji that can be sent as a message or image
- Alternatively, click Copy from the Options section itself, and then go to the text editor or any other portal you want to use the emoji in, and press Ctrl + V to paste and insert the emoji in your conversation or text without any hassle.
Conclusion
While the emojis were introduced to Windows as late as 2012, Windows 11 has a wide range of these virtual objects or faces for various occasions and to convey different expressions respectively. Furthermore, Windows 11 also gives you access to Tenor’s GIFs, and ASCII characters with particular combinations to represent the emojis, as it was done back in the days of button-operated cellphones.
Also, if the built-in emoji keyboard doesn’t have your favorite expressions and smileys, you can always generate your custom ones by going to http://www.iemoji.com/ , and using the options that the website offers. All in all, it’s easy to learn how to use emojis on Windows as long as you have access to the correct tutorial that explains the process in an easy manner.
02 Part 2: How to Use Emojis with Keyboard Shortcuts
03 Part 3: How to Use Emojis on Windows PC with Touch Keyboard
04 Part 4: What’s New in Emojis in Windows 11
05 Part 5: How to Get More Emojis in Windows 11
Part 1: The History of Emojis in Windows
Although emojis are present in some form or the other since the mid-‘90s, they were not quite popular back then. With the evolution of smartphones, these iconic characters got attention from the then-teenagers. Seeing this, in 2012, Microsoft introduced the first-ever set of black-and-white emojis with the release of Windows 8, and after some time, the company also added the same to Windows 7 that was rolled out along with the updates for the OS.
With the release of Windows 10 in 2015, a wide range of full-fledged colored emojis was introduced and received a large number of positive reactions from the users. As of today, emojis have become an integral part of everyone’s day-to-day text conversation, be it on Skype, WhatsApp, Facebook, or any other such platform.
Part 2: How to Use Emojis with Keyboard Shortcuts
A keyboard shortcut is a combination of two or more keys that are pressed simultaneously to trigger a pre-assigned event or action. A good example of a keyboard shortcut is ‘Ctrl + S’ which, when pressed, saves the document you’re working on.
While learning the process of how to use emoji in Windows 10, it is equally imperative to memorize the shortcut keys to insert those icons without taking your hands off the keyboard. This not only saves your time, but it also prevents you from going through the lengthy process of opening the emojis keyboard, navigating through all the available icons to choose the one you’re looking for, and then clicking it to insert in the document or conversation.
Nevertheless, it would be a good idea to learn how to launch the emojis keyboard, and the process is simple. All you need to do is:
- Make sure that your keyboard cursor is in an app that can accept text inputs. A text editor like MS Word or WordPad could be a good example
- Press the Windows + ; (semicolon) or Windows + . (period) keys together to open the emojis keyboard
Once the keyboard is open, you can click any of the available emojis to insert it in your conversion or text content.
As for the shortcuts, depending on the type of expression you want to convey, there could be thousands of them. Some of the commonly used emojis and their universal shortcut keys for both Windows 10 and Windows 11 include:
: (colon) + ) (right brace) will create a smiley face
: (colon) + ( (left brace) will create a sad face
: (colon) + ; (semicolon) will create a wink face
…and so on. You can conduct a quick online search to get the entire list of keyboard shortcuts and the emojis that they will create. For your convenience, a link from the Microsoft official website is given below:
Part 3: How to Use Emojis on Windows PC with Touch Keyboard
If you have Microsoft Surface or any other device that has Windows 10 or Windows 11 installed on it, and can accept inputs via touch keyboard, you can enable the feature in the operating system, and then use the touch keyboard to add emojis to your conversion or content. You can follow the instructions given below to enable touch keyboard, and then learn how to use emojis on Windows 11 or Windows 10 via touch:
- Right-click anywhere on the taskbar (Windows 11 is used here for demonstration), and then click Taskbar settings
- From the right area of the Settings window that opens next, scroll down to the Taskbar corner icons section, and then turn on the Touch keyboard switch
- Launch an app that can accept text inputs, e.g., a text editor, chatting app, etc. Click or tap the Touch keyboard icon from the notification area that is present at the bottom-right corner of the screen.
- Click or tap the Emojis icon from the upper-left corner of the touch keyboard that opens up, and then touch your preferred emoji to add it to your text or conversation.
Part 4: What’s New in Emojis in Windows 11
In addition to learning how to use emojis on Windows 10, it is also important to know what’s new with them or the emojis panel in Windows 11, the latest operating system released by Microsoft this year, i.e., 2021.
In Windows 11, although you can launch the emojis keyboard using the same shortcuts, i.e., ‘Windows + .’ or ‘Windows + ;’ keys as mentioned earlier, the emojis keyboard itself has four sections, namely:
- Emojis – Contains various emojis and smileys
- GIF – Gives you access to various animated GIFs from Tenor
- Kamojis – Lets you add the ASCII characters for emojis, e.g., :-) or :-(
- Symbols – To add important symbols to your text, e.g., ©, ®, etc.
In addition to this, the 2D Clippy emoji has also been introduced with Windows 11, and can be located by launching the emojis keyboard, and typing ‘Clippy’.
Part 5: How to Get More Emojis in Windows 11
If the built-in emoji library doesn’t contain your favorite expressions, you can always get several more by following the instructions given below:
- Launch your favorite web browser on Windows 11, and then go to http://www.iemoji.com/
- Click an emoji from the available options or copy one from your favorite portal, and paste it in the Paste Emoji here field
- Review the emoji in the MESSAGE PREVIEW field, and click Create from the Options section to generate the emoji that can be sent as a message or image
- Alternatively, click Copy from the Options section itself, and then go to the text editor or any other portal you want to use the emoji in, and press Ctrl + V to paste and insert the emoji in your conversation or text without any hassle.
Conclusion
While the emojis were introduced to Windows as late as 2012, Windows 11 has a wide range of these virtual objects or faces for various occasions and to convey different expressions respectively. Furthermore, Windows 11 also gives you access to Tenor’s GIFs, and ASCII characters with particular combinations to represent the emojis, as it was done back in the days of button-operated cellphones.
Also, if the built-in emoji keyboard doesn’t have your favorite expressions and smileys, you can always generate your custom ones by going to http://www.iemoji.com/ , and using the options that the website offers. All in all, it’s easy to learn how to use emojis on Windows as long as you have access to the correct tutorial that explains the process in an easy manner.
Top 10 Free Emoji Websites to Download Emojis Online
Top 10 Free Emoji Websites to Download Emojis Online

Shanoon Cox
Mar 27, 2024• Proven solutions
With the rise of social media and online conversations gifs, emojis, memes have taken a huge slot. A lot could be expressed without typing a word, just send an emoji and it will do everything for you on that chat. Sometimes we need a collection of emoji and we try to download emojis so that we can use them frequently without searching for them, a right emoji at the right time can do wonders. People today are very curious about sending many thoughts in one word so no one can do that but emojis. In this guide, you will learn about the best emoji websites and how can you download emojis for free on your device to use them later.
Table of Content:
- 10 Free Emoji Websites to Download/Get Emojis Online
- Add Emojis to Your Video with Wondershare Filmora
10 Free Emoji Websites to Download/Get Emojis Online
Now, you are all set to get the best emoji websites to download emojis and save them on your device and use them for a brilliant sense of humor. These emoji websites are specially curated and tested so that you don’t have to think twice before making an effort.
- 1. Getemoji
- 2. Pixabay
- 3. Emojicopy
- 4. iemoji
- 5. Emojipedia
- 6. Copy and Paste Emoji
- 7. Emojiterra
- 8. Emojiforu
- 9. Coolsymbol
- 10. Joypixels
1. Getemoji
Getemoji a great emoji website to copy and paste and save emojis on your social media profiles. Be it our computer or mobile phone get emoji is compatible with all the operating systems and Chrome browsers. You can go to the website and scroll through thousands of free emojis to select from and copy the best emoji to your chats and captions to create an impact.
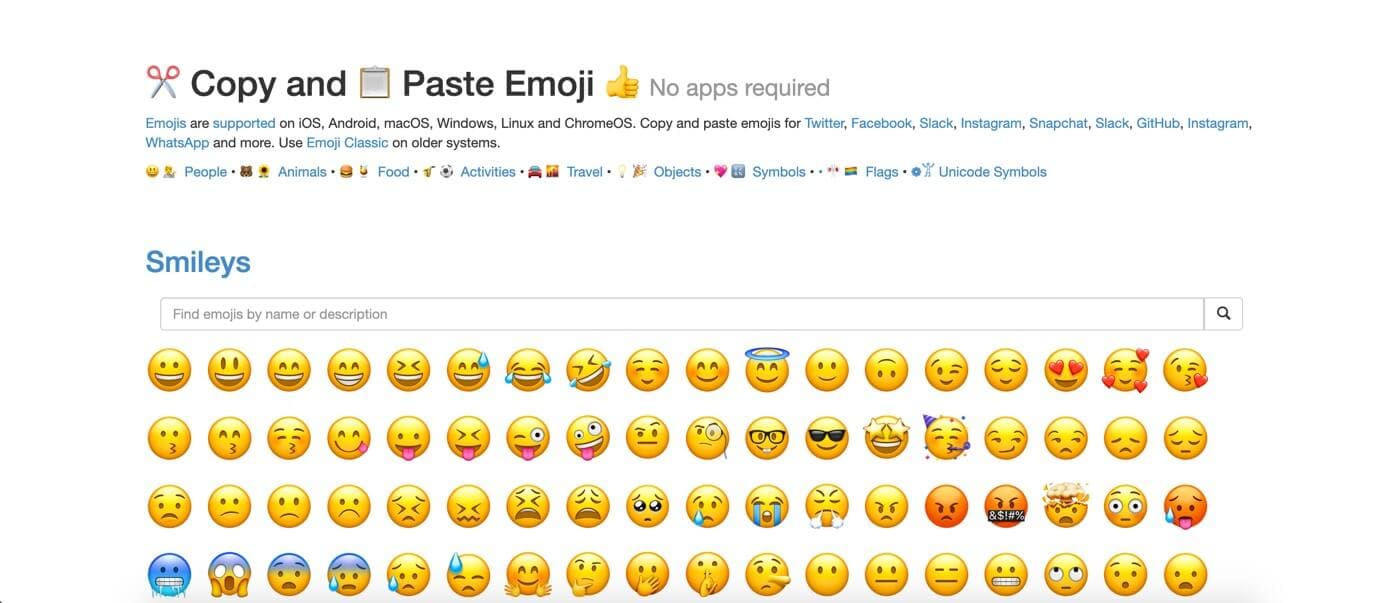
2. Pixabay
Pixabay is primarily an image website where you can download images of all kinds depending upon your requirement. Now, the emoji on this website are available in a huge quantity where you need to search for the best emoji and you will get the high-resolution emoji that you can download, save or copy-paste directly to the chat or caption on your social media channels.

3. Emojicopy
Emojicopy is another website where you can find the best emoji and copy them to your chats and caption text easily from the browser. Emojicopy is just like other websites where you can get a lot of emojis to choose from and select one. Though it’s a simple website the thumbnail option on the header section makes it easier to navigate through a lot of different emojis on this website.
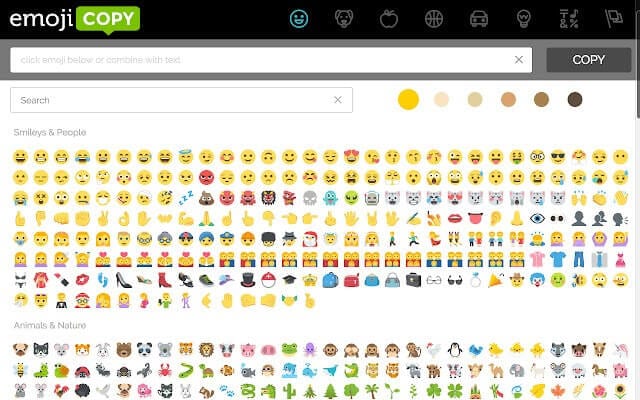
4. iemoji
iemoji is something different from all the other websites that you have surfed until as it has some unique features to rely on. You can select the best emoji and tweak its skin tone and theme type before you use it on your social media channels. The best part about this website is that it provides the feature of sending an emoji as SMS and email to anyone and that is something brilliant when it comes to sharing.
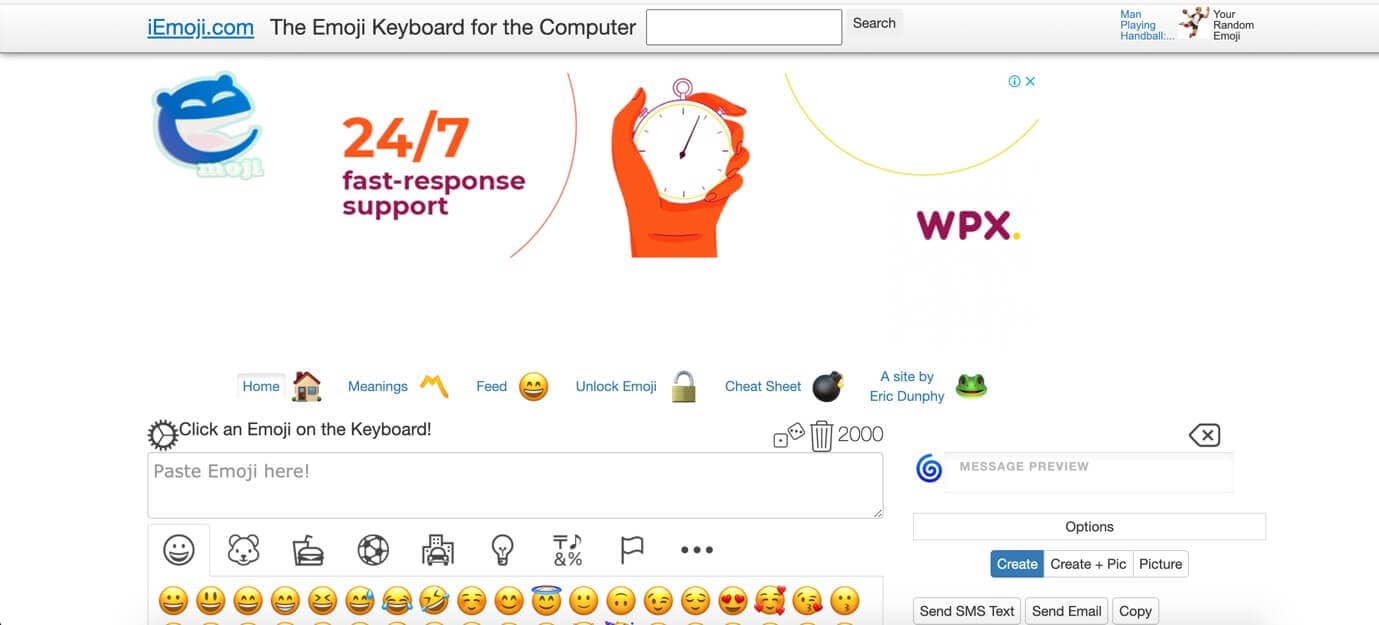
5. Emojipedia
Emojipedia is another bible for emoji lovers, as the name suggests the interface of this website is quite like Wikipedia and you can get a huge library of emojis in different categories. The best part about this website is the categorization based on the platforms you are using or the device that you are running an app on. Emojipedia updates its database and you can find the Unicode version if you are looking for one. Overall, this website is quite technical and you can get all the emojis and technical items related to emojis if you are looking for one.

6. Copy and Paste Emoji
Copy and Paste Emoji is an emoji website where you will get a huge collection of emojis to use on your chat windows that would certainly amaze your friends and loved ones. As the name suggests, you can copy and paste emojis to your social media channels from this website. This website has a huge collection of emojis and all the images are listed on the main page so that it’s easy to navigate and you can copy-paste the emojis on all the devices as this website is supported by Windows, iOS, Android, and macOS.
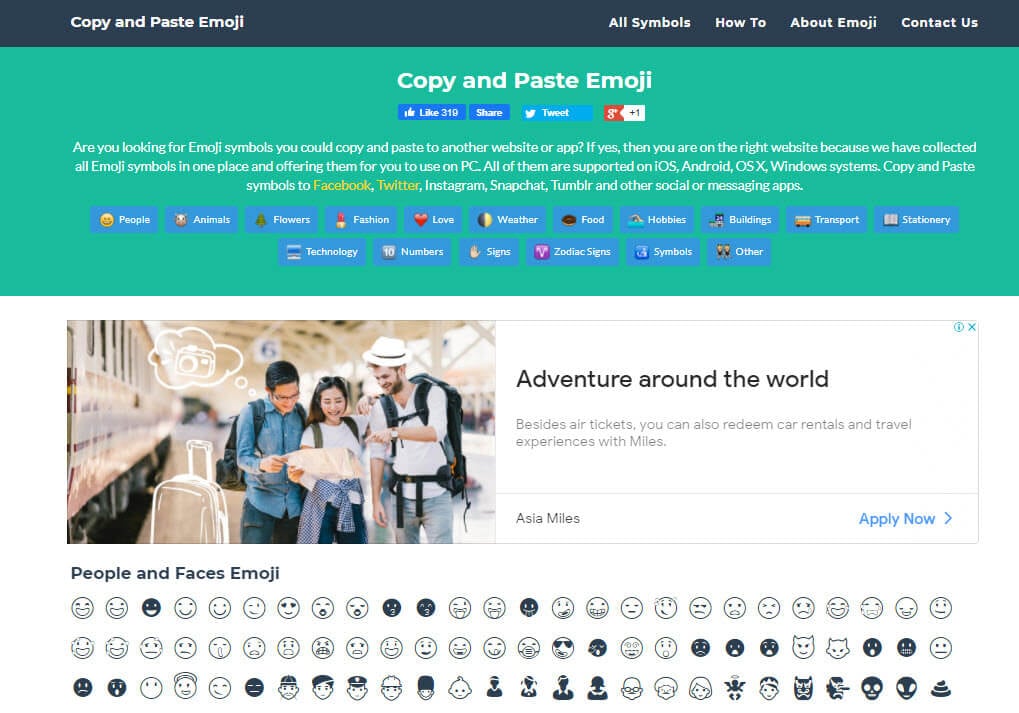
7. Emojiterra
Emojiterra is an emoji website with a collection of over 3304 emojis and images with their meanings. The website has a smooth interface where you can use the online keyboard to type the message and add emojis to it and later on you can copy-paste that message on your social media chats or captions. Apart from English, the website is available in 5 different languages and that makes this website stand out among its competitors.
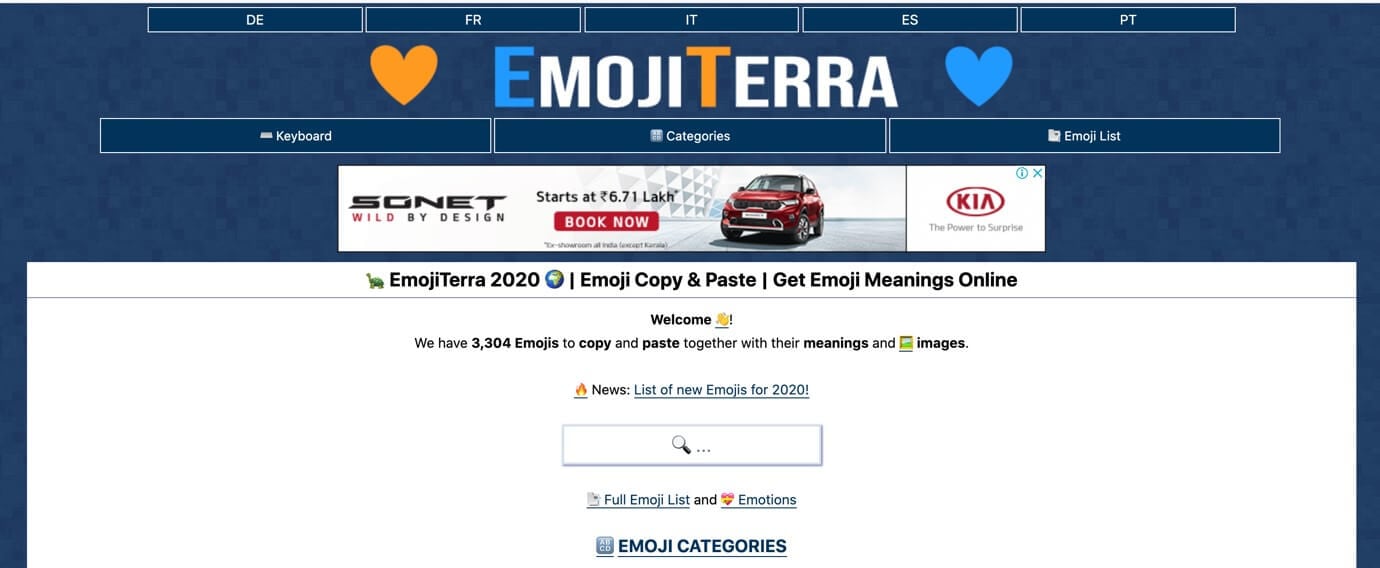
8. Emojiforu
Emojiforu is a good website for emojis and messages created using many emojis in a chatbox. If you are looking for some cool emojis and the long text messages that are created using some keyboard shortcuts, then this is the website that you are looking for. You can easily copy and paste any emoji that you like to your social media profiles. On this website, you will get some of the best emojis directly copied on your chat windows as the website also provides some cool tips on how you can create emojis on your chat windows with some simple buttons on your keyboard.
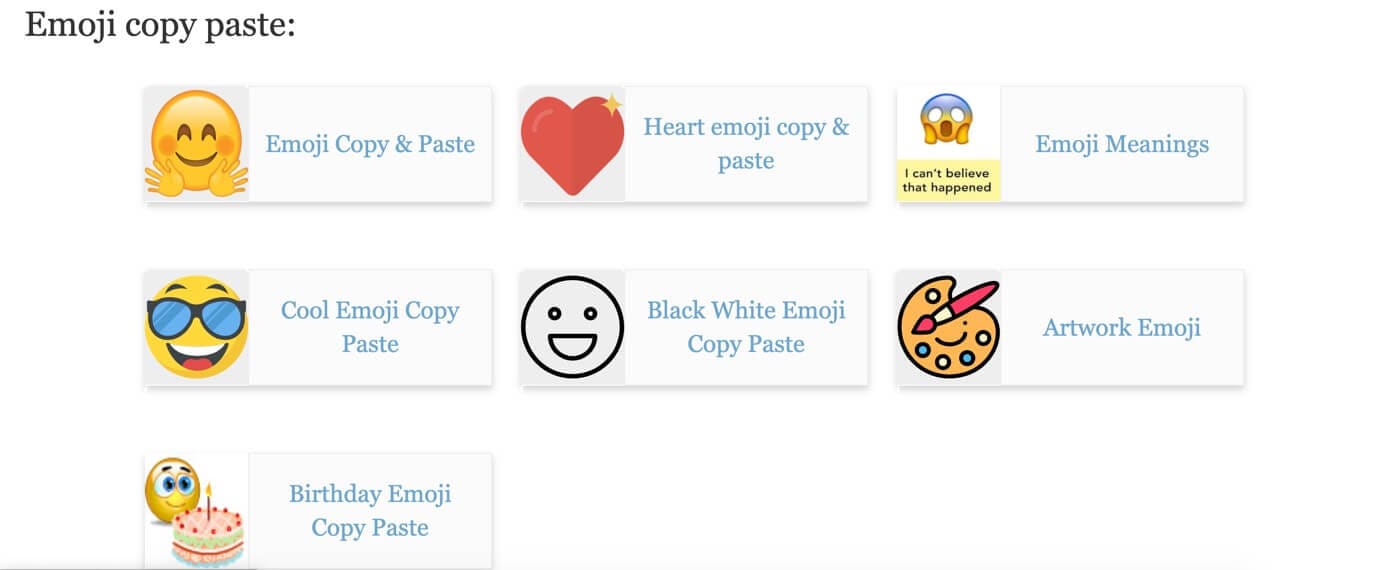
9. Coolsymbol
Coolsymbol is a great website for emojis and other features that includes cool fonts, text decorator, big text generator, character counter, etc. There are a lot of features on this website that would certainly make you happy. Just create the best art and copy it to the social media platform that you are using. No doubt, this website has some great features that are really nice to use.

10. Joypixels
Joypixels is another great website that recently got rebranded in the emoji industry. Like the other websites listed this website also allows you to copy and paste cool emojis but there is one better feature that makes it stand apart and that is the chrome extension. You can download the jo pixel chrome extension and the rest is history. Now, if you are surfing social media sites from your browser then you don’t need to wait and worry, the chrome extension has all the features to serve your purpose.
![]()
Add Emojis to Your Video with Wondershare Filmora
Wondershare Filmora is a powerful video editing tool that comes with inbuilt effects that helps a professional to create amazing videos with the features it has. The most powerful feature it has includes the transitions, filters, motion elements, blending modes, and a free media library to soundtrack to your clips. Filmora comes in handy with some great features like 3D LUTs and Advanced color correction to give sharp look to your video and image files. These are just selected features that are mentioned here, there are unlimited features on the dashboard that would certainly amaze you.
1. Download and install Filmora on your computer.
2. Open Filmora, import your video to the Filmora media library and drag the video clip on the timeline that you want to edit with emojis.
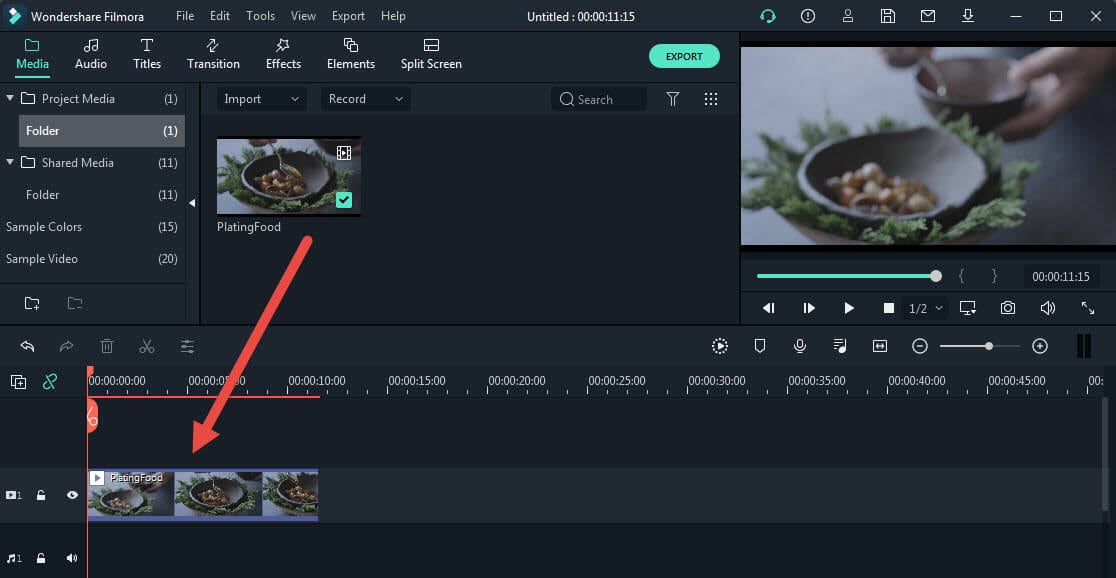
3. Now, navigate to the Elements tab, then go to Included-Emoji, and you can download free emojis and add it to your video.

4. Or you can access Wondershare Filmstock (Filmora’s effects store) to download the free animated emoji pack to get more animated emojis.
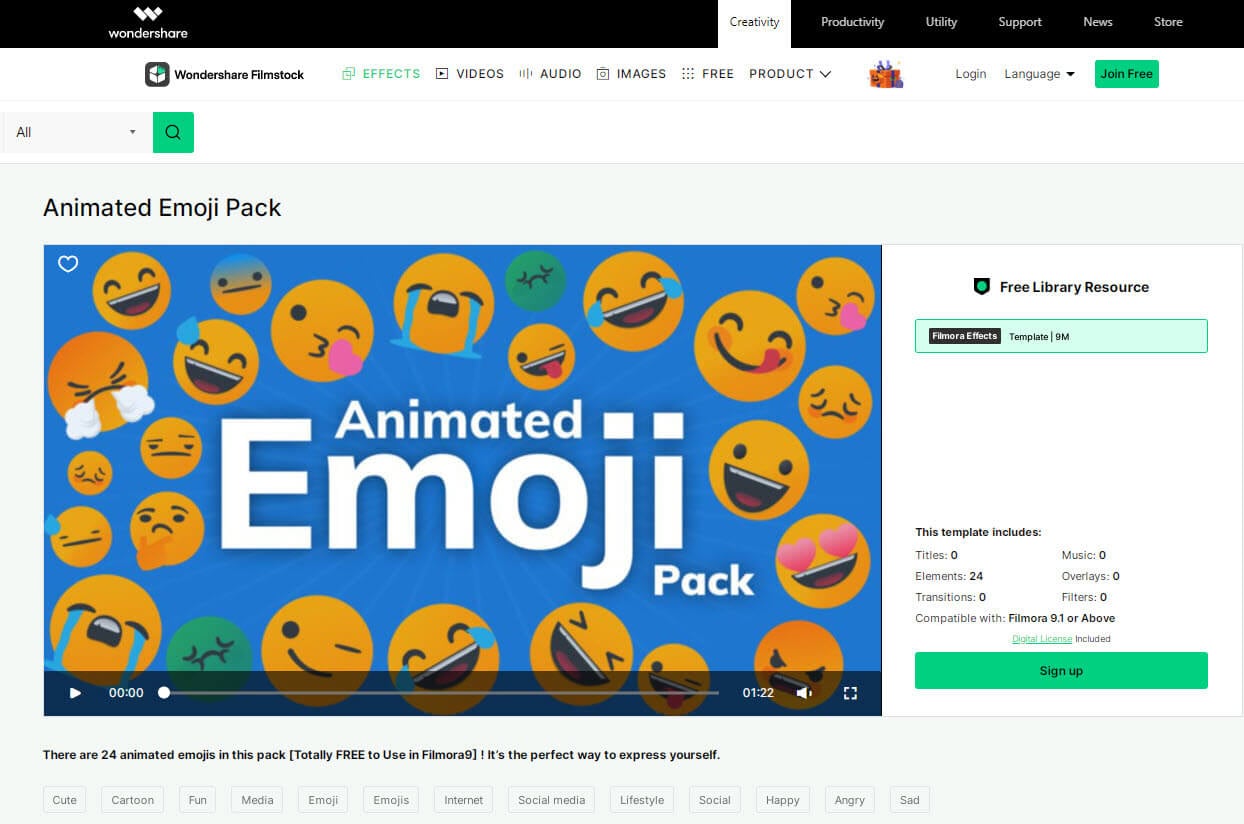
5. Then simply add the emoji to the timeline. You can resize, rotate, color tune the emoji, or even add two or more emojis to the video as you like.
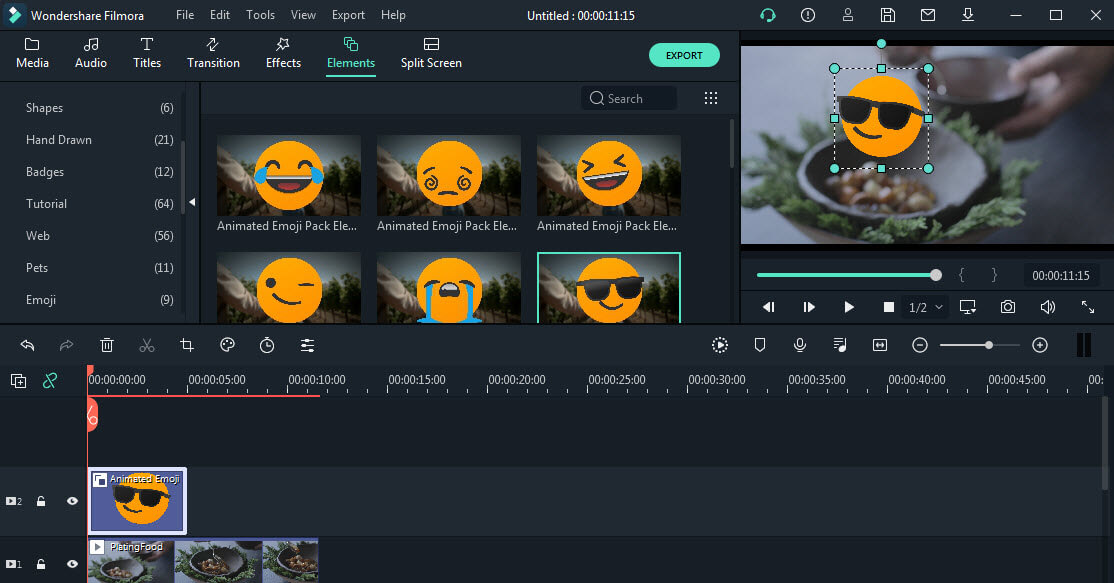
6. Once done, click the Export button to export the video to your local device, or you can upload it to YouTube directly.

Bonus tip: Create an Animation Video with Anireel
Anireel provides a faster and smoother animated video creation experience with customizable elements to bring anyone’s imagination to life. All you have to do is choose your script, input the content, and Anireel will instantly match your script to rich animation explainer scenes, convert the text into voice-over, and generate a vivid, complete animation video.

Conclusion
Emoji websites are hard to find and it’s even harder to find a website that allows you to download emojis and save emojis for later use. The guide has been great and there are 10 websites that you can utilize to get emojis, fonts, text decorators, and whatnot, and to make the social media integration easy for you because when you are chatting with a friend and a good line needs some decoration then no one can do that better than emojis. So, what are you waiting for, just go and check out these websites and let us know in the comment section about your favorite website?
Shanoon Cox
Shanoon Cox is a writer and a lover of all things video.
Follow @Shanoon Cox
Shanoon Cox
Mar 27, 2024• Proven solutions
With the rise of social media and online conversations gifs, emojis, memes have taken a huge slot. A lot could be expressed without typing a word, just send an emoji and it will do everything for you on that chat. Sometimes we need a collection of emoji and we try to download emojis so that we can use them frequently without searching for them, a right emoji at the right time can do wonders. People today are very curious about sending many thoughts in one word so no one can do that but emojis. In this guide, you will learn about the best emoji websites and how can you download emojis for free on your device to use them later.
Table of Content:
- 10 Free Emoji Websites to Download/Get Emojis Online
- Add Emojis to Your Video with Wondershare Filmora
10 Free Emoji Websites to Download/Get Emojis Online
Now, you are all set to get the best emoji websites to download emojis and save them on your device and use them for a brilliant sense of humor. These emoji websites are specially curated and tested so that you don’t have to think twice before making an effort.
- 1. Getemoji
- 2. Pixabay
- 3. Emojicopy
- 4. iemoji
- 5. Emojipedia
- 6. Copy and Paste Emoji
- 7. Emojiterra
- 8. Emojiforu
- 9. Coolsymbol
- 10. Joypixels
1. Getemoji
Getemoji a great emoji website to copy and paste and save emojis on your social media profiles. Be it our computer or mobile phone get emoji is compatible with all the operating systems and Chrome browsers. You can go to the website and scroll through thousands of free emojis to select from and copy the best emoji to your chats and captions to create an impact.
2. Pixabay
Pixabay is primarily an image website where you can download images of all kinds depending upon your requirement. Now, the emoji on this website are available in a huge quantity where you need to search for the best emoji and you will get the high-resolution emoji that you can download, save or copy-paste directly to the chat or caption on your social media channels.
3. Emojicopy
Emojicopy is another website where you can find the best emoji and copy them to your chats and caption text easily from the browser. Emojicopy is just like other websites where you can get a lot of emojis to choose from and select one. Though it’s a simple website the thumbnail option on the header section makes it easier to navigate through a lot of different emojis on this website.
4. iemoji
iemoji is something different from all the other websites that you have surfed until as it has some unique features to rely on. You can select the best emoji and tweak its skin tone and theme type before you use it on your social media channels. The best part about this website is that it provides the feature of sending an emoji as SMS and email to anyone and that is something brilliant when it comes to sharing.
5. Emojipedia
Emojipedia is another bible for emoji lovers, as the name suggests the interface of this website is quite like Wikipedia and you can get a huge library of emojis in different categories. The best part about this website is the categorization based on the platforms you are using or the device that you are running an app on. Emojipedia updates its database and you can find the Unicode version if you are looking for one. Overall, this website is quite technical and you can get all the emojis and technical items related to emojis if you are looking for one.
6. Copy and Paste Emoji
Copy and Paste Emoji is an emoji website where you will get a huge collection of emojis to use on your chat windows that would certainly amaze your friends and loved ones. As the name suggests, you can copy and paste emojis to your social media channels from this website. This website has a huge collection of emojis and all the images are listed on the main page so that it’s easy to navigate and you can copy-paste the emojis on all the devices as this website is supported by Windows, iOS, Android, and macOS.
7. Emojiterra
Emojiterra is an emoji website with a collection of over 3304 emojis and images with their meanings. The website has a smooth interface where you can use the online keyboard to type the message and add emojis to it and later on you can copy-paste that message on your social media chats or captions. Apart from English, the website is available in 5 different languages and that makes this website stand out among its competitors.
8. Emojiforu
Emojiforu is a good website for emojis and messages created using many emojis in a chatbox. If you are looking for some cool emojis and the long text messages that are created using some keyboard shortcuts, then this is the website that you are looking for. You can easily copy and paste any emoji that you like to your social media profiles. On this website, you will get some of the best emojis directly copied on your chat windows as the website also provides some cool tips on how you can create emojis on your chat windows with some simple buttons on your keyboard.
9. Coolsymbol
Coolsymbol is a great website for emojis and other features that includes cool fonts, text decorator, big text generator, character counter, etc. There are a lot of features on this website that would certainly make you happy. Just create the best art and copy it to the social media platform that you are using. No doubt, this website has some great features that are really nice to use.
10. Joypixels
Joypixels is another great website that recently got rebranded in the emoji industry. Like the other websites listed this website also allows you to copy and paste cool emojis but there is one better feature that makes it stand apart and that is the chrome extension. You can download the jo pixel chrome extension and the rest is history. Now, if you are surfing social media sites from your browser then you don’t need to wait and worry, the chrome extension has all the features to serve your purpose.
![]()
Add Emojis to Your Video with Wondershare Filmora
Wondershare Filmora is a powerful video editing tool that comes with inbuilt effects that helps a professional to create amazing videos with the features it has. The most powerful feature it has includes the transitions, filters, motion elements, blending modes, and a free media library to soundtrack to your clips. Filmora comes in handy with some great features like 3D LUTs and Advanced color correction to give sharp look to your video and image files. These are just selected features that are mentioned here, there are unlimited features on the dashboard that would certainly amaze you.
1. Download and install Filmora on your computer.
2. Open Filmora, import your video to the Filmora media library and drag the video clip on the timeline that you want to edit with emojis.
3. Now, navigate to the Elements tab, then go to Included-Emoji, and you can download free emojis and add it to your video.
4. Or you can access Wondershare Filmstock (Filmora’s effects store) to download the free animated emoji pack to get more animated emojis.
5. Then simply add the emoji to the timeline. You can resize, rotate, color tune the emoji, or even add two or more emojis to the video as you like.
6. Once done, click the Export button to export the video to your local device, or you can upload it to YouTube directly.
Bonus tip: Create an Animation Video with Anireel
Anireel provides a faster and smoother animated video creation experience with customizable elements to bring anyone’s imagination to life. All you have to do is choose your script, input the content, and Anireel will instantly match your script to rich animation explainer scenes, convert the text into voice-over, and generate a vivid, complete animation video.
Conclusion
Emoji websites are hard to find and it’s even harder to find a website that allows you to download emojis and save emojis for later use. The guide has been great and there are 10 websites that you can utilize to get emojis, fonts, text decorators, and whatnot, and to make the social media integration easy for you because when you are chatting with a friend and a good line needs some decoration then no one can do that better than emojis. So, what are you waiting for, just go and check out these websites and let us know in the comment section about your favorite website?
Shanoon Cox
Shanoon Cox is a writer and a lover of all things video.
Follow @Shanoon Cox
How to Add and Custom Slack Emoji-Wondershare Filmora
How to Add and Custom Slack Emoji-Wondershare Filmora
Shanoon Cox
Mar 27, 2024• Proven solutions
A Slack emoji is just like the emojis you usually use on Whatsapp, Messenger, or other chatting platforms. There is a wide range of emojis you can use to express yourself better or lighten the working environment.
Plus, the option to create a custom Slack emoji makes it more interesting. You can use it to create a new and unique Slack emoji to personalize your chatting experience. Why write long texts when you can just add Slack emoji to say it all?
Let me show you the ropes on how to create a custom Slack emoji and make your chatting experience more fun.
- Part 1: How to Add Slack Emoji
- Part 2: How to Custom Slack Emoji
- Bonus Tip-Edit Emoji and Add Emoji to Your Video
Part 1: How to Add Slack Emoji
At Slack, you can find a Slack emoji for every emotion or occasion. Finding the perfect Slack emoji is as easy as browsing through the categorized sections. Better yet, the option to search for a Slack emoji makes it a cakewalk to get the exact Slack emoji to express oneself.
Also, you can add Slack emoji with a single tap. And it allows you to add unlimited Slack emoji in one message.
Let me show you how to add Slack emoji in a few quick steps:
1.Download and open Slack on your desktop or smartphone.
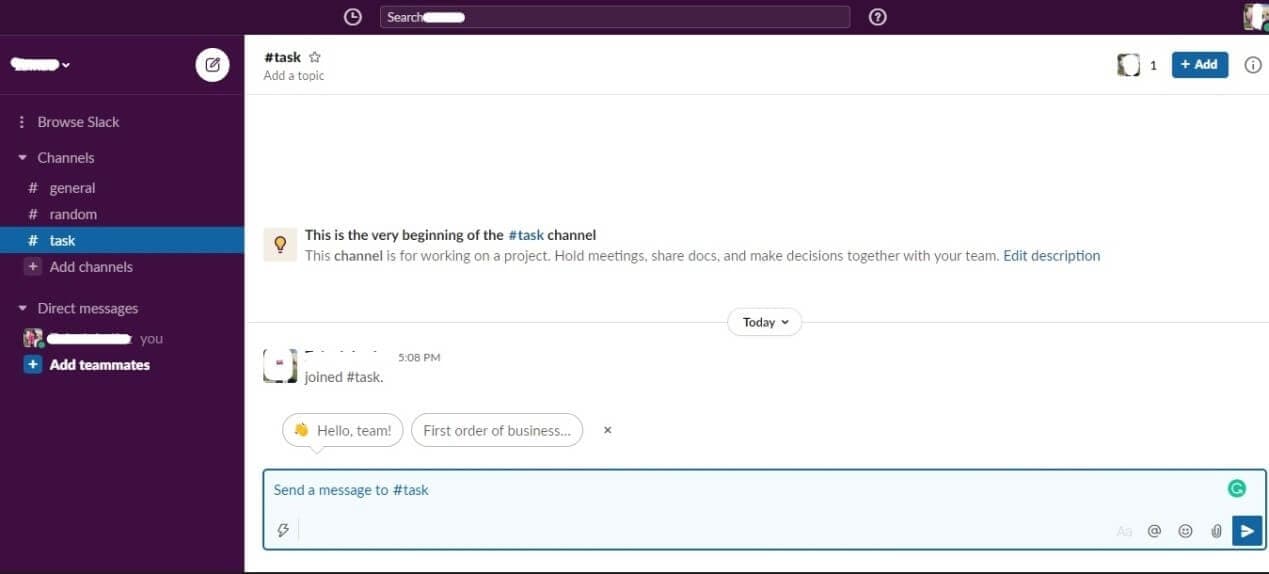
2.To add a Slack emoji, click on the Smiley face icon in the bottom right corner of the message box
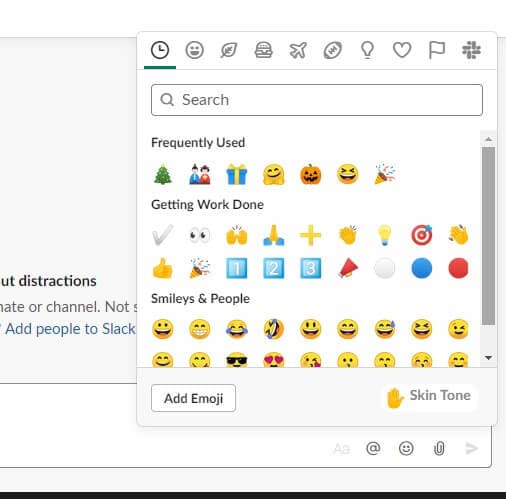
3.Browse through the categories to find the right Slack emoji for your message. In the search bar, type the kind of emoji you are looking for to find it faster.
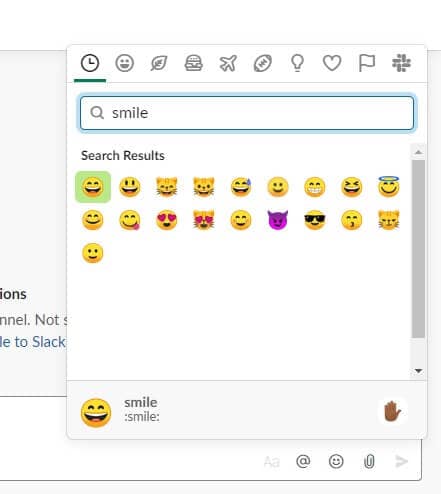
4.Click on the Hand icon in the bottom right corner to choose the default skin tone for all your emojis. Finally, to add Slack emoji to your message, just tap on it. Add as many Slack emoji as you like just by tapping on them.
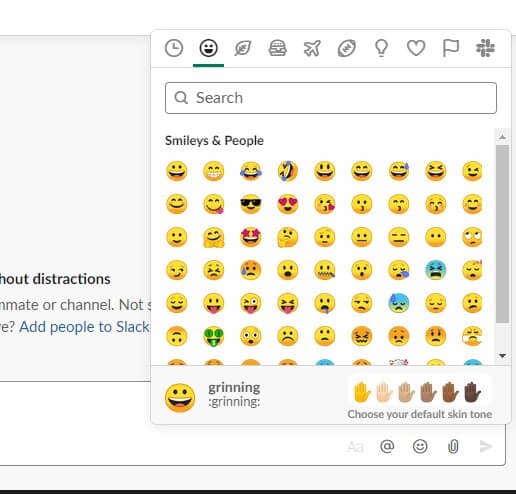
Part 2: How to Custom Slack Emoji
Using the commonly used emojis can get boring. Sometimes, even the Slack emoji collection falls short in expressing the exact feeling you wish to convey. However, the good news is that you can easily create a custom Slack emoji without any hassle.
A Slack custom emoji can range from your own picture to any other image. You can create a personalized custom Slack emoji to crack inside jokes or create your brand icon Slack emoji.
Here’s how to create an awesome custom Slack emoji-
1.On your workspace, click on your company name or icon to open the settings drop-down menu. Tap on Settings&Administration<Customize.
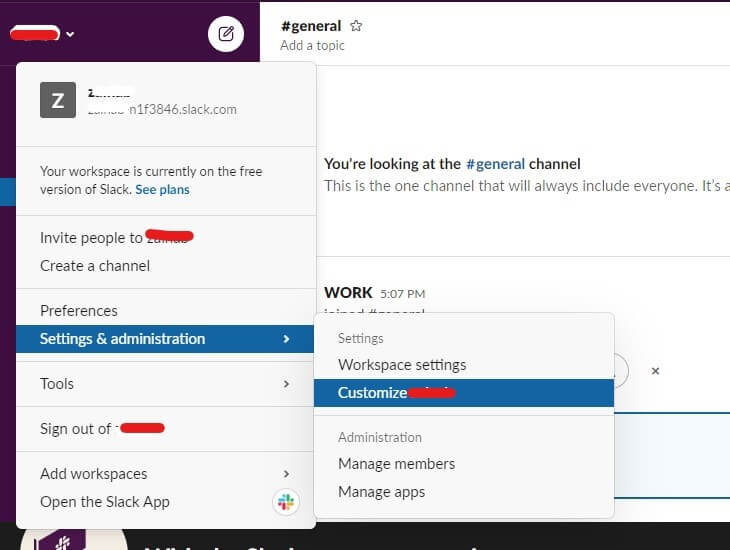
2.A new window will pop open. In the Emoji tab, click on Add Custom Emoji.
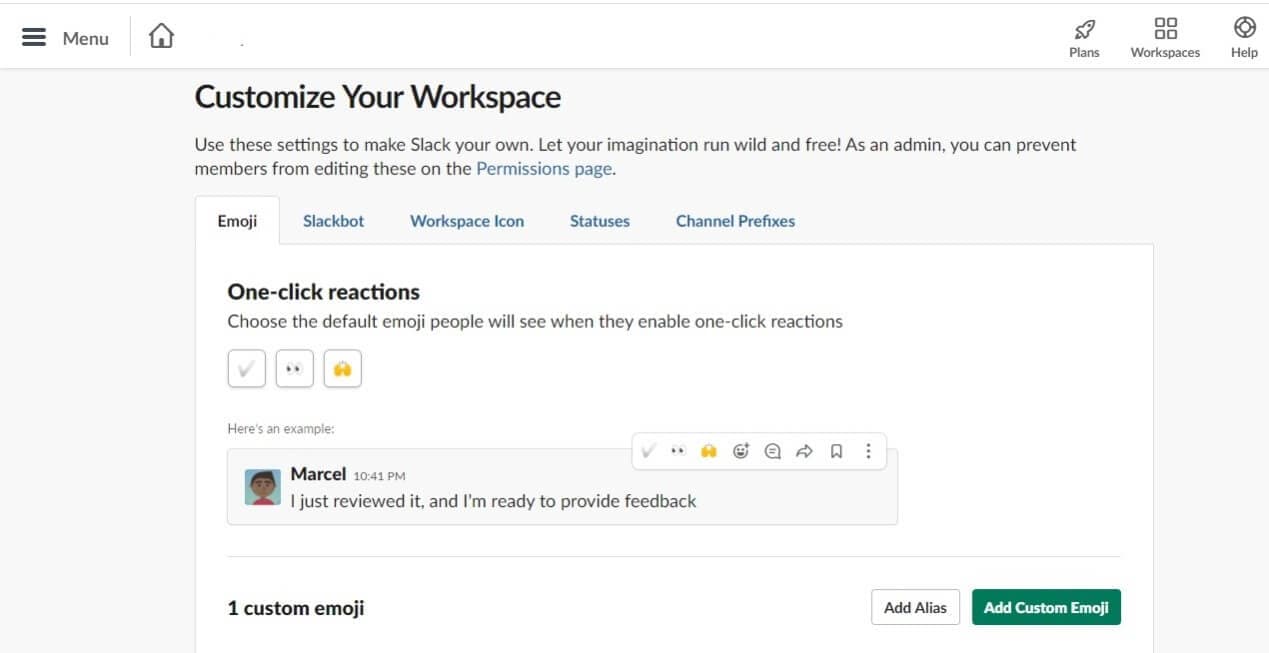
3.Here you can upload any image to make your custom Slack emoji. Click on Upload Image to select a file.
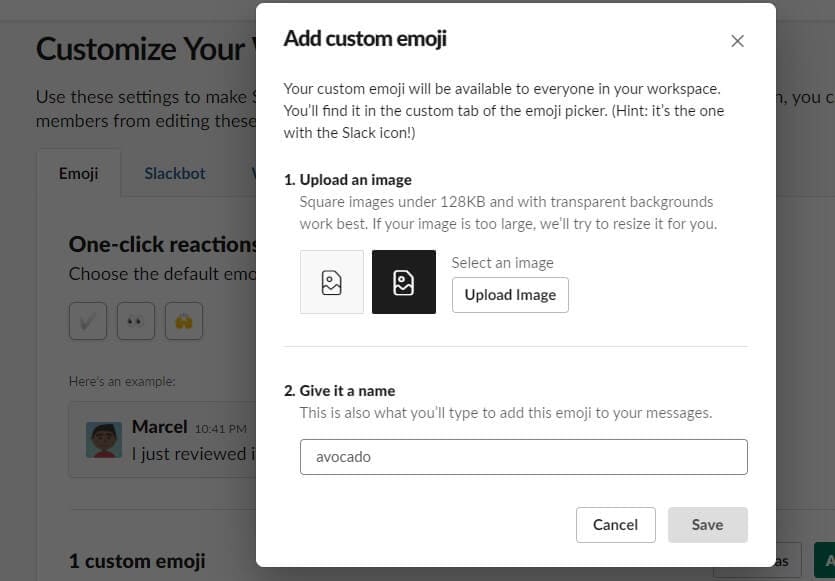
4.Then, give your emoji a name so you can easily find the custom Slack emoji while chatting. Click Save to finish.
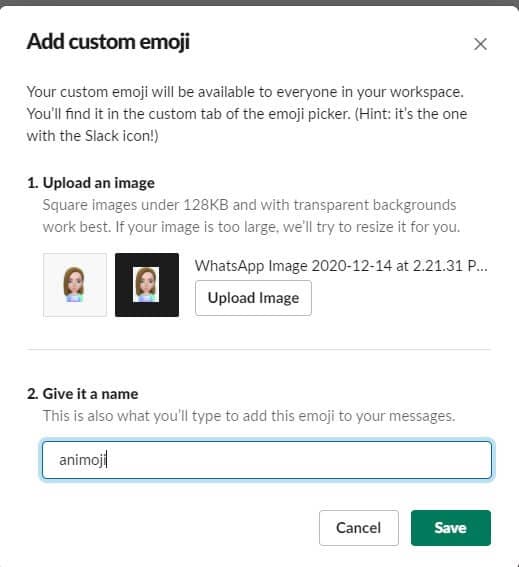
5.Now, go back to the workspace and click on the Smiley icon. Type the custom Slack emoji name to find it and click to send it.
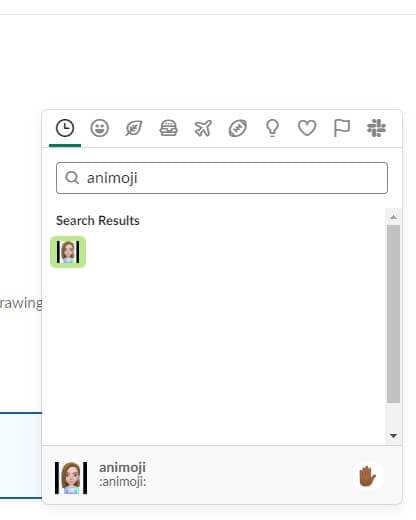
Bonus Tip-Edit Emoji and Add Emoji to Your Video
Now, let me present a top-notch video editor to help you add Slack emoji to your video without needing any editing experience.
Wondershare Filmora is a powerful video editor with a highly intuitive interface. It is loaded with high-end editing tools that are incredibly easy to use. You can add keyframe animations to make your videos more dynamic with a single click. Motion tracking allows you to track the specified object’s movements throughout the video, even allowing you to blur certain parts of the video. From the Effects tab, you can add cinematic effects to your videos, or you can easily color match all your scenes with one tap or apply noise reduction.
If you wish to edit or add custom Slack emoji to your video, you can import the image to Filmora and then drag it to the track above the video in the timeline. You can then add animations or motion tracking to adjust the custom Slack emoji. Cool transitions and color adjustments can also be made to make the video more appealing and unique. Special effects or catchy captions are just a tap away to help you create stunning videos
Conclusion
With the introduction of emojis, the need for writing long messages has diminished. Using a Slack emoji can turn your conversations around and make them more interesting. Chatting has never been easier or more fun.
Add Slack emoji or react to what others have to say. It’s time to create a custom Slack emoji to wow your friends and colleagues with tiny emojis that are exclusive to just you. If you want to spice up your work chats, just add Slack emoji and enjoy.
Try out Wondershare Filmora to add Slack emoji to your videos to make them unique.
Shanoon Cox
Shanoon Cox is a writer and a lover of all things video.
Follow @Shanoon Cox
Shanoon Cox
Mar 27, 2024• Proven solutions
A Slack emoji is just like the emojis you usually use on Whatsapp, Messenger, or other chatting platforms. There is a wide range of emojis you can use to express yourself better or lighten the working environment.
Plus, the option to create a custom Slack emoji makes it more interesting. You can use it to create a new and unique Slack emoji to personalize your chatting experience. Why write long texts when you can just add Slack emoji to say it all?
Let me show you the ropes on how to create a custom Slack emoji and make your chatting experience more fun.
- Part 1: How to Add Slack Emoji
- Part 2: How to Custom Slack Emoji
- Bonus Tip-Edit Emoji and Add Emoji to Your Video
Part 1: How to Add Slack Emoji
At Slack, you can find a Slack emoji for every emotion or occasion. Finding the perfect Slack emoji is as easy as browsing through the categorized sections. Better yet, the option to search for a Slack emoji makes it a cakewalk to get the exact Slack emoji to express oneself.
Also, you can add Slack emoji with a single tap. And it allows you to add unlimited Slack emoji in one message.
Let me show you how to add Slack emoji in a few quick steps:
1.Download and open Slack on your desktop or smartphone.
2.To add a Slack emoji, click on the Smiley face icon in the bottom right corner of the message box
3.Browse through the categories to find the right Slack emoji for your message. In the search bar, type the kind of emoji you are looking for to find it faster.
4.Click on the Hand icon in the bottom right corner to choose the default skin tone for all your emojis. Finally, to add Slack emoji to your message, just tap on it. Add as many Slack emoji as you like just by tapping on them.
Part 2: How to Custom Slack Emoji
Using the commonly used emojis can get boring. Sometimes, even the Slack emoji collection falls short in expressing the exact feeling you wish to convey. However, the good news is that you can easily create a custom Slack emoji without any hassle.
A Slack custom emoji can range from your own picture to any other image. You can create a personalized custom Slack emoji to crack inside jokes or create your brand icon Slack emoji.
Here’s how to create an awesome custom Slack emoji-
1.On your workspace, click on your company name or icon to open the settings drop-down menu. Tap on Settings&Administration<Customize.
2.A new window will pop open. In the Emoji tab, click on Add Custom Emoji.
3.Here you can upload any image to make your custom Slack emoji. Click on Upload Image to select a file.
4.Then, give your emoji a name so you can easily find the custom Slack emoji while chatting. Click Save to finish.
5.Now, go back to the workspace and click on the Smiley icon. Type the custom Slack emoji name to find it and click to send it.
Bonus Tip-Edit Emoji and Add Emoji to Your Video
Now, let me present a top-notch video editor to help you add Slack emoji to your video without needing any editing experience.
Wondershare Filmora is a powerful video editor with a highly intuitive interface. It is loaded with high-end editing tools that are incredibly easy to use. You can add keyframe animations to make your videos more dynamic with a single click. Motion tracking allows you to track the specified object’s movements throughout the video, even allowing you to blur certain parts of the video. From the Effects tab, you can add cinematic effects to your videos, or you can easily color match all your scenes with one tap or apply noise reduction.
If you wish to edit or add custom Slack emoji to your video, you can import the image to Filmora and then drag it to the track above the video in the timeline. You can then add animations or motion tracking to adjust the custom Slack emoji. Cool transitions and color adjustments can also be made to make the video more appealing and unique. Special effects or catchy captions are just a tap away to help you create stunning videos
Conclusion
With the introduction of emojis, the need for writing long messages has diminished. Using a Slack emoji can turn your conversations around and make them more interesting. Chatting has never been easier or more fun.
Add Slack emoji or react to what others have to say. It’s time to create a custom Slack emoji to wow your friends and colleagues with tiny emojis that are exclusive to just you. If you want to spice up your work chats, just add Slack emoji and enjoy.
Try out Wondershare Filmora to add Slack emoji to your videos to make them unique.
Shanoon Cox
Shanoon Cox is a writer and a lover of all things video.
Follow @Shanoon Cox
Burn Photos to DVD | How to Burn Photos to DVD with Transitions and Music
How to Burn Photos to DVD with Transitions and Music
Shanoon Cox
Mar 27, 2024• Proven solutions
Photos are precious memories not only for you but also for your family members. As time goes on, the photos might fade out and be unable to retrieve. To avoid this, burn photos to DVD will be a great idea to preserve family memories eternally.
This article will show you how to burn photos to DVD Slideshow with transition, titles and music quickly and easily by using Wondershare DVD Slideshow Builder Deluxe . It also provides some tips on how to burn photos to DVD.
Part 1: How to Burn Photos to DVD with Transition, Titles and Music
Wondershare DVD Slideshow Builder Deluxe can help you quickly create and burn photos to DVD. Download the free trial version this photo DVD maker first.

Step 1. Add Photo or Video Files
In Organize tab, simply click the “Add Files” button to open the browse window, find your files and import them into the program, you can drag and drop photos or videos to organize them on storyboard. Click the Expand button to get a larger viewer.

Step 2. Customize Photo Slideshow Transitions
Generally speaking, transition effects will be automatically inserted between every two photos/videos when you import the photos. But you can customize them by clicking the Personalize tab, then drag and drop a transition from the list to the thumbnail between two slides.
You are also able to add background music here: click the Music button and choose a music file from your computer.

Step 3. Choose DVD Menu
Now switch to Create tab to author a DVD menu from template and burn to DVD disc quickly:
- On the right hand side of the screen, double click on desired menu template to apply a DVD menu template.
- Click the Edit button under the preview windows to customize your DVD menu or right click on menu for more options.
- You can also make a professional DVD menu using dynamic DVD menu templates.
BTW, if you don’t want a DVD menu, just check the “Disable DVD Menu” option.

Step 4. Burn Photos to DVD Disc
Now click the Preview button beneath the preview window to make sure the photo DVD slideshow is exactly what you want. Go back to Personalize tab to change if necessary. After that, click “Burn” button to start burning your DVD slideshow to DVD.
You can also output photo slideshow to watch on Youtube, Mobile Phone, iPhone, PSP, etc. through options on the left. Below are the instructions to burn DVD for watch on TV:

- Insert a blank DVD disc, and do the following.
- Click “Burn to DVD”. Then specify the number of DVD copies. You can also choose to generate ISO Image files or DVD Folders.
- Make sure the PAL or NTSC TV Standard settings is right. If you don’t know which standard is used in your country, click the “Help” button. The wrong TV standard would cause playback incompatibility problem.
- Then click “Start” to burn DVD slideshow. If you have checked Create DVD Folder and/or Create DVD Image File options, the corresponding files will also be created to the specified folder.
Now sit back and relax, when burning complete, insert the created DVD disc into your DVD player to watch photo DVD slideshow on TV.
Learn more: User Guide of DVD Slideshow Builder Deluxe
Part 2: More Photo to DVD Tips
More about NTSC/PAL TV Standard
Nowadays, there are three video formats around the world. But each one is incompatible with others. For instance, NTSC is used in North America, Canada and Japan; while most of other regions PAL/SECAM. To apply TV Standard in DVD Slideshow Builder Deluxe , go to “Create“ -> Option tab and locate TV Standard option to select NTSC or PAL. If you are not sure which one to choose, please click “Help” button, select your country, then click “OK” , the program will choose the right TV standard for you.
Burn Photos to DVD/CD as Data Disc
If you only want to burn photo to DVD for backup and further use, you only need a burning photo to DVD software like ImgBurn (Free) or Nero (commercial). These software helps you burn all digital media files to DVD, of course you can burn photos to DVD for backup purpose. Notice that some photo DVD maker allows you burn slideshow as well as the original photos. This way, you turn photos to DVD slideshow with transition, and at the same time, backup photos to DVD for other uses.
Scan Photos to DVD - Digitize Photos
If you use traditional camera and have got loads of photos in album, you can scan photos to computer so that convert photo to digital format. Afterwards, you can get more from these digital photos, like backup photos to DVD, send to others as DVD gift, make a photo DVD show to play on TV, etc. All these could be done with your favorite photo DVD maker software. Now see how to transform your printed photos to digital first:
Select a good photo scanner -> Prepare your photos to scan -> Start photo scanning -> Adjust scanned photos
Scanning printed photos to computer is not an easy job. It needs patience and some tips and tricks. As you may know, some companies provide photo scanning service. For the Step 4, you can also adjust digital photos in your selected photo DVD maker. Anyway, you need to get your digital photos ready before you burn photos to DVD with transitions and music.
Shanoon Cox
Shanoon Cox is a writer and a lover of all things video.
Follow @Shanoon Cox
Shanoon Cox
Mar 27, 2024• Proven solutions
Photos are precious memories not only for you but also for your family members. As time goes on, the photos might fade out and be unable to retrieve. To avoid this, burn photos to DVD will be a great idea to preserve family memories eternally.
This article will show you how to burn photos to DVD Slideshow with transition, titles and music quickly and easily by using Wondershare DVD Slideshow Builder Deluxe . It also provides some tips on how to burn photos to DVD.
Part 1: How to Burn Photos to DVD with Transition, Titles and Music
Wondershare DVD Slideshow Builder Deluxe can help you quickly create and burn photos to DVD. Download the free trial version this photo DVD maker first.
Step 1. Add Photo or Video Files
In Organize tab, simply click the “Add Files” button to open the browse window, find your files and import them into the program, you can drag and drop photos or videos to organize them on storyboard. Click the Expand button to get a larger viewer.
Step 2. Customize Photo Slideshow Transitions
Generally speaking, transition effects will be automatically inserted between every two photos/videos when you import the photos. But you can customize them by clicking the Personalize tab, then drag and drop a transition from the list to the thumbnail between two slides.
You are also able to add background music here: click the Music button and choose a music file from your computer.
Step 3. Choose DVD Menu
Now switch to Create tab to author a DVD menu from template and burn to DVD disc quickly:
- On the right hand side of the screen, double click on desired menu template to apply a DVD menu template.
- Click the Edit button under the preview windows to customize your DVD menu or right click on menu for more options.
- You can also make a professional DVD menu using dynamic DVD menu templates.
BTW, if you don’t want a DVD menu, just check the “Disable DVD Menu” option.
Step 4. Burn Photos to DVD Disc
Now click the Preview button beneath the preview window to make sure the photo DVD slideshow is exactly what you want. Go back to Personalize tab to change if necessary. After that, click “Burn” button to start burning your DVD slideshow to DVD.
You can also output photo slideshow to watch on Youtube, Mobile Phone, iPhone, PSP, etc. through options on the left. Below are the instructions to burn DVD for watch on TV:
- Insert a blank DVD disc, and do the following.
- Click “Burn to DVD”. Then specify the number of DVD copies. You can also choose to generate ISO Image files or DVD Folders.
- Make sure the PAL or NTSC TV Standard settings is right. If you don’t know which standard is used in your country, click the “Help” button. The wrong TV standard would cause playback incompatibility problem.
- Then click “Start” to burn DVD slideshow. If you have checked Create DVD Folder and/or Create DVD Image File options, the corresponding files will also be created to the specified folder.
Now sit back and relax, when burning complete, insert the created DVD disc into your DVD player to watch photo DVD slideshow on TV.
Learn more: User Guide of DVD Slideshow Builder Deluxe
Part 2: More Photo to DVD Tips
More about NTSC/PAL TV Standard
Nowadays, there are three video formats around the world. But each one is incompatible with others. For instance, NTSC is used in North America, Canada and Japan; while most of other regions PAL/SECAM. To apply TV Standard in DVD Slideshow Builder Deluxe , go to “Create“ -> Option tab and locate TV Standard option to select NTSC or PAL. If you are not sure which one to choose, please click “Help” button, select your country, then click “OK” , the program will choose the right TV standard for you.
Burn Photos to DVD/CD as Data Disc
If you only want to burn photo to DVD for backup and further use, you only need a burning photo to DVD software like ImgBurn (Free) or Nero (commercial). These software helps you burn all digital media files to DVD, of course you can burn photos to DVD for backup purpose. Notice that some photo DVD maker allows you burn slideshow as well as the original photos. This way, you turn photos to DVD slideshow with transition, and at the same time, backup photos to DVD for other uses.
Scan Photos to DVD - Digitize Photos
If you use traditional camera and have got loads of photos in album, you can scan photos to computer so that convert photo to digital format. Afterwards, you can get more from these digital photos, like backup photos to DVD, send to others as DVD gift, make a photo DVD show to play on TV, etc. All these could be done with your favorite photo DVD maker software. Now see how to transform your printed photos to digital first:
Select a good photo scanner -> Prepare your photos to scan -> Start photo scanning -> Adjust scanned photos
Scanning printed photos to computer is not an easy job. It needs patience and some tips and tricks. As you may know, some companies provide photo scanning service. For the Step 4, you can also adjust digital photos in your selected photo DVD maker. Anyway, you need to get your digital photos ready before you burn photos to DVD with transitions and music.
Shanoon Cox
Shanoon Cox is a writer and a lover of all things video.
Follow @Shanoon Cox
The Essential Guide to Emoji, Memoji, Animoji, and Bitmoji
The Essential Guide to Emoji, Memoji, Animoji, and Bitmoji
Shanoon Cox
Mar 27, 2024• Proven solutions
Did you know there are 3,304 emojis as of now? Why do we even need emojis? Well, Emojis and emoticons have a long history within digital communication, internet culture, and digital content. Nowadays, emoticons have evolved into different animated versions like emoji, Bitmoji, Animoji, and Memoji. All these types of emoticons have become an important communication tool in the contemporary online world – especially on social media apps like Facebook, Instagram, and Snapchat. If you are confused between emojis, Bitmojis, Animoji, and Memoji, read this guide to understand better!
Here is an introduction to emoji, bitmoji, Animoji, and memoji.
1.What Is Emoji?
Anybody with a smartphone should know what an emoji is. Open up your keypad, and the ideograms and smileys present there are called emojis.
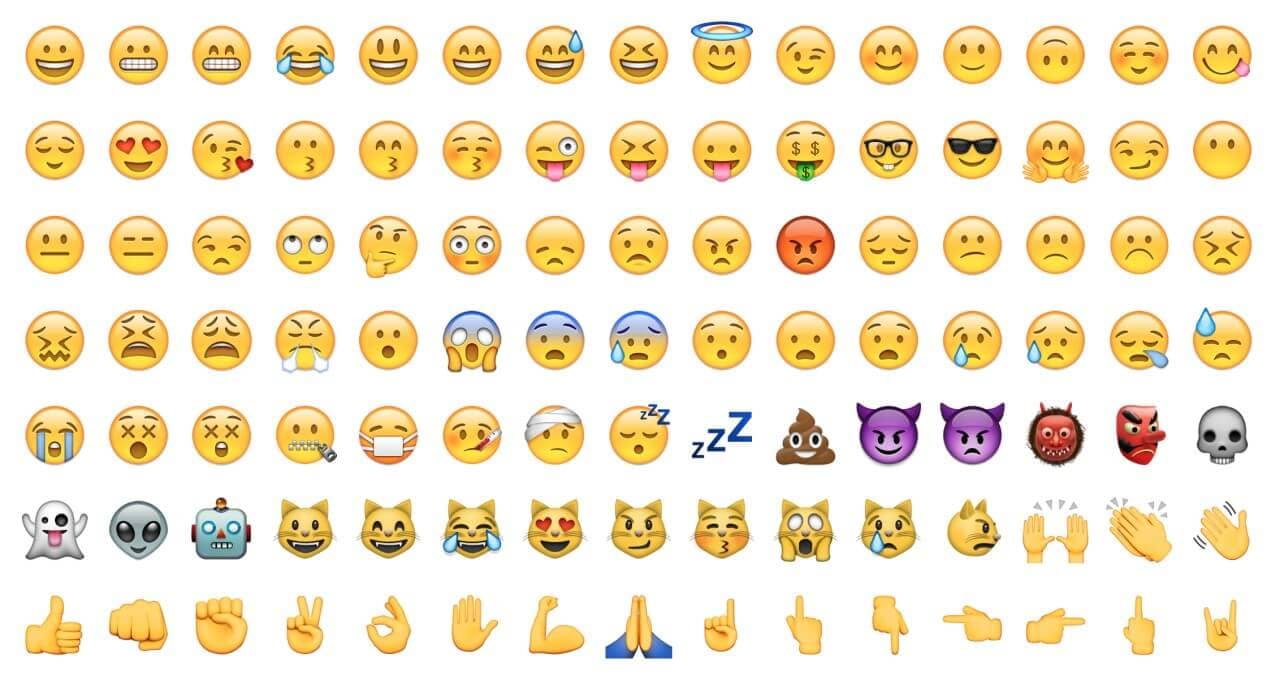
We can say that emojis are an advanced form of emoticons, but instead of typographic expressions, they are in the form of pictures. In simple words, an emoji is a small digital icon or image that expresses your emotions or ideas.
Emojis are widely used in our day-to-day communications through electronic messages and web pages. The emojis on our mobile phones exist in various genres, including facial expressions, places, food items, types of weather, animals, and other everyday objects.
Over the years, the emoji lexicon has constantly evolved to become all-inclusive as emojis are for everyone. Nowadays, emojis can be used across cultures, across screens, and across time. Whether you are white or black, Muslim or Christian, or gay or transgender, there is an emoji representing you and your culture!
2.What is Animoji?
Animojis are popular on iOS devices. Apple devices include an animated emoji feature that is called Animoji. Animoji is a 3D animated emoji that responds to your facial expressions. You can create and emojis on your phone using the front camera face ID system.

Animoji is created with the facial ID software allowing the screen to record and register your facial expressions and movements. The animojis recognize and copy your facial movements like pouting, lowering eyebrow, or rolling the eyeball.
Thus, Animoji is a customized or personalized animated emoji. Animojis have a range of expressions, and they also mimic to match the audio. The current full set of Animoji includes alien, bore, bear, cat, cow, dog, chicken, fox, dragon, rabbit, and many more!
Furthermore, Animojis can be shared as a video (with sound) via different messaging apps like WhatsApp and Facebook Messenger.
3.What is Memoji?
Animojis evolve into Memojis. In simple words, Memojis are personalized Animojis. Such Animojis are 3D animated emojis that look exactly like you or an animated version of you.

Memoji was first introduced by Apple, where the iPhone face ID camera system creates your avatar copying your facial expressions in real-time recording. Some high-end Android devices have also introduced the Memoji feature like the Samsung AR emoji.
The best thing about memojis is that you can completely customize them to suit you. From changing the shape of the head to brows, and hair color to eye color, you can make your Memoji look like you as much as possible.
Like other emojis, Memojis can also be shared on different popular messaging apps like WhatsApp, Facebook, and Instagram.
4.What is Bitmoji?
If you are an avid Snapchat user, then you must know what a Bitmoji is. Bitmojis are like Memojis, but they belong to the Bitmoji app owned by Bitstrips.
Bitstrips is a company that makes personalized emojis and cartoon avatars. Snapchat acquired Bitstrips in 2007 and later on introduced it as a feature in the Snapchat app. Over the years, Snapchat released new versions, and now it supports Bitmojis. Thus, all Snapchat users can create their own personal emojis using the Bitmoji app.
Bitmojis are customizable to a great extent allowing you to create your own cartoon version. You can also choose from a massive library of different moods and expressions, featuring your avatar.
You can also share your little cartoon versions of Bitmojis on different social media accounts. Moreover, you can put them into any chat message or even status update!
Conclusion
If it weren’t for emojis, the online messaging world would be so boring! Emojis add a touch of fun and emotion to everything. Therefore, the majority of us today use emojis to express our emotions through digital communication.
Thus, emojis have become the language of the digital era and social media apps. So, whether you use Emojis, Animojis, Memojis, or Bitmojis, they will lighten the mood and make any conversation fun!
Shanoon Cox
Shanoon Cox is a writer and a lover of all things video.
Follow @Shanoon Cox
Shanoon Cox
Mar 27, 2024• Proven solutions
Did you know there are 3,304 emojis as of now? Why do we even need emojis? Well, Emojis and emoticons have a long history within digital communication, internet culture, and digital content. Nowadays, emoticons have evolved into different animated versions like emoji, Bitmoji, Animoji, and Memoji. All these types of emoticons have become an important communication tool in the contemporary online world – especially on social media apps like Facebook, Instagram, and Snapchat. If you are confused between emojis, Bitmojis, Animoji, and Memoji, read this guide to understand better!
Here is an introduction to emoji, bitmoji, Animoji, and memoji.
1.What Is Emoji?
Anybody with a smartphone should know what an emoji is. Open up your keypad, and the ideograms and smileys present there are called emojis.
We can say that emojis are an advanced form of emoticons, but instead of typographic expressions, they are in the form of pictures. In simple words, an emoji is a small digital icon or image that expresses your emotions or ideas.
Emojis are widely used in our day-to-day communications through electronic messages and web pages. The emojis on our mobile phones exist in various genres, including facial expressions, places, food items, types of weather, animals, and other everyday objects.
Over the years, the emoji lexicon has constantly evolved to become all-inclusive as emojis are for everyone. Nowadays, emojis can be used across cultures, across screens, and across time. Whether you are white or black, Muslim or Christian, or gay or transgender, there is an emoji representing you and your culture!
2.What is Animoji?
Animojis are popular on iOS devices. Apple devices include an animated emoji feature that is called Animoji. Animoji is a 3D animated emoji that responds to your facial expressions. You can create and emojis on your phone using the front camera face ID system.
Animoji is created with the facial ID software allowing the screen to record and register your facial expressions and movements. The animojis recognize and copy your facial movements like pouting, lowering eyebrow, or rolling the eyeball.
Thus, Animoji is a customized or personalized animated emoji. Animojis have a range of expressions, and they also mimic to match the audio. The current full set of Animoji includes alien, bore, bear, cat, cow, dog, chicken, fox, dragon, rabbit, and many more!
Furthermore, Animojis can be shared as a video (with sound) via different messaging apps like WhatsApp and Facebook Messenger.
3.What is Memoji?
Animojis evolve into Memojis. In simple words, Memojis are personalized Animojis. Such Animojis are 3D animated emojis that look exactly like you or an animated version of you.
Memoji was first introduced by Apple, where the iPhone face ID camera system creates your avatar copying your facial expressions in real-time recording. Some high-end Android devices have also introduced the Memoji feature like the Samsung AR emoji.
The best thing about memojis is that you can completely customize them to suit you. From changing the shape of the head to brows, and hair color to eye color, you can make your Memoji look like you as much as possible.
Like other emojis, Memojis can also be shared on different popular messaging apps like WhatsApp, Facebook, and Instagram.
4.What is Bitmoji?
If you are an avid Snapchat user, then you must know what a Bitmoji is. Bitmojis are like Memojis, but they belong to the Bitmoji app owned by Bitstrips.
Bitstrips is a company that makes personalized emojis and cartoon avatars. Snapchat acquired Bitstrips in 2007 and later on introduced it as a feature in the Snapchat app. Over the years, Snapchat released new versions, and now it supports Bitmojis. Thus, all Snapchat users can create their own personal emojis using the Bitmoji app.
Bitmojis are customizable to a great extent allowing you to create your own cartoon version. You can also choose from a massive library of different moods and expressions, featuring your avatar.
You can also share your little cartoon versions of Bitmojis on different social media accounts. Moreover, you can put them into any chat message or even status update!
Conclusion
If it weren’t for emojis, the online messaging world would be so boring! Emojis add a touch of fun and emotion to everything. Therefore, the majority of us today use emojis to express our emotions through digital communication.
Thus, emojis have become the language of the digital era and social media apps. So, whether you use Emojis, Animojis, Memojis, or Bitmojis, they will lighten the mood and make any conversation fun!
Shanoon Cox
Shanoon Cox is a writer and a lover of all things video.
Follow @Shanoon Cox
Also read:
- [New] In 2024, How Often to Post A Guide to YouTube Video Upload Patterns for Success
- [New] YouTube Profits Demystified From Clicks to Credit
- 7 Top Ways To Resolve Apple ID Not Active Issue For iPhone 15 Pro
- Burn Photos to DVD | How to Burn Photos to DVD with Transitions and Music
- Gears of War 5 Issues? Here's How to Stabilize Your Gameplay
- How to Unlock Vivo V27 Bootloader Easily
- In 2024, 10 Most Popular Minion Memes that Moms Are Crazy About
- In 2024, How Do You Get Sun Stone Evolutions in Pokémon For OnePlus Ace 3? | Dr.fone
- In 2024, Top 5 Best Websites to Add Emojis to Photo Online
- New In 2024, FCPX Audio Editing Essentials Learn L-Cuts and J-Cuts
- New What Is Emoji for 2024
- Optimize PC Setup with Corsair's iCUE Link Upgrade Perks
- Top 10 Storyboarding Software Free&Paid
- Updated 10 Best Free Websites to Watch Cartoons Online for 2024
- Updated 2024 Approved What Is Emoji and What Does It Mean?
- Updated In 2024, Mocking Sponge Bob Meme Generator
- Visual Narrative The Art of Scriptwriting for 2024
- Title: 2024 Approved Top 10 Storyboarding Software Free&Paid
- Author: Jan
- Created at : 2024-09-23 20:37:50
- Updated at : 2024-09-30 21:38:06
- Link: https://meme-emoji.techidaily.com/2024-approved-top-10-storyboarding-software-freeandpaid/
- License: This work is licensed under CC BY-NC-SA 4.0.