
2024 Approved Generating the Nut Button Meme
Generating the Nut Button Meme
Generating the Nut Button Meme

Ollie Mattison
Mar 27, 2024• Proven solutions
Generating the Nut Button Meme
The Nut Button meme started out as an immature joke, with a word ‘Nut’ written across a blue button, and for a number of years, this meme was used mostly for bad sex jokes. However, the meme has evolved through the years and meme makers from around the world use it to make social media, gaming and countless other types of jokes.
Commonly, the Nut Button meme suggests that a person, in many cases the creator of the meme, likes doing something in certain types of situations, like listening to crappy music when they feel down or taking revenge on their enemies when they have the opportunity. Generating this type of meme doesn’t require too much effort as it often contains one word. Some versions of this meme include the motive that prompts the hand in the meme to push the button, but using this element of the meme is optional.
A Few Good Examples of the Nut Button Meme
Taking the first concept that comes to your mind won’t necessarily make this meme as effective as you’d like it to be, so you have to think carefully which button the hand is going to hit.
Hitting the Divorce button can be a painful process in real life, but it can also be an endless source of fun if the reason why the hand hits it is so ridiculous that it could never be an actual reason for a divorce.
This meme can also be used to make fun of world leaders and their bad decisions or pop-culture figures that often do ill-advised things.

The elements of the Nut meme are always the same, although their topics can vary because the hand and the blue button are irreplaceable parts of this meme.
Generating the Nut Button Meme
We suggest using Filmora Online Meme Maker to generate your meme because this online tool lets you create memes without watermarks for free. What’s more, you don’t even have to sign up in order to make a meme from images, GIFs or videos.
Step 1 – Uploading the Meme Template
You can click the “Copy the image” link below and the image link will be copied automatically.
![]()
Copy the image
After arriving at Filmora Online Meme Maker ‘s home page, you’ll be asked to upload the image. Paste the image’s URL into the Enter a URL box. After uploading a picture from your computer, you’ll be asked if you would like to crop, flip or rotate it. Click on the OK button to confirm the changes you’ve made and proceed to the next step of the process.

Step 2 – Adding Text to the Image
When a new page loads you will get access to all tools Filmora Online Meme Maker offers. Make sure that the Text Inside option is selected, since on nearly all examples of this meme the text is positioned within the image.

Insert the text into the text boxes, and reposition it on the picture so it is placed between the blue button and hand. You can add as many text boxes as you want to the picture, but Nut Button memes commonly include just one or two lines of text.

The color of the text, size, and font can all be changed in the Text Options menu, so before hitting the Create button you can experiment with these tools in order to generate a better meme.
Step 3 – Saving the Meme
Finally, click on the download button, and when a new page loads and you’re ready to share your new Nut Button meme on social media.

The Filmora Online Meme Maker is mobile friendly, which means that you can use this platform to make memes from your Smartphone.
Conclusion
The Nut Button meme can be used in a wide array of different contexts, and it is up to you which one you’re going to use. You can mock stereotypical answers to questions, world leaders or make a joke at your own expense. Whichever topic you choose, the Filmora Online Meme Maker will help you express your creativity fully. What is your favorite Nut Button meme? Leave a comment below and let us know.
Ollie Mattison
Ollie Mattison is a writer and a lover of all things video.
Follow @Ollie Mattison
Ollie Mattison
Mar 27, 2024• Proven solutions
Generating the Nut Button Meme
The Nut Button meme started out as an immature joke, with a word ‘Nut’ written across a blue button, and for a number of years, this meme was used mostly for bad sex jokes. However, the meme has evolved through the years and meme makers from around the world use it to make social media, gaming and countless other types of jokes.
Commonly, the Nut Button meme suggests that a person, in many cases the creator of the meme, likes doing something in certain types of situations, like listening to crappy music when they feel down or taking revenge on their enemies when they have the opportunity. Generating this type of meme doesn’t require too much effort as it often contains one word. Some versions of this meme include the motive that prompts the hand in the meme to push the button, but using this element of the meme is optional.
A Few Good Examples of the Nut Button Meme
Taking the first concept that comes to your mind won’t necessarily make this meme as effective as you’d like it to be, so you have to think carefully which button the hand is going to hit.
Hitting the Divorce button can be a painful process in real life, but it can also be an endless source of fun if the reason why the hand hits it is so ridiculous that it could never be an actual reason for a divorce.
This meme can also be used to make fun of world leaders and their bad decisions or pop-culture figures that often do ill-advised things.
The elements of the Nut meme are always the same, although their topics can vary because the hand and the blue button are irreplaceable parts of this meme.
Generating the Nut Button Meme
We suggest using Filmora Online Meme Maker to generate your meme because this online tool lets you create memes without watermarks for free. What’s more, you don’t even have to sign up in order to make a meme from images, GIFs or videos.
Step 1 – Uploading the Meme Template
You can click the “Copy the image” link below and the image link will be copied automatically.
![]()
Copy the image
After arriving at Filmora Online Meme Maker ‘s home page, you’ll be asked to upload the image. Paste the image’s URL into the Enter a URL box. After uploading a picture from your computer, you’ll be asked if you would like to crop, flip or rotate it. Click on the OK button to confirm the changes you’ve made and proceed to the next step of the process.
Step 2 – Adding Text to the Image
When a new page loads you will get access to all tools Filmora Online Meme Maker offers. Make sure that the Text Inside option is selected, since on nearly all examples of this meme the text is positioned within the image.
Insert the text into the text boxes, and reposition it on the picture so it is placed between the blue button and hand. You can add as many text boxes as you want to the picture, but Nut Button memes commonly include just one or two lines of text.
The color of the text, size, and font can all be changed in the Text Options menu, so before hitting the Create button you can experiment with these tools in order to generate a better meme.
Step 3 – Saving the Meme
Finally, click on the download button, and when a new page loads and you’re ready to share your new Nut Button meme on social media.
The Filmora Online Meme Maker is mobile friendly, which means that you can use this platform to make memes from your Smartphone.
Conclusion
The Nut Button meme can be used in a wide array of different contexts, and it is up to you which one you’re going to use. You can mock stereotypical answers to questions, world leaders or make a joke at your own expense. Whichever topic you choose, the Filmora Online Meme Maker will help you express your creativity fully. What is your favorite Nut Button meme? Leave a comment below and let us know.
Ollie Mattison
Ollie Mattison is a writer and a lover of all things video.
Follow @Ollie Mattison
Ollie Mattison
Mar 27, 2024• Proven solutions
Generating the Nut Button Meme
The Nut Button meme started out as an immature joke, with a word ‘Nut’ written across a blue button, and for a number of years, this meme was used mostly for bad sex jokes. However, the meme has evolved through the years and meme makers from around the world use it to make social media, gaming and countless other types of jokes.
Commonly, the Nut Button meme suggests that a person, in many cases the creator of the meme, likes doing something in certain types of situations, like listening to crappy music when they feel down or taking revenge on their enemies when they have the opportunity. Generating this type of meme doesn’t require too much effort as it often contains one word. Some versions of this meme include the motive that prompts the hand in the meme to push the button, but using this element of the meme is optional.
A Few Good Examples of the Nut Button Meme
Taking the first concept that comes to your mind won’t necessarily make this meme as effective as you’d like it to be, so you have to think carefully which button the hand is going to hit.
Hitting the Divorce button can be a painful process in real life, but it can also be an endless source of fun if the reason why the hand hits it is so ridiculous that it could never be an actual reason for a divorce.
This meme can also be used to make fun of world leaders and their bad decisions or pop-culture figures that often do ill-advised things.
The elements of the Nut meme are always the same, although their topics can vary because the hand and the blue button are irreplaceable parts of this meme.
Generating the Nut Button Meme
We suggest using Filmora Online Meme Maker to generate your meme because this online tool lets you create memes without watermarks for free. What’s more, you don’t even have to sign up in order to make a meme from images, GIFs or videos.
Step 1 – Uploading the Meme Template
You can click the “Copy the image” link below and the image link will be copied automatically.
![]()
Copy the image
After arriving at Filmora Online Meme Maker ‘s home page, you’ll be asked to upload the image. Paste the image’s URL into the Enter a URL box. After uploading a picture from your computer, you’ll be asked if you would like to crop, flip or rotate it. Click on the OK button to confirm the changes you’ve made and proceed to the next step of the process.
Step 2 – Adding Text to the Image
When a new page loads you will get access to all tools Filmora Online Meme Maker offers. Make sure that the Text Inside option is selected, since on nearly all examples of this meme the text is positioned within the image.
Insert the text into the text boxes, and reposition it on the picture so it is placed between the blue button and hand. You can add as many text boxes as you want to the picture, but Nut Button memes commonly include just one or two lines of text.
The color of the text, size, and font can all be changed in the Text Options menu, so before hitting the Create button you can experiment with these tools in order to generate a better meme.
Step 3 – Saving the Meme
Finally, click on the download button, and when a new page loads and you’re ready to share your new Nut Button meme on social media.
The Filmora Online Meme Maker is mobile friendly, which means that you can use this platform to make memes from your Smartphone.
Conclusion
The Nut Button meme can be used in a wide array of different contexts, and it is up to you which one you’re going to use. You can mock stereotypical answers to questions, world leaders or make a joke at your own expense. Whichever topic you choose, the Filmora Online Meme Maker will help you express your creativity fully. What is your favorite Nut Button meme? Leave a comment below and let us know.
Ollie Mattison
Ollie Mattison is a writer and a lover of all things video.
Follow @Ollie Mattison
How to Use Emojis on Windows 10 and Windows 11?
If you ever wondered how to use emojis on Windows, or since when the emojis are around and what is their significance, you will find all your answers here. Because Windows 10 offers a great range of emojis that help you express your feelings and reactions in fewer words, they have recently gained a decent level of popularity, mostly amongst youngsters and millennials.
With that said, in the following sections, you will learn how to use emojis on Windows 10 using both keyboard shortcuts and touch keyboard, how to get emojis on Windows 10 to make your text or conversation look more versatile, and what new has been added to the latest operating system released by Microsoft, i.e., Windows 11.
In this article
01 Part 1: The History of Emojis in Windows
02 Part 2: How to Use Emojis with Keyboard Shortcuts
03 Part 3: How to Use Emojis on Windows PC with Touch Keyboard
04 Part 4: What’s New in Emojis in Windows 11
05 Part 5: How to Get More Emojis in Windows 11
Part 1: The History of Emojis in Windows
Although emojis are present in some form or the other since the mid-‘90s, they were not quite popular back then. With the evolution of smartphones, these iconic characters got attention from the then-teenagers. Seeing this, in 2012, Microsoft introduced the first-ever set of black-and-white emojis with the release of Windows 8, and after some time, the company also added the same to Windows 7 that was rolled out along with the updates for the OS.
With the release of Windows 10 in 2015, a wide range of full-fledged colored emojis was introduced and received a large number of positive reactions from the users. As of today, emojis have become an integral part of everyone’s day-to-day text conversation, be it on Skype, WhatsApp, Facebook, or any other such platform.
Part 2: How to Use Emojis with Keyboard Shortcuts
A keyboard shortcut is a combination of two or more keys that are pressed simultaneously to trigger a pre-assigned event or action. A good example of a keyboard shortcut is ‘Ctrl + S’ which, when pressed, saves the document you’re working on.
While learning the process of how to use emoji in Windows 10, it is equally imperative to memorize the shortcut keys to insert those icons without taking your hands off the keyboard. This not only saves your time, but it also prevents you from going through the lengthy process of opening the emojis keyboard, navigating through all the available icons to choose the one you’re looking for, and then clicking it to insert in the document or conversation.
Nevertheless, it would be a good idea to learn how to launch the emojis keyboard, and the process is simple. All you need to do is:
- Make sure that your keyboard cursor is in an app that can accept text inputs. A text editor like MS Word or WordPad could be a good example
- Press the Windows + ; (semicolon) or Windows + . (period) keys together to open the emojis keyboard

Once the keyboard is open, you can click any of the available emojis to insert it in your conversion or text content.
As for the shortcuts, depending on the type of expression you want to convey, there could be thousands of them. Some of the commonly used emojis and their universal shortcut keys for both Windows 10 and Windows 11 include:
: (colon) + ) (right brace) will create a smiley face
: (colon) + ( (left brace) will create a sad face
: (colon) + ; (semicolon) will create a wink face
…and so on. You can conduct a quick online search to get the entire list of keyboard shortcuts and the emojis that they will create. For your convenience, a link from the Microsoft official website is given below:
Part 3: How to Use Emojis on Windows PC with Touch Keyboard
If you have Microsoft Surface or any other device that has Windows 10 or Windows 11 installed on it, and can accept inputs via touch keyboard, you can enable the feature in the operating system, and then use the touch keyboard to add emojis to your conversion or content. You can follow the instructions given below to enable touch keyboard, and then learn how to use emojis on Windows 11 or Windows 10 via touch:
- Right-click anywhere on the taskbar (Windows 11 is used here for demonstration), and then click Taskbar settings

- From the right area of the Settings window that opens next, scroll down to the Taskbar corner icons section, and then turn on the Touch keyboard switch

- Launch an app that can accept text inputs, e.g., a text editor, chatting app, etc. Click or tap the Touch keyboard icon from the notification area that is present at the bottom-right corner of the screen.

- Click or tap the Emojis icon from the upper-left corner of the touch keyboard that opens up, and then touch your preferred emoji to add it to your text or conversation.

Part 4: What’s New in Emojis in Windows 11
In addition to learning how to use emojis on Windows 10, it is also important to know what’s new with them or the emojis panel in Windows 11, the latest operating system released by Microsoft this year, i.e., 2021.
In Windows 11, although you can launch the emojis keyboard using the same shortcuts, i.e., ‘Windows + .’ or ‘Windows + ;’ keys as mentioned earlier, the emojis keyboard itself has four sections, namely:
- Emojis – Contains various emojis and smileys
- GIF – Gives you access to various animated GIFs from Tenor
- Kamojis – Lets you add the ASCII characters for emojis, e.g., :-) or :-(
- Symbols – To add important symbols to your text, e.g., ©, ®, etc.
In addition to this, the 2D Clippy emoji has also been introduced with Windows 11, and can be located by launching the emojis keyboard, and typing ‘Clippy’.
Part 5: How to Get More Emojis in Windows 11
If the built-in emoji library doesn’t contain your favorite expressions, you can always get several more by following the instructions given below:
- Launch your favorite web browser on Windows 11, and then go to http://www.iemoji.com/
- Click an emoji from the available options or copy one from your favorite portal, and paste it in the Paste Emoji here field

- Review the emoji in the MESSAGE PREVIEW field, and click Create from the Options section to generate the emoji that can be sent as a message or image

- Alternatively, click Copy from the Options section itself, and then go to the text editor or any other portal you want to use the emoji in, and press Ctrl + V to paste and insert the emoji in your conversation or text without any hassle.

Conclusion
While the emojis were introduced to Windows as late as 2012, Windows 11 has a wide range of these virtual objects or faces for various occasions and to convey different expressions respectively. Furthermore, Windows 11 also gives you access to Tenor’s GIFs, and ASCII characters with particular combinations to represent the emojis, as it was done back in the days of button-operated cellphones.
Also, if the built-in emoji keyboard doesn’t have your favorite expressions and smileys, you can always generate your custom ones by going to http://www.iemoji.com/ , and using the options that the website offers. All in all, it’s easy to learn how to use emojis on Windows as long as you have access to the correct tutorial that explains the process in an easy manner.
02 Part 2: How to Use Emojis with Keyboard Shortcuts
03 Part 3: How to Use Emojis on Windows PC with Touch Keyboard
04 Part 4: What’s New in Emojis in Windows 11
05 Part 5: How to Get More Emojis in Windows 11
Part 1: The History of Emojis in Windows
Although emojis are present in some form or the other since the mid-‘90s, they were not quite popular back then. With the evolution of smartphones, these iconic characters got attention from the then-teenagers. Seeing this, in 2012, Microsoft introduced the first-ever set of black-and-white emojis with the release of Windows 8, and after some time, the company also added the same to Windows 7 that was rolled out along with the updates for the OS.
With the release of Windows 10 in 2015, a wide range of full-fledged colored emojis was introduced and received a large number of positive reactions from the users. As of today, emojis have become an integral part of everyone’s day-to-day text conversation, be it on Skype, WhatsApp, Facebook, or any other such platform.
Part 2: How to Use Emojis with Keyboard Shortcuts
A keyboard shortcut is a combination of two or more keys that are pressed simultaneously to trigger a pre-assigned event or action. A good example of a keyboard shortcut is ‘Ctrl + S’ which, when pressed, saves the document you’re working on.
While learning the process of how to use emoji in Windows 10, it is equally imperative to memorize the shortcut keys to insert those icons without taking your hands off the keyboard. This not only saves your time, but it also prevents you from going through the lengthy process of opening the emojis keyboard, navigating through all the available icons to choose the one you’re looking for, and then clicking it to insert in the document or conversation.
Nevertheless, it would be a good idea to learn how to launch the emojis keyboard, and the process is simple. All you need to do is:
- Make sure that your keyboard cursor is in an app that can accept text inputs. A text editor like MS Word or WordPad could be a good example
- Press the Windows + ; (semicolon) or Windows + . (period) keys together to open the emojis keyboard
Once the keyboard is open, you can click any of the available emojis to insert it in your conversion or text content.
As for the shortcuts, depending on the type of expression you want to convey, there could be thousands of them. Some of the commonly used emojis and their universal shortcut keys for both Windows 10 and Windows 11 include:
: (colon) + ) (right brace) will create a smiley face
: (colon) + ( (left brace) will create a sad face
: (colon) + ; (semicolon) will create a wink face
…and so on. You can conduct a quick online search to get the entire list of keyboard shortcuts and the emojis that they will create. For your convenience, a link from the Microsoft official website is given below:
Part 3: How to Use Emojis on Windows PC with Touch Keyboard
If you have Microsoft Surface or any other device that has Windows 10 or Windows 11 installed on it, and can accept inputs via touch keyboard, you can enable the feature in the operating system, and then use the touch keyboard to add emojis to your conversion or content. You can follow the instructions given below to enable touch keyboard, and then learn how to use emojis on Windows 11 or Windows 10 via touch:
- Right-click anywhere on the taskbar (Windows 11 is used here for demonstration), and then click Taskbar settings
- From the right area of the Settings window that opens next, scroll down to the Taskbar corner icons section, and then turn on the Touch keyboard switch
- Launch an app that can accept text inputs, e.g., a text editor, chatting app, etc. Click or tap the Touch keyboard icon from the notification area that is present at the bottom-right corner of the screen.
- Click or tap the Emojis icon from the upper-left corner of the touch keyboard that opens up, and then touch your preferred emoji to add it to your text or conversation.
Part 4: What’s New in Emojis in Windows 11
In addition to learning how to use emojis on Windows 10, it is also important to know what’s new with them or the emojis panel in Windows 11, the latest operating system released by Microsoft this year, i.e., 2021.
In Windows 11, although you can launch the emojis keyboard using the same shortcuts, i.e., ‘Windows + .’ or ‘Windows + ;’ keys as mentioned earlier, the emojis keyboard itself has four sections, namely:
- Emojis – Contains various emojis and smileys
- GIF – Gives you access to various animated GIFs from Tenor
- Kamojis – Lets you add the ASCII characters for emojis, e.g., :-) or :-(
- Symbols – To add important symbols to your text, e.g., ©, ®, etc.
In addition to this, the 2D Clippy emoji has also been introduced with Windows 11, and can be located by launching the emojis keyboard, and typing ‘Clippy’.
Part 5: How to Get More Emojis in Windows 11
If the built-in emoji library doesn’t contain your favorite expressions, you can always get several more by following the instructions given below:
- Launch your favorite web browser on Windows 11, and then go to http://www.iemoji.com/
- Click an emoji from the available options or copy one from your favorite portal, and paste it in the Paste Emoji here field
- Review the emoji in the MESSAGE PREVIEW field, and click Create from the Options section to generate the emoji that can be sent as a message or image
- Alternatively, click Copy from the Options section itself, and then go to the text editor or any other portal you want to use the emoji in, and press Ctrl + V to paste and insert the emoji in your conversation or text without any hassle.
Conclusion
While the emojis were introduced to Windows as late as 2012, Windows 11 has a wide range of these virtual objects or faces for various occasions and to convey different expressions respectively. Furthermore, Windows 11 also gives you access to Tenor’s GIFs, and ASCII characters with particular combinations to represent the emojis, as it was done back in the days of button-operated cellphones.
Also, if the built-in emoji keyboard doesn’t have your favorite expressions and smileys, you can always generate your custom ones by going to http://www.iemoji.com/ , and using the options that the website offers. All in all, it’s easy to learn how to use emojis on Windows as long as you have access to the correct tutorial that explains the process in an easy manner.
How to Make a FLV Photo Slideshow with Music
How to Make a FLV Photo Slideshow

Shanoon Cox
Mar 27, 2024• Proven solutions
FLV slideshow is a suitable way to share photos and videos online due to its small size and reasonable quality. Wondershare DVD Slideshow Builder brings more convenience to instantly make a slideshow with music , photos and lets you create FLV videos, as well as other video formats. You can create a FLV slideshow in easy steps as below.
Easy Guide to Make FLV Slideshow with Music

1 Import Photos & Video and Music for FLV Slideshow
Install and launch the slideshow maker, go to Organize tab and import your photos, videos and music files. Transitions between adjacent slides will be used. But you can change them by following step 2.
2 Apply Transition and Motion Effect
This slideshow maker includes more than 100 transition effects for slides switch. Before applying, double-click transition thumbnail to preview in player on the right. You could also randomize transitions or apply one transition to all slides in FLV slideshow.
3 Save Photo Slideshow to FLV Video
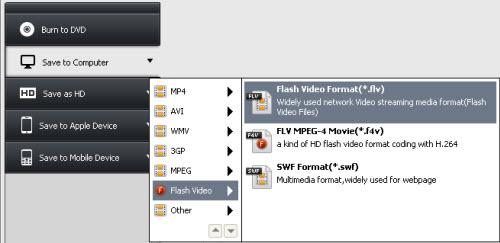
Select Flash Video format as the output and make advanced settings by clicking Settings button. Finally, click Burn and wail a while, you get your FLV video to sharing on YouTube, Facebook, MySpace, Mobile Phone. Alternatively, play FLV video on computer via stand-alone FLV player.
FLV Slideshow Tips
For more detailed settings of FLV slideshow, click Settings button and specify various options, like encoder, resolution, frame rate, bit rate and audio settings.
To play FLV slideshow on Nokia mobile phone, you should set encode type to Nokia FLV series (*.flv). Once created, upload flv to Nokia phone or online and view FLV slideshow using FLV player or web browser plugin.
You could also upload FLV slideshow to YouTube to share with more people. FLV videos are perfectly supported by YouTube.
More: Convert All Popular Formats to FLV
Wondershare DVD Slideshow Builder Deluxe supports all popular video formats. Therefore, you can import videos that need to change format, and save it in another format. It’s not only a DVD slideshow maker, but only powerful FLV converter. For detailed supported input formats, check video format references.
More: Convert FLV to MP4, AVI, MOV, MPEG or Burn FLV to DVD
You could also import FLV to DVD Slideshow Builder Deluxe and save it as MP4, AVI, MOV and 3GP, or even burn FLV video to DVD with beautiful DVD menus. For detailed supported output formats, check video format references. Here, I recommended to save FLV to MP4 for its comprehensive support on various devices, such as iPhone, iPod, Apple TV, Gphone, Nokia phone, LG phone, PSP, Palm, Zune, etc.
About FLV Video (Flash Video)
Flash Video (*.FLV) is a container file format used to deliver video over the internet using Adobe Flash Player versions 6-10 (developed by Macromedia). Flash Video content may also be embedded within SWF files. FLV videos are widely used by international companies, including YouTube, Google Video, Yahoo! Video, metacafe, Reuters.com, and many other news providers. Flash Video could be watched on most operating systems, via the Adobe Flash Player and web browser plugin, or desired third-party FLV Players.
Shanoon Cox
Shanoon Cox is a writer and a lover of all things video.
Follow @Shanoon Cox
Shanoon Cox
Mar 27, 2024• Proven solutions
FLV slideshow is a suitable way to share photos and videos online due to its small size and reasonable quality. Wondershare DVD Slideshow Builder brings more convenience to instantly make a slideshow with music , photos and lets you create FLV videos, as well as other video formats. You can create a FLV slideshow in easy steps as below.
Easy Guide to Make FLV Slideshow with Music
1 Import Photos & Video and Music for FLV Slideshow
Install and launch the slideshow maker, go to Organize tab and import your photos, videos and music files. Transitions between adjacent slides will be used. But you can change them by following step 2.
2 Apply Transition and Motion Effect
This slideshow maker includes more than 100 transition effects for slides switch. Before applying, double-click transition thumbnail to preview in player on the right. You could also randomize transitions or apply one transition to all slides in FLV slideshow.
3 Save Photo Slideshow to FLV Video
Select Flash Video format as the output and make advanced settings by clicking Settings button. Finally, click Burn and wail a while, you get your FLV video to sharing on YouTube, Facebook, MySpace, Mobile Phone. Alternatively, play FLV video on computer via stand-alone FLV player.
FLV Slideshow Tips
For more detailed settings of FLV slideshow, click Settings button and specify various options, like encoder, resolution, frame rate, bit rate and audio settings.
To play FLV slideshow on Nokia mobile phone, you should set encode type to Nokia FLV series (*.flv). Once created, upload flv to Nokia phone or online and view FLV slideshow using FLV player or web browser plugin.
You could also upload FLV slideshow to YouTube to share with more people. FLV videos are perfectly supported by YouTube.
More: Convert All Popular Formats to FLV
Wondershare DVD Slideshow Builder Deluxe supports all popular video formats. Therefore, you can import videos that need to change format, and save it in another format. It’s not only a DVD slideshow maker, but only powerful FLV converter. For detailed supported input formats, check video format references.
More: Convert FLV to MP4, AVI, MOV, MPEG or Burn FLV to DVD
You could also import FLV to DVD Slideshow Builder Deluxe and save it as MP4, AVI, MOV and 3GP, or even burn FLV video to DVD with beautiful DVD menus. For detailed supported output formats, check video format references. Here, I recommended to save FLV to MP4 for its comprehensive support on various devices, such as iPhone, iPod, Apple TV, Gphone, Nokia phone, LG phone, PSP, Palm, Zune, etc.
About FLV Video (Flash Video)
Flash Video (*.FLV) is a container file format used to deliver video over the internet using Adobe Flash Player versions 6-10 (developed by Macromedia). Flash Video content may also be embedded within SWF files. FLV videos are widely used by international companies, including YouTube, Google Video, Yahoo! Video, metacafe, Reuters.com, and many other news providers. Flash Video could be watched on most operating systems, via the Adobe Flash Player and web browser plugin, or desired third-party FLV Players.
Shanoon Cox
Shanoon Cox is a writer and a lover of all things video.
Follow @Shanoon Cox
10 Best Meme Makers Online (Free to Use)
Top 12 Best Meme Makers Online for FREE
Ollie Mattison
Mar 27, 2024• Proven solutions
Memes have become a central part of many online conversations. They pop up a lot on social media, especially platforms such as Twitter, Tumblr and Facebook . People even converse with each other using meme keyboards.
With memes taking over popular culture, you may want to make a meme for yourself. By using a meme maker, you can do just that! Here is a look at the top 10+ best meme maker online options that you can use for free.
10+ Best Meme Makers Online
1. Filmora Free Meme Generator
Filmora meme maker is a totally free meme generator without a watermark. Also, you don’t need to sign up or log in first to use it. It supports importing images, GIFs, and videos in one place. Just drag and drop to import, so easy to use. More importantly, if you want to select a white or black background to input the caption, Filmora meme maker can help you quickly. Changing text size, color and position is also available. After editing is done, just one click to export your work within a few seconds. You can also freely upload to social media platforms, like FB and IG.
- Place text anywhere (inside and outside of image)
- Support exporting to popular image and video formats, including jpg, png, gif, mp4
- It is totally free to use, no subscription or cost
[

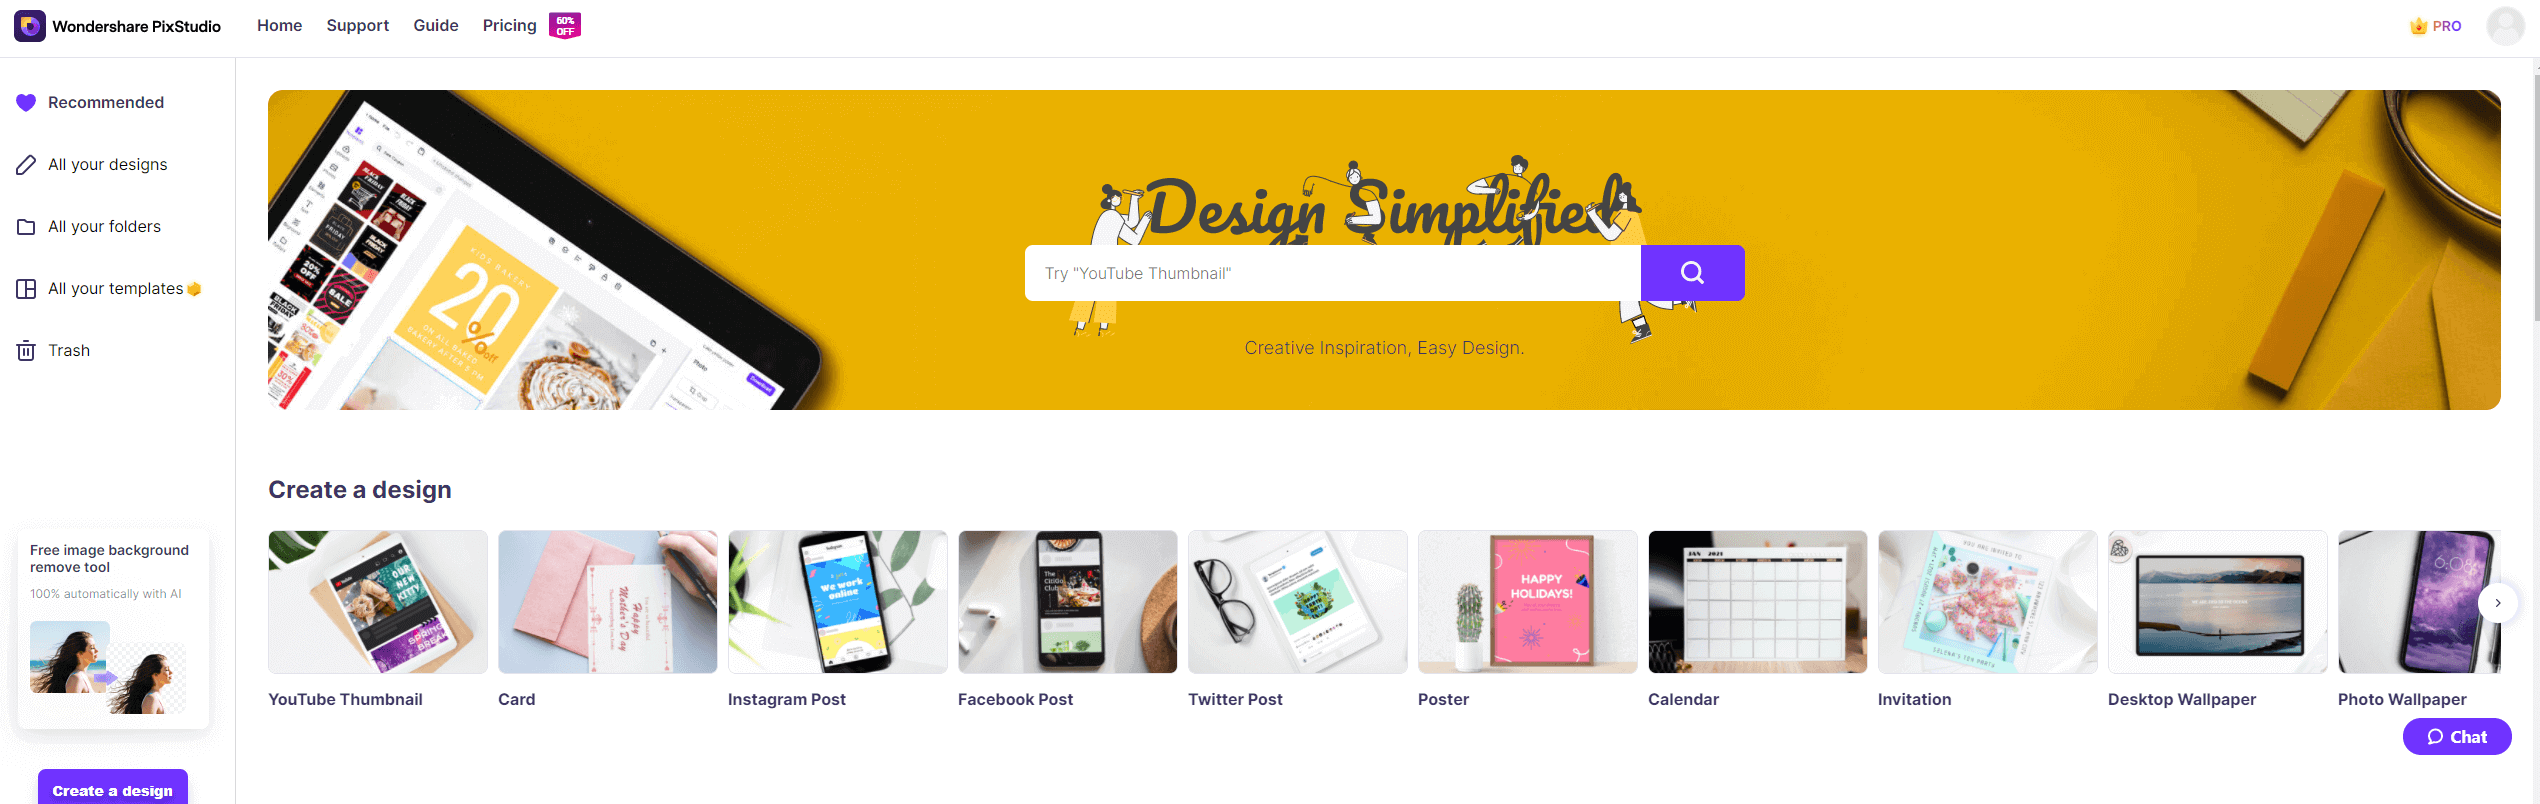
3. Wondershare PixStudio
Wondershare PixStudio owns massive templates that can help you create your memes easily. You can feel free to upload your image and start to design it with text, colors and filters to the images.
Features:
- Free and easy to use.
- Ability to create memes with your images.
- Option to add filters to images for your memes.
- Option to change font and text color.
4. Quickmeme
Quickmeme is the best meme maker option for anyone who wants a simple experience, without too many frills. You can check out featured memes, which show you the most popular ones right now.
All you need to do to create a meme is go on “upload a funny” to start from scratch. If you want to select a famous picture and add your own text, you can do so using the “caption a meme” option.
Features:
- Create a meme with your own images or famous images.
- Login with Facebook to set up your account and save the memes you create.
5. MemeGenerator
One of the most popular tools for creating memes, MemeGenerator is the meme maker online that you can use when you want to add some funny captions to images. You can check out all the popular images that are being used to create memes by other people.
If you want to create a meme with one of those images, simply click on them or you can choose “create” to start making a meme with your own image or character.
Features:
- Create memes with custom images or characters.
- Add your own text to famous meme images.
- Send and share memes through the site.

6. Imgur
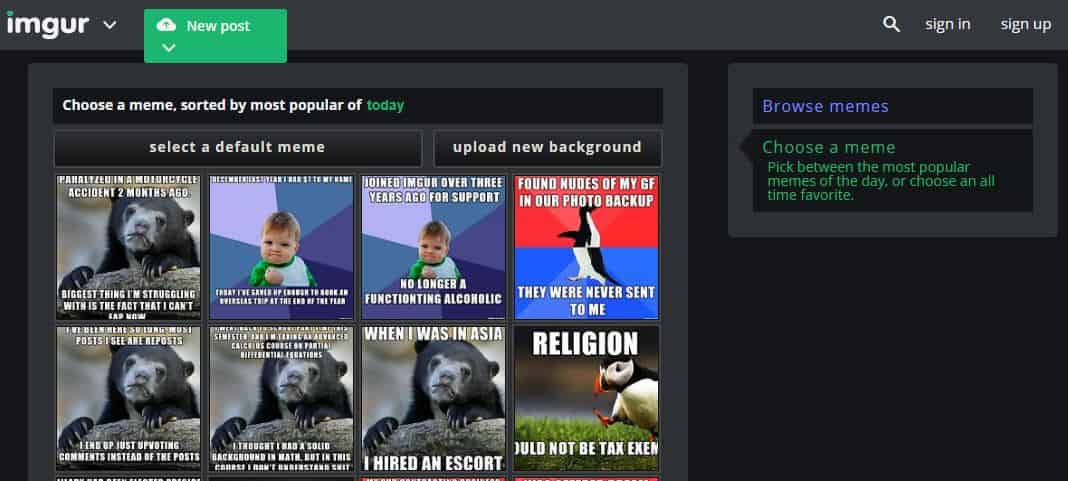
Imgur is mostly known as an image hosting platform. People will host images on Imgur so they can share them with friends or on social media. But there is also a meme creation tool that you can use on the site.
All you need to do is select one of the default images on the site, or use your own, and you can add the text that you want. Selecting the text to put at the top and bottom of the image is very easy with Imgur.
Features:
- Takes under a minute to create a meme with your own image or pre-selected ones.
- Imgur also offers an image hosting service.
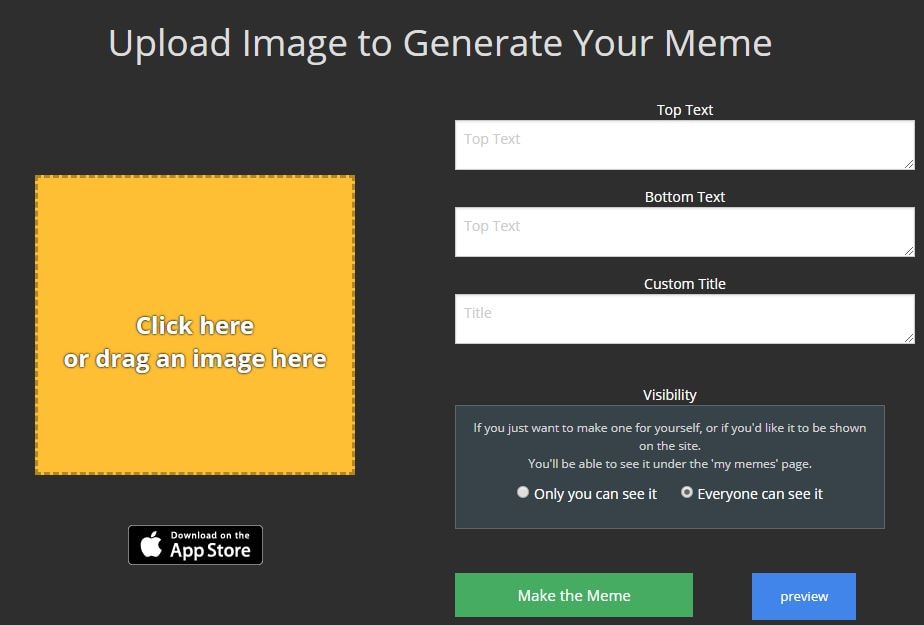
7. Make a Meme
When you go on Make a Meme, you will immediately see images of all the most famous memes from around the world. You can click on those images, where you get an interface asking for the top text, bottom text, and your custom title. Then you click on “make a meme” and your image is ready.
You can even upload your own image and then add text to it in a similar way. You have the option to preview your memes before you create them as well.
Features:
- Create memes from custom images or popular ones.
- Add top and bottom text easily.
- Create custom meme titles.
- Preview memes before making them.
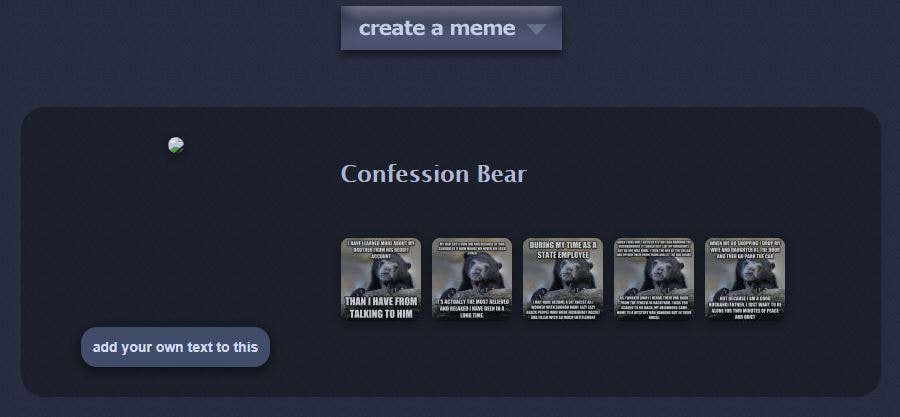
8. Livememe
Livememe is a meme generator that is very straightforward to use. When you visit the homepage, you will see a few selected images that are very popular. Click on the “create a meme” button and you will get a drop down menu that is thumbnails of all the popular memes.
You may select any of those images to create your own meme, or upload your own image and add the relevant text. You can save the image on your computer and even share it through the site.
Features:
- Includes nearly every popular meme as preselected images.
- Ability to create custom image memes.
- Easily share created memes.
9. Canva
Unlike other sites, Canva goes a step further and gives you professionally created templates that you can use for your memes. There are over a million stock photos available to you. It is a much larger selection than other sites.
But you can also upload your own image, add relevant text and then create the meme.
Features:
- Large collection of stock images.
- Ability to create memes with your own images.
- Option to add filters to images for your memes.
- Option to change font and text color.
10. iLoveIMG
iLoveIMG is one of the easiest sites to use if you want to create a meme. The homepage will let you upload an image or select a meme template to get started.
Text boxes are already present, but you can edit them with your own text and see exactly how they would look. If you want to add more lines of text, you can do that as well.
It is even possible to add an image on top of one image to take your meme game to a whole new level!
Features:
- Easy meme creation with uploaded or custom images.
- Ability to add more than two lines of text.
- Option to add an image on top of the existing image.
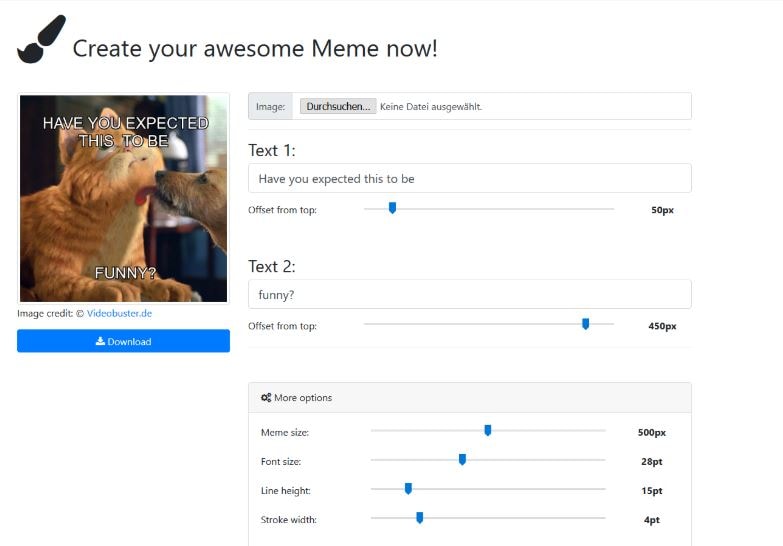
11. Meme Creator
With Meme Creator, you can recreate existing memes with the text of your choice, or upload images to make custom memes.
The site is very easy to use, which does not require you to create an account, and is completely free. It is possible to adjust the text size and color when you are using this meme generator, which is not always an option on these free tools.
Within a minute, you will have the custom meme that you can share with friends!
Features:
- Use preexisting and custom images for memes.
- Adjust the color and font size of both top and bottom text.
12. DIYLOL
Want to create a meme from images that already have become popular memes? Now you can do so with DIYLOL. All you need to do is pick the preexisting image that you like best, add your top and bottom text, and you are ready to go.
You can even adjust the font color and size for the top and bottom text. Then you can download the image to share with friends and family.
Features:
- Easy tool to create memes from preexisting images.
- Ability to adjust font size and color.
Conclusion
By using an online meme maker, you have the ability to create your own memes whenever you want. All you need is a source image and your idea for the text. Within minutes, the meme generator you are using will have your meme ready to download. Then you can share it with friends and save it on all your devices. And the best part is that you can do all of this with a meme maker online that is completely free!
[
Ollie Mattison
Ollie Mattison is a writer and a lover of all things video.
Follow @Ollie Mattison
Ollie Mattison
Mar 27, 2024• Proven solutions
Memes have become a central part of many online conversations. They pop up a lot on social media, especially platforms such as Twitter, Tumblr and Facebook . People even converse with each other using meme keyboards.
With memes taking over popular culture, you may want to make a meme for yourself. By using a meme maker, you can do just that! Here is a look at the top 10+ best meme maker online options that you can use for free.
10+ Best Meme Makers Online
1. Filmora Free Meme Generator
Filmora meme maker is a totally free meme generator without a watermark. Also, you don’t need to sign up or log in first to use it. It supports importing images, GIFs, and videos in one place. Just drag and drop to import, so easy to use. More importantly, if you want to select a white or black background to input the caption, Filmora meme maker can help you quickly. Changing text size, color and position is also available. After editing is done, just one click to export your work within a few seconds. You can also freely upload to social media platforms, like FB and IG.
- Place text anywhere (inside and outside of image)
- Support exporting to popular image and video formats, including jpg, png, gif, mp4
- It is totally free to use, no subscription or cost
[
3. Wondershare PixStudio
Wondershare PixStudio owns massive templates that can help you create your memes easily. You can feel free to upload your image and start to design it with text, colors and filters to the images.
Features:
- Free and easy to use.
- Ability to create memes with your images.
- Option to add filters to images for your memes.
- Option to change font and text color.
4. Quickmeme
Quickmeme is the best meme maker option for anyone who wants a simple experience, without too many frills. You can check out featured memes, which show you the most popular ones right now.
All you need to do to create a meme is go on “upload a funny” to start from scratch. If you want to select a famous picture and add your own text, you can do so using the “caption a meme” option.
Features:
- Create a meme with your own images or famous images.
- Login with Facebook to set up your account and save the memes you create.
5. MemeGenerator
One of the most popular tools for creating memes, MemeGenerator is the meme maker online that you can use when you want to add some funny captions to images. You can check out all the popular images that are being used to create memes by other people.
If you want to create a meme with one of those images, simply click on them or you can choose “create” to start making a meme with your own image or character.
Features:
- Create memes with custom images or characters.
- Add your own text to famous meme images.
- Send and share memes through the site.
6. Imgur
Imgur is mostly known as an image hosting platform. People will host images on Imgur so they can share them with friends or on social media. But there is also a meme creation tool that you can use on the site.
All you need to do is select one of the default images on the site, or use your own, and you can add the text that you want. Selecting the text to put at the top and bottom of the image is very easy with Imgur.
Features:
- Takes under a minute to create a meme with your own image or pre-selected ones.
- Imgur also offers an image hosting service.
7. Make a Meme
When you go on Make a Meme, you will immediately see images of all the most famous memes from around the world. You can click on those images, where you get an interface asking for the top text, bottom text, and your custom title. Then you click on “make a meme” and your image is ready.
You can even upload your own image and then add text to it in a similar way. You have the option to preview your memes before you create them as well.
Features:
- Create memes from custom images or popular ones.
- Add top and bottom text easily.
- Create custom meme titles.
- Preview memes before making them.
8. Livememe
Livememe is a meme generator that is very straightforward to use. When you visit the homepage, you will see a few selected images that are very popular. Click on the “create a meme” button and you will get a drop down menu that is thumbnails of all the popular memes.
You may select any of those images to create your own meme, or upload your own image and add the relevant text. You can save the image on your computer and even share it through the site.
Features:
- Includes nearly every popular meme as preselected images.
- Ability to create custom image memes.
- Easily share created memes.
9. Canva
Unlike other sites, Canva goes a step further and gives you professionally created templates that you can use for your memes. There are over a million stock photos available to you. It is a much larger selection than other sites.
But you can also upload your own image, add relevant text and then create the meme.
Features:
- Large collection of stock images.
- Ability to create memes with your own images.
- Option to add filters to images for your memes.
- Option to change font and text color.
10. iLoveIMG
iLoveIMG is one of the easiest sites to use if you want to create a meme. The homepage will let you upload an image or select a meme template to get started.
Text boxes are already present, but you can edit them with your own text and see exactly how they would look. If you want to add more lines of text, you can do that as well.
It is even possible to add an image on top of one image to take your meme game to a whole new level!
Features:
- Easy meme creation with uploaded or custom images.
- Ability to add more than two lines of text.
- Option to add an image on top of the existing image.
11. Meme Creator
With Meme Creator, you can recreate existing memes with the text of your choice, or upload images to make custom memes.
The site is very easy to use, which does not require you to create an account, and is completely free. It is possible to adjust the text size and color when you are using this meme generator, which is not always an option on these free tools.
Within a minute, you will have the custom meme that you can share with friends!
Features:
- Use preexisting and custom images for memes.
- Adjust the color and font size of both top and bottom text.
12. DIYLOL
Want to create a meme from images that already have become popular memes? Now you can do so with DIYLOL. All you need to do is pick the preexisting image that you like best, add your top and bottom text, and you are ready to go.
You can even adjust the font color and size for the top and bottom text. Then you can download the image to share with friends and family.
Features:
- Easy tool to create memes from preexisting images.
- Ability to adjust font size and color.
Conclusion
By using an online meme maker, you have the ability to create your own memes whenever you want. All you need is a source image and your idea for the text. Within minutes, the meme generator you are using will have your meme ready to download. Then you can share it with friends and save it on all your devices. And the best part is that you can do all of this with a meme maker online that is completely free!
[
Ollie Mattison
Ollie Mattison is a writer and a lover of all things video.
Follow @Ollie Mattison
How to Burn Photos to DVD with Transitions and Music
How to Burn Photos to DVD with Transitions and Music
Shanoon Cox
Mar 27, 2024• Proven solutions
Photos are precious memories not only for you but also for your family members. As time goes on, the photos might fade out and be unable to retrieve. To avoid this, burn photos to DVD will be a great idea to preserve family memories eternally.
This article will show you how to burn photos to DVD Slideshow with transition, titles and music quickly and easily by using Wondershare DVD Slideshow Builder Deluxe . It also provides some tips on how to burn photos to DVD.
Part 1: How to Burn Photos to DVD with Transition, Titles and Music
Wondershare DVD Slideshow Builder Deluxe can help you quickly create and burn photos to DVD. Download the free trial version this photo DVD maker first.
Step 1. Add Photo or Video Files
In Organize tab, simply click the “Add Files” button to open the browse window, find your files and import them into the program, you can drag and drop photos or videos to organize them on storyboard. Click the Expand button to get a larger viewer.

Step 2. Customize Photo Slideshow Transitions
Generally speaking, transition effects will be automatically inserted between every two photos/videos when you import the photos. But you can customize them by clicking the Personalize tab, then drag and drop a transition from the list to the thumbnail between two slides.
You are also able to add background music here: click the Music button and choose a music file from your computer.

Step 3. Choose DVD Menu
Now switch to Create tab to author a DVD menu from template and burn to DVD disc quickly:
- On the right hand side of the screen, double click on desired menu template to apply a DVD menu template.
- Click the Edit button under the preview windows to customize your DVD menu or right click on menu for more options.
- You can also make a professional DVD menu using dynamic DVD menu templates.
BTW, if you don’t want a DVD menu, just check the “Disable DVD Menu” option.

Step 4. Burn Photos to DVD Disc
Now click the Preview button beneath the preview window to make sure the photo DVD slideshow is exactly what you want. Go back to Personalize tab to change if necessary. After that, click “Burn” button to start burning your DVD slideshow to DVD.
You can also output photo slideshow to watch on Youtube, Mobile Phone, iPhone, PSP, etc. through options on the left. Below are the instructions to burn DVD for watch on TV:

- Insert a blank DVD disc, and do the following.
- Click “Burn to DVD”. Then specify the number of DVD copies. You can also choose to generate ISO Image files or DVD Folders.
- Make sure the PAL or NTSC TV Standard settings is right. If you don’t know which standard is used in your country, click the “Help” button. The wrong TV standard would cause playback incompatibility problem.
- Then click “Start” to burn DVD slideshow. If you have checked Create DVD Folder and/or Create DVD Image File options, the corresponding files will also be created to the specified folder.
Now sit back and relax, when burning complete, insert the created DVD disc into your DVD player to watch photo DVD slideshow on TV.
Learn more: User Guide of DVD Slideshow Builder Deluxe
Part 2: More Photo to DVD Tips
More about NTSC/PAL TV Standard
Nowadays, there are three video formats around the world. But each one is incompatible with others. For instance, NTSC is used in North America, Canada and Japan; while most of other regions PAL/SECAM. To apply TV Standard in DVD Slideshow Builder Deluxe , go to “Create“ -> Option tab and locate TV Standard option to select NTSC or PAL. If you are not sure which one to choose, please click “Help” button, select your country, then click “OK” , the program will choose the right TV standard for you.
Burn Photos to DVD/CD as Data Disc
If you only want to burn photo to DVD for backup and further use, you only need a burning photo to DVD software like ImgBurn (Free) or Nero (commercial). These software helps you burn all digital media files to DVD, of course you can burn photos to DVD for backup purpose. Notice that some photo DVD maker allows you burn slideshow as well as the original photos. This way, you turn photos to DVD slideshow with transition, and at the same time, backup photos to DVD for other uses.
Scan Photos to DVD - Digitize Photos
If you use traditional camera and have got loads of photos in album, you can scan photos to computer so that convert photo to digital format. Afterwards, you can get more from these digital photos, like backup photos to DVD, send to others as DVD gift, make a photo DVD show to play on TV, etc. All these could be done with your favorite photo DVD maker software. Now see how to transform your printed photos to digital first:
Select a good photo scanner -> Prepare your photos to scan -> Start photo scanning -> Adjust scanned photos
Scanning printed photos to computer is not an easy job. It needs patience and some tips and tricks. As you may know, some companies provide photo scanning service. For the Step 4, you can also adjust digital photos in your selected photo DVD maker. Anyway, you need to get your digital photos ready before you burn photos to DVD with transitions and music.
Shanoon Cox
Shanoon Cox is a writer and a lover of all things video.
Follow @Shanoon Cox
Shanoon Cox
Mar 27, 2024• Proven solutions
Photos are precious memories not only for you but also for your family members. As time goes on, the photos might fade out and be unable to retrieve. To avoid this, burn photos to DVD will be a great idea to preserve family memories eternally.
This article will show you how to burn photos to DVD Slideshow with transition, titles and music quickly and easily by using Wondershare DVD Slideshow Builder Deluxe . It also provides some tips on how to burn photos to DVD.
Part 1: How to Burn Photos to DVD with Transition, Titles and Music
Wondershare DVD Slideshow Builder Deluxe can help you quickly create and burn photos to DVD. Download the free trial version this photo DVD maker first.
Step 1. Add Photo or Video Files
In Organize tab, simply click the “Add Files” button to open the browse window, find your files and import them into the program, you can drag and drop photos or videos to organize them on storyboard. Click the Expand button to get a larger viewer.
Step 2. Customize Photo Slideshow Transitions
Generally speaking, transition effects will be automatically inserted between every two photos/videos when you import the photos. But you can customize them by clicking the Personalize tab, then drag and drop a transition from the list to the thumbnail between two slides.
You are also able to add background music here: click the Music button and choose a music file from your computer.
Step 3. Choose DVD Menu
Now switch to Create tab to author a DVD menu from template and burn to DVD disc quickly:
- On the right hand side of the screen, double click on desired menu template to apply a DVD menu template.
- Click the Edit button under the preview windows to customize your DVD menu or right click on menu for more options.
- You can also make a professional DVD menu using dynamic DVD menu templates.
BTW, if you don’t want a DVD menu, just check the “Disable DVD Menu” option.
Step 4. Burn Photos to DVD Disc
Now click the Preview button beneath the preview window to make sure the photo DVD slideshow is exactly what you want. Go back to Personalize tab to change if necessary. After that, click “Burn” button to start burning your DVD slideshow to DVD.
You can also output photo slideshow to watch on Youtube, Mobile Phone, iPhone, PSP, etc. through options on the left. Below are the instructions to burn DVD for watch on TV:
- Insert a blank DVD disc, and do the following.
- Click “Burn to DVD”. Then specify the number of DVD copies. You can also choose to generate ISO Image files or DVD Folders.
- Make sure the PAL or NTSC TV Standard settings is right. If you don’t know which standard is used in your country, click the “Help” button. The wrong TV standard would cause playback incompatibility problem.
- Then click “Start” to burn DVD slideshow. If you have checked Create DVD Folder and/or Create DVD Image File options, the corresponding files will also be created to the specified folder.
Now sit back and relax, when burning complete, insert the created DVD disc into your DVD player to watch photo DVD slideshow on TV.
Learn more: User Guide of DVD Slideshow Builder Deluxe
Part 2: More Photo to DVD Tips
More about NTSC/PAL TV Standard
Nowadays, there are three video formats around the world. But each one is incompatible with others. For instance, NTSC is used in North America, Canada and Japan; while most of other regions PAL/SECAM. To apply TV Standard in DVD Slideshow Builder Deluxe , go to “Create“ -> Option tab and locate TV Standard option to select NTSC or PAL. If you are not sure which one to choose, please click “Help” button, select your country, then click “OK” , the program will choose the right TV standard for you.
Burn Photos to DVD/CD as Data Disc
If you only want to burn photo to DVD for backup and further use, you only need a burning photo to DVD software like ImgBurn (Free) or Nero (commercial). These software helps you burn all digital media files to DVD, of course you can burn photos to DVD for backup purpose. Notice that some photo DVD maker allows you burn slideshow as well as the original photos. This way, you turn photos to DVD slideshow with transition, and at the same time, backup photos to DVD for other uses.
Scan Photos to DVD - Digitize Photos
If you use traditional camera and have got loads of photos in album, you can scan photos to computer so that convert photo to digital format. Afterwards, you can get more from these digital photos, like backup photos to DVD, send to others as DVD gift, make a photo DVD show to play on TV, etc. All these could be done with your favorite photo DVD maker software. Now see how to transform your printed photos to digital first:
Select a good photo scanner -> Prepare your photos to scan -> Start photo scanning -> Adjust scanned photos
Scanning printed photos to computer is not an easy job. It needs patience and some tips and tricks. As you may know, some companies provide photo scanning service. For the Step 4, you can also adjust digital photos in your selected photo DVD maker. Anyway, you need to get your digital photos ready before you burn photos to DVD with transitions and music.
Shanoon Cox
Shanoon Cox is a writer and a lover of all things video.
Follow @Shanoon Cox
How to Add Bitmoji to Keyboard? Complete Guide][Emojis
Apart from the generic emojis that you can find in your chat applications, Bitmoji enables you to customize your character and share it with people you chat with. Bitmoji is fun, but do you know how to add it to a keyboard? If you don’t, don’t worry, this post will help you understand how to do that.
In this article
02 How to Add and Use Bitmoji to iPhone Keyboard?
03 How to Get the Bitmoji Keyboard on Android?
04 How to Install and Use Bitmoji on Windows and Mac?
Part 1: What is Bitmoji?
If you are new to Bitmoji, you may wonder what it is? Bitmoji is essentially your own personal emoji. You can create a cartoon version of yourself and share it with people to make the conversation fun. So, what one does is create an avatar of themselves and give it all kinds of expressions.
Then, you can create comics using your Bitmoji, use it to express yourself while having a chat, and even use it as a reaction. Anyone who is done using the same old emojis has started using Bitmoji because it’s a lot more fun.
Now, let’s learn how to create your very own Bitmoji.
Step 1: First, go to the App Store or Play store and download the Bitmoji application.
Step 2: Once downloaded, launch the app and start making an avatar or your Bitmoji.
Step 3: Pick a skin color, hair color, chin, nose, hairstyle, jawline, and more.

Once your Bitmoji is created, you are all set to use the Bitmoji as stickers. Moreover, the app lets you dress your Bitmoji as you want as well. Let it have different expressions and postures because that’s how it’s going to be fun! After your Bitmoji is added, the next thing to do is enable Bitmoji on the keyboard of the device you are using.
Part 2: How to Add and Use Bitmoji to iPhone Keyboard?
Since you have learned how to create a Bimoji, it’s time to learn the steps to use it on your iPhone keyboard. Unfortunately, just by downloading the app, it won’t reflect on the keyboard directly. Instead, you will have to follow a few steps to add Bitmoji to the keyboard. Here’s what you need to do.
Step 1: Launch your iPhone and click on the Settings option.
Step 2: Now, go to the General option and click on the Keyboard option.

Step 3: When the Keyboard page opens, click on the option that says Keyboards and then click on Add New Keyboard.
Step 4: You will see the Third Party Keyboards option. There, you need to click on Bitmoji.
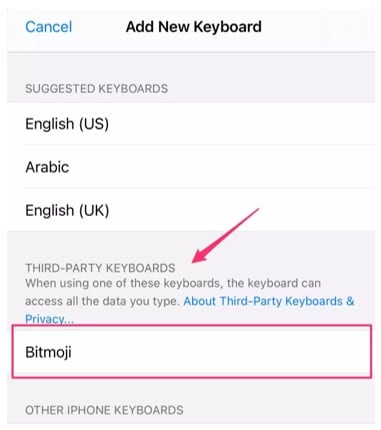
Step 5: Now, toggle the option that says Allow Full Access. Once you do that, you will see a small pop-up. Click on the Allow option.
And that’s it. Bitmoji will be added to the iPhone keyboard. Open any messaging app and click on the globe and hold it for a few seconds. When you see Bitmoji, click on that, and you will be able to use Bitmoji stickers.
Part 3: How to Get the Bitmoji Keyboard on Android?
Bitmoji is available for Android users as well. Before you begin to use it, go through the first part again and download the app. Then create your Bitmoji, as explained earlier. You can send Bitmojis directly from the app itself, but if you plan to use Bitmoji regularly, getting the Bitmoji keyboard makes sense. So, once you are done, follow the following steps to get the Bitmoji keyboard on Android.
Step 1: Launch the Bitmoji app. Click on the Keyboard option that you see at the bottom of the Bitmoji app screen.
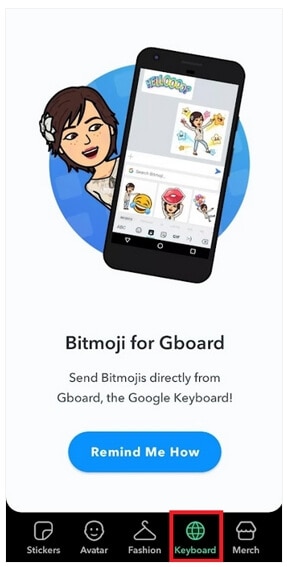
Step 2: Install Bitmoji keyboard and give permission to your phone to use Bitmoji keyboard. Bitmoji will notify you when the Bitmoji keyboard gets activated.
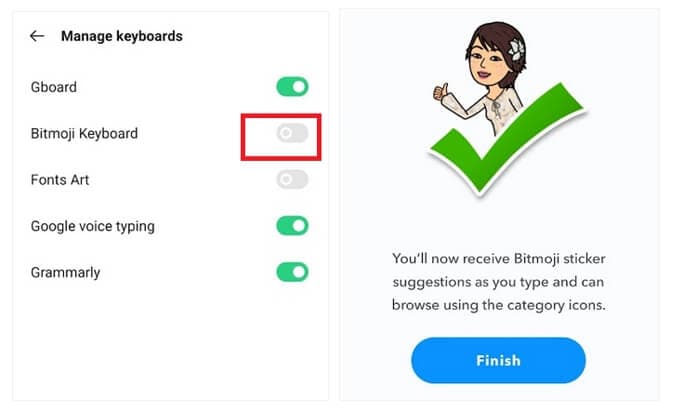
You are all done. Now, use the Bitmoji keyboard to chat with your family members and friends and make everything fun and exciting.
Part 4: How to Install and Use Bitmoji on Windows and Mac?
If you want to use Bitmoji on Windows and Mac, you will have to use the Google Chrome browser. If you already have the Google Chrome browser, carry on with the steps explained below; otherwise, get the browser before starting.
Step 1: Go to Chrome Extension and install Bitmoji for Chrome Extension.
Step 2: You will have to sign in to Bitmoji. If you want to add Bitmoji to Gmail, click on add Bitmoji to Gmail.
After you are done following the three easy steps, you will see Bitmoji is installed. To start using it, move the cursor to the upper corner of the browser and click on the Bitmoji icon. Next, you will see the Bitmojis. Choose any Bitmoji, copy it, and paste it on Gmail or instant messaging applications.
Part 5: Where can You Use Bitmoji?
Bitmojis can be used on different platforms. All you need to do is enable Bitmoji keyboard on your iPhone or Android phone or Windows and Mac computers and use it on various social media platforms. For example, use Snapchat to send Bitmojis for different types of occasions.
If you are an iPhone user, you can share fun Bitmojis through iMessage. On a computer, you can use these Bitmojis on Facebook or other instant messaging platforms. You can drag and drop the Bitmoji sticker or copy it to share it with your friends.
If you are a working professional and want to lighten the mood of your Slack workspace, use Bitmojis to make your coworkers feel relaxed. Plus, this can be a great way to make someone feel pumped up. Like that, there are many other platforms to use Bitmojis!
Related: Best Free Apps to Get Emojis on iPhone and Android
Conclusion
So, there you go. We have finally reached the end of this guide. We hope you have found this post interesting and will face no hassle using the Bitmoji keyboard on different devices. Get the Bitmoji app if you haven’t downloaded it yet and make your conversations fun and enjoyable!
02 How to Add and Use Bitmoji to iPhone Keyboard?
03 How to Get the Bitmoji Keyboard on Android?
04 How to Install and Use Bitmoji on Windows and Mac?
Part 1: What is Bitmoji?
If you are new to Bitmoji, you may wonder what it is? Bitmoji is essentially your own personal emoji. You can create a cartoon version of yourself and share it with people to make the conversation fun. So, what one does is create an avatar of themselves and give it all kinds of expressions.
Then, you can create comics using your Bitmoji, use it to express yourself while having a chat, and even use it as a reaction. Anyone who is done using the same old emojis has started using Bitmoji because it’s a lot more fun.
Now, let’s learn how to create your very own Bitmoji.
Step 1: First, go to the App Store or Play store and download the Bitmoji application.
Step 2: Once downloaded, launch the app and start making an avatar or your Bitmoji.
Step 3: Pick a skin color, hair color, chin, nose, hairstyle, jawline, and more.
Once your Bitmoji is created, you are all set to use the Bitmoji as stickers. Moreover, the app lets you dress your Bitmoji as you want as well. Let it have different expressions and postures because that’s how it’s going to be fun! After your Bitmoji is added, the next thing to do is enable Bitmoji on the keyboard of the device you are using.
Part 2: How to Add and Use Bitmoji to iPhone Keyboard?
Since you have learned how to create a Bimoji, it’s time to learn the steps to use it on your iPhone keyboard. Unfortunately, just by downloading the app, it won’t reflect on the keyboard directly. Instead, you will have to follow a few steps to add Bitmoji to the keyboard. Here’s what you need to do.
Step 1: Launch your iPhone and click on the Settings option.
Step 2: Now, go to the General option and click on the Keyboard option.
Step 3: When the Keyboard page opens, click on the option that says Keyboards and then click on Add New Keyboard.
Step 4: You will see the Third Party Keyboards option. There, you need to click on Bitmoji.
Step 5: Now, toggle the option that says Allow Full Access. Once you do that, you will see a small pop-up. Click on the Allow option.
And that’s it. Bitmoji will be added to the iPhone keyboard. Open any messaging app and click on the globe and hold it for a few seconds. When you see Bitmoji, click on that, and you will be able to use Bitmoji stickers.
Part 3: How to Get the Bitmoji Keyboard on Android?
Bitmoji is available for Android users as well. Before you begin to use it, go through the first part again and download the app. Then create your Bitmoji, as explained earlier. You can send Bitmojis directly from the app itself, but if you plan to use Bitmoji regularly, getting the Bitmoji keyboard makes sense. So, once you are done, follow the following steps to get the Bitmoji keyboard on Android.
Step 1: Launch the Bitmoji app. Click on the Keyboard option that you see at the bottom of the Bitmoji app screen.
Step 2: Install Bitmoji keyboard and give permission to your phone to use Bitmoji keyboard. Bitmoji will notify you when the Bitmoji keyboard gets activated.
You are all done. Now, use the Bitmoji keyboard to chat with your family members and friends and make everything fun and exciting.
Part 4: How to Install and Use Bitmoji on Windows and Mac?
If you want to use Bitmoji on Windows and Mac, you will have to use the Google Chrome browser. If you already have the Google Chrome browser, carry on with the steps explained below; otherwise, get the browser before starting.
Step 1: Go to Chrome Extension and install Bitmoji for Chrome Extension.
Step 2: You will have to sign in to Bitmoji. If you want to add Bitmoji to Gmail, click on add Bitmoji to Gmail.
After you are done following the three easy steps, you will see Bitmoji is installed. To start using it, move the cursor to the upper corner of the browser and click on the Bitmoji icon. Next, you will see the Bitmojis. Choose any Bitmoji, copy it, and paste it on Gmail or instant messaging applications.
Part 5: Where can You Use Bitmoji?
Bitmojis can be used on different platforms. All you need to do is enable Bitmoji keyboard on your iPhone or Android phone or Windows and Mac computers and use it on various social media platforms. For example, use Snapchat to send Bitmojis for different types of occasions.
If you are an iPhone user, you can share fun Bitmojis through iMessage. On a computer, you can use these Bitmojis on Facebook or other instant messaging platforms. You can drag and drop the Bitmoji sticker or copy it to share it with your friends.
If you are a working professional and want to lighten the mood of your Slack workspace, use Bitmojis to make your coworkers feel relaxed. Plus, this can be a great way to make someone feel pumped up. Like that, there are many other platforms to use Bitmojis!
Related: Best Free Apps to Get Emojis on iPhone and Android
Conclusion
So, there you go. We have finally reached the end of this guide. We hope you have found this post interesting and will face no hassle using the Bitmoji keyboard on different devices. Get the Bitmoji app if you haven’t downloaded it yet and make your conversations fun and enjoyable!
Also read:
- [Updated] 2024 Approved Navigating Advanced Color Grading Techniques Using LUTs
- [Updated] Future-Ready Inhabitants of the Metaverse - Your Device Blueprint
- 2024 Approved 10 Best Memes Right Now (Include Image/ GIF/Video)
- 2024 Approved Experience Reality Redefined with HTC Vive
- Fast Track: How to Swiftly Download the RS232 Driver for Your USB Device
- How to Clear the Liquid Alert on an iPhone When Using a USB-C Charging Cable
- In 2024, 10 Best Memes Right Now (Include Image/ GIF/Video)
- In 2024, Channel Branding Made Simple & Free
- In 2024, How to Make a Slideshow with Music
- In 2024, Micro Vids Unpacked What's the Score?
- In 2024, Omni-VMix Universal Controller
- New 2024 Approved FREE 10 Websites to Watch Cartoon Online in HD
- New How to Add Emojis To Discord for 2024
- Top 10 Best Free Manga Sites to Read Online
- Top Storytelling Screenplays that Transcend Genres
- Updated 7 Free Apps to Get Emojis on Android and iPhone
- Updated In 2024, 10 Free Online Sticker Makers to Make Your Own Stickers
- Title: 2024 Approved Generating the Nut Button Meme
- Author: Jan
- Created at : 2024-09-30 21:53:35
- Updated at : 2024-10-05 18:52:02
- Link: https://meme-emoji.techidaily.com/2024-approved-generating-the-nut-button-meme/
- License: This work is licensed under CC BY-NC-SA 4.0.